Samsung Electronics Co GTM382W GSM/GPRS/UMTS/HSUPA/HSDPA PCI MINI EXPRESS MODULE User Manual Host 1 of 2
Samsung Electronics Co Ltd GSM/GPRS/UMTS/HSUPA/HSDPA PCI MINI EXPRESS MODULE Host 1 of 2
Contents
- 1. Host User Manual 1 of 2
- 2. Host User Manual 2 of 2
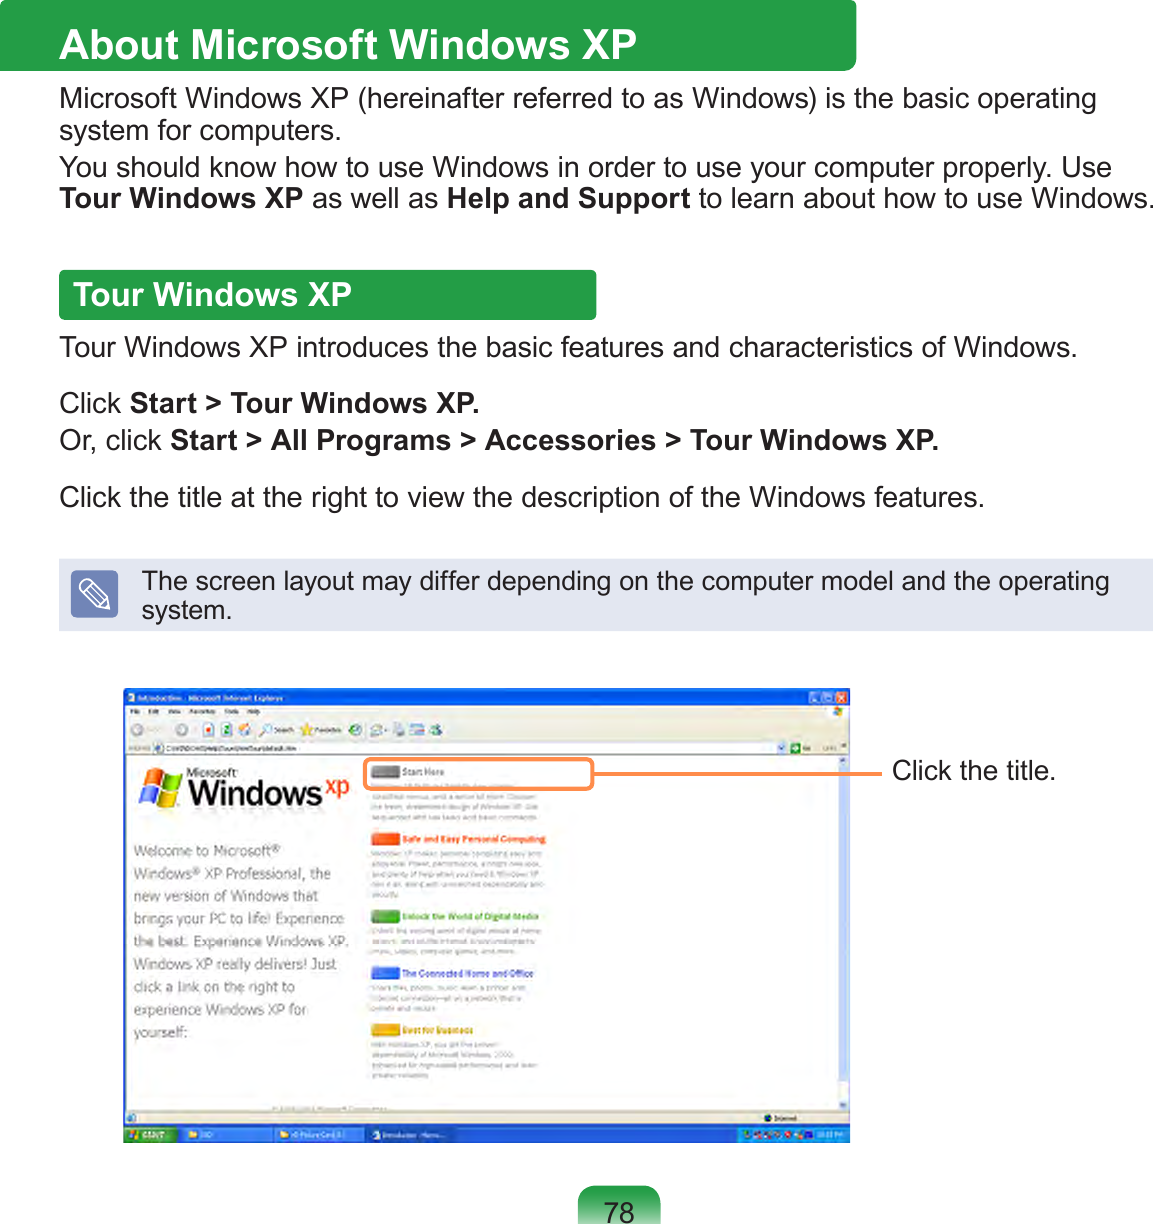
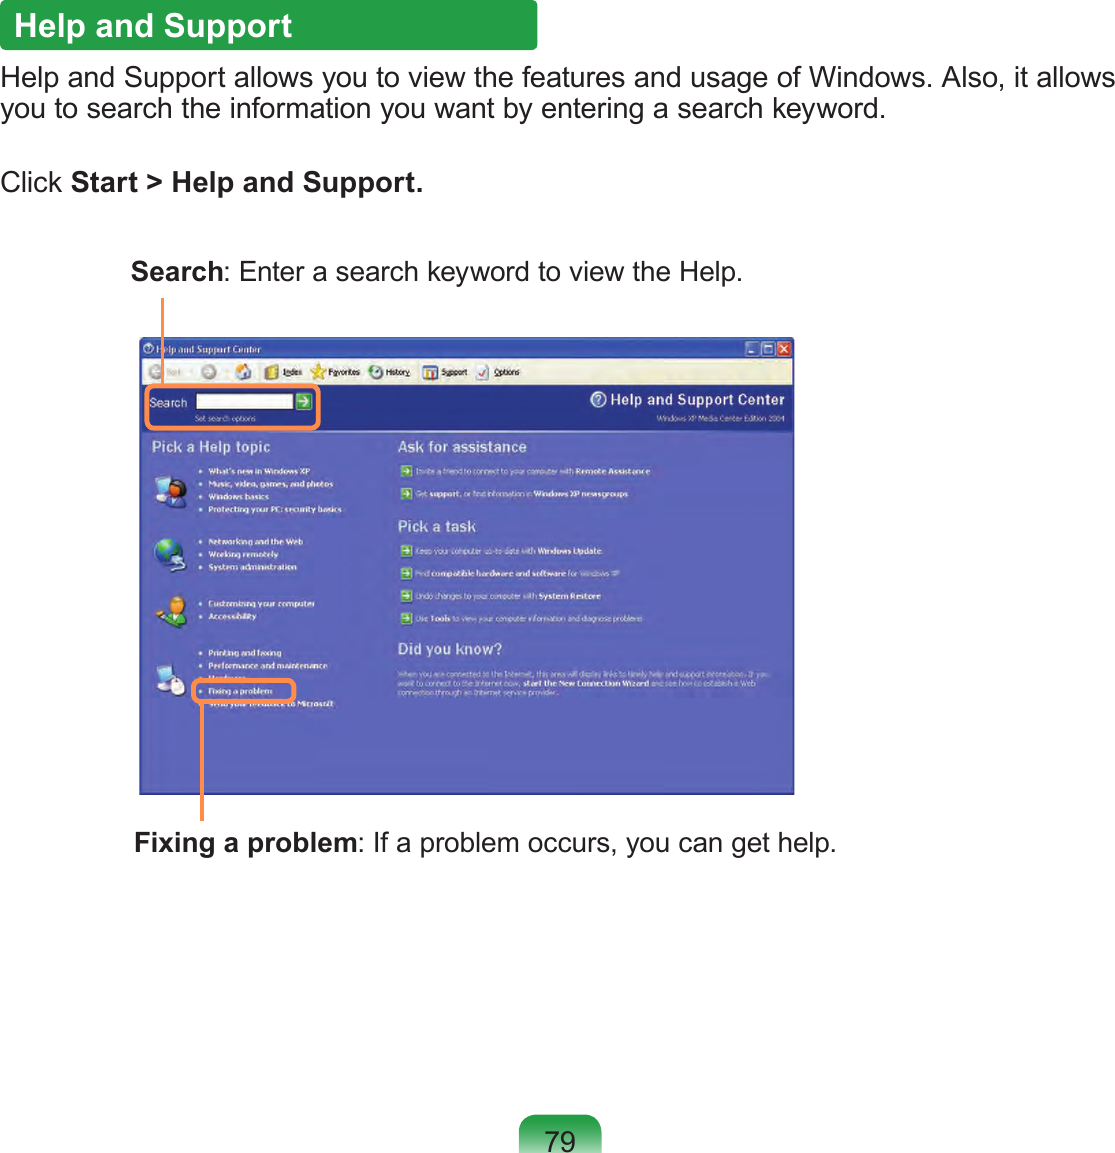
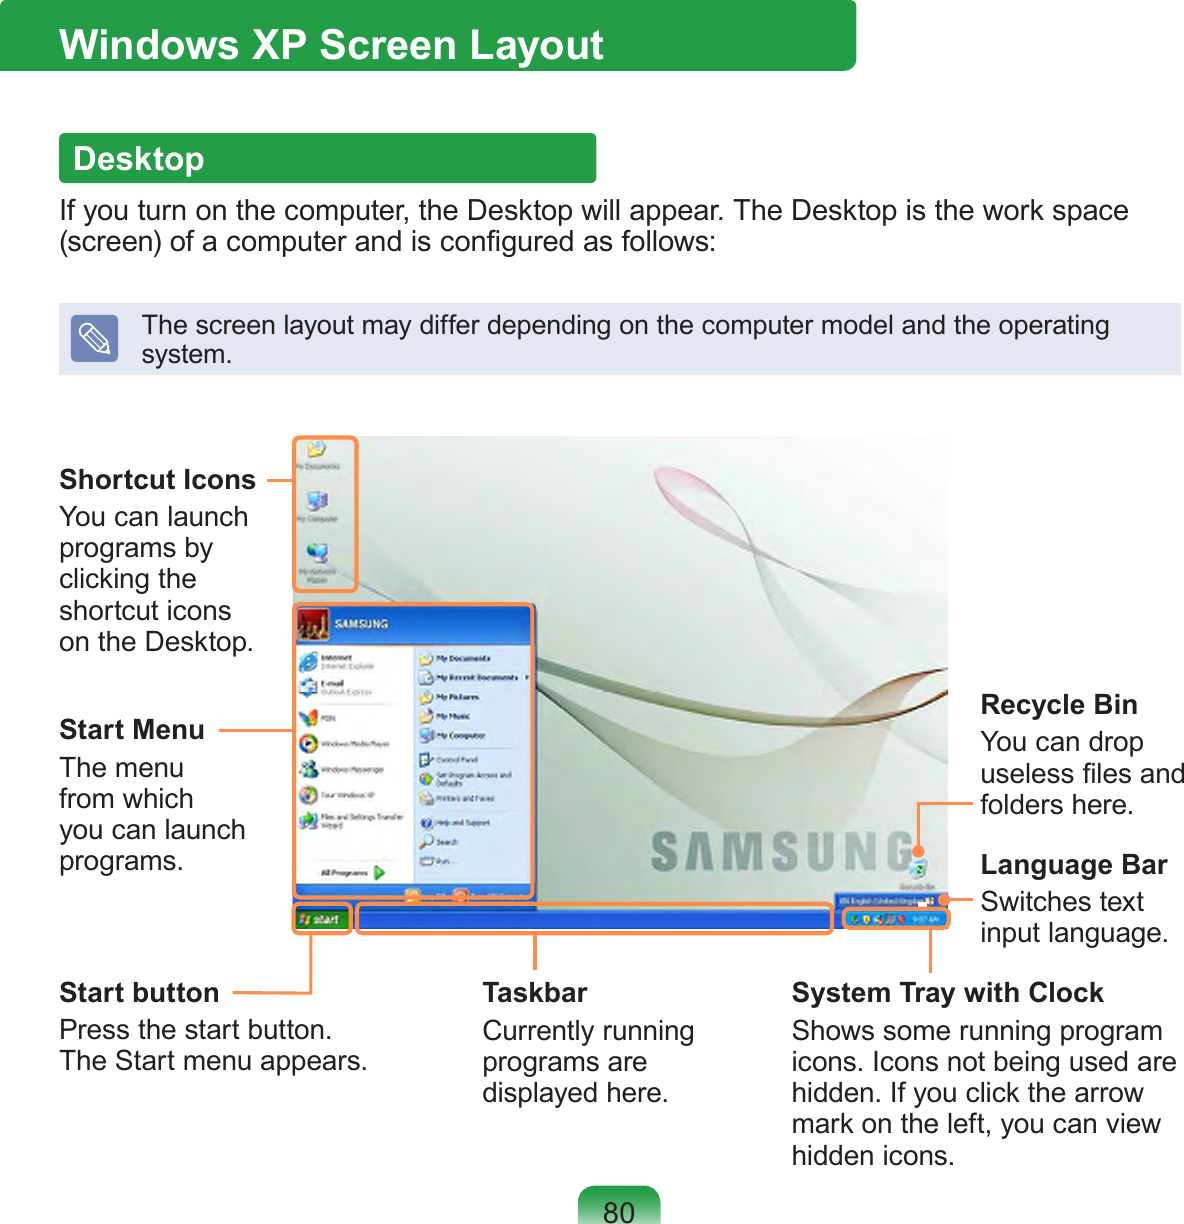
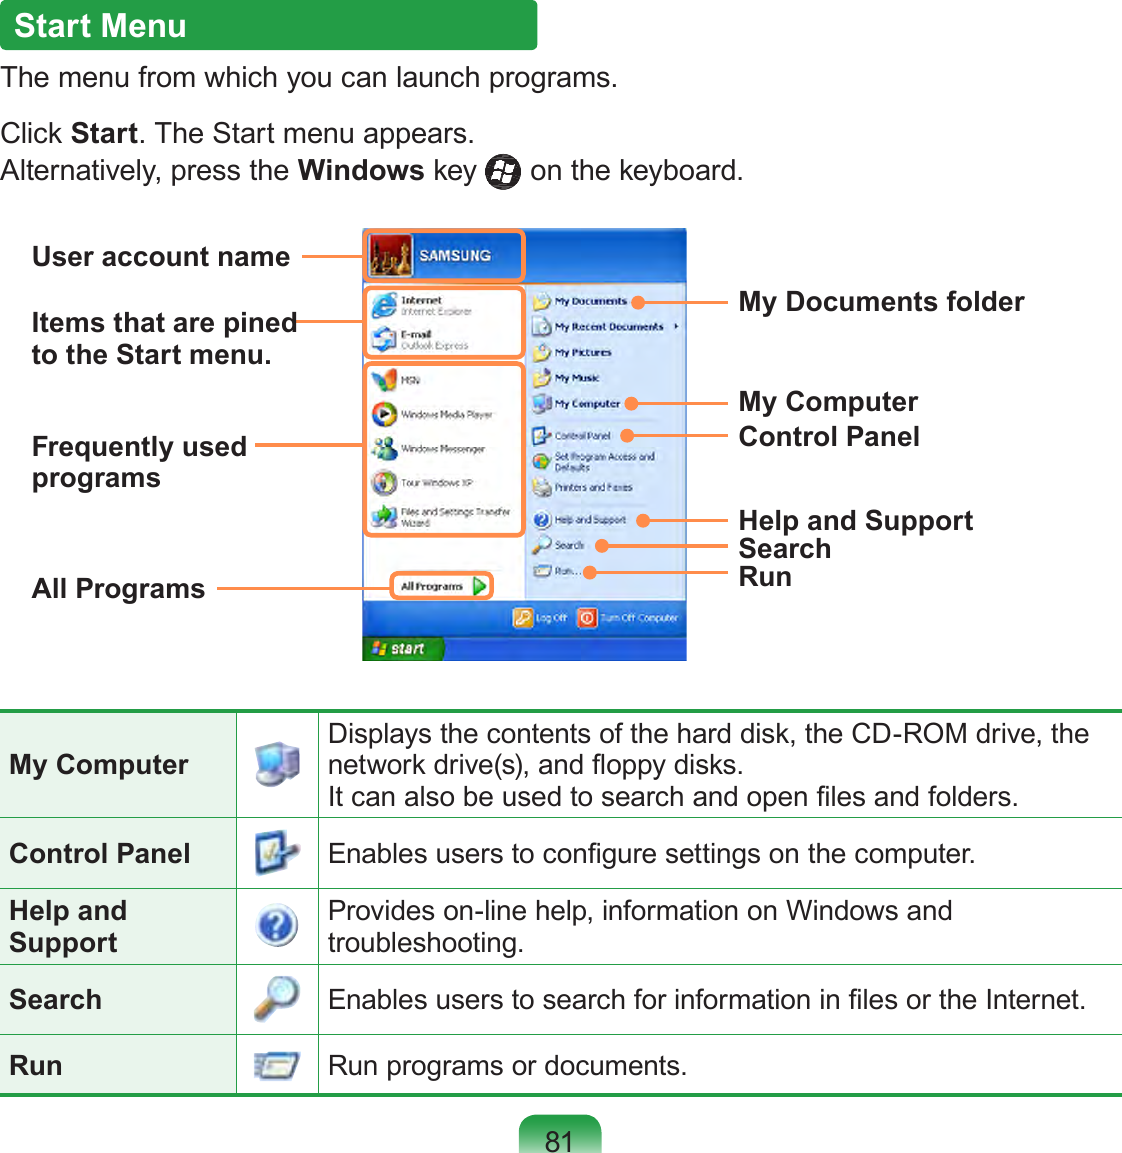
Host User Manual 1 of 2

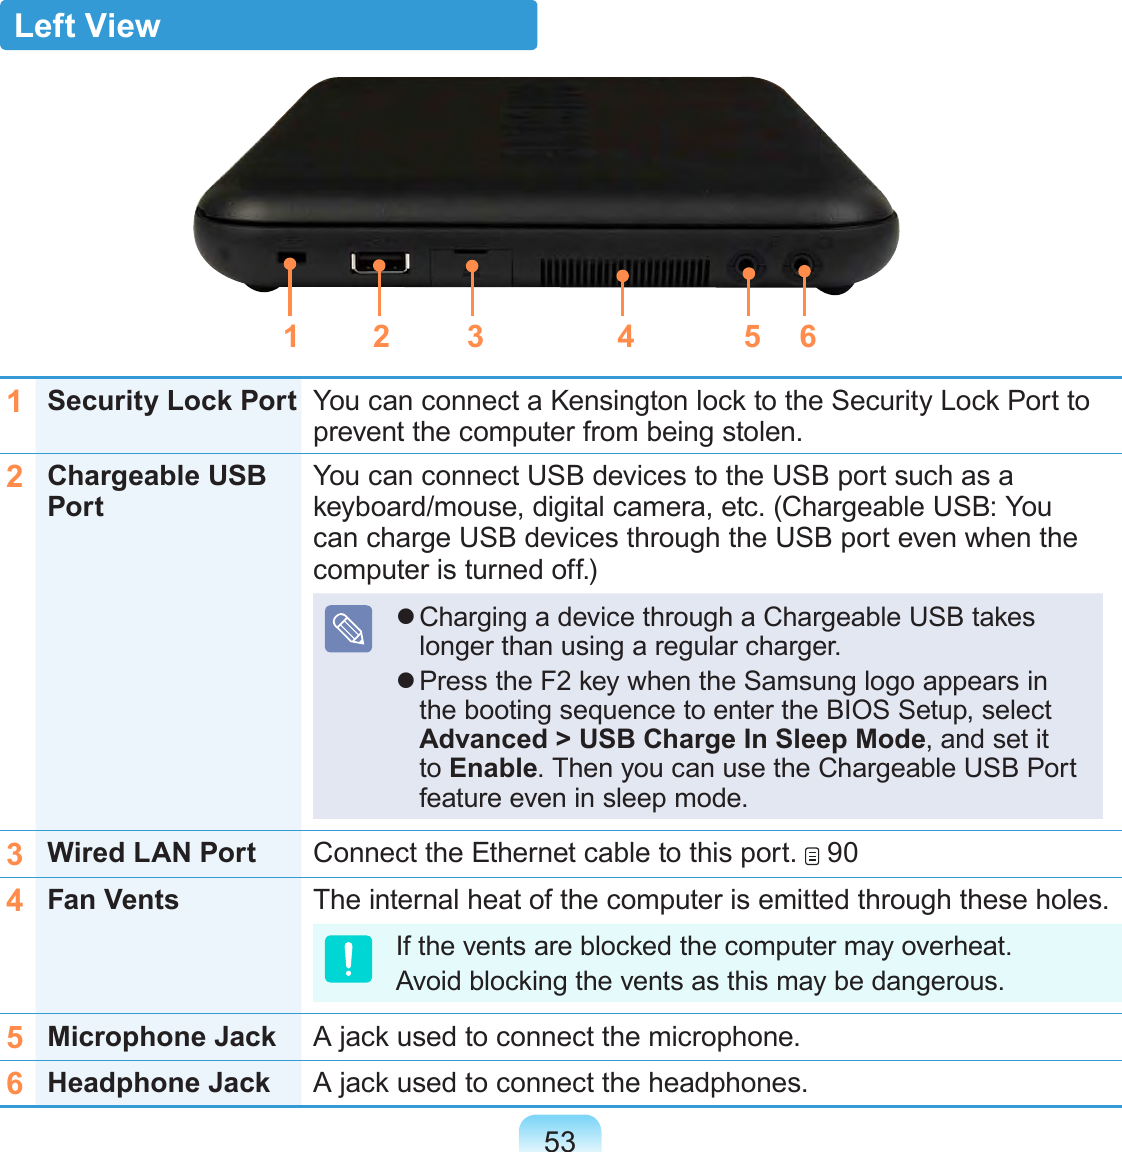
![44European Radio Approval Information (for products tted with EU-approved radio devices)This Product is a Notebook computer; low power, Radio LAN type devices (radio frequency (RF) wireless communication devices), operating in the 2.4GHz/5GHz band, may be present (embedded) in your notebook system which is intended for home or ofce use. This section is only applicable if these devices are present. Refer to the system label to verify the presence of wireless devices.Wireless devices that may be in your system are only qualied for use in the European Union or associated areas if a CE mark with a Notied Body Registration Number and the Alert Symbol is on the system label.The power output of the wireless device or devices that may be embedded in you notebook is well below the RF exposure limits as set by the European Commission through the R&TTE directive.The low band 5.15 - 5.35 GHz is for indoor use only.See 802.11b and 802.11g restrictions for specic countries or regions within countries under the heading “European Economic Area Restrictions” below.Translated Statements of Compliance[English]This product follows the provisions of the European Directive 1999/5/EC.[Danish]Dette produkt er i overensstemmelse med det europæiske direktiv 1999/5/EC[Dutch]Dit product is in navolging van de bepalingen van Europees Directief 1999/5/EC.[Finnish]Tämä tuote noudattaa EU-direktiivin 1999/5/EC määräyksiä.[French]Ce produit est conforme aux exigences de la Directive Européenne 1999/5/EC.[German]Dieses Produkt entspricht den Bestimmungen der Europäischen Richtlinie 1999/5/EC[Greek]Το προϊόν αυτό πληροί τις προβλέψεις της Ευρωπαϊκής Οδηγίας 1999/5/ΕC.[Icelandic]Þessi vara stenst reglugerð Evrópska Efnahags Bandalagsins númer 1999/5/EC[Italian]Questo prodotto è conforme alla Direttiva Europea 1999/5/EC.](https://usermanual.wiki/Samsung-Electronics-Co/GTM382W.Host-User-Manual-1-of-2/User-Guide-1169112-Page-44.png)
![45[Norwegian]Dette produktet er i henhold til bestemmelsene i det europeiske direktivet 1999/5/EC.[Portuguese]Este produto cumpre com as normas da Diretiva Européia 1999/5/EC.[Spanish]Este producto cumple con las normas del Directivo Europeo 1999/5/EC.[Swedish]Denna produkt har tillverkats i enlighet med EG-direktiv 1999/5/EC.European Economic Area RestrictionsLocal Restriction of 802.11b/802.11g Radio Usage[Note to integrator: The following statements on local restrictions must be published in all end-user documentation provided with the system or product incorporating the wireless product.]Due to the fact that the frequencies used by 802.11b/802.11g wireless LAN devices may not yet be harmonized in all countries, 802.11b/802.11g products are designed for use only in specic countries or regions, and are not allowed to be operated in countries or regions other than those of designated use.As a user of these products, you are responsible for ensuring that the products are used only in the countries or regions for which they were intended and for verifying that they are congured with the correct selection of frequency and channel for the country or region of use. Any deviation from permissible settings and restrictions in the country or region of use could be an infringement of local law and may be punished as such.](https://usermanual.wiki/Samsung-Electronics-Co/GTM382W.Host-User-Manual-1-of-2/User-Guide-1169112-Page-45.png)


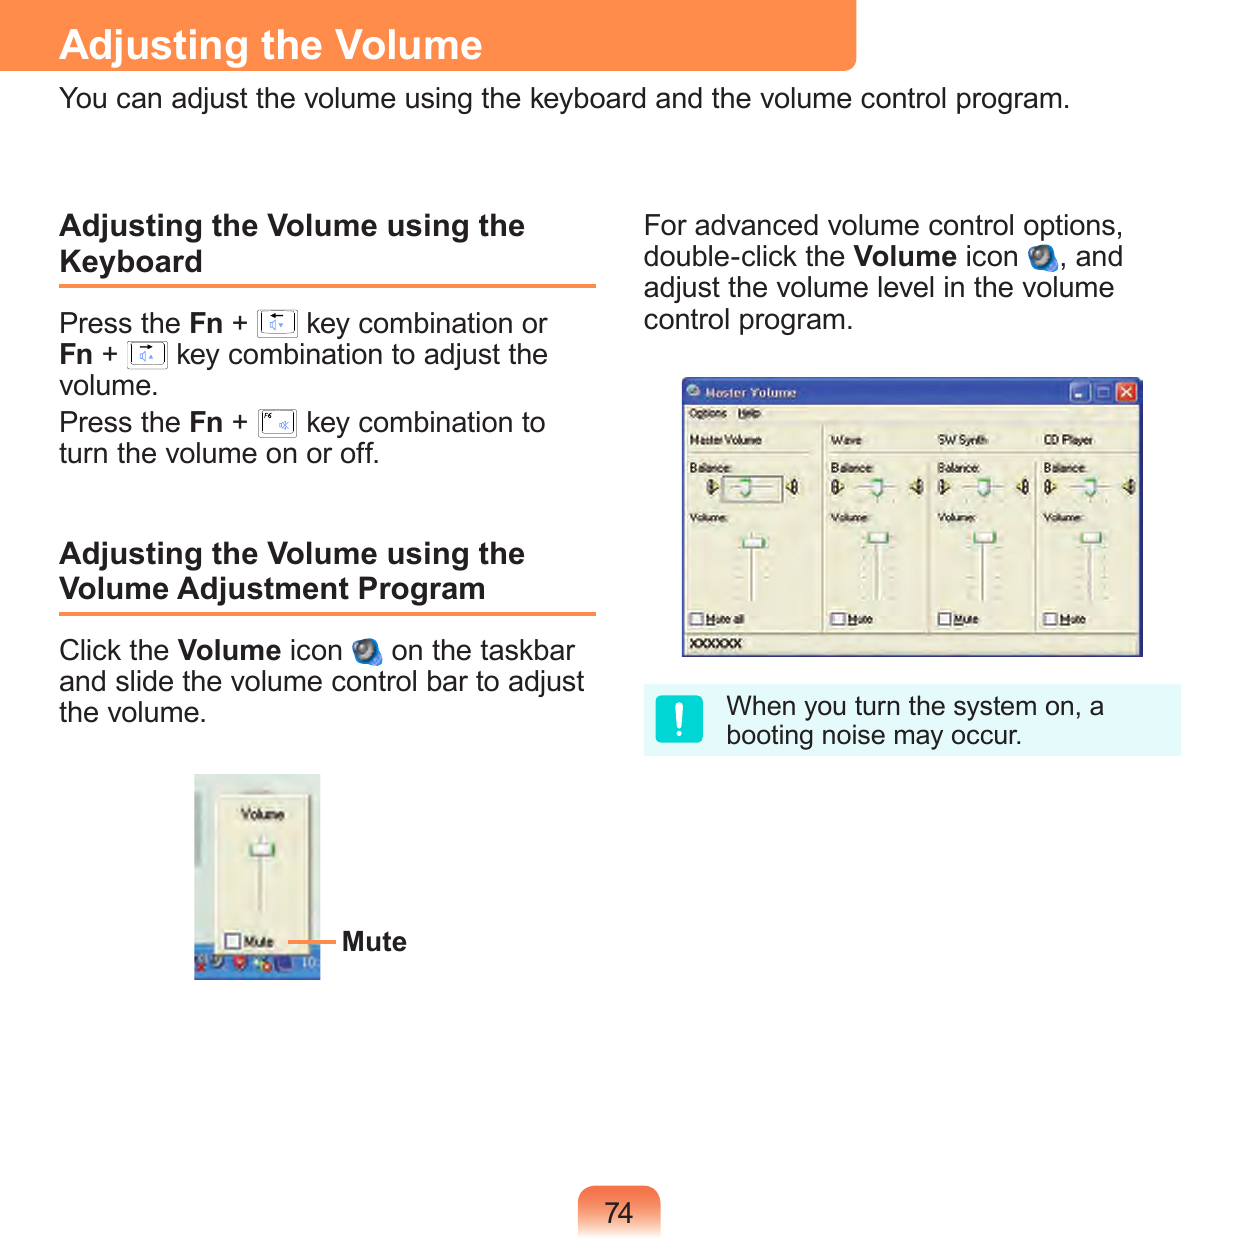
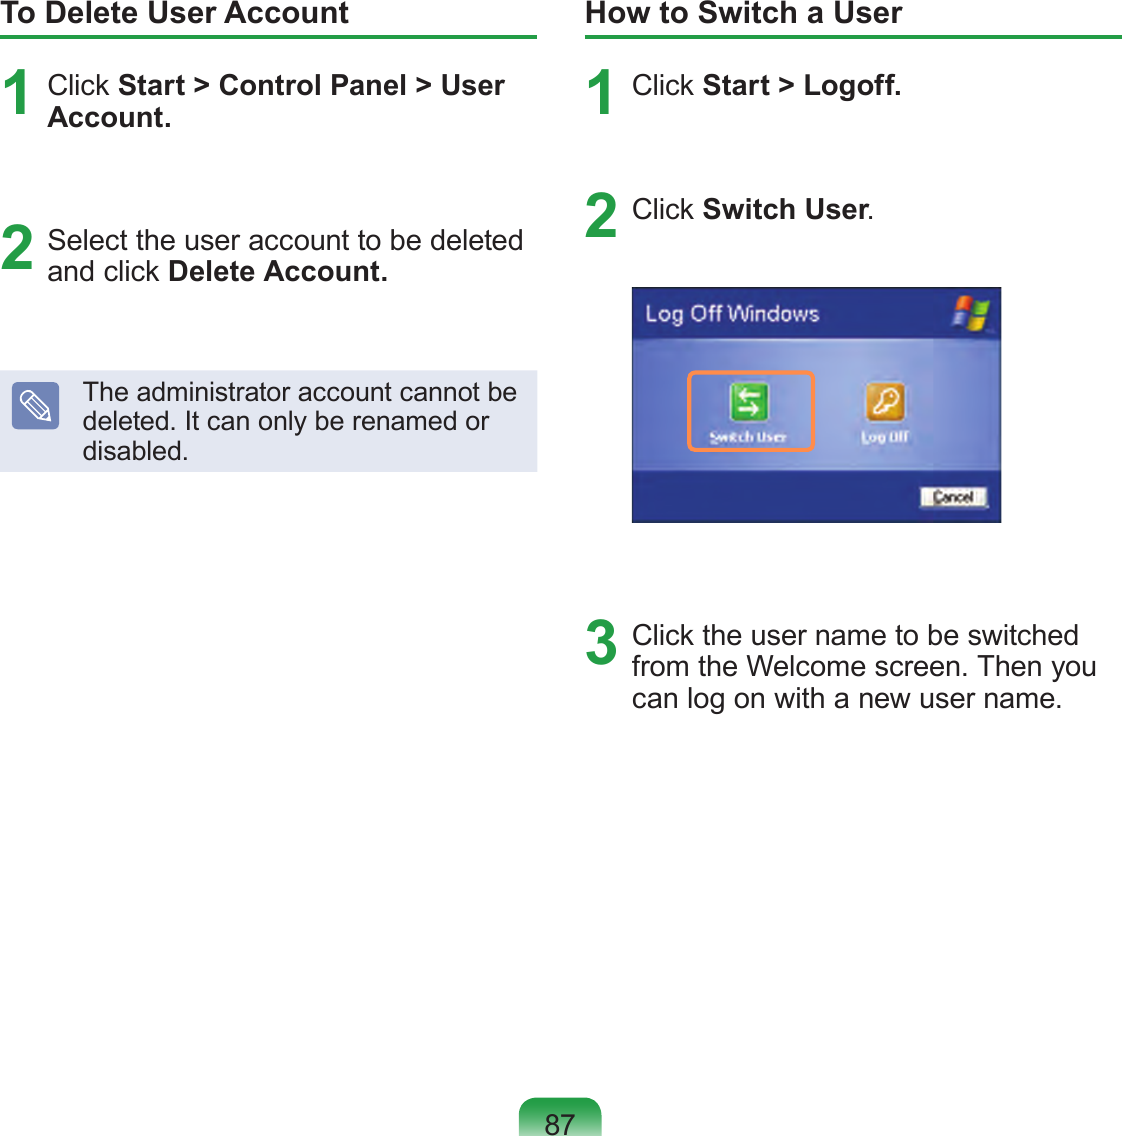
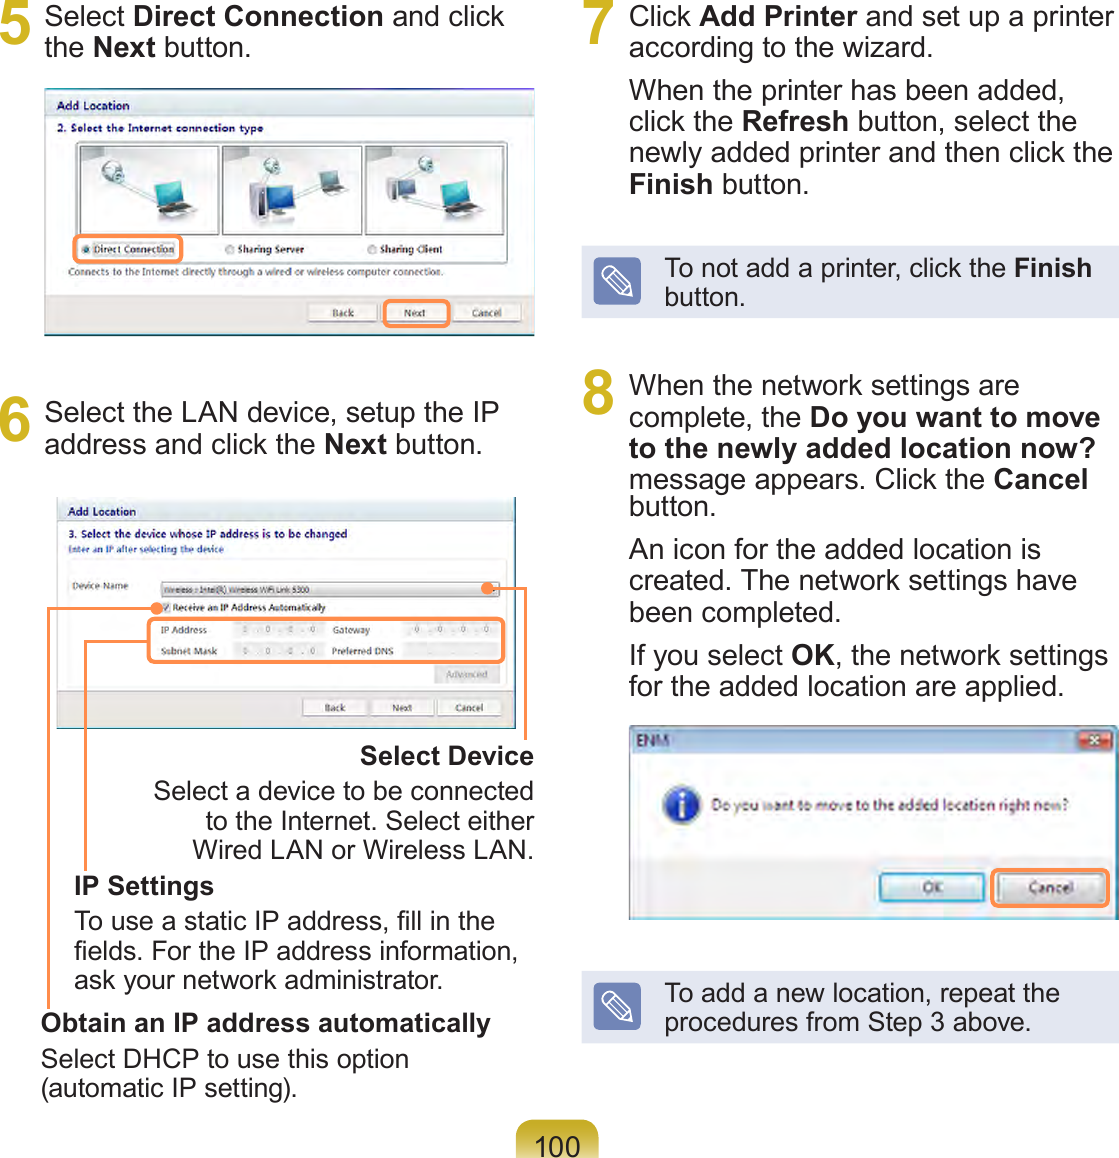
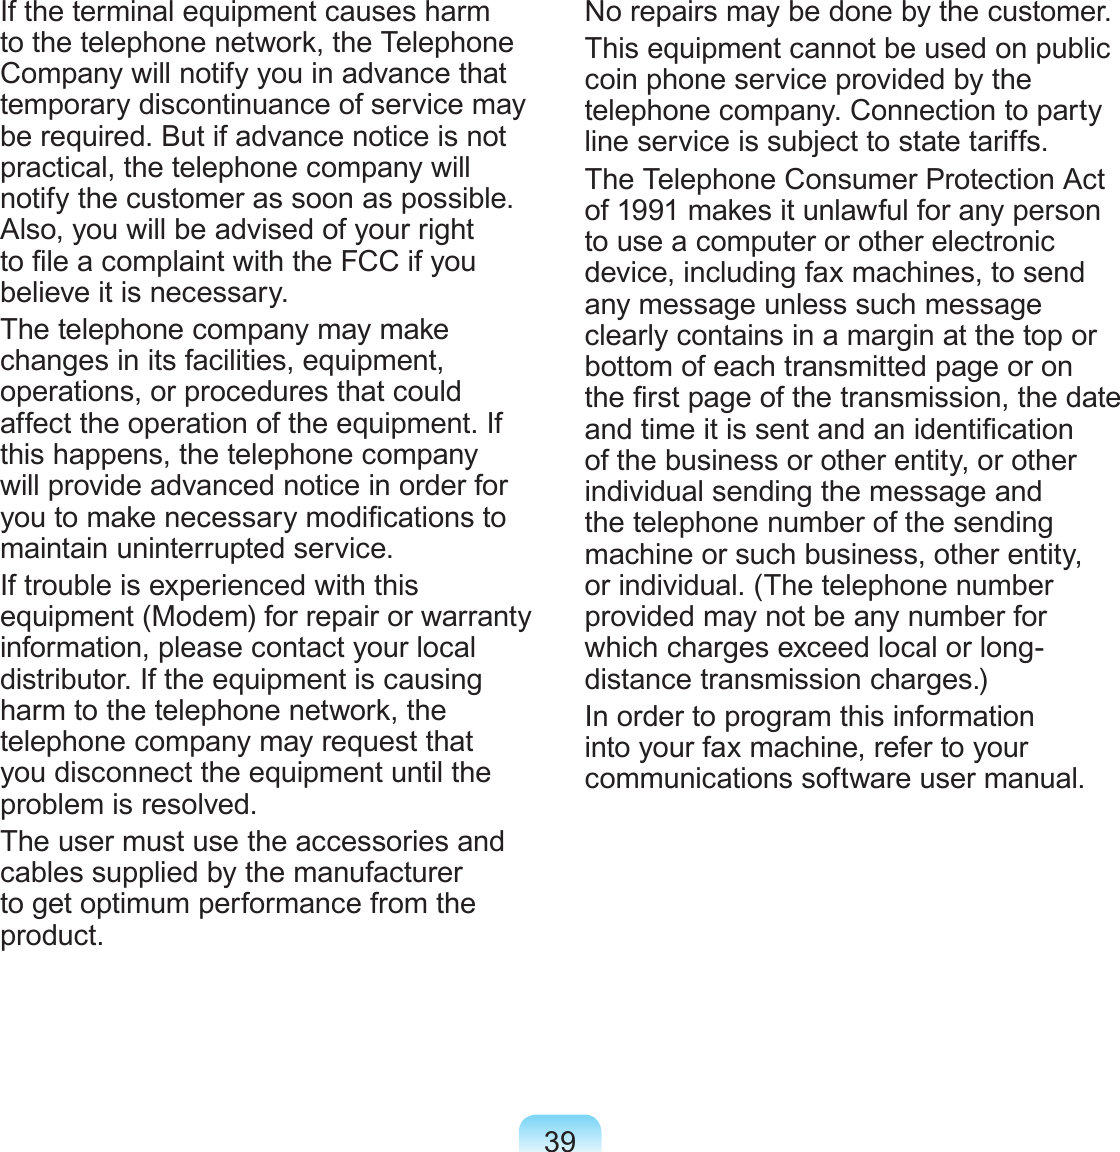
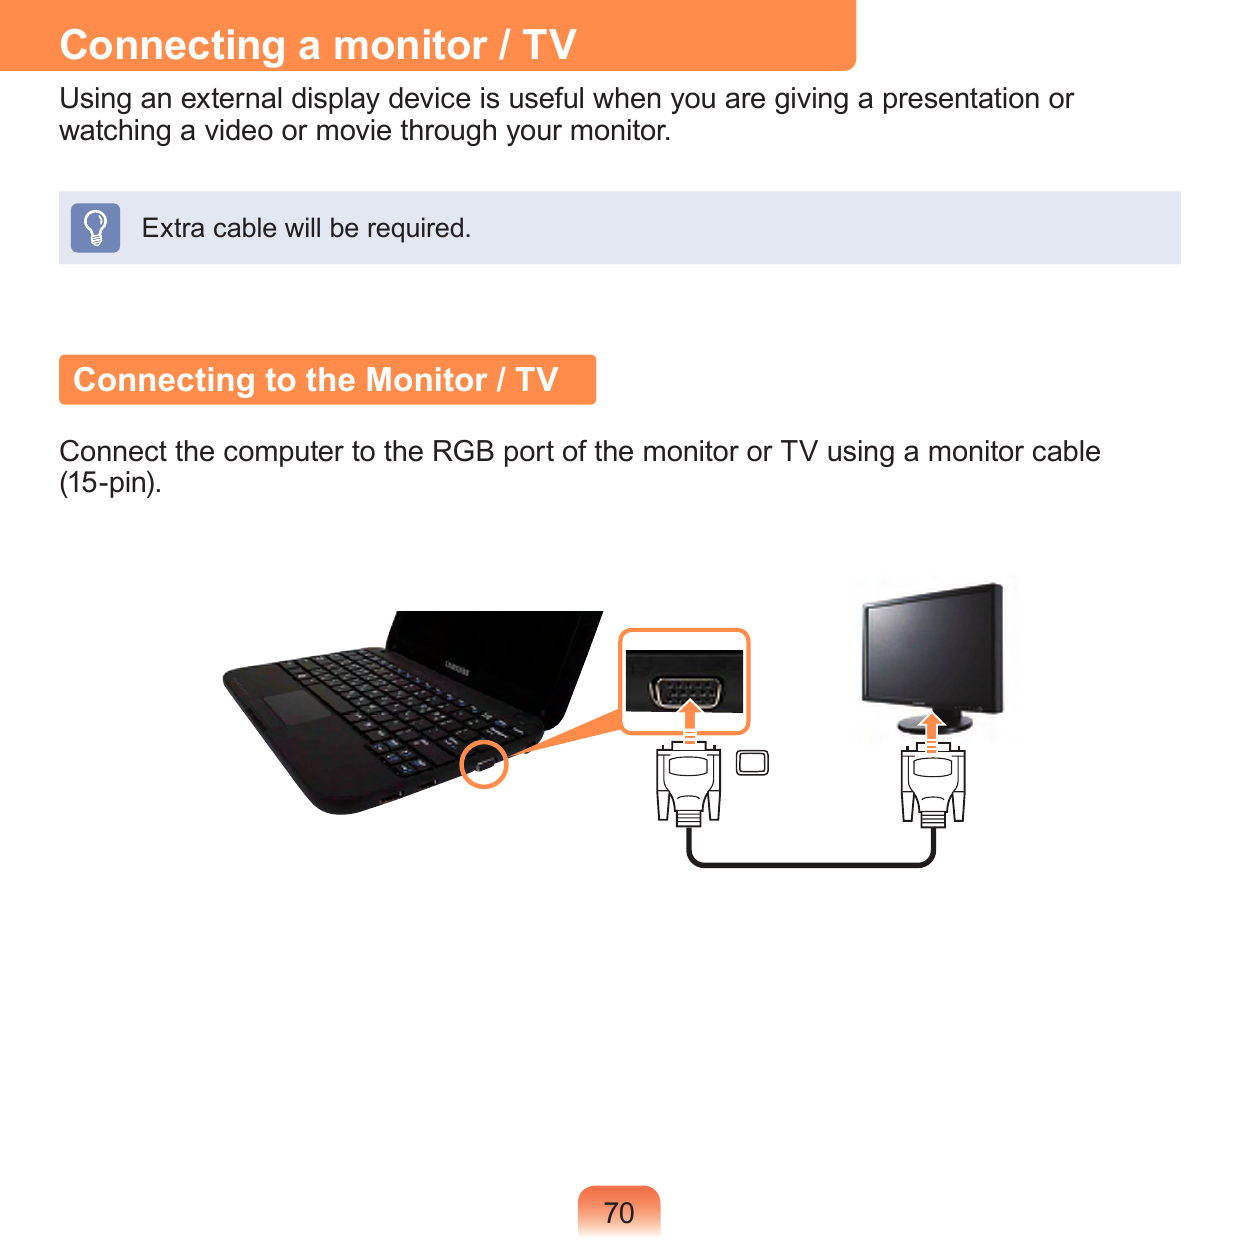
![56Turning the computer off1 Click the Start button on the taskbar.2 Click Turn Off Computer.3 Click Turn Off. If the computer has not turned off properly due to a system error, press <Ctrl>+<Alt>+<Delete>. When [Windows Task Manager] dialog box appears, click Shut Down > Turn Off to turn off the computer. Your unsaved work may be lost/damaged. If <Ctrl>+<Alt>+<Delete> keys do not operate either, press the power button for more than 4 seconds to turn off the computer. Your unsaved work may be lost/damaged. The next time you turn on your computer, a hard disk check will be performed, before Windows starts.](https://usermanual.wiki/Samsung-Electronics-Co/GTM382W.Host-User-Manual-1-of-2/User-Guide-1169112-Page-56.png)
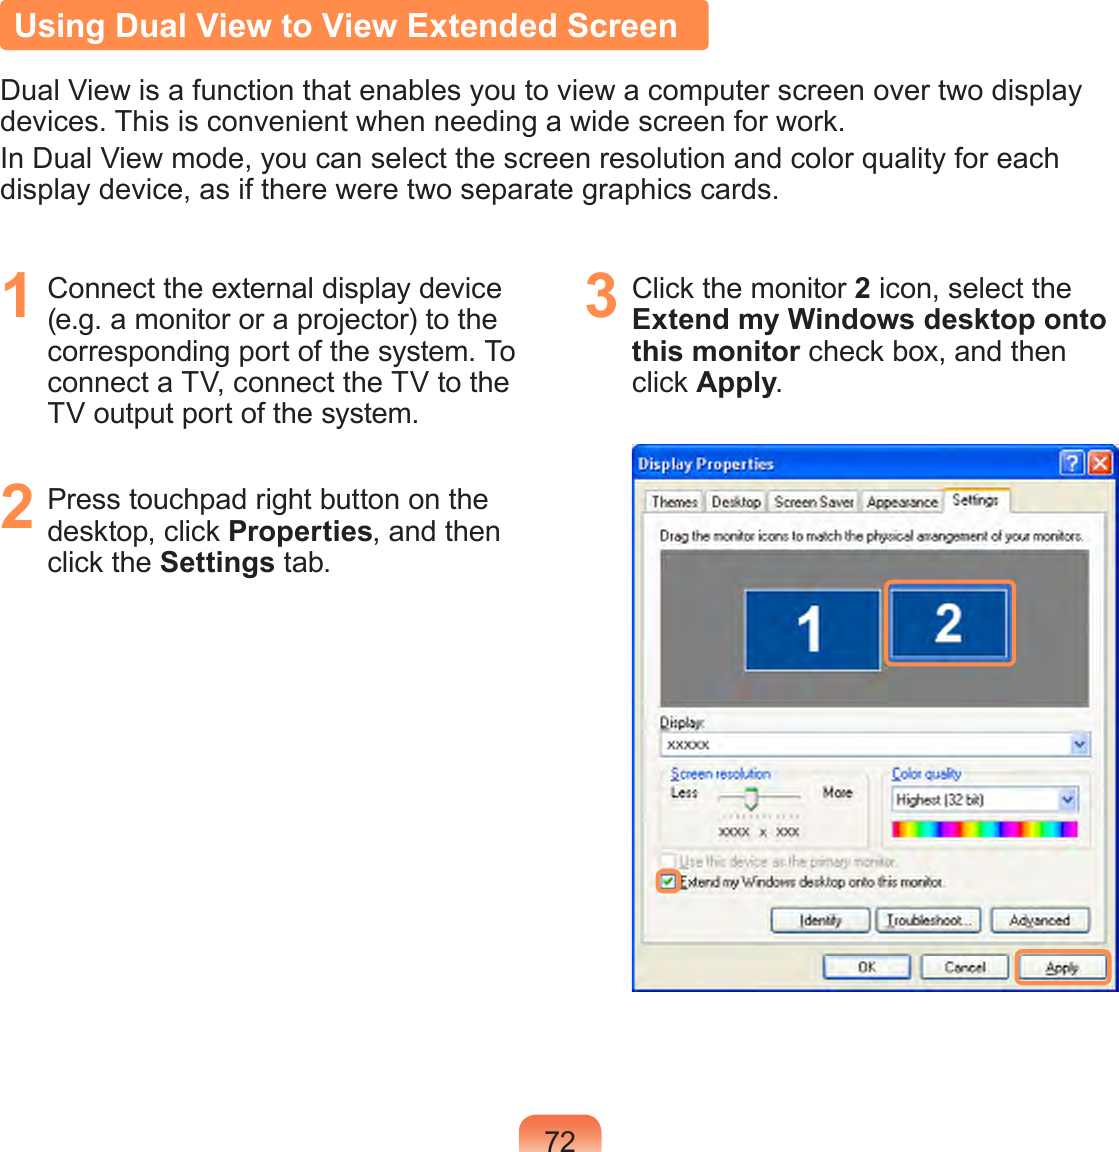
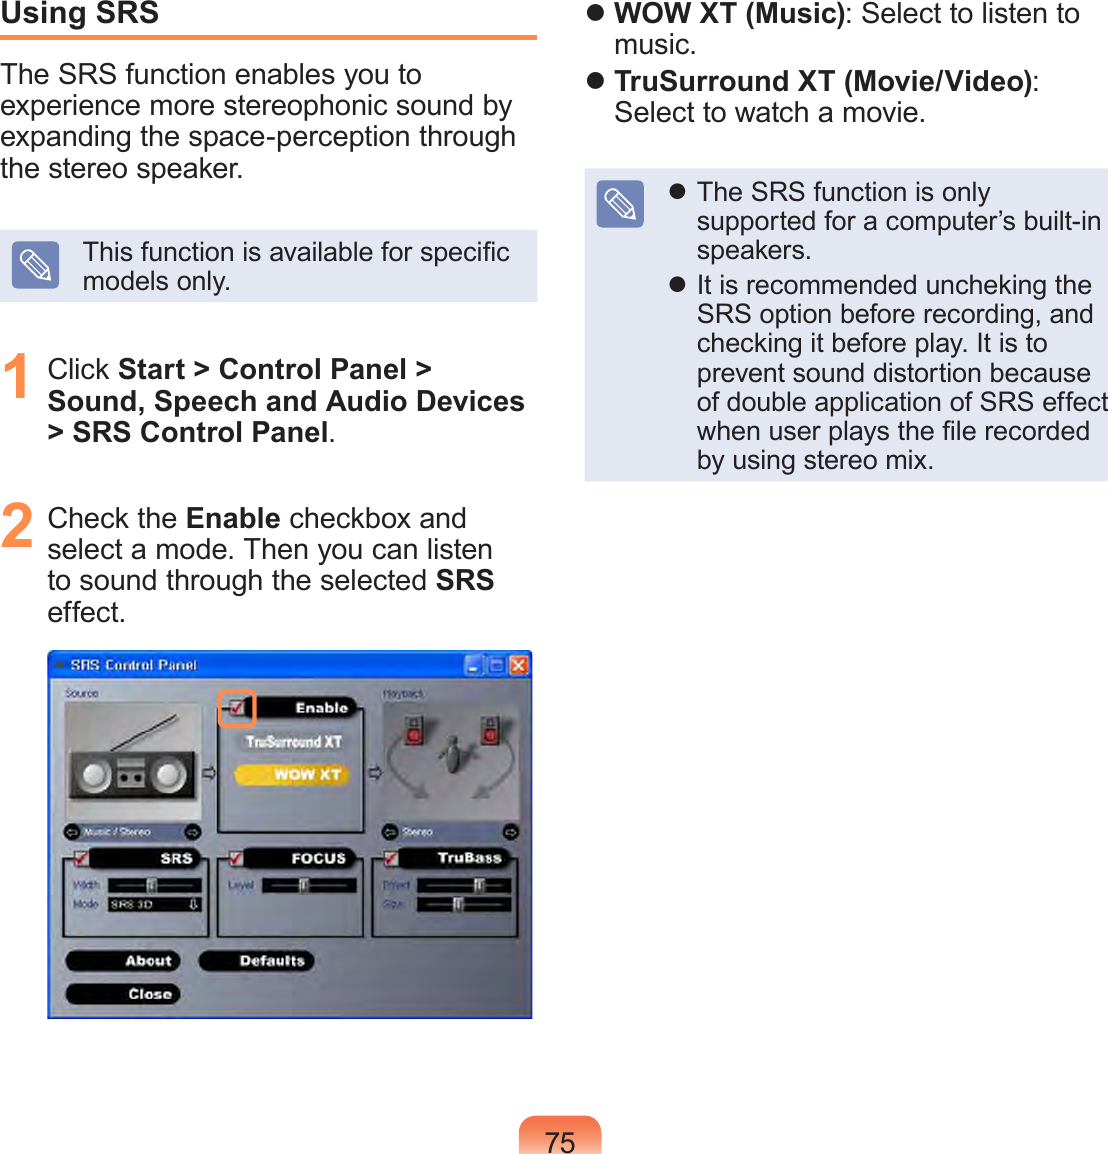
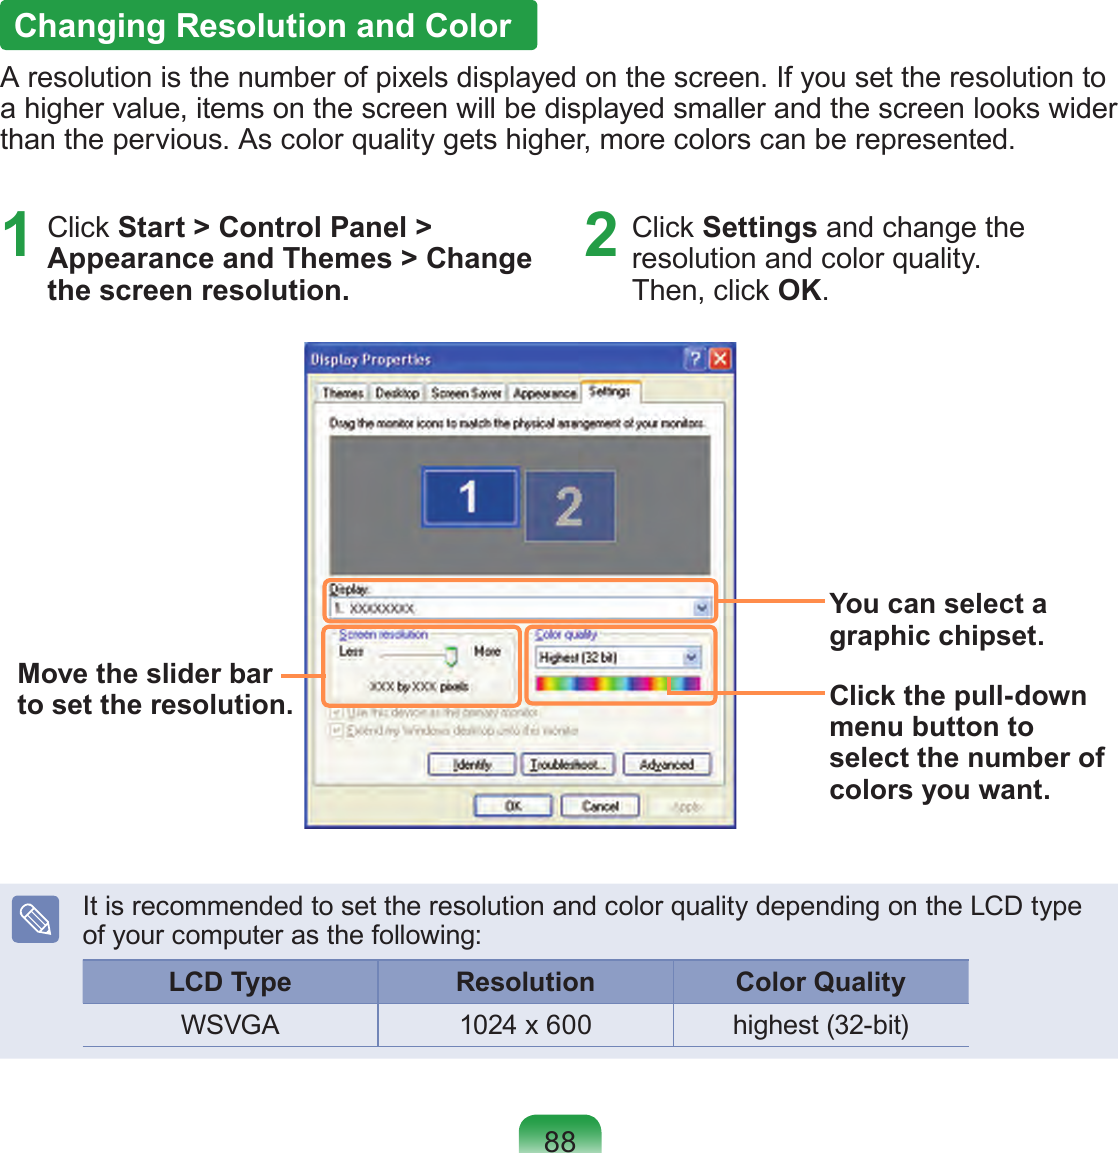
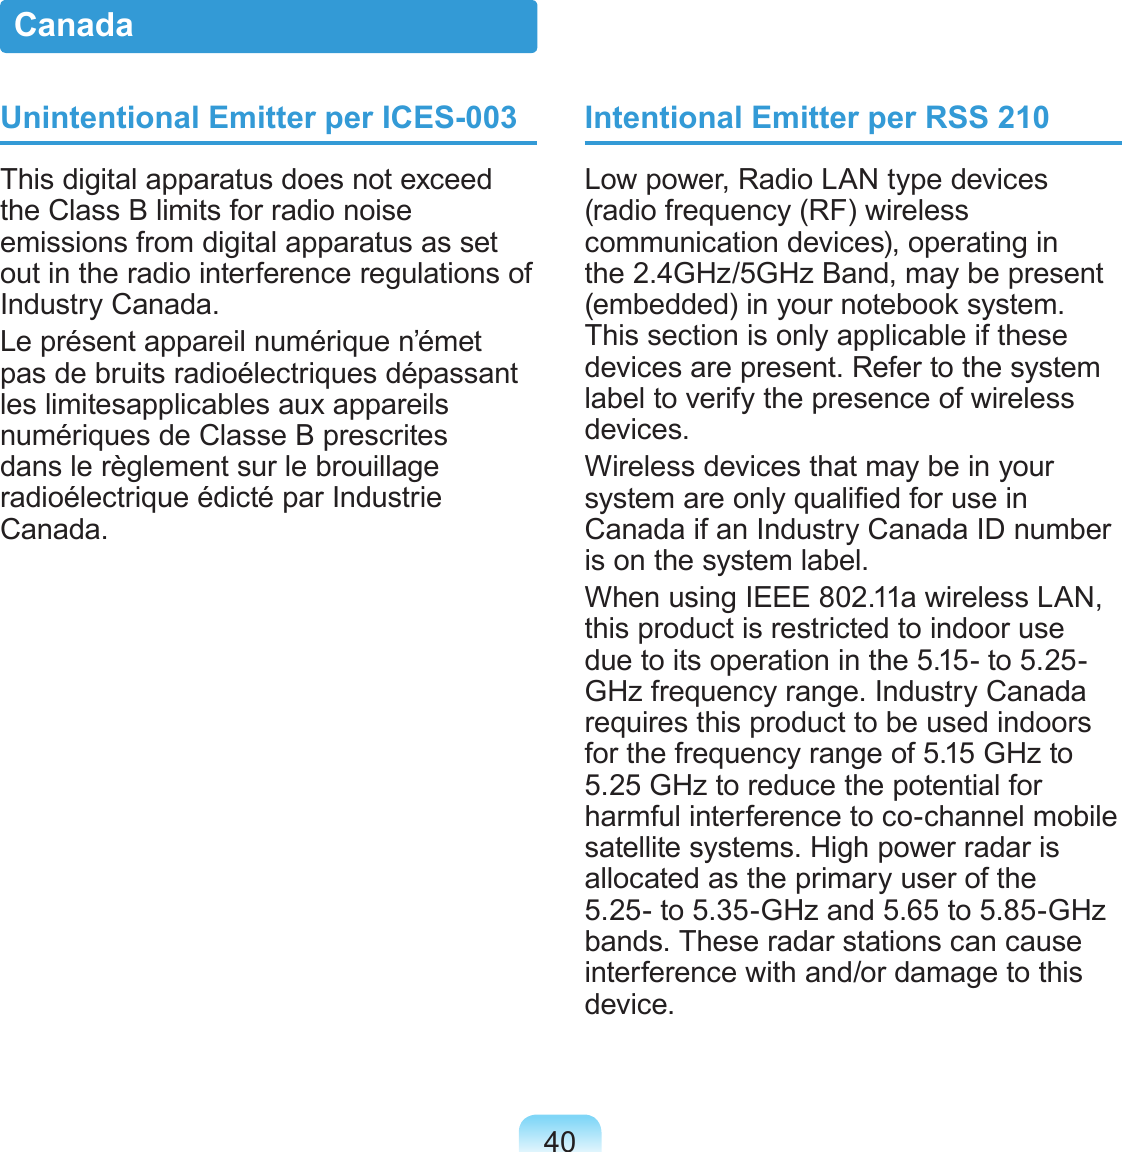
![734 When the conguration is complete, click Identify on the left side of Troubleshoot. The primary display device(the LCD) is indicated as 1, and the secondary display device is indicated as 2. Now you can view the screen through two monitors.1 : Primary 2 : Secondary When you use Dual View, conguring the LCD as the 'Primary' monitor is recommended. If the screen of the secondary display device is displayed at 1024x768 pixels, with 32bit colors, change the settings to the desired screen resolution and color quality in the [Display Properties] dialog box.Deactivating Dual View ModeClick the monitor 2 icon, clear the Extend my Windows desktop onto this monitor check box, and then click Apply.To move a window between display devices in Dual View modeClick the title bar of the window in the primary display device (1, the LCD), and drag it to the secondary display device (2). The window is moved to the secondary display device.](https://usermanual.wiki/Samsung-Electronics-Co/GTM382W.Host-User-Manual-1-of-2/User-Guide-1169112-Page-73.png)