Samsung Electronics Co KT35MPB Laser Beam Printer User Manual ML 3560Series En
Samsung Electronics Co Ltd Laser Beam Printer ML 3560Series En
UserManual.wiki
>
Samsung Electronics Co
>
KT35MPB User Manual
Users Manual
Navigation menu
Upload a User Manual
Namespaces
Wiki Guide
HTML
PDF
Info
Views
User Manual
Discussion / Help
Navigation

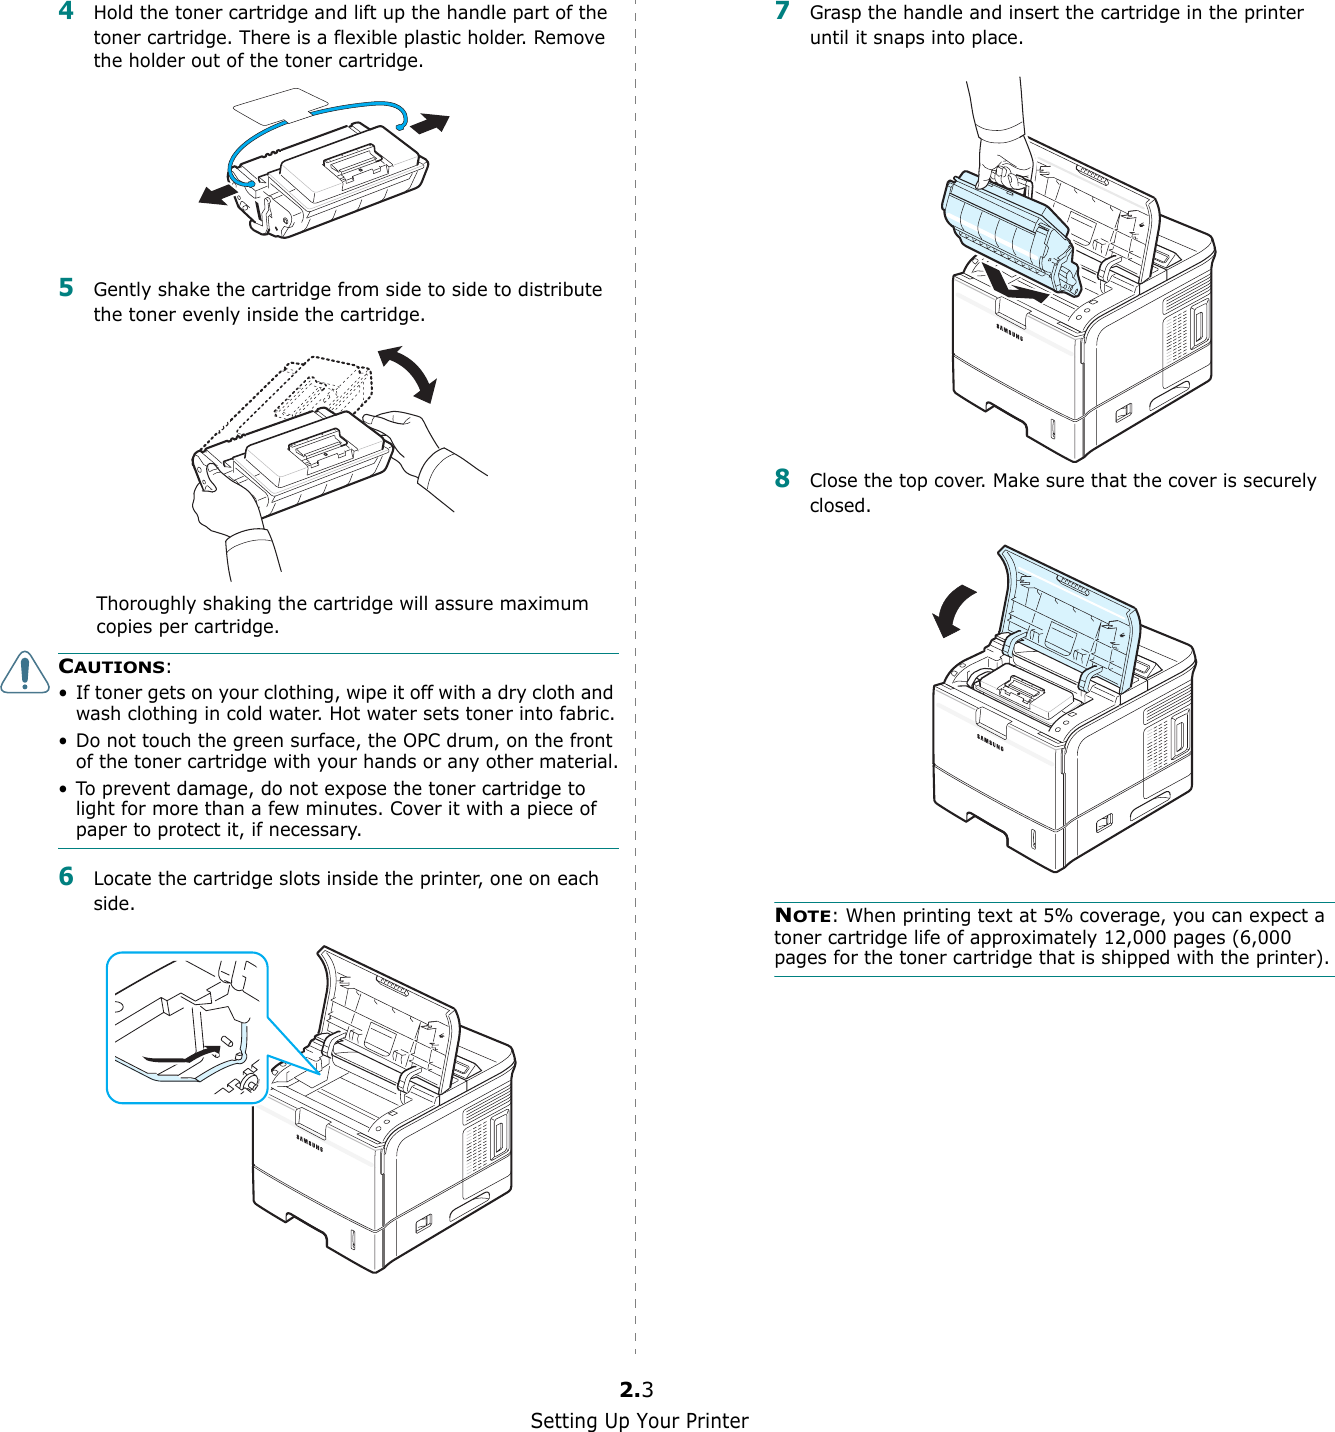
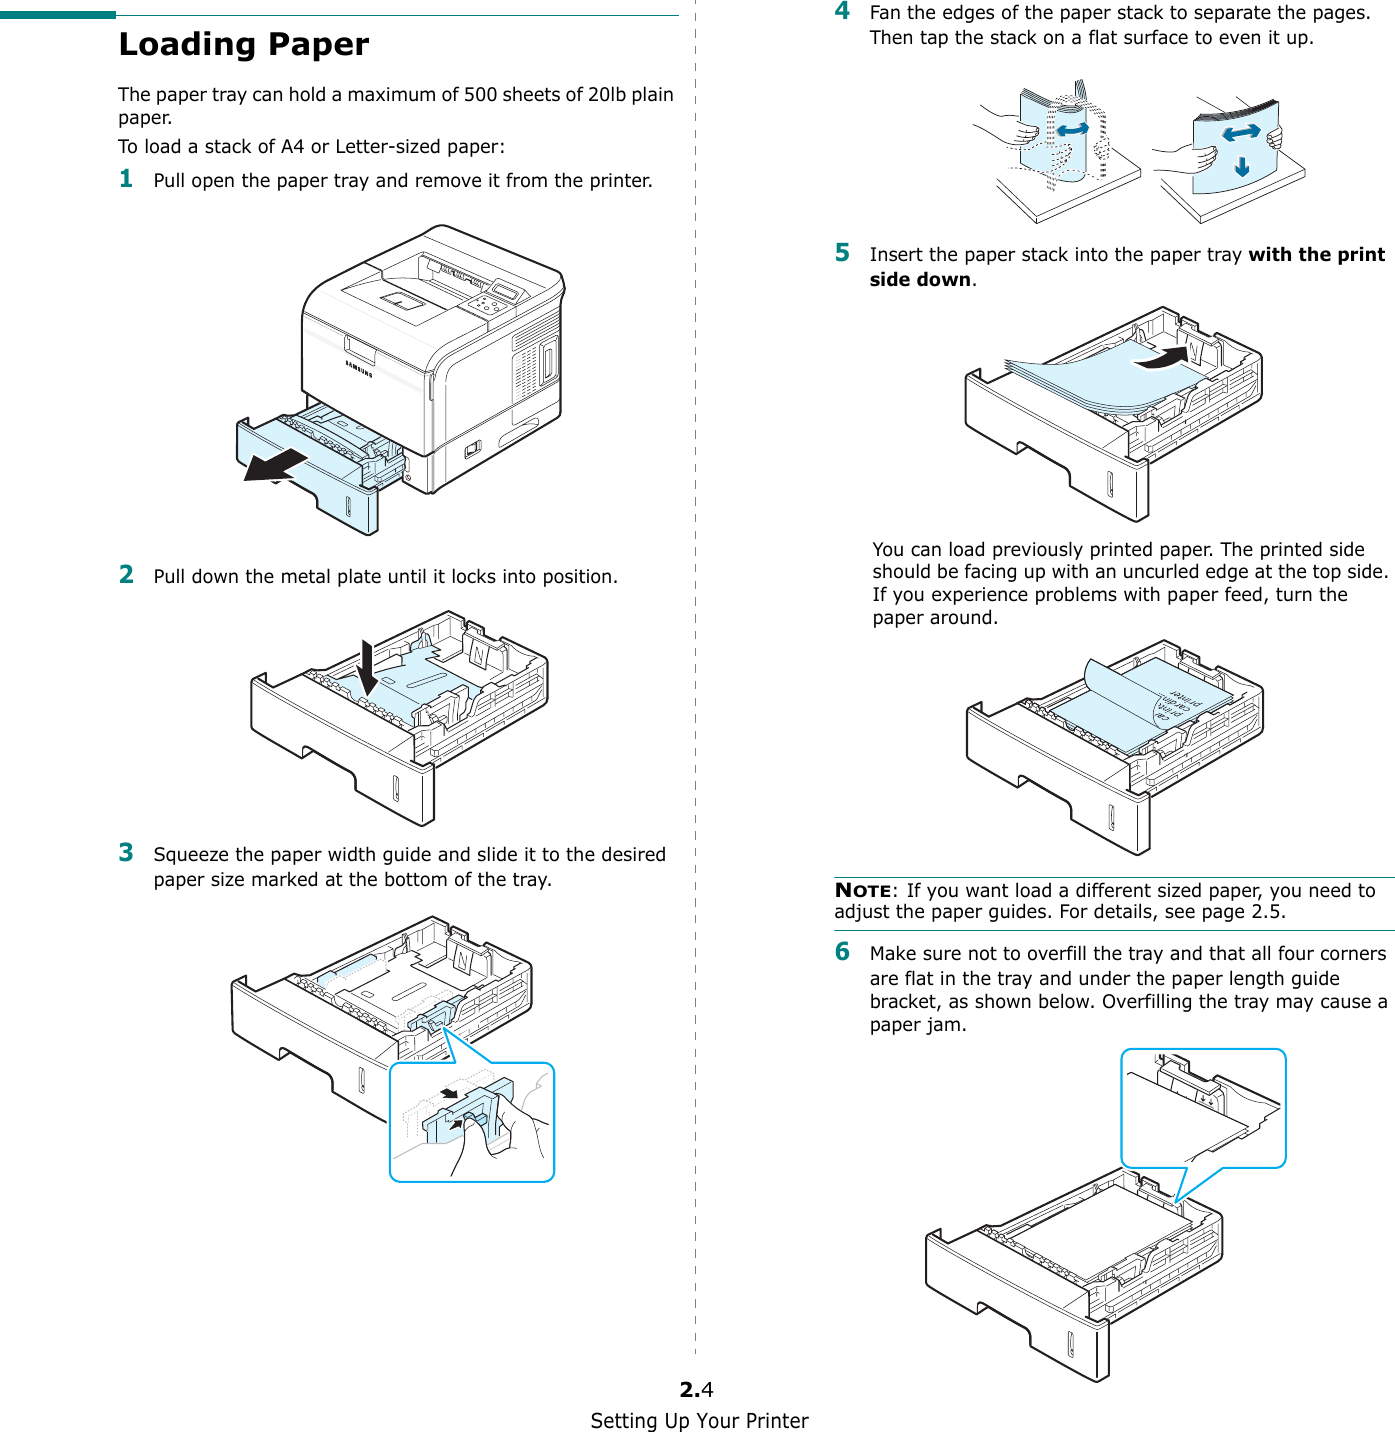

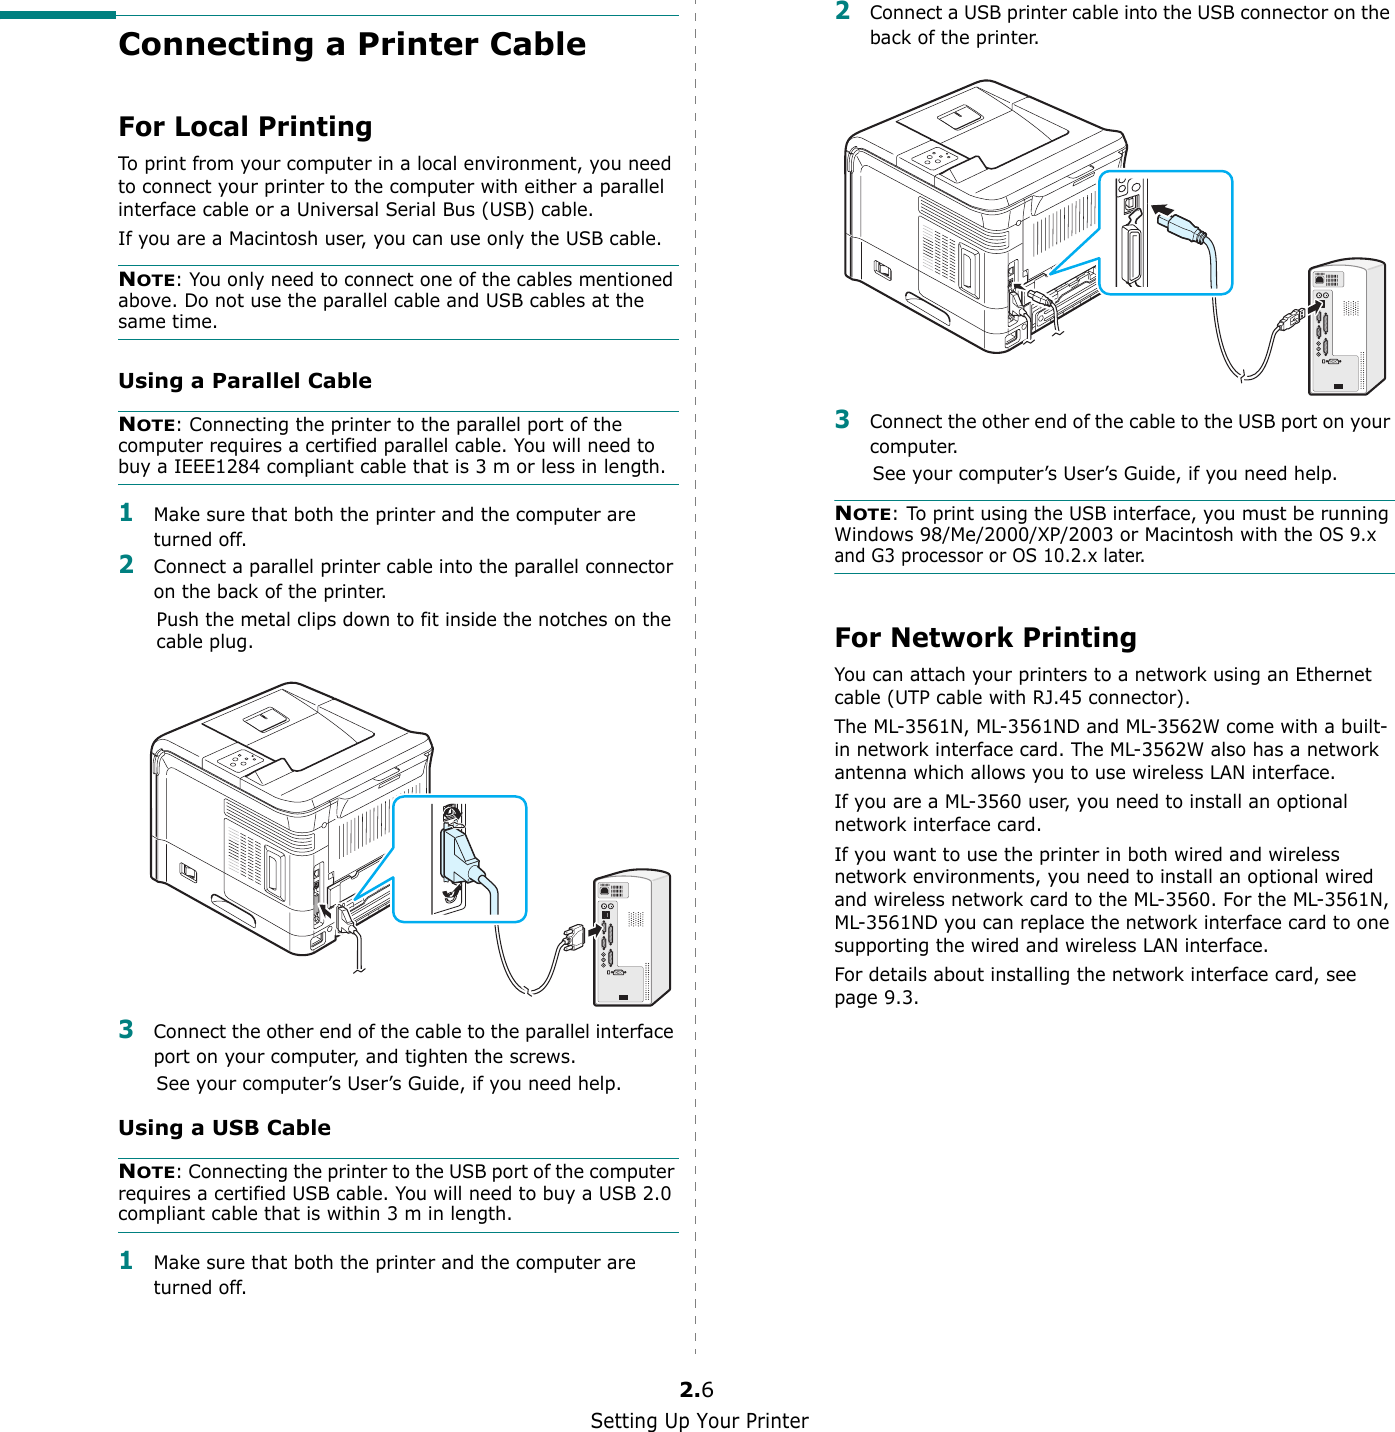
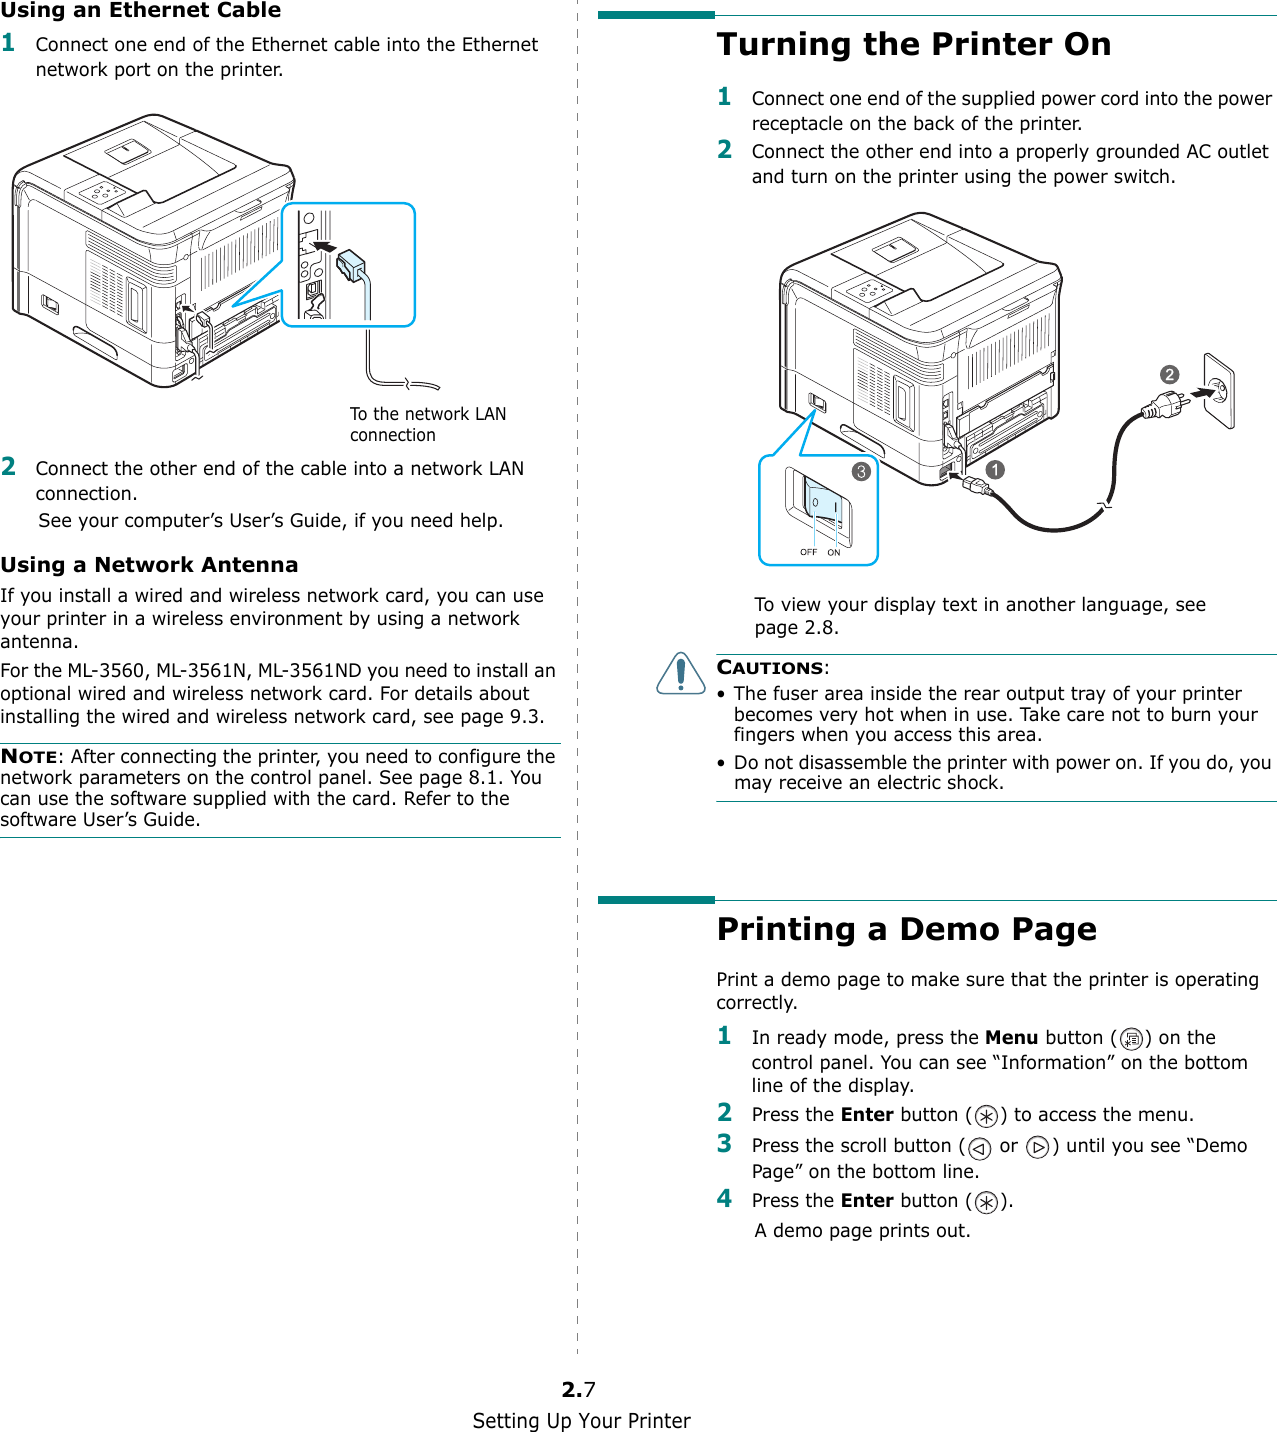

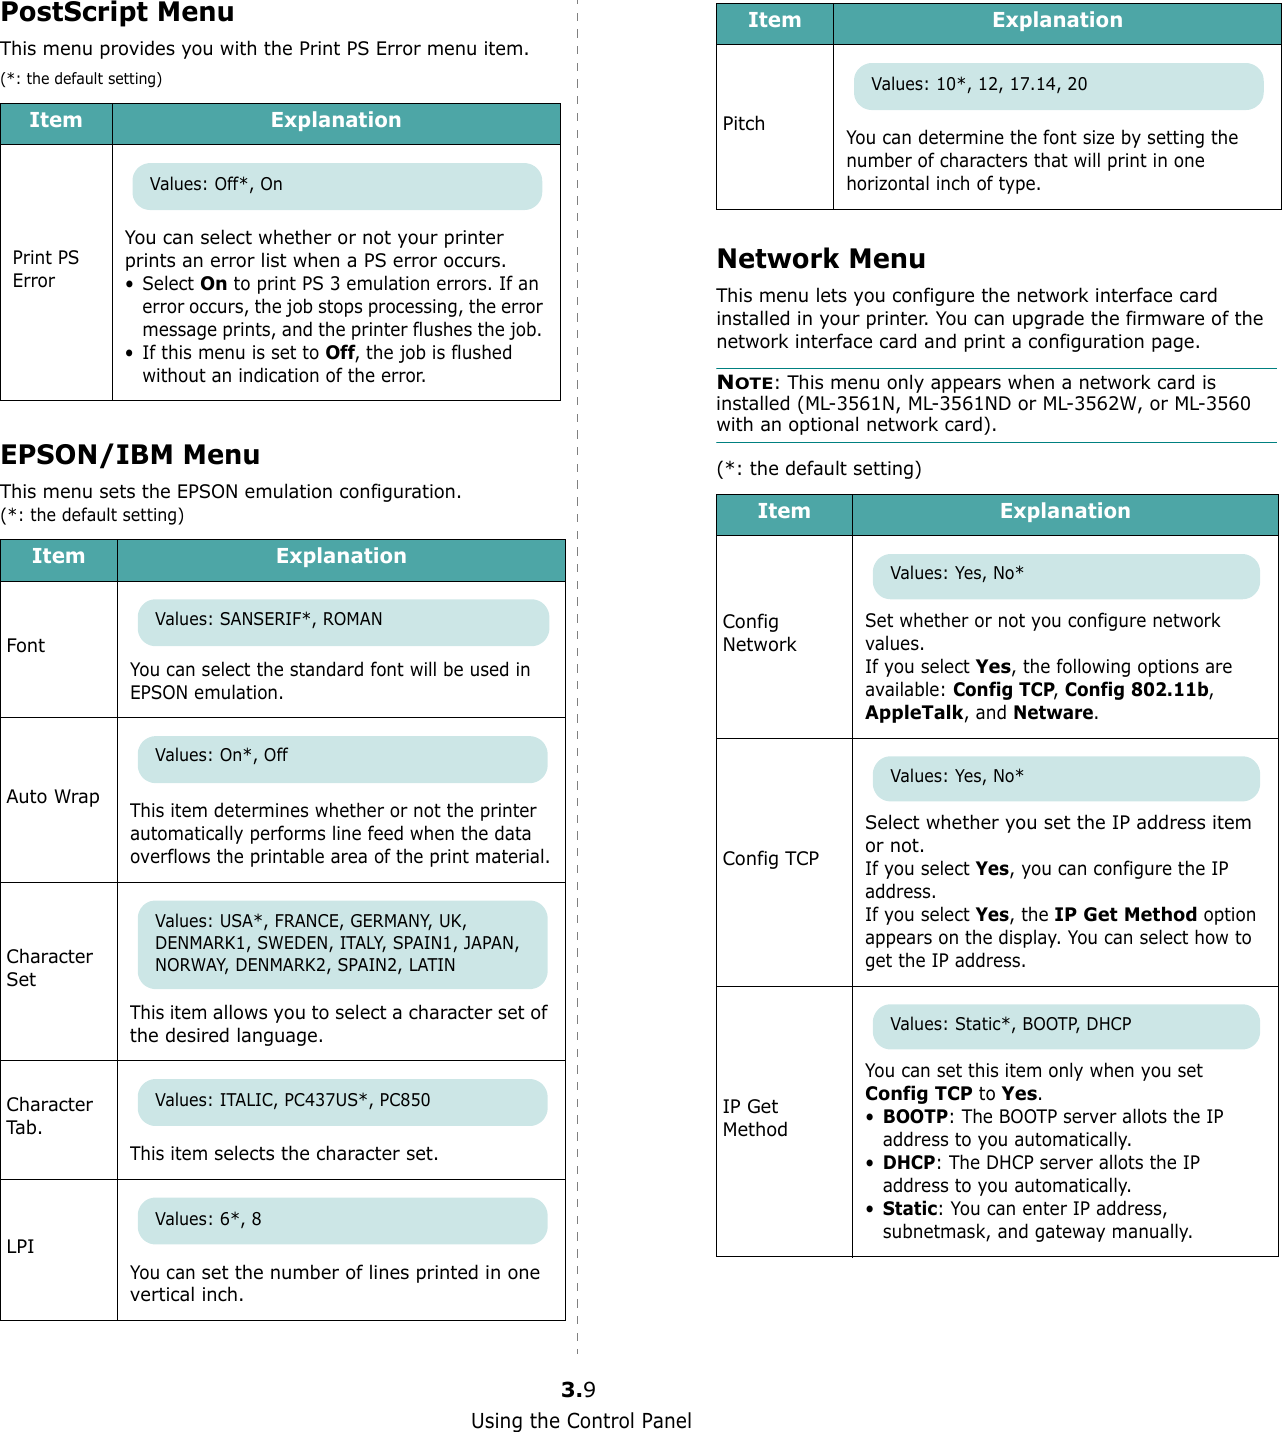
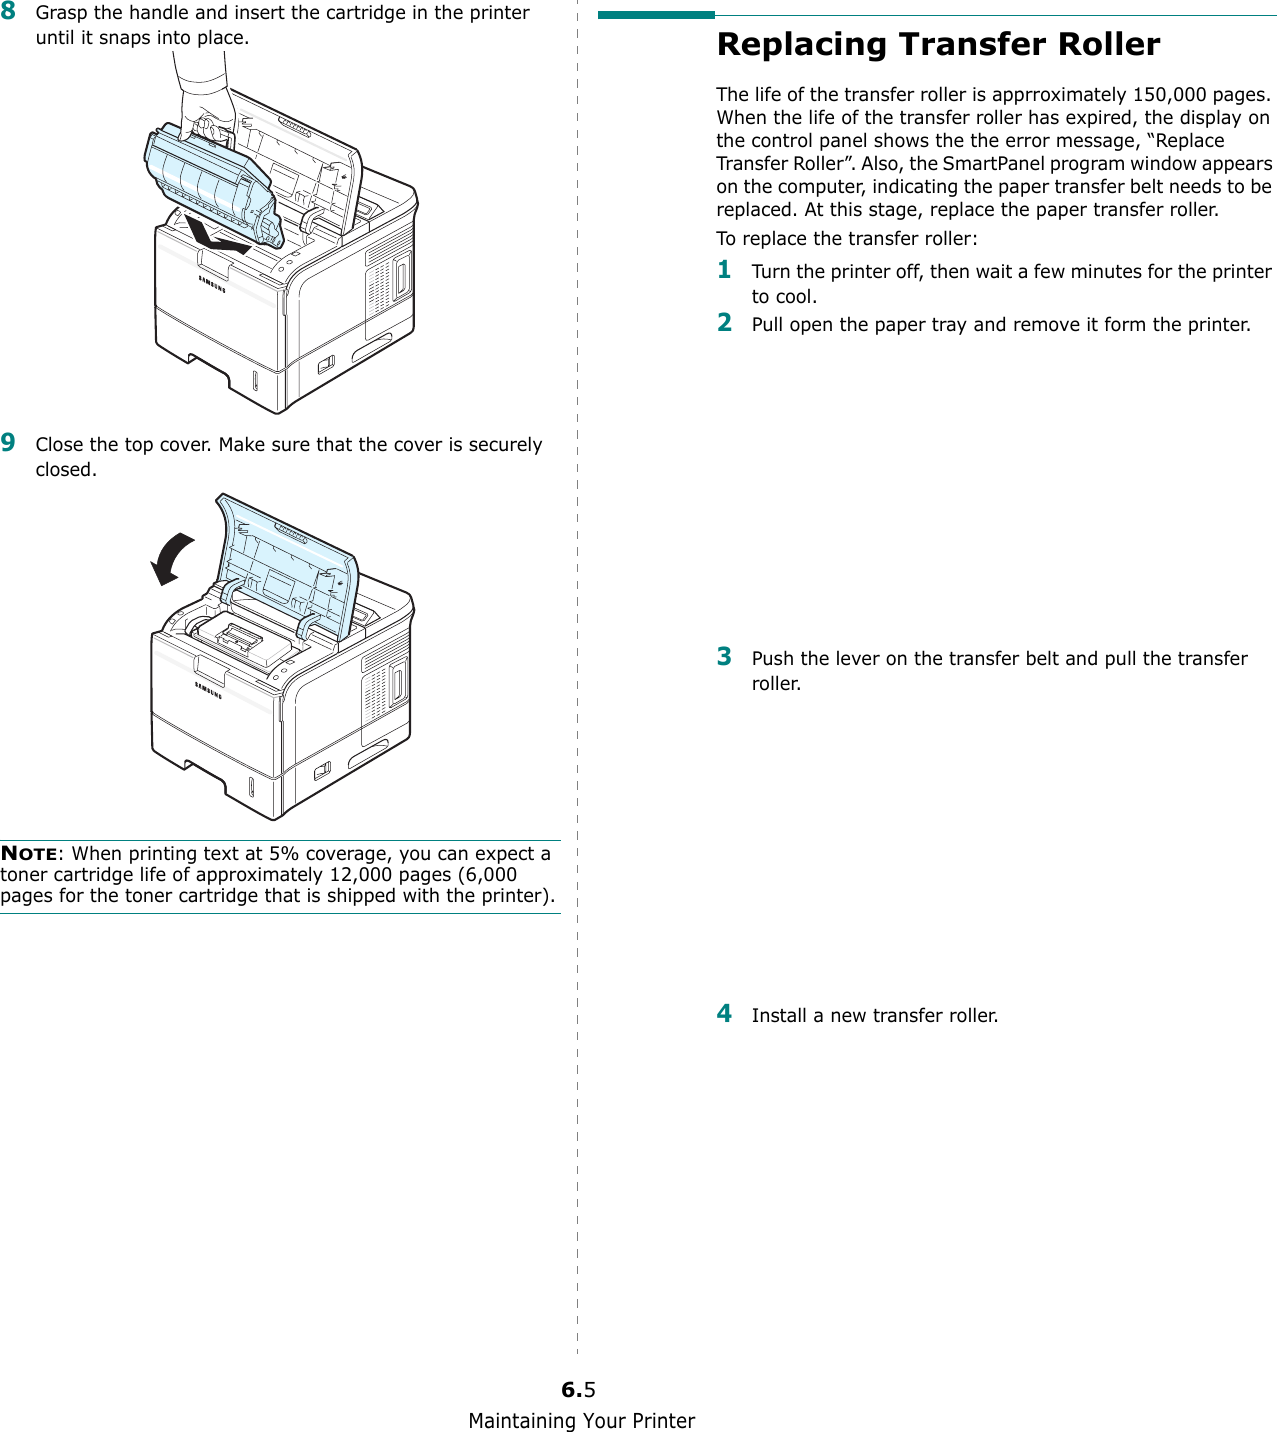


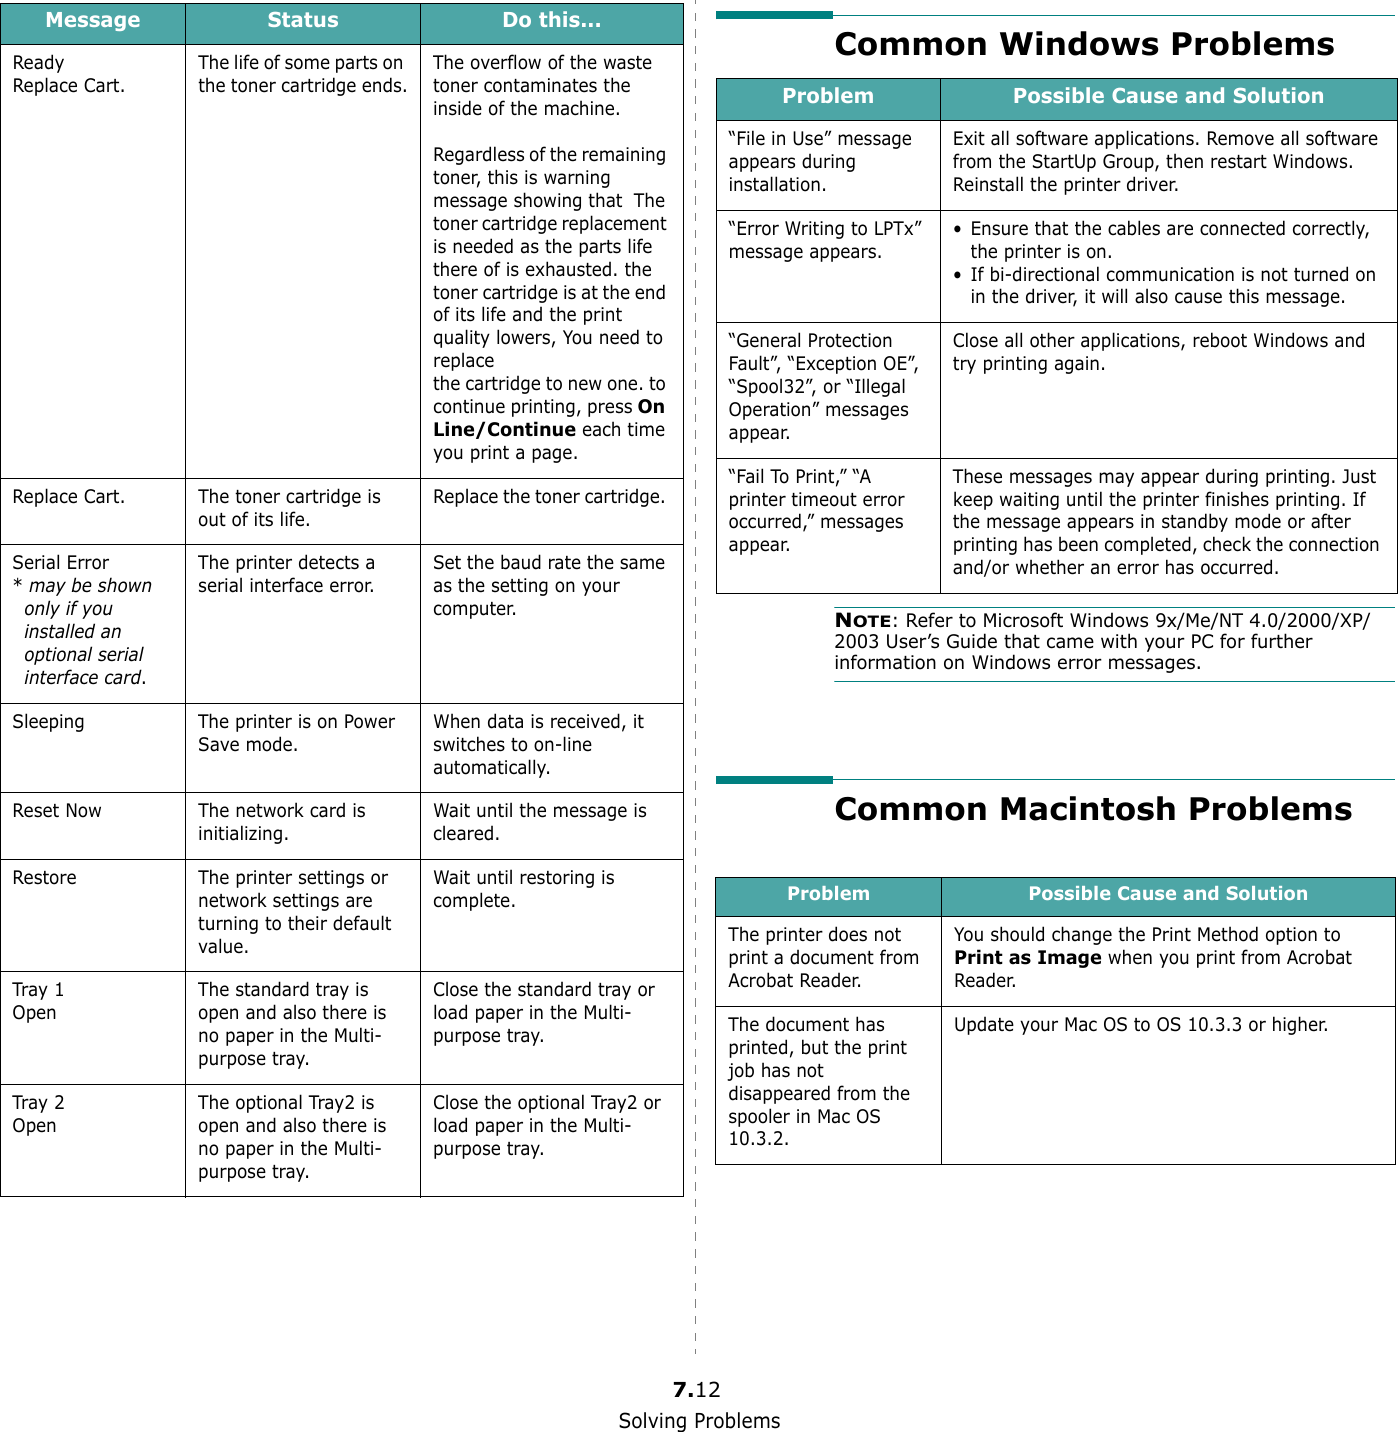
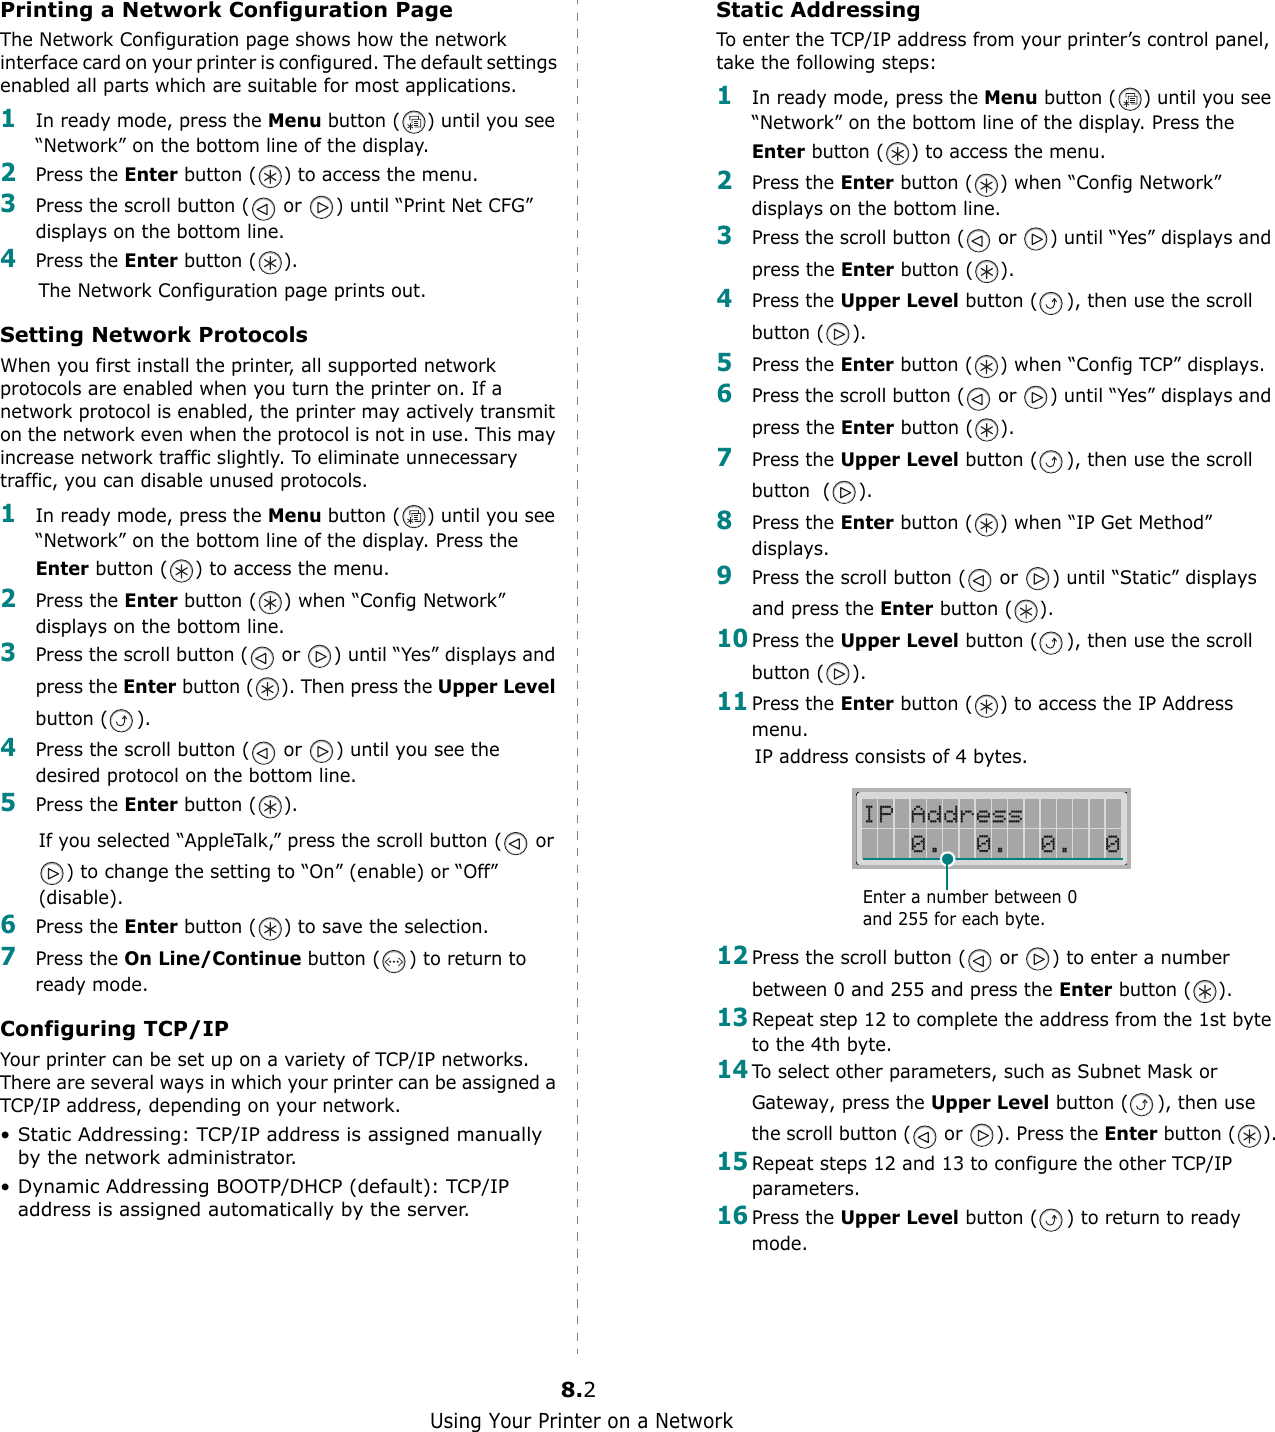
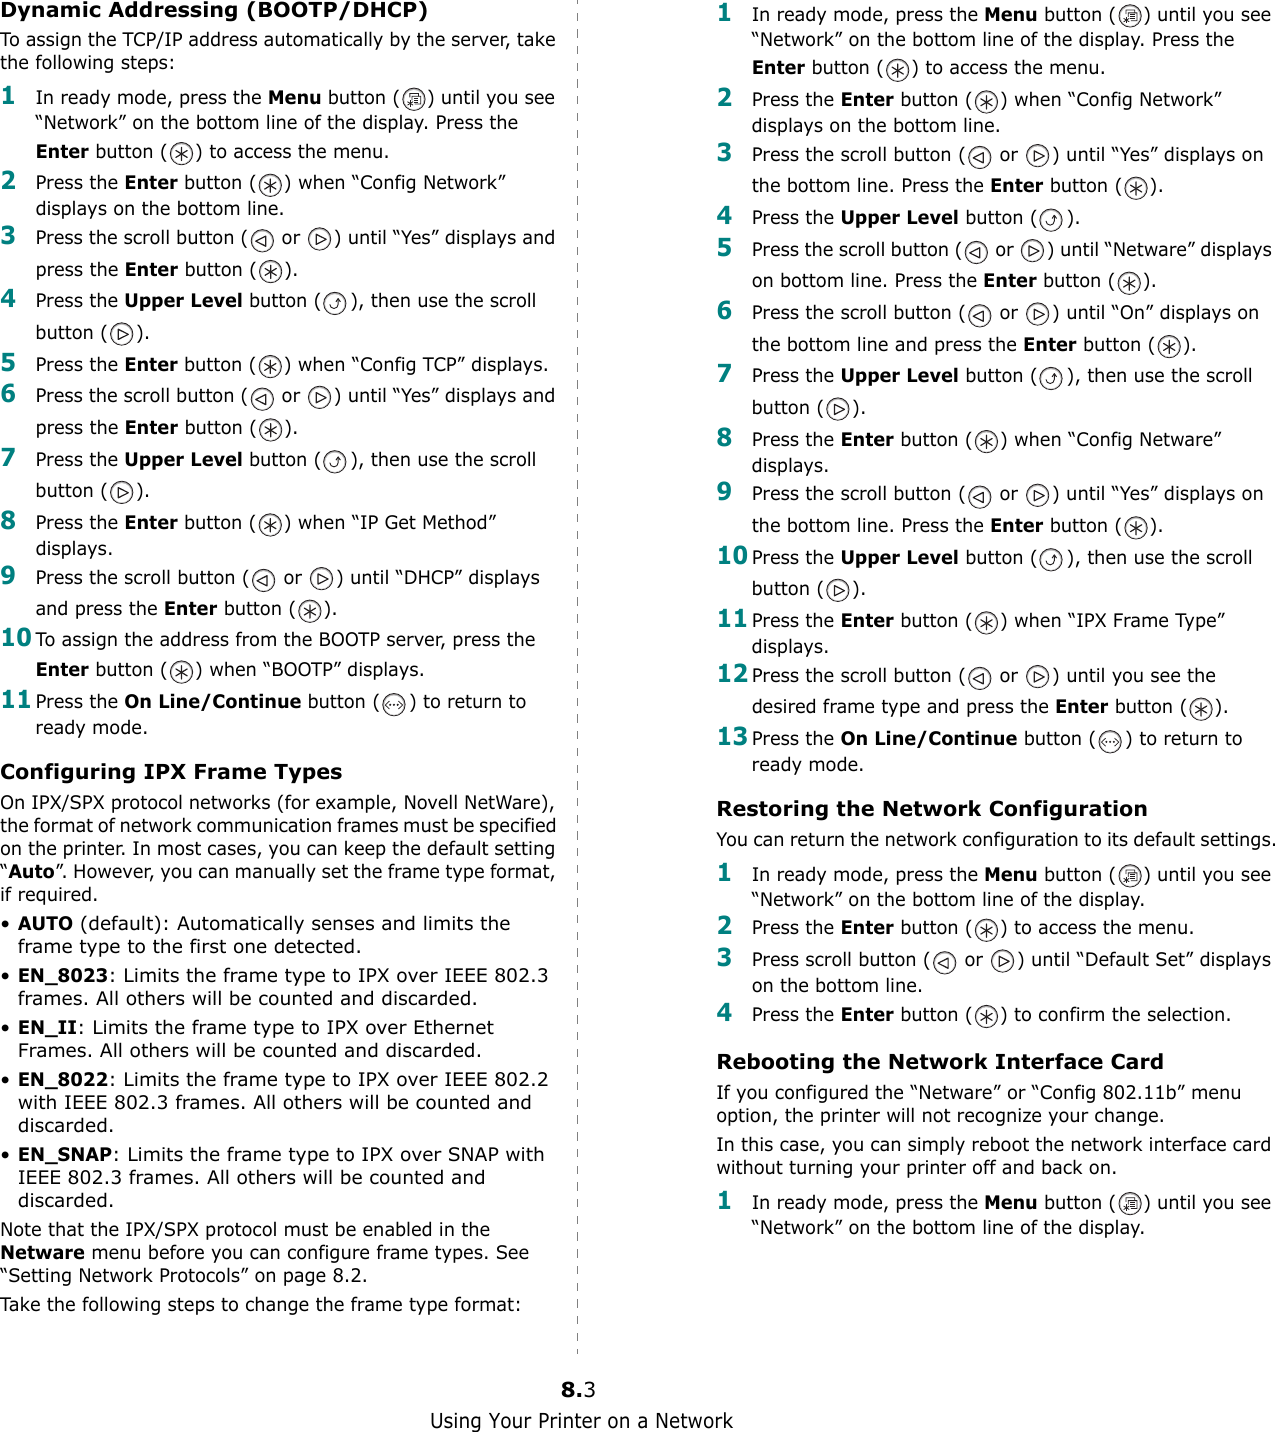
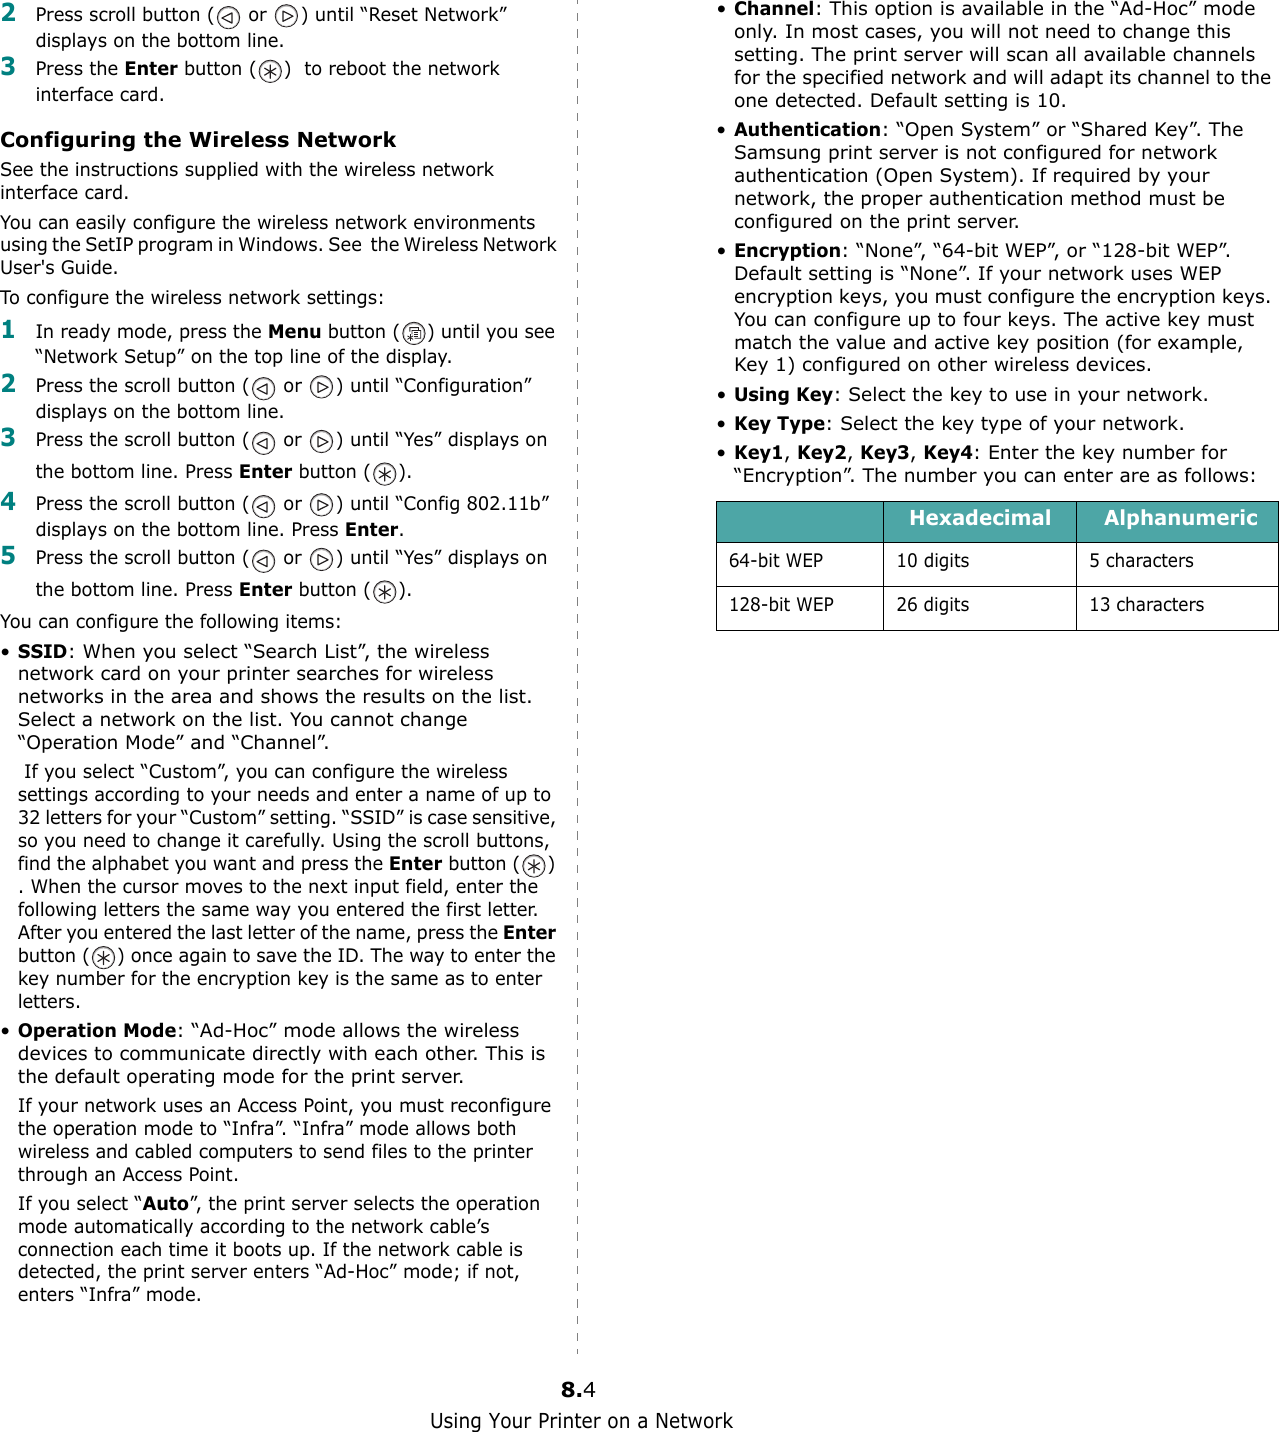
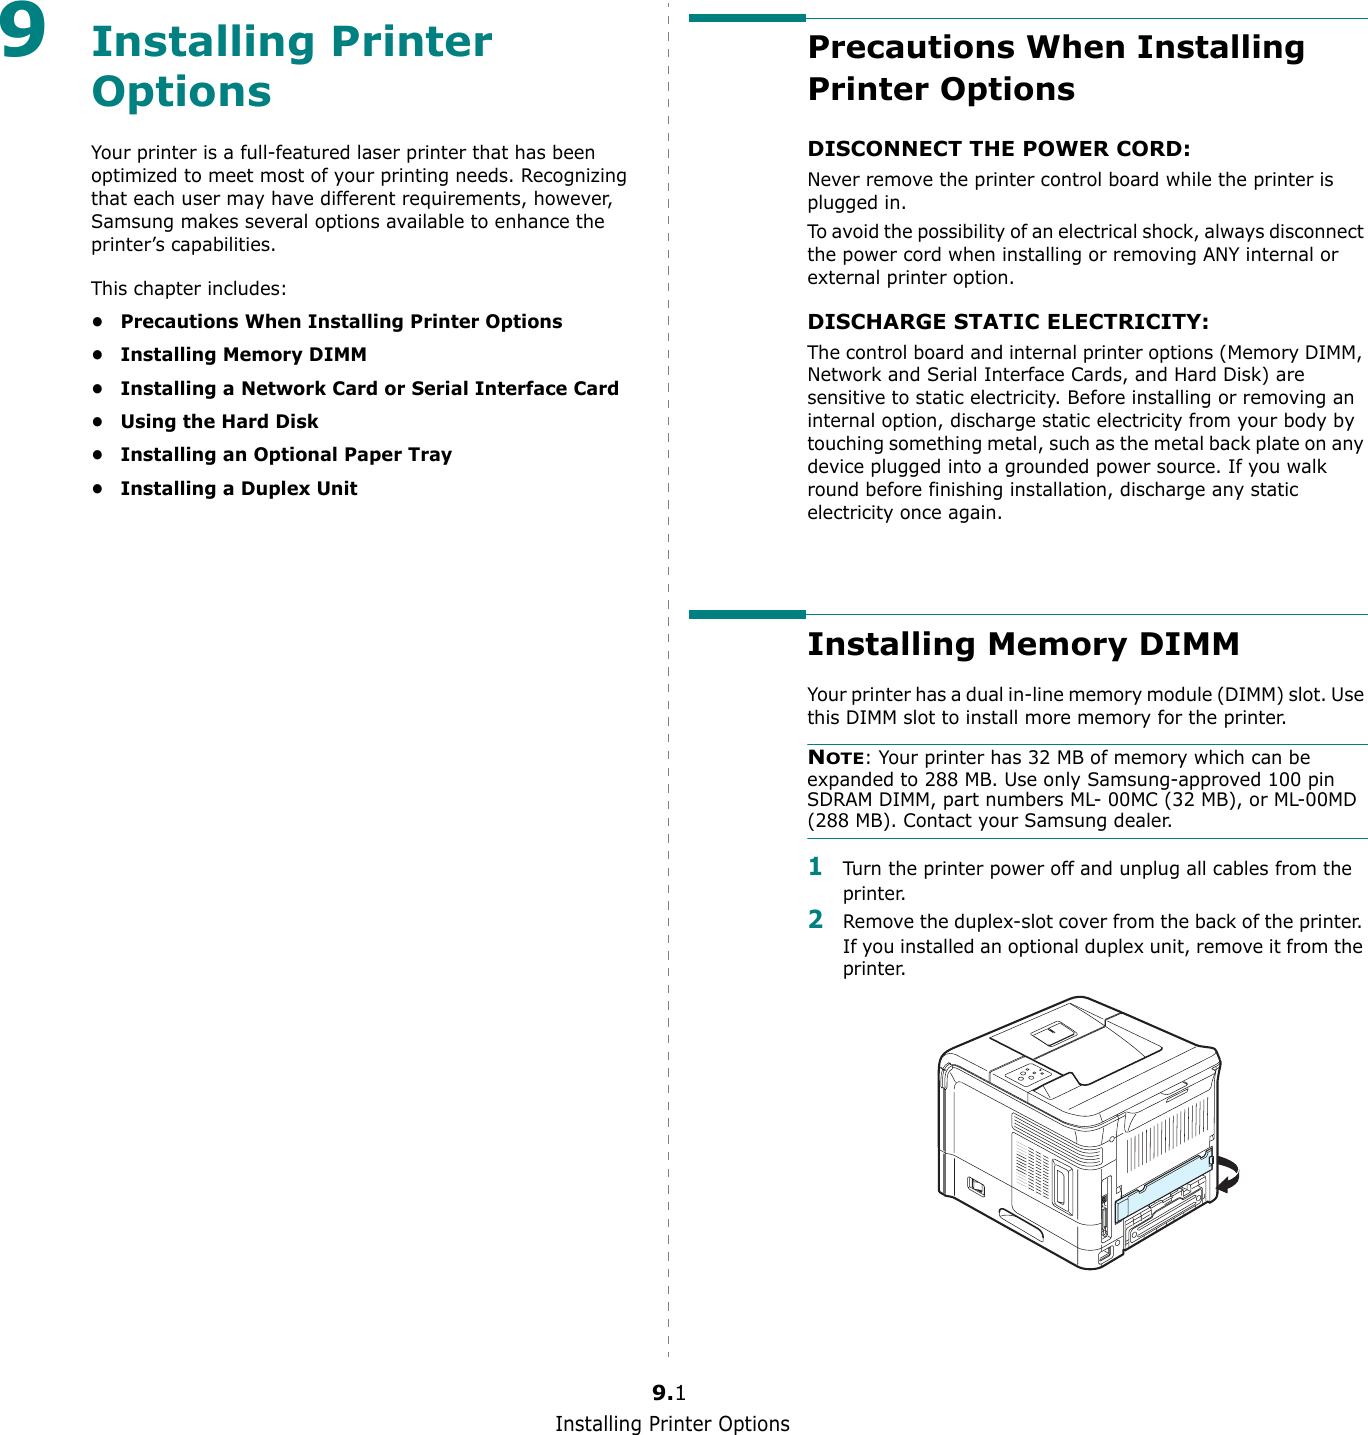
![Solving Problems7.11Engine Fuser Over Heat ErrorThe temperature in the fuser is abnormally high.Unplug the power cord and plug it in again. If the problem persists, call for service.Engine HsyncErrorThere is a problem in your printer engine.Turn off and then on the printer.Engine LSU Error A problem has occurred in the LSU (Laser Scanning Unit) in the printer.Unplug the power cord and plug it in again. If the problem persists, call for service.InitializeSystemThe printer is now turning on.Wait until your printer turns on completely.Check Cartridge Your toner cartridge is not for your printer.Install a Samsung-approved toner cartridge, designed for your printer.Load ManualPress Cont KeyThe Multi-purpose Tray is empty in manual feed mode.Load a sheet of print material and press the On Line/Continue button. You need to press the button each page to be printed.Load [Size] In [Tray]The paper size specified in the printer properties does not match the paper you are loading.Load the correct paper in the tray.Memory Overflow The printer does not have enough memory to print the current job.The job will be automatically cleared and the printer will return to ready mode.• Expand the memory in your printer. See“Installing Memory DIMM” on page 9.1.Menu The Menu button is pressed.Use the printer features.Offline The printer is off-line and cannot print.Press the On Line/Continue button.Outbin Full The output bin is full. It can hold up to 250 sheets of paper. Once the paper is removed from the output bin, the printer resumes printing.Message Status Do this...Page Too Complex Too complicated data was sent to the printer.Simplify the page layout and remove unnecessary graphics from your document.If the message persists, expand the memory in your printer. See “Installing Memory DIMM” on page 9.1.Paper Empty[Size] In [Tray]The displayed tray is empty.Load the corresponding size of paper into the tray.Paper Jam 0 A paper jam occurs in the paper feed area.Remove the jammed paper from the tray in use, referring to page 7.4.Paper Jam 1 A paper jam occurs around the toner cartridge.Remove the jammed paper from the printer, referring to page 7.6.Paper Jam 2 A paper jam occurs in the paper exit area.Remove the jammed paper from the output tray, referring to page 7.7.Press Cont key The paper size specified in the printer properties does not match the paper you are loading.Load the correct paper and press the On Line/Continue button.Printing xxx(xxx: Emulation)The printer is printing jobs using the displayed language.Complete your printing.Ready The printer is on-line and ready to printer.Use your printer.Ready Close Tray 1The standard tray is open but there is paper in the Multi-purpose tray.Close the standard tray to clear the message.Ready Close Tray 2The optional Tray2 is open but there is paper in the Multi-purpose tray.Close the optional Tray2 to clear the message.Ready IP Conflict An IP address conflicts with other devices on the network.Contact your network administrator and choose an address within your subnet which will not conflict with any other devices.Ready Low TonerThe toner cartridge in your printer is nearly empty.Redistribute the toner, referring to page 6.2.Message Status Do this...](https://usermanual.wiki/Samsung-Electronics-Co/KT35MPB/User-Guide-545330-Page-61.png)