Samsung Electronics Co ML-2550 Laser Beam Printer User Manual 2550 EN
Samsung Electronics Co Ltd Laser Beam Printer 2550 EN
UserManual.wiki
>
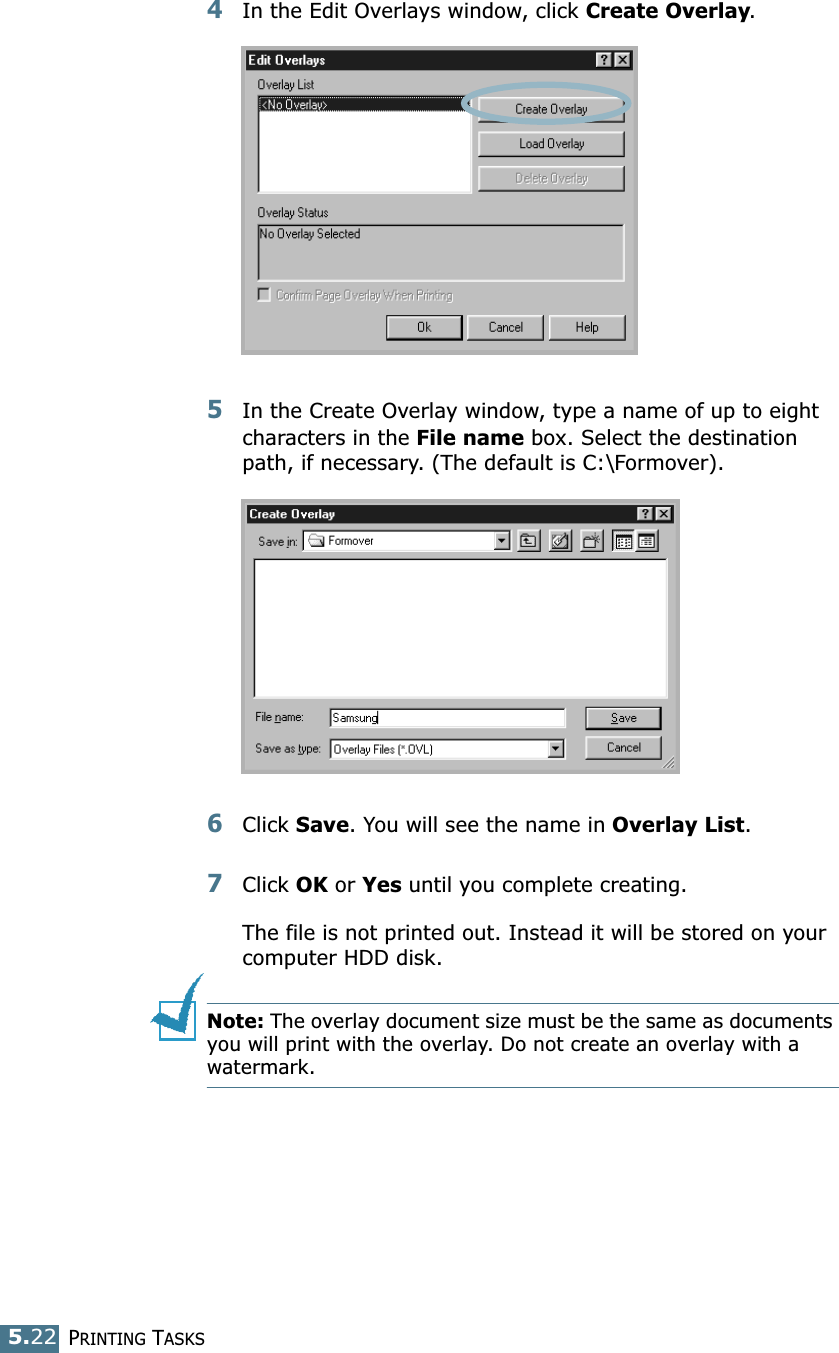
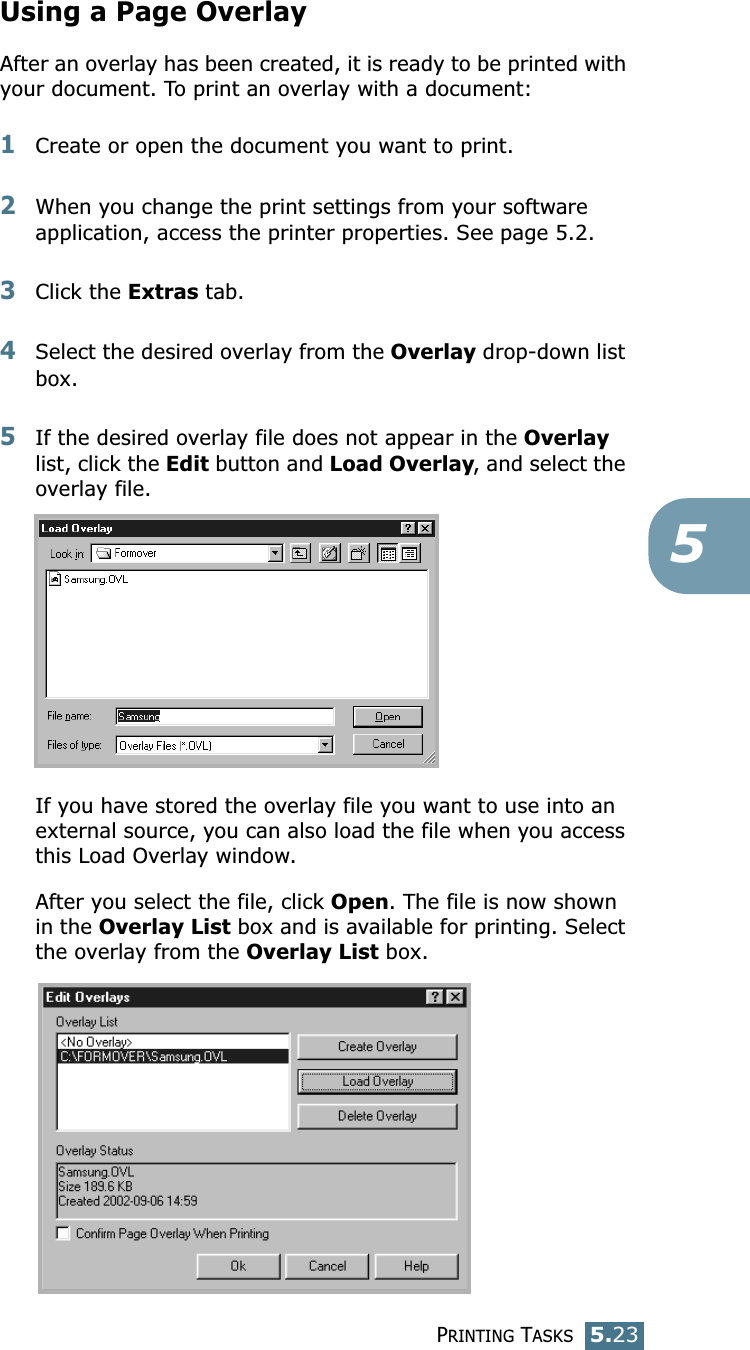
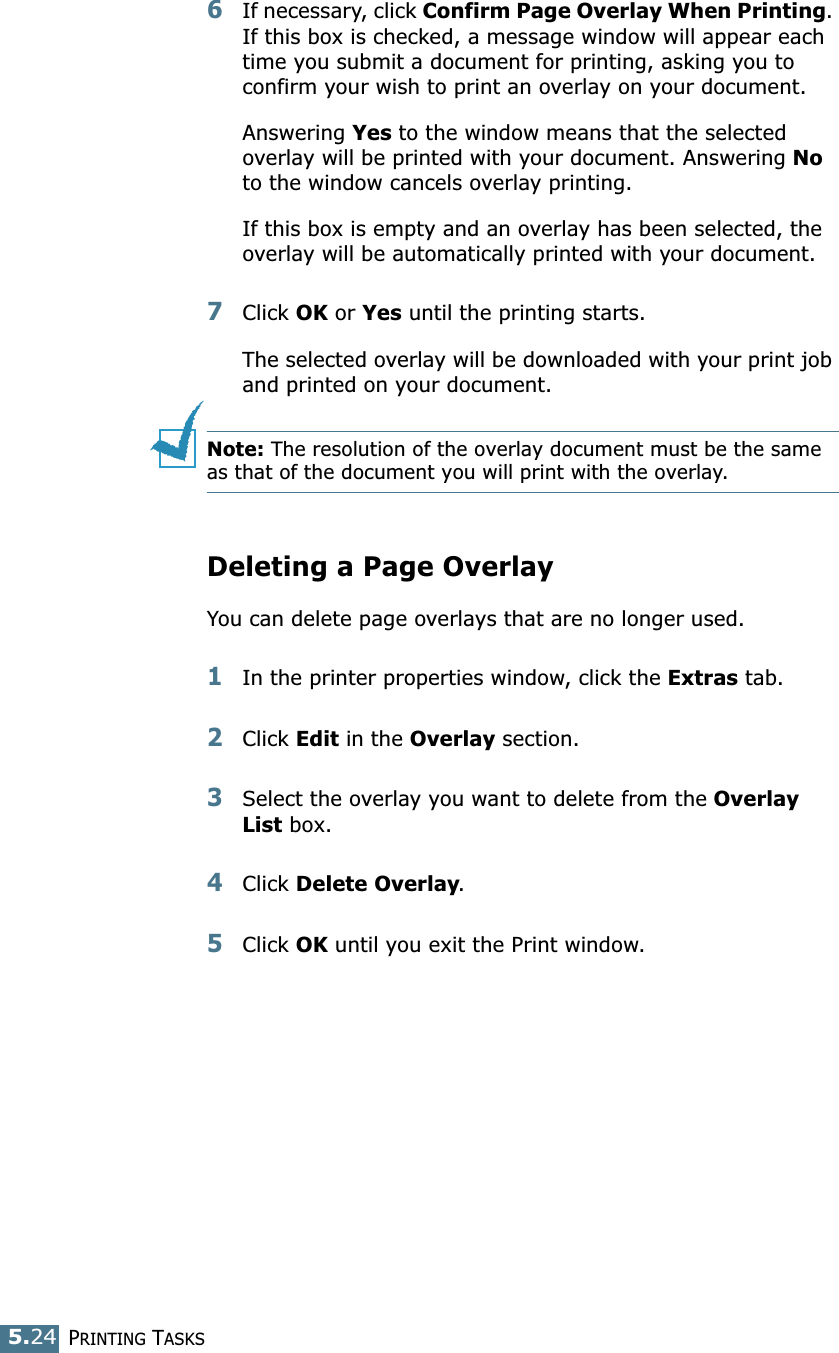
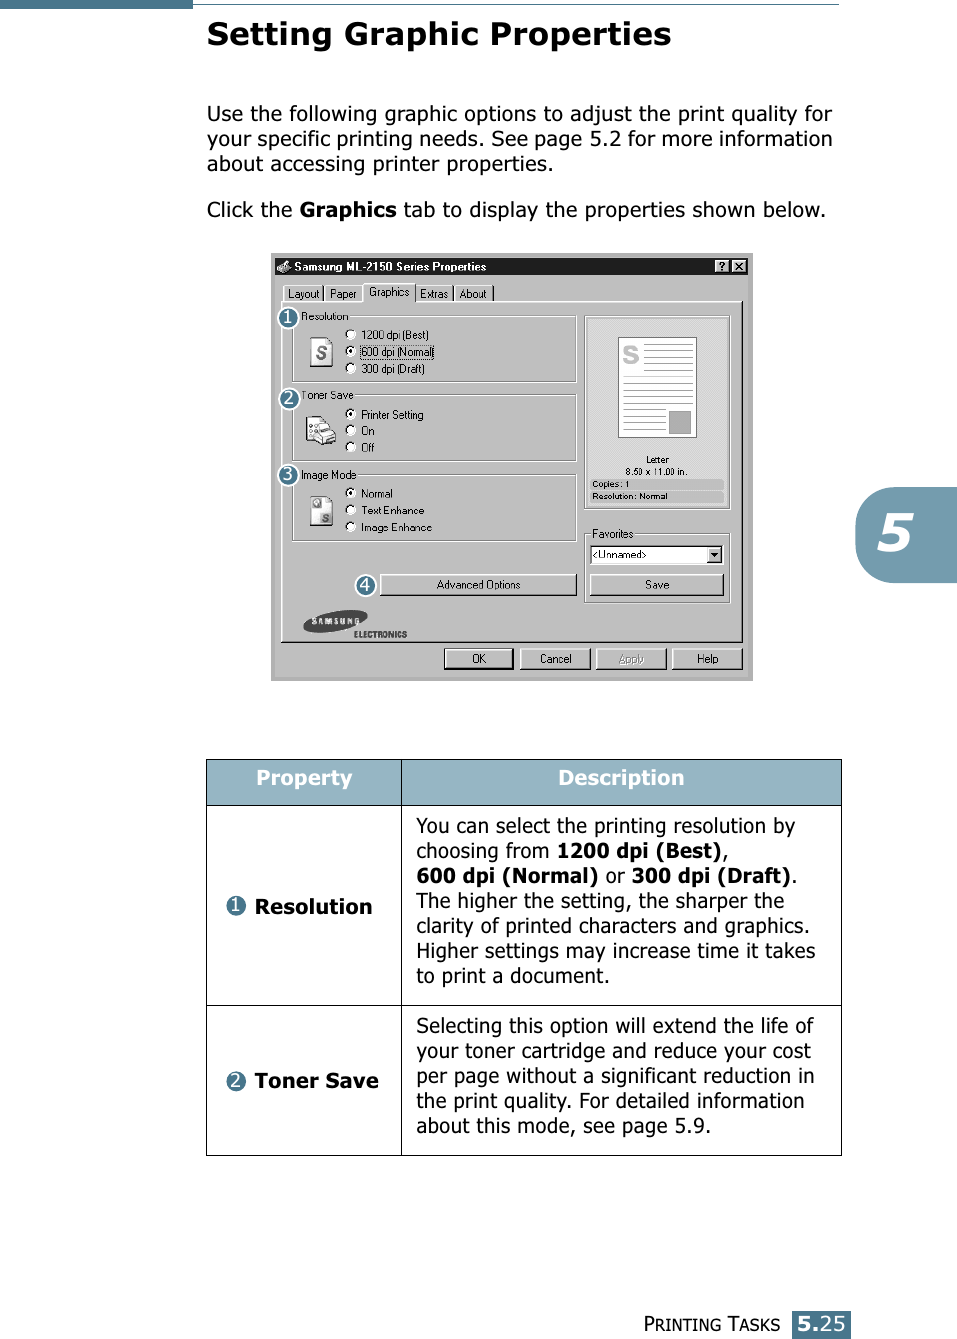
Samsung Electronics Co
>
ML-2550 User Manual
>
Users Manual 2
Contents
1.
Users Manual 1
2.
Users Manual 2
3.
Users Manual 3
Users Manual 2
Navigation menu
Upload a User Manual
Namespaces
Wiki Guide
HTML
PDF
Info
Views
User Manual
Discussion / Help
Navigation
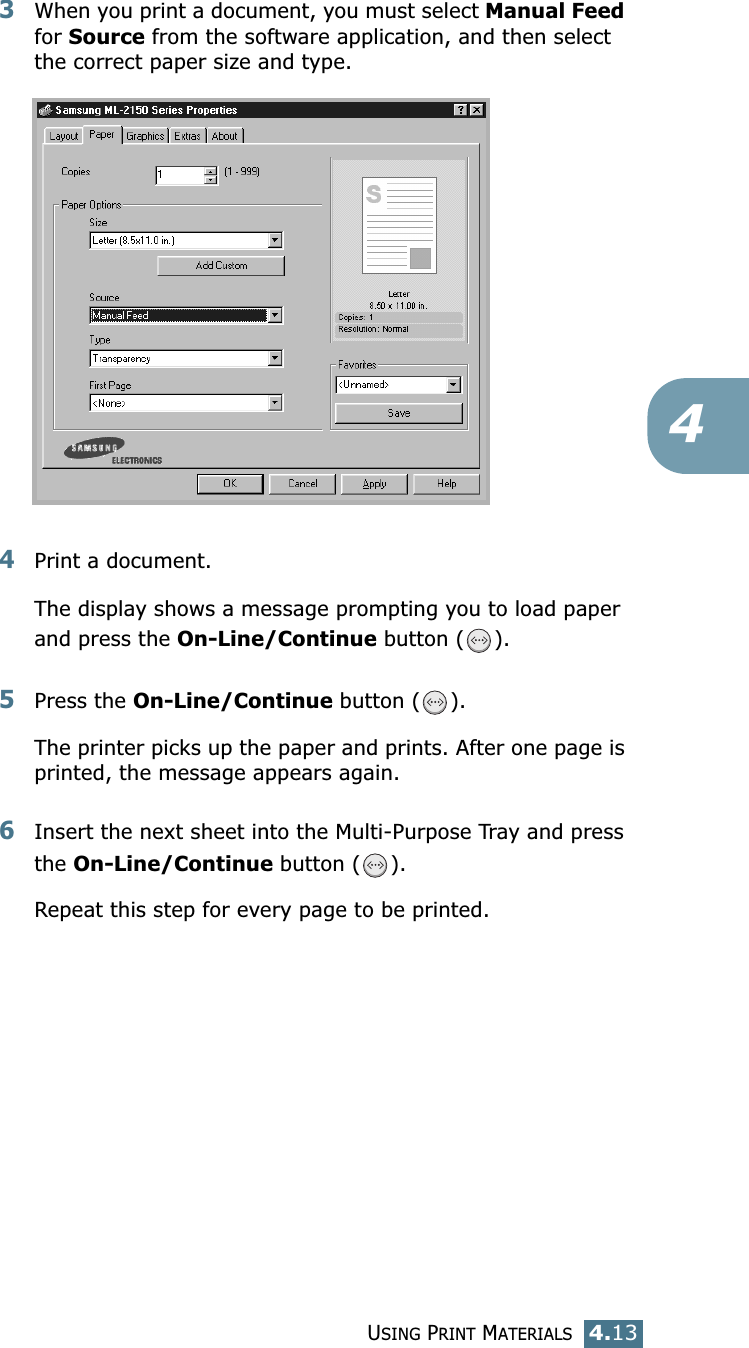

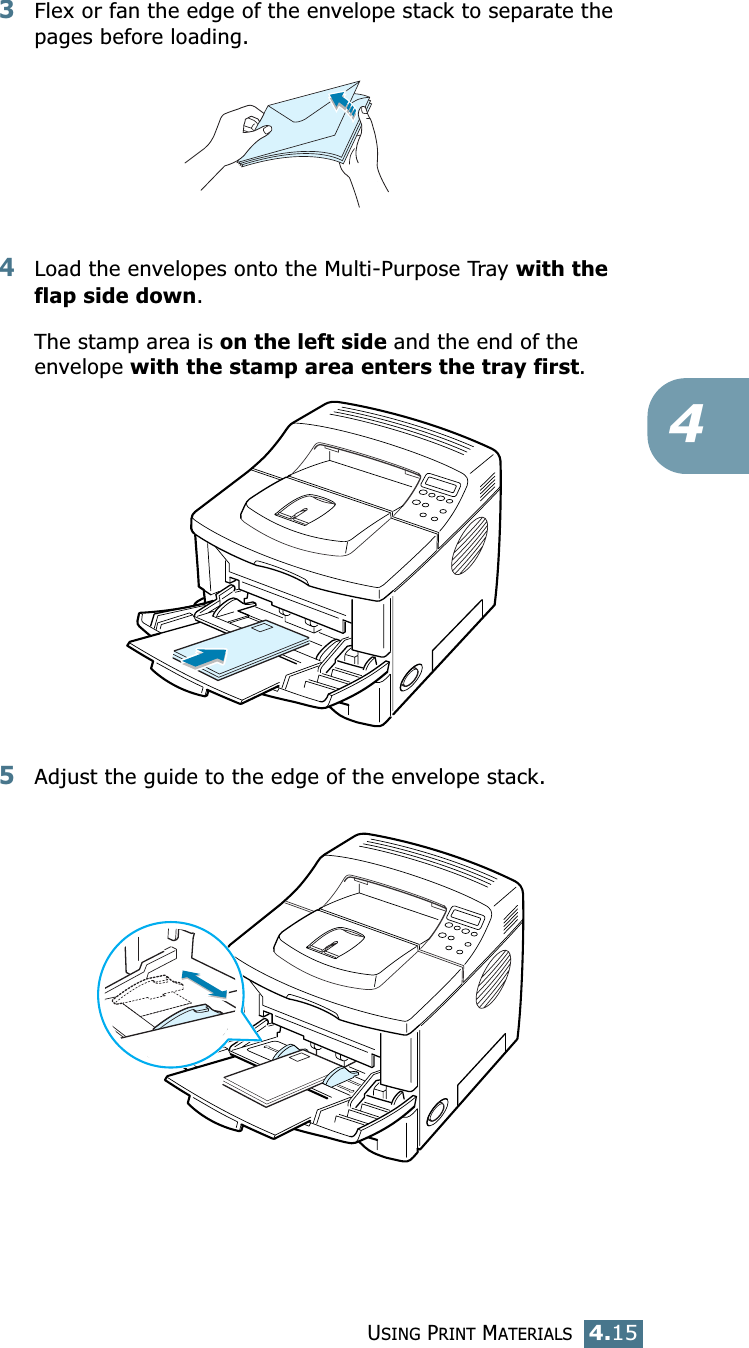
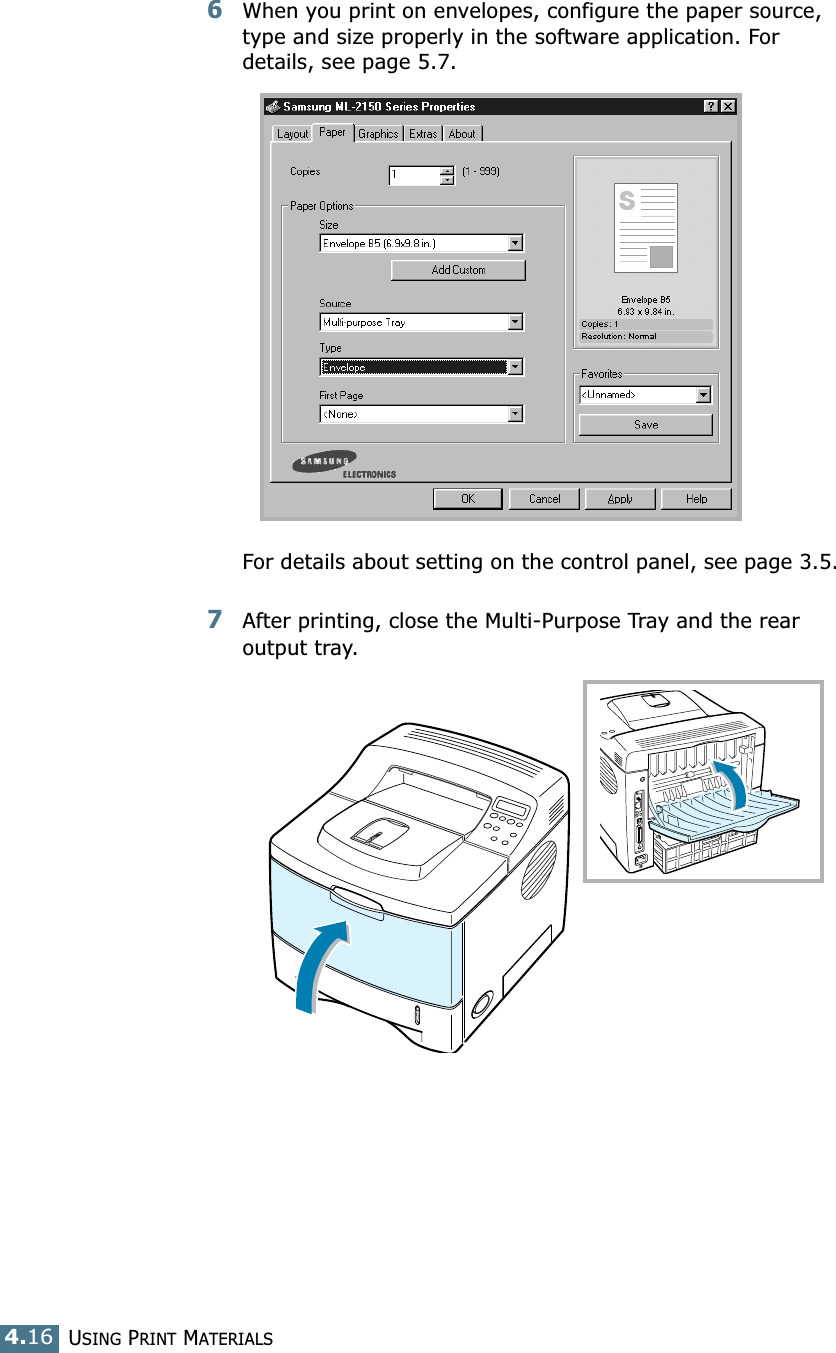
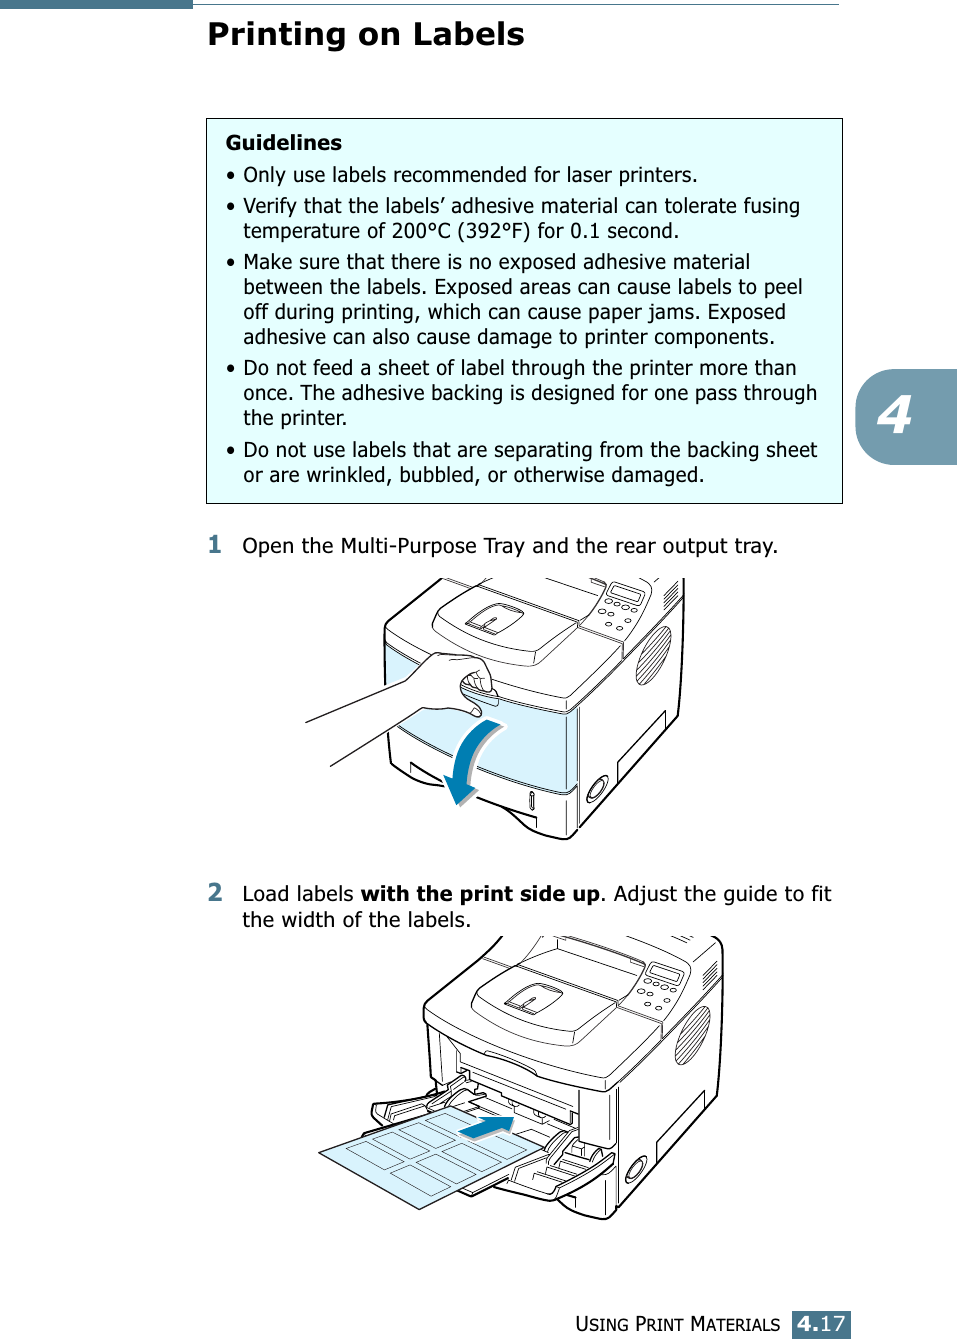
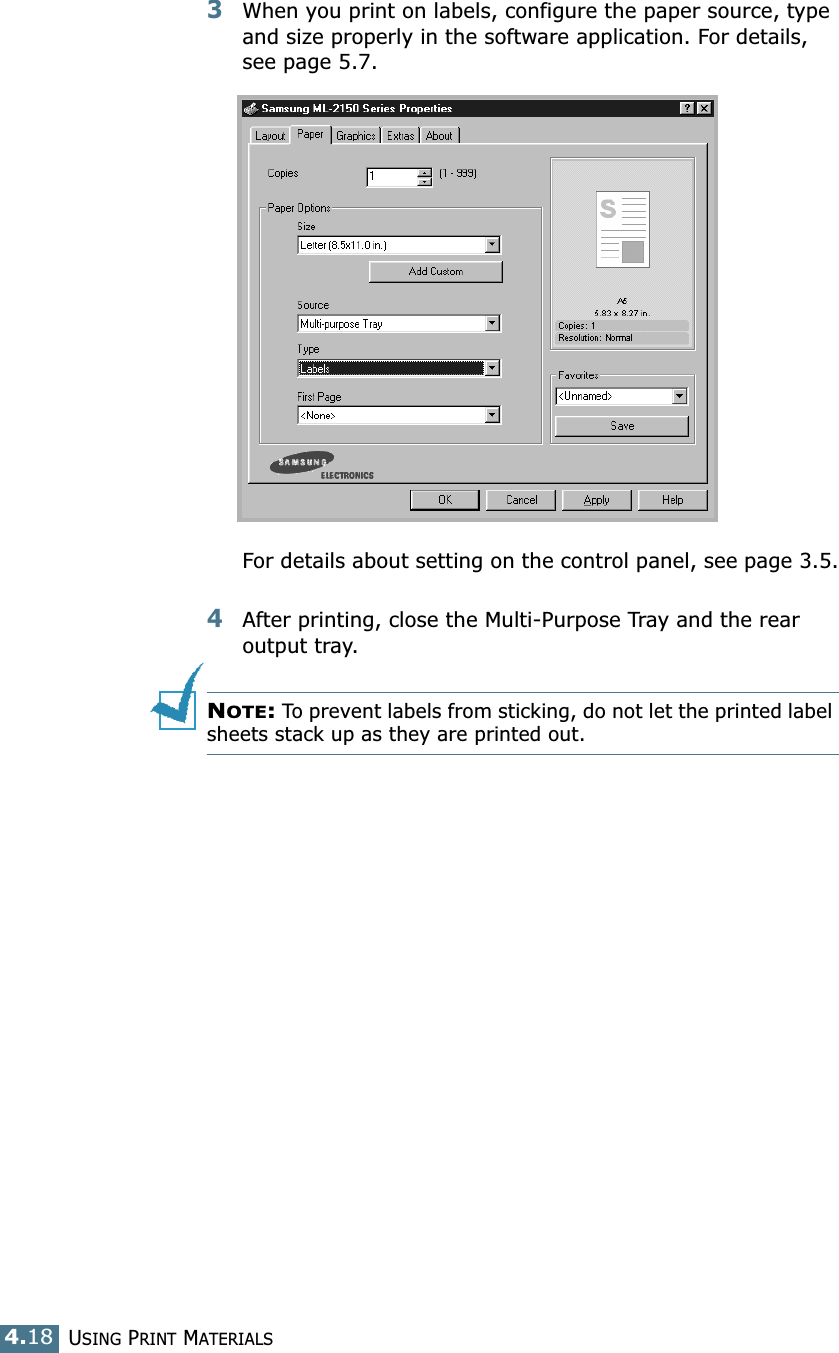


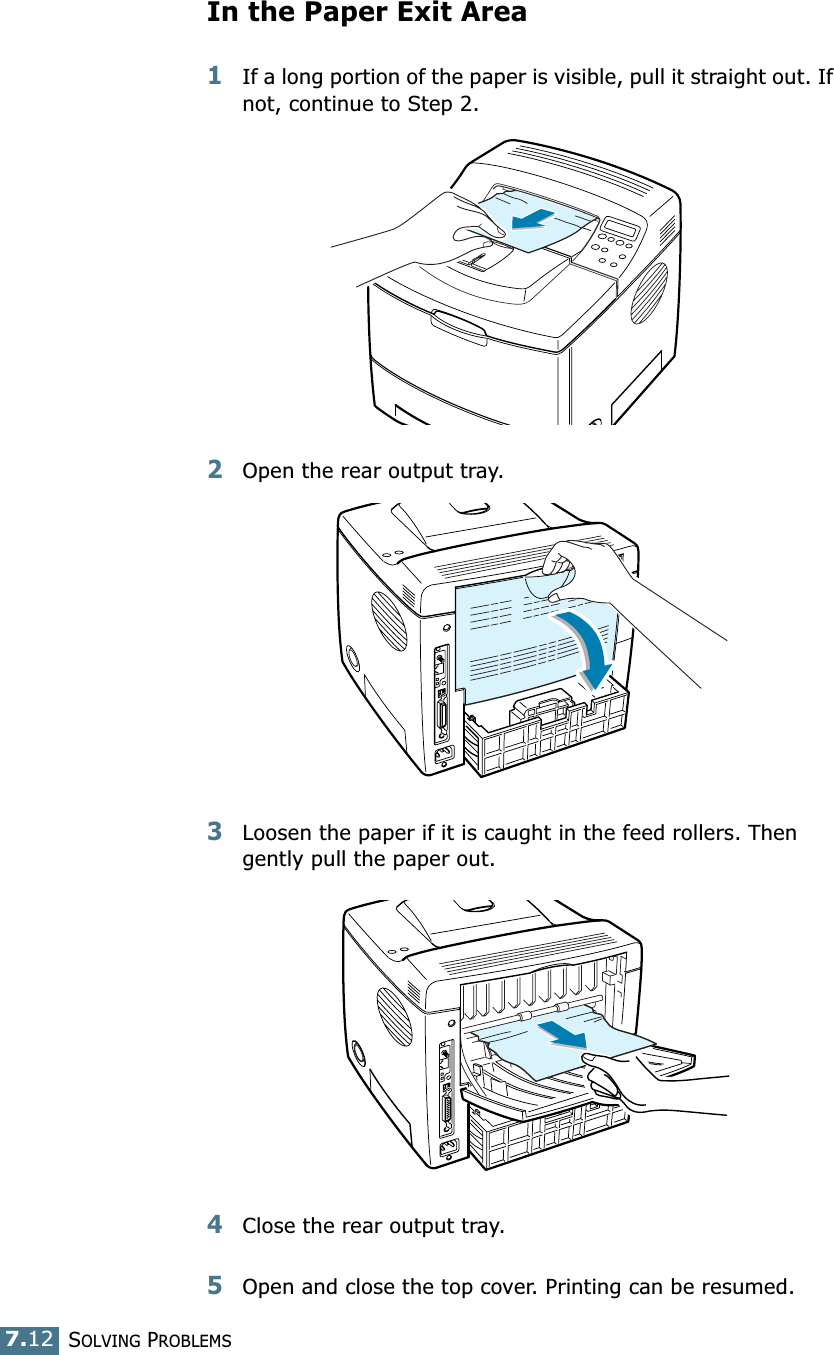
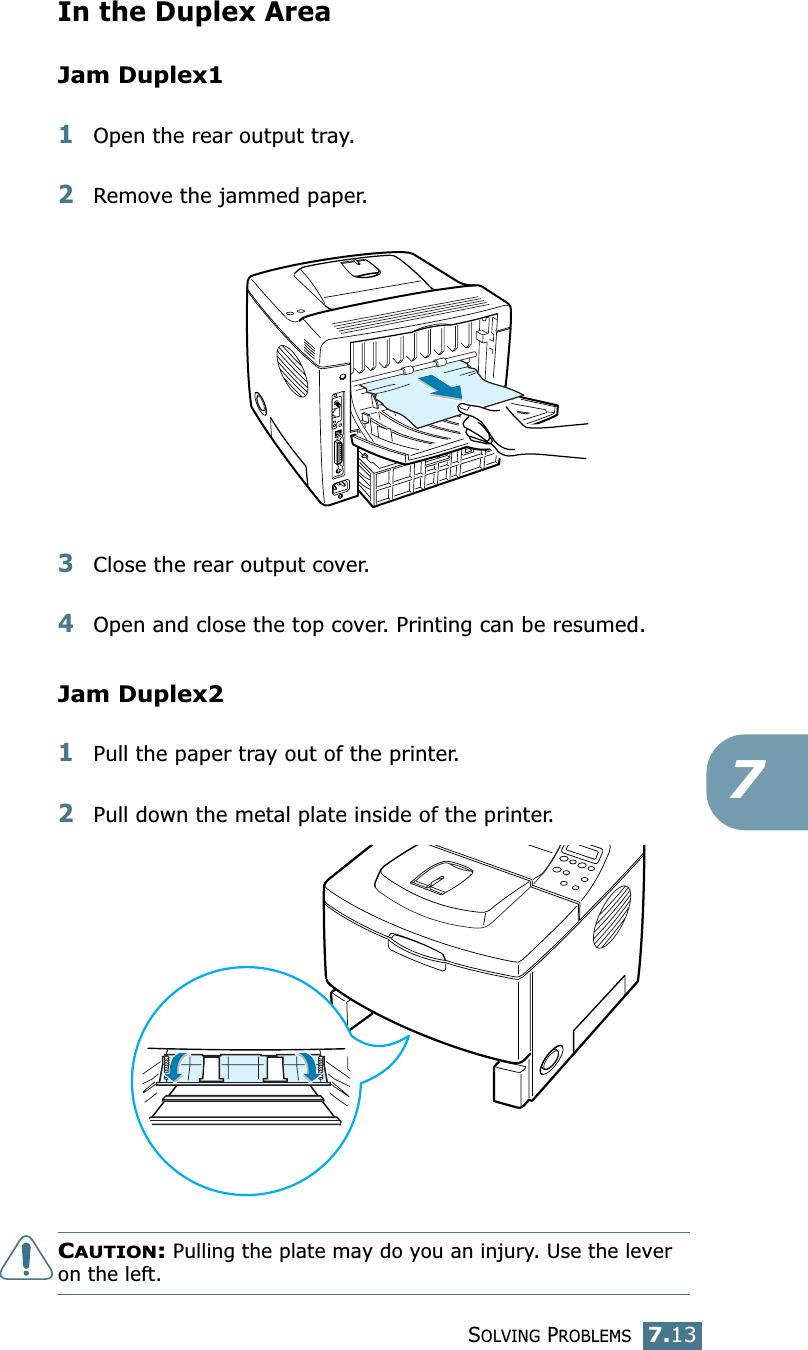

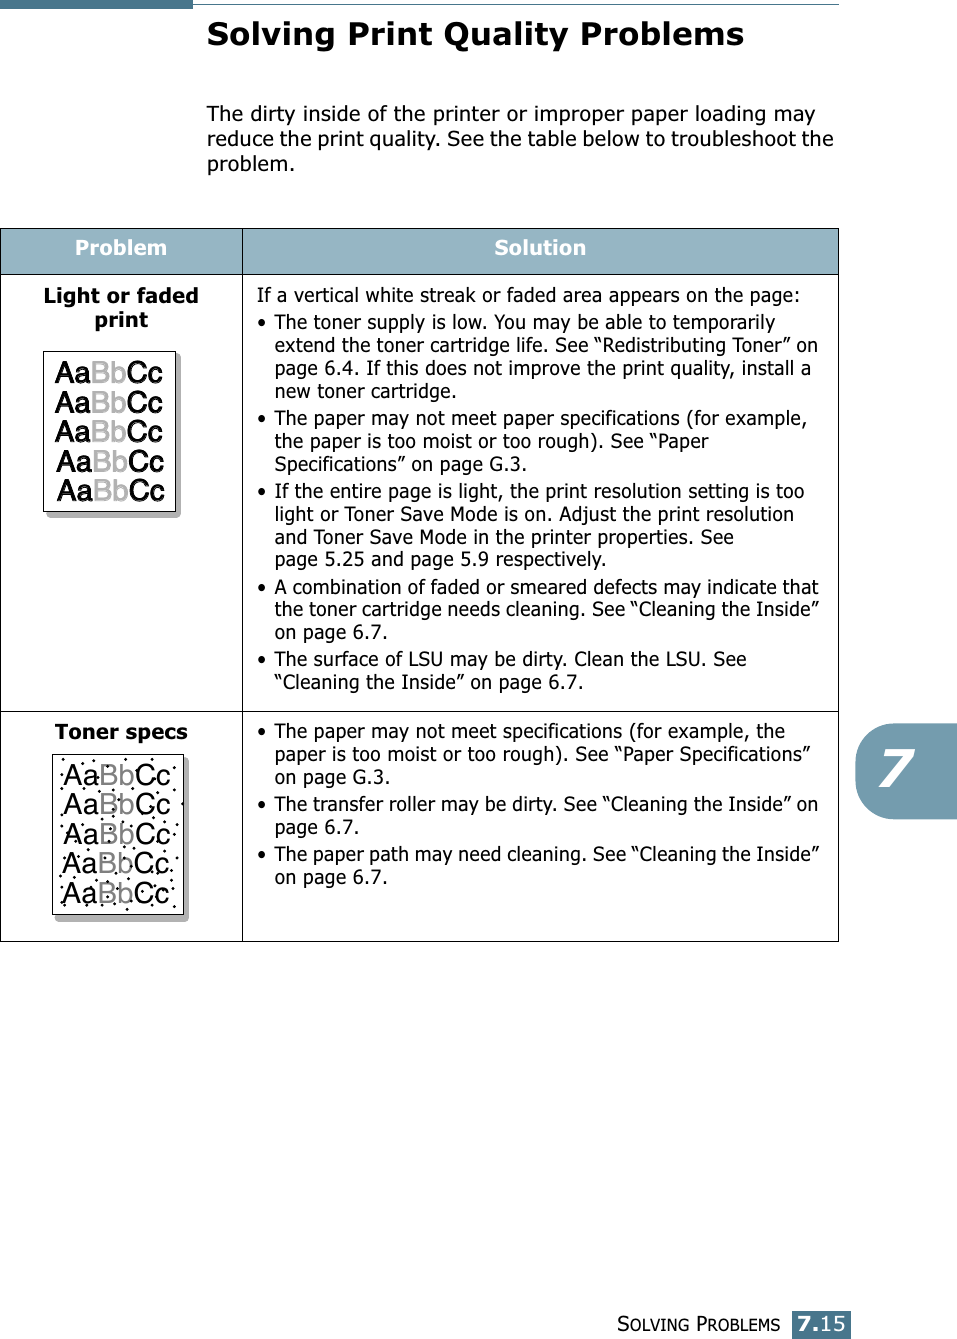
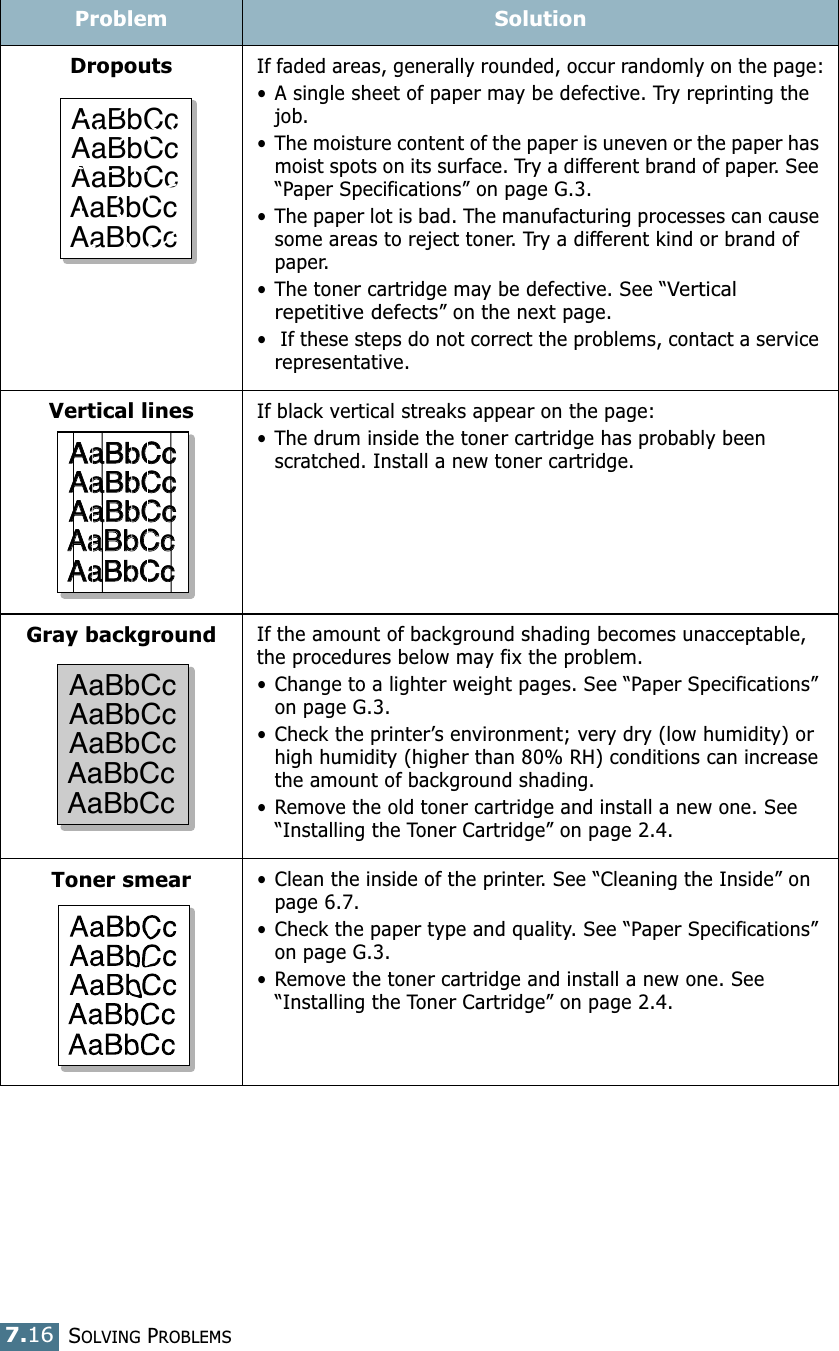

![SOLVING PROBLEMS7.217Page Too Complex Too complicated data was sent to the printer.Simplify the page layout and remove unnecessary graphics from your document.If the message persists, expand the memory in your printer. See “Installing Memory and PostScript DIMMs” on page F.3.Paper Empty[Size]In[Tray]The displayed tray is empty.Load the corresponding size of paper into the tray.ReadyLow TonerThe toner cartridge in your printer is nearly empty.Redistribute the toner, referring to page 6.4.Serial Error* may be shown only if you installed the optional serial interface card.The printer detects a serial interface error.Set the baud rate the same as the setting on your computer.Ready Replace CartThe life of some parts on the toner cartridge endsThe overflow of the waste toner contaminates the inside of the machine.Regardless of the remaining toner, this is warning message showing that The toner cartridge replacement is needed as the parts life there of is exhausted. the toner cartridge is at the end of its life and the print quality lowers, You need to replace the cartridge to new one. to con-tinue printing, press On-Line/Continue each time you print a page.Wait Image The firmware programme in the printer has been damaged.You need to download the programme to the printer again. Contact your local Samsung dealer.Message Status Do this...](https://usermanual.wiki/Samsung-Electronics-Co/ML-2550.Users-Manual-2/User-Guide-329097-Page-73.png)