Samsung Electronics Co ML-2550 Laser Beam Printer User Manual 2550 EN
Samsung Electronics Co Ltd Laser Beam Printer 2550 EN
UserManual.wiki
>
Samsung Electronics Co
>
ML-2550 User Manual
>
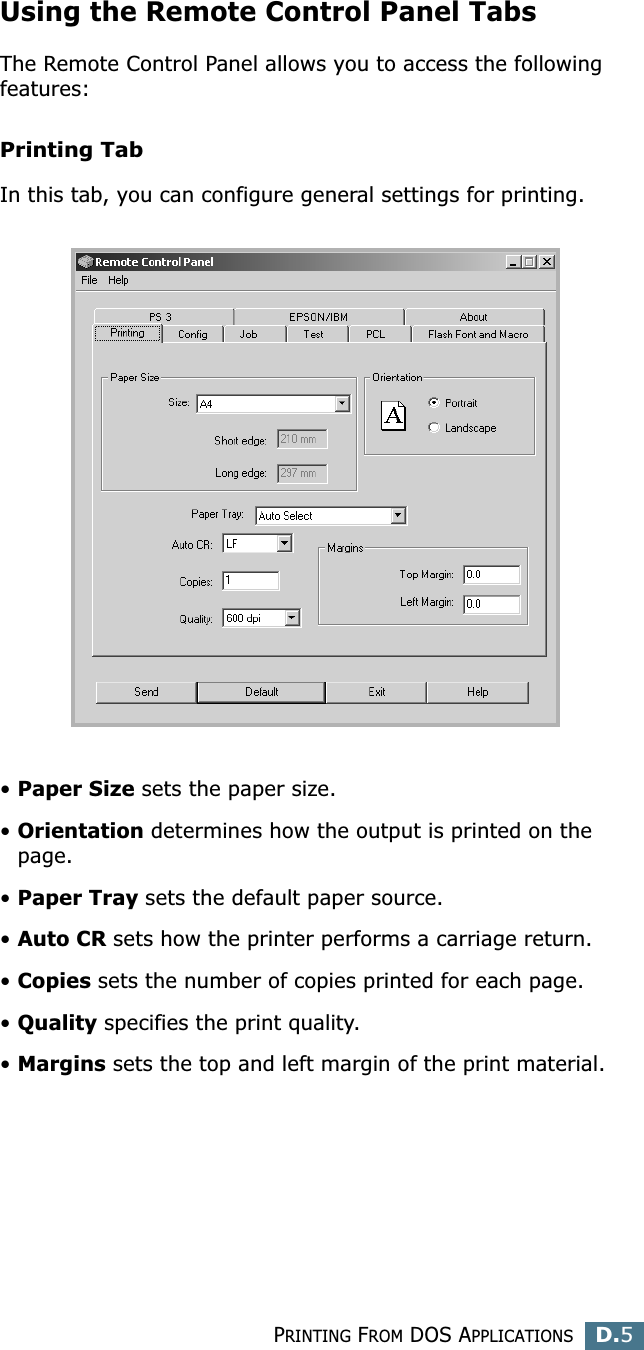
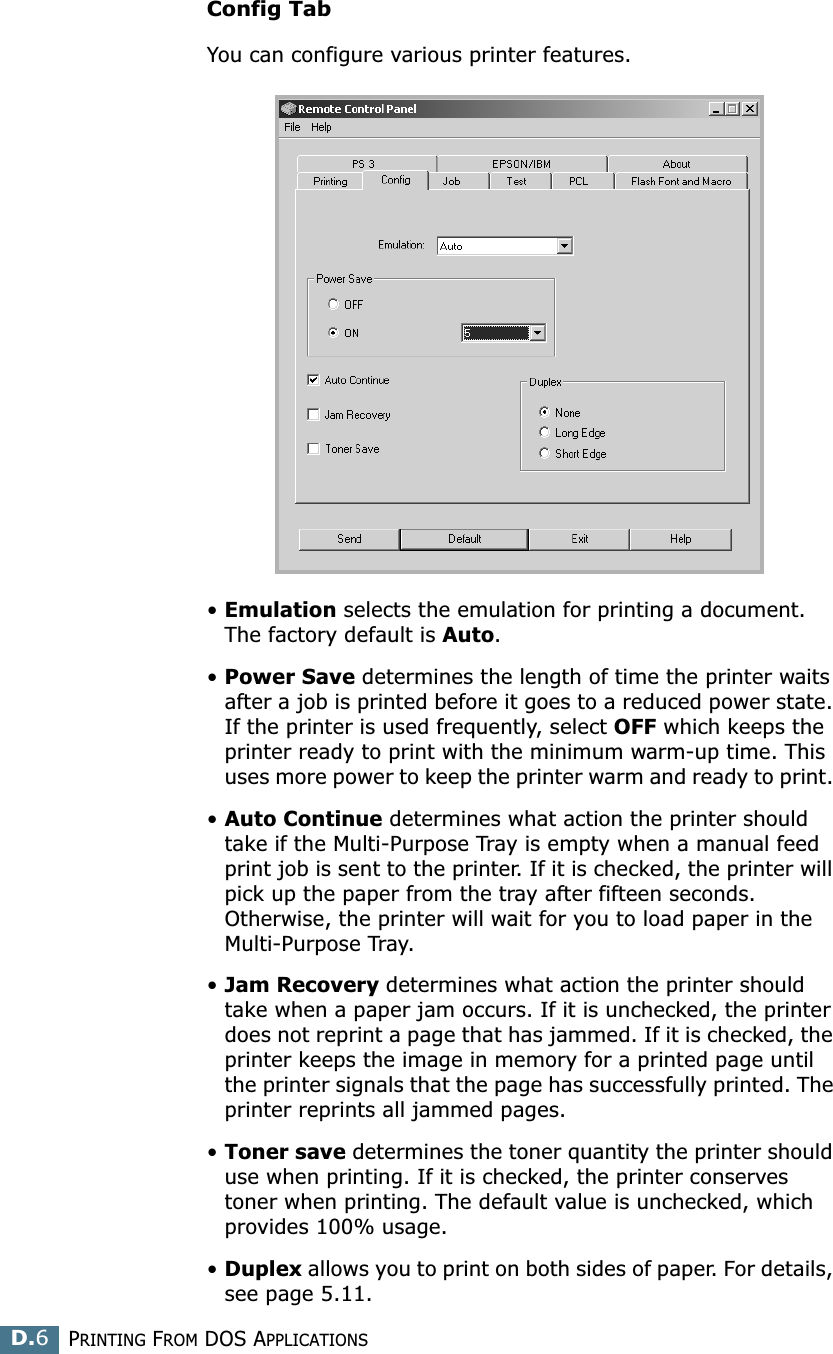
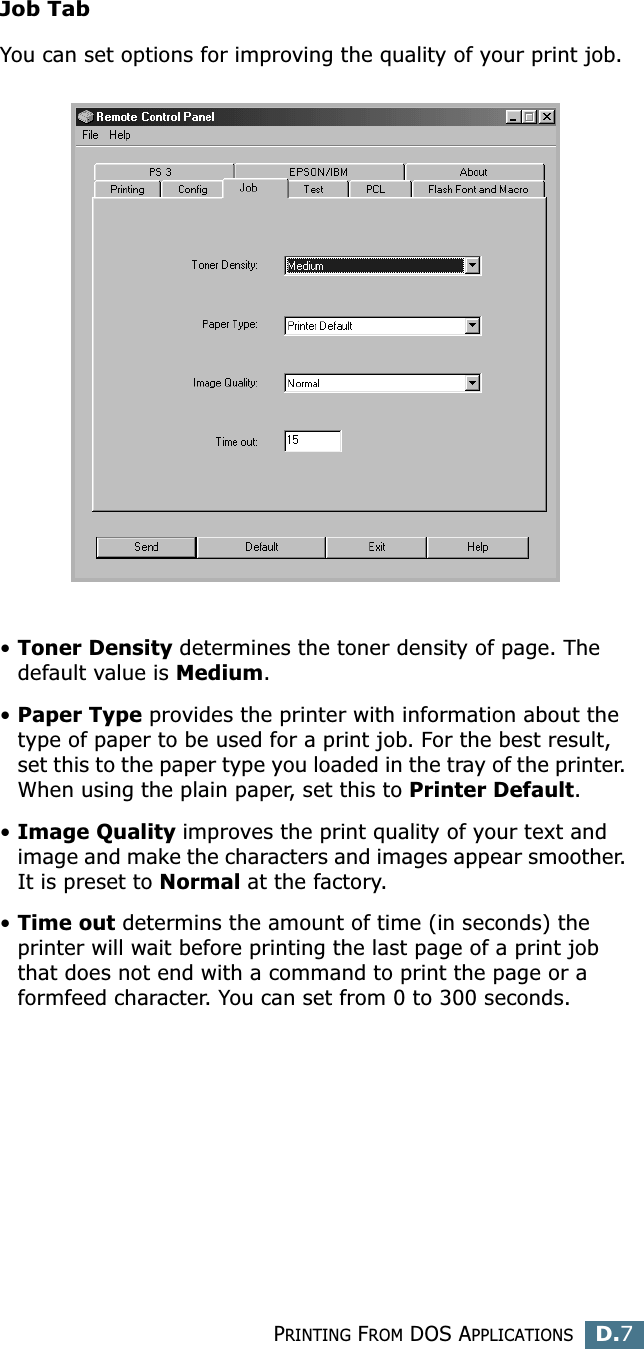
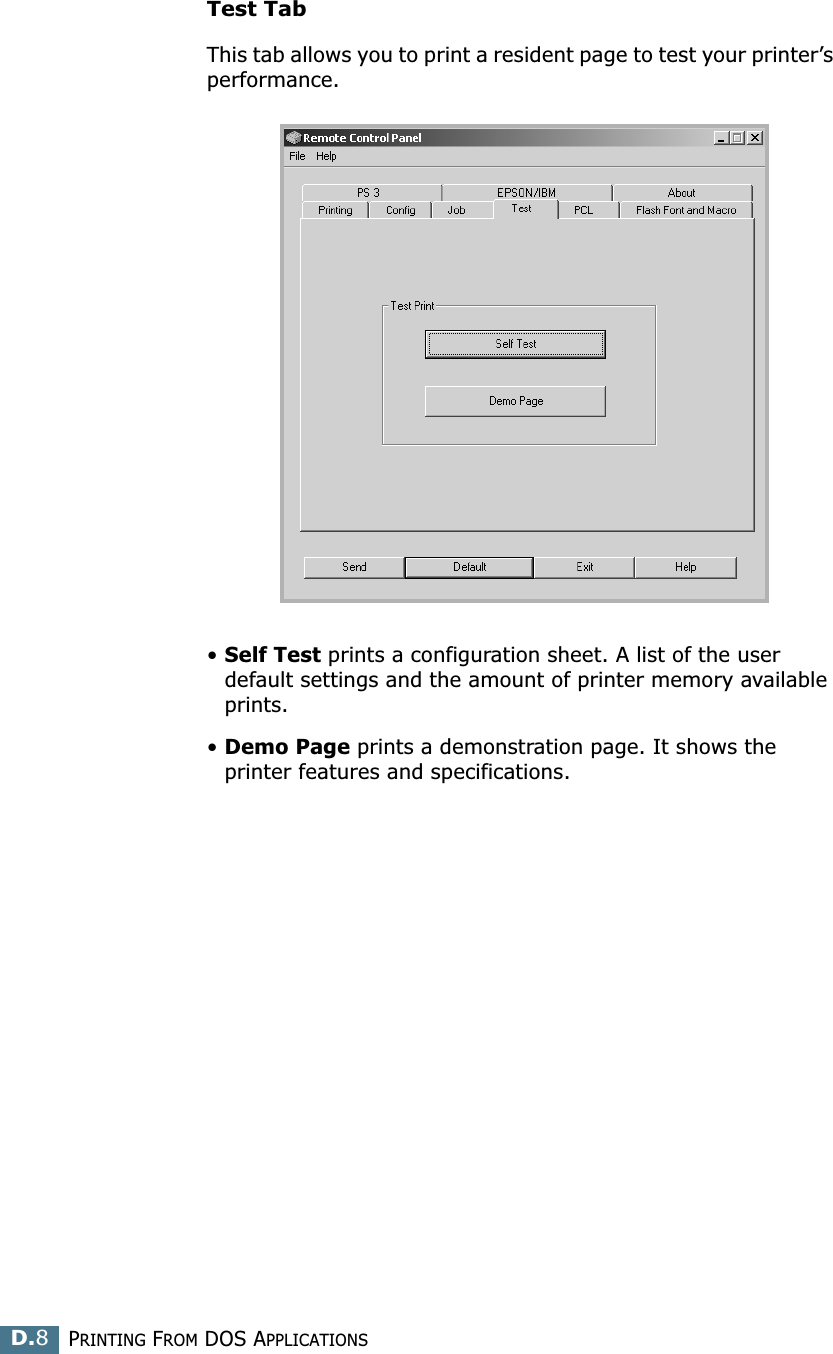
Users Manual 3
Contents
1.
Users Manual 1
2.
Users Manual 2
3.
Users Manual 3
Users Manual 3
Navigation menu
Upload a User Manual
Namespaces
Wiki Guide
HTML
PDF
Info
Views
User Manual
Discussion / Help
Navigation
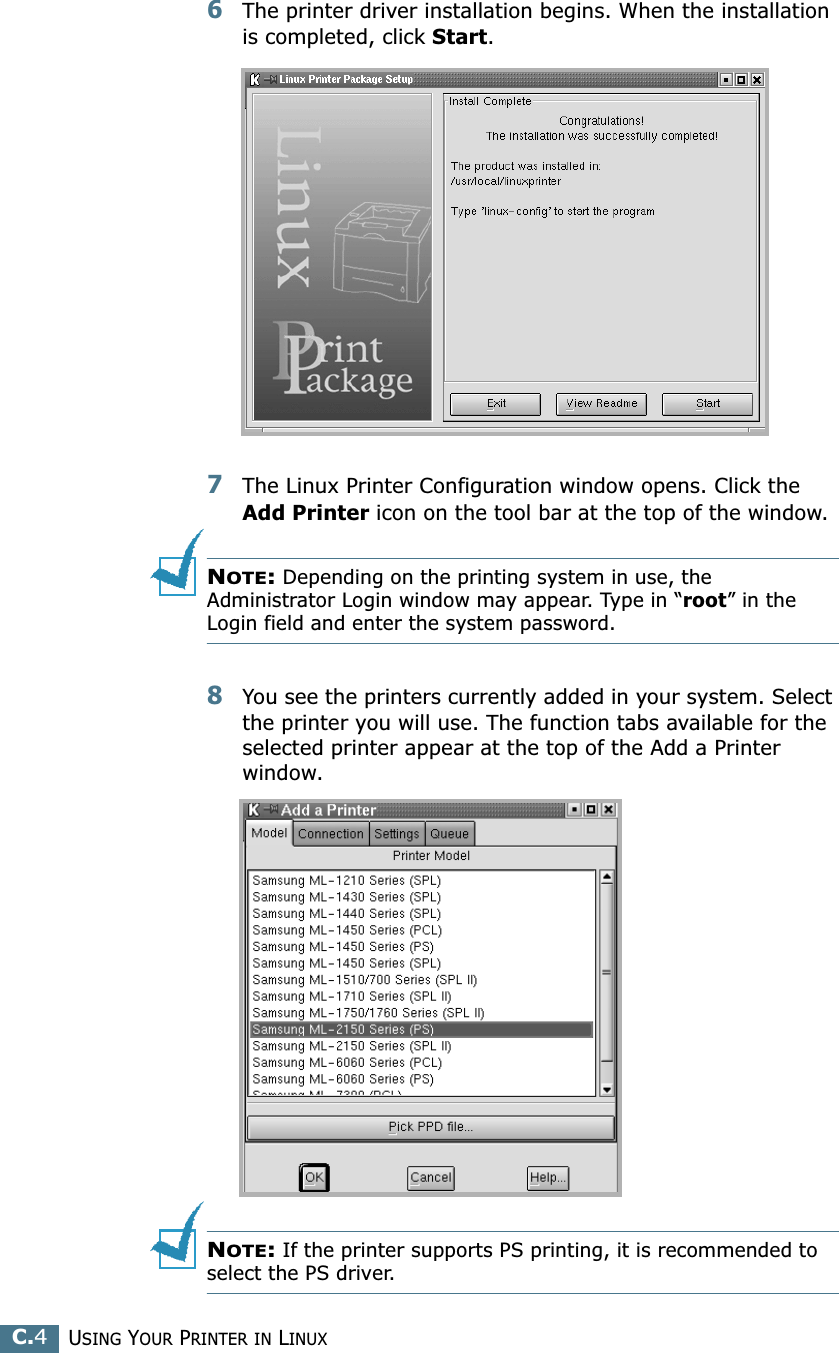
![USING YOUR PRINTER IN LINUXC.3C3Insert the printer software CD-ROM. The CD-ROM automatically runs.NOTE: If the CD-ROM does not automatically run, click the icon at the bottom of the window. When the Terminal screen appears, type in:[root@local /root]# cd /mnt/cdrom (the CD-ROM directory) [root@local cdrom]# ./setup.sh 4Select the installation type, either Recommended or Expert, and then click Continue.Recommended is fully automated and is not required any interaction. Expert installation allows you to select the install path or printing system.5If you selected Recommended, go to Step 6.For Expert, select the desired option and then click Begin Install.](https://usermanual.wiki/Samsung-Electronics-Co/ML-2550.Users-Manual-3/User-Guide-329098-Page-24.png)