Samsung Electronics Co MOBILE1 FM Transmitter User Manual Attachments
Samsung Electronics Co Ltd FM Transmitter Attachments
UserManual.wiki
>
Samsung Electronics Co
>
MOBILE1 User Manual
Users Manual
Navigation menu
Upload a User Manual
Namespaces
Wiki Guide
HTML
PDF
Info
Views
User Manual
Discussion / Help
Navigation
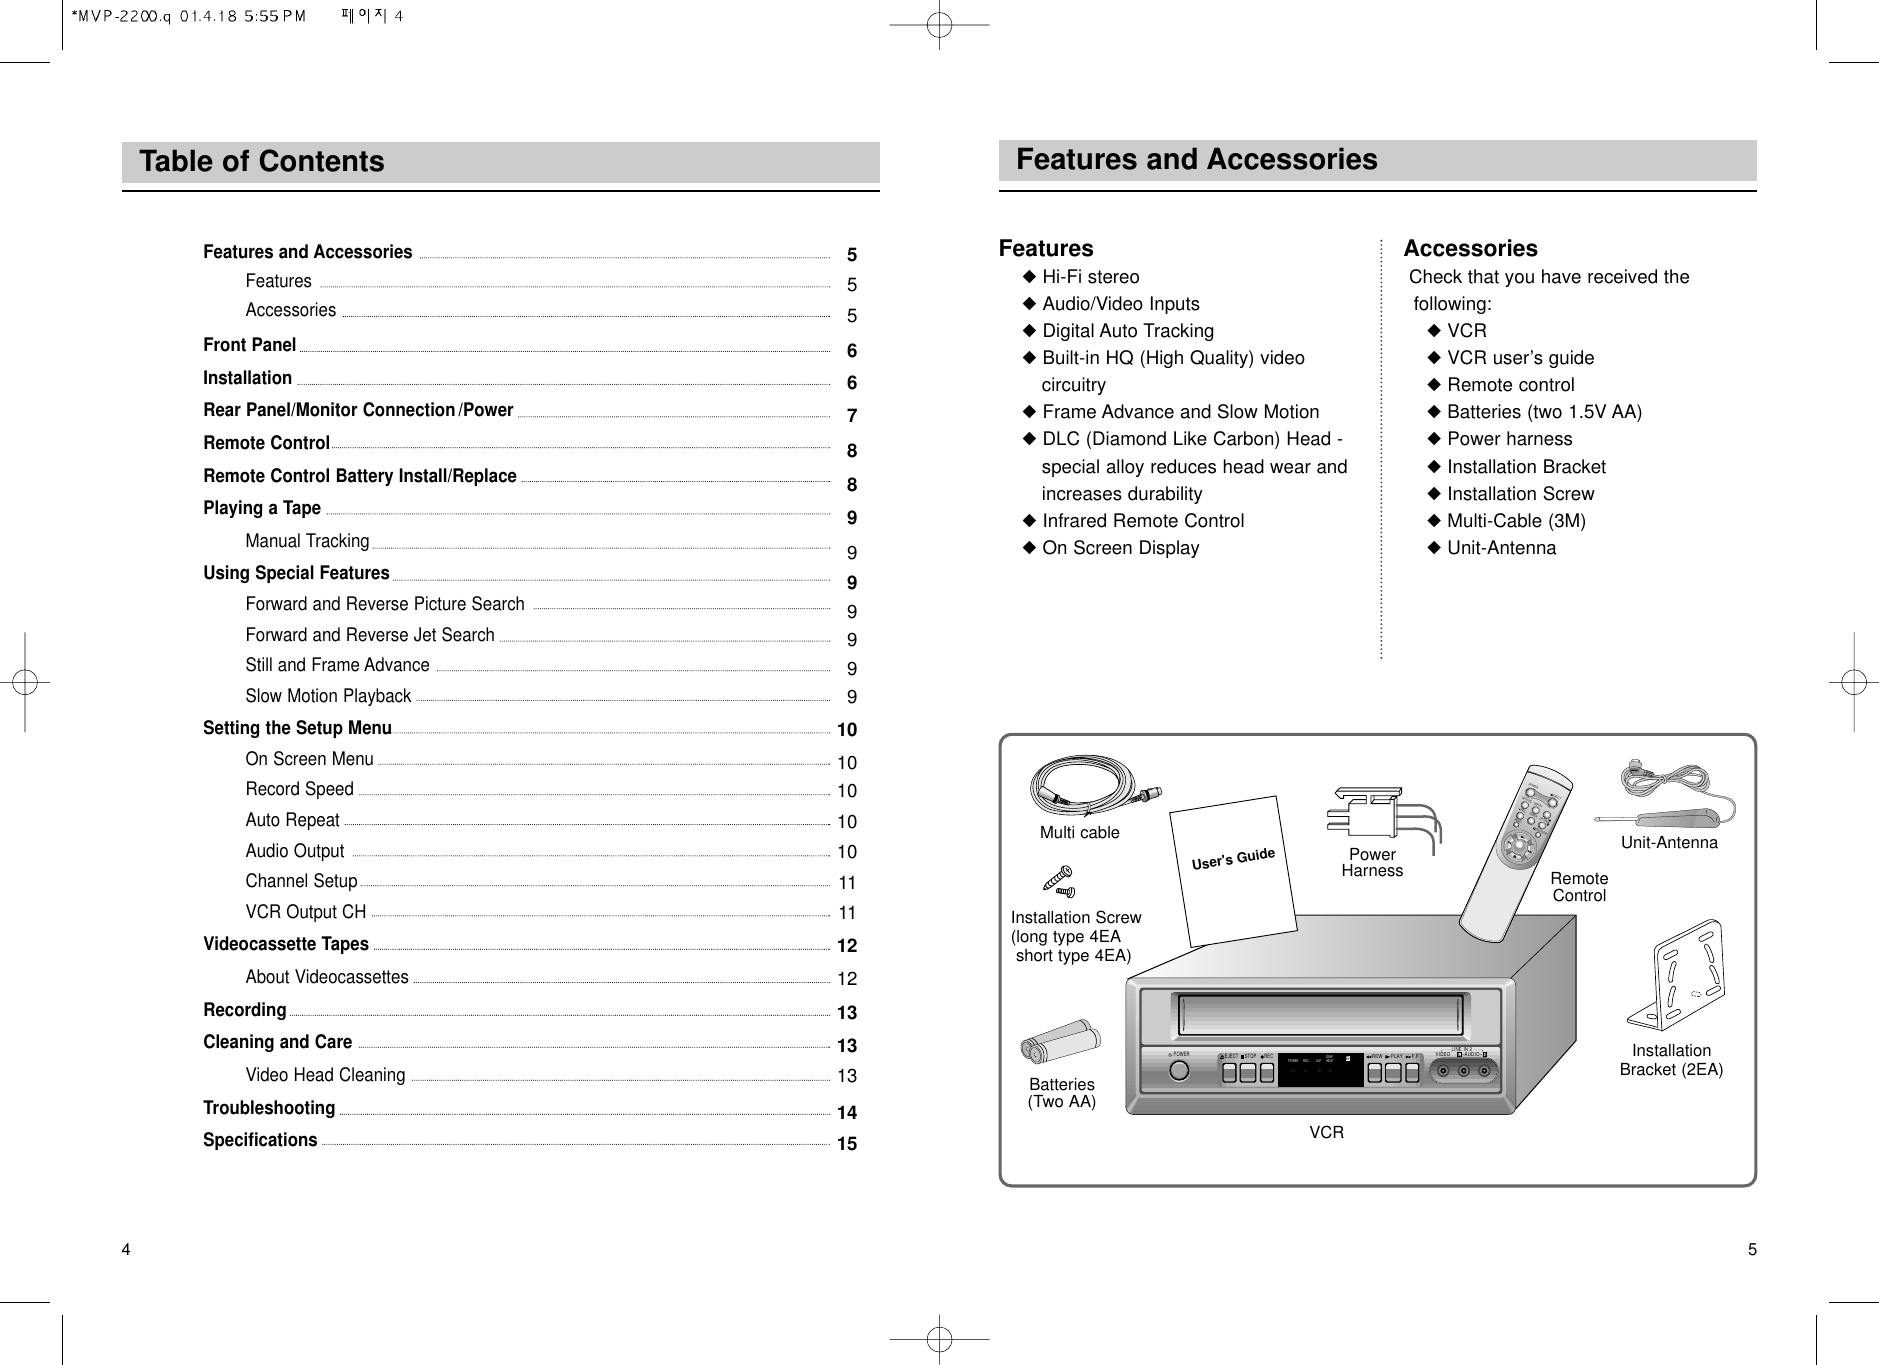
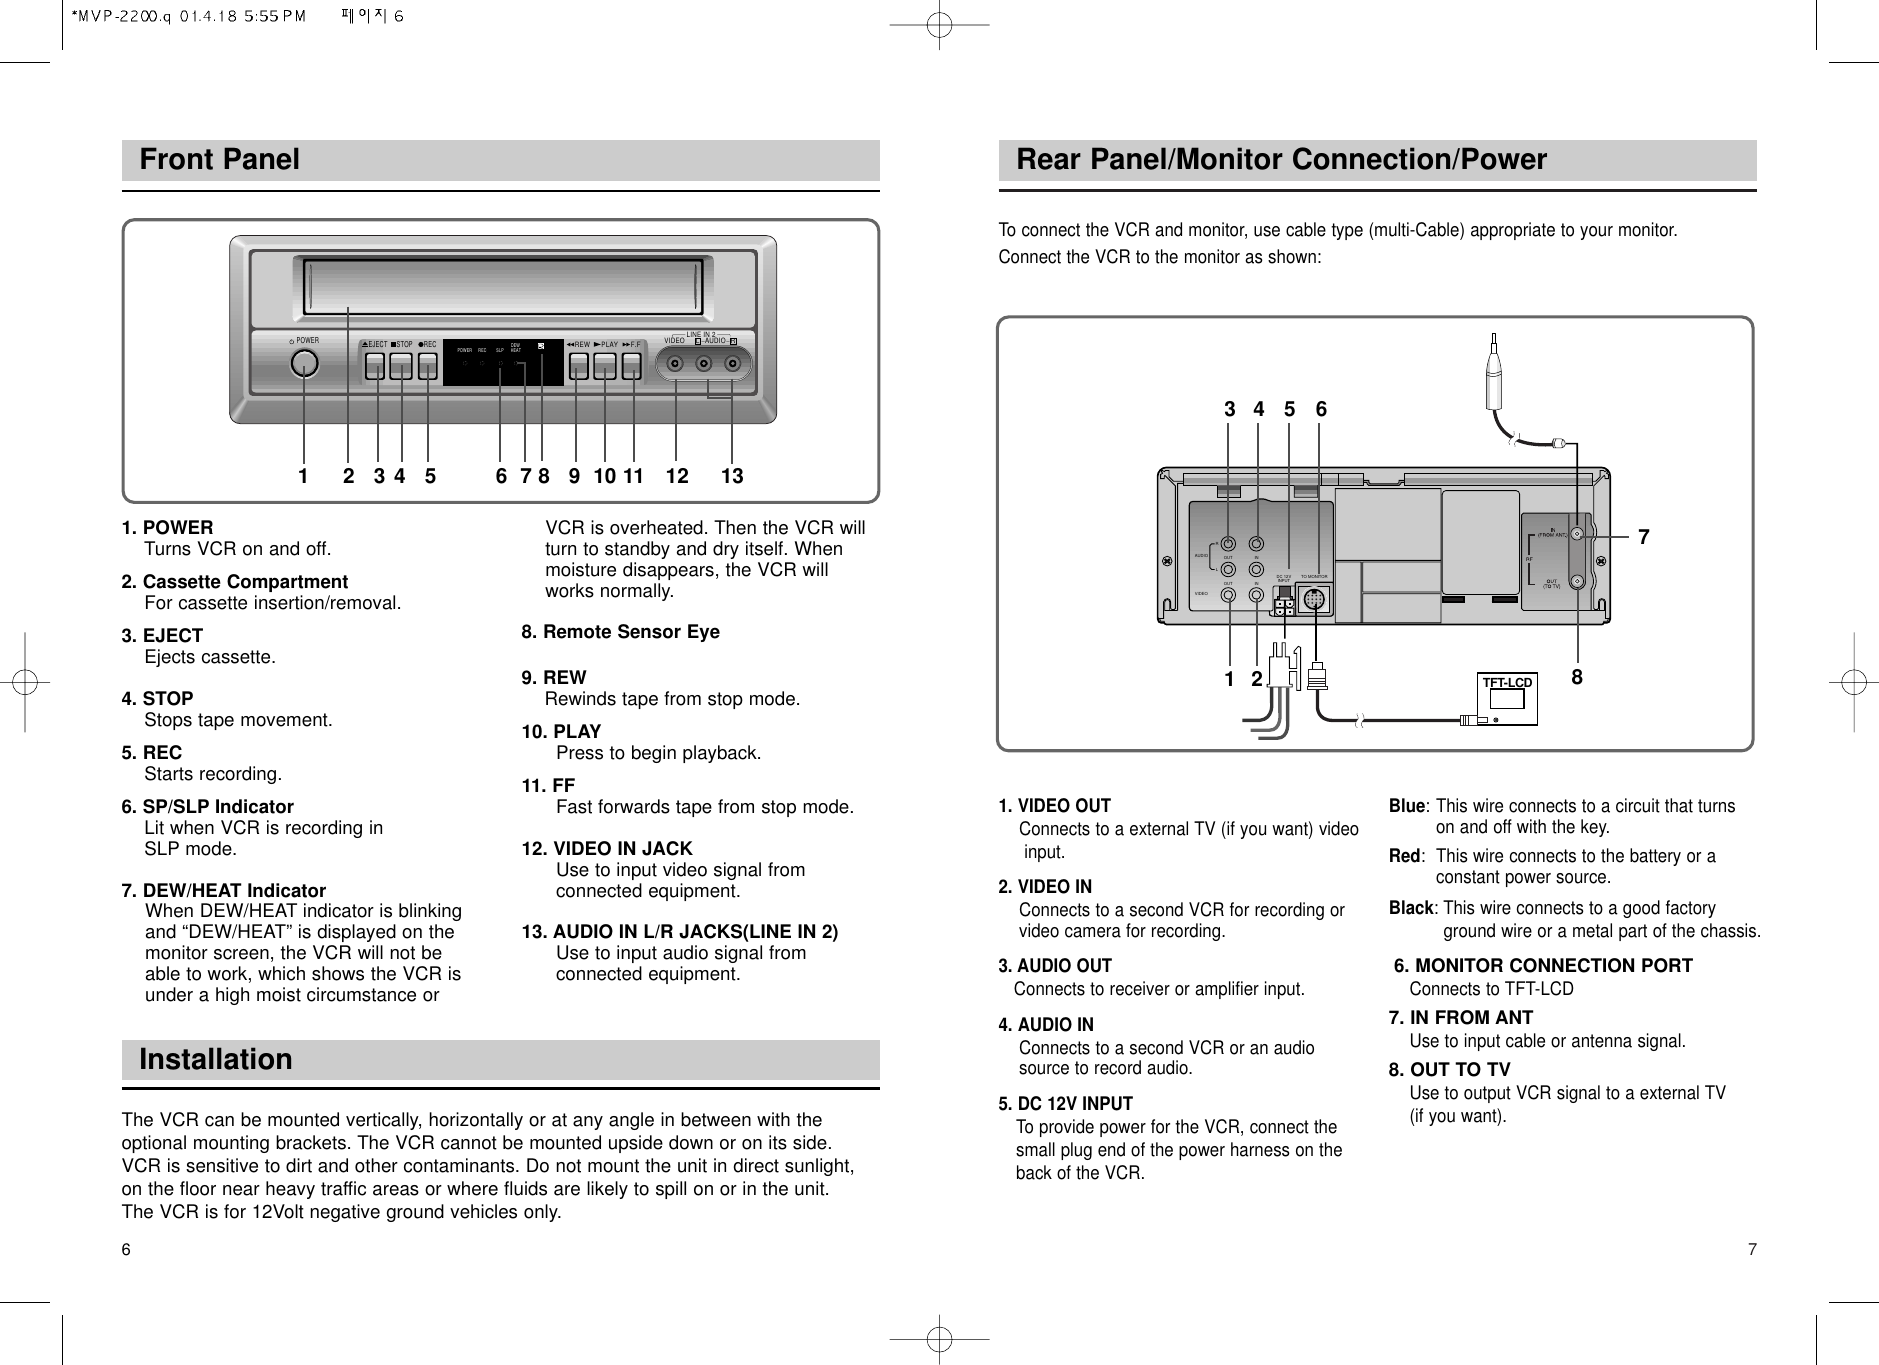
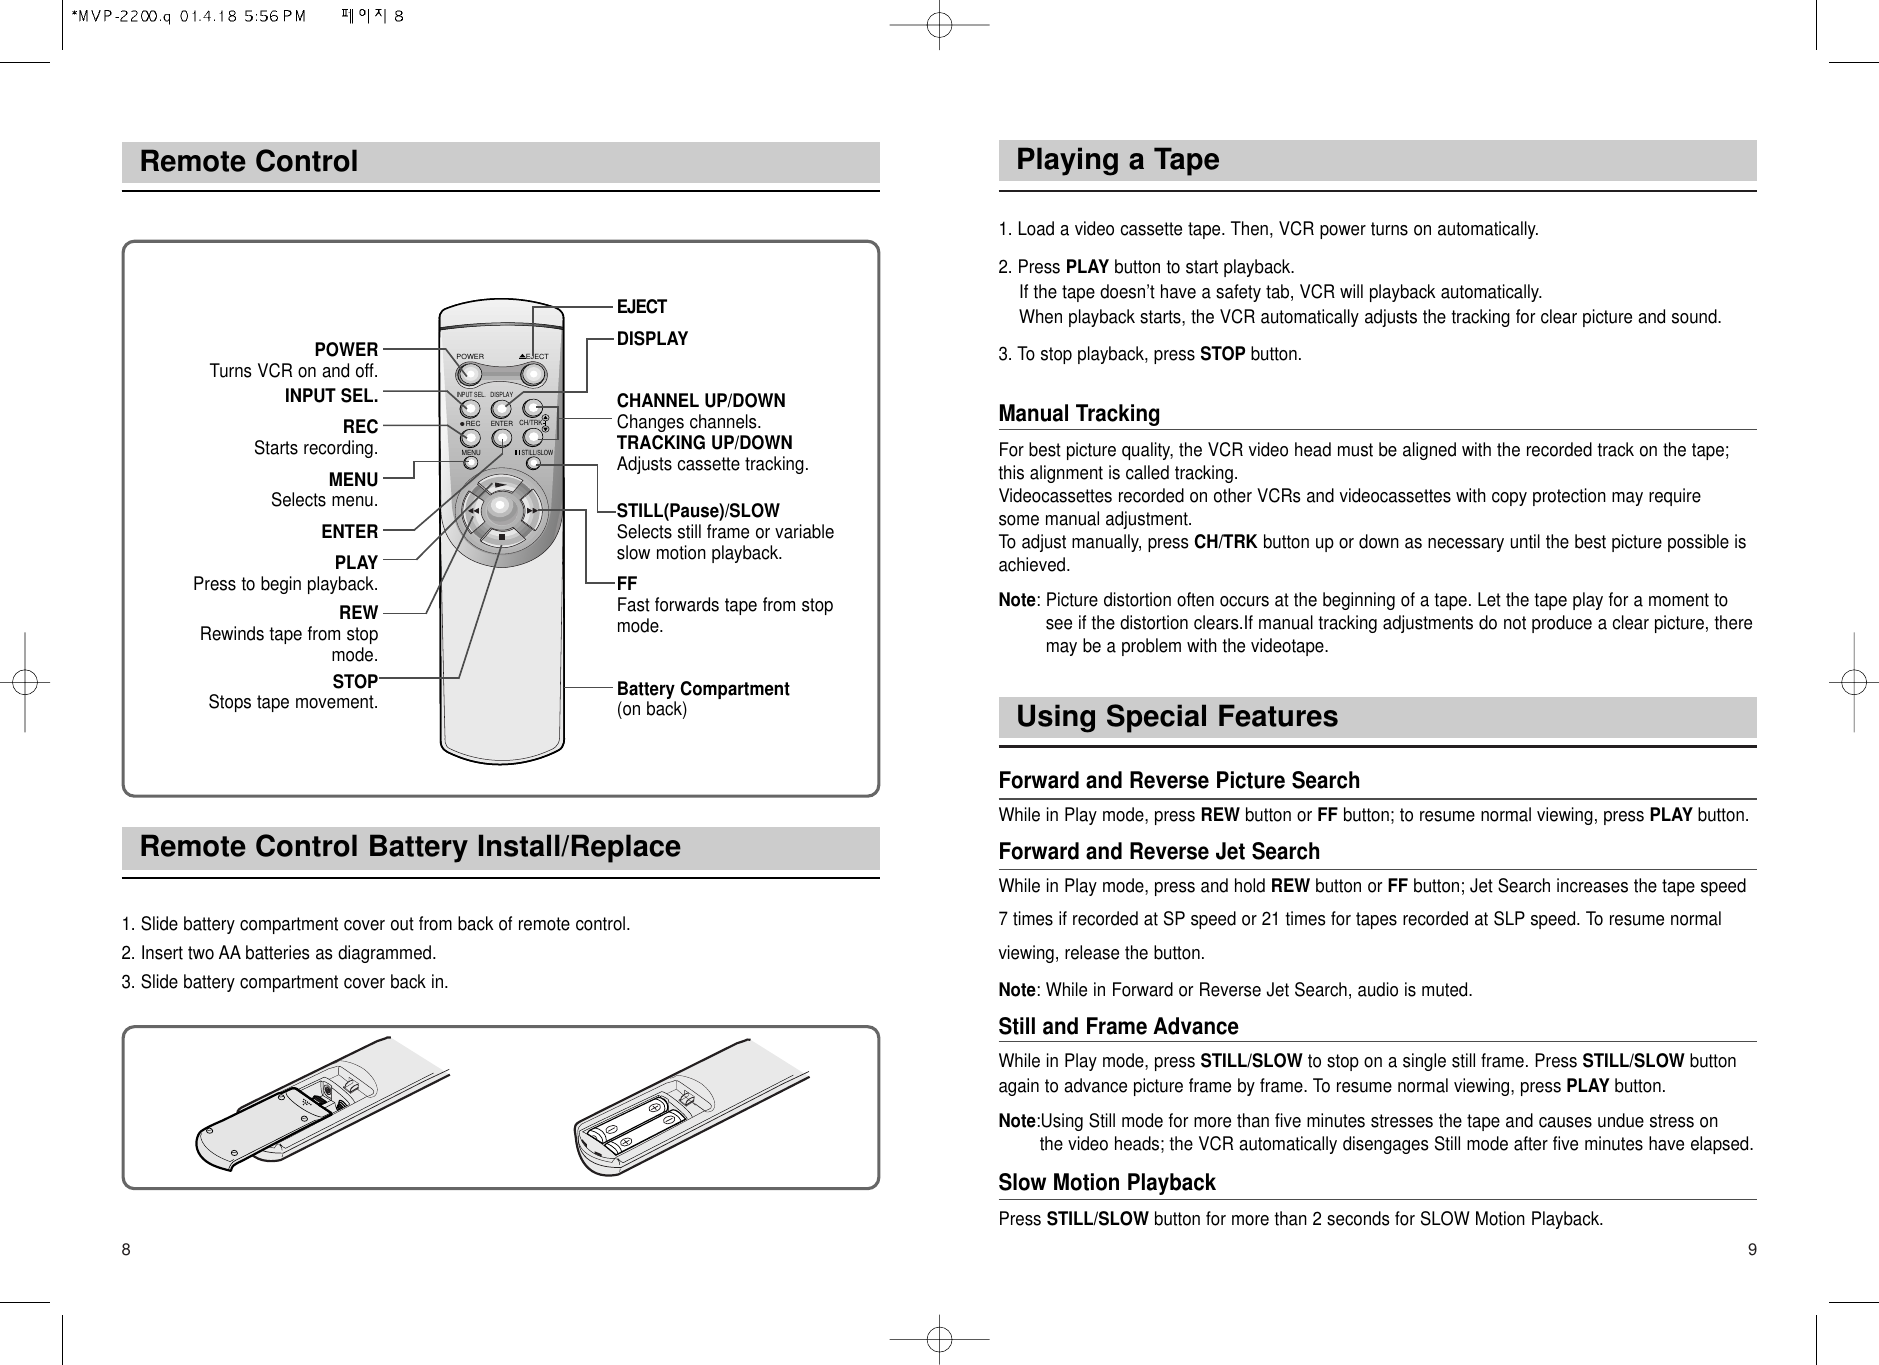
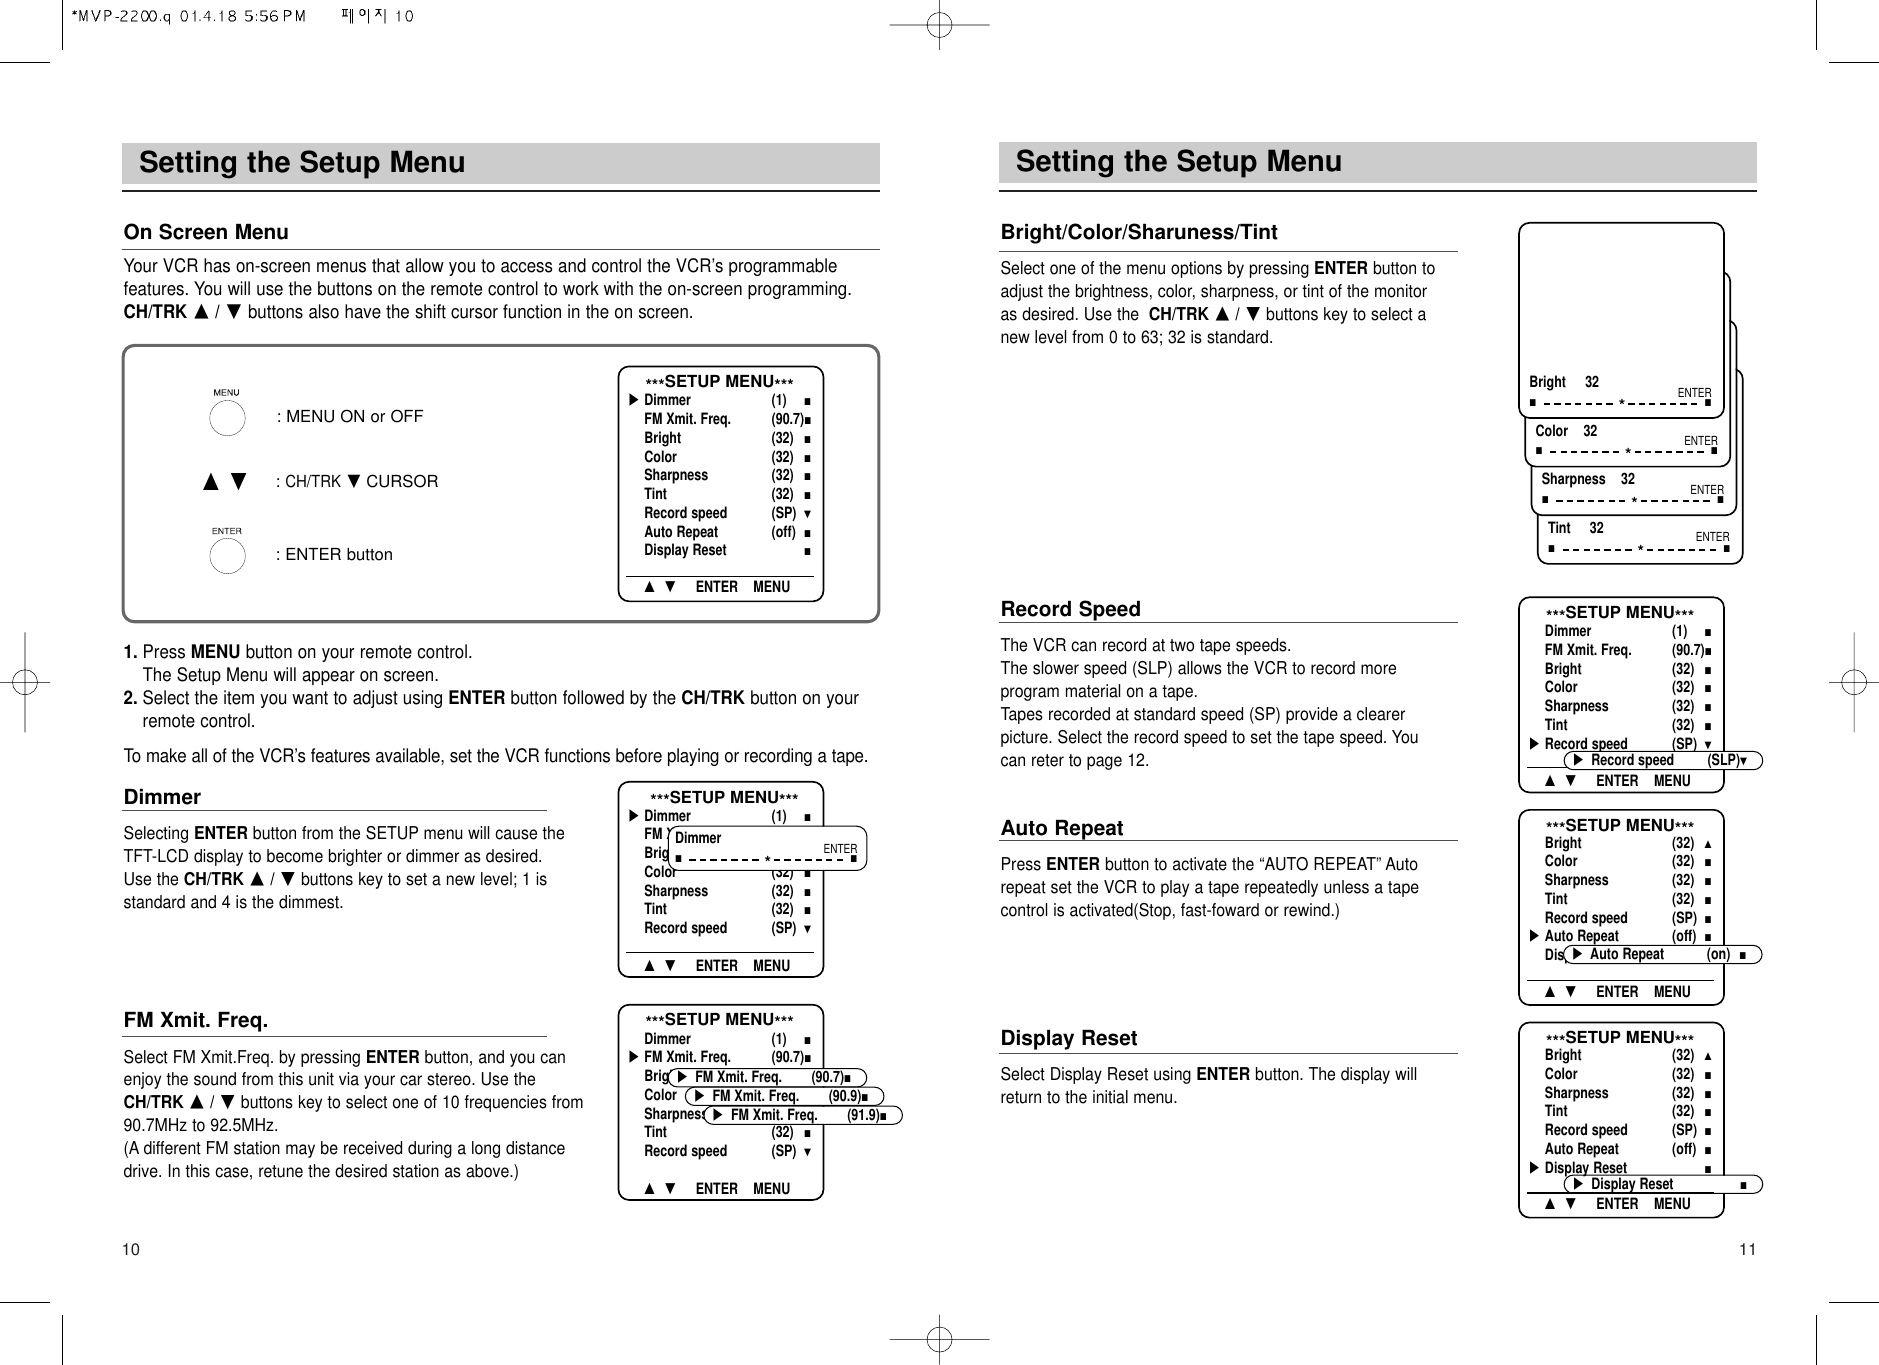
![Display Control5Display Control4DimmerYou can adjust the brightness of the display to 1 to 4 depending on the ambient illumination.FM Xmit. Freq. It changes FM frequencies received by your car stereo. [Note 1]BrightIt adjusts the brightness of the screen. ColorIt adjusts the color of the screen. SharpnessIt adjusts the sharpness of the screen. TintIt adjusts the tint of the screen.Record SpeedIt adjusts recording speed for your VCR.Auto RepeatIt turns on/off the automatic repeat function of your VCR.Display ResetIt resets the screen to default values.[Note 1]Tuning in to FM stationsYou can enjoy FM broadcasts via your car stereo. As this monitor does not have built-inspeakers, you should use your FM tuner. Frequency range : 90.7MHz to 92.5MHzTo set FM frequencies1. Select the menu screen.2. Select FM Xmit. Freq. and press the ENTER key.3. Use the Ħor Ĥkey to select one within the frequency range. 4. Tune your car FM radio (or FM receiver ) to the selected station.A different FM station may be received during a long distance drive. In this case, followthe steps above to retune it to the desired station.*** SETUP MENU ***̈Dimmer (1)̆FM Xmit. Freq. (90.7) ½Bright (32) ½Color (32) ½Sharpness (32) ½Tint (32) ½Record speed (SP) ½Auto Repeat (off) ½Display Reset ½ĦĤ ENTER MENU](https://usermanual.wiki/Samsung-Electronics-Co/MOBILE1/User-Guide-152148-Page-12.png)