Samsung Electronics Co NP-Q1 Mobile PC User Manual SAMSUNG Q1
Samsung Electronics Co Ltd Mobile PC SAMSUNG Q1
UserManual.wiki
>
Samsung Electronics Co
>
NP-Q1 User Manual
>
Users Manual 1a
Contents
1.
Users Manual 1a
2.
Users Manual 1b
3.
Users Manual 2
Users Manual 1a
Navigation menu
Upload a User Manual
Namespaces
Wiki Guide
HTML
PDF
Info
Views
User Manual
Discussion / Help
Navigation
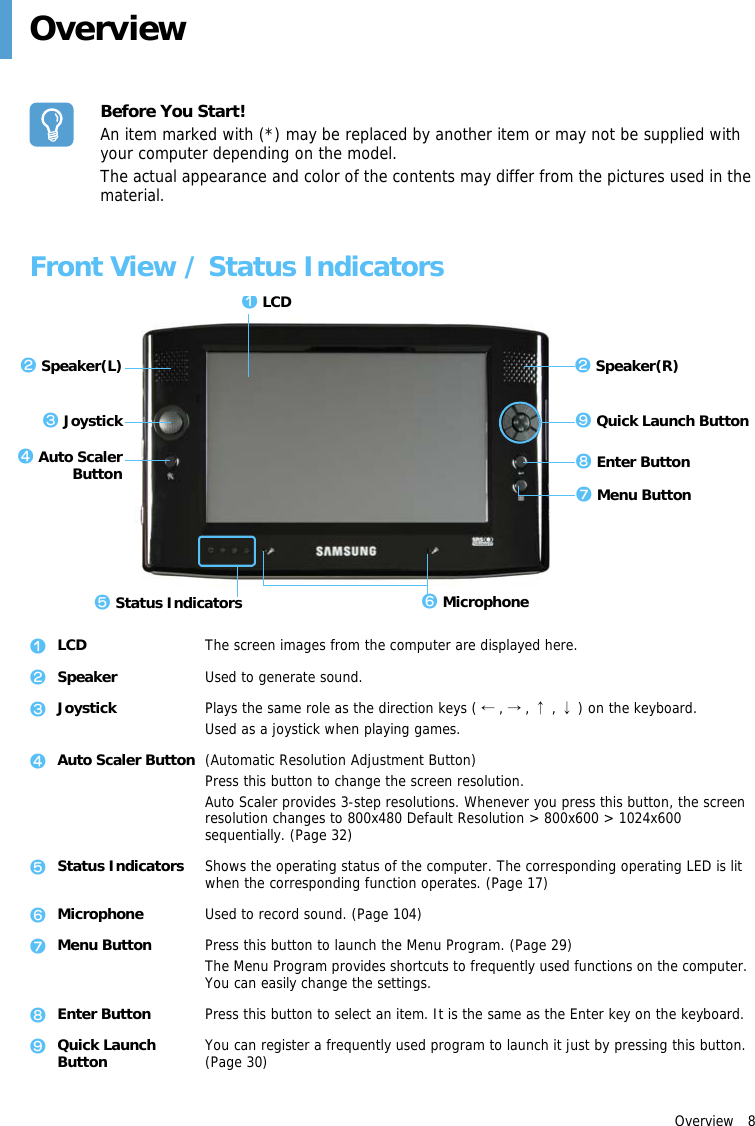
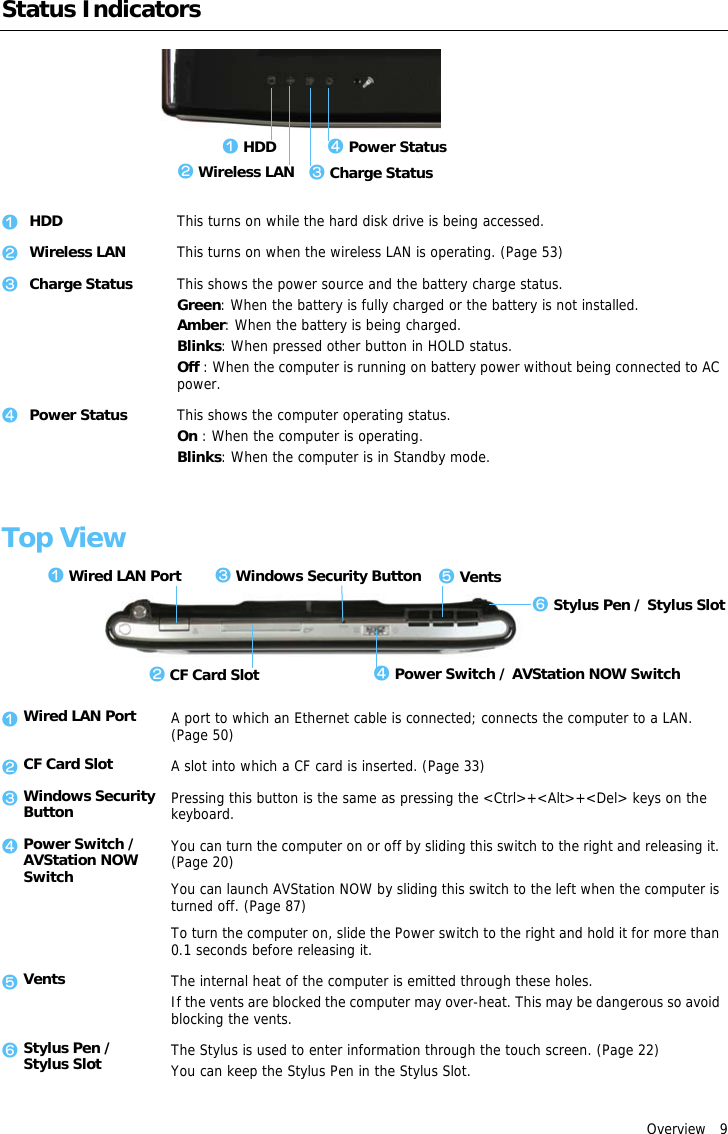
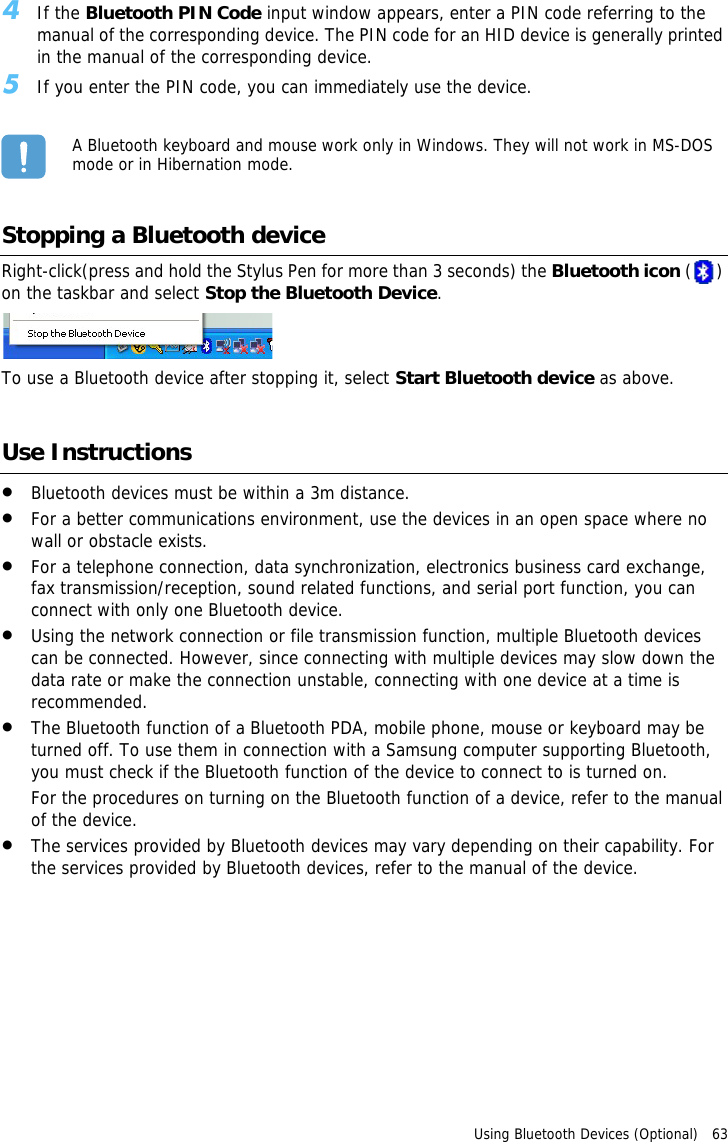
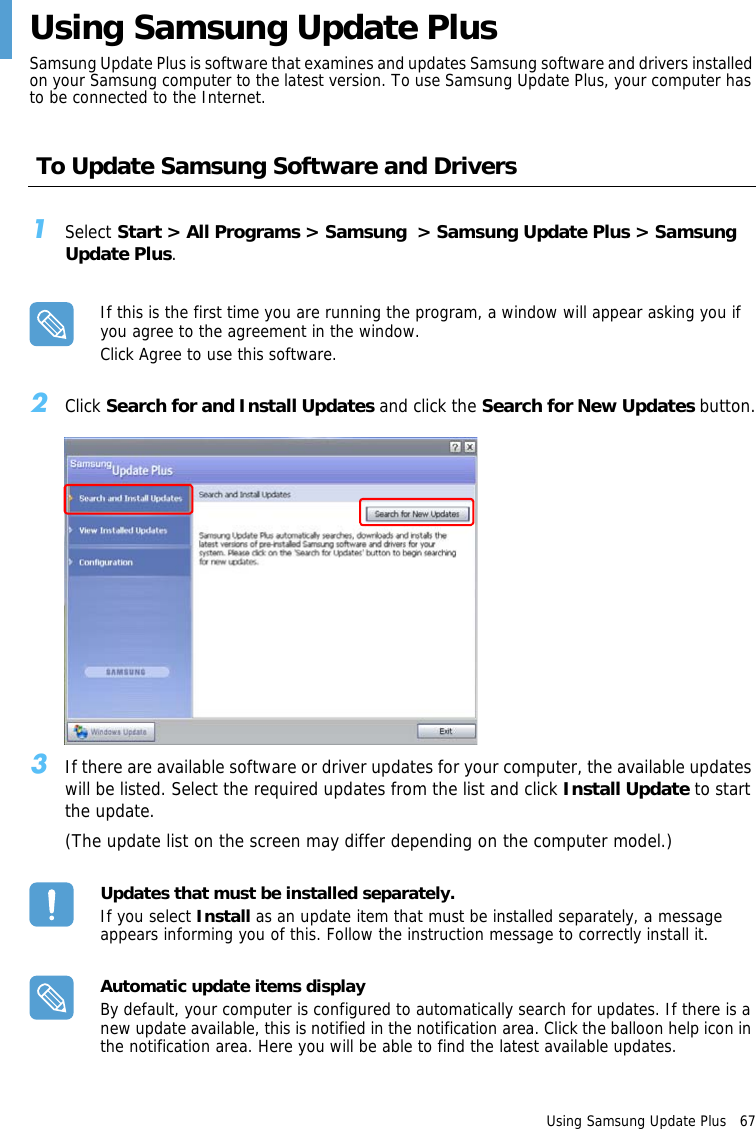
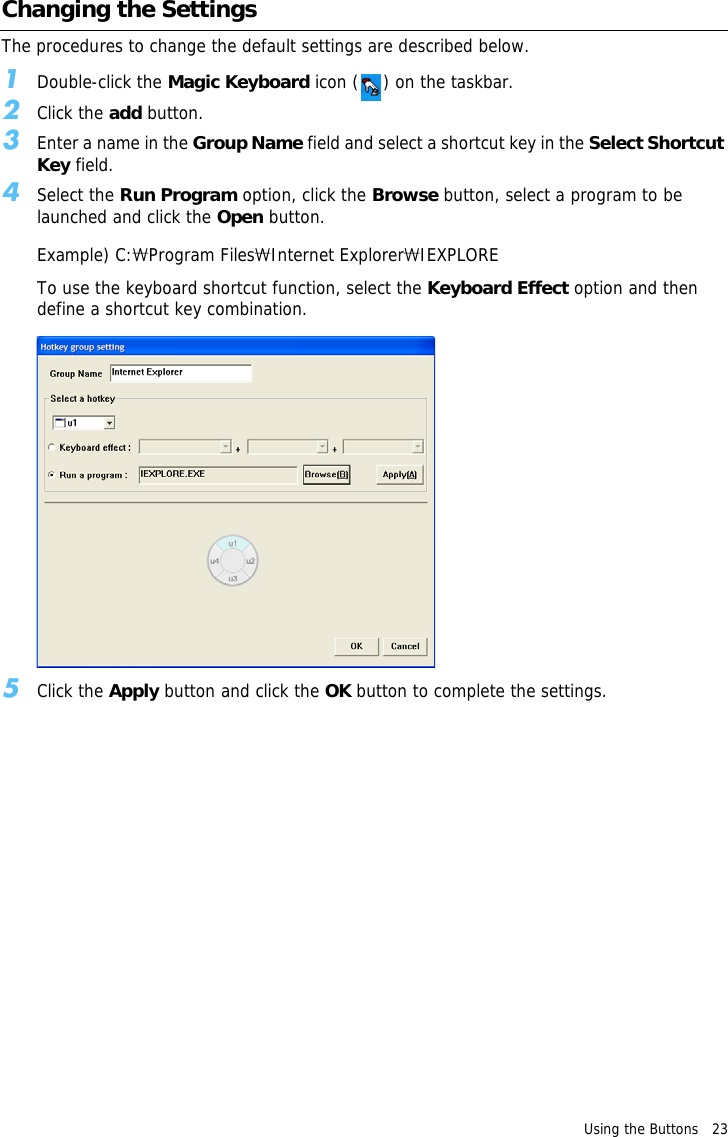
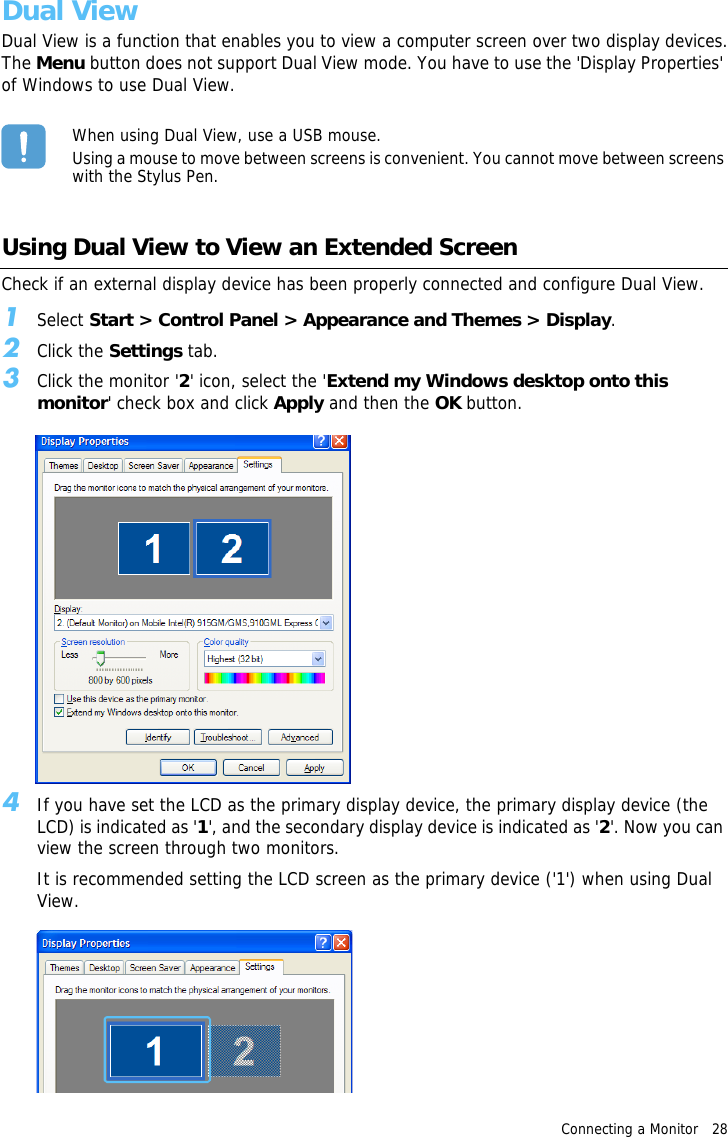
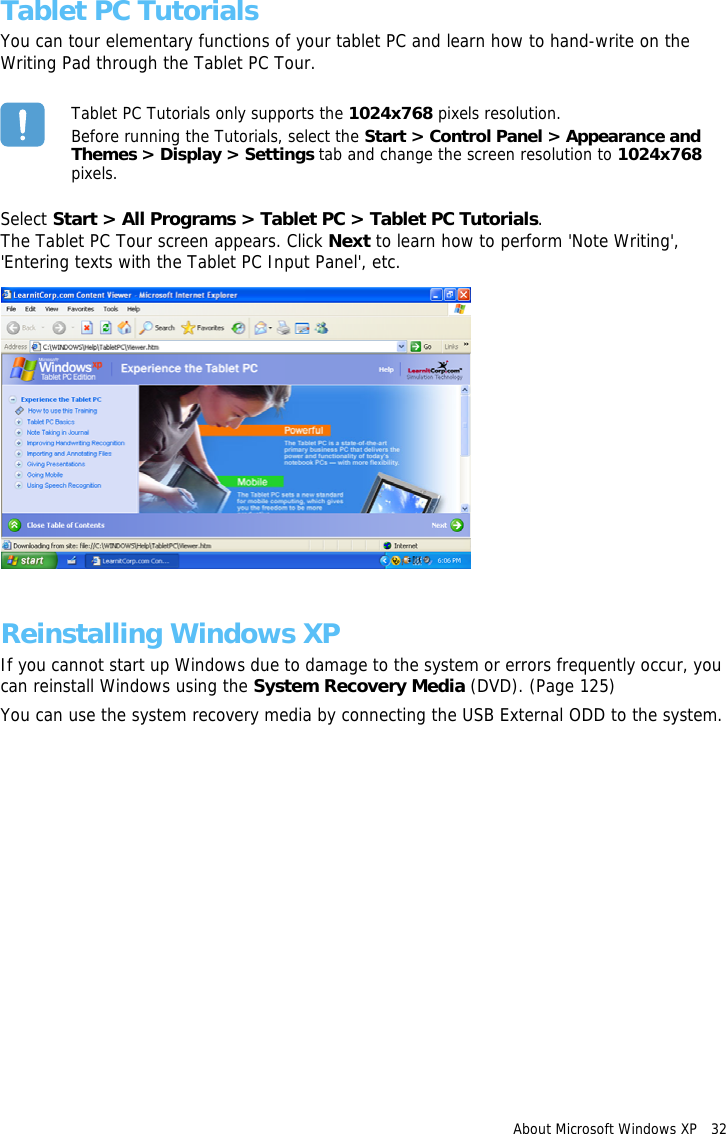
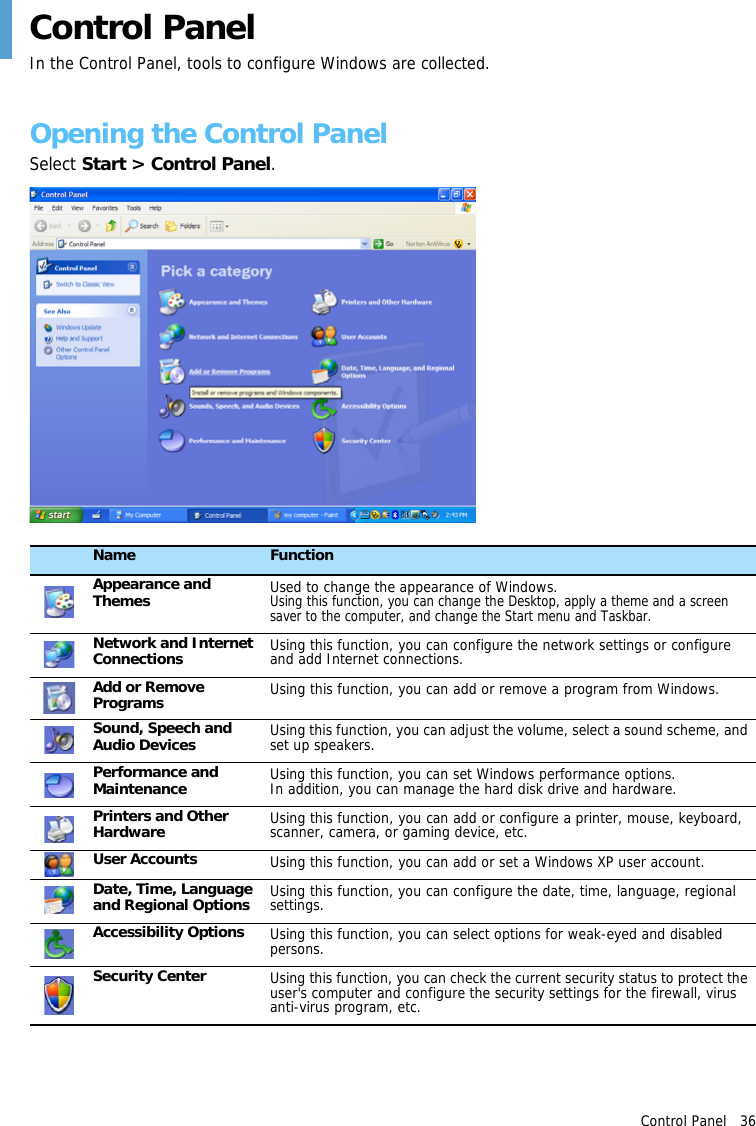
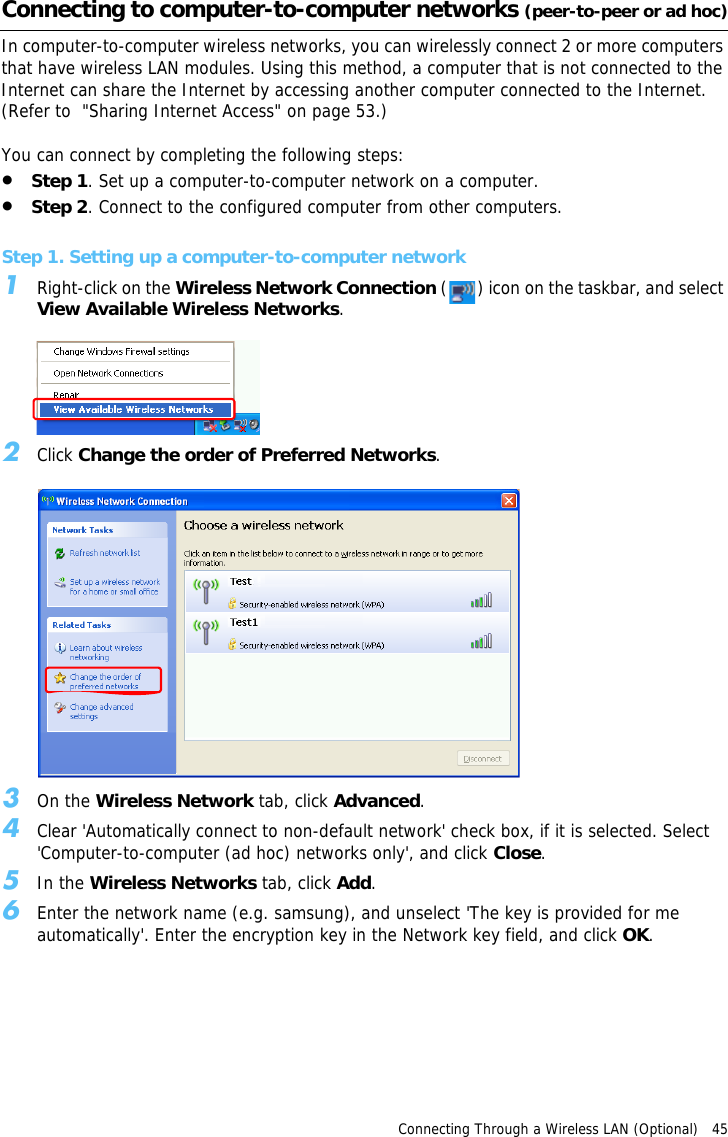
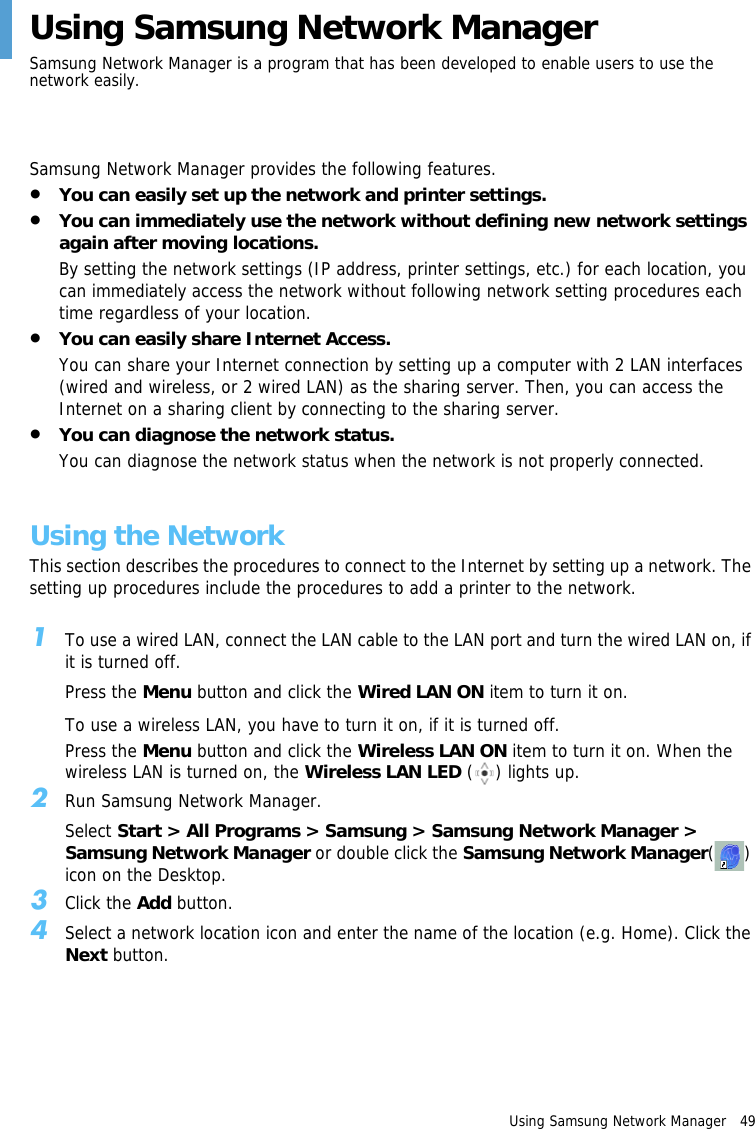
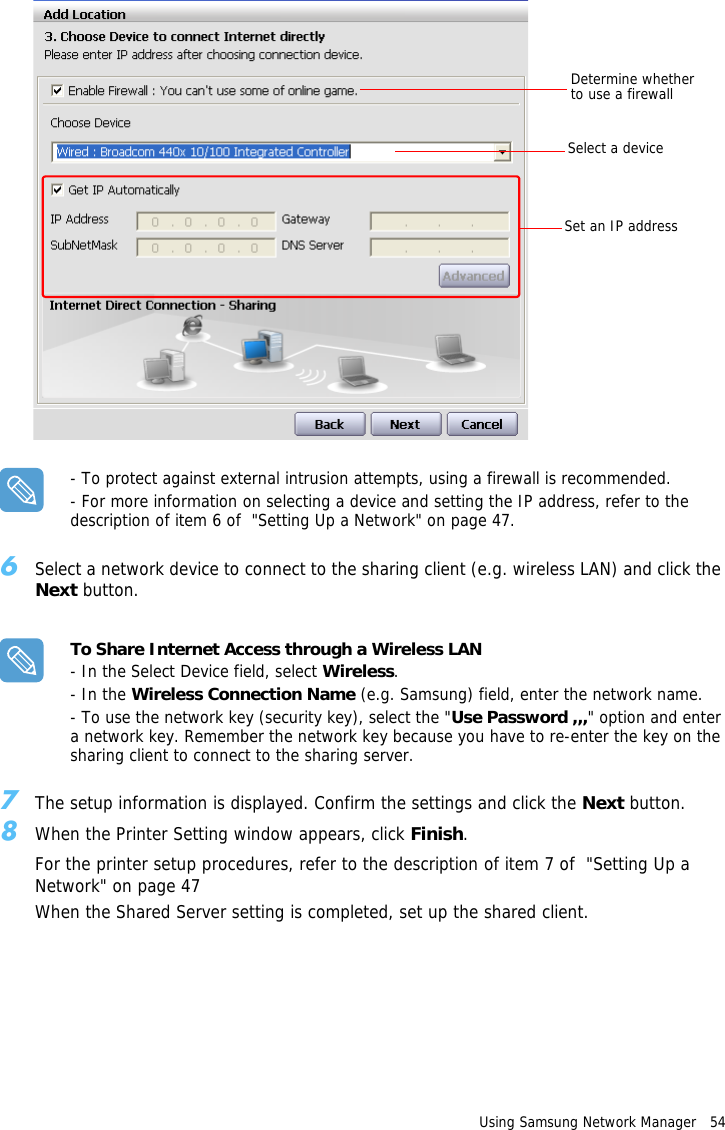
![Overview 10 Right ViewzxczMonitor PortA port used to connect a monitor, TV or projector supporting a 15-pin D-SUB interface. (Page 34)xUSB PortA port used to connect a USB device such as a USB keyboard, mouse, etc.cDC-in JackA port used to connect the AC adapter supplying power to the computer.Left ViewzxcvbnzUSB External ODD Power PortA port used to supply power to the external USB ODD.xUSB PortA port used to connect a USB device such as a USB keyboard, mouse, USB ODD, etc.cHeadphone JackA jack used to connect the headphones.vVolume Control ButtonA button used to control the volume. (Page 28)bHOLD SwitchIf this switch is in the HOLD position (upside), none of the buttons will function.If the computer enters HOLD mode, the Lock icon appears on the screen for a moment and the Charge LED ([ICON]) blinks for a moment.To release HOLD mode, slide the HOLD switch downwards.nHand Strap HoleYou can connect the Hand Strap here.](https://usermanual.wiki/Samsung-Electronics-Co/NP-Q1.Users-Manual-1a/User-Guide-641548-Page-10.png)

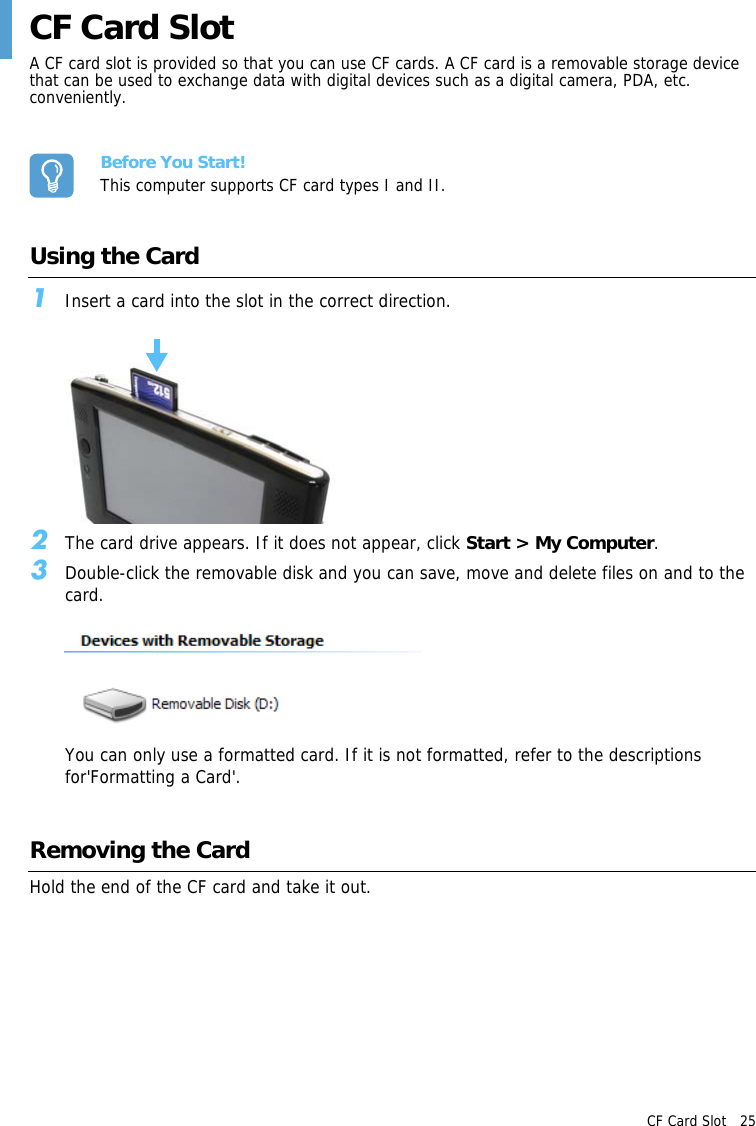
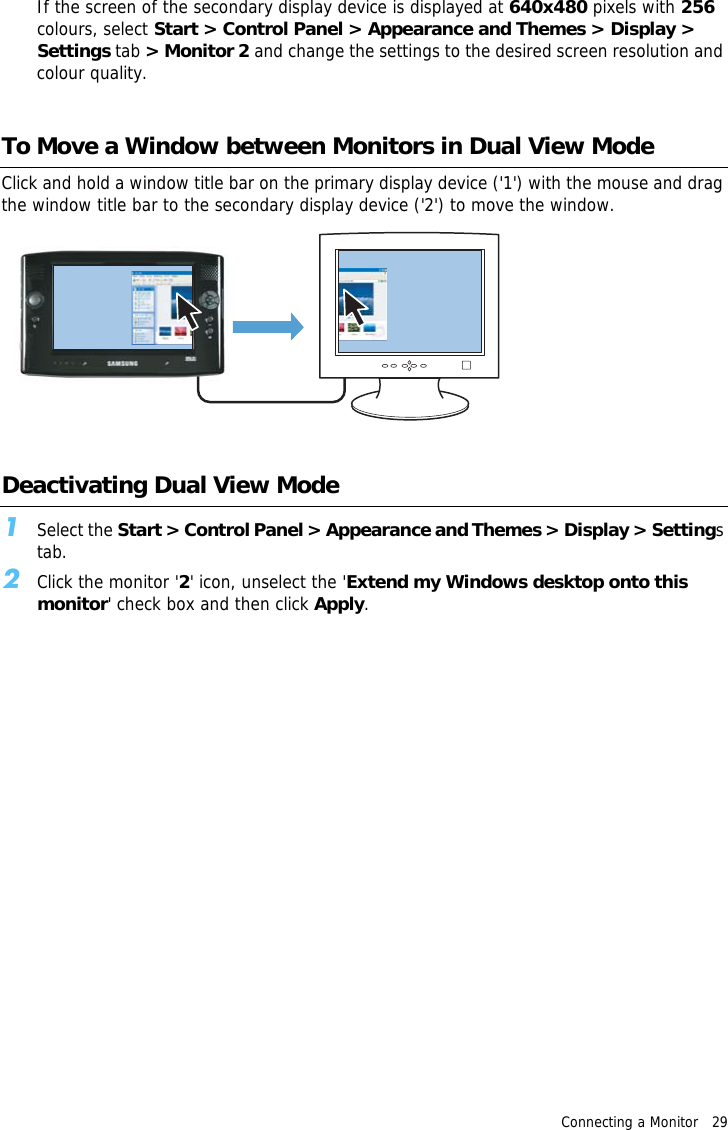
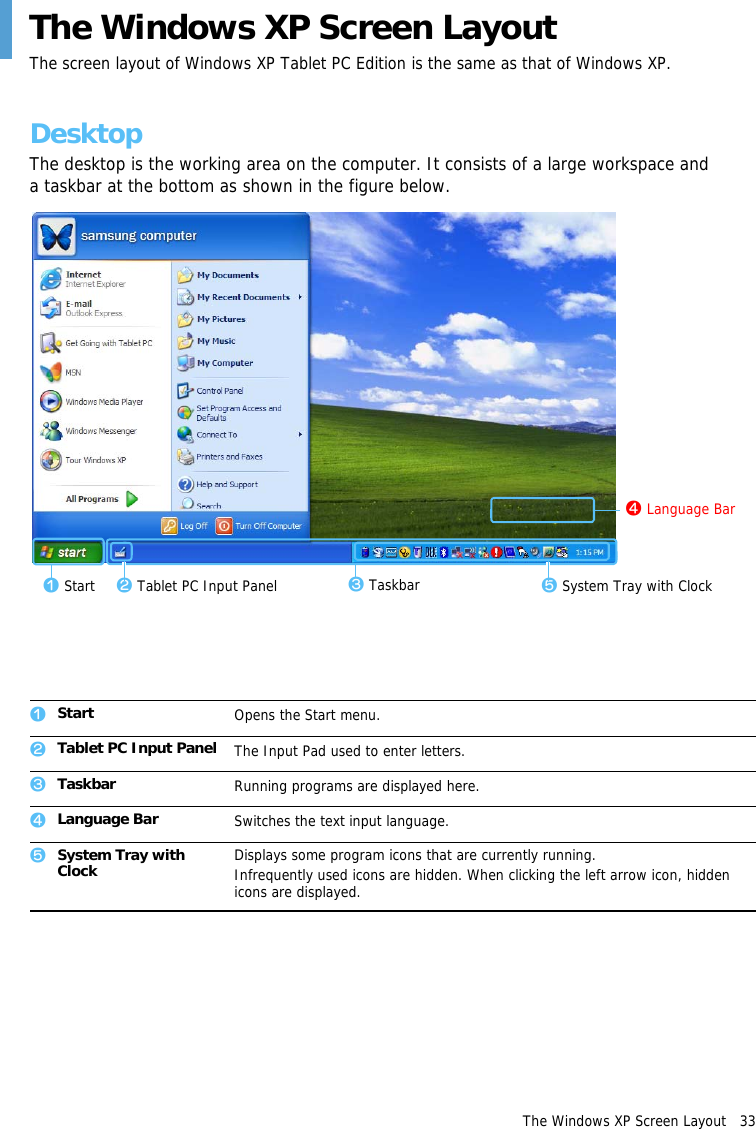
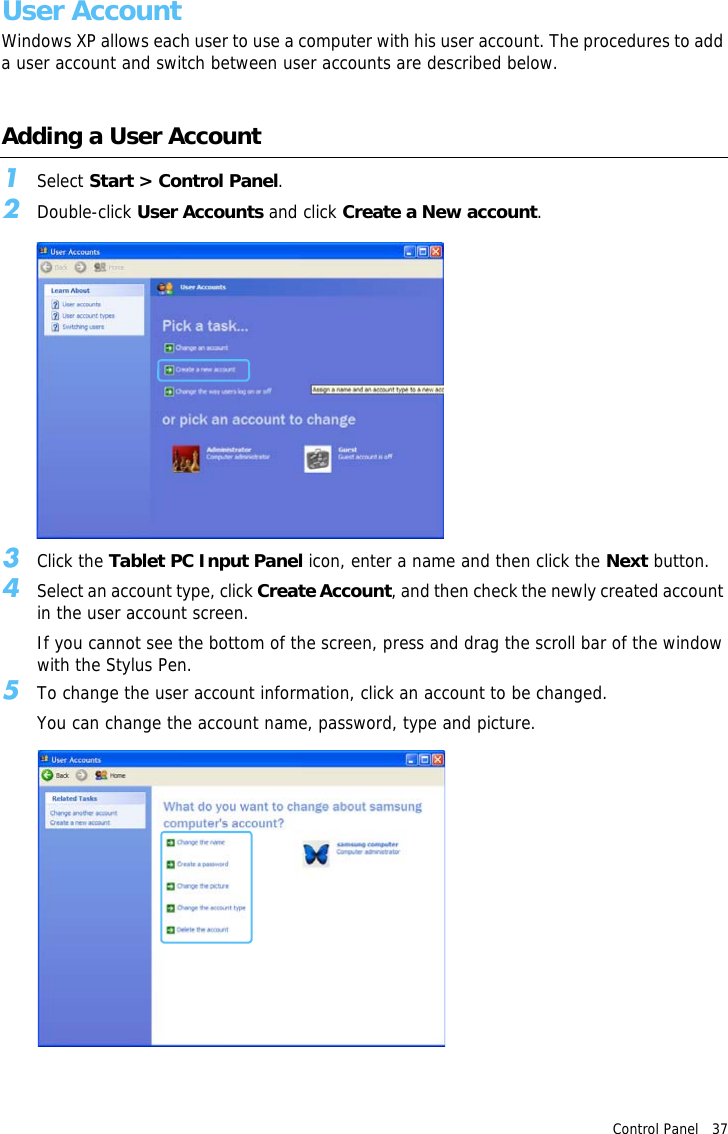
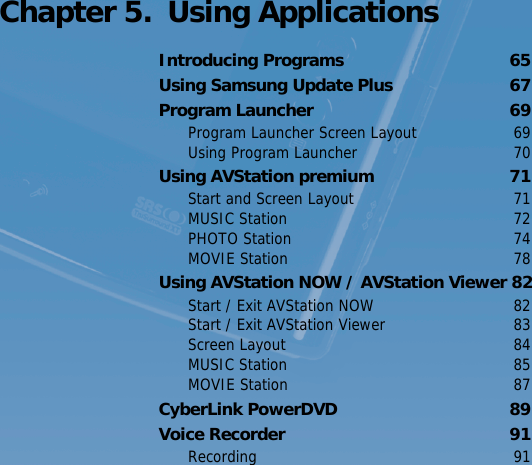
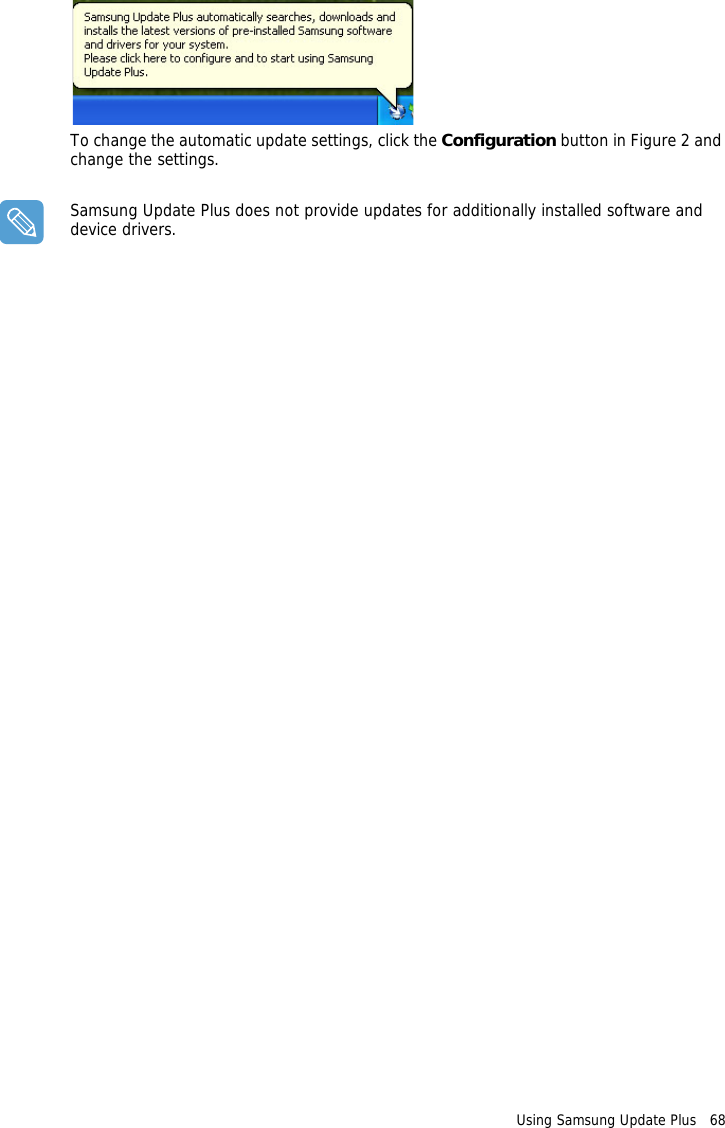
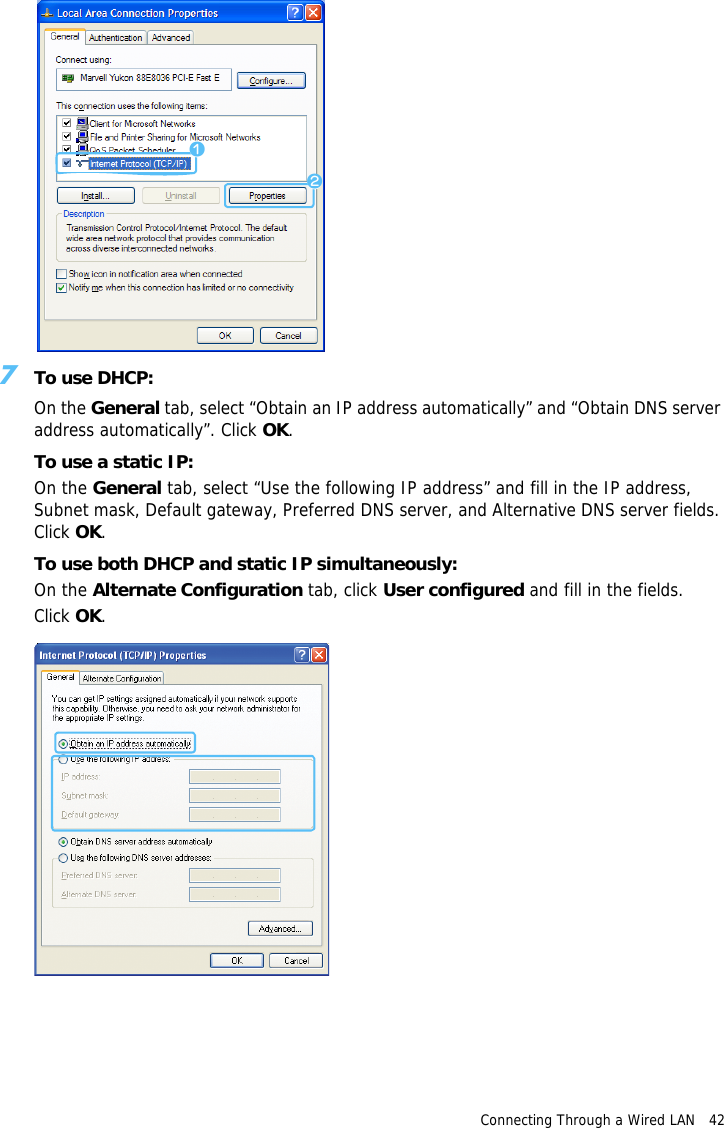
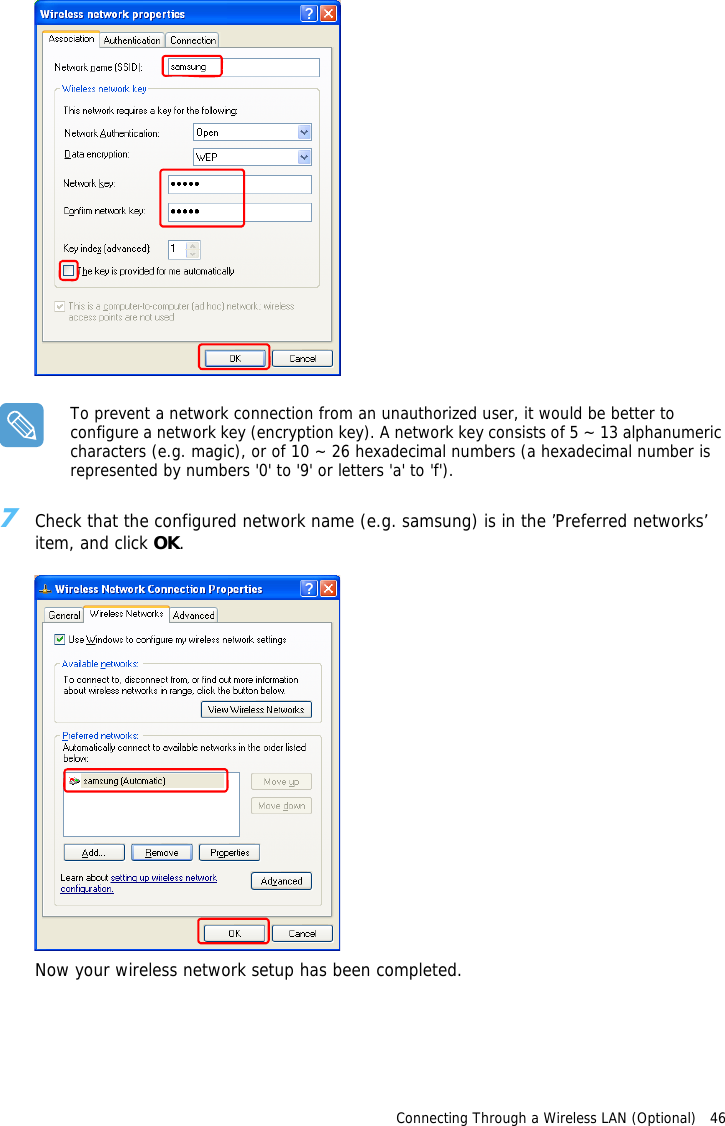
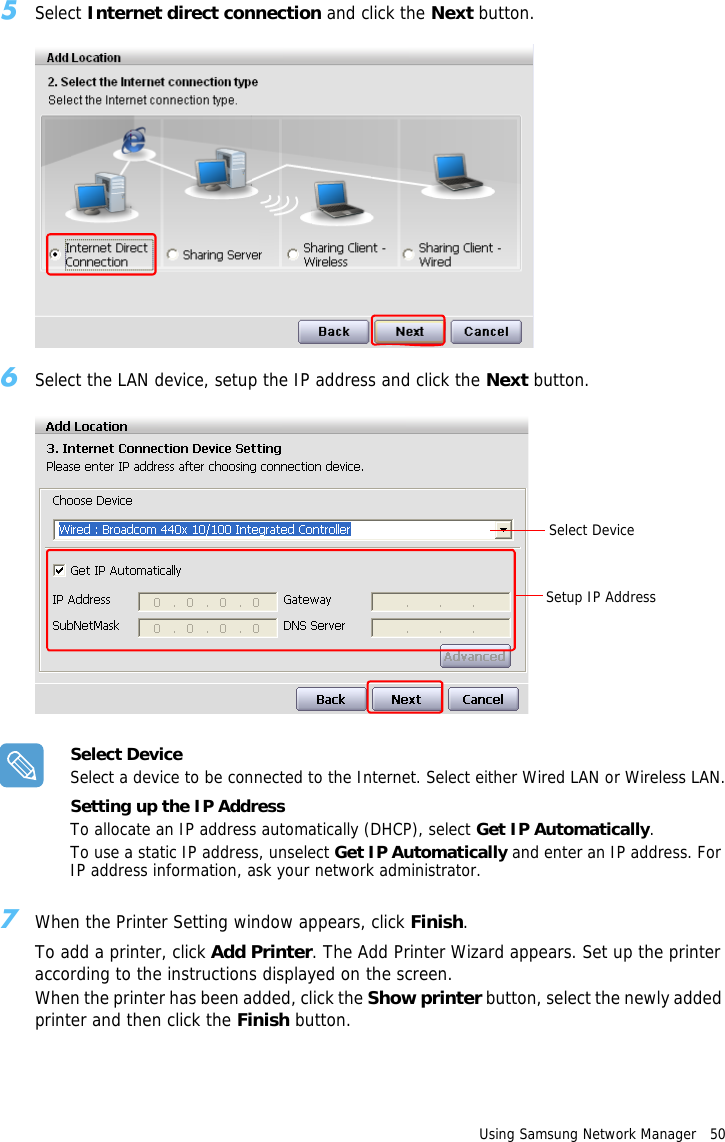
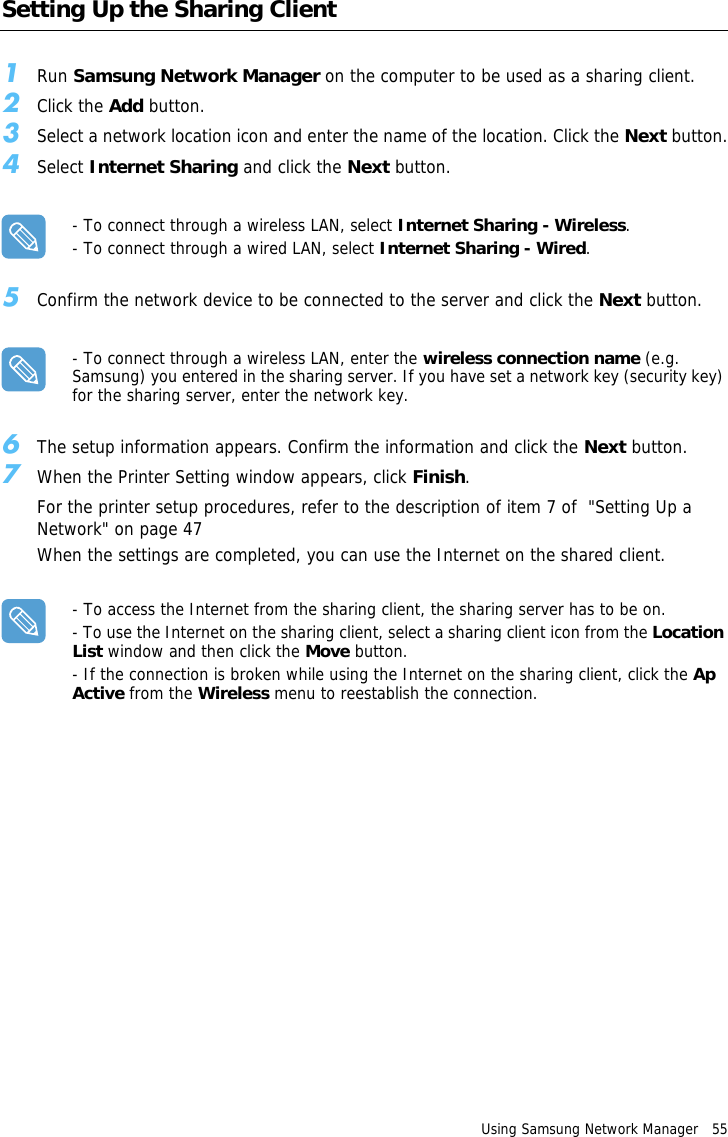
![Connecting Through a Wired LAN 41 Connecting Through a Wired LANBefore You Start!You can also configure the network settings using the Samsung Network Manager. (Page 56)Before configuring the Wired LAN, you have to turn the Wired LAN on, if it is turned off.Press the Menu button and press the Wired LAN ON item to turn it on. 1Connect a LAN cable to the computer’s LAN port.2Click Start > Control Panel.3Click Network and Internet Connections in the [Control Panel] window.4Click Network Connections in the [Network and Internet Connections] window.5Right-click(press and hold the Stylus Pen for more than 3 seconds) the Local Area Connection icon and click Properties.6On the General tab, select “Internet Protocol(TCP/IP)” and click Properties.](https://usermanual.wiki/Samsung-Electronics-Co/NP-Q1.Users-Manual-1a/User-Guide-641548-Page-41.png)
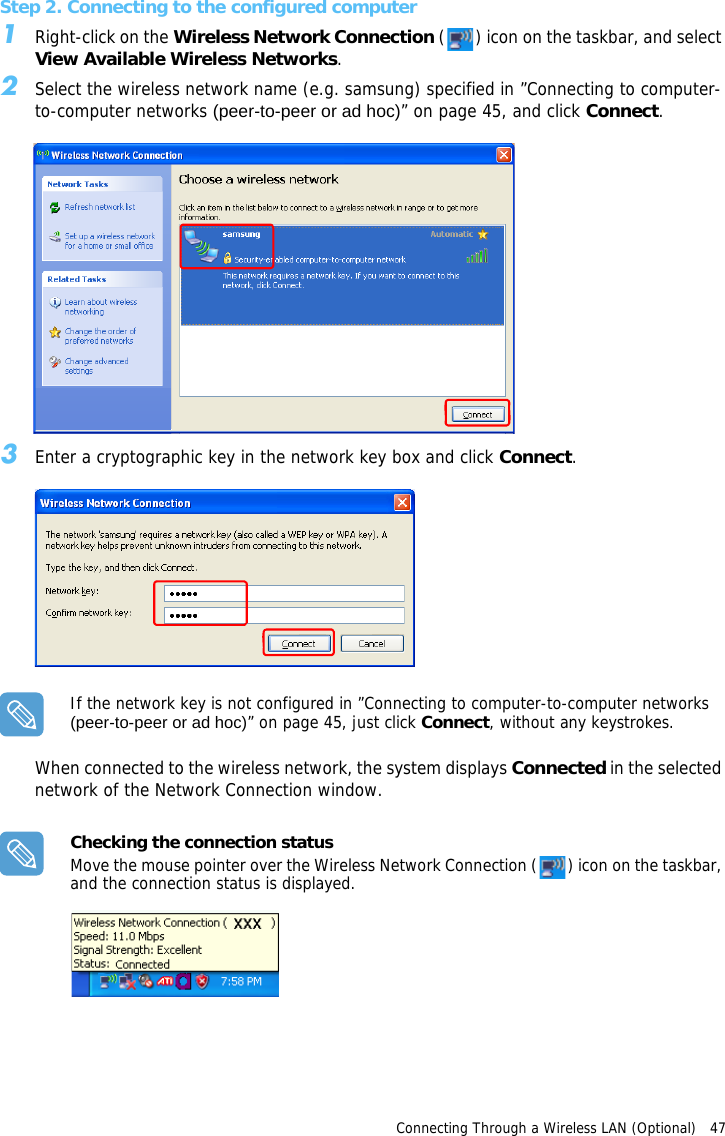
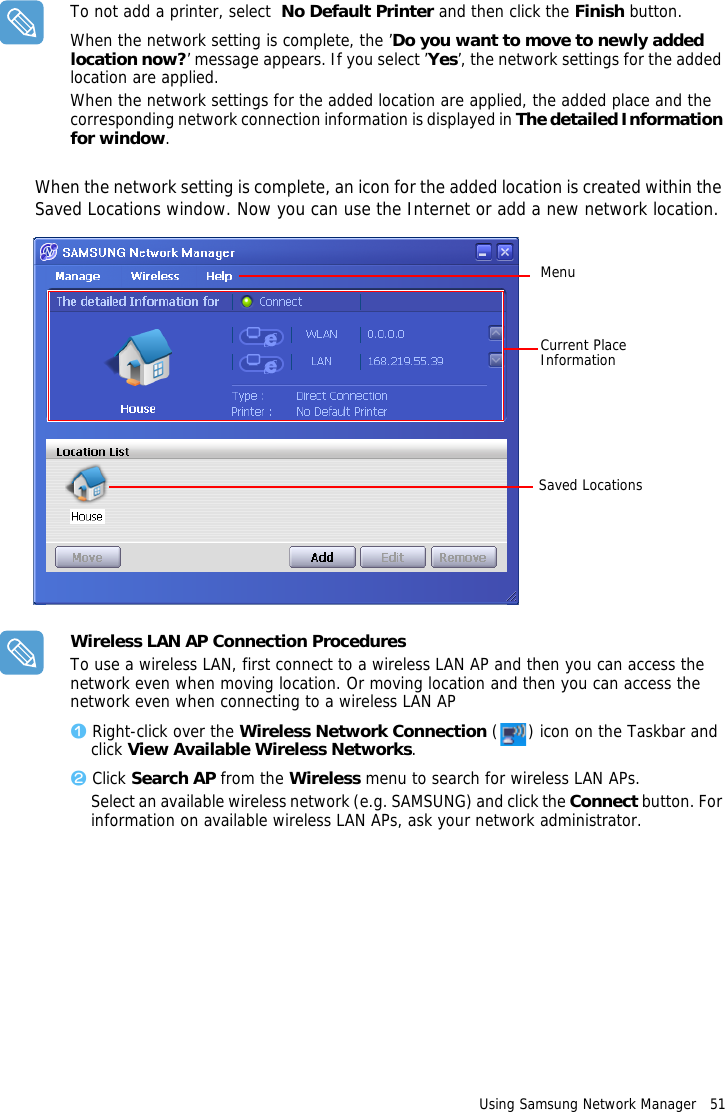
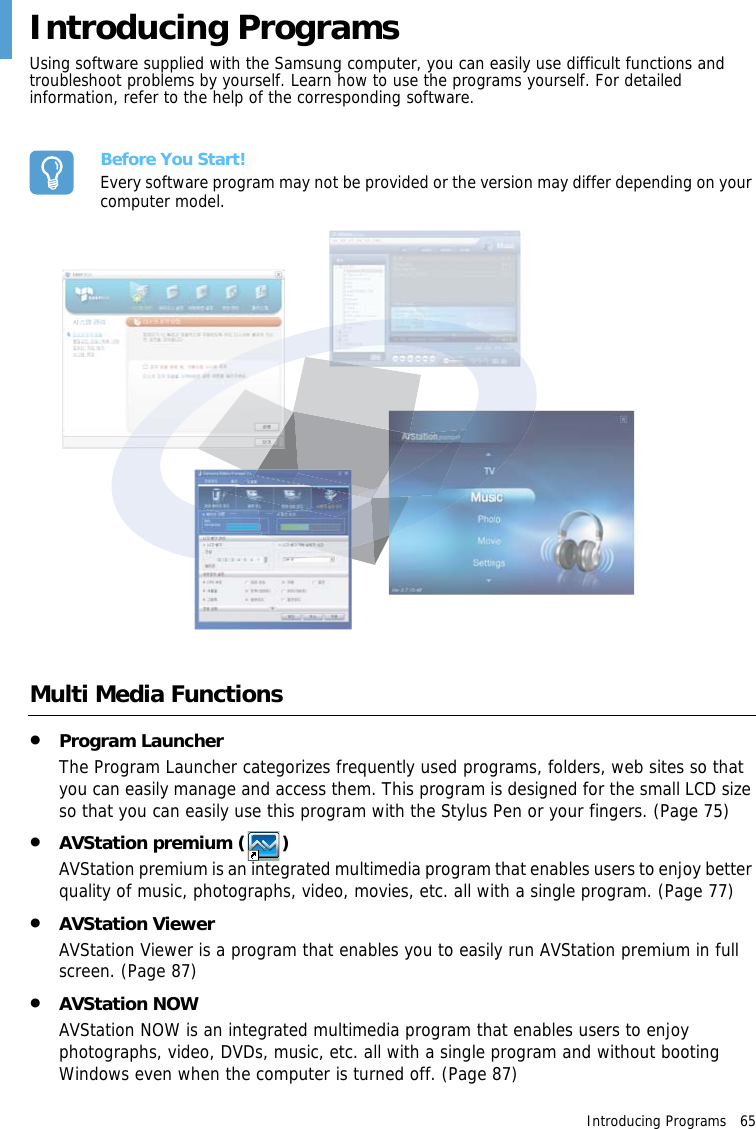
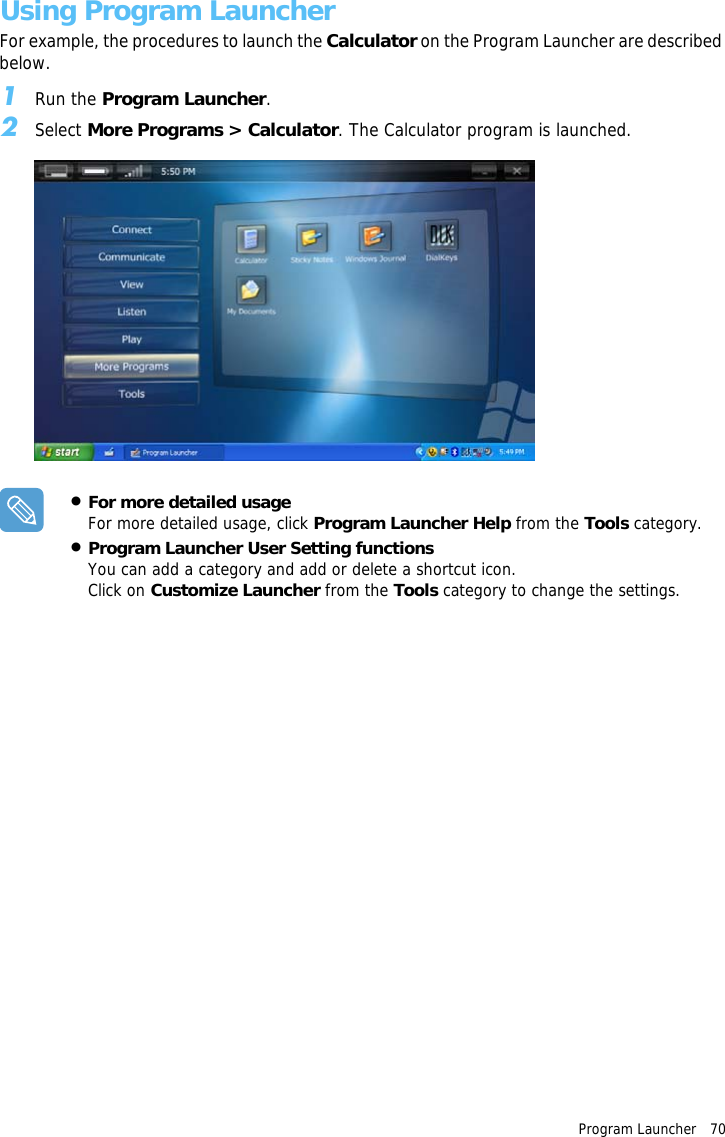
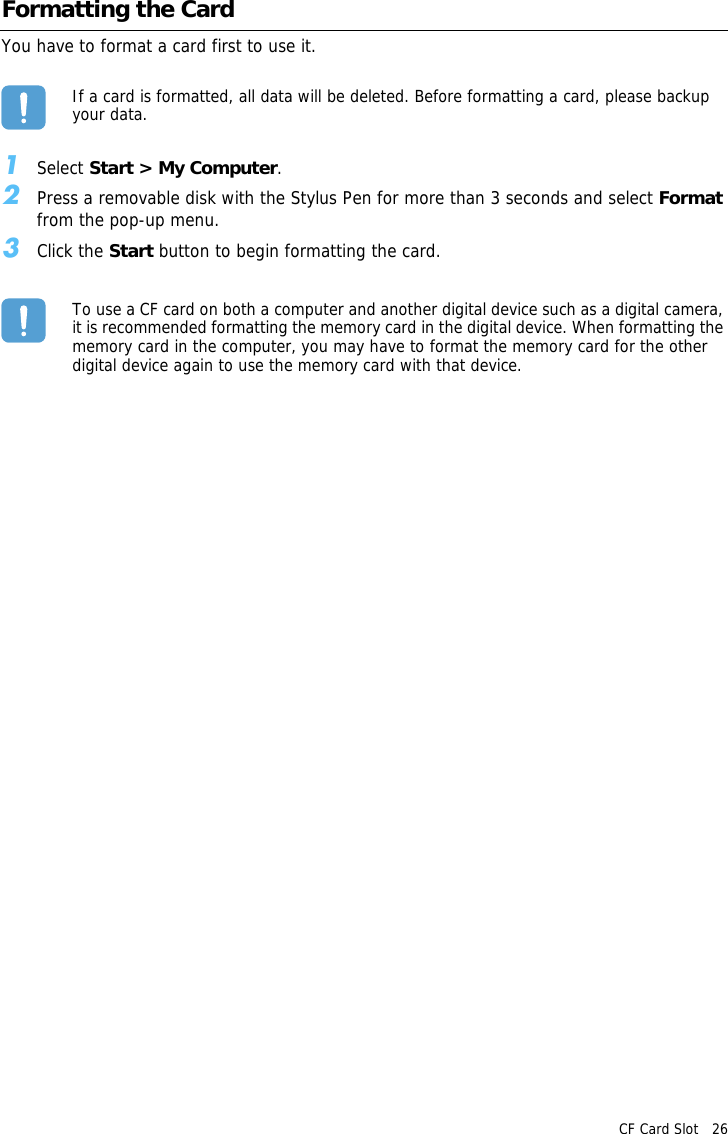
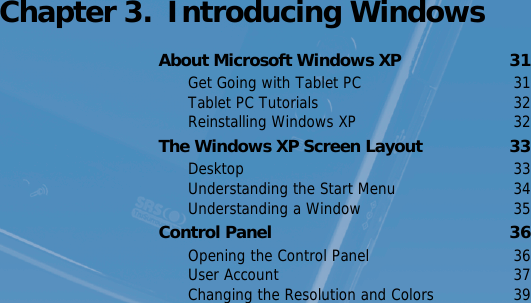
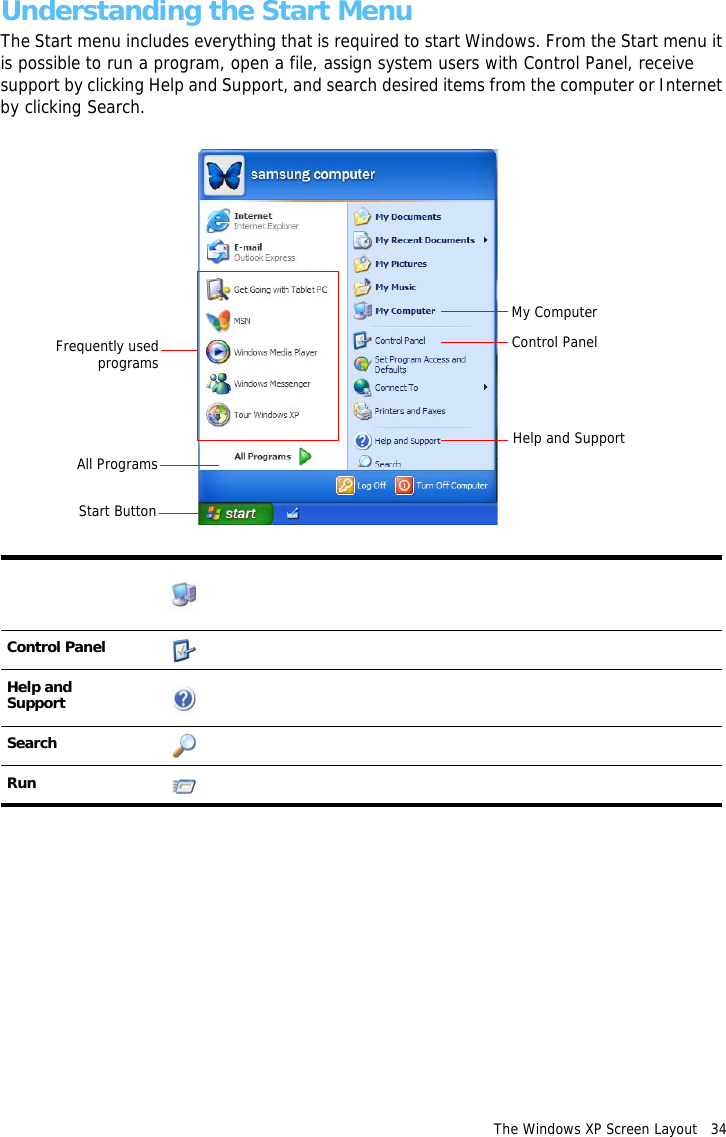
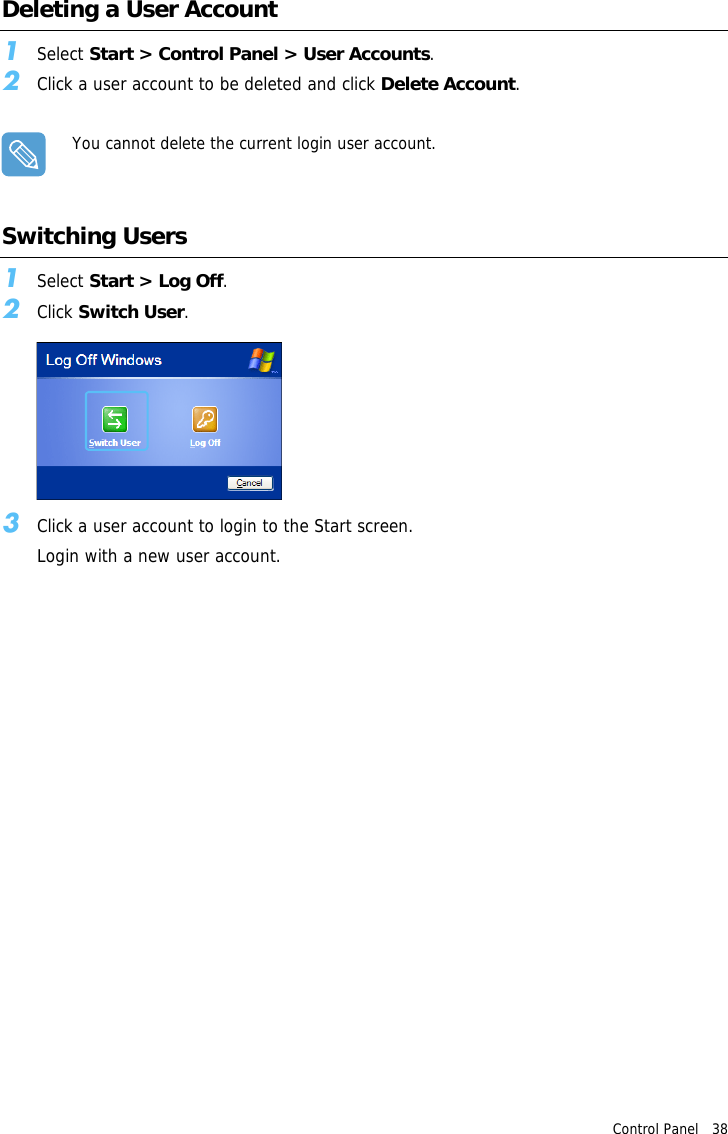
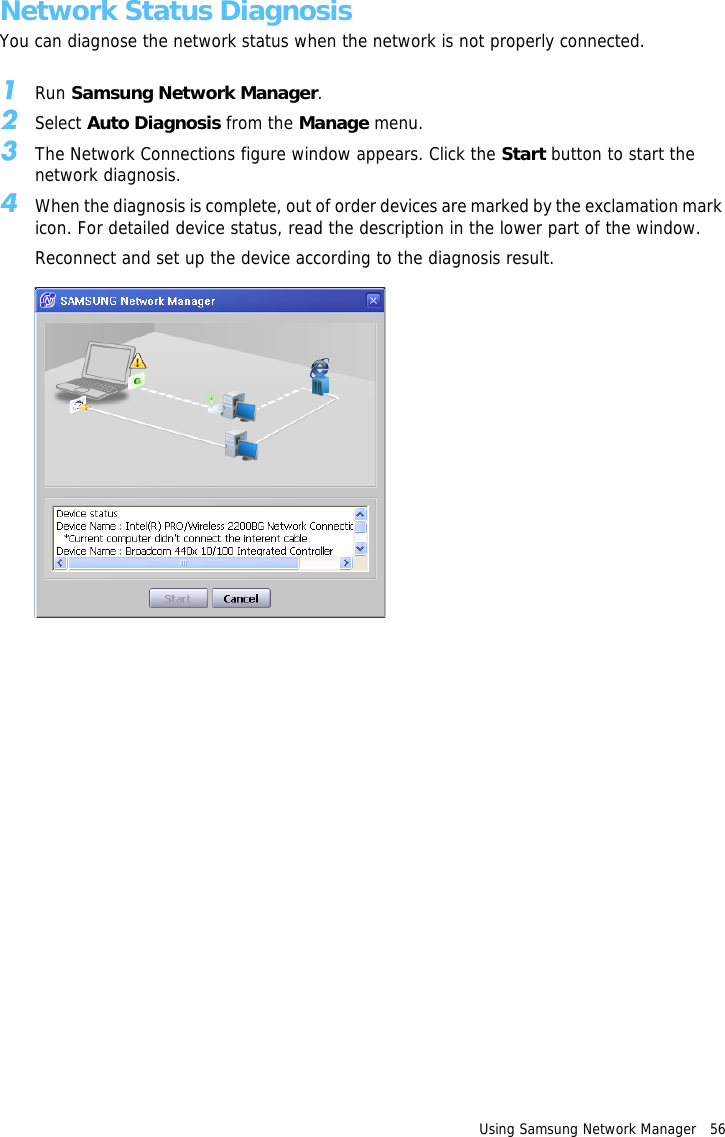
![Using Samsung Network Manager 53 Sharing Internet AccessThis section describes the procedures to share Internet Access.To share Internet Access, you first have to set a sharing server and a sharing client. When the setup is complete, you can access the Internet from the sharing client by connecting to the sharing server.Sharing Server : A computer with a direct connection to the internet and a local network connection.Sharing Client : A computer that uses the Internet by connecting to a sharing server without itself having a direct connection to the Internet.You can connect a sharing server and a sharing client as follows.(See Figure 5 on page (p50))Sharing Server Sharing ClientExternal Internet Device Client DeviceConnection 1 Wired LAN Wireless LAN Wireless LANConnection 2 Wireless LAN Wired LAN Wired LANConnection 3 Wired LAN Wired LAN Wired LANFor Connection 1: To use a wired LAN, connect the LAN cable to the LAN port and turn the wired LAN on, if it is turned off. Press the Menu button and click the Wired LAN ON item to turn it on.To use a wireless LAN, you have to turn it on, if it is turned off.Press the Menu button and click the Wireless LAN ON item to turn it on. When the wireless LAN is turned on, the Wireless LAN LED ( ) lights up.For Connection 2,3: To connect a sharing server and a sharing client using a wired LAN, connect the computers with a crossover LAN cable or network hub first.For Connection 3, you have to connect a LAN card in advance.As an example, Internet sharing procedures for [Connection 1], which connect the sharing server and the Internet through a wired LAN and connect the sharing server and the sharing client through a wireless LAN, are described below.Setting Up a Sharing Server 1Run Samsung Network Manager on the computer to be used as the sharing server.2Click the Add button.3Select a network location icon and enter the name of the location (e.g. Home). Click the Next button.4Select Internet direct Connection for sharing and click the Next button.5Set up the network device to be connected to the external Internet. Determine whether to use a firewall and select a network device to be connected to the external Internet (e.g. Wired LAN). Set the IP address and then click the Next button.](https://usermanual.wiki/Samsung-Electronics-Co/NP-Q1.Users-Manual-1a/User-Guide-641548-Page-53.png)
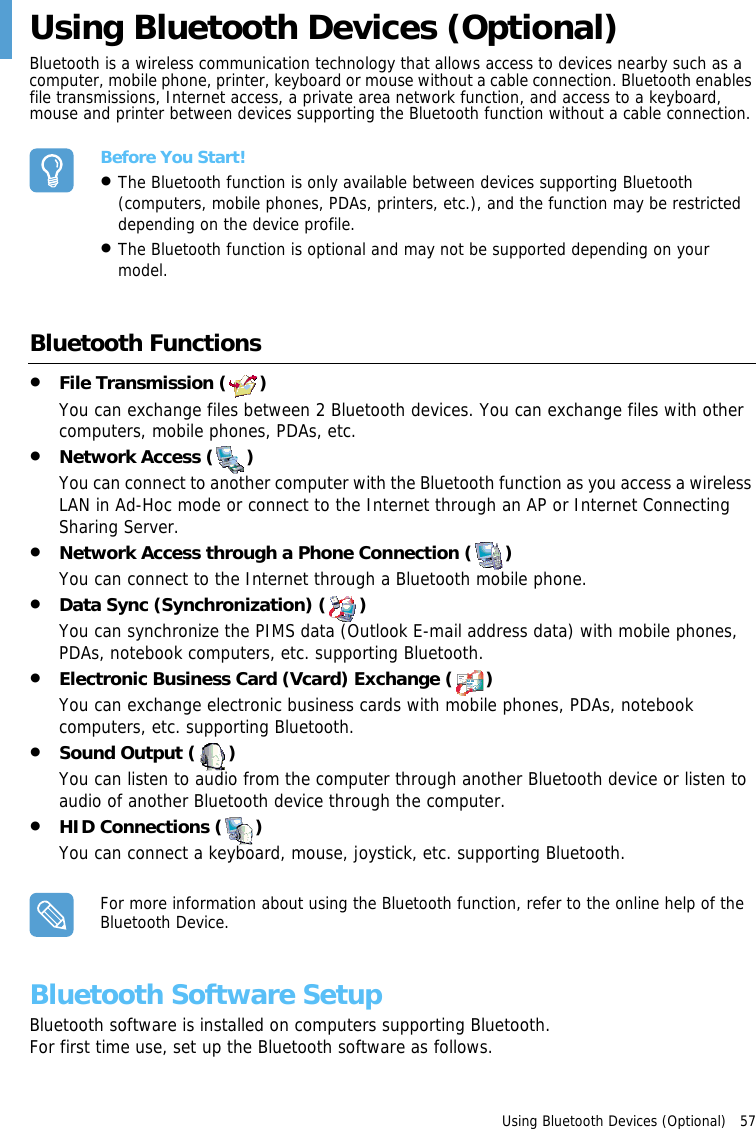
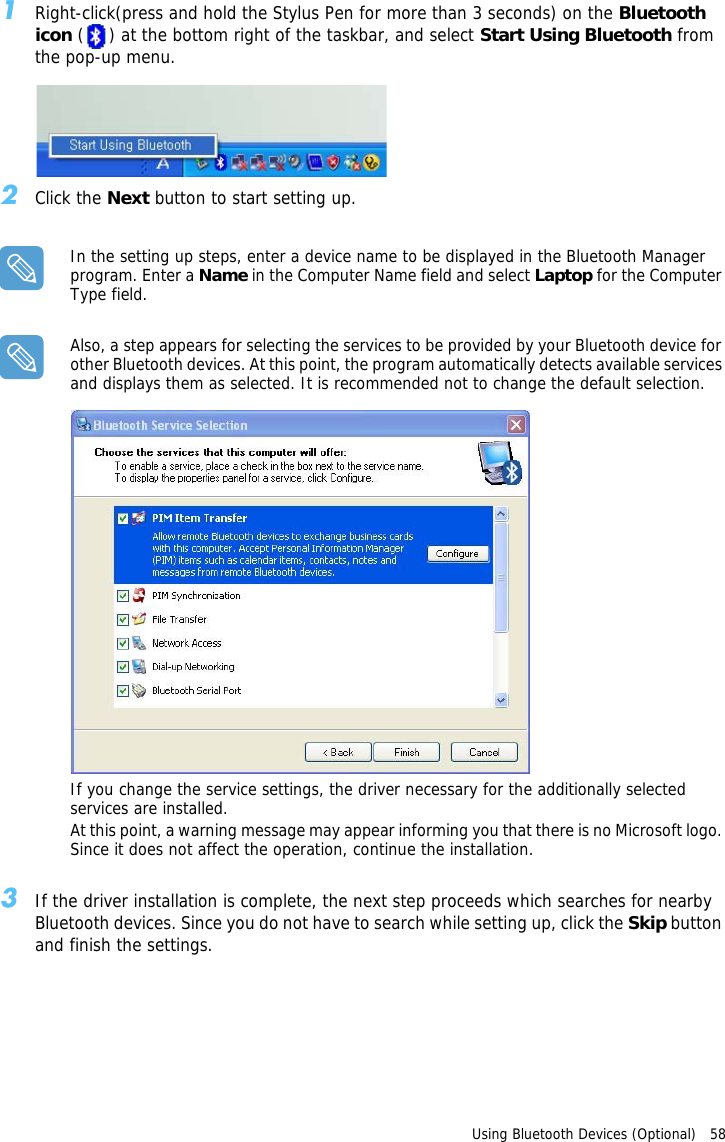
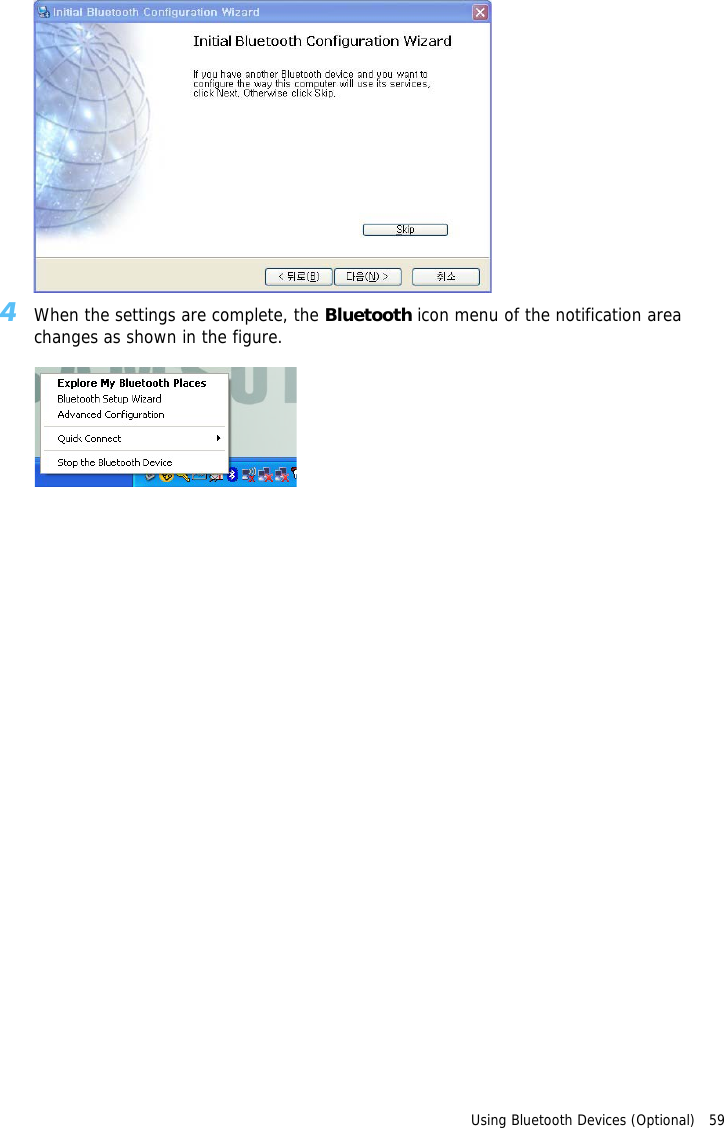
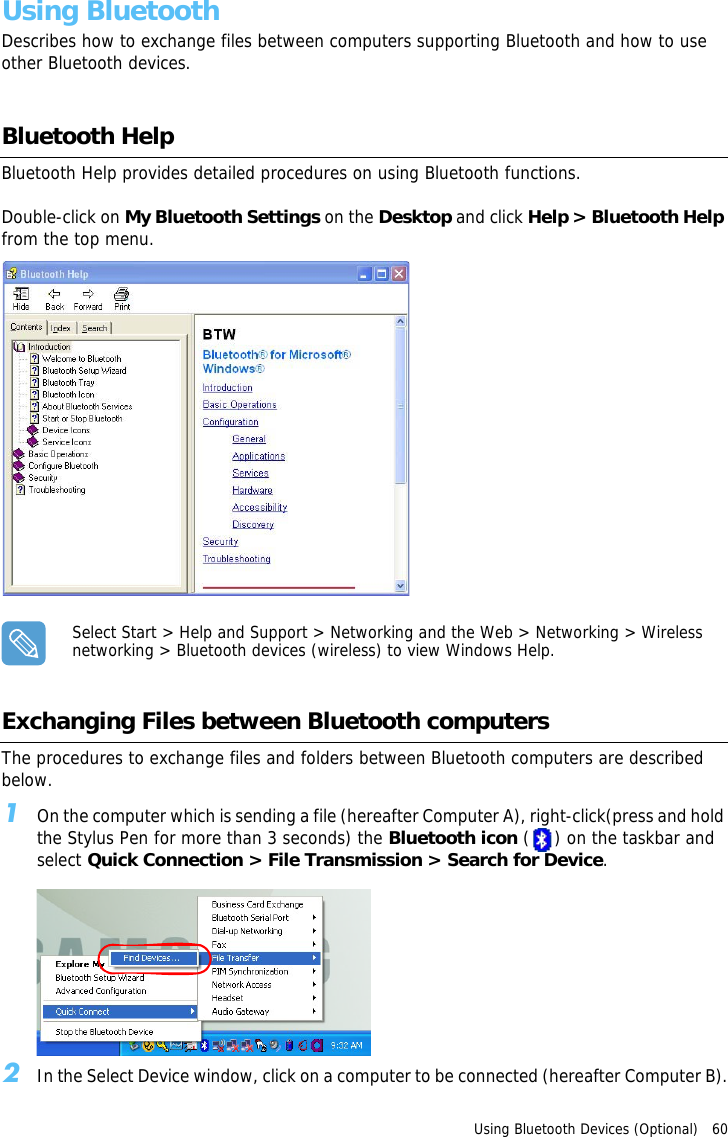
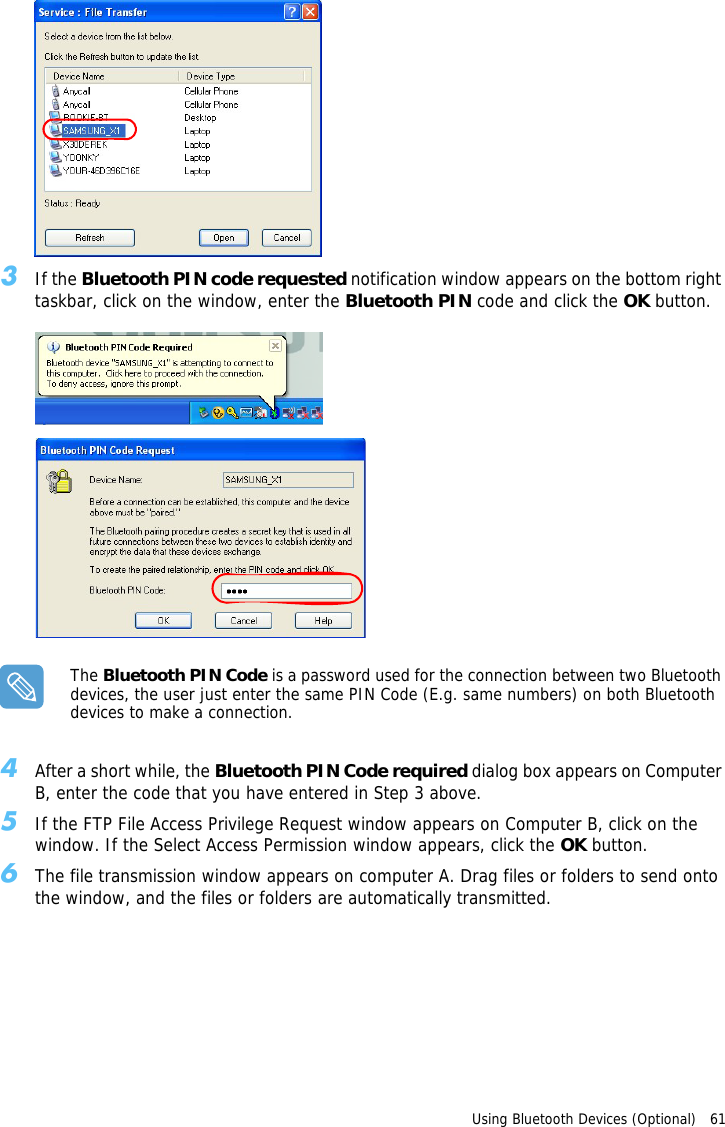
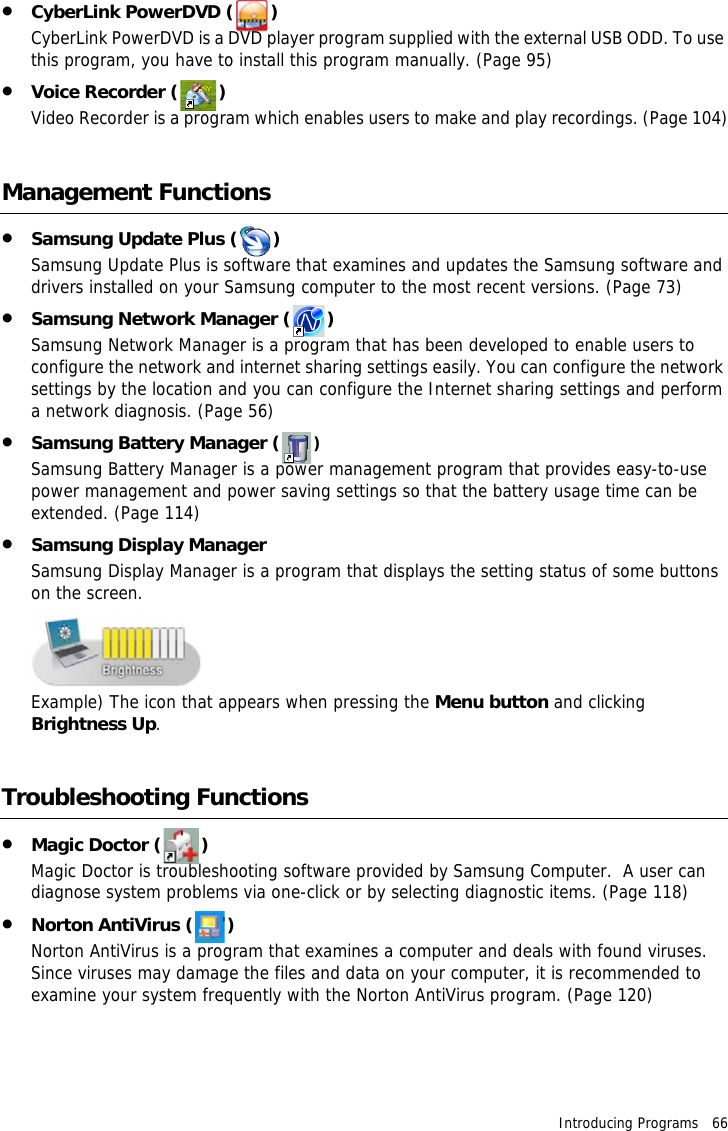
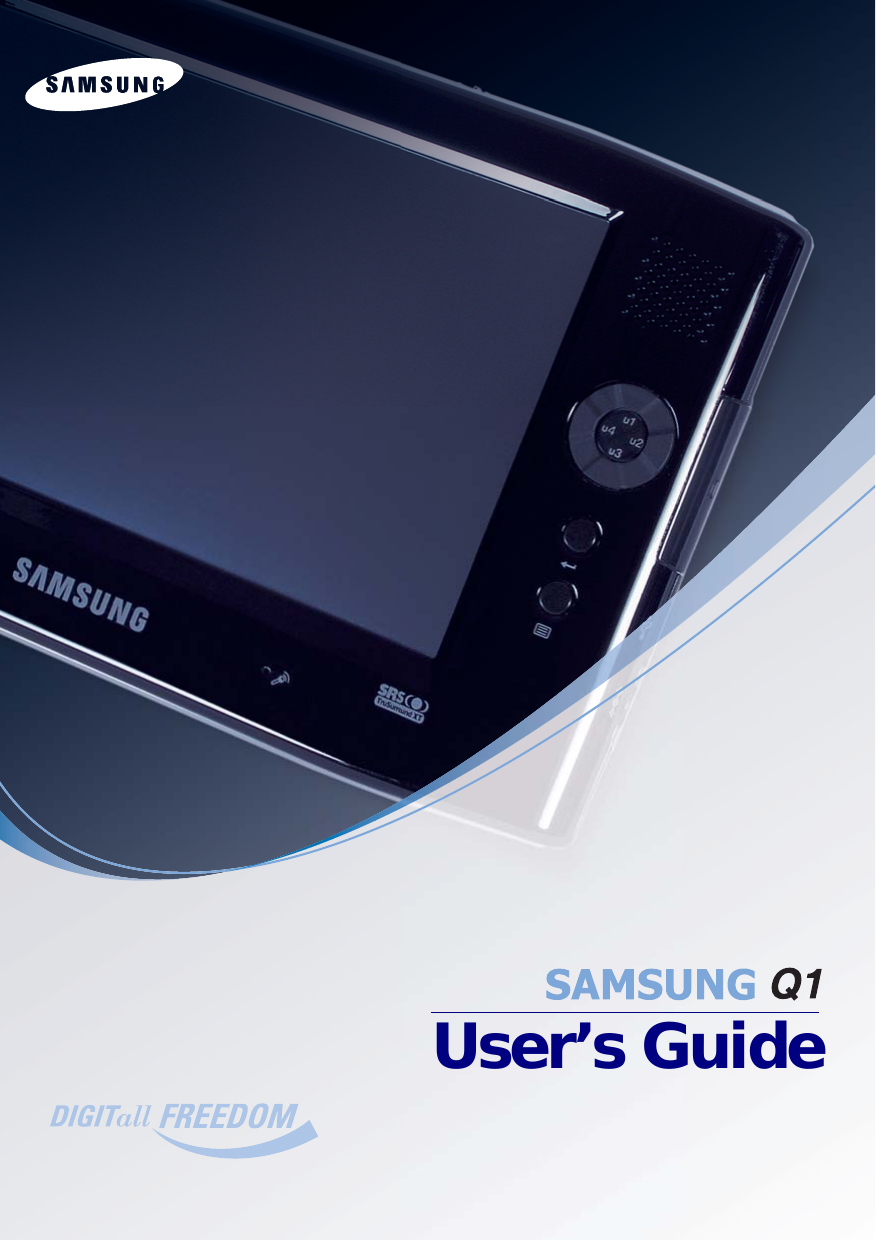
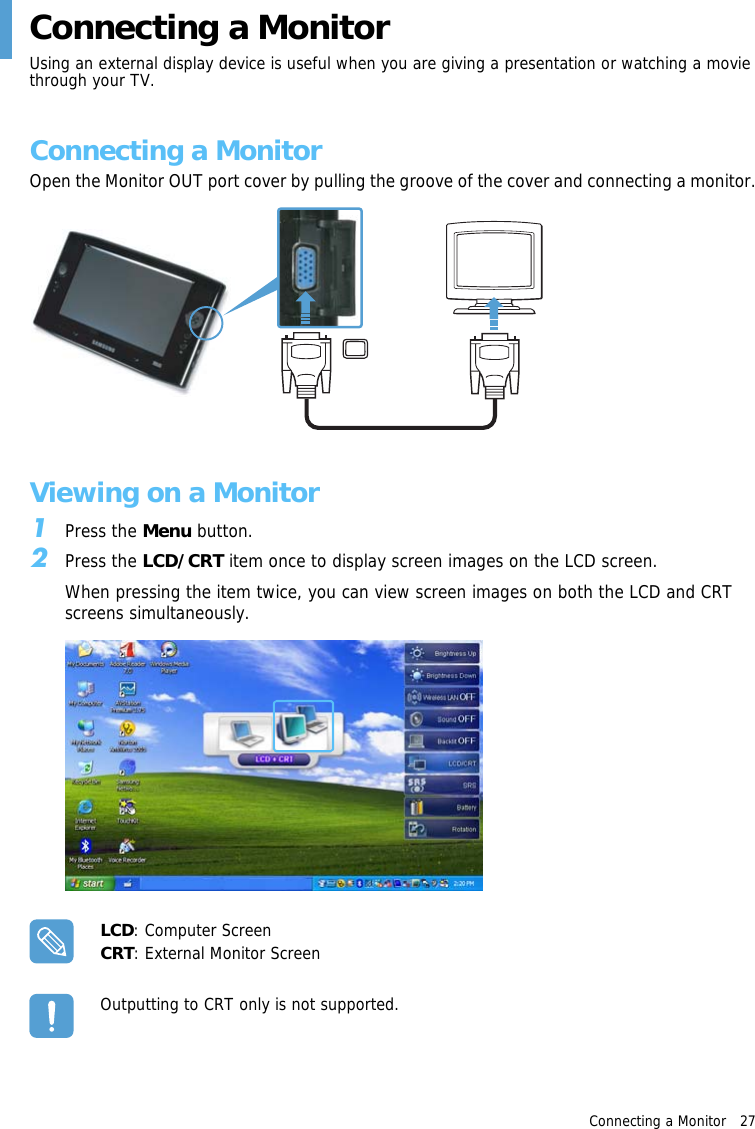
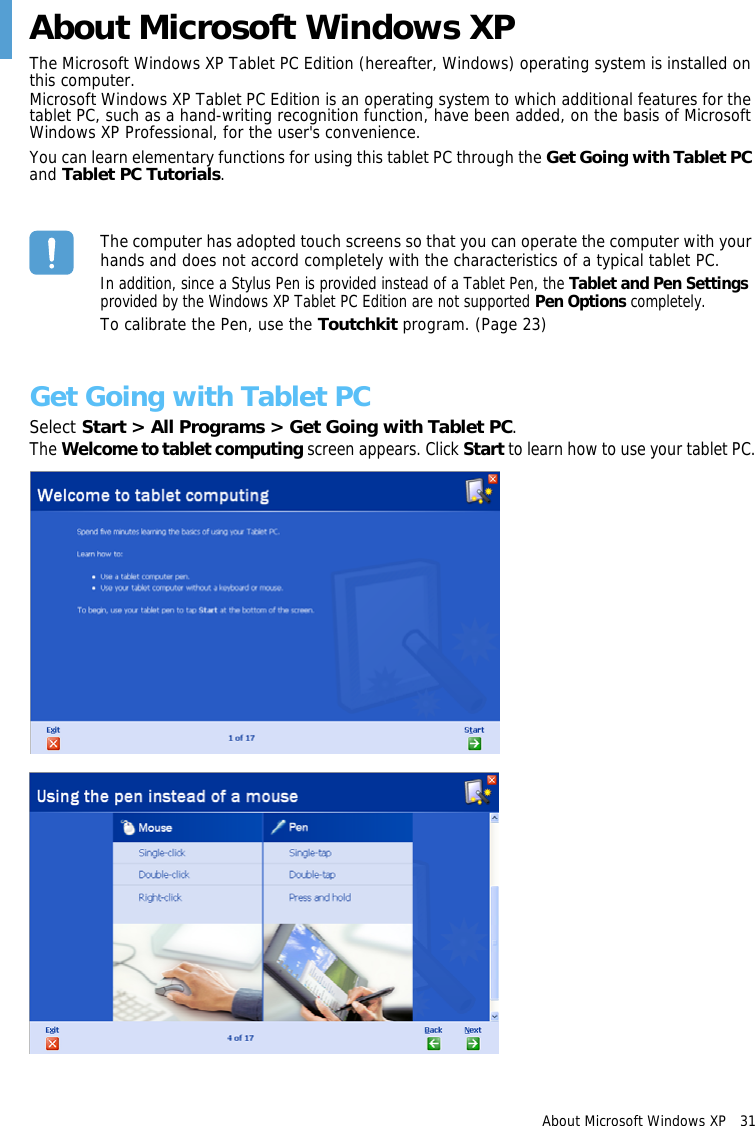
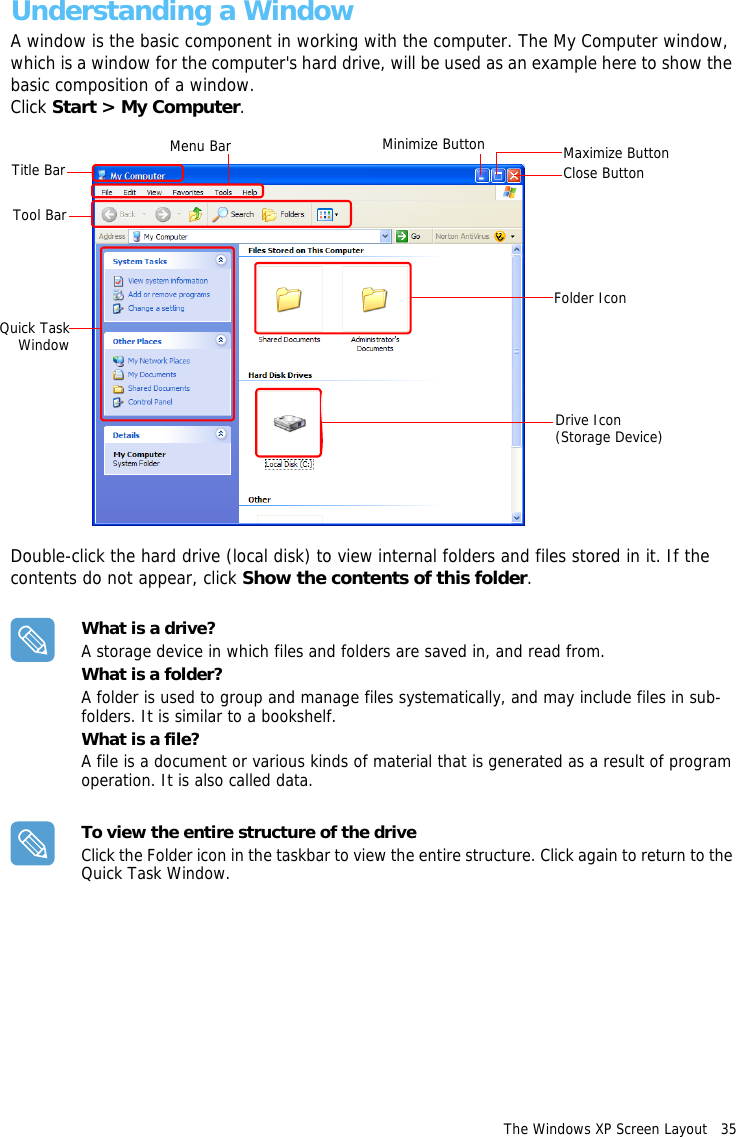
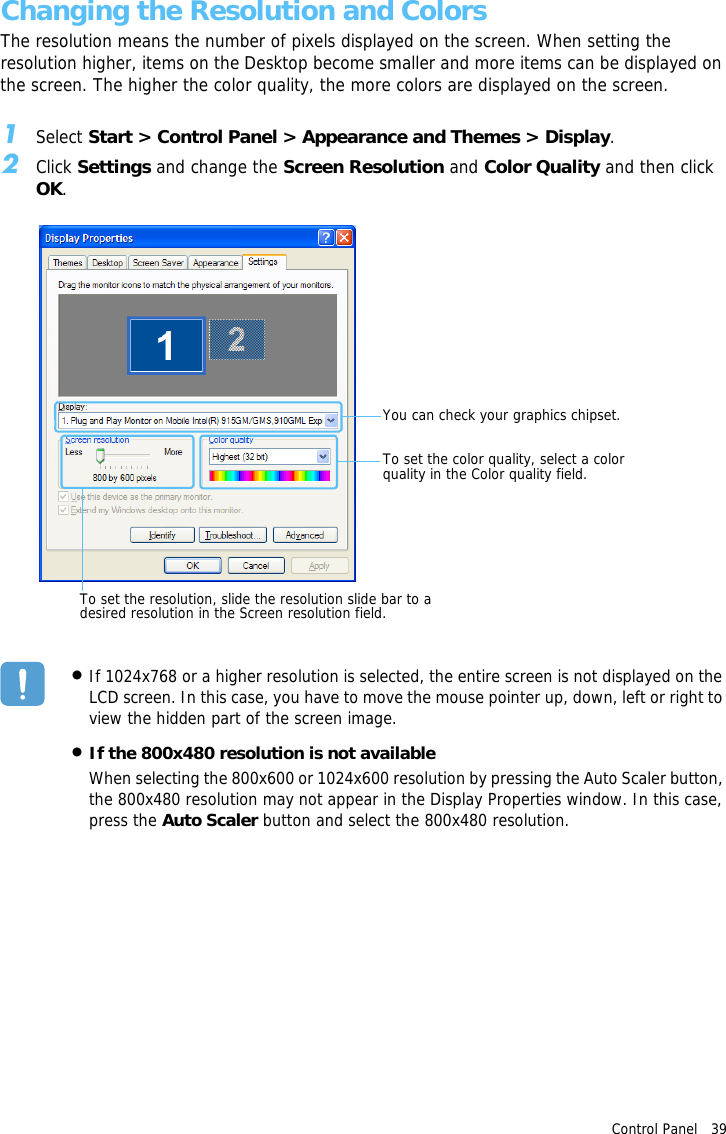
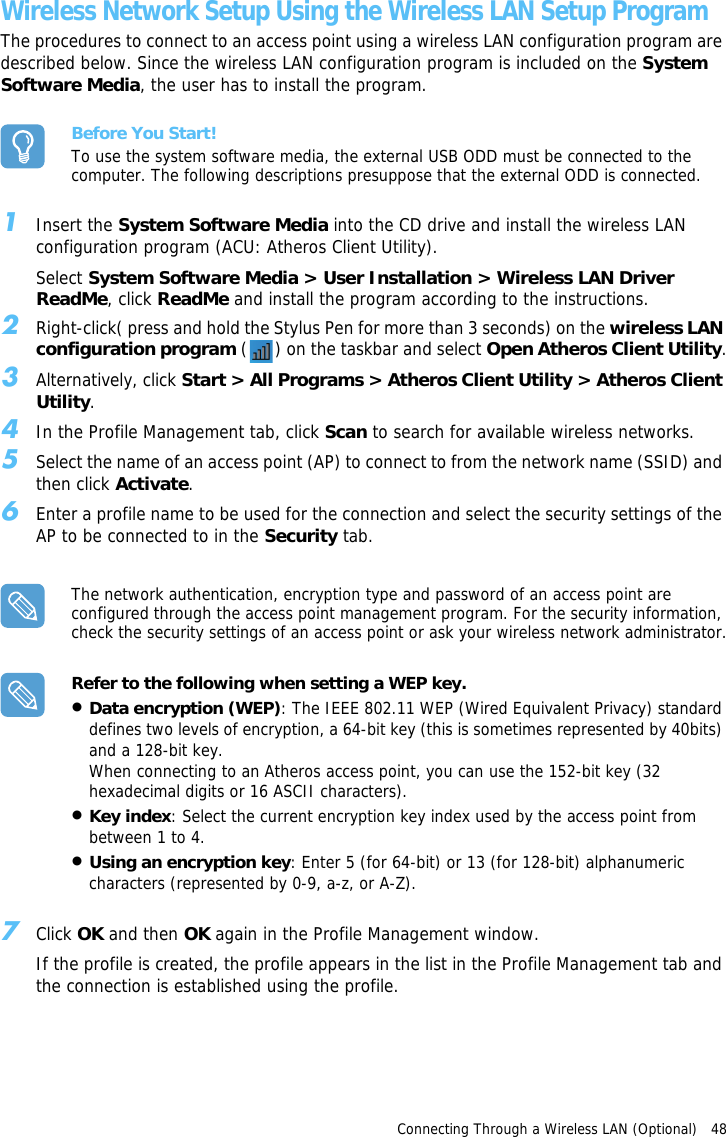
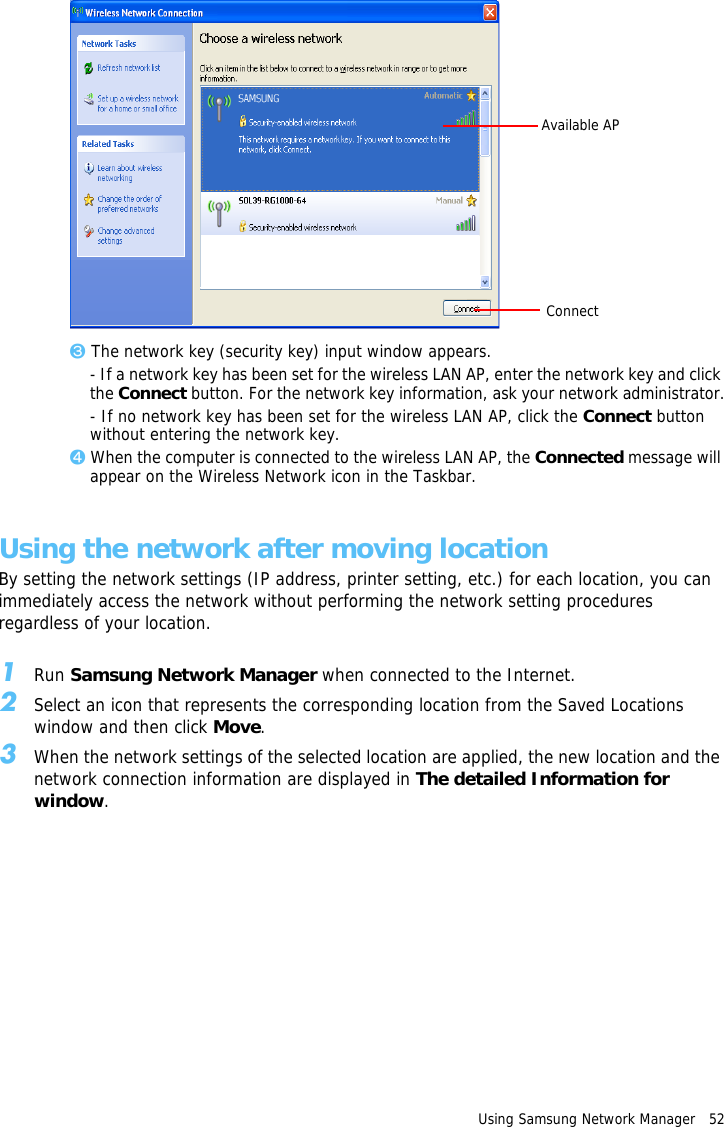
![Using Bluetooth Devices (Optional) 62 7If the file transmission is complete, close the File Transmission window.The received files are saved in the C:\Documents and Settings\[user name]\My Documents\Bluetooth Exchange folder.Connecting Keyboard, Mouse, Joystick and Headset devicesThe procedures to use Bluetooth HID devices (keyboard, mouse, joystick, etc.) or a headset, etc. on the computer are described below.The Bluetooth PIN Code is a password used for the connection between two Bluetooth devices, the user just enter the same PIN Code on both Bluetooth devices to make a connection.1Turn on the Bluetooth function on the device to connect to (mouse, keyboard, joystick or headset).Some devices have a button to turn on the Bluetooth function, so refer to the corresponding device manual.2Double-click on the My Bluetooth Settings icon ( ) on the Desktop.3If the My Bluetooth Settings window appears, click on View Devices within Coverage.If the device to connect to appears, click on the device. (E.g. mouse)If the device does not appear, click the View Devices within Coverage. If the device has not appeared yet, since this menu changes to Search Devices within Coverage, click the Search Devices within Coverage to show the device.](https://usermanual.wiki/Samsung-Electronics-Co/NP-Q1.Users-Manual-1a/User-Guide-641548-Page-62.png)