Samsung Electronics Co NP-Q1-C Notebook PC User Manual Samsung Q1b v1 0 English
Samsung Electronics Co Ltd Notebook PC Samsung Q1b v1 0 English
UserManual.wiki
>
Samsung Electronics Co
>
NP-Q1-C User Manual
>
Users Manual 1 of 2
Contents
1.
Users Manual 1 of 2
2.
Users Manual 2 of 2
Users Manual 1 of 2
Navigation menu
Upload a User Manual
Namespaces
Wiki Guide
HTML
PDF
Info
Views
User Manual
Discussion / Help
Navigation

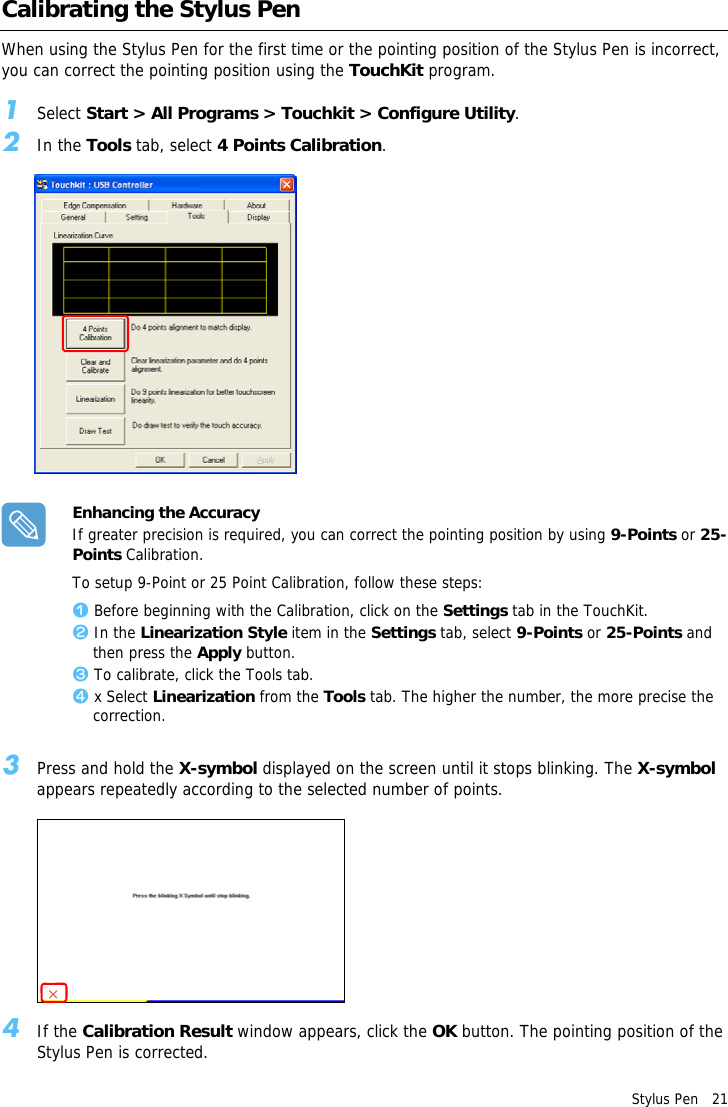
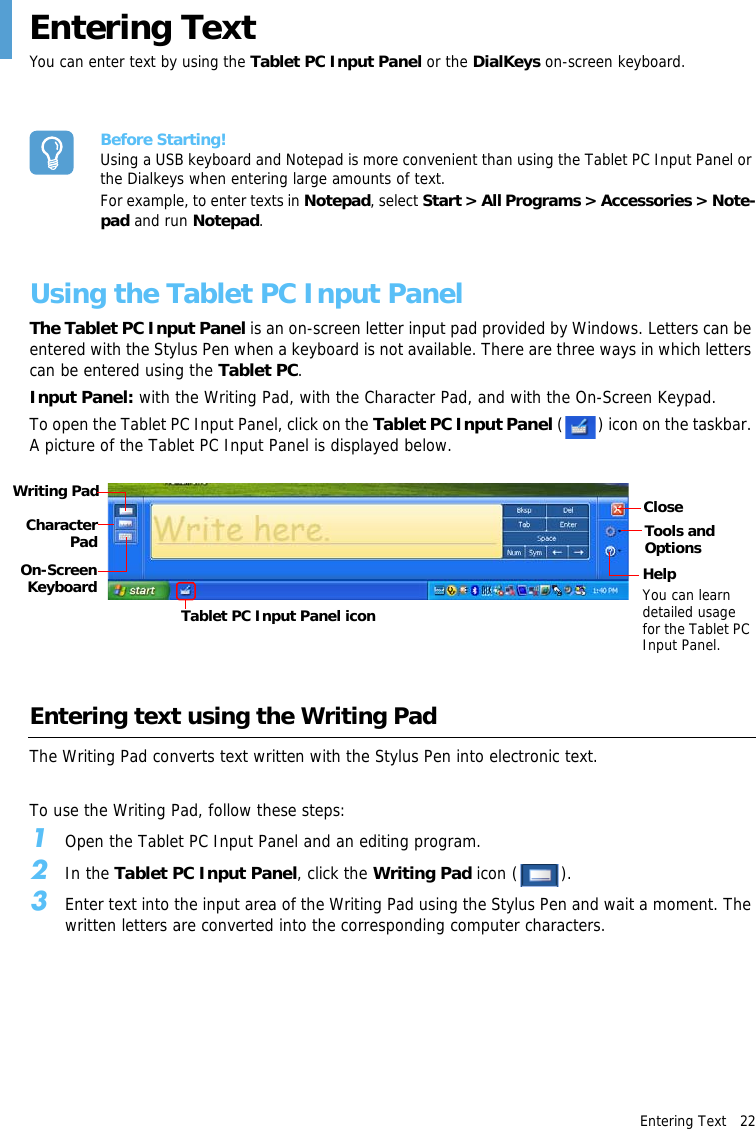


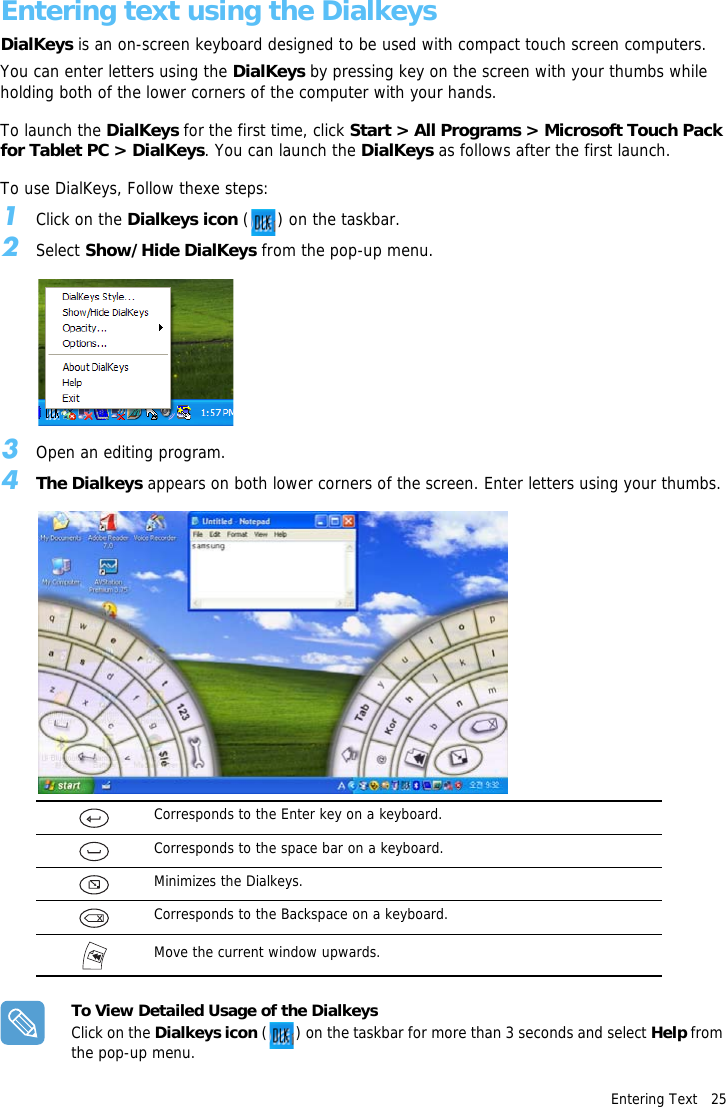
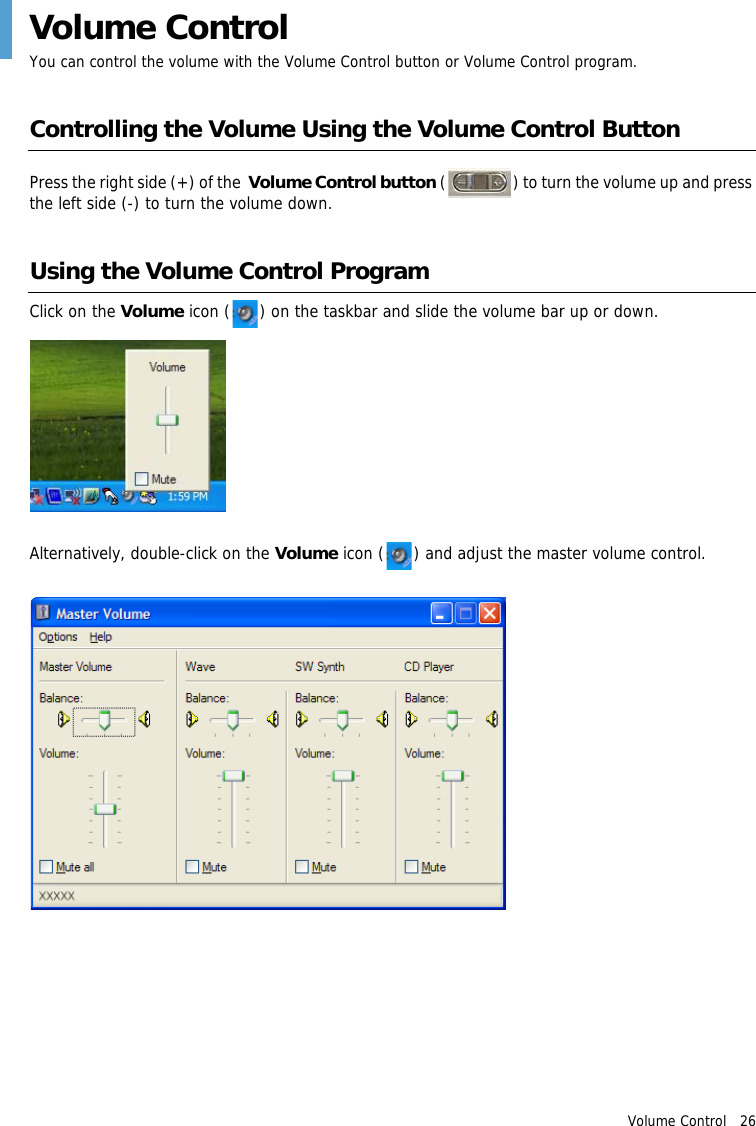


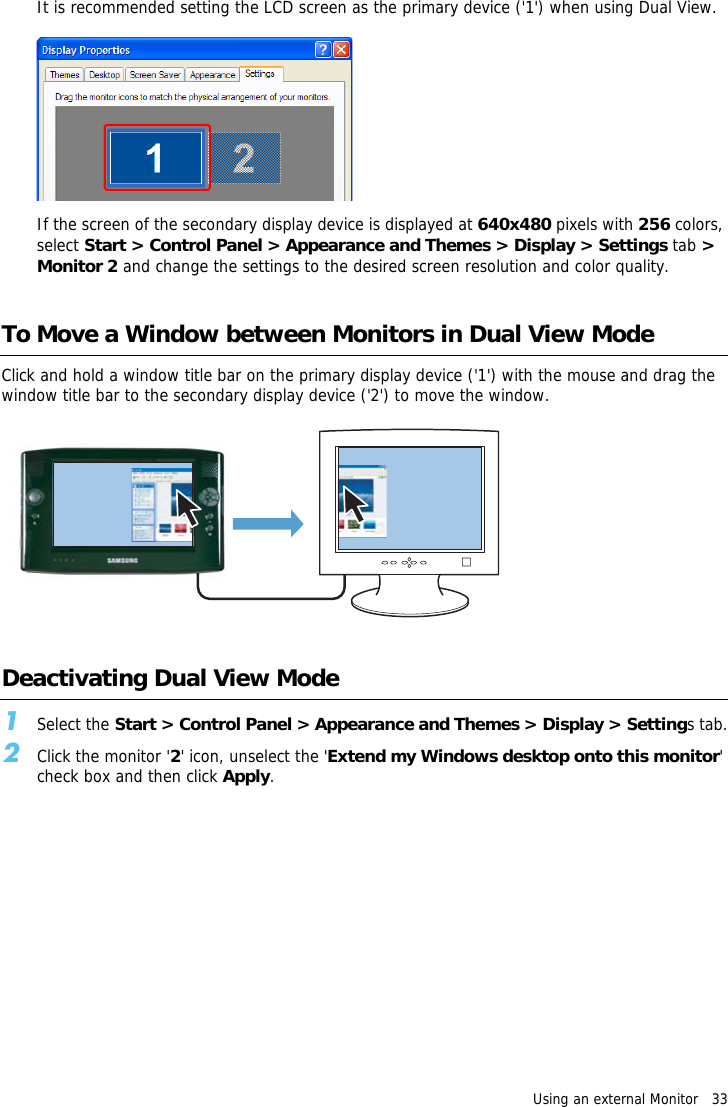

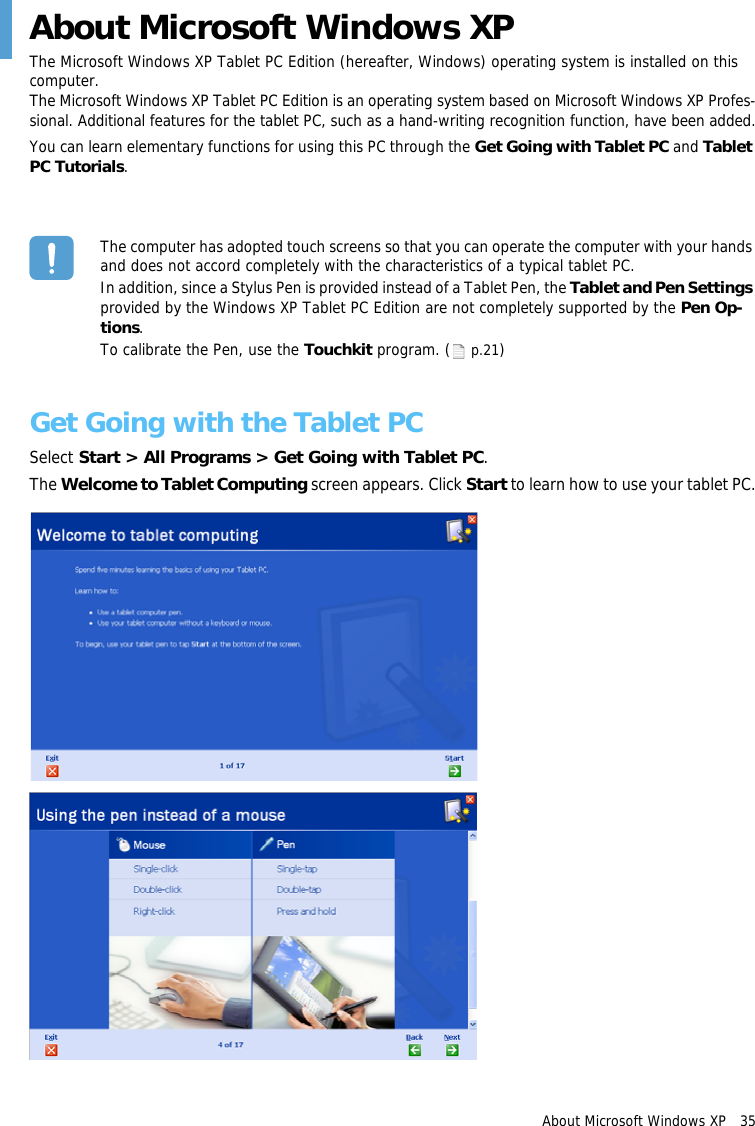
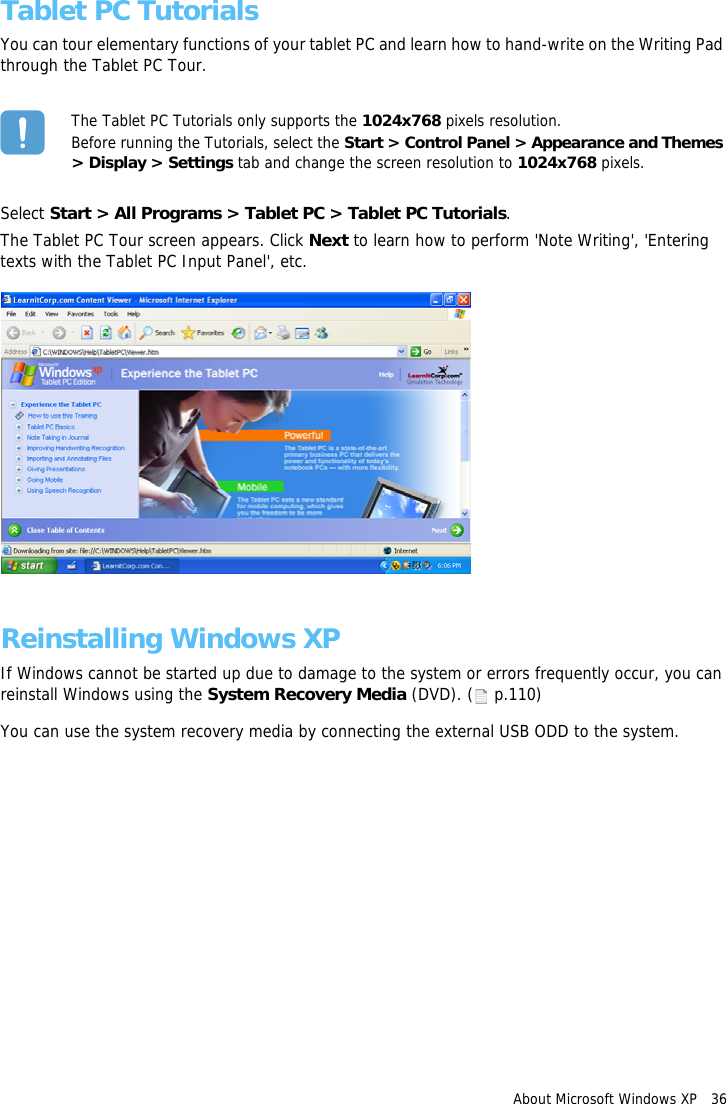
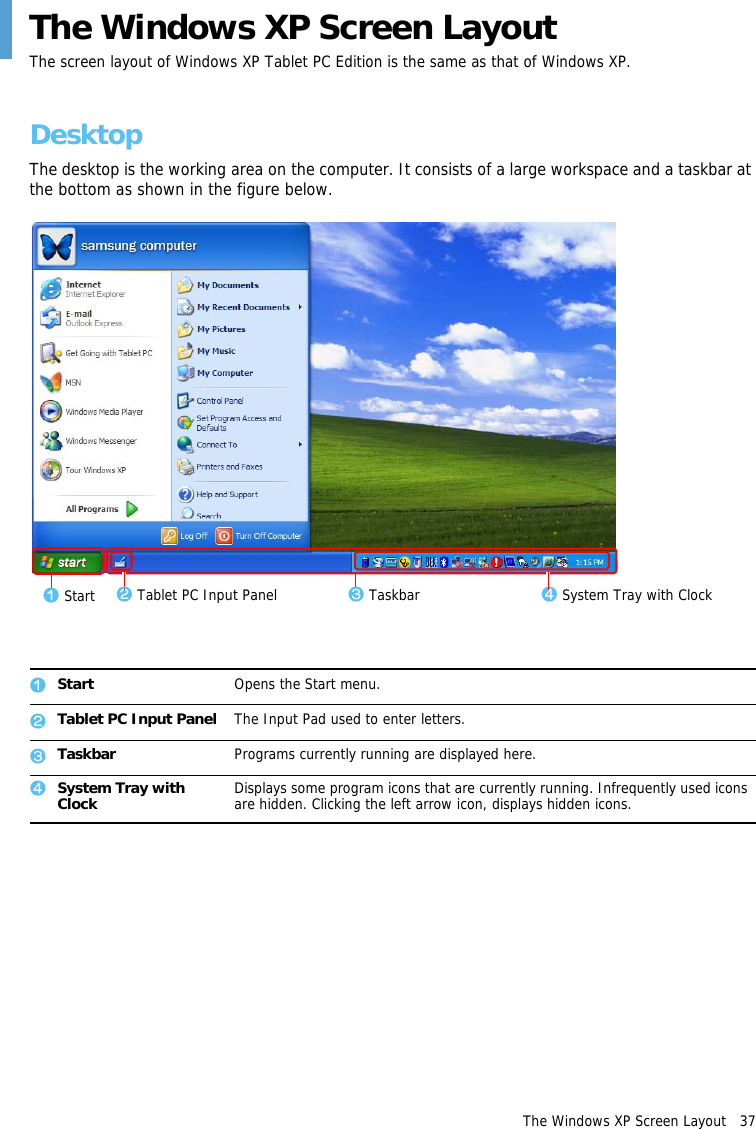
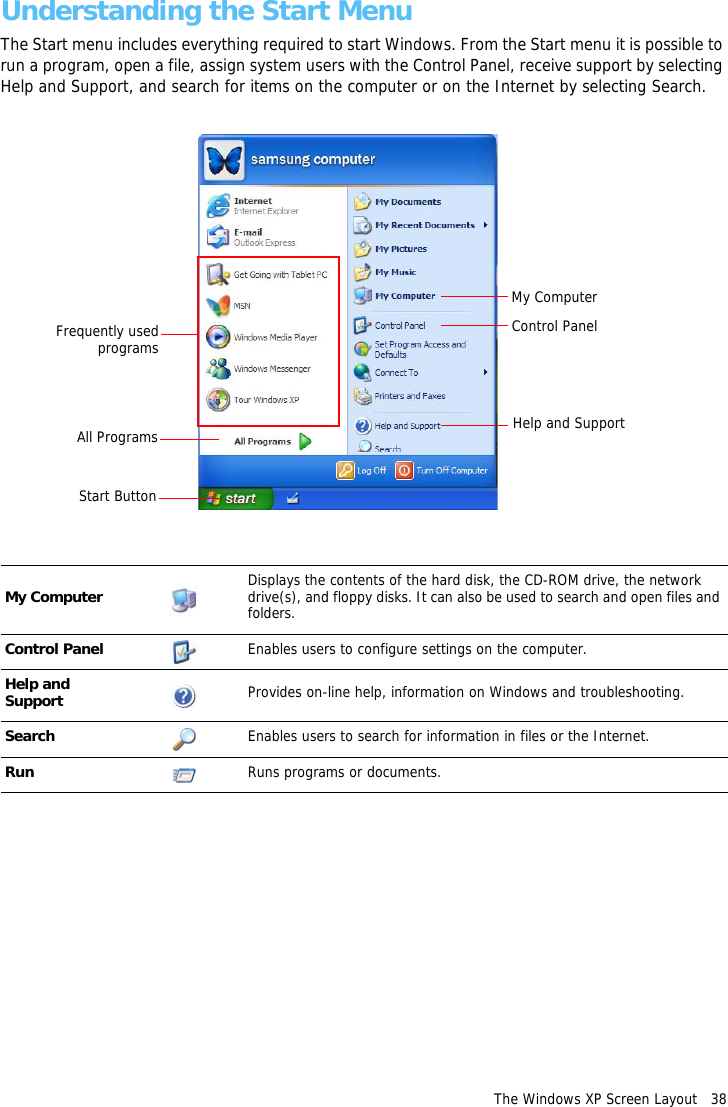
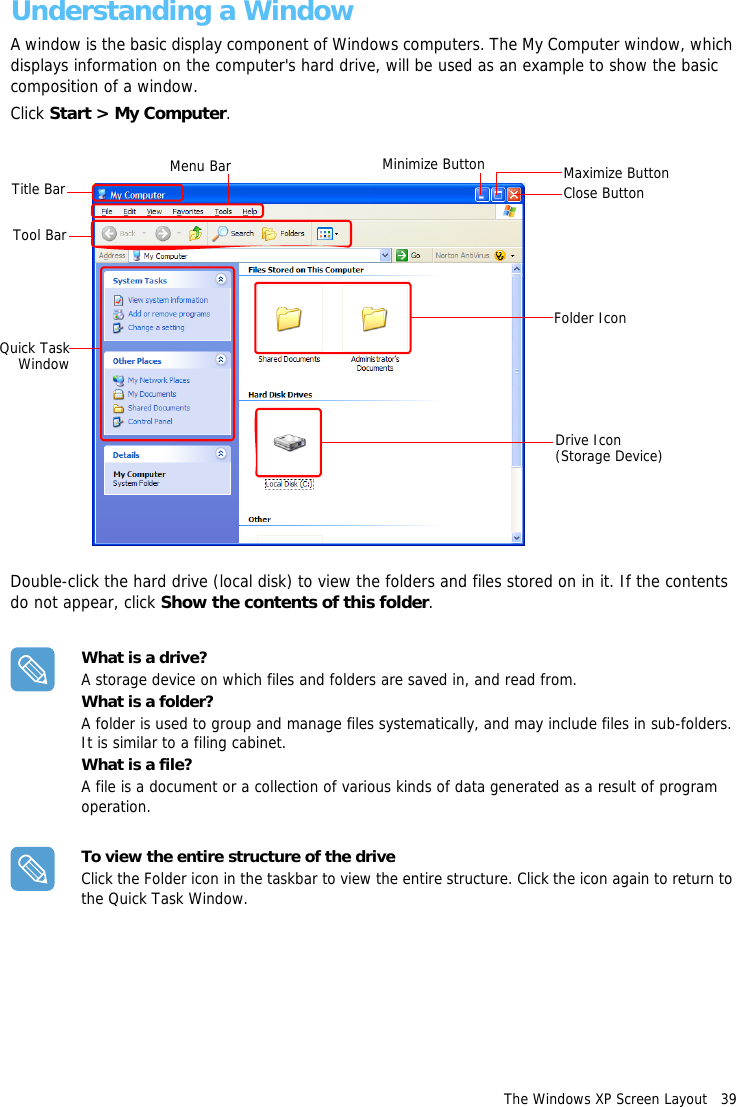
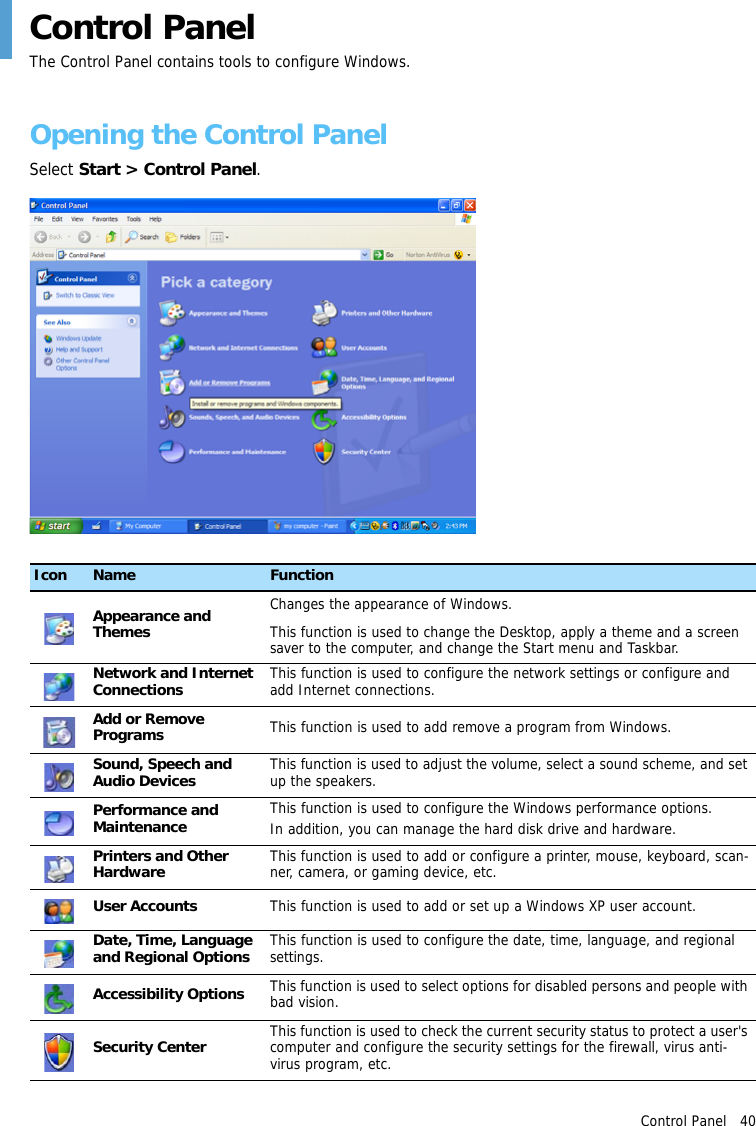
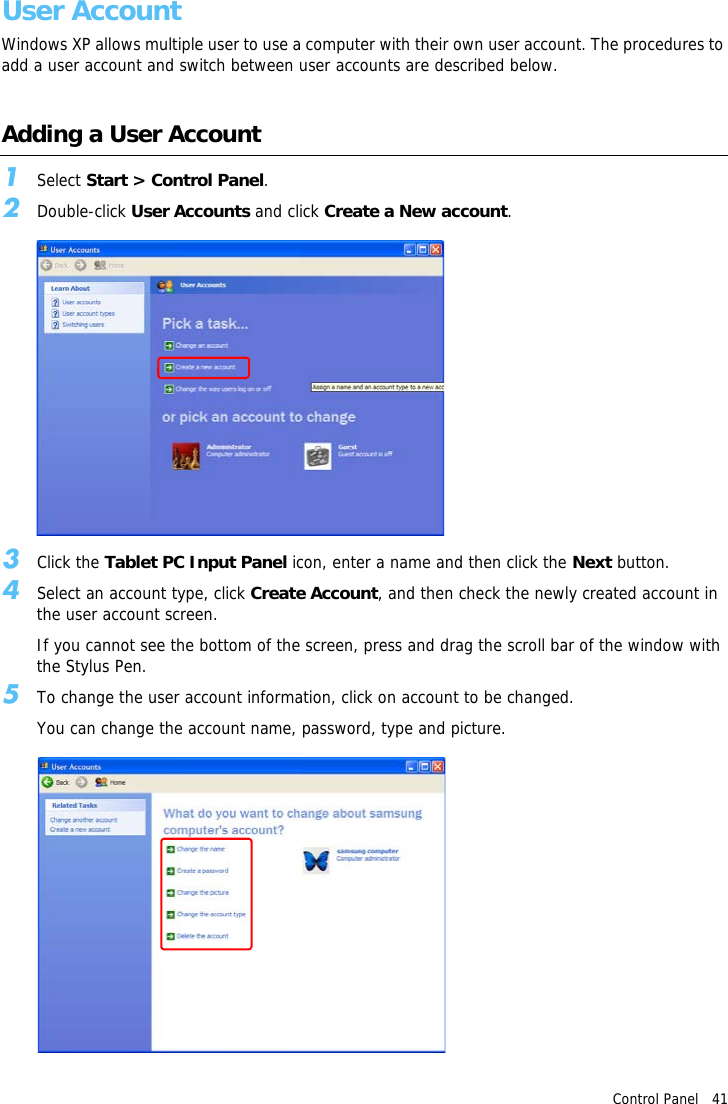
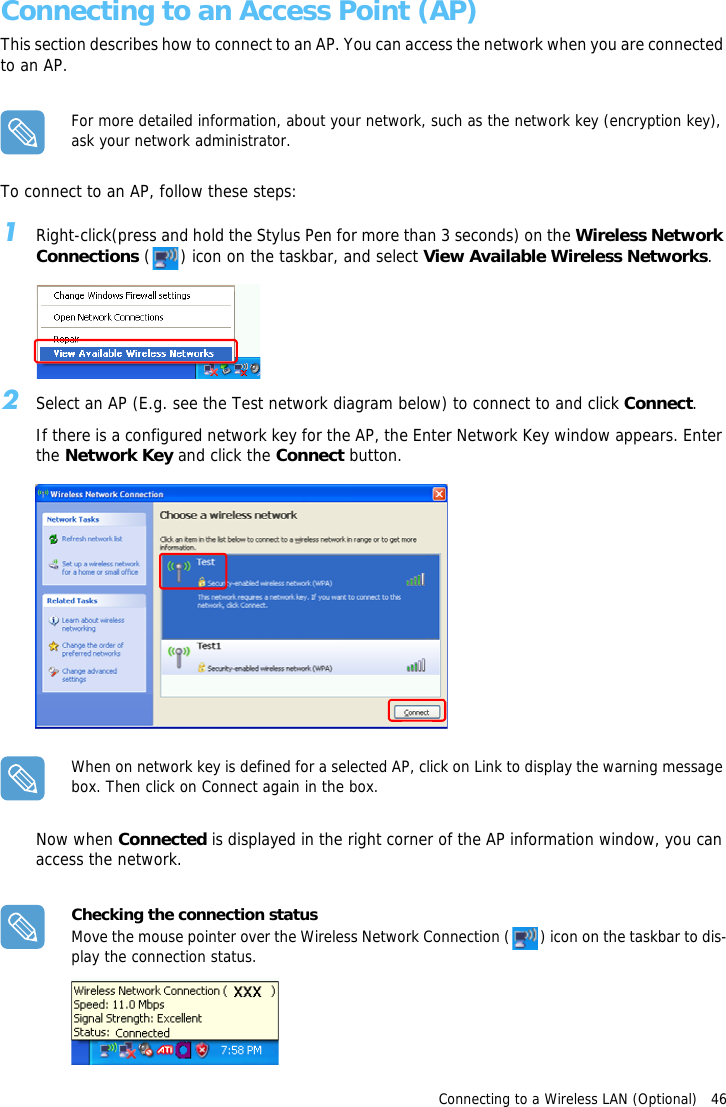
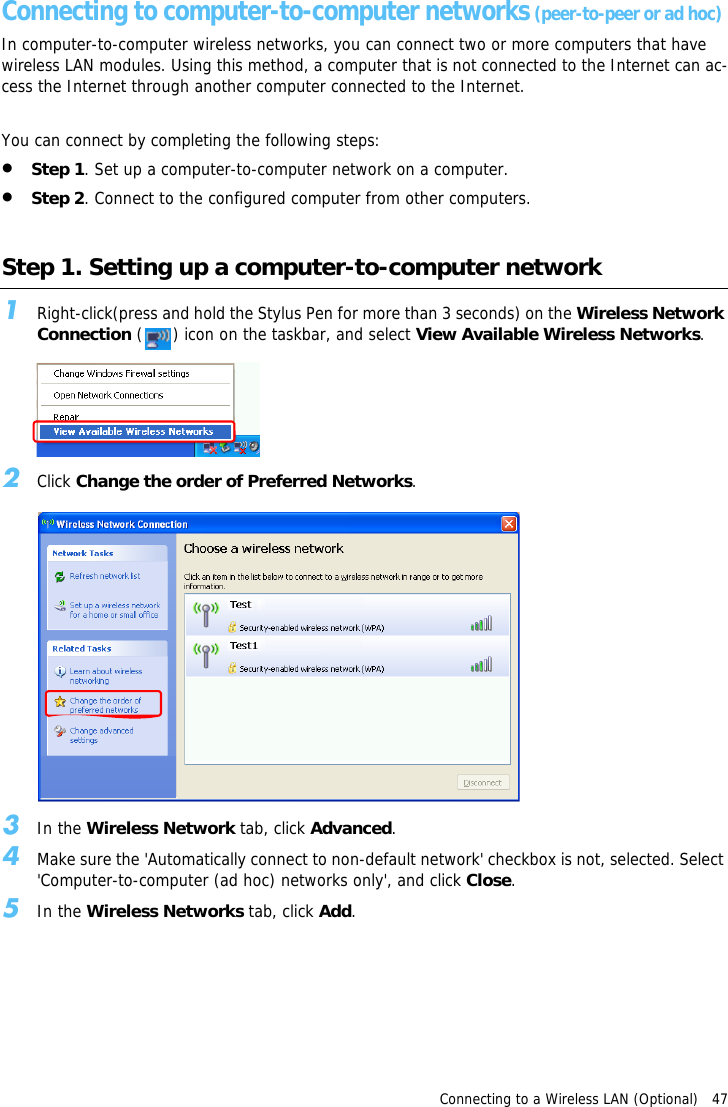
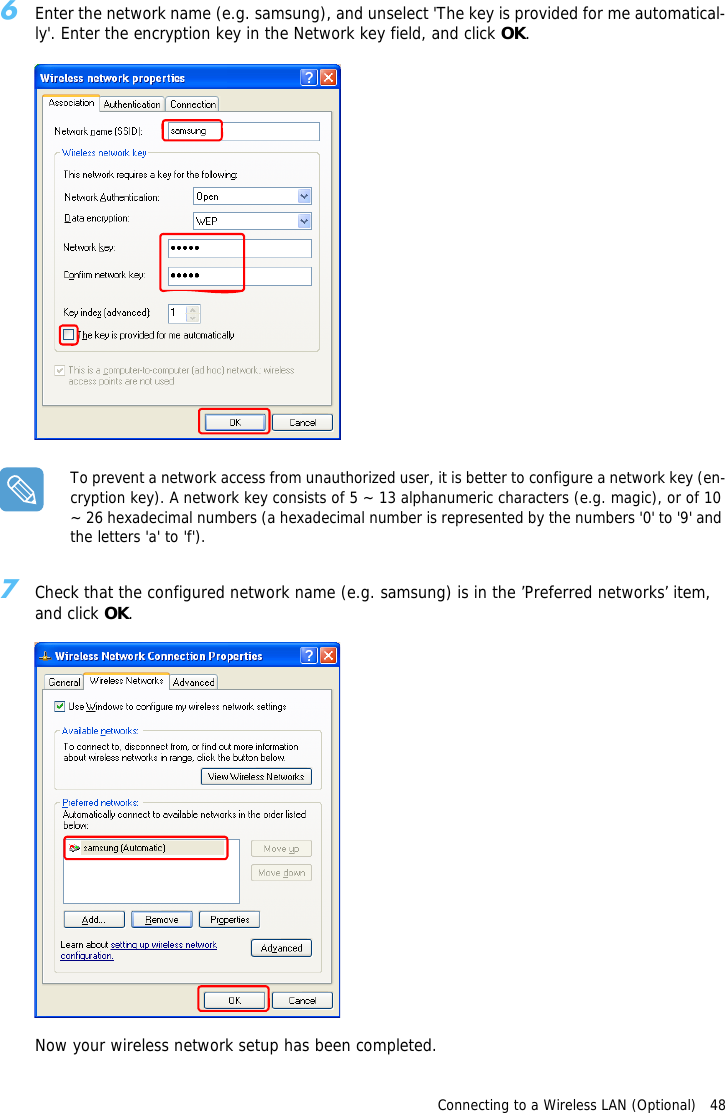
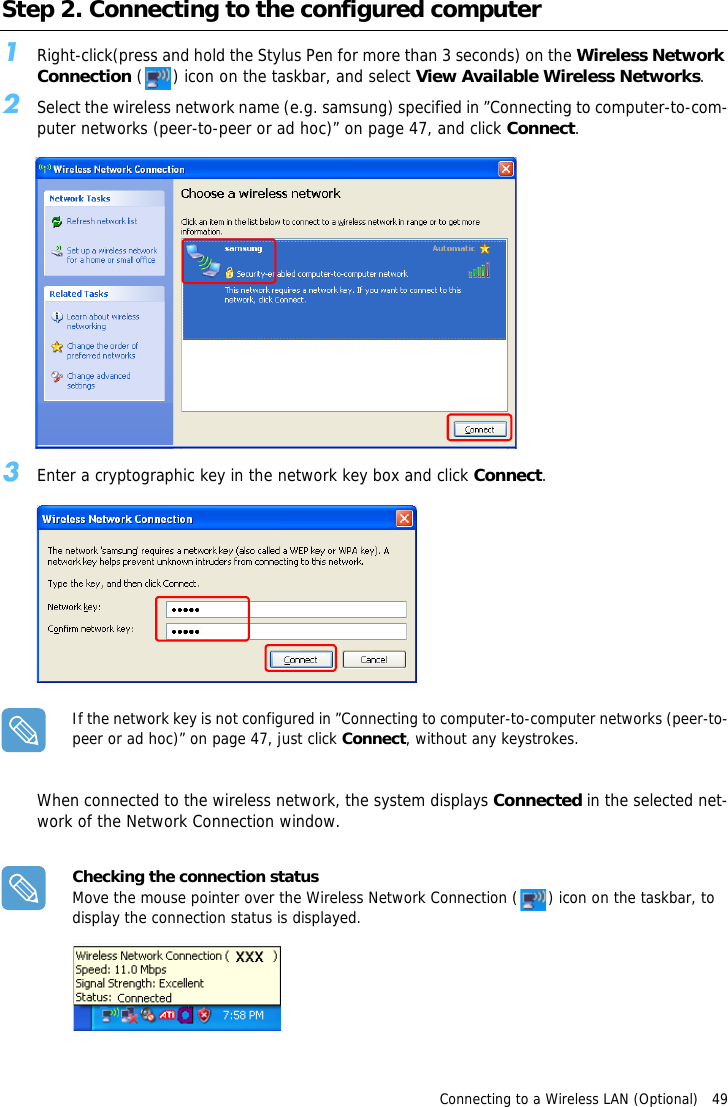
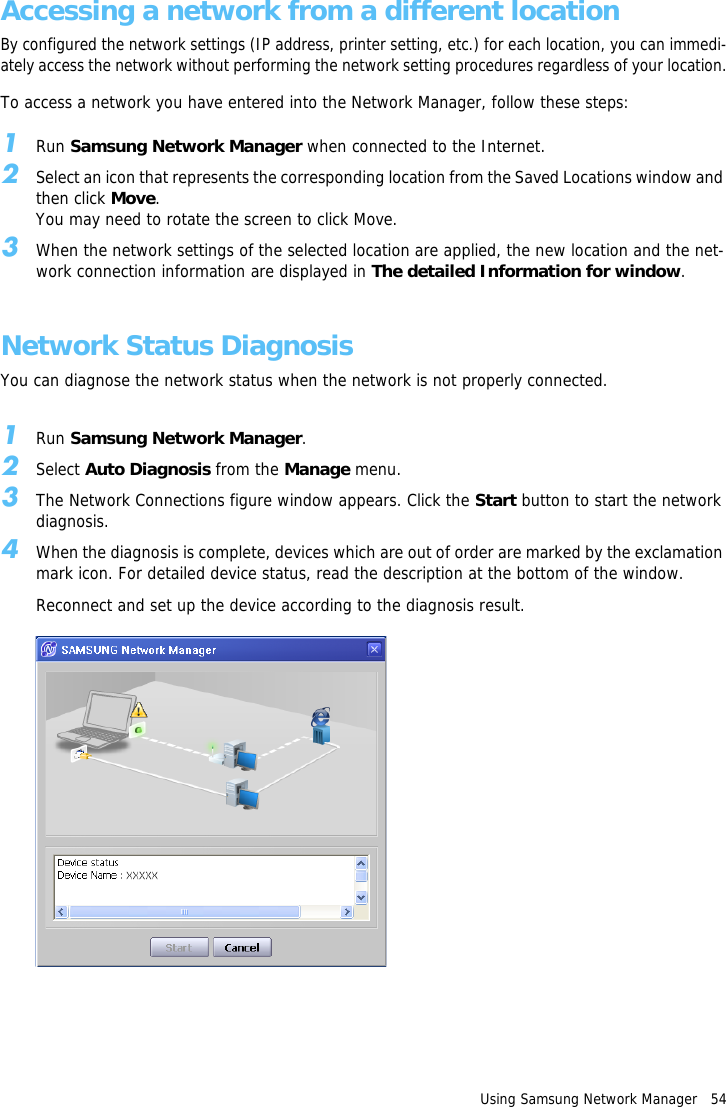
![Using Bluetooth Devices (Optional) 606The file transmission window appears on computer A. Drag files or folders to send onto the window, and the files or folders are automatically transmitted.7If the file transmission is complete, close the File Transmission window.The received files are saved in the C:\Documents and Settings\[user name]\My Docu-ments\Bluetooth Exchange folder.Connecting Keyboard, Mouse, Joystick and Headset devicesThe procedures to use Bluetooth HID devices (keyboard, mouse, joystick, etc.) or a headset, etc. on the computer are described below.The Bluetooth PIN Code is a password used for the connection between two Bluetooth devices, the user simply enters the same PIN Code on both Bluetooth devices to make a connection.1Turn on the Bluetooth function on the device to connect to (mouse, keyboard, joystick or head-set).Some devices have a button to turn on the Bluetooth function, so refer to the corresponding device manual.2Double-click on the My Bluetooth Settings icon ( ) on the Desktop.3If the My Bluetooth Settings window appears, click on View Devices within Coverage.If the device to connect to appears, click on the device. (E.g. mouse)](https://usermanual.wiki/Samsung-Electronics-Co/NP-Q1-C.Users-Manual-1-of-2/User-Guide-680321-Page-60.png)