Samsung Electronics Co NX1 Digital camera User Manual 1 of 3
Samsung Electronics Co Ltd Digital camera 1 of 3
UserManual.wiki
>
Samsung Electronics Co
>
NX1 User Manual
>
User manual 1 of 3
Contents
1.
User manual 1 of 3
2.
User manual 2 of 3
3.
User manual 3 of 3
User manual 1 of 3
Navigation menu
Upload a User Manual
Namespaces
Wiki Guide
HTML
PDF
Info
Views
User Manual
Discussion / Help
Navigation
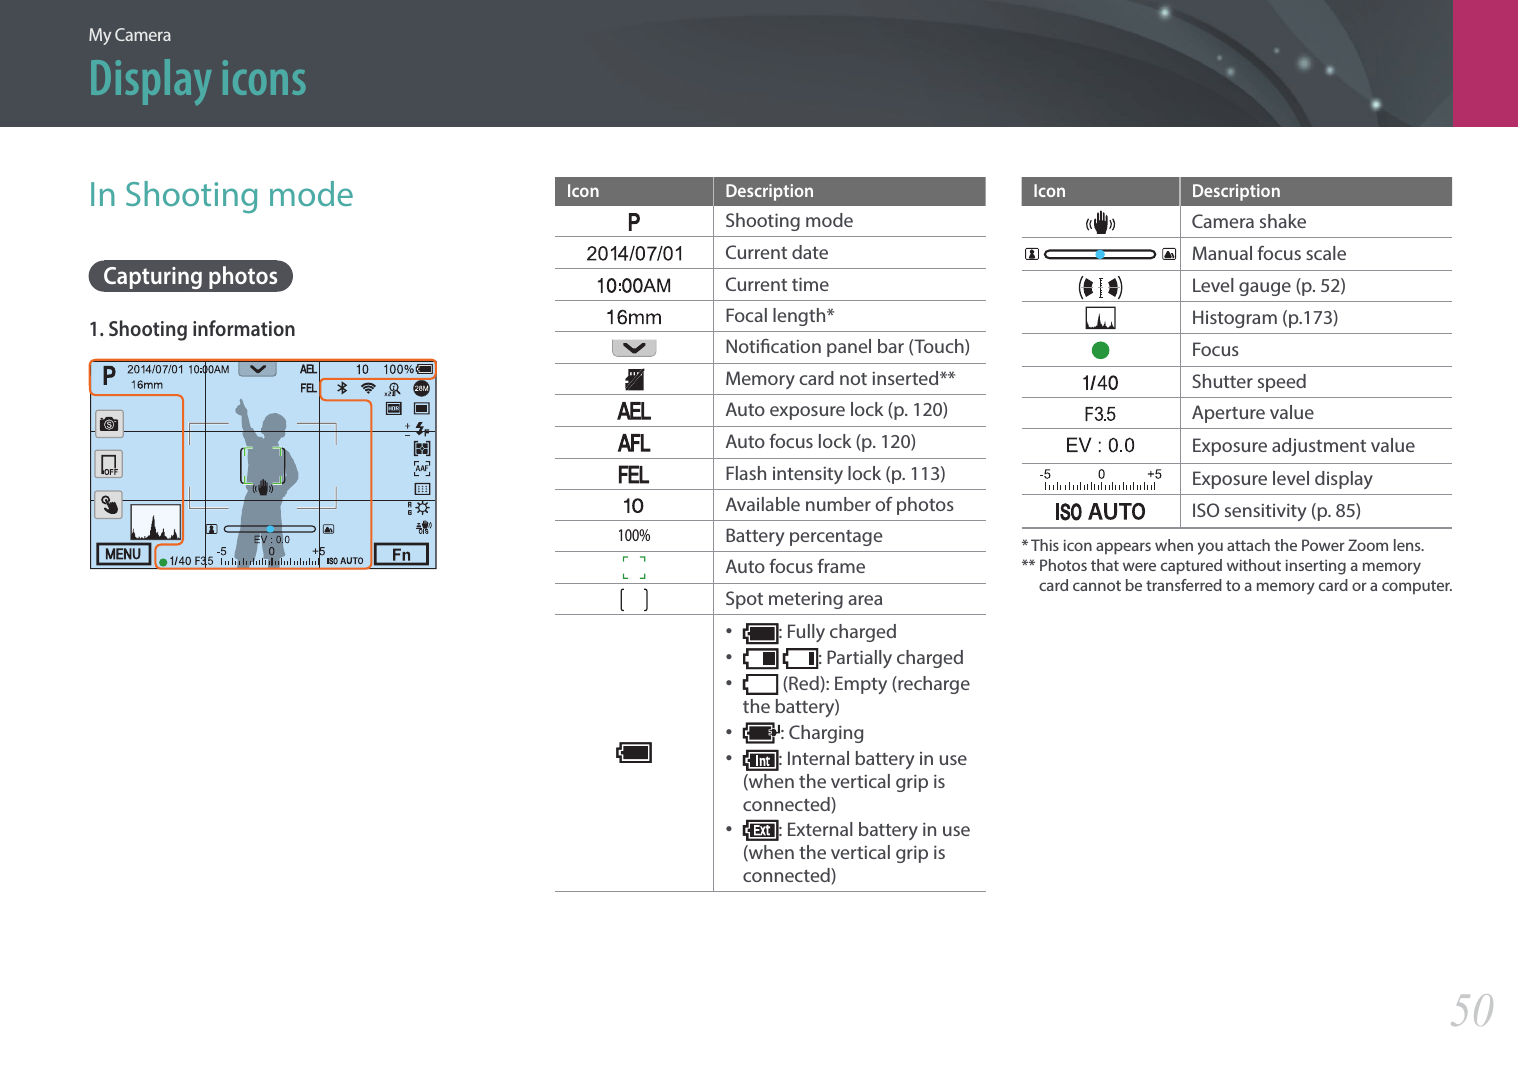
![7Indications used in this manualMode indicationsMode IndicationSmart Auto tProgram PAperture PriorityAShutter PrioritySManualMCustom1TCustom2USmartsIcons used in this manualIcon FunctionAdditional informationSafety warnings and precautions[ ]Camera buttons. For example, [Shutter] represents the shutter button.( )Page number of related information→The order of options or menus you must select to perform a step; for example: Select b → Quality (represents select b, and then Quality). *Annotation](https://usermanual.wiki/Samsung-Electronics-Co/NX1.User-manual-1-of-3/User-Guide-2394046-Page-8.png)


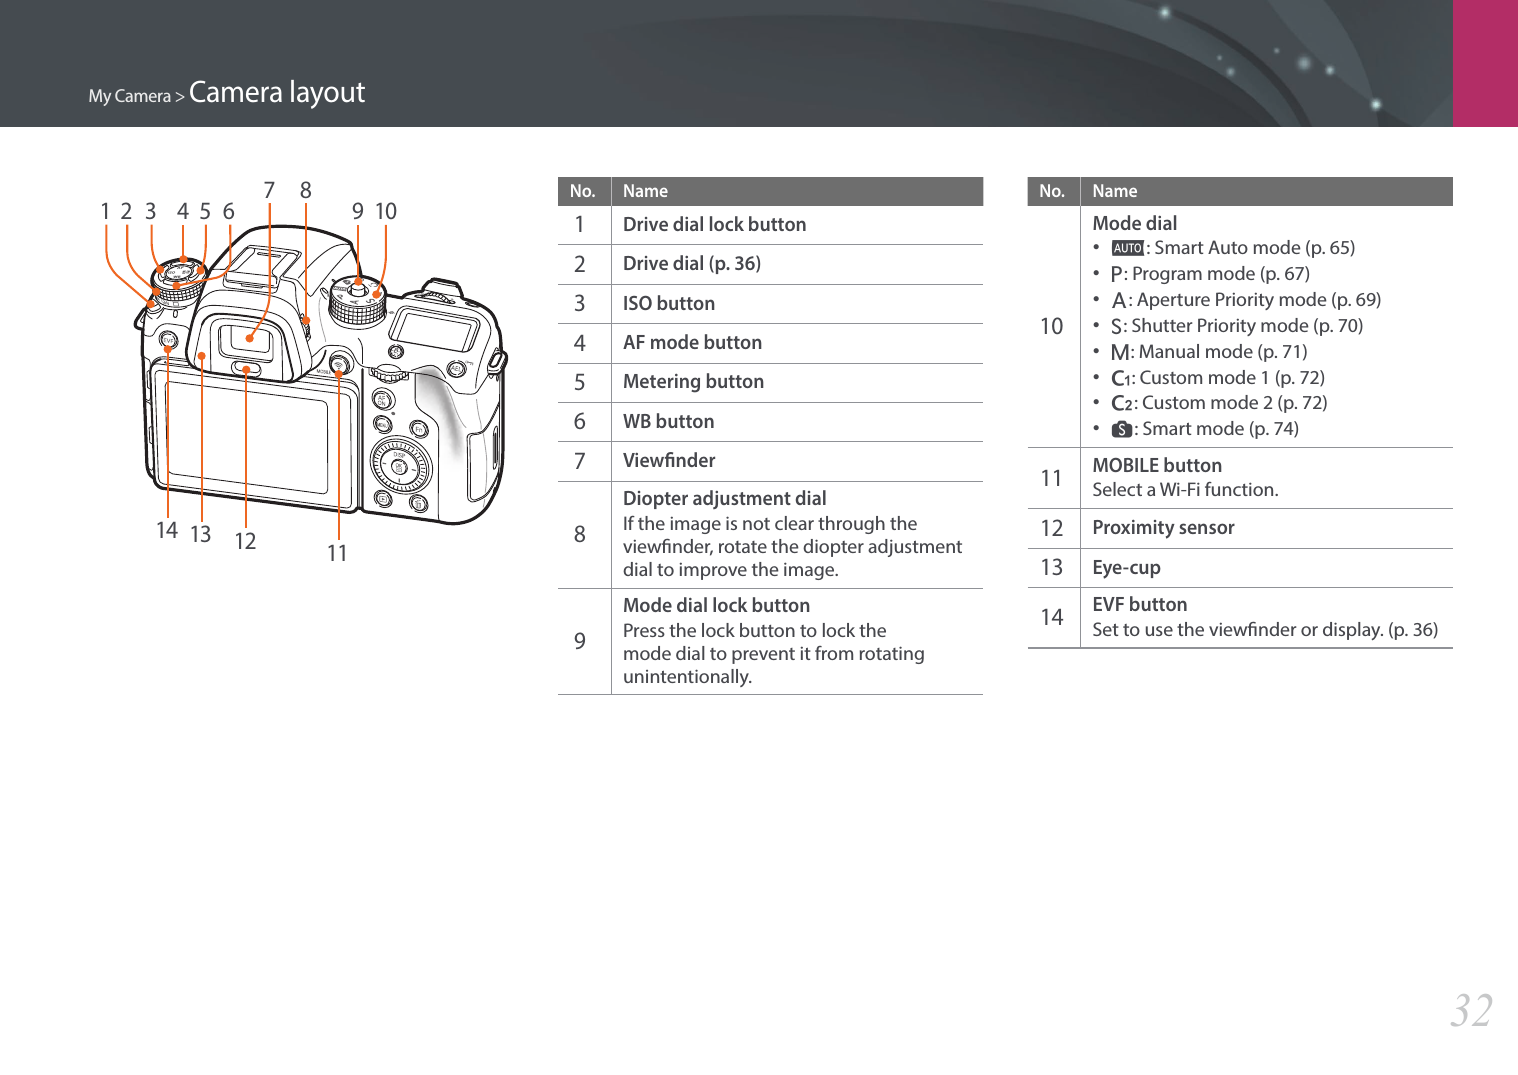
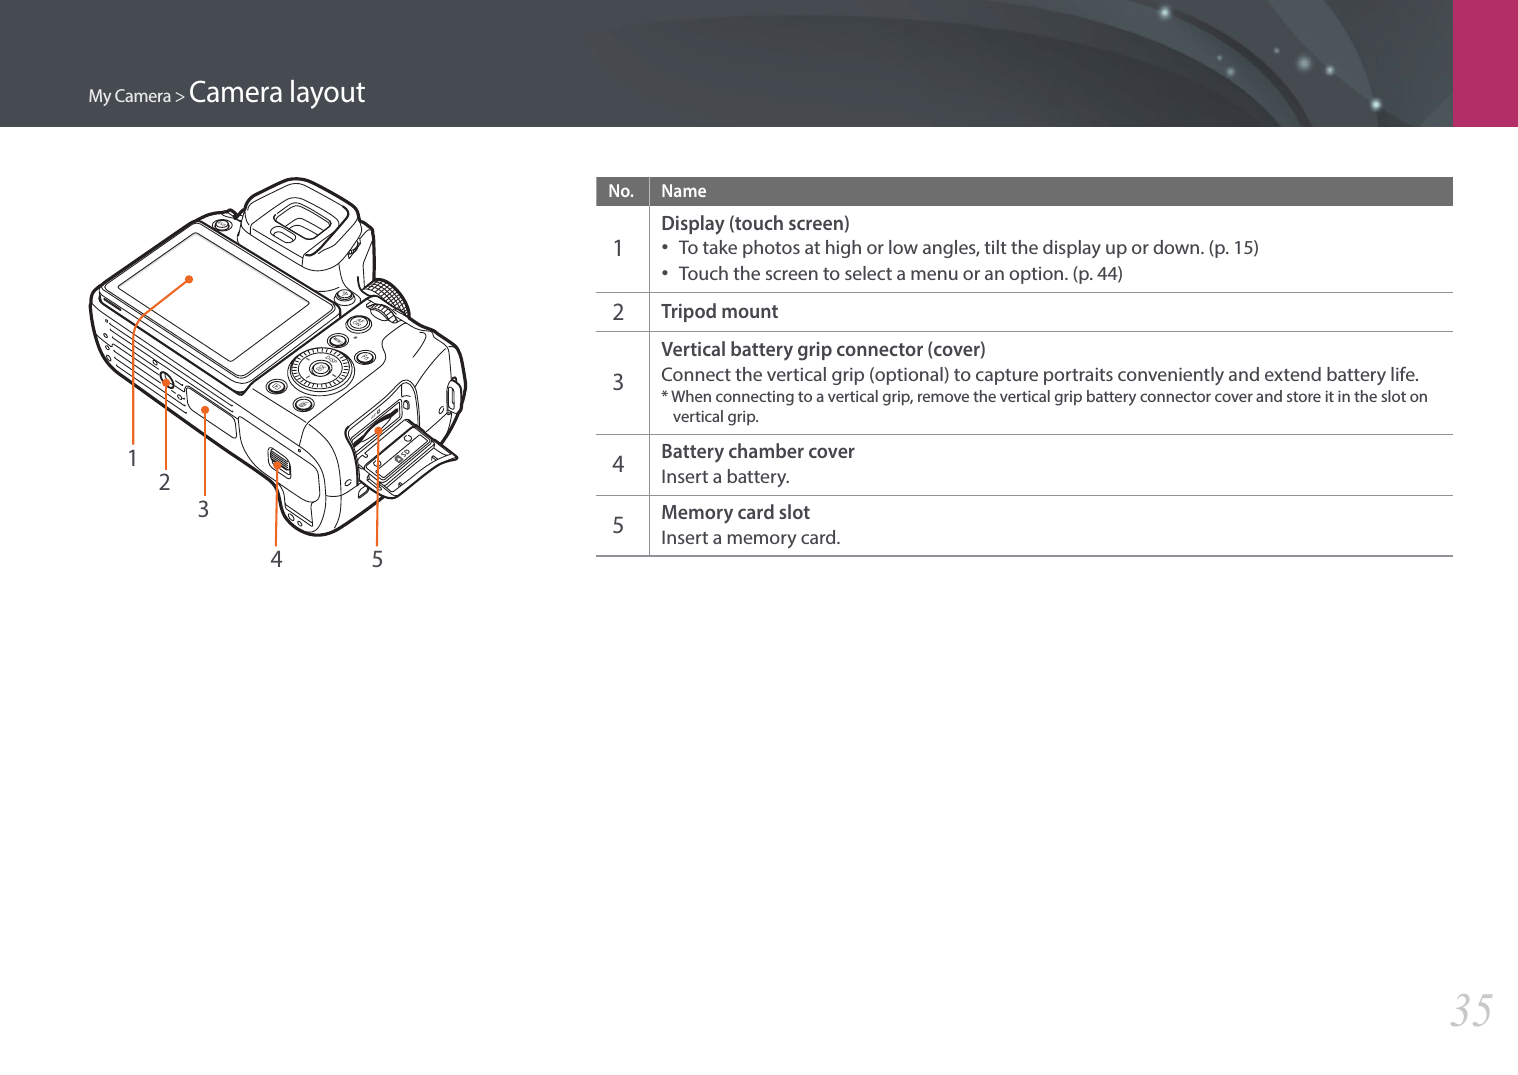
![My Camera > Camera layout36Using the drive dialWhile pressing the drive dial lock button( ), rotate the drive dial( ) to select a shooting method.21Do not rotate the drive dial without pressing the drive dial lock button. Doing so may damage the camera.Using the EVF buttonPressing [E] will allow you to view the viewnder or display.](https://usermanual.wiki/Samsung-Electronics-Co/NX1.User-manual-1-of-3/User-Guide-2394046-Page-37.png)
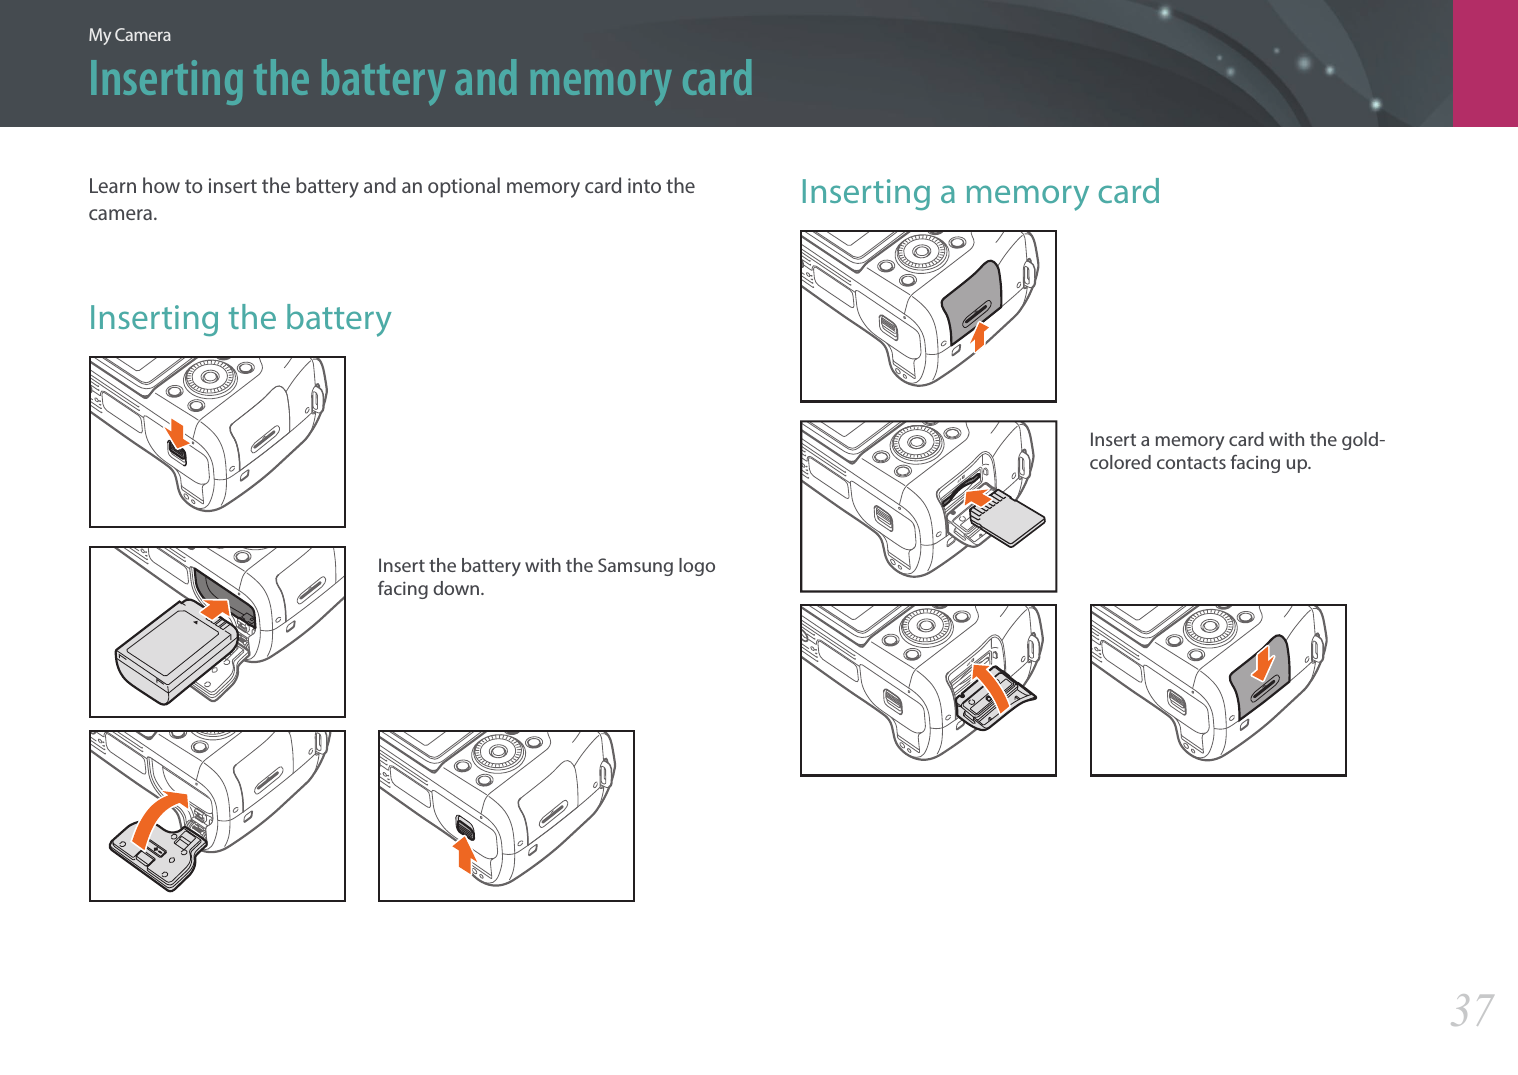
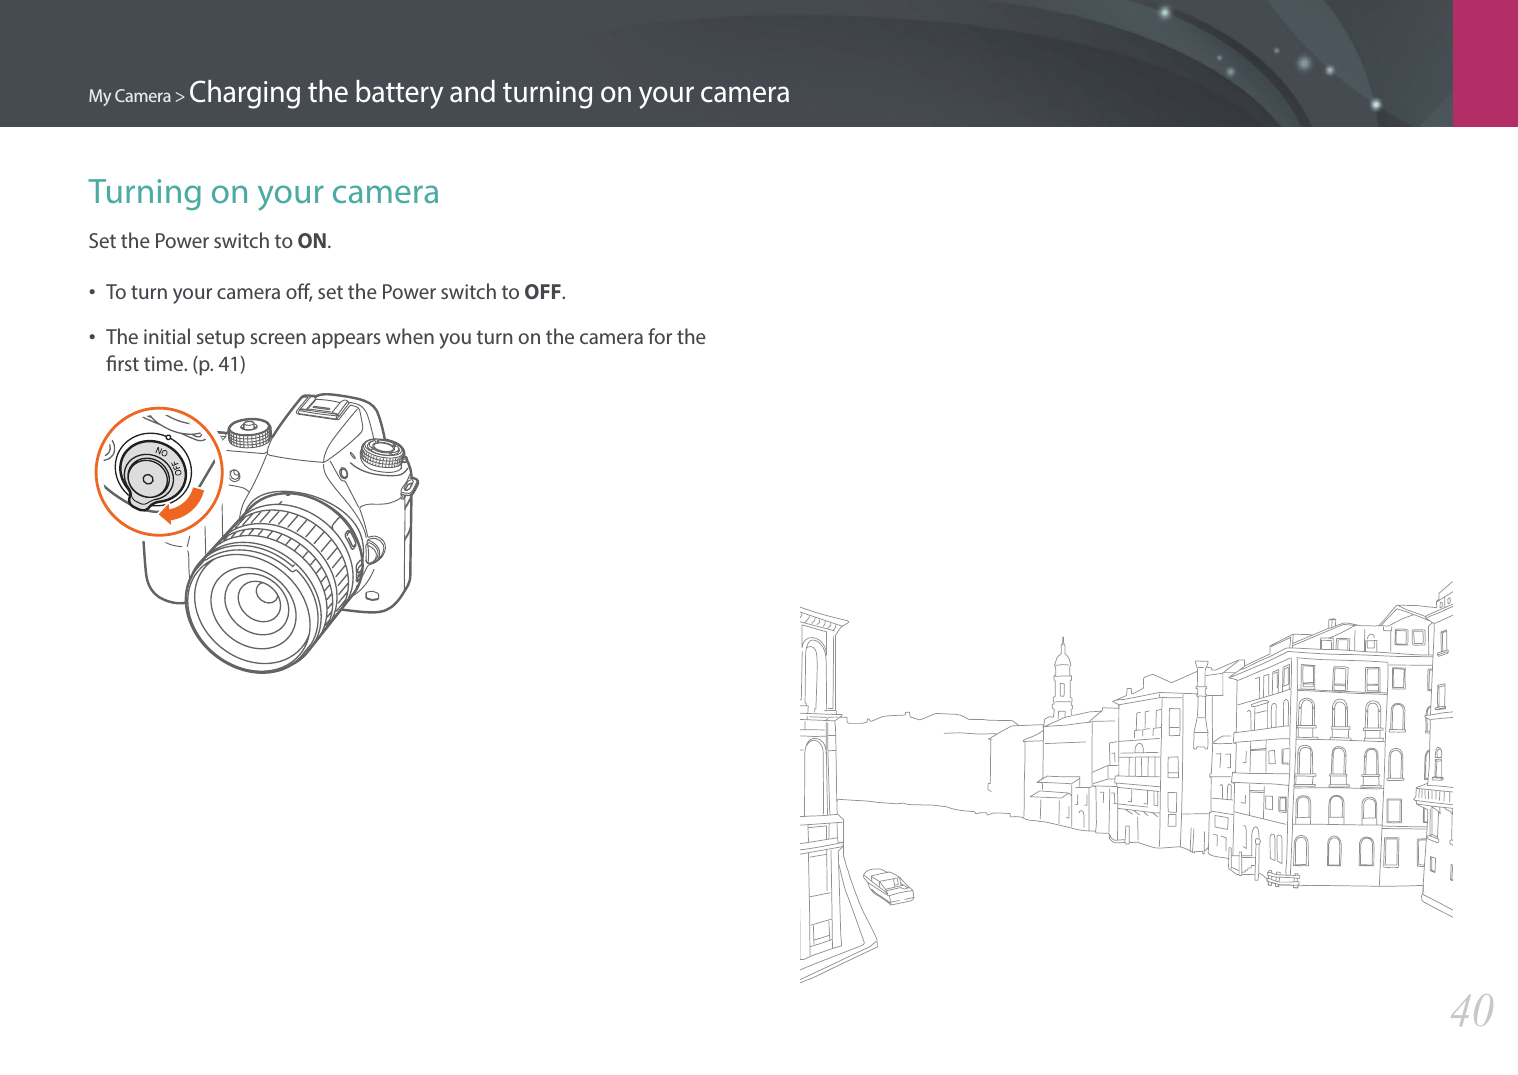
![My Camera41Performing the initial setupWhen you turn on your camera for the rst time, the initial setup screen appears. The language is preset for the country or region where the camera is sold. You can change the language as desired. You can also select an item by touching it on the screen.1 Press [h] to select Time Zone, and then press [o].2 Press [D/h] to select a time zone, and then press [o].BackTime Zone[GMT +00:00] London[GMT -01:00] Cape Verde[GMT -02:00] Mid-Atlantic[GMT -03:00] Buenos Aires, Sao Paulo[GMT -03:30] Newfoundland3 Press [h] to select Date Settings, and then press [o].4 Press [e/e] to select an item (Year/Month/Day).5 Press [D/h] to set the option, and then press [o].07Back SetYearMonth DayDate Settings•The screen may dier depending on the language you selected.6 Press [h] to select Time Settings, and then press [o].7 Press [e/e] to select an item (Hour/Minute/Summer time).8 Press [D/h] to set the option, and then press [o].Time SettingsBack SetDSTHour Min](https://usermanual.wiki/Samsung-Electronics-Co/NX1.User-manual-1-of-3/User-Guide-2394046-Page-42.png)
![My Camera > Performing the initial setup429 Press [h] to select Date Type, and then press [o].10 Press [D/h] to select a date type, and then press [o].SetBackLanguageTime ZoneDate SettingssTime SettingssDate TypeDate TypeYYYY/MM/DDMM/DD/YYYYDD/MM/YYYYLondonEnglish11 Press [h] to select Time Type, and then press [o].12 Press [D/h] to select a time type, and then press [o].Back SetLondon2014/01/0110:00 AMTime ZoneDate SettingsTime SettingsDate TypeTime TypeTime Type12H24H13 Press [m] to nish the initial setup.](https://usermanual.wiki/Samsung-Electronics-Co/NX1.User-manual-1-of-3/User-Guide-2394046-Page-43.png)
![My Camera43Selecting functions (options)Selecting with buttonsUse one of the following methods to select an option:•Rotate the command dial 1, and then press [o].•Rotate the command dial 2, and then press [o].•Rotate the navigation button, and then press [o].•Press [D/h/e/e], and then press [o].](https://usermanual.wiki/Samsung-Electronics-Co/NX1.User-manual-1-of-3/User-Guide-2394046-Page-44.png)

![My Camera > Selecting functions (options)45Using mPress [m] or touch on the screen, and then change shooting options or settings.E.g. Selecting the photo size in P mode1 Rotate the mode dial to P.2 Press [m] or touch .3 Scroll the command dial 1 or press [D/h] to move to b, and then press [o].•You can also touch b on the screen.4 Rotate the navigation button or press [D/h] to move to Photo Size, and then press [o].•You can also drag the option list, and then touch an option.BackPhoto SizeQualityISOOLED ColorMinimum Shutter SpeedO5 Rotate the navigation button or press [D/h] to move to an option, and then press [o].•You can also drag the option list, and then touch an option.•Press [m] or touch Back to go back to the previous menu.BackPhoto SizeQualityISOOLED ColorMinimum Shutter Speed (3:2) (6480x4320)(3:2) (4560x3040)(3:2) (3264x2176)(3:2) (2112x1408)(16:9) (6480x3648)Photo Size6 Press [m] or touch Back to switch to Shooting mode.](https://usermanual.wiki/Samsung-Electronics-Co/NX1.User-manual-1-of-3/User-Guide-2394046-Page-46.png)
![My Camera > Selecting functions (options)46Using the Smart panelPress [f] or touch on the screen to access some functions such as Exposure, ISO, and White Balance.E.g. Adjust the exposure value in P mode1 Rotate the mode dial to P.2 Press [f] or touch .3 Scroll the command dial 2 or rotate the navigation button or press [D/h/e/e] to move to EV, and then press [o].•You can directly select an option by scrolling the command dial 1 without having to press [o].•You can also select an option by touching it.EV : 0.0AdjustBackYou can adjust some options by dragging them. 4 Scroll the command dial 1 or command dial 2, or rotate the navigation button, or press [e/e] to adjust the exposure value, and then press [o].•You can also drag the dial on the screen, and then touch Set to adjust the option.EV : 0.0Back Set](https://usermanual.wiki/Samsung-Electronics-Co/NX1.User-manual-1-of-3/User-Guide-2394046-Page-47.png)
![My Camera > Selecting functions (options)47Using iFnPress [i-Function] on an i-Function lens to manually select and adjust shutter speed, aperture value, exposure value, ISO sensitivity, and White Balance on the lens.0.0Select an option.Adjust an option value.1 Rotate the mode dial to P, A, S, or M.2 Press [i-Function] on the lens to select a setting.•To select items to appear, select [m] → d → iFn Setting → an item.•You can also press [i-Function], and then press [D/h] or drag the screen to select a setting.Option DescriptionApertureAdjust the aperture value.Shutter speedAdjust the shutter speed.EVAdjust the exposure value.ISOAdjust the ISO sensitivity.White BalanceSelect a White Balance option.intelli-ZoomZoom in on a subject with less degradation of photo quality than the Digital zoom. However, the photo resolution or size may change compared to when you zoom in by rotating the zoom ring.](https://usermanual.wiki/Samsung-Electronics-Co/NX1.User-manual-1-of-3/User-Guide-2394046-Page-48.png)
![My Camera > Selecting functions (options)483 Adjust the focus ring to select an option.•You can also scroll the command dial 2 or rotate the navigation button or drag the screen to select an option.4 Half-press [Shutter] to focus, and then press [Shutter] to capture the photo.Available optionsShooting mode P A S M 3DAperture-O-O-Shutter speed- - O O -EVO O O - OISOOOOOOWhite BalanceOOOOOintelli-ZoomOOOOO•This function is not available when you attach a 3D lens and set 3D Auto Mode in 3D mode.•intelli-Zoom is not available when you capture photos in the RAW le format.•intelli-Zoom is deactivated when you record videos by pressing the video recording button.](https://usermanual.wiki/Samsung-Electronics-Co/NX1.User-manual-1-of-3/User-Guide-2394046-Page-49.png)
![My Camera > Selecting functions (options)49Using custom buttons and dialsAssign your favorite functions to some buttons and dials. In Shooting mode, press [m] → d → Key Mapping → an option.Available itemsPreview button, AEL button, AF start button, Navigation button, Command dial 1/2When you frequently adjust AF Area, White Balance, and Picture Wizard (Example)1 In shooting mode, [m] → d → Key Mapping.2 Select a button from the list.3 Select a function.Button Function DescriptionCustom ◄ KeyAF Area Select the positions of the focus area.Custom ► KeyWhite Balance Select the appropriate light source.Custom ▼ KeyPicture Wizard Apply dierent photo styles.4 Press [m] to move to the previous screen.](https://usermanual.wiki/Samsung-Electronics-Co/NX1.User-manual-1-of-3/User-Guide-2394046-Page-50.png)