Samsung Electronics Co NX3000 Digital Camera User Manual NX3000 UM ENG
Samsung Electronics Co Ltd Digital Camera NX3000 UM ENG
UserManual.wiki
>
Samsung Electronics Co
>
NX3000 User Manual
User Manual
Navigation menu
Upload a User Manual
Namespaces
Wiki Guide
HTML
PDF
Info
Views
User Manual
Discussion / Help
Navigation
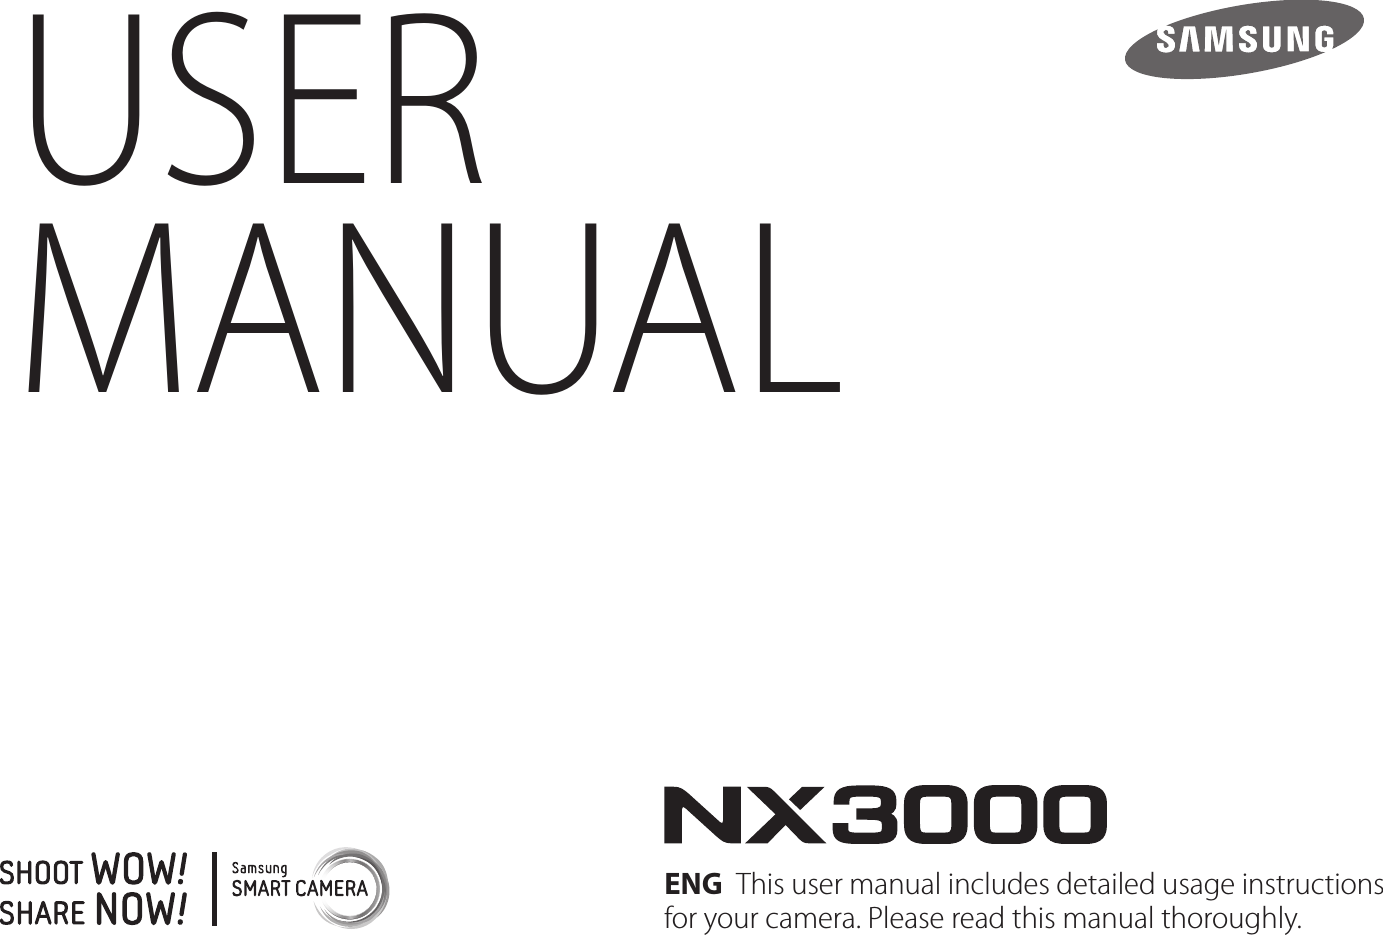
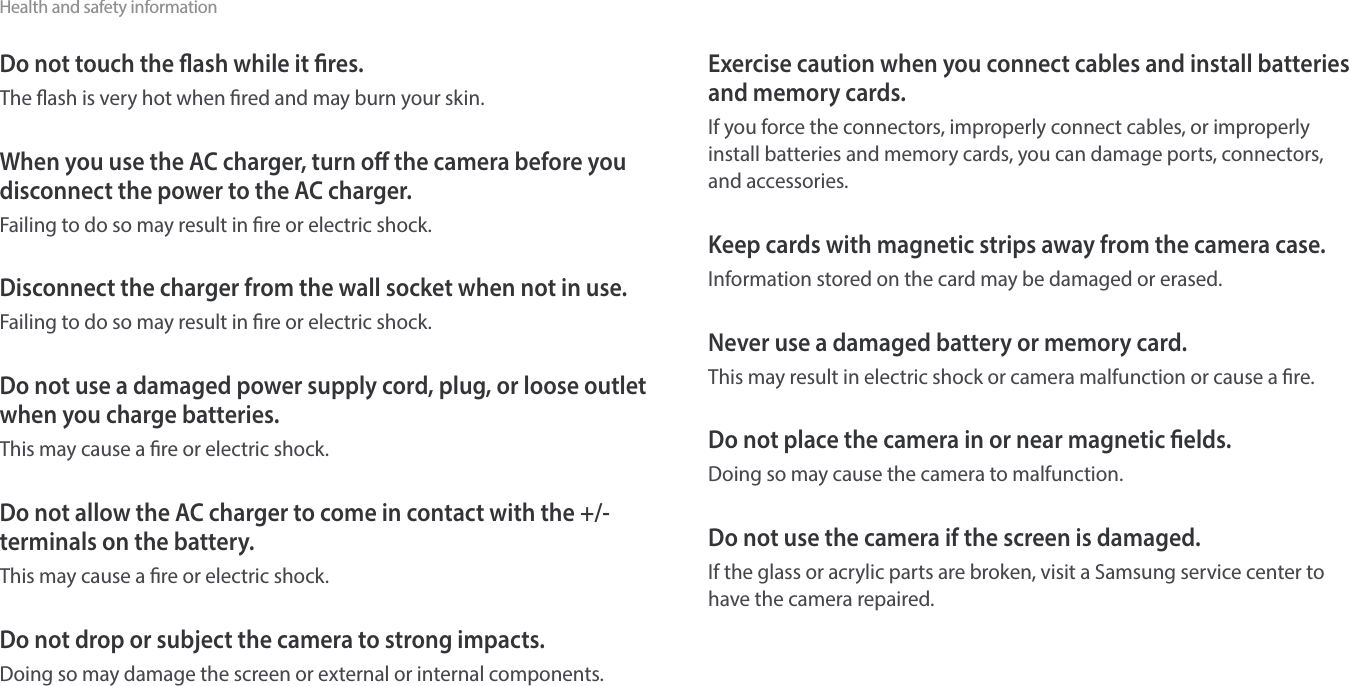
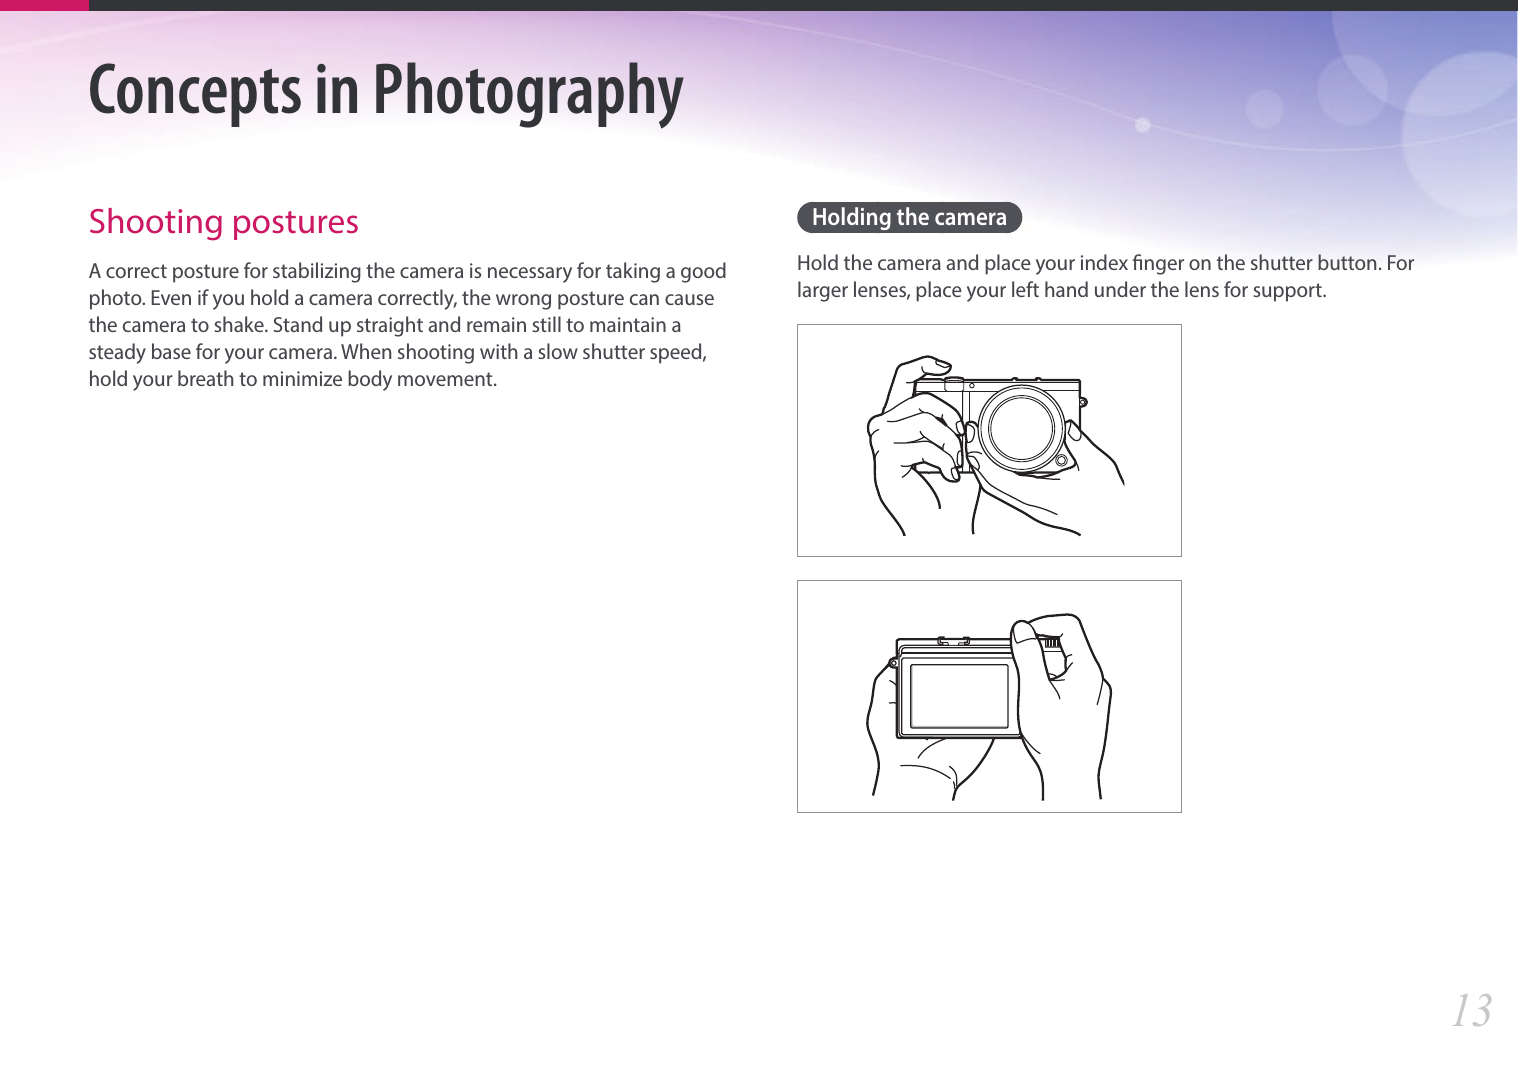
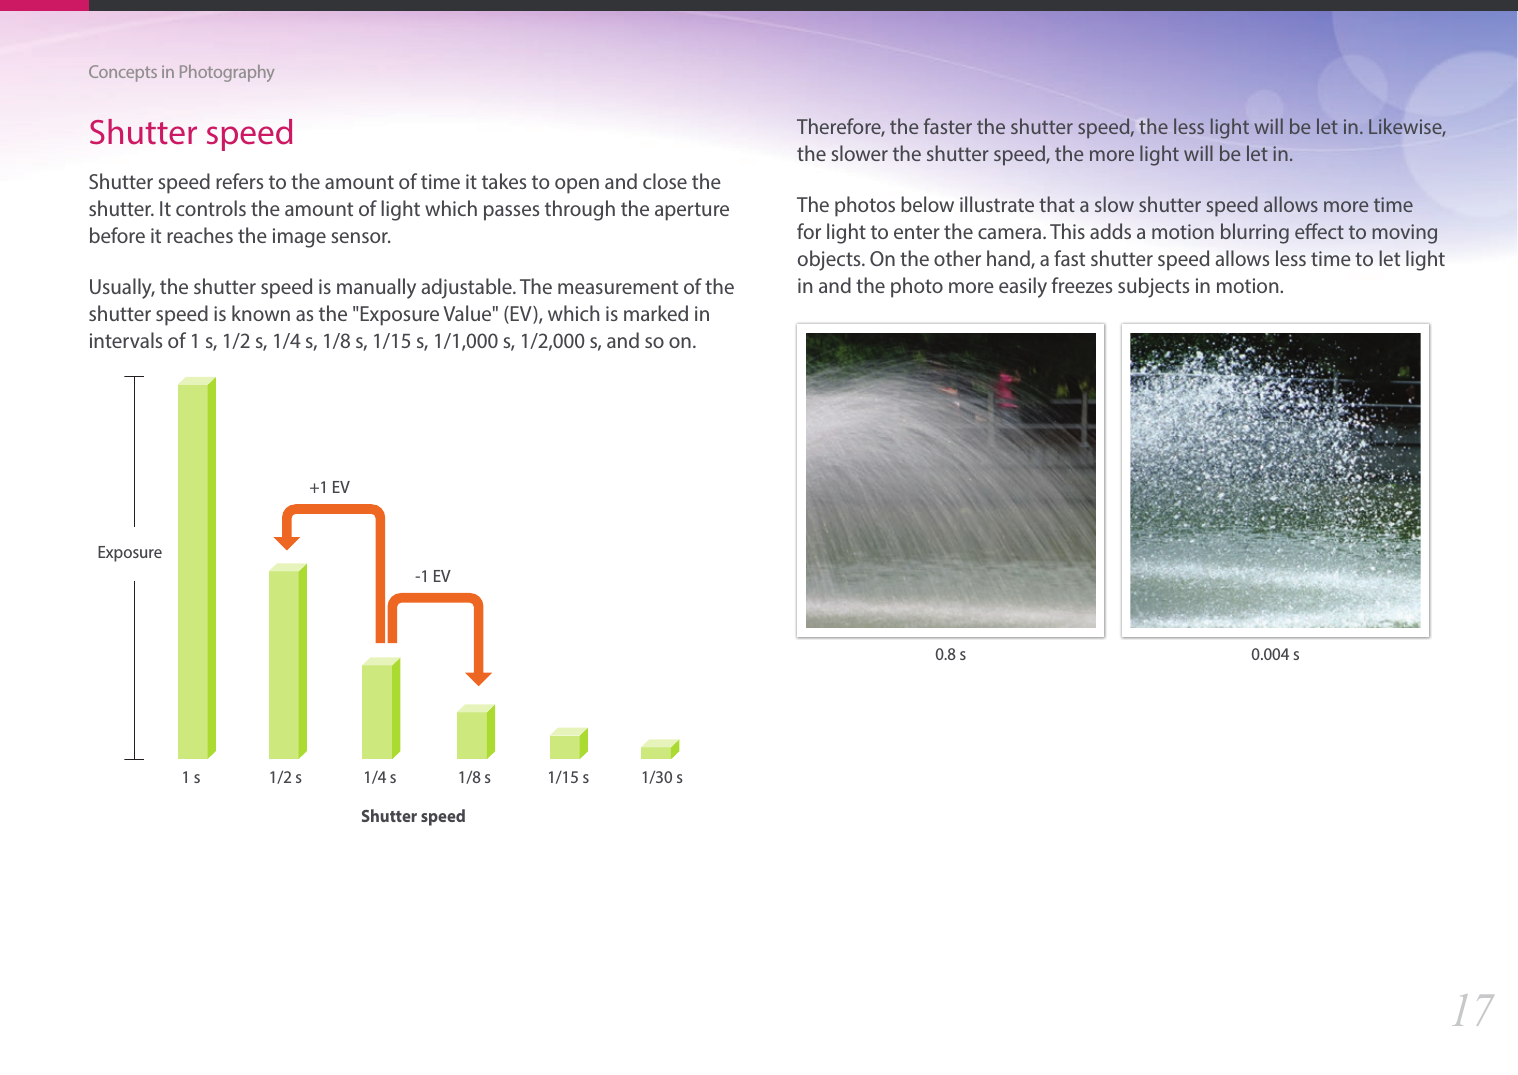
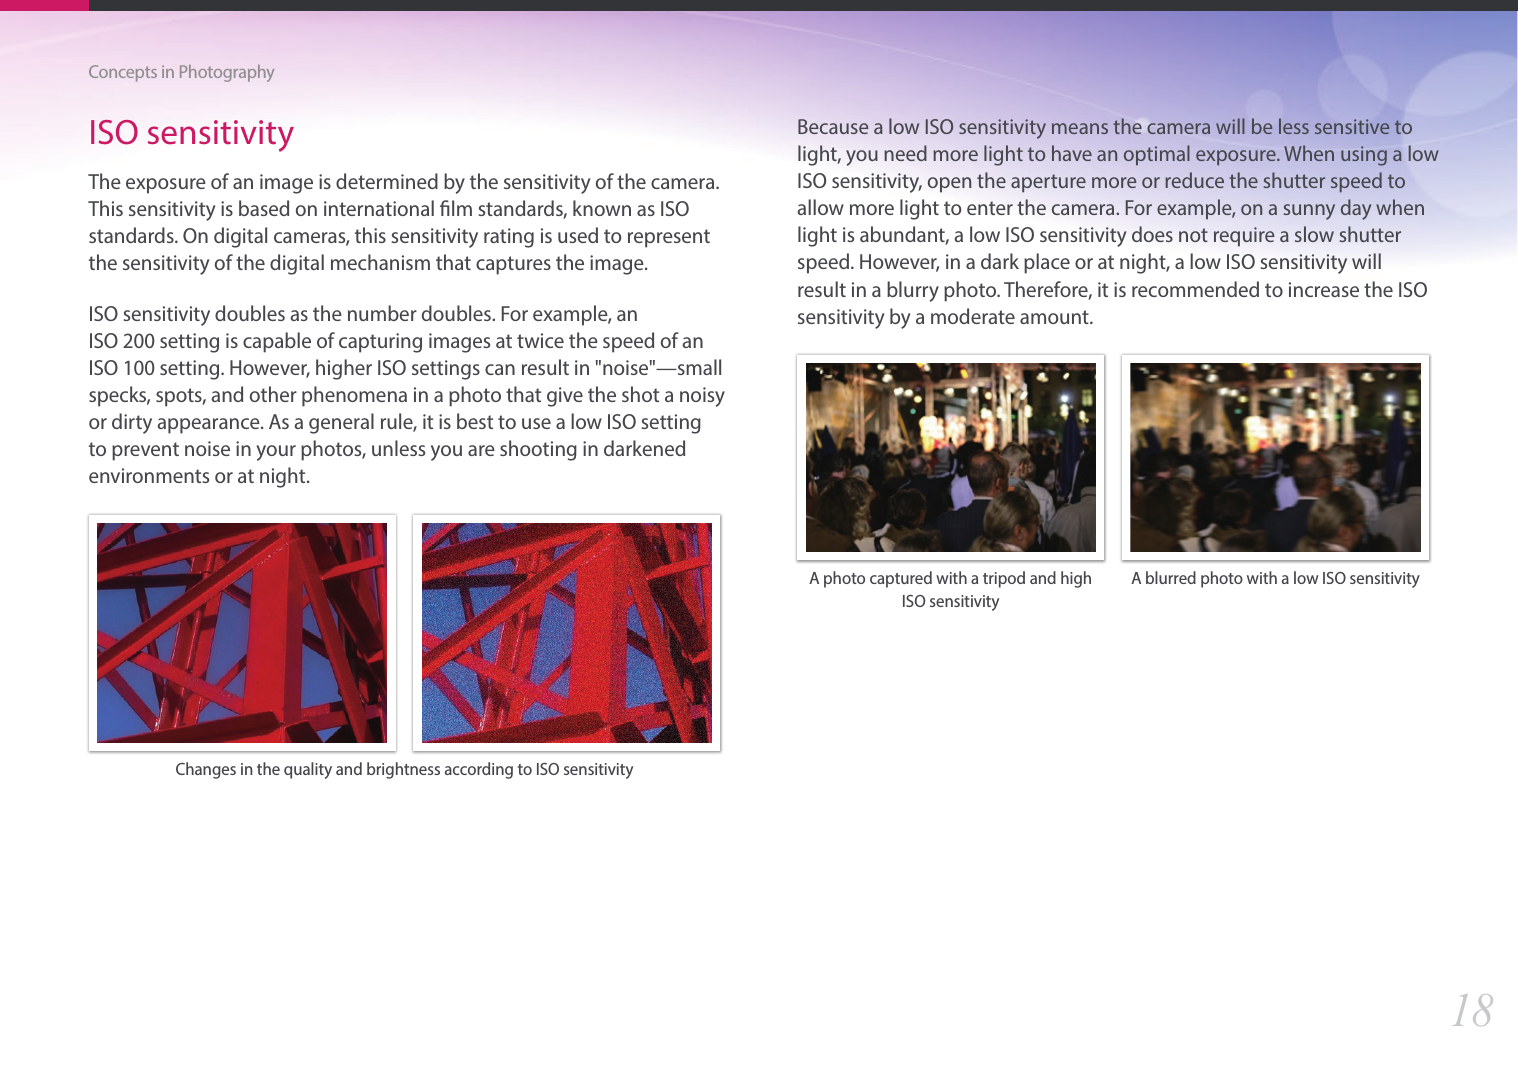
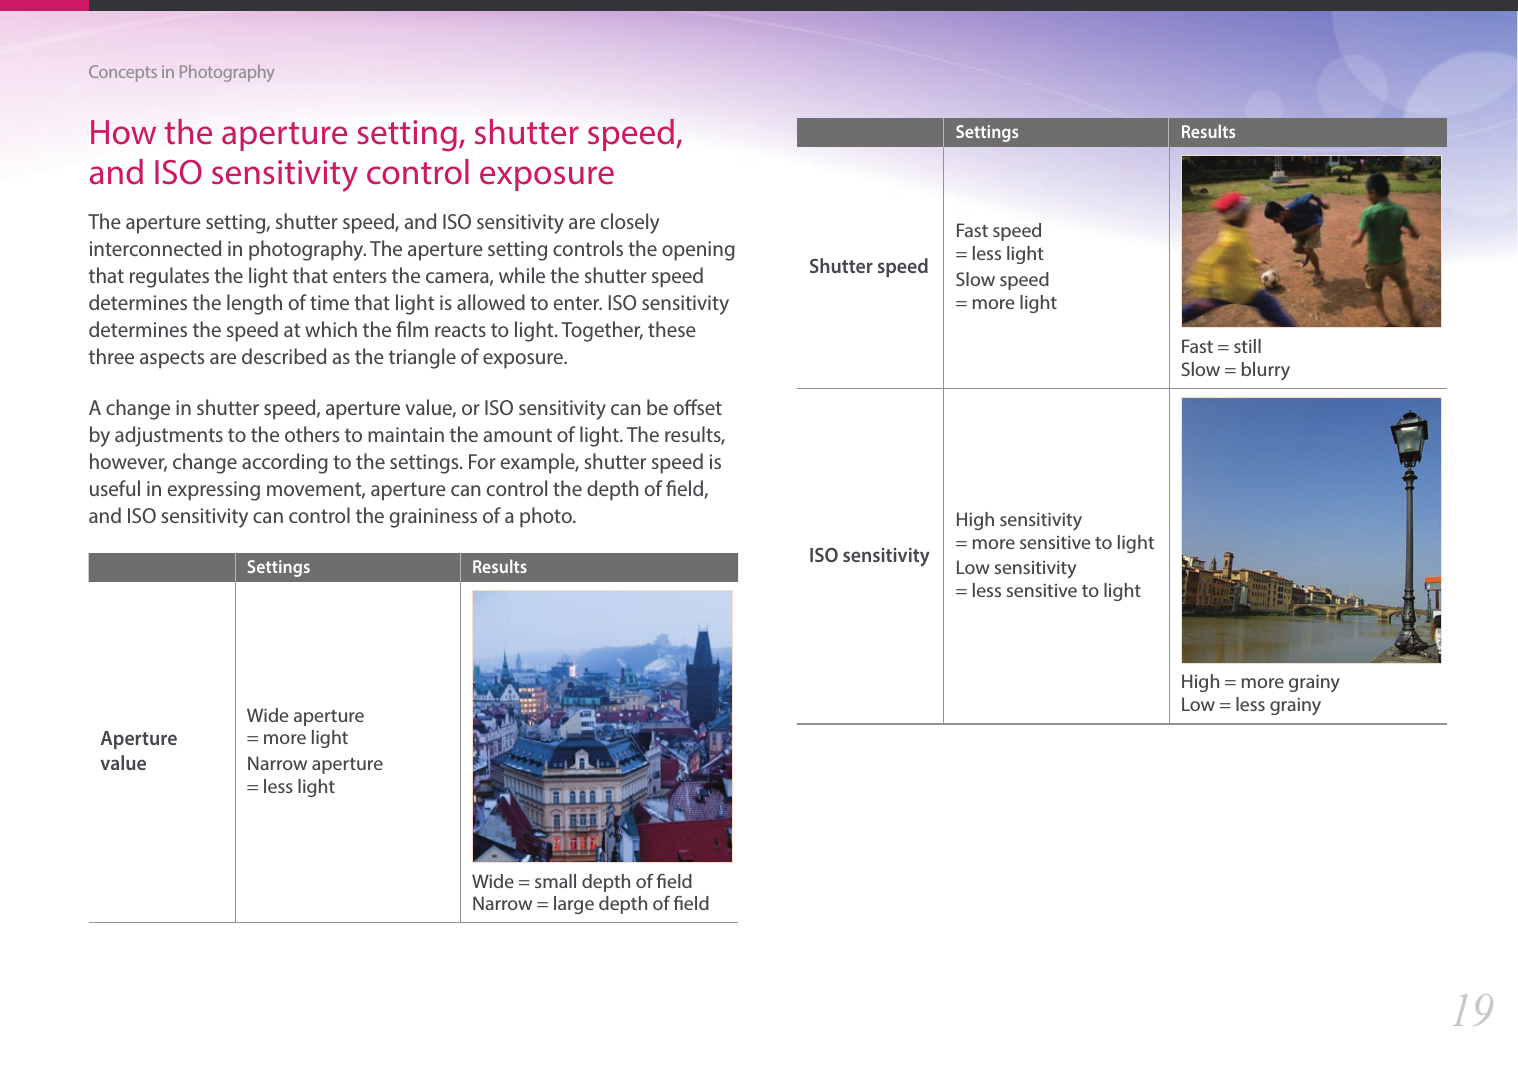
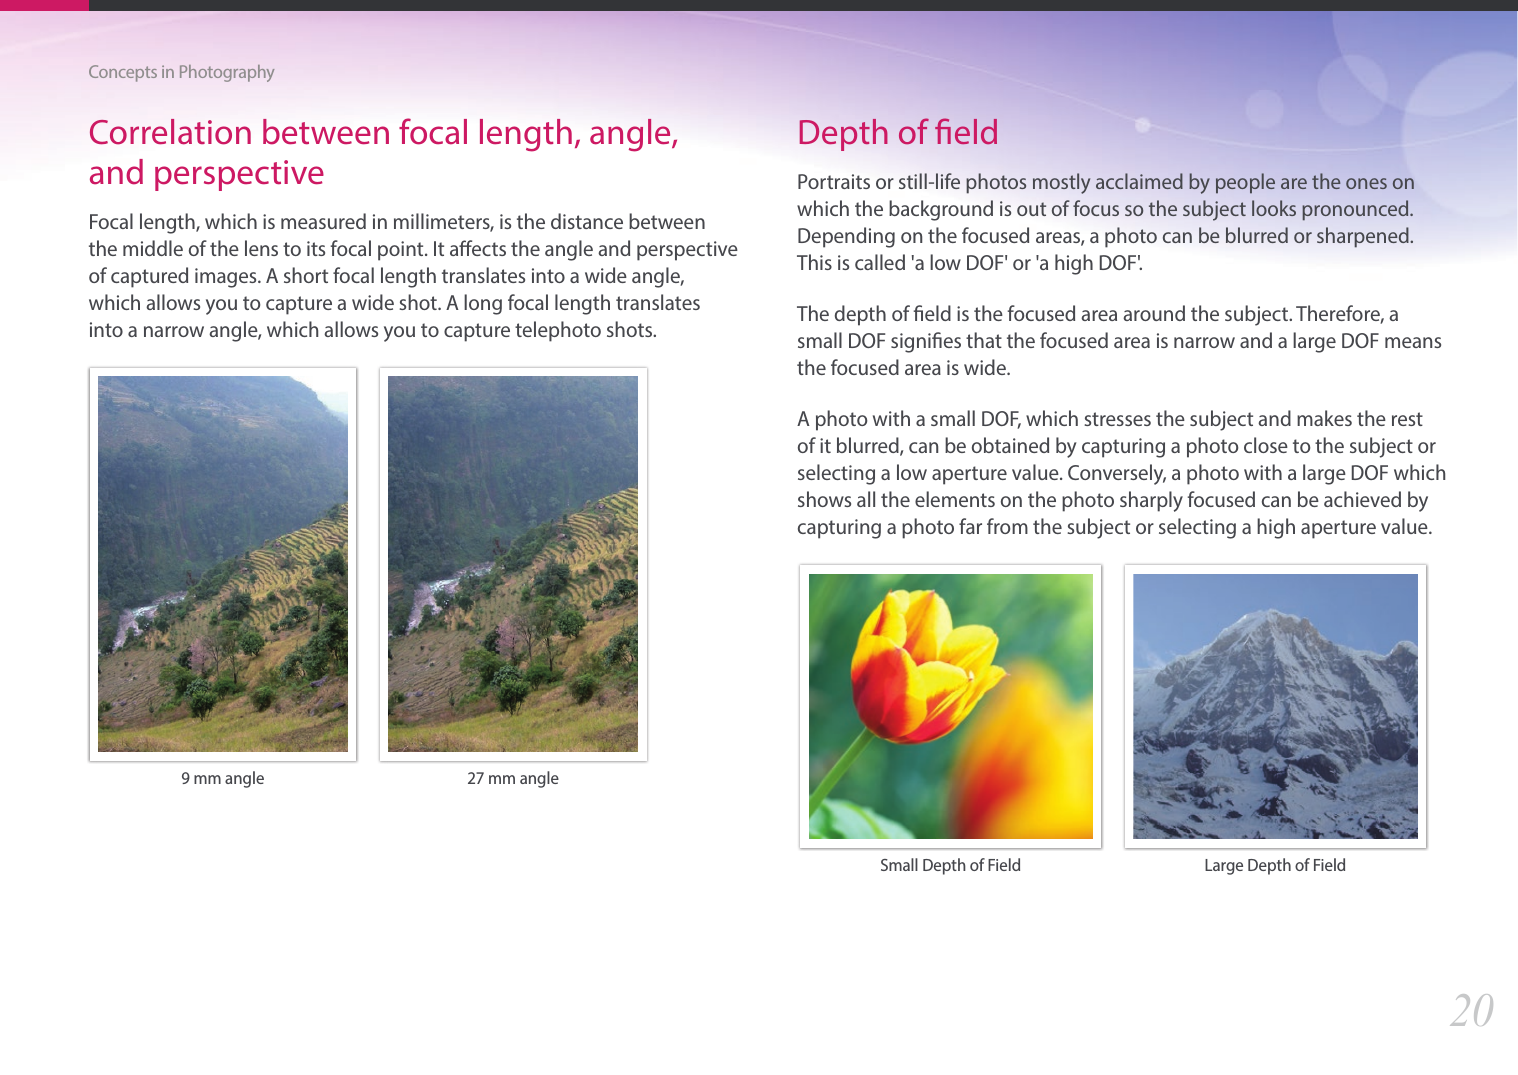
![6Icons used in this manualIcon FunctionAdditional informationSafety warnings and precautions[ ]Camera buttons. For example, [Shutter] represents the shutter button.( )Page number of related informationĺThe order of options or menus you must select to perform a step; for example: Select b ĺ Quality (represents select b, and then Quality). *Annotation](https://usermanual.wiki/Samsung-Electronics-Co/NX3000/User-Guide-2248332-Page-7.png)
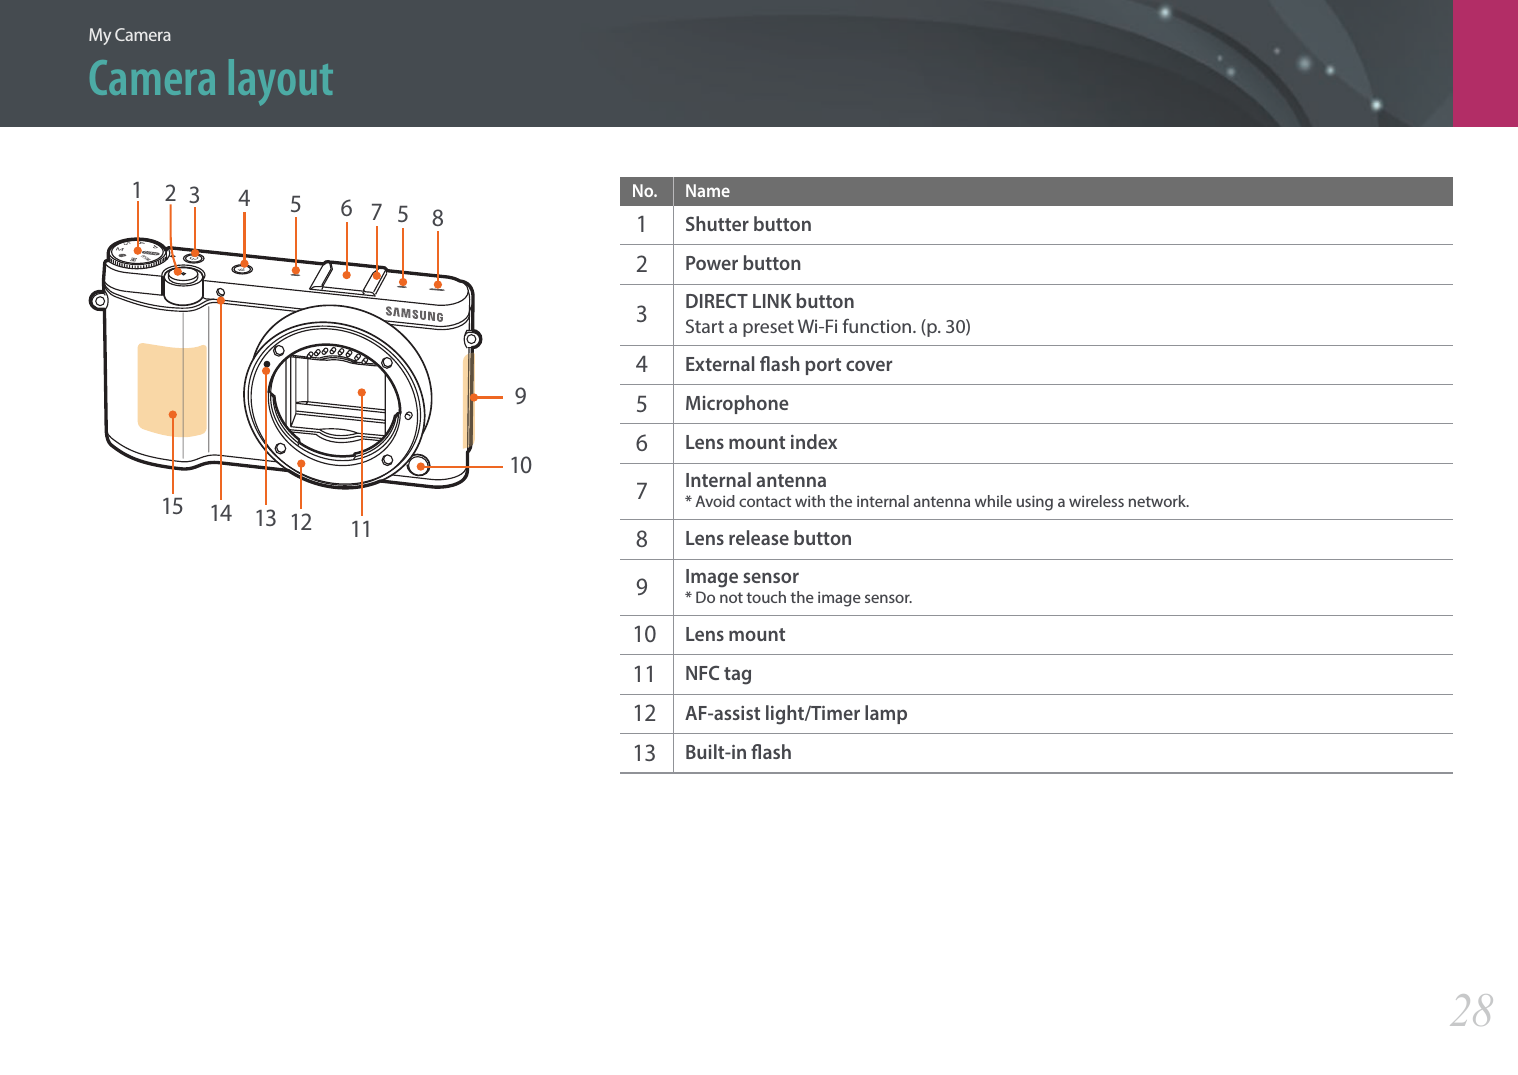
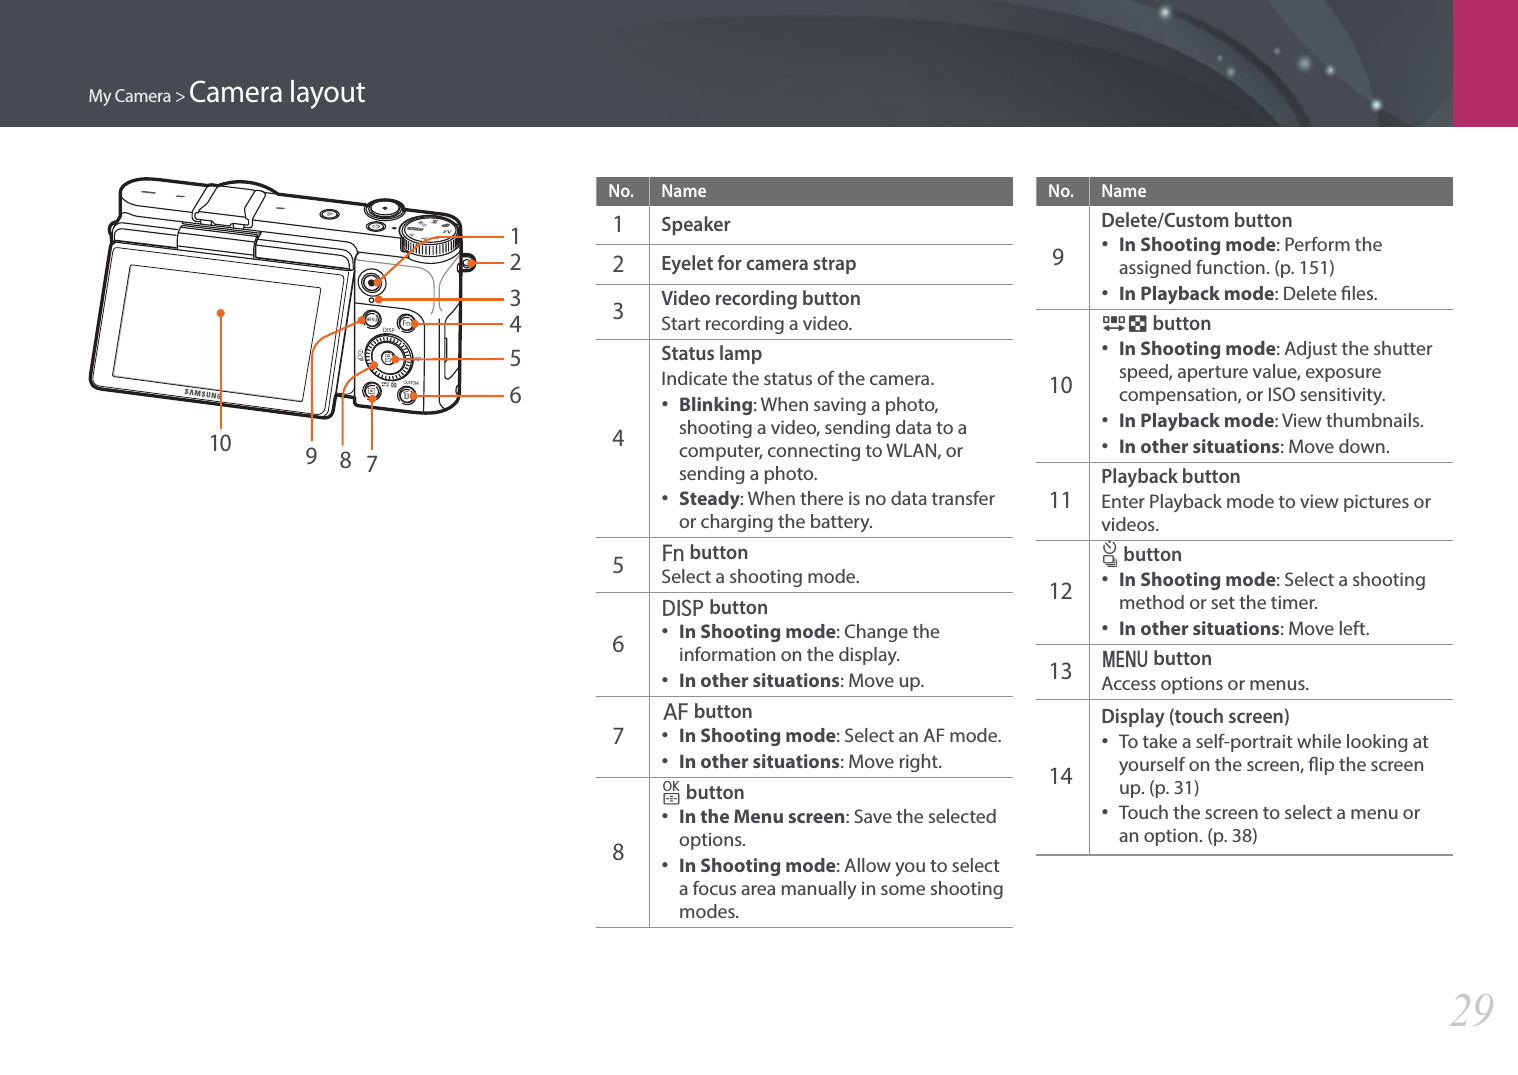
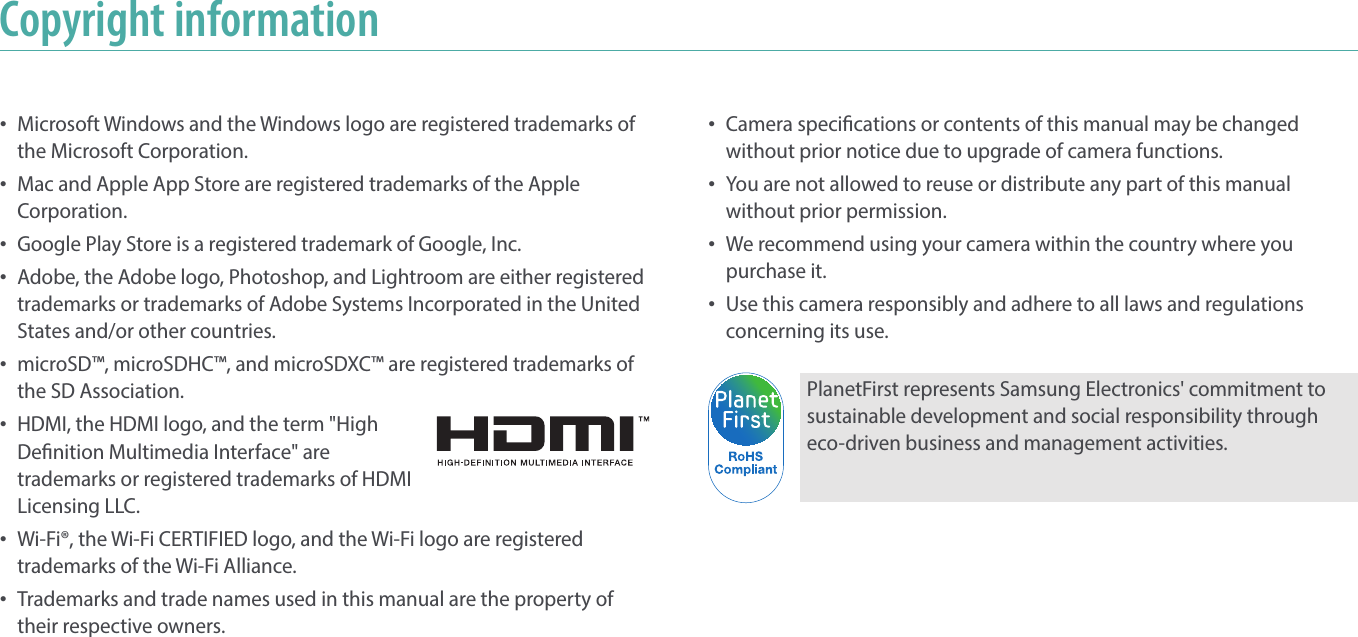
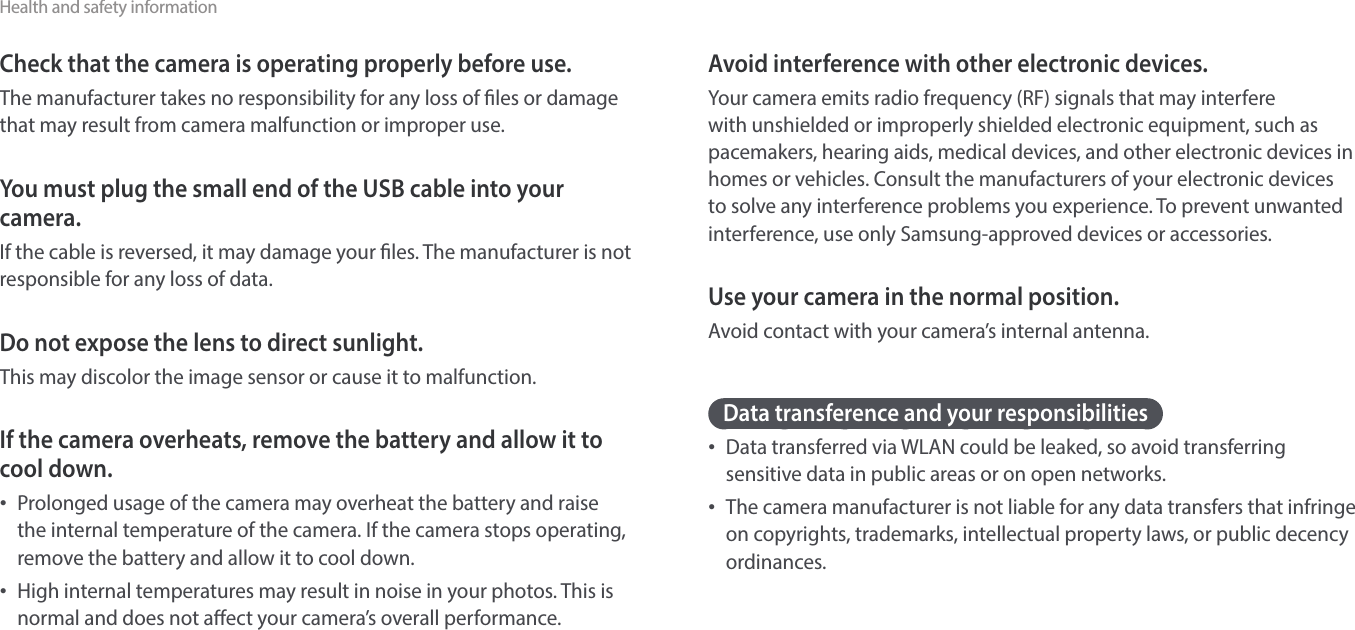
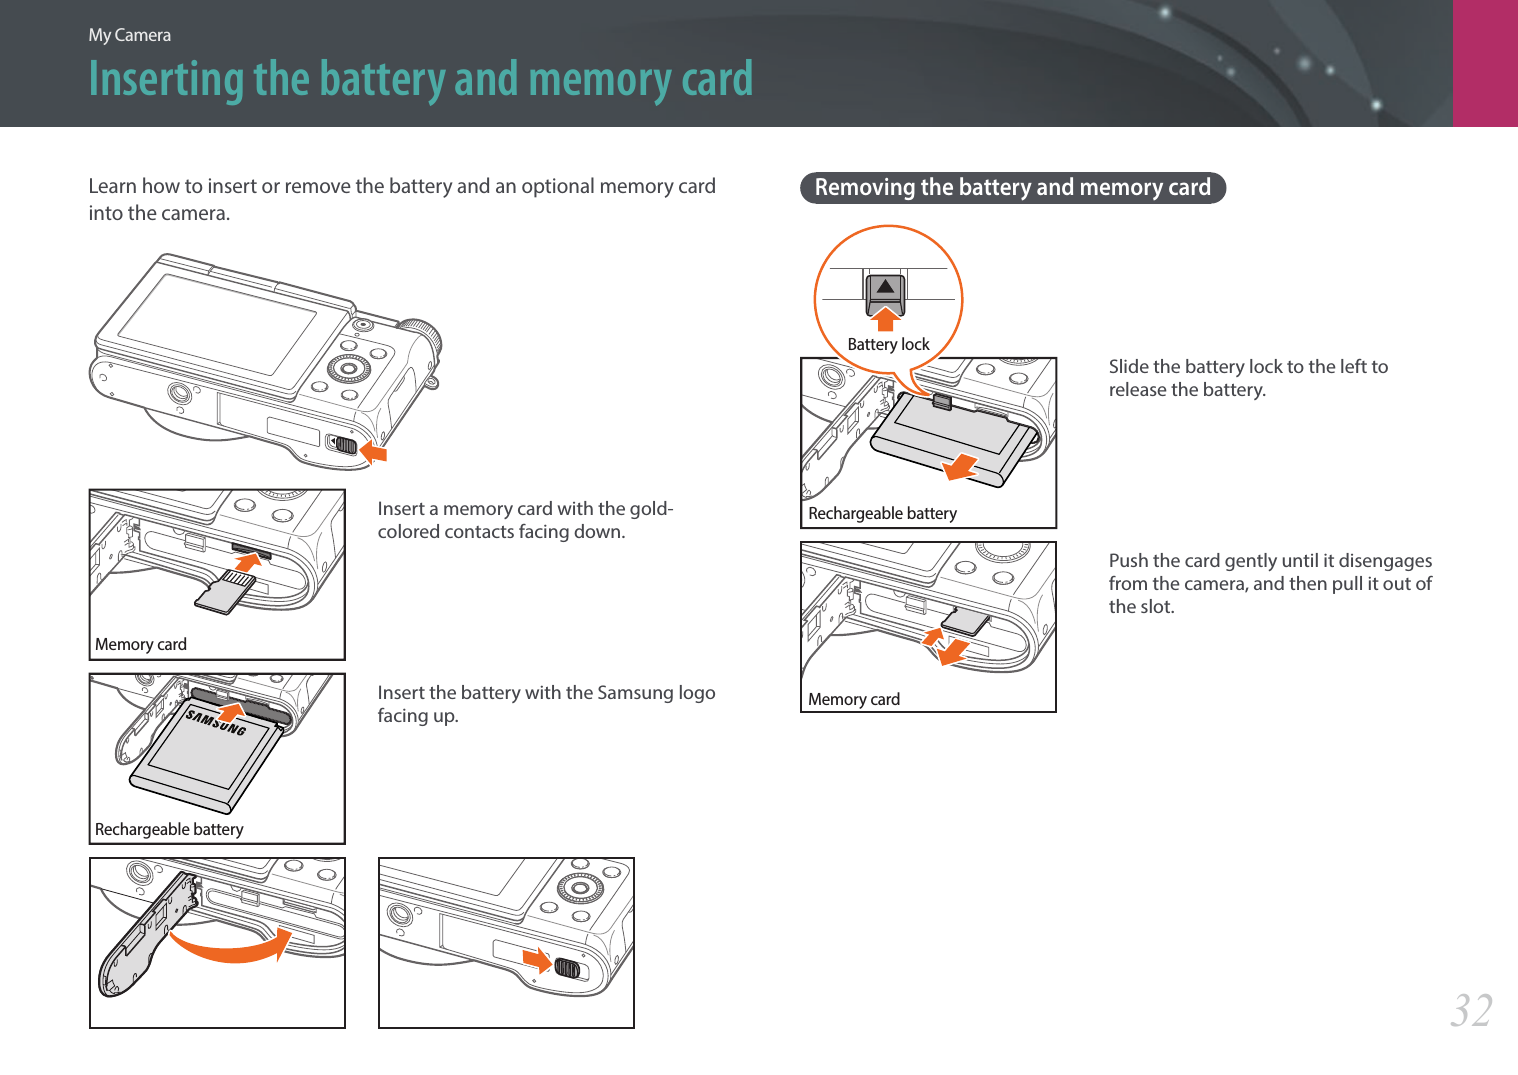
![My Camera > Camera layout30No. Name1 Tripod mount2 Battery lock3 Memory card slot4 USB and shutter release portConnect the camera to a computer or shutter release. Use a shutter release cable with a tripod to minimize camera movement.5 HDMI port6 Battery slot7 Battery coverUsing the DIRECT LINK buttonYou can turn on the Wi-Fi feature conveniently by pressing [DIRECT LINK]. Press [DIRECT LINK] again to return to the previous mode.Setting the DIRECT LINK buttonYou can select a Wi-Fi function to launch when you press [DIRECT LINK]. (p. 151)To set a DIRECT LINK option, In Shooting mode, press [m] ĺ d ĺ Key Mapping ĺDIRECT LINKĺ an option.1243](https://usermanual.wiki/Samsung-Electronics-Co/NX3000/User-Guide-2248332-Page-31.png)
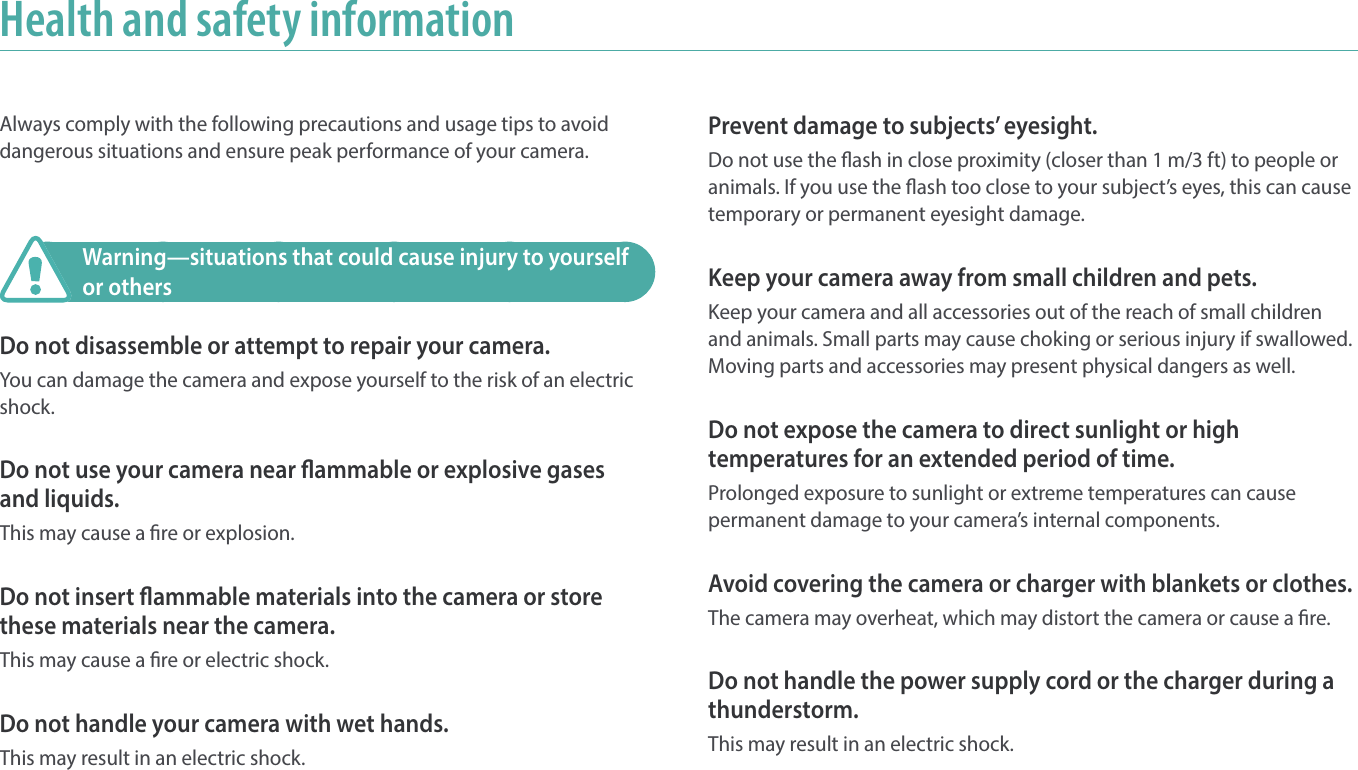
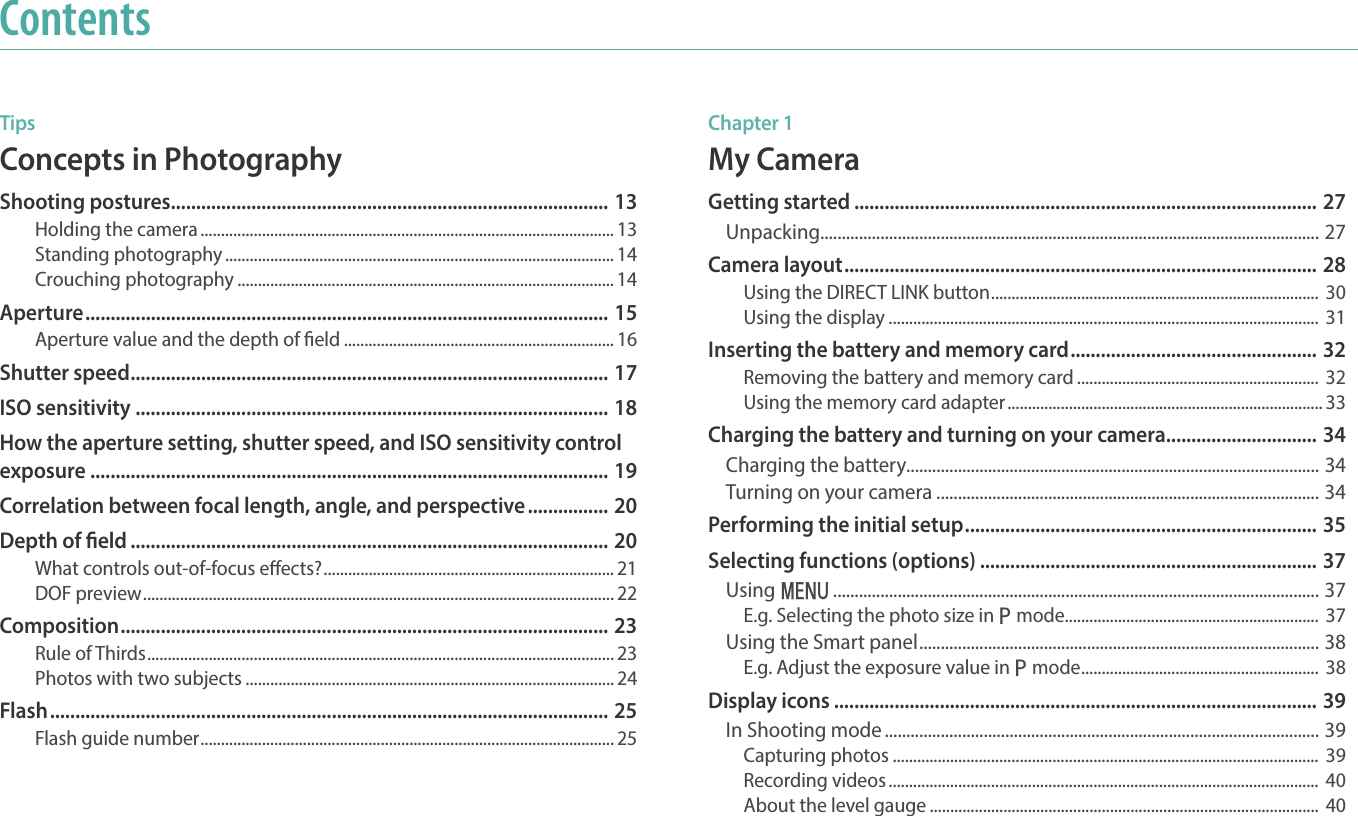
![My Camera > Camera layout31Using the displayYou can take a self-portrait while looking at yourself on the display by ipping the display up.Using the Self shot modeWhen the camera is o and you enabled the Self shot option (p. 152), ipping the display upward turns the camera on and enters Self shot mode.In Self shot mode, the timer (3 seconds), one-touch shot, face detection, and beauty face functions are automatically activated. 1 Flip the display upward.180˚2 Touch the frame area on the display, or press [Shutter].• After 3 seconds, the camera automatically releases the shutter.• When the camera is o, ipping the display upward automatically turns the camera on.• Keep the display closed when the camera is not in use.• Flip the display only within the angle allowed. Failing to do so may damage your camera.• When the camera is not held and the display is ipped upward, use a tripod. Otherwise, it may cause damage to your camera.• Do not ip the display up when an external ash is mounted on the camera. Otherwise, it may cause damage to your camera.](https://usermanual.wiki/Samsung-Electronics-Co/NX3000/User-Guide-2248332-Page-32.png)

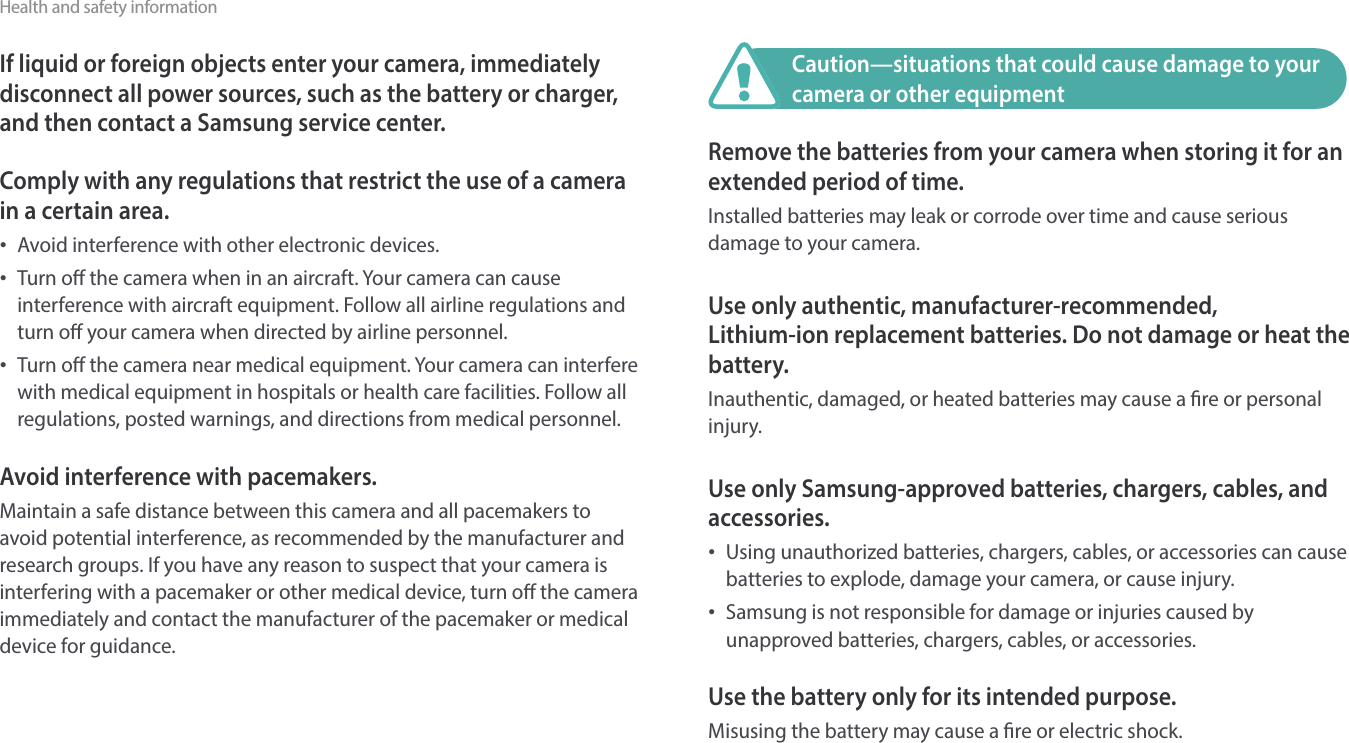
![My Camera34Charging the battery and turning on your cameraCharging the batteryBefore you use the camera for the rst time, you must charge the battery. Plug the small end of the USB cable into your camera, and then plug the other end of the USB cable into the AC adapter.Status lamp• Red light on: Charging• Green light on: Fully charged• Red light blinking: Charging ErrorUse only the AC adapter and USB cable supplied with your camera. If you use another AC adapter, the camera battery may not charge or work properly.Turning on your cameraTo turn on or o the camera, press [ ].• The initial setup screen appears when you turn on the camera for the rst time. (p. 36)For some lenses, when you turn on the camera, the lens moves automatically. Do not press or force the lens, as it may damage the lens.](https://usermanual.wiki/Samsung-Electronics-Co/NX3000/User-Guide-2248332-Page-35.png)
![My Camera35Performing the initial setupWhen you turn on your camera for the rst time, the initial setup screen appears. The language is preset for the country or region where the camera is sold. You can change the language as desired. You can also select an item by touching it on the screen.1 Press [I] to select Time Zone, and then press [o].2 Press [D/I] to select a time zone, and then press [o].Back SetTime Zone[GMT +00:00] London[GMT -01:00] Cape Verde[GMT -02:00] Mid-Atlantic[GMT -03:00] Buenos Aires, Sao Paulo[GMT -03:30] Newfoundland3 Press [I] to select Date/Time Set, and then press [o].4 Press [C/F] to select an item (Year/Month/Day/Hour/Minute/Summer time).5 Press [D/I] to set the option, and then press [o].Back SetYear Hour Min DSTMonth DayDate/Time Set• The screen may dier depending on the language you selected.6 Press [I] to select Date Type, and then press [o].7 Press [D/I] to select a date type, and then press [o].Back SetDate TypeYYYY/MM/DDMM/DD/YYYYDD/MM/YYYY](https://usermanual.wiki/Samsung-Electronics-Co/NX3000/User-Guide-2248332-Page-36.png)
![My Camera > Performing the initial setup368 Press [I] to select Time Type, and then press [o].9 Press [D/I] to select a time type, and then press [o].Back SetTime Type12 Hr24 Hr10 Press [m] to nish the initial setup.](https://usermanual.wiki/Samsung-Electronics-Co/NX3000/User-Guide-2248332-Page-37.png)
![My Camera37Selecting functions (options)Press [D/I/C/F] to move, and then press [o] to select an option.Using mPress [m] or touch on the screen, and then change shooting options or settings.E.g. Selecting the photo size in P mode1 On the Mode screen, select Program.2 Press [m] or touch .3 Press [D/I] to move to b, and then press [o].• You can also touch b on the screen.4 Press [D/I] to move to Photo Size, and then press [o].• You can also drag the option list, and then touch an option.AutoSharePhoto SizeQualityISOMinimum Shutter SpeedBack Select](https://usermanual.wiki/Samsung-Electronics-Co/NX3000/User-Guide-2248332-Page-38.png)
![My Camera > Selecting functions (options)385 Press [D/I] to move to an option, and then press [o].• You can also drag the option list, and then touch an option.• Press [m] or touch Back to go back to the previous menu.(3:2) (5472x3648)(3:2) (3888x2592)(3:2) (2976x1984)(3:2) (1728x1152)(16:9) (5472x3080)Photo SizeBack Set6 Press [m] or touch Back to switch to Shooting mode.Using the Smart panelTouch on the screen to access some functions such as Exposure, ISO, and White Balance.E.g. Adjust the exposure value in P mode1 On the Mode screen, select Program.2 Touch .3 Press [D/I/C/F] to move to EV, and then press [o].• You can also select an option by touching it.4 Press [D/I/C/F] to adjust the exposure value, and then press [o].• You can also drag the dial on the screen to adjust the option.EV : 0AdjustBackYou can adjust some options by dragging them.](https://usermanual.wiki/Samsung-Electronics-Co/NX3000/User-Guide-2248332-Page-39.png)
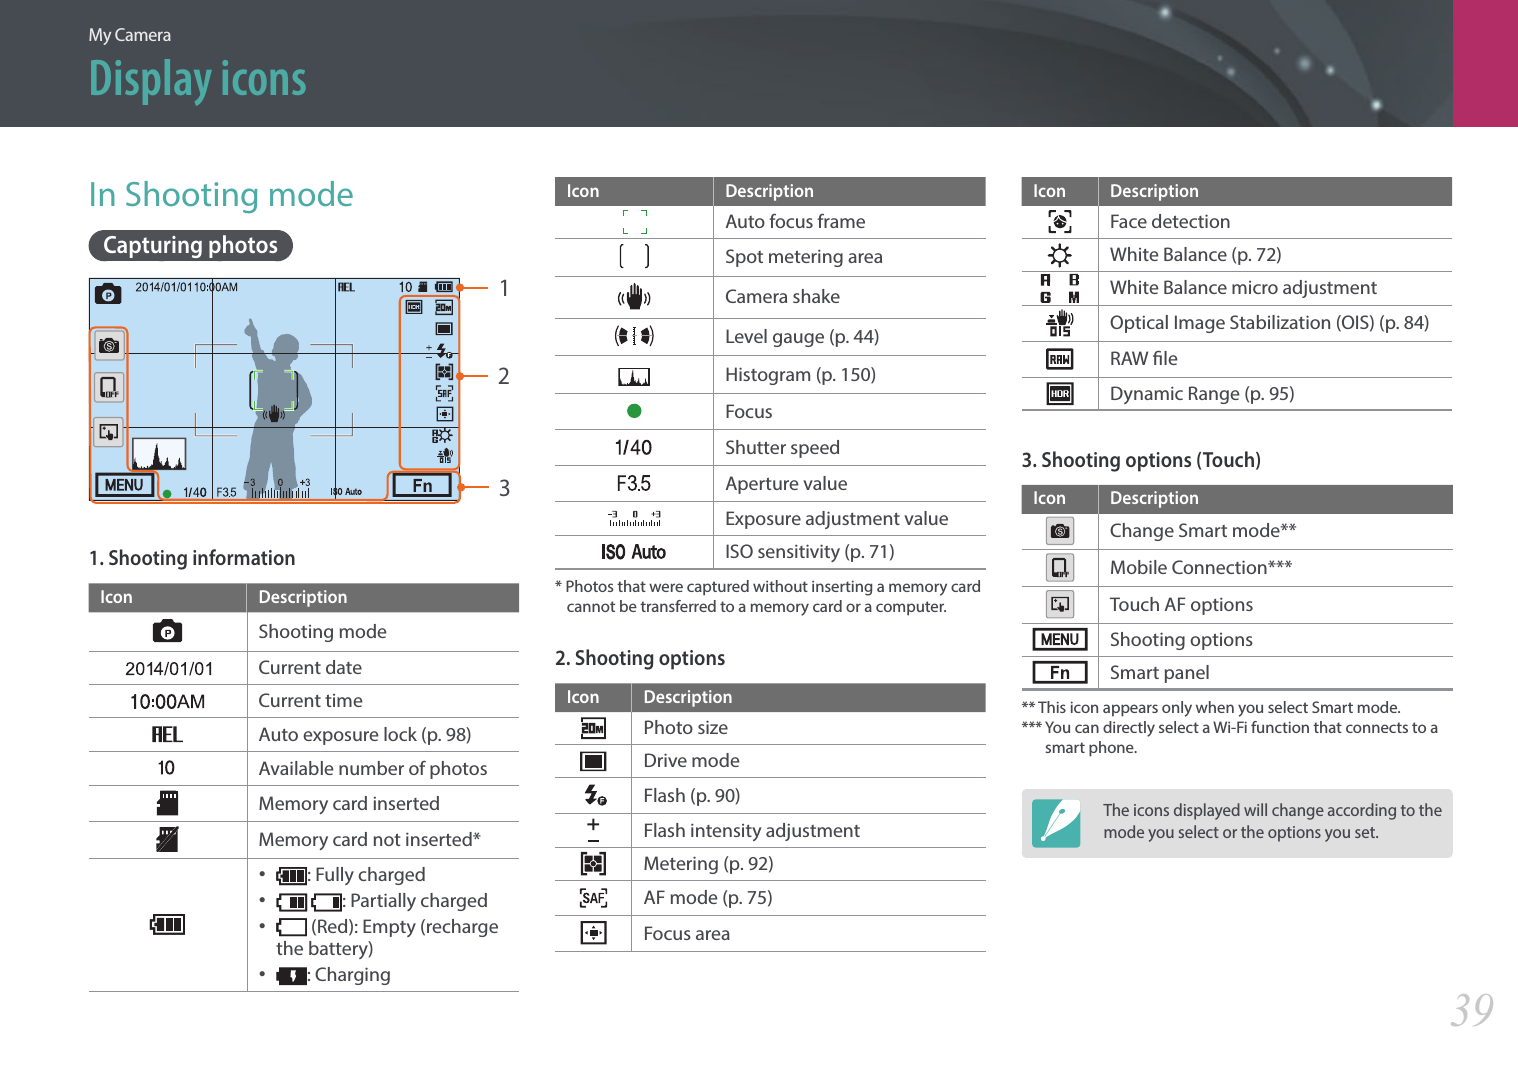
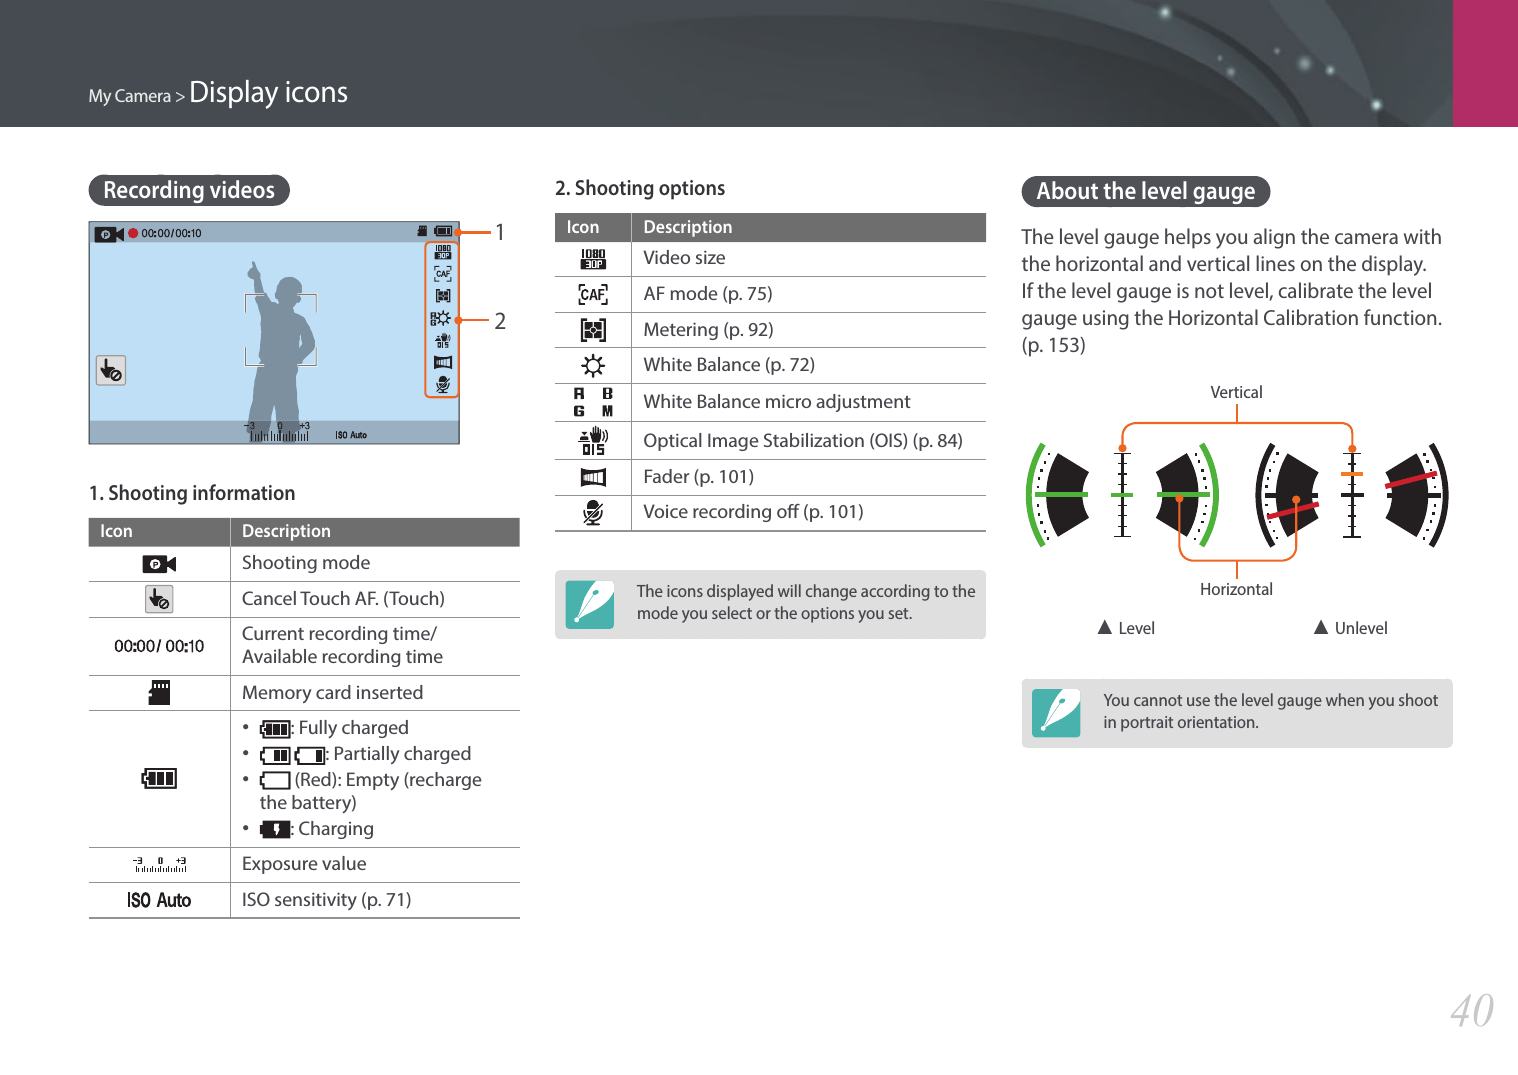
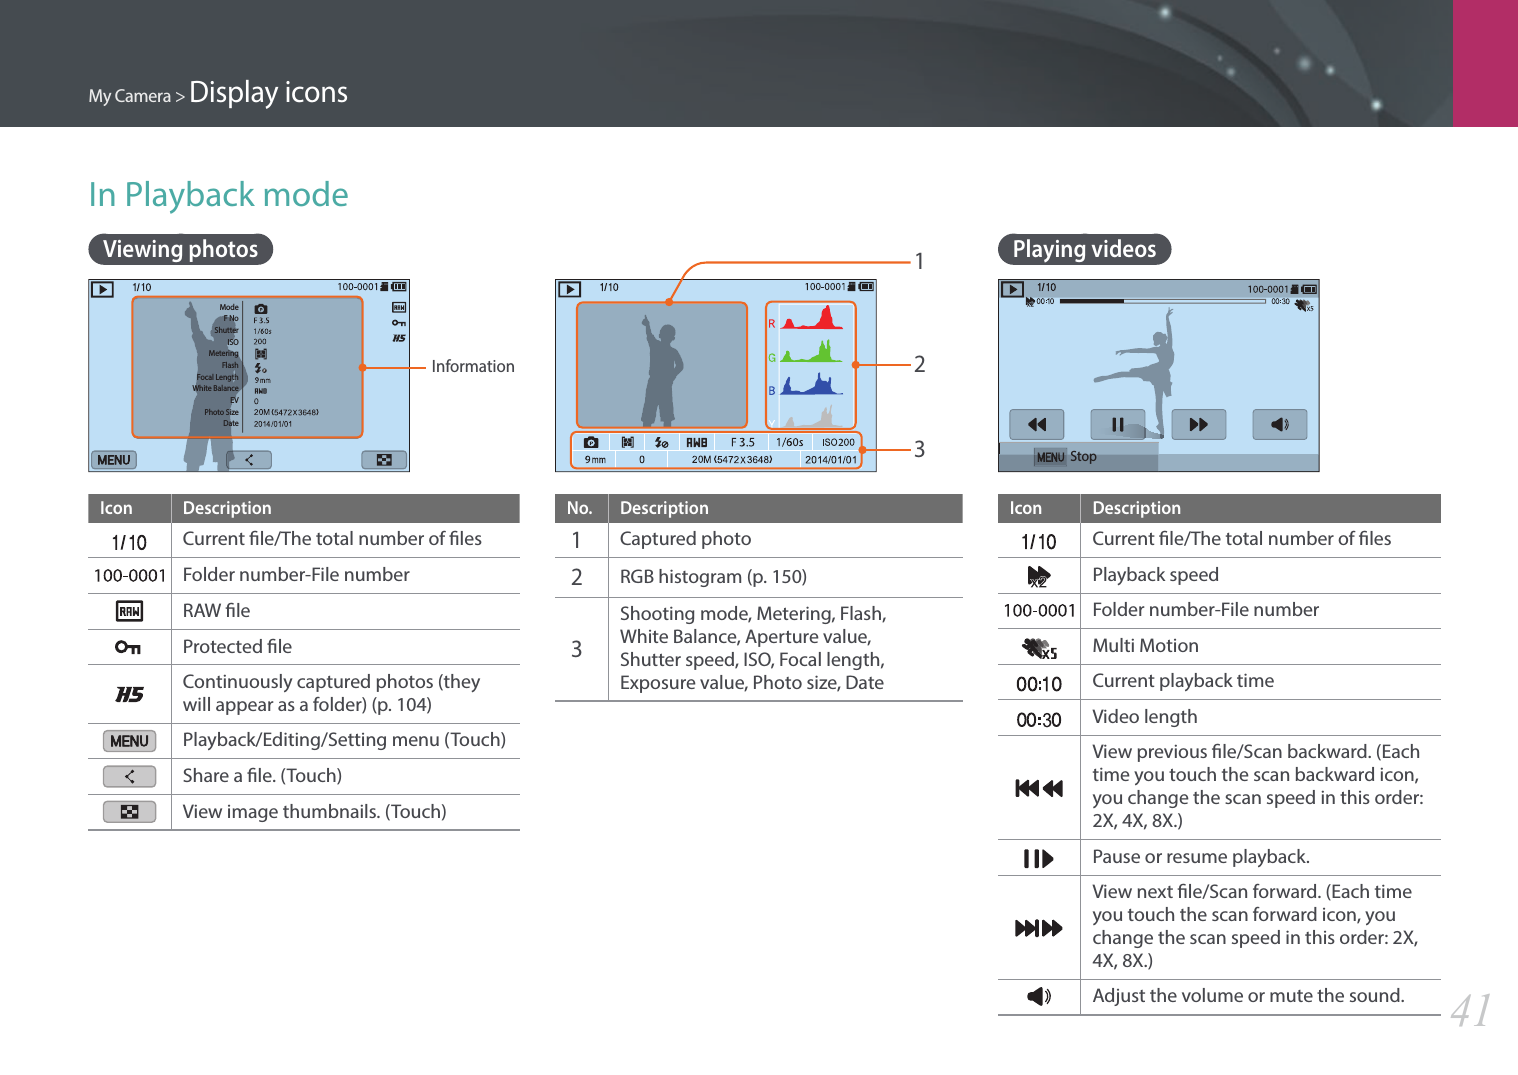
![My Camera > Display icons42Changing the information displayedPress [D] repeatedly to change the display type.Mode Display typeShooting• Basic shooting information (Shooting mode, Shutter speed, Aperture value, Exposure value, ISO sensitivity, etc.)• Basic shooting information + Shooting option buttons (MENU, Fn, Mobile Connection, Touch AF) + Level gauge• Basic shooting information + Shooting option buttons + Current shooting options information (Photo size, Drive mode, Flash, Metering, AF mode, etc.)• Basic shooting information + Shooting option buttons + Current shooting options information + Histogram + Date and timePlayback• Basic information• Display all information about the current le.• Display all information about the current le including RGB histogram.• No information (when connected to an HDTV or an HDMI- enabled monitor)](https://usermanual.wiki/Samsung-Electronics-Co/NX3000/User-Guide-2248332-Page-43.png)
![My Camera46Shooting modesTwo simple shooting modes—Auto and Smart mode—help you capture photos with numerous automatic settings. Additional modes allow for greater customization of settings.Auto modeIn Auto mode, the camera recognizes surrounding conditions and automatically adjusts factors that contribute to exposure, including shutter speed, aperture value, metering, White Balance, and exposure compensation. As the camera controls most of the functions, some shooting functions are limited. This mode is useful for capturing quick snapshots with the least amount of adjustment.1 On the Mode screen, select Auto.2 Align your subject in the frame.3 Half-press [Shutter] to focus.• The camera selects a scene. An appropriate scene icon appears at the screen.A](https://usermanual.wiki/Samsung-Electronics-Co/NX3000/User-Guide-2248332-Page-47.png)
![My Camera > Shooting modes47Recognizable scenesIcon DescriptionLandscapesScenes with bright white backgroundsLandscapes at nightPortraits at nightLandscapes with backlightingPortraits with backlightingPortraitsClose-up photos of objectsClose-up photos of textSunsetsIndoors, darkPartially litClose-up with spot lightingPortraits with spot lightingIcon DescriptionBlue skiesForested areas typically consist of green-colored subjectsClose-up photos of colorful subjectsCamera is stabilized on a tripod and the subject is not moving for a certain period of time. (when shooting in the dark)Actively moving subjectsFireworks (when using a tripod)4 Press [Shutter] to capture the photo.• The camera may detect dierent scenes, even the same subjects, depending on external factors such as camera shake, lighting, or distance to the subject.• If the camera does not recognize an appropriate scene mode, it uses the default settings for the Auto mode.• Even if it detects a face, the camera may not select a portrait mode depending on the subject's position or lighting.• Even if you use a tripod, the camera may not detect the tripod mode ( ) if the subject is moving.• The camera consumes more battery power, because it changes settings often to select appropriate scenes.](https://usermanual.wiki/Samsung-Electronics-Co/NX3000/User-Guide-2248332-Page-48.png)
![My Camera > Shooting modes48Smart modeIn Smart mode, you can capture photos with options that are preset for a specic scene.1 On the Mode screen, select Smart.2 Select a scene. Back SetOption DescriptionBeauty FaceCapture a portrait with options to hide facial imperfections.Best FaceCapture multiple photos and replace faces to create the best possible image.Continuous ShotCapture a series of photos of moving subjects.Kids ShotCapture a photo with a funny sound to get a kid's attention.Option DescriptionLandscapeCapture still-life scenes and landscapes.MacroCapture small or close-up subjects.FoodCapture a photo of food in more colorful tones.Parties and IndoorsCapture a crisp indoor photos.Action FreezeCapture subjects moving at high speed.Rich TonesCapture a photo with vibrant colors.PanoramaCapture a wide panoramic scene in a single photo.WaterfallCapture scenes with waterfalls.SilhouetteCapture subjects as dark shapes against a light background.SunsetCapture scenes at sunset, with natural-looking reds and yellows.NightCapture a photo with less blurring and image noise in low light conditions.FireworksCapture scenes with reworks.Light TraceCapture scenes with the light trailing in low-light conditions.3 Half-press [Shutter] to focus, and then press [Shutter] to capture.](https://usermanual.wiki/Samsung-Electronics-Co/NX3000/User-Guide-2248332-Page-49.png)
![My Camera > Shooting modes49Using the Best Face modeIn Best Face mode, you can capture multiple photos and replace faces to create the best possible image. Use this mode to select the best image for each individual when capturing group photos.1 On the Mode screen, select Smart ĺ Best Face.2 Align your subject in the frame, and then half-press [Shutter] to focus.3 Press [Shutter] to capture the photo.• The camera captures 5 photos consecutively.• The rst photo is set as the background image.• The camera automatically detects faces after shooting.4 Touch a face to replace.Back Save5 Touch the best image from the 5 faces that were captured.• Repeat steps 4 and 5 to replace the rest of the faces in the photo.• The icon will appear on the image that the camera recommends.6 Press [o] to save the photo. • Use a tripod to prevent your camera from shaking.• The resolution is set to 5.9M or less.](https://usermanual.wiki/Samsung-Electronics-Co/NX3000/User-Guide-2248332-Page-50.png)
![My Camera > Shooting modes50Capturing panoramic photosIn Panorama mode, you can capture a wide panoramic scene in a single photo. Panorama mode captures and combines a series of photos to create a panoramic image. 1 On the Mode screen, select Smart ĺ Panorama.2 Press and hold [Shutter], and then slowly move the camera in the direction you selected.• An arrow toward the direction of motion is displayed, and the entire shooting image is displayed in the preview box.• When the scenes are aligned, the camera captures the next photo automatically.3 When you are nished, release [Shutter].• The camera will automatically save the shots into one photo.• If you release [Shutter] while shooting, the panoramic shooting stops and photos that have been captured are saved.• The resolution varies depending on the panoramic photo you captured.• In Panorama mode, some shooting options are not available.• The camera may stop shooting due to the shooting composition or the subject's movement.• In Panorama mode, your camera may not capture the entire last scene if you stop moving the camera to improve the photo quality. To capture the entire scene, move your camera slightly beyond the point where you want the scene to end.• For best results when capturing panoramic photos, avoid the following: -moving the camera too quickly or too slowly -moving the camera too little to capture the next image -moving the camera at irregular speeds -shaking the camera -shooting in dark places -capturing moving subjects nearby -shooting conditions where the brightness or color of light is changing• Photos taken are automatically saved, and shooting is stopped under the following conditions: -if you change the shooting direction while shooting -if you move the camera too rapidly -if you do not move the camera](https://usermanual.wiki/Samsung-Electronics-Co/NX3000/User-Guide-2248332-Page-51.png)
![My Camera > Shooting modes51Program modeThe camera automatically adjusts shutter speed and aperture value so that an optimal exposure value can be achieved.This mode is useful when you want to capture shots of constant exposure while being able to adjust other settings.1 On the Mode screen, select Program.2 Set the desired options. 3 Half-press [Shutter] to focus, and then press [Shutter] to capture the photo.](https://usermanual.wiki/Samsung-Electronics-Co/NX3000/User-Guide-2248332-Page-52.png)
![My Camera > Shooting modes52Program ShiftProgram Shift function lets you adjust the shutter speed and aperture value while the camera maintains the same exposure. Press [I] to select the shutter speed and aperture value and press [C/F] to adjust the aperture value. The shutter speed will change according to the aperture value.Minimum shutter speedSet the shutter speed not to be slower than the selected speed. However, if an optimal exposure value cannot be achieved because the ISO sensitivity reached the maximum ISO value that is set by Auto ISO Range, shutter speed may be slower than the selected minimum shutter speed.To set the minimum shutter speed, In Shooting mode, press [m] ĺ b ĺ Minimum Shutter Speed ĺ an option.• This feature is available only when the ISO sensitivity is set to Auto.• This feature is available only in Program or Aperture Priority mode.](https://usermanual.wiki/Samsung-Electronics-Co/NX3000/User-Guide-2248332-Page-53.png)
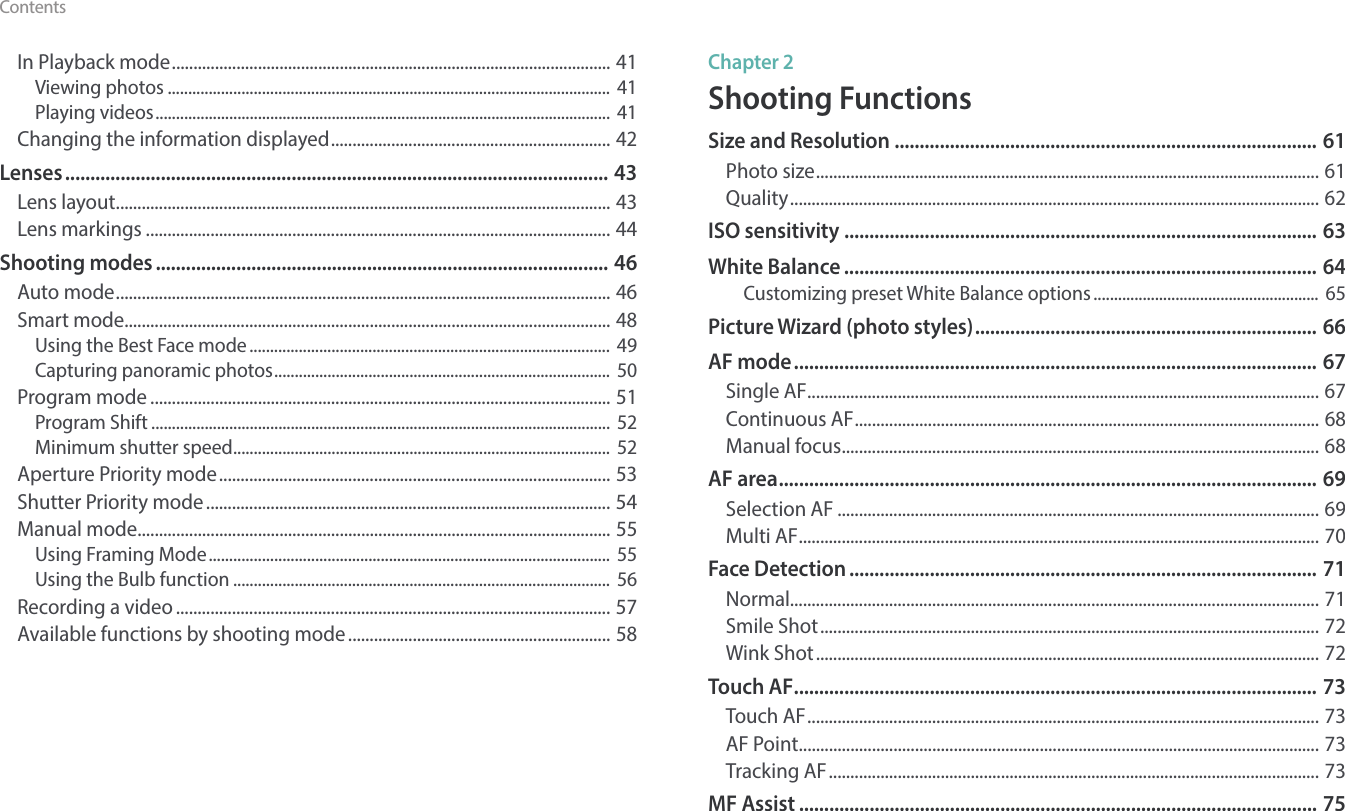
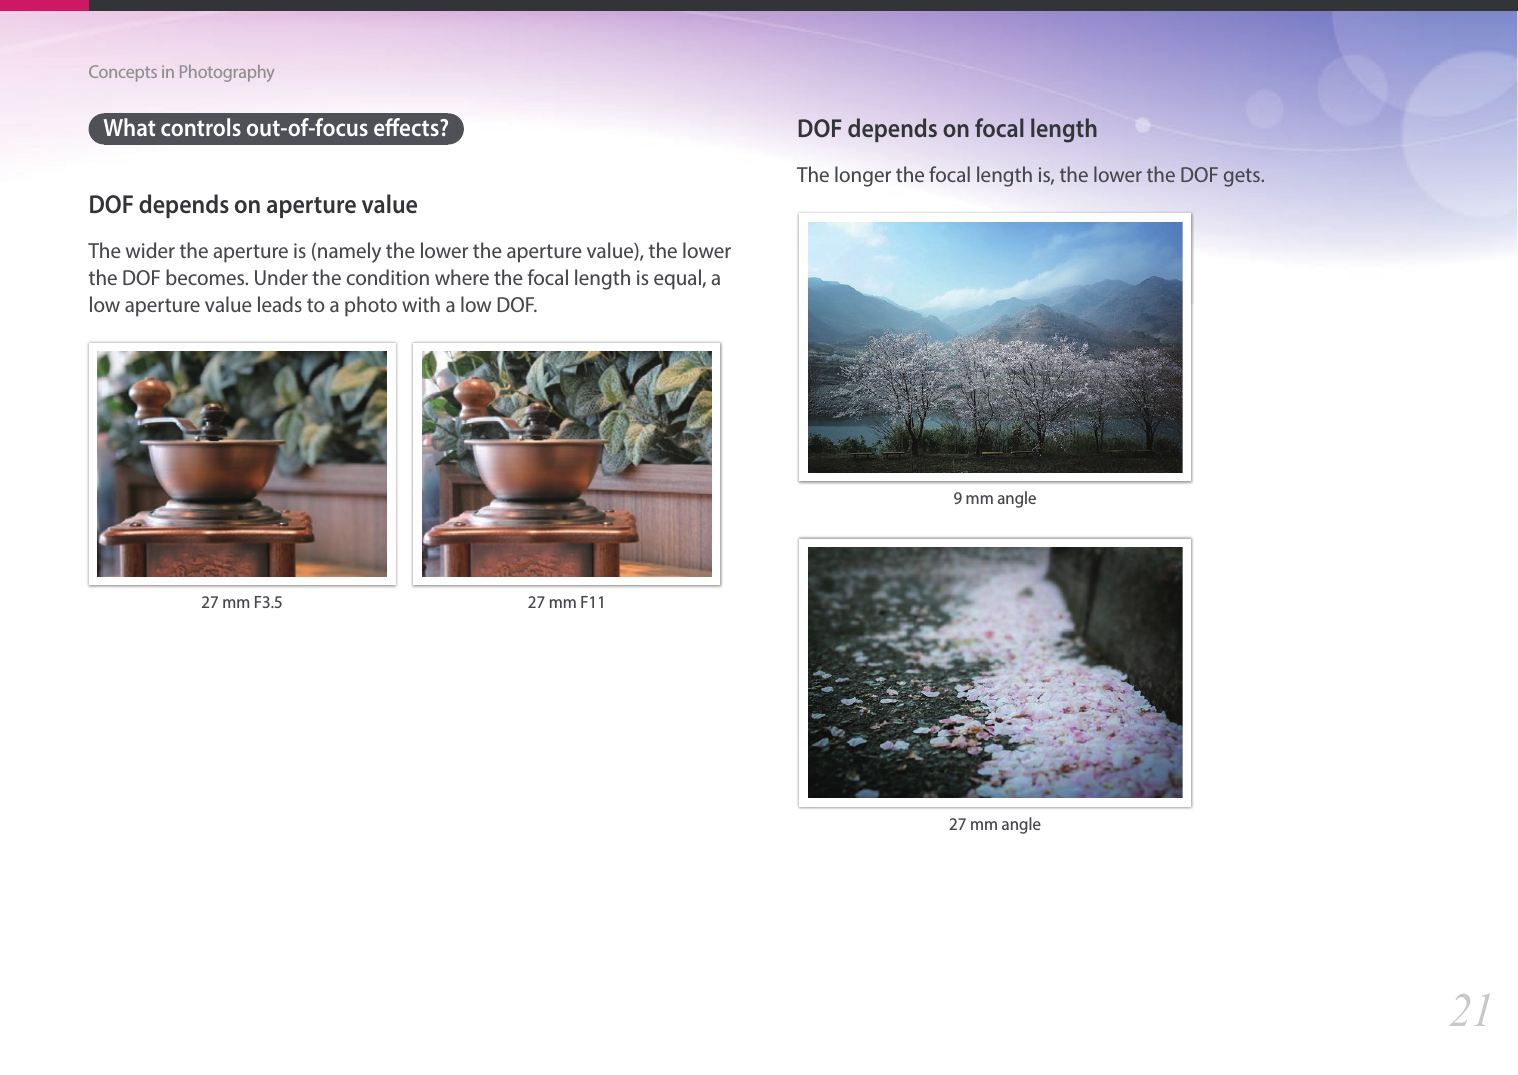
![My Camera > Shooting modes53Aperture Priority modeIn Aperture Priority mode, the camera automatically calculates shutter speed according to the aperture value you choose. You can adjust the depth of eld (DOF) by changing the aperture value. This mode is useful for taking portraits, owers, or landscape shots.Large Depth of Field Small Depth of Field1 On the Mode screen, select Aperture Priority.2 Press [I] to select the aperture value.3 Press [C/F] to adjust the aperture value.4 Set the desired options. 5 Half-press [Shutter] to focus, and then press [Shutter] to capture the photo.• In low-light settings, you may need to increase the ISO sensitivity to prevent blurred photos.• To set the minimum shutter speed, in Shooting mode, press [m] ĺ b ĺ Minimum Shutter Speed ĺ an option.• You can also touch the aperture value on the screen to adjust it.](https://usermanual.wiki/Samsung-Electronics-Co/NX3000/User-Guide-2248332-Page-54.png)
![My Camera > Shooting modes54Shutter Priority modeIn Shutter Priority mode, the camera automatically adjusts the aperture value according to the shutter speed you choose. This mode is useful for capturing photos of fast-moving subjects or for creating tracer eects in a photo.For example, set the shutter speed to over 1/500 s to freeze the subject. To make the subject appear blurred set the shutter speed to below 1/30 s.Slow shutter speed Fast shutter speed1 On the Mode screen, select Shutter Priority.2 Press [I] to select the shutter speed.3 Press [C/F] to adjust the shutter speed.4 Set the desired options. 5 Half-press [Shutter] to focus, and then press [Shutter] to capture the photo.• In order to compensate for the reduced amount of light allowed by fast shutter speeds, open the aperture and let in more light. If your photos are still too dark, increase the ISO value.• You can also touch the shutter speed on the screen to adjust it.](https://usermanual.wiki/Samsung-Electronics-Co/NX3000/User-Guide-2248332-Page-55.png)
![My Camera > Shooting modes55Manual modeManual mode lets you adjust the shutter speed and aperture value manually. In this mode, you can fully control the exposure of your photos.This mode is useful in controlled shooting environments, such as a studio, or when it is necessary to ne-tune camera settings. The Manual mode is also recommended for shooting night scenes or reworks.1 On the Mode screen, select Manual.2 Press [I] to select the aperture value or shutter speed.3 Press [C/F] to adjust the aperture value or shutter speed.4 Set the desired options.5 Half-press [Shutter] to focus, and then press [Shutter] to capture the photo.You can also touch the aperture value or shutter speed on the screen to adjust it.Using Framing ModeWhen you adjust the aperture value or shutter speed, the exposure changes according to the settings, so the display may darken. With this function on, the brightness of the display is constant regardless of the settings, so you can better frame your shot.To use Framing Mode,In Shooting mode, press [m] ĺ b ĺ Framing Mode ĺ an option.](https://usermanual.wiki/Samsung-Electronics-Co/NX3000/User-Guide-2248332-Page-56.png)
![My Camera > Shooting modes56Using the Bulb functionUse the Bulb function to shoot night scenes or the night sky. While you are pressing [Shutter], the shutter is left open so you can create moving light eects.To use a bulb,In Shooting mode, press [I] to select the shutter speed ĺ Press [C] repeatedly to set the shutter speed to Bulb ĺ Press and hold [Shutter] for the desired time.• If you set a high ISO value or open the shutter for a long time, image noise may increase.• Drive options, ash, and One touch shot cannot be used with the Bulb function.• The Bulb function is available only in Manual mode.• Use a tripod and shutter release to prevent your camera from shaking.• The longer you open the shutter, the longer it takes to save a photo. Do not turn the camera o while the camera saves a photo. • If you use this function for a long time, use a fully charged battery.](https://usermanual.wiki/Samsung-Electronics-Co/NX3000/User-Guide-2248332-Page-57.png)
![My Camera > Shooting modes57• H.264 (MPEG-4 part10/AVC) is the latest video coding format established in 2003 collaboratively by ISO-IEC and ITU-T. Since this format uses a high compression rate, more data can be saved in less memory space.• If you have the image stabilizer option on when shooting a movie, the camera may record the image stabilizer sound.• If you remove the camera lens while recording a movie, the recording will be interrupted. Do not change the lens while recording.• If you change the shooting angle of the camera suddenly while shooting a movie, the camera may not be able to record images accurately. Use a tripod to minimize camera shake.• The camera supports only the Multi AF function when recording a video. You cannot use any other focus area setting functions.• When the size of a movie le exceeds 4 GB, the camera automatically stops recording even if the maximum recording time (29 minutes and 59 seconds) has not been reached.• If you use a slow writing memory card, the recording of your movie can be interrupted because the card cannot process data at the rate the video is being shot. If this occurs, replace the card with a faster memory card or reduce the video size (for example, from 1280X720 to 640X480).• When formatting a memory card, always format using the camera. If you format on another camera or a PC, you can lose les on the card or cause a change in the capacity of the card.• While recording a video in the same ISO sensitivity, the screen may be darker than taking a photo. Adjust the ISO sensitivity.• When you record a video in Program, Aperture Priority, or Shutter Priority mode, ISO is automatically set to Auto.Recording a videoIn Shooting mode, you can record Full HD videos (1920X1080) by pressing (Video recording). The camera lets you record a video up to 29 minutes and 59 seconds in length at 30 fps, and saves the les in MP4 (H.264) format. The sound is recorded via the camera's microphone.Select Fader to fade in or out a scene. You can also select Voice or other options to set recording options. (p. 101)1 On the Mode screen, select a shooting mode.• This feature may not work in some modes.2 Set the desired options.3 Press (Video recording) to start recording.• The camera will retain the shutter speed and aperture value that you have set before starting shooting.4 Press (Video recording) again to stop.• You can also press [Shutter] to stop recording.](https://usermanual.wiki/Samsung-Electronics-Co/NX3000/User-Guide-2248332-Page-58.png)
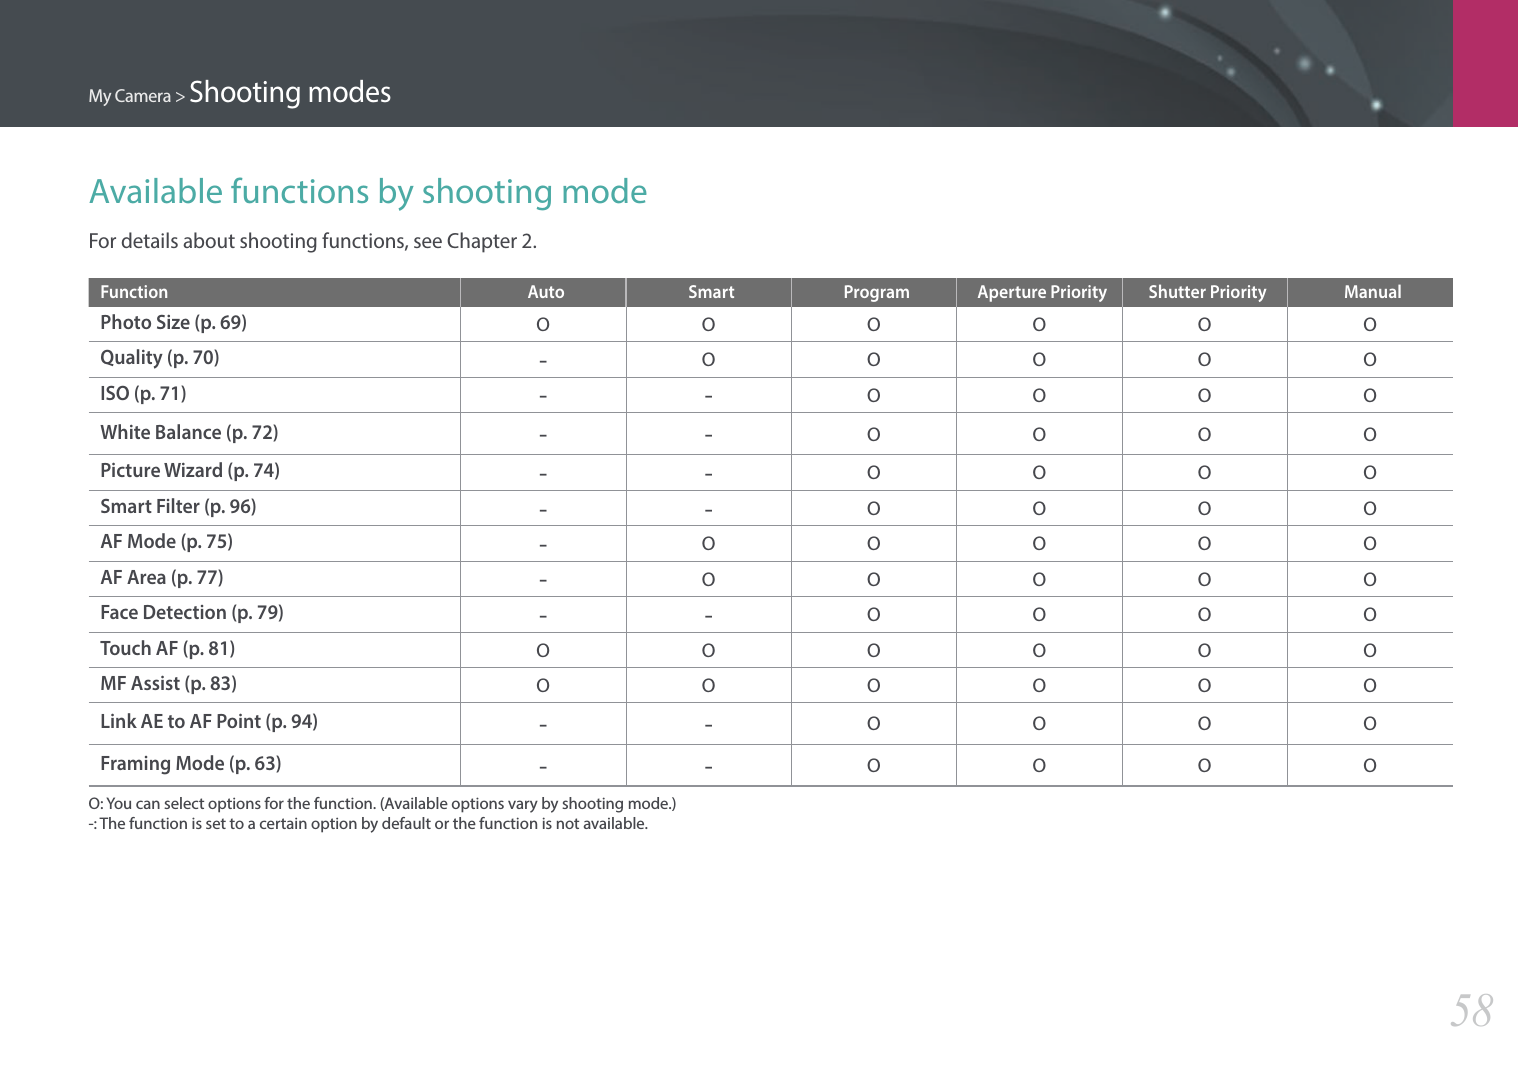
![61Shooting Functions > Size and Resolution61Shooting Functions > Size and ResolutionShooting FunctionsPhoto sizeAs you increase the resolution, your photo or video will include more pixels, so it can be printed on larger paper or displayed on a larger screen. When you use a high resolution, the le size will also increase. Select a low resolution for photos that will be displayed in a digital picture frame or uploaded to the web.To set the size, In Shooting mode, press [m] ĺ b ĺ Photo Size ĺ an option.* DefaultIcon Size Recommended for(3:2) 5472x3648* Printing on A1 paper.(3:2) 3888x2592 Printing on A2 paper.(3:2) 2976x1984 Printing on A3 paper.(3:2) 1728x1152 Printing on A5 paper.(16:9) 5472x3080 Printing on A1 paper or viewing on an HDTV.(16:9) 3712x2088 Printing on A3 paper or viewing on an HDTV.(16:9) 2944x1656 Printing on A4 paper or viewing on an HDTV.(16:9) 1920x1080 Printing on A5 paper or viewing on an HDTV.(1:1) 3648x3648 Printing a square photo on A1 paper.(1:1) 2640x2640 Printing a square photo on A3 paper.(1:1) 2000x2000 Printing a square photo on A4 paper.(1:1) 1024x1024 Attaching to an email. Available options may dier depending on shooting conditions.Size and Resolution](https://usermanual.wiki/Samsung-Electronics-Co/NX3000/User-Guide-2248332-Page-62.png)
![62Shooting Functions > Size and ResolutionQualityThe camera saves photos in either the JPEG or RAW format.Photos captured by a camera are often transformed to the JPEG format and stored in the memory according to the settings of the camera at the time of shooting. RAW les are not transformed to the JPEG format and are stored in the memory without any changes. RAW les have the le extension "SRW". To adjust and calibrate exposures, White Balances, tones, contrasts, and colors of the RAW les, or to convert them into JPEG or TIFF format, use the Adobe Photoshop Lightroom program found on the supplied DVD-ROM.Ensure you have enough space on the memory card to save photos in the RAW format.To set the quality, In Shooting mode, press [m] ĺ b ĺ Quality ĺ an option.* DefaultIcon Format DescriptionJPEGSuper Fine*:• Compressed for the best quality.• Recommended for printing in large size.JPEGFine:• Compressed for better quality.• Recommended for printing in normal size.* DefaultIcon Format DescriptionJPEGNormal:• Compressed for normal quality.• Recommended for printing in small size or uploading to the web.RAWRAW:• Save a photo without data loss.• Recommended for editing after shooting.RAW+JPEG RAW + S.Fine: Save a photo in both the JPEG (S.Fine quality) and RAW format.RAW+JPEG RAW + Fine: Save a photo in both the JPEG (Fine quality) and RAW format.RAW+JPEG RAW + Normal: Save a photo in both the JPEG (Normal quality) and RAW format.Available options may dier depending on shooting conditions.](https://usermanual.wiki/Samsung-Electronics-Co/NX3000/User-Guide-2248332-Page-63.png)
![63Shooting Functions > ISO sensitivity63Shooting Functions > ISO sensitivityShooting FunctionsThe ISO sensitivity value represents the sensitivity of camera to light. The larger the ISO value, the more sensitive the camera is to light. Consequently, by selecting a higher ISO sensitivity value, you can capture photos in dim or dark places at faster shutter speeds. However, this may increase electronic noise and result in a grainy photo.To set ISO sensitivity, In Shooting mode, press [m] ĺ b ĺ ISO ĺ an option.ExamplesISO 160 ISO 400ISO 800 ISO 3200• Increase the ISO value in places where ash use is prohibited. You can capture a clear photo by setting a high ISO value without having to secure more light.• Use the Noise Reduction function in order to reduce the visual noise that can appear on photos of a high ISO value. (p. 147)• Available options may dier depending on the shooting conditions.• You can also touch the ISO value on the screen to adjust it.ISO sensitivity](https://usermanual.wiki/Samsung-Electronics-Co/NX3000/User-Guide-2248332-Page-64.png)
![64Shooting Functions > White Balance64Shooting Functions > White BalanceShooting FunctionsWhite Balance represents the light source that inuences on the color of a photo. The color of a photo depends on the type and quality of the light source. If you want the color of your photo to be realistic, select an appropriate lighting condition to calibrate the White Balance, such as Auto WB, Daylight, Cloudy, Tungsten, or adjust color temperature manually.You can also adjust color for the preset light sources so that the colors of the photo match the actual scene under mixed lighting conditions.To set the White Balance, In Shooting mode, press [m] ĺ b ĺ White Balance ĺ an option.* DefaultIcon DescriptionAuto WB*: Use automatic settings depending on the lighting conditions.Daylight: Select when taking outdoor photos on a sunny day. This option results in photos closest to the natural colors of the scene.Cloudy: Select when taking outdoor photos on a cloudy day or in shadows. Photos captured on cloudy days tend to be more bluish than on sunny days. This option osets that eect.Fluorescent White: Select when shooting under a daylight uorescent lamp, especially for white uorescent light.* DefaultIcon DescriptionNFluorescent NW: Select when shooting under a daylight uorescent lamp, especially for white uorescent light of very white hues.DFluorescent Daylight: Select when shooting under a daylight uorescent lamp, especially for white uorescent light of slightly bluish hue.Tungsten: Select when taking indoor photos under incandescent bulbs or halogen lamps. Incandescent tungsten bulbs tend to have a reddish hue. This option osets that eect.Flash WB: Select when using a ash.Custom Set: Use your pre-dened settings. You can manually set the White Balance by pressing [D], and then shooting a white sheet of paper. Fill the spot metering circle with the paper and set the White Balance.Color Temperature: Manually adjust the color temperature of the light source. Color temperature is a measurement in degrees Kelvin that indicates the specic type of light source. You can get a warmer photo with a higher value, and a cooler photo with a lower value. Press [D], and then adjust the color temperature.Available options may dier depending on shooting conditions.White Balance](https://usermanual.wiki/Samsung-Electronics-Co/NX3000/User-Guide-2248332-Page-65.png)
![65Shooting Functions > White BalanceCustomizing preset White Balance optionsYou can also customize preset White Balance options.To customize preset options,In Shooting mode, press [m] ĺ b ĺ White Balance ĺ an option ĺ [D] ĺ press [D/I/C/F]. White Balance : DaylightBack Set ResetYou can also touch an area on the screen.ExamplesAuto WB DaylightFluorescent Daylight Tungsten](https://usermanual.wiki/Samsung-Electronics-Co/NX3000/User-Guide-2248332-Page-66.png)
![66Shooting Functions > Picture Wizard (photo styles)66Shooting Functions > Picture Wizard (photo styles)Shooting FunctionsPicture Wizard lets you apply dierent photo styles to your photo to create various looks and emotional moods. You can also create and save your own photo styles by adjusting color, saturation, sharpness, and contrast for each style.There is no rule for which style is suitable in which conditions. Experiment with dierent styles and nd your own settings.To set a photo style, In Shooting mode, press [m] ĺ b ĺ Picture Wizard ĺ an option.ExamplesStandard Vivid PortraitLandscape Forest RetroCool Calm Classic• You can also adjust the value of the preset style settings. Select a Picture Wizard option, press [D], and then adjust color, saturation, sharpness, or contrast.• To customize your own picture wizard, select , , or , and then adjust the color, saturation, sharpness, and contrast.• Picture Wizard options cannot be set with Smart Filter options at the same time.Picture Wizard (photo styles)](https://usermanual.wiki/Samsung-Electronics-Co/NX3000/User-Guide-2248332-Page-67.png)
![67Shooting Functions > AF mode67Shooting Functions > AF modeShooting FunctionsAF modeLearn how to adjust the camera’s focus according to the subjects.You can select a focusing mode appropriate to the subject among Single Auto Focus, Continuous Auto Focus, and Manual Focus. The AF function is activated when you press [Shutter] halfway. In the MF mode, you have to press [C/F] to focus manually.In most cases, you can have a focus by selecting Single AF. Fast moving subjects or subjects with small shading dierences to the background are dicult to focus. Select an appropriate focusing mode for such instances.To set the auto focus mode, In Shooting mode, press [F] ĺ an option.• You can also set the option by pressing [m] ĺ b ĺ AF Mode ĺ an option in Shooting mode.• The available options may dier depending on the lens in use.Single AFSingle AF is appropriate for shooting a still subject. When you press [Shutter] halfway, the focus xes in the focus area. The area turns green when the focus is achieved.](https://usermanual.wiki/Samsung-Electronics-Co/NX3000/User-Guide-2248332-Page-68.png)
![68Shooting Functions > AF modeContinuous AFWhile you are pressing [Shutter] halfway, the camera continues to automatic focusing. Once the focus area is xed on the subject, the subject is always in focus even when moving. This mode is recommended for shooting a person on a bicycle, a running dog, or a car racing scene.Manual focusYou can manually focus on a subject by pressing [C/F] on the camera. The MF Assist function lets you easily achieve a focus. While you are adjusting the focus, the focus area is magnied. This mode is recommended for shooting an object similar in color to the background, a night scene, or reworks.• After capturing a photo with manual focus, press [o] ĺ [C/F] to manually adjust the focus again.• If you use this function, you cannot set Touch AF, Face Detection, AF Area, and Link AE to AF Point options.• While you are adjusting the focus, the manual focus scale () appears.](https://usermanual.wiki/Samsung-Electronics-Co/NX3000/User-Guide-2248332-Page-69.png)
![69Shooting Functions > AF area69Shooting Functions > AF areaShooting FunctionsThe AF area function changes the positions of the focus area.Generally, cameras focus on the nearest subject. When there are a lot of subjects, however, unwanted subjects can be in focus. In order to prevent unwanted subjects from being in focus, change the focus area so that a desired subject is in focus. You can get a clearer and sharper photo by selecting an appropriate focus area.To set the auto focus area, In Shooting mode, press [m] ĺb ĺ AF Area ĺ an option.Available options may dier depending on shooting conditions.Selection AFYou can set the focus on an area you want. Apply an out-of-focus eect to make the subject more distinguishable.The focus on the photo below was repositioned and resized so that it ts the subject’s face. To resize or move the focus area, in Shooting mode, press [o]. Touch an area to focus on it or press [D/I/C/F] to move the focus area, and pinch your ngers together or spread them apart to resize the focus area.AF area](https://usermanual.wiki/Samsung-Electronics-Co/NX3000/User-Guide-2248332-Page-70.png)
![70Shooting Functions > AF areaMulti AFThe camera displays a green rectangle in places where focus is set correctly. The photo is divided into two or more areas, and the camera obtains focus points of each area. It is recommended for scenery photos.When you press [Shutter] halfway, the camera displays the focus areas as shown in the photo below.](https://usermanual.wiki/Samsung-Electronics-Co/NX3000/User-Guide-2248332-Page-71.png)
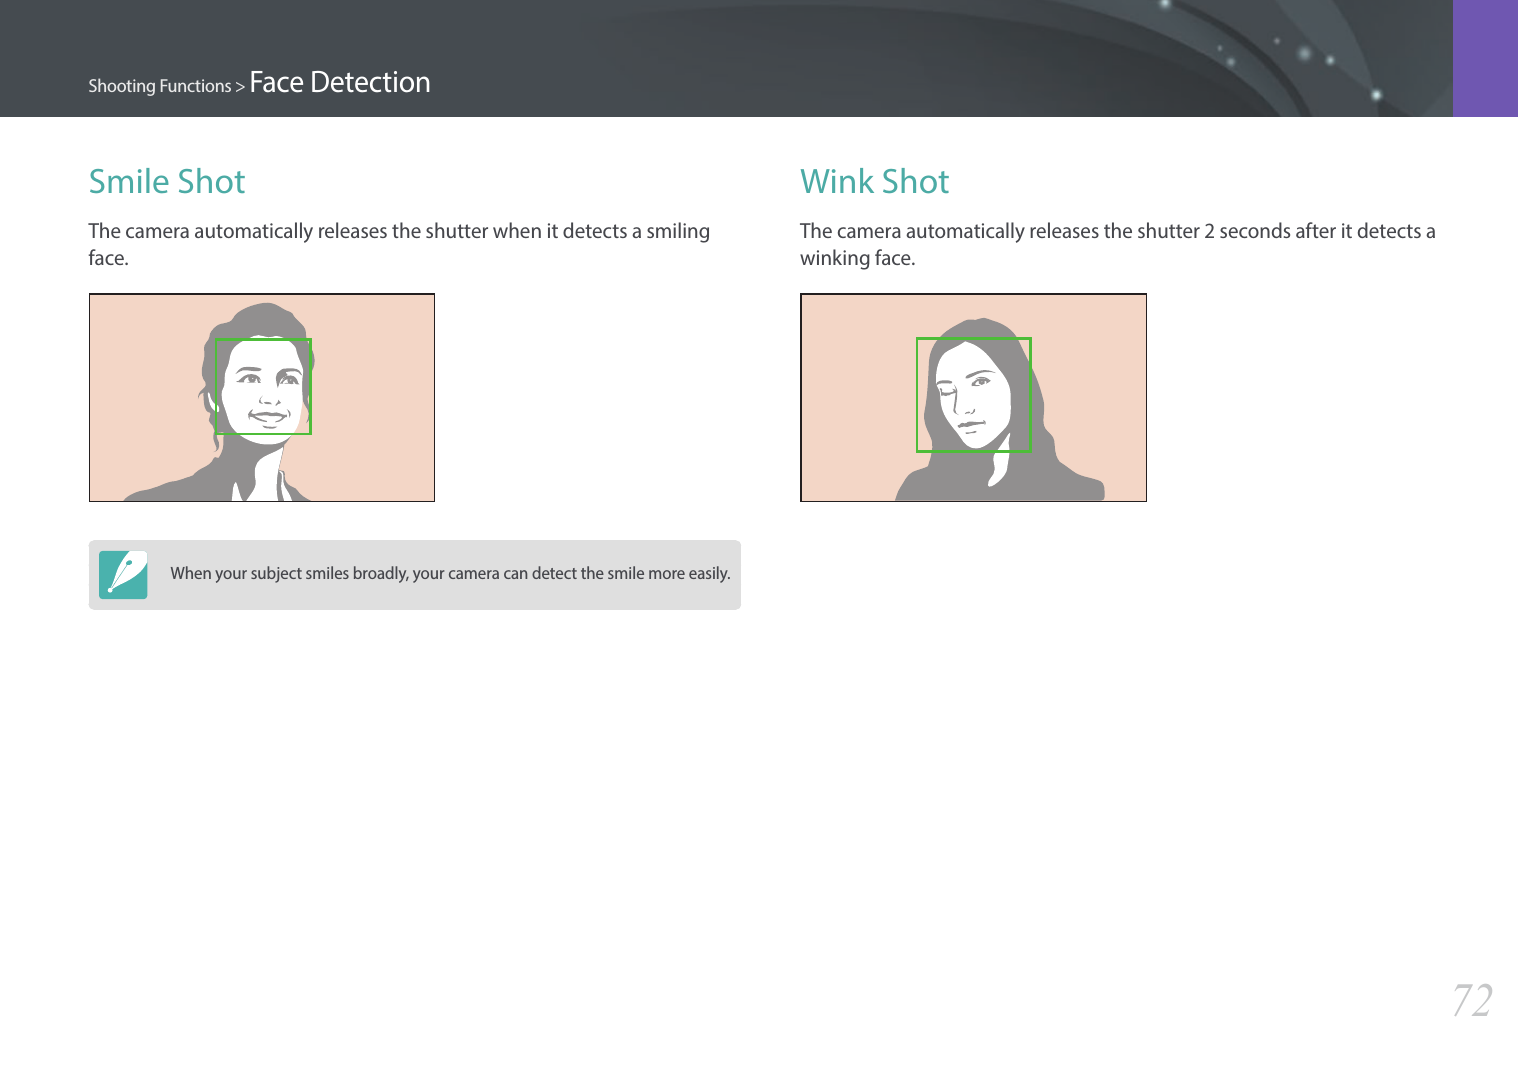
![71Shooting Functions > Face Detection71Shooting Functions > Face DetectionShooting FunctionsFace DetectionUse Face Detection options to capture a self portrait or a smiling face.To use the face detection function, In Shooting mode, press [m] ĺb ĺ Face Detection ĺ an option.• When your camera detects a face, it tracks the detected face automatically.• When you use the Face Detection AF option, the camera focuses on the area with the white frame automatically. • Depending on the Picture Wizard options, Face Detection may not be eective. • When you set manual focus, Face Detection may not be available.• Face Detection may not be eective when: -the subject is far from the camera (The focus frame will appear orange for Smile Shot.) -it is too bright or too dark -the subject is not facing the camera -the subject is wearing sunglasses or a mask -the subject’s facial expression changes drastically -the subject is backlit or the lighting conditions are unstable • When you set Face Detection options, the AF area is automatically set to Multi AF. • Depending on the Face Detection options you selected, some shooting options may not be available.NormalThe camera focuses on human faces preferentially. Faces of up to 10 people can be detected. This setting is recommended for shooting a group of people.When you press [Shutter] halfway, the camera focuses on faces as shown in the photo below. In cases of shooting a group of people, the camera displays the focus on the nearest person’s face in white and the rest of the people’s faces in gray.](https://usermanual.wiki/Samsung-Electronics-Co/NX3000/User-Guide-2248332-Page-72.png)
![73Shooting Functions > Touch AF73Shooting Functions > Touch AFShooting FunctionsTracking AFTracking AF allows you to track and automatically focus on your subject, even when the subject is moving or when you change the shooting composition. White frame: Your camera is tracking the subject.Green frame: Your subject is in focus when you half-press [Shutter].Red frame: Your camera failed to focus. Select or focus on an area that you touch on the screen. Additionally, focus on the subject and capture a photo by touching on the screen.To set Touch AF, In Shooting mode, press [m] ĺb ĺTouch AF ĺ an option.• Available options may dier depending on the shooting conditions.• You can also touch on the screen and select an option in Shooting mode.Touch AFTouch AF allows you to select and focus on the focus area that you touch on the screen.AF PointThe focus area will correspond to the area you touch on the screen and the focus will not be achieved.Touch AF](https://usermanual.wiki/Samsung-Electronics-Co/NX3000/User-Guide-2248332-Page-74.png)

![75Shooting Functions > MF Assist75Shooting Functions > MF AssistShooting FunctionsIn the manual focus mode, you have to press [C/F] to focus. When you use the MF Assist function, you can achieve a clearer focus because the focus area is magnied. This function is only available on a lens that supports manual focus.To set the manual focus assist, In Shooting mode, press [m] ĺ b ĺ MF Assist ĺ an option.* DefaultOption DescriptionODo not use the MF Assist function.Enlarge x5*The focus area is magnied by 5 times when you adjust the focus.Enlarge x8The focus area is magnied by 8 times when you adjust the focus.MF Assist](https://usermanual.wiki/Samsung-Electronics-Co/NX3000/User-Guide-2248332-Page-76.png)
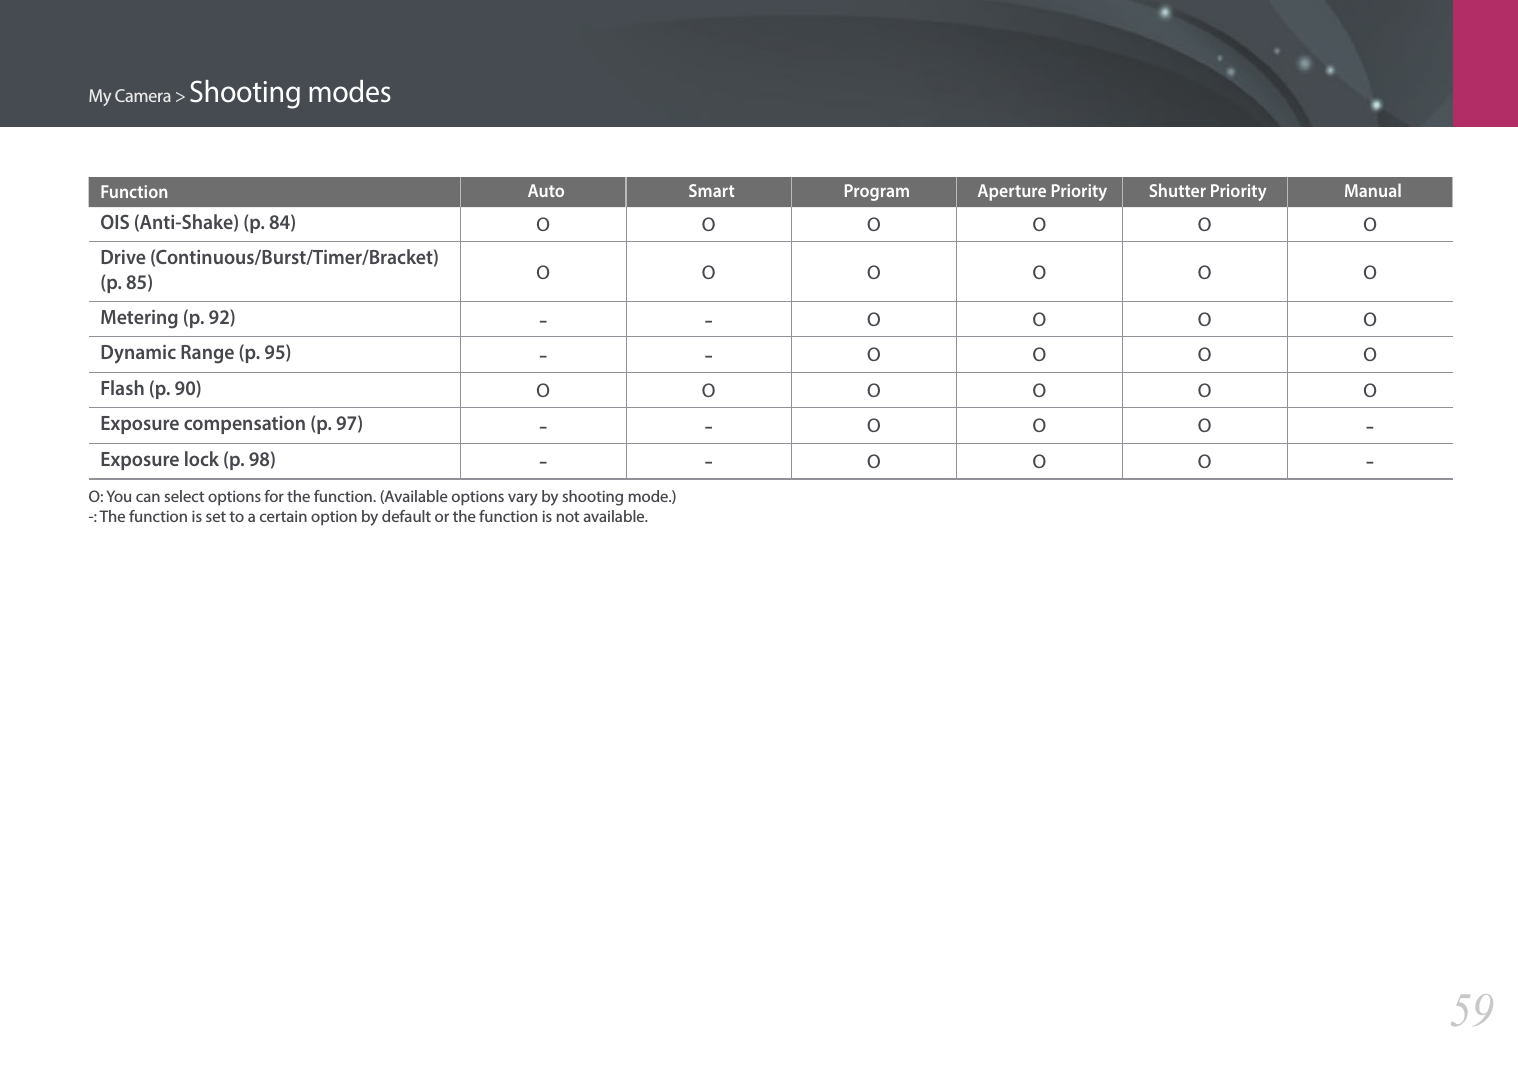
![76Shooting Functions > Optical Image Stabilization (OIS)76Shooting Functions > Optical Image Stabilization (OISSS))Shooting FunctionsUse the Optical Image Stabilization (OIS) function to minimize camera shake. OIS may not be available with some lenses.Camera shake tends to occur in dark places or when shooting indoors. In such cases, the camera uses slower shutter speeds in order to increase the amount of light taken in, which can result in a blurry photo. You can prevent this situation by using the OIS function.To set OIS options, In Shooting mode, press [m] ĺb ĺ OIS (Anti-Shake) ĺ an option.* DefaultIcon DescriptionMode 1*: The OIS function is applied only when you press [Shutter] in full or half.Mode 2: The OIS function is on.O: The OIS function is o. Optical Image Stabilization (OIS)Without OIS correction With OIS correction• OIS may not function properly when: -you move your camera to follow a moving subject -there is too much camera shake -the shutter speed is slow (for example, when you select Night in Smart mode) -the battery is low -you capture a close-up shot• If you use the OIS function with a tripod, your images may be blurred by the vibration of the OIS sensor. Deactivate the OIS function when you use a tripod.• If the camera is hit or dropped, the display will be blurry. If this occurs, turn o the camera, and then turn it on again.• Use the OIS function only when needed because the function consumes more battery power.• This option may not be available with some lenses.](https://usermanual.wiki/Samsung-Electronics-Co/NX3000/User-Guide-2248332-Page-77.png)
![77Shooting Functions > Drive (shooting method)77Shooting Functions > Drive (shooting method)Shooting FunctionsYou can set the shooting method, such as Continuous, Burst, Timer or Bracketing.Select Single to capture one photo at a time. Select Continuous or Burst to shoot fast moving subjects. Select AE Bracket, WB Bracket, P Wiz Bracket, or Depth Bracket to adjust exposure, White Balance, apply picture Wizard eects, or capture photos with dierent depths of eld. You can also select Timer to capture a photo automatically after a specied time.To change the shooting method, In Shooting mode, press [C] ĺ an option.• You can also set the option by pressing [m] ĺ b ĺ Drive ĺ a shooting method in Shooting mode.• Available options may dier depending on shooting conditions.SingleCapture one photo whenever you press [Shutter]. Recommended for general conditions.Drive (shooting method)](https://usermanual.wiki/Samsung-Electronics-Co/NX3000/User-Guide-2248332-Page-78.png)
![78Shooting Functions > Drive (shooting method)ContinuousContinuously capture photos while you are pressing [Shutter]. You can capture up to 6 photos per second.BurstConsecutively capture up to 10 shots per second (3 seconds), 15 shots per second (2 seconds), or 30 shots per second (1 second) when you press [Shutter] once. It is recommended for shooting the rapid motion of fast moving subjects such as racing cars.• To set the number of shots, in Shooting mode, press [C] ĺ Burst, and then press [D].• The photo size is set to 5M. • It may take longer to save a photo. • You cannot use the ash with this option.• Shutter speed must be faster than 1/30 second.• Photos captured with this option may be slightly enlarged when saving.• You cannot set an ISO option higher than ISO 3200.• This option cannot be used with the RAW le format and is not available when the photo quality is set to RAW.](https://usermanual.wiki/Samsung-Electronics-Co/NX3000/User-Guide-2248332-Page-79.png)
![79Shooting Functions > Drive (shooting method)TimerCapture a photo after a specied time. You can set the Timer for 2 to 30 seconds.• Press [Shutter] to stop capturing.• To set the timer details, in Shooting mode, press [C] ĺ Timer, and then press [D].Auto Exposure Bracketing (AE Bracket)When you press [Shutter], the camera captures 3 consecutive photos: the original, one a step darker, and one a step lighter. Use a tripod to prevent blurry photos as the camera captures three photos continuously. You can adjust the settings in Bracketing Settings menu.Exposure -2OriginalExposure +2To set the bracketing details, press [m] ĺ d ĺ Bracketing Settings ĺ an option.](https://usermanual.wiki/Samsung-Electronics-Co/NX3000/User-Guide-2248332-Page-80.png)
![80Shooting Functions > Drive (shooting method)White Balance Bracketing (WB Bracket)When you press [Shutter], the camera captures 3 consecutive photos: the original and two more with dierent White Balance settings. The original photo is captured when you press [Shutter]. The other two are automatically adjusted according to the White Balance you have set. You can adjust the settings in Bracketing Settings menu.WB-2OriginalWB+2• To set the bracketing details, press [m] ĺ d ĺ Bracketing Settings ĺ an option. • This option cannot be used with the RAW le format and is not available when the photo quality is set to RAW. Picture Wizard Bracketing (P Wiz Bracket)When you press [Shutter], the camera captures three consecutive photos, each with a dierent Picture Wizard setting. The camera captures a photo and applies the three Picture Wizard options you have set to the image captured. You can select three dierent settings in Bracketing Settings menu.VividStandardRetro• To set the bracketing details, press [m] ĺ d ĺ Bracketing Settings ĺ an option. • This option cannot be used with the RAW le format and is not available when the photo quality is set to RAW.](https://usermanual.wiki/Samsung-Electronics-Co/NX3000/User-Guide-2248332-Page-81.png)
![81Shooting Functions > Drive (shooting method)Depth Bracketing When you press [Shutter], the camera captures three consecutive photos, each with a dierent depth of eld by adjusting the aperture value. Use a tripod to prevent blurry photos as the camera captures three photos continuously. You can adjust the settings in Bracketing Settings menu. • To set the bracketing details, press [m] ĺ d ĺ Bracketing Settings ĺ an option. • This feature is available only in Program or Aperture Priority mode.• If the aperture value is set to its maximum or minimum, two photos will be captured with the maximum or minimum aperture value.](https://usermanual.wiki/Samsung-Electronics-Co/NX3000/User-Guide-2248332-Page-82.png)
![82Shooting Functions > Flash82Shooting Functions > FlashShooting FunctionsIn order to capture a realistic photo of a subject, the amount of light should be constant. When the light source varies, you can use a ash and supply a constant amount of light. Select appropriate settings according to a light source and a subject.To set ash options, In Shooting mode, press [m] ĺ b ĺ Flash ĺ an option.Icon DescriptionO: Do not use the ash.ASmart Flash: The camera automatically adjusts the brightness of the ash according to the amount of light in the surrounding environment.AAuto: The ash automatically res in dark places.Auto Red-eye: The ash automatically res and reduces red-eyes.Fill in: The ash res whenever you capture a photo. (Brightness is automatically adjusted.)Fill-in Red: The ash res whenever you capture a photo and reduces red-eyes.1st Curtain: The ash res immediately after the shutter opens. The camera captures a photo of a subject earlier in an action sequence clearly. Ball moving directionIcon Description2nd Curtain: The ash res just before the shutter closes. The camera captures a photo of a subject later in an action sequence clearly. Ball moving direction• The available options may dier depending on shooting conditions.• There is an interval between two bursts of the ash. Do not move until the ash res a second time.• If you select O, the ash does not re even when an external ash is attached.• For some lenses, the lens may block the light from the internal ash. If this occurs, use an optional external ash.• If you attach a lens other than the one provided, using a lens mount adapter, no ashes will re.Use only Samsung-approved ashes. Using incompatible external ashes may damage your camera. Flash](https://usermanual.wiki/Samsung-Electronics-Co/NX3000/User-Guide-2248332-Page-83.png)
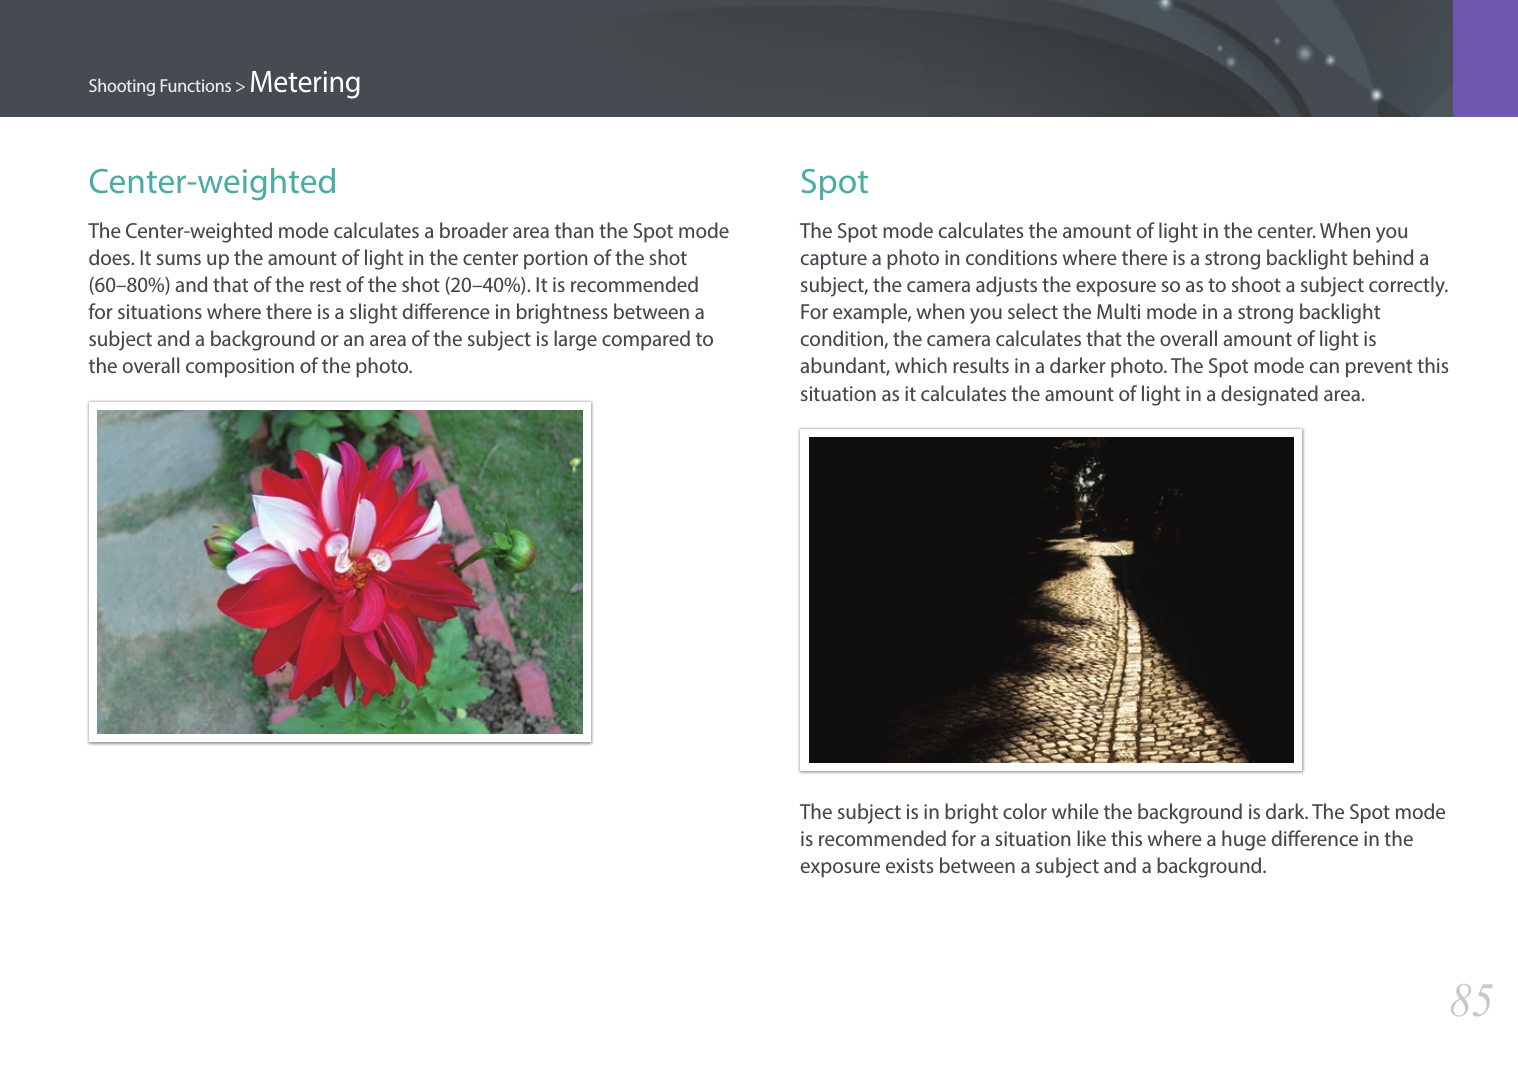
![83Shooting Functions > FlashReducing the red-eye eectIf the ash res when you capture a photo of a person in the dark, a red glow may appear in the eyes. To reduce the red-eye eect, select Auto Red-eye or Fill-in Red.Without red-eye reduction With red-eye reductionIf the subject is too far from the camera or moves when the rst ash res, red-eyes may not be reduced.Adjusting the ash intensityWhen the ash is on, adjust the ash intensity ±2 levels.To set the ash intensity, In Shooting mode, touch ĺ Flash ĺ move to a desired option ĺ press [D] ĺ [C/F].Back SetFlash : Fill in• You can also drag the slider or touch +/- to adjust the intensity.• Adjusting the flash intensity may not be eective when: -the subject is too close to the camera -you set a high ISO sensitivity -the exposure value is too big or too small• In some shooting modes, you cannot use this function.• If the subject is too close when you use the ash, some light may be blocked, resulting in a dark photo. Ensure that the subject is within the recommended range, which varies by lens.](https://usermanual.wiki/Samsung-Electronics-Co/NX3000/User-Guide-2248332-Page-84.png)
![84Shooting Functions > Metering84Shooting Functions > MeteringShooting FunctionsThe metering mode refers to the way in which a camera measures the quantity of light.The camera measures the amount of light in a scene, and in many of its modes, uses the measurement to adjust various settings. For example, if a subject looks darker than its actual color, the camera captures an overexposed photo of it. If a subject looks lighter than its actual color, the camera captures an underexposed photo of it.The brightness and overall mood of the photo can also be aected by how the camera measures the amount of light. Select an appropriate setting for a shooting condition.To set a metering option, In Shooting mode, press [m] ĺ b ĺ Metering ĺ an option.MultiThe Multi mode calculates the amount of light in multiple areas. When light is sucient or insucient, the camera adjusts the exposure by averaging the overall brightness of the scene. This mode is suitable for general photos.Metering](https://usermanual.wiki/Samsung-Electronics-Co/NX3000/User-Guide-2248332-Page-85.png)
![86Shooting Functions > MeteringMeasuring the exposure value of the focus area When this function is turned on, the camera automatically sets an optimal exposure by calculating the brightness of the focus area. This function is only available when you select Spot metering or Multi metering, and Selection AF.To set this function, In Shooting mode, press [m] ĺ b ĺ Link AE to AF Point ĺ an option.](https://usermanual.wiki/Samsung-Electronics-Co/NX3000/User-Guide-2248332-Page-87.png)
![87Shooting Functions > Dynamic Range87Shooting Functions > Dynamic RangeShooting FunctionsThis function automatically corrects the loss of bright detail that can occur due to shading dierences in the photo.To set Dynamic Range options, In Shooting mode, press [m] ĺ b ĺ Dynamic Range ĺ an option.Without Dynamic Range eect With Dynamic Range eect* DefaultIcon DescriptionO*: Do not use Dynamic Range.Smart Range+: Correct the loss of bright detail.HDR: Capture 3 photos with dierent exposures, and then combine them to create a single image automatically.• You cannot set an ISO option higher than ISO 3200.• Dynamic Range options cannot be set with drive options other than Single or Timer.• Dynamic Range options cannot be set with Smart Filter or Picture Wizard options at the same time.• Dynamic Range options cannot be set with the Bulb function.Dynamic Range](https://usermanual.wiki/Samsung-Electronics-Co/NX3000/User-Guide-2248332-Page-88.png)
![88Shooting Functions > Smart Filter88Shooting Functions > Smart FilterShooting FunctionsSmart Filter lets you apply special eects to your photos or videos. You can select various lter options to create special eects that are dicult to be achieved with normal lenses.To set Smart Filter options,In Shooting mode, press [m] ĺ b ĺ Smart Filter ĺ an option.* DefaultOption DescriptionO*No eectVignettingApply the retro-looking colors, high contrast, and strong vignette eect of Lomo cameras.MiniatureApply a tilt-shift eect to make the subject appear in miniature.SketchApply a pen sketch eect.Fish EyeDistort close objects to imitate the visual eect of a sheye lens.Smart Filter options cannot be set with Picture Wizard options at the same time.Smart Filter](https://usermanual.wiki/Samsung-Electronics-Co/NX3000/User-Guide-2248332-Page-89.png)
![89Shooting Functions > Exposure compensation89Shooting Functions > Exposure compensationShooting FunctionsThe camera automatically sets the exposure by measuring the levels of light from the photo’s composition and the position of a subject. If the exposure set by the camera is higher or lower than you expected, you can adjust the exposure value manually. The exposure value is adjustable in ±3 increments. The camera displays the exposure warning in red for each step beyond ±3 range.To adjust the exposure value, touch the exposure level indicator on the screen or touch ĺ EV and adjust the exposure value. You can also press [I] to select the exposure value and press [C/F] to adjust it.You can check the exposure value by the position of the exposure level indicator.Exposure level indicatorIncreased exposure (brighter)Decreased exposure (darker) Exposure warning Standard exposure index-2Original+2Exposure compensation](https://usermanual.wiki/Samsung-Electronics-Co/NX3000/User-Guide-2248332-Page-90.png)
![90Shooting Functions > Exposure lock90Shooting Functions > Exposure lockShooting FunctionsWhen you cannot achieve an appropriate exposure because of a strong brightness contrast, lock the exposure and then capture a photo.To lock the exposure, adjust the photo’s composition on which you want to calculate the exposure, and then press the Custom button. (when the function of the Custom button is set to AEL) (p. 151)After locking the exposure, aim the lens where you desire, and then press [Shutter].Exposure lock](https://usermanual.wiki/Samsung-Electronics-Co/NX3000/User-Guide-2248332-Page-91.png)
![91Shooting Functions > Video functions91Shooting Functions > Video functionsShooting FunctionsThe functions available for video are explained below.Movie sizeSet the movie size.To set movie size options, In Shooting mode, press [m] ĺ g ĺ Movie Size ĺ an option.When Video Out is set to NTSC* DefaultIcon Size Recommended for*1920X1080 (30 fps) (16:9) View on a Full HDTV. 1280X720 (30 fps) (16:9) View on an HDTV.640X480 (30 fps) (4:3) View on a TV.320X240 (30 fps) (4:3) Post on a website using the wireless network (30 seconds maximum).When Video Out is set to PAL* DefaultIcon Size Recommended for*1920X1080 (25 fps) (16:9) View on a Full HDTV. 1280X720 (25 fps) (16:9) View on an HDTV.640X480 (25 fps) (4:3) View on a TV.320X240 (25 fps) (4:3) Post on a website using the wireless network (30 seconds maximum).Video functions](https://usermanual.wiki/Samsung-Electronics-Co/NX3000/User-Guide-2248332-Page-92.png)
![92Shooting Functions > Video functionsMovie qualitySet the Movie quality.To set movie quality options, In Shooting mode, press [m] ĺ g ĺ Movie Quality ĺ an option.* DefaultIcon Extension DescriptionMP4 (H.264) Normal: Record videos in normal quality.MP4 (H.264) HQ*: Record videos in high quality.Multi MotionSet the playing speed of a video.To set playing speed options,In Shooting mode, press [m] ĺg ĺMulti Motion ĺ an option.* DefaultIcon Descriptionx0.25: Record a video to view it at 1/4 normal speed during playback. (Available only with 640x480 or 320x240)x1*: Record a video to view it at normal speed during playback.x5: Record a video to view it at 5X normal speed during playback.x10: Record a video to view it at 10X normal speed during playback.x20: Record a video to view it at 20X normal speed during playback.• If you select an option other than x1, the sound recording function and the Distortion Correct function will not be supported.• The available options may dier depending on shooting conditions.](https://usermanual.wiki/Samsung-Electronics-Co/NX3000/User-Guide-2248332-Page-93.png)
![93Shooting Functions > Video functionsVoiceSometimes, a muted video is more appealing than the one with sound. Turn the voice o to record a muted video. To set voice options, In Shooting mode, press [m] ĺ g ĺ Voice ĺ an option.FaderYou can fade in or fade out a scene using the fader function on the camera without having to do it on a PC. Set the fade in option to gradually fade in at the start of the scene. Set the fade out option to gradually fade out the scene. Use the function appropriately and add dramatic eects on your videos.To set fader options, In Shooting mode, press [m] ĺ g ĺFader ĺ an option.* DefaultIcon DescriptionO*: Fader function not used.In: Scene gradually fades in.Out: Scene gradually fades out.In-Out: The fader function is applied at the start and end of the scene.When you use the fader function, it may take longer to save a le.](https://usermanual.wiki/Samsung-Electronics-Co/NX3000/User-Guide-2248332-Page-94.png)
![95Playback/EditingLearn how to view photo and video thumbnails and how to protect or delete les.If you perform no operations for a while, information and icons on the screen disappear. When you operate the camera again, they will reappear.Viewing photos1 Press [y].• The most recent le you captured will be displayed.2 Press [C/F] to scroll through les.• You can also drag the image left or right to move to another le.You may not be able to edit or play back les that were captured with other cameras, due to unsupported sizes or codecs. Use a computer or another device to edit or play back these les.Viewing image thumbnailsIn order to search for photos and videos you want, convert to the thumbnail view by pressing [I] or touching in Playback mode. The thumbnail view displays multiple images at a time so that you can easily look through items you wish to nd. You can also classify and display les by category, such as date or le type.In thumbnail view, press [m] ĺ z ĺ View ĺ an item to select the thumbnail view mode. Searching and managing files](https://usermanual.wiki/Samsung-Electronics-Co/NX3000/User-Guide-2248332-Page-96.png)
![96Playback/Editing > Searching and managing lesViewing les by category1 In the thumbnail view, press [m] ĺ z ĺ Filter ĺ a category.* DefaultOption DescriptionAll*View les normally.DateView les by the date they were saved.File TypeView les by the le type.2 Select a list to open it.3 Select a le to view it.Viewing les as a folderContinuous and burst shots appear as a folder. Selecting a folder will play back all photos automatically. Deleting a folder will delete all photos in the folder.1 In Playback mode, press [C/F] to move to a desired folder.• You can also drag the image left or right to move to a desired folder.• The camera will automatically play back photos in the folder.2 Press [o] to open the folder.• You can also touch the folder on the screen to open the folder.](https://usermanual.wiki/Samsung-Electronics-Co/NX3000/User-Guide-2248332-Page-97.png)
![97Playback/Editing > Searching and managing les3 Press [C/F] to move to another le.• You can also drag the image left or right to move to another le.4 Press [o] to return to Playback mode.• You can also touch to return to Playback mode.Protecting lesProtect your les from accidental deletion.1 In Playback mode, scroll to a le.2 Press [m] ĺ z ĺ Protect ĺ On.You cannot delete or rotate a protected le.](https://usermanual.wiki/Samsung-Electronics-Co/NX3000/User-Guide-2248332-Page-98.png)
![98Playback/Editing > Searching and managing lesDeleting lesDelete les in Playback mode and secure more space on your memory card. Protected les are not deleted.Deleting a single leYou can select a single le and delete it.1 In Playback mode, select a le, and then press [n].2 When the pop-up message appears, select Ye s .Deleting multiple lesYou can select multiple les and delete them.1 In Playback mode, press [m] ĺ z ĺ Delete ĺ Multiple Delete.• Alternatively, in thumbnails view, press [n], and then select les to delete.2 Select les you want to delete by pressing [C/F], and then press [o].• Press [o] again to cancel your selection.3 Press [n].4 When the pop-up message appears, select Yes.Deleting all lesYou can delete all les on the memory card at once.1 In Playback mode, press [m].2 Select z ĺ Delete ĺ Delete All.3 When the pop-up message appears, select Yes.](https://usermanual.wiki/Samsung-Electronics-Co/NX3000/User-Guide-2248332-Page-99.png)
![99Playback/EditingEnlarging a photoYou can enlarge photos when viewing them in Playback mode. Pinch your ngers together or spread them apart on the screen to reduce or enlarge a photo. Drag the photo to move the magnied area. You can also use the Trim function to extract the portion of the image displayed on the screen and save it as a new le.Magnied areaMagnication (The maximum magnication may dier by resolution.) Back CropTo Do thisMove magnied areaPress [D/I/C/F].Crop the enlarged imagePress [o]. (saved as a new le)Return to the original imagePress [m].Double-tap an area to enlarge it quickly.Viewing a slide showYou can view photos in a slide show and apply various eects to the slide show.1 In Playback mode, press [m].2 Select z ĺ Slide Show Options.3 Select a slide show eect option.• Skip to step 4 to start a slide show with no eects.* DefaultOption DescriptionPlay ModeSet whether or not to repeat the slide show. (One Play*, Repeat)IntervalSet the interval between photos. (1 sec*, 3 sec, 5 sec, 10 sec)Eect• Set a scene change eect between photos.• Select O to cancel eects.Viewing photos](https://usermanual.wiki/Samsung-Electronics-Co/NX3000/User-Guide-2248332-Page-100.png)
![100Playback/Editing > Viewing photos4 Press [m].5 Select Start Slide Show.6 View the slide show.• Press [o] to pause.• Press [o] again to resume. • Press [m] to stop the slide show and return to Playback mode.Auto rotatingWith Auto Rotate on, the camera automatically rotates photos you have captured vertically so they t the screen horizontally.To set auto rotate options, In Playback mode, press [m] ĺ z ĺ Auto Rotate ĺ an option.](https://usermanual.wiki/Samsung-Electronics-Co/NX3000/User-Guide-2248332-Page-101.png)
![101Playback/EditingIn Playback mode, you can play a video, capture an image from a video, or crop a video to save as another le.StopIcon Description View previous le/Scan backward. (Each time you touch the icon while playing the video, you change the scan speed in this order: 2X, 4X, 8X.) Pause or resume playback. View next le/Scan forward. (Each time you touch the icon while playing the video, you change the scan speed in this order: 2X, 4X, 8X.)Adjust the volume or mute the sound. Scanning backward or forwardTo scan backwards or forwards through a video le while it is playing, use one of the following methods.• Touch . Each time you touch the icon, you change the scan speed in this order: 2X, 4X, 8X.• Press [C/F]. Each time you press the button, you change the scan speed in this order: 2X, 4X, 8X.• Drag the handles that appear on the progress bar to the left or right. You can change the playback position in the video.• Drag an area on the screen to the left or right. You can change the playback position in the video.Playing videos](https://usermanual.wiki/Samsung-Electronics-Co/NX3000/User-Guide-2248332-Page-102.png)
![102Playback/Editing > Playing videosAdjusting the brightness of a videoAdjust the brightness of a video while playing it.To adjust the brightness of a video, Touch the left half of the display ĺ drag upward or downward. StopAdjusting the volume of a videoAdjust the volume of a video while playing it.To adjust the volume of a video, Touch the right half of the display ĺ drag upward or downward.StopYou can also press [D/I] to adjust the volume of a video.](https://usermanual.wiki/Samsung-Electronics-Co/NX3000/User-Guide-2248332-Page-103.png)
![103Playback/Editing > Playing videos9 Touch Trim to trim a video.• You can adjust the scene to be cropped by dragging the handles that appear on the progress bar.10 When the pop-up message appears, select Ye s .• The original video should be at least 10 seconds long.• The camera will save the edited video as a new le and leave the original video intact.• The point where you want the trimming to begin can be selected 2 seconds after playback starts.Capturing an image during playback1 While viewing a video, press [o] or touch at the point where you want to capture an image.2 Touch Capture.• The resolution of the captured image will be the same as the original video.• The captured image is saved as a new le.Trimming a video during playback1 In Playback mode, scroll to a video, and then press [m].2 Select Trim Movie.3 Press [o] or touch to start playing the video.4 Press [o] or touch at the point where you want the trimming to begin.5 Touch Start Point.6 Press [o] or touch to resume playing the video.7 Press [o] or touch at the point where you want the trimming to end.8 Touch End Point.](https://usermanual.wiki/Samsung-Electronics-Co/NX3000/User-Guide-2248332-Page-104.png)
![104Playback/EditingPerform photo editing tasks, such as resizing, rotating, or reducing red-eye eects. Edited photos are saved as new les under dierent le names. Photos captured in some modes cannot be edited with the Image Edit function.To edit images, In Playback mode, scroll to a photo, and then press [m] ĺ z ĺ Edit Image ĺan option.• Some images may not be edited with the Image Edit function. In this case, use the supplied image editing software.• RAW les cannot be edited with the Image Edit function. In this case, use the supplied image editing software.• The camera will save edited photos as new les.• When you edit photos, the camera will automatically convert them to a lower resolution. Photos that you rotate or resize manually are not automatically converted to a lower resolution.• You cannot edit photos while viewing les as a folder. Open the folder and select a photo to edit each photo.Cropping a photo1 Touch ĺ .2 Drag the corner of the box to adjust the size of the area.3 Drag the box to move the location of the area.4 Press [o] or touch to save.Editing photos](https://usermanual.wiki/Samsung-Electronics-Co/NX3000/User-Guide-2248332-Page-105.png)
![105Playback/Editing > Editing photosRotating a photo1 Touch ĺ .2 Touch an option.Rotate : Right 90˚3 Press [o] or touch to save.• You can also rotate a photo in Playback mode by pressing [m], and then selecting z ĺ Rotate ĺ a desired option.• The camera will overwrite the original le.Resizing photosChange the size of a photo and save it as a new le.1 Touch ĺ .2 Touch an option.Resize : 3888 x 25923 Press [o] or touch to save.Available resize options dier depending on the original size of the photo.](https://usermanual.wiki/Samsung-Electronics-Co/NX3000/User-Guide-2248332-Page-106.png)
![106Playback/Editing > Editing photosAdjusting your photosYou can correct captured photos by adjusting the brightness, contrast, or color. 1 Touch .2 Touch an adjusting option.• If you selected (Auto adjustment), skip to step 6.Icon DescriptionOriginal (Reset to the original image)Auto adjustmentBrightnessContrastSaturationRGB adjustmentColor TemperatureExposure3 Press [C/F] to adjust the option.• You can also drag the slider or touch +/- to adjust the option.4 Press [o] or touch .5 Touch .6 Press [o] or touch to save.](https://usermanual.wiki/Samsung-Electronics-Co/NX3000/User-Guide-2248332-Page-107.png)
![107Playback/Editing > Editing photosRetouching faces1 Touch ĺ .2 Press [C/F] to adjust the option.• You can also drag the slider or touch +/- to adjust the option.• As the number increases, the skin tone becomes brighter and smoother.3 Press [o] or touch to save.Reducing red-eye1 Touch ĺ .2 Press [o] or touch to save.](https://usermanual.wiki/Samsung-Electronics-Co/NX3000/User-Guide-2248332-Page-108.png)
![108Playback/Editing > Editing photosApplying Smart Filter eectsApply special eects to your photos.1 Touch , and then touch an option.Smart Filter : VignettingOption DescriptionONo eectVignettingApply the retro-looking colors, high contrast, and strong vignette eect of Lomo cameras.MiniatureApply a tilt-shift eect to make the subject appear in miniature.Soft FocusHide facial imperfections or apply dreamy eects.SketchApply a pen sketch eect.Option DescriptionFish-eyeDistort close objects to imitate the visual eect of a sheye lens.Classic Apply a black and white eect. RetroApply a sepia tone eect.Oil PaintingApply an oil painting eect.CartoonApply a cartoon eect.Ink PaintingApply ink sketching eect.Cross Filter Add lines that radiate outward from bright objects to imitate the visual eect of a cross lter.Zooming Shot Blur the edges of a photo to emphasize the subjects in the center.2 Press [o] or touch .3 Touch to save.](https://usermanual.wiki/Samsung-Electronics-Co/NX3000/User-Guide-2248332-Page-109.png)
![110Wireless networkConnecting to a WLAN and configuring network settingsLearn to connect via an access point (AP) when you are in a range of a WLAN. You can also congure network settings.Connecting to a WLAN1 On the Mode screen, select Wi-Fi.2 Select , , , , or .3 Follow the on-screen instructions until the Wi-Fi Setting screen appears.• In some modes, press [m], and then select Wi-Fi Setting.• The camera automatically searches for available AP devices.4 Select an AP.Samsung1Samsung2Samsung3Wi-Fi SettingRefreshBack• Select Refresh to refresh the list of connectable APs.• Select Add wireless network to add an AP manually. The AP name must be in English to add the AP manually.Icon DescriptionAd hoc APSecured APWPS APSignal strengthPress [F] or touch to open network setting options.• When you select a secured AP, a pop-up window appears. Enter the required passwords to connect to the WLAN. For information about entering text, refer to "Entering text". (p. 122)• When a login page appears, refer to "Using the login browser". (p. 120)• When you select an unsecured AP, the camera will connect to the WLAN.• If you select a WPS prole supported AP, select ĺ WPS PIN connection, and then enter a PIN on the AP device. You can also connect to a WPS prole supported AP by selecting ĺ WPS button connection on the camera, and then pushing the WPS button on the AP device.• If a pop-up message about data collection regulations appears, read and agree to it.](https://usermanual.wiki/Samsung-Electronics-Co/NX3000/User-Guide-2248332-Page-111.png)
![111Wireless network > Connecting to a WLAN and conguring network settingsSetting network options1 In the Wi-Fi Setting screen, move to an AP, and then press [F] or touch .2 Select each option, and then enter the required information.Option DescriptionNetwork PasswordEnter the network password.IP SettingSet the IP address automatically or manually.Manually setting the IP address1 In the Wi-Fi Setting screen, move to an AP, and then press [F] or touch .2 Select IP Setting ĺ Manual.3 Select each option, and then enter the required information.Option DescriptionIPEnter the static IP address.Subnet MaskEnter the subnet mask.GatewayEnter the gateway.DNS ServerEnter the DNS address.](https://usermanual.wiki/Samsung-Electronics-Co/NX3000/User-Guide-2248332-Page-112.png)
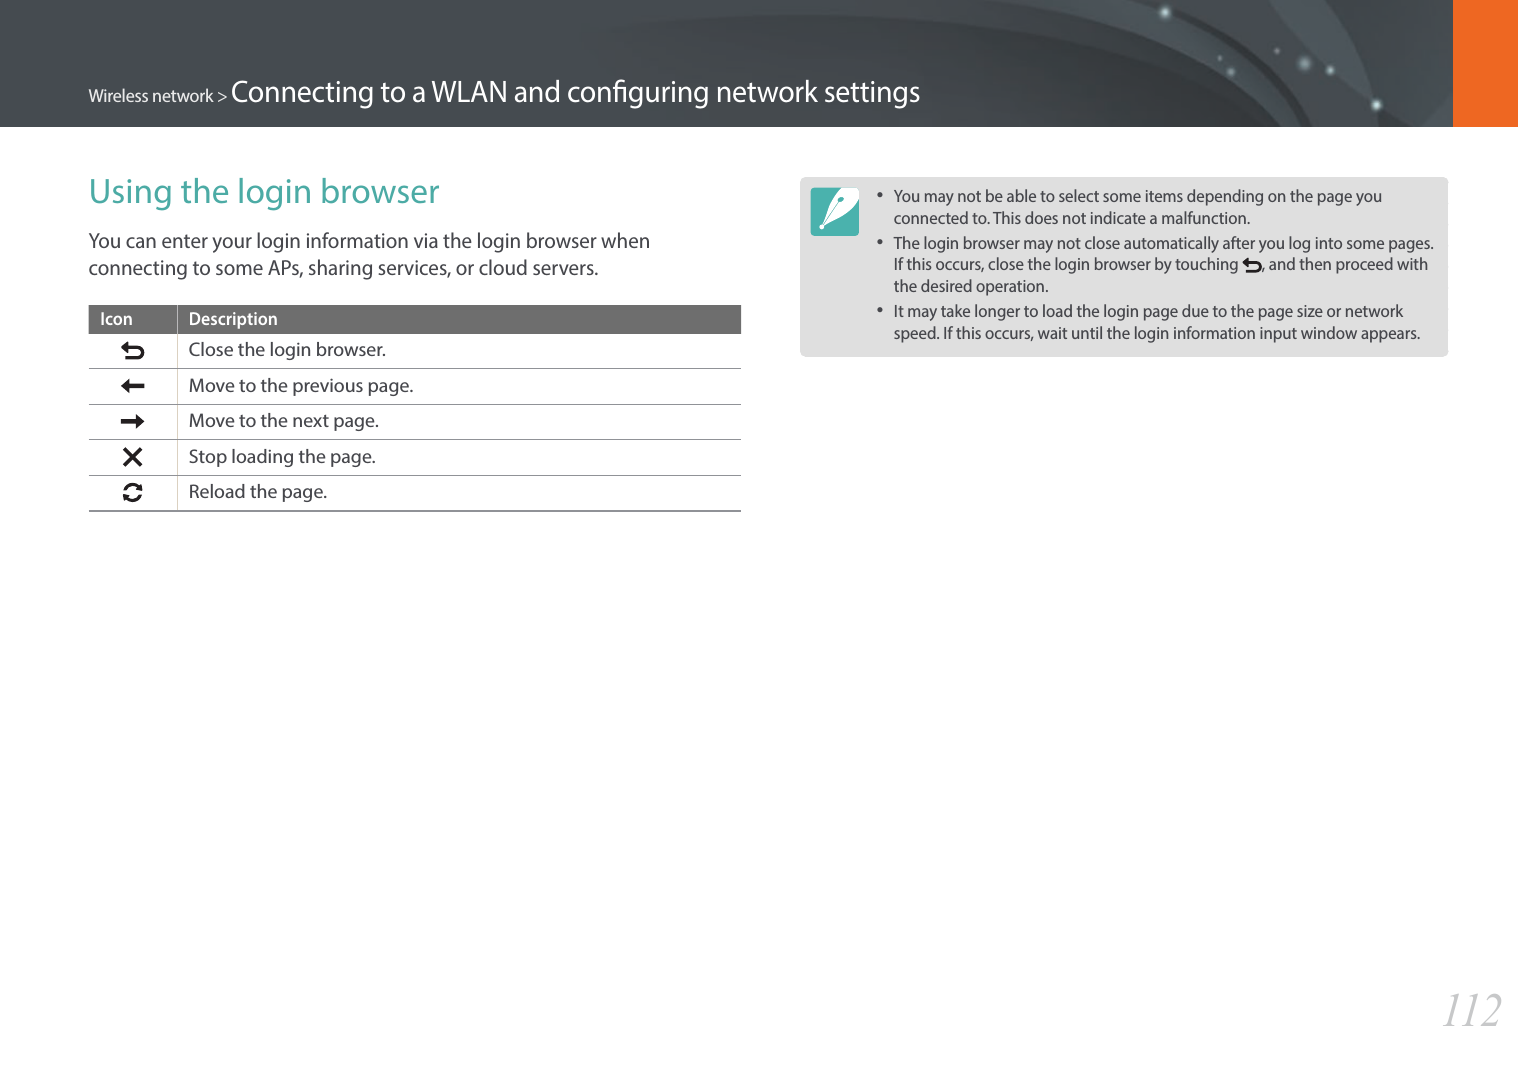
![114Wireless network > Connecting to a WLAN and conguring network settingsEntering textLearn how to enter text. The icons in the table let you move the cursor, change the case, etc. Press [D/I/C/F] to scroll to a key and press [o] to enter it. Or, touch a key to enter it.XDoneCancelIcon DescriptionMove the cursor.In ABC mode, change the case.XDelete the last letter.CancelStop entering text and return to the previous page.Switch between Symbol mode and ABC mode.Enter a space.DoneSave the displayed text.• You can use only the English alphabets in some modes, regardless of the display language.• Press [y] to move to Done directly.• The number of characters you can enter varies depending on the situation.• The screen may dier depending on the input mode.](https://usermanual.wiki/Samsung-Electronics-Co/NX3000/User-Guide-2248332-Page-115.png)
![115Wireless networkUsing the NFC Feature (Tag & Go)Using NFC features in Playback mode (Photo Beam)In Playback mode, the camera transfers the current le to the smart phone automatically when you read a tag from an NFC-enabled device.• To transfer multiple les, select les from the thumbnail view, and then read a tag from an NFC-enabled device.Using NFC features in Wi-Fi modeSelect MobileLink or Remote Viewnder from the pop-up window that appears by reading a tag from an NFC-enabled device. (p. 126, 130)Place a smart phone's NFC antenna near the camera’s NFC tag to launch the feature for saving photos to a smart phone automatically or the feature for using a smart phone as a remote shutter. You can also transfer les to an NFC-enabled device in Playback mode. • This feature is supported by NFC-enabled smart phones running Android OS. It is recommended that you use the latest version. This feature is not available for iOS devices.• You should install Samsung SMART CAMERA App on your phone or device before using this feature. You can download the application from Samsung Apps or the Google Play Store. Samsung SMART CAMERA App is compatible with Samsung camera models manufactured in 2013 or later.• For devices running Android OS 2.3.3 – 2.3.7, download Samsung SMART CAMERA App from www.samsung.com.• To read an NFC tag, place the NFC-enabled device near the camera’s NFC tag for more than 2 seconds.• You can set the size for transferred photos by pressing [m], and then selecting d ĺ MobileLink/NFC Image Size ĺ an option. • Do not modify the NFC tag in any way.Using NFC features in Shooting modeLaunch AutoShare or Remote Viewnder by reading a tag from an NFC-enabled device. (p. 124, 130) Preset to launch the Wi-Fi function by reading a tag on an NFC-enabled device. (p. 151)](https://usermanual.wiki/Samsung-Electronics-Co/NX3000/User-Guide-2248332-Page-116.png)
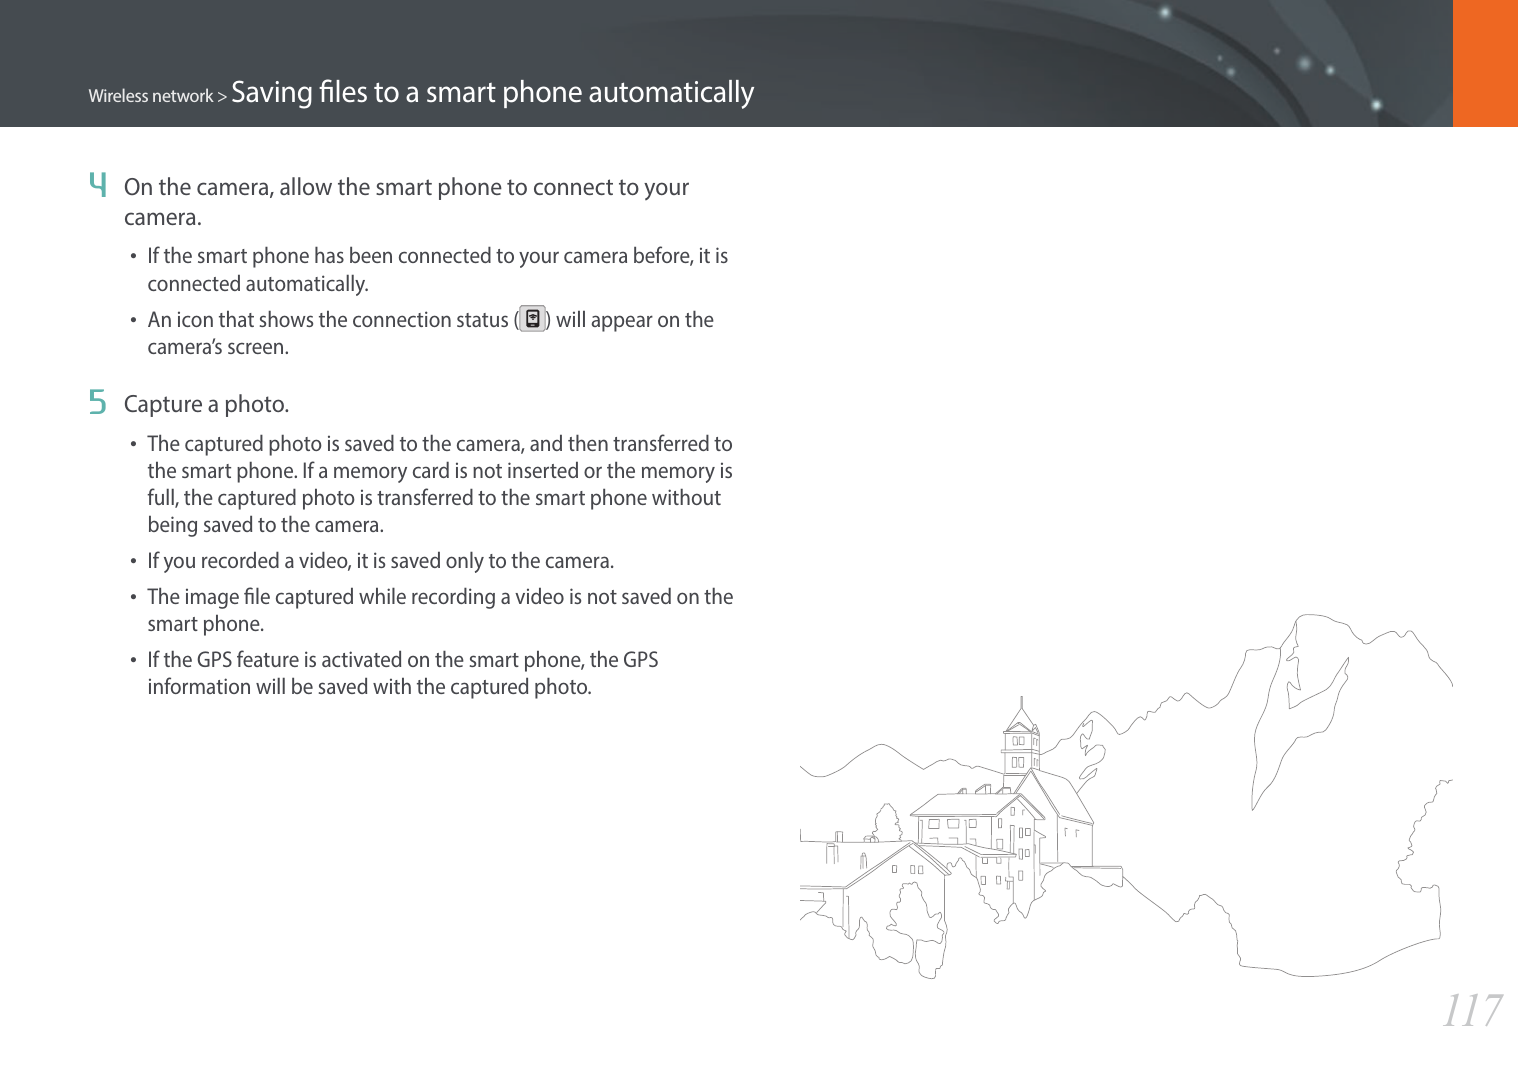
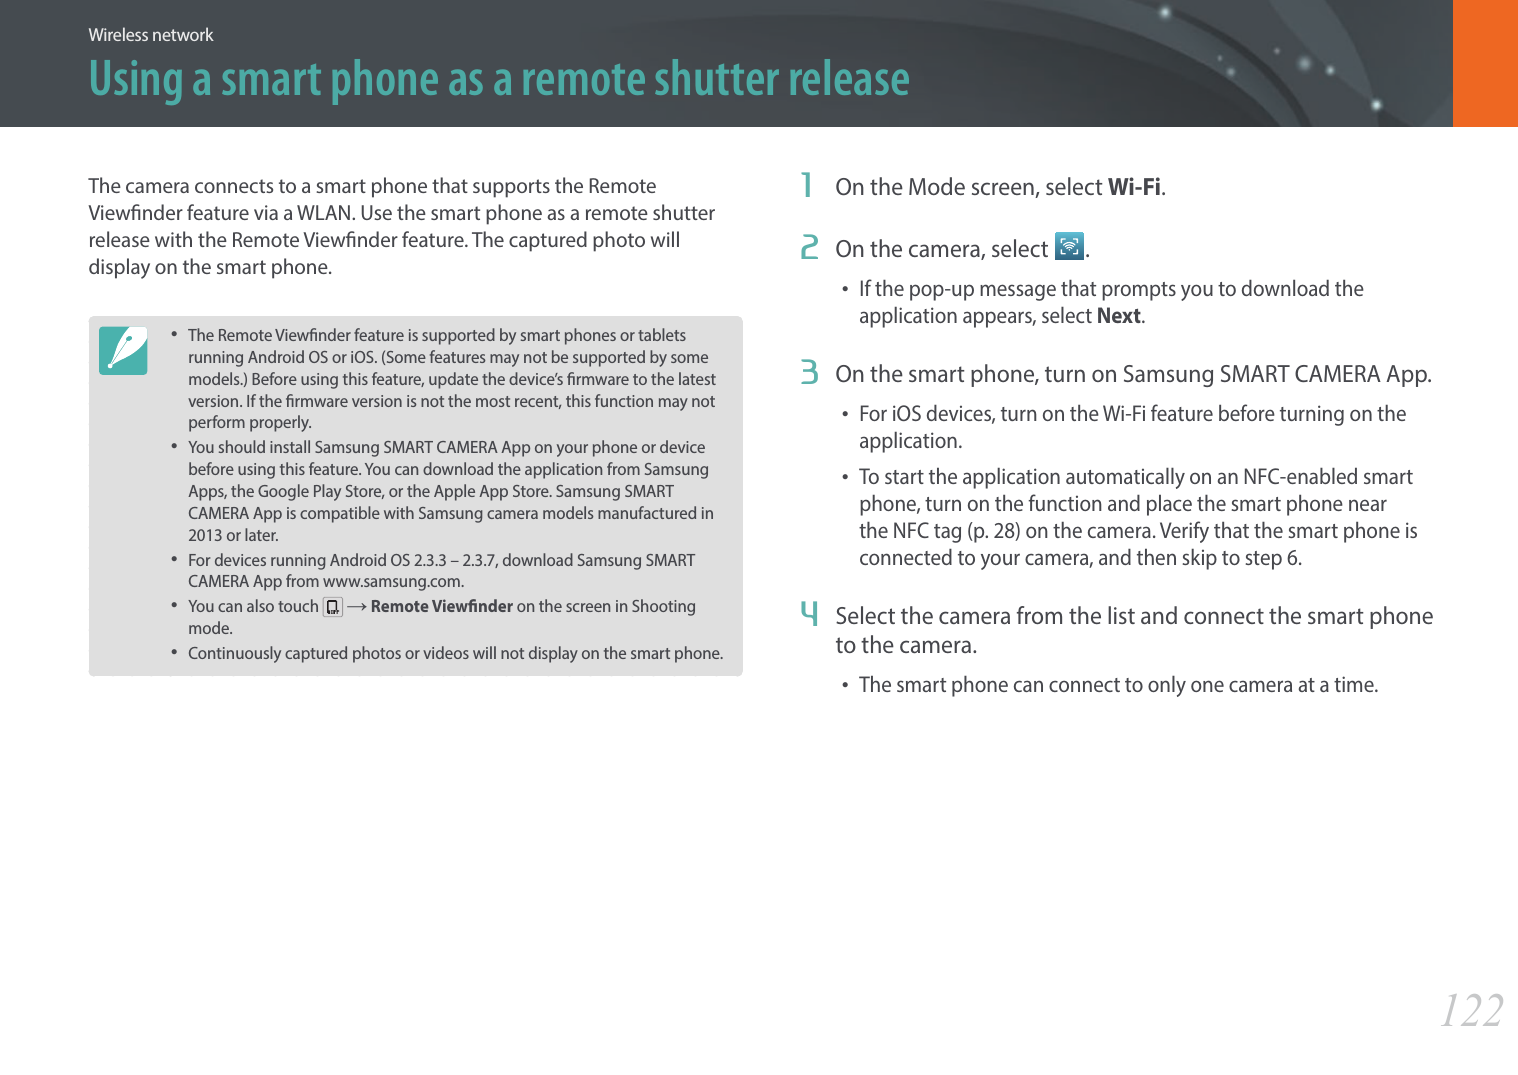
![116Wireless networkSaving files to a smart phone automaticallyThe camera connects to a smart phone that supports the AutoShare feature via a WLAN. When you capture a photo with your camera, the photo is saved to a smart phone automatically.• The AutoShare feature is supported by smart phones or tablets running Android OS or iOS. (Some features may not be supported by some models.) Before using this feature, update the device’s rmware to the latest version. If the rmware version is not the most recent, this function may not perform properly. • You should install Samsung SMART CAMERA App on your phone or device before using this feature. You can download the application from Samsung Apps, the Google Play Store, or the Apple App Store. Samsung SMART CAMERA App is compatible with Samsung camera models manufactured in 2013 or later. • For devices running Android OS 2.3.3 – 2.3.7, download Samsung SMART CAMERA App from www.samsung.com.• If you set this function, the setting is maintained even when you change the Shooting mode.• This feature may not be supported in some modes or may not be available with some shooting options.1 In Shooting mode, touch ĺAutoShare.• You can also press [m] ĺ b ĺ AutoShare ĺ On.• If the pop-up message that prompts you to download the application appears, select Next.2 On the smart phone, turn on Samsung SMART CAMERA App.• For iOS devices, turn on the Wi-Fi feature before turning on the application.• To start the application automatically on an NFC-enabled smart phone, turn on the function and place the smart phone near the NFC tag (p. 28) on the camera. Verify that the smart phone is connected to your camera, and then skip to step 5.3 Select the camera from the list and connect the smart phone to the camera.• The smart phone can connect to only one camera at a time.](https://usermanual.wiki/Samsung-Electronics-Co/NX3000/User-Guide-2248332-Page-117.png)
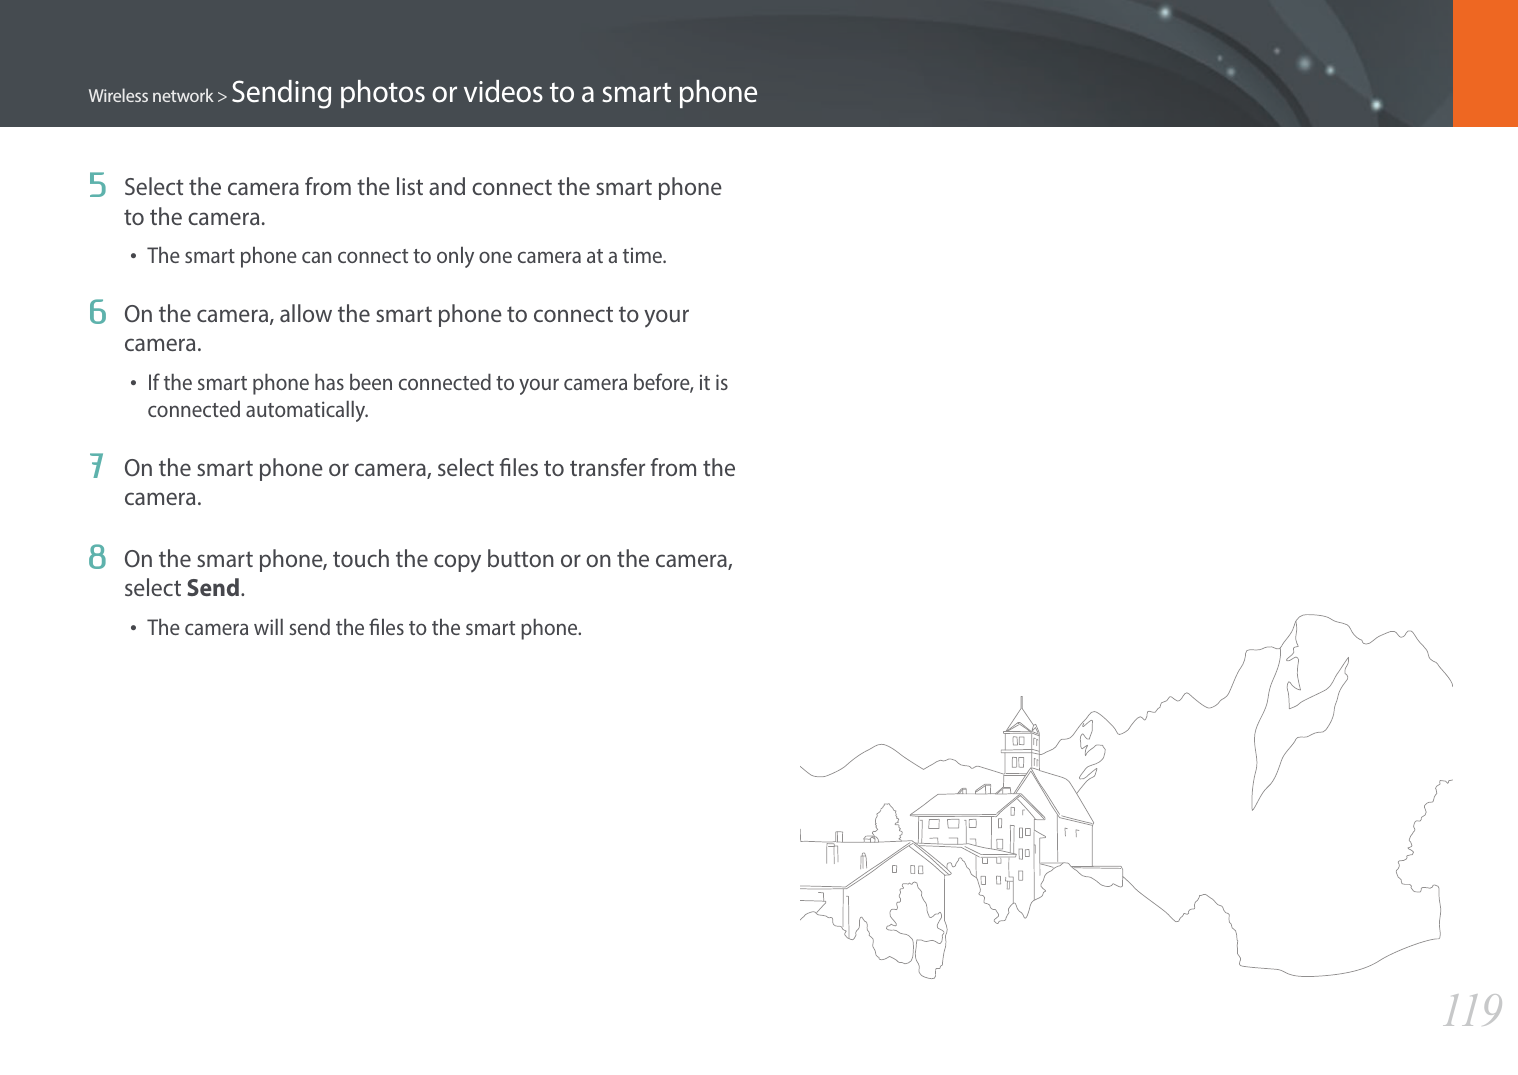
![118Wireless networkThe camera connects to a smart phone that supports the MobileLink feature via a WLAN. You can easily send photos or videos to your smart phone.• The MobileLink feature is supported by smart phones or tablets running Android OS or iOS. (Some features may not be supported by some models.) Before using this feature, update the device’s rmware to the latest version. If the rmware version is not the most recent, this function may not perform properly. • You should install Samsung SMART CAMERA App on your phone or device before using this feature. You can download the application from Samsung Apps, the Google Play Store, or the Apple App Store. Samsung SMART CAMERA App is compatible with Samsung camera models manufactured in 2013 or later. • For devices running Android OS 2.3.3 – 2.3.7, download Samsung SMART CAMERA App from www.samsung.com.• When there are no les in the camera memory, you cannot use this feature.• You can view up to 1,000 recent les and send up to 1,000 les at a time.• When you send Full HD videos using MobileLink feature, you may not be able to play back les on some devices.• When using this feature on an iOS device, the device may lose its Wi-Fi connection.• You cannot send RAW les. • You can set the size for transferred photos by pressing [m], and then selecting d ĺ MobileLink/NFC Image Size ĺ an option. • You can also touch ĺ MobileLink on the screen in Shooting mode.• You can also send les in Playback mode by pressing [m], and then selecting Share(Wi-Fi) ĺ MobileLink or by selecting ĺ MobileLink.• The screen turns o if you perform no operations on the camera for 30 seconds.1 On the Mode screen, select Wi-Fi.2 On the camera, select .• If the pop-up message that prompts you to download the application appears, select Next.3 On the camera, select a sending option. • If you select Select Files from Smartphone, you can use your smart phone to view and share les stored on the camera. The screen turns o if you perform no operations on the smart phone for 30 seconds. • If you select Select Files from Camera, you can select les to send from the camera. 4 On the smart phone, turn on Samsung SMART CAMERA App.• For iOS devices, turn on the Wi-Fi feature before turning on the application.• To start the application automatically on an NFC-enabled smart phone, turn on the function and place the smart phone near the NFC tag (p. 28) on the camera. Verify that the smart phone is connected to your camera, and then skip to step 7.Sending photos or videos to a smart phone](https://usermanual.wiki/Samsung-Electronics-Co/NX3000/User-Guide-2248332-Page-119.png)
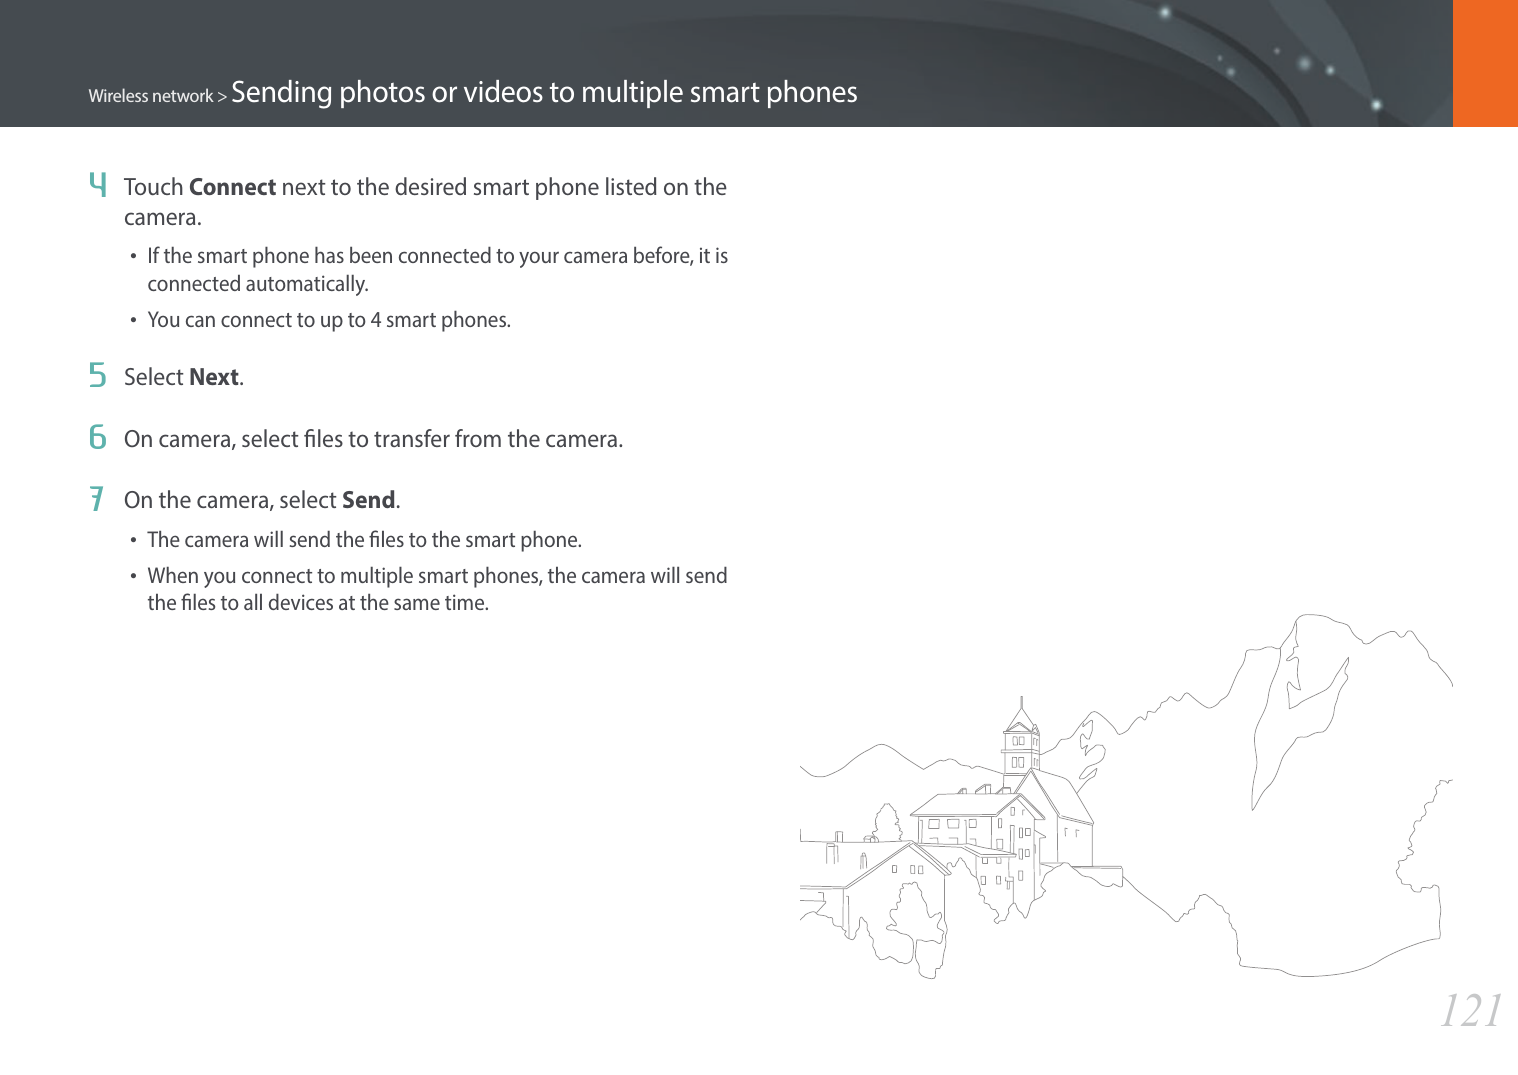
![120Wireless networkSending photos or videos to multiple smart phonesThe camera connects to a smart phone that supports the Group Share feature via a WLAN. You can easily send photos or videos to multiple smart phones.• The Group Share feature is supported by smart phones or tablets running Android OS or iOS. (Some features may not be supported by some models.) Before using this feature, update the device’s rmware to the latest version. If the rmware version is not the most recent, this function may not perform properly. • You should install Samsung SMART CAMERA App on your phone or device before using this feature. You can download the application from Samsung Apps, the Google Play Store, or the Apple App Store. Samsung SMART CAMERA App is compatible with Samsung camera models manufactured in 2013 or later. • For devices running Android OS 2.3.3 – 2.3.7, download Samsung SMART CAMERA App from www.samsung.com.• When there are no les in the camera memory, you cannot use this feature.• Transferring les to multiple smart phones may take longer than transferring les to one device. • When you send Full HD videos using Group Share feature, you may not be able to play back les on some devices.• When using this feature on an iOS device, the device may lose its Wi-Fi connection.• You cannot send RAW les. • You can set the size for transferred photos by pressing [m], and then selecting d ĺ MobileLink/NFC Image Size ĺ an option. • You can also send les in Playback mode by pressing [m], and then selecting Share(Wi-Fi) ĺ Group Share or by selecting ĺ Group Share.1 On the Mode screen, select Wi-Fi.2 On the camera, select .• If the pop-up message that prompts you to download the application appears, select Next.3 On the smart phone, turn on Samsung SMART CAMERA App.• For iOS devices, turn on the Wi-Fi feature before turning on the application.• To start the application automatically on an NFC-enabled smart phone, turn on the function and place the smart phone near the NFC tag (p. 28) on the camera. Verify that the smart phone is connected to your camera, and then skip to step 6.](https://usermanual.wiki/Samsung-Electronics-Co/NX3000/User-Guide-2248332-Page-121.png)
![125Wireless network > Using the Baby Monitor6 Start live video or sound monitoring.• Watch live video from the camera on your smart phone. During video monitoring, touch the Sound Monitoring Mode button on the smart phone to stop the video stream. If the camera detects noise, an alarm will notify you on the smart phone.• During live video monitoring via the smart phone, video is not saved on the camera.• If the monitored location is dark, touch to turn on the AF-assist light.• During sound monitoring, alarms will sound on the smart phone if the camera detects noise for a short period at a volume that is higher than the designated level. • During live video monitoring, alarms will not sound on the smart phone even if the camera detects noise.7 Touch to exit the Samsung Home Monitor application.Adjusting the noise level for alarm activationYou can set the level of noise that will activate an alarm while using sound monitoring. Press [D/I] to adjust the noise level.Noise level for alarm activation:When the camera detects noise that exceeds the designated level for a short period, an alarm will sound.Back Wi-Fi SettingSensor sensitivityDo not use this feature for illegal purposes.](https://usermanual.wiki/Samsung-Electronics-Co/NX3000/User-Guide-2248332-Page-126.png)
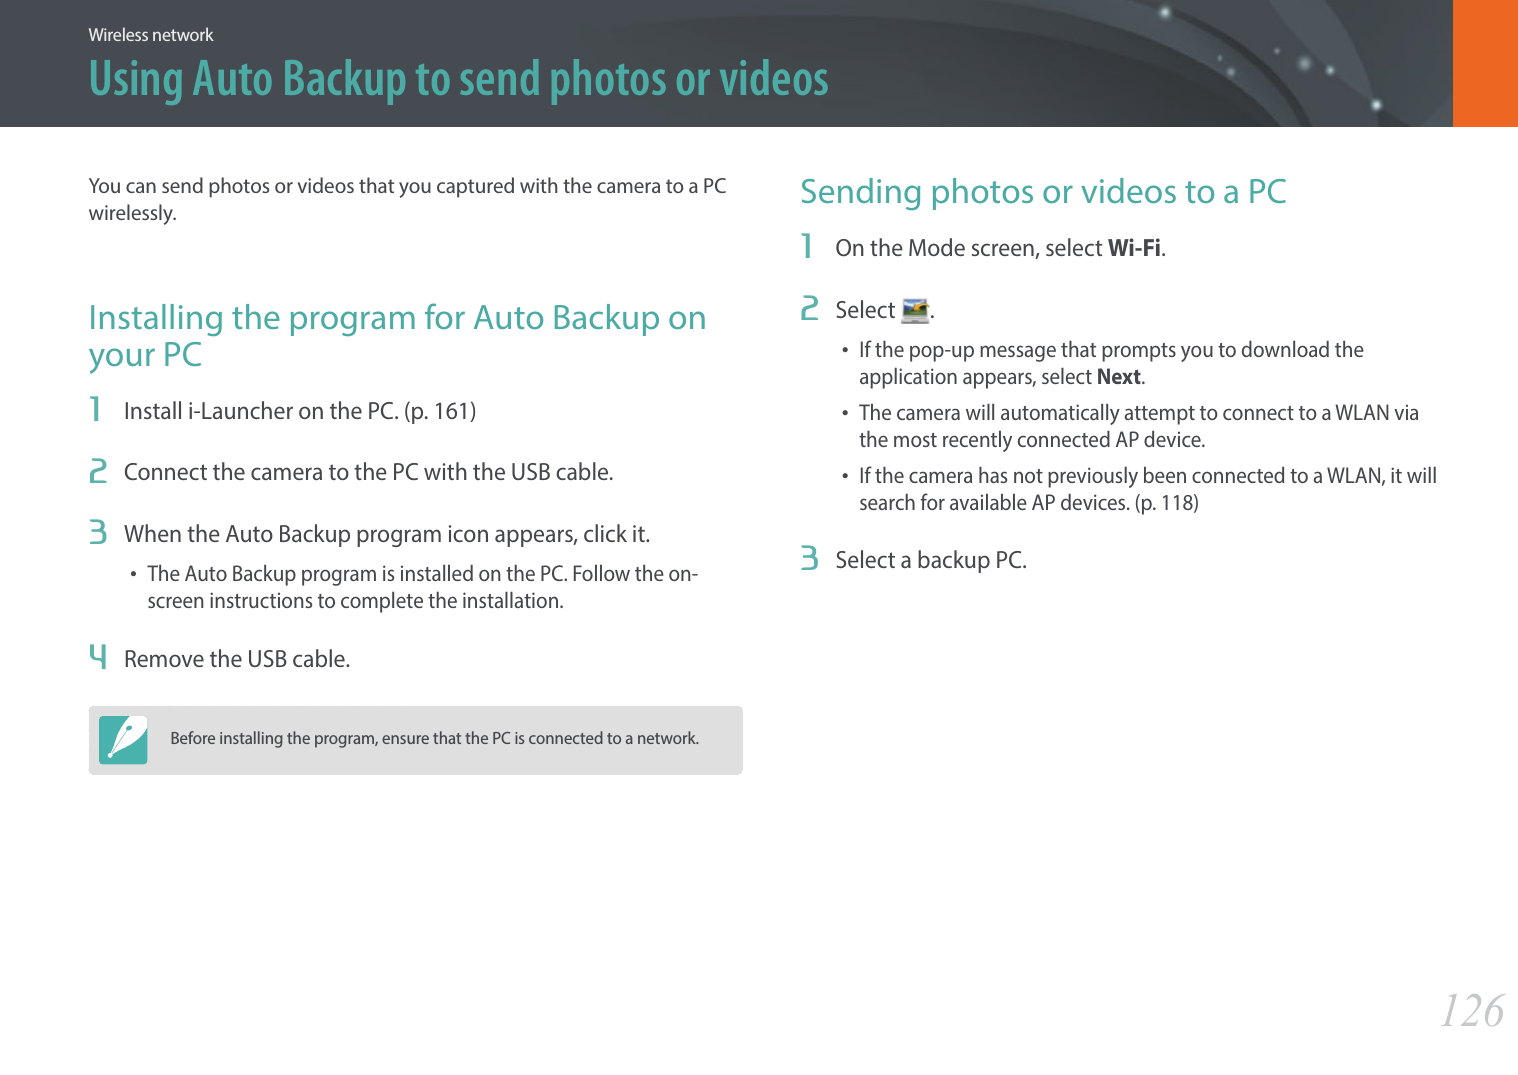
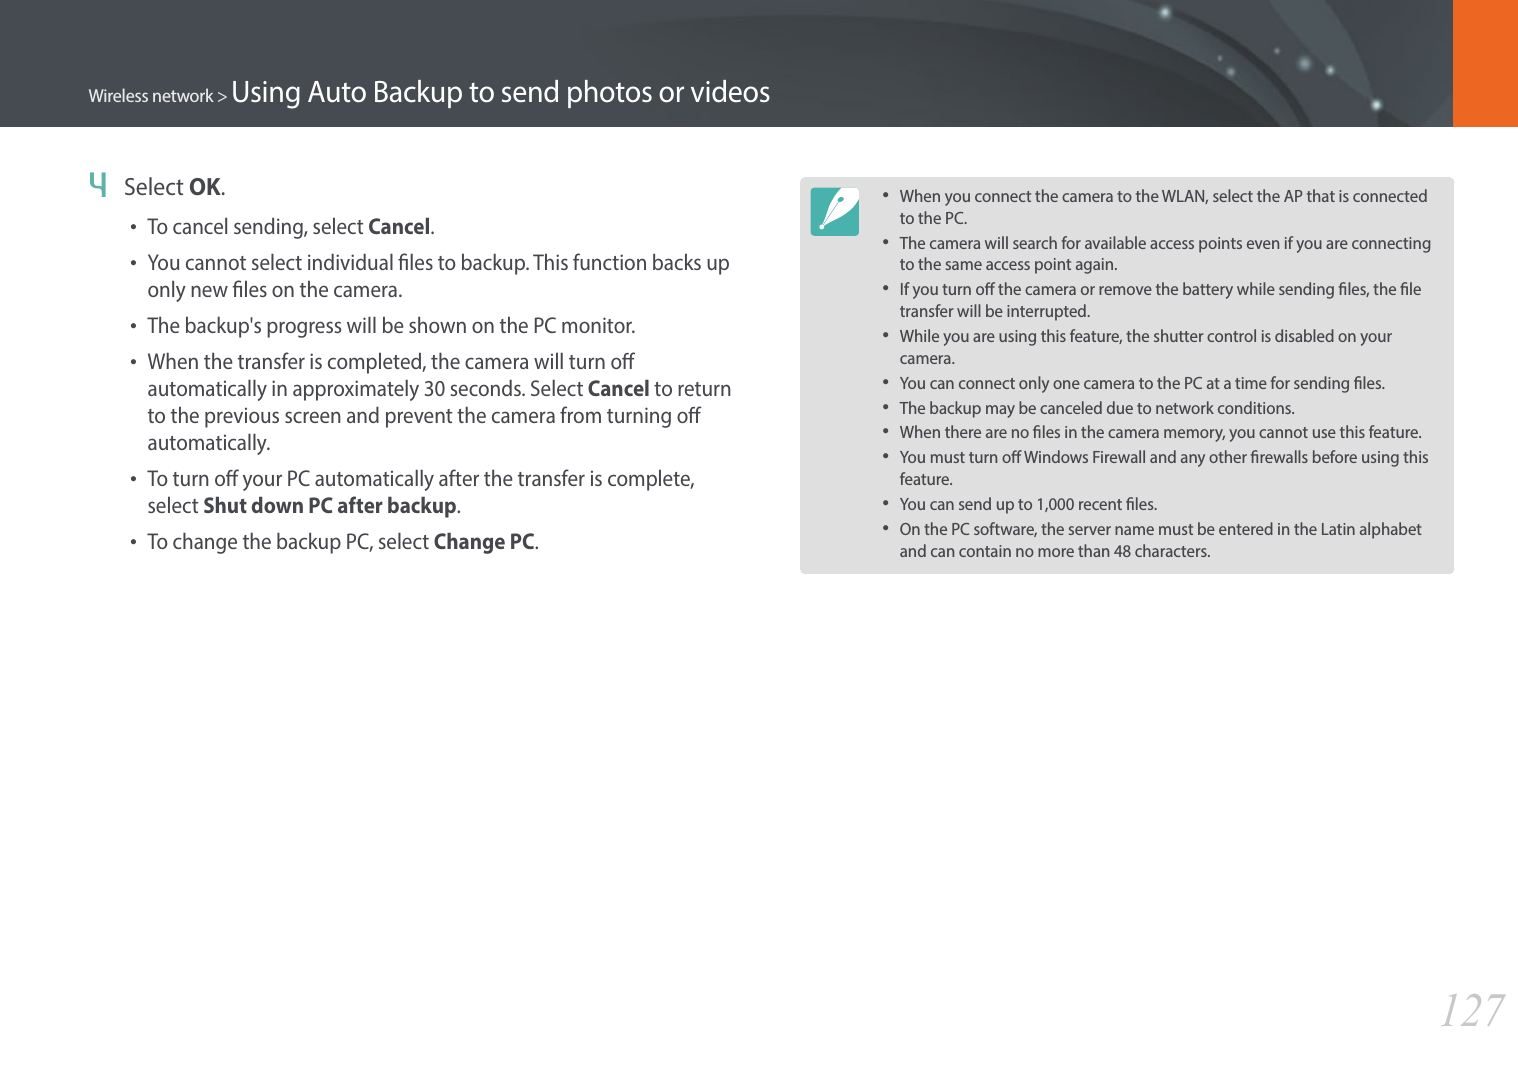
![128Wireless network5 Select the Name box, enter your name, and then touch Done.Sender SettingNameSaveEmailReset6 Select the Email box, enter your email address, and then touch Done.7 Select Save to save your changes.• To delete your information, select Reset.You can change settings in the email menu and send photos or videos stored on the camera via email.Changing email settingsIn the email menu, you can change settings for storing your information. You can also set or change the email password. For information about entering text, refer to "Entering text". (p. 122)Storing your information1 On the Mode screen, select Wi-Fi.2 Select .• The camera will automatically attempt to connect to a WLAN via the most recently connected AP device.• If the camera has not previously been connected to a WLAN, it will search for available AP devices. (p. 118)3 Press [m].4 Select Sender Setting.Sending photos or videos via email](https://usermanual.wiki/Samsung-Electronics-Co/NX3000/User-Guide-2248332-Page-129.png)
![129Wireless network > Sending photos or videos via emailSetting an email password1 On the Mode screen, select Wi-Fi.2 Select .• The camera will automatically attempt to connect to a WLAN via the most recently connected AP device.• If the camera has not previously been connected to a WLAN, it will search for available AP devices. (p. 118)3 Press [m].4 Select Setting Password ĺ On.• To deactivate the password, select O.5 When the pop-up appears, select OK.6 Enter a 4-digit password.7 Enter the password again.8 When the pop-up appears, select OK.If you lost your password, you can reset it by selecting Reset on the password setting screen. When you reset the information, the previously saved user’s setting information and email address will be deleted.](https://usermanual.wiki/Samsung-Electronics-Co/NX3000/User-Guide-2248332-Page-130.png)
![130Wireless network > Sending photos or videos via emailChanging the email password1 On the Mode screen, select Wi-Fi.2 Select .• The camera will automatically attempt to connect to a WLAN via the most recently connected AP device.• If the camera has not previously been connected to a WLAN, it will search for available AP devices. (p. 118)3 Press [m].4 Select Change Password.5 Enter your current 4-digit password.6 Enter a new 4-digit password.7 Enter the new password again.8 When the pop-up appears, select OK.Sending photos or videos via emailYou can send photos or videos stored on the camera via email. For information about entering text, refer to "Entering text". (p. 122)1 On the Mode screen, select Wi-Fi.2 Select .3 Connect to a WLAN. (p. 118)4 Select the Sender box, enter your email address, and then touch Done.• If you have previously saved your information, it will be inserted automatically. (p. 136)• To use an address from the list of previous senders, select ĺ an address.](https://usermanual.wiki/Samsung-Electronics-Co/NX3000/User-Guide-2248332-Page-131.png)
![131Wireless network > Sending photos or videos via email5 Select the Receiver box, enter an email address, and then touch Done.• To use an address from the list of previous recipients, select ĺ an address.• Select to add additional recipients. You can input up to 30 recipients.• Select to delete an address from the list.6 Select Next.7 Select les to send.• You can select up to 20 les. The total size must be 7 MB or less.8 Select Next.9 Select the comment box, enter your comments, and then touch Done.10 Select Send.• The camera will send the email.• If an email fails to send, a message prompting you to send it again appears.• Even if a photo appears to have transferred successfully, errors with the recipient’s email account may cause the photo to be rejected or recognized as spam.• You may not be able to send an email if no network connection is available or if your email account settings are incorrect.• You cannot send an email if the combined le sizes exceed the 7 MB. The maximum resolution of photos you can send is 2M. The maximum resolution of videos you can send is . If the selected photo has a resolution higher than 2M, it will be automatically resized to a lower resolution.• If you cannot send an email because of rewall or user authentication settings, contact your network administrator or network service provider.• When there are no les in the camera memory, you cannot use this feature.• You can also send an email in Playback mode by pressing [m], and then selecting Share(Wi-Fi) ĺ Email or by selecting ĺ Email.](https://usermanual.wiki/Samsung-Electronics-Co/NX3000/User-Guide-2248332-Page-132.png)
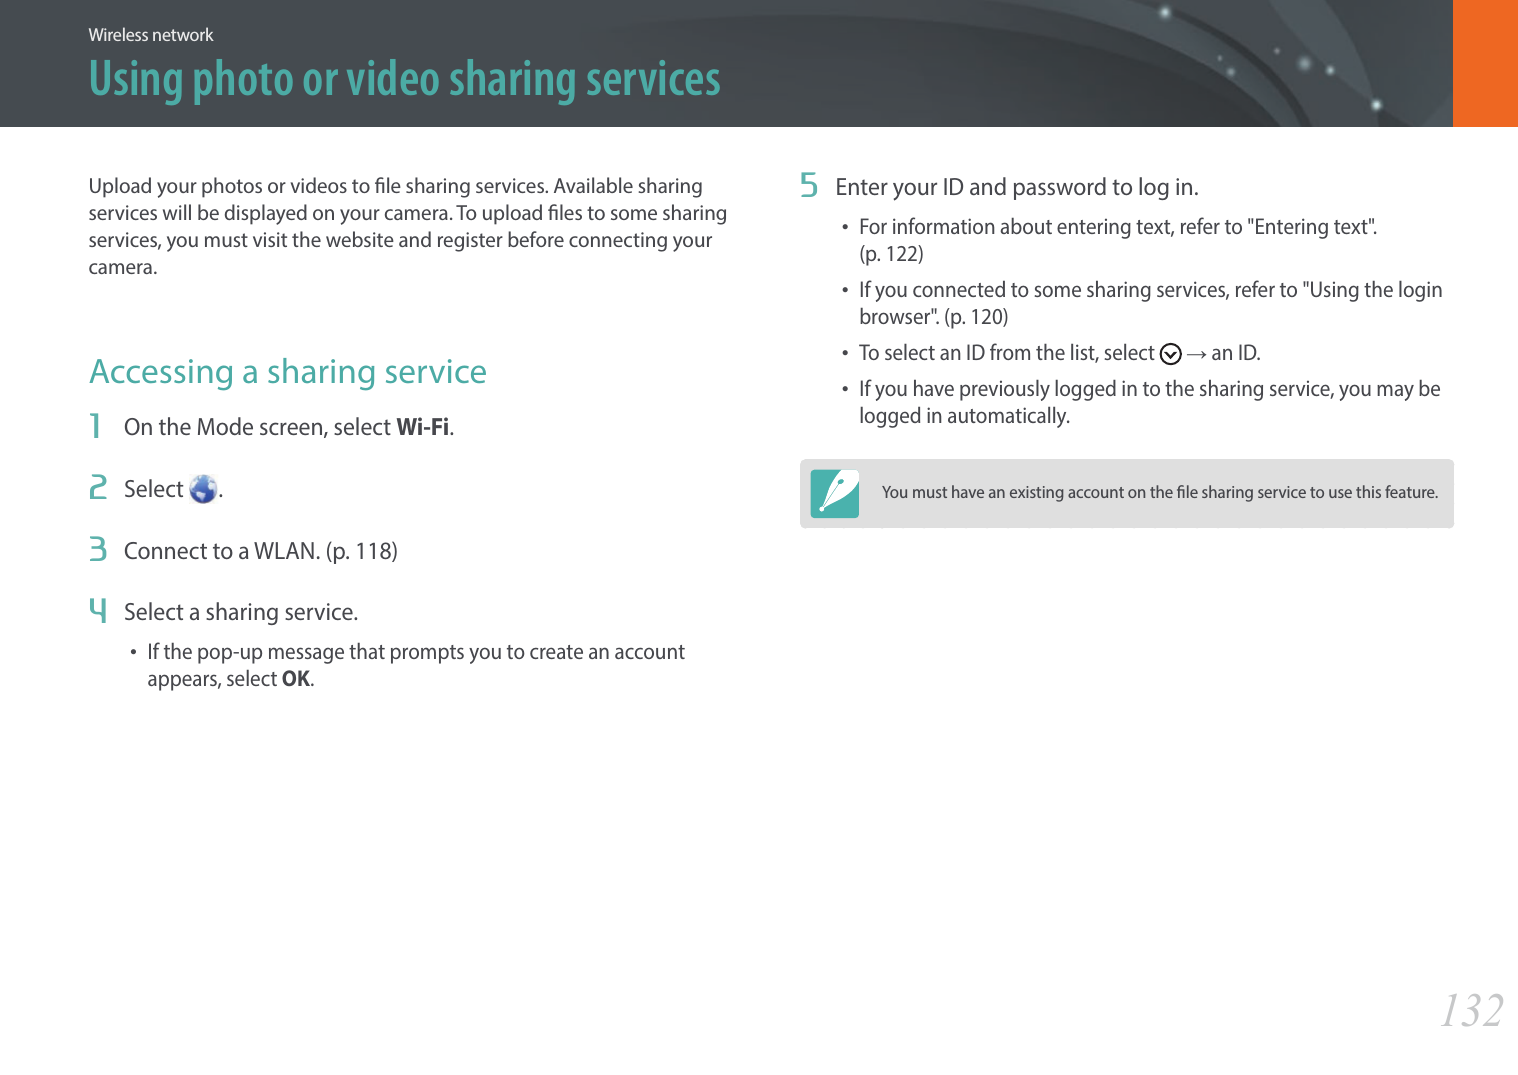
![133Wireless network > Using photo or video sharing servicesUploading photos or videos1 Access the sharing service with your camera.2 Select les to upload.• You can select up to 20 les. The total size must be 10 MB or less. (On some sharing services, the total size or number of les may vary.)3 Select Upload.• The camera will upload photos or videos. • When an upload fails, a message prompting you to upload it again appears. • On some sharing services, you can enter your comments by selecting the comment box. For information about entering text, refer to "Entering text". (p. 122)• You can set an upload folder for Facebook by pressing [m], and then selecting Upload Folder (Facebook) on the sharing service's list screen.• You cannot upload les if the le size exceeds the limit. The maximum resolution of photos you can upload is 2M. The maximum resolution of videos you can upload is . If the selected photo has a resolution higher than 2M, it will be automatically resized to a lower resolution. (On some sharing services, the maximum photo resolution may vary.)• The method of uploading photos or videos may dier depending on the selected sharing service.• If you cannot access a sharing service because of rewall or user authentication settings, contact your network administrator or network service provider.• Uploaded photos or videos may be automatically titled with the date they were captured.• The speed of your internet connection may aect how quickly photos upload or web pages open.• When there are no les in the camera memory, you cannot use this feature.• You can also upload photos or videos to le sharing services in Playback mode by pressing [m], and then selecting Share(Wi-Fi) ĺ a sharing service or by selecting ĺ a sharing service.• You cannot upload videos to some sharing services.• When you upload photos to a le sharing service, the photo may be resized to 2M or 1M depending on their policy.](https://usermanual.wiki/Samsung-Electronics-Co/NX3000/User-Guide-2248332-Page-134.png)
![134Wireless networkUsing Samsung Link to send filesYou can upload les from your camera to the Samsung Link online storage or view les on a Samsung Link device connected to the same AP.Uploading photos to an online storage1 On the Mode screen, select Wi-Fi.2 Select ĺWeb storage.• If the guide message appears, select OK.• The camera will automatically attempt to connect to a WLAN via the most recently connected AP device.• If the camera has not previously been connected to a WLAN, it will search for available AP devices. (p. 118)• To change the size for uploaded photos, press [m], and then select Upload Image Size.3 Enter your ID and password, and then select Login ĺ OK.• For information about entering text, refer to "Entering text". (p. 122)• To select an ID from the list, select ĺ an ID.• If you have previously logged in to the website, you may be logged in automatically.To use this feature, you must create a Samsung Link account and an account with an aliated online storage service using your PC. After you have nished creating the accounts, add your online storage account to Samsung Link.4 Select an online storage service.• Before you use this feature, you must visit the Samsung Link website with your PC and register an online storage. 5 Select les to upload, and then select Upload. • You cannot upload video les to Samsung Link online storage.• When there are no les in the camera memory, you cannot use this feature.• You can upload up to 20 les.• You can also upload photos in Playback mode by pressing [m], and then selecting Share(Wi-Fi) ĺ Samsung Link or by selecting ĺ Samsung Link.](https://usermanual.wiki/Samsung-Electronics-Co/NX3000/User-Guide-2248332-Page-135.png)
![135Wireless network > Using Samsung Link to send lesViewing photos or videos on devices that support Samsung Link1 On the Mode screen, select Wi-Fi.2 Select ĺNearby devices.• The camera will automatically attempt to connect to a WLAN via the most recently connected AP device. • If the camera has not previously been connected to a WLAN, it will search for available AP devices. (p. 118)• You can set to allow only selected devices or all devices to connect by pressing [m], and then selecting DLNA Access Control on the screen.• A sharing le list is created. Wait until other devices can nd your camera.3 Connect the Samsung Link device to a network, and then turn on the Samsung Link feature.• Refer to your device's user manual for more information.4 On the camera, allow the Samsung Link device to connect to your camera.5 On the Samsung Link device, select a camera to connect to.6 On the Samsung Link device, browse the shared photos or videos.• For information about searching for the camera and browsing the photos or videos on the Samsung Link device, refer to the device's user manual.• Videos may not play smoothly depending on the type of Samsung Link device or the network condition.AP▲ The camera is connected to a TV that supports Samsung Link via WLAN.](https://usermanual.wiki/Samsung-Electronics-Co/NX3000/User-Guide-2248332-Page-136.png)
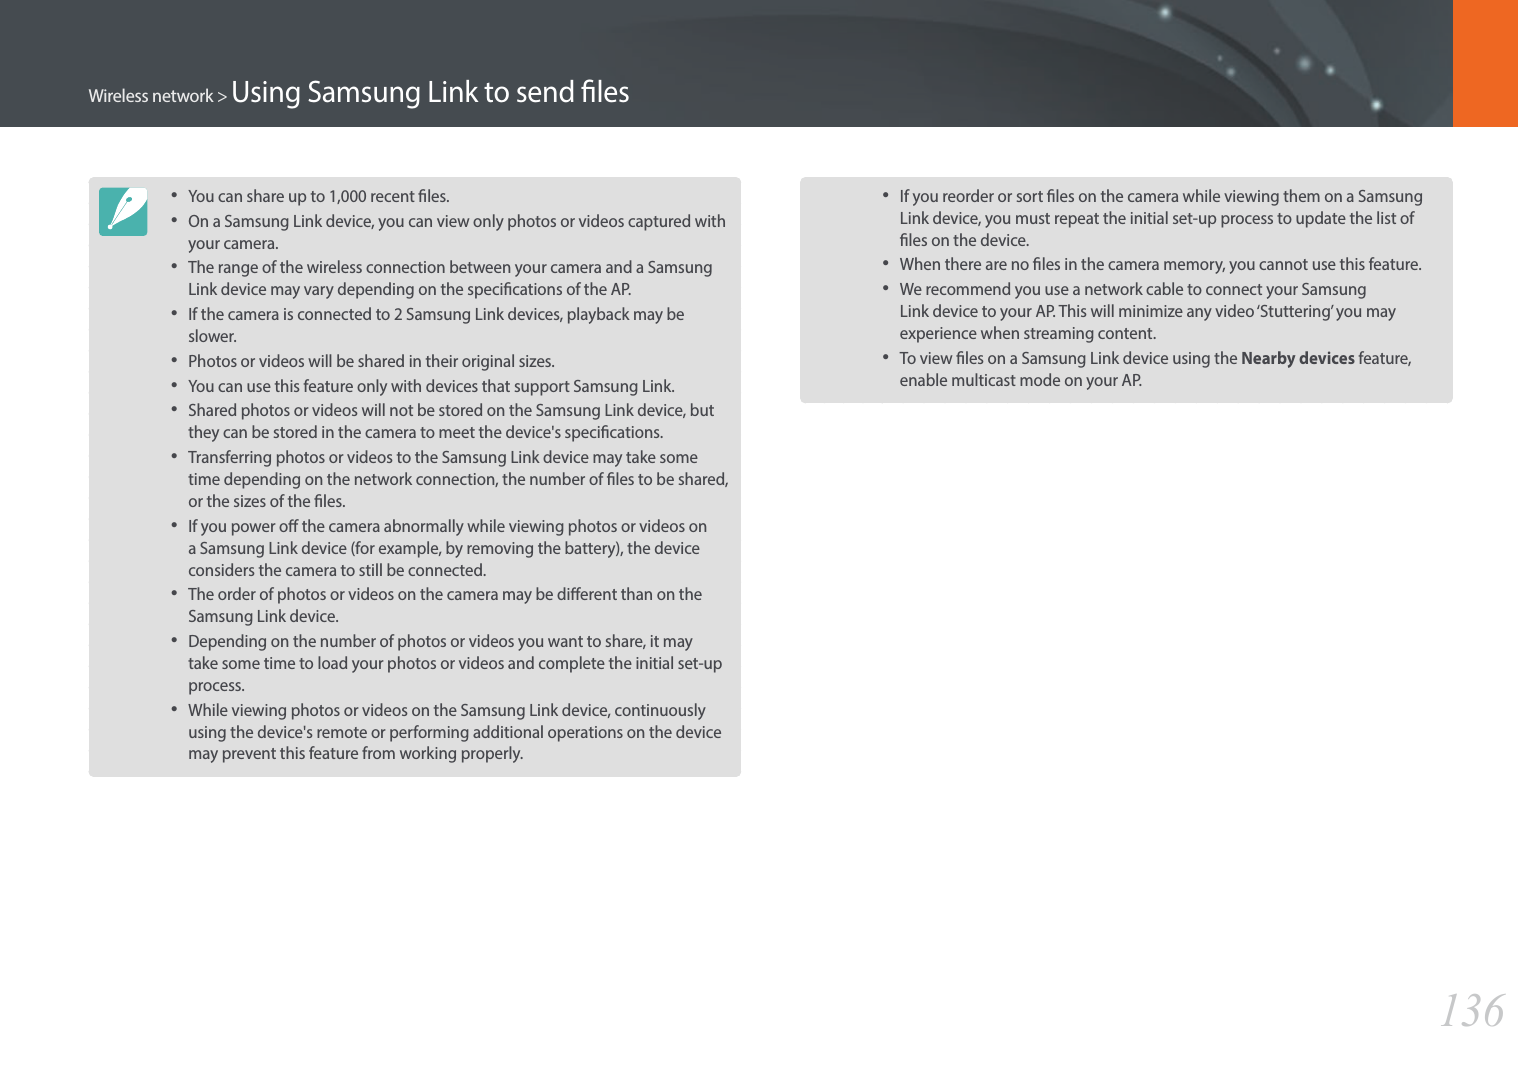
![138Camera settings menuYou can set the user environment with these settings.To set user options, In Shooting mode, press [m] ĺ d ĺ an option.Available items and the order of them may dier depending on shooting conditions.ISO CustomizingISO ExpansionYou can select ISO 100 and 25600.ISO StepYou can set the size for the ISO sensitivity by either 1/3 or 1 step.Auto ISO RangeYou can set the maximum ISO value under which each EV step is chosen when you set the ISO to Auto.User settings](https://usermanual.wiki/Samsung-Electronics-Co/NX3000/User-Guide-2248332-Page-139.png)
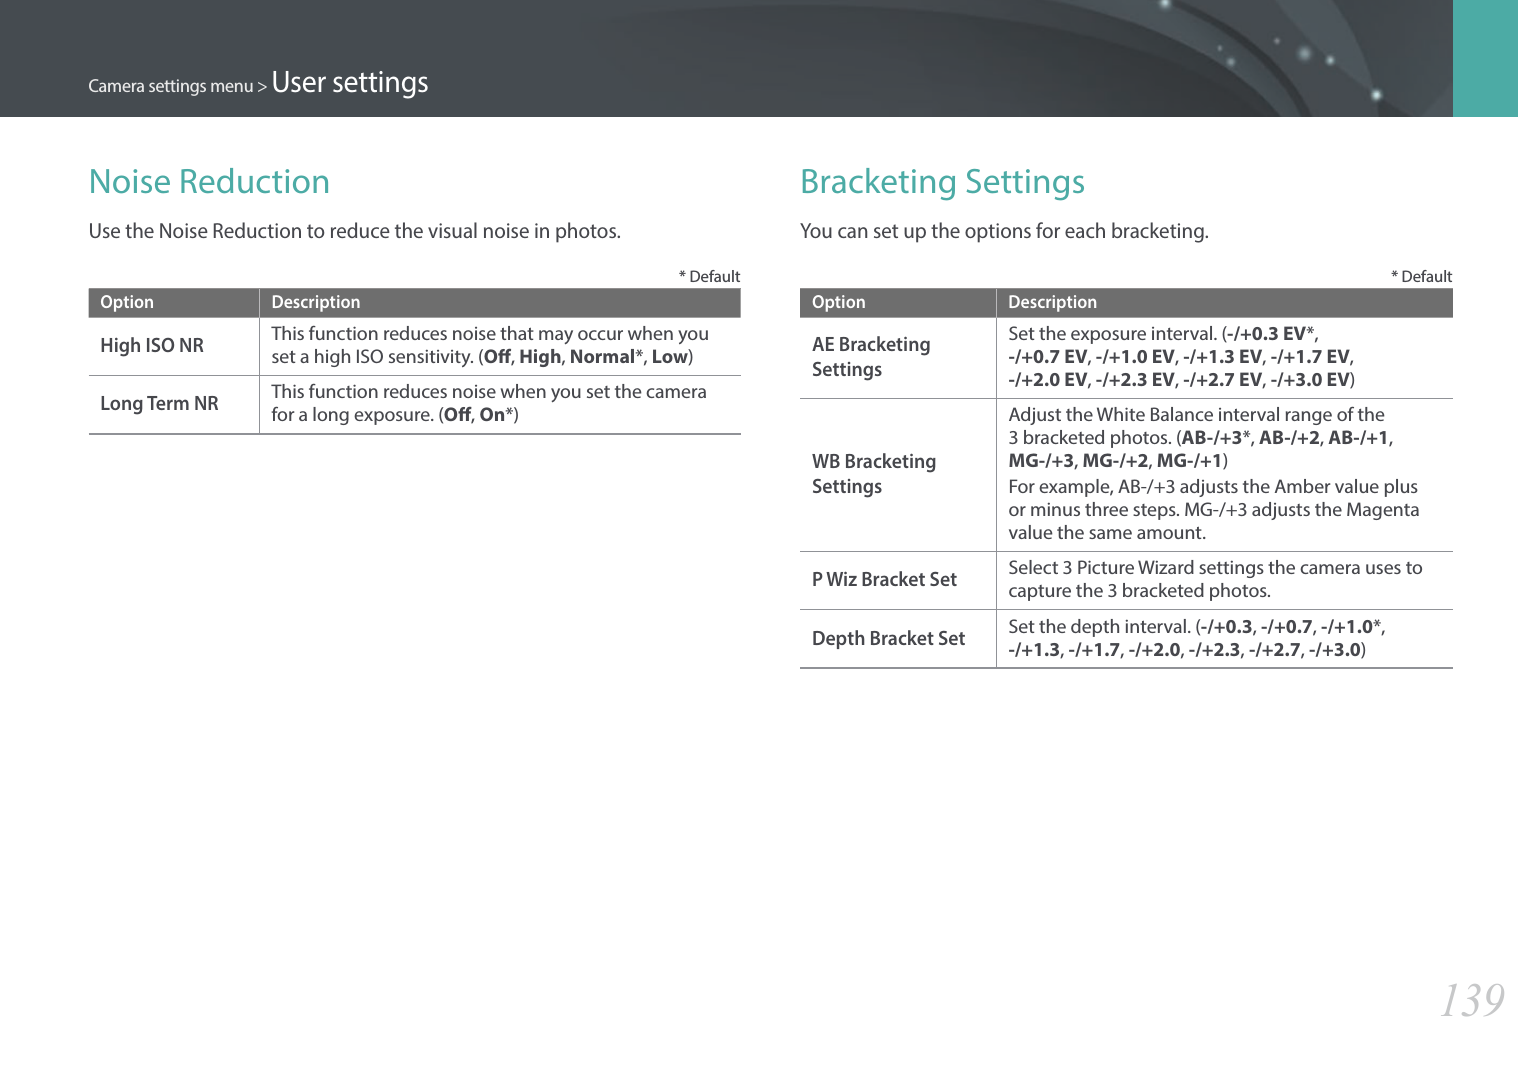
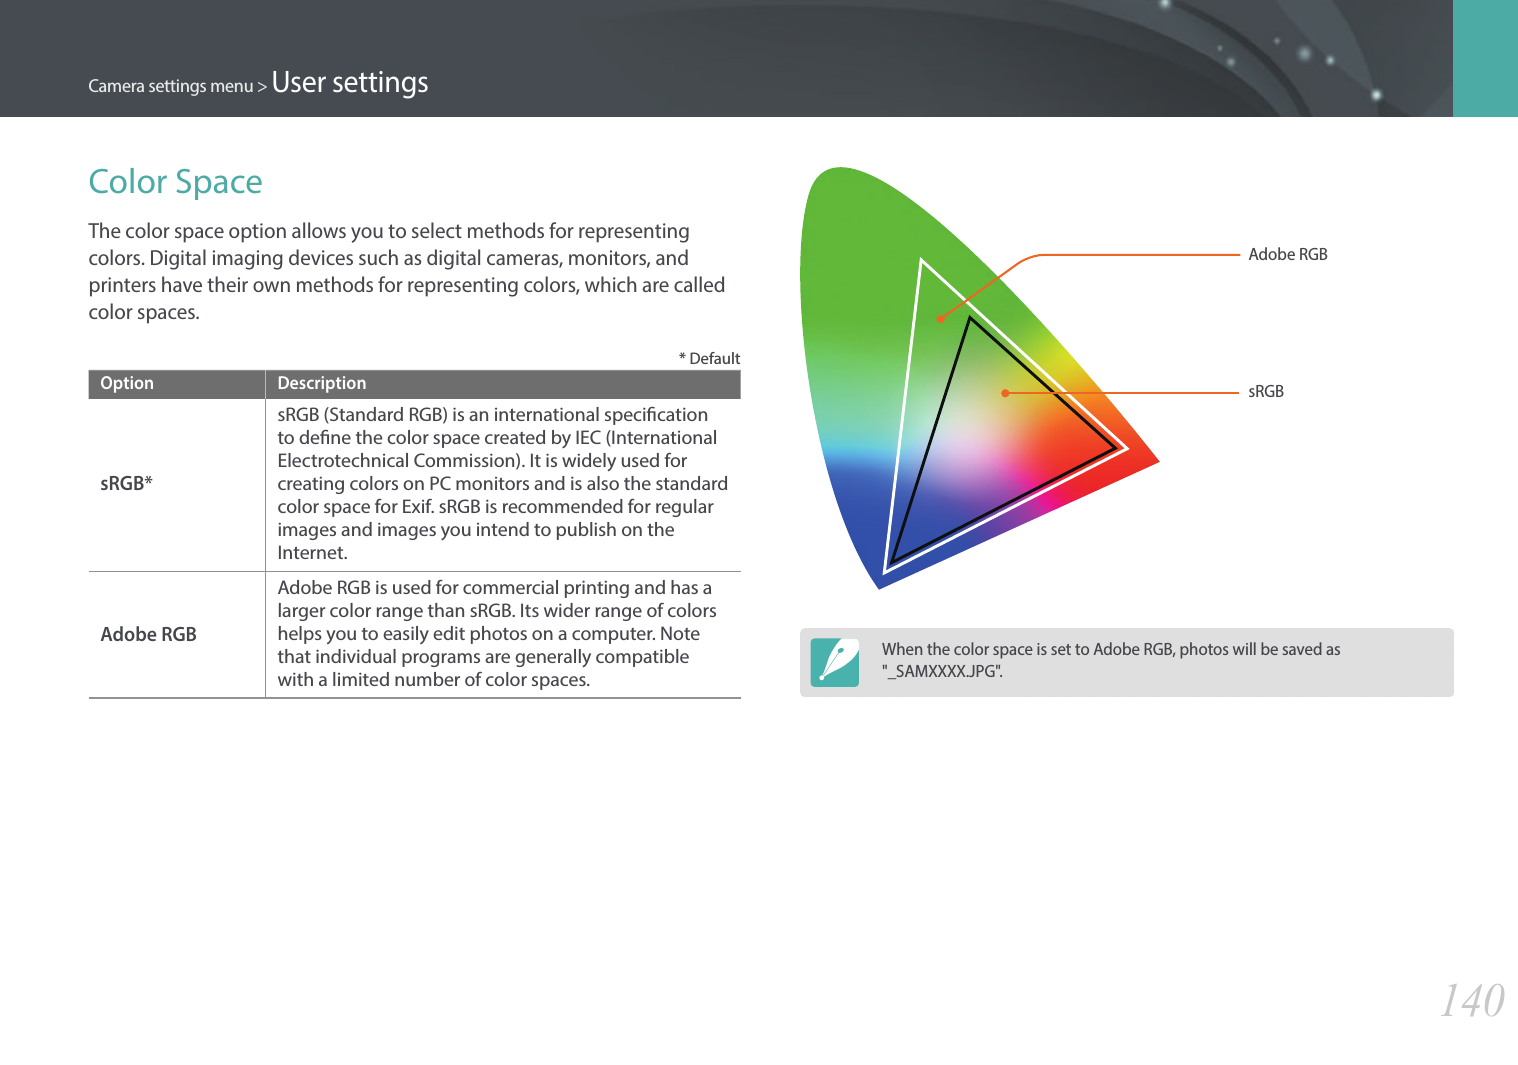
![141Camera settings menu > User settingsDistortion CorrectYou can correct lens distortion that might occur from lenses. This feature is available with lenses that support it.Touch OperationSet to enable touch operation in Shooting mode.* DefaultOption DescriptionODo not use touch operations in Shooting mode. (You can use touch operations in other situations.)On*Use touch operations in Shooting mode.iFn CustomizingYou can select options that can be adjusted when you press [i-Function] on an i-Function lens. Option DescriptionApertureSet to adjust the aperture value.Shutter SpeedSet to adjust the shutter speed. EVSet to adjust the exposure value.ISOSet to adjust ISO sensitivity.White Balance Set to adjust the White Balance.](https://usermanual.wiki/Samsung-Electronics-Co/NX3000/User-Guide-2248332-Page-142.png)
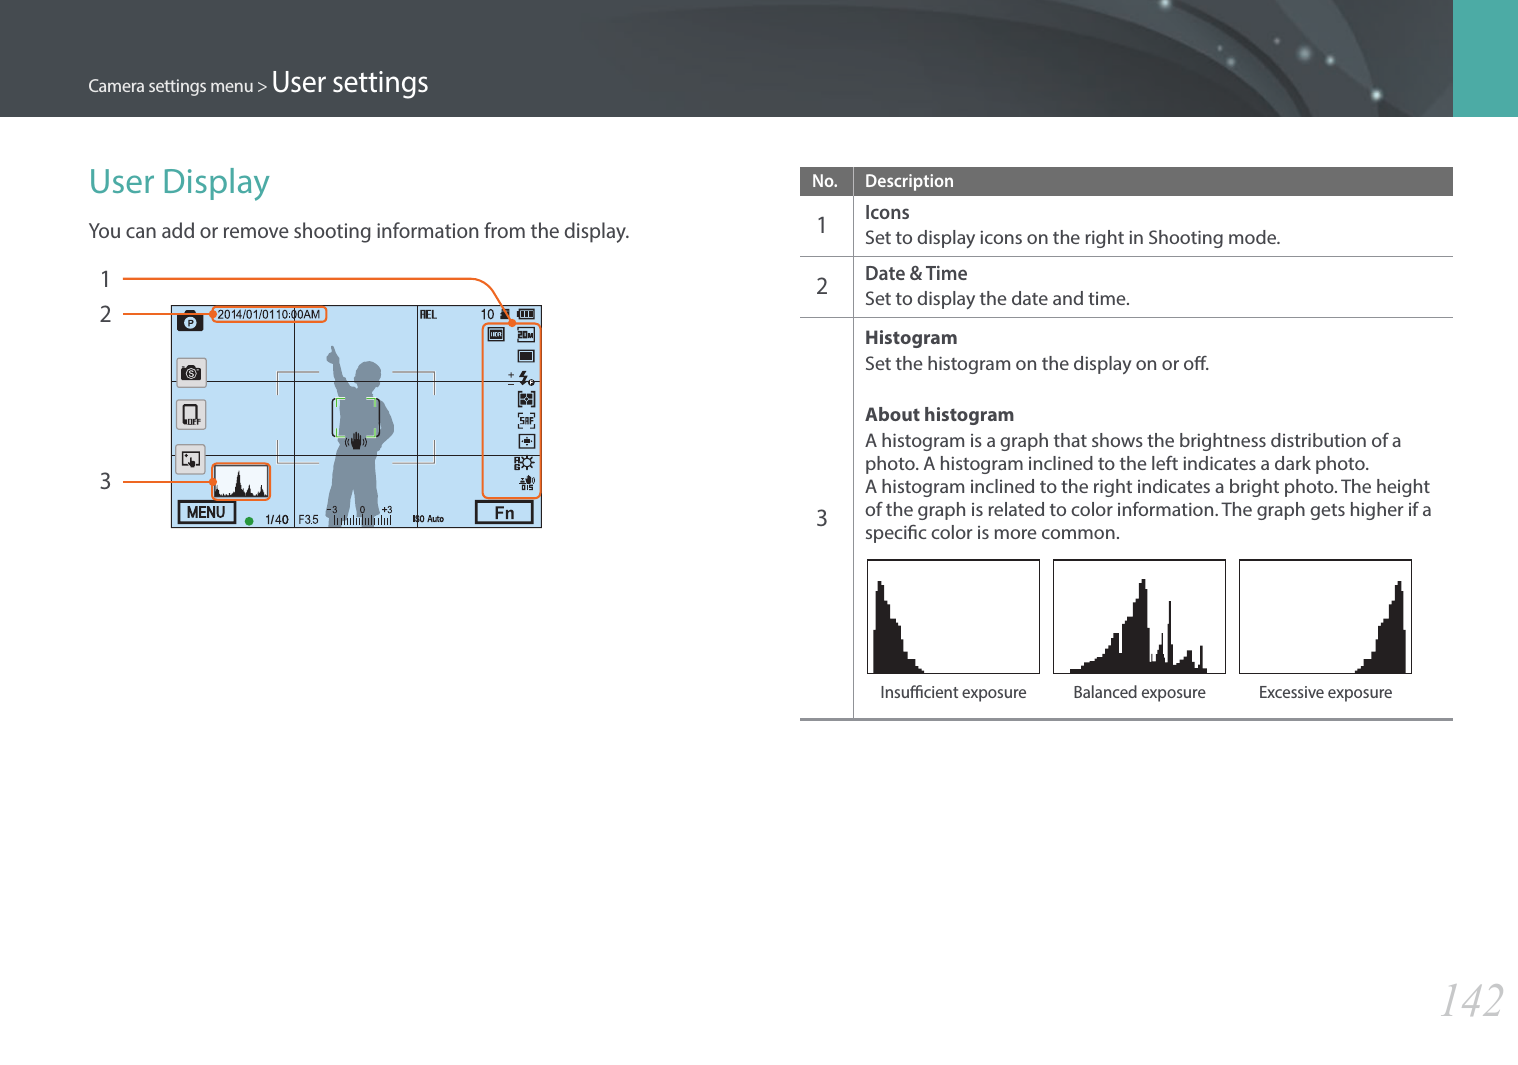
![143Camera settings menu > User settingsKey MappingYou can change the function assigned to the Custom button or the DIRECT LINK button.* DefaultButton FunctionCustomSet the Custom button's function.• Optical Preview*: Execute the Depth of Field Preview function for the current aperture value. (p. 22)• One Touch WB (White Balance): Execute the Custom White Balance function.• One Touch RAW +: Save a le in the RAW+JPEG format. To save a le in JPEG format, press the button again.• Reset: Reset some settings.• AEL: Execute the auto exposure lock function. (Half-pressing [Shutter] executes the auto focus lock function.)• AEL Hold: Keep executing the auto exposure lock function after shooting. (The exposure remains locked even after you capture a photo.)DIRECT LINKSet the DIRECT LINK button's function. (AutoShare, MobileLink, Remote Viewnder, Group Share, Baby Monitor, Auto Backup, Email, SNS & Cloud, Samsung Link)Live view NFCIn Shooting mode, turn on the NFC feature on an NFC-enabled smart phone and place the smart phone's NFC antenna near the camera’s NFC tag to launch AutoShare or Remote Viewnder. This feature is supported by NFC-enabled smart phones running Android OS. It is recommended that you use the latest version. This feature is not available for iOS devices. MobileLink/NFC Image Size Set the size of photos to transfer to a smartphone using the MobileLink or NFC functions. * DefaultOption DescriptionResize to 2M or lower* If a photo's size is larger than 3M, it will be transferred after resizing it to 2M or lower. Original The photo will be transferred in its original size.Grid LineSelect a guide to help you compose a scene. (O*, 4 X 4, 3 X 3, Cross, Diagonal)](https://usermanual.wiki/Samsung-Electronics-Co/NX3000/User-Guide-2248332-Page-144.png)
![145Camera settings menuLearn to congure your camera's settings.To set Setting options, In Shooting or Playback mode, press [m] ĺ q ĺ an option.* DefaultItem DescriptionSound• System Volume: Set the sound volume or turn all sound o entirely. (O, Low, Medium*, High)Even if the system volume is turned o, the camera emits the sound while playing a video or a slide show.• AF Sound: Set the sound the camera emits when you half-press the shutter button on or o. (O, On*)• Button Sound: Set the sound the camera emits when you press the buttons or touch the screen on or o. (O, On*)Quick ViewSet the Quick View time length–the amount of time the camera displays a photo immediately after you capture it. (O, 1 sec*, 3 sec, 5 sec, Hold)* DefaultItem DescriptionDisplay AdjustAdjust the display brightness, auto brightness setting, display color, or level gauge.• Display Brightness: You can adjust the display brightness manually.• Auto Brightness: Turn auto brightness on or o. (O, On*)• Display Color: You can adjust the display color manually.• Horizontal Calibration: Calibrate the level gauge. If the level gauge is not level, position the camera on the level surface, and then follow the on-screen instructions.• You cannot access the Horizontal Calibration option in Playback mode.• You cannot calibrate the level gauge in portrait orientation.Auto Display OSet the display o time. The display turns o if you do not use the camera for the time you set. (O, 30 sec*, 1 min, 3 min, 5 min, 10 min)Setting](https://usermanual.wiki/Samsung-Electronics-Co/NX3000/User-Guide-2248332-Page-146.png)
![146Camera settings menu > Setting* DefaultItem DescriptionAuto Power OSet power shut o time. The camera shuts o if you do not use it for the time you set. (O, 1 min*, 3 min, 5 min, 10 min, 30 min)• The camera retains the power-o time setting even if you replace the battery.• Auto Power O may not work if the camera is connected to a computer or a TV or playing a slide show or a movie.Help Guide DisplaySet to display help text about menus and functions. (O, On*)Press [n] to hide the help text.LanguageSet a language the camera shows on the display.Date & TimeSet date, time, date format, time zone and whether to imprint the date on photos. (Time Zone, Date/Time Set, Date Type, Time Type, Imprint)• The date appears on the lower right side of the photo.• When you print a photo, some printers may not print the date appropriately. * DefaultItem DescriptionVideo OutSet the video signal output appropriate for your country when connecting the camera to an external video device such as a monitor or HDTV.• NTSC: USA, Canada, Japan, Korea, Taiwan, Mexico, etc.• PAL (Supports only PAL B, D, G, H, or I): Australia, Austria, Belgium, China, Denmark, Finland, France, Germany, England, Italy, Kuwait, Malaysia, New Zealand, Singapore, Spain, Sweden, Switzerland, Thailand, Norway, etc.Anynet+ (HDMI-CEC)When you connect the camera to an HDTV that supports Anynet+ (HDMI-CEC), you can control the play function of the camera with the TV remote control.• O: You cannot control the play function of camera with the TV remote control.• On*: You can control the play function of camera with the TV remote control.HDMI OutputWhen you connect the camera to an HDTV with an HDMI cable, you can change the resolution of the image.• NTSC: Auto*, 1080i, 720p, 480p, 576p (activates only when PAL is selected)If the connected HDTV does not support the resolution you select, the camera sets the resolution one level lower.](https://usermanual.wiki/Samsung-Electronics-Co/NX3000/User-Guide-2248332-Page-147.png)
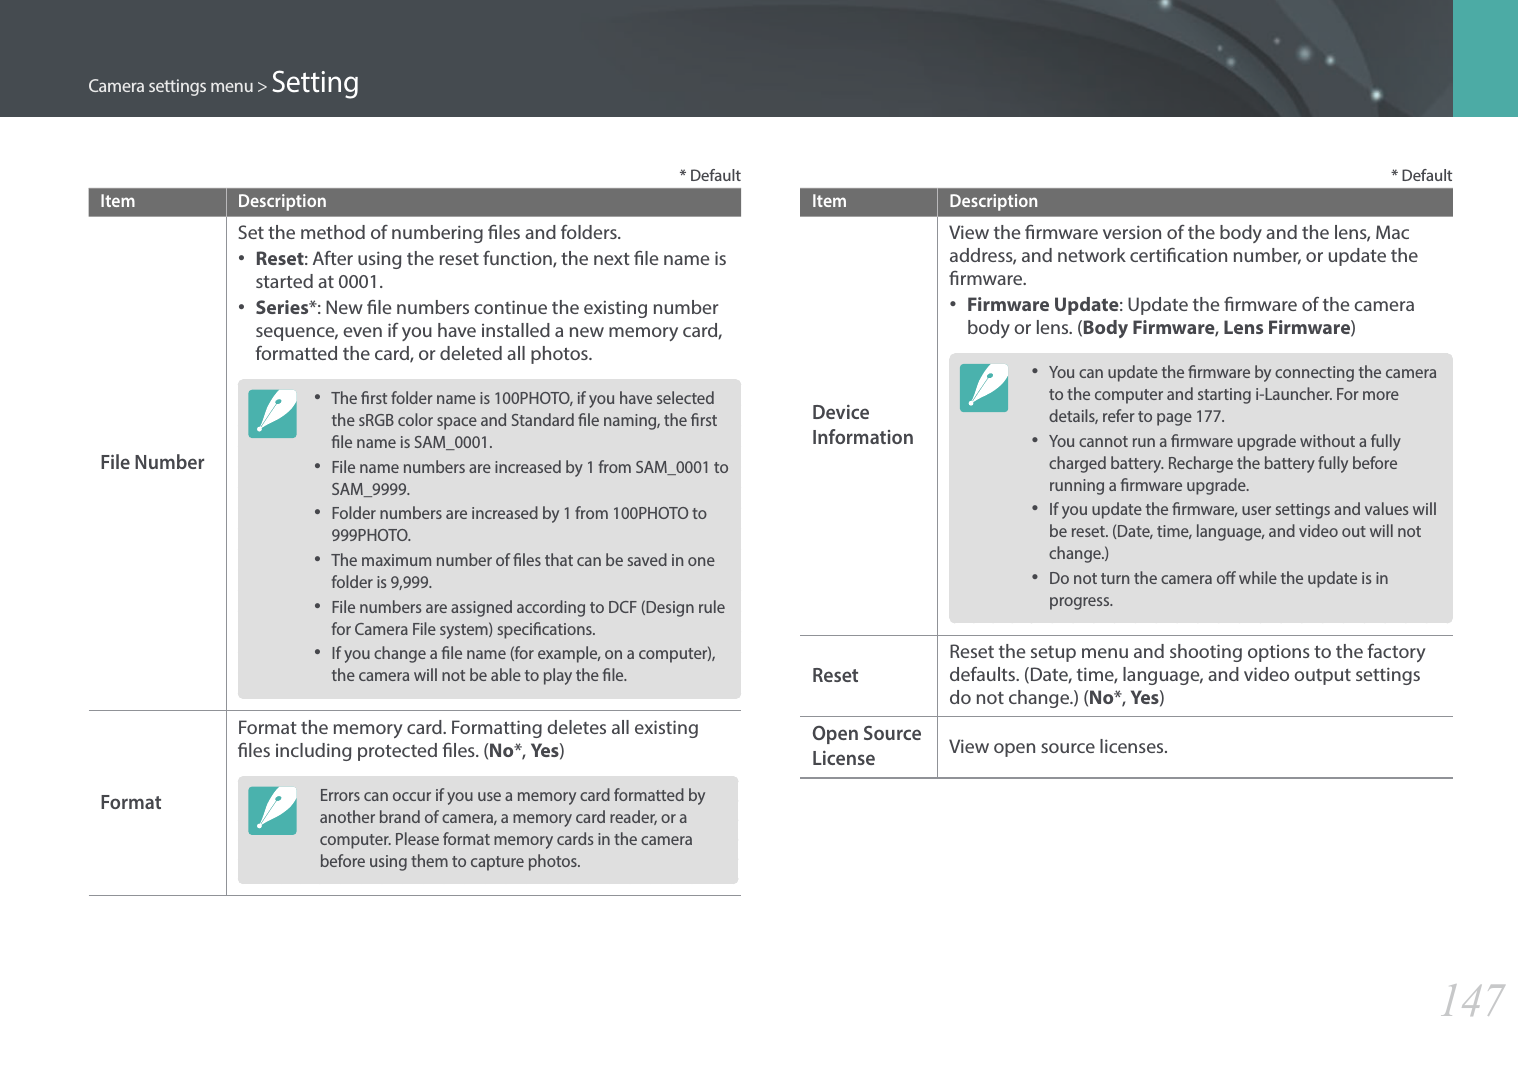
![149Connecting to external devicesPlay back photos or videos by connecting your camera to an HDTV using an optional HDMI cable.1 In Shooting or Playback mode, press [m] ĺ q ĺ HDMI Output ĺ an option. (p. 154)2 Turn o your camera and HDTV.3 Connect your camera to your HDTV with the optional HDMI cable.4 Turn on your HDTV, and then select the HDMI video source.5 Turn on the camera.• The camera automatically enters into Playback mode when you connect it to an HDTV. 6 View photos or play videos using the camera buttons.• When using the HDMI cable, you can connect the camera to an HDTV using the Anynet+(CEC) method. • The Anynet+(CEC) functions allow you to control connected devices using the TV remote control.• If the HDTV supports Anynet+(CEC), the TV turns on automatically when used in conjunction with the camera. This feature may not be available on some HDTVs.• When connected to an HDTV by an HDMI cable, the camera cannot capture a photo or video. • When connected to an HDTV, some of the camera’s playback functions may not be available.• The length of time after which the camera and an HDTV are connected may vary depending on the memory card that you are using. As the main feature of a memory card is to increase the transfer speed, it is not necessarily true to say that a memory card with a faster transfer speed is also fast in using the HDMI function.Viewing files on an HDTV](https://usermanual.wiki/Samsung-Electronics-Co/NX3000/User-Guide-2248332-Page-150.png)
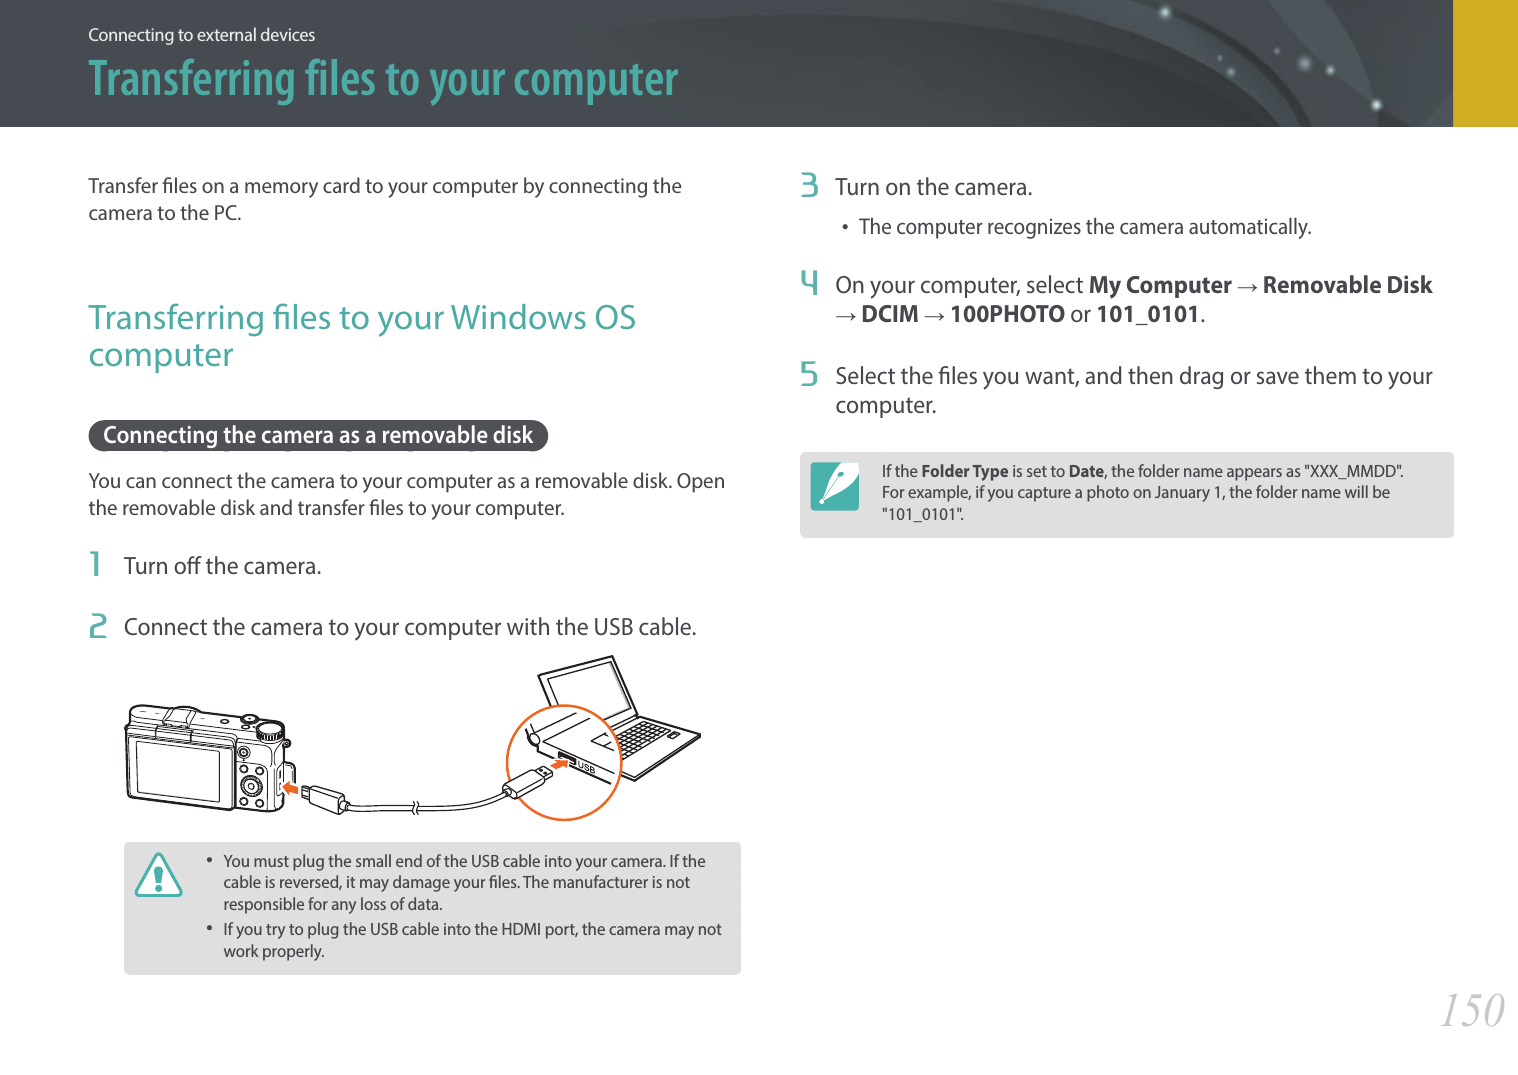
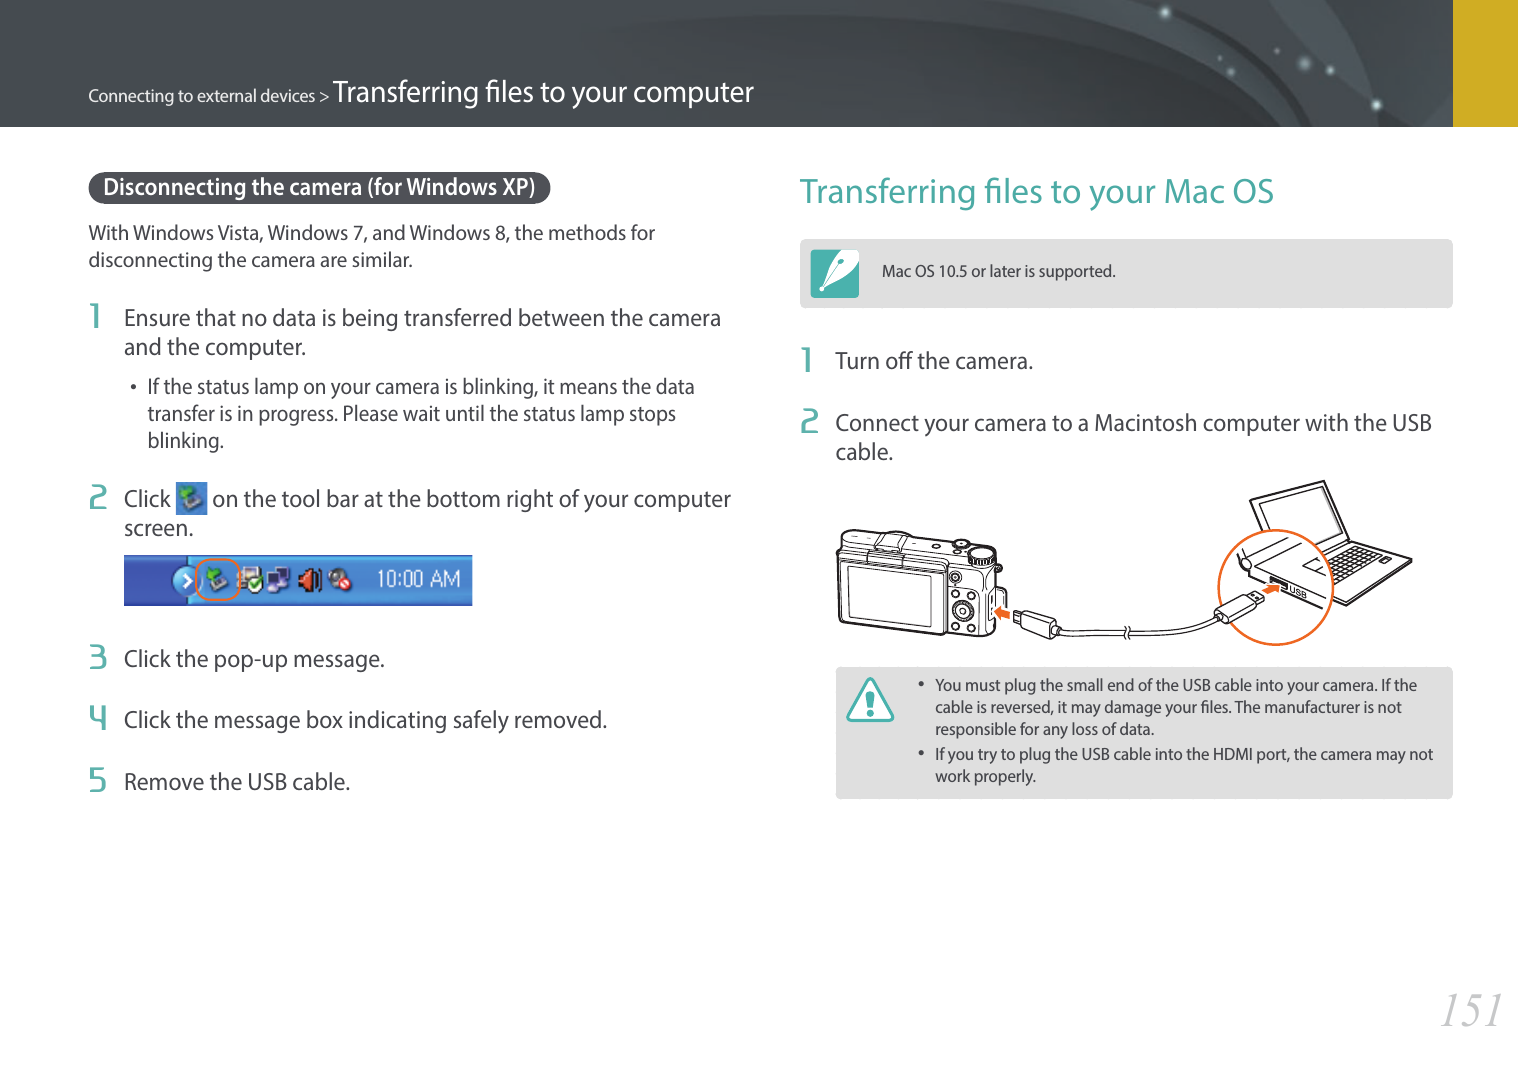
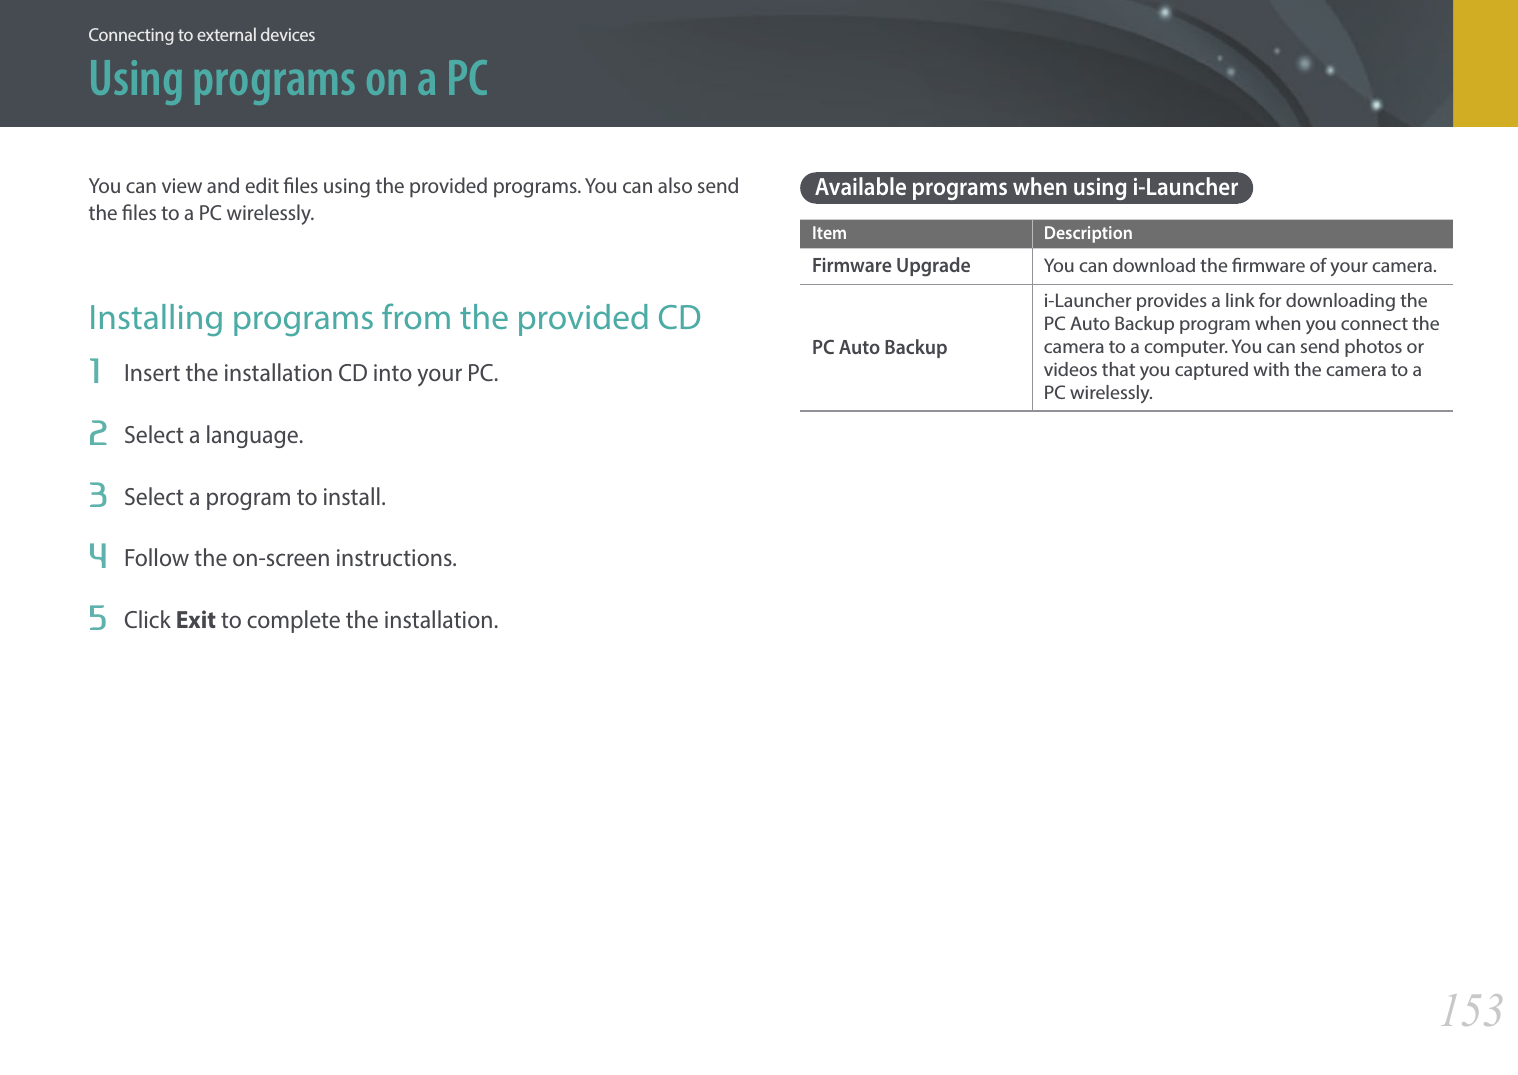
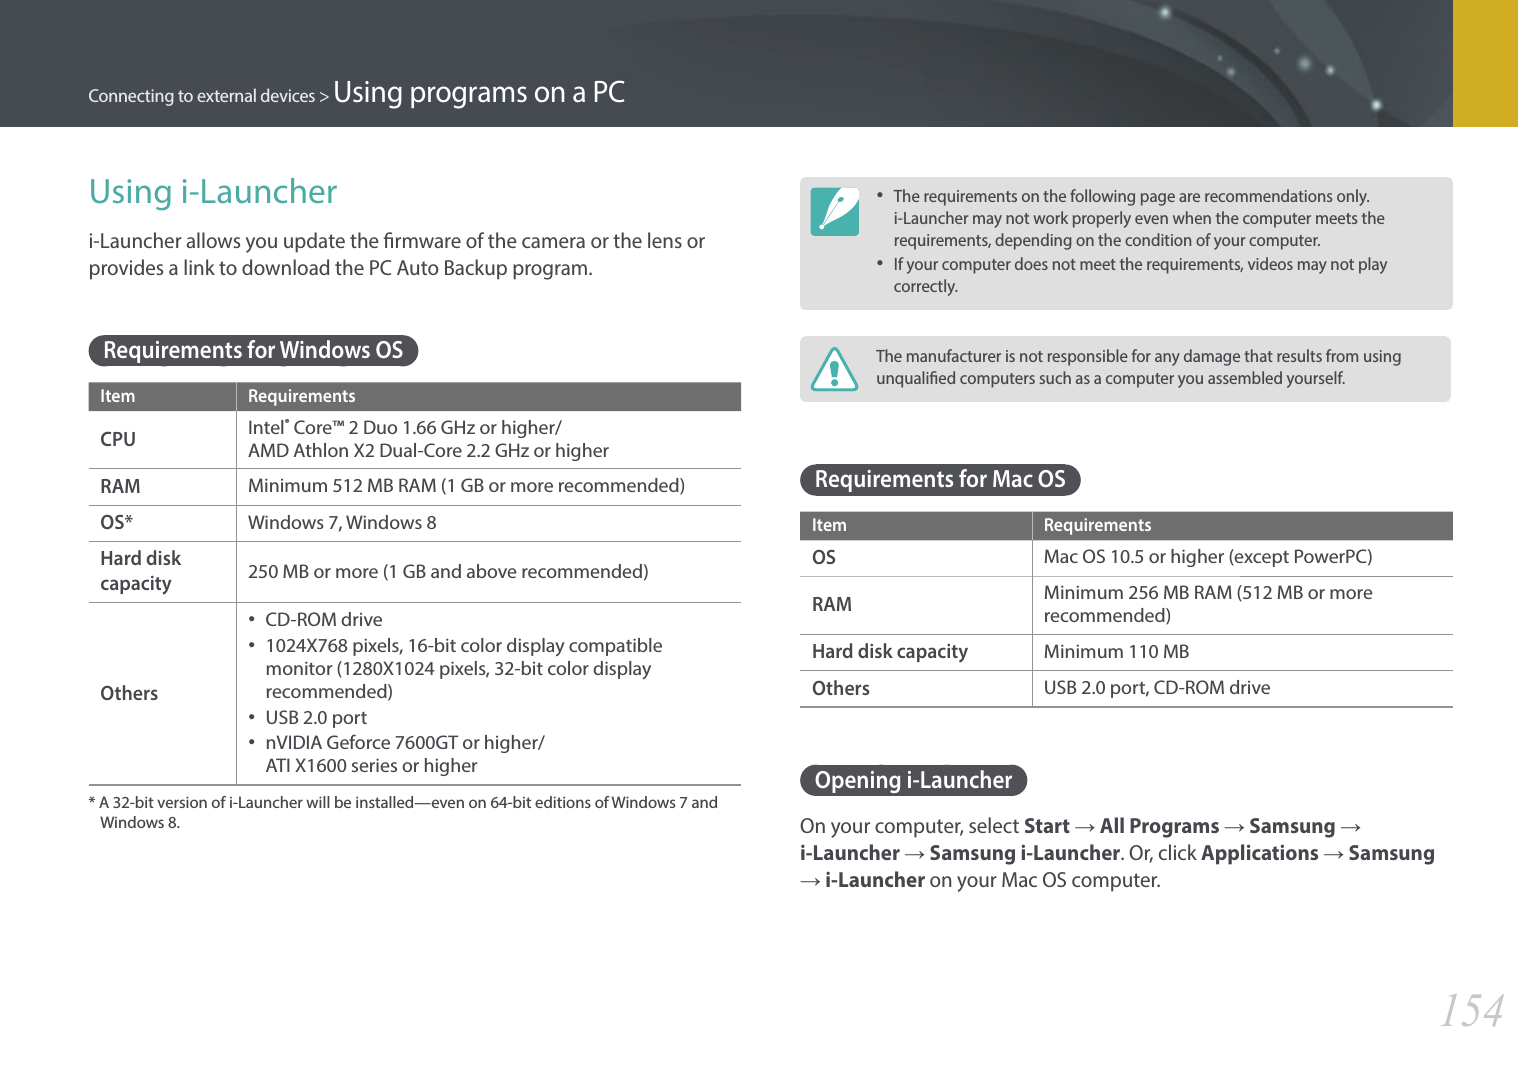
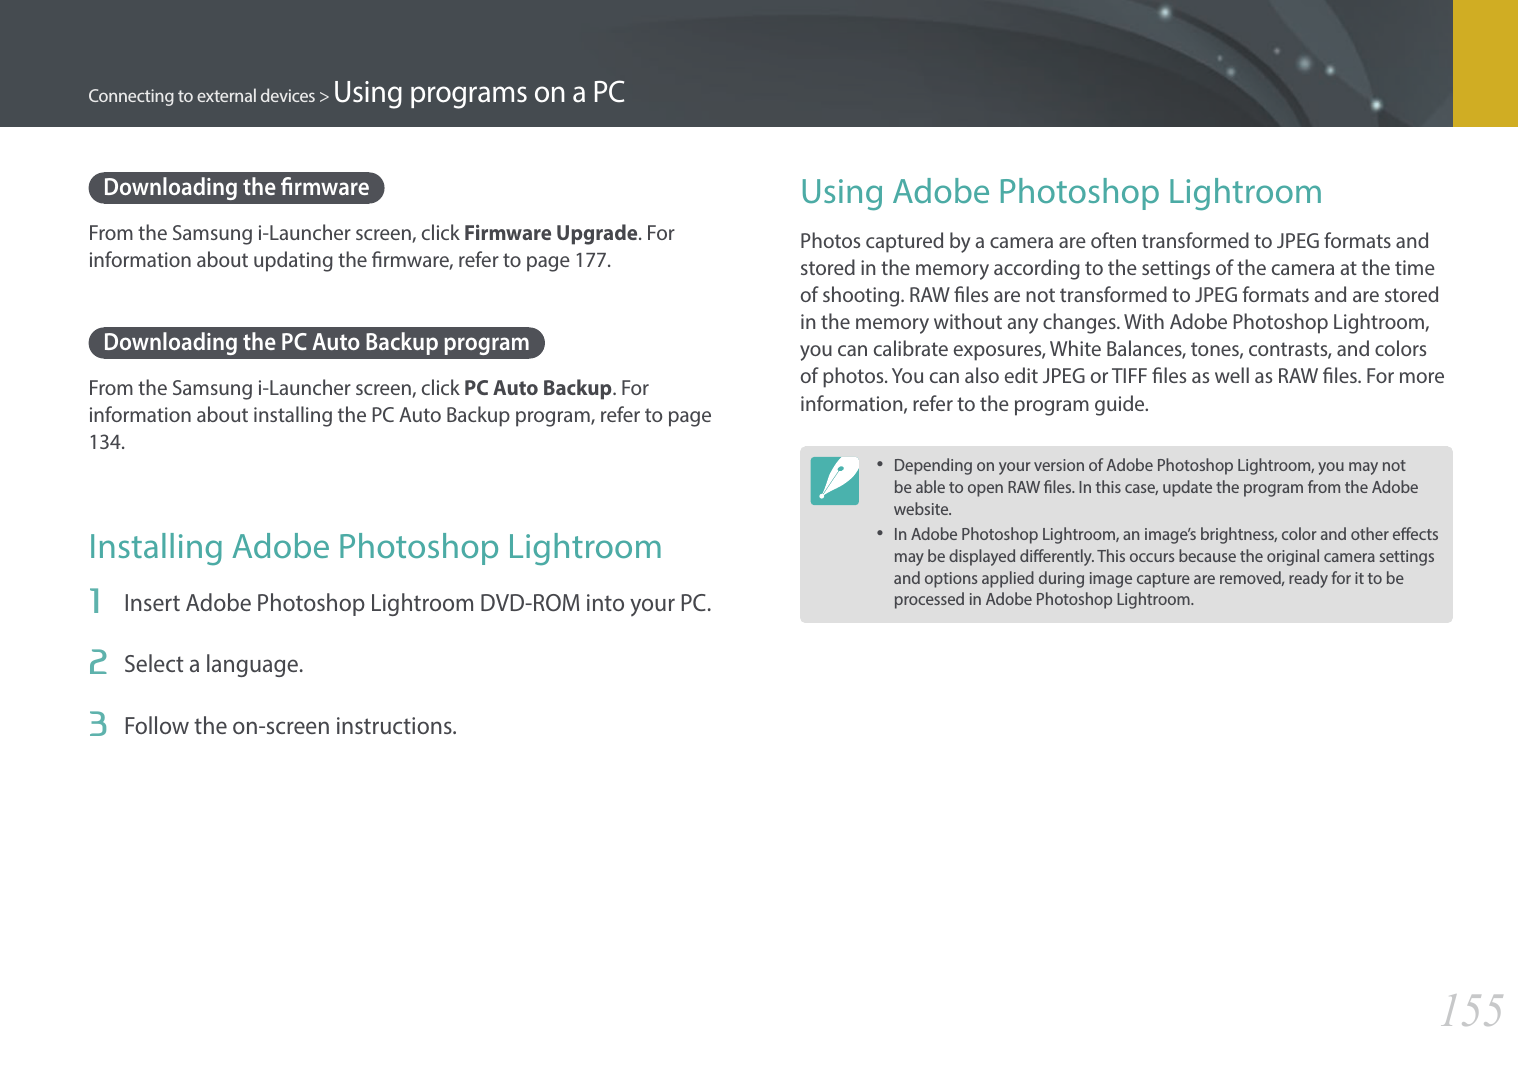

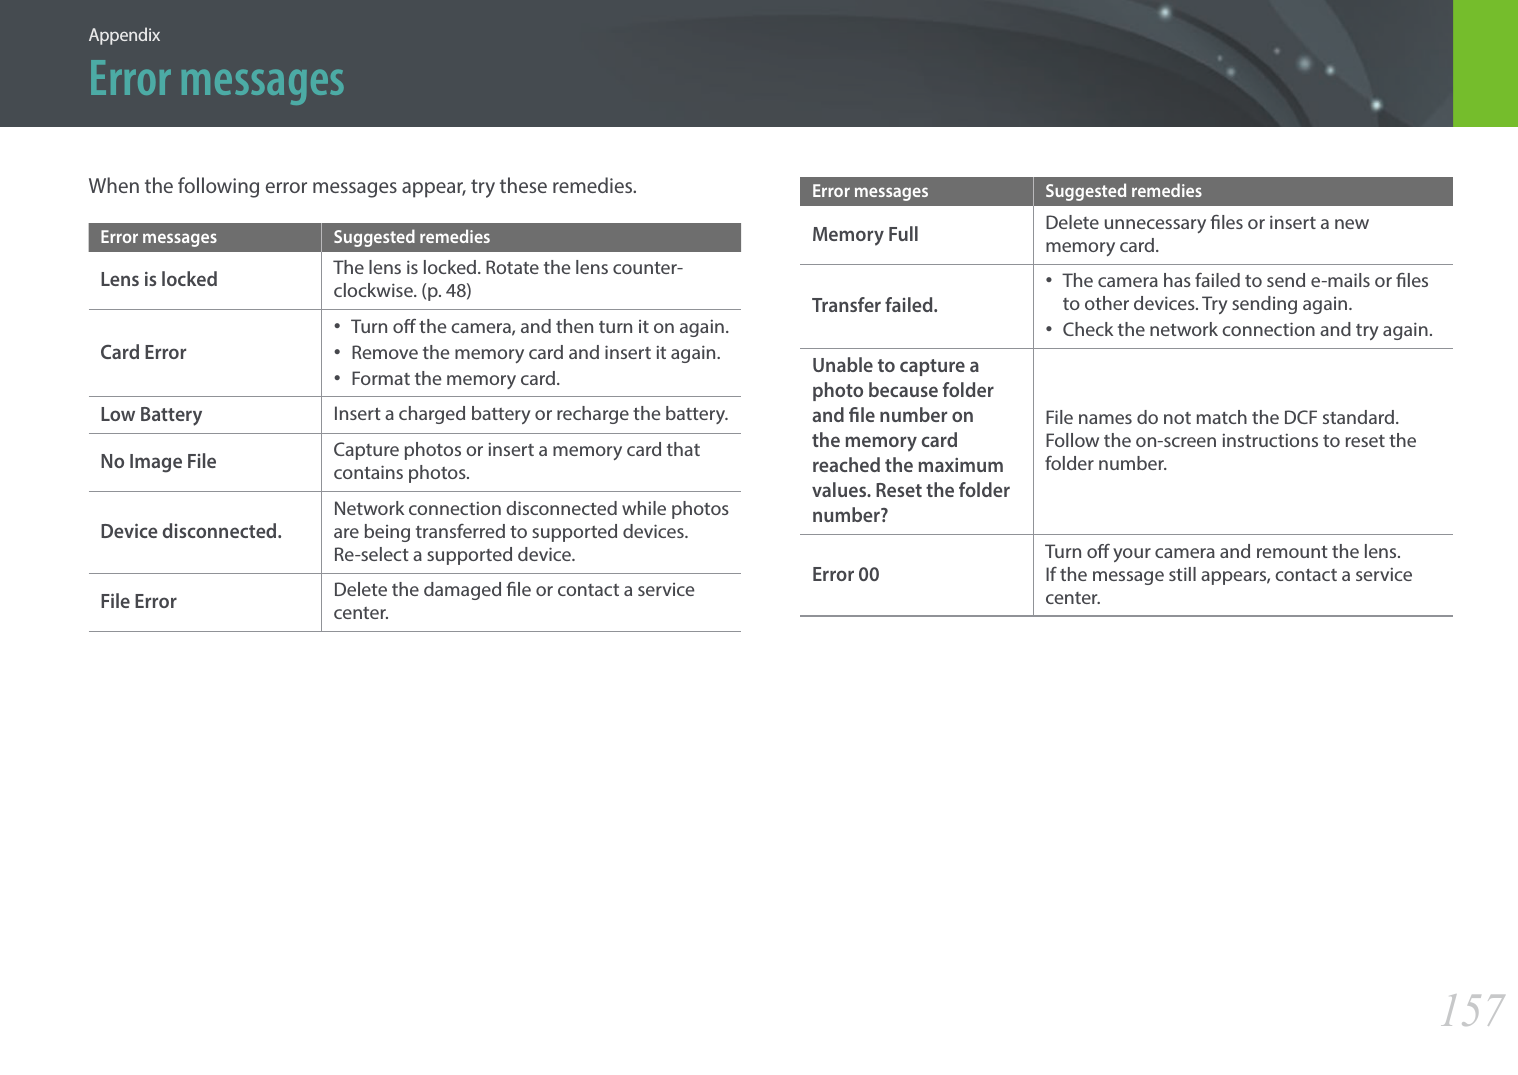
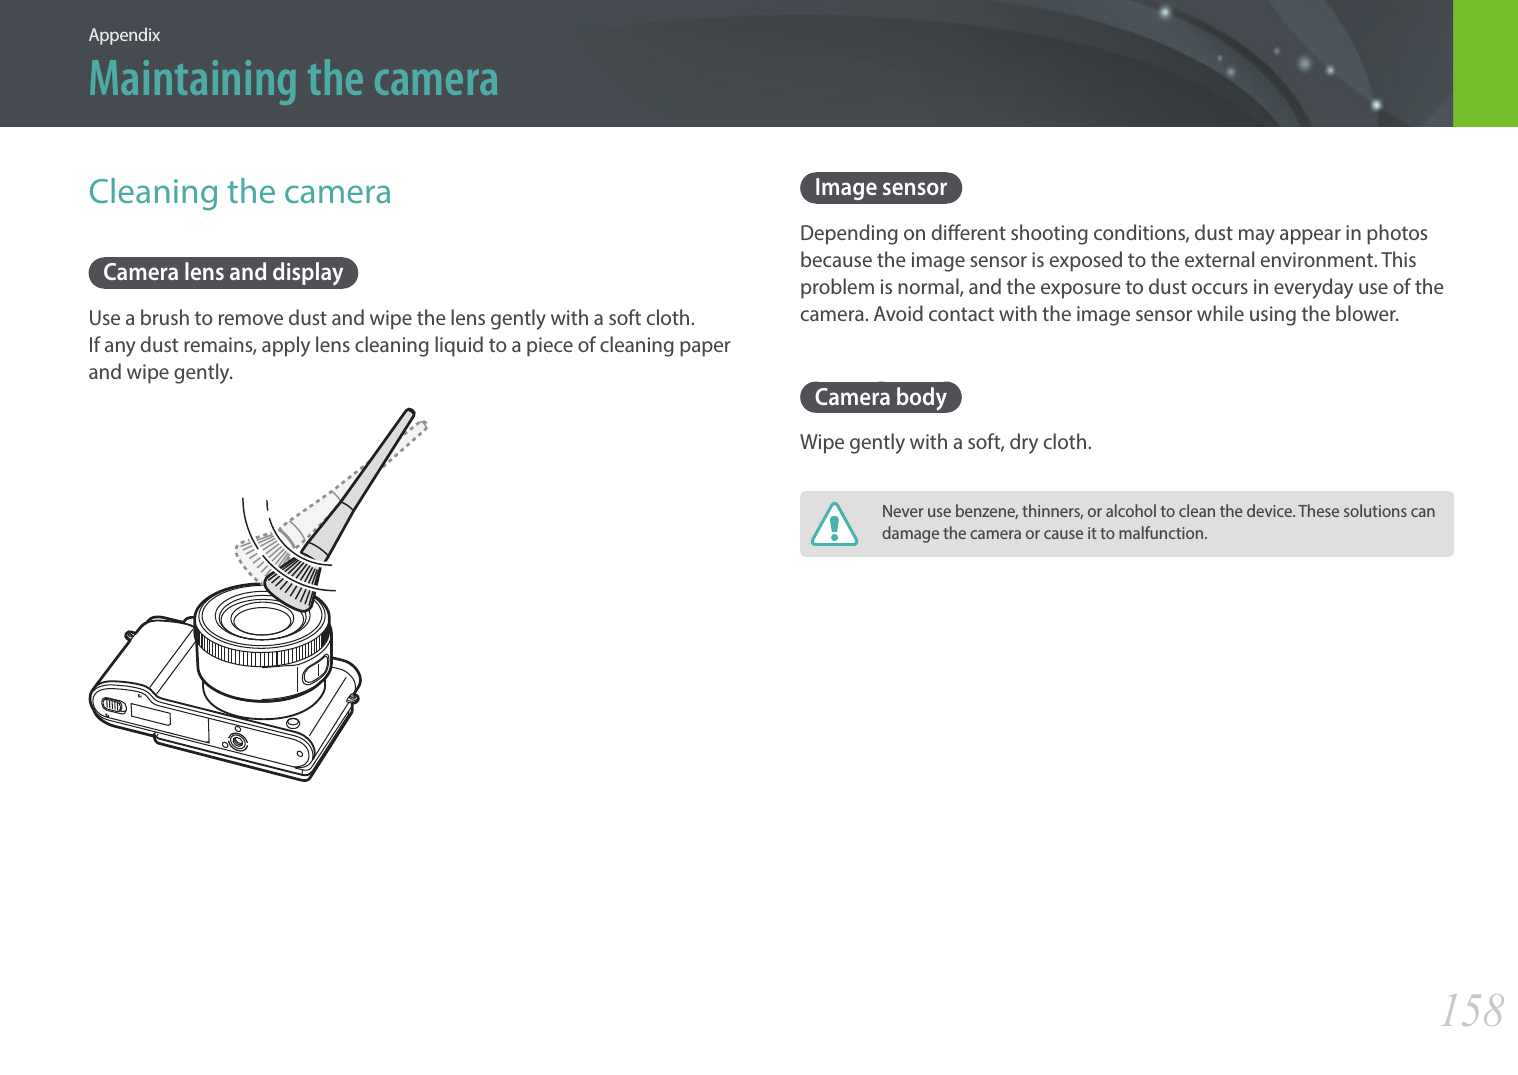
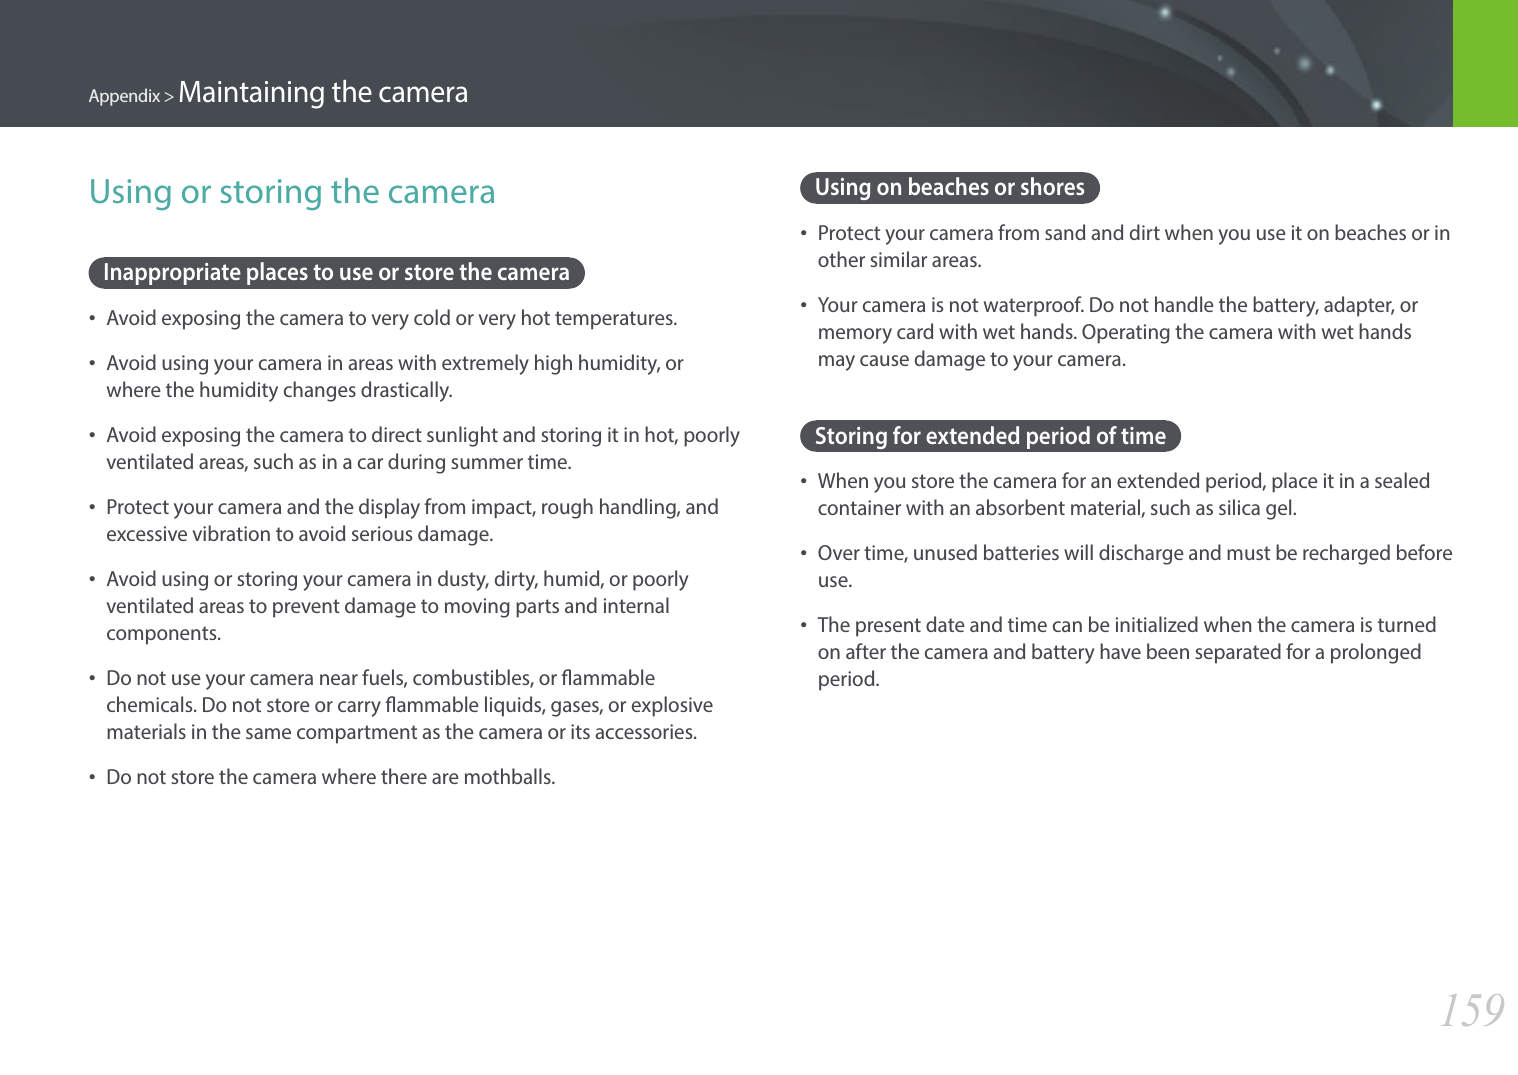

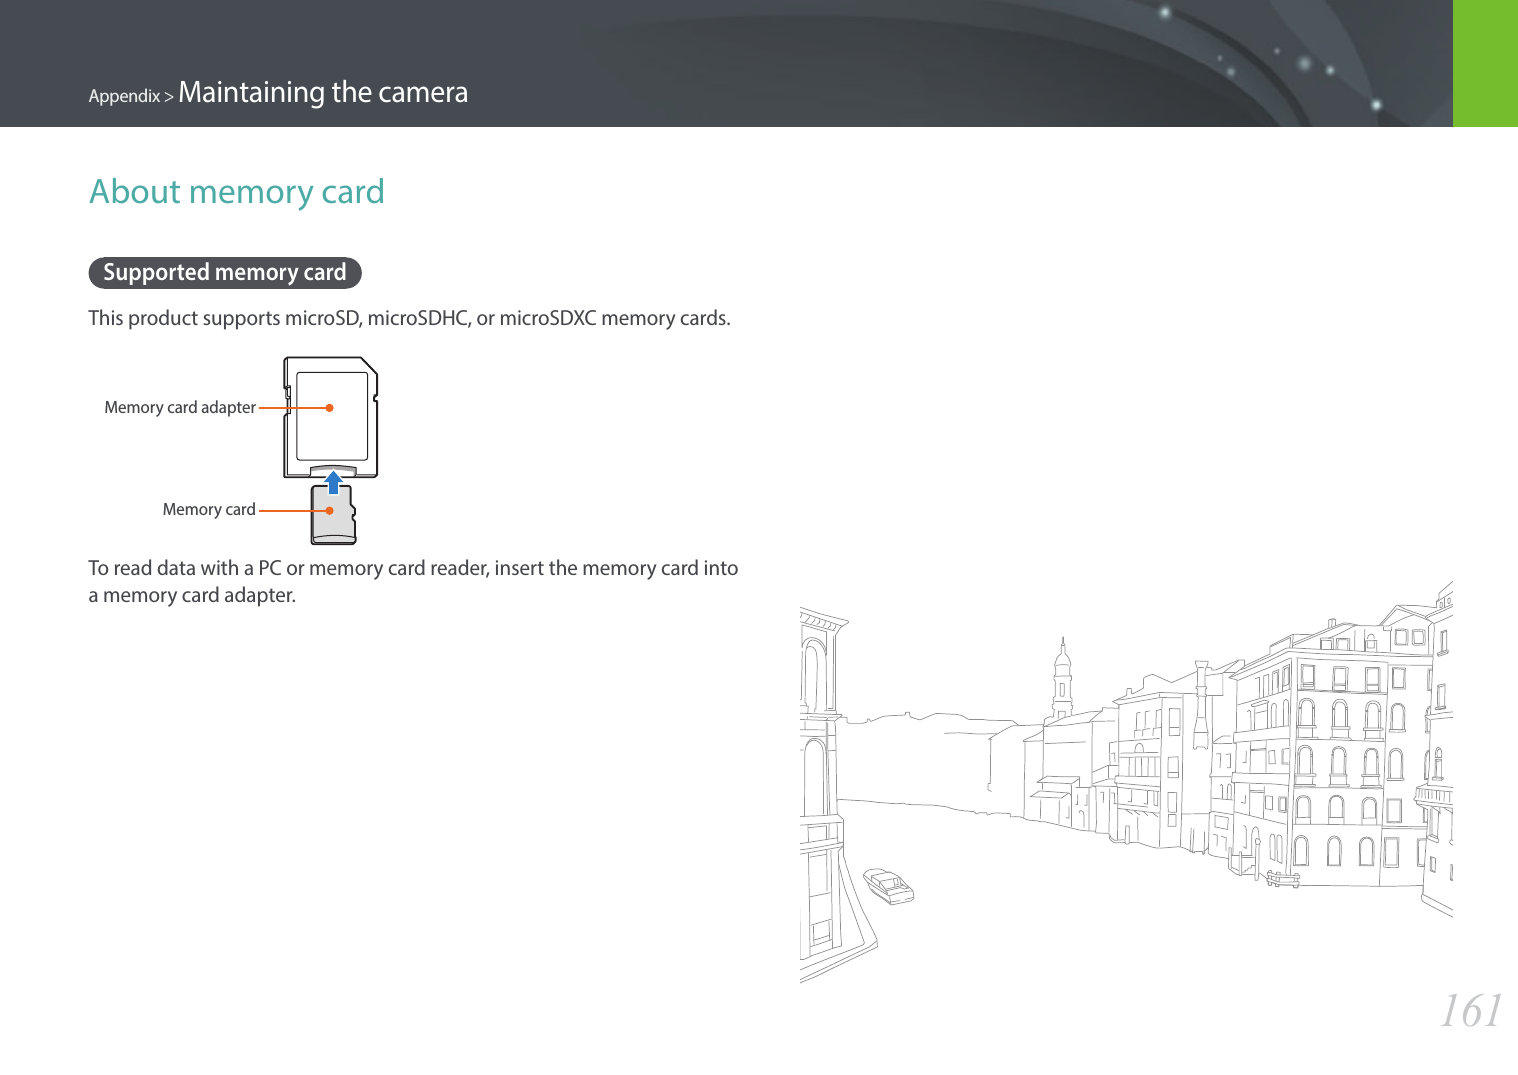
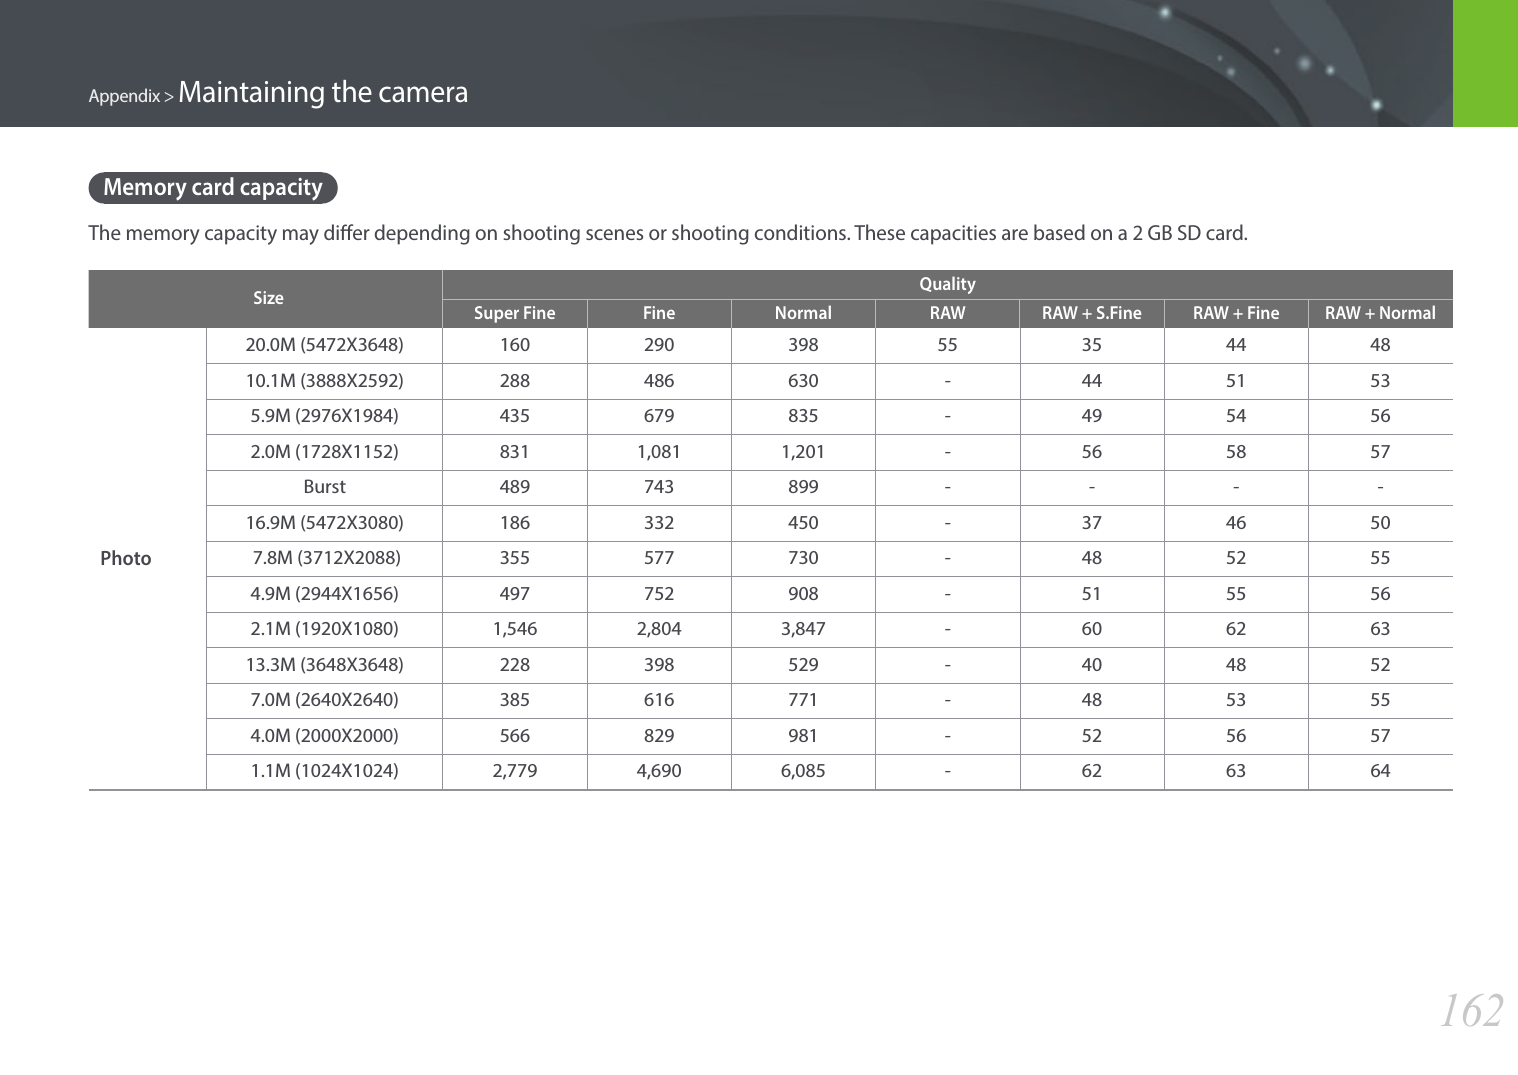
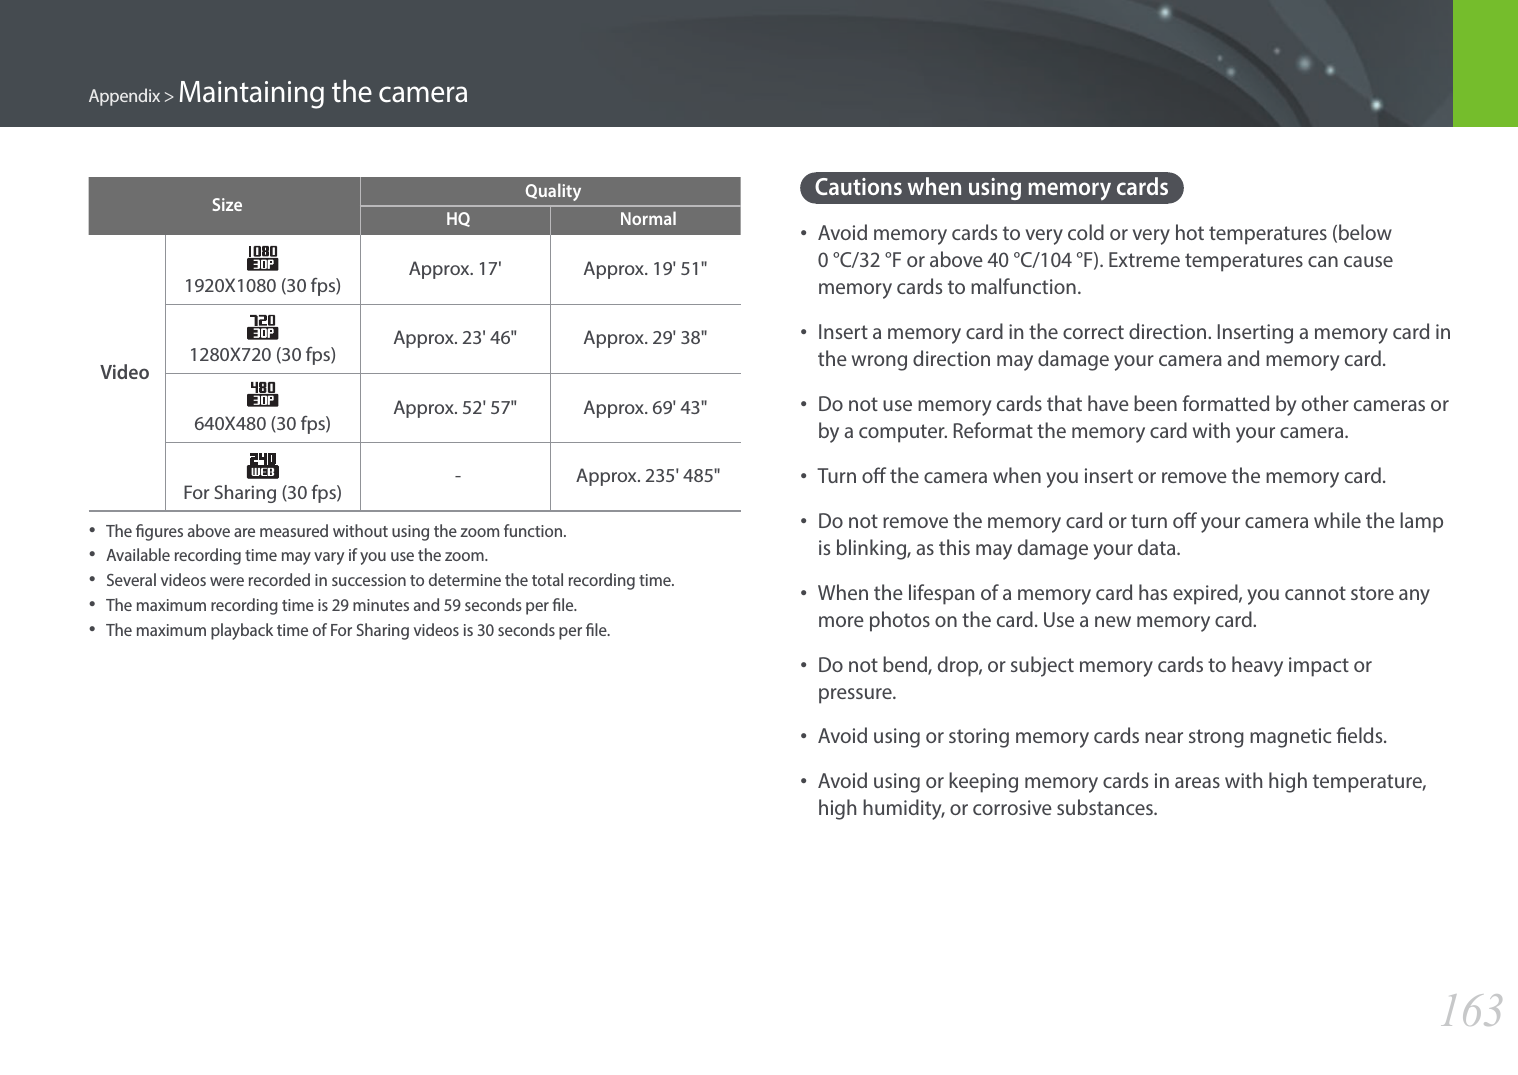
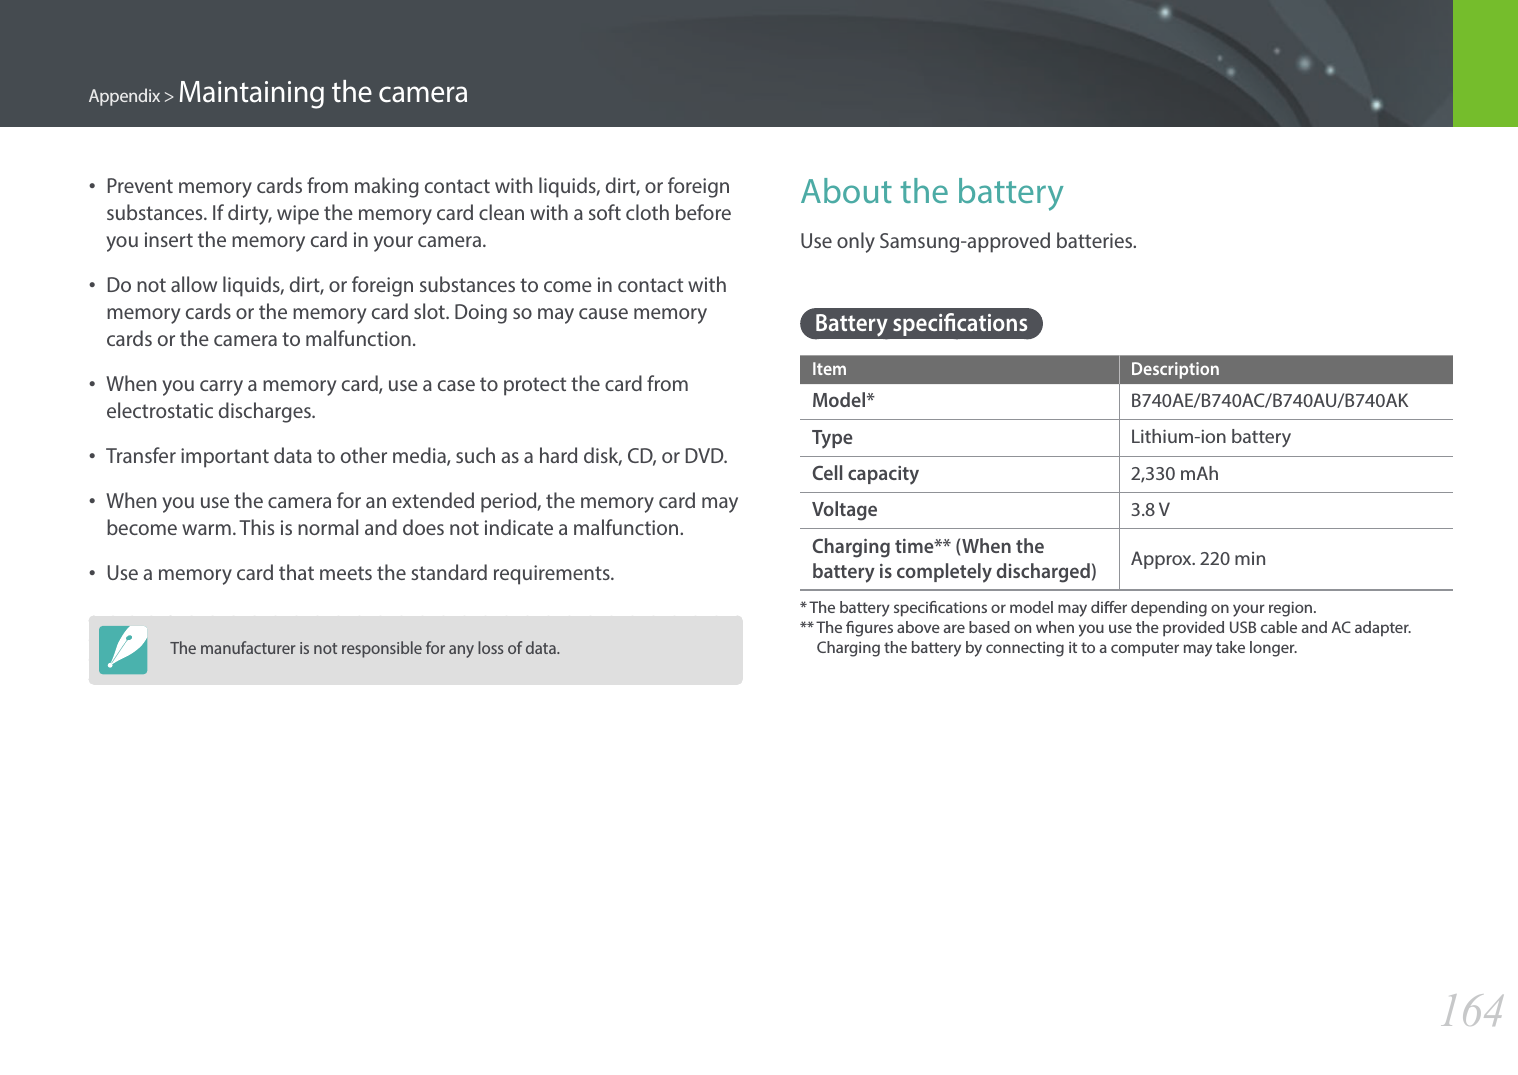

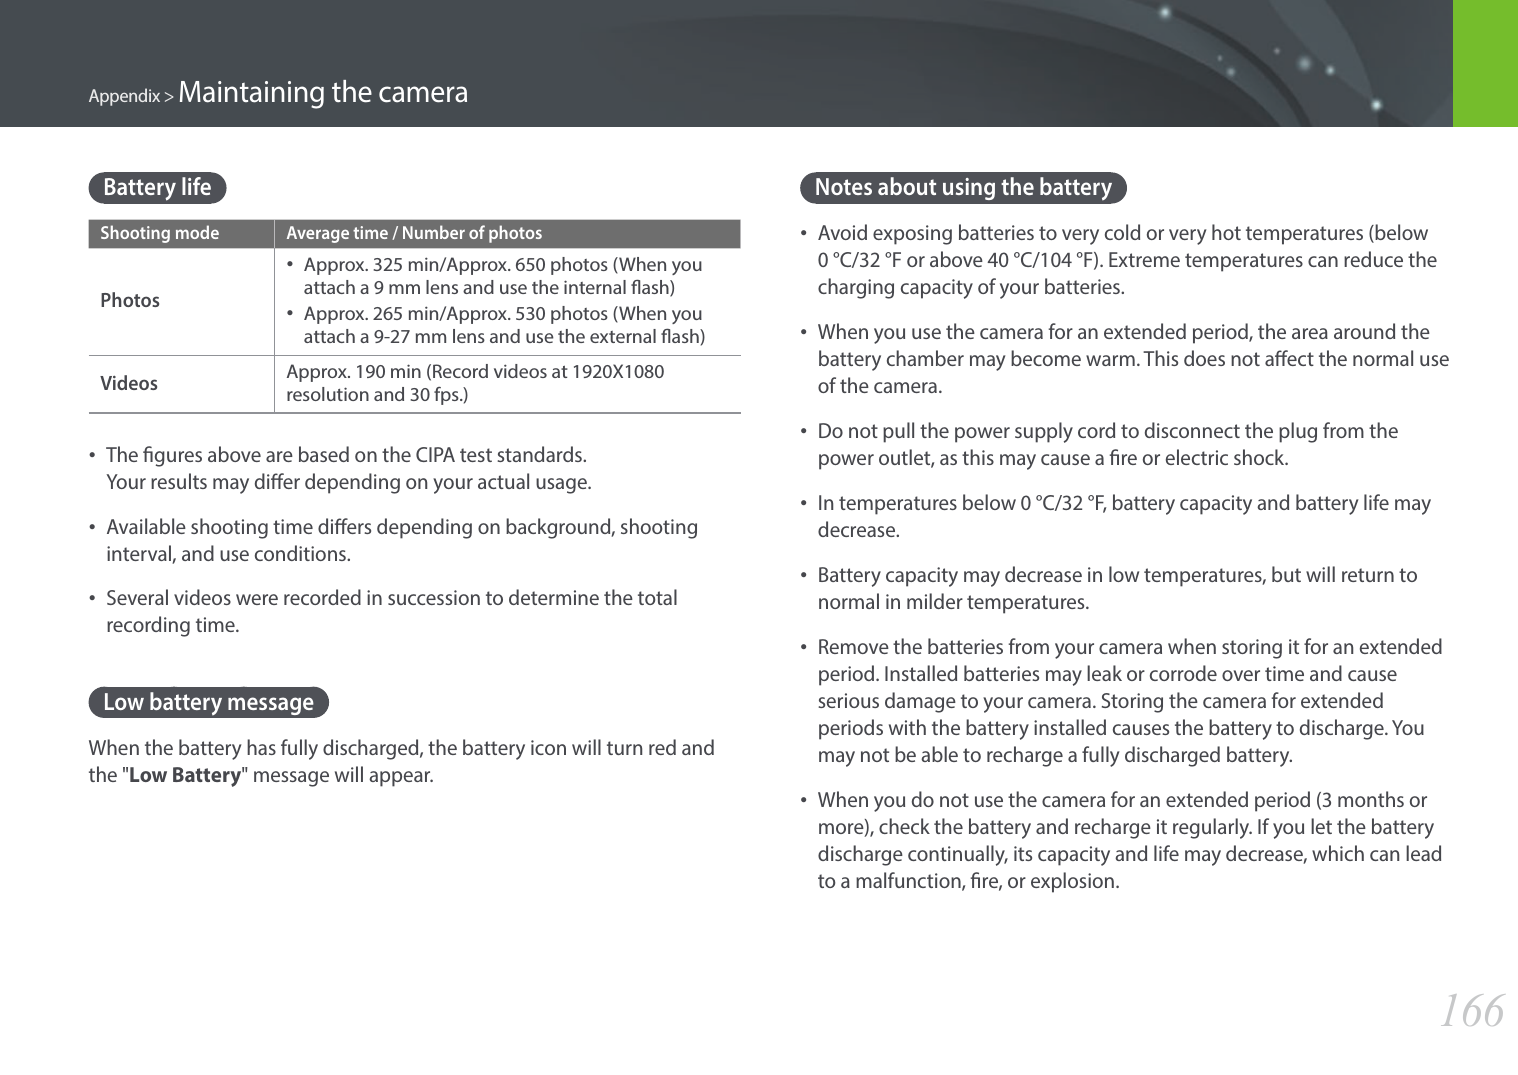
![169AppendixUpdating the firmwareConnect the camera to the computer and update the rmware of the camera of the lens.• You cannot run a rmware upgrade without a fully charged battery. Recharge the battery fully before running a rmware upgrade. • If you update the rmware, user settings and values will be reset. (Date, time, language, and video out will not change.) • Do not turn the camera o while the update is in progress. 1 Turn o the camera.2 Connect your camera to the computer with the USB cable.• You must plug the small end of the USB cable into your camera. If the cable is reversed, it may damage your les. The manufacturer is not responsible for any loss of data. • If you try to plug the USB cable into the HDMI port, the camera may not work properly.3 Turn on the camera. 4 On the computer, select i-Launcher ĺ Firmware Upgrade.5 Follow the on-screen instructions to download the rmware to the camera.• You can download the rmware of the camera or the lens.6 Turn o the camera when the download completes.7 Remove the USB cable.8 Turn on the camera.• Firmware update screen appears on the camera. Verify the rmware version. 9 Press [Shutter] to update the rmware.](https://usermanual.wiki/Samsung-Electronics-Co/NX3000/User-Guide-2248332-Page-170.png)

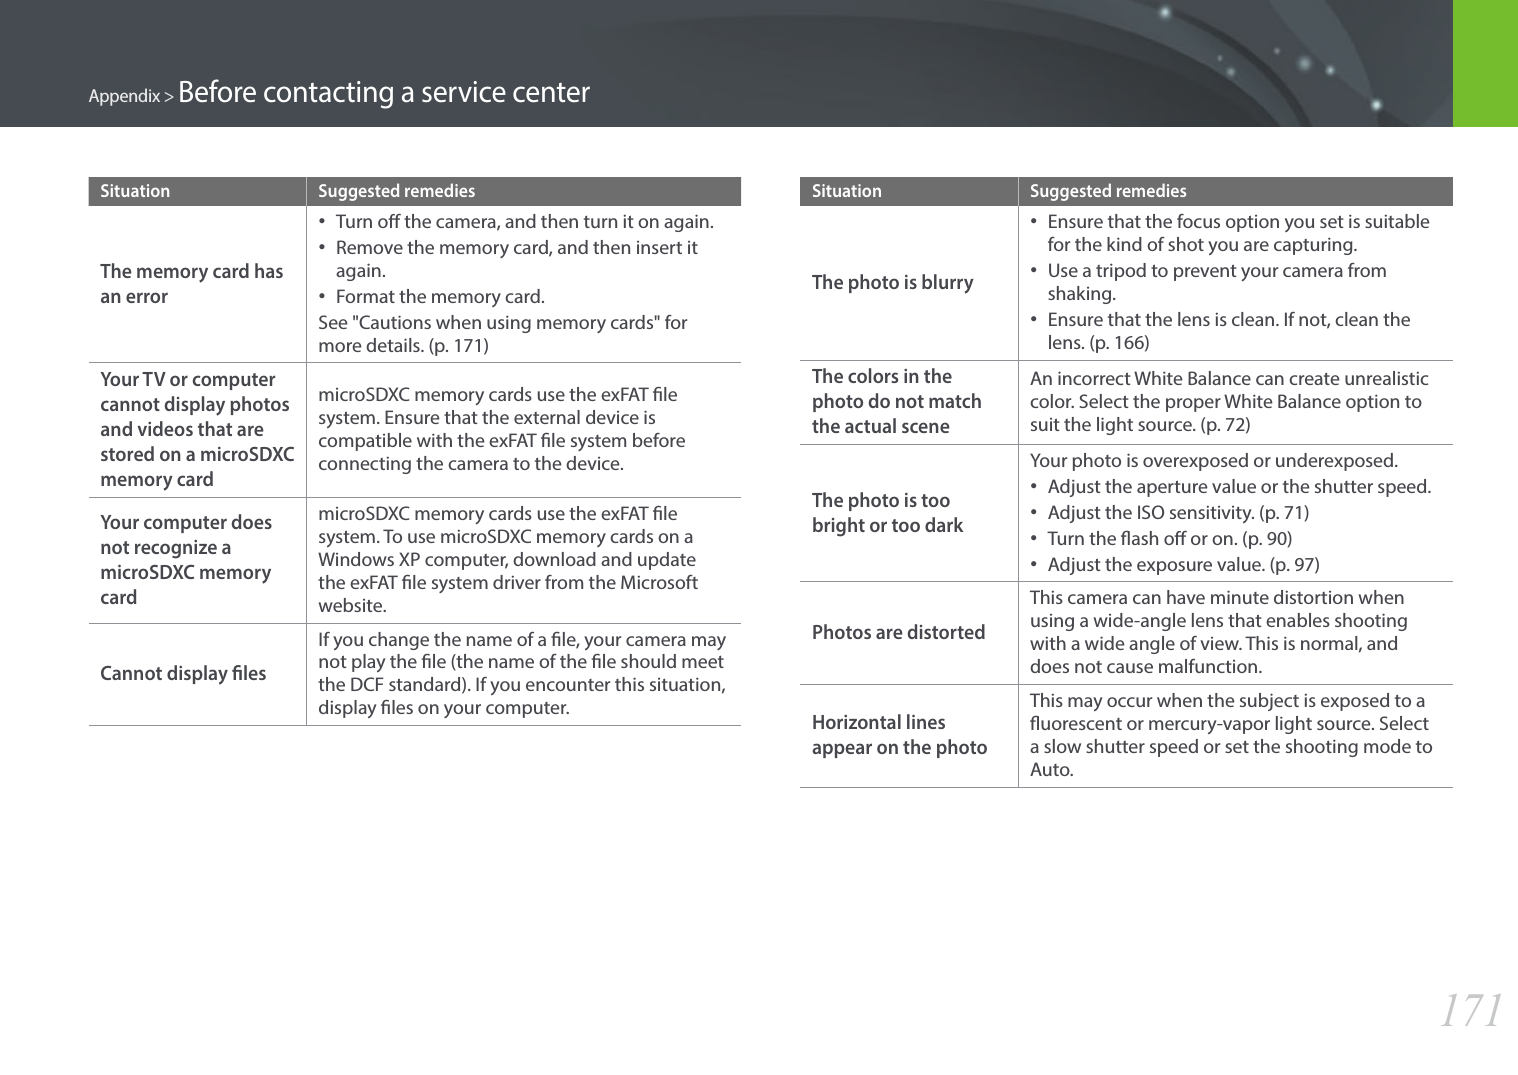
![172Appendix > Before contacting a service centerSituation Suggested remediesPlayback screen does not appear on the connected external device• Ensure that HDMI cable is properly connected to the external monitor.• Ensure that the memory card is properly recorded.Your computer does not recognize your camera• Ensure that the USB cable is connected correctly.• Ensure that the camera is switched on.• Ensure that you are using a supported operating system.Your computer disconnects the camera while transferring lesThe le transfer may be interrupted by static electricity. Disconnect the USB cable and connect it again. i-Launcher is not functioning properly• End i-Launcher and restart the program.• Depending on your computer's specications and environment, the program may not launch automatically. In this case, click Start ĺ All Programs ĺ Samsung ĺ i-Launcher ĺ Samsung i-Launcher on your Windows computer. (For Windows 8, open Start screen, and then select All apps ĺ Samsung i-Launcher.) Or, click Applications ĺ Samsung ĺ i-Launcher on your Mac OS computer.Situation Suggested remediesAuto Focus does not work• Subject is not in focus. When the subject is outside the AF area, shoot by moving the subject inside the AF area and half-pressing [Shutter].• Subject is too close. Step back from the subject and shoot.Lens does not work• Ensure that the lens is properly mounted. • Remove the lens from the camera and remount it.External ash does not workEnsure that the external ash is properly mounted on the external ash port.The date & time settings screen appears when you power on the camera• Set the date and time again.• This screen appears when the camera’s internal power source is completely discharged. Insert a fully charged battery and wait at least 72 hours in power o status for the internal power source to be recharged.](https://usermanual.wiki/Samsung-Electronics-Co/NX3000/User-Guide-2248332-Page-173.png)