Samsung Electronics Co OMEGA Digital Video Camcorder User Manual SCD99 UK 01 27
Samsung Electronics Co Ltd Digital Video Camcorder SCD99 UK 01 27
UserManual.wiki
>
Samsung Electronics Co
>
OMEGA User Manual
>
Users Manual 2
Contents
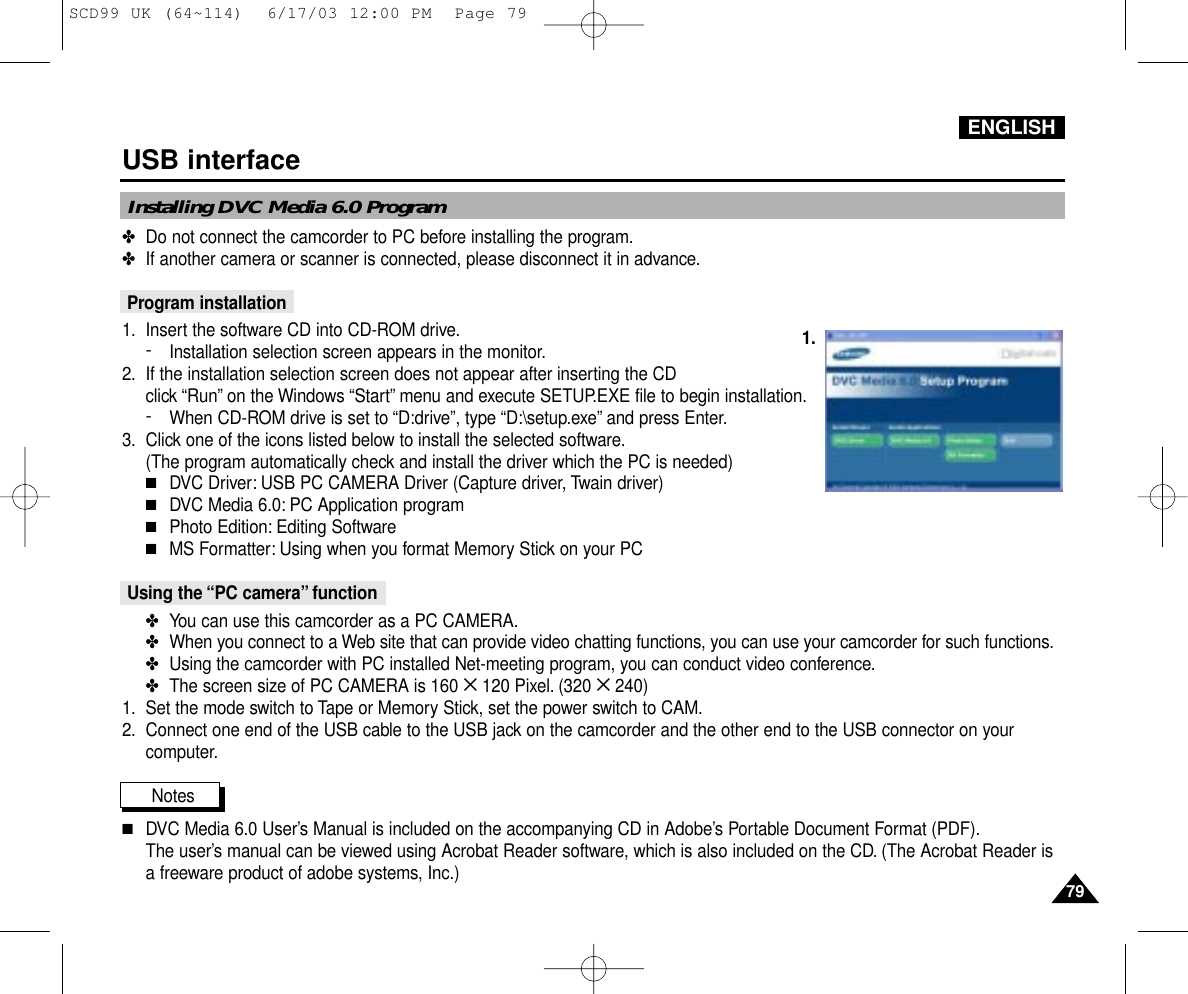
1.
Users Manual 1
2.
Users Manual 2
Users Manual 2
Navigation menu
Upload a User Manual
Namespaces
Wiki Guide
HTML
PDF
Info
Views
User Manual
Discussion / Help
Navigation
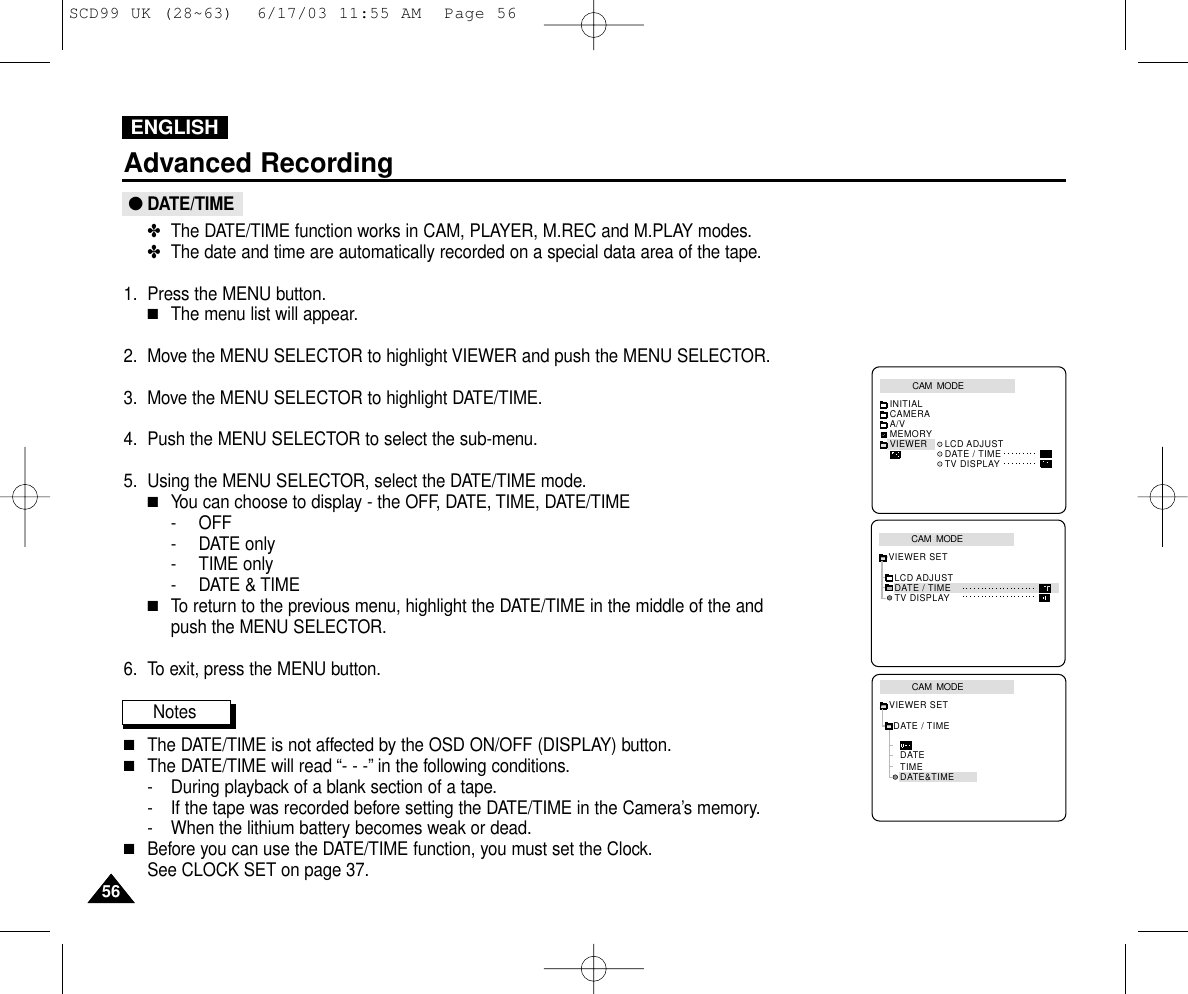
![ENGLISH6767Advanced RecordingDubbed audio Playback1. Insert the dubbed tape and press MENU button.2. Move the MENU SELECTOR to highlight A/V.3. Push the MENU SELECTOR to enter the sub-menu.4. Use the MENU SELECTOR to select AUDIO SELECT from the submenu.5. Push the MENU SELECTOR to enter the sub-menu.6. Using the MENU SELECTOR, select the AUDIO playback channel.■Push the MENU SELECTOR to confirm the audio playback channel.- SOUND1 : play the original sound.- SOUND2 : play the dubbed sound.- MIX(1+2) : play back SOUND1 and 2 equally mixed.7. To exit, press the MENU button.8. Press the (PLAY/STILL) button to playback the dubbed tape.Note■When you playback added sound (SOUND2 or MIX mode), you may experience loss of sound quality.PLAYER MODEA / V SETAUDIO SELECTSOUND [ 1 ]SOUND [ 2 ]MIX [ 1 + 2 ]PLAYER MODEREC MODEPHOTO SEARCHPHOTO COPYAUDIO MODE 12SOUND[1]AUDIO SELECTWIND CUTA / V SETOUTAV IN/OUTSCD99 UK (64~114) 6/17/03 11:59 AM Page 67](https://usermanual.wiki/Samsung-Electronics-Co/OMEGA.Users-Manual-2/User-Guide-336676-Page-12.png)
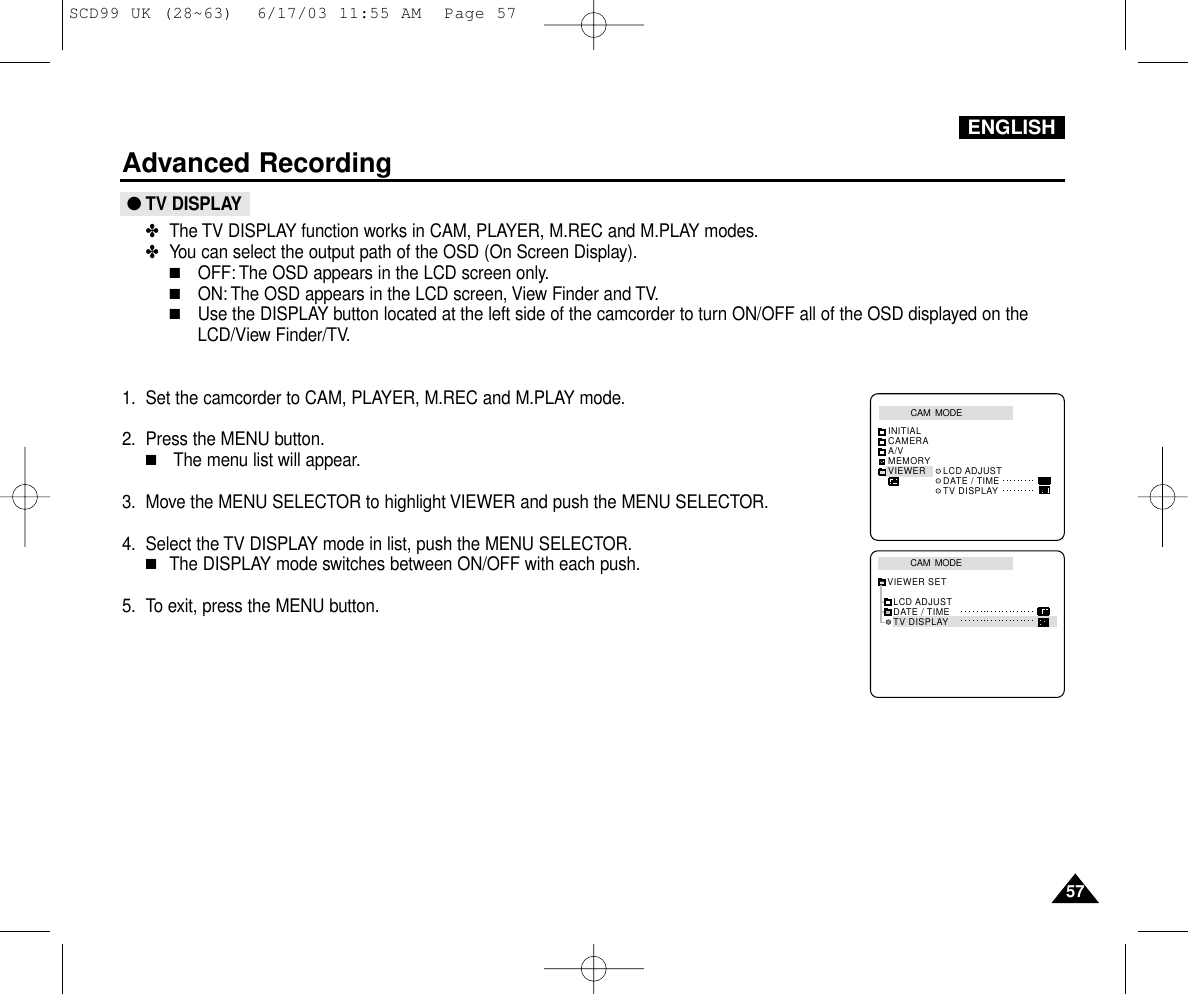
![ENGLISH6868Advanced Recording1. Press the PHOTO button lightly (about halfway down) and hold it.■The still picture appears on the LCD monitor.■If you do not wish to record, release the button.2. Press the PHOTO button fully down.■The still picture is recorded for about 6~7 seconds.3. After the PHOTO has been recorded, the camcorder returns to STBY mode.Searching for a PHOTO picture ✤The PHOTO SEARCH works in PLAYER mode only.1. Press the MENU button. (or press the PHOTO SEARCH button on the remote control.)■The MENU list will appear.2. Move the MENU SELECTOR to highlight A/V.3. Push the MENU SELECTOR to enter the sub-menu.4. Select PHOTO SEARCH from the sub-menu and push the MENU SELECTOR.5. Search the PHOTO using the (FF) and (REW) buttons.■The PHOTO search process appears on the LCD while you are searching.■After completing the search, the camcorder displays the still image.6. To exit, press the (STOP) button.PLAYER MODEINITIALWIND CUTREC MODEPHOTO SEARCHCOPYAUDIO MODE 12AUDIO SELECTCAMERAA/VMEMORYVIEWERAV IN/OUT OUTPLAYER MODEREC MODEPHOTO SEARCHPHOTO COPYAUDIO MODE 12SOUND[1]AUDIO SELECTWIND CUTA / V SETOUTAV IN/OUTPHOTO Image RecordingPHOTOSCD99 UK (64~114) 6/17/03 11:59 AM Page 68](https://usermanual.wiki/Samsung-Electronics-Co/OMEGA.Users-Manual-2/User-Guide-336676-Page-13.png)

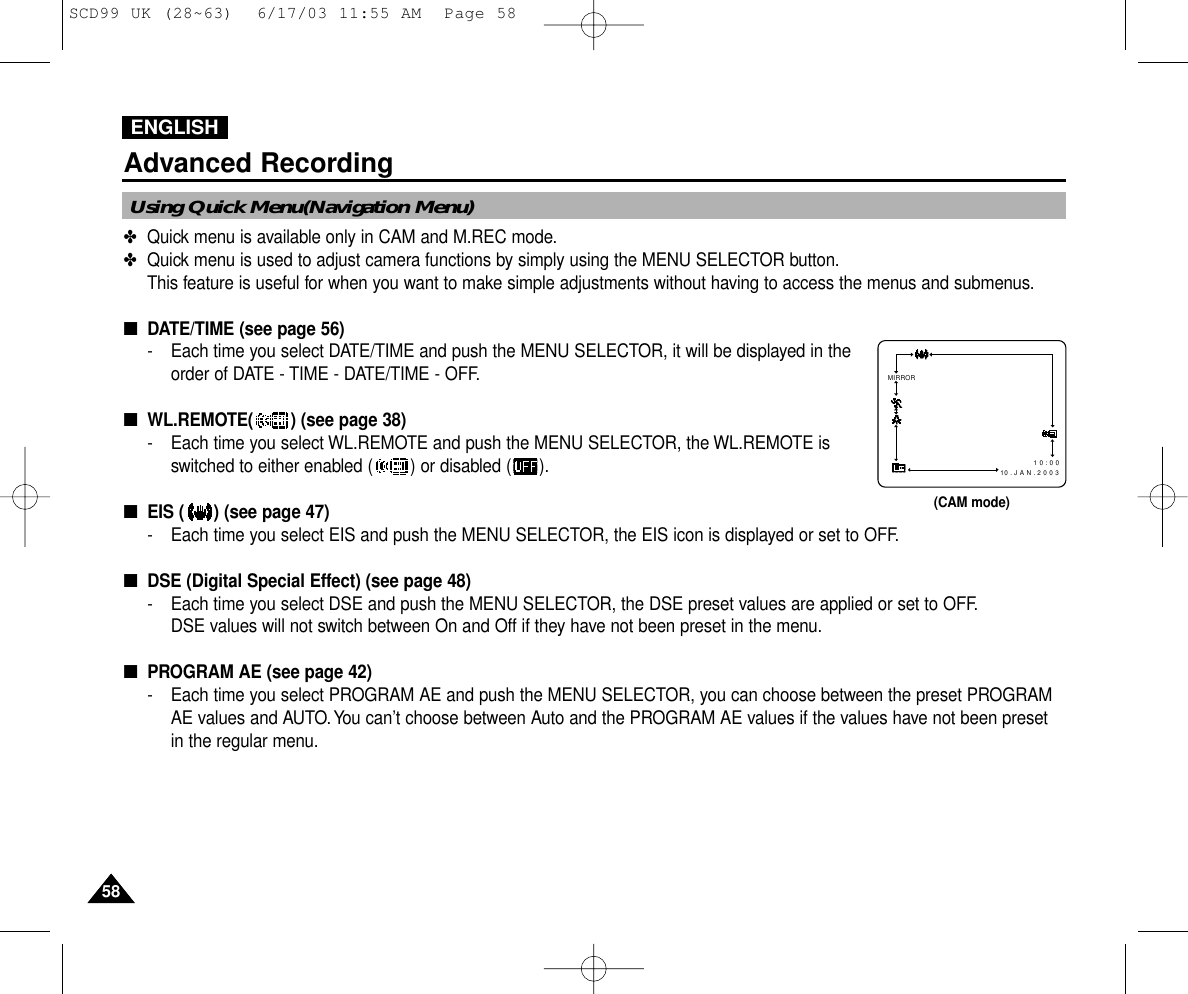
![ENGLISH7575Recording in PLAYER mode✤You can use this camcorder as a recorder.✤You can record a tape from VCR or TV.1. Connect the camcorder and VCR or TV with the Multi-AV cable.2. Set the power switch of the camcorder to PLAYER mode.3. Turn on the VCR or TV.4. Insert the blank tape with protection tab closed into the camcorder.■If you want to record from a connected VCR, insert a recorded VHS tape into the VCR.5. Push the MENU button, move the MENU SELECTOR to highlight A/V and push the MENU SELECTOR.6. Move the MENU SELECTOR to highlight AV IN/OUT and push the MENUSELECTOR to select AV IN/OUT.7. Move the MENU SELECTOR to highlight AV IN or S-VIDEO IN and push theMENU SELECTOR.■“AV IN”and picture appear on the LCD monitor.■OUT : Releases the INPUT mode■AV IN : When signals are received from the Audio/Video input jacks■S-VIDEO IN : When signals are received from the the S-video (S-Jack plug) and Audio inputs8. Press the START/STOP button to set the camcorder to REC PAUSE mode.■“PAUSE”on the LCD monitor.9. Select the TV program or playback the VHS tape.10.Press START/STOP button to start recording.■If you want to pause recording for a while, press the START/STOP button again.11.To stop recording, press the (STOP) button.Notes■When you record the images being played back on analog VCR, if they are not being playedback in normal speed, (for example, more than double speed or slow playback), only gray imageappears on the camcorder.■If you want to see the camcorder picture with a TV, set AV IN/OUT menu to OUT.Recording in PLAYER mode (VP-D93i/D97i/D99i only)PLAYER MODEREC MODEPHOTO SEARCHPHOTO COPYAUDIO MODE 12SOUND[1]AUDIO SELECTWIND CUTA / V SETAV IN/OUTOUTPLAYER MODEA / V SETS-VIDEO INAV IN/OUTOUTAV INANTENNAS-VIDEOA/V OUTTVVCRCAMCORDERVIDEOAUDIO(L)AUDIO(R)SCD99 UK (64~114) 6/17/03 12:00 PM Page 75](https://usermanual.wiki/Samsung-Electronics-Co/OMEGA.Users-Manual-2/User-Guide-336676-Page-20.png)
![ENGLISH8080USB interfaceConnecting to a PC1. Connect a USB cable to the USB port on the PC.2. Connect the other end of the USB cable into the proper terminal on the camcorder. (USB jack)3. Connect the audio cable to the Line input jack of the PC.If the PC has no Line input jack, connect the audio cable to the MIC input jack.There is a possibility you’ll here some audio noise if you use the MIC jack.Disconnecting the USB cable✤After completing the data transmission, you must disconnect the cable in the following way:1. Select the removable disc icon and click the right mouse button to select [Eject].2. Select [Confirm] and disconnect the USB cable when the Windows Splash screen appears.Notes ■If you disconnect the USB cable from the PC or the camcorder while transferring, the data transmission will stop and thedata may be damaged.■If you connect the USB cable to a PC via a USB HUB orsimultaneously connect the USB cable along with otherUSB devices, the camcorder may not work properly.- If this occurs, remove all USB devices from the PCand reconnect the camcorder.USB CableUSB AUDIO CableSCD99 UK (64~114) 6/17/03 12:00 PM Page 80](https://usermanual.wiki/Samsung-Electronics-Co/OMEGA.Users-Manual-2/User-Guide-336676-Page-25.png)
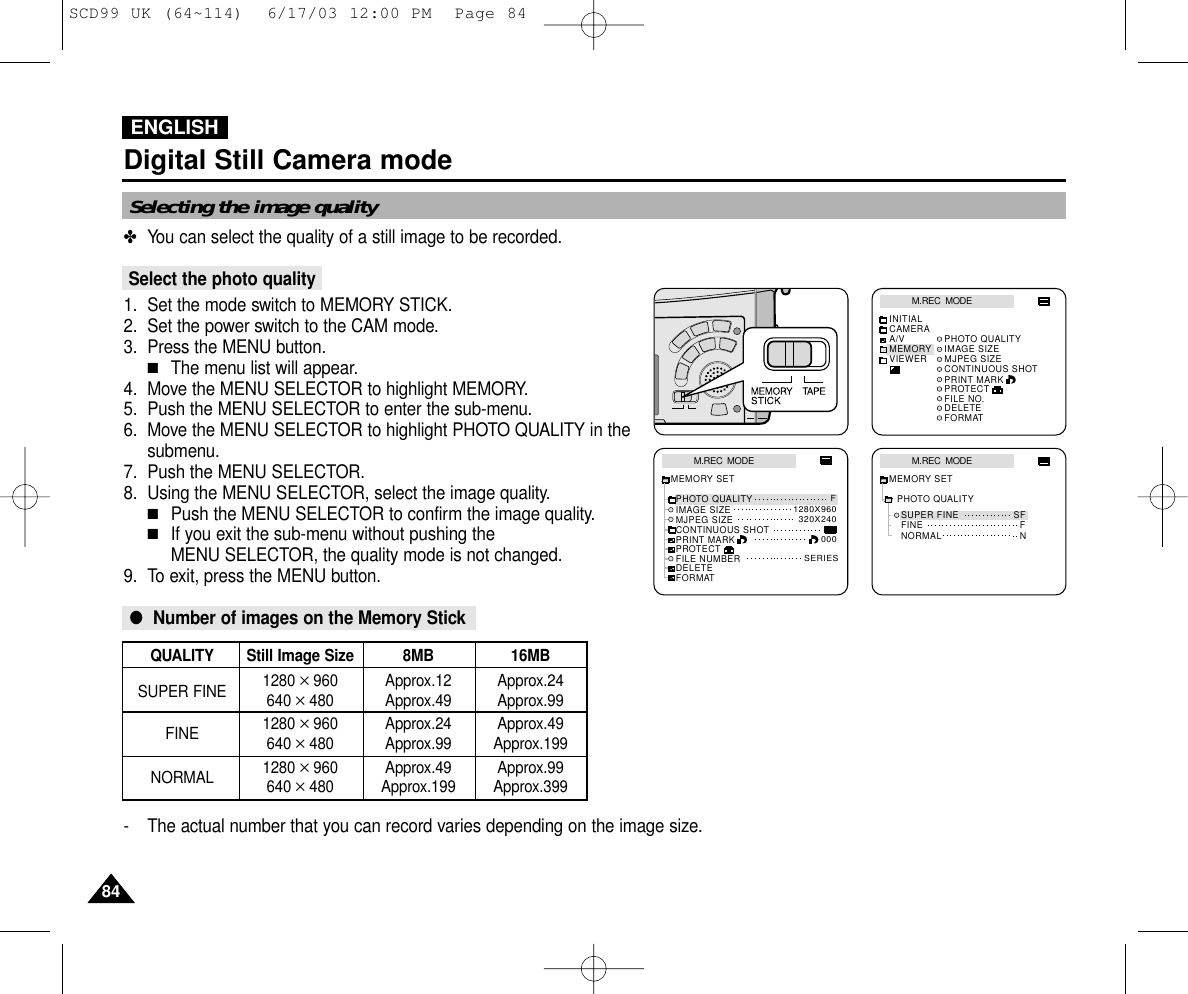
![ENGLISHDigital Still Camera mode8585Selecting the recording image size✤Select the image size of still image to be recorded.1. Set the mode switch to MEMORY STICK.2. Set the power switch to the CAM mode.3. Press the MENU button.■The menu list will appear4. Move the MENU SELECTOR to highlight MEMORY and push the MENU SELECTOR.5. Select IMAGE SIZE from the submenu and push the MENU SELECTOR.■The IMAGE SIZE toggles between 1280 x 960 and 640 x 480 with each push.6. To exit the menu, press the MENU button.Note■When still images are recorded at an image size of 1280 x 960 on your camcorder, images are sometimes not played back properly on other digital devices that do not support recording at an image size of 1280 x 960.M.REC MODEINITIALPRINT MARKPROTECTPHOTO QUALITYFILE NO.DELETEFORMATIMAGE SIZEMJPEG SIZECONTINUOUS SHOTCAMERAA/VMEMORYVIEWERM.REC MODEMEMORY SETPRINT MARKPROTECTPHOTO QUALITYFILE NUMBERDELETEFORMATIMAGE SIZEMJPEG SIZEF320X2401280X960000SERIESCONTINUOUS SHOT [ 1 0 / 1 4 ]3 2 0 0 0 min1280FImage SizeSCD99 UK (64~114) 6/17/03 12:00 PM Page 85](https://usermanual.wiki/Samsung-Electronics-Co/OMEGA.Users-Manual-2/User-Guide-336676-Page-30.png)
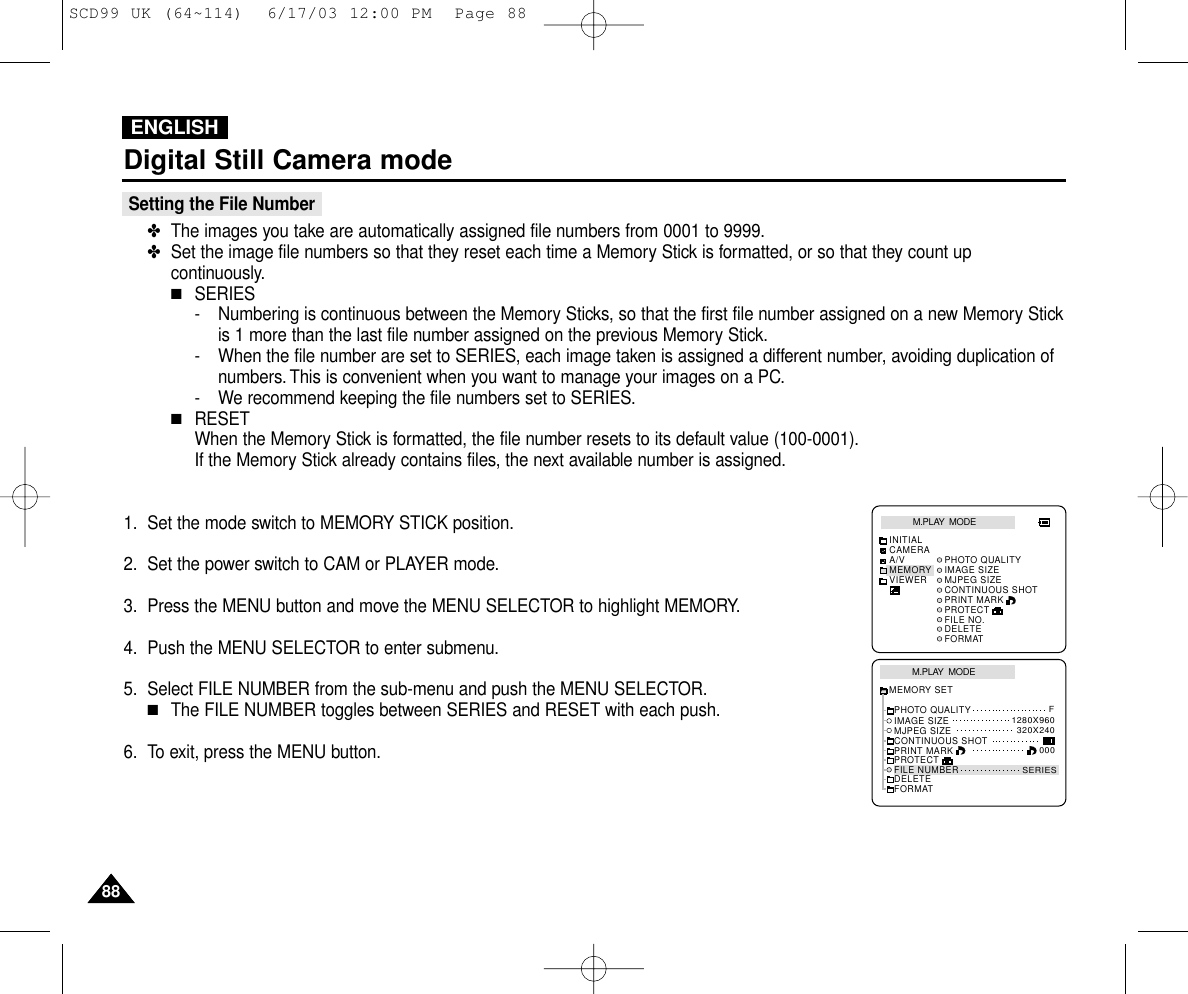
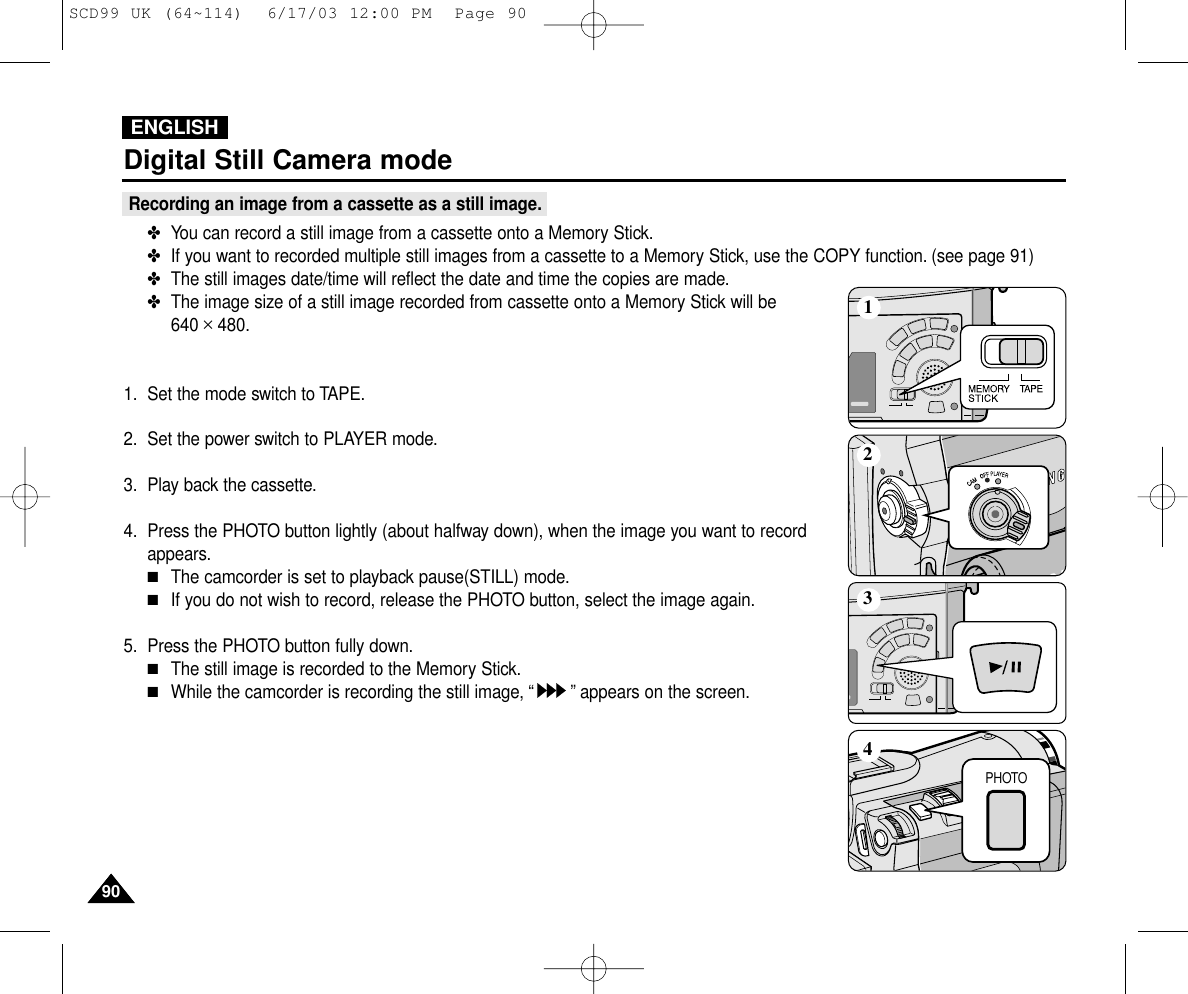
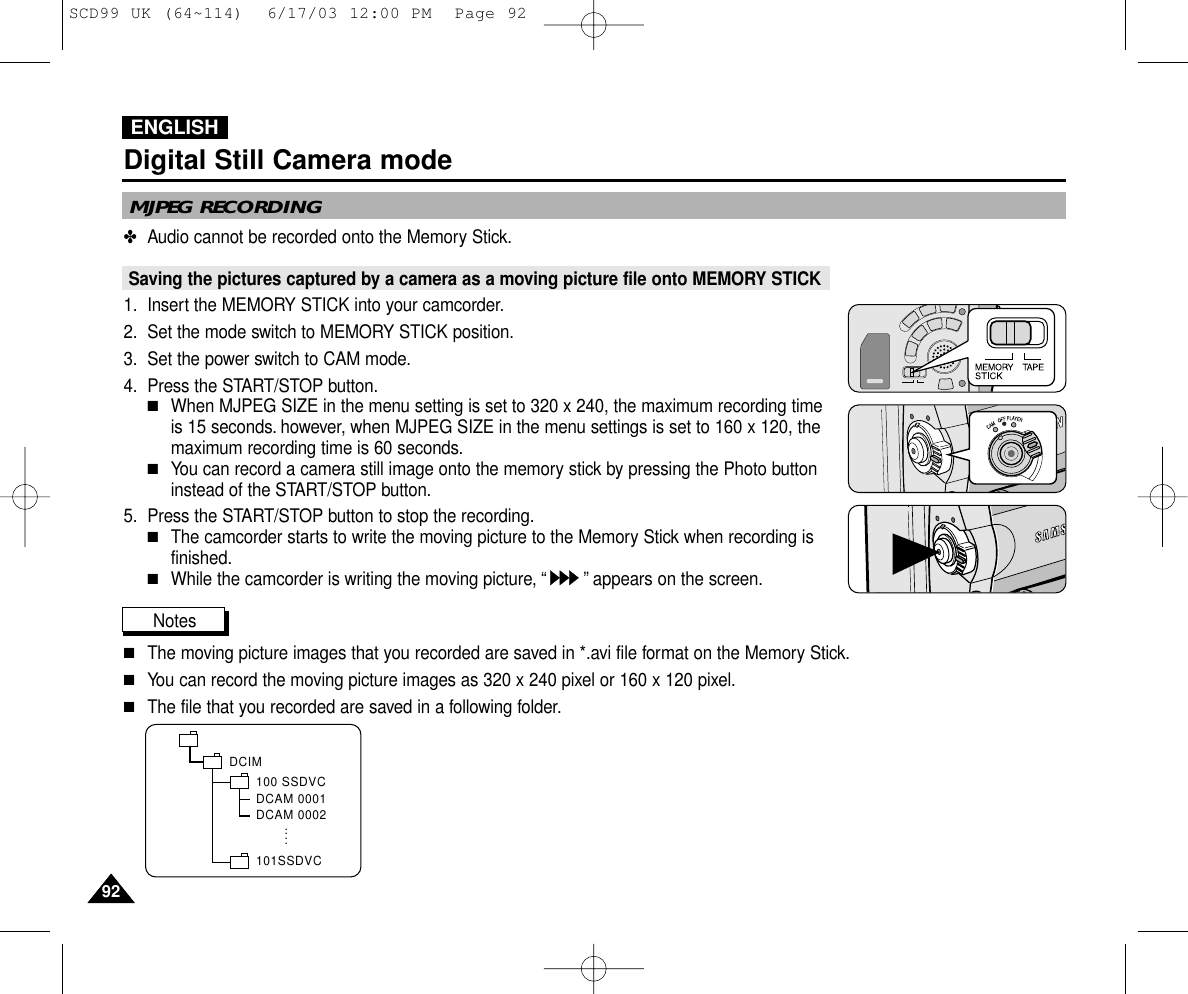
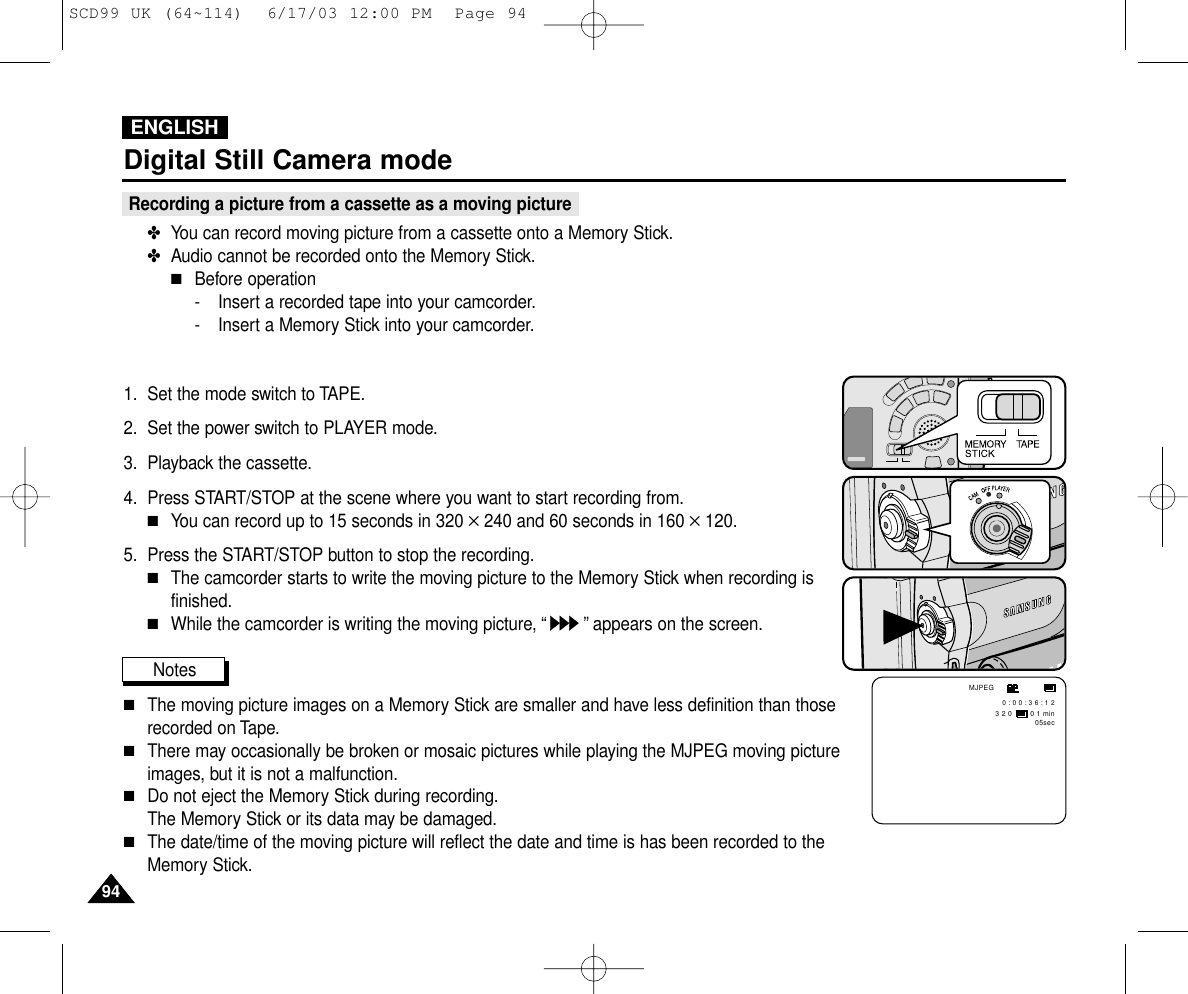
![ENGLISH8989Digital Still Camera mode✤Audio cannot be recorded with still images onto the Memory Stick.Recording images to a Memory Stick1. Set the mode switch to MEMORY STICK.2. Set the power switch to CAM.3. Press the PHOTO button lightly (about halfway down) and hold it.■During autofocus photo mark ( ) flashes in the display as the camcorder adjust thefocus and it is displayed continuously when the camcorder is ready to take the still image.■If you do not wish to record, release the pressure from the button.4. Press the PHOTO button fully down.■The still image is recorded to the Memory Stick.■While the camcorder is recording the still image, “”appears on the screen.Notes■The remote controller’s PHOTO button has no halfway setting.Press the button fully and the camcorder immediately takes the image.■Do not turn the power off, eject a Memory Stick or remove the battery pack during recording.The Memory Stick or its data may be damaged.■If focusing is difficult with the autofocus mode when using the PHOTO function, focusmanually. [ 0 9 / 2 4 ]FRecording Still images to a Memory Stick in M.REC Mode.PHOTOSCD99 UK (64~114) 6/17/03 12:00 PM Page 89](https://usermanual.wiki/Samsung-Electronics-Co/OMEGA.Users-Manual-2/User-Guide-336676-Page-34.png)
![ENGLISH9191Digital Still Camera mode✤You can copy still images recorded with PHOTO function on a cassette onto a Memory Stick.■The still images date/time will reflect the date and time the copies are made.■The image size of a still image copied from tape to Memory Stick will be 640 ✕480.■Before operation- Insert a recorded tape into your camcorder and rewind the tape.- Insert a Memory Stick into your camcorder.1. Set the mode switch to TAPE.2. Set the power switch to the PLAYER mode.3. Press the MENU button.4. Move the MENU SELECTOR to highlight A/V and push the MENU SELECTOR.■The submenu will appear.5. Move the MENU SELECTOR to highlight PHOTO COPY and push the MENU SELECTOR.■All still images that recorded on a cassette will be copied to a Memory Stick.6. The camcorder automatically performs the photo search to find still images and copying starts.7. Press (STOP) button to stop copying.■Copying stops when the cassette is finished or Memory Stick is full.PLAYER MODEREC MODEPHOTO SEARCHPHOTO COPYAUDIO MODE 12SOUND[1]AUDIO SELECTWIND CUTA / V SETOUTAV IN/OUT[ 1 5 / 4 4 ]640PHOTO COPYNOW SEARCH ... 0 : 1 0 : 3 5 : 0 2PLAYER MODEINITIALWIND CUTREC MODEPHOTO SEARCHCOPYAUDIO MODE 12AUDIO SELECTCAMERAA/VMEMORYVIEWERAV IN/OUT OUTCopying still images from a cassette to Memory StickSCD99 UK (64~114) 6/17/03 12:00 PM Page 91](https://usermanual.wiki/Samsung-Electronics-Co/OMEGA.Users-Manual-2/User-Guide-336676-Page-36.png)
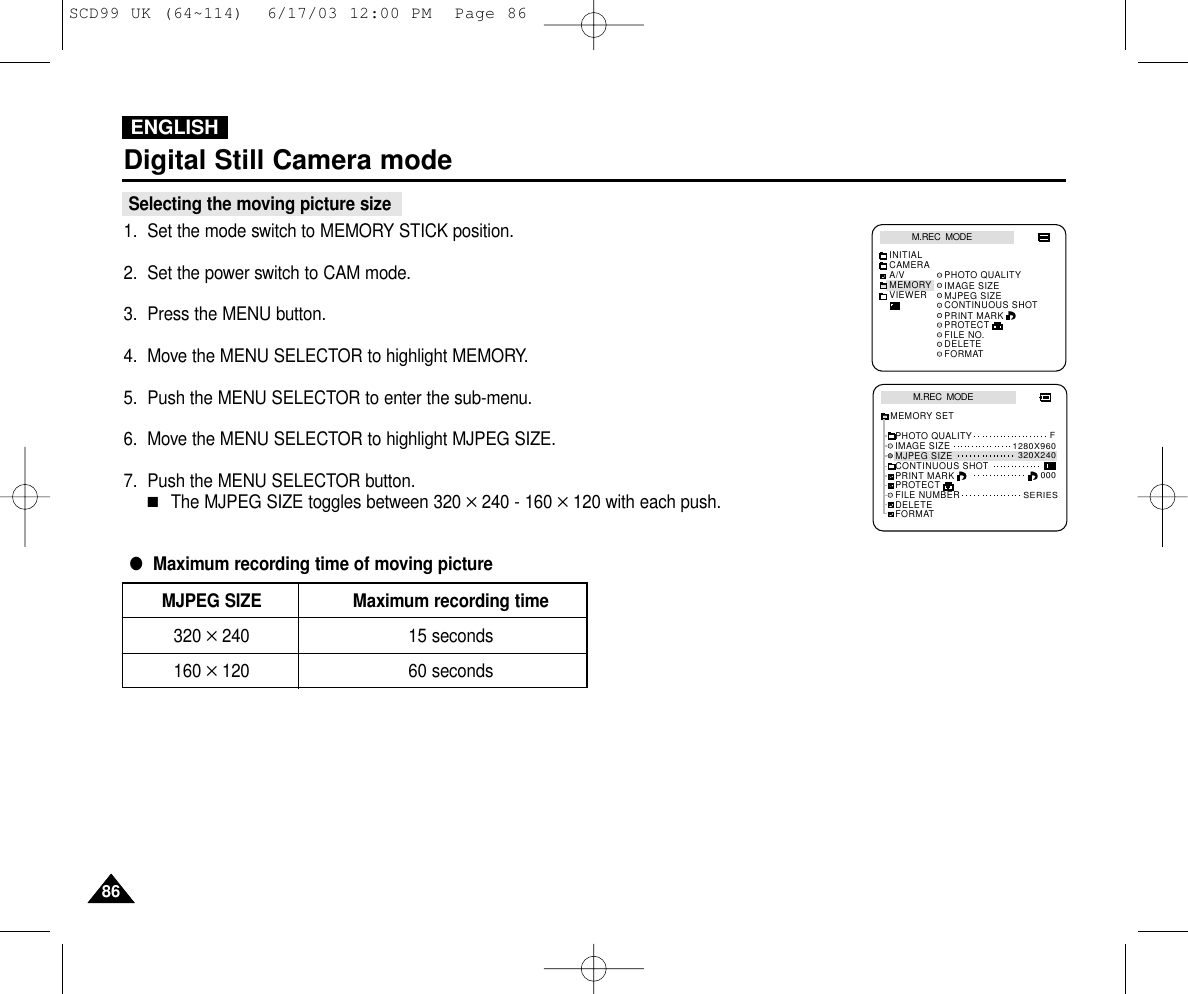
![ENGLISH9595Recording a moving picture from other equipment (VP-D93i/D97i/D99i only)✤You can record moving picture from VCR or TV onto a Memory Stick.✤Audio cannot be recorded onto the Memory Stick.■Before operation- Eject a cassette from your camcorder.- Insert a Memory Stick into your camcorder.1. Connect the camcorder and VCR or TV with the Multi-AV cable.2. Set the power switch of the camcorder to PLAYER mode.3. Turn on the VCR or TV.■If you want to record from a connected VCR, insert a recorded VHS tape into theVCR.4. Push the MENU button, move the MENU SELECTOR to highlight A/V and push theMENU SELECTOR.5. Move the MENU SELECTOR to highlight AV IN/OUT and push the MENU SELECTORto select AV IN/OUT.6. Move the MENU SELECTOR to highlight AV IN or S-VIDEO IN and push the MENUSELECTOR. (see page 75)■“AV-IN”and picture appear on the LCD monitor.■OUT: Releases the INPUT mode.■AV IN: When signals are received from the Audio/Video input jacks.■S-VIDEO IN: When signals are received from the S-VIDEO (S-Jack plug)7. Press START/STOP at the scene where you want to start recording from.■You can record up to 15 seconds in 320 ✕240 and 60 seconds in 160 ✕120.8. Press the START/STOP button to stop the recording.■The camcorder starts to write the moving picture to the Memory Stick when recording is finished.■While the camcorder is writing the moving picture, “”appears on the screen.Notes■If you want to see the camcorder picture with a TV, set AV IN/OUT menu to OUT.■Do not eject the Memory Stick during recording. The Memory Stick or its data may be damaged.■There is no need to load a cassette if you only record a moving picture onto the Memory Stick.If a cassette is inserted, eject a cassette from your camcorder.Digital Still Camera modePLAYER MODEREC MODEPHOTO SEARCHPHOTO COPYAUDIO MODE 12SOUND[1]AUDIO SELECTWIND CUTA / V SETAV IN/OUTOUTPLAYER MODEA / V SETS-VIDEO INAV IN/OUTOUTAV INANTENNAS-VIDEOA/V OUTTVVCRCAMCORDERVIDEOAUDIO(L)AUDIO(R)SCD99 UK (64~114) 6/17/03 12:00 PM Page 95](https://usermanual.wiki/Samsung-Electronics-Co/OMEGA.Users-Manual-2/User-Guide-336676-Page-40.png)
![ENGLISH9797Digital Still Camera mode✤You can playback and view still images/movingpictures recorded on the Memory Stick.✤There are 3 ways to view recorded images.■Single images/Moving pictures■Slide show : To view all images automatically andin consecutive order.■Multi display : To view 6 images at once.✤You cannot hear the sound.To view a Single image1. Set the mode switch to MEMORY STICK.2. Set the power switch to PLAYER mode.■The last still image/moving picture recorded apears in the display.- If there are no recorded still images/moving pictures on the Memory Stick, NO STORED IMAGE! and will display on the screen.3. Using the (FWD) and (REV) buttons, search for the desired still images/moving pictures.■To view the next still image/moving picture: press the (FWD) button.■To view the previous still image/moving picture: press the (REV) button.■Pressing (FWD) when you are on the last still image/moving picture will take you to the firststill image and pressing (REV) when you are on the first still image/moving picture will takeyou to the last still image/moving picture.■Keep pressing (FWD) or (REV) to search for an still image/moving picture quickly.■Moving picture: Pressing (PLAY/STILL) plays back the moving picture and will show firstscene as a still image when playback ends.- Pressing (PLAY/STILL) during playback will stop the moving picture and the scene isshown as a still image.Pressing (PLAY/STILL) again will restart the playback.Notes■There could be any broken or mosaic pictures while playing the MJPEG moving pictures, but it is not malfunction.■The moving pictures that you recorded in the Memory Stick might not be allowed to play by the camcorder of another brands.■The MJPEG file recorded by another camcorder might not be allowed to play by this camcorder.■You can transfer MJPEG file to PC through DVC Media 6.0 using USB port on your PC.And then, play MJPEG file with a moving picture player program like a Microsoft Windows Media Player.(DVC Media 6.0 is included in the CD that is supplied)Viewing Still images/Moving pictures1280 X 960[0 4 / 0 6]1 0 0 - 0 0 0 4ImageSize320MJPEG0 0 / 1 5 secDCAM0002.AVIPlayback time/Time of recordedpictureMJPEG SizeFile numberstill image moving pictureSCD99 UK (64~114) 6/17/03 12:00 PM Page 97](https://usermanual.wiki/Samsung-Electronics-Co/OMEGA.Users-Manual-2/User-Guide-336676-Page-42.png)
![ENGLISH9898Digital Still Camera modeTo view a slide show1. Set the mode switch to MEMORY STICK.2. Set the power switch to PLAYER mode.■The last recorded still image/moving picture appears3. Press the S.SHOW button.■All images will be played back consecutively for 3~4 seconds each.4. To stop the slide show, press the S.SHOW button again.To view the Multi Display1. Set the mode switch to MEMORY STICK.2. Set the power switch to PLAYER mode.■The last recorded still image/moving picture appears.3. To view six stored still image/moving picture on single screen, press the MULTI DISP. button.■A selection mark ( ) appears under the still image/moving picture.■Moving pictures will be displayed with the first scene as a still image, indicated by apicture mark ( ).■Move the MENU SELECTOR to select a still image/moving picture.■To display the previous six images, press the (REV).■To display the next six images, press the (FWD).4. To return to single playback mode, press the MULTI DISP. button again.■The still image/moving picture you have marked fills the whole display.19 20 2122 23 24[24/24]100-0025SCD99 UK (64~114) 6/17/03 12:00 PM Page 98](https://usermanual.wiki/Samsung-Electronics-Co/OMEGA.Users-Manual-2/User-Guide-336676-Page-43.png)