Samsung Electronics Co OTR19MHC4 Microwave Oven User Manual MHC4 8505 XAA 03805A Instruction manual
Samsung Electronics Co Ltd Microwave Oven MHC4 8505 XAA 03805A Instruction manual
Users Manual

Kenmore®
Microwave Hood Combination
Combinación Microondas Compana
* = color number, número de color
Models / Modelos : 401.8505*
Use & Care Guide
Manual de Uso y Cuidado
English / Español
P/N DE68-03805A
Sears Brands Management Corporation,
+RçPDQ(VWDWHV,/86$
www.kenmore.com
www.sears.com
8505_XAA_03805A-EN+MES.indb 1 2010-07-08 6:45:46

2
Table of Contents
Microwave Hood Combination Warranty. . 3
Sears Service ....................... 4
Master Protection Agreements ..........4
IMPORTANT SAFETY INSTRUCTIONS..... 6
PRECAUTIONS TO AVOID POSSIBLE
EXPOSURE TO EXCESSIVE MICROWAVE
ENERGY ........................... 7
Getting the Best cooking results ........ 10
Testing your dinnerware or cookware . . . .10
Features.......................... 11
2YHQ6SHFLÀFDWLRQV ..................11
Features...........................13
Operating instructions ............... 14
Learn about your microwave oven ......14
Clock .............................14
Kitchen Timer .......................14
Options ...........................14
Turntable On/Off ...................15
Vent Fan...........................15
Delay Off .........................15
Control Lock........................15
Add 30 Sec ........................15
Light Set Timer......................16
Light Hi/Nite/Off ...................16
Cooking at high power levels ..........17
Cooking at lower power levels .........17
Multi - stage cooking.................17
Cooking guide for power levels ........18
Sensor cooking guide ................19
Popcorn ...........................20
Pizza .............................20
Veggies ...........................20
Sensor Cook........................21
Potato ............................21
Sensor Reheat ......................21
Time Cook .........................23
Favorite ...........................23
Warm & Hold ......................23
Snacks ............................24
Kids Meals .........................25
Soften/Melt ........................26
Auto Defrost........................27
1 Lb Defrost........................28
Cooking guide ......................29
Cooking utensils ................... 32
Microwave utensil guide ..............32
Care and Cleaning .................. 33
Care and Cleaning ..................33
&OHDQLQJWKHJUHDVHÀOWHU .............33
Charcoal Filter replacement ...........34
Cooktop/Night Light replacement.......34
Oven Light replacement ..............35
Troubleshooting .................... 36
Troubleshooting guide ................36
8505_XAA_03805A-EN+MES.indb 2 2010-07-08 6:45:46

3
Microwave Hood
Combination
Warranty
One Year Limited Warranty
When installed, operated and maintained
according to all instructions supplied with the
product, if this appliance fails due to a defect
in material or workmanship within one year
from the date of purchase, call 1-800-4-MY-
HOME® to arrange for free repair.
If this appliance is used for other than private
family purposes, this warranty applied for only
90 days from the date of purchase.
This warranty covers only defects in material
and workmanship. Sears will NOT pay for:
1. Expendable items that can wear out from
QRUPDOXVHLQFOXGLQJEXWQRWOLPLWHGWRÀOWHUV
belts, light bulb, and bags.
2. A service technician to instruct the user in
correct product installation, operation or
maintenance.
3. A service technician to clean or maintain this
product.
4. Damage to or failure of this product if it
is not installed, operated or maintained
according to all instructions supplied with the
product.
5. Damage to or failure of this product
resulting from accident, abuse, misuse or use
for other than its intended purpose.
6. Damage to or failure of this product caused
by the use of detergents, cleaners, chemicals
or utensils other than those recommended in
all instructions supplied with the product.
7. Damage to or failure of parts or systems
UHVXOWLQJIURPXQDXWKRUL]HGPRGLÀFDWLRQV
made to this product.
Disclaimer or implied warranties; limitations
of remedies
Customer’s sole and exclusive remedy under
this limited warranty shall be product repair as
provided herein. Implied warranties, including
ZDUUDQWLHVRIPHUFKDQWDELOLW\RUÀWQHVVIRUD
particular purpose, are limited to one year or
the shortest period allowed by law. Sears shall
not be liable for incidental or consequential
damages. Some states and provinces do not
allow the exclusion or limitations on the duration
of implied warranties of merchantability or
ÀWQHVVVRWKHVHH[FOXVLRQVRUOLPLWDWLRQVPD\QRW
apply to you.
This warranty applied only while this appliance
is used in the United States.
7KLVZDUUDQW\JLYHV\RXVSHFLÀFOHJDOULJKWV
and you may also have other rights which vary
from state to state.
Sears Brands Management Corporation,
Hoffman Estates, IL 60179
8505_XAA_03805A-EN+MES.indb 3 2010-07-08 6:45:46

4
Master Protection Agreements
Congratulations on making a smart
purchase.
Your new Kenmore® product is designed
and manufactured for years of dependable
operation.
But like all products, it may require preventive
maintenance or repair from time to time.
That’s when having a Master Protection
Agreement can save you money and
aggravation.
The Master Protection Agreement also helps
extend the life of your new product. Here’s
what the Agreement* includes:
Parts and labor needed to help keep
products operating properly under normal
use, not just defects. Our coverage goes
well beyond the product warranty. No
deductibles, no functional failure excluded
from coverage— real protection.
Expert service by a force of more
than 10,000 authorized Sears service
technicians, which means someone you can
trust will be working on your product.
Unlimited service calls and nationwide
service, as often as you want us, whenever
you want us.
“No-lemon” guarantee – replacement
of your covered product if four or more
product failures occur within twelve months.
Product replacement if your covered
SURGXFWFDQ·WEHÀ[HG
Annual Preventive Maintenance Check at
your request – no extra charge.
Fast help by phone – we call it Rapid
Resolution – phone support from a Sears
representative on all products. Think of us
as a “talking owner’s manual.”
Sears Service
Power surge protection against electrical
GDPDJHGXHWRSRZHUÁXFWXDWLRQV
$250 Food Loss Protection annually
for any food spoilage that is the result
of mechanical failure of any covered
refrigerator or freezer.
Rental reimbursement if repair of
your covered product takes longer than
promised.
10% discount off the regular price of any
non-covered repair service and related
installed parts.
Once you purchase the Agreement, a simple
phone call is all that it takes for you to schedule
service. You can call anytime day or night, or
schedule a service appointment online.
The Master Protection Agreement is a risk free
purchase. If you cancel for any reason during
the product warranty period, we will provide
a full refund. Or, a prorated refund anytime
after the product warranty period expires.
Purchase your Master Protection Agreement
today!
Some limitations and exclusions apply. For
prices and additional information in the
U.S.A. call 1-800-827-6655.
* Coverage in Canada varies on some items.
For full details call Sears Canada at 1-888-
Kenmore.
Sears Installation Service
For Sears professional installation of home
appliances, garage door openers, water
heaters, and other major home items, in the
U.S.A. or Canada call 1-800-4-MY-HOME®.
8505_XAA_03805A-EN+MES.indb 4 2010-07-08 6:45:46

IMPORTANT SAFETY INSTRUCTIONS
SAVE THESE INSTRUCTIONS
5
WARNING
Improper use of the grounding plug can result
in a risk of electric shock.
GROUNDING
INSTRUCTIONS
This appliance must be
grounded. In the event of
an electrical short circuit,
grounding reduces the
risk of electric shock by
providing an escape wire for the electrical
current. This appliance is equipped with a cord
that includes a grounding wire and a grounding
plug. The plug must be plugged into an outlet
that is properly installed and grounded. See
Installation Instructions.
This appliance must be connected to a
grounded, metallic, permanent wiring system or
an equipment grounding conductor should be
run with the circuit conductors and connected to
the equipment grounding terminal or lead on
the appliance.
&RQVXOWDTXDOLÀHGHOHFWULFLDQRUVHUYLFHULI
grounding instructions are not completely
understood, or if doubt exists as to whether the
oven is properly grounded.
Do not use an extension cord. If the product power
FRUGLVWRRVKRUWKDYHDTXDOLÀHGHOHFWULFLDQ
install a three-slot receptacle. This oven should
be plugged into a separate 60 Hertz circuit with
WKHHOHFWULFDOUDWLQJDVVKRZQLQVSHFLÀFDWLRQV
table. When the oven is on a circuit with other
equipment, an increase in cooking times may be
required and fuses can be blown.
Microwave operates on standard household
current, 110- 120V.
FEDERAL
COMMUNICATIONS
COMMISSION RADIO
FREQUENCY INTERFERENCE
STATEMENT (U.S.A. ONLY)
This equipment generates and uses ISM
frequency energy and if not installed and
used properly, that is in strict accordance with
the manufacturer’s instructions, may cause
interference to radio and television reception. It
has been type tested and found to comply with
limits for ISM Equipment pursuant to part 18
of FCC Rules, which are designed to provide
reasonable protection against such interference
in a residential installation.
However, there is no guarantee that
interference will not occur in a particular
installation. If this equipment does cause
interference to radio or television reception,
which can be determined by turning the
equipment off and on, the user is encouraged
to try to correct the interference by one or
more of the following:
Reorient the receiving antenna of the radio
or television.
Relocate the microwave oven with respect
to the receiver.
Move the microwave oven away from the
receiver.
Plug the microwave oven into a different
outlet so that the microwave oven and the
receiver are on different branch circuits.
The manufacturer is not responsible for any
radio or television interference caused by
XQDXWKRUL]HGPRGLÀFDWLRQWRWKLVPLFURZDYH
oven. It is the responsibility of the user to
correct such interference.
8505_XAA_03805A-EN+MES.indb 5 2010-07-08 6:45:47
6
IMPORTANT SAFETY INSTRUCTIONS
SAVE THESE INSTRUCTIONS
WHAT YOU NEED TO
KNOW ABOUT SAFETY
INSTRUCTIONS
Warning and Important Safety Instructions
appearing in this Use & Care Guide are not
meant to cover all possible conditions and
situations that may occur. Common sense,
caution, and care must be exercised when
installing, maintaining, or operating microwave.
Always contact your dealer, distributor, service
agent, or manufacturer about problems or
conditions you do not understand.
RECOGNIZE SAFETY
SYMBOLS, WORDS, LABELS
DANGER
Immediate hazards which WILL result in
severe personal injury or death.
WARNING
Hazards or unsafe practices which COULD
result in severe personal injury or death.
CAUTION
Hazards or unsafe practices which COULD
result in minor personal injury.
CAUTION
To avoid personal injury or property
damage, observe the following:
1. Do not deep fat fry in oven. Fat could
overheat and be hazardous to handle.
2. Do not cook or reheat eggs in shell or with
an unbroken yolk using microwave energy.
Pressure may build up and erupt. Pierce
yolk with fork or knife before cooking.
3. Pierce skin of potatoes, tomatoes,
and similar foods before cooking with
microwave energy. When skin is pierced,
steam escapes evenly.
4. Do not operate oven without load or food
in oven cavity.
5. Use only popcorn in packages designed
and labeled for microwave use. Popping
time varies depending on oven wattage.
Do not continue to heat after popping has
stopped. Popcorn will scorch or burn. Do
not leave oven unattended.
6. Do not use regular cooking thermometers
in oven. Most cooking thermometers contain
mercury and may cause an electrical arc,
malfunction, or damage to oven.
7. Do not use metal utensils in oven.
8. Never use paper, plastic, or other
combustible materials that are not intended
for cooking.
9. When cooking with paper, plastic, or
other combustible materials, follow
manufacturer’s recommendations on product
use.
10. Do not use paper towels which contain
Q\ORQRURWKHUV\QWKHWLFÀEHUV+HDWHG
synthetics could melt and cause paper to
ignite.
11. Do not heat sealed containers or plastic
bags in oven. Food or liquid could expand
quickly and cause container or bag to
break. Pierce or open container or bag
before cooking.
12. To avoid pacemaker malfunction, consult
physician or pacemaker manufacturer
about effects of microwave energy on
pacemaker.
8505_XAA_03805A-EN+MES.indb 6 2010-07-08 6:45:47

IMPORTANT SAFETY INSTRUCTIONS
SAVE THESE INSTRUCTIONS
7
PRECAUTIONS TO AVOID
POSSIBLE EXPOSURE TO
EXCESSIVE MICROWAVE
ENERGY
A. DO NOT attempt to operate this oven with
the door open since open door operation
can result in harmful exposure to microwave
energy. It is important not to defeat or
tamper with the safety interlocks.
B. DO NOT place any object between the
oven front face and the door or allow soil
or cleaner residue to accumulate on sealing
surfaces.
C. DO NOT operate the oven if it is
damaged. It is particularly important that
oven door close properly and that there is
no damage to:
1. door (bent),
2. hinges and latches (broken or loosened),
3. door seals and sealing surfaces.
D. Oven should not be adjusted or repaired
E\DQ\RQHH[FHSWSURSHUO\TXDOLÀHG
service personnel.
WARNING
Liquids such as water, coffee, or tea are
able to be overheated beyond the boiling
point without appearing to be boiling due to
surface tension of the liquid. Visible bubbling
or boiling when the container is removed
from the microwave oven is not always
present. THIS COULD RESULT IN VERY HOT
LIQUIDS SUDDENLY BOILING OVER WHEN
A SPOON OR OTHER UTENSIL IS INSERTED
INTO THE LIQUID. To reduce the risk of
injury to persons:
1. Do not overheat the liquid.
2. Stir the liquid both before and halfway
through heating it.
3. Do not use straight-sided containers with
narrow necks.
4. After heating, allow the container to
stand in the microwave oven for a short
time before removing the container.
5. Use extreme care when inserting a spoon
or other utensil into the container.
8505_XAA_03805A-EN+MES.indb 7 2010-07-08 6:45:47

8
IMPORTANT SAFETY INSTRUCTIONS
SAVE THESE INSTRUCTIONS
WARNING
When using electrical appliances, basic safety
precautions should be followed to reduce the
ULVNRIEXUQVHOHFWULFVKRFNÀUHRULQMXU\WR
persons or exposure to excessive microwave
energy.
1. READ all instructions before using oven.
2. READ AND FOLLOWWKHVSHFLÀF
“PRECAUTIONS TO AVOID POSSIBLE
EXPOSURE TO EXCESSIVE MICROWAVE
ENERGY” on page 7
3. Install or locate this oven ONLY in
accordance with the installation instructions
in this manual.
4. Some products such as whole eggs and
sealed containers—for example, closed
glass jars—are able to explode and
SHOULD NOT be HEATED in this oven.
5. Use this oven ONLY for its intended use
as described in this manual. Do not use
corrosive chemicals or vapors in this oven.
7KLVW\SHRIRYHQLVVSHFLÀFDOO\GHVLJQHGWR
heat, cook, or dry food. It is not designed
for industrial or laboratory use.
6. As with any appliance, CLOSE
SUPERVISION is necessary when used by
CHILDREN or INFIRM PERSONS.
7. See door cleaning instructions in the Care
and Cleaning section on page 33
8. Baby food jars shall be open when heated
and contents stirred or shaken before
consumption, in order to avoid burns.
9. DO NOT use this oven for commercial
purposes. It is made for household use only.
10. DO NOT heat baby bottles in oven.
11. DO NOT operate this oven if it has a
damaged cord or plug, if it is not working
properly, or if it has been damaged or
dropped.
12. This oven, including power cord, must
be serviced ONLYE\TXDOLÀHGVHUYLFH
personnel. Special tools are required to
service oven. Contact nearest authorized
service facility for examination, repair, or
adjustment.
13. DO NOTFRYHURUEORFNÀOWHURURWKHU
openings on oven.
14. DO NOT store this oven outdoors. DO NOT
use this product near water – for example,
near a kitchen sink, in a wet basement,
near a swimming pool or similar locations.
15. DO NOT immerse cord or plug in water.
16. Keep cord AWAY from HEATED surfaces.
17. DO NOT let cord hang over edge of table
or counter.
18. Clean the ventilating hood frequently.
19. DO NOT allow grease to accumulate on
WKHKRRGRUÀOWHUV
20. Use care when cleaning the ventilating
KRRGÀOWHU&RUURVLYHFOHDQLQJDJHQWVVXFK
as lye-based oven cleaners may damage
WKHÀOWHUV
:KHQÁDPLQJIRRGVXQGHUWKHKRRGWXUQ
the fan on.
22. This oven is suitable for use above both gas
and electric cooking equipment 36 inches
or less wide.
23. This appliance must be grounded. Connect
only to properly grounded outlet. See
“GROUNDING INSTRUCTIONS” found on 5
page.
8505_XAA_03805A-EN+MES.indb 8 2010-07-08 6:45:47

IMPORTANT SAFETY INSTRUCTIONS
SAVE THESE INSTRUCTIONS
9
CAUTION
7RDYRLGULVNRIÀUHLQWKHRYHQFDYLW\
a. DO NOT overcook food. Carefully attend oven when paper, plastic, or other combustible
materials are placed inside the oven to facilitate cooking.
b. Remove wire twist-ties from paper or plastic bags before placing bag in oven.
c. If materials inside the oven ignite, keep oven door CLOSED, turn oven off and disconnect the
power cord, or shut off power at the fuse or circuit breaker panel.
d. DO NOT use the cavity for storage. DO NOT leave paper products, cooking utensils, or food
in the cavity when not in use.
8505_XAA_03805A-EN+MES.indb 9 2010-07-08 6:45:47

10
Getting the Best cooking results
Testing your dinnerware or cookware
Test dinnerware or cookware before using. To test a dish for safe use, put it into oven with a
cup of water beside it. Cook at 100% cook power for one minute. If the dish gets hot, do not
use it.
Some dishes (melamine, some ceramic dinnerware, etc.) absorb microwave energy, becoming
too hot to handle and slowing cooking times. Cooking in metal containers not designed for
microwave use could damage the oven, as could containers with hidden metal (twist-ties, foil
lining, staples, metallic glaze or trim).
To get the best results from your microwave oven, read and follow the guidelines below.
Storage Temperature:
Foods taken from the freezer or refrigerator take longer to cook than the
same foods at room temperature.
Size:
Small pieces of food cook faster than large ones, and pieces similar in size and shape
cook more evenly. For even cooking, reduce the power when cooking large pieces of food.
Natural Moisture:
Very moist foods cook more evenly because microwave energy is attracted to
water molecules.
Stir foods
such as casseroles and vegetables from the outside to the center to distribute the heat
evenly and speed cooking. Constant stirring is not necessary.
Turn over foods like pork chops,
EDNLQJSRWDWRHVURDVWVRUZKROHFDXOLÁRZHUKDOIZD\WKURXJKWKH
cooking time to expose all sides equally to microwave energy.
Place delicate areas of foods,
such as asparagus tips, toward the center of the dish.
Arrange unevenly shaped foods,
such as chicken pieces or salmon steaks, with the thicker, meatier
parts toward the outside of the dish.
Shield, with small pieces of aluminum foil,
parts of food that may cook quickly, such as wing tips
and leg ends of poultry.
Let It Stand:
After the timed cooking period ends, let food stand inside or outside of the oven so
WKDWLWÀQLVKHVFRRNLQJWRWKHFHQWHUDQGWRDYRLGRYHUFRRNLQJWKHRXWHUHGJHV7KHOHQJWKRI
standing time depends on the density and surface area of the food. For standing time outside
the oven, cover the food with foil or a casserole lid.
Wrapping in waxed paper or paper towel:
Sandwiches and many other foods containing
prebaked bread should be wrapped prior to microwaving to prevent drying out.
8505_XAA_03805A-EN+MES.indb 10 2010-07-08 6:45:48

11
Features
Wire rack
The wire rack gives you extra space when
cooking in more than one container at the same
time.
CAUTION
To avoid risk of property damage:
Do not use rack to pop popcorn.
Rack must be on the four plastic supports
when used.
Use the rack only when cooking food on
rack position.
Do not FRRNZLWKUDFNRQÁRRURIWKH
oven.
To use rack:
1. Place rack securely in the four plastic
supports.
Rack MUST NOT touch metal walls or back
of microwave oven.
2. Place equal amounts of food both ABOVE
AND BELOW rack.
Amount of food must be approximately the
same to balance out cooking energy.
IMPORTANT:
To avoid oven damage, DO NOT store or use
the wire rack in this oven unless more than one
item is being cooked or a recipe calls for it.
2YHQ6SHFLÀFDWLRQV
Power Supply 120 VAC, 60 Hz
Input Power 1,700W
Cooking Power 1,100W IEC 60705 Standard
Frequency 2,450 MHz
Rated Current 14.5 A
Outer Dimensions 29 7/8 (W) x 16 1/2(H) x 15 1/8 (D)
Cavity Volume 1.9 Cu. Ft.
Net Weight 50.5 lbs. / 51.8 lbs. (85053 model)
Door Handle Window with
Metal Shield
Cooking Guide
Wire Rack
Door Safety
Lock System
Oven Control
Panel
Glass
Turntable
Model and Serial
Number Plate
8505_XAA_03805A-EN+MES.indb 11 2010-07-08 6:45:48
12
FEATURES
8505_XAA_03805A-EN+MES.indb 12 2010-07-08 6:45:49

FEATURES
13
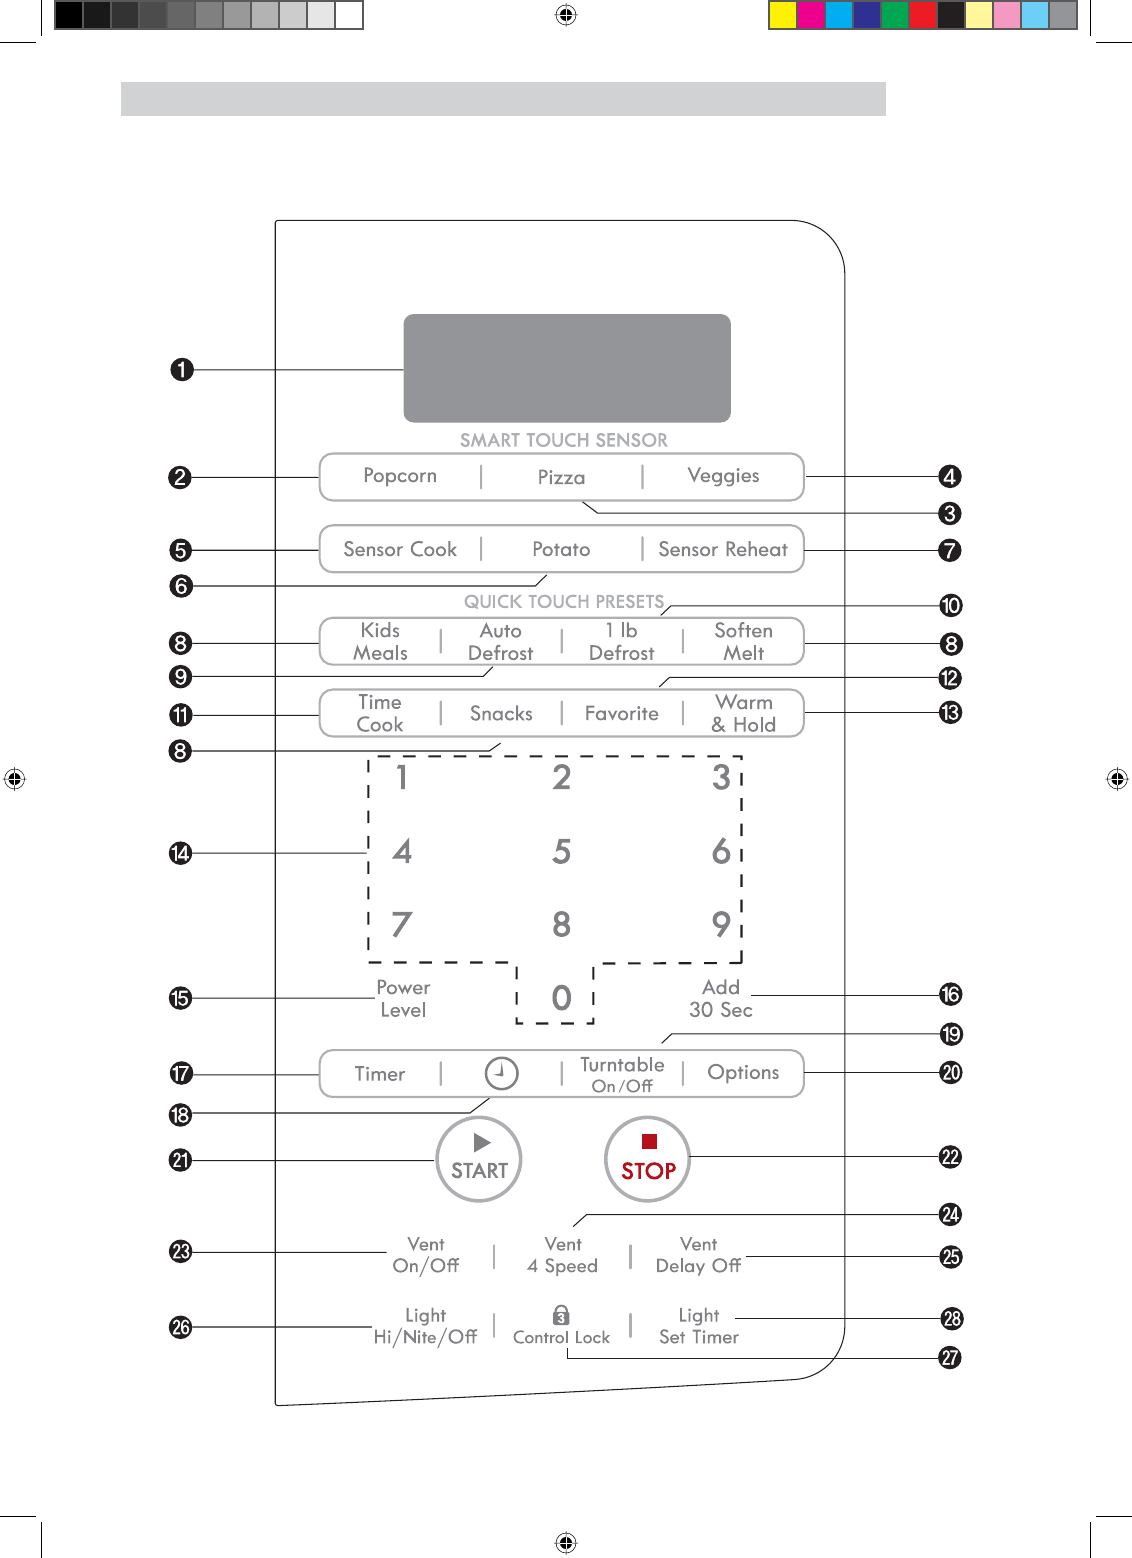
Features
1. DISPLAY : The Display includes a clock and
indicators to tell you time of day, cooking
time settings and cooking functions selected.
2. POPCORN : Touch this pad when popping
popcorn in your microwave oven. The oven’s
sensor will tell the oven how long to cook
depending on the amount of humidity it
detects from the popcorn.
3. PIZZA : Touch this pad to reheat pizza. The
oven’s sensor will tell the oven how long to
cook depending on the amount of humidity
it detects.
4. VEGGIES : Touch this pad to cook fresh or
frozen vegetables. The oven’s sensor will
tell the oven how long to cook depending
on the amount of humidity it detects from
the vegetables.
5. SENSOR COOK : Touch this pad to cook
beverage, frozen dinner, frozen breakfast,
or chicken breast. The oven’s sensor will
tell the oven how long to cook depending
on the amount of humidity coming from the
food.
6. POTATO : Touch this pad to cook potatoes.
The oven’s sensor will tell the oven how
long to cook depending on the amount of
humidity it detects from the potato.
7. SENSOR REHEAT : Touch this pad to reheat
dinner plate, casserole, and pasta. The
oven’s sensor will tell the oven how long to
cook depending on the amount of humidity
coming from the food.
8. KIDS MEALS, SOFTEN/MELT, SNACKS :
7RXFKWKHVHSDGVWRFRRNVSHFLÀFIRRG
9. AUTO DEFROST: Touch this pad to defrost
food by weight.
10. 1LB DEFROST : Touch this pad to defrost
1.0 pound of frozen food.
11. TIME COOK : Touch this pad to input
cooking time.
12 FAVORITE : Touch this pad to recall one
cooking instruction previously programmed
into memory.
13. WARM & HOLD : Touch this pad to keep
hot, cooked food warm in your microwave
oven for up to 99 minutes 99 seconds.
14. NUMBER : Touch number pads to enter
cooking time, power level, quantities, or
weights.
15. POWER LEVEL : Touch this pad to select a
cooking power level.
16. ADD 30 SEC : Touch this pad to set and
start cooking quickly at 100% power level.
17. TIMER : Touch this pad to set the kitchen
timer.
18. CLOCK : Touch this pad to enter the time of
day.
19. TURNTABLE ON/OFF : Touch this pad to
turn off the turntable. OFF will appear in
the display.
TURNTABLE ON/OFF is not available in
sensor cook and defrost modes.
20. OPTIONS : Touch this pad to change the
oven’s default settings.
21. START : Touch this pad to start a function.
If you open the door after oven begins
to cook, close the door and touch ENTER/
START pad again.
22. STOP : Touch this pad to stop the oven or to
clear all entries.
23. VENT ON/OFF : Touch this pad to turn the
fan on/off.
24. VENT 4 SPEED: Touch this pad to choose
one of 4 fan speeds.
25. VENT DELAY OFF : Touch this pad when
setting ventilation time (1, 3, 5, 10, 30
minutes).
26. LIGHT HI/NITE/OFF : Touch this pad to turn
on the cooktop light.
27. CONTROL LOCK : Touch and hold this pad
more than 3 seconds to lock the control
panel.
28. LIGHT SET TIMER : Touch this pad to set the
light timer.
8505_XAA_03805A-EN+MES.indb 13 2010-07-08 6:45:49
14
Operating instructions
Learn about your microwave oven
This section introduces you to the basics you
need to know to operate your microwave oven.
Please read this information before use.
CAUTION
To avoid risk of personal injury or
property damage, do not run oven
empty.
To avoid risk of personal injury or
property damage, do not use stoneware,
aluminum foil, metal utensils, or metal
trimmed utensils in the oven.
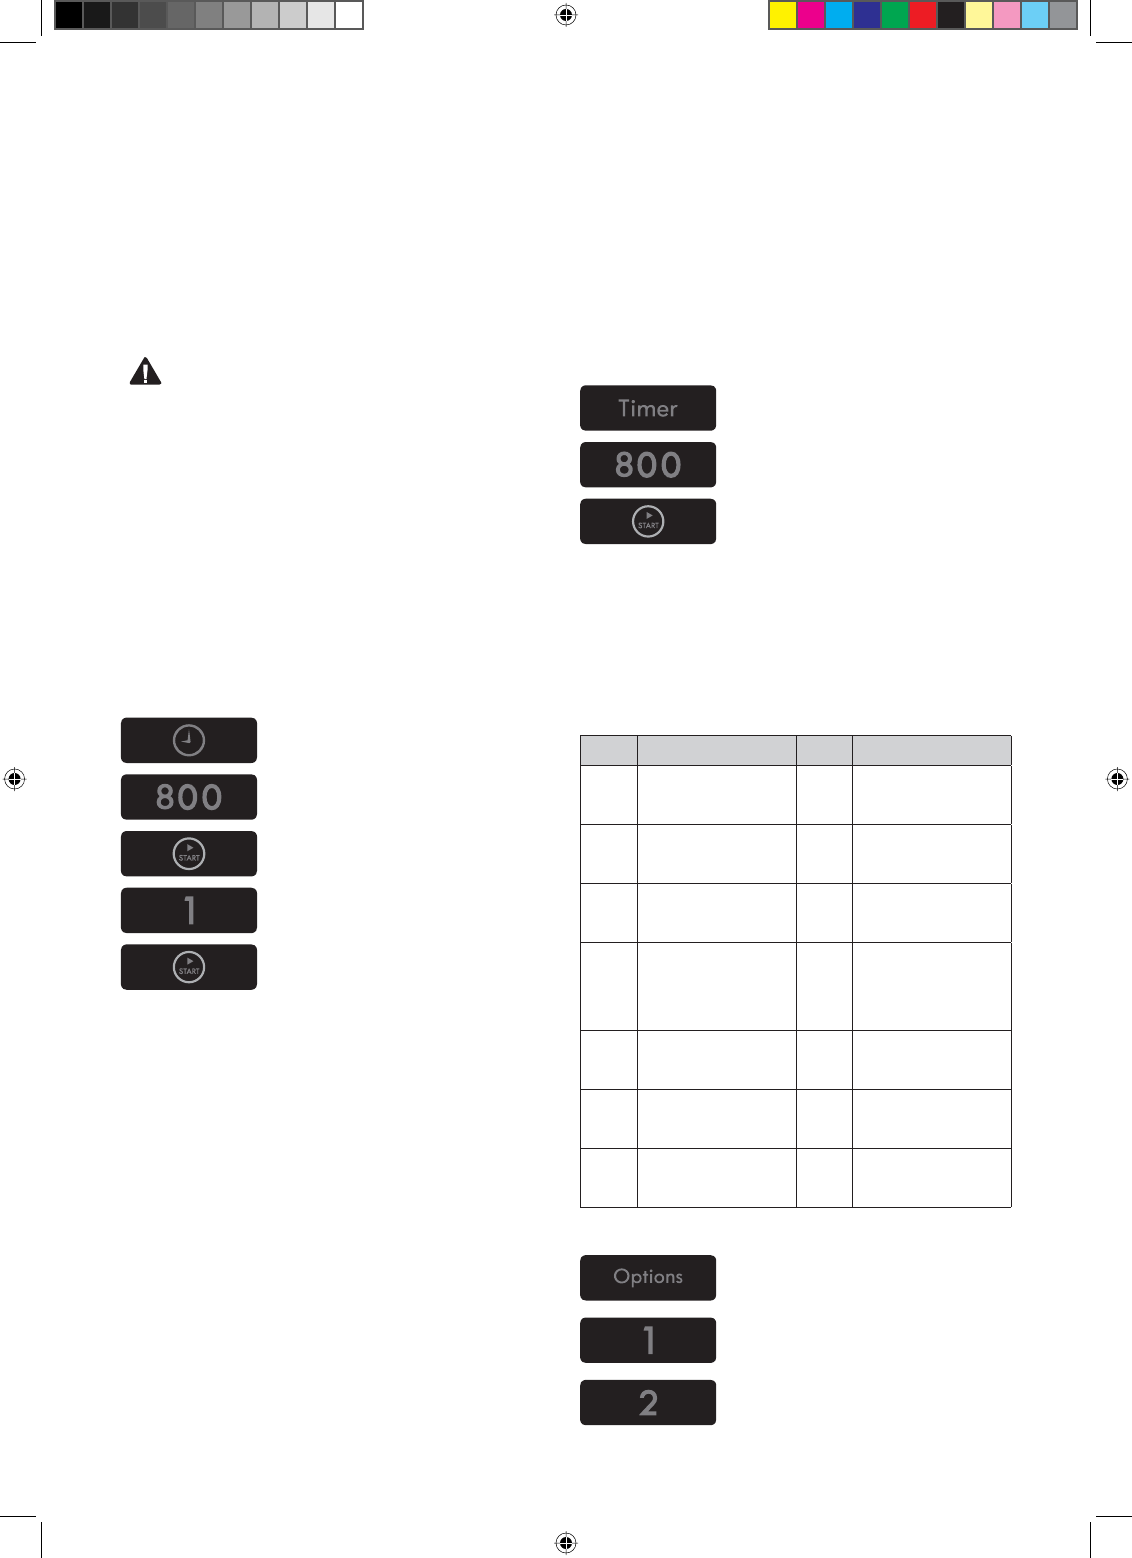
Clock
Example: To set 8:00 AM.
1Touch CLOCK pad.
2Enter the time by using the
number pads.
3Touch ENTER/ START pad.
4Touch 1 for AM.
5Touch START pad.
Kitchen Timer
You can use your microwave oven as a timer.
Use the Kitchen Timer for timing up to 99
minutes, 99 seconds.
Example: To set for 8 minutes.
1. Touch KITCHEN TIMER
pad.
2. Enter the time by using the
number pads.
3. Touch START pad.
When the time is over, you will hear beeps and
END will display.
Options
You can change the default values. See
following chart for more information.
No. Function No. Result
1Weight mode
selected
1
2
Lbs.
Kg.
2Sound on/off
control
1
2
Sound ON
Sound OFF
3Clock display
control
1
2
12HR
24HR
4 Display
1
2
3
Slow speed
Normal speed
Fast speed
5Remind end
signal
1
2
ON
OFF
6 Demo mode 1
2
ON
OFF
7Daylight
Saving time
1
2
ON
OFF
Example: To change weight mode (from Lbs. to Kg).
1. Touch OPTIONS pad.
2. Touch number 1 pad.
3. Touch number 2 pad.
8505_XAA_03805A-EN+MES.indb 14 2010-07-08 6:45:51

OPERATING INSTRUCTIONS
15
Turntable On/Off
For best cooking results, leave the turntable on.
It can be turned off for large dishes.
1. Touch TURNTABLE ON/
OFF pad to turn the
turntable on or off.
NOTES:
This option is not available in sensor cook,
auto cook and defrost modes.
Sometimes the turntable can become hot
to touch. Be careful touching the turntable
during and after cooking.
Do not operate oven if it is empty.
Vent Fan
The VENT moves steam and other vapors from
the cooking surface.
Example: To set Level 2.
1. Touch ON/OFF pad. This
shows the last level until
you select the fan speed
level.
2. Touch 4 SPEED pad until
Level 4 appears in the
display.
3Touch ON/OFF pad to turn
off fan when desired.
NOTES:
If the temperature gets too hot around the
microwave oven, the fan in the vent hood will
automatically turn on at the LEVEL 1 setting
to cool the oven. When this occurs, the fan
cannot be turned off manually. The fan will
automatically turn off when the internal parts
are cool.
The vent fan will operate only in LEVEL1-2
while the microwave is working.
Delay Off
Example: To turn off fan after 30 minutes for Level
2.
1. Touch ON/OFF pad.
2. Touch 4 SPEED pad until
Level 4 appears in the
display.
3. Touch DELAY OFFSDGÀYH
times. AFTER 30 MINUTES
will appear in the display.
Control Lock
You may lock the control panel to prevent the
microwave from being accidentally started or
used by children.
The Control Lock feature is also useful when
cleaning the control panel. Control Lock
prevents accidental programming when wiping
the control panel.
Example: To set the control lock.
Touch and hold CONTROL
LOCK pad more than 3
seconds.CHILD LOCK ON
will appear in the display
window with two beeps.
Example: To cancel the control lock.
Touch and hold CONTROL
LOCK pad more than 3
seconds. LOCKED will
disappear and you will hear
two beeps.
Add 30 Sec
$WLPHVDYLQJSDGWKLVVLPSOLÀHGFRQWUROOHWV
you quickly set and start microwave cooking.
Example: To set ADD 30 SEC for 2 minutes.
Touch ADD 30 SEC pad 4
times and touch START pad.
The oven begins cooking and
display shows time counting
down.
8505_XAA_03805A-EN+MES.indb 15 2010-07-08 6:45:53
16
OPERATING INSTRUCTIONS
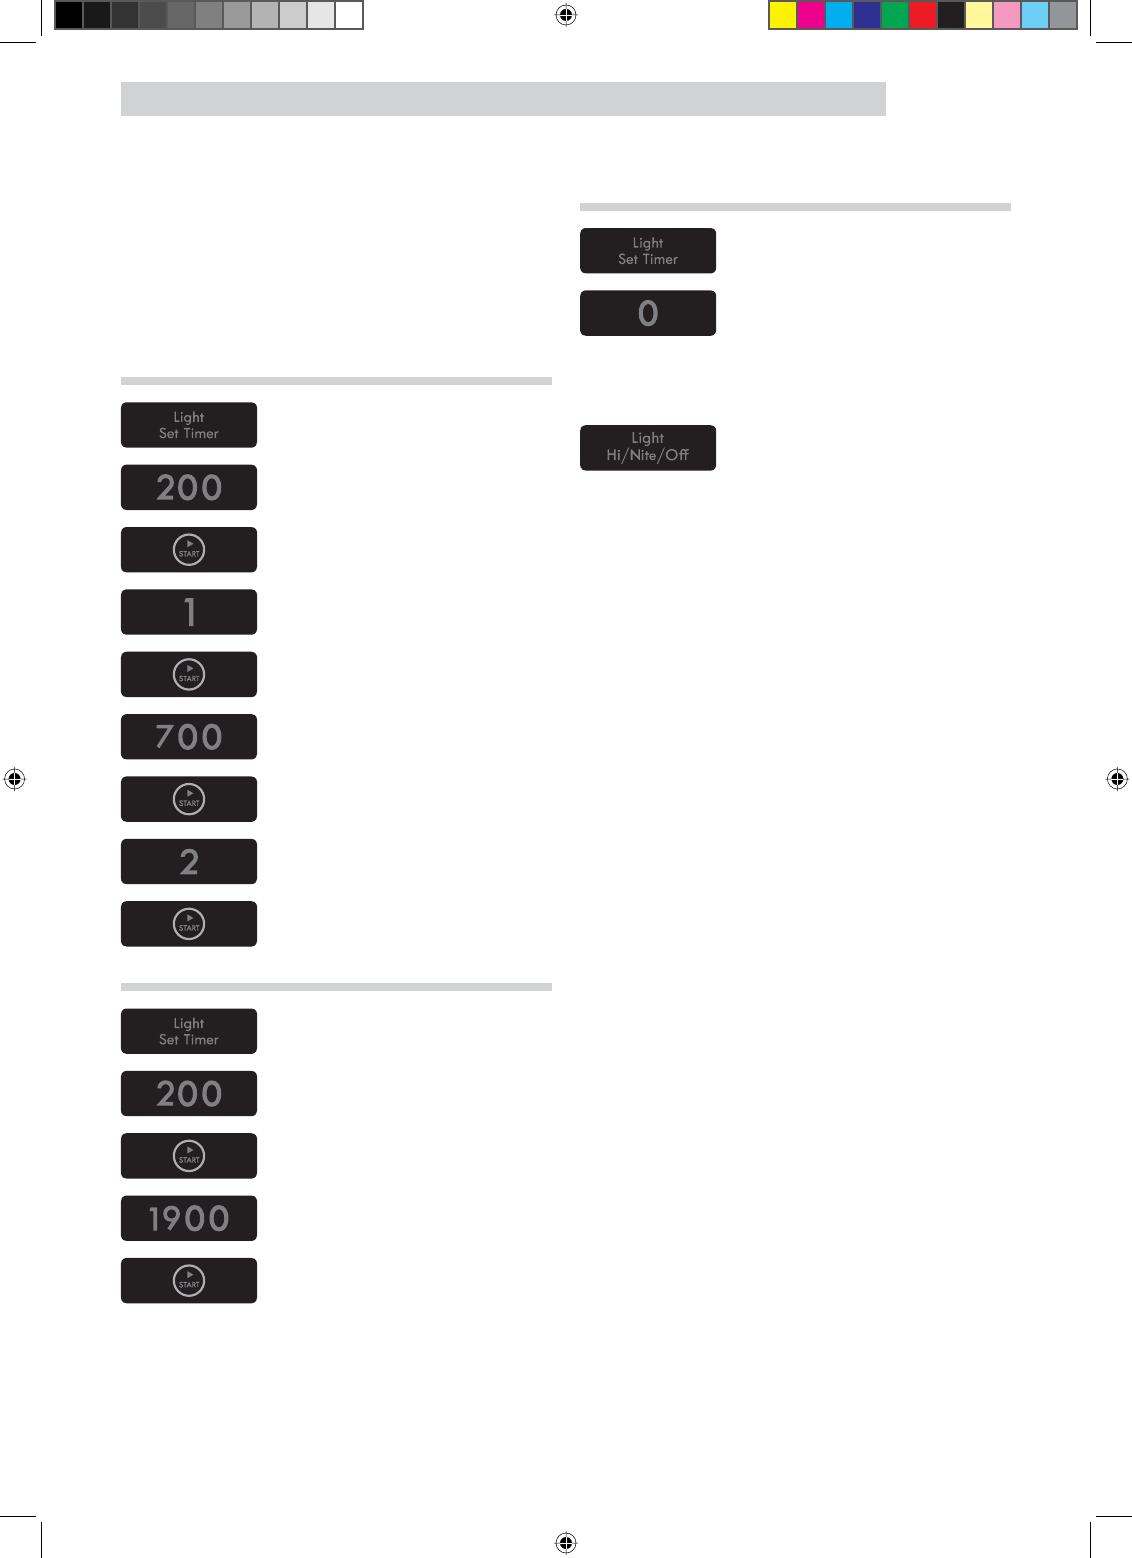
Light Set Timer
You can set the LIGHT to turn on and off
automatically at any time. The light comes on
at the same time every day until reset.
Example: Turn on 2:00 AM, turn off 7:00 PM.
12 hour clock mode.
1. Touch LIGHT SET TIMER
pad.
2. Enter the time you want the
LIGHT to turn on.
3. Touch START pad.
4. Touch 1 for AM.
5. Touch START pad.
6. Enter the time you want the
LIGHT to turn off.
7. Touch START pad.
8. Touch 2 for PM.
9. Touch START pad.
24 hour clock mode.
1. Touch LIGHT SET TIMER
pad.
2. Enter the time you want the
LIGHT to turn on.
3. Touch START pad.
4. Enter the time you want the
LIGHT to turn off.
5. Touch START pad.
To cancel the light timer.
1. Touch LIGHT SET TIMER
pad.
2. Touch 0 pad.
Light Hi/Nite/Off
Touch LIGHT HI/NITE/OFF
pad once for bright light,
twice for night light, or three
times to turn the light off.
8505_XAA_03805A-EN+MES.indb 16 2010-07-08 6:45:55
OPERATING INSTRUCTIONS
17
Cooking at high power levels
Example: To cook food for 8 minutes 30 seconds at
100% power.
1. Enter the cook time.
2. Touch START pad.
When the cook time is over, you will hear four
beeps and END will display.
Cooking at lower power levels
HIGH power cooking does not always give
you the best results with foods that need
slower cooking, such as roasts, baked goods,
or custards. Your oven has 9 power settings in
addition to HIGH.
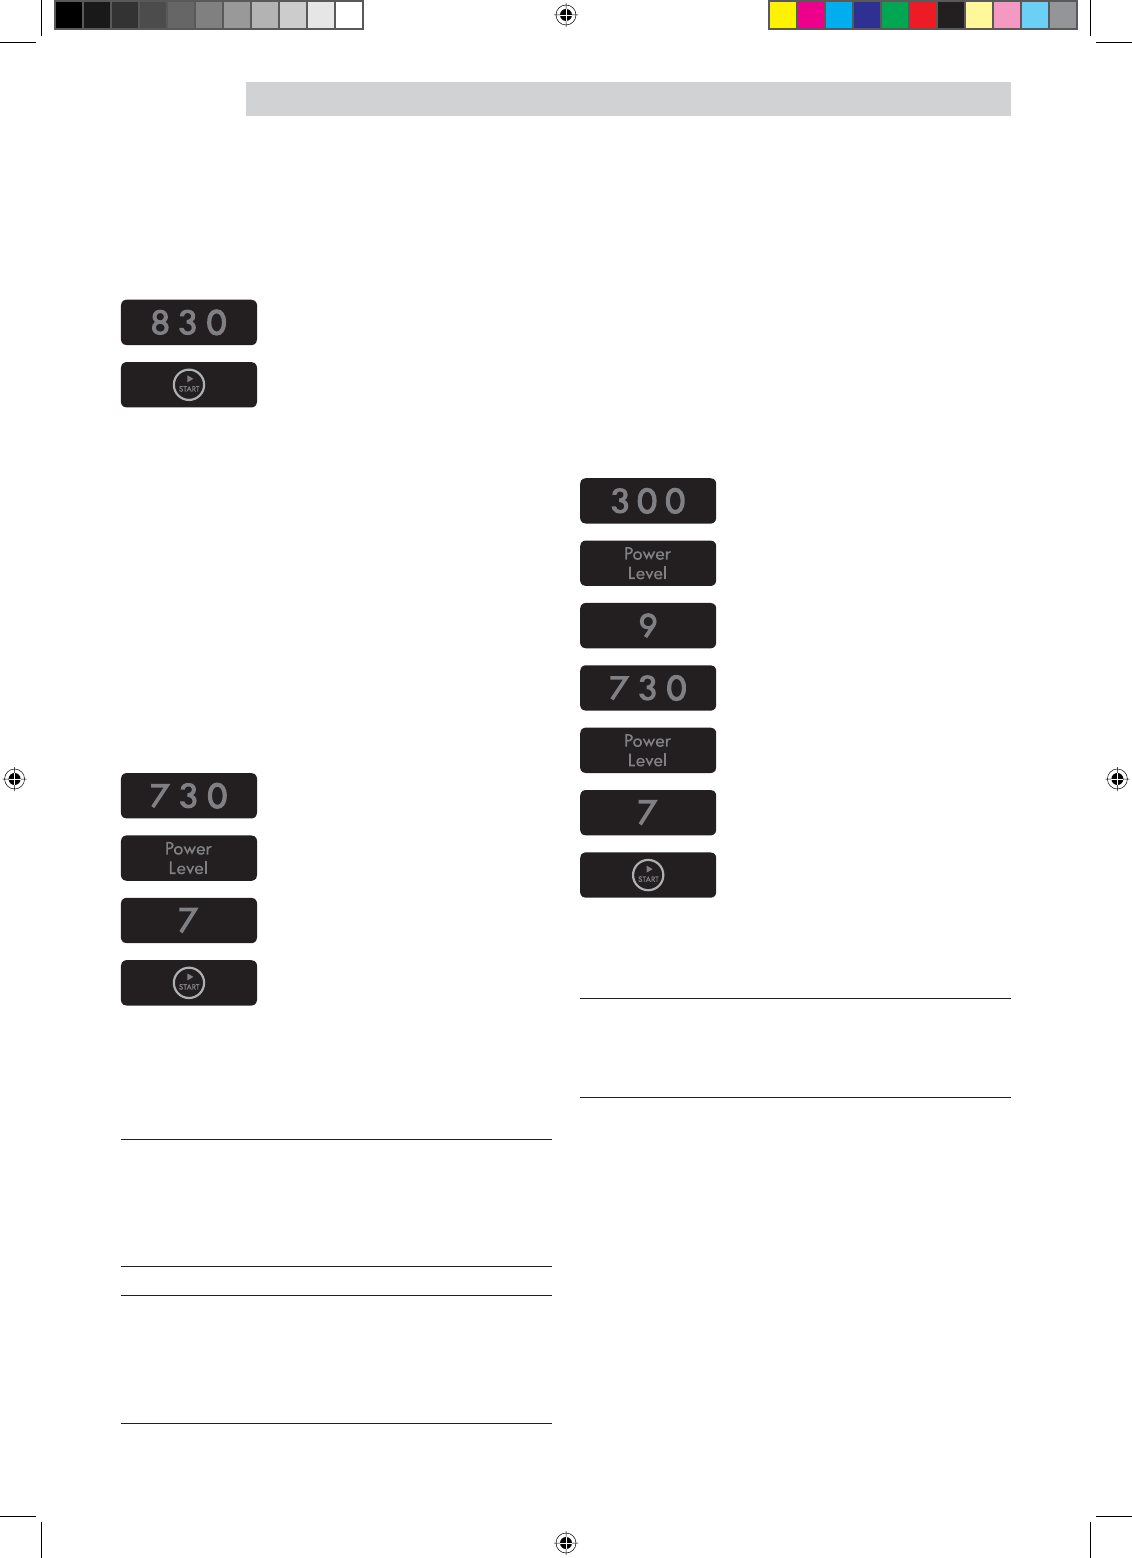
Example: To cook food for 7 minutes 30 seconds at
70% power.
1. Enter the cook time.
2. Touch POWER LEVEL pad.
3. Enter the power level.
4. Touch START pad.
When the cook time is over, you will hear four
beeps and END will display.
See cooking guide for power levels, page 18.
IMPORTANT:
To avoid damge to the oven, DO NOT store
or use the wire rack in this oven unless more
than one item is being cooked or a recipe
calls for it.
NOTE:
If the oven is set to cook for more than 20
minutes, it will automatically adjust itself to
70 percent power after 20 minutes to avoid
overcooking.
Multi - stage cooking
For best results, some recipes call for one
Power Level for a certain length of time, and
another Power Level for another length of time.
Your oven can be set to automatically change
from one power level to another for two
cooking stages, or for three stages.
Example: To cook food for 3 minutes at 90% power
and then 70% power for 7 minutes 30 seconds.
1. Enter the cook time.
2. Touch POWER LEVEL pad.
3. Enter the power level.
4. Enter the second cook time.
5. Touch POWER LEVEL pad.
6. Enter the power level.
7. Touch START pad.
When the cook time is over, you will hear four
beeps and END will display.
NOTE:
You can set the second cook cycle to 0 power
to conveniently establish a period of standing
time within the oven.
8505_XAA_03805A-EN+MES.indb 17 2010-07-08 6:45:57

18
OPERATING INSTRUCTIONS
Cooking guide for power levels
The power levels allow you to choose the best amount of heating energy for the food you are
cooking. Below are listed all the power levels, examples of foods best cooked at each level, and
the amount of microwave power you are using.
POWER
LEVEL
MICROWAVE
OUTPUT
USE
10 High 100 % Boil water.
Cook ground beef or begin cooking roasts.
Make candy.
Cook fresh fruits and vegetables.
Preheat browning dish.
Reheat beverages.
Bacon slices.
9 90 % Reheat meat slices quickly.
Saute onions, celery, and green pepper.
8 80 % All reheating.
Cook scrambled eggs.
7 70 % Cook poultry or seafood.
Cook breads and cereal products.
Cook cheese dishes, veal.
&RRNFDNHVPXIÀQVEURZQLHVFXSFDNHV
6 60 % Cook pasta.
5 50 % Cook meats.
Cook custard.
Cook spare ribs, rib roast, sirloin roast.
4 40 % Cook less tender cuts of meat.
Reheat frozen convenience foods.
3 30 % Thaw meat, poultry, and seafood.
Cook small quantities of food.
Finish cooking casserole, stew, and some sauces.
2 20 % Soften butter and cream cheese.
Heat small amounts of food.
1 10 % Soften ice cream.
Raise yeast dough.
0 0 % Standing time in oven.
8505_XAA_03805A-EN+MES.indb 18 2010-07-08 6:45:57

OPERATING INSTRUCTIONS
19
Sensor operating instructions
(Following page 20 ~ 22)
Sensor Cook allows you to cook most of your
favorite foods without selecting cooking times
and power levels. The display will indicate
the sensing period by scrolling the name of
the food category that you select. The oven
automatically determines required cooking
time for each food item. When the internal
sensor detects a certain amount of humidity
coming from the food, it will tell the oven how
much longer to cook. The display will show the
remaining heating time.
For best results when cooking by Sensor, follow
these recommendations:
1. Food cooked with the sensor system should
be at normal storage temperature.
2. Glass turntable and outside of container
should be dry to assure best cooking results.
3. Most foods should always be covered
loosely with microwavable plastic wrap,
waxed paper, or a lid.
4. Do not open the door or touch the STOP/
CLEAR pad during the sensing time. When
sensing time is over, the oven beeps and the
remaining cooking time will appear in the
display window. At this time you can open
the door to stir, turn, or rearrange the food.
See sensing chart on page 22.
IMPORTANT:
When using sensor cook, the oven must cool for
5 minutes between uses or food will not cook
properly.
Sensor cooking guide
Appropriate containers and coverings help
assure good Sensor cooking results.
1. Always use microwavable containers and
cover them with lids or vented plastic wrap.
2. Never use tight-sealing plastic covers. They
can prevent steam from escaping and cause
food to overcook.
3. Match the amount to the size of the
container. Fill containers at least half full for
best results.
4. Be sure the outside of the cooking container
and the inside of the microwave oven are
dry before placing food in the oven. Beads
of moisture turning into steam can mislead
the sensor.
NOTE:
If food is not thoroughly cooked or reheated
when using the sensor feature, complete using
a power level and cooking time. DO NOT
continue using the sensor pad.
8505_XAA_03805A-EN+MES.indb 19 2010-07-08 6:45:57

20
OPERATING INSTRUCTIONS
Popcorn
POPCORN pad lets you pop commercially
packaged microwave popcorn. Pop only one
package at a time. For best results, use fresh
bags of popcorn.
Example: To pop popcorn.
1. Touch POPCORN pad.
2. Touch START pad.
When the cook time is over, you will hear four
beeps and END will display.
Recommended amounts: 3.0-3.5 ozs.
CAUTION
DO NOT leave microwave oven
unattended while popping corn.
When popping commercially packaged
popcorn, remove the rack from the
oven;
Do not place the bag of microwave
popcorn on the rack or under the rack.
Pizza
The PIZZA pad lets you reheat one to four
slices of pizza without selecting cooking times
and power levels.
Example: To reheat 2 slices of pizza.
1. Touch PIZZA pad.
2. Touch START pad.
When the cook time is over, you will hear four
beeps and END will display.
5HFRPPHQGHGDPRXQWVVOLFHV
Veggies
VEGGIES pad has preset cooking times and
power levels power for 2 food categories:
Fresh, Frozen.
Example: To cook Frozen Vegetables.
1. Touch VEGGIES pad.
2. Choose food category.
3. Touch START pad.
When the cook time is over, you will hear four
beeps and END will display.
Category Touch Pad Number
Fresh 1
Frozen 2
5HFRPPHQGHGDPRXQWVWRVHUYLQJV
8505_XAA_03805A-EN+MES.indb 20 2010-07-08 6:45:58
OPERATING INSTRUCTIONS
21
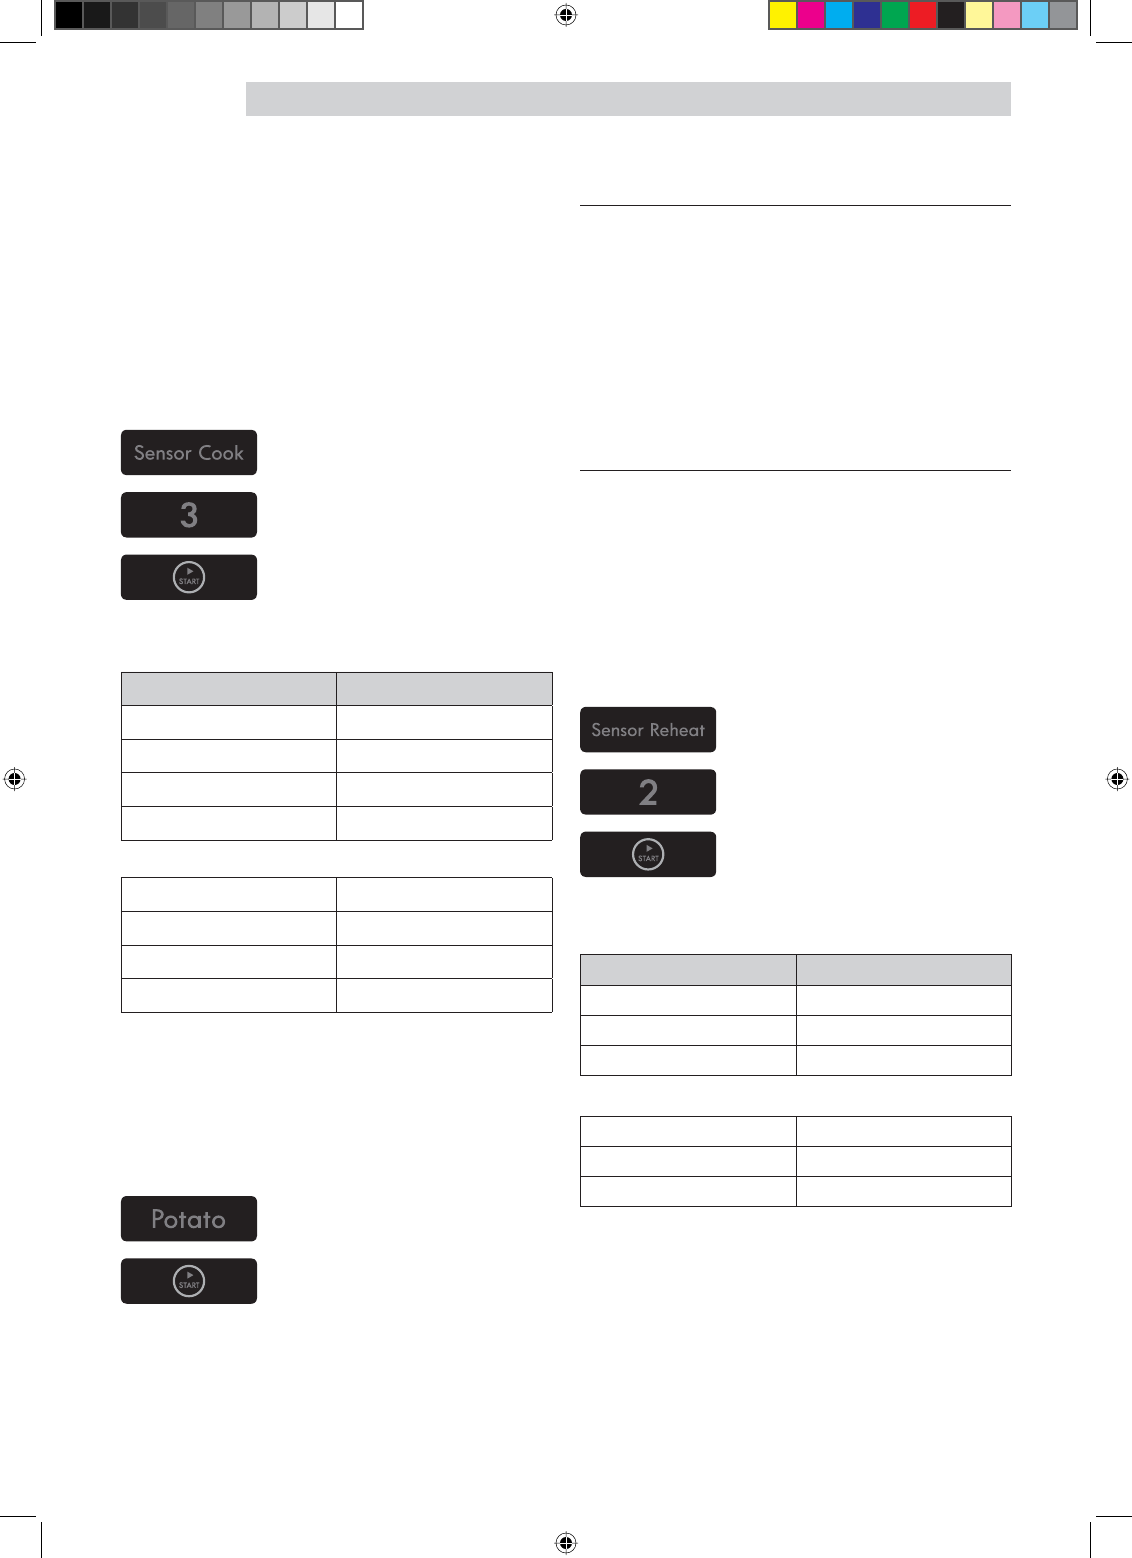
Sensor Cook
Using SENSOR COOK pad lets you heat
common microwave-prepared foods without
needing to program cooking times and power
levels. SENSOR COOK has 4 preset food
categories: Beverage, Frozen Dinner, Frozen
Breakfast and Chicken Breast.
Example: To cook Frozen Breakfast.
1. Touch SENSOR COOK
pad.
2. Choose food category.
3. Touch START pad.
When the cook time is over, you will hear four
beeps and END will display.
Category Touch Pad Number
Beverage 1
Chicken Breast 2
Frozen Breakfast 3
Frozen Dinner 4
Recommended amounts:
Beverage 8 ozs. (1cup)
Chicken Breast 8-24 ozs.
Frozen Breakfast 4-8 ozs.
Frozen Dinner 8-14 ozs.
Potato
The POTATO pad lets you bake one to six
potatoes without selecting cooking times and
power levels.
Example: To cook 2 potatoes.
1. Touch POTATO pad.
2. Touch START pad.
When the cook time is over, you will hear four
beeps and END will display.
Recommended amounts: 1-6 potatoes,
about 6-8 oz. each.
NOTES:
Cooking time is based on a 6-8 oz. potato.
Before baking, pierce potato with fork
several times.
If potatoes are not completely cooked,
continue cooking using cooking time.
DO NOT use the POTATO pad to complete
cooking.
After baking, let stand for 5 minutes.
Sensor Reheat
SENSOR REHEAT pad lets you heat foods
without needing to program cooking times and
power levels. SENSOR REHEAT has 3 preset
categories: Dinner Plate, Casserole and Pasta.
Example: To reheat Casserole.
1. Touch SENSOR REHEAT
pad.
2. Choose food category.
3. Touch START pad.
When the cook time is over, you will hear four
beeps and END will display.
Category Touch Pad Number
Casserole 1
Dinner Plate 2
Pasta 3
Recommended amounts:
Casserole 1-4 servings
Dinner Plate 1 serving
Pasta 1-4 servings
8505_XAA_03805A-EN+MES.indb 21 2010-07-08 6:46:00
22
OPERATING INSTRUCTIONS
Sensor cook table
CATEGORY DIRECTIONS AMOUNT
Popcorn Use only one microwave-only bag of popcorn at a time. Use
caution when removing and opening the hot bag from oven. Let
oven cool for at least 5 minutes before using again.
3.0 to 3.5
oz.
1 package
Potato Prick each potato several times with fork. Place on turntable in
spoke-like fashion. Let stand 3-5 minutes. Let oven cool for at least
5 minutes before using again.
1 to 6
potatoes
VEGGIES
Fresh
Vegetables
Place fresh vegetables in microwave-safe ceramic, glass or plastic
dish and add 2-4 Tbs. water. Cover with lid or vented plastic wrap
during cooking and stir before standing. Let oven cool for at least
5 minutes before using again.
1 to 4
servings
Frozen
Vegetables
Place frozen vegetables in microwave-safe ceramic, glass or
plastic dish and add 2-4 Tbs. water. Cover with lid or vented
plastic wrap during cooking and stir before standing. Let oven cool
for at least 5 minutes before using again.
1 to 4
servings
Pizza
Put 1-4 slices of pizza on a microwave-safe plate with wide end
of slice toward the outside edge of the plate. Do not let slices
overlap. Do not cover. Let oven cool for at least 5 minutes before
using again.
1 to 4 Slices
Beverage
Use measuring cup or mug ; do not cover. Place the beverage
in the oven. After heating, stir well. Let oven cool for at least 5
minutes before using again.
Note:
Reheat times based on an 8 ounce cup. (1 cup.)Beverage heated with the beverage feature may be very hot.Remove container with care.
8 oz.
(1 cup.)
Chicken Breast
Place chicken breasts on a microwave-safe plate and cover with
plastic wrap. Cook to an internal temperature of 170 degrees F.
Turn over during countdown time. Let stand 5 minutes. Let oven cool
for at least 5 minutes before using again.
8 to 24 oz.
Frozen
Breakfast
Follow package instructions for covering and standing. Use this
pad for frozen sandwich, breakfast entree, etc. Let oven cool for
at least 5 minutes before using again. 4 to 8 oz.
Frozen Dinner Remove food from outer wrapping and follow box instructions for
covering and standing. Let oven cool for at least 5 minutes before
using again. 8 to 14 oz.
Sensor reheat table
CATEGORY DIRECTIONS AMOUNT
Dinner Plate
Use only pre-cooked, refrigerated foods. Cover plate with vented
plastic wrap or waxed paper, tucked under plate. If food is not as
hot as you prefer after heating with REHEAT, continue heating using
cooking time and power level. Do not continue cooking using the
Reheat pad.
Contents:
R]PHDWSRXOWU\RUÀVKXSWRR]ZLWKERQH1/2 cup starch (potatoes, pasta, rice, etc.)1/2 cup vegetables (about 3-4 oz.)
1 serving
(1 plate)
Casserole Cover plate with lid or vented plastic wrap. If food is not as hot as
you prefer after heating with REHEAT, continue heating using time
and power level. Do not continue cooking using the Reheat pad.
Stir foods once before serving.
Contents:
Casserole-refrigerated foods. (Examples: Lasagna and beef stew.)
Pasta-Canned spaghetti and ravioli, refrigerated foods.
1 to 4
servings.
Pasta
8505_XAA_03805A-EN+MES.indb 22 2010-07-08 6:46:00
OPERATING INSTRUCTIONS
23
Time Cook
Example: To cook food for 8 minutes 30 seconds at
100% power.
1. Touch Time cook pad.
2. Enter the cook time.
3. Touch START pad.
When the cook time is oven, you will hear four
beeps and END will display.
NOTE:
If the oven is set to cook for more than 20
minutes, it will automatically adjust itself to
70 percent power after 20 minutes to avoid
overcooking.
Favorite
FAVORITE lets you recall one cooking instruction
previously placed in memory and begin
cooking immediately.
Example: To cook for 2 minutes at 70% power.
1. Touch FAVORITE pad.
2. Enter the cook time.
3. Touch POWER LEVEL pad.
4. Enter the power level.
5. Touch START pad.
Example: To recall the favorite.
1. Touch FAVORITE pad.
2. Touch START pad.
When the cook time is over, you will hear four
beeps and END will display.
Warm & Hold
You can keep cooked food warm in your
microwave oven for up to 99 minutes 99
seconds.
Example: To warm for 60 min.
1. Touch WARM & HOLD
pad.
2. Enter the cook time.
3. Touch START pad.
NOTES:
WARM & HOLD operates for up to 99
minutes 99 seconds.
Food that is cooked covered should also be
covered during WARM & HOLD.
Pastry items (pies, turnovers, etc.) should be
uncovered during WARM & HOLD.
Complete meals kept warm on a dinner
plate can be covered during WARM &
HOLD.
Food type Recommended
Quantity
Liquid 1-2 cups
Dry 5-10 oz.
8505_XAA_03805A-EN+MES.indb 23 2010-07-08 6:46:02
24
OPERATING INSTRUCTIONS
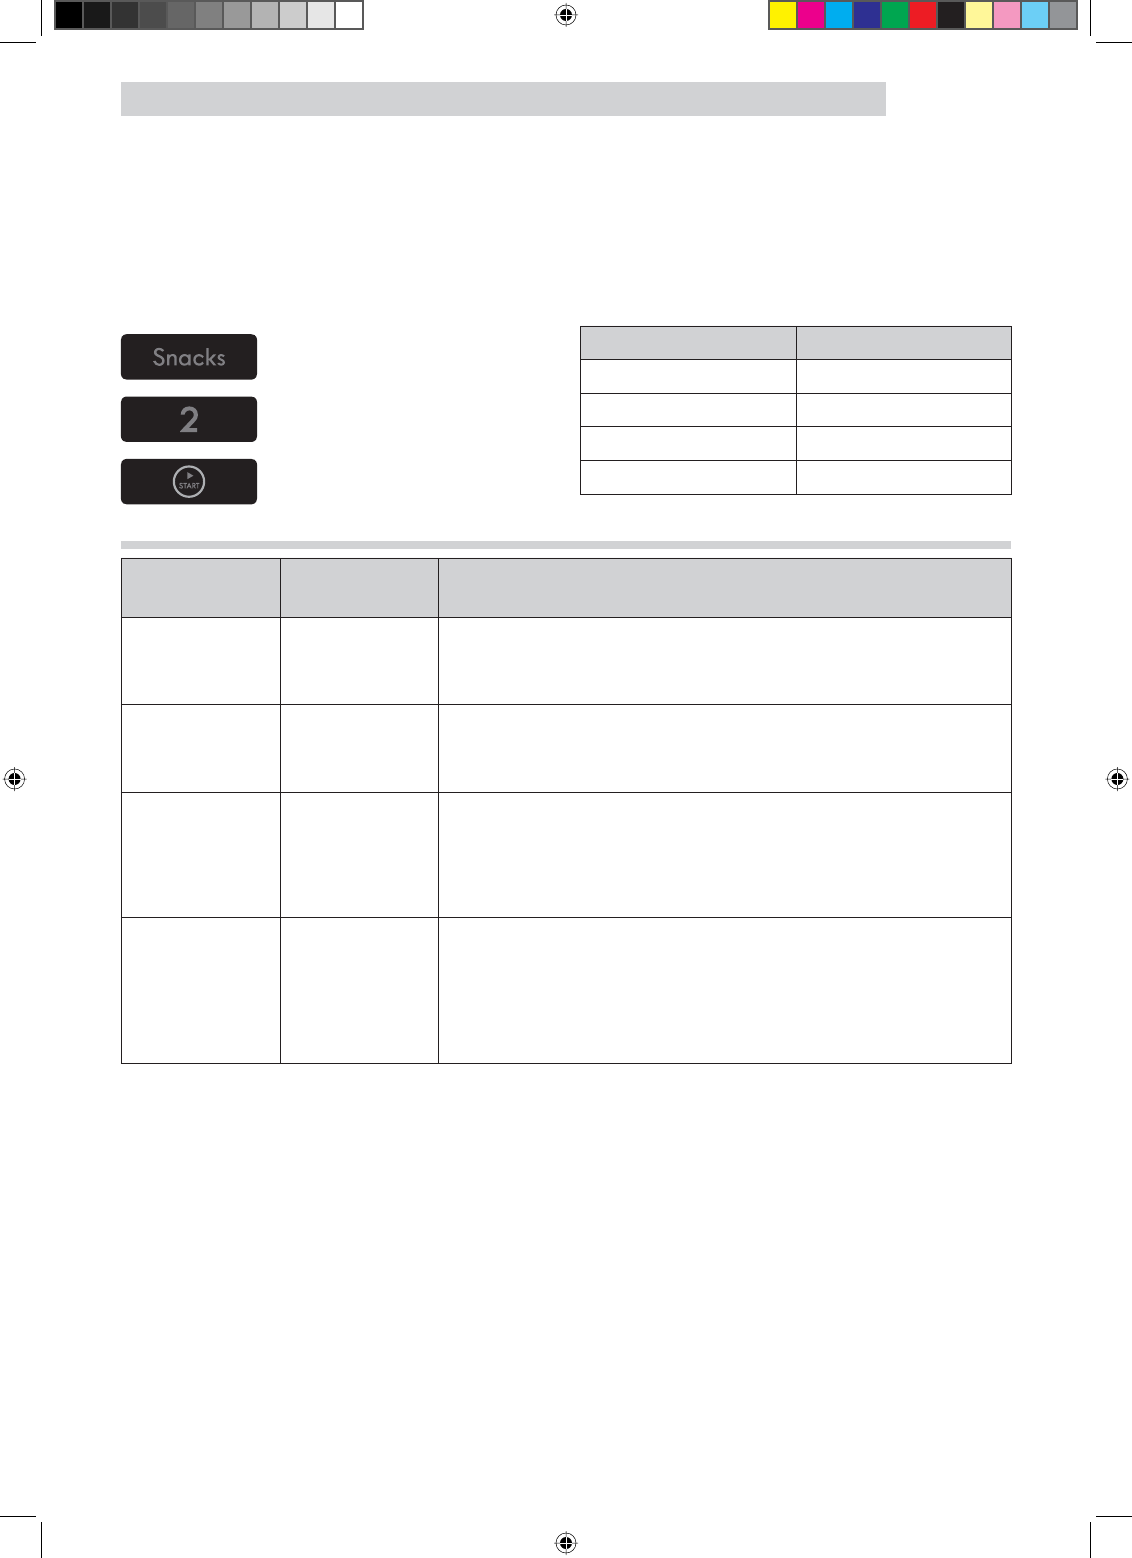
Snacks
SNACKS lets you heat 4 categories of food: Nachos, Chicken Wings, Potato Skins, and Cheese
Sticks.
Example: To heat chicken wings.
1. Touch SNACKS pad. Category Touch Pad Number
Cheese Sticks 1
Chicken Wings 2
Nachos 3
Potato Skins 4
2. Choose food
category(1-4).
3. Touch START pad.
Snacks table
ITEM AMOUNT OR
SERVINGS REMARKS
Cheese Sticks 5-6 pcs.
7-10 pcs.
Arrange the cheese sticks in the pattern of the spokes of a
wheel.
Do not cover.
Chicken Wings 5-6 oz.
7-8 oz.
Use pre-cooked, refrigerated chicken wings.
Place chicken wings around plate in spoke fashion and
cover with wax paper.
Nachos 1 serving
Place tortilla chips on plate without overlapping.
Sprinkle evenly with cheese.
Contents: - 2 cups tortilla chips.
- 1/3 cup grated cheese.
Potato Skins
1 cooked
potato
2 cooked
potatoes
Cut cooked potato into 4 even wedges. Scoop or cut out
SRWDWRÁHVKOHDYLQJDERXWµRIVNLQ
Place skins on the plate in the pattern of the spokes of a
wheel.
Sprinkle with bacon, onions and cheese. Do not cover.
8505_XAA_03805A-EN+MES.indb 24 2010-07-08 6:46:03
OPERATING INSTRUCTIONS
25
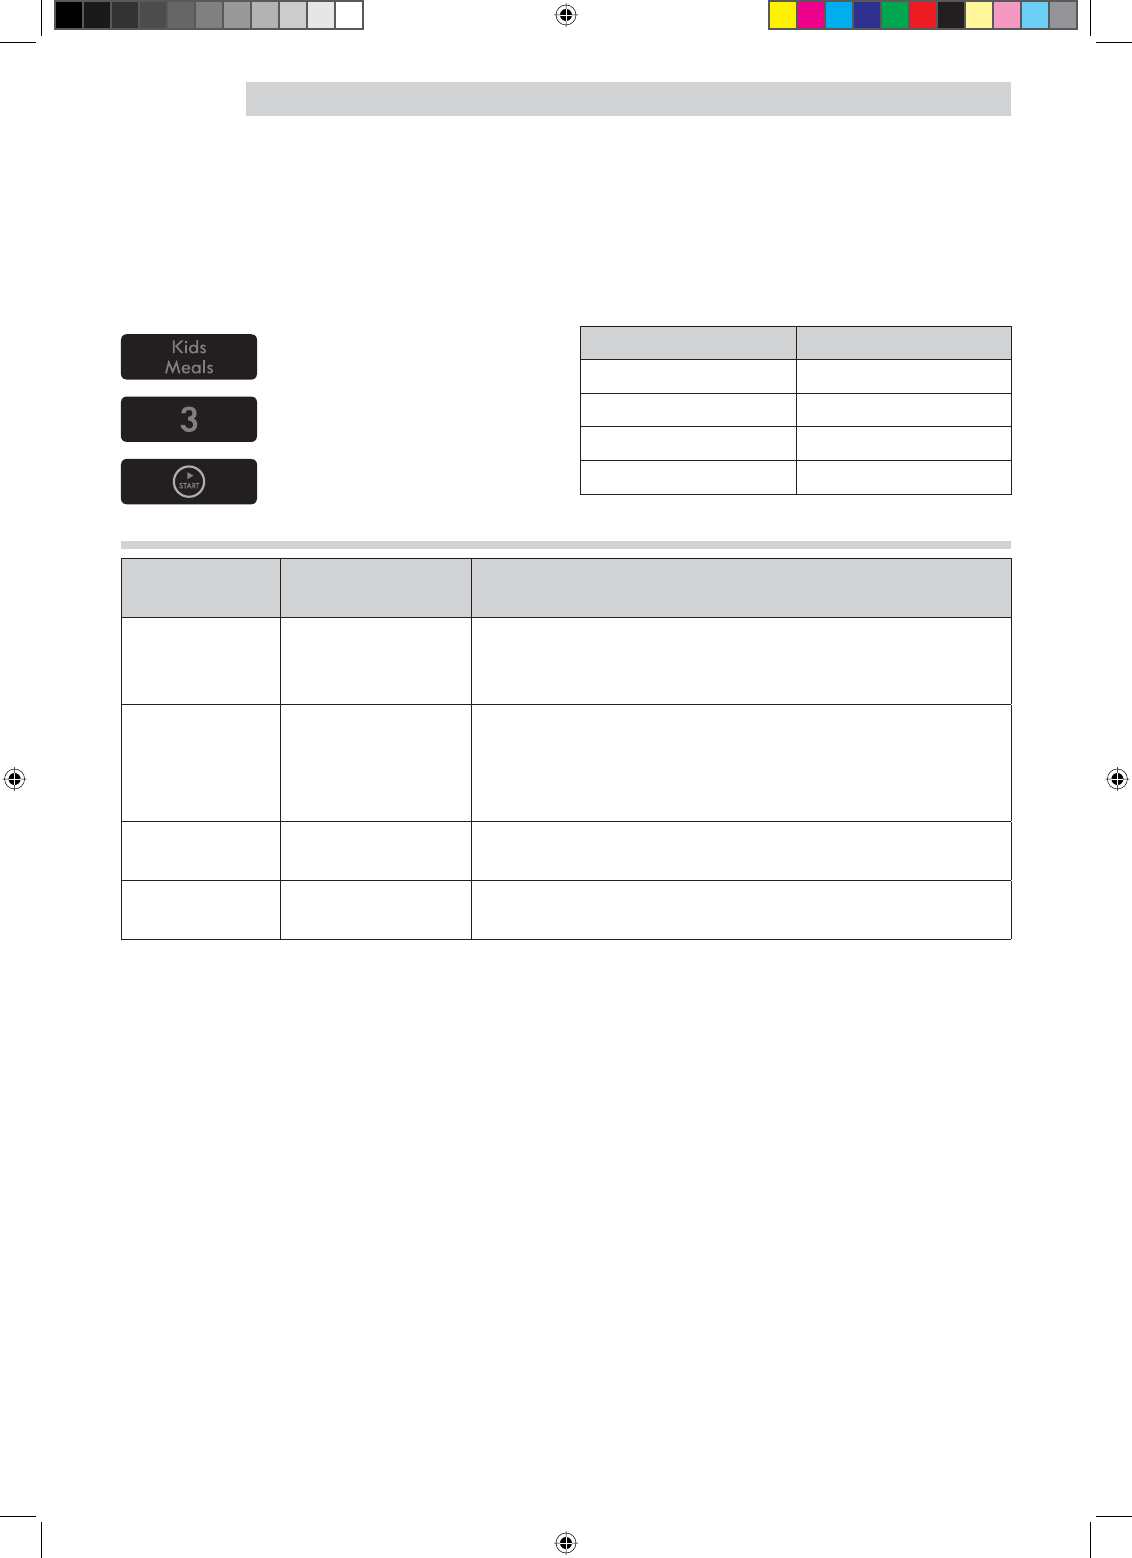
Kids Meals
KIDS MEALS lets you heat 4 categories of food: Chicken Nuggets, French Fries and Frozen
Sandwiches, Hot Dogs.
Example: To cook frozen sandwiches.
1. Touch KIDS MEALS pad. Category Touch Pad Number
Chicken Nuggets 1
French Fries 2
Frozen Sandwiches 3
Hot Dogs 4
2. Choose food
category(1-4).
3. Touch START pad.
Kids Meals table
ITEM AMOUNT OR
SERVINGS REMARKS
Chicken
Nuggets
1 serving (4-5 oz.)
2 servings (6-7 oz.)
Put a paper towel on top of plate and arrange nuggets
in spoke fashion on paper towel.
Do not cover. Let stand 1 minute.
French Fries
1 serving (4-5 oz.)
2 servings (6-7 oz.)
Place 2 paper towels on plate and arrange french fries
on towels, do not overlap.
Blot with additional paper towel after removal from
oven.
Frozen
Sandwiches
1 EA
2 EA
Place frozen sandwich in susceptor “sleeve” (which is in
package) and put on plate.
Hot Dogs 2 EA
4 EA
Prick hot dogs, place on plate. When the oven beeps,
add buns and re-start the oven.
8505_XAA_03805A-EN+MES.indb 25 2010-07-08 6:46:03

26
OPERATING INSTRUCTIONS
Soften/Melt
SOFTEN/MELT lets you soften or melt 4 categories of food: Melt Butter , Melt Chocolate, Soften
Butter, Soften Cream Cheese and.
Example: To melt chocolate.
1. Touch SOFTEN/MELT pad. Category Touch Pad Number
Melt Butter 1
Melt Chocolate 2
Soften Butter 3
Soften Cream Cheese 4
2. Choose food
category(1-4).
3. Touch START pad.
Soften/Melt table
ITEM AMOUNT OR
SERVINGS REMARKS
Melt Butter
1 stick (1/4 lb.) Remove wrapping and cut butter in half vertically.
Place butter in dish, cover with wax paper.
6WLUZHOODIWHUÀQLVKLQJDQGOHWVWDQGPLQXWHV
2 sticks (1/2 lb.)
Melt Chocolate 2 squares or 1
cup chips
Place chocolate chips or square in a microwave-safe dish.
Stir well at half time when the oven beeps, and re-start
the oven.
Unless stirred, the chocolate keeps its shape even when
heating time is over.
Soften Butter 1 stick (1/4 lb.) Remove wrapping and cut butter in half vertically.
Place butter in dish, cover with wax paper.
Soften Cream
Cheese 1 package (8 oz.) Unwrap cream cheese and place on microwave-safe dish.
Let stand 1-2 minutes.
8505_XAA_03805A-EN+MES.indb 26 2010-07-08 6:46:04
OPERATING INSTRUCTIONS
27
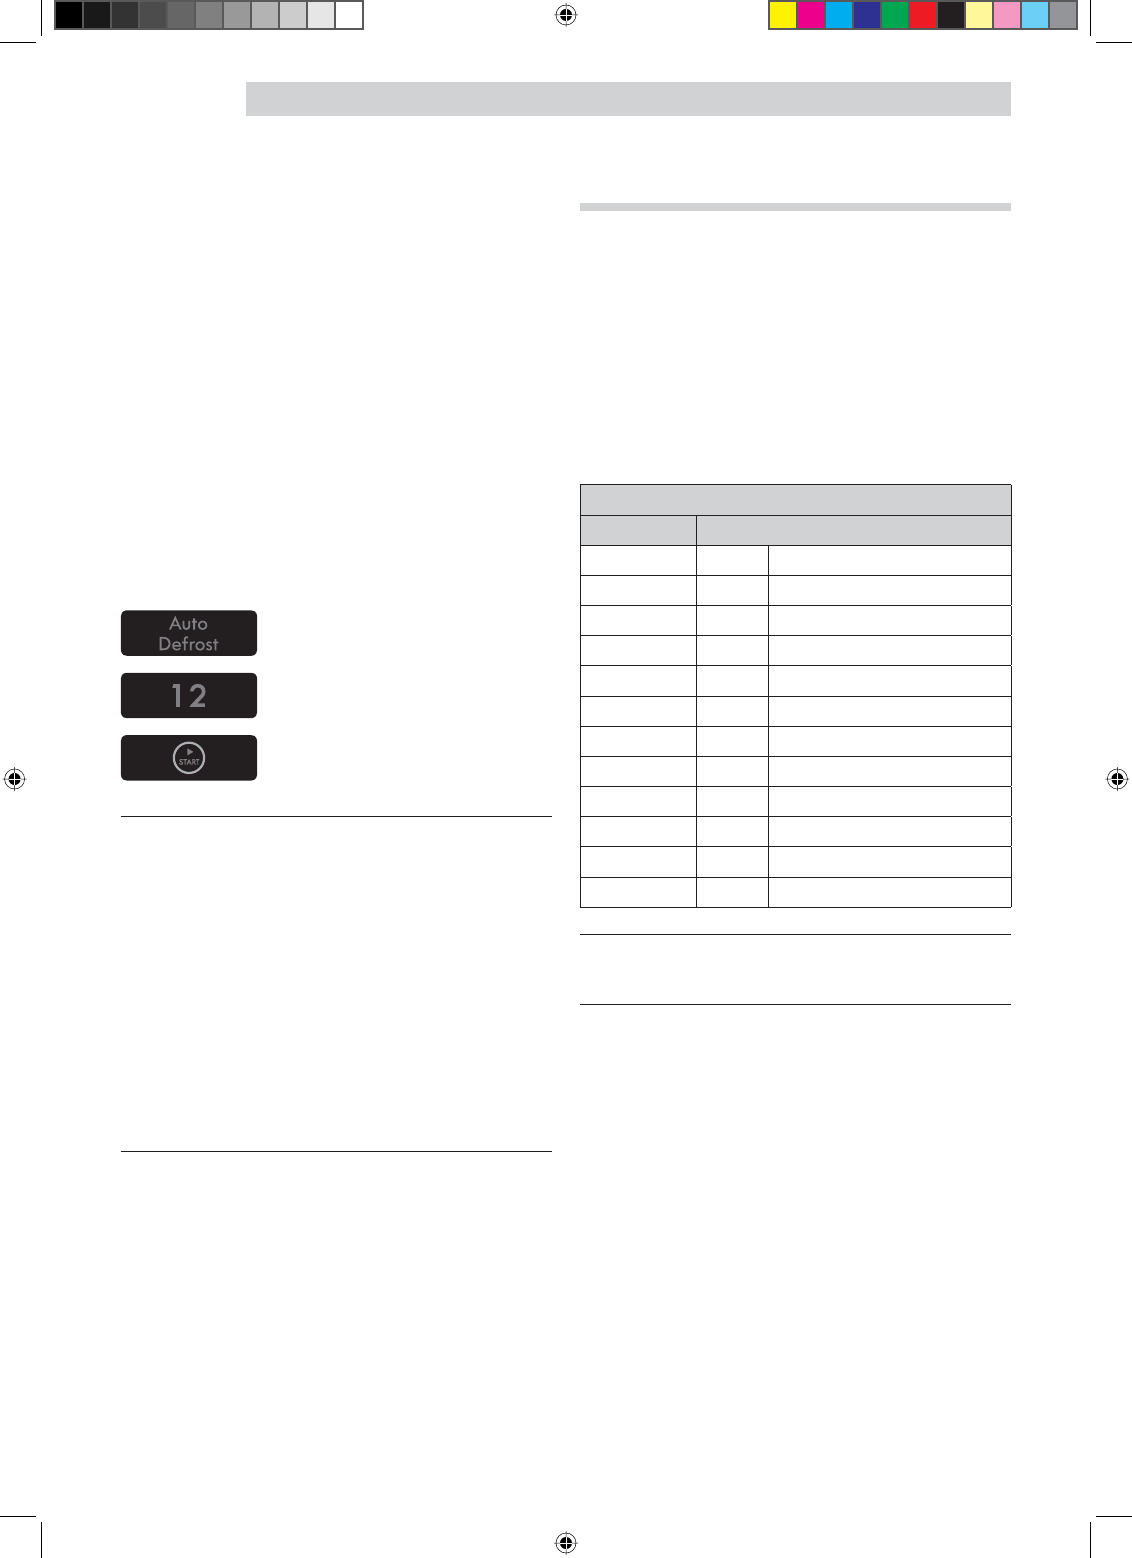
Auto Defrost
Defrost choices are preset in the oven. The
defrost feature provides you with the best
defrosting method for frozen foods, because
the oven automatically sets the defrosting times
according to the weight you enter.
For added convenience, the AUTO DEFROST
beeps to remind you to check or turn over the
food during the defrost cycle.
After touching the AUTO DEFROST pad once,
enter the food weight.
Available weight ranges are 0.1 to 6.0 lbs.
Example: To defrost 1.2 lbs of meat.
1. Touch AUTO DEFROST
pad.
2. Enter the weight.
3. Touch START pad.
NOTES:
After you touch START pad, the display
counts down the defrost time. The oven
will beep at two different times during the
defrost cycle. At each time, open the door
and turn the food as needed. Remove any
portions that have thawed, then return
frozen portions to the oven and touch START
pad to resume the defrost cycle.
When the oven beeps, the defrost cycle will
continue uninterrupted unless the oven door
is opened.
Weight conversion table
You are probably used to food weights as
being in pounds and ounces that are fractions
of a pound (for example, 4 ounces equals 1/4
pound). However, in order to enter food weight
in Auto Defrost, you must specify pounds and
tenths of a pound.
If the weight on the food package is in
fractions of a pound, you can use the following
table to convert the weight to decimals.
EQUIVALENT WEIGHT
OUNCES DECIMAL WEIGHT
1.6 .10
3.2 .20
4.0 .25 One-Quarter Pound
4.8 .30
6.4 .40
8.0 .50 One-Half Pound
9.6 .60
11.2 .70
12.0 .75 Three-Quarters Pound
12.8 .80
14.4 .90
16.0 1.00 One Pound
NOTES:
If between two decimal weights, choose the
lower weight for the best defrosting results.
8505_XAA_03805A-EN+MES.indb 27 2010-07-08 6:46:04

28
OPERATING INSTRUCTIONS
Defrosting guide
Follow the instructions below when defrosting different types of food.
FOOD STANDARD
AMOUNT PROCEDURE
Roast Beef, Pork 2.5-6.0 lbs.
Start with the food placed fat side down. After each stage,
turn the food over and shield any warm portions with narrow
strips of aluminum foil. Let stand, covered, for 15 to 30
minutes.
Steaks, Chops,
Fish 0.5-3.0 lbs.
After each stage, rearrange the food. If there are any warm
RUWKDZHGSRUWLRQVRIIRRGVKLHOGWKHPZLWKQDUURZÁDW
pieces of aluminum foil. Remove any pieces of food that are
nearly defrosted. Let stand, covered, for 5-10 minutes.
Ground Meat 0.5-3.0 lbs. After each stage, remove any pieces of food that are nearly
defrosted. Let stand, covered with foil, for 5-10 minutes.
Whole Chicken 2.5-6.0 lbs.
Remove giblets before freezing poultry. Start defrosting with
WKHEUHDVWVLGHGRZQ$IWHUWKHÀUVWVWDJHWXUQWKHFKLFNHQ
over and shield any warm portions with narrow strips of
aluminum foil. After the second stage, again shield any warm
portions with narrow strips of aluminum foil. Let stand, covered
for 30-60 minutes in the refrigerator.
Chicken Pieces 0.5-3.0 lbs. After each stage, rearrange or remove any pieces of food
that are nearly defrosted. Let stand for 10-20 minutes.
Defrost tips
When using AUTO DEFROST, the weight to be entered is the net weight in pounds and tenths of pounds (the weight of the food minus the container).
Use AUTO DEFROST only for raw food. AUTO DEFROST gives best results when food to be thawed is a minimum of 0°F (taken directly from a true freezer). If food has been stored in a
refrigerator-freezer that does not maintain a temperature of 5°F or below, always program a
lower food weight (for a shorter defrosting time) to prevent cooking the food.
If the food is stored outside the freezer for up to 20 minutes, enter a lower food weight.
The shape of the package alters the defrosting time. Shallow rectangular packets defrost more quickly than a deep block.
Separate pieces as they begin to defrost. Separated pieces defrost more easily.
Shield areas of food with small pieces of foil if they start to become warm.
<RXFDQXVHVPDOOSLHFHVRIDOXPLQXPIRLOWRVKLHOGIRRGVOLNHFKLFNHQZLQJVOHJWLSVDQGÀVK tails, but the foil must not touch the side of the oven. Foil causes arcing, which can damage the
oven lining.
1 Lb Defrost
The 1 LB DEFROST feature provides a rapid defrost for 1.0 pound frozen food. The oven
automatically sets the defrosting time. Place directly on turntable tray or wax paper. Do not use
extra tray.
Example: To defrost 1lb. ground beef.
1. Touch 1 LB DEFROST pad.
2. Touch START pad.
8505_XAA_03805A-EN+MES.indb 28 2010-07-08 6:46:05
OPERATING INSTRUCTIONS
29
Cooking guide
Guide for cooking meat in your microwave
Place meat on a microwave-safe roasting rack in a microwave-safe dish.
Start meat fat-side down. Use narrow strips of aluminum foil to shield any bone tips or thin
meat areas.
Check the temperature in several places before letting the meat stand the recommended time.
Food Cook time Power level Directions
Roast Beef
Boneless
(Up to 4 ls.)
9-13 min./lb. for 145° F
(Rare) +LJKIRUÀUVW
5 minutes, then
medium (5)
Place roast fat-side down on
roasting rack. Cover with wax
paper. Turn over half way through
cooking. Let stand 10 -15 minutes.
10-15 min./lb. for 160° F
(Medium)
12-17 min./lb. for 170° F
(Well Done)
Pork Boneless
or bone-in
(Up to 4 lbs.)
13-17 min./lb. for 170° F
(Well Done)
+LJKIRUÀUVW
5 minutes, then
medium (5)
Place roast fat-side down on
roasting rack. Cover with wax
paper. Turn over half way through
cooking. Let stand 10 -15 minutes.
The following temperatures are removal temperatures. The temperature of the food will rise
during the standing time.
Expect a 10°F rise in temperature during the standing time.
Food Remove from oven After standing (10 -15 min.)
Beef
Rare 135 °F 145 °F
Medium 150 °F 160 °F
Well Done 160 °F 170 °F
Pork Medium 150 °F 160 °F
Well Done 160 °F 170 °F
Poultry Dark meat 170 °F 180 °F
Light meat 160 °F 170 °F
8505_XAA_03805A-EN+MES.indb 29 2010-07-08 6:46:05

30
OPERATING INSTRUCTIONS
Guide for cooking poultry in your microwave
Place poultry on a microwave-safe roasting rack in a microwave-safe dish.
Cover poultry with wax paper to prevent spattering.
Use aluminum foil to shield bone tips, thin meat areas, or areas that start to overcook.
Check the temperature in several places before letting the poultry stand the recommended
time.
Food Cook Time/Power Level Directions
Whole Chicken
Up to 4 lbs.
Cooking Time: 9-13 min. / lb.
180°F dark meat
170°F light meat
Power Level: Medium High(7).
Place chicken breast-side down on roasting
rack. Cover with wax paper. Turn over half
way through cooking. Cook until juices run clear
and meat near the bone is no longer pink. Let
stand 5-10 minutes.
Chicken Pieces
Up to 2 lbs.
Cooking Time: 8-11 min. / lb.
180°F dark meat
170°F light meat
Power Level: Medium High(7).
Place chicken bone-side down on dish, with the
thickest portions toward the outside of the dish.
Cover with wax paper. Turn over half way
through cooking. Cook until juices run clear and
meat near the bone is no longer pink. Let stand
5-10 minutes.
Guide for cooking seafood in your microwave
&RRNÀVKXQWLOLWÁDNHVHDVLO\ZLWKDIRUN
3ODFHÀVKRQDPLFURZDYHVDIHURDVWLQJUDFNLQDPLFURZDYHVDIHGLVK
8VHDWLJKWFRYHUWRVWHDPÀVK$OLJKWHUFRYHURIZD[SDSHURUSDSHUWRZHOSURYLGHVOHVV
steaming.
'RQRWRYHUFRRNÀVKFKHFNLWDWPLQLPXPFRRNLQJWLPH
Food Cook Time/Power Level Directions
Steaks
Up to 1.5 lbs.
Cooking Time: 6-10 min. / lb.
Power Level: Medium-High (7).
Arrange steaks on roasting rack with meaty
portions towards the outside of rack. Cover
with wax paper. Turn over and rearrange
when cooking time is half up. Cook until
ÀVKÁDNHVHDVLO\ZLWKDIRUN/HWVWDQG
minutes.
Fillets
Up to 1.5 lbs.
Cooking Time: 4-8 min. / lb
Power Level:Medium-High (7).
$UUDQJHÀOOHWVLQDEDNLQJGLVKWXUQLQJDQ\
thin pieces under. Cover with wax paper. If
over ½ inch thick, turn over and rearrange
when cooking time is half up. Cook until
ÀVKÁDNHVHDVLO\ZLWKDIRUN/HWVWDQG
minutes.
Shrimp
Up to 1.5 lbs.
Cooking Time: 4-6 min. / lb.
Power Level: Medium-High (7).
Arrange shrimp in a baking dish without
overlapping or layering. Cover with wax
SDSHU&RRNXQWLOÀUPDQGRSDTXHVWLUULQJ
or 3 times. Let stand 5 minutes.
8505_XAA_03805A-EN+MES.indb 30 2010-07-08 6:46:05

OPERATING INSTRUCTIONS
31
Guide for cooking eggs in your microwave
Never cook eggs in the shell, and never warm hard-cooked eggs in the shell; they can
explode.
Always pierce whole eggs to keep them from bursting.
Cook eggs just until set; they become tough if overcooked.
Guide for cooking vegetables in your microwave
Vegetables should be washed just before cooking. Often, no extra water is needed. If dense
vegetables such as potatoes, carrots and green beans are being cooked, add about ¼ cup
water.
Small vegetables (sliced carrots, peas, lima beans, etc.) will cook faster than larger ones.
Whole vegetables, such as potatoes, acorn squash or corn on the cob, should be arranged in a
circle on the turntable before cooking. They will cook more evenly if turned over after half the
cooking time has passed.
Always place vegetables like asparagus and broccoli with the stem ends pointing towards the
edge of the dish and the tips toward the center.
When cooking cut vegetables, always cover the dish with a lid or vented microwavable plastic
wrap.
Whole, unpeeled vegetables such as potatoes, squash, eggplant, etc., should have their skin
pricked in several spots before cooking to prevent them from bursting.
For more even cooking, stir or rearrange whole vegetables halfway through the cooking time.
Generally, the denser the food, the longer the standing time. (Standing time refers to the time
QHFHVVDU\IRUGHQVHODUJHIRRGVDQGYHJHWDEOHVWRÀQLVKFRRNLQJRQFHWKHWLPHGFRRNLQJ
SHULRGHQGV$EDNHGSRWDWRVKRXOGVWDQGIRUÀYHPLQXWHVZKLOHDGLVKRISHDVFDQEH
served immediately.
8505_XAA_03805A-EN+MES.indb 31 2010-07-08 6:46:05

32
Cooking utensils
Microwave utensil guide
USE DO NOT USE
OVEN PROOF GLASS (treated for
high intensity heat):
Utility dishes, loaf dishes, pie
plates, cake plates, liquid
measuring cups, casseroles and
bowls without metallic trim.
CHINA:
Bowls, cups, serving plates and
platters without metallic trim.
PLASTIC:
Plastic wrap (as a cover)-- lay the
plastic wrap loosely over the dish
and press it to the sides.
Vent plastic wrap by turning back
one edge slightly to allow excess
steam to escape. The dish should
be deep enough so that the plastic
wrap will not touch the food. As
the food heats it may melt the
plastic wrap wherever the wrap
touches the food.
Use plastic dishes, cups, semirigid
freezer containers and plastic
bags only for short cooking times.
Use these with care because the
plastic may soften from the heat of
the food.
PAPER:
Paper towels, waxed paper, paper
napkins, and paper plates with no
metallic trim or design. Look for
the manufacturer’s label for use in
the microwave oven.
METAL UTENSILS:
Metal shields the food from microwave energy and
produces uneven cooking. Also avoid metal skewers,
thermometers or foil trays. Metal utensils can cause
arcing, which is a discharge of electrical energy that can
damage your microwave oven.
METAL DECORATION:
Metal-trimmed or metal-banded dinnerware, casserole
dishes, etc. The metal trim interferes with normal cooking
and may damage the oven.
ALUMINUM FOIL:
Avoid large sheets of aluminum foil because they hinder
cooking and may cause arcing, which is a discharge of
electrical energy that can damage your microwave oven.
Use small pieces of foil to shield poultry legs and wings.
Keep ALL aluminum foil at least 1 inch from the side walls
and door of the oven.
WOOD:
Wooden bowls and boards will dry out and may split or
crack when you use them in the microwave oven. Baskets
react in the same way.
TIGHTLY COVERED UTENSILS:
Be sure to leave openings for steam to escape from
covered utensils.
Pierce plastic pouches of vegetables or other food items
before cooking.
Tightly closed pouches could explode.
BROWN PAPER:
Avoid using brown paper bags.
They absorb too much heat and could burn.
FLAWED OR CHIPPED UTENSILS:
$Q\XWHQVLOWKDWLVFUDFNHGÁDZHGRUFKLSSHGPD\EUHDN
in the oven.
METAL TWIST TIES:
Remove metal twist ties from plastic or paper bags.
7KH\EHFRPHKRWDQGFRXOGFDXVHDÀUH
8505_XAA_03805A-EN+MES.indb 32 2010-07-08 6:46:06
33
Care and Cleaning
Care and Cleaning
For best performance and safety, keep the
oven clean inside and outside. Take special
care to keep the inner door panel and the oven
front frame free of food or grease build-up.
Never use rough powder or pads. Wipe the
microwave oven inside and out, including the
hood bottom cover, with a soft cloth and a
warm (not hot) mild detergent solution. Then
rinse and wipe dry. Use a chrome cleaner and
polish on chrome, metal and aluminum surfaces.
Wipe spatters immediately with a wet paper
towel, especially after cooking chicken or
bacon. Clean your oven weekly or more often,
if needed.
Follow these instructions to clean and care for
your oven.
Keep the inside of the oven clean. Food particles and spilled liquids can stick to the
oven walls, causing the oven to work less
HIÀFLHQWO\
Wipe up spills immediately. Use a damp cloth and mild soap. Do not use harsh
detergents or abrasives.
To help loosen baked on food particles or liquids, heat two cups of water (add the
juice of one lemon if you desire to keep the
oven fresh) in a four-cup measuring glass at
+LJKSRZHUIRUÀYHPLQXWHVRUXQWLOERLOLQJ
Let stand in the oven for one or two minutes.
Remove the glass tray from the oven when cleaning the oven or tray. To prevent the
tray from breaking, handle it carefully and
do not put it in water immediately after
cooking. Wash the tray carefully in warm
sudsy water or in the dishwasher.
Clean the outside surface of the oven with soap and a damp cloth. Dry with a soft
cloth. To prevent damage to the operating
parts of the oven, don’t let water seep into
the openings.
Wash the door window with very mild soap and water. Be sure to use a soft cloth to
avoid scratching.
If steam accumulates inside or outside the oven door, wipe with a soft cloth. Steam
can accumulate when operating the oven
in high humidity and in no way indicates
microwave leakage.
Never operate the oven without food in it; this can damage the magnetron tube or
glass tray. You may wish to leave a cup of
water in the oven when it is not in use to
prevent damage if the oven is accidentally
turned on.
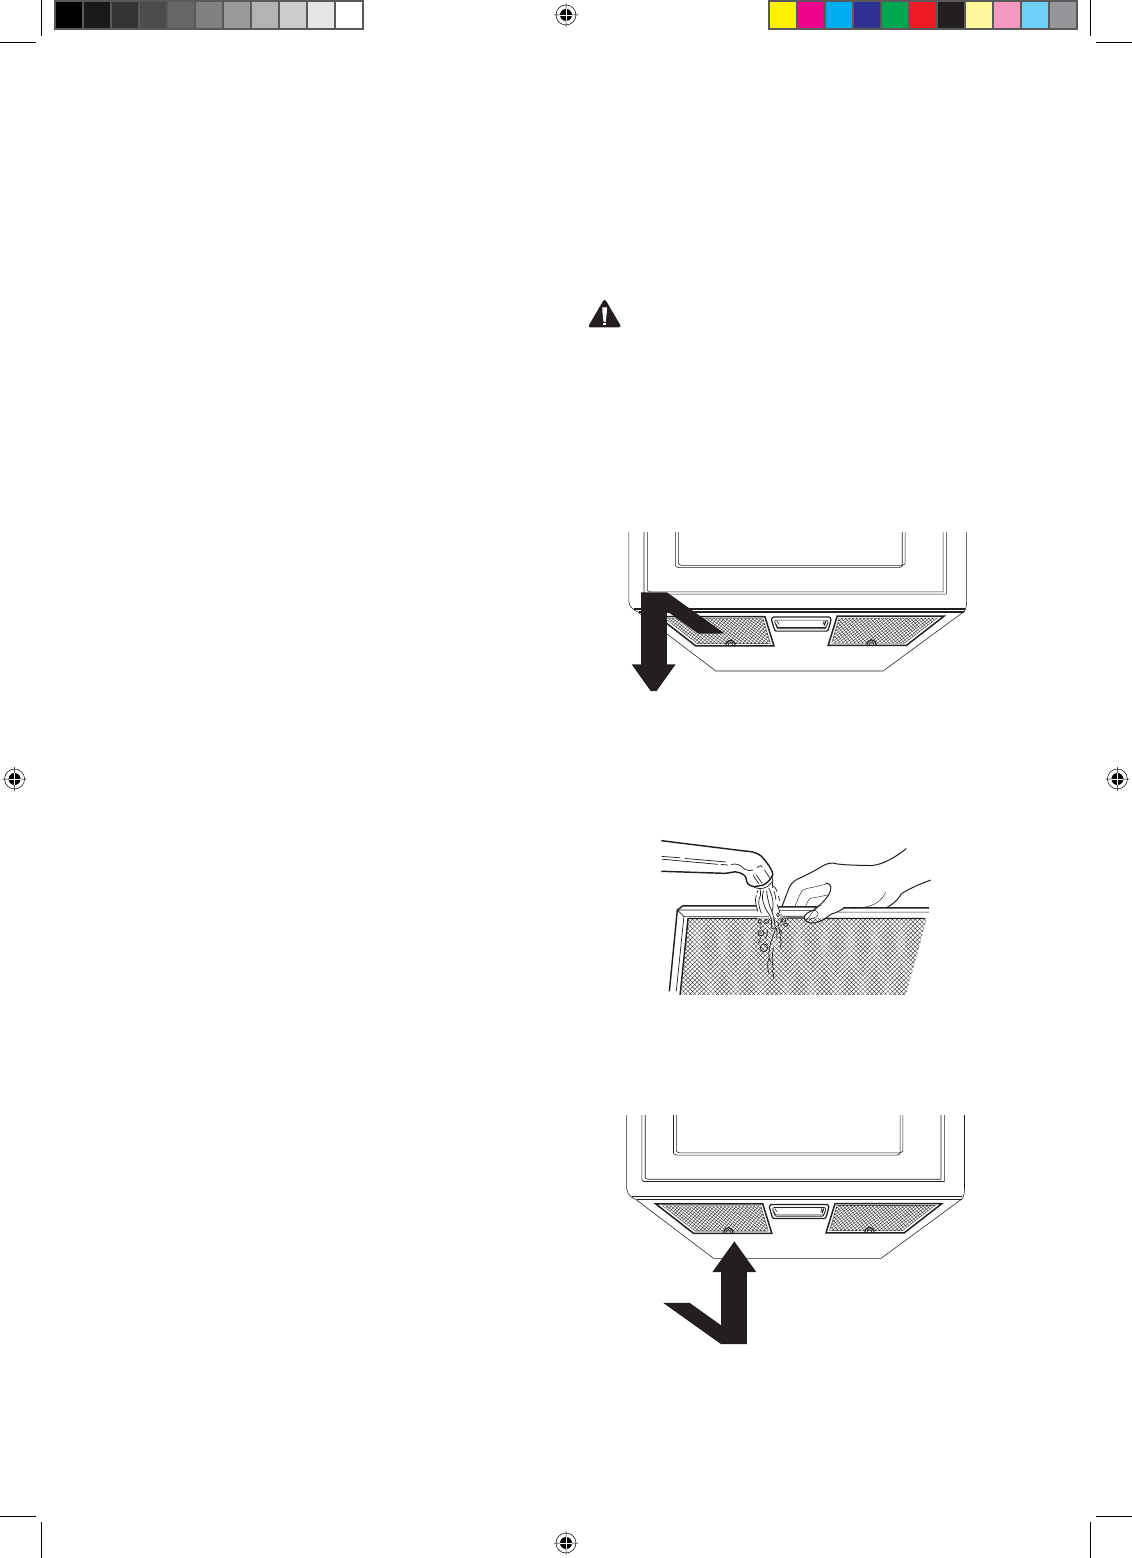
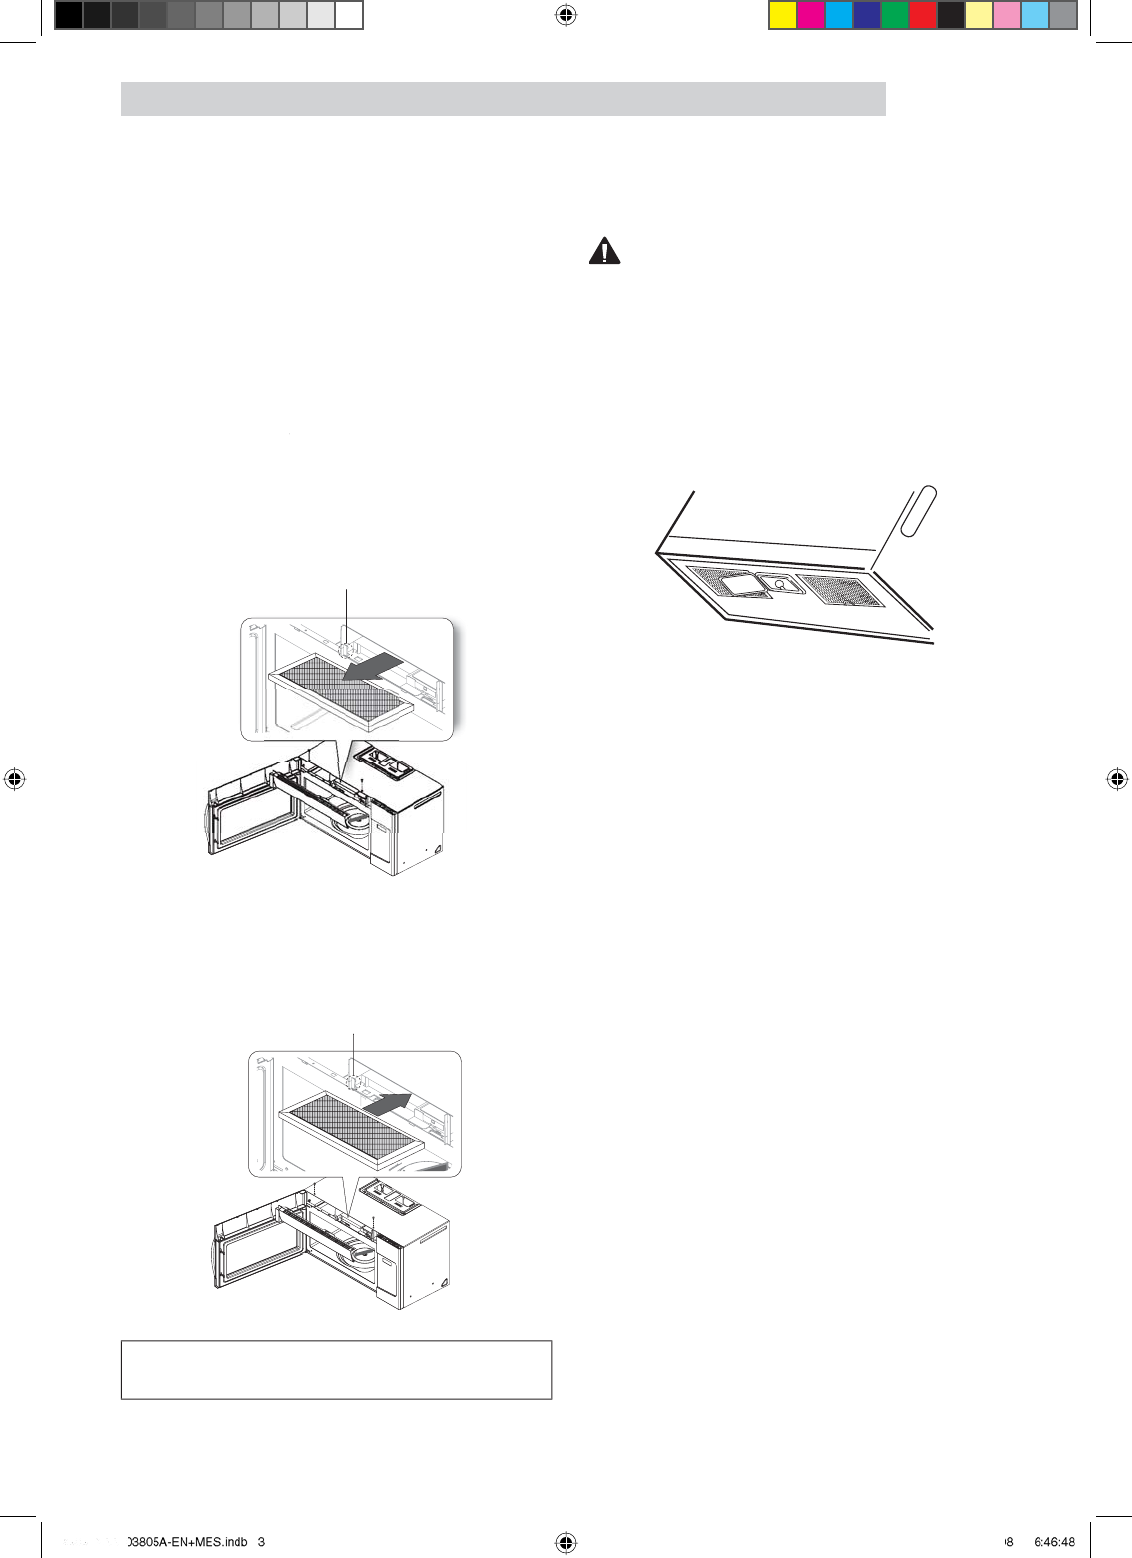
&OHDQLQJWKHJUHDVHÀOWHU
7KHJUHDVHÀOWHUVKRXOGEHUHPRYHGDQG
cleaned often, at least once a month.
CAUTION
To avoid risk of personal injury or property
damage, do not operate oven hood without
ÀOWHUVLQSODFH
7RUHPRYHJUHDVHÀOWHUVOLGHÀOWHUWRWKH
VLGH3XOOÀOWHUGRZQZDUGDQGSXVKWRWKH
RWKHUVLGH7KHÀOWHUZLOOGURSRXW
6RDNJUHDVHÀOWHULQKRWZDWHUDQGDPLOG
detergent. Rinse well and shake to dry. Do
not use ammonia or place in a dishwasher.
The aluminum will darken.
7RUHLQVWDOOWKHÀOWHUVOLGHLWLQWRWKHVLGH
slot, then push up and toward oven center
to lock.
8505_XAA_03805A-EN+MES.indb 33 2010-07-08 6:46:06
34
CARE AND CLEANING
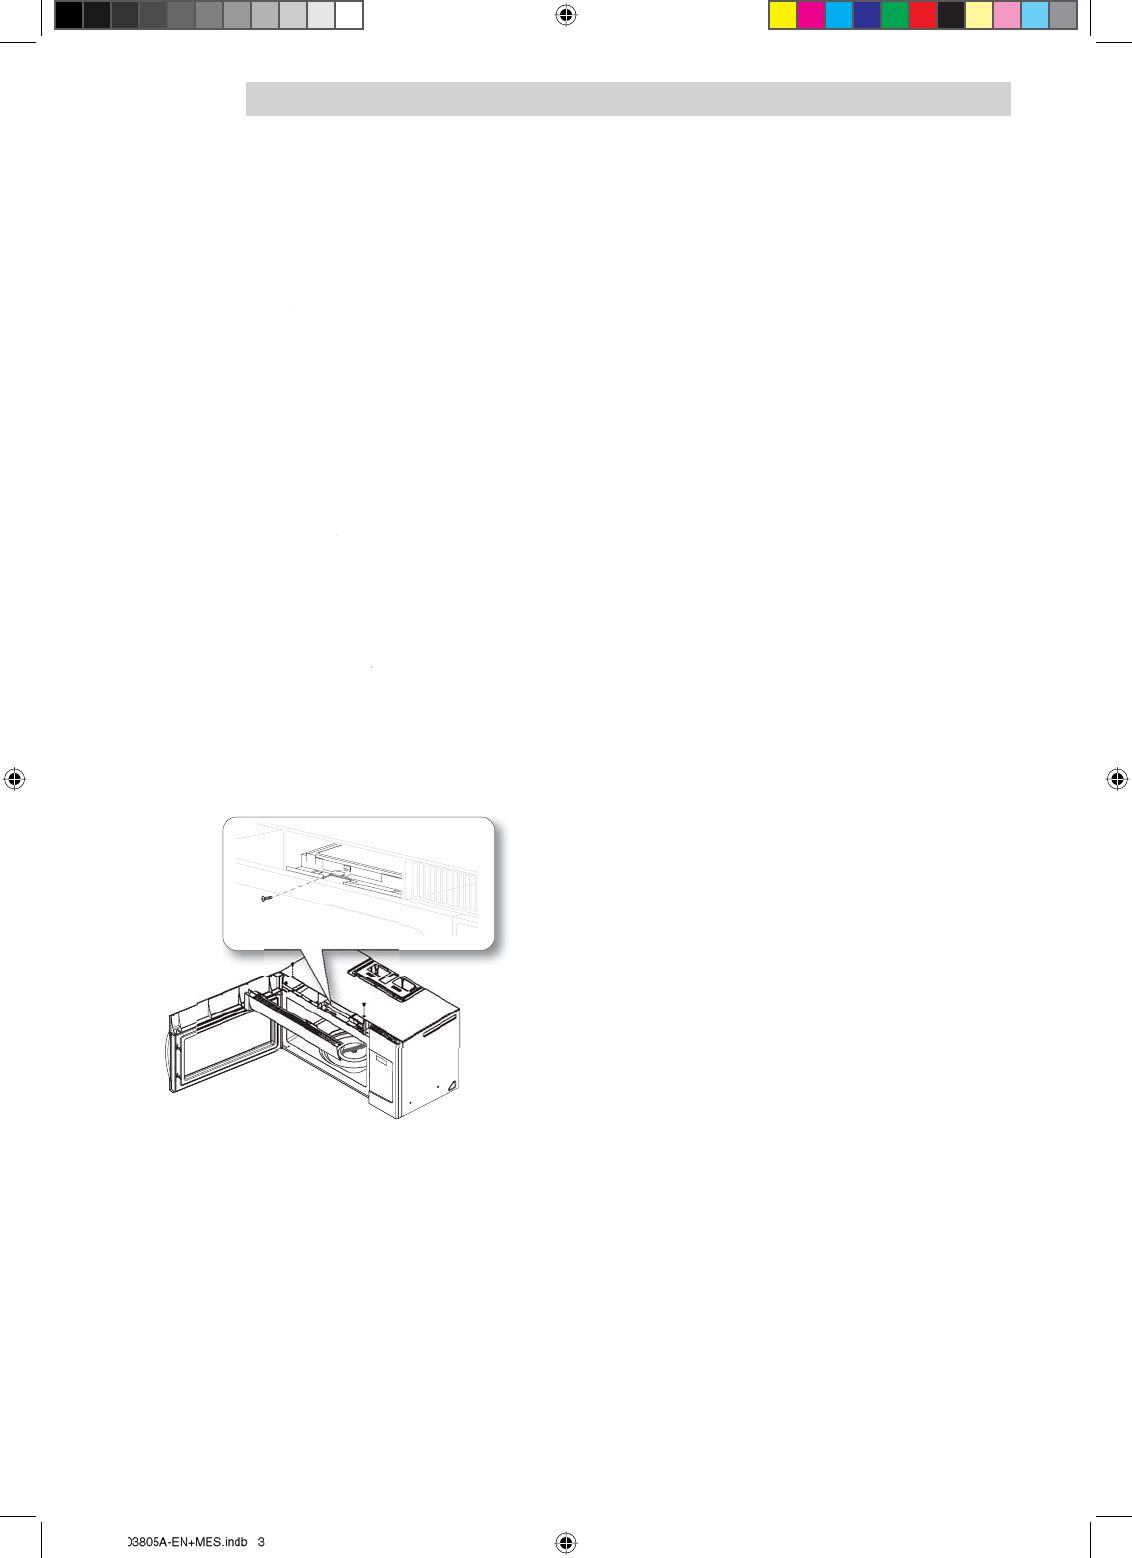
Charcoal F
i
lter re
p
lacement
If
y
our oven is vented to the inside, the charcoal
ÀOWHUVKRXOGEHUH
S
ODFHGHYHU
\
WRPRQWKV
a
nd more often if necessar
y
.
The charcoal
À
OWHUFDQQRWEHFOHDQHG7KHFKDUFRDO
À
OWHULV
a
vailable
f
rom Sears b
y
callin
g
1-800-4-
M
Y-HO
M
E
®
o
r
f
r
o
m sear
s
.
com
.
1
.
Un
p
lu
g
the oven
p
lu
g
or turn off the
p
ower
a
t the main power supply
.
2
.
Open the door
.
r
r
3
.
Remove t
h
e vent
g
ri
ll
e mountin
g
screws
(
4 middle screws
)
.
4
.
Slide the vent
g
rille to the le
f
t, then
p
ull it
straight out
.
3XVKWKHKRRNDQGUHPRYHWKHROG
À
OWHU
6OLGHDQHZFKDUFRDOÀOWHULQWR
S
ODFH7KH
À
OWHUVKRXOGUHVWDWWKHDQ
J
OHVKRZQ
7
.
Replace the vent grille and
4
screws and
close the door
.
r
r
Turn t
h
e power
b
ac
k
on an
d
set t
h
e c
lo
c
k
.
CHARCOAL FILTER PART NO
.
Part N
o
.
:
DE63-0036
7
D
Cookto
p/
Night Light re
p
lacemen
t
C
AUTION
T
o avoid
p
ersonal in
j
ur
y
or
p
ro
p
ert
y
d
amage, wear gloves when re
p
lac
i
ng l
i
ght
bu
l
b
.
1
.
U
nplug the oven or turn off power at the
main power supply
.
2
.
Remove the bulb cover mounting screw
s
.
3
.
Re
p
lace bulb with
20
watt Halo
g
en bulbs
w
it
h
gl
oves or a tissu
e
.
The
o
ils
f
r
o
m
\
RXUÀQ
J
HUFDQPDNHWKHEXOEEXUQRXW
p
remature
ly
.
4
.
Re
pl
ace
b
u
lb
cover, an
d
mountin
g
screws
.
5
.
T
urn t
h
e power
b
ac
k
on at t
h
e main power
supp
l
y
.
T
he angl
e
The angle
8
5
0
5
_
XA
XAA
AA
_
0
4
4
2010-07-0
2
0
1
0
-
0
7-0
7
-
0
CARE AND CLEANING
35
Oven L
i
ght re
p
lacemen
t
1
.
Unplug the oven or also turn o
ff
the power
a
t t
h
e main power supp
l
y
.
2
.
Open the door
.
r
r
3
.
Remove t
h
e vent cover mounting screws
(
2 middle screws
)
.
4
.
Slide the vent grille to the left, then pull it
straight out
.
5HPRYHWKHFKDUFRDOÀOWHULISUHVHQW
6
.
Remove the cover by pushing the hook and
pushing up the lever
.
r
r
7
.
Remove the bulb by turning it gentl
y
.
8
.
Replace the bulb with a 40 watt
incandescent lamp
.
9
.
Replace the bulb holder
.
r
r
1
0
.
Replace the vent grille and the
4
screw
s
.
11
.
Plug the oven back in and turn the power
back on at the main power supply if it was
o
ff
.
8505_XAA_03805A-EN+MES.indb 35
8
5
0
5
_
XA
XAA
AA
_
0
5
5
2010-07-08 6:47:08
2
0
1
0
-
0
7
-
0
8 6:4
8
6
:
4
7:0
7
:
0
8
8

36
Troubleshooting
Troubleshooting guide
Before you call a repair person for your oven, check this list of possible problems and solutions.
Neither the oven’s display nor the oven operate.
Properly insert the plug into a grounded outlet.
If the outlet is controlled by a wall switch, make sure the wall switch is turned on.
Remove the plug from the outlet, wait ten seconds, then plug it in again.
Reset the circuit breaker or replace any blown fuse.
3OXJDQRWKHUDSSOLDQFHLQWRWKHRXWOHWLIWKHRWKHUDSSOLDQFHGRHVQ·WZRUNKDYHDTXDOLÀHG electrician repair the outlet.
Plug the oven into a different outlet.
The oven’s display works, but the power won’t come on.
Make sure the door is closed securely.
Check to see if packing material or other material is stuck to the door seal.
Check for door damage.
Press STOP/CLEAR pad twice and re-enter all cooking instructions.
The power goes off before the set time has elapsed.
If there has not been a power outage, remove the plug from the outlet, wait ten seconds, then plug it in again. If there was a power outage, the time indicator will display: PLEASE TOUCH
CLOCK AND SET TIME OF DAY. Reset the clock and any cooking instructions.
Reset the circuit breaker or replace any blown fuse.
The food is cooking too slowly.
Make sure the oven is on its own 20 amp circuit line. Operating another appliance on the same circuit can cause a voltage drop. If necessary, move the oven to its own circuit.
You see sparks or arcing.
Remove any metallic utensils, cookware, or metal ties. If using foil, use only narrow strips and allow at least one inch between the foil and interior oven walls.
The turntable makes noises or sticks.
&OHDQWKHWXUQWDEOHUROOHUULQJDQGRYHQÁRRU
Make sure the turntable and roller ring are positioned correctly.
Using your microwave causes TV or radio interference.
This is similar to the interference caused by other small appliances, such as hair dryers. Move your microwave further away from other appliances, like your TV or radio.
Normal noise during operation.
Buzzing can be caused by the magnetron.
Dull thumping sound while oven is operating.
Slight vibration is considered normal during operation.
NOTE:
If the oven is set to cook for more than 20 minutes, it will automatically adjust itself to 70 percent
power after 20 minutes to avoid overcooking.
If none of these items are causing your problem,
call Sears service at 1-800-4-MY-HOME®
8505_XAA_03805A-EN+MES.indb 36 2010-07-08 6:47:09

37
Índice
Garantía de Combinación Microondas
Campana ......................... 38
Servicio técnico de Sears ............. 39
Contratos maestros de protección .......39
INSTRUCCIONES DE SEGURIDAD
IMPORTANTES ..................... 41
PRECAUCIONES PARA EVITAR LA POSIBLE
EXPOSICIÓN A ENERGÍA DE MICROONDAS
EXCESIVA......................... 42
Obtener los mejores resultados de cocción45
Prueba de la vajilla o los utensilios......45
Características ..................... 46
(VSHFLÀFDFLRQHVGHOKRUQR .............46
Características......................48
Manual de instrucciones ............. 49
Conozca su horno de microondas .......49
Reloj (Clock)........................49
Temporizador de cocina ..............49
Opciones ..........................49
Turntable on/off (plato giratorio activado/
desactivado) .......................50
Ventilador .........................50
Retardo apagado ...................50
Control lock (Bloquear controles)........50
Agregar 30 seg ....................51
Light Set Timer (Temporizador de
FRQÀJXUDFLyQGHODOX] ...............51
Light Hi/Nite/Off (Luz alta/noche/
apagada) .........................51
Cocción con altos niveles de potencia. . . .52
Cocción con bajos niveles de potencia . . .52
Cocción multietapas..................52
Guía de cocción de los niveles
de potencia ........................53
Guía de cocción con sensor ............54
Popcorn (Palomitas) ..................55
Pizza .............................55
Veggies (Verduras) ..................55
Cocción con sensor...................56
Potato (Papas) ......................56
Sensor reheat
(recalentamiento con sensor) ...........56
Tiempo de cocción (Time Cook).........58
Favorite (Favoritos) ..................58
Warm & hold
(Calentar y mantener caliente) .........58
Botanas ...........................59
Comidas para niños..................60
Ablandar/derretir...................61
Auto Descongelado (Auto Defrost) ......62
1 Lb defrost (Descongelamiento 1 Lb)....63
Guía de cocción.....................64
Utensilios para cocinar .............. 67
Guía de utensilios para microondas .....67
Cuidado y limpieza ................. 68
Cuidado y limpieza..................68
/LPSLH]DGHORVÀOWURVGHJUDVD ........68
5HHPSOD]RGHOÀOWURGHFDUEyQ ........69
Reemplazo de la luz de la cubierta/luz
nocturna...........................69
Reemplazo de la luz del horno .........70
Guía de solución de problemas ........ 71
Guía de solución de problemas ........71
8505_XAA_03805A-EN+MES.indb 37 2010-07-08 6:47:09

38
Garantía de
Combinación
Microondas Campana
Garantía limitada de un año
Una vez instalado, en funcionamiento
y mantenido de acuerdo con todas las
instrucciones proporcionadas con el producto, si
este aparato no funciona debido a un defecto
en los materiales o la mano de obra durante
un período de un año desde la fecha de
adquisición, llame a 1-800-4-MY-HOME® para
obtener una reparación gratuita.
Si este electrodoméstico se utiliza con
SURSyVLWRVGLVWLQWRVDORVÀQHVSULYDGRVGH
una familia, esta garantía sólo será aplicable
durante 90 días desde la fecha de la compra.
Esta garantía sólo cubre defectos de
fabricación de los materiales y la mano de
obra. Sears no pagará por:
1. Elementos consumibles que se pueden
desgastar con el uso normal, incluidos,
aunque no taxativamente enumerados,
ÀOWURVFLQWDVERPELOODVGHOX]\EROVDV
2. Un técnico de servicio para instruir al usuario
sobre la instalación, el funcionamiento o el
mantenimiento correctos del producto.
3. Un técnico de servicio para limpiar o
efectuar el mantenimiento de este producto.
4. Los daños o las fallas de este producto
si no se instala, se utiliza o se mantiene
de acuerdo con todas las instrucciones
suministradas con el producto.
5. Los daños o las fallas de este producto
causados por accidentes, abuso, uso
incorrecto o un uso distinto al que fue
destinado.
6. Los daños o las fallas causados por el uso de
detergentes, limpiadores, productos químicos
o utensilios que no sean los recomendados en
todas las instrucciones suministradas con el
producto.
7. Los daños o las fallas de las piezas o
VLVWHPDVFDXVDGRVSRUPRGLÀFDFLRQHVQR
autorizadas realizadas en este producto.
Desconocimiento de garantías tácitas;
limitación de reparaciones.
La única y exclusiva reparación para el
cliente bajo esta garantía limitada será la
reparación del producto como aquí se estipula.
Garantías tácitas, incluyendo las garantías de
comerciabilidad o aptitud para un propósito
especial, poseen un término limitado de un
año o el período más corto permitido por la
ley. Sears no se hará responsable por daños
derivados o imprevistos. Algunos estados
y provincias no permiten la exclusión o las
limitaciones en cuanto a la duración de las
garantías tácitas de comerciabilidad o aptitud,
por lo tanto las limitaciones o exclusiones
antedichas pueden no aplicarse a usted.
Esta garantía sólo se aplica si este aparato se
usa en los Estados Unidos.
Esta garantía le otorga derechos legales
HVSHFtÀFRV\DGHPiVSXHGHWHQHURWURV
derechos que varían según el Estado en el que
se encuentre.
Sears Brands Management Corporation,
Hoffman Estates, IL 60179
8505_XAA_03805A-EN+MES.indb 38 2010-07-08 6:47:09

39
Contratos maestros de protección
Felicitaciones por haber realizado una compra
inteligente.
Su nuevo producto Kenmore® ha sido diseñado y
fabricado para garantizar años de funcionamiento
FRQÀDEOH
No obstante, al igual que todos los productos, es
posible que requiera un mantenimiento preventivo o
reparación en algunas ocasiones.
En esos momentos, un Contrato maestro de protección
puede ahorrarle dinero y evitarle inconvenientes.
El Contrato maestro de protección también lo ayuda
a extender la vida útil de su nuevo producto. A
continuación, mencionamos lo que incluye el Contrato*:
Piezas y mano de obra necesaria para ayudar
a que los productos funcionen continuamente de
manera adecuada bajo un uso normal, no sólo
ante defectos. Nuestra cobertura sobrepasa
la garantía del producto. No se cobran
deducibles, no se excluyen fallas funcionales de
la cobertura— protección real.
Servicio especializado por parte de un grupo
de más de 10000 técnicos autorizados de
SearsHVGHFLUTXHDOJXLHQFRQÀDEOHHVWDUi
trabajando en su producto.
Visitas de servicio técnico ilimitadas y servicio
en todo el país, las veces que desee, cuando
quiera que nos necesite.
Garantía contra defectos de fábrica –
reemplazo de su producto asegurado si se
producen cuatro fallas de producto, o más,
dentro de los primeros doce meses.
Reemplazo del producto si no puede repararse.
Control de mantenimiento preventivo anual
cuando lo desee – sin cargo adicional.
Asistencia telefónica rápida – la denominamos
Resolución Rápida – apoyo telefónico por
parte de un representante de Sears para todos
los productos. Considérenos un “manual de
usuario que habla”.
Servicio técnico de Sears
Protección en caso de sobretensión contra
GDxRVHOpFWULFRVDFDXVDGHÁXFWXDFLRQHVGH
energía.
Protección de pérdida de alimentos por $250
anuales debido a cualquier tipo de desperdicio
de alimentos a causa de fallas mecánicas de
cualquier refrigerador o freezer cubierto.
Reembolso de alquiler, si la reparación de su
producto tarda más tiempo del prometido.
Descuento del 10 % del precio de cualquier
servicio de reparaciones no cubierto y piezas
LQVWDODGDVDÀQHV
Una vez que adquiera el Contrato, sólo debe
realizar una llamada telefónica para programar
el servicio. Puede programar un servicio técnico en
línea en cualquier momento, las 24 horas.
El Contrato maestro de protección representa
una adquisición sin riesgos. Si por algún motivo,
lo cancela durante el período de garantía del
producto, proporcionaremos un reembolso total. O
bien, un reembolso prorrateado una vez que venza
el período de garantía del producto. ¡Adquiera su
Contrato maestro de protección ya mismo!
Se aplican algunas limitaciones y exclusiones.
Para obtener precios e información adicional
dentro de los EE.UU., comuníquese al 1-800-827-
6655.
/DFREHUWXUDHQ&DQDGiGLÀHUHHQ
algunos puntos. Para obtener información
detallada, comuníquese con Sears Canadá al
1-888-Kenmore.
Servicio de Instalación de Sears
Para obtener instalación profesional de
electrodomésticos, abridores de puertas de garaje,
calentadores de agua y otros artículos del hogar
de Sears en los EE. UU o Canadá, comuníquese al
1-800-4-MY-HOME®.
8505_XAA_03805A-EN+MES.indb 39 2010-07-08 6:47:10
40
CONSERVE ESTAS INSTRUCCIONES
INSTRUCCIONES DE SEGURIDAD IMPORTANTES
ADVERTENCIA
El uso inadecuado del enchufe de conexión
a tierra puede conducir a un riesgo de
descarga eléctrica.
INSTRUCCIONES DE
CONEXIÓN A TIERRA
Este electrodoméstico debe
conectarse a tierra. En
caso de cortocircuito, la
conexión a tierra reduce el
riesgo de descarga eléctrica ya que ofrece un
cable de escape para la corriente eléctrica.
Este electrodoméstico está equipado con un
cable que incluye un cable y un enchufe de
conexión a tierra. El enchufe debe conectarse
a un tomacorriente que esté correctamente
instalado y conectado a tierra. Consulte las
instrucciones de instalación.
Consulte a un electricista o servicio técnico
FDOLÀFDGRVLQRFRPSUHQGHELHQODV
instrucciones de conexión a tierra, o si tiene
alguna duda respecto de si el horno está
conectado a tierra correctamente.
No utilice un cable prolongador. Si el cable de
alimentación del producto es demasiado corto,
KDJDTXHXQHOHFWULFLVWDFDOLÀFDGRLQVWDOHXQ
tomacorriente de tres ranuras. Este horno debe
enchufarse en un circuito de 60 Hz separado
con los valores eléctricos nominales mostrados
HQODWDEODGHHVSHFLÀFDFLRQHV&XDQGRHO
horno comparte el circuito con otros equipos,
quizás sea necesario un aumento en los tiempos
de cocción y pueden saltar los fusibles.
El microondas funciona con la corriente normal
doméstica, 110-120 V.
DECLARACIÓN DE
INTERFERENCIA DE
RADIOFRECUENCIA DE LA
COMISIÓN FEDERAL DE
COMUNICACIONES (ESTADOS
UNIDOS SOLAMENTE)
Este equipo genera y utiliza energía de
frecuencia ISM, y si no se instala y se
utiliza correctamente, es decir, en estricto
cumplimiento con las instrucciones del
fabricante, puede causar interferencia con
la recepción de radio y televisión. Se ha
FRPSUREDGR\FRQÀUPDGRTXHFXPSOHFRQ
los límites estipulados para Equipos ISM
,QGXVWULDOHV&LHQWtÀFRV0pGLFRVHQYLUWXG
de la sección 18 de los reglamentos de la
FCC, que han sido diseñados para proveer
protección razonable contra tal interferencia
en una instalación residencial.
Sin embargo, no se garantiza que no
habrá interferencia en alguna instalación
determinada. Si este equipo causa
interferencia con la recepción de radio
o televisión, lo que puede determinarse
apagando y encendiendo el equipo, se
recomienda que el usuario intente corregir la
interferencia de una de las siguientes maneras:
Cambie la orientación de la antena de
recepción de radio o televisión.
Ubique en otro lugar el horno de
microondas con respecto al receptor.
Aleje el horno de microondas del receptor.
Enchufe el horno de microondas en un
tomacorriente distinto para que el horno de
microondas y el receptor estén en circuitos
diferentes.
El fabricante no es responsable de ninguna
interferencia de radio o televisión causada por
ODPRGLÀFDFLyQQRDXWRUL]DGDGHHVWHKRUQR
de microondas. Es responsabilidad del usuario
corregir tal interferencia.
8505_XAA_03805A-EN+MES.indb 40 2010-07-08 6:47:10
41
INSTRUCCIONES DE SEGURIDAD IMPORTANTES
CONSERVE ESTAS INSTRUCCIONES
LO QUE NECESITA SABER
SOBRE LAS INSTRUCCIONES
DE SEGURIDAD
Las advertencias e instrucciones importantes sobre
seguridad que aparecen en esta Guía de uso y
cuidado no están destinadas a cubrir todas las
posibles condiciones y situaciones que pueden
ocurrir. Debe actuar con sentido común, precaución
y cuidado cuando instale, realice el mantenimiento o
ponga en funcionamiento el microondas.
Comuníquese siempre con su vendedor, distribuidor,
agente de servicio o fabricante si surgen problemas
o situaciones que usted no comprende.
RECONOZCA LOS SÍMBOLOS,
ADVERTENCIAS Y ETIQUETAS
DE SEGURIDAD
PELIGRO
Riesgos inminentes que CAUSARÁN lesiones
físicas graves o la muerte.
ADVERTENCIA
Peligros o prácticas inseguras que PODRÍAN
causar lesiones físicas graves o la muerte.
PRECAUCIÓN
Peligros o prácticas inseguras que PODRÍAN
causar lesiones físicas leves.
PRECAUCIÓN
Para evitar lesiones físicas o daños
materiales, cumpla lo siguiente:
1. No fría en grasa abundante en el horno. La
grasa podría recalentarse y ser peligrosa de
manipular.
2. No cocine ni recaliente huevos con cáscara o con
yema entera utilizando energía de microondas.
Podría acumular presión y estallar. Perfore
la yema con un tenedor o cuchillo antes de la
cocción.
3. Perfore la piel de las papas, tomates y
alimentos simulares antes de cocinarlos con
energía de microondas. Cuando se perfora la
piel, el vapor sale de manera uniforme.
4. No ponga en funcionamiento el horno sin carga
o alimentos en el interior.
5. Utilice sólo las palomitas de maíz que vienen
en paquetes diseñados y rotulados para uso
en el microondas. El tiempo de cocción varía
según el vatiaje del horno. No siga calentando
después de que las palomitas de maíz dejaron
de estallar. De lo contrario se chamuscarán o
quemarán. No descuide el microondas.
6. No utilice termómetros de cocción comunes en el
horno. La mayoría de los termómetro de cocción
contienen mercurio y pueden causar arcos
eléctricos, mal funcionamiento o daño al horno.
7. No utilice utensilios de metal en el horno.
8. Nunca utilice papel, plástico u otro material
combustible que no esté destinado a la cocción.
9. Cuando cocine con papel, plástico u otro
material combustible, siga las recomendaciones
del fabricante sobre el uso del producto.
10. No utilice toallas de papel que contengan nailon
XRWUDVÀEUDVVLQWpWLFDV/DVÀEUDVVLQWpWLFDV
calentadas podrían derretirse y hacer que el
papel se incendiara.
11. No caliente recipientes sellados ni bolsas de
plástico en el horno. Los alimentos o líquidos
podrían expandirse rápidamente y hacer que
el recipiente o la bolsa se rompiera. Perfore o
abra el recipiente o la bolsa antes de la cocción.
12. Para evitar el mal funcionamiento de un
marcapasos, consulte con su médico o el
fabricante del marcapasos acerca de los efectos
de la energía de microondas en el marcapasos.
8505_XAA_03805A-EN+MES.indb 41 2010-07-08 6:47:10

42
CONSERVE ESTAS INSTRUCCIONES
INSTRUCCIONES DE SEGURIDAD IMPORTANTES
PRECAUCIONES PARA
EVITAR LA POSIBLE
EXPOSICIÓN A ENERGÍA
DE MICROONDAS
EXCESIVA
A. NO intente hacer funcionar este horno
con la puerta abierta dado que el
funcionamiento con la puerta abierta
puede dar como resultado una exposición
nociva a energía de microondas. Es
LPSRUWDQWHQRDOWHUDUQLPRGLÀFDUODV
trabas de seguridad.
B. NO coloque ningún objeto entre la parte
delantera del horno y la puerta ni deje
que se acumule suciedad o residuos de
OLPSLDGRUHVHQODVVXSHUÀFLHVGHVHOODGR
C. NO haga funcionar el horno si está
dañado. Es particularmente importante que
la puerta del horno cierre bien y que no se
ocasionen daños a:
1. la puerta (doblada),
2. las bisagras y pestillos (rotos o sueltos),
ODVMXQWDVGHODSXHUWD\ODVVXSHUÀFLHV
de sellado.
D. El horno no debe ser regulado o reparado
por ninguna persona excepto el personal
GHVHUYLFLRGHELGDPHQWHFDOLÀFDGR
ADVERTENCIA
Los líquidos tales como el agua, café o
té pueden calentarse más allá del punto
de ebullición sin que parezca que están
KLUYLHQGRGHELGRDODWHQVLyQVXSHUÀFLDOGHO
líquido. No siempre se verán las burbujas o
el hervor cuando se retira el recipiente del
horno de microondas. ESTO PUEDE HACER
QUE LOS LÍQUIDOS MUY CALIENTES
SE DERRAMEN REPENTINAMENTE
CUANDO SE INSERTA EN EL LÍQUIDO UNA
CUCHARA U OTRO UTENSILIO.
Para reducir el riesgo de lesiones:
1. No caliente el líquido demasiado.
2. Revuelva el líquido tanto antes como a la
mitad del proceso de calentamiento.
3. No utilice recipientes con lados rectos y
cuellos estrechos.
4. Después de calentar, deje reposar el
recipiente en el horno de microondas
durante un tiempo breve antes de
sacarlo.
5. Sea muy cuidadoso cuando inserte una
cuchara u otro utensilio en el recipiente.
8505_XAA_03805A-EN+MES.indb 42 2010-07-08 6:47:10

CONSERVE ESTAS INSTRUCCIONES
43
INSTRUCCIONES DE SEGURIDAD IMPORTANTES
ADVERTENCIA
Cuando se utilizan aparatos eléctricos, se
deben seguir instrucciones de seguridad
básicas para reducir el riesgo de quemaduras,
descargas eléctricas, incendios o lesiones físicas
o exposición a energía de microondas excesiva.
1. LEA todas las instrucciones antes de usar el
horno.
2. LEA Y SIGA las “PRECAUCIONES PARA EVITAR
LA POSIBLE EXPOSICIÓN A ENERGÍA DE
MICROONDAS EXCESIVA” en la página 42.
3. Instale o coloque este horno SÓLO de
acuerdo con las instrucciones de instalación de
este manual.
4. Algunos productos tales como los huevos
enteros y los recipientes sellados, como
por ejemplo los frascos de vidrio cerrados,
pueden explotar y NO DEBEN CALENTARSE
en este horno.
5. Utilice este horno SÓLO para el propósito
para el que se diseñó como se describe en
este manual. No utilice productos químicos
corrosivos ni vapores en este horno. Este tipo
GHKRUQRHVWiHVSHFtÀFDPHQWHGLVHxDGRSDUD
calentar, cocinar o secar alimentos. No está
diseñado para uso industrial o de laboratorio.
6. Al igual que con cualquier electrodoméstico,
es necesaria una SUPERVISIÓN ESTRICTA
cuando lo utilizan NIÑOS o PERSONAS
ENFERMAS.
7. Consulte las instrucciones de limpieza de la
puerta en la sección Cuidado y Limpieza en
la página 68.
8. Los frascos de alimentos de bebé deben
abrirse para calentarse y el contenido debe
revolverse o sacudirse antes del consumo,
para evitar quemaduras.
9. NO utilice este horno para propósitos
comerciales. Está fabricado para uso
doméstico solamente.
10. NO caliente biberones en el horno.
11. NO ponga en funcionamiento este horno si tiene
un cable o enchufe dañado, si no funciona bien,
o si sufrió algún daño o se cayó.
12. Este horno, incluyendo el cable de alimentación,
debe ser reparado SOLAMENTE por personal
GHVHUYLFLRFDOLÀFDGR6HUHTXLHUHQKHUUDPLHQWDV
especiales para reparar el horno. Comuníquese
con el centro de servicio autorizado más cercano
para el examen, reparación o ajuste del horno.
13. NOFXEUDQLEORTXHHHOÀOWURXRWUDVDEHUWXUDV
del horno.
14. NO guarde este horno al aire libre. NO utilice
este producto cerca del agua – por ejemplo,
cerca del fregadero de la cocina, en un sótano
húmedo, cerca de una piscina o en lugares
similares.
15. NO sumerja el cable ni el enchufe en agua.
16. Mantenga el cable ALEJADOGHVXSHUÀFLHV
CALENTADAS.
17. NO deje que el cable cuelgue sobre el borde
de la mesa o la mesada.
18. Limpie la campana de ventilación con frecuencia.
19. NO permita que se acumule la grasa en la
FDPSDQDRORVÀOWURV
7HQJDFXLGDGRFXDQGROLPSLHHOÀOWURGH
la campana de ventilación. Los agentes de
limpieza corrosivos tales como los limpiadores de
KRUQRDEDVHGHOHMtDSXHGHQGDxDUORVÀOWURV
21. Cuando cocine alimentos con fuego debajo de
la campana, encienda el ventilador.
22. Este horno puede utilizarse sobre estufas a gas o
eléctricas de 36 pulgadas o menos de ancho.
23. Este electrodoméstico debe conectarse a
tierra. Conéctelo sólo a los tomacorrientes
adecuadamente conectados a tierra. Es
importante que consulte “Instrucciones de
conexión a tierra” en la página 40 de este
manual.
8505_XAA_03805A-EN+MES.indb 43 2010-07-08 6:47:10

44
CONSERVE ESTAS INSTRUCCIONES
INSTRUCCIONES DE SEGURIDAD IMPORTANTES
PRECAUCIÓN
Para evitar el riesgo de incendio en la parte interior del horno:
a. NO cocine en exceso los alimentos. Preste atención al horno cuando coloque en su interior
papel, plástico u otros materiales combustibles para facilitar la cocción.
b. Retire las ataduras de alambre de las bolsas de papel o plástico antes de colocar la bolsa
en el horno.
c. Si los materiales dentro del horno se prenden fuego, mantenga la puerta del horno
CERRADA, apague el horno y desconecte el cable de alimentación, o corte la corriente en el
fusible o el panel del disyuntor.
d. NO use la parte interna del horno para almacenamiento. NO deje productos de papel,
utensilios de cocción o alimentos en la parte interna del horno cuando no se utiliza.
8505_XAA_03805A-EN+MES.indb 44 2010-07-08 6:47:10

45
Obtener los mejores resultados de cocción
Prueba de la vajilla o los utensilios
Pruebe la vajilla o los utensilios antes de usarlos. Para comprobar que un plato sea seguro,
colóquelo en el horno con una taza de agua al lado. Ponga en funcionamiento el horno durante
un minuto al 100 % de la potencia de cocción. Si el plato se calienta, no lo use.
Algunos platos (de melamina, de cerámica, etc.) absorben la energía del microondas, se
calientan demasiado como para ser manipulados y demoran el tiempo de cocción. Cocinar en
recipientes de metal no diseñados para ser usados en hornos de microondas podrían dañar
el horno, lo mismo podría suceder con los recipientes con metal oculto (ataduras de alambre,
papel de aluminio, grapas, esmalte o ribetes de metal).
Para obtener los mejores resultados de su horno de microondas, lea y siga las pautas a
continuación.
Temperatura de almacenamiento:
Los alimentos que se sacan del freezer o refrigerador tardan
más tiempo en cocinarse que los mismos alimentos a temperatura ambiente.
Tamaño:
Los trozos pequeños de alimentos se cocinan más rápido que los de mayor tamaño
y los trozos de tamaño y forma similares se cocinan en forma más pareja. Para una cocción
uniforme, reduzca la potencia cuando cocina trozos grandes de alimentos.
Humedad natural:
Los alimentos muy húmedos se cocinan en forma más pareja porque la
energía del microondas se ve atraída por las moléculas de agua.
Revuelva los alimentos
tales como guisos y verduras desde el exterior hacia el centro
para distribuir el calor en forma pareja y acelerar la cocción. No es necesario revolver
constantemente.
Dé vuelta los alimentos tales como las chuletas de cerdo,
las papas al horno, las carnes asadas o
ODFROLÁRUHQWHUDDODPLWDGGHOWLHPSRGHFRFFLyQSDUDH[SRQHUWRGRVORVODGRVSRULJXDOD
la energía de microondas.
Coloque las áreas delicadas de los alimentos,
tales como las puntas de los espárragos, hacia el
centro del plato.
Acomode los alimentos de formas desparejas,
WDOHVFRPRODVSUHVDVGHSROORRORVÀOHWHVGH
salmón con las partes más gruesas hacia la parte externa del plato.
Proteja con pedazos pequeños de papel de aluminio las
partes de los alimentos que puedan
cocinarse más rápidamente, tales como las puntas de las alas o los extremos de las patas de
las aves.
Deje reposar:
'HVSXpVTXHÀQDOLFHHOWLHPSRGHFRFFLyQSUHSURJUDPDGRGHMHTXHORV
alimentos reposen dentro o fuera del horno para que se terminen de cocinar en el centro y
para evitar que los bordes externos se cocinen demasiado. La cantidad del tiempo de reposo
GHSHQGHGHODGHQVLGDG\ODVXSHUÀFLHGHODOLPHQWR'XUDQWHHOWLHPSRGHUHSRVRIXHUDGHO
horno, cubra los alimentos con papel de aluminio o la tapa del recipiente.
Envolver en papel de cera o en una toalla de papel:
Los emparedados y muchos otros alimentos
que contienen pan horneado previamente deben envolverse antes de calentarlos en el
microondas para evitar que se sequen.
8505_XAA_03805A-EN+MES.indb 45 2010-07-08 6:47:11
46
Características
Estante de alambre
El estante de alambre le ofrece espacio
adicional cuando cocina en más de un
recipiente a la vez.
PRECAUCIÓN
Para evitar el riesgo de daños materiales:
No utilice el estante para cocinar
palomitas de maíz.
El estante debe apoyarse sobre los cuatro
soportes plásticos cuando se utilice.
Utilice el estante sólo cuando cocine
alimentos en la posición del estante.
No cocine con el estante en el piso del
horno.
Para utilizar el estante:
1. Coloque el estante de manera segura
sobre los cuatro soportes plásticos.
El estante NO DEBE tocar las paredes de
metal ni la parte trasera del horno de
microondas.
2. Coloque cantidades equivalentes de alimentos
tanto ARRIBA COMO ABAJO del estante.
La cantidad de alimentos debe ser
aproximadamente la misma para
compensar la energía de cocción.
IMPORTANTE:
Para evitar dañar el horno, NO almacene ni
utilice el estante de alambre en este horno
a menos que se vaya a cocinar más de un
alimento o una receta lo requiera.
(VSHFLÀFDFLRQHVGHOKRUQR
Alimentación eléctrica 120 VCA, 60 Hz
Potencia de entrada 1700 W
Potencia de cocción 1100 W IEC 60705 estándar
Frecuencia 2450 MHz
Potencia nominal 14.5 A
Dimensiones exteriores 29 7/8 (Ancho) x 16 1/2(Alto) x 15 1/8 (Profundidad)
Capacidad interior 1.9 pies cúbicos
Peso neto 50.5 lbs. / 51.8 lbs. (modelo 85053)
Manija de la puerta Ventana con escudo metálico
Guía de cocción
Sistema de cierre de seguridad de la puerta
Panel de control
del horno
Plato giratorio de vidrio
Placa de modelo y
número de serie Estante de alambre
8505_XAA_03805A-EN+MES.indb 46 2010-07-08 6:47:11
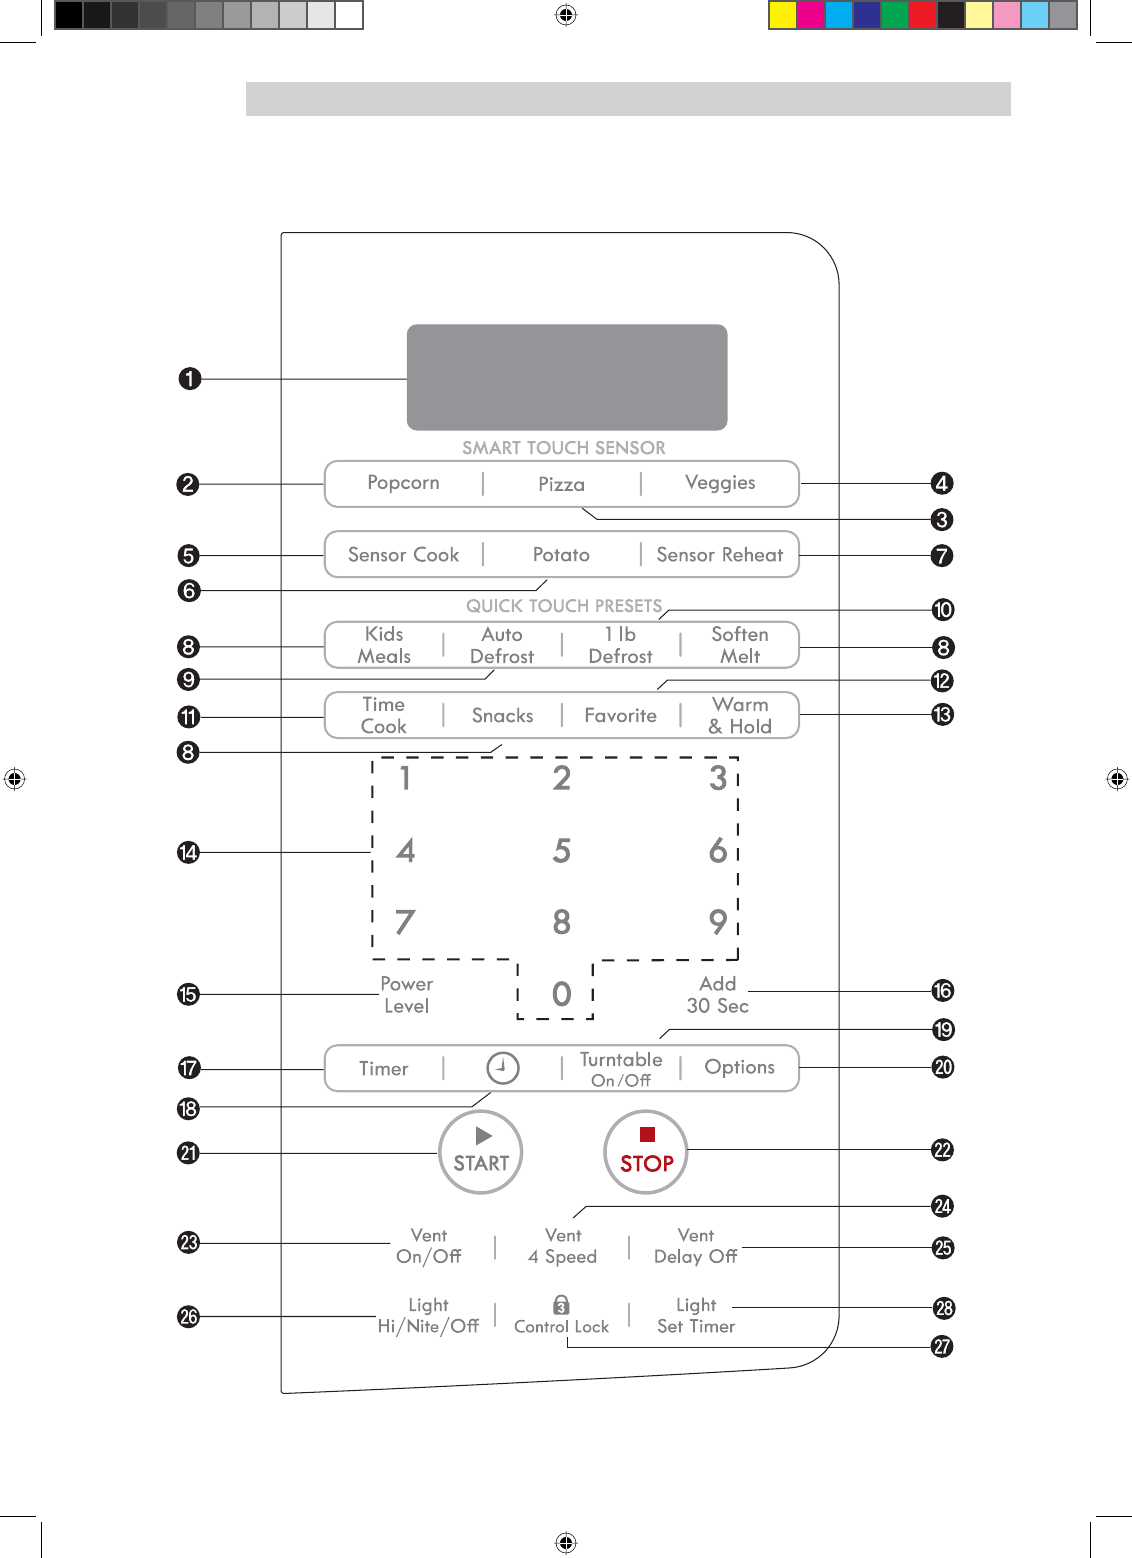
CARACTERÍSTICAS
47
8505_XAA_03805A-EN+MES.indb 47 2010-07-08 6:47:12

48
CARACTERÍSTICAS
Características
1. PANTALLA: La Pantalla incluye un reloj e indicadores
SDUDFRPXQLFDUOHODKRUDGHOGtDODVFRQÀJXUDFLRQHV
del tiempo de cocción y las funciones seleccionadas.
2. POPCORN (PALOMITAS DE MAÍZ): Oprima esta tecla
cuando prepare palomitas de maíz en su horno de
microondas. El sensor le indicará al horno cuánto tiempo
cocinar dependiendo de la cantidad de humedad que
detecte en las palomitas de maíz.
3. PIZZA (PIZZA): Oprima esta tecla para recalentar
la pizza. El sensor le indicará al horno cuánto tiempo
cocinar dependiendo de la cantidad de humedad que
detecte.
4. VEGGIES (VERDURAS) : Oprima esta tecla para
cocinar verduras frescas o congeladas. El sensor le
indicará al horno cuánto tiempo cocinar dependiendo
de la cantidad de humedad que detecte en las
verduras.
5. SENSOR COOK (COCCIÓN CON SENSOR): Oprima
esta tecla para cocinar bebidas, comidas congeladas,
desayunos congelados o pechugas de pollo. El sensor le
indicará al horno cuánto tiempo cocinar dependiendo
de la cantidad de humedad proveniente de la comida.
6. POTATO (PAPAS): Oprima esta tecla para cocinar
papas. El sensor le indicará al horno cuánto tiempo
cocinar dependiendo de la cantidad de humedad que
detecte en las papas.
7. SENSOR REHEAT (RECALENTAMIENTO CON
SENSOR): Oprima esta tecla para recalentar un
plato de comida, guisos y pastas. El sensor le indicará
al horno cuánto tiempo cocinar dependiendo de la
cantidad de humedad proveniente de la comida.
8. KIDS MEALS, SOFTEN/MELT, SNACKS (COMIDAS
PARA NIÑOS, ABLANDAR/DERRETIR, BOTANAS):
2SULPDHVWDVWHFODVSDUDFRFLQDUFRPLGDVHVSHFtÀFDV
9. AUTO DEFROST (DESCONGELAMIENTO
AUTOMÁTICO): Oprima esta tecla para descongelar
alimentos según el peso.
10. 1 LB DEFROST (DESCONGELAMIENTO 1 LB):
Oprima esta tecla para descongelar 1 libra de
alimentos congelados.
11. TIME COOK (TIEMPO DE COCCIÓN): Oprima esta
tecla para agregar más tiempo de cocción.
12 FAVORITE (FAVORITOS): Oprima esta tecla para
recuperar una instrucción de cocción previamente
programada en la memoria.
13. WARM & HOLD (CALENTAR Y MANTENER
CALIENTE): Oprima esta tecla para mantener calientes
los alimentos cocinados en el horno microondas hasta
99 minutos y 99 segundos.
14. TECLAS NUMÉRICAS: Oprima las teclas numéricas
para ingresar el tiempo de cocción, el nivel de
potencia, las cantidades o los pesos.
15. POWER LEVEL (NIVEL DE POTENCIA): Oprima esta
tecla para seleccionar un nivel de potencia de cocción.
16. ADD 30 SEC (AGREGAR 30 SEG): Oprima esta tecla
para ajustar y comenzar rápidamente la cocción en el
nivel de potencia del 100 %.
17. TIMER (TEMPORIZADOR): Oprima esta tecla para
FRQÀJXUDUHOWHPSRUL]DGRUGHODFRFLQD
18. CLOCK (RELOJ): Oprima esta tecla para ingresar la
hora del día.
19. TURNTABLE ON/OFF (PLATO GIRATORIO
ACTIVADO/DESACTIVADO): Oprima esta tecla para
desactivar el plato giratorio. En la pantalla, aparecerá
OFF (DESACTIVADO).
La función ACTIVAR/DESACTIVAR PLATO GIRATORIO
no está disponible en los modos cocción con sensor ni
descongelamiento.
20. OPTIONS (OPCIONES): Oprima esta tecla para
PRGLÀFDUODVFRQÀJXUDFLRQHVSUHGHWHUPLQDGDVGHO
horno.
21. START (INICIO): Oprima esta tecla para iniciar una
función. Si abre la puerta después de que el horno
comienza a cocinar, cierre la puerta y oprima la tecla
ENTER/START (INGRESAR/INICIO) nuevamente.
22. STOP (DETENER): Oprima esta tecla para apagar el
horno o anular todas las entradas.
23. VENT ON/OFF
(VENTILACIÓN ACTIVADA/DESACTIVADA): Oprima
esta tecla para encender o apagar el ventilador.
24. VENT 4 SPEED (VENTILACIÓN CON 4 VELOCIDADES):
Oprima esta tecla para elegir una de las 4 velocidades
del ventilador.
25. VENT DELAY ON/OFF
(VENTILACIÓN RETARDADA ACTIVADA/
DESACTIVADA)2SULPDHVWDWHFODFXDQGRFRQÀJXUHHO
tiempo de ventilación (1, 3, 5, 10, 30 minutos).
26. LIGHT HI/NITE/OFF (LUZ ALTA/NOCHE/APAGADA):
Oprima esta tecla para encender la luz de la cubierta.
27. CONTROL LOCK (BLOQUEAR CONTROLES):
Mantenga presionada esta tecla más de 3 segundos
para bloquear el panel de control.
28. LIGHT TIMER (TEMPORIZADOR DE CONFIGURACIÓN
DE LA LUZ)2SULPDHVWDWHFODSDUDFRQÀJXUDUHO
temporizador de la luz.
8505_XAA_03805A-EN+MES.indb 48 2010-07-08 6:47:12
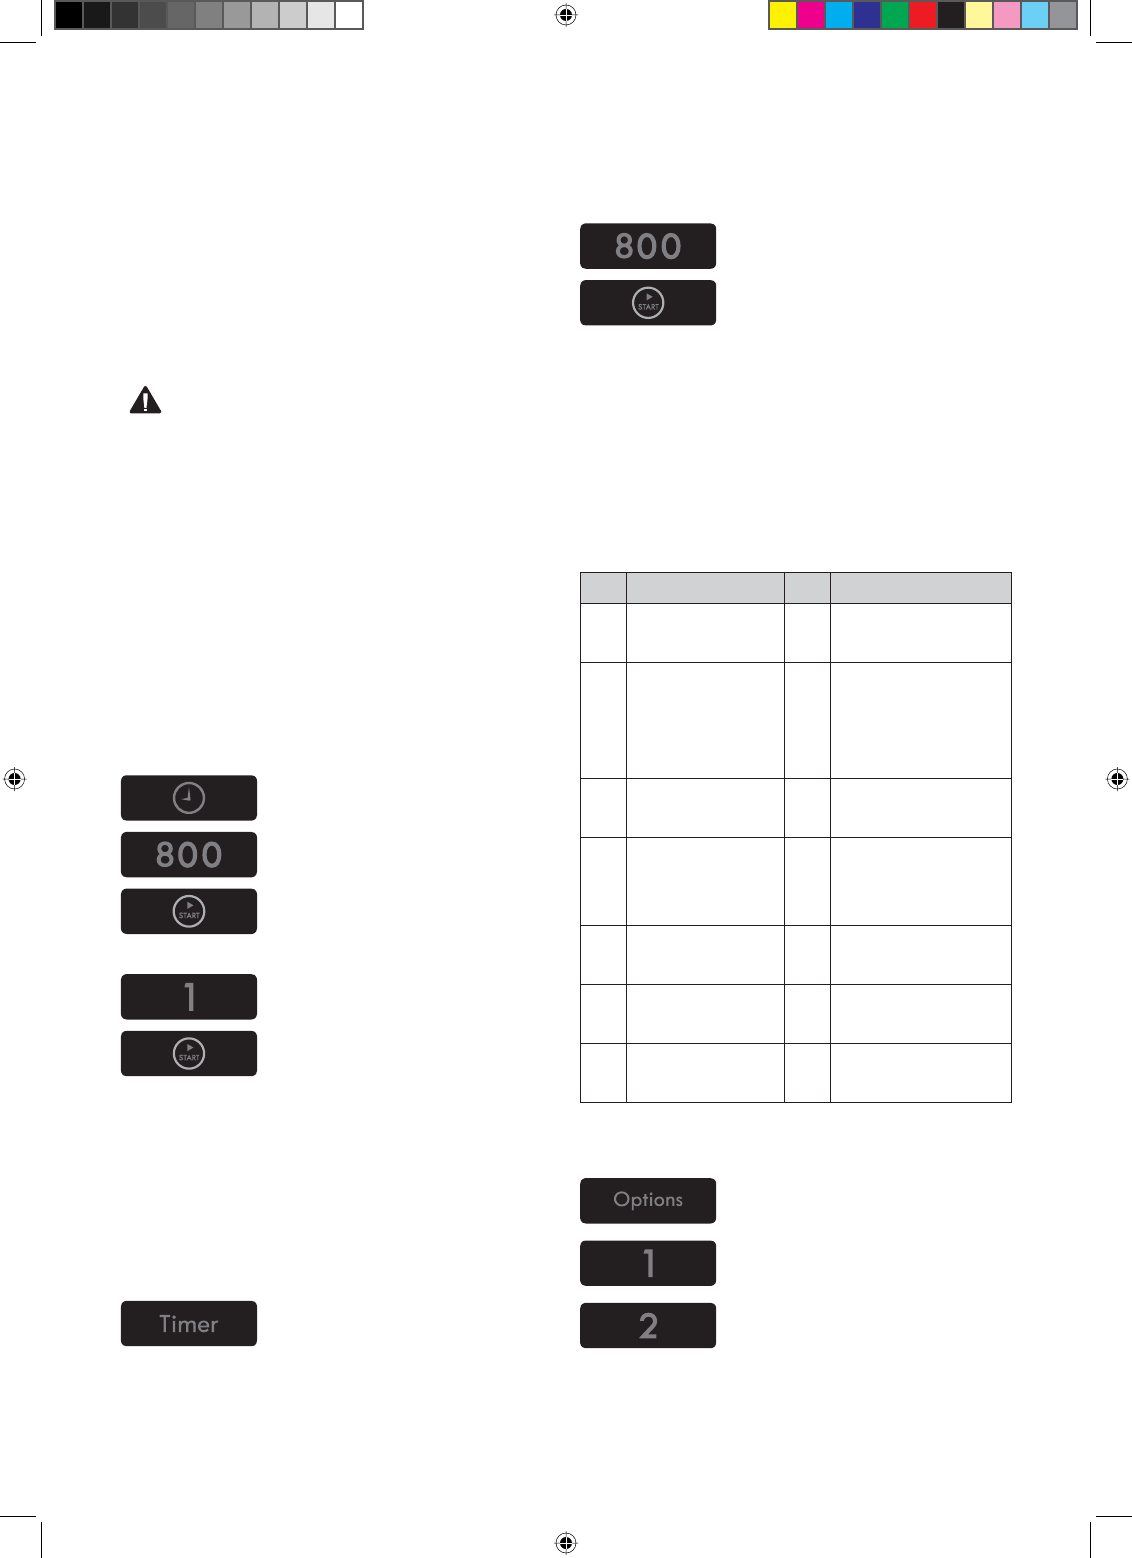
49
Manual de instrucciones
Conozca su horno de microondas
Esta sección describe los elementos básicos
que debe conocer para manejar su horno de
microondas. Por favor lea esta información
antes de utilizarlo.
PRECAUCIÓN
Para evitar el riesgo de lesiones físicas
o daños materiales, no ponga en
funcionamiento el horno vacío.
Para evitar el riesgo de lesiones físicas
o daños materiales no utilice recipientes
de barro cocido, papel de aluminio,
utensilios de metal ni con adornos de
metal en el horno.
Reloj (Clock)
Ejemplo: Para poner el reloj a las 8:00 AM.
1Oprima la tecla CLOCK.
2Ingrese la hora utilizando
el teclado numérico.
3Oprima la tecla
ENTER/START
(INGRESAR/INICIO).
4Oprima 1 para AM.
5Oprima la tecla START
(INICIO).
Temporizador de cocina
Puede utilizar su horno de microondas como
temporizador. Utilice el temporizador de la
cocina para programar hasta 99 minutos,
99 segundos.
Ejemplo: Para programar 8 minutos.
1. Oprima la tecla
KITCHEN TIMER
(TEMPORIZADOR DE LA
COCINA).
2. Ingrese la hora utilizando
el teclado numérico.
3. Oprima la tecla START
(INICIO).
Cuando haya transcurrido el tiempo, escuchará
señales sonoras y aparecerá la palabra END
(FIN).
Opciones
3XHGHPRGLÀFDUORVYDORUHVSUHGHWHUPLQDGRV
Consulte la siguiente tabla para obtener más
información.
No. Función No. Resultado
1Selección de
unidad de peso
1
2
Lbs.
Kg.
2Control de
sonido
1
2
Sonido ON
(activado)
Sonido OFF
(desactivado)
3 Control del reloj 1
2
12HR
24HR
4 Pantalla
1
2
3
Velocidad lenta
Velocidad normal
Velocidad rápida
5Señal de
ÀQDOL]DFLyQ
1
2
ON (activado)
OFF (desactivado)
6Modo
demostración
1
2
ON (activado)
OFF (desactivado)
7 Hora de verano 1
2
ON (activado)
OFF (desactivado)
Ejemplo: Para cambiar el modo de peso
(de Lbs. a Kg.).
1. Oprima la tecla OPTIONS
(OPCIONES).
2. Oprima la tecla numérica
1.
3. Oprima la tecla numérica
2.
8505_XAA_03805A-EN+MES.indb 49 2010-07-08 6:47:14

50
MANUAL DE INSTRUCCIONES
Turntable on/off (plato giratorio
activado/desactivado)
Para obtener mejores resultados de cocción,
deje el plato giratorio activado. Puede
desactivarse para platos grandes.
1. Presione el botón Turntable
On/Off (Activar/Desactivar
plato giratorio) para
activar o desactivar el plato
giratorio.
NOTAS:
Esta opción no está disponible en los modos
cocción con sensor, cocción automática y
descongelamiento.
A veces el plato giratorio puede estar demasiado caliente. Tenga cuidado cuando toque
el plato giratorio durante y después de la cocción.
No haga funcionar el horno si está vacío.
Ventilador
La VENTILACIÓN quita el vapor de agua y
RWURVYDSRUHVGHODVXSHUÀFLHGHFRFFLyQ
Ejemplo: Para seleccionar Level 2 (Nivel 2).
1. Oprima la tecla ON/OFF
(ENCENDIDO/APAGADO).
Esto muestra el último nivel
hasta que usted seleccione
el nivel de velocidad del
ventilador.
2. Oprima la tecla 4 SPEED
(4 VELOCIDADES) hasta
que en la pantalla aparezca
Level 4 (Nivel 4).
3Oprima la tecla ON/OFF
(ENCENDIDO/APAGADO)
para apagar el ventilador
cuando lo desee.
NOTAS:
Si la temperatura sube demasiado alrededor del
horno de microondas, el ventilador de la campana
de ventilación se encenderá automáticamente en
LEVEL 1 (NIVEL 1) para enfriar el horno. Cuando esto
sucede, no se puede apagar la ventilación en forma
manual. El ventilador se apagará automáticamente
cuando las partes internas estén frías.
El ventilador
funciona sólo en Nivel 1-2 mientras funciona el
microondas.
Retardo apagado
Ejemplo: Para apagar el ventilador después de
30 minutos para el Nivel 2.
1. Oprima la tecla ON/OFF
(ENCENDIDO/APAGADO).
2. Oprima la tecla 4 SPEED
(4 VELOCIDADES) hasta
que en la pantalla aparezca
Level 4 (Nivel 4).
3. Oprima la tecla DELAY OFF
(RETARDO APAGADO)
cinco veces. En la pantalla
se leerá AFTER 30 MINUTES
(DESPUÉS DE 30 MINUTOS).
Control lock (Bloquear controles)
Puede bloquear el panel de control
para evitar que el microondas se inicie
accidentalmente o sea utilizado por niños.
La función Control Lock (Bloquear controles)
también es útil cuando se limpia el panel de
control. Control Lock (Bloquear controles) evita
la programación accidental cuando se limpia el
panel de control.
(MHPSOR3DUDFRQÀJXUDUHOEORTXHRGHORV
controles.
Oprima y mantenga oprimida
la tecla CONTROL LOCK
(BLOQUEAR CONTROLES)
por más de 3 segundos. En la
pantalla se leerá CHILD LOCK
ON (BLOQUEO PARA NIÑOS
ACTIVADO) y se escucharán
dos señales sonoras.
Ejemplo: Para cancelar el bloqueo de los
controles.
Oprima y mantenga oprimida
la tecla CONTROL LOCK
(BLOQUEAR CONTROLES)
por más de 3 segundos.
Desaparecerá la palabra
LOCKED (BLOQUEADO) y
se escucharán dos señales
sonoras.
8505_XAA_03805A-EN+MES.indb 50 2010-07-08 6:47:16
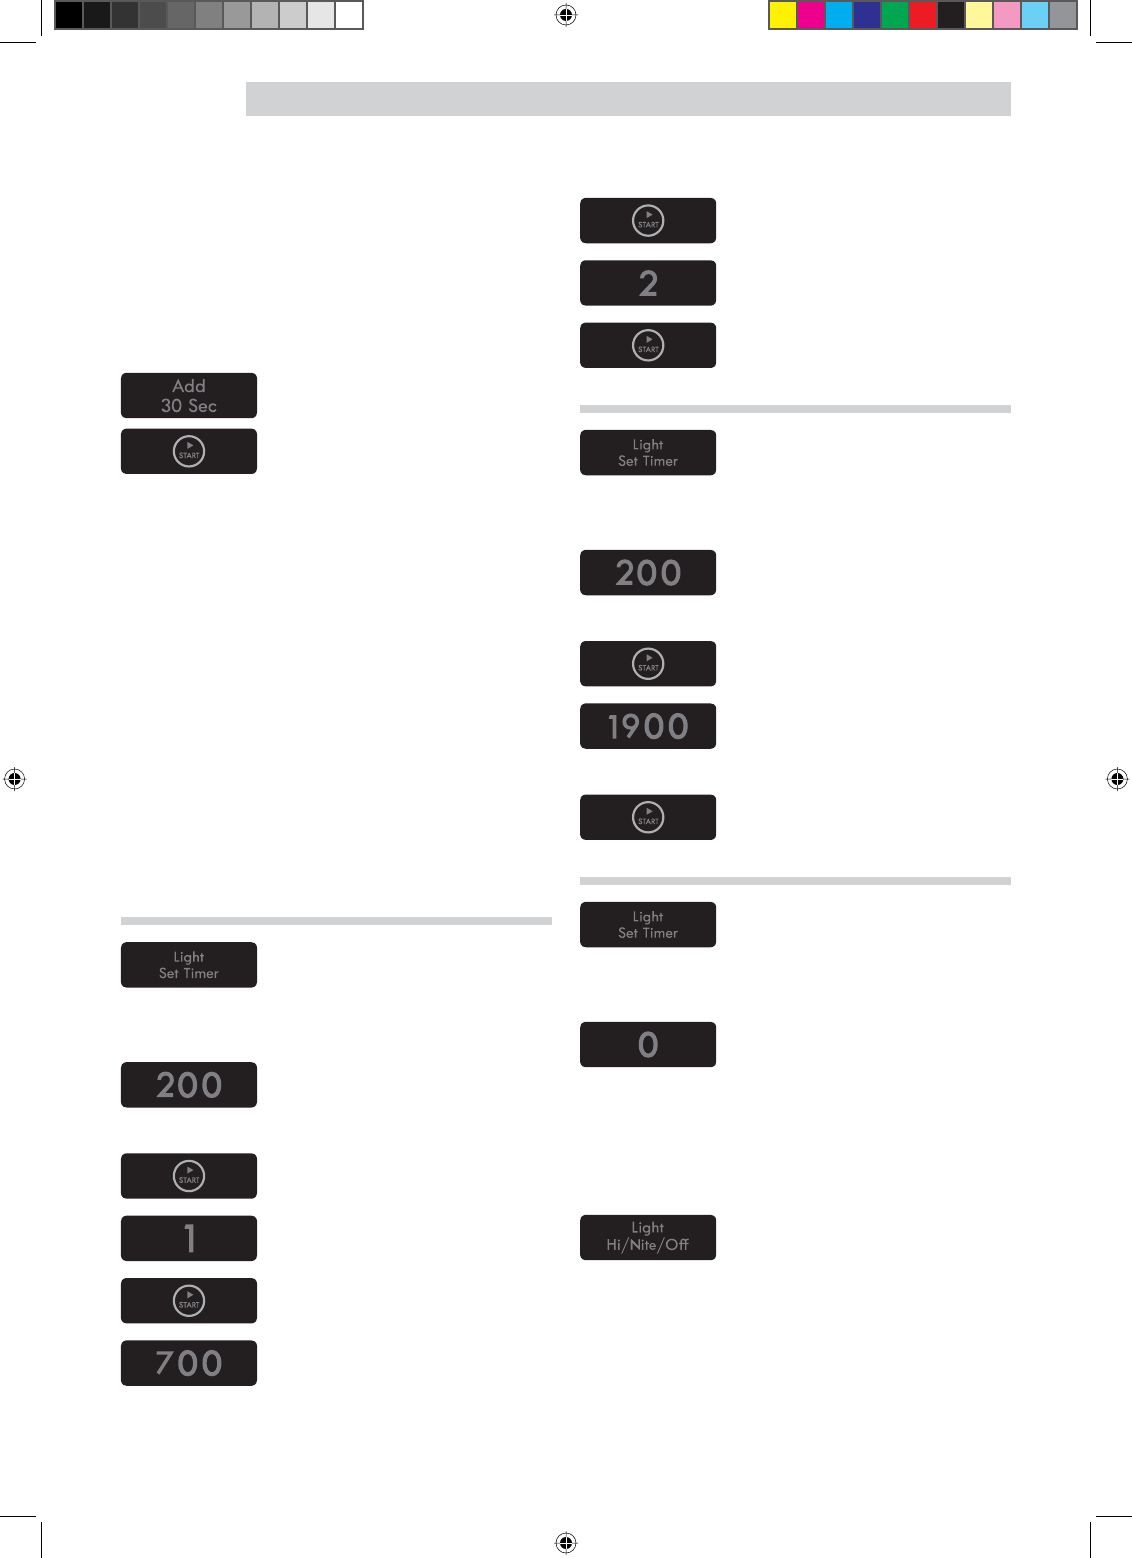
MANUAL DE INSTRUCCIONES
51
Agregar 30 seg
(VWDWHFODVLPSOLÀFDGDDKRUUDWLHPSR\OH
SHUPLWHFRQÀJXUDUUiSLGDPHQWH\FRPHQ]DUOD
cocción en el microondas.
(MHPSOR3DUDFRQÀJXUDU$''6(&
(AGREGAR 30 SEG) en 2 minutos.
Oprima la tecla ADD 30 SEC
(AGREGAR 30 SEG) 4 veces
y oprima la tecla START
(INICIO). El horno comienza la
cocción y la pantalla muestra
la cuenta regresiva del
tiempo.
Light Set Timer (Temporizador de
FRQÀJXUDFLyQGHODOX]
Puede programar la LIGHT (LUZ) para que
se encienda y se apague automáticamente
en cualquier momento. La luz se enciende a la
misma hora todos los días hasta que se reinicie
el horno.
Ejemplo: Se enciende a las 2:00 AM, se apaga a las
7:00 AM.
Modo de reloj de 12 horas.
1. Oprima la tecla LIGHT SET
TIMER (TEMPORIZADOR
DE CONFIGURACIÓN DE
LA LUZ).
2. Ingrese la hora a la que
desea que se encienda la
LUZ.
3. Oprima la tecla START
(INICIO).
4. Oprima 1 para AM.
5. Oprima la tecla START
(INICIO).
6. Ingrese la hora a la que
desea que se apague la
LUZ.
7. Oprima la tecla START
(INICIO).
8. Oprima 2 para PM.
9. Oprima la tecla START
(INICIO).
Modo de reloj de 24 horas.
1. Oprima la tecla LIGHT SET
TIMER (TEMPORIZADOR
DE CONFIGURACIÓN DE
LA LUZ).
2. Ingrese la hora a la que
desea que se encienda la
LUZ.
3. Oprima la tecla START
(INICIO).
4. Ingrese la hora a la que
desea que se apague la
LUZ.
5. Oprima la tecla START
(INICIO).
Para cancelar el temporizador de luz.
1. Oprima la tecla LIGHT SET
TIMER (TEMPORIZADOR
DE CONFIGURACIÓN DE
LA LUZ).
2. Oprima la tecla 0.
Light Hi/Nite/Off
(Luz alta/noche/apagada)
Oprima la tecla
LIGHT HI/NITE/OFF
(LUZ ALTA/NOCHE/
APAGADA) una vez para luz
brillante, dos veces para luz
nocturna, o tres veces para
apagar la luz.
8505_XAA_03805A-EN+MES.indb 51 2010-07-08 6:47:19
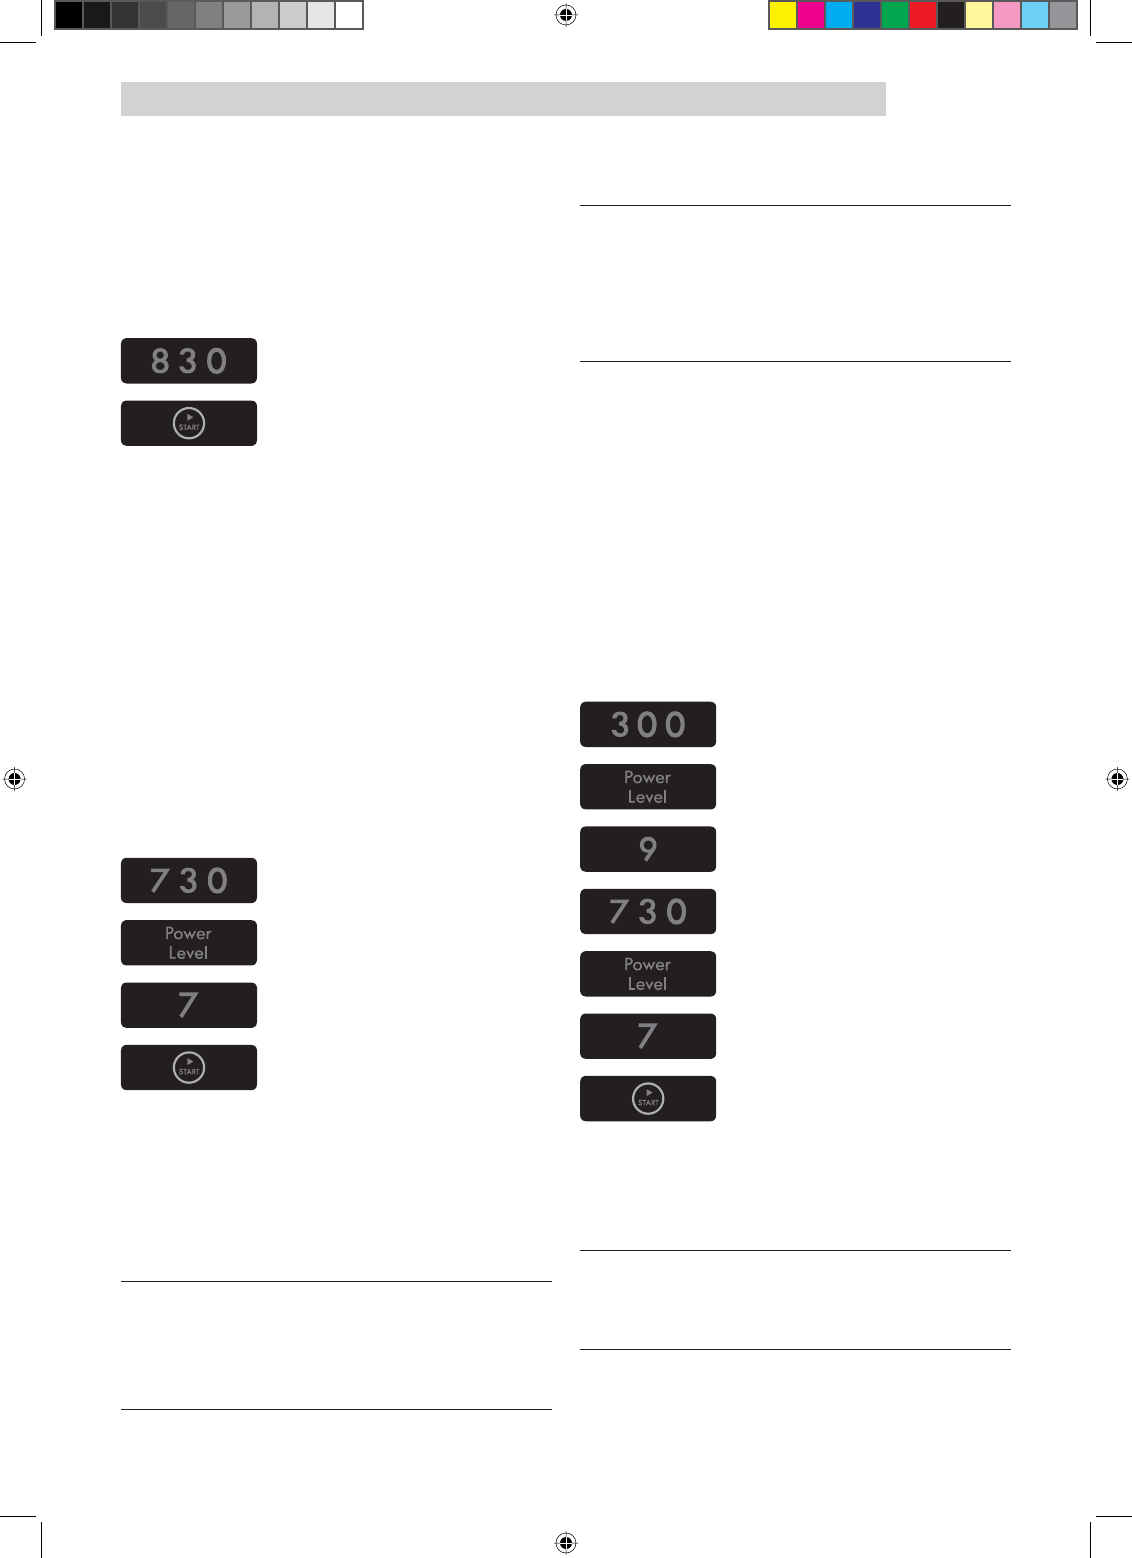
52
MANUAL DE INSTRUCCIONES
Cocción con altos niveles de
potencia
Ejemplo: Para cocinar alimentos durante 8 minutos
30 segundos a una potencia del 100 %.
1. Ingrese el tiempo de
cocción.
2. Oprima la tecla START
(INICIO).
Cuando haya transcurrido el tiempo de cocción,
escuchará cuatro señales sonoras y aparecerá
la palabra END (FIN).
Cocción con bajos niveles de potencia
La cocción con el nivel de potencia HIGH no
siempre le brinda los mejores resultados con los
alimentos que necesitan una cocción más lenta,
tales como las carnes asadas, los alimentos
KRUQHDGRVRORVÁDQHV6XKRUQRWLHQHDMXVWHV
de potencia además de HIGH.
Ejemplo: Para cocinar alimentos durante 7 minutos
30 segundos a una potencia del 70 %.
1. Ingrese el tiempo de
cocción.
2. Oprima la tecla POWER
LEVEL.
3. Ingrese en nivel de
potencia.
4. Oprima la tecla START
(INICIO).
Cuando haya transcurrido el tiempo de cocción,
escuchará cuatro señales sonoras y aparecerá
la palabra END (FIN).
Para conocer los niveles de potencia consulte la
guía de cocción en la página 53.
IMPORTANTE:
Para evitar dañar el horno, NO almacene ni
utilice el estante de alambre en este horno
a menos que se vaya a cocinar más de un
alimento o una receta lo requiera.
NOTA:
Si el horno está programado para cocinar
durante más de 20 minutos, después de los
20 minutos se ajustará automáticamente a una
potencia del 70 por ciento para evitar que se
pase la comida.
Cocción multietapas
Para obtener mejores resultados, algunas
recetas requieren un nivel de potencia durante
un tiempo y otro nivel de potencia durante otro
WLHPSR6HSXHGHFRQÀJXUDUVXKRUQRSDUD
pasar de uno a otro en forma automática,
durante dos ciclos o durante tres ciclos.
Ejemplo: Para cocinar alimentos durante 3 minutos a
una potencia del 90 % y luego a una potencia del
70 % durante 7 minutos 30 segundos.
1. Ingrese el tiempo de
cocción.
2. Oprima la tecla POWER
LEVEL.
3. Ingrese en nivel de
potencia.
4. Ingrese el segundo tiempo
de cocción.
5. Oprima la tecla POWER
LEVEL.
6. Ingrese en nivel de
potencia.
7. Oprima la tecla START
(INICIO).
Cuando haya transcurrido el tiempo de cocción,
escuchará cuatro señales sonoras y aparecerá
la palabra END (FIN).
NOTA:
6HSXHGHFRQÀJXUDUHOVHJXQGRFLFORGH
FRFFLyQHQSRWHQFLDDÀQGHHVWDEOHFHUXQ
periodo de reposo dentro del horno.
8505_XAA_03805A-EN+MES.indb 52 2010-07-08 6:47:21

MANUAL DE INSTRUCCIONES
53
Guía de cocción de los niveles de potencia
Los niveles de potencia le permiten elegir la cantidad de energía de calor más adecuada
para los alimentos que cocina. A continuación se enumeran los niveles de potencia, ejemplos de
alimentos que se cocinan mejor a cada nivel y la potencia del microondas que utiliza.
NIVEL DE
POTENCIA
SALIDA DEL
MICROONDAS
USAR
10 High
(alto)
100 % Hervir agua.
Cocinar carne picada o comenzar a cocinar carnes asadas.
Hacer dulces.
Cocinar frutas y verduras frescas.
Precalentar una bandeja doradora.
Recalentar bebidas.
Rebanadas de tocino.
9 90 % Recalentar rebanadas de carne rápidamente.
Saltear cebollas, apio y pimiento verde.
8 80 % Todo tipo de recalentamiento.
Cocinar huevos revueltos.
7 70 % Cocinar aves o mariscos.
Cocinar panes y productos a base de cereales.
Cocinar platos con queso, ternera.
&RFLQDUWRUWDVPXIÀQVEURZQLHVPDJGDOHQDV
6 60 % Cocinar pasta.
5 50 % Cocinar carnes.
Cocinar budines.
Cocinar costillas, costillas asadas, solomillo asado.
4 40 % Cocinar cortes de carne menos tiernos.
Recalentar comidas rápidas congeladas.
3 30 % Descongelar carne de res, de ave y mariscos.
Cocinar pequeñas cantidades de alimentos.
Terminar de cocinar guiso, estofado y algunas salsas.
2 20 % Ablandar mantequilla y queso crema.
Calentar pequeñas cantidades de alimentos.
1 10 % Ablandar helado.
Leudar masa con levadura.
0 0 % Tiempo de reposo en el horno.
8505_XAA_03805A-EN+MES.indb 53 2010-07-08 6:47:21

54
MANUAL DE INSTRUCCIONES
Instrucciones del sensor
(Páginas siguientes 55~57)
La Cocción con Sensor le permite cocinar
la mayoría de sus alimentos favoritos sin
seleccionar los tiempos de cocción y los niveles
de potencia. La pantalla indicará el período
de detección desplazando el nombre de la
categoría de alimento que se ha seleccionado.
El horno determina automáticamente el tiempo
de cocción para cada alimento. Cuando el
sensor interno detecta una cierta cantidad de
humedad proveniente del alimento, le indicará
al horno cuánto tiempo más cocinarlo. La
pantalla mostrará el tiempo de calentamiento
restante.
Para obtener mejores resultados cuando cocina
con Sensor, siga estas recomendaciones:
1. Los alimentos cocinados con el sistema
de sensor deben estar a temperatura de
almacenamiento normal.
2. El plato giratorio de vidrio y la parte
externa del recipiente deben estar secos
para asegurar mejores resultados de
cocción.
3. La mayoría de los alimentos deben cubrirse
siempre, sin apretar, con un envoltorio
plástico para microondas, papel de cera o
una tapa.
4. No abra la puerta ni toque la tecla
STOP/CLEAR (DETENER/ELIMINAR) durante
el tiempo de detección. Cuando haya
transcurrido el tiempo de detección, se
escuchará una señal sonora y aparecerá el
tiempo de cocción restante en la pantalla.
En este momento puede abrir la puerta
para revolver, dar vuelta o reacomodar la
comida.
Consulte las tablas de sensores en la
página 57.
IMPORTANTE:
Antes de volver a utilizar la cocción con sensor,
se debe dejar enfriar el horno durante
5 minutos para que los alimentos se cocinen
correctamente.
Guía de cocción con sensor
Los recipientes y las cubiertas adecuadas
ayudan a garantizar buenos resultados de
cocción con Sensor.
1. Siempre utilice recipientes para microondas
y cúbralos con sus tapas o con un envoltorio
plástico con ventilación.
2. Nunca utilice cubiertas de plástico
herméticas. Pueden evitar que salga el
vapor y hacer que la comida se pase.
3. Ajuste la cantidad al tamaño del recipiente.
Llene los recipientes al menos hasta la
mitad para obtener mejores resultados.
4. Asegúrese de que la parte externa del
recipiente de cocción y la parte interna del
microondas estén secas antes de colocar la
comida en el horno. Las gotas de humedad
que se convierten en vapor de agua
pueden engañar al sensor.
NOTA:
Si la comida no está bien cocinada o
recalentada cuando se utiliza la función sensor,
utilice el nivel de potencia y el tiempo de
cocción. NO siga utilizando la tecla sensor.
8505_XAA_03805A-EN+MES.indb 54 2010-07-08 6:47:22
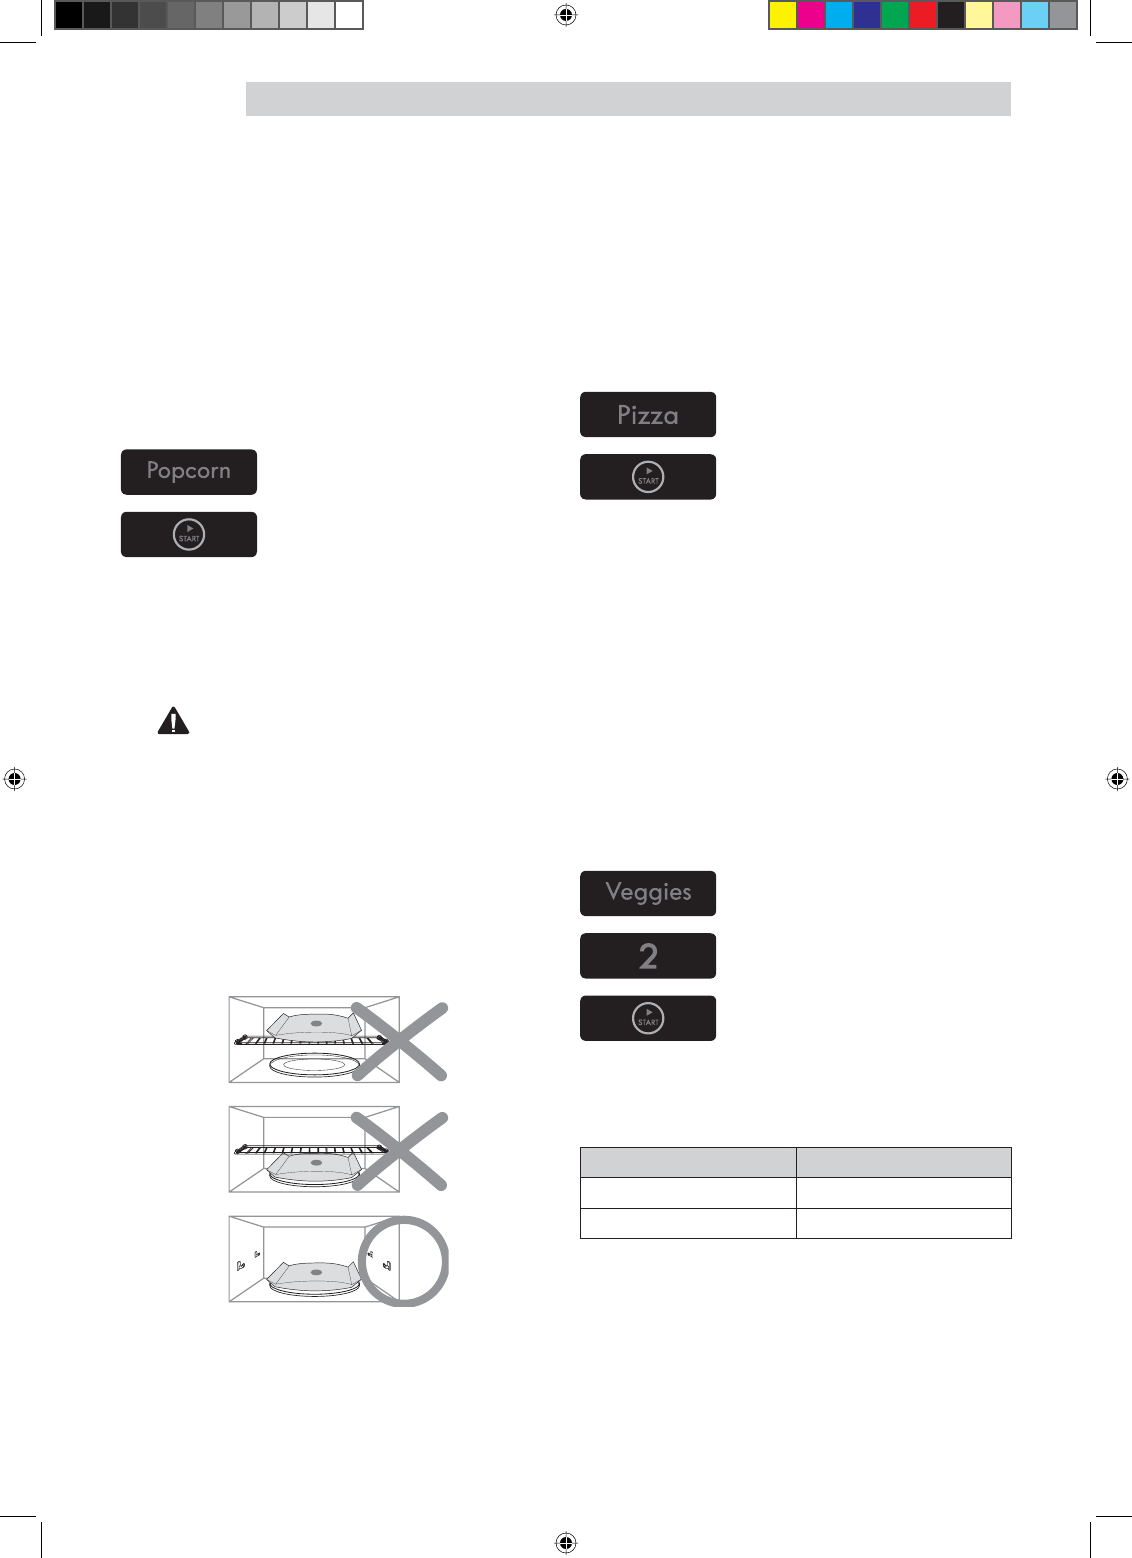
MANUAL DE INSTRUCCIONES
55
Popcorn (Palomitas)
La tecla POPCORN (PALOMITAS) le permite
preparar en el microondas palomitas de maíz
envasadas comercialmente. Prepare sólo
un paquete a la vez. Para obtener mejores
resultados, utilice bolsas nuevas de palomitas
de maíz.
Ejemplo: Para preparar palomitas de maíz.
1. Oprima la tecla
POPCORN.
2. Oprima la tecla START
(INICIO).
Cuando haya transcurrido el tiempo de cocción,
escuchará cuatro señales sonoras y aparecerá
la palabra END (FIN).
Cantidades recomendadas: 3.0-3.5 ozs.
PRECAUCIÓN
NO descuide el microondas mientras
prepara palomitas de maíz.
Cuando cocine palomitas de maíz
envasadas comercialmente,
quite el estante del horno;
No coloque la bolsa de palomitas de
maíz para microondas sobre la rejilla ni
debajo de la misma.
Pizza
La tecla PIZZA (PIZZA) le permite recalentar
de una a cuatro rebanadas de pizza sin
seleccionar los tiempos de cocción y los niveles
de potencia.
Ejemplo: Para recalentar 2 rebanadas de pizza.
1. Oprima la tecla PIZZA
(PIZZA).
2. Oprima la tecla START
(INICIO).
Cuando haya transcurrido el tiempo de cocción,
escuchará cuatro señales sonoras y aparecerá
la palabra END (FIN).
&DQWLGDGHVUHFRPHQGDGDVUHEDQDGDV
Veggies (Verduras)
La tecla VEGGIES (VERDURAS) tiene
tiempos de cocción y niveles de potencia
predeterminados para 2 categorías de
alimentos: Frescas, Congeladas.
Ejemplo: Para cocinar verduras congeladas.
1. Oprima la tecla VEGGIES
(VERDURAS).
2. Elija la categoría de
alimento.
3. Oprima la tecla START
(INICIO).
Cuando haya transcurrido el tiempo de cocción,
escuchará cuatro señales sonoras y aparecerá
la palabra END (FIN).
Categoría Oprimir tecla número
Natural 1
Congelada 2
&DQWLGDGHVUHFRPHQGDGDVDSRUFLRQHV
8505_XAA_03805A-EN+MES.indb 55 2010-07-08 6:47:23
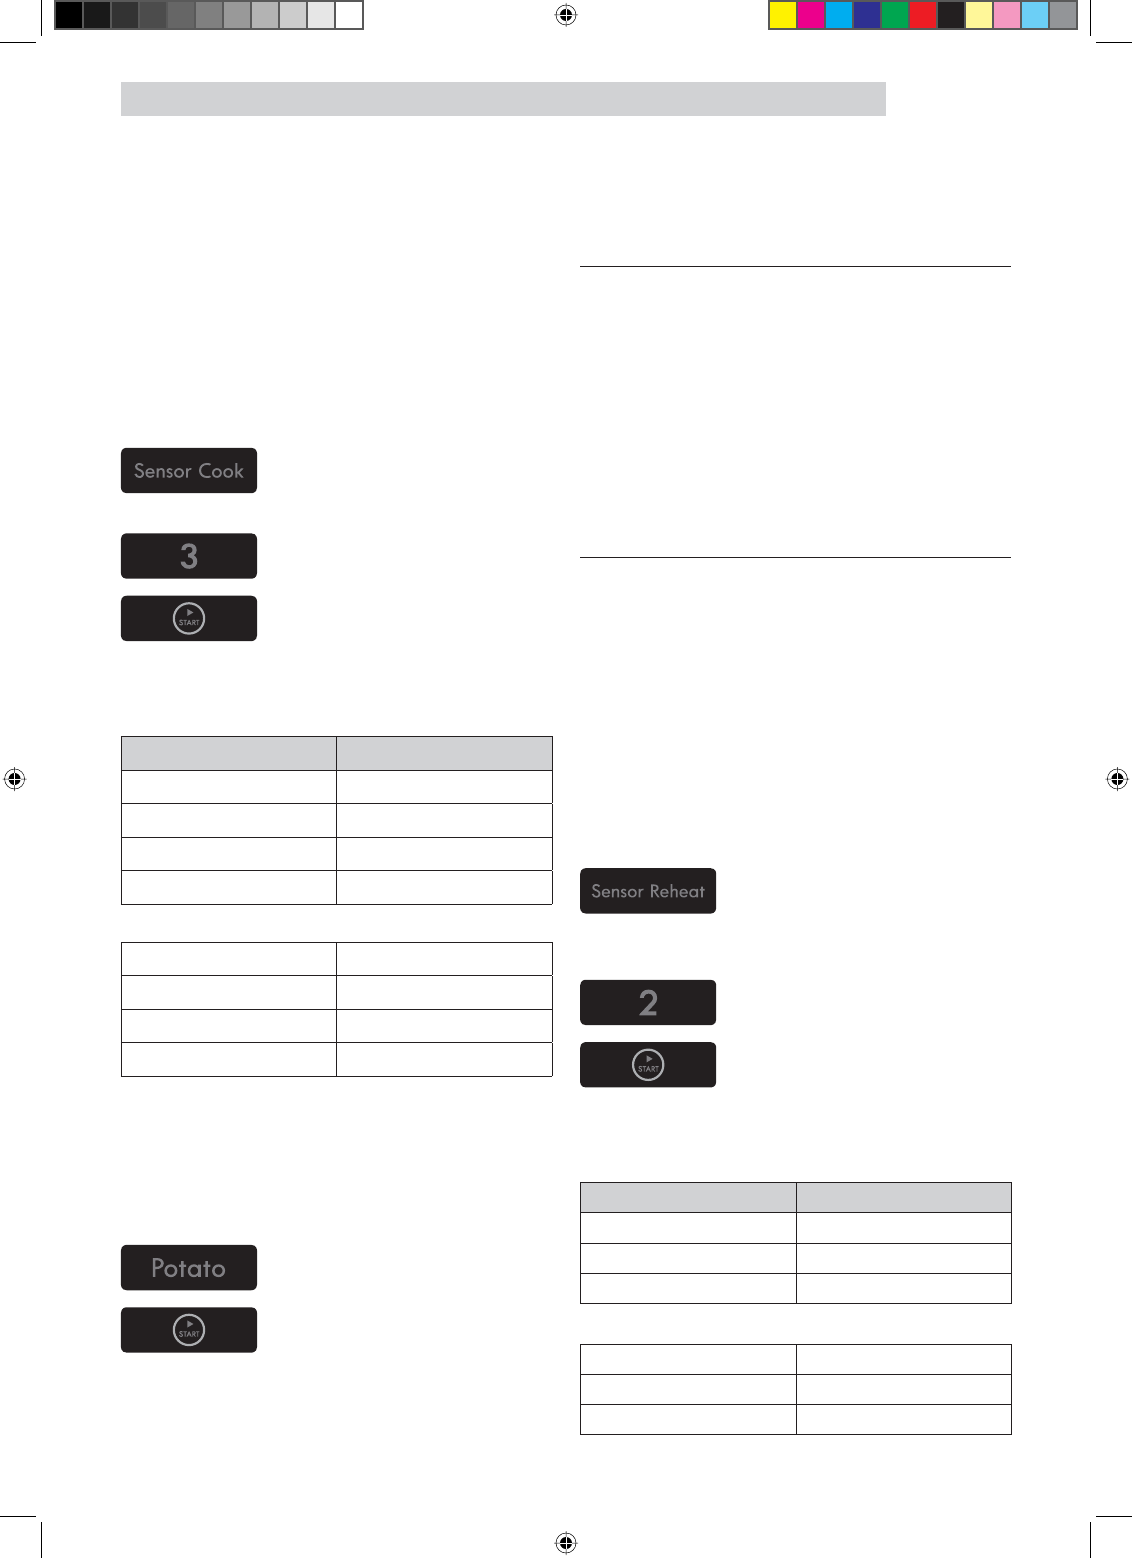
56
MANUAL DE INSTRUCCIONES
Cocción con sensor
Usar la tecla SENSOR COOK (COCCIÓN CON
SENSOR) le permite calentar comidas comunes
preparadas para microondas sin necesidad de
programar tiempos de cocción ni niveles de potencia.
SENSOR COOK tiene 4 categorías de alimentos
predeterminadas. Bebidas, comidas congeladas,
desayunos congelados y pechugas de pollo.
Ejemplo: Para cocinar un desayuno congelado.
1. Oprima la tecla SENSOR
COOK (COCCIÓN CON
SENSOR).
2. Elija la categoría de
alimento.
3. Oprima la tecla START
(INICIO).
Cuando haya transcurrido el tiempo de cocción,
escuchará cuatro señales sonoras y aparecerá
la palabra END (FIN).
Categoría Oprimir tecla número
Bebidas 1
Pechugas de pollo 2
Desayunos congelados 3
Comidas congeladas 4
Cantidades recomendadas:
Bebidas 8 ozs. (1 taza)
Pechugas de pollo 8-24 ozs.
Desayunos congelados 4-8 ozs.
Comidas congeladas 8-14 ozs.
Potato (Papas)
La tecla POTATO (PAPAS) le permite hornear
de una a seis papas sin seleccionar los tiempos
de cocción y los niveles de potencia.
Ejemplo: Para cocinar 2 papas.
1. Oprima la tecla POTATO
(PAPAS).
2. Oprima la tecla START
(INICIO).
Cuando haya transcurrido el tiempo de cocción,
escuchará cuatro señales sonoras y aparecerá
la palabra END (FIN).
Cantidades recomendadas: 1-6 papas,
aproximadamente 6-8 ozs. cada una.
NOTAS:
El tiempo de cocción está basado en una
papa de 6-8 ozs..
Antes de hornear, perfore la papa con un
tenedor varias veces.
Si las papas no están cocinadas
completamente, siga cocinándolas utilizando
el tiempo de cocción.
NO use la tecla POTATO (PAPAS) para
completar la cocción.
Después de hornear, deje reposar durante
5 minutos.
Sensor reheat
(recalentamiento con sensor)
La función SENSOR REHEAT
(RECALENTAMIENTO CON SENSOR) le permite
calentar alimentos sin necesidad de programar
tiempos de cocción ni niveles de potencia.
SENSOR REHEAT (RECALENTAMIENTO CON
SENSOR) tiene 3 categorías predeterminadas:
Plato de comida, Guisos y Pastas.
Ejemplo: Para recalentar un guiso.
1. Oprima la tecla
SENSOR REHEAT
(RECALENTAMIENTO
CON SENSOR).
2. Elija la categoría de
alimento.
3. Oprima la tecla START
(INICIO).
Cuando haya transcurrido el tiempo de cocción,
escuchará cuatro señales sonoras y aparecerá
la palabra END (FIN).
Categoría Oprimir tecla número
Guisado 1
Plato de comida 2
Pastas 3
Cantidades recomendadas:
Guisado 1-4 porciones
Plato de comida 1 porción
Pastas 1-4 porciones
8505_XAA_03805A-EN+MES.indb 56 2010-07-08 6:47:25
MANUAL DE INSTRUCCIONES
57
Tabla de cocción con sensor
CATEGORÍA INSTRUCCIONES CANTIDAD
Popcorn
(Palomitas)
Utilice sólo una bolsa para microondas de palomitas de maíz a la vez. Tenga
cuidado cuando saque y abra la bolsa caliente del horno. Deje enfriar el horno
durante al menos 5 minutos antes de utilizarlo nuevamente.
3 a 3.5 oz.
1 paquete
Potato (Papas) Pinche cada papa varias veces con un tenedor. Colóquelas en el plato giratorio al
estilo de los rayos de una rueda. Deje reposar 3-5 minutos. Deje enfriar el horno
durante al menos 5 minutos antes de utilizarlo nuevamente.
1 a 6
papas
VEGGIES (VERDURAS)
Verduras
frescas
Coloque las verduras frescas en una fuente de plástico, vidrio o cerámica para
microondas y agregue 2-4 cucharadas de agua. Cubra con una tapa o envoltorio
plástico con ventilación durante la cocción y revuelva antes de dejar reposar. Deje
enfriar el horno durante al menos 5 minutos antes de utilizarlo nuevamente.
1 a 4
porciones
Verduras
congeladas
Coloque las verduras congeladas en una fuente de plástico, vidrio o cerámica para
microondas y agregue 2-4 cucharadas de agua. Cubra con una tapa o envoltorio
plástico con ventilación durante la cocción y revuelva antes de dejar reposar. Deje
enfriar el horno durante al menos 5 minutos antes de utilizarlo nuevamente.
1 a 4
porciones
Pizza
Coloque 1-4 rebanadas de pizza en un plato para microondas con el extremo
ancho de la porción hacia el borde exterior del plato. No permita que las porciones
se superpongan. No las cubra. Deje enfriar el horno durante al menos 5 minutos
antes de utilizarlo nuevamente.
1 a 4
rebanadas
Bebidas
Utilice una taza o jarro para medir; no lo cubra. Coloque la bebida en el horno.
Después de calentar, revuelva bien. Deje enfriar el horno durante al menos 5
minutos antes de utilizarlo nuevamente.
Nota:
Los tiempos de recalentamiento están basados en una taza de 8 onzas. (1 taza) La bebida recalentada con esta función puede estar muy caliente. Saque el recipiente con cuidado.
8 oz.
(1 taza)
Pechugas de
pollo
Coloque las pechugas de pollo en un plato para microondas y cúbralas con un
envoltorio plástico. Cocine a una temperatura interna de 170 grados F. Voltéelas
durante la fase de conteo. Deje reposar 5 minutos. Deje enfriar el horno durante al
menos 5 minutos antes de utilizarlo nuevamente.
8 a 24 oz.
Desayunos
congelados
Siga las instrucciones del envase para cubrirlo y dejarlo reposar. Utilice esta tecla
para emparedados congelados, el plato principal del desayuno, etc. Deje enfriar el
horno durante al menos 5 minutos antes de utilizarlo nuevamente. 4 a 8 oz.
Comidas
congeladas
Quite el envoltorio externo de la comida y siga las instrucciones de la caja para
cubrirla y dejarla reposar. Deje enfriar el horno durante al menos 5 minutos antes
de utilizarlo nuevamente. 8 a 14 oz.
Tabla de recalentamiento con sensor
CATEGORÍA INSTRUCCIONES CANTIDAD
Plato de
comida
Utilice sólo alimentos precocidos refrigerados. Cubra el plato con un envoltorio
plástico con ventilación o papel de cera, metido debajo del plato. Si la comida no
está tan caliente como la desea después de calentarla con REHEAT (RECALENTAR),
continúe calentándola utilizando el tiempo de cocción y el nivel de potencia. No siga
cocinando utilizando la tecla Reheat (Recalentar)
Contenido:
3-4 oz. de carne, ave o pescado (hasta 6 oz. con hueso) 1/2 taza de almidón (papas, pasta, arroz, etc.) 1/2 taza de verduras (alrededor de 3-4 oz.)
1 porción
(1 plato)
Guisado Cubra el plato con una tapa o un envoltorio plástico con ventilación. Si la comida no
está tan caliente como la desea después de calentarla con REHEAT (RECALENTAR),
continúe calentándola utilizando el tiempo de cocción y el nivel de potencia. No siga
cocinando utilizando la tecla Reheat (Recalentar) Revuelva la comida una vez antes
de servirla.
Contenido:
Guisos refrigerados. (Ejemplos: lasagna o guiso). Espaguetis y ravioles enlatados y refrigerados.
1 a 4
porciones.
Pastas
8505_XAA_03805A-EN+MES.indb 57 2010-07-08 6:47:25
58
MANUAL DE INSTRUCCIONES
Tiempo de cocción (Time Cook)
Ejemplo: Para cocinar alimentos durante 8 minutos
30 segundos a una potencia del 100 %.
1. Oprima la tecla Time
Cook (Tiempo de cocción).
2. Ingrese el tiempo de
cocción.
3. Oprima la tecla START
(INICIO).
Cuando haya transcurrido el tiempo de cocción,
escuchará cuatro señales sonoras y aparecerá
la palabra END (FIN).
NOTA:
Si el horno está programado para cocinar
durante más de 20 minutos, después de los
20 minutos se ajustará automáticamente a una
potencia del 70 por ciento para evitar que se
pase la comida.
Favorite (Favoritos)
FAVORITE (FAVORITOS) le permite recuperar
una instrucción de cocción previamente
incorporada a la memoria y comenzar a
cocinar inmediatamente.
Ejemplo: Para cocinar durante 2 minutos a una
potencia del 70 %.
1. Oprima la tecla FAVORITE
(FAVORITOS).
2. Ingrese el tiempo de
cocción.
3. Oprima la tecla POWER
LEVEL.
4. Ingrese en nivel de
potencia.
5. Oprima la tecla START
(INICIO).
Ejemplo: Para recuperar un favorito.
1. Oprima la tecla FAVORITE
(FAVORITOS).
2. Oprima la tecla START
(INICIO).
Cuando haya transcurrido el tiempo de cocción,
escuchará cuatro señales sonoras y aparecerá
la palabra END (FIN).
Warm & hold
(Calentar y mantener caliente)
Puede mantener calientes los alimentos
cocinados en el horno microondas hasta
99 minutos y 99 segundos.
Ejemplo: Para mantener caliente 60 minutos.
1. Oprima la tecla WARM
& HOLD (CALENTAR Y
MANTENER CALIENTE)
2. Ingrese el tiempo de
cocción.
3. Oprima la tecla START
(INICIO).
NOTAS:
WARM & HOLD (CALENTAR Y MANTENER
CALIENTE) funciona hasta 99 minutos y
99 segundos.
El alimento que se cocido cubierto se
debe también cubrir durante la función
WARM & HOLD (CALENTAR Y MANTENER
CALIENTE).
La masa (pasteles, empanadillas, etc.) no
se debe cubrir durante WARM & HOLD
(CALENTAR Y MANTENER CALIENTE).
Para mantener calientes los platos
completos se pueden cubrir durante la
función WARM & HOLD (CALENTAR Y
MANTENER CALIENTE).
Tipo de alimento Cantidad recomendada
Líquidos 1-2 tazas
Secado 5-10
oz.
8505_XAA_03805A-EN+MES.indb 58 2010-07-08 6:47:27
MANUAL DE INSTRUCCIONES
59
Botanas
SNACKS (BOTANAS) le permite calentar 4 categorías de alimentos: Nachos, Alitas de pollo,
Papas con piel y Bastones de queso.
Ejemplo: Para calentar alitas de pollo.
1. Oprima la tecla SNACKS
(BOTANAS).
Categoría Oprimir tecla número
Bastones de queso 1
Alitas de pollo 2
Nachos 3
Papas rellenas 4
2. Elija la categoría de
alimento (1-4).
3. Oprima la tecla START
(INICIO).
Tabla de botanas
ALIMENTO CANTIDAD O
PORCIÓN COMENTARIOS
Bastones de
queso
5-6 unidades.
7-10 unidades.
Disponga las bastones de queso como los rayos de una
rueda.
No las cubra.
Alitas de pollo 5-6 oz.
7-8 oz.
Utilice alitas de pollo precocidas refrigeradas.
Coloque las alitas de pollo alrededor del plato al estilo de
los rayos de una rueda y cúbralas con papel encerado.
Nachos 1 porción
Coloque las tortillas de maíz en el plato sin superponerlas.
Espolvoréelas con queso en forma pareja.
Contenido: - 2 tazas de tortillas de maíz
- 1/3 taza de queso rallado.
Papas rellenas 1 patata cocida
2 papas cocidas
Corte la papa cocida en 4 rebanadas parejas. Quite la
pulpa de la papa dejando aproximadamente 1/4” de
piel.
Disponga las cáscaras como los rayos de una rueda
alrededor del plato.
Espolvoree con tocino, cebollas y queso. No las cubra.
8505_XAA_03805A-EN+MES.indb 59 2010-07-08 6:47:28
60
MANUAL DE INSTRUCCIONES
Comidas para niños
KIDS MEALS (COMIDAS PARA NIÑOS) le permite calentar 4 categorías de alimentos:
Trocitos de pollo, papas fritas, papas fritas, emparedados congelados y salchichas.
Ejemplo: Para cocinar emparedados congelados.
1. Oprima la tecla KIDS
MEALS (COMIDAS PARA
NIÑOS).
Categoría Oprimir tecla número
Trocitos de pollo 1
Papas fritas 2
Emparedados
congelados
3
Salchichas 4
2. Elija la categoría de
alimento (1-4).
3. Oprima la tecla START
(INICIO).
Tabla de comidas para niños
ALIMENTO CANTIDAD O
PORCIÓN COMENTARIOS
Trocitos de
pollo
1 porción (4-5 oz.)
2 porciones (6-7 oz.)
Coloque una toalla de papel sobre el plato y acomode
los trocitos al estilo de los rayos de una rueda en la
toalla de papel.
No las cubra. Deje reposar 1 minuto.
Papas fritas
1 porción (4-5 oz.)
2 porciones (6-7 oz.)
Coloque 2 toallas de papel sobre el plato y acomode
las papas fritas sobre las toallas, sin superponerlas.
Tápelas con otra toalla de papel después de sacarlas
del horno.
Emparedados
congelados
1 EA
2 EA
Coloque el emparedado congelado en el “manguito”
(que está en el paquete) y póngalo en un plato.
Salchichas
2 EA
4 EA
Pinche las salchichas, colóquelas en el plato. Cuando el
horno emita la señal sonora, agregue los panes y vuelva
a iniciarlo.
8505_XAA_03805A-EN+MES.indb 60 2010-07-08 6:47:28

MANUAL DE INSTRUCCIONES
61
Ablandar/derretir
SOFTEN/MELT (ABLANDAR/DERRETIR) le permite ablandar o derretir 4 categorías de alimentos:
Derretir manteca, derretir chocolate, ablandar manteca, ablandar queso crema.
Ejemplo: Para derretir chocolate.
1. Oprima la tecla
SOFTEN/MELT
(ABLANDAR/DERRETIR).
Categoría Oprimir tecla número
Derretir manteca 1
Derretir chocolate 2
Ablandar manteca 3
Ablandar queso
crema
4
2. Elija la categoría de
alimento (1-4).
3. Oprima la tecla START
(INICIO).
Tabla de Ablandar / Derretir
ALIMENTO CANTIDAD O
PORCIÓN COMENTARIOS
Derretir
manteca
1 barra (1/4 lb.) Quite el envoltorio y corte la manteca a la mitad en forma
vertical.
Coloque la manteca en el recipiente, cúbralo con papel
encerado.
5HYXHOYDELHQGHVSXpVGHÀQDOL]DU\GHMHUHSRVDU
1-2 minutos.
2 barras (1/2 lb.)
Derretir
chocolate
2 cuadrados o
1 taza de pepitas
Coloque los cuadrados o las pepitas de chocolate en un
recipiente apto para microondas.
Revuelva bien en la mitad del tiempo cuando el horno emita
una señal sonora, y vuelva a iniciar el horno.
A menos que se revuelva, el chocolate mantiene su forma
incluso cuando termina el tiempo de calentamiento.
Ablandar
manteca 1 barra (1/4 lb.)
Quite el envoltorio y corte la manteca a la mitad en forma
vertical.
Coloque la manteca en el recipiente, cúbralo con papel
encerado.
Ablandar
queso crema 1 paquete (8 oz.)
Desenvuelva el queso crema y colóquelo en un recipiente
apto para microondas.
Deje reposar 1-2 minutos.
8505_XAA_03805A-EN+MES.indb 61 2010-07-08 6:47:29
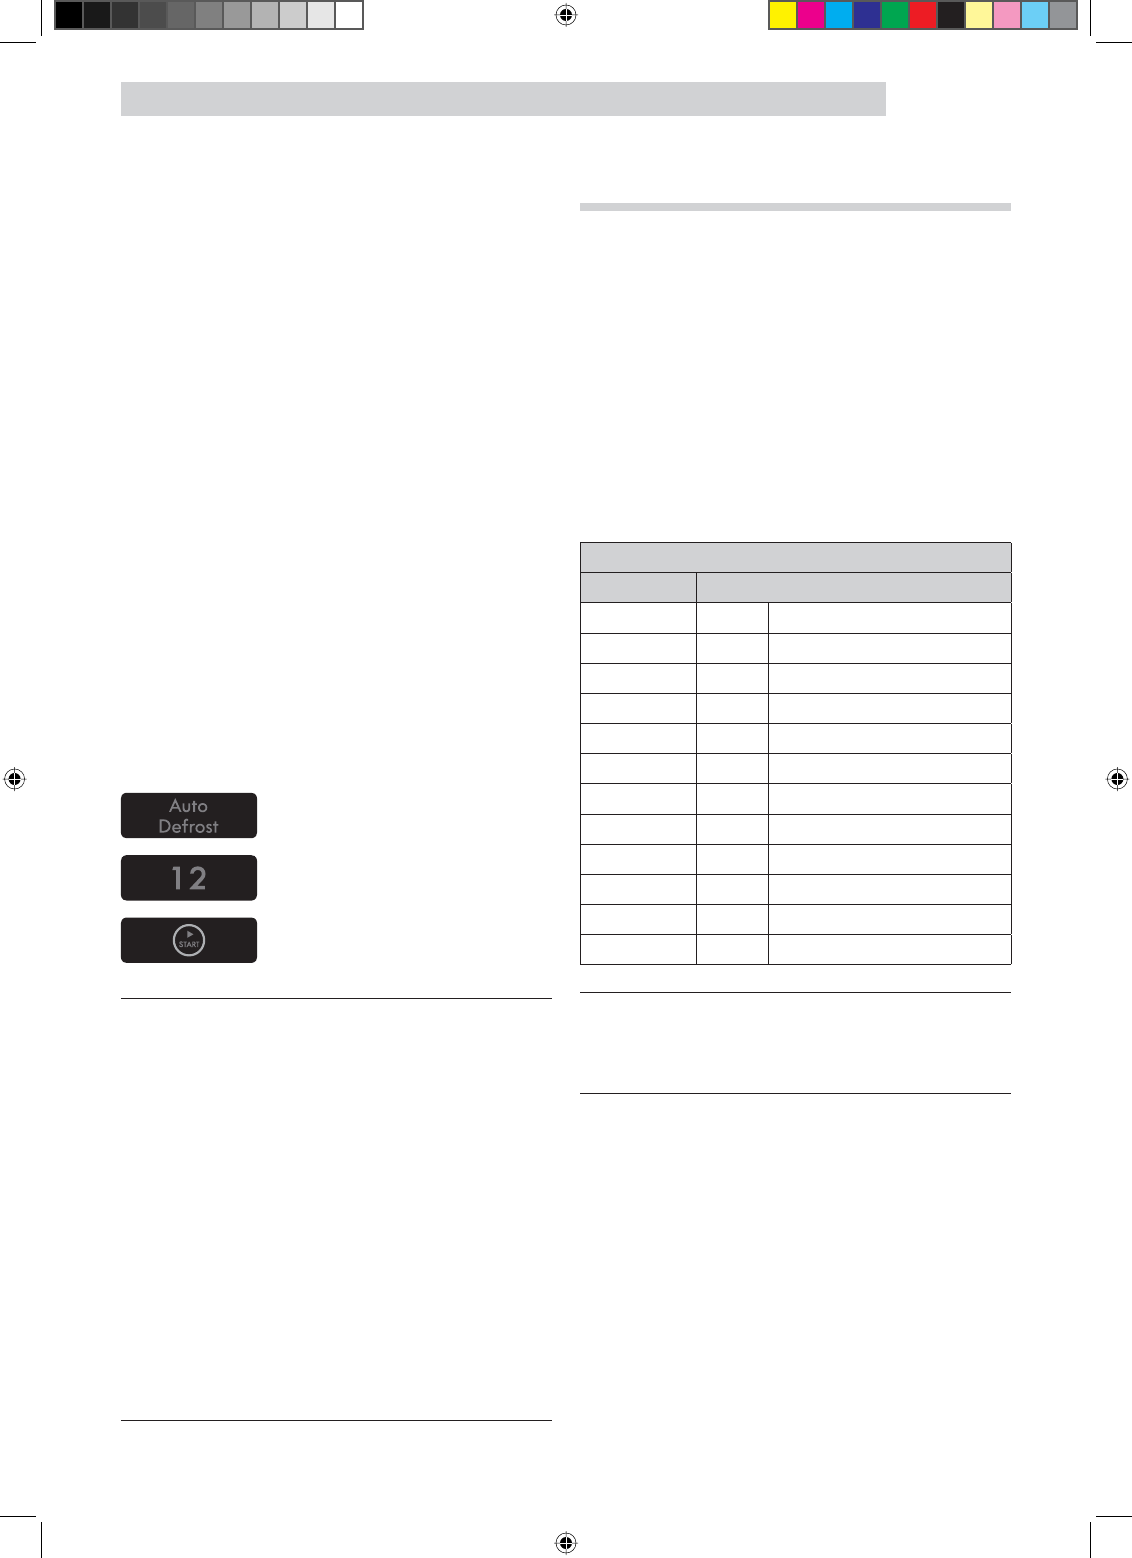
62
MANUAL DE INSTRUCCIONES
Auto Descongelado
(Auto Defrost)
Las opciones de descongelamiento están
programadas en el horno. La función de
descongelamiento le ofrece el mejor método de
descongelamiento para alimentos congelados,
GDGRTXHHOKRUQRFRQÀJXUDDXWRPiWLFDPHQWH
los tiempos de descongelamiento de acuerdo
con el peso que usted ingresa.
Para mayor comodidad, la función
AUTO DEFROST (DESCONGELAMIENTO
AUTOMÁTICO) emite señales sonoras que le
recuerdan controlar o dar vuelta los alimentos
durante el ciclo de descongelamiento.
Después de tocar la tecla AUTO DEFROST una
vez, seleccione el peso de los alimentos.
Los rangos de peso disponibles son de 0.1 a
6.0 lbs.
Ejemplo: Para descongelar 1.2 lbs de carne.
1. Oprima la tecla AUTO
DEFROST.
2. Ingrese el peso.
3. Oprima la tecla START
(INICIO).
NOTAS:
Después de oprimir la tecla START
(INICIO), la pantalla cuenta el tiempo de
descongelamiento en forma regresiva. El
horno emitirá la señal sonora dos veces
durante el ciclo de descongelamiento. En
ese momento, abra la puerta y dé vuelta
los alimentos según sea necesario. Saque
las porciones que se hayan descongelado
luego coloque las porciones congeladas en
el horno y presione la tecla START (INICIO)
para reanudar el ciclo de descongelamiento.
Cuando el horno emita la señal sonora, el
ciclo de descongelamiento continuará sin
interrupción a menos que se abra la puerta.
Tabla de conversión de pesos
Usted probablemente ha utilizado pesos
de alimentos como libras y onzas que son
fracciones de una libra (por ejemplo, 4 onzas
equivalen a 1/4 de libra). Sin embargo, para
introducir el peso del alimento en Auto Defrost
(Descongelamiento automático), se debe
HVSHFLÀFDUHQOLEUDV\GpFLPDVGHOLEUDV
Si el peso del paquete del producto está
en fracciones de una libra, podrá utilizar
la siguiente tabla para convertir el peso en
decimales.
PESO EQUIVALENTE
ONZAS PESO DECIMAL
1.6 .10
3.2 .20
4.0 .25 Un cuarto de libra
4.8 .30
6.4 .40
8.0 .50 Media libra
9.6 .60
11.2 .70
12.0 .75 Tres cuartos de libra
12.8 .80
14.4 .90
16.0 1.00 Una libra
NOTAS:
Entre dos pesos decimales, elija el peso
inferior para obtener mejores resultados de
descongelamiento.
8505_XAA_03805A-EN+MES.indb 62 2010-07-08 6:47:30

MANUAL DE INSTRUCCIONES
63
Guía de descongelamiento
Siga estas instrucciones cuando descongele distintos tipos de alimentos.
ALIMENTO CANTIDAD
ESTÁNDAR PROCEDIMIENTO
Rosbif,
puerco 2.5 a 6 lb. Comience con el alimento ubicado con el lado de la grasa hacia abajo. Después
GHFDGDHWDSDJLUHHODOLPHQWR\FXEUDFXDOTXLHUSDUWHFDOLHQWHFRQWLUDVÀQDV
de papel de aluminio. Déjelo reposar, cubierto, durante 15 a 30 minutos.
Bistecs,
chuletas,
pescado 0.5 a 3 lb.
Después de cada etapa, reacomode el alimento. Si hay alguna parte caliente o
GHVFRQJHODGDF~EUDODFRQSHGDFLWRVÀQRVGHSDSHOGHDOXPLQLR4XLWHFXDOTXLHU
parte del alimento que esté casi descongelada. Déjelo reposar, cubierto, durante
5 a 10 minutos.
Carne
molida 0.5 a 3 lb. Después de cada etapa, retire cualquier parte del alimento que esté casi
descongelada. Deje reposar la carne, cubierta con papel de aluminio, durante
5-10 minutos
Pollo entero 2.5 a 6 lb.
Retire los menudos antes de congelar aves. Comience descongelando con el lado
de la pechuga hacia abajo. Después de la primera etapa, gire el pollo y cubra
FXDOTXLHUSDUWHFDOLHQWHFRQWLUDVÀQDVGHSDSHOGHDOXPLQLR'HVSXpVGHOD
VHJXQGDHWDSDYXHOYDDFXEULUFXDOTXLHUSDUWHFDOLHQWHFRQWLUDVÀQDVGHSDSHO
de aluminio. Deje reposar, cubierto, durante 30-60 minutos en el refrigerador.
Presas de
pollo 0.5 a 3 lb. Después de cada etapa, reacomode o retire cualquier parte del alimento que
esté casi descongelada. Deje reposar durante 10-20 minutos.
Consejos para el descongelamiento
Cuando utiliza la función AUTO DEFROST, el peso que se debe ingresar es el peso neto en libras y décimas de libras (el peso del alimento menos el del recipiente).
Utilice AUTO DEFROST sólo para alimentos crudos. La función AUTO DEFROST (DESCONGELAMIENTO AUTOMÁTICO) obtiene mejores resultados cuando los alimentos que se descongelarán están a un
mínimo de 0 °F (sacados directamente de un auténtico freezer). Si el alimento se almacenó en un
refrigerador-freezer que no mantiene una temperatura de 5 °F o menos, siempre programe un peso
inferior del alimento (durante un tiempo de descongelamiento más reducido) para evitar cocinar el
alimento.
Si el alimento queda hasta 20 minutos fuera del freezer, ingrese un peso inferior del alimento.
La forma del envase altera el tiempo de descongelamiento. Los paquetes rectangulares chatos se descongelan más rápidamente que un bloque profundo.
Separe los pedazos a medida que comienzan a descongelarse. Los pedazos separados se descongelan con más facilidad.
Cubra áreas de los alimentos con pedacitos pequeños de papel de aluminio si comienzan a calentarse.
Puede utilizar pequeños pedazos de papel de aluminio para proteger alimentos como las alas de pollo, los extremos de las patas y las colas de pescado, pero el papel no debe tocar los laterales del
horno. El papel de aluminio produce chispas, lo que puede dañar el revestimiento del horno.
1 Lb defrost (Descongelamiento 1 Lb)
La función 1 LB DEFROST (DESCONGELAMIENTO 1 LB) ofrece un descongelamiento rápido para
DOLPHQWRVFRQJHODGRVGHOLEUD(OKRUQRFRQÀJXUDDXWRPiWLFDPHQWHHOWLHPSRGHGHVFRQJHODPLHQWR
Coloque directamente sobre el plato giratorio o papel de cera. No utilice una bandeja adicional.
Ejemplo: Para descongelar 1 lb. de carne picada.
1. Oprima la tecla 1 LB DEFROST (DESCONGELAMIENTO 1 LB).
2. Oprima la tecla START (INICIO).
8505_XAA_03805A-EN+MES.indb 63 2010-07-08 6:47:30
64
MANUAL DE INSTRUCCIONES
Guía de cocción
Guía para cocinar carne en el microondas
Coloque la carne sobre una asadera para microondas en una fuente para microondas.
&RPLHQFHDFRFLQDUODFDUQHFRQHOODGRGHODJUDVDKDFLDDEDMR8WLOLFHWLUDVÀQDVGHSDSHO
de aluminio para proteger cualquier punta de hueso o área de carne delgadas.
Controle la temperatura en varios lugares antes de dejar reposar la carne el tiempo
recomendado.
Tipo de
alimento Tiempo de cocción Nivel de potencia Instrucciones
Asar bistec sin
hueso
(Hasta 4 lbs.)
9-13 min./lb. para
145 °F (Jugoso) Alta (10) durante los
primeros 5 minutos,
luego media (5)
Coloque el lado de la grasa
hacia abajo en la asadera.
Cubra con papel encerado.
Dé vuelta a la mitad del ciclo
de cocción. Deje reposar
10-15 minutos.
10-15 min./lb. para
160 °F (A punto)
12-17 min./lb. para
170 °F (Cocido)
Cerdo sin hueso
o con hueso
(Hasta 4 lbs.)
13-17 min./lb. para
170 °F (Cocido)
Alta (10) durante los
primeros 5 minutos,
luego media (5)
Coloque el lado de la grasa
hacia abajo en la asadera.
Cubra con papel encerado.
Dé vuelta a la mitad del ciclo
de cocción. Deje reposar
10-15 minutos.
Las siguientes temperaturas son las temperaturas a las que se sacan los alimentos. La
temperatura del alimento aumentará durante el tiempo de reposo.
Considere que se producirá un incremento de 10 °F en la temperatura durante el tiempo de
reposo.
Tipo de alimento Al sacarlo del
horno Después del tiempo de reposo (10-15 min.)
Carne de res
Jugoso 135 °F 145 °F
Media 150 °F 160 °F
Cocida 160 °F 170 °F
Carne de puerco Media 150 °F 160 °F
Cocida 160 °F 170 °F
Carne de ave Carne oscura 170 °F 180 °F
Carne blanca 160 °F 170 °F
8505_XAA_03805A-EN+MES.indb 64 2010-07-08 6:47:30

MANUAL DE INSTRUCCIONES
65
Guía para cocinar ave en el microondas
Coloque la carne de ave sobre una asadera para microondas en una fuente para microondas.
Cubra la carne de ave con papel encerado para evitar salpicaduras.
Utilice papel de aluminio para cubrir las puntas de los huesos, las áreas de carne delgada o las
áreas que comienzan a cocinarse demasiado.
Controle la temperatura en varios lugares antes de dejar reposar la carne de ave el tiempo
recomendado.
Tipo de
alimento
Tiempo de cocción/
Nivel de potencia Instrucciones
Pollo entero
Hasta 4 lb.
Tiempo de cocción: 9-13 min./lb.
180 °F para carne oscura
170 °F para carne blanca
Nivel de potencia: Mediana alta (7).
Coloque el lado de la pechuga del pollo hacia abajo
en la asadera. Cubra con papel encerado. Dé vuelta
a la mitad del ciclo de cocción. Cocine hasta que los
jugos sean claros y la carne cerca del hueso ya no sea
rosada. Deje reposar 5-10 minutos.
Presas de
pollo
Hasta 2 lb.
Tiempo de cocción: 8-11 min./lb.
180 °F para carne oscura
170 °F para carne blanca
Nivel de potencia: Mediana alta (7).
Coloque el lado del hueso del pollo hacia abajo en la
fuente, con las porciones más gruesas hacia la parte
externa del plato. Cubra con papel encerado. Dé
vuelta a la mitad del ciclo de cocción. Cocine hasta que
los jugos sean claros y la carne cerca del hueso ya no
sea rosada. Deje reposar 5-10 minutos.
Guía para cocinar mariscos en el microondas
Cocine el pescado hasta que se pueda desmenuzar fácilmente con un tenedor.
Coloque el pescado sobre una asadera para microondas en una fuente para microondas.
Utilice una cubierta ceñida para cocinar el pescado al vapor. Una cubierta más liviana de papel
encerado o toalla de papel genera menos vapor.
No deje que el pescado se pase, contrólelo en el tiempo de cocción mínimo.
Tipo de
alimento
Tiempo de cocción/
Nivel de potencia Instrucciones
Filetes
Hasta
1.5 lb.
Tiempo de cocción: 6-10 min./lb.
Nivel de potencia: Mediana alta (7).
Acomode los bistecs en la asadera con las porciones
más carnosas hacia la parte exterior de la asadera.
Cubra con papel encerado. Dé vuelta y reacomode el
pescado cuando haya transcurrido la mitad del tiempo
de cocción. Cocine el pescado hasta que se pueda
desmenuzar fácilmente con un tenedor. Deje reposar
3-5 minutos.
Filetes
Hasta
1.5 lb.
Tiempo de cocción: 4-8 min./lb.
Nivel de potencia: Mediana alta (7).
$FRPRGHORVÀOHWHVHQXQDIXHQWHSDUDKRUQRGDQGR
YXHOWDFXDOTXLHUSHGD]RÀQLWR&XEUDFRQSDSHO
encerado. Si tiene más de 1/2 pulgada de grosor,
dé vuelta y reacomode el pescado cuando haya
transcurrido la mitad del tiempo de cocción. Cocine el
pescado hasta que se pueda desmenuzar fácilmente
con un tenedor. Deje reposar 2-3 minutos.
Camarones
Hasta
1.5 lb.
Tiempo de cocción: 4-6 min./lb.
Nivel de potencia: Mediana alta (7).
Acomode los camarones en una fuente para horno
sin superponerlos ni formar capas. Cubra con papel
HQFHUDGR&RFLQHKDVWDTXHHVWpQÀUPHV\RSDFRV
revolviendo 2 ó 3 veces. Deje reposar 5 minutos.
8505_XAA_03805A-EN+MES.indb 65 2010-07-08 6:47:31

66
MANUAL DE INSTRUCCIONES
Guía para cocinar huevos en el microondas
Nunca cocine huevos con cáscara y nunca caliente los huevos duros con la cáscara; pueden
explotar.
Siempre perfore los huevos enteros para evitar que estallen.
Cocine los huevos hasta que apenas se endurezcan; quedan duros si se pasan.
Guía para cocinar verduras en el microondas
Las vegetales deben lavarse antes de cocinarlos. Por lo general, no se necesita agua
adicional. Si se cocinan verduras densas como, por ejemplo, papas, zanahorias y judías
verdes, agregue 1/4 de taza de agua aproximadamente.
Los vegetales pequeños (zanahorias rebanadas, chícharos, frijoles, etc.) se cocinarán más
rápido que los vegetales de mayor tamaño.
Los vegetales enteros, tales como las patatas, calabazas o mazorca, deben acomodarse en
círculo sobre el plato giratorio antes de cocinarlos. Se cocinarán en forma más pareja si se
dan vuelta una vez transcurrida la mitad del tiempo de cocción.
Siempre coloque los vegetales como espárragos y brócoli con los extremos de los tallos
apuntando hacia el borde de la fuente y las puntas hacia el centro.
Cuando cocine vegetales cortados, siempre cubra la fuente con una tapa o envoltorio plástico
para microondas con ventilación.
Las vegetales enteros sin pelar, tales como las papas, calabaza, berenjenas, etc., deben
pincharse en varios lugares antes de cocinarlas para evitar que estallen.
Para una cocción más pareja, revuelva o reacomode los vegetales enteros a la mitad del
tiempo de cocción.
Por lo general, cuanto más denso es el alimento, mayor será el tiempo de reposo. (El tiempo
GHUHSRVRVHUHÀHUHDOWLHPSRQHFHVDULRSDUDTXHORVDOLPHQWRV\YHUGXUDVGHQVRV\
JUDQGHVWHUPLQHQGHFRFLQDUVHXQDYH]ÀQDOL]DGRHOWLHPSRGHFRFFLyQ8QDSDSDDOKRUQR
debe reposar durante cinco minutos, mientras que una fuente de arvejas puede servirse de
inmediato.
8505_XAA_03805A-EN+MES.indb 66 2010-07-08 6:47:31

67
Utensilios para cocinar
Guía de utensilios para microondas
USAR NO UTILICE
VIDRIO RESISTENTE AL HORNO
(tratado para calor de alta densidad):
Platos de uso general, platos
para pastel de carne, platos para
tartas, platos para tortas, tazas
para medir líquidos, cacerolas y
bols sin adornos metálicos.
LOZA:
Bols, tazas, platos de servir y
bandejas sin adornos metálicos.
PLÁSTICO:
Envoltorio plástico (como por
ejemplo tapas)—coloque el
envoltorio plástico sin apretar
sobre la fuente y presiónelo hacia
los lados.
Ventile el envoltorio plástico
dando vuelta un borde
ligeramente para permitir que
salga el exceso de vapor. La
IXHQWHGHEHVHUORVXÀFLHQWHPHQWH
profunda para que el envoltorio
plástico no toque los alimentos.
A medida que los alimentos se
calientan el envoltorio plástico
puede derretirse en las partes
donde toca los alimentos.
Utilice fuentes, tazas y recipientes
para freezer semirígidos de
plástico sólo para tiempos de
cocción breves.
Utilícelos con cuidado dado que el
plástico puede ablandarse por el
calor de la comida.
PAPEL:
Toallas de papel, papel de
cera, servilletas de papel y
platos de papel sin adorno ni
diseños metálicos. Observe las
instrucciones en la etiqueta del
fabricante para su uso en el horno
de microondas.
UTENSILIOS DE METAL:
El metal protege a los alimentos de la energía del
microondas y produce una cocción despareja. También
evite los pinchos de metal, los termómetros y las
bandejas de aluminio. Los utensilios de metal pueden
producir chispas, que son una descarga de energía
eléctrica, lo que puede dañar su horno de microondas.
DECORACIÓN DE METAL:
La vajilla, las fuentes etc adornados con metal o con
ERUGHVGHPHWDO/RVDGRUQRVGHPHWDOLQWHUÀHUHQFRQOD
cocción normal y pueden dañar al horno.
PAPEL DE ALUMINIO:
Evite las hojas de papel de aluminio grandes porque
GLÀFXOWDQODFRFFLyQ\SXHGHQSURGXFLUFKLVSDVGDxLQDV
que son una descarga de energía eléctrica, lo que
puede dañar su horno de microondas. Utilice pedacitos
pequeños de papel de aluminio para proteger las patas
y alas de pollo. Mantenga TODO el papel de aluminio
por lo menos a 1 pulgada de las paredes laterales y la
puerta del horno.
MADERA:
Los bols y tablas de madera se secarán y pueden
partirse o agrietarse cuando los utiliza en el horno de
microondas. Las cestas reaccionan de la misma manera.
UTENSILIOS CON TAPAS APRETADAS:
Asegúrese de dejar aberturas para que salga el vapor
de los utensilios que están tapados.
Perfore las bolsas de plástico de verduras u otros
alimentos antes de la cocción.
Las bolsas cerradas herméticamente podrían explotar.
PAPEL MADERA:
Evite utilizar bolsas de papel madera.
Absorben demasiado calor y podrían quemarse.
UTENSILIOS DEFORMADOS O PICADOS:
Cualquier utensilio que esté agrietado, deformado o
picado puede romperse en el horno.
CIERRES TRENZADOS DE METAL:
Retire los cierres trenzados de metal de las bolsas de
plástico o papel.
Se calientan demasiado y podrían causar un incendio.
8505_XAA_03805A-EN+MES.indb 67 2010-07-08 6:47:31
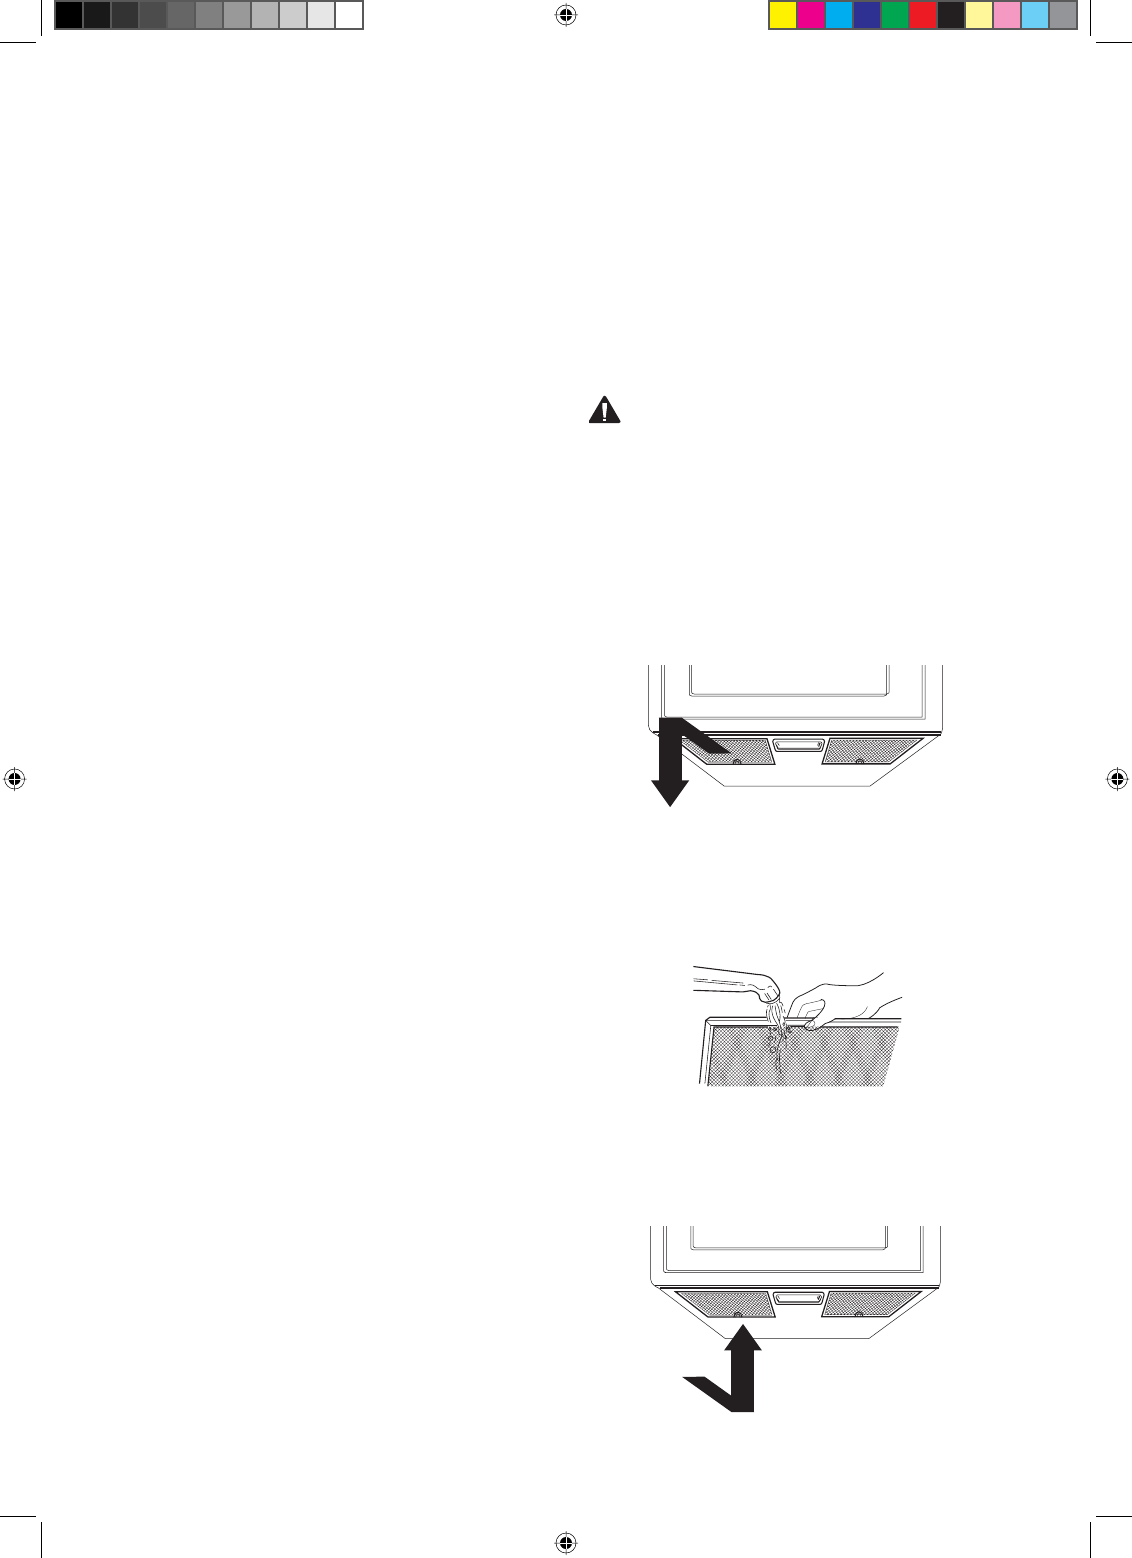
68
Cuidado y limpieza
Cuidado y limpieza
Para un mejor desempeño y mayor seguridad,
mantenga el horno limpio por dentro y por fuera.
Preste especial cuidado para que el panel interior
de la puerta y el marco delantero del horno se
mantengan limpios y sin acumulación de restos de
alimentos o grasa. Nunca utilice polvos abrasivos o
esponjas duras. Limpie el interior y el exterior del
horno de microondas, incluyendo la cubierta inferior
de la campana, con un paño suave y una solución
con detergente suave tibio (no caliente). Luego
enjuague y seque. Utilice un limpiador de cromo y
OLPSLHODVVXSHUÀFLHVGHFURPRPHWDO\DOXPLQLR
Limpie de inmediato las salpicaduras con una toalla
de papel húmeda, especialmente después de
cocinar pollo o tocino. Limpie su horno semanalmente
o más a menudo si es necesario.
Siga estas instrucciones para limpiar y cuidar su
horno.
Mantenga limpia la parte interna del horno. Las partículas de alimentos y los líquidos
derramados pueden adherirse a las paredes
del horno, haciendo que el horno funcione menos
HÀFLHQWHPHQWH
Limpie los derrames de inmediato. Utilice un paño húmedo y detergente suave. No use
detergentes fuertes ni abrasivos.
Para ayudar a ablandar las partículas de alimentos o líquidos, caliente dos tazas de agua
(agregue el jugo de un limón si desea mantener
el horno fresco) en un medidor de cuatro tazas
a potencia Alta durante cinco minutos o hasta
que hierva. Déjelo en el horno durante uno o dos
minutos.
Saque la charola de vidrio del horno cuando limpie el horno o la charola. Para evitar que la
charola se rompa, manipúlela con cuidado y no
la ponga en agua inmediatamente después de
cocinar. Lave la charola con cuidado en agua
jabonosa tibia o el en lavavajillas.
/LPSLHODVXSHUÀFLHH[WHUQDGHOKRUQRFRQ detergente y un paño húmedo. Séquelo con
un paño suave. Para evitar causar daños a las
partes operativas del horno, no deje que entre
agua en las aberturas.
Limpie la ventana de la puerta con un detergente muy suave y agua. Asegúrese de
utilizar un paño suave para evitar rayarla.
Si se acumula vapor dentro o fuera de la puerta del horno, límpielo con un paño suave. Se puede
acumular vapor cuando el horno funciona con
mucha humedad y esto de ninguna manera
indica una fuga del microondas.
Nunca ponga en funcionamiento el horno sin alimentos dentro; esto puede dañar el tubo de
magnetrón o la charola de vidrio. Puede dejar
un vaso de agua en el horno cuando no se use
para evitar daños en caso de que el horno se
encienda accidentalmente.
/LPSLH]DGHORVÀOWURVGHJUDVD
(OÀOWURGHJUDVDGHEHTXLWDUVH\OLPSLDUVHFRQ
frecuencia, al menos una vez al mes.
PRECAUCIÓN
Para evitar el riesgo de lesiones físicas
o daños materiales, no ponga en
funcionamiento la campana del horno sin
WHQHUFRORFDGRVORVÀOWURV
3DUDVDFDUHOÀOWURGHJUDVDGHVOLFHHO
ÀOWURKDFLDXQODGR7LUHGHOÀOWURKDFLD
DEDMR\HPSXMHKDFLDHORWURODGR(OÀOWUR
caerá.
6XPHUMDHOÀOWURGHJUDVDHQDJXDFDOLHQWH
y detergente suave. Enjuáguelo bien y
sacúdalo hasta que se seque. No utilice
amoníaco ni lo coloque en un lavavajillas. El
aluminio se oscurecerá.
3DUDYROYHUDLQVWDODUHOÀOWURFROyTXHOR
en la ranura lateral, luego empuje hacia
arriba y hacia el centro del horno para
trabarlo.
8505_XAA_03805A-EN+MES.indb 68 2010-07-08 6:47:32

CUIDADO Y LIMPIEZA
69
5HHP
S
OD]RGHO
À
OWURGHFDUEy
Q
S
i su horno tiene ventilación hacia el interior
,
el
ÀOWURGHFDUEyQGHEHUHHP
S
OD]DUVHFDGD
D
12 meses, y más a menudo si es necesario
.
El
À
OWURGHFDUEyQQRSXHGHOLPSLDUVH(O
À
OWURGH
carbón está dis
p
onible en
S
ears si llama a
l
1-800-4-
M
Y-HO
M
E
®
o
v
isita sears
.
com
.
1
.
Desenchu
f
e el horno o corte la electricidad
de la
f
uente de alimentación
p
rinci
p
al
.
2
.
A
bra la
p
uert
a
.
3
.
Retire los tornillos de monta
j
e de la re
j
illa
de ventilación (2 tornillos del medio)
.
4
.
C
orra la rejilla de ventilación hacia la
iz
q
uier
d
a
y
retíre
l
a
d
irectamente
.
2
S
ULPDHO
J
DQFKR
\
H[WUDL
J
DHOÀOWURYLH
M
R
Ángulo
Ángulo
Án
g
ulo
Án
g
u
o
l
o
,QVHUWHXQQXHYR
À
OWURGHFDUEyQHQVX
O
X
J
DU(OÀOWURGHEH
T
XHGDULQVWDODGRHQHO
á
n
g
u
l
o
q
ue se muestr
a
.
7
.
Vuelva a colocar la re
j
illa de ventilación
y
l
os
4
tornillos y cierre la puerta
.
V
uelva a
F
RQHFWDUODFRUULHQWH\FRQ
À
JXUHHOUHORM
Ángulo
Ángulo
Án
g
uo
Án
g
u
o
l
o
N
.
°
DE PIEZA DEL FILTRO DE
C
ARB
ÓN
N
.
º de
pi
eza: DE63-00367D
R
eem
p
lazo de la luz de la
c
ubierta
/
luz nocturna
PRE
C
A
UC
I
ÓN
Para evitar lesiones
f
ísicas o daños
materiales, use guantes cuando reemplace
la b
o
mbilla d
e
lu
z
.
1
.
Desenchu
f
e el horno o corte la energía
e
l
éctrica
d
e
l
suministro principa
l
.
2
.
Retire
l
os torni
ll
os
d
e montaje
d
e
l
a
c
u
b
ierta
d
e
l
a
b
om
b
i
lla
.
3
.
Reem
pl
ace
l
a
b
om
b
i
ll
a con una
b
om
b
i
ll
a
haló
g
ena de
20
watts; utilice
g
uantes o
un
p
añue
l
o
.
La
g
rasa
d
e
l
os
d
e
d
os
p
ue
d
e
acortar
l
a
v
i
d
a
d
e
l
a
b
om
b
i
lla
.
4
.
V
ue
l
va a co
l
ocar
l
a cu
b
ierta
d
e
l
a
b
om
b
i
ll
a
y
l
os torni
ll
os
d
e monta
je
.
5
.
V
ue
l
va a conectar
l
a ener
g
ía e
l
éctrica en
e
l
suministro
p
rinci
p
a
l
.
8
5
0
5
_
XA
XAA
AA
_
0
9
9
2010-07-0
2
0
1
0
-
0
7
-
0
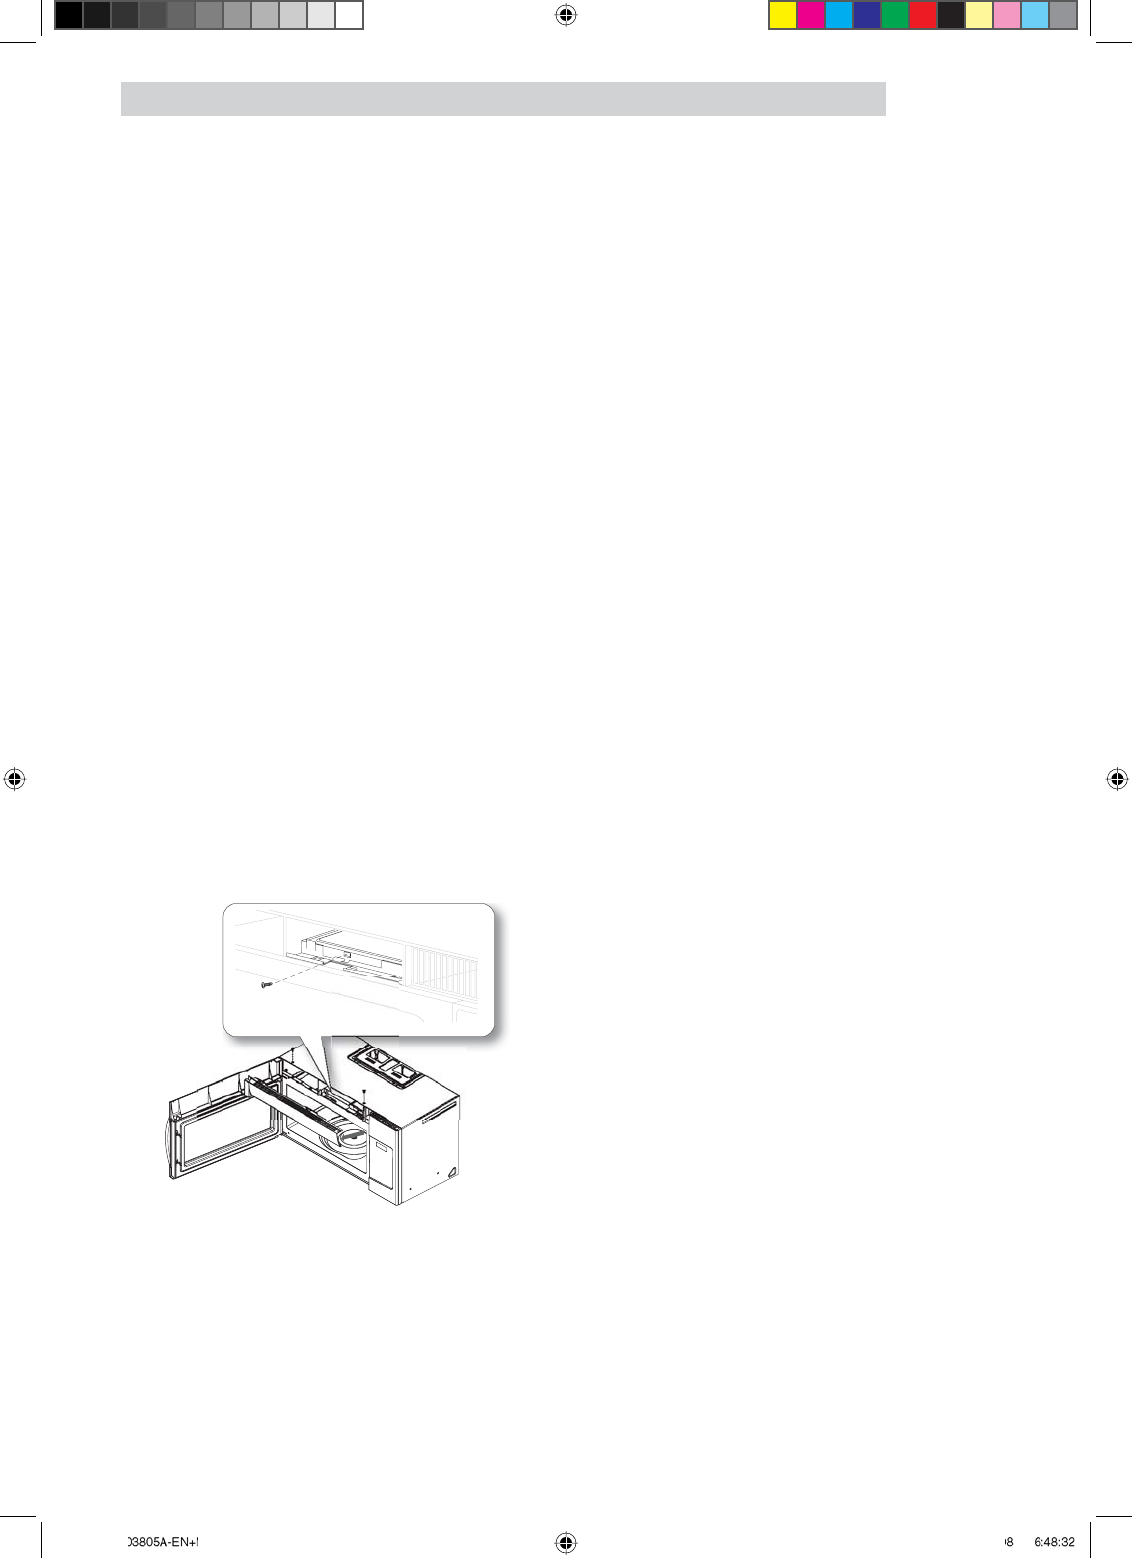
70
CUIDADO Y LIMPIEZA
Reem
p
lazo de la luz del horno
1
.
Desenchu
f
e el horno o también corte la
e
lectricidad de la
f
uente de alimentación
p
rincipa
l
.
2
.
A
bra la puert
a
.
3
.
Retire
l
os torni
ll
os
d
e montaje
d
e
l
a
c
ubierta de ventilación
(2
tornillos del
m
edio
)
.
4
.
C
orra la rejilla de ventilación hacia la
izquierda y retírela directamente
.
5HWLUHHO
À
OWURGHFDUEyQVLORKXELHUH
6
.
Retire la cubierta empujando el gancho y
l
evantando la palanc
a
.
7
.
Retire la bombilla girándola con cuidado
.
8
.
Reemplace la bombilla por una lámpara
incandescente de 4
0
watts
.
9
.
Vuelva a colocar el portabombill
a
.
1
0
.
Vuelva a colocar la tapa de la ventilación
y
los
4
tornillo
s
.
11
.
Vuelva a enchufar el horno
y
conecte la
e
ner
g
ía eléctrica en el suministro
p
rinci
p
al
si la había desc
o
nectad
o
.
8505_XAA_03805A-EN+MES.indb 70
8
5
0
5
_
XA
XAA
AA
_
0
M
E
S
.
i
n
d
b70
b
7
0
2010-07-0
2
0
1
0
-07-0
-
0
7
-
0

71
Guía de solución de problemas
Guía de solución de problemas
$QWHVGHOODPDUDXQWpFQLFRSDUDVXKRUQRYHULÀTXHHVWDOLVWDGHSRVLEOHVSUREOHPDV\VROXFLRQHV
La pantalla del horno y el horno no funcionan.
Inserte correctamente el enchufe a un tomacorriente conectado a tierra.
Si el tomacorriente está controlado por un interruptor de pared, asegúrese de que el interruptor de pared esté encendido.
Retire el enchufe del tomacorriente, espere diez segundos y vuelva a enchufarlo.
Reinicie el disyuntor o reemplace cualquier fusible quemado.
(QFKXIHRWURDSDUDWRHQHOWRPDFRUULHQWHVLHORWURDSDUDWRQRIXQFLRQDOODPHDXQHOHFWULFLVWDFDOLÀFDGR para que repare el tomacorriente.
Enchufe el horno en un tomacorriente diferente.
La pantalla del horno funciona, pero la potencia no arranca.
Asegúrese de que la puerta esté bien cerrada.
Controle si quedó material de embalaje u otro material en la traba de la puerta.
Controle que la puerta no esté dañada.
Presione STOP/CLEAR (DETENER/ELIMINAR) dos veces y vuelva a ingresar todas las instrucciones de
cocción.
El horno se apaga antes de que transcurra el tiempo programado.
Si no hubo un corte de electricidad, retire el enchufe del tomacorriente, espere diez segundos y vuelva a enchufarlo. Si hubo un corte de electricidad, el indicador de tiempo mostrará: PLEASE TOUCH CLOCK AND
SET TIME OF DAY. (POR FAVOR OPRIMA CLOCK (RELOJ) Y CONFIGURE LA HORA DEL DÍA.)Reajuste el
reloj y las instrucciones de cocción.
Reinicie el disyuntor o reemplace cualquier fusible quemado.
La comida se cocina muy lentamente.
Asegúrese de que el horno esté en su propio circuito de 20 A. Poner en funcionamiento otro electrodoméstico en el mismo circuito puede causar una caída de tensión. Si es necesario, enchufe el horno en su propio
circuito.
Ve chispas o arco eléctrico.
Retire cualquier utensilio metálico, artículos de cocina o cierres de metal. Si usa papel de aluminio, utilice sólo tiras pequeñas y deje al menos una pulgada entre el papel de aluminio y las paredes interiores del horno.
El plato giratorio hace ruido o se pega.
Limpie el plato giratorio, el anillo giratorio y el piso del horno.
Asegúrese de que el plato y el anillo giratorio estén colocados correctamente.
El uso de su microondas causa interferencia de TV o radio.
Esto es similar a la interferencia causada por otros artefactos pequeños, como, por ejemplo, los secadores. Aleje más su microondas de otros electrodomésticos, como su TV o radio.
Ruido normal durante el funcionamiento.
El magnetrón puede causar el zumbido.
Ruido de golpes durante el funcionamiento.
Durante el funcionamiento una ligera vibración se considera normal.
NOTA:
Si el horno está programado para cocinar durante más de 20 minutos, después de los 20 minutos
se ajustará automáticamente a una potencia del 70 por ciento para evitar que se pase la comida.
Si ninguno de estos artículos es la causa del problema,
comuníquese con el servicio técnico de Sears al 1-800-4-MY-HOME®
8505_XAA_03805A-EN+MES.indb 71 2010-07-08 6:48:33
® Registered Trademark / TM Trademark of KCD IP, LLC in the United States, or Sears Brands, LLC in other countries
® Marca Registrada / TM Marca de Fábrica de KCD IP, LLC en Estados Unidos, o Sears Brands, LLC in otros países
MC Marque de commerce / MD Marque déposée de Sears Brands, LLC
Get it fixed, at your home or ours!
Your Home
For troubleshooting, product manuals and expert advice:
www.managemylife.com
For repair – in your home – of all major brand appliances,
lawn and garden equipment, or heating and cooling systems,
no matter who made it, no matter who sold it!
For the replacement parts, accessories and
owner’s manuals that you need to do-it-yourself.
For Sears professional installation of home appliances
and items like garage door openers and water heaters.
1-800-4-MY-HOME®(1-800-469-4663)
Call anytime, day or night (U.S.A. and Canada)
www.sears.com www.sears.ca
Our Home
For repair of carry-in items like vacuums, lawn equipment,
and electronics, call anytime for the location of your nearest
Sears Parts & Repair Service Center
1-800-488-1222 (U.S.A.) 1-800-469-4663 (Canada)
www.sears.com www.sears.ca
To purchase a protection agreement on a product serviced by Sears:
1-800-827-6655 (U.S.A.) 1-800-361-6665 (Canada)
Para pedir servicio de reparación
a domicilio, y para ordenar piezas:
1-888-SU-HOGAR®
(1-888-784-6427)
www.sears.com
Au Canada pour service en français:
1-800-LE-FOYERMC
(1-800-533-6937)
www.sears.ca
8505_XAA_03805A-EN+MES.indb 72 2010-07-08 6:48:34