Samsung Electronics Co RMCBNF Bluetooth Remote Control User Manual HT F9730W ZA 0514 indd
Samsung Electronics Co Ltd Bluetooth Remote Control HT F9730W ZA 0514 indd
User manual
| 2 English
Safety Information
WARNING
• To reduce the risk of fire or electric shock, do not
expose this appliance to rain or moisture.
• To turn this apparatus off completely, you must pull the
power plug out of the wall socket. Consequently, the
power plug must be easily and readily accessible at all
times.
• Do not expose this apparatus to dripping or splashing.
Do not put objects filled with liquids, such as vases on
the apparatus.
FCC NOTES (for U.S.A)
This equipment has been tested and found to comply
with the limits for a Class B digital device, pursuant to
Part 15 of the FCC rules. These limits are designed
to provide reasonable protection against harmful
interference in a residential installation. This equipment
generates, uses and can radiate radio frequency energy
and, if not installed and used in accordance with the
instructions, may cause harmful interference to radio or
television reception, which can be determined by turning
the equipment off and on.
If interference is present, the user is encouraged to try to
correct the interference by one or more of the following
measures:
• Reorient or relocate the receiving antenna.
• Increase the separation between the equipment and
receiver.
• Connect this equipment to an outlet on a circuit that
the receiver is not connected to.
• Consult the dealer or an experienced radio/TV
technician for help.
This class B digital product meets all requirements
of the Canadian Interference - Causing Equipment
Regulations.
Warning
TO REDUCE THE RISK OF ELECTRIC SHOCK, DO NOT REMOVE THE COVER (OR BACK).
NO USER-SERVICEABLE PARTS ARE INSIDE. REFER SERVICING TO QUALIFIED SERVICE PERSONNEL.
CAUTION
RISK OF ELECTRIC SHOCK
DO NOT OPEN
The lighting flash and
arrowhead within the triangle
are warning signs alerting you
to dangerous voltage inside
the product.
CAUTION: TO REDUCE THE RISK OF ELECTRIC
SHOCK, DO NOT REMOVE THE COVER (OR
BACK). NO USER SERVICEABLE PARTS INSIDE.
REFER SERVICING TO QUALIFIED SERVICE
PERSONNEL.
The exclamation point within
the triangle is a warning sign
alerting you to important
instructions accompanying the
product.
CLASS 1 LASER PRODUCT
This Compact Disc player is classified as a CLASS
1 LASER product. Use of controls, adjustments or
performance of procedures other than those specified
herein may result in hazardous radiation exposure.
Complies with 21CFR 1040.10 except for deviations
pursuant to Laser Notice No. 50, dated June 24, 2007.
DANGER :
• VISIBLE AND INVISIBLE LASER RADIATION WHEN
OPEN. AVOID DIRECT EXPOSURE TO BEAM. (FDA
21 CFR)
CAUTION :
• CLASS 3B VISIBLE AND INVISIBLE LASER
RADIATION WHEN OPEN. AVOID EXPOSURE TO THE
BEAM (IEC 60825-1)
• THIS PRODUCT UTILIZES A LASER. USE OF
CONTROLS OR ADJUSTMENTS OR PERFORMANCE
OF PROCEDURES OTHER THAN THOSE SPECIFIED
HEREIN MAY RESULT IN HAZARDOUS RADIATION
EXPOSURE. DO NOT OPEN COVER AND DO
NOT REPAIR YOURSELF. REFER SERVICING TO
QUALIFIED PERSONNEL.
CLASS 1 LASER PRODUCT
KLASSE 1 LASER PRODUKT
LUOKAN 1 LASER LAITE
KLASS 1 LASER APPARAT
PRODUCTO LÁSER CLASE 1
HT-F9730W_ZA_0514.indd 2HT-F9730W_ZA_0514.indd 2 2013-05-14 오후 6:20:282013-05-14 오후 6:20:28
English 13 |
02 Getting Started
Remote Control
To pair NFC (Near Field Communication) devices with your Home Theater, you must first pair the remote control with the
Home Theater. See page 39. Pairing occurs automatically when you press any button on the remote after turning on the
Home Theater for the first time.
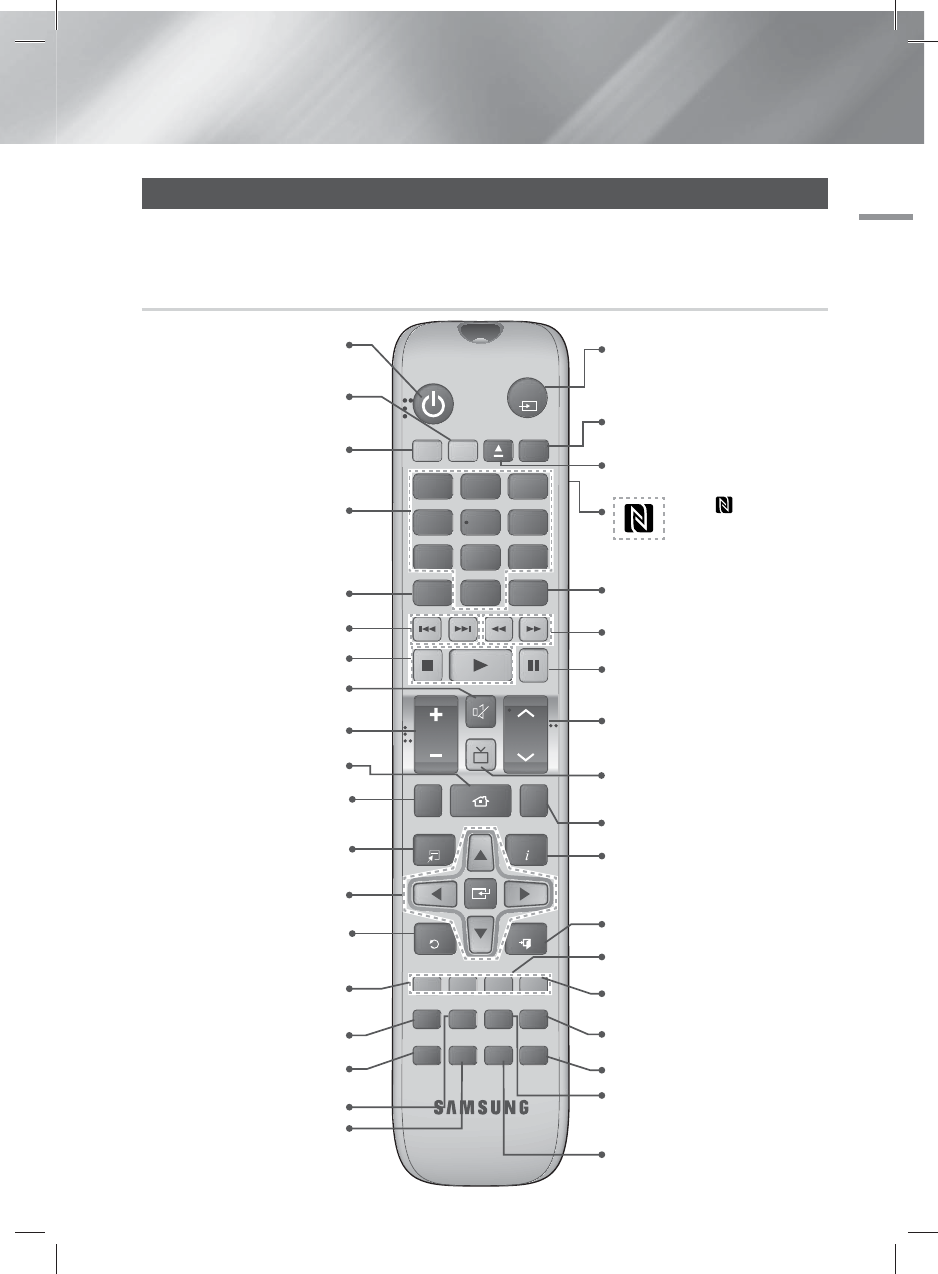
Tour of the Remote Control
Tag the on the back of
the remote control to use
the NFC function.
(See page 39)
FUNCTION
DISC MENU TITLE MENU
MUTE
TV SOUND
FULL SCREEN REPEAT
TOOLS
RETURN
EXIT
INFO
MO/ST
3D SOUND
SOUND
S/W LEVEL
MANUAL
123
456
78
0
9
POPUP
RECEIVER
SLEEP
BD TV
TUNER
MEMORY
SUBTITLE
SMART SEARCH
HOME
ABCD
EFFECTPRESET
HUB
VOL
TUNING
/ CH
TV
SOURCE
AUDIO
Press to apply sound effects.
Turn the product on and off.
To change to Home Theater mode
and control the Home Theater,
press the BD button.
Press numeric buttons to operate
options.
Press to skip backwards or
forwards.
Adjust the volume.
Cut off the sound temporarily.
Press to see the full screen
on a TV.
Press to move to the Home screen.
Select on-screen menu items and
change menu values.
Return to the previous menu.
These buttons are used both for
menus on the product and also
several Blu-ray Disc functions.
Press to view the disc menu.
Press to use the Tools menu.
Press to use Smart Hub.
Selects the disc Audio language.
To change to Television mode
and control the TV, press the TV
button.
Press to stop/play a disc.
Press to search contents.
Press to select MANUAL/
PRESET in the Tuner function.
Set a Sleep time to shut off the
product.
Press to select the home theater's
mode (HDMI, AUX, BD/DVD, etc.).
or
Press to select TV's video mode.
Select MONO or STEREO for radio
broadcasts.
Press to search backwards or
forwards.
Press to pause a disc.
Search for active FM stations and
to change channels.
Press to output the audio signal to
the home theater speakers or the TV
speaker. (See page 42)
Use to enter the Popup menu/Title
menu.
Press to exit the menu.
Use to display the playback
information when playing
a Blu-ray/DVD disc.
Use to set a preset radio frequency.
Allows you to repeat a title,
chapter, track or disc.
Use to adjust the level of the
subwoofer.
Selects the disc subtitle language.
Press to apply the 3D sound effect.
Press to open and close the disc
tray.
HT-F9730W_ZA_0514.indd 13HT-F9730W_ZA_0514.indd 13 2013-05-14 오후 6:20:412013-05-14 오후 6:20:41
| 14 English
Getting Started
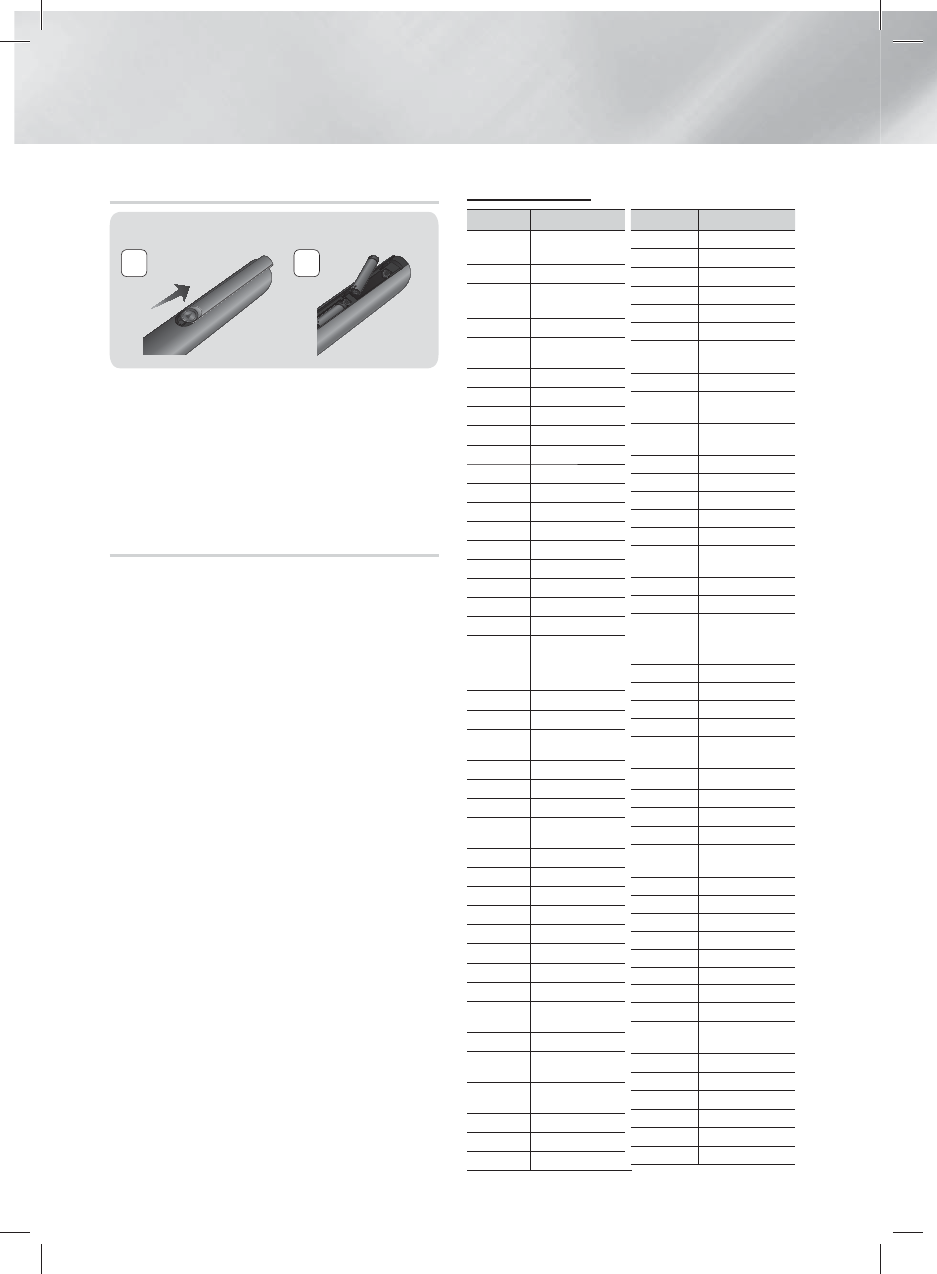
Installing batteries in the Remote Control
Battery size: AAA
21
| NOTES |
Make sure to match the “+” and “–” ends of the
batteries with the diagram inside the compartment.
Assuming typical TV usage, the batteries last for about
one year.
The remote control can be used up to approximately
23 feet (7 meters) from the product in a straight line.
Setting up the Remote Control
You can control certain functions of your TV with this
remote control.
To operate a TV with the Remote Control
1. Press the TV button to set the remote control to TV
mode.
2. Turn on your TV.
3. While holding down the POWER button, enter the
code corresponding to your brand of TV.
• If there is more than one code listed for your TV in
the table, enter one at a time to determine which
code works.
• Example : For a Samsung TV
While holding down the POWER button, use
the number buttons to enter 00. If that does not
work, try 15, then 16, etc.
4. If the TV turns off, the setting is complete.
• You can use the TV POWER, VOLUME,
CHANNEL, and Numeric buttons (0~9).
| NOTES |
The remote may not be able to control some
functions, depending on your brand of TV. Also, the
remote control may not work on some brands of TVs.
The remote control will work with Samsung TVs by
default.
TV Control Codes
Brand Code
Admiral
(M.Wards) 56, 57, 58
A Mark 01, 15
Anam 01, 02, 03, 04, 05, 06, 07,
08, 09, 10, 11, 12, 13, 14
AOC 01, 18, 40, 48
Bell & Howell
(M.Wards) 57, 58, 81
Brocsonic 59, 60
Candle 18
Cetronic 03
Citizen 03, 18, 25
Cinema 97
Classic 03
Concerto 18
Contec 46
Coronado 15
Craig 03, 05, 61, 82, 83, 84
Croslex 62
Crown 03
Curtis Mates 59, 61, 63
CXC 03
Daewoo
02, 03, 04, 15, 16, 17, 18,
19, 20, 21, 22, 23, 24, 25,
26, 27, 28, 29, 30, 32, 34,
35, 36, 48, 59, 90
Daytron 40
Dynasty 03
Emerson 03, 15, 40, 46, 59, 61, 64,
82, 83, 84, 85
Fisher 19, 65
Funai 03
Futuretech 03
General Electric
(GE) 06, 40, 56, 59, 66, 67, 68
Hall Mark 40
Hitachi 15, 18, 50, 59, 69
Inkel 45
JC Penny 56, 59, 67, 86
JVC 70
KTV 59, 61, 87, 88
KEC 03, 15, 40
KMC 15
LG (Goldstar) 01, 15, 16, 17, 37, 38, 39,
40, 41, 42, 43, 44
Luxman 18
LXI (Sears) 19, 54, 56, 59, 60, 62, 63,
65, 71
Magnavox 15, 17, 18, 48, 54, 59, 60,
62, 72, 89
Marantz 40, 54
Matsui 54
MGA 18, 40
Brand Code
Mitsubishi/MGA 18, 40, 59, 60, 75
MTC 18
NEC 18, 19, 20, 40, 59, 60
Nikei 03
Onking 03
Onwa 03
Panasonic 06, 07, 08, 09, 54, 66,
67, 73, 74
Penney 18
Philco 03, 15, 17, 18, 48, 54,
59, 62, 69, 90
Philips 15, 17, 18, 40, 48, 54,
62, 72
Pioneer 63, 66, 80, 91
Portland 15, 18, 59
Proton 40
Quasar 06, 66, 67
Radio Shack 17, 48, 56, 60, 61, 75
RCA/Proscan 18, 59, 67, 76, 77, 78,
92, 93, 94
Realistic 03, 19
Sampo 40
Samsung
00, 15, 16, 17, 40, 43,
46, 47, 48, 49,
59, 60, 98
Sanyo 19, 61, 65
Scott 03, 40, 60, 61
Sears 15, 18, 19
Sharp 15, 57, 64
Signature 2000
(M.Wards) 57, 58
Sony 50, 51, 52, 53, 55
Soundesign 03, 40
Spectricon 01
SSS 18
Sylvania 18, 40, 48, 54, 59, 60,
62
Symphonic 61, 95, 96
Tatung 06
Techwood 18
Teknika 03, 15, 18, 25
TMK 18, 40
Toshiba 19, 57, 63, 71
Vidtech 18
Videch 59, 60, 69
Wards 15, 17, 18, 40, 48, 54,
60, 64
Yamaha 18
York 40
Yupiteru 03
Zenith 58, 79
Zonda 01
Dongyang 03, 54
HT-F9730W_ZA_0514.indd 14HT-F9730W_ZA_0514.indd 14 2013-05-14 오후 6:20:442013-05-14 오후 6:20:44
English 39 |
05 Media Play
To disconnect the Home Theater from the
Bluetooth device
Press the ( ) button on the front panel of the Home
Theater to switch from BT to another mode or turn off the
Home Theater.
• Except when you disconnect the home theater by
changing functions, the connected Bluetooth device
will wait a certain time for a response from the
Home Theater before terminating the connection.
(Disconnection time may differ, depending on the
Bluetooth device.)
| NOTES |
In Bluetooth connection mode, the Bluetooth
connection will be lost if the distance between the
Home Theater System and the Bluetooth device
exceeds 32.8 feet. When the Bluetooth device comes
back into effective range or you restart the Bluetooth
device, you have to pair the device and home theater
again to reconnect.
In Bluetooth mode, the screen saver will start if
the Bluetooth device stays in the Ready state for 5
minutes. To reconnect the Bluetooth device, turn off
the screen saver, and then connect the device. To turn
off the screen saver, press any button on the remote
control (the Volume button, a number button, etc.)
Using NFC (Near Field Communication)
Using NFC pairing, you can easily connect your home
theater to an NFC compatible Bluetooth source device
for music listening.
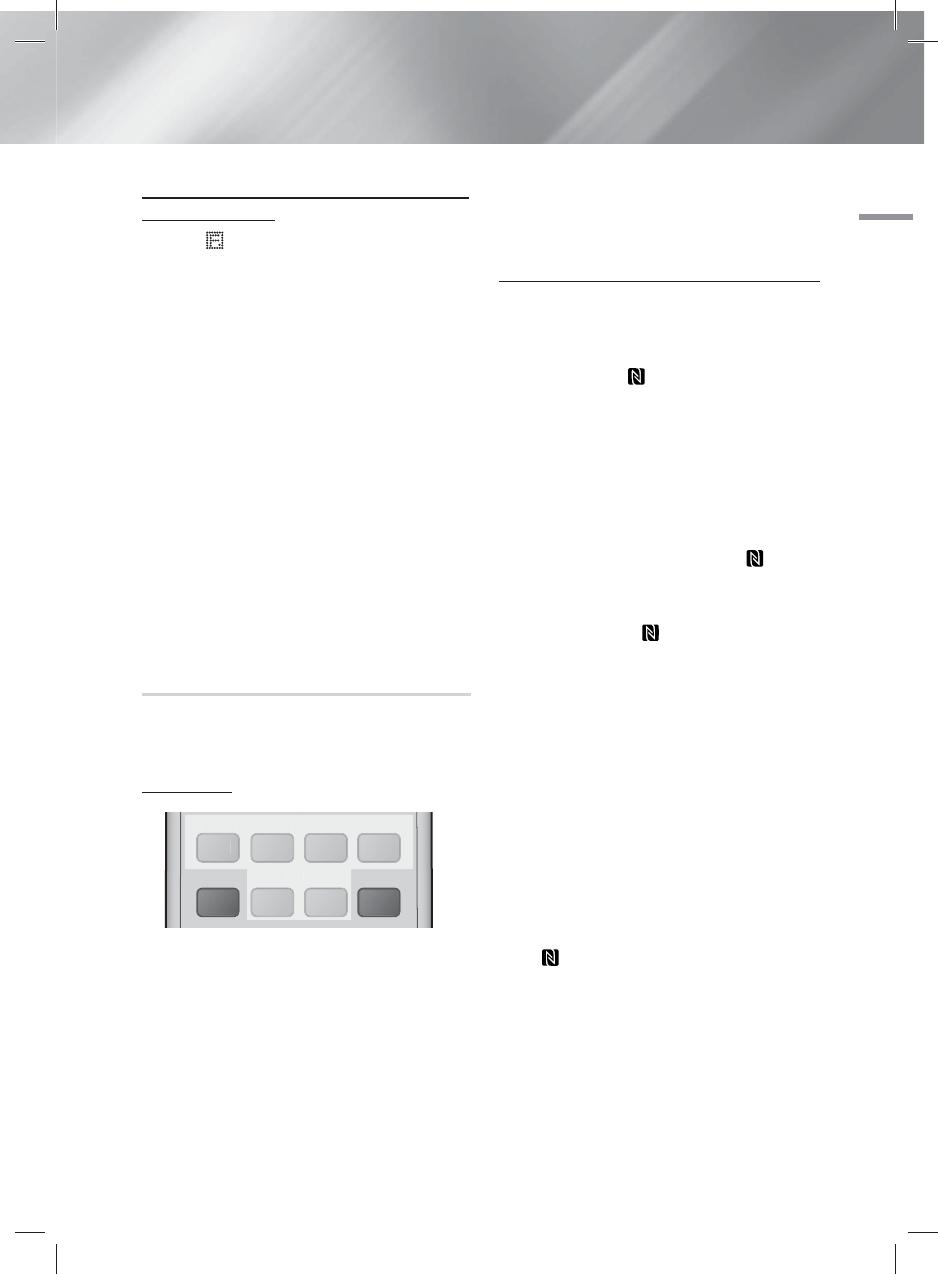
Initial Pairing
3D SOUND
SOUND
S/W LEVEL
MANUAL SUBTITLE
SMART SEARCH
EFFECTPRESET
HUB
AUDIO
3
D
SO
UND
S/
W LEVE
L
SUB
TITL
E
S
MAR
T
S
EAR
CH
H
UB
AUD
IO
To pair NFC devices with your Home Theater, you first
must pair the remote control and the Home Theater.
Pairing occurs automatically when you press any button
on the remote after turning on the Home Theater for the
first time.
If pairing fails, follow these steps:
1. To reset NFC pairing, press and hold the both
PRESET and EFFECT buttons on the remote
simultaneously for more than 2 seconds.
The BD RECEIVER button on the remote blinks
and the NFC pairing resets.
2. Press any button on the remote. If pairing is
successful, the “REMOTE PAIRED” message
appears on the Home Theater’s display within 20
seconds.
Pairing an NFC Device with the Home Theater
1. Turn on your NFC compatible Bluetooth device and
make sure its screen is unlocked.
• NFC pairing becomes unavailable if the device’s
screen lock is enabled.
2. Gently touch the
on the home theater remote’s
rear side with the NFC compatible Bluetooth device.
| NOTES |
This pairing feature works only if the home theater is
turned on.
3. On the NFC compatible Bluetooth device’s screen,
a message to confirm pairing appears. Select "Yes".
• Once pairing is complete the “Paired.” Message
appears.
4.
To cancel NFC pairing, gently touch the on the
home theater remote’s rear side with the device again.
• To pair another NFC device with the home theater
if it is already paired to a device:
Gently touch the on the home theater
remote’s rear side with the new NFC compatible
device. The home theater cancels the existing
connection and pairs with the new device.
| NOTES |
The NFC feature is available in the Android 4.1x ‘Jelly
Bean’ version or later.
- This feature is supported by devices with Android
v4.1 ‘Jelly Bean' only.
Jelly Bean 4.1.X: Switches to BT mode upon Tagging.
Jelly Bean 4.2.X: Switches to BT mode and begins
Music playback upon Tagging.
The actual location of the NFC antenna varies from
device to device. Before connecting, confirm the
location of your device’s antenna.
If the pairing device is covered by or inside a thick
case/housing, pairing may not be easy.
The is a trademark or registered trademark of
NFC Forum, Inc. in the United States and in other
countries.
HT-F9730W_ZA_0514.indd 39HT-F9730W_ZA_0514.indd 39 2013-05-14 오후 6:21:302013-05-14 오후 6:21:30
Notice
This device complies with part 15 of the FCC Rules. Operation is subject to the following two
conditions:
(1) This device may not cause harmful interference, and (2) this device must accept any
interference received, including interference that may cause undesired operation.
Any changes or modifications (including the antennas) to this device that are not expressly
approved by the manufacturer may void the user's authority to operate the equipment.
- Reorient or relocate the receiving antenna.
- Increase the separation between the equipment and receiver.
- Connect the equipment into an outlet on a circuit different from that to which the receiver is
connected.
- Consult the dealer or an experienced radio/TV technician for help.
Modifications not expressly approved by the manufacturer could void your authority to operate
the equipment under FCC rules.
This device complies with Industry Canada licence-exempt RSS standard(s).
Operation is subject to the following two conditions:
(1) this device may not cause interference, and (2) this device must accept any interference,
including interference that may cause undesired operation of the device.
Le présent appareil est conforme aux CNR d'Industrie Canada applicables aux appareils radio
exempts de licence
L'exploitation est autorisée aux deux conditions suivantes : (1) l'appareil ne doit pas produire de
brouillage, et (2) l'utilisateur de l'appareil doit accepter tout brouillage radioélectrique subi, même
si le brouillage est susceptible d'en compromettre le fonctionnement.