Samsung Electronics Co S760 Notebook Computer User Manual Version 0 Maverick Change from Matrix
Samsung Electronics Co Ltd Notebook Computer Version 0 Maverick Change from Matrix
Contents
- 1. user manual 1 of 3
- 2. user manual 2 of 3
- 3. user manual 3 of 3
user manual 1 of 3

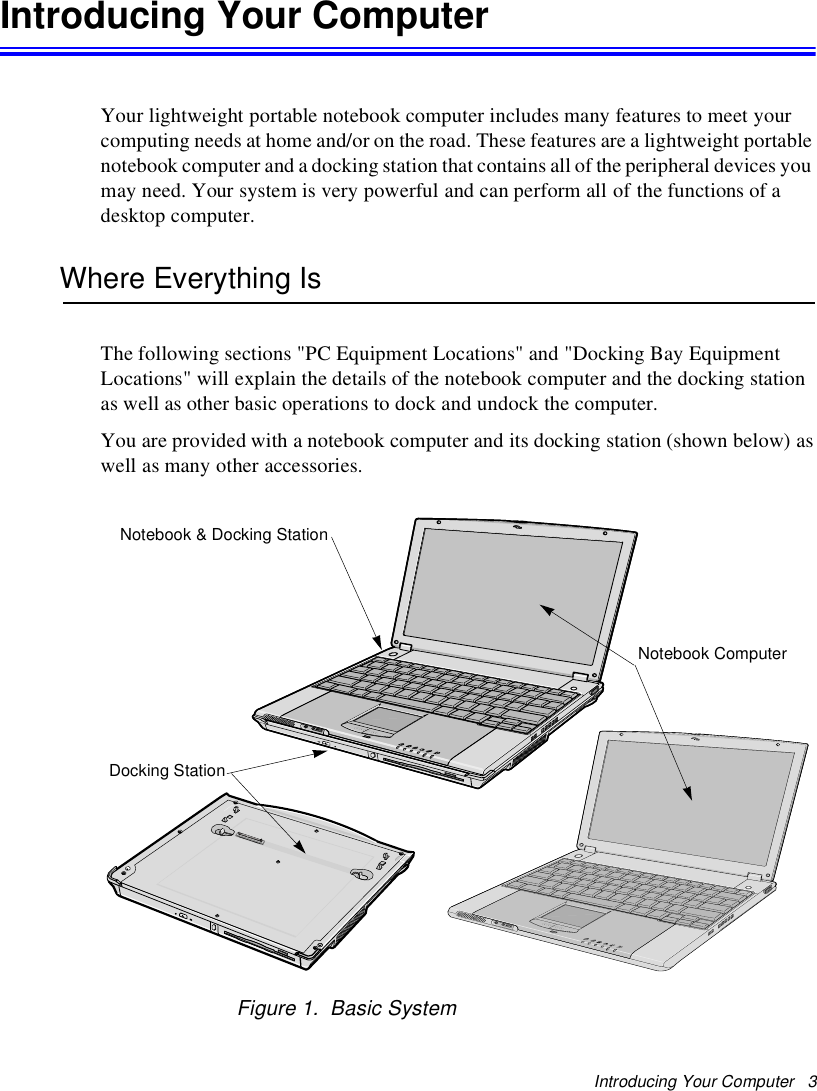
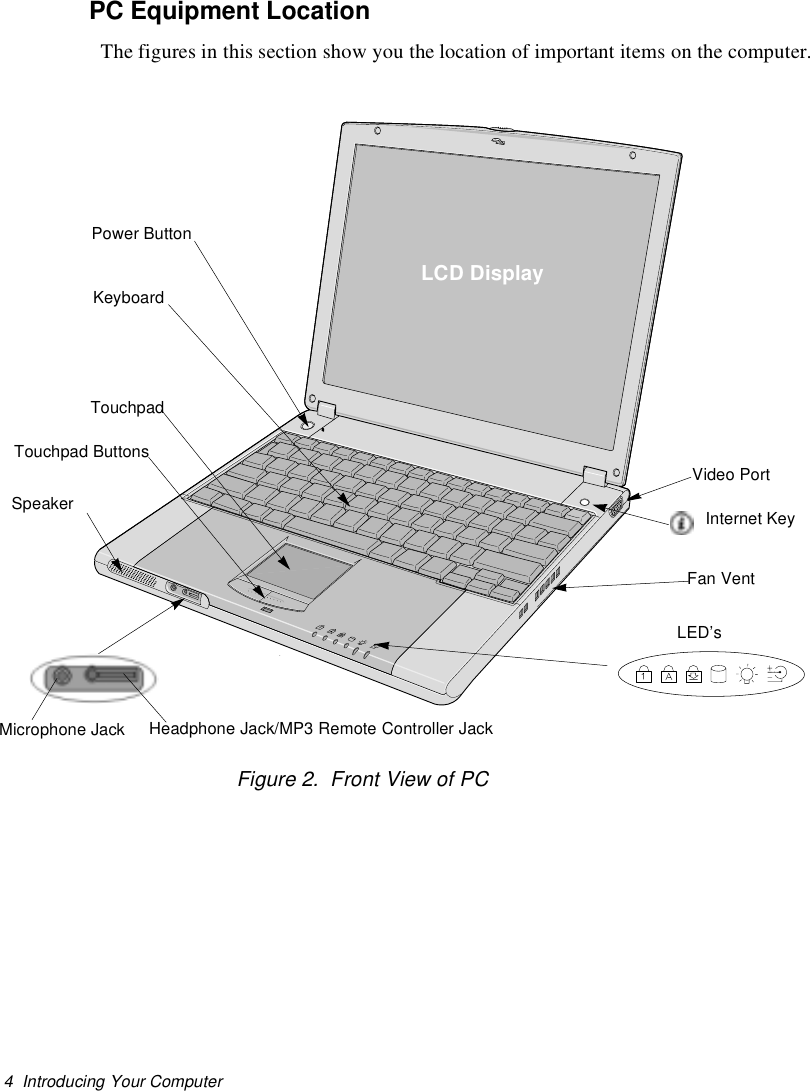
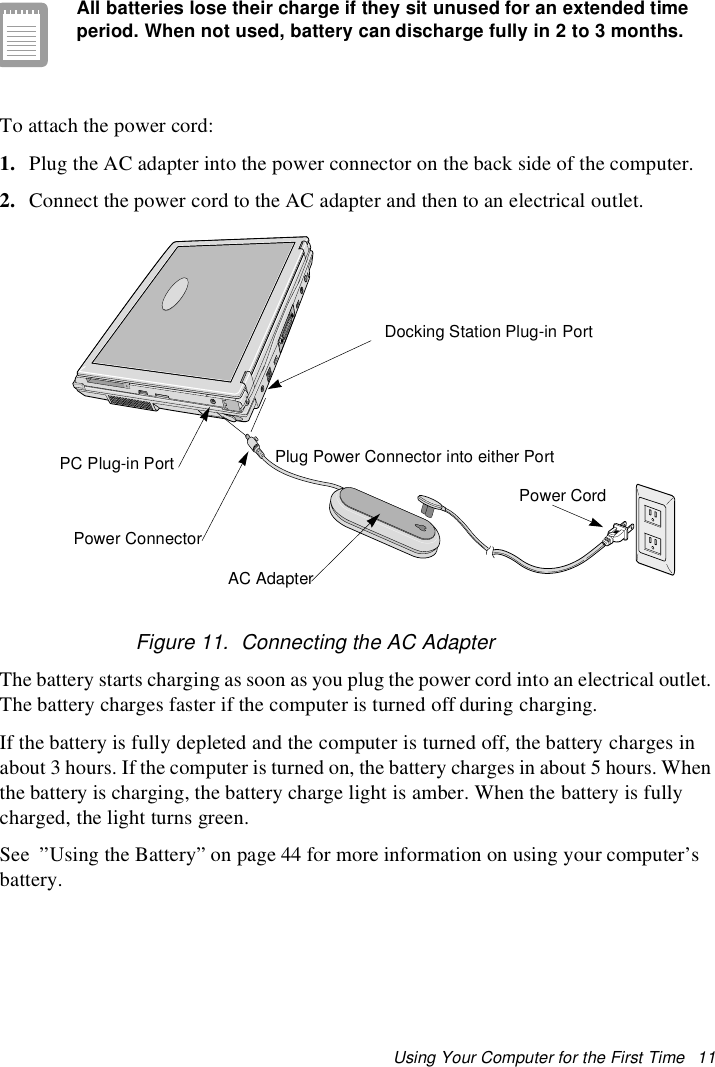
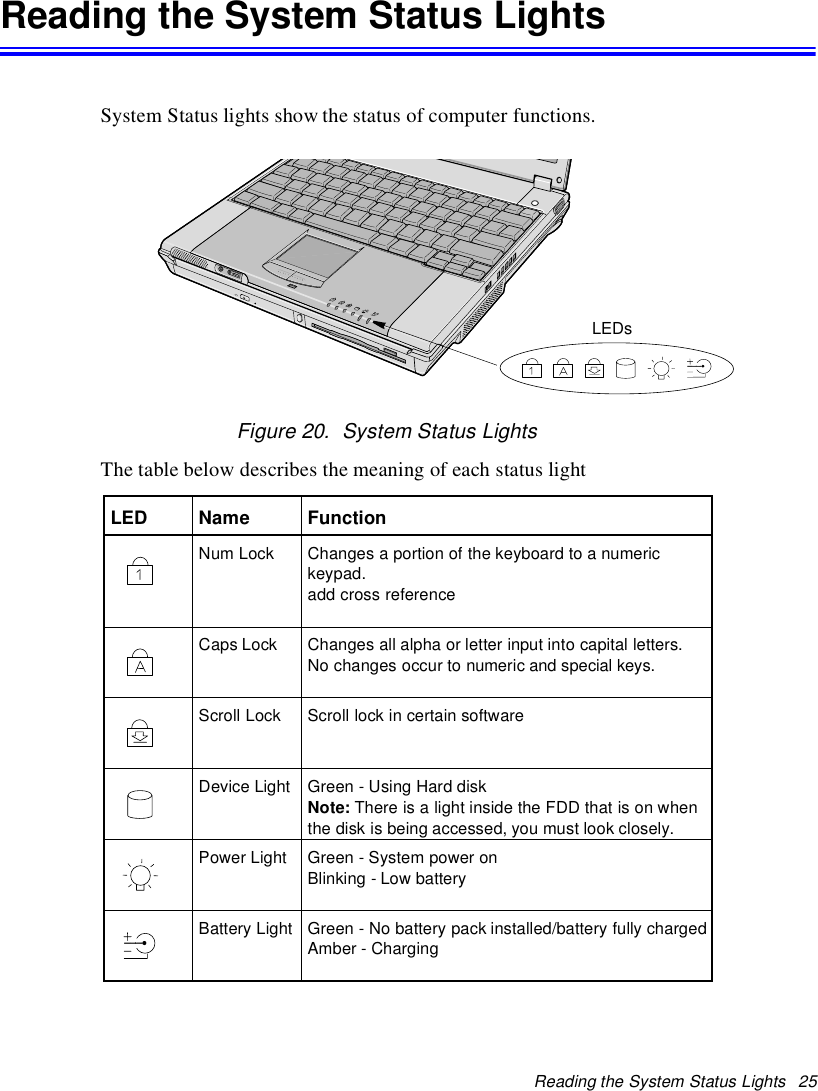
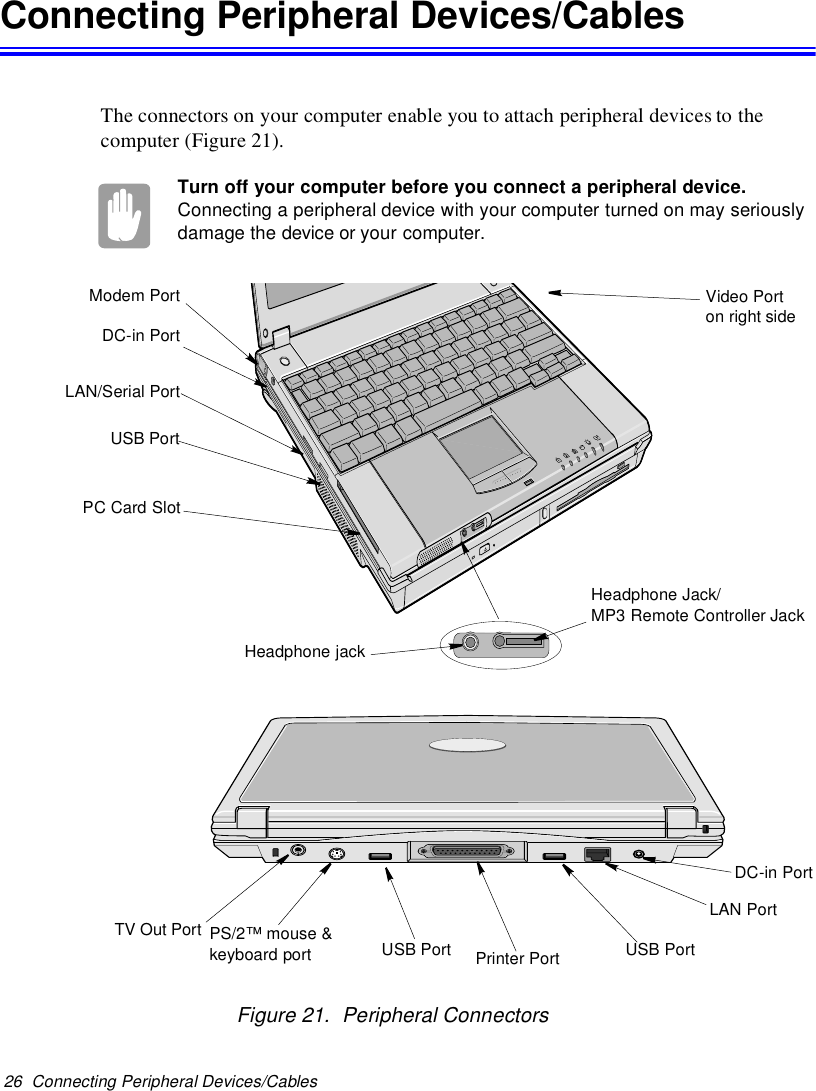
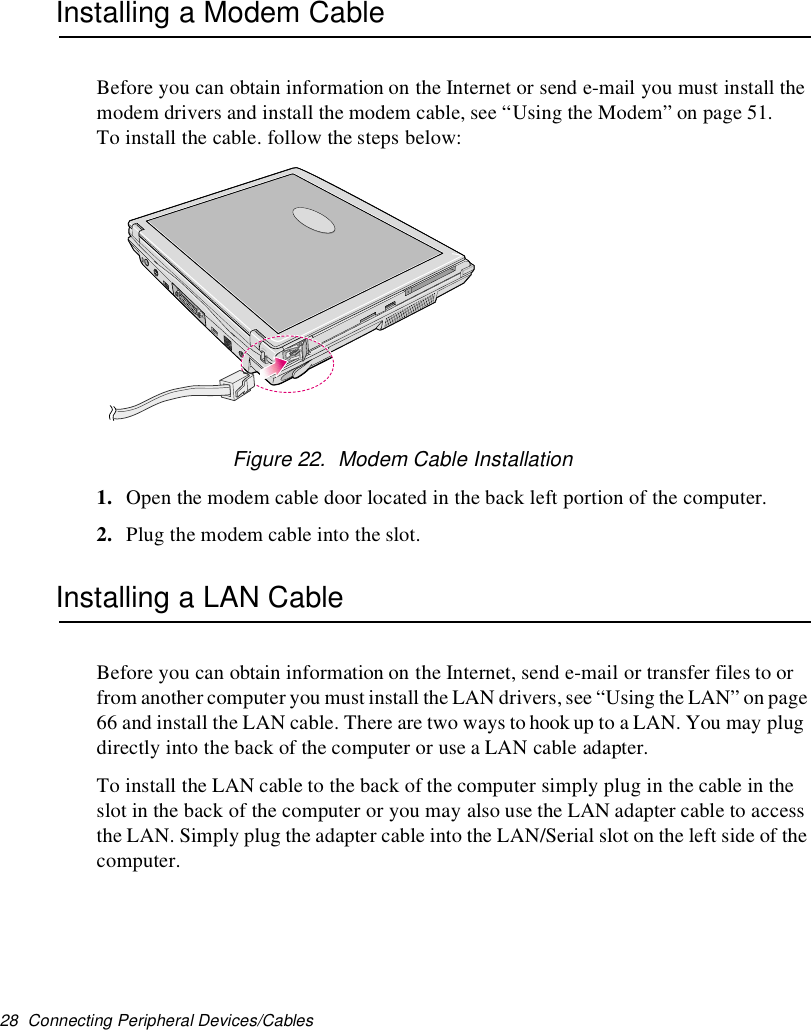
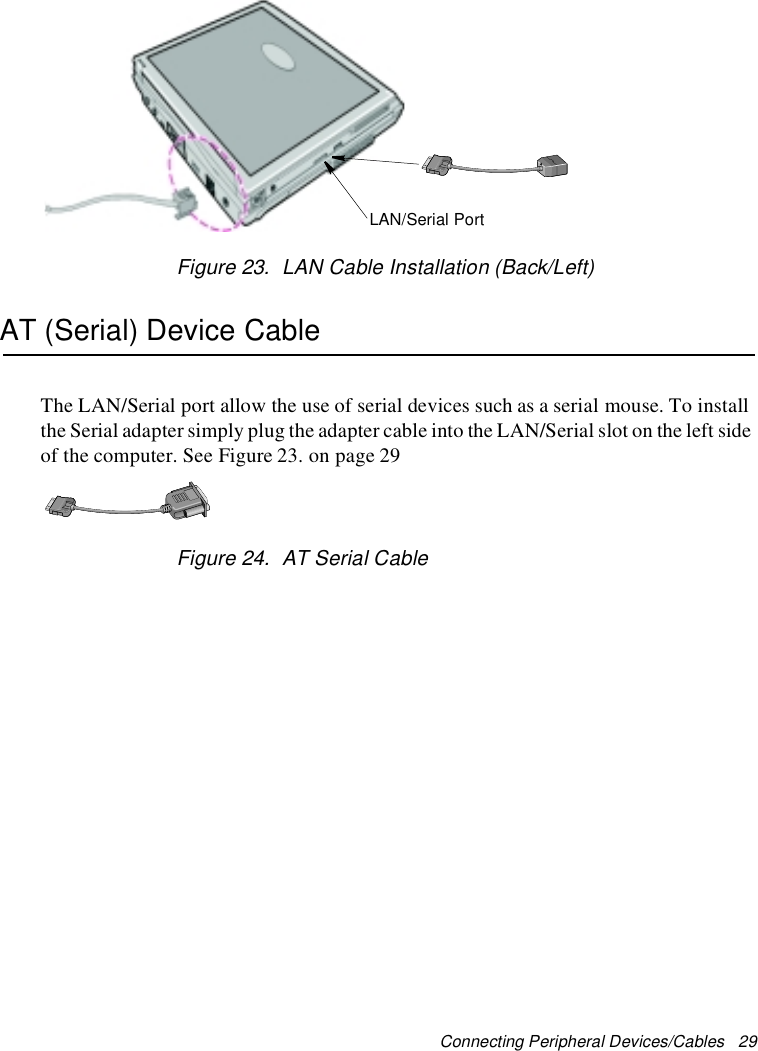
![6 Introducing Your ComputerDocking Bay Equipment LocationThe figures in this section show you the location of important items on the dockingstation.Figure 6. Docking Station Front/TopFigure 7. Docking Station BackDocking Release LatchDocking PinsFDD Release LatchCD/DVD Release LatchDocking ConnectorUndocking ButtonDocking HookCD/DVD DriveFDD [Floppy Disk Drive]Docking HookKensington LockTV-Out PortPS/2 PortUSB PortUSB PortLAN Port DC-in PortSpeakerDockingReleaseLatchPrinter Port](https://usermanual.wiki/Samsung-Electronics-Co/S760.user-manual-1-of-3/User-Guide-132875-Page-6.png)
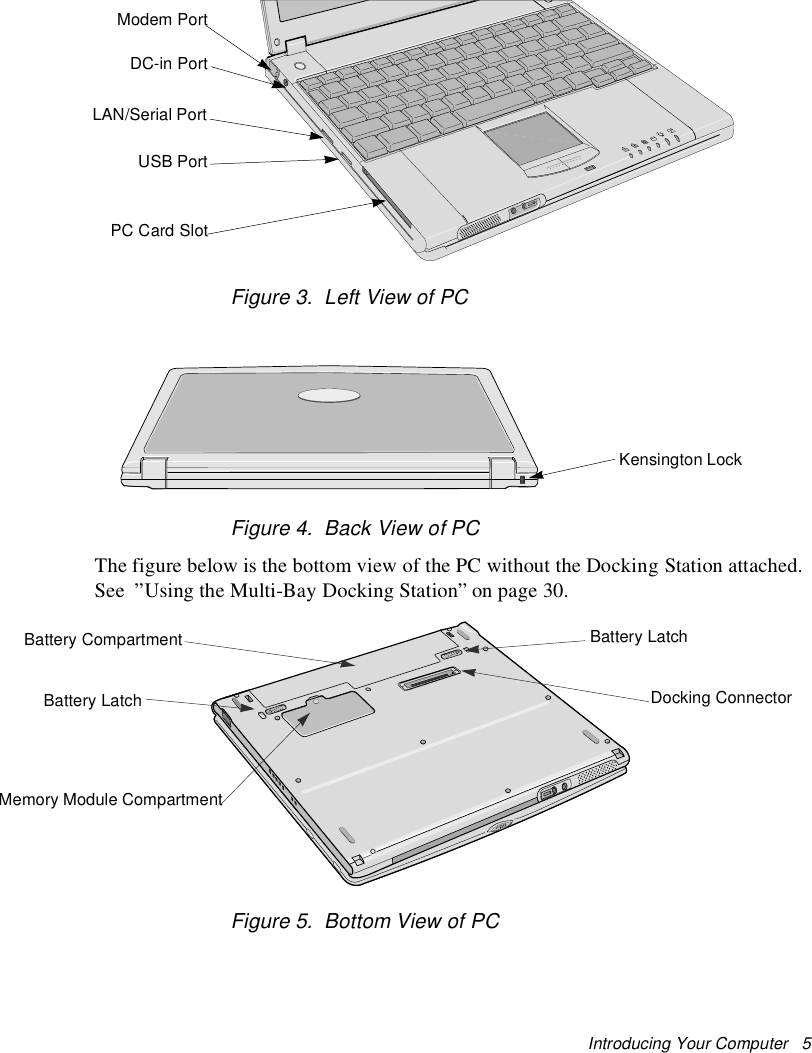
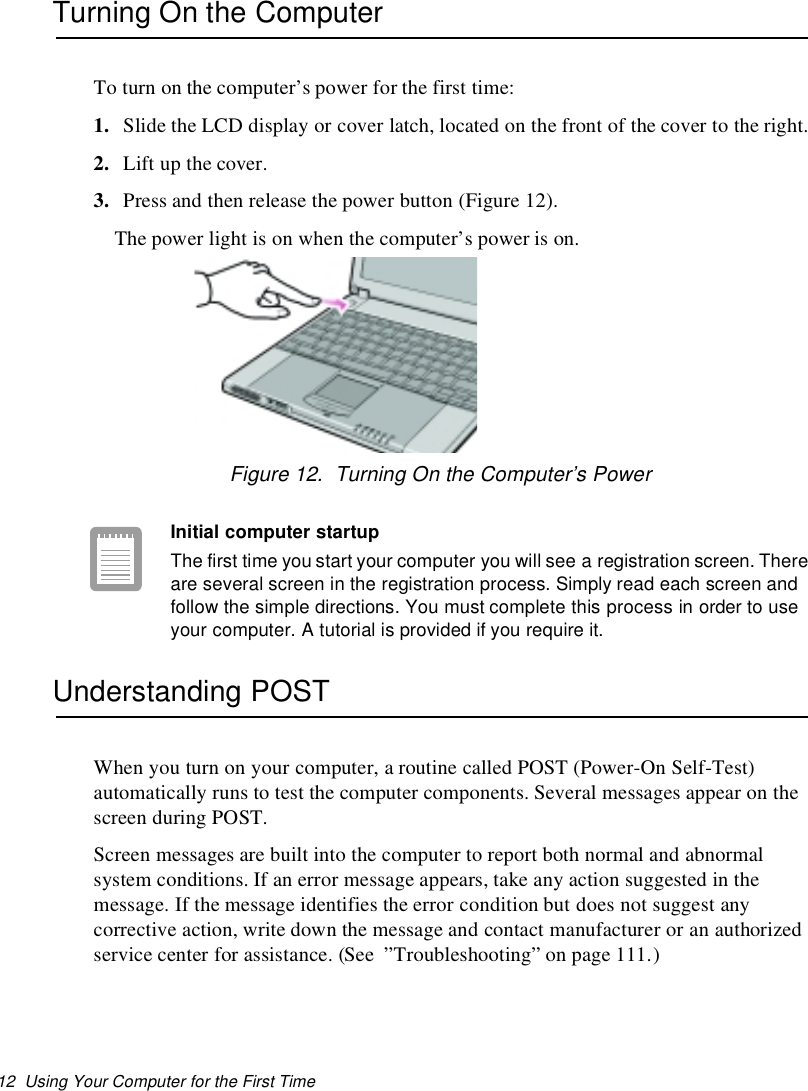
![8 Introducing Your Computer3. Grab the two docking release latches and pull them out.Figure 9. Release Latch4. Tilt the system up at the back.5. After tilting remove the system by sliding/lifting out toward the back of the dockingbay.6. Connect the AC adapter to the system.Power On.1. Press the PC detach button on frontof the docking.2. When [xxxx] message shows on thescreen, then hold and pull tworelease latches.3. Remove a system.4. Attach the AC adapter to a system.UseStart>PCdetachinsteadofthePCdetachbutton.Docking your ComputerPower OffTo install your computer into the docking station with the power off complete thefollowing steps.1. Disconnect the AC adapter from the system.Release LatchPC Detach Button](https://usermanual.wiki/Samsung-Electronics-Co/S760.user-manual-1-of-3/User-Guide-132875-Page-8.png)
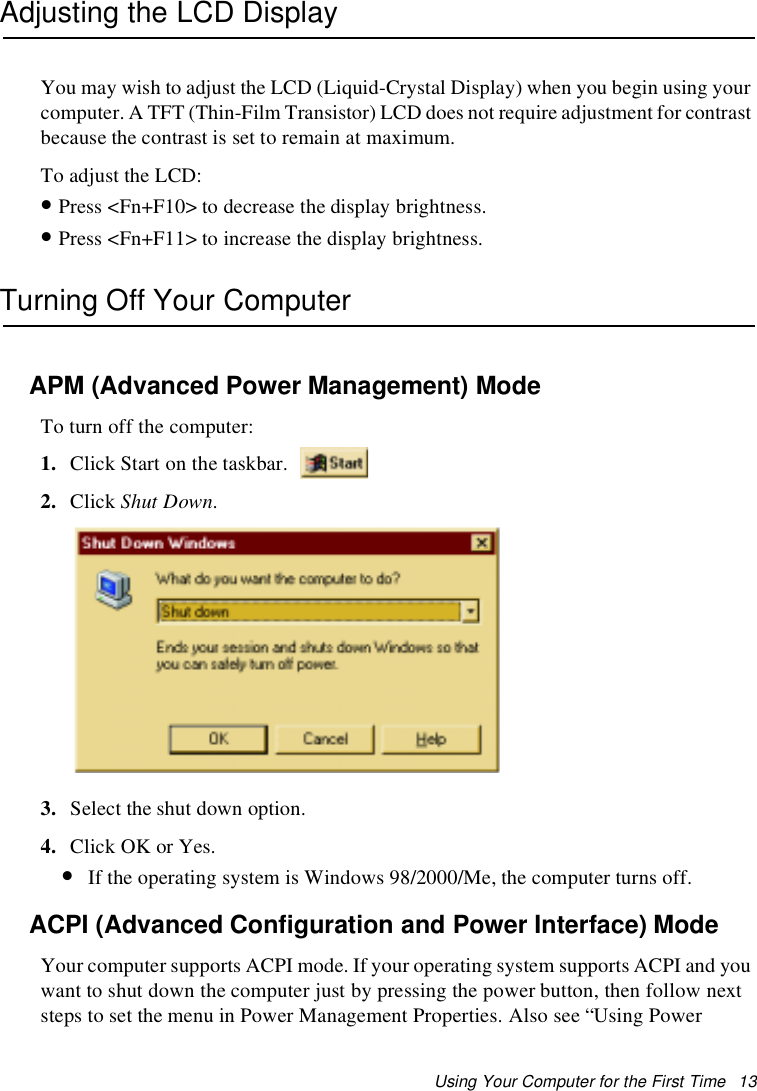
![Introducing Your Computer 92. Place the front part of a system on two hooks of the docking station.Figure 10. Docking Sequence3. Press the back part of a system until it clicks into a docking fully.Power onTo dock your computer with the power on just reverse the directions in the power onundocking section.When it is connected properly then [xxxxx] message shows. Press asystem to make sure that a docking connector is completely connectedto the system.Back of the System Front of the SystemHook](https://usermanual.wiki/Samsung-Electronics-Co/S760.user-manual-1-of-3/User-Guide-132875-Page-9.png)
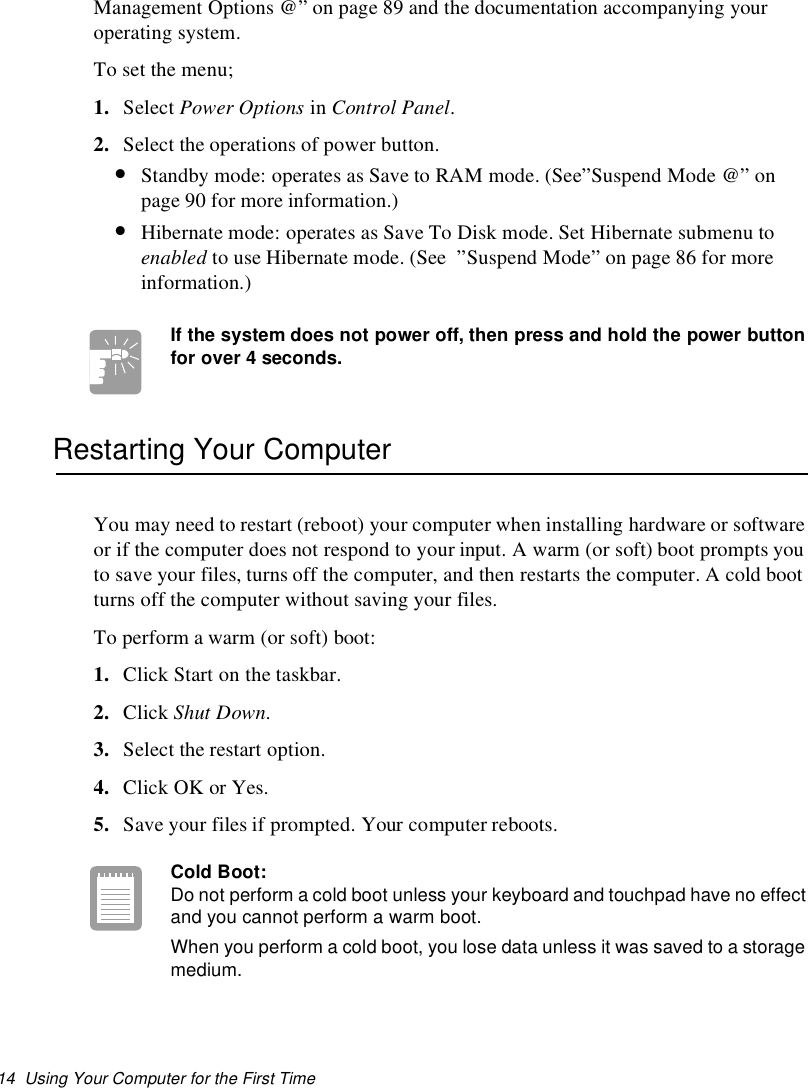

![Using the Keyboard 19Using the KeyboardYour computer has an 87/88-key keyboard (Figure 14). By pressing designated keycombinations, you can have access to all the key functions of a full-sized keyboard.Figure 14. KeyboardAlthough the layout of the keys on your computer’s keyboard is differentfrom that on a desktop computer’s keyboard, the keyboard feels like afull-sized keyboard when you use it.The keys on the keyboard can be grouped into the following categories:•Full-sized Alphanumeric typewriter keys are arranged like a standard typewriterkeyboard [QWERTY] and are used for text entry. The Windows key on the rightside of the spacebar open Windows menus and perform other special functions.•Function keys, when pressed together with the <Fn> key, enable special functions.•Cursor and Screen control keys move the cursor. They may perform otherfunctions, depending on your software.Function & Special purpose Hot Keys Embedded Numeric KeypadAlphanumeric KeysFunction Key Cursor & Screen Control KeysWindows Key](https://usermanual.wiki/Samsung-Electronics-Co/S760.user-manual-1-of-3/User-Guide-132875-Page-19.png)

![38 Multi Media Functions/Equipment1. Click the Windows Media Player button on the Windows taskbar to open theWindows Media Player window.Figure 28. Windows Media Player2. Click the Stop button in the Windows Media Player window.3. Press the button on your CD-ROM drive. The drive tray opens and you can removethe disc from the CD-ROM drive.4. For more information on playing compact discs, see the Help menu in the WindowsMedia Player window.Double click Windows Media Player icon on the LCD display window.Volume ControlUsing the KeyboardChanging the volume with your keyboardUse <Fn> + <F7> to decrease the volume or <Fn> + <F8> to increase the volume.Using the Volume Control IconDouble click the volume control icon on a tray bar on down side of the LCD screenand control volume in [Volume Control] as following window.Using Windows Media PlayerThe Windows Media Player has a slidebar to adjust the volume, click and hold thepointer on the slidebar and adjust the volume.DisplayChange ModePlay List](https://usermanual.wiki/Samsung-Electronics-Co/S760.user-manual-1-of-3/User-Guide-132875-Page-38.png)