Samsung Electronics Co S760 Notebook Computer User Manual Version 0 Maverick Change from Matrix
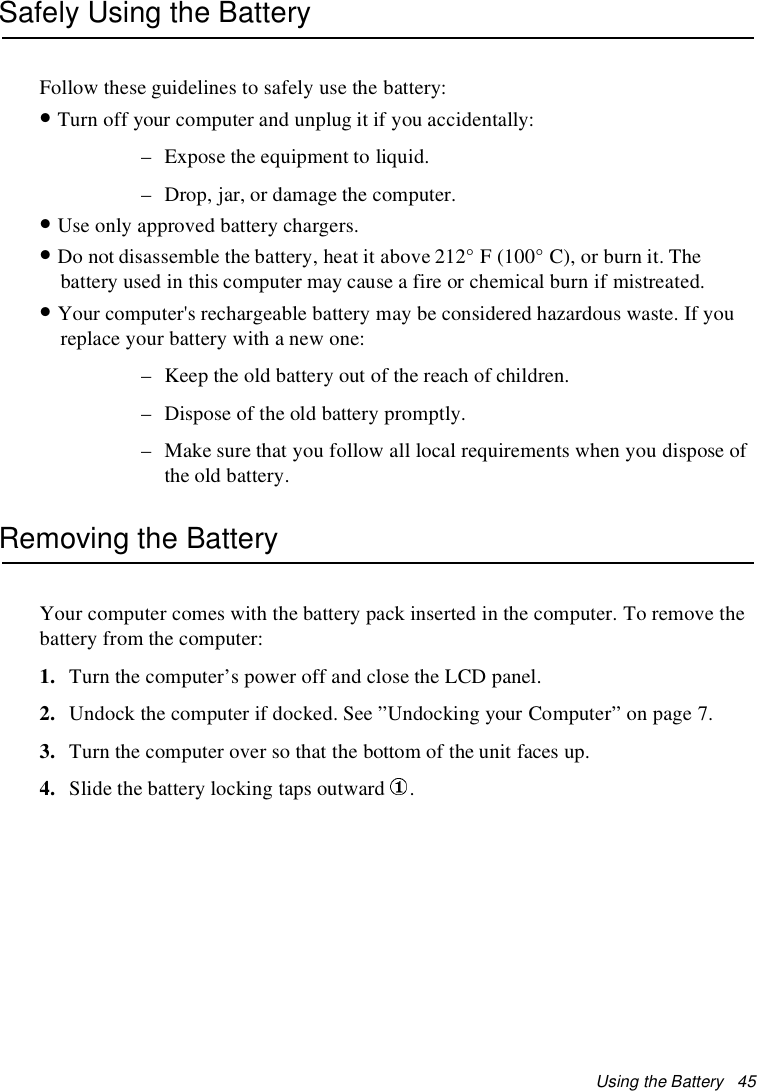
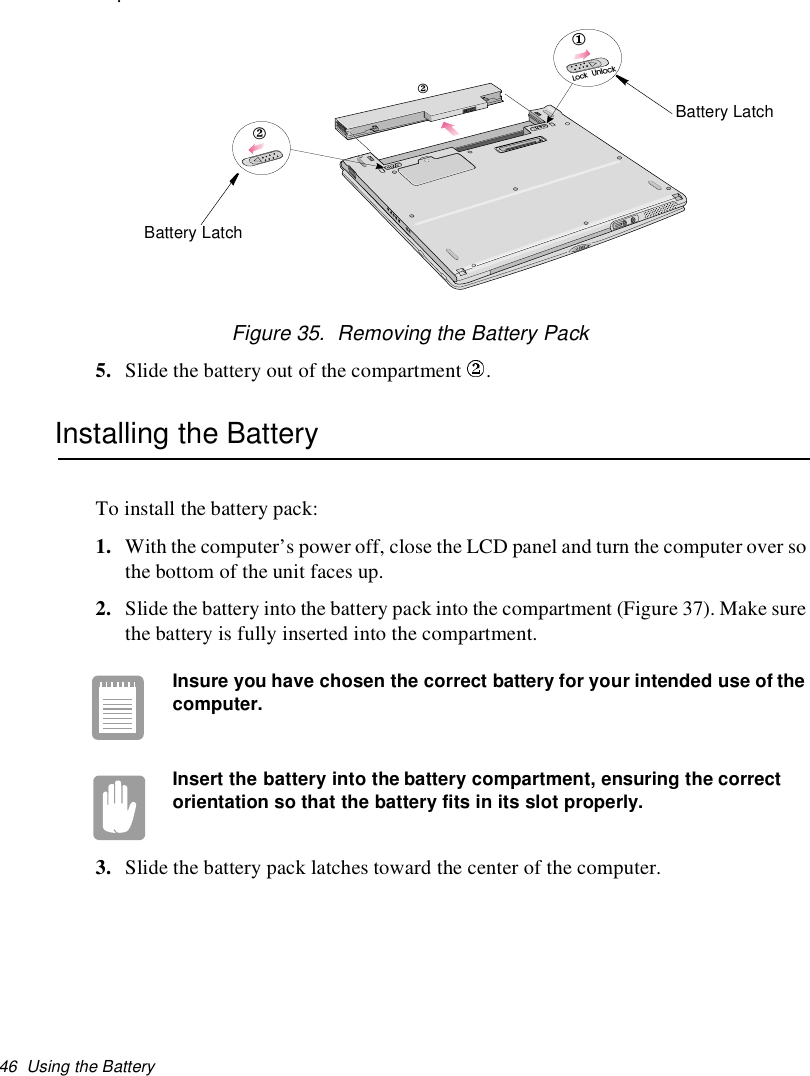
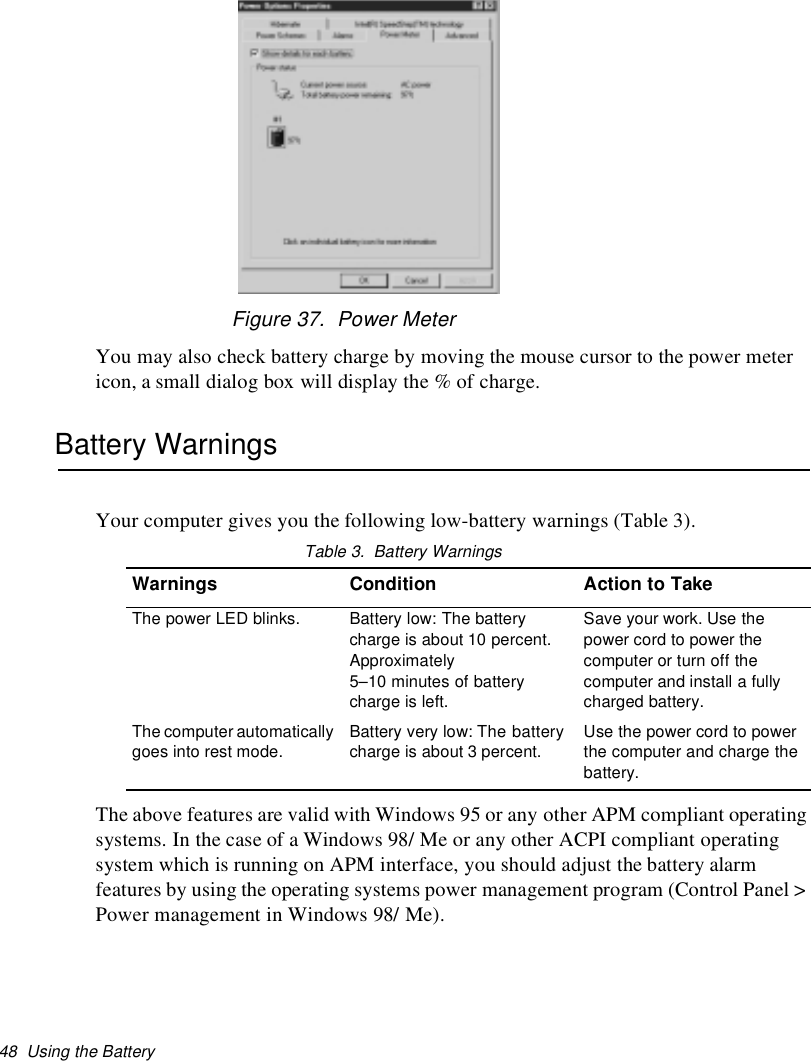
Samsung Electronics Co Ltd Notebook Computer Version 0 Maverick Change from Matrix
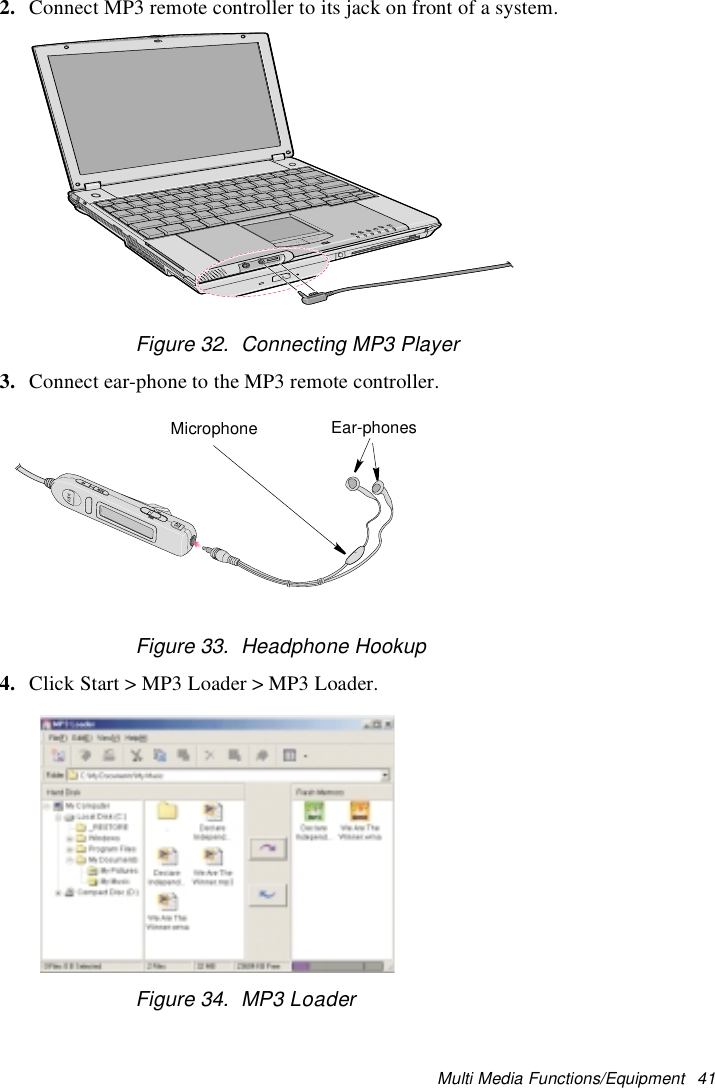
Contents
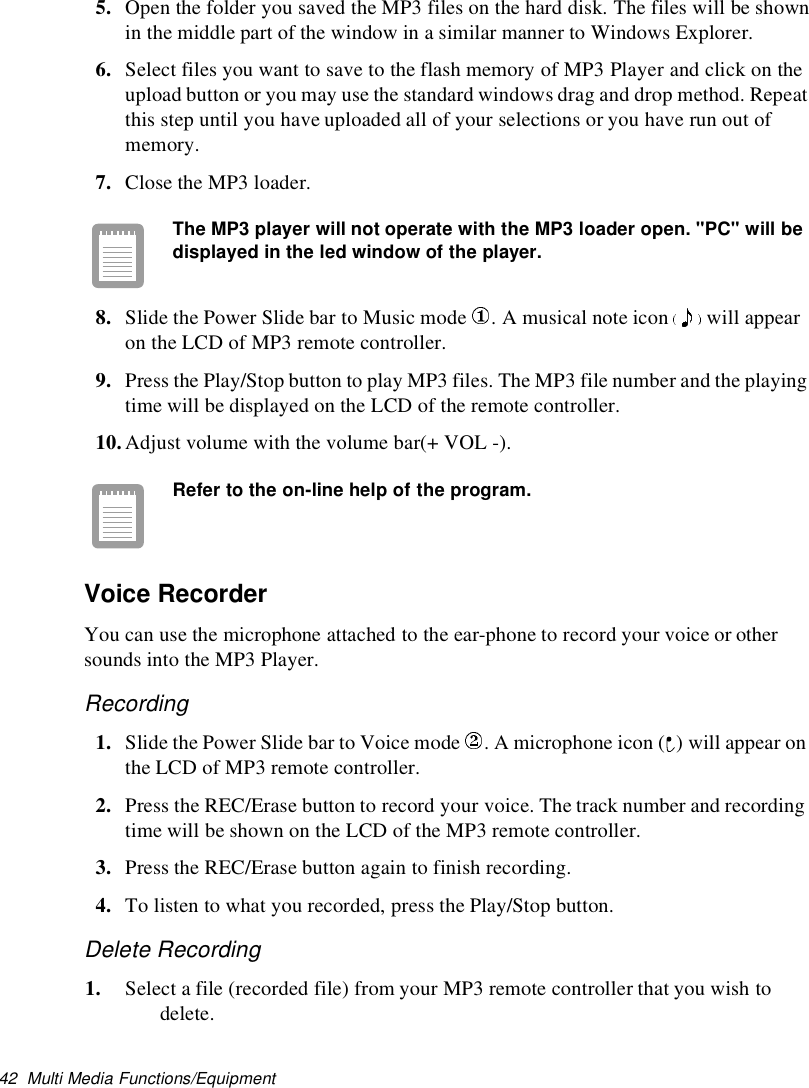
- 1. user manual 1 of 3
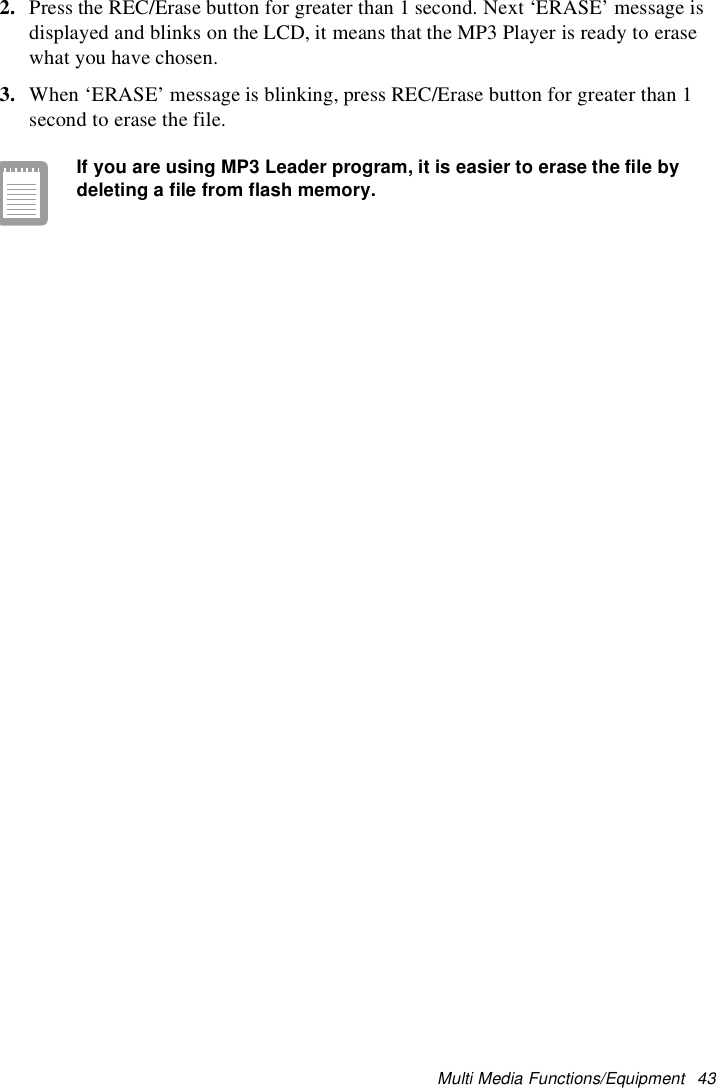
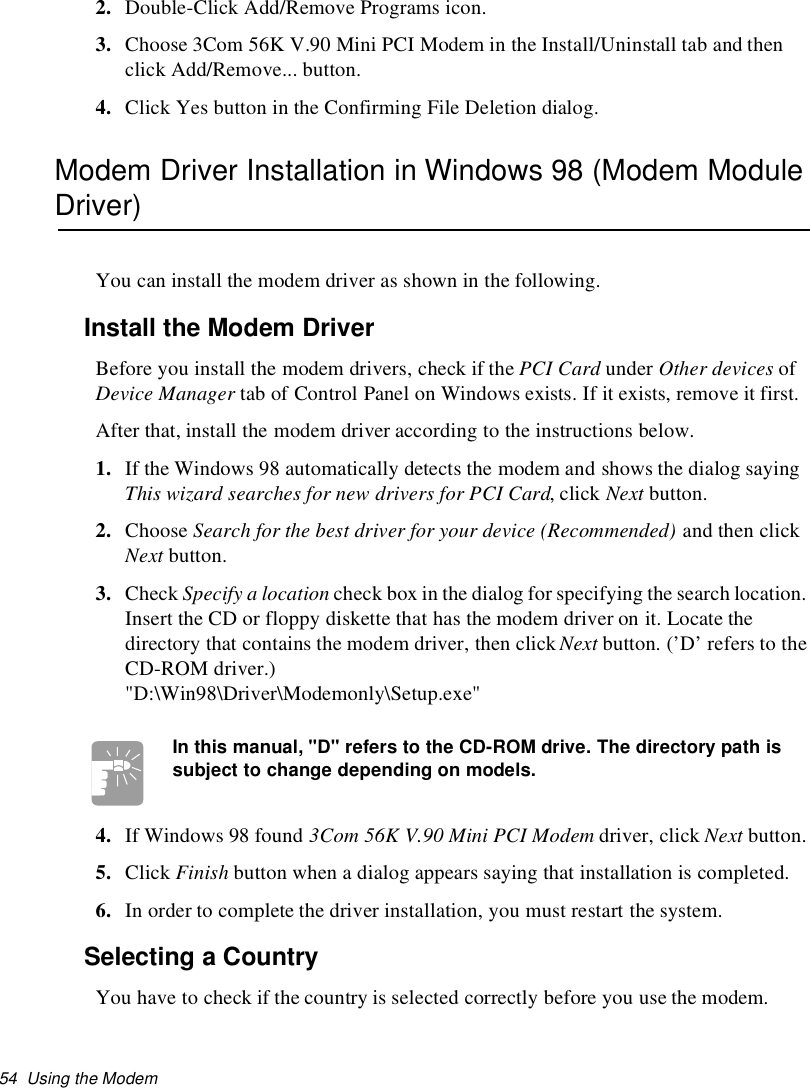
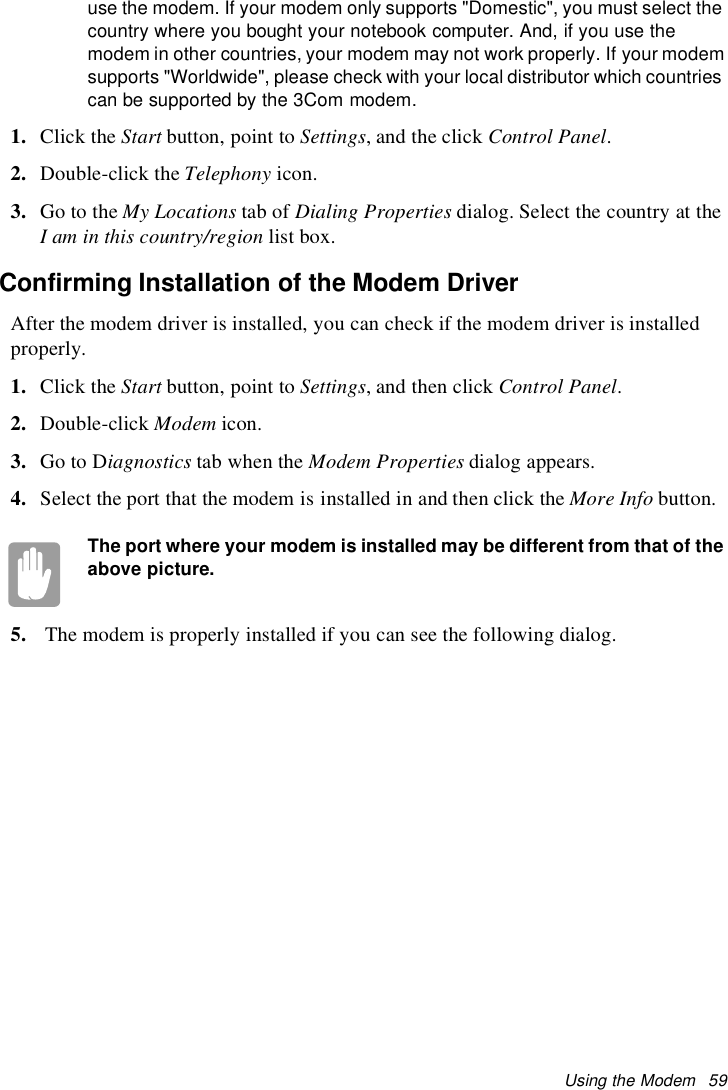
- 2. user manual 2 of 3
- 3. user manual 3 of 3
user manual 2 of 3