Samsung Electronics Co SCHI830 Dual-Band CDMA Phone with Bluetooth Transmitter User Manual C mySingle Temp FCC SCH I830
Samsung Electronics Co Ltd Dual-Band CDMA Phone with Bluetooth Transmitter C mySingle Temp FCC SCH I830
UserManual.wiki
>
Samsung Electronics Co
>
SCHI830 User Manual
Users Manual
Navigation menu
Upload a User Manual
Namespaces
Wiki Guide
HTML
PDF
Info
Views
User Manual
Discussion / Help
Navigation


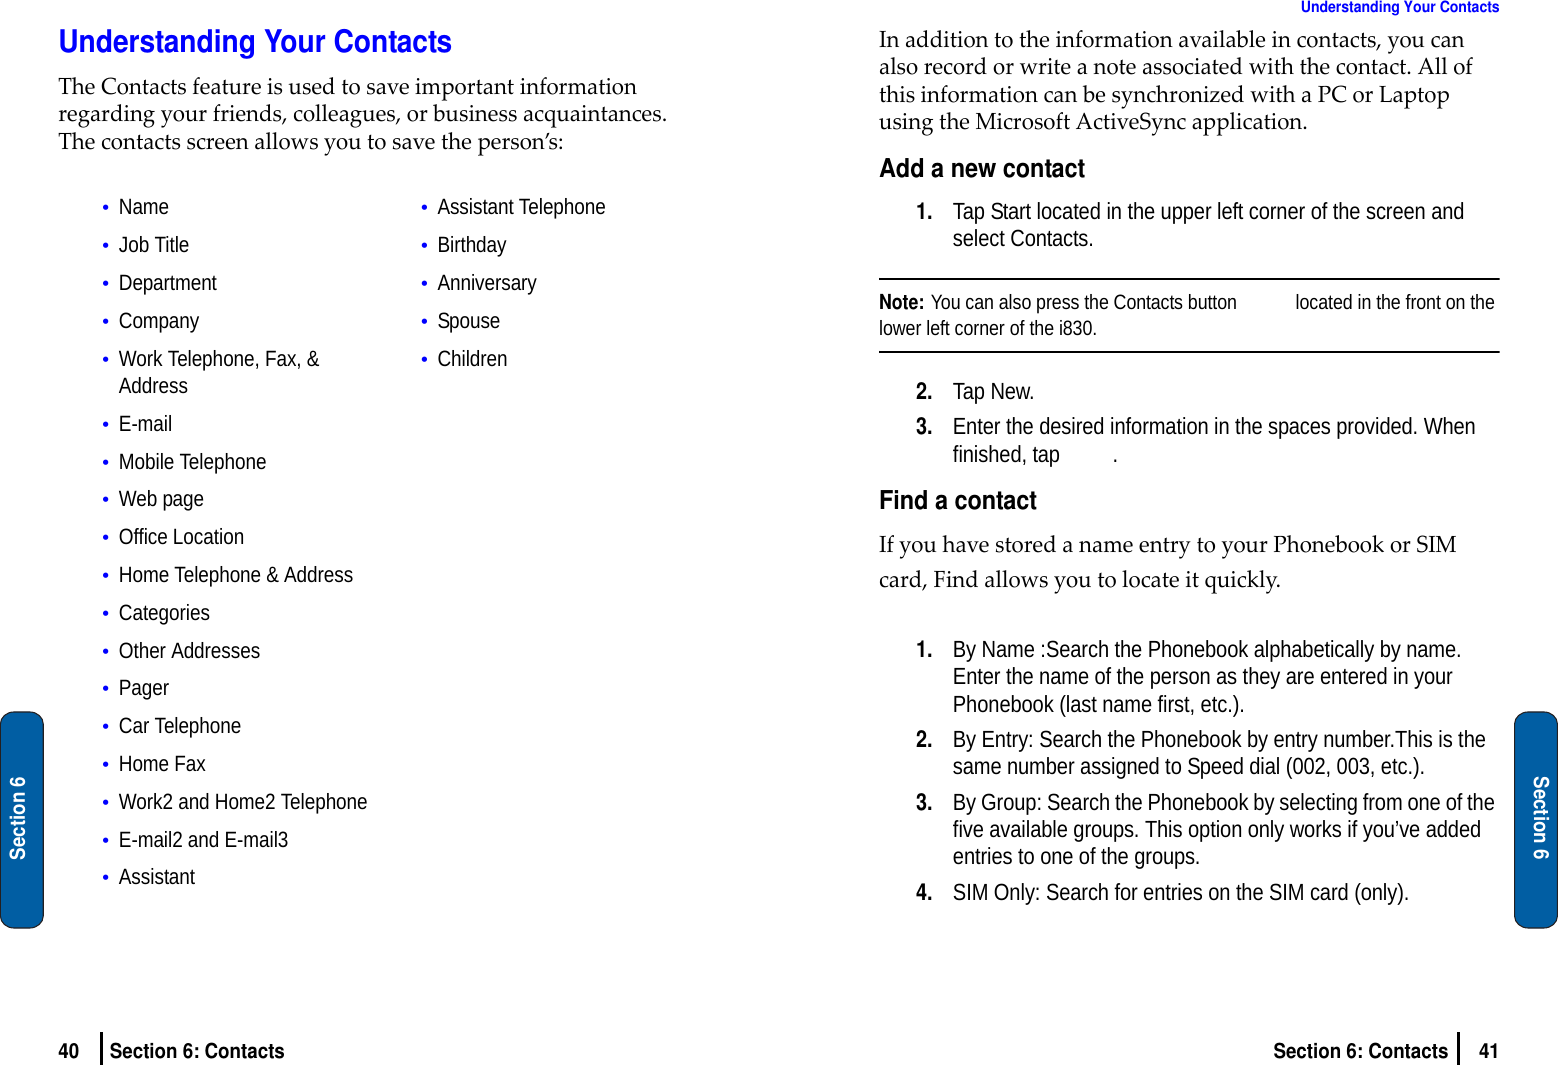
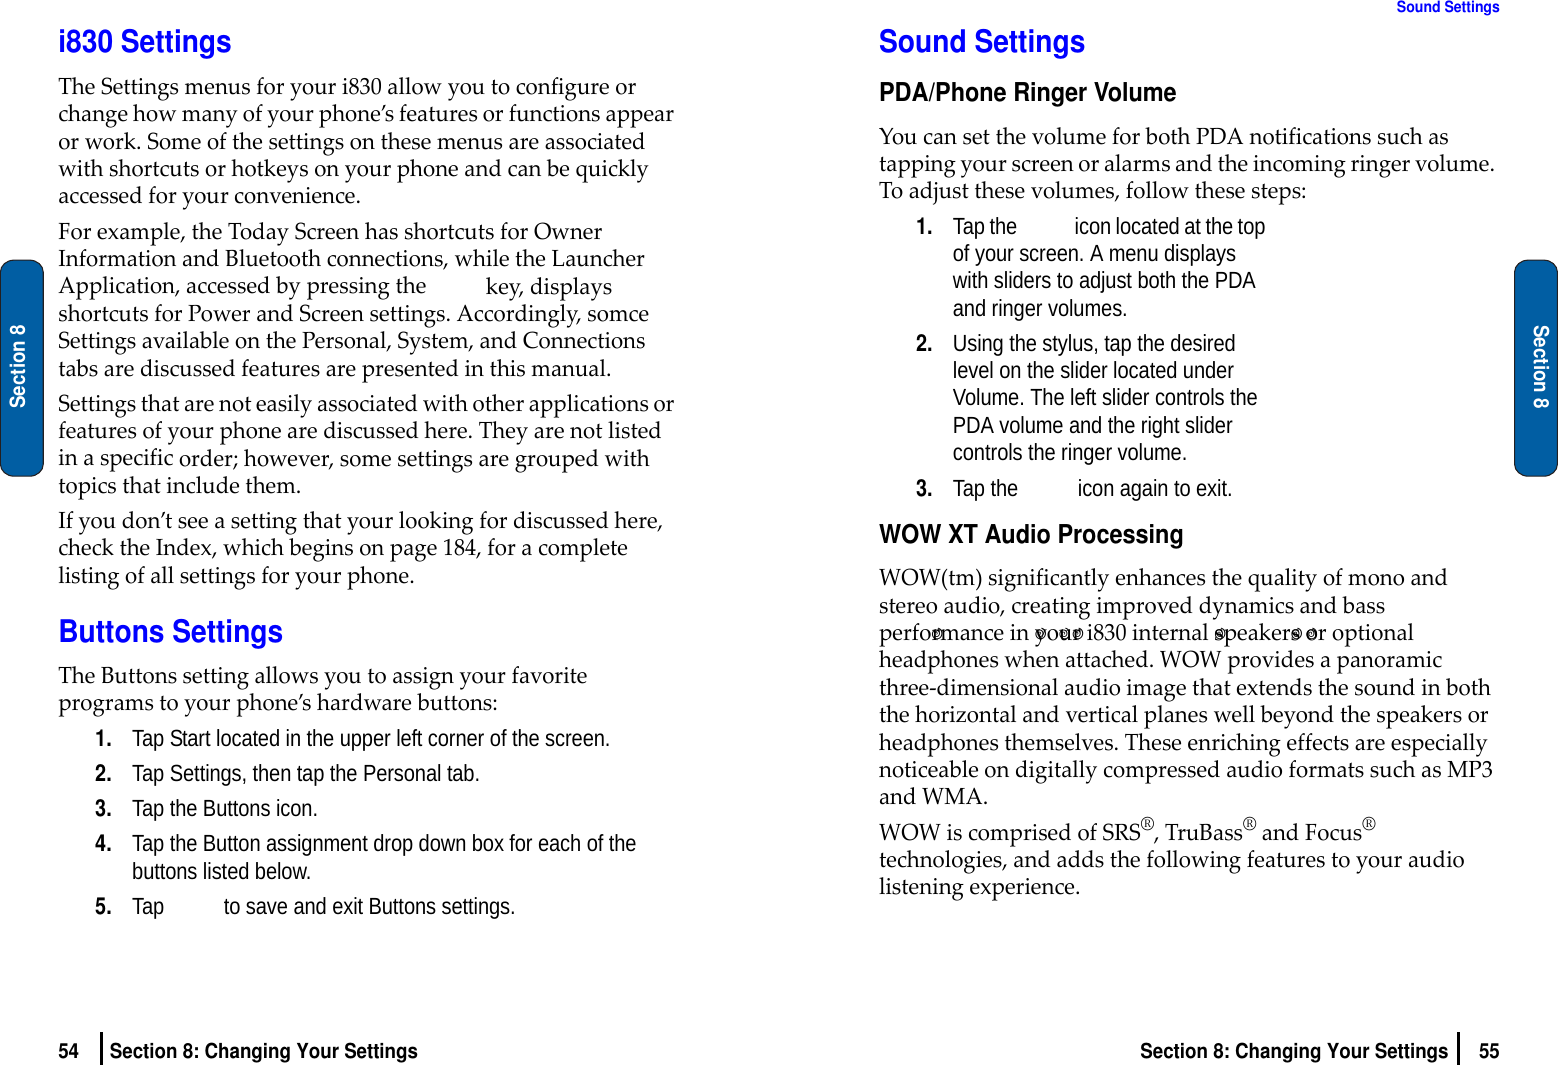
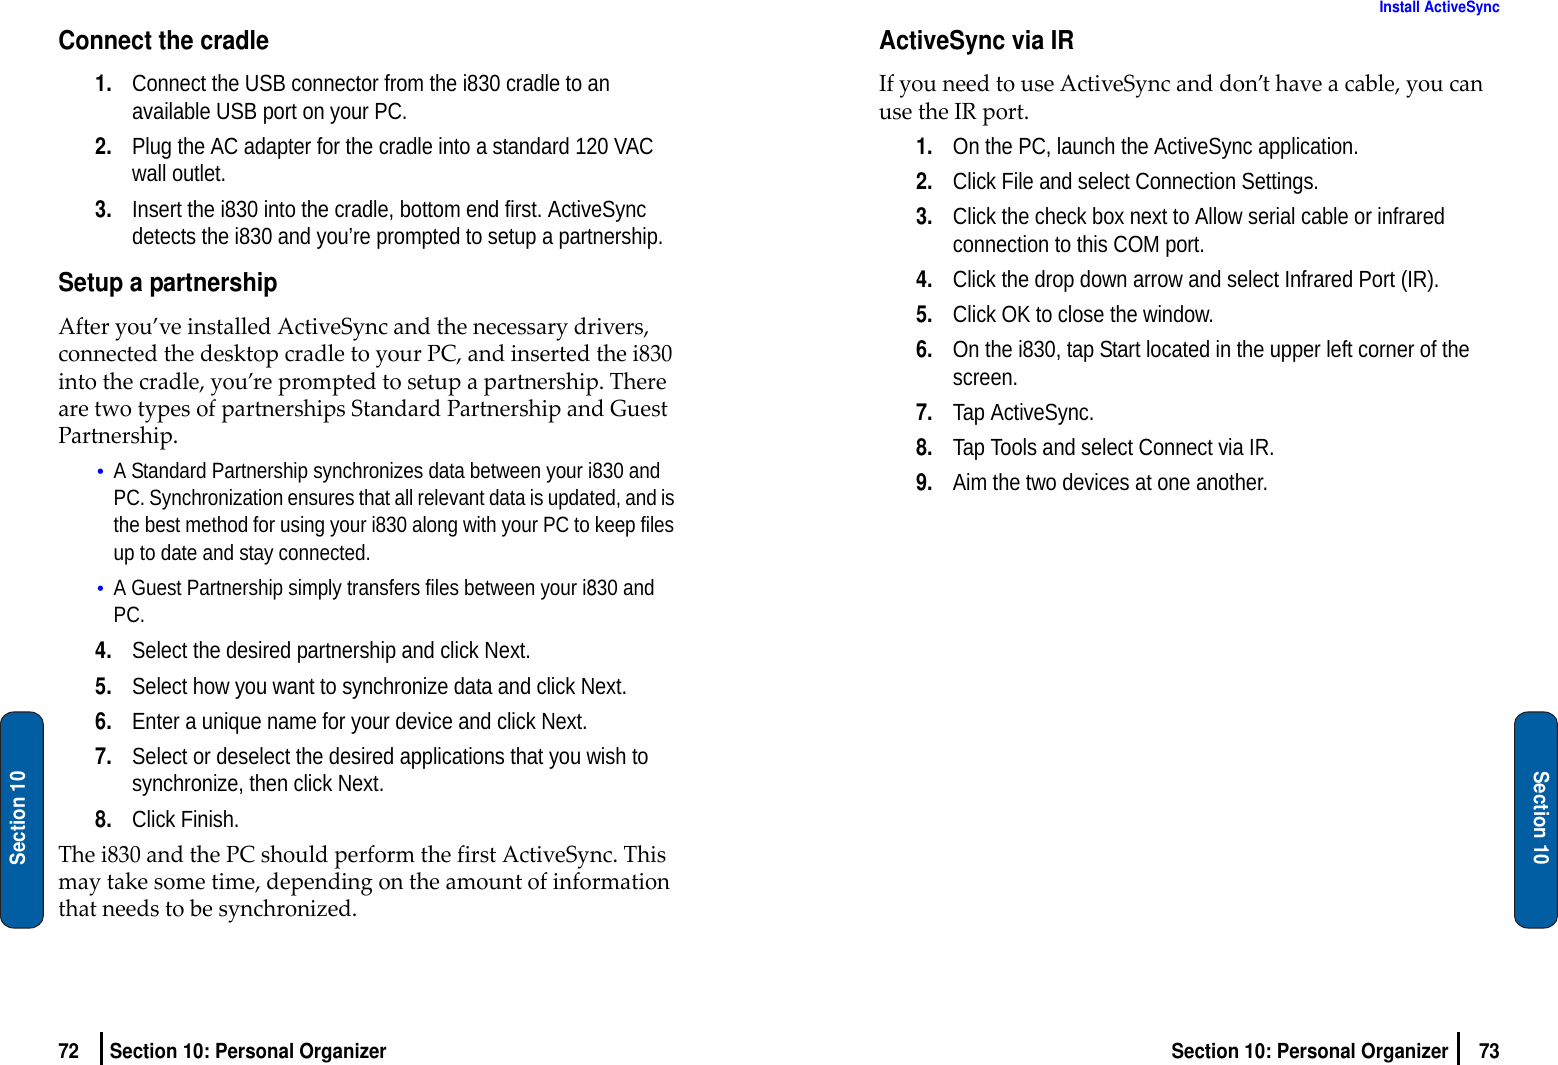
![10 Section 1: Getting StartedSection 1Activating Your PhoneIfyoupurchasedyourphoneataVerizonWirelessStore,itisprobablyactivatedandreadytouse.Ifyouhaveupgradedyourphoneorreceivedanewphonebymail,itprobablyneedstobeactivatedbeforeyoucanuseit.Toactivateyourphone,followthesesteps:1.Visit a Verizon Wireless Store and have your phone activated, or visit www.verizonwireless.com and place your cursor on the MY ACCOUNT tab available on the home page.2.When the drop-down menu displays, select ACTIVATE PHONE to display instructions needed to activate your phone online.3.After gathering the required materials, select the Activate New Phone link and follow the online directions to complete the activation process.Setting Up Your VoicemailIfanewvoicemailisreceived,anotificationscreenisdisplayedalertingyouthatanewmessageisavailable.Ifmultiplevoicemailmessagesarereceived,thenotificationscreendisplaysthenumberofnewmessagesreceived.Customer Support11Section 1: Getting StartedSection 1Customer Support[Verizontodetermineiftheywanttoaddinformationherefortheircustomersorremovethissectioncompletely.]Understanding this User ManualThechaptersofthisguidegenerallyfollowthesameorderasthemenusandsubmenusinyourphone.Arobustindexforquickreferencetomostfeaturesbeginsonpage184.Alsoincludedisimportantsafetyinformationthatyoushouldknowbeforeusingyourphone.Mostofthisinformationisnearthebackoftheguide,beginningonpagepage152.](https://usermanual.wiki/Samsung-Electronics-Co/SCHI830/User-Guide-559137-Page-8.png)

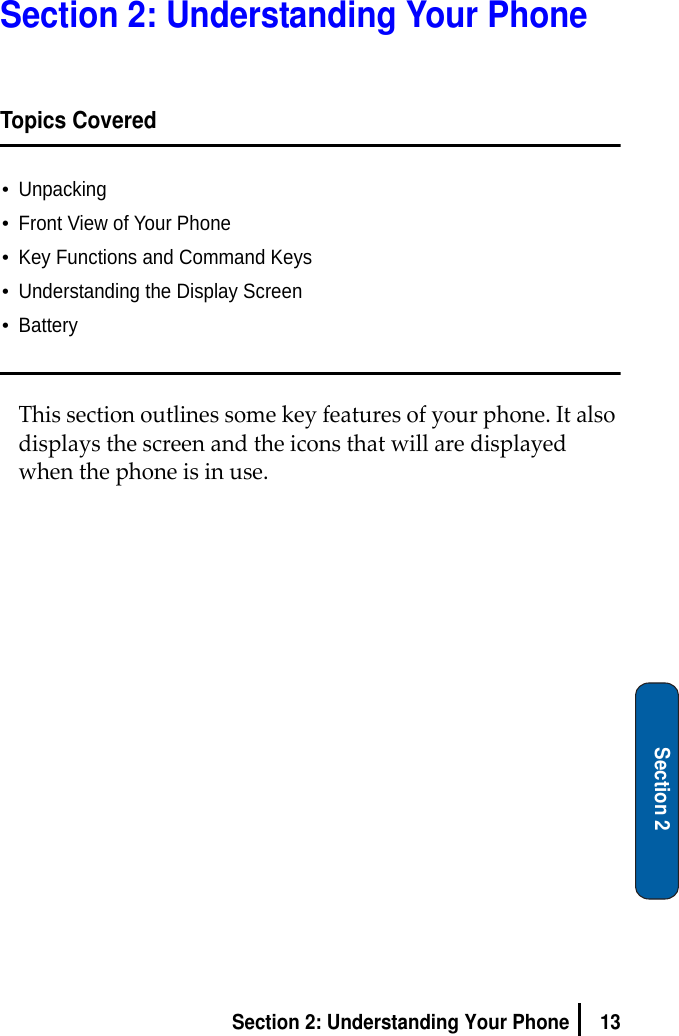
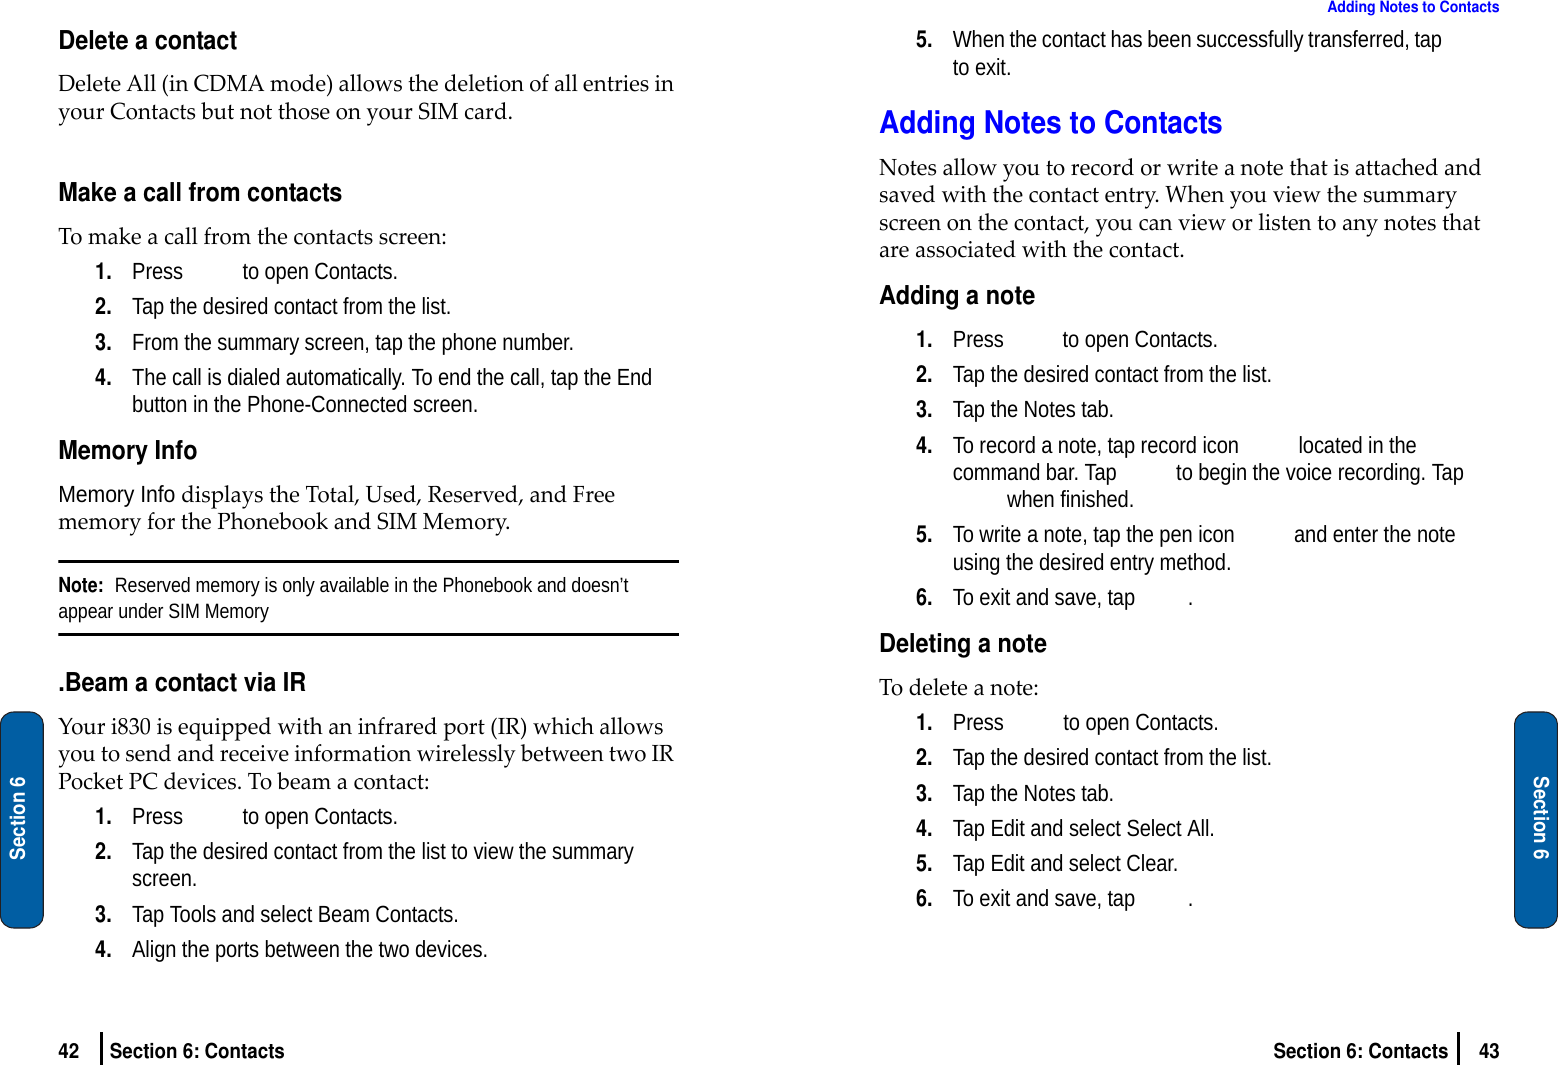
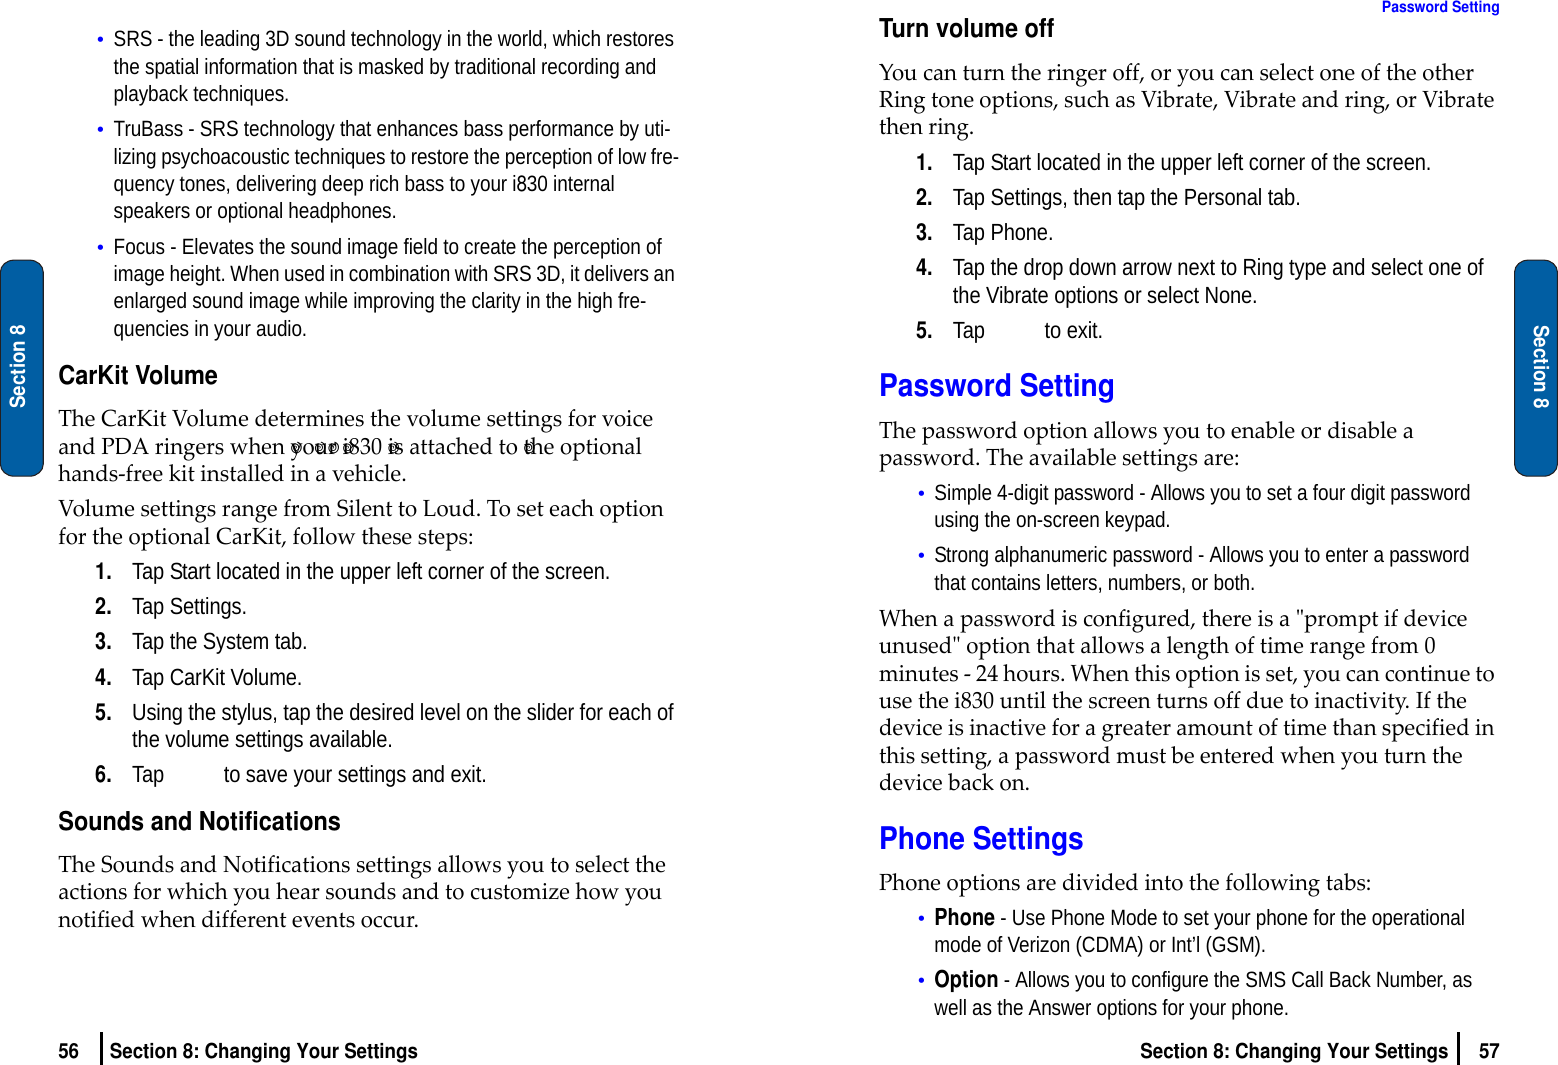
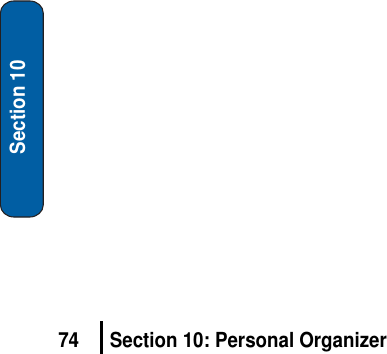
![16 Section 2: Understanding Your PhoneSection 2Key Functions1.Receiver: The receiver allows you to hear the other caller and the different ring tones and sounds offered by your phone.2.Application Icons: These icons represent the applications that are available on your phone.3.Display Screen: This screen displays all the information needed to operate your phone.4.OK Key: Pressing when navigating through a menu accepts the highlighted choice in the menu.5.Volume Key: Allows you to adjust the ringer volume in standby mode (with the flip open) or adjust the voice volume during a call. To mute the ringer during an incoming call, press the volume key up or down.6.TALK Key: Allows you to place or receive a call. In standby mode, press the key once to access the Outgoing call log.7.Voice Memo Key: This key launches the voice notes option which allows you to record voice notes and save them on your phone.8.Voicemail Key: Press and hold to automatically dial your voicemail.9.Keypad: Use these keys to enter numbers, letters, and characters.10.Shift/Asterisk Key: Enters the asterisk [*] character for calling features. In text entry mode, press to change the character input type.11.Microphone: The Microphone allows the other caller to hear you clearly when you are speaking to them.12.Power/Accessory Interface Connector: The power/accessory interface connector is used to plug in the charging accessories and also connect any available accessory cables to your phone.Key Functions17Section 2: Understanding Your PhoneSection 213.Space/Pound Key: Enters the pound [#] character for calling features. In text entry mode, press to enter a space or press and hold to open the symbols table.14.SD I/O Slot: This expansion slot allows you to insert an SD memory card to add additional memory and storage capacity. This allows you to play games, store large data files, and listen to and store music and video clips.15.END Key: Ends a call. Press and hold this key for a few seconds to turn your phone On or Off. When you receive an incoming call, press to mute the ringer and send the call to voicemail.16.BACK Key: Deletes characters from the display when you are in text entry mode. When in a menu, press to return to the previous menu. This key also allows you to return to the previous screen in a Sprint PCS Vision session.17.Navigation Key: This key allows you to scroll through the phone menu options.18.SEND Key: This key is used to iniatiate your calls or to activate your phone when the slider is down.19.Signal Strength Indicator: This icon represents the signal strength by displaying bars. The more bars displayed, the better the signal strength.20.Charging/Battery Indicator: This icon indicates the battery level or charging status of the battery.](https://usermanual.wiki/Samsung-Electronics-Co/SCHI830/User-Guide-559137-Page-12.png)