Samsung Electronics Co SCHR830 Multi-Band CDMA/ LTE Phone with WLAN, Bluetooth and RFID User Manual r830
Samsung Electronics Co Ltd Multi-Band CDMA/ LTE Phone with WLAN, Bluetooth and RFID r830
Contents
- 1. Users Manual 1
- 2. Users Manual 2
Users Manual 1


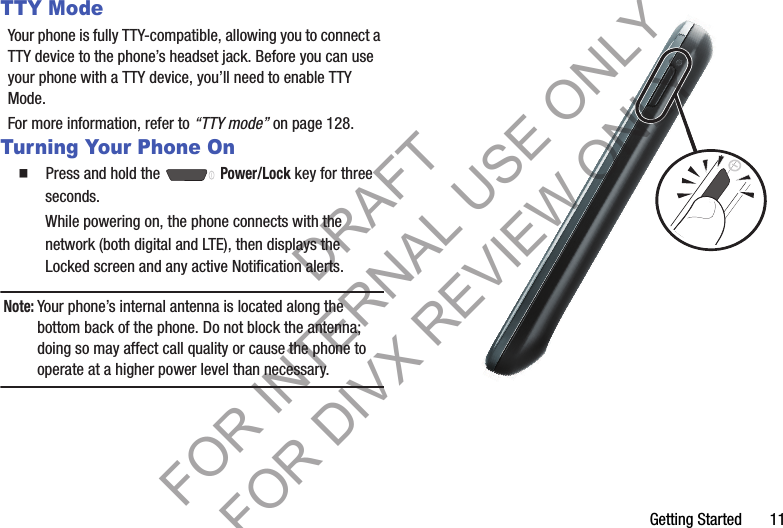
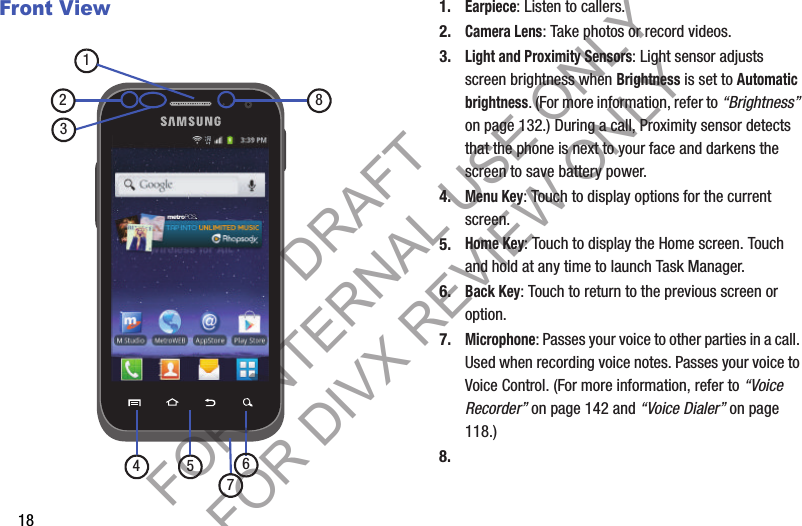
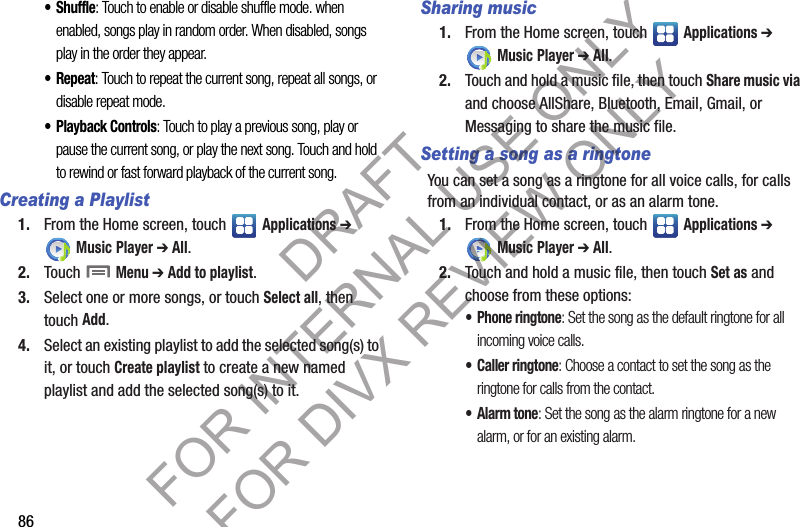
![Understanding Your Phone 17Section 2: Understanding Your PhoneThis section outlines key features of your phone, including keys, displays, and icons. Features• 4.0-inch (486x320 pixel) WVGA full-screen touch screen • High Speed Data [4G Long Term Evolution (LTE) Technology, EVDO 1x - Rev 0 Capable Technology, and Wi-Fi Technology] • Android OS • Motion and position sensitivity • Full integration with Google® applications, including Play Store®, plus pre-loaded applications • Connections –4G LTE –Wi-Fi 802.11 a/b/g/n –Wireless Modem Service –Bluetooth 4.0 (For more information, refer to “Bluetooth profiles” on page 148.) • Messaging Services (with on-screen QWERTY Keypads) –Text, Picture, and Video Messaging –Voice Messaging –Email –Mobile Instant Messenger (IM) –Chat • Full-HTML Browser • Global Positioning (GPS) Technology • 5 Megapixel CMOS Camera-Camcorder, rear-facing • 1.3 Megapixel CMOS Camera-Camcorder, front-facing • Picture Gallery, supporting JPG, PNG, GIF, and BMP formats • Music Player, supporting MP3 format • Video Player, supporting MP4, M4V, 3GP, DIVX, H.263, and H.264 formats • Speakerphone • Voice recognition by Nuance® • Ringtone and Alert tone support for MP3, AAC, WMA, OGG, QCP, EVRC, MIDI, WAV, and AMR formats • Support for microSD™ and microSDHC™ Memory Cards (up to 32 GB capacity) (A microSD Memory Card is included with your phone.) DRAFT FOR INTERNAL USE ONLY FOR DIVX REVIEW ONLY](https://usermanual.wiki/Samsung-Electronics-Co/SCHR830.Users-Manual-1/User-Guide-1819530-Page-23.png)


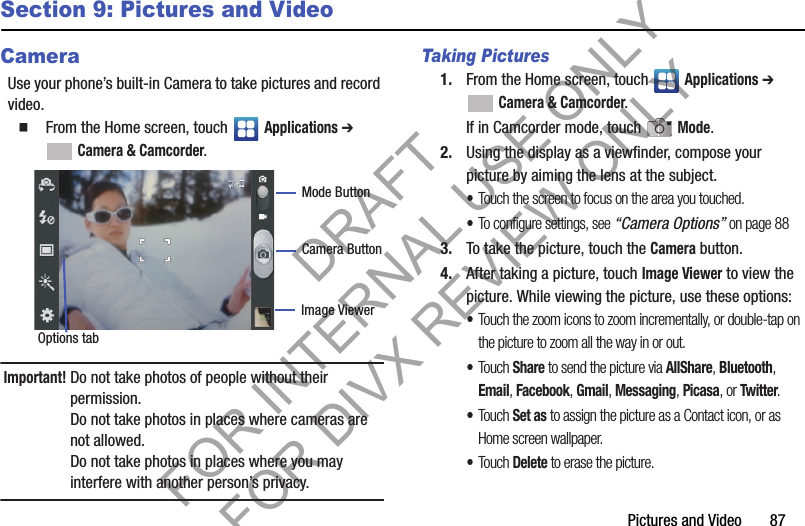

![Connections 95Section 10: ConnectionsWi-FiWi-Fi is a wireless networking technology that provides access to local area networks.Wi-Fi communication requires access to an existing Wi-Fi network. Wi-Fi networks can be Open (unsecured), or Secured (requiring you to provide login credentials). Your phone supports the 802.11 a/b/g/n Wi-Fi protocols.Configuring Wi-Fi SettingsConfigure your phone’s Wi-Fi settings. For more information, see “Wi-Fi Settings” on page 147.Turning Wi-Fi On or OffWhen you turn Wi-Fi service on, your phone automatically searches for available, in-range “hotspots” [also termed WAPs (Wireless Access Points)]. Turning Wi-Fi On1. From the top of the Home screen, sweep your finger downward to display the Notifications screen. 2. At the top of the Notifications screen, touch Wi-Fi to turn Wi-Fi On. Turning Wi-Fi Off1. From the top of the Home screen, sweep your finger downward to display Notifications. 2. At the top of the Notifications screen, touch Wi-Fi to turn Wi-Fi Off.DRAFT FOR INTERNAL USE ONLY FOR DIVX REVIEW ONLY](https://usermanual.wiki/Samsung-Electronics-Co/SCHR830.Users-Manual-1/User-Guide-1819530-Page-101.png)