Samsung Electronics Co SCHX659 Single-Mode Cellular Phone (CDMA) User Manual
Samsung Electronics Co Ltd Single-Mode Cellular Phone (CDMA) Users Manual
UserManual.wiki
>
Samsung Electronics Co
>
SCHX659 User Manual
Users Manual
Navigation menu
Upload a User Manual
Namespaces
Wiki Guide
HTML
PDF
Info
Views
User Manual
Discussion / Help
Navigation

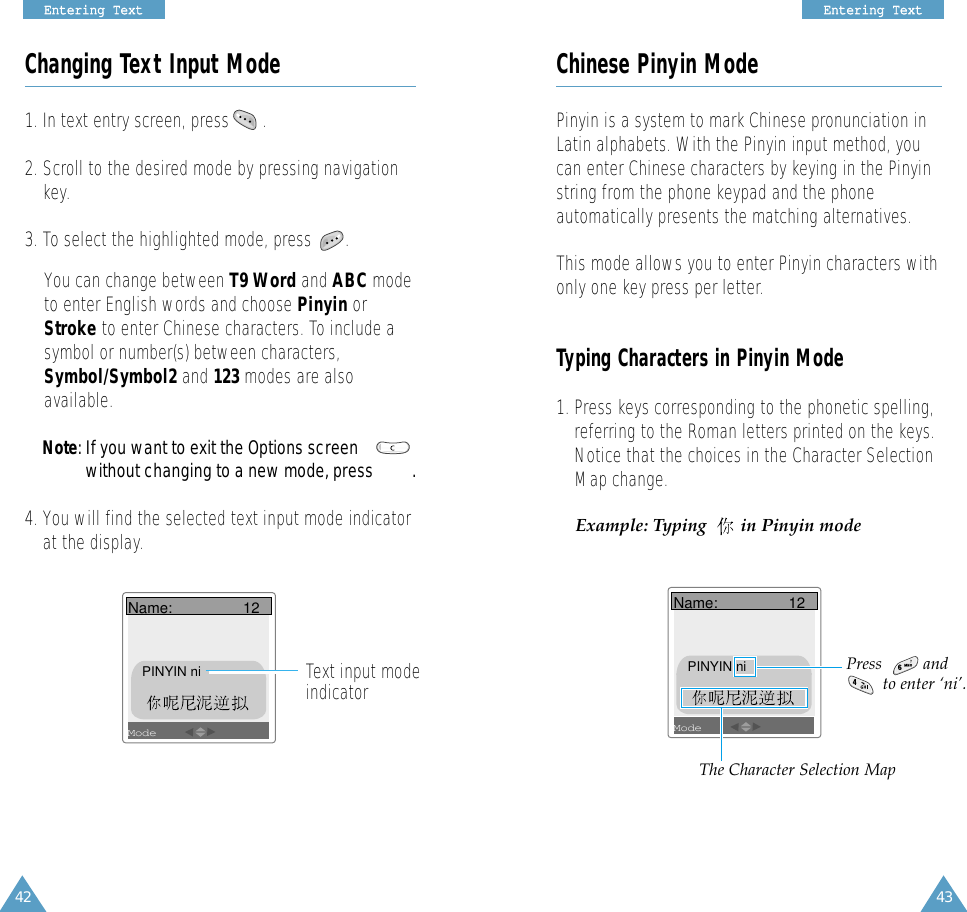
![53EEnntteerriinngg TTeexxttABC ModeWhen typing in ABC mode, you should press keylabeled with the required letter:-Once for the first letter-Twice for the second letter-And so on.For example, you press three times quickly to display the letter “C” , two times quickly todisplay the letter “K”. So, this method is calledMulti-tap typing.Refer to the table below for the list of charactersassigned on each key.52EEnntteerriinngg TTeexxttSmart PunctuationsPeriod, hyphen, and apostrophe are available on. T9 Word applies rules of grammar to insert thecorrect punctuation. Notice that is used twicein this example to display two punctuation marks: Changing CaseTo shift the case of the next letter(s) that you type,press . There are three shift states: LowerCase(T9word), Initial Capital(T9Word) and CapitalsLock(T9WORD).Including a NumberYou can include a number between letters withoutexiting the T9 Word mode. Press and hold thedesired number key.ScrollingTo move the cursor left or right through your textmessage, press left or right navigation key.Clearing Letters and WordsPress one or more times to clear letters one byone to the left. Press and hold to erase allletters on the display.L e t ‘ s e a t . Characters in the Order Displayed. @ , : ? - ; ’ / ( ) ! # % & *< > _ + = ” \ { } $ [ ] 1AB C2DE F 3GH I 4JK L5MN O 6PQ RS7TU V8WX Y Z 90List of characters available:(Caps Lock mode)Key](https://usermanual.wiki/Samsung-Electronics-Co/SCHX659/User-Guide-418020-Page-27.png)