Samsung Electronics Co SCOR4MONO Video Cassette Recorder (VHS) User Manual
Samsung Electronics Co Ltd Video Cassette Recorder (VHS) Users Manual
UserManual.wiki
>
Samsung Electronics Co
>
SCOR4MONO User Manual
Users Manual
Navigation menu
Upload a User Manual
Namespaces
Wiki Guide
HTML
PDF
Info
Views
User Manual
Discussion / Help
Navigation


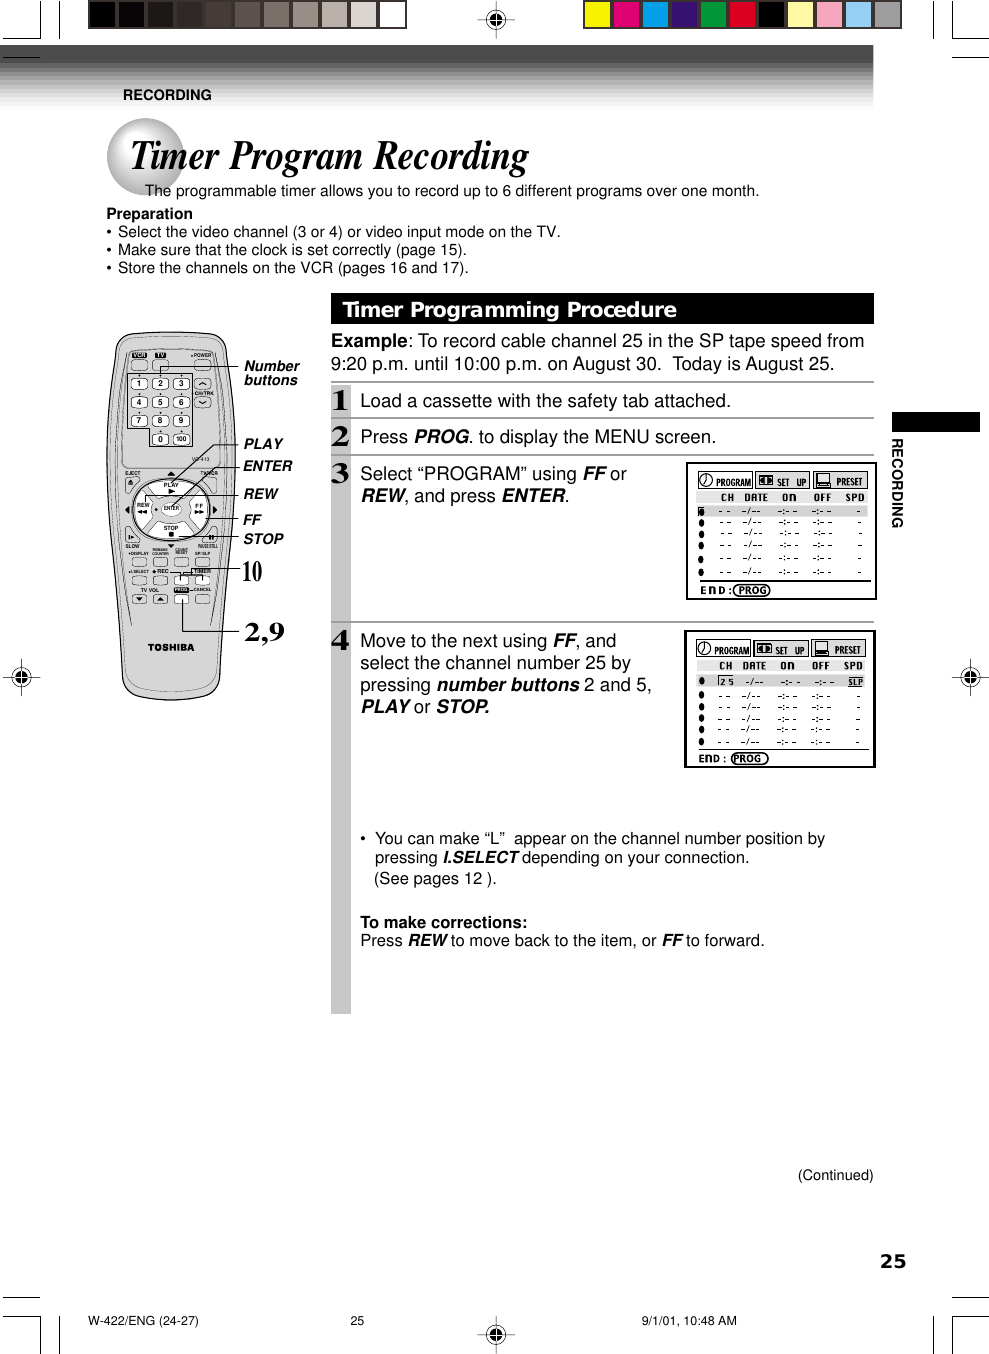
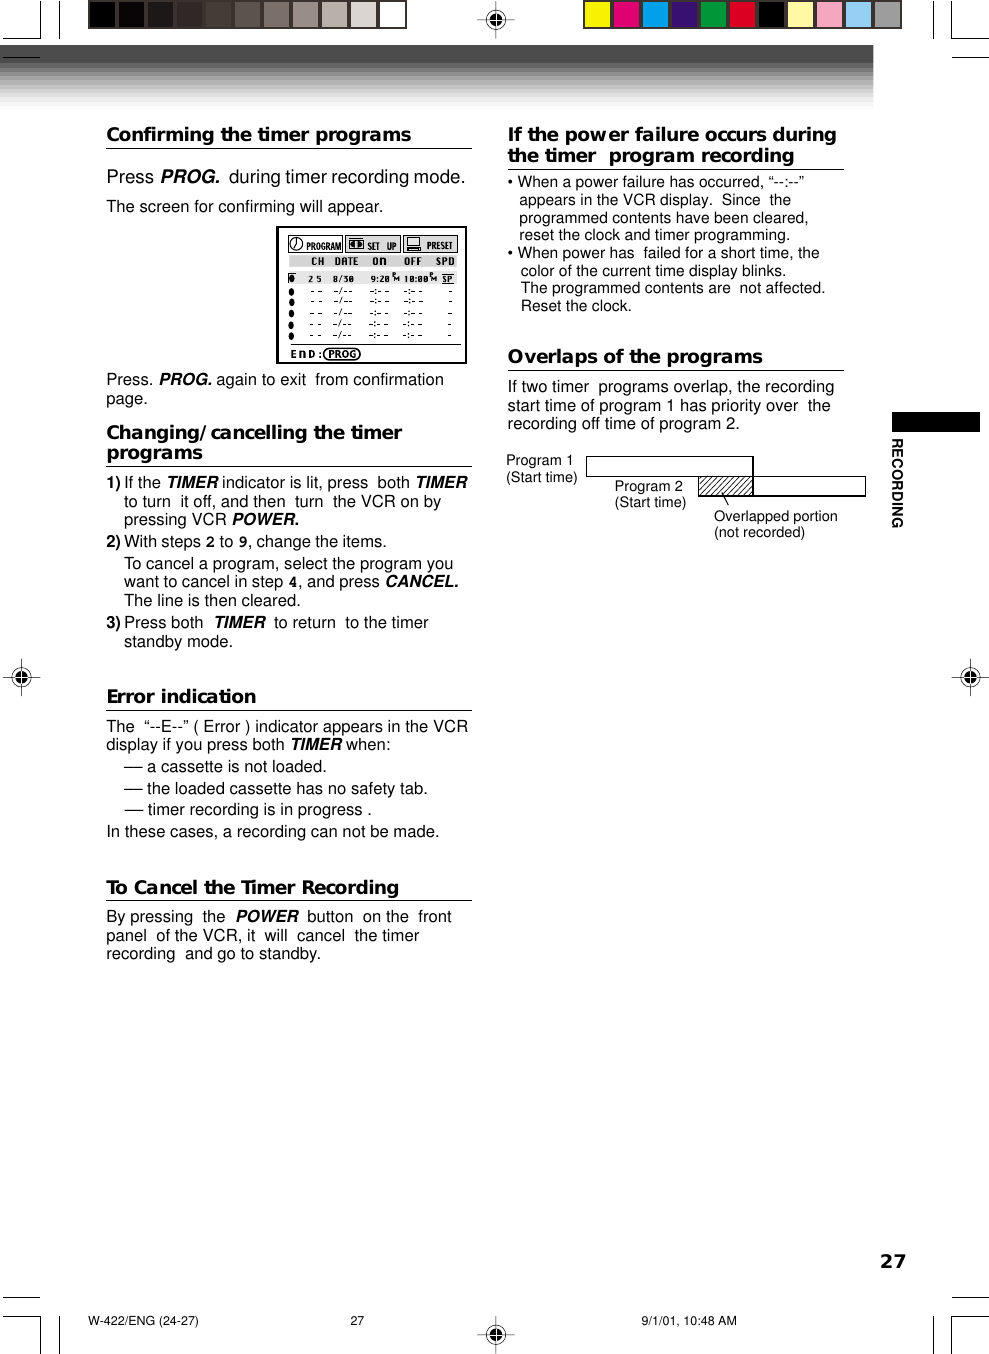
![265Move to the next using FF, and setthe recording date using PLAY orSTOP.The date changes as follows:[WKLYSU]…[WKLYSA]: You can record TV programs on the samechannel on the day and time every week.[MO~FR]: You can record TV programs on the same channel on theday and time Monday through Friday.6Move to the next using FF, and setthe hour and minutes of therecording start time.7Move to the next, and set therecording off time.8Move to the next, and select thetape speed (SP) using PLAY orSTOP.For the tape speed “AUTO (Auto SpeedSelect)”, see below.To set another program, press FF, andselect the next line pressing STOP.Repeat steps 4 to 8.9Press PROG..Now programming is completed.10Press both TIMER simultaneously.The power turns off and the VCR entersthe timer standby mode.Auto Speed SelectIf you are not sure the tape is long enough fortimer program recording in the SP tape speed,set the recording tape speed to “AUTO”.Recording starts in the SP tape speed and theVCR automatically selects the tape speed torecord the program to the end. If the tape lengthis not long enough, the tape speed automaticallychanges from SP to SLP.Notes• Make sure that the tape length is selected correctlyaccording to the tape used on the SET UP screen(page 22).• When the SLP tape speed is selected and the tapelength is not sufficient to record the program to theend, the program cannot be recorded to the end.• The picture will be distorted when playing the partwhere the recording tape speed is switched fromSP to SLP with the Auto Speed Select feature.Hi-FiSTEREOSAPLTIMERTimer Program Recording (continued) → 8/25 → 9/25 → … → 7/25 → WKLYSU → … MO~FR ← WKLYSA ←REC TIMERPMW-422/ENG (24-27) 9/1/01, 10:48 AM26](https://usermanual.wiki/Samsung-Electronics-Co/SCOR4MONO/User-Guide-178464-Page-26.png)