Samsung Electronics Co SCX4729FW Mono Laser Printer User Manual batian basic english
Samsung Electronics Co Ltd Mono Laser Printer batian basic english
UserManual.wiki
>
Samsung Electronics Co
>
SCX4729FW User Manual
>
Users Manual 1
Contents
1.
Users Manual 1
2.
Users Manual 2
Users Manual 1
Navigation menu
Upload a User Manual
Namespaces
Wiki Guide
HTML
PDF
Info
Views
User Manual
Discussion / Help
Navigation
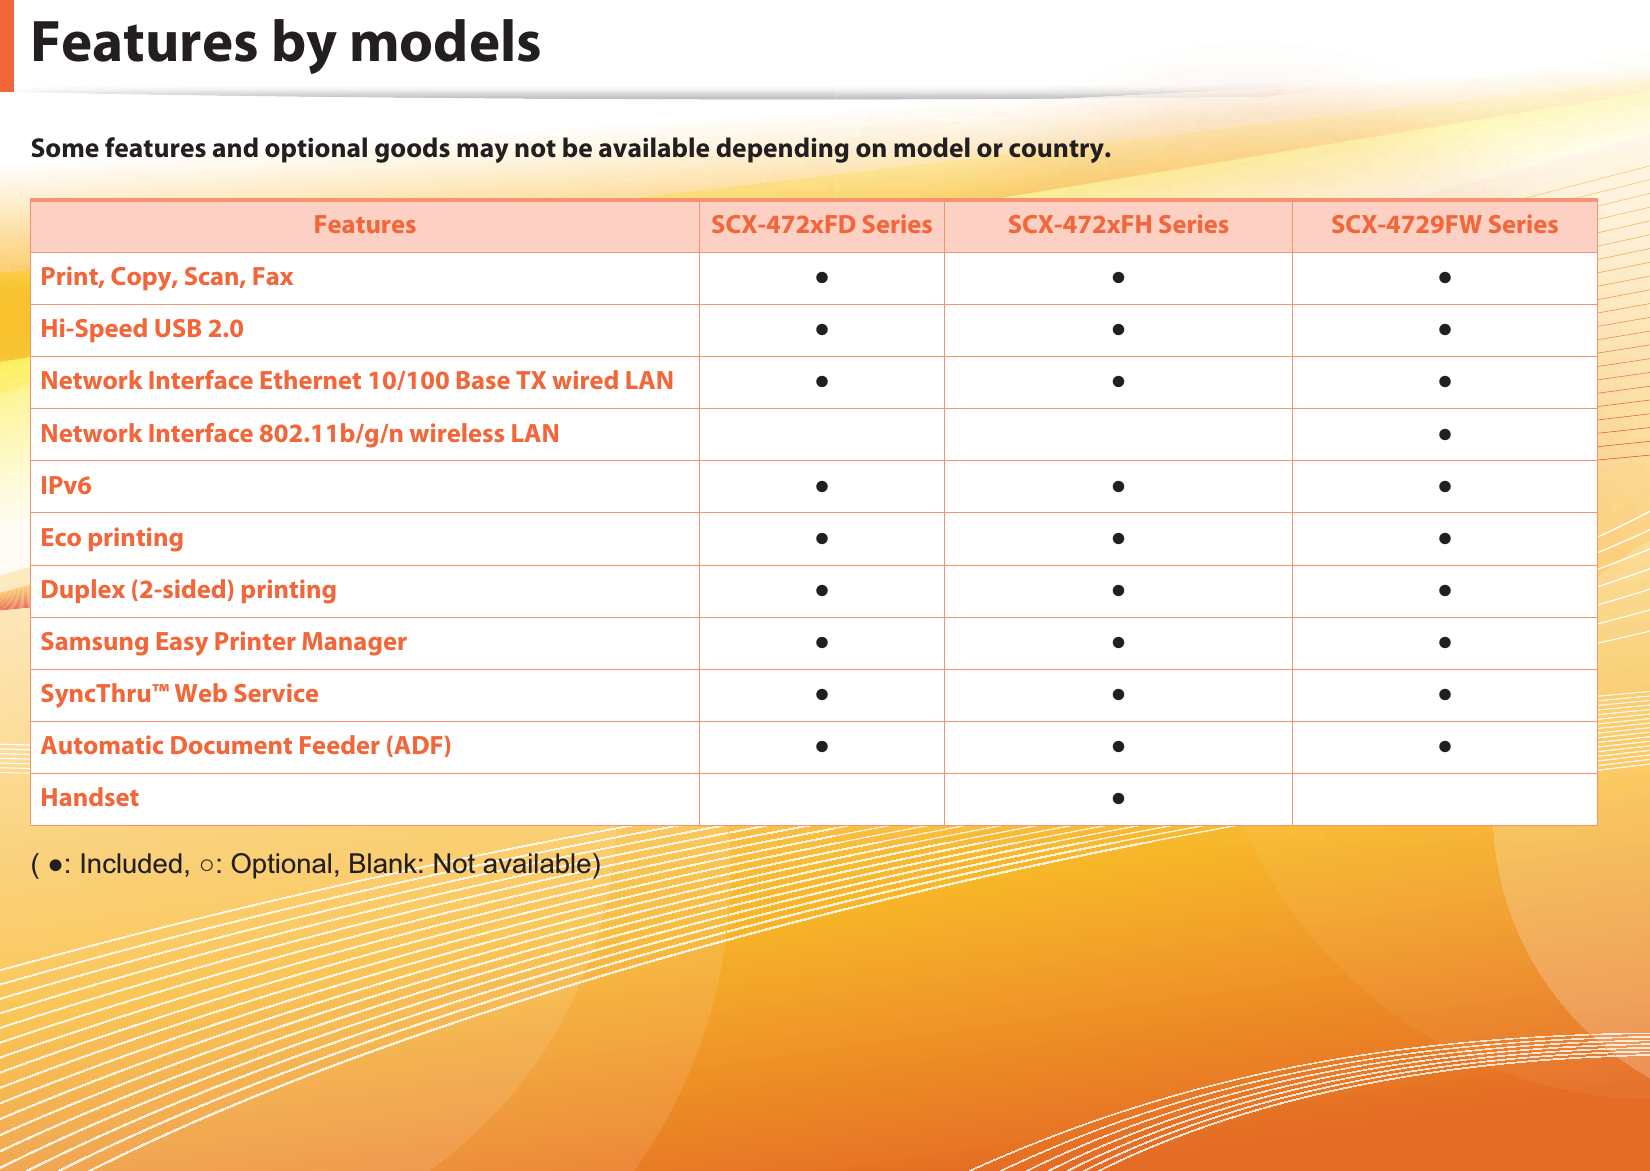
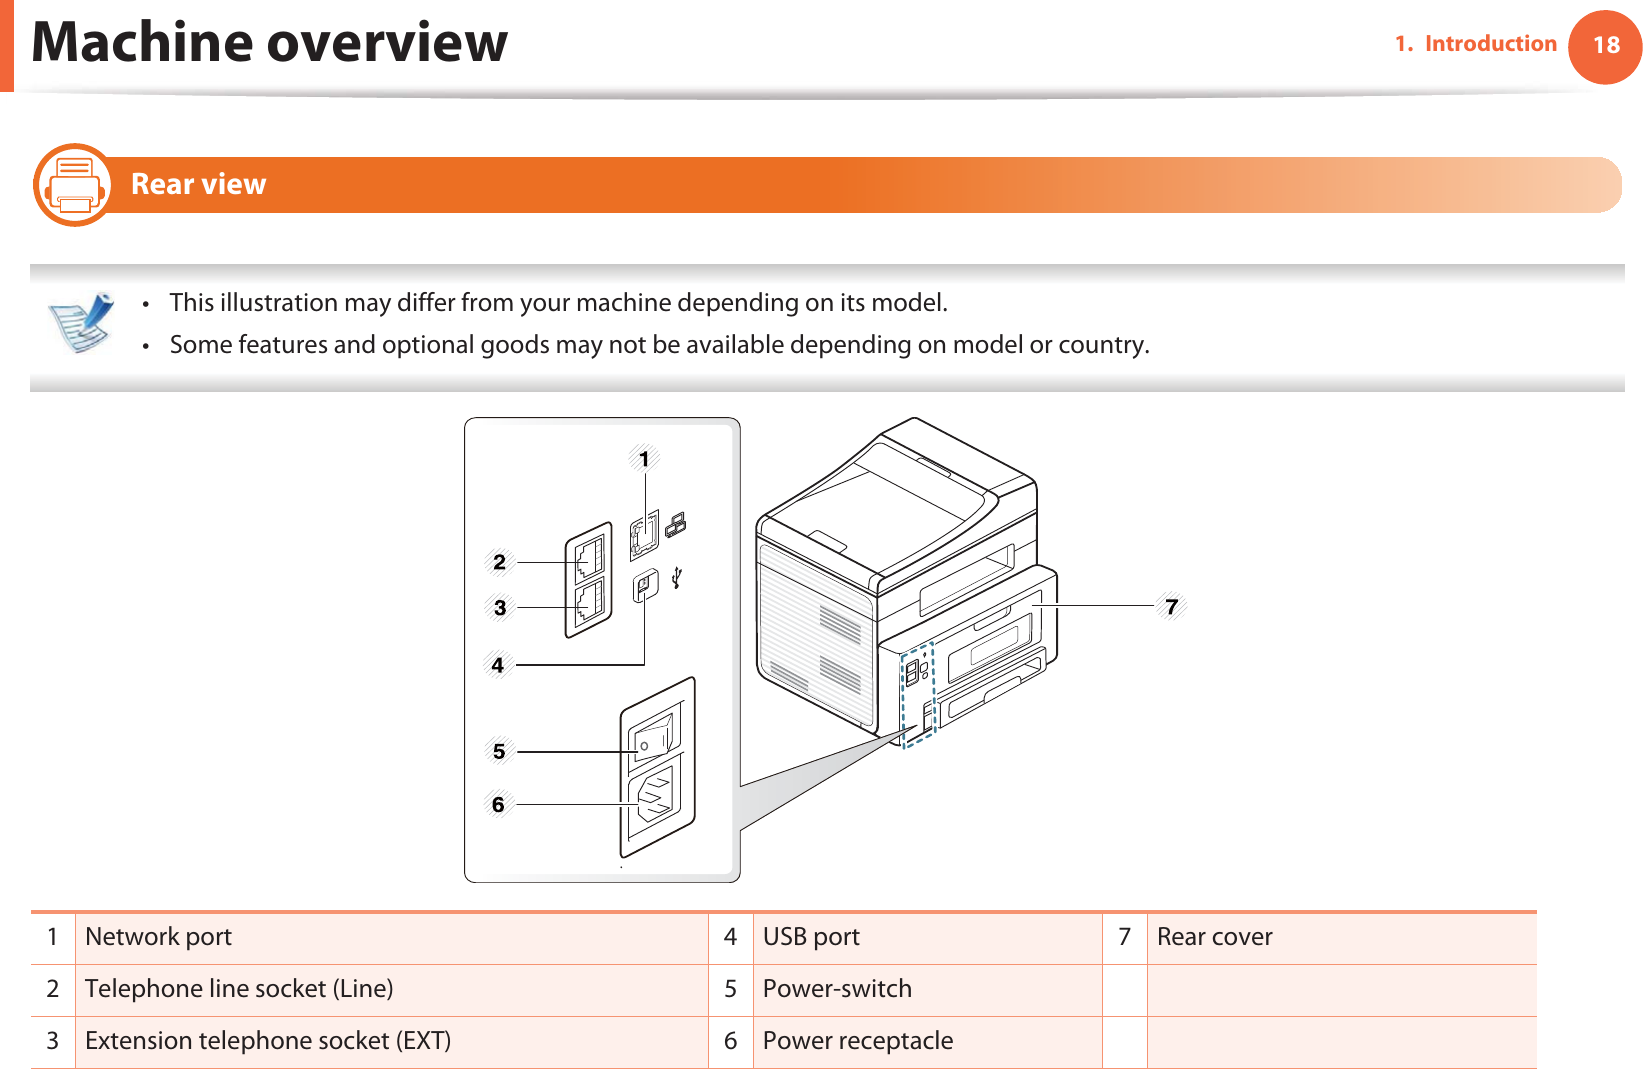
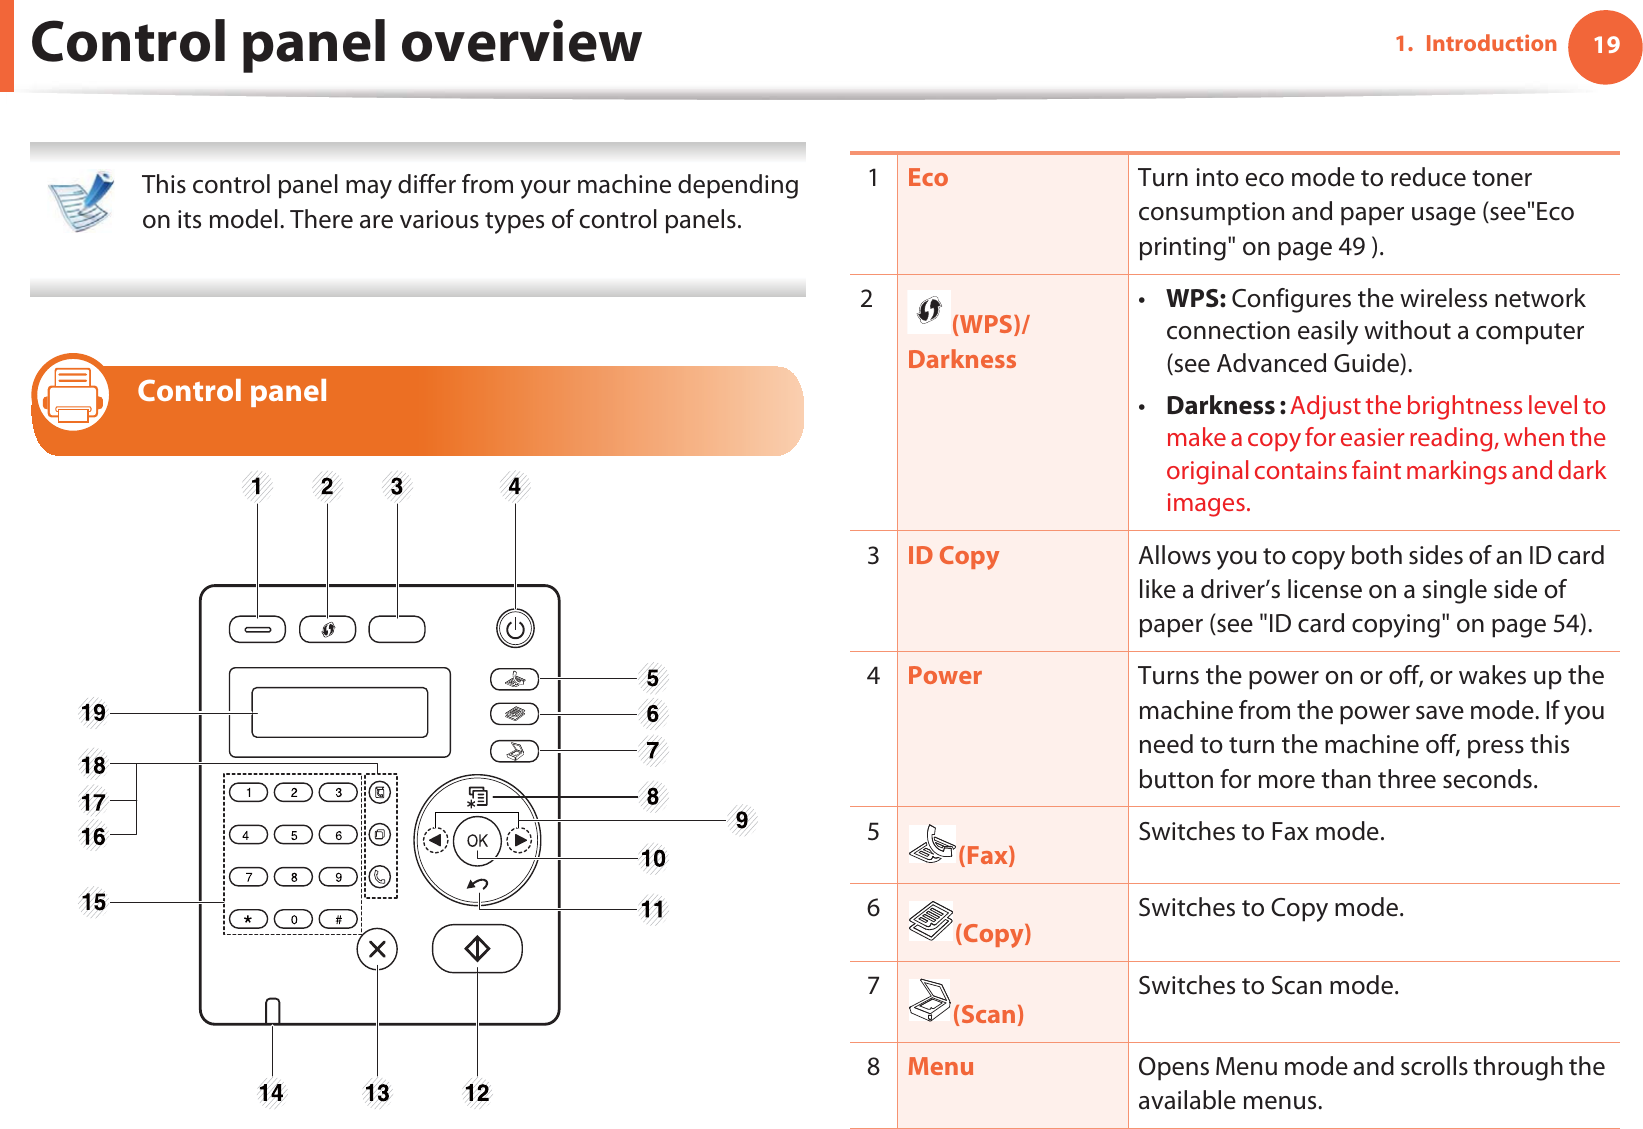
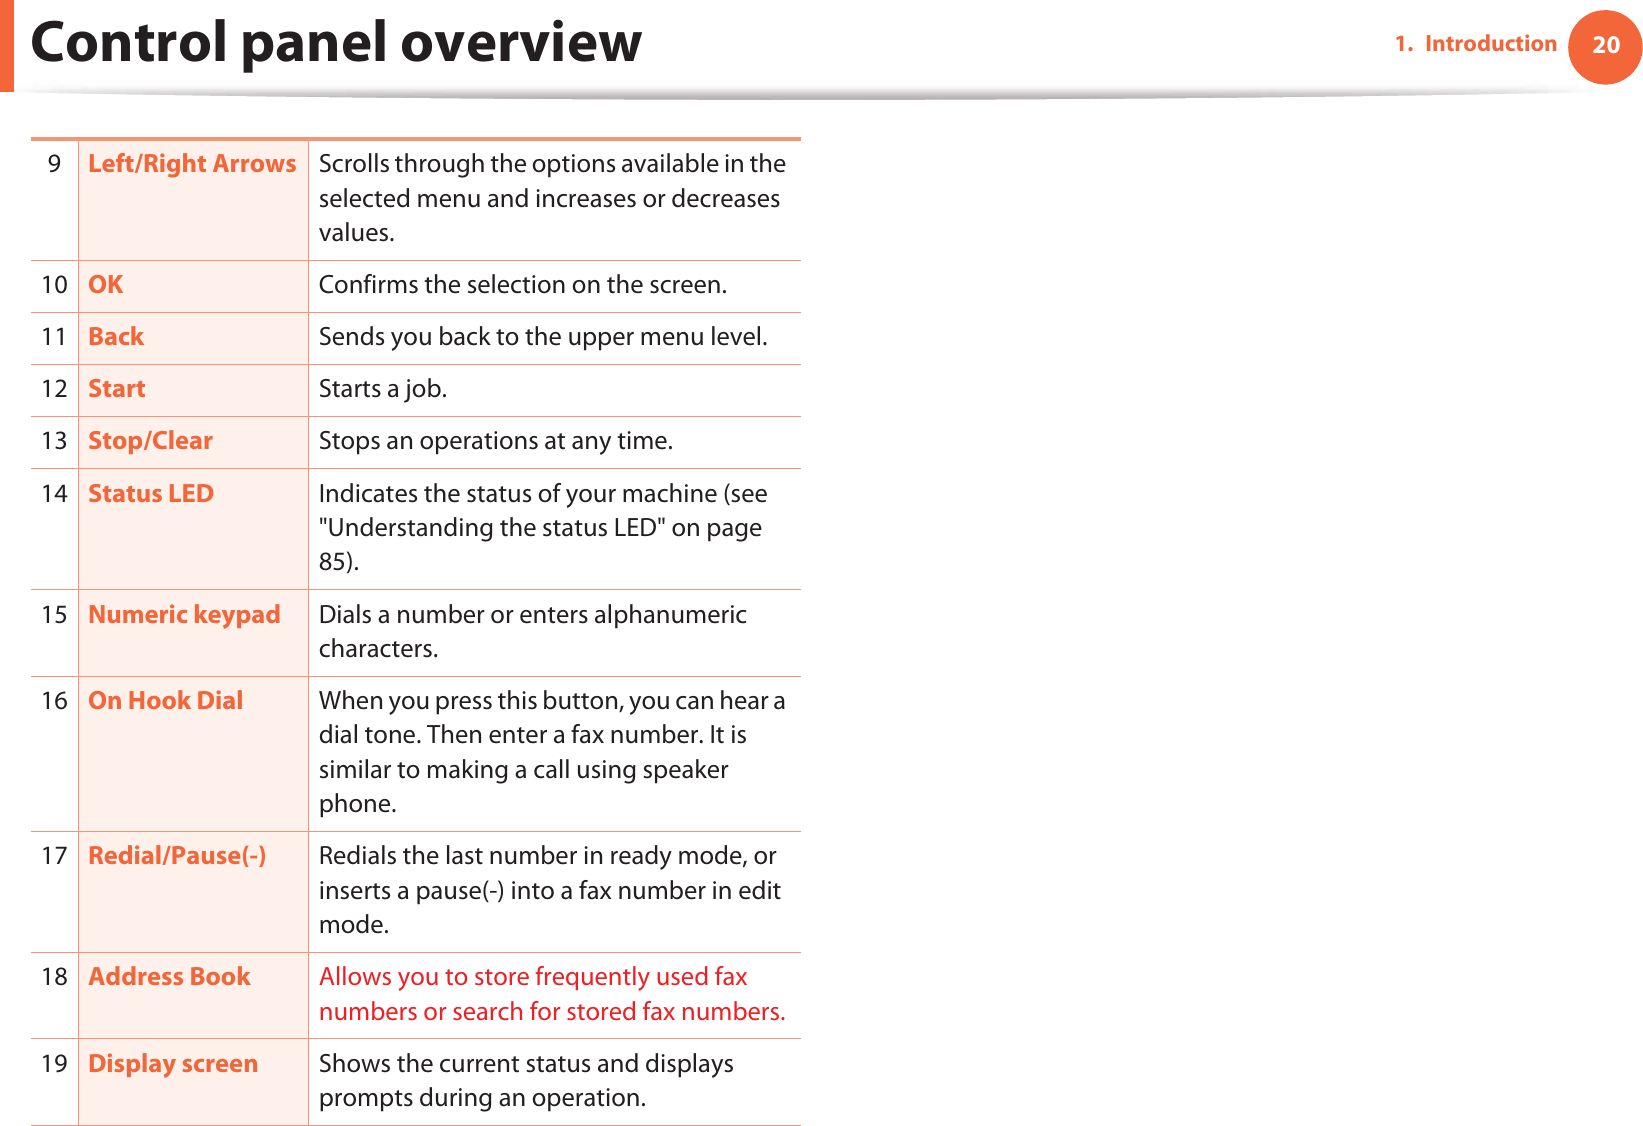
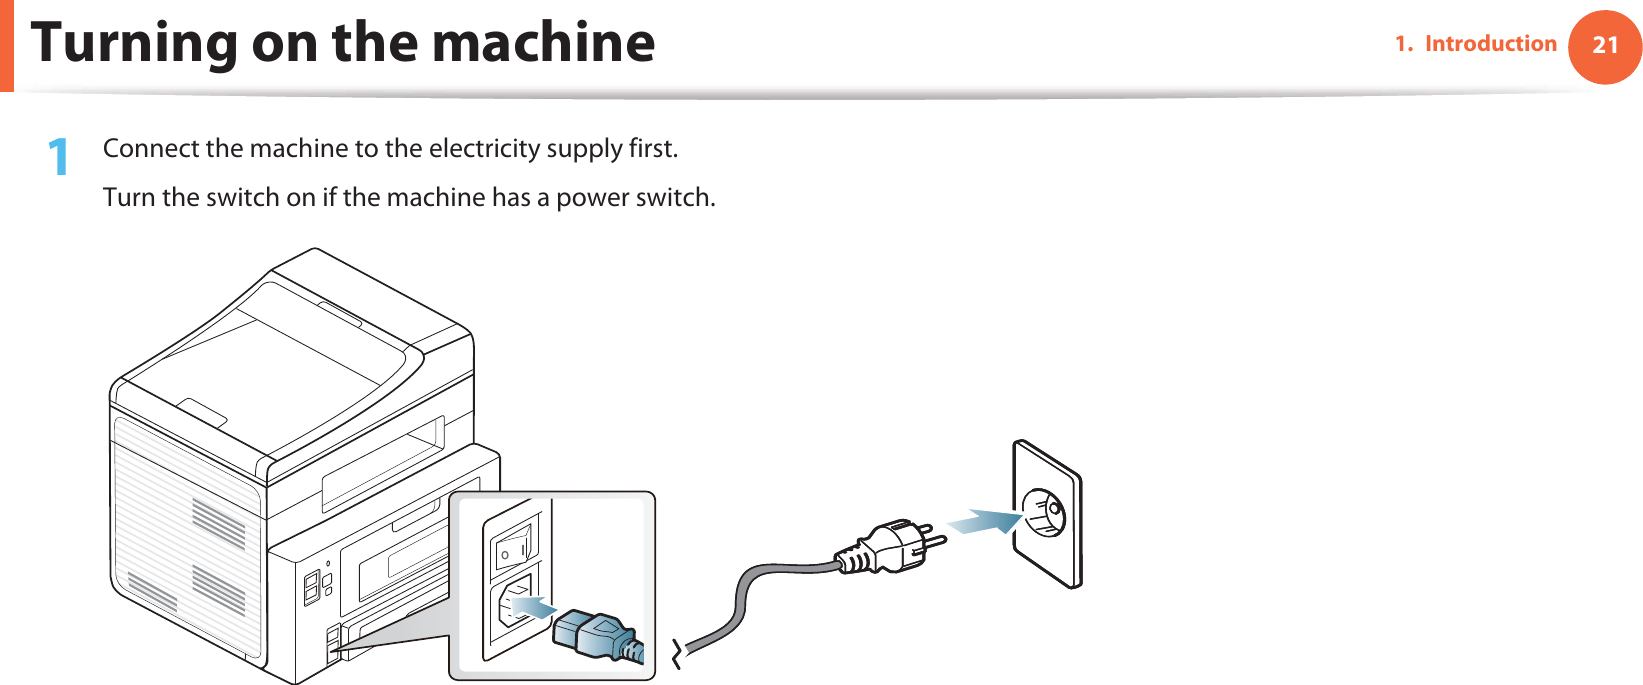
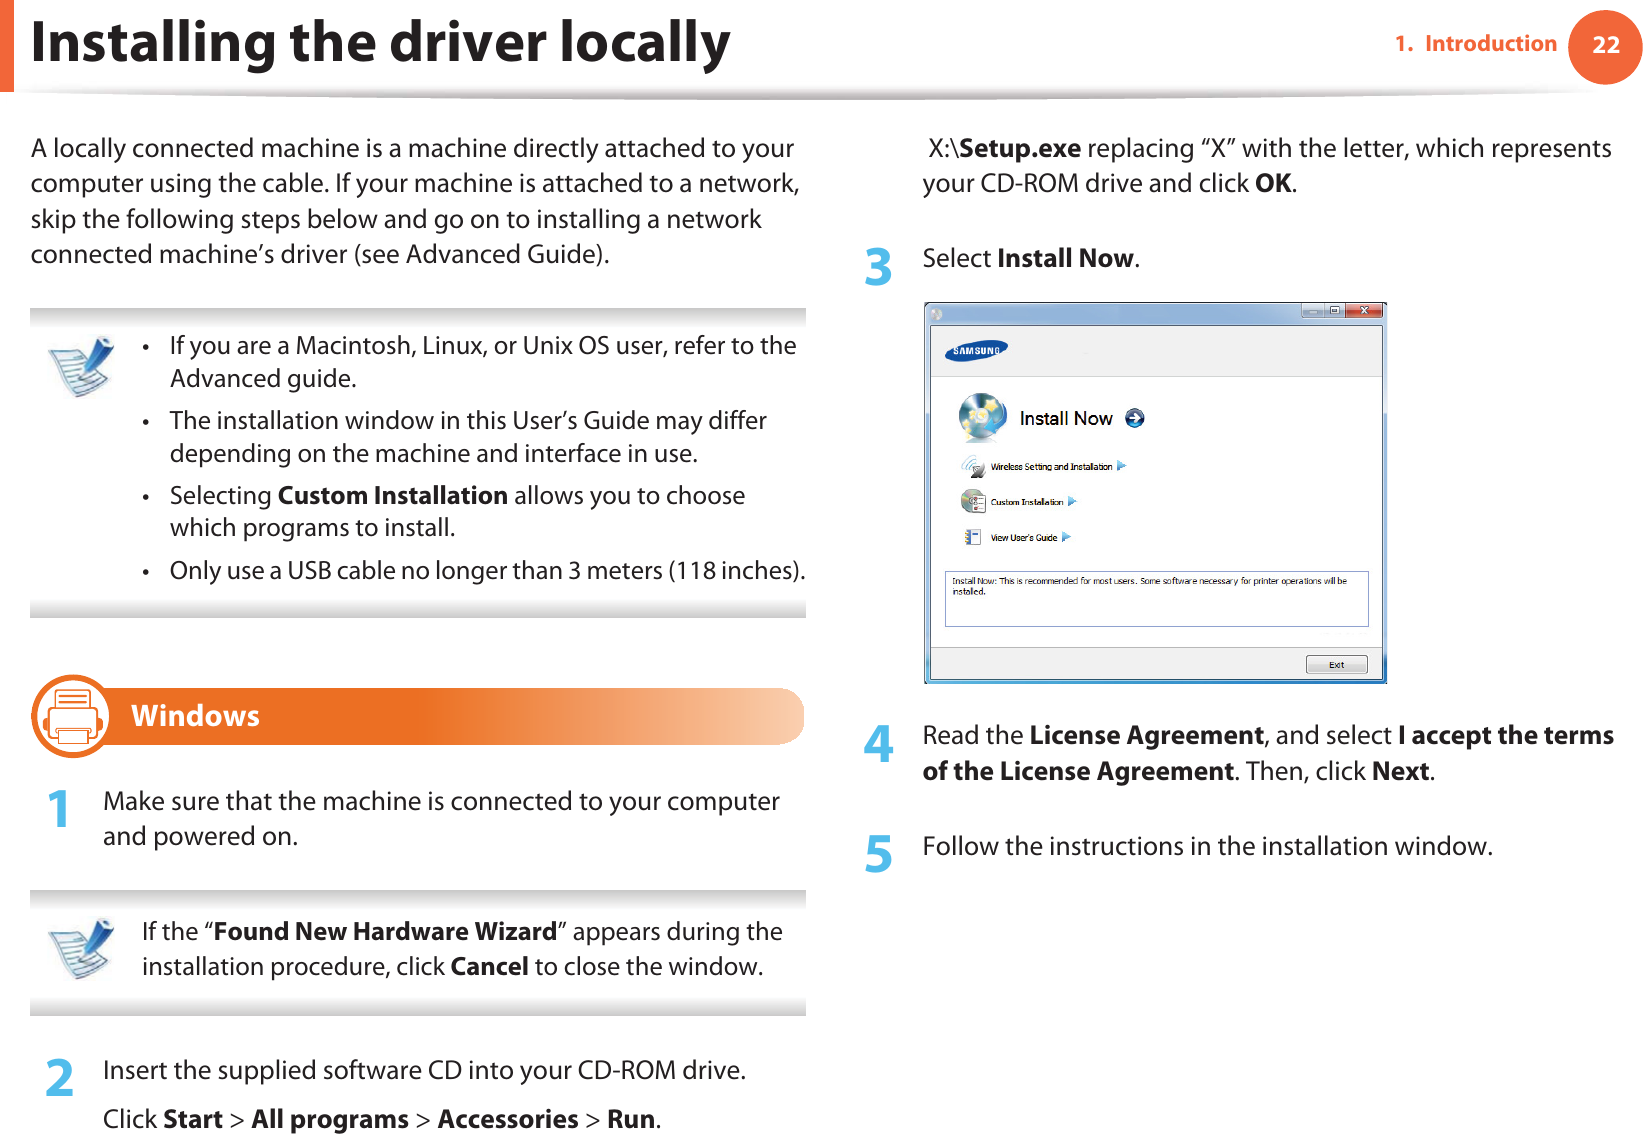
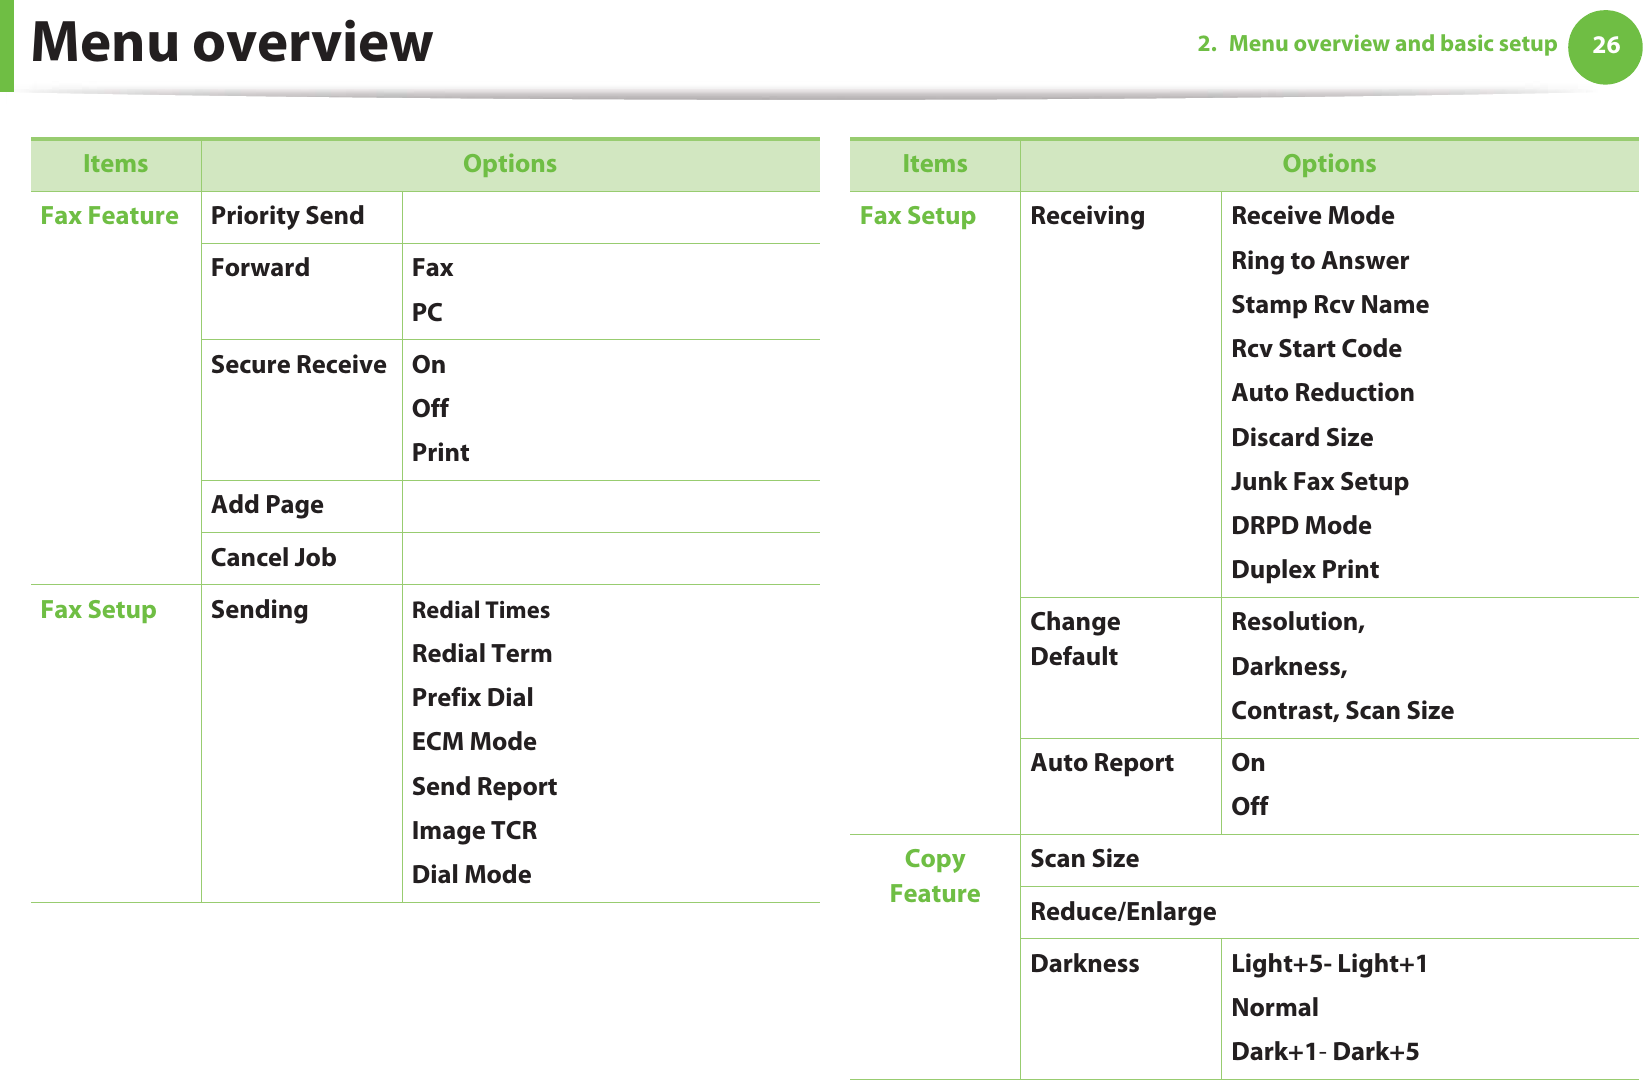
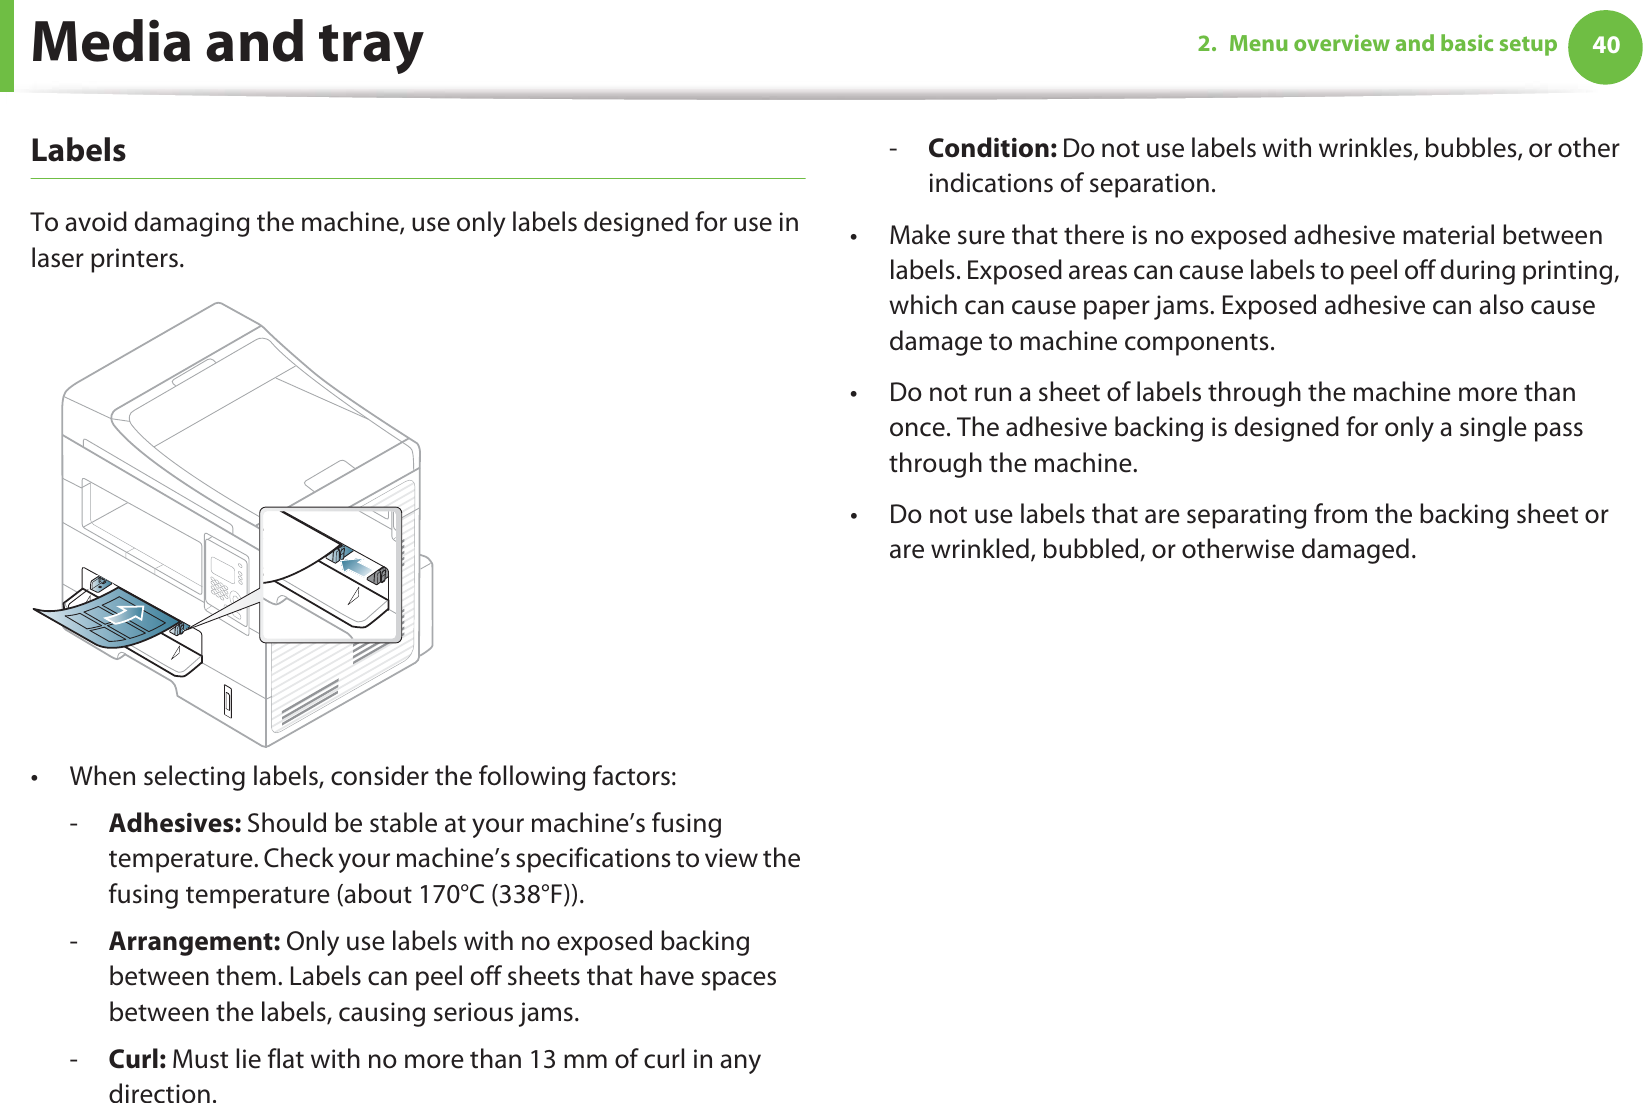
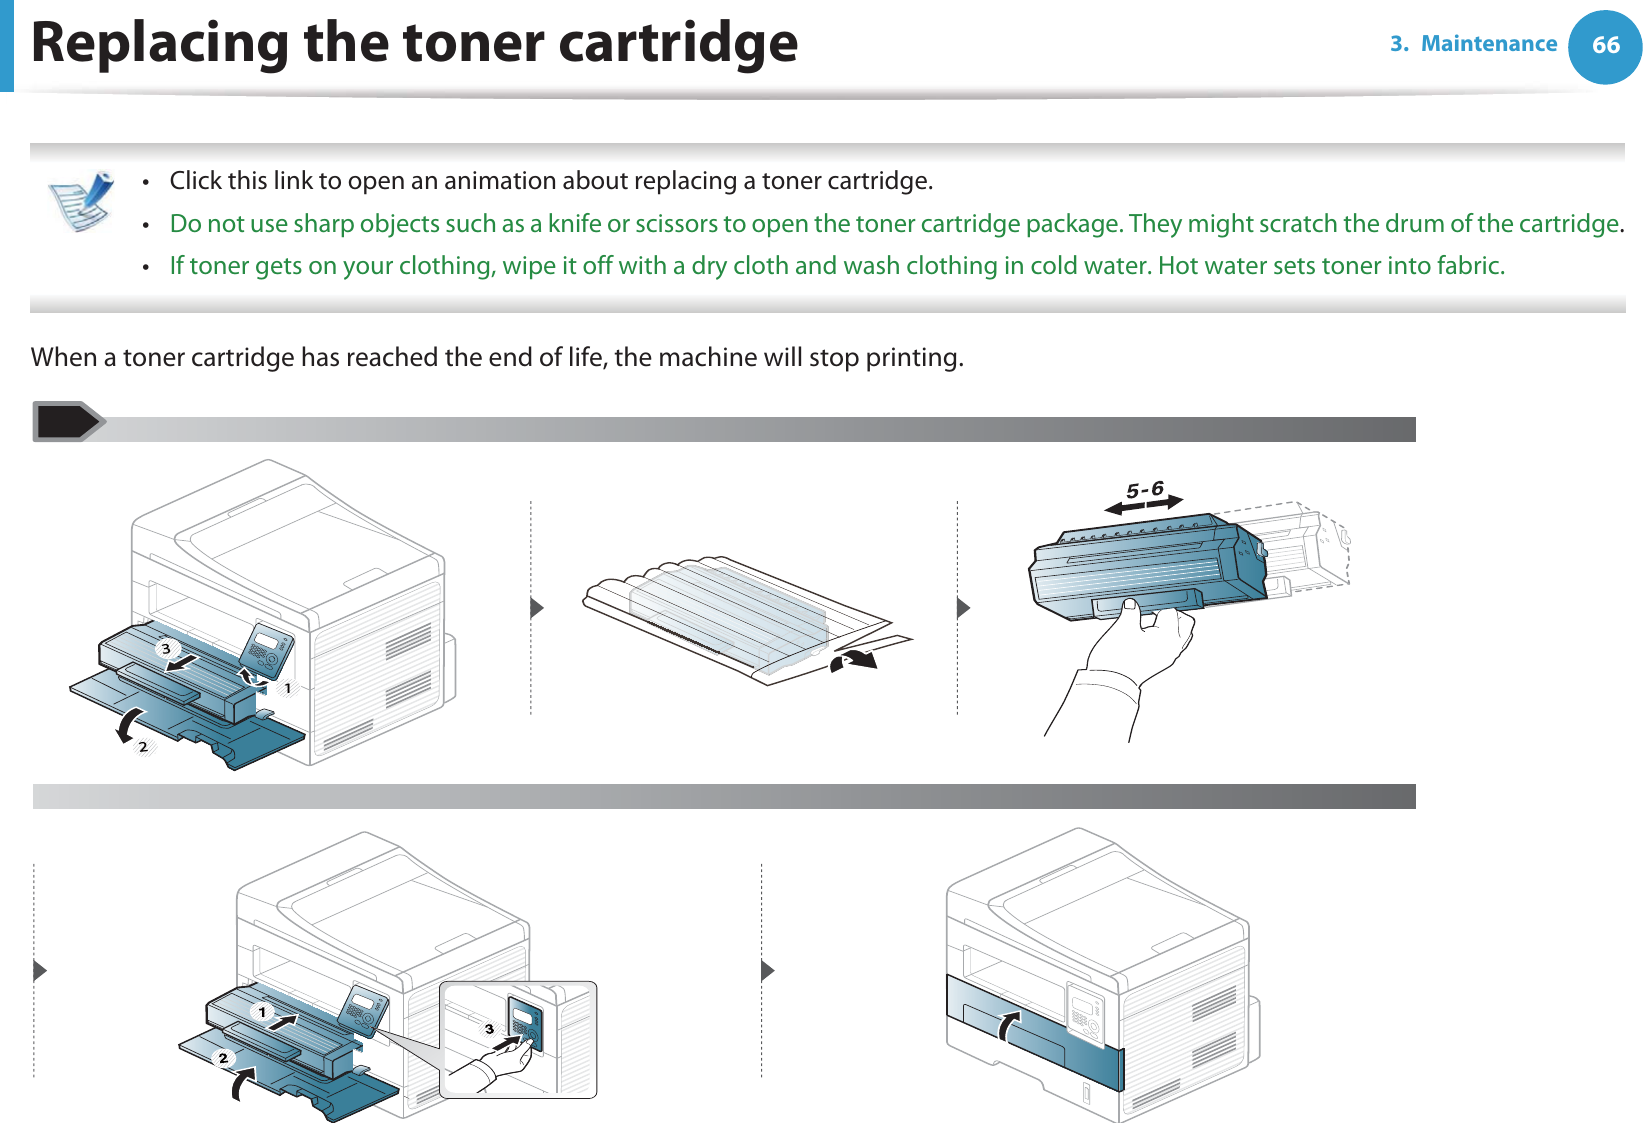
![YContentsXXUIntroduction[Key benefits]Features by models^Useful to know_About this user’s guide`Safety informationX\Machine overviewX`Control panel overviewYXTurning on the machineYYInstalling the driver locallyYZReinstalling the driverYUMenu overview and basic setupY\Menu overviewZXChanging the display languageZYMedia and tray[]Basic printing\YBasic copying\]Basic scanning\^Basic faxingZUMaintenance]YOrdering supplies and accessories]ZAvailable supplies][Available maintenance parts]\Redistributing toner]]Replacing the toner cartridge]_Monitoring the supplies life]`Setting the toner low alert^WCleaning the machine[UTroubleshooting^\Tips for avoiding paper jams^]Clearing original document jams_WClearing paper jams_\Understanding the status LED_^Understanding display messages\UAppendix`ZSpecificationsXWZRegulatory informationXX^Copyright](https://usermanual.wiki/Samsung-Electronics-Co/SCX4729FW.Users-Manual-1/User-Guide-1493407-Page-2.png)
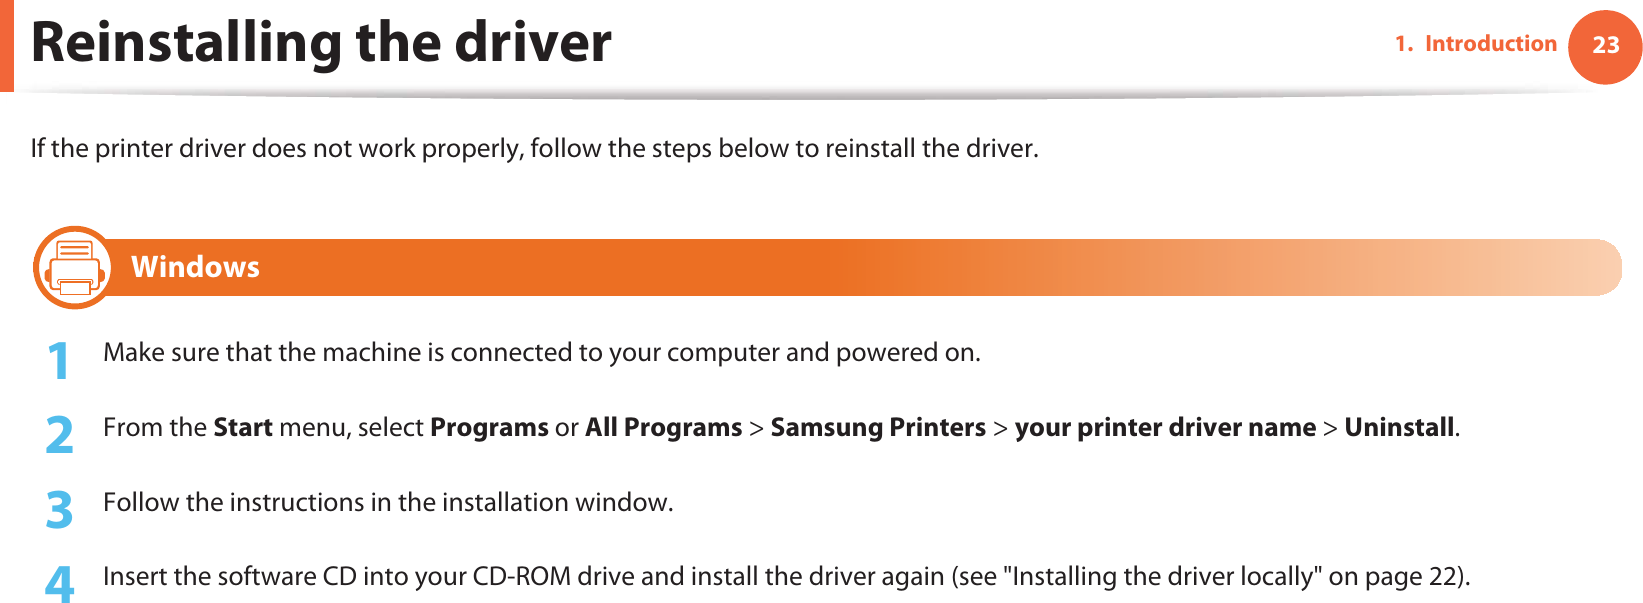


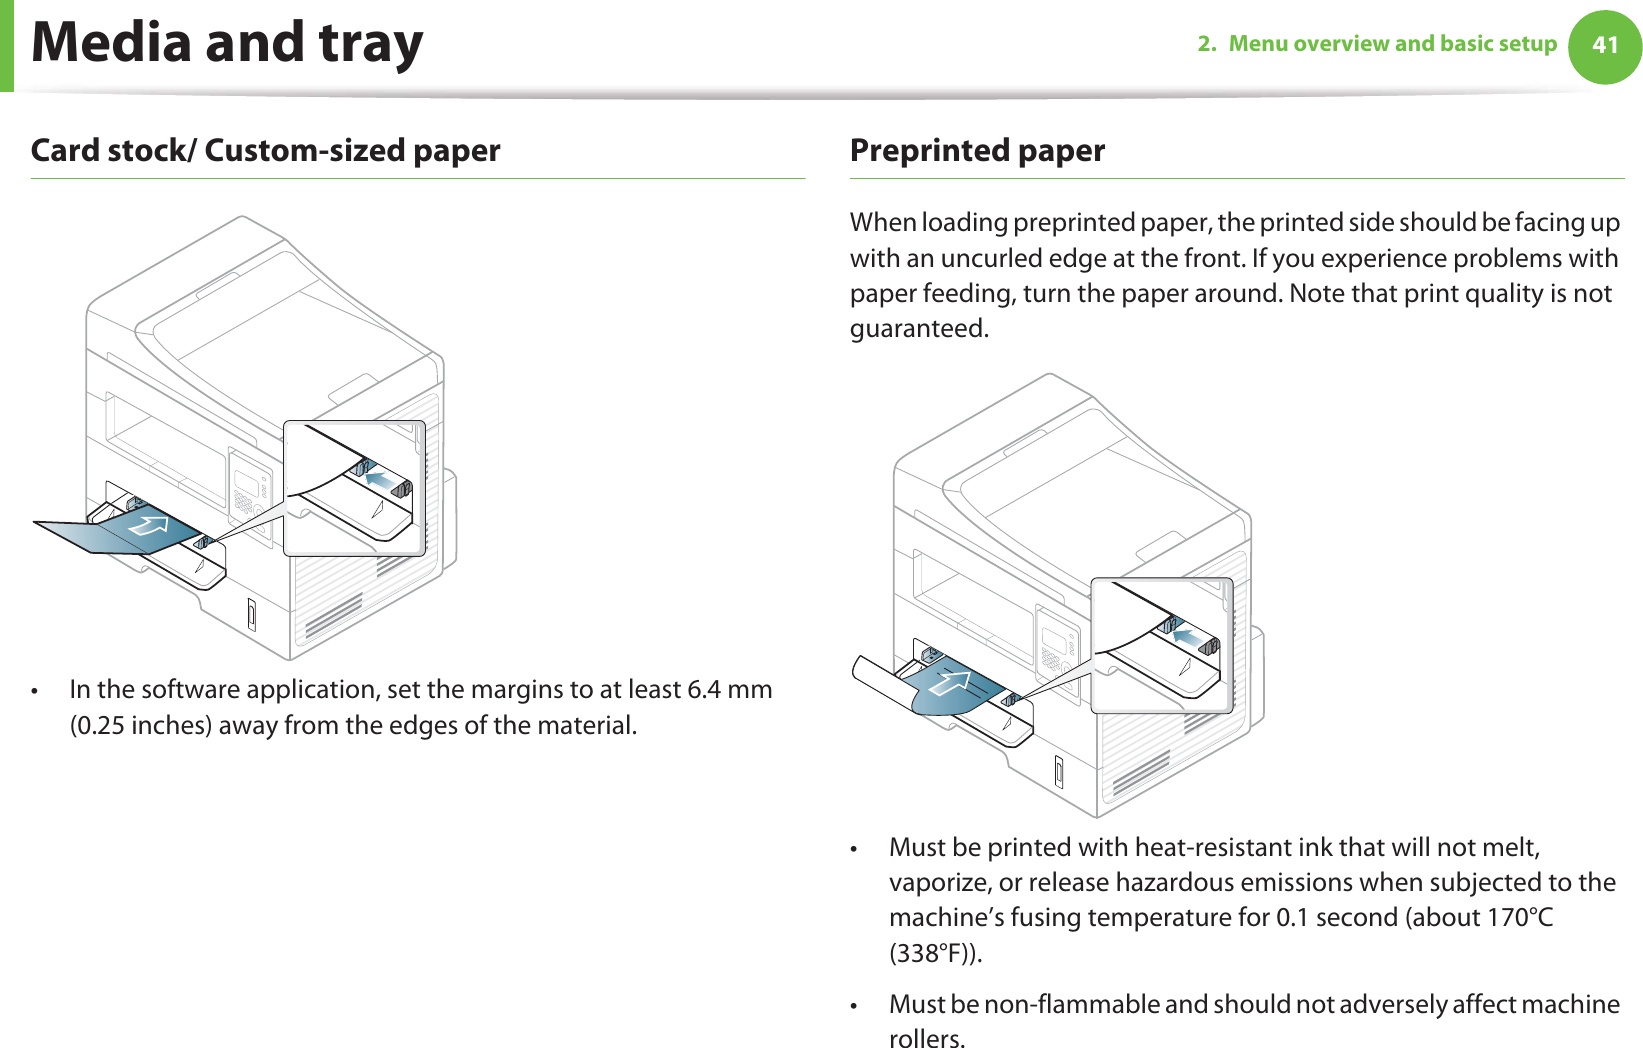
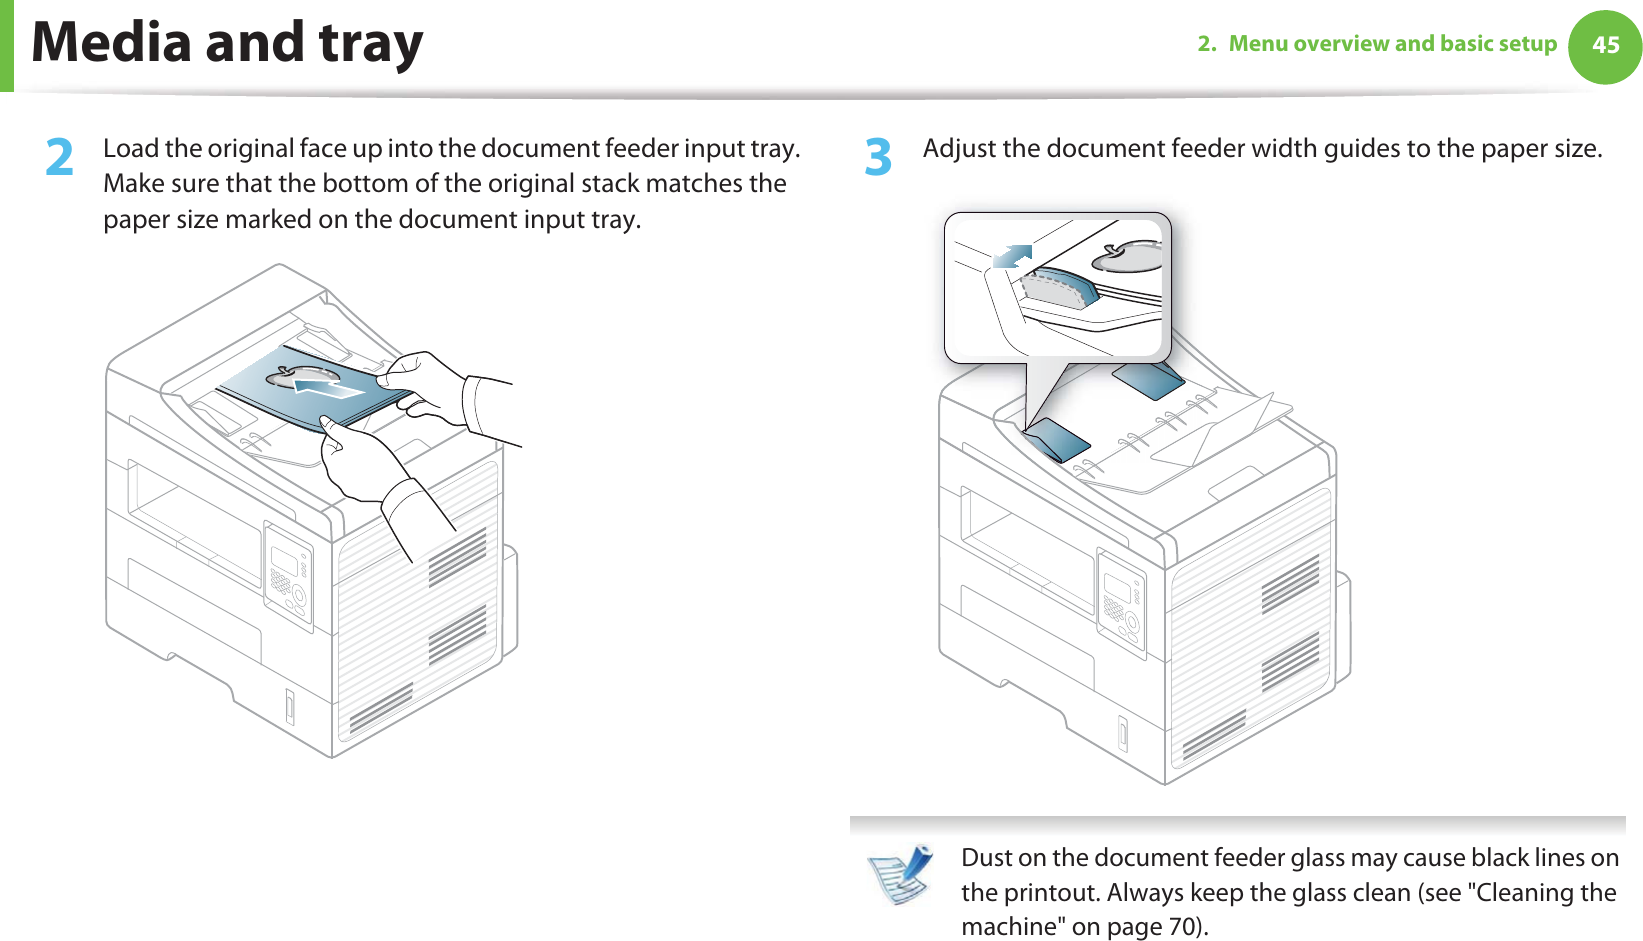
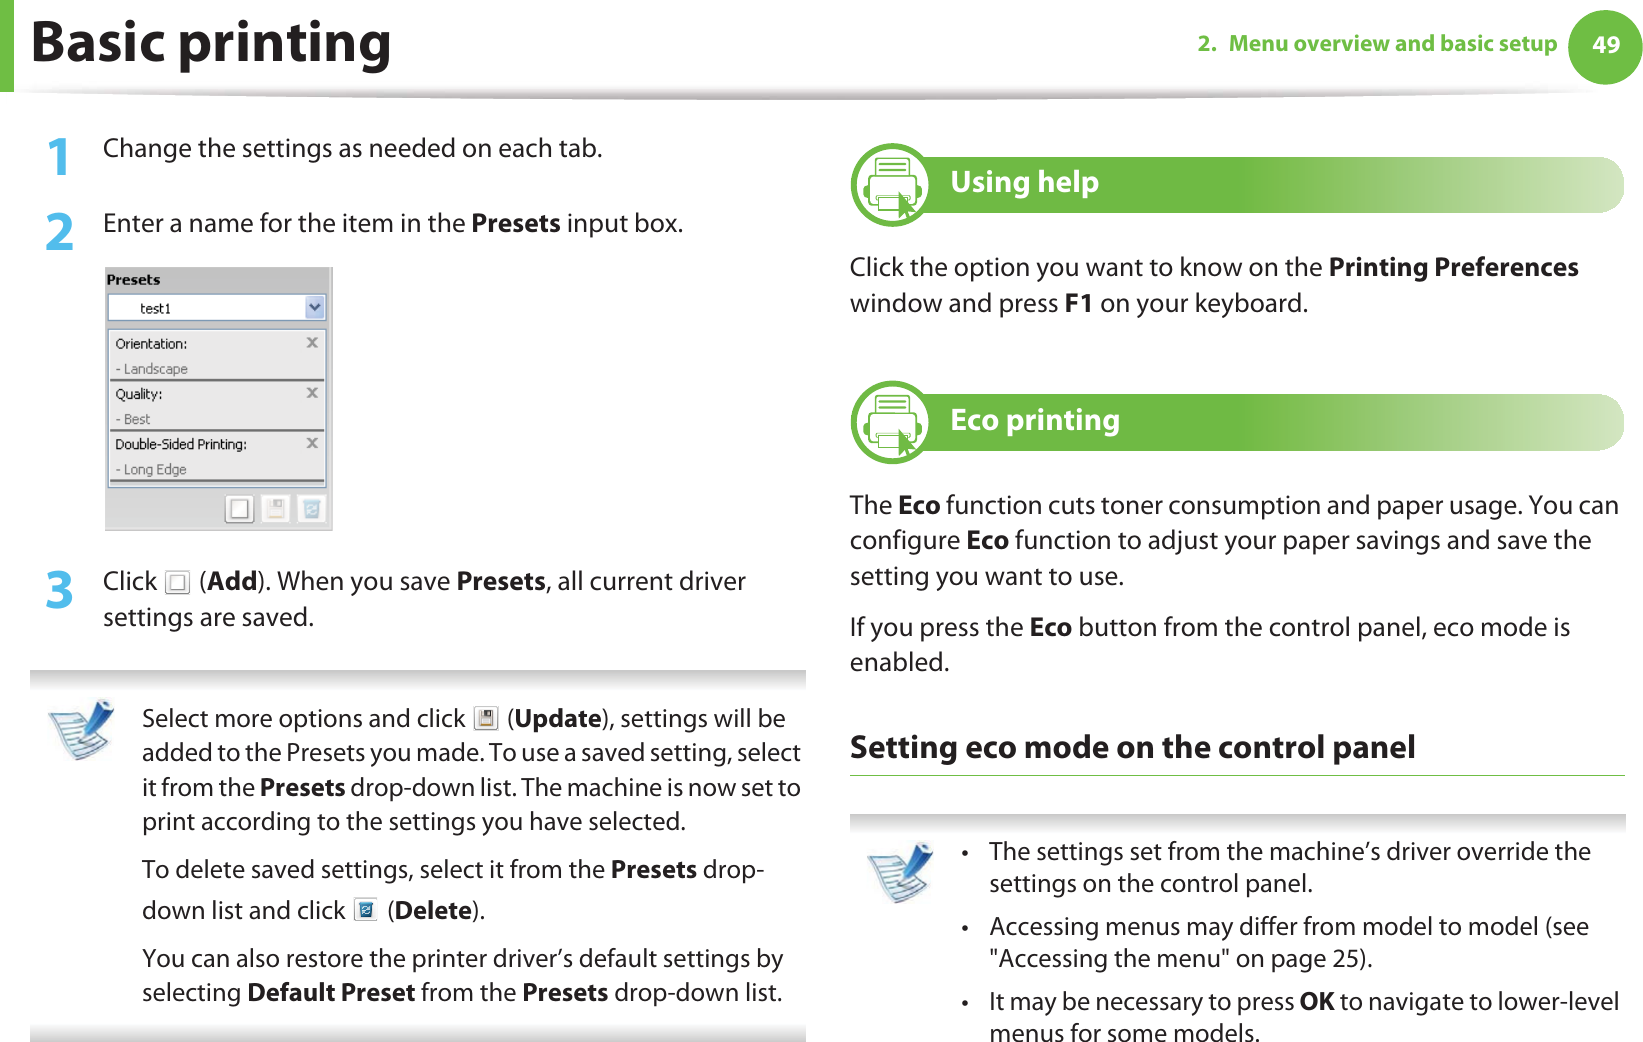
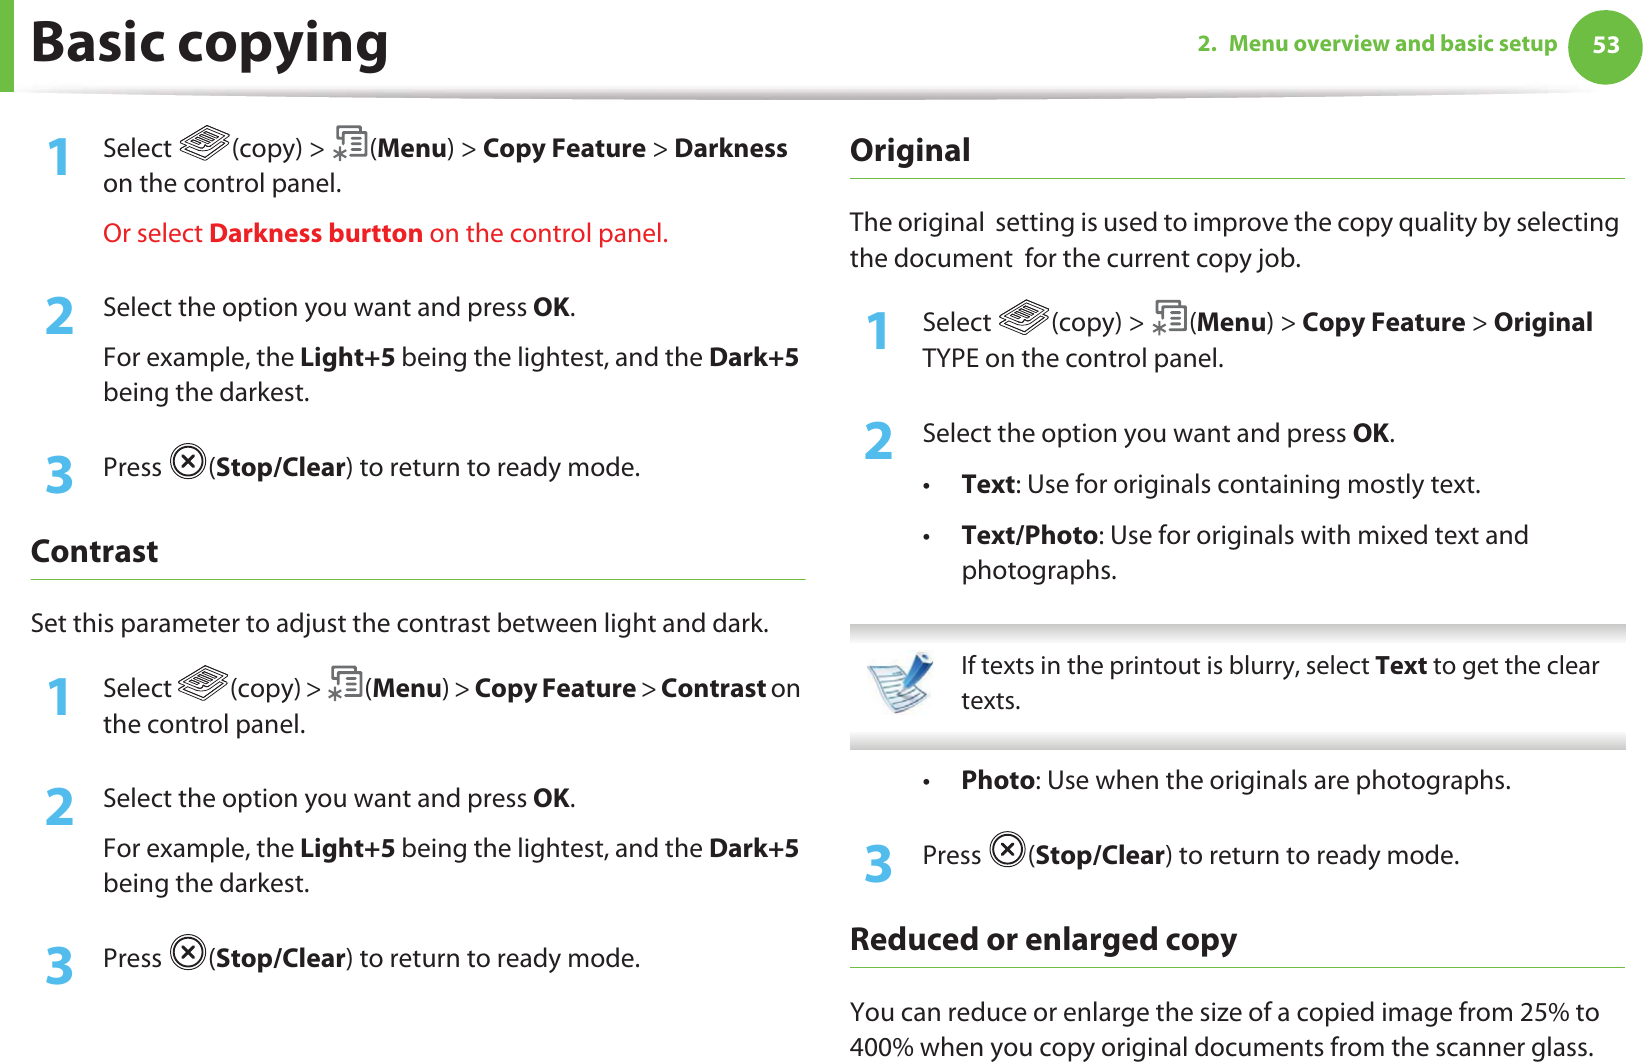
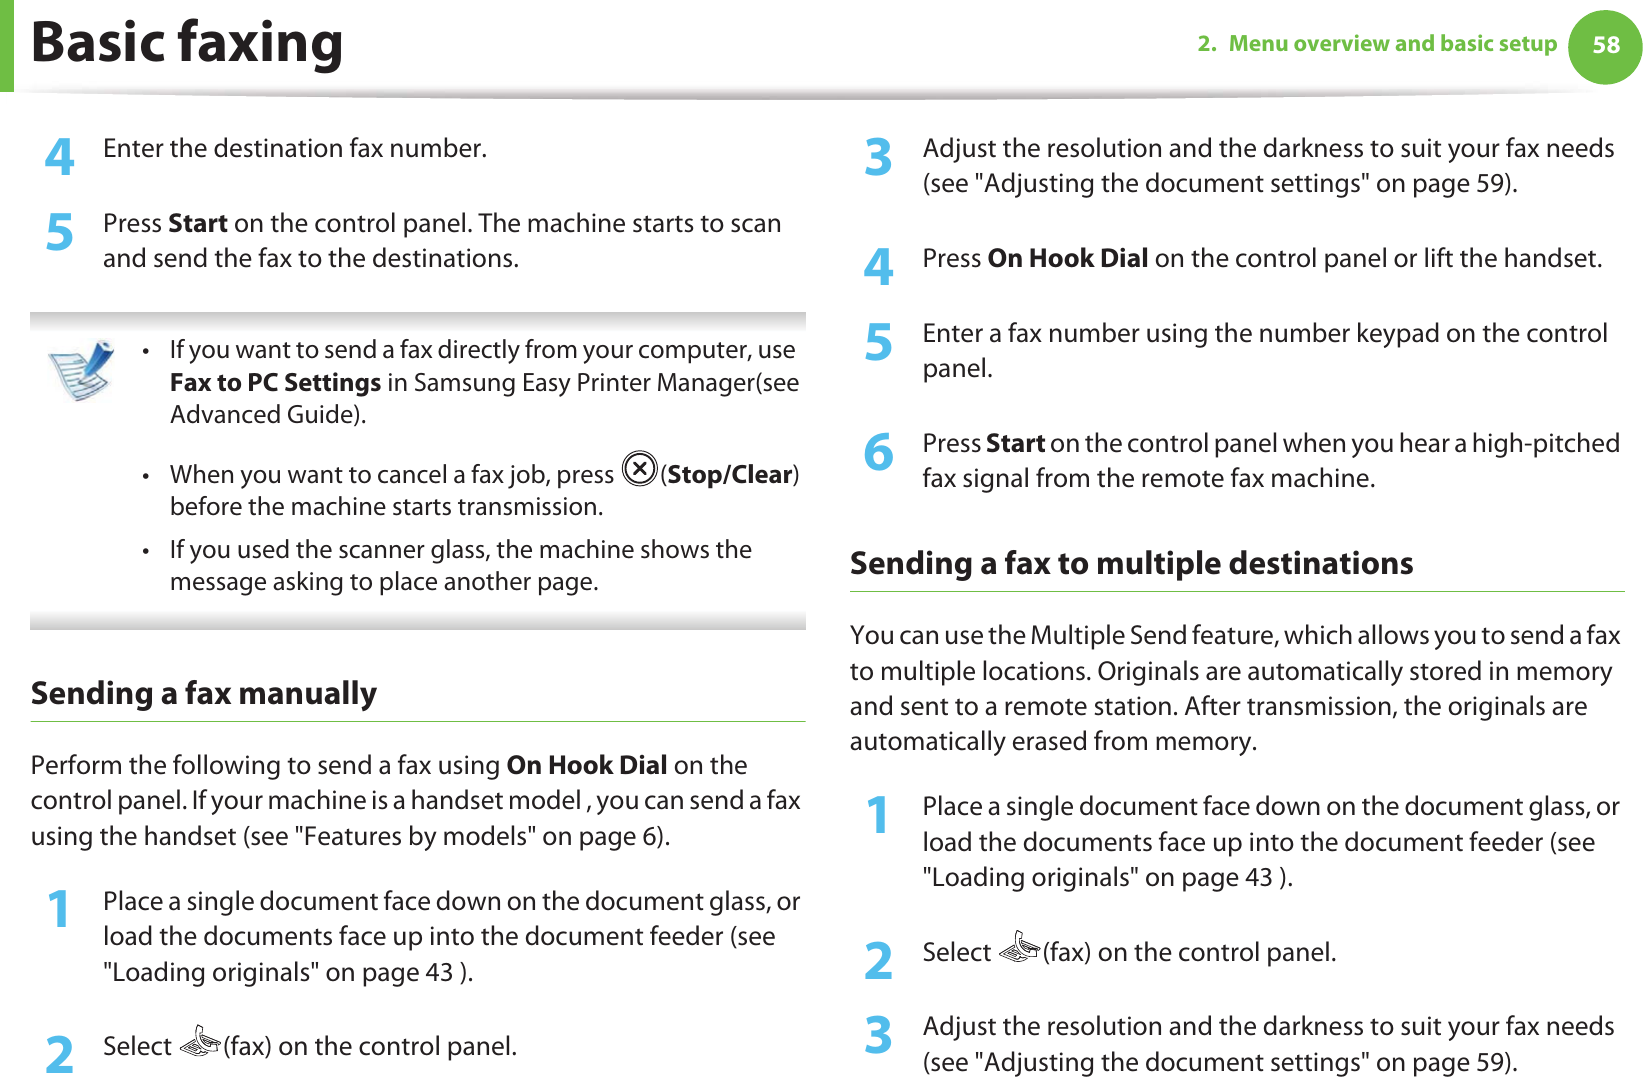
![Basic copying 552. Menu overview and basic setup1Press ID Copy on the control panel. 2 Place the front side of an original facing down on the scanner glass where arrows indicate as shown. Then, close the scanner lid.3 Place Front Side and Press [Start] appears on the display.4 Press Start.Your machine begins scanning the front side and shows Place Back Side and Press [Start].5 Turn the original over and place it on the scanner glass where arrows indicate as shown. Then, close the scanner lid.6 Press Start. • If you do not press the Start button, only the front side will be copied.• If the original is larger than the printable area, some portions may not be printed.](https://usermanual.wiki/Samsung-Electronics-Co/SCX4729FW.Users-Manual-1/User-Guide-1493407-Page-55.png)
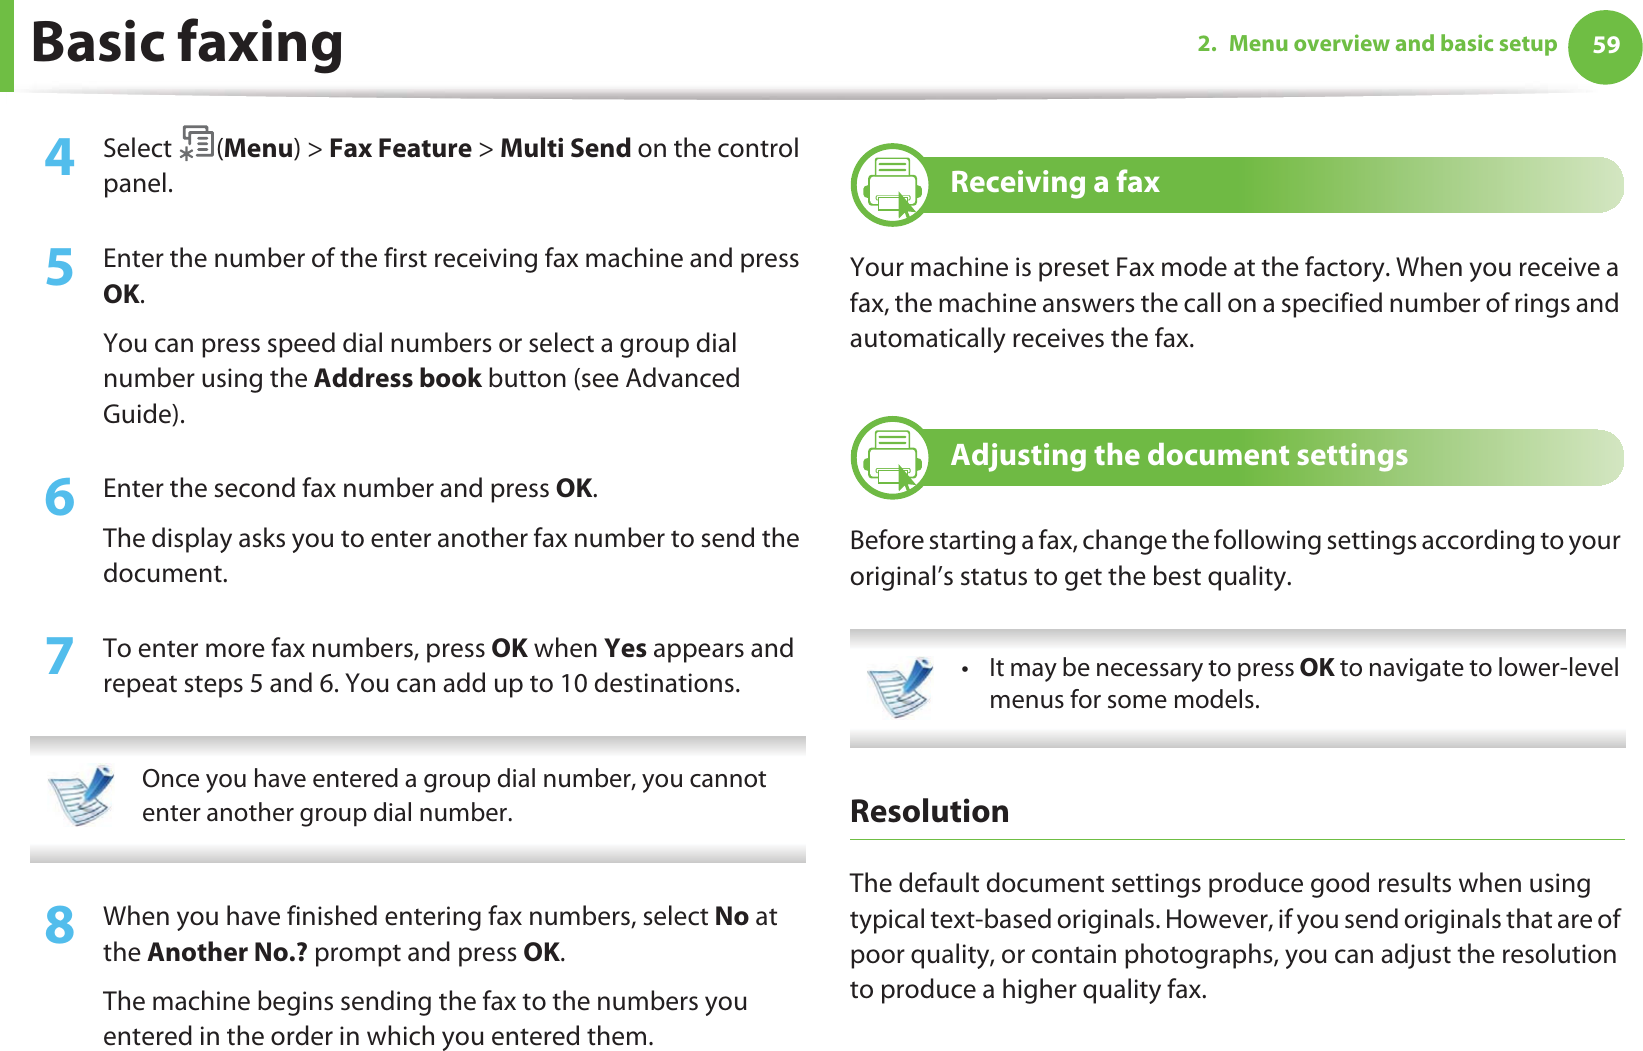


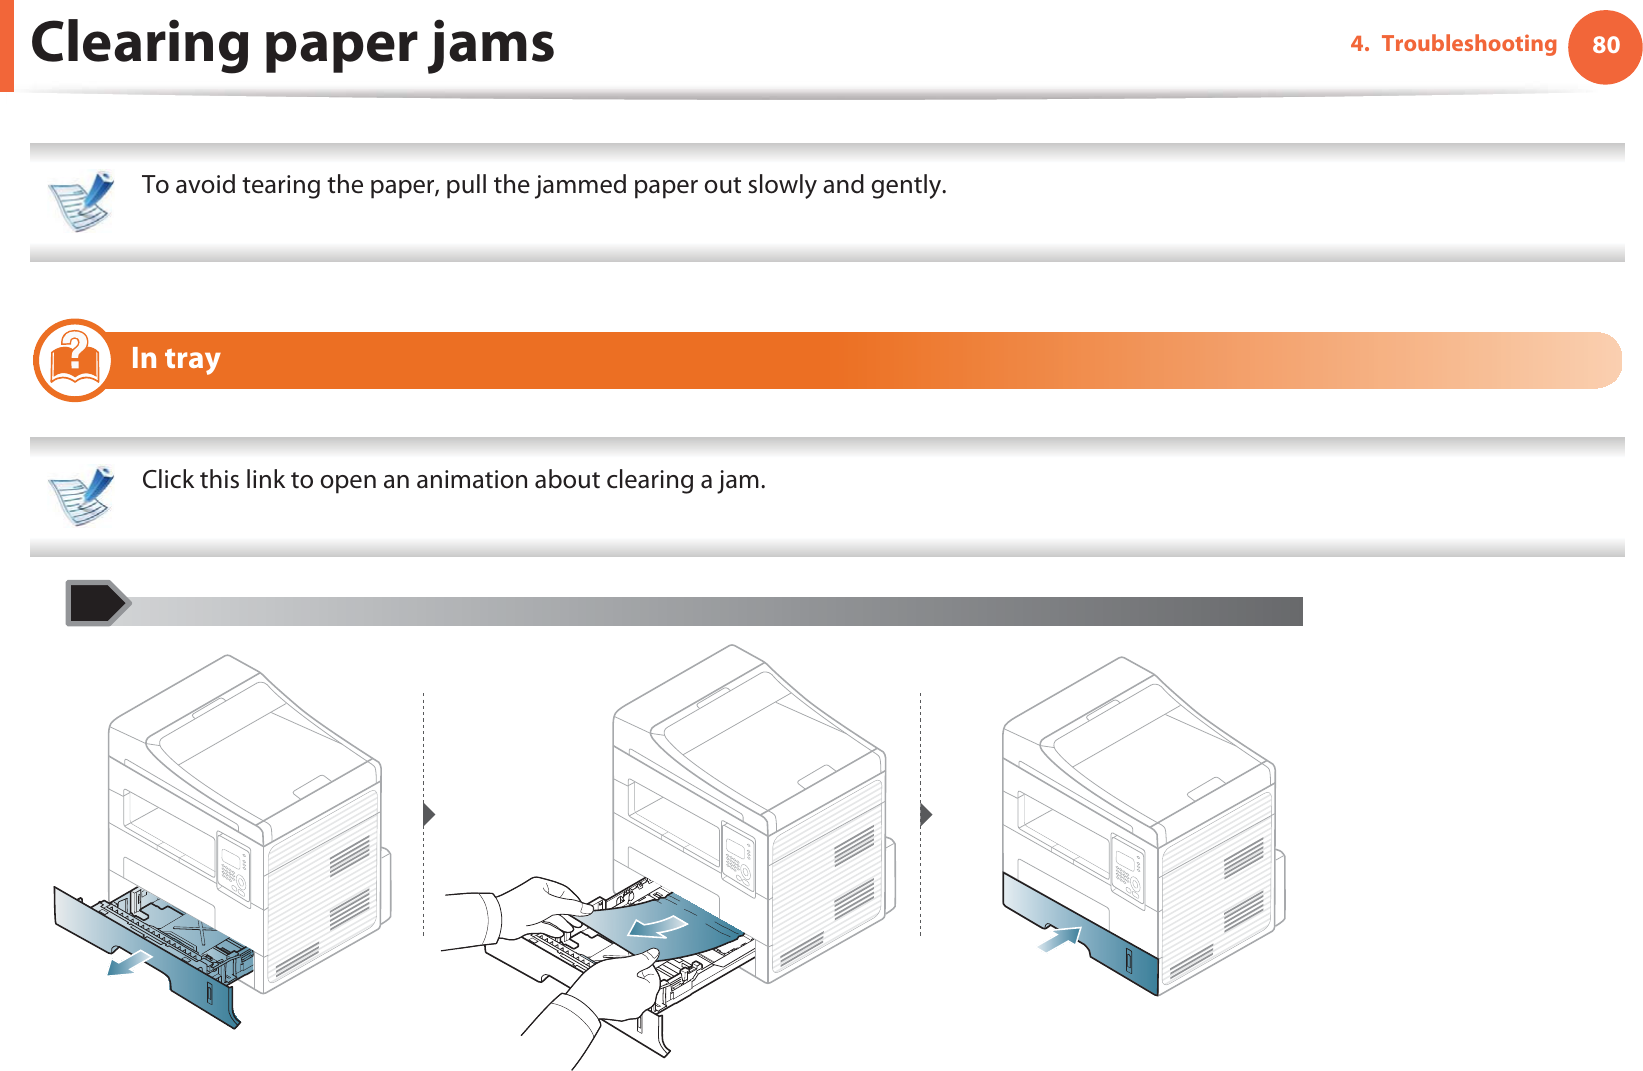
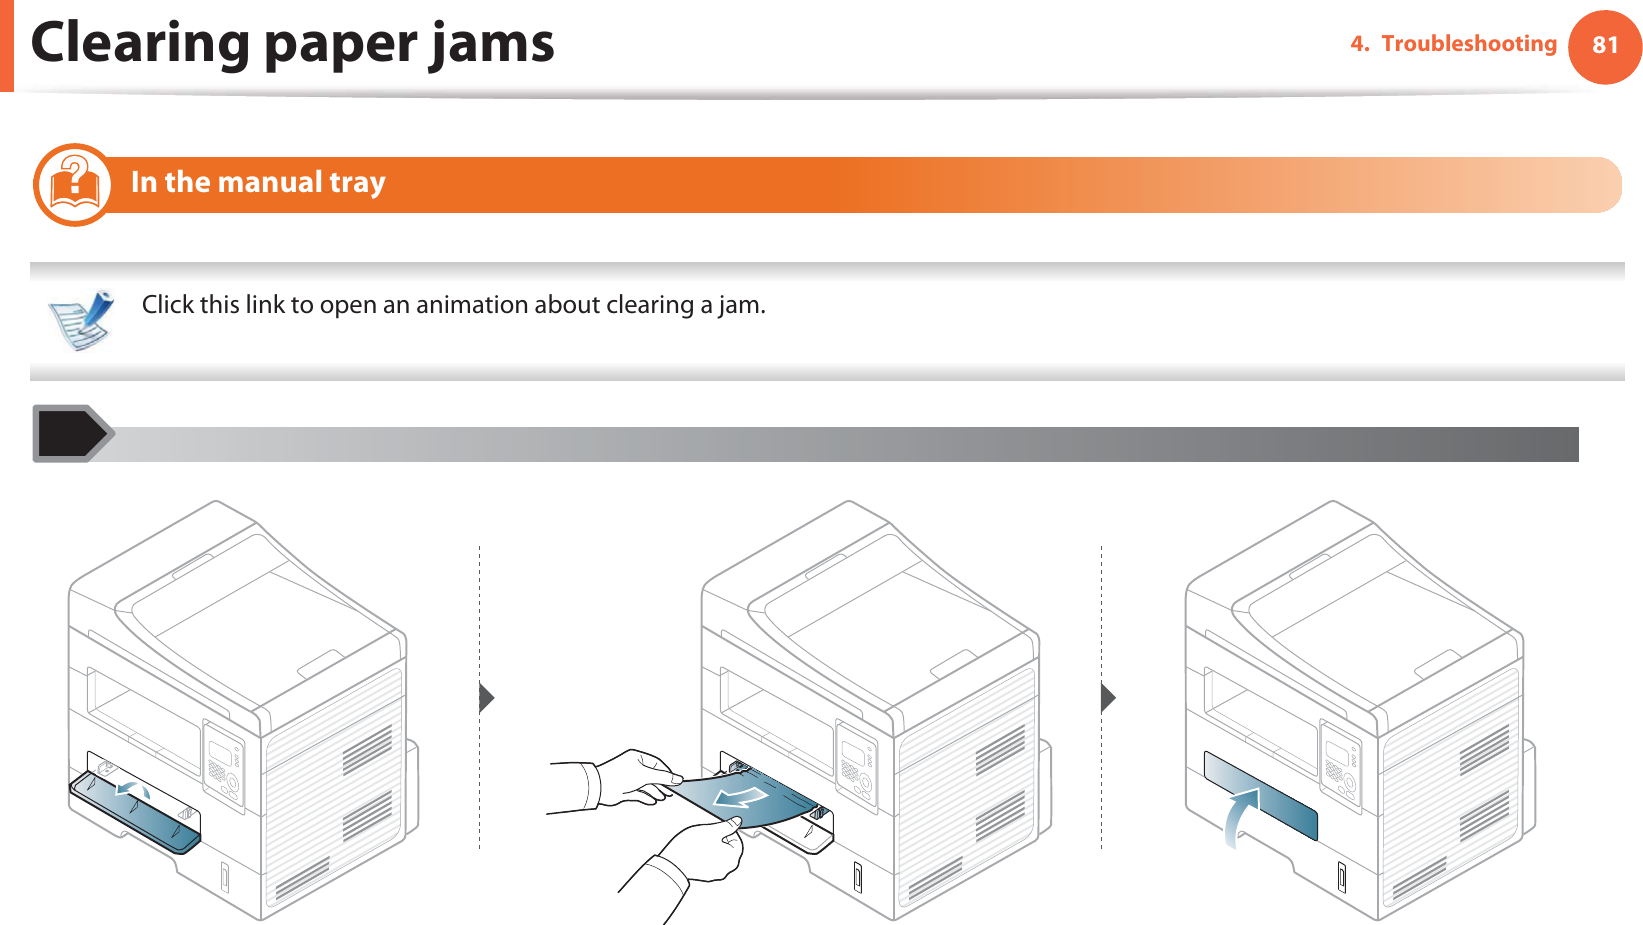
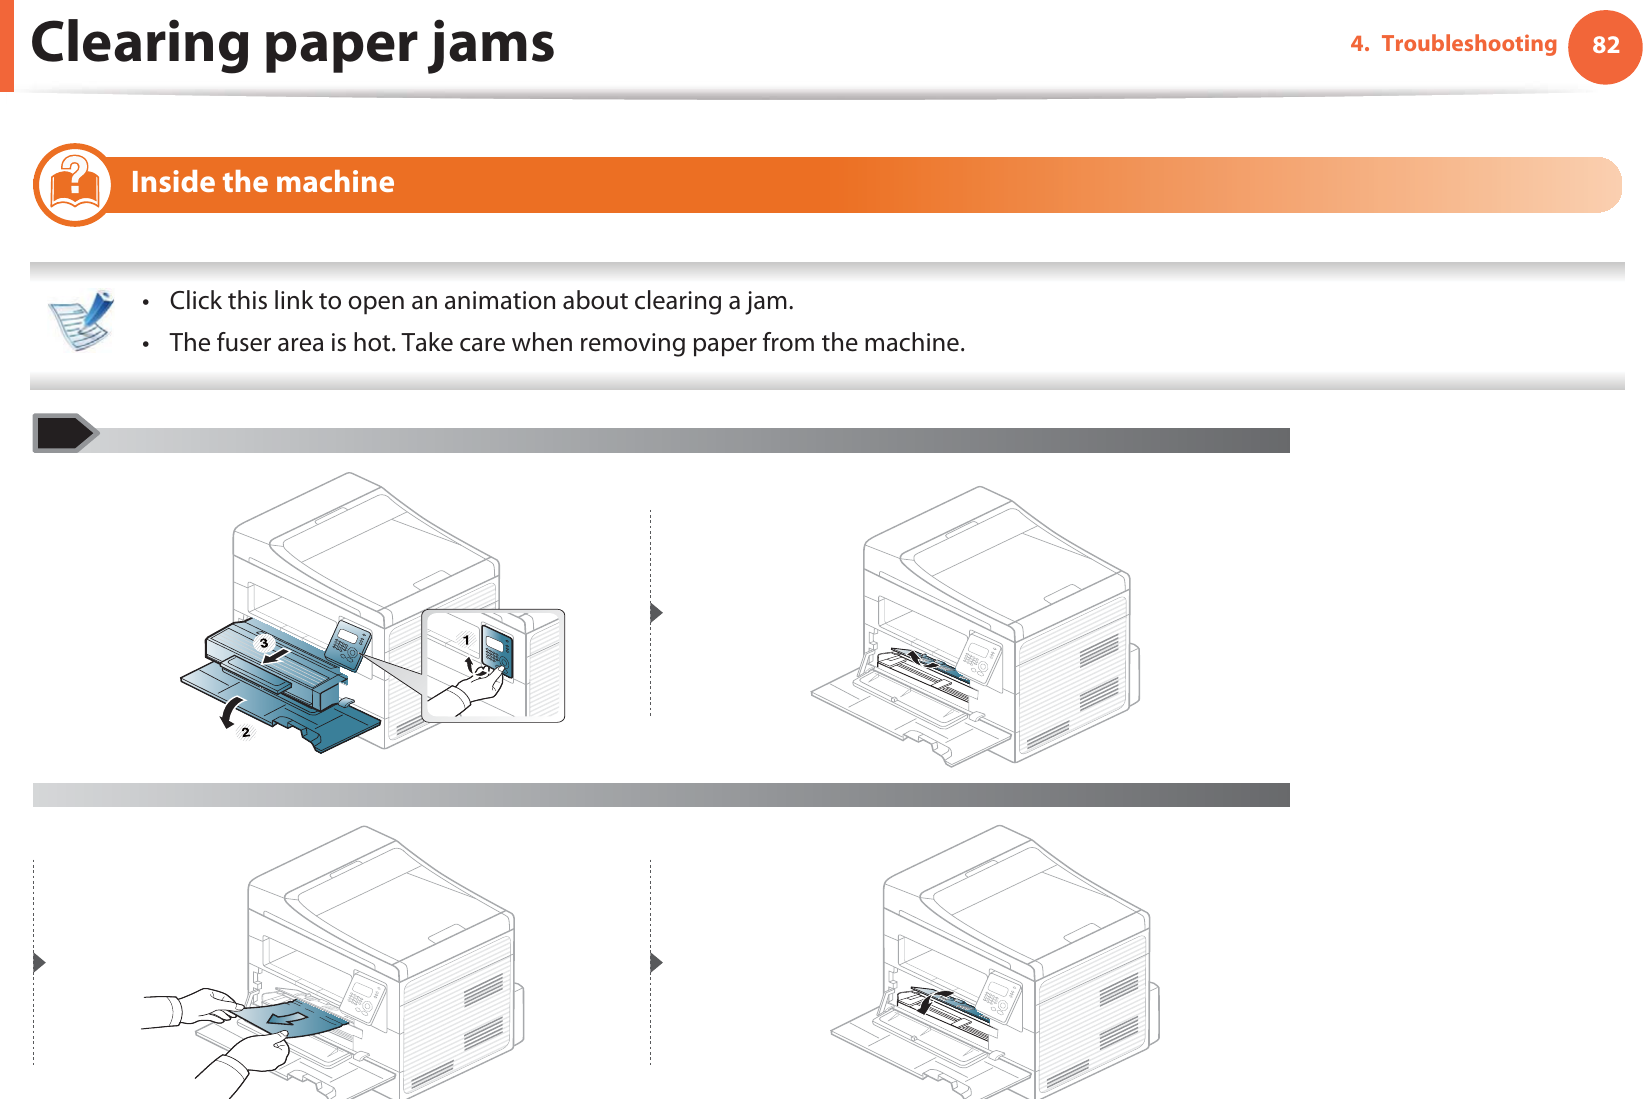
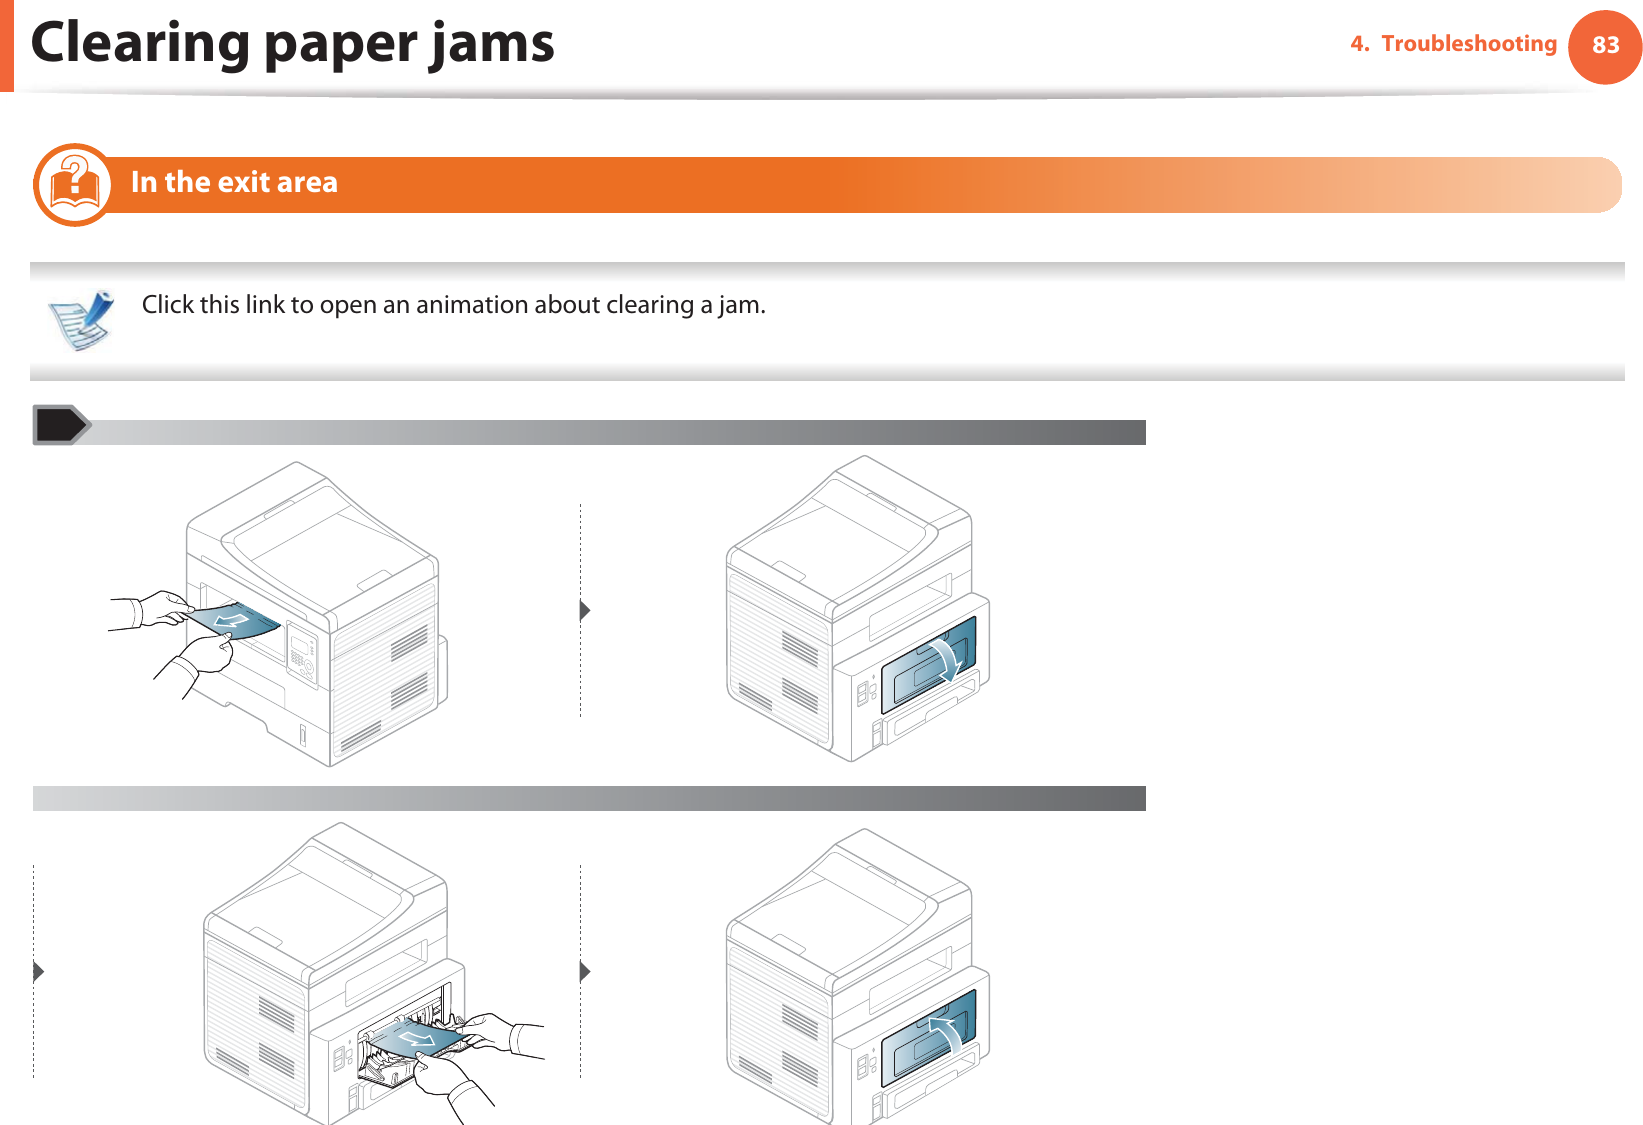
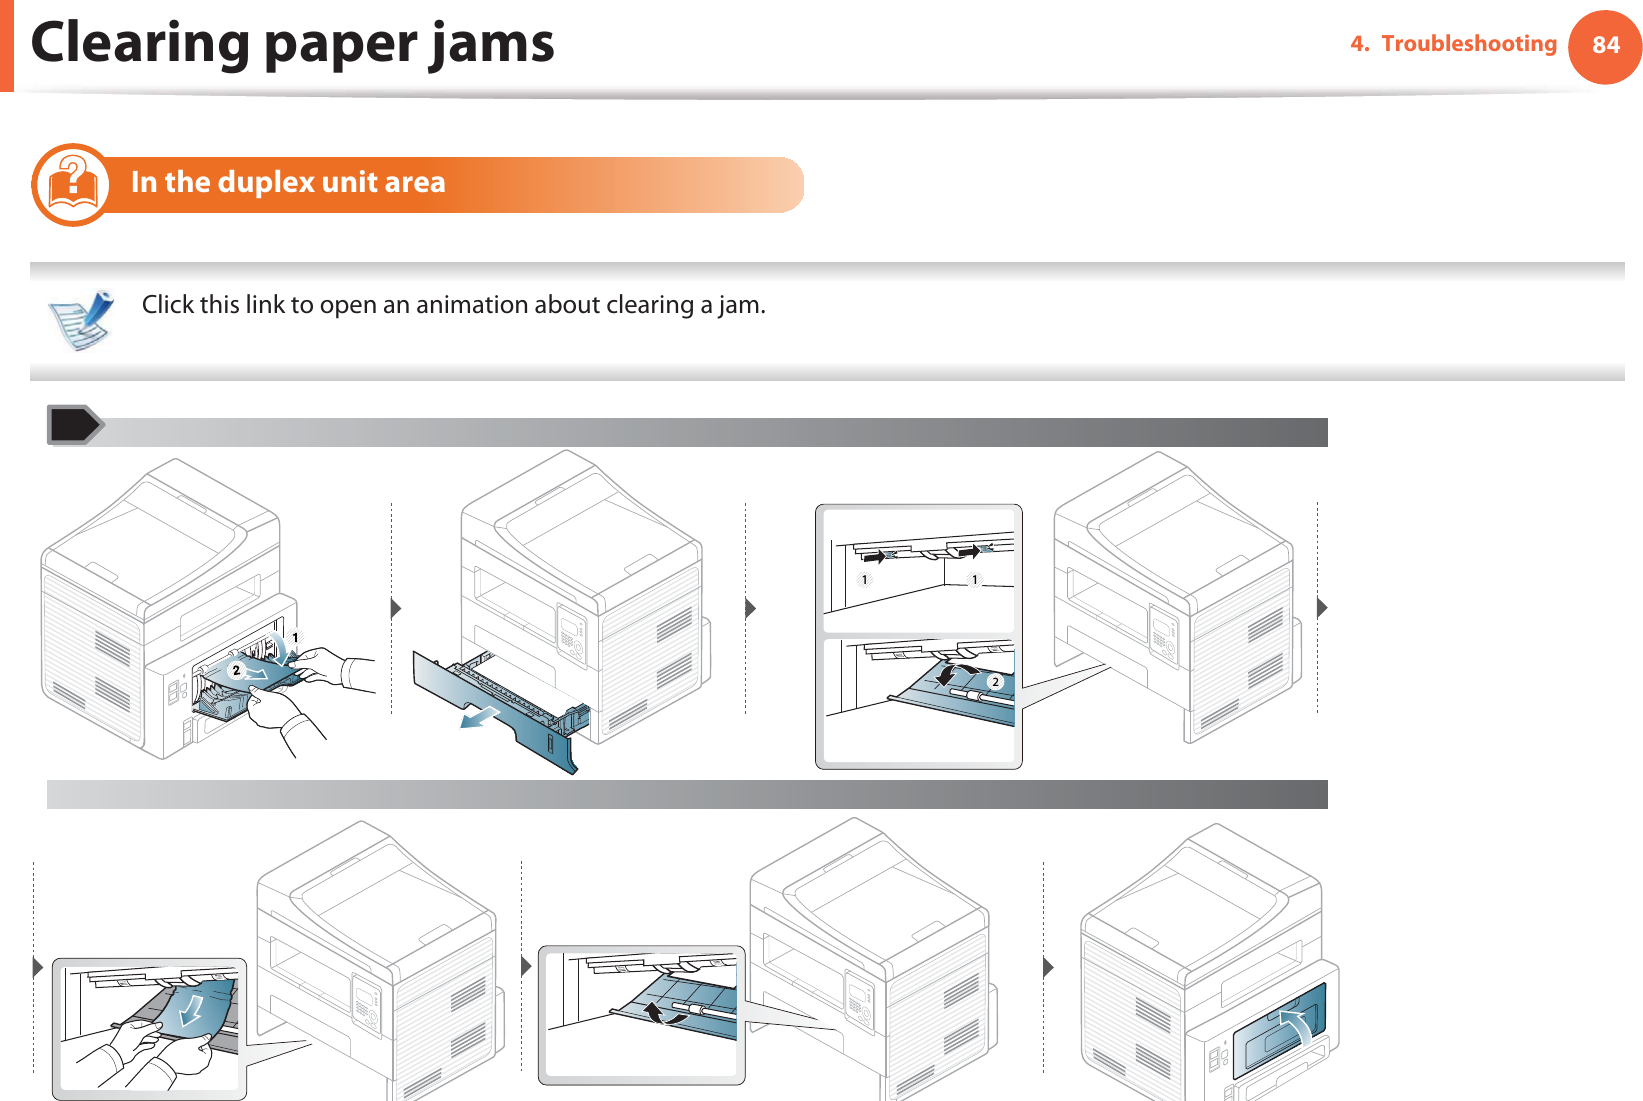
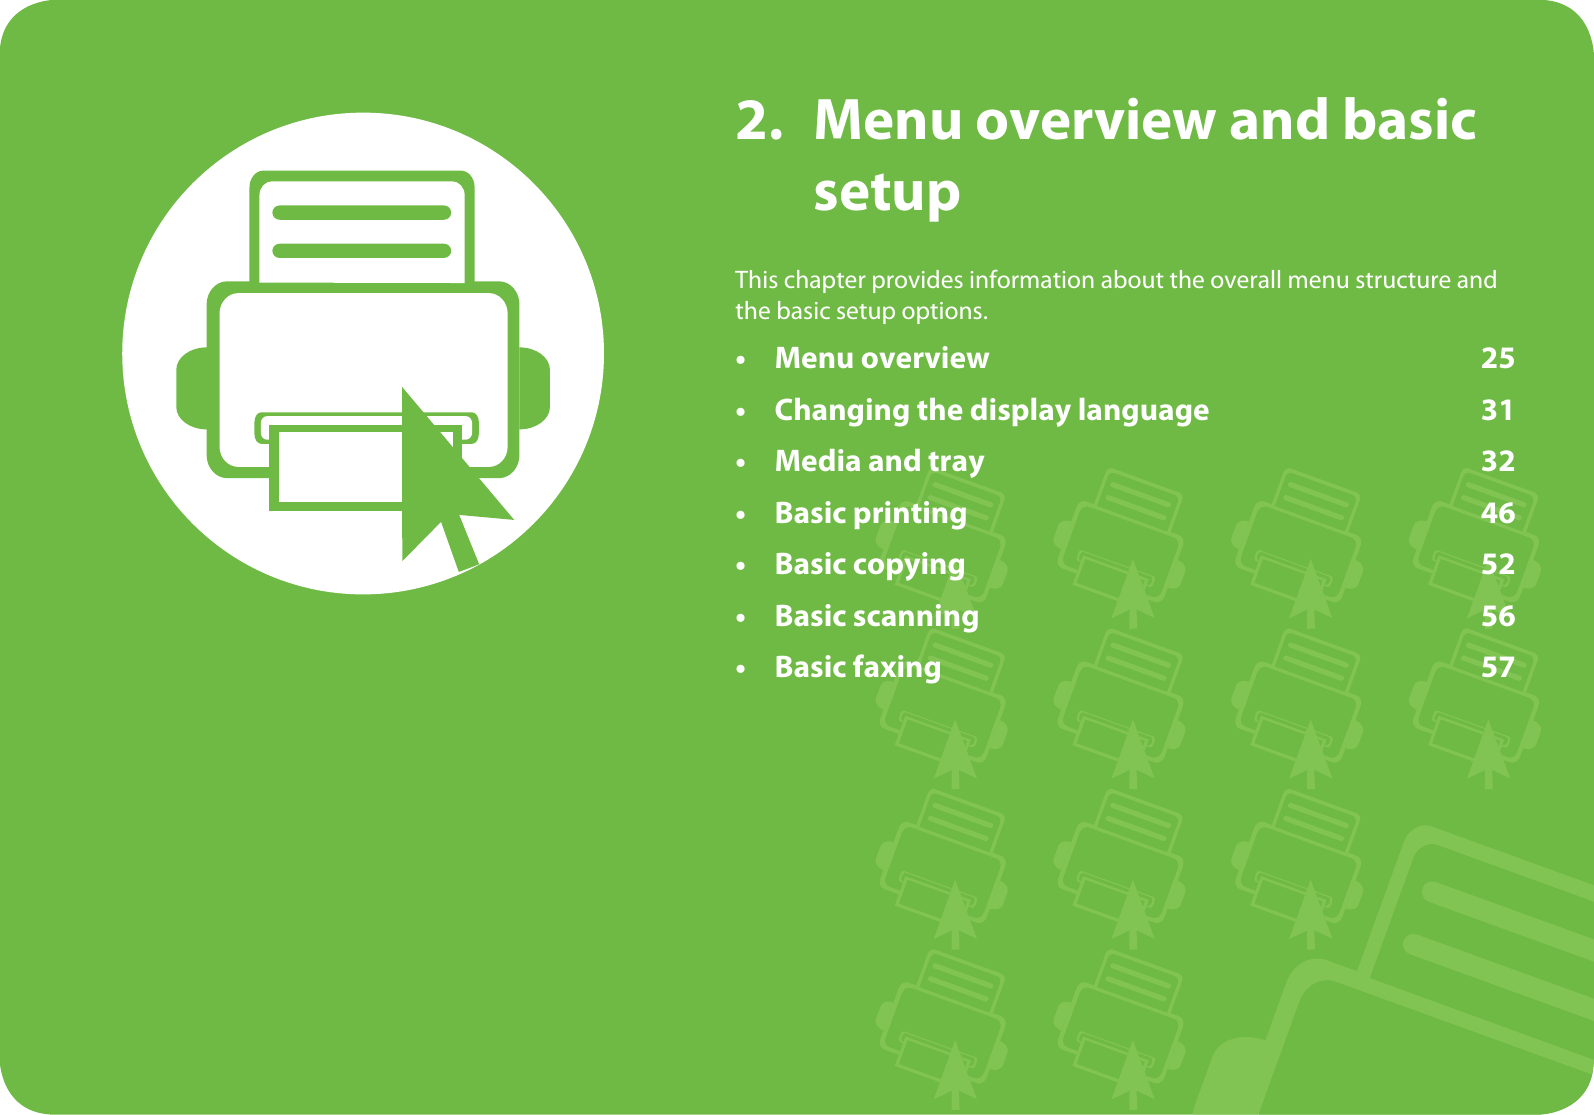
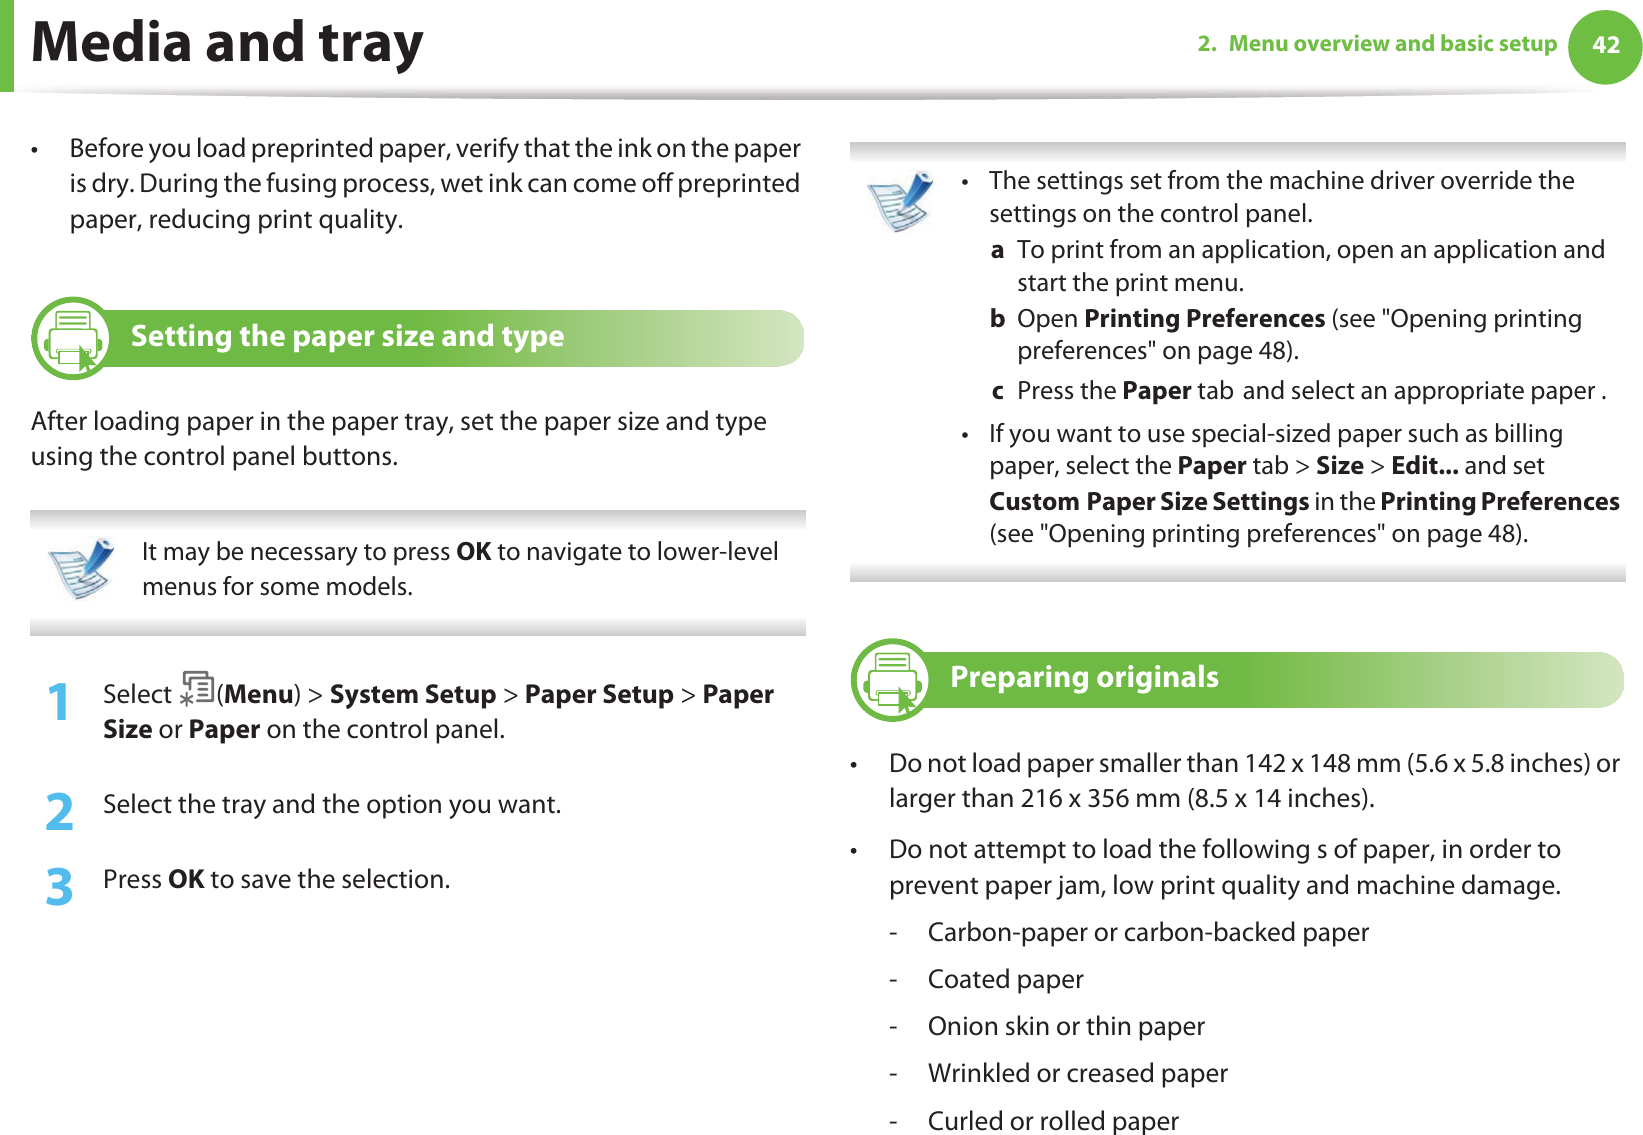
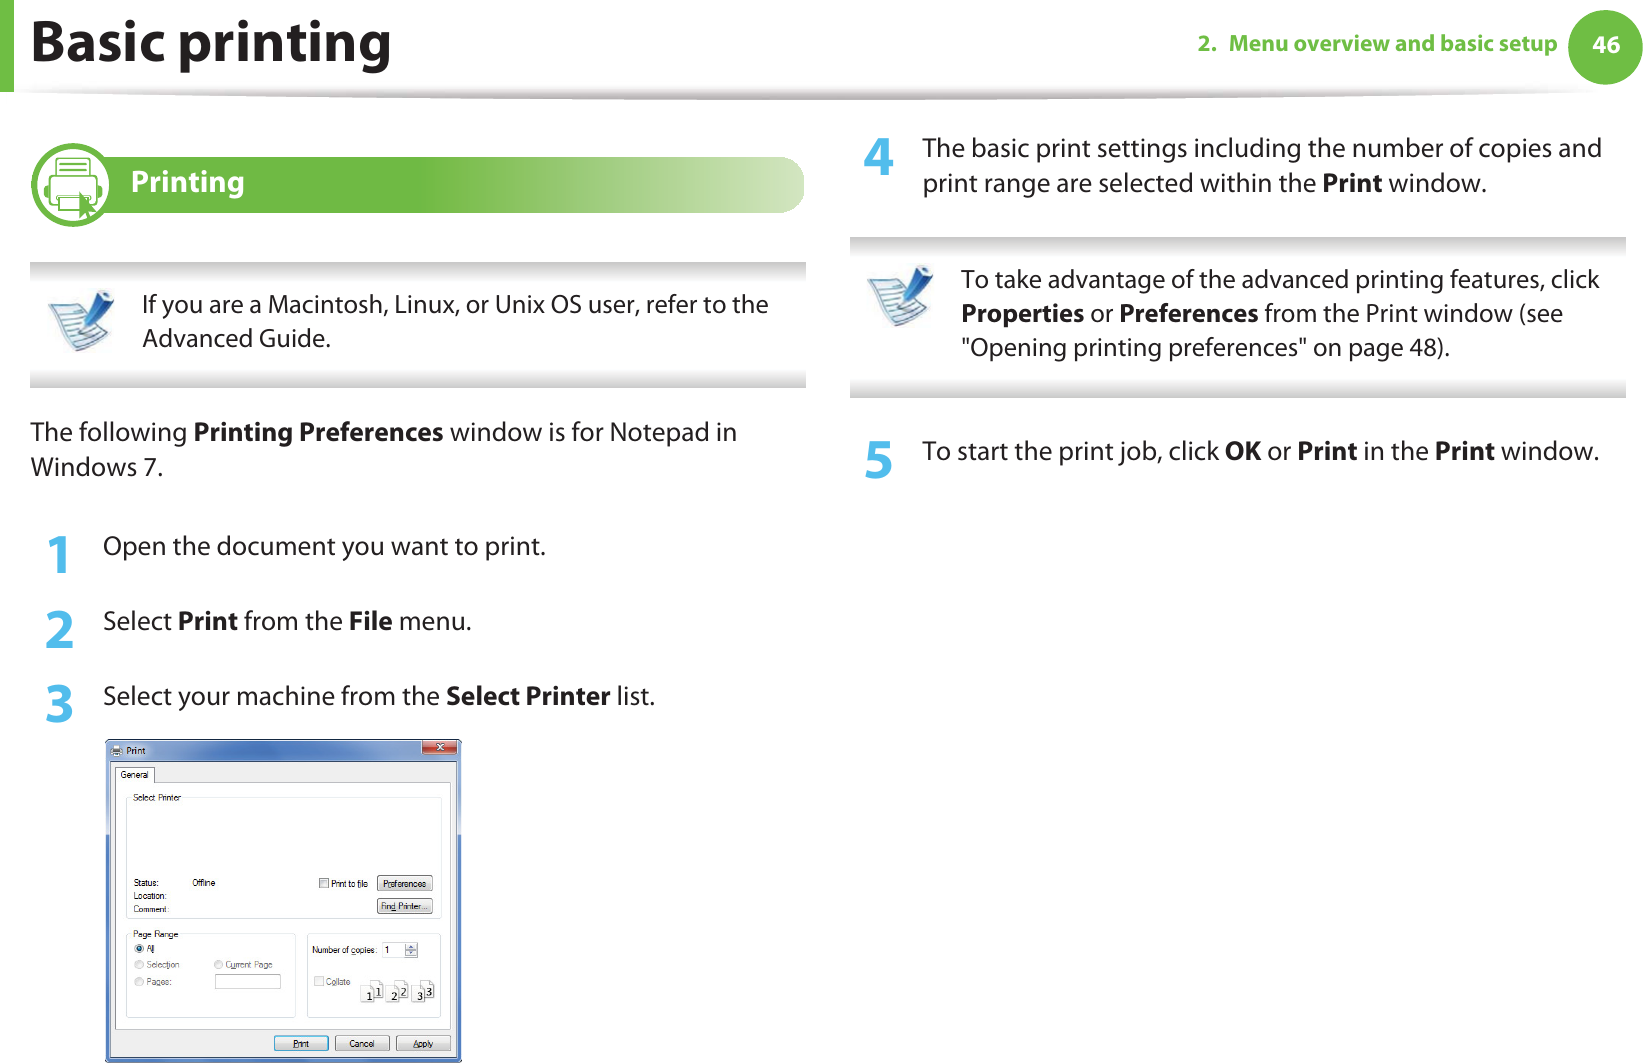
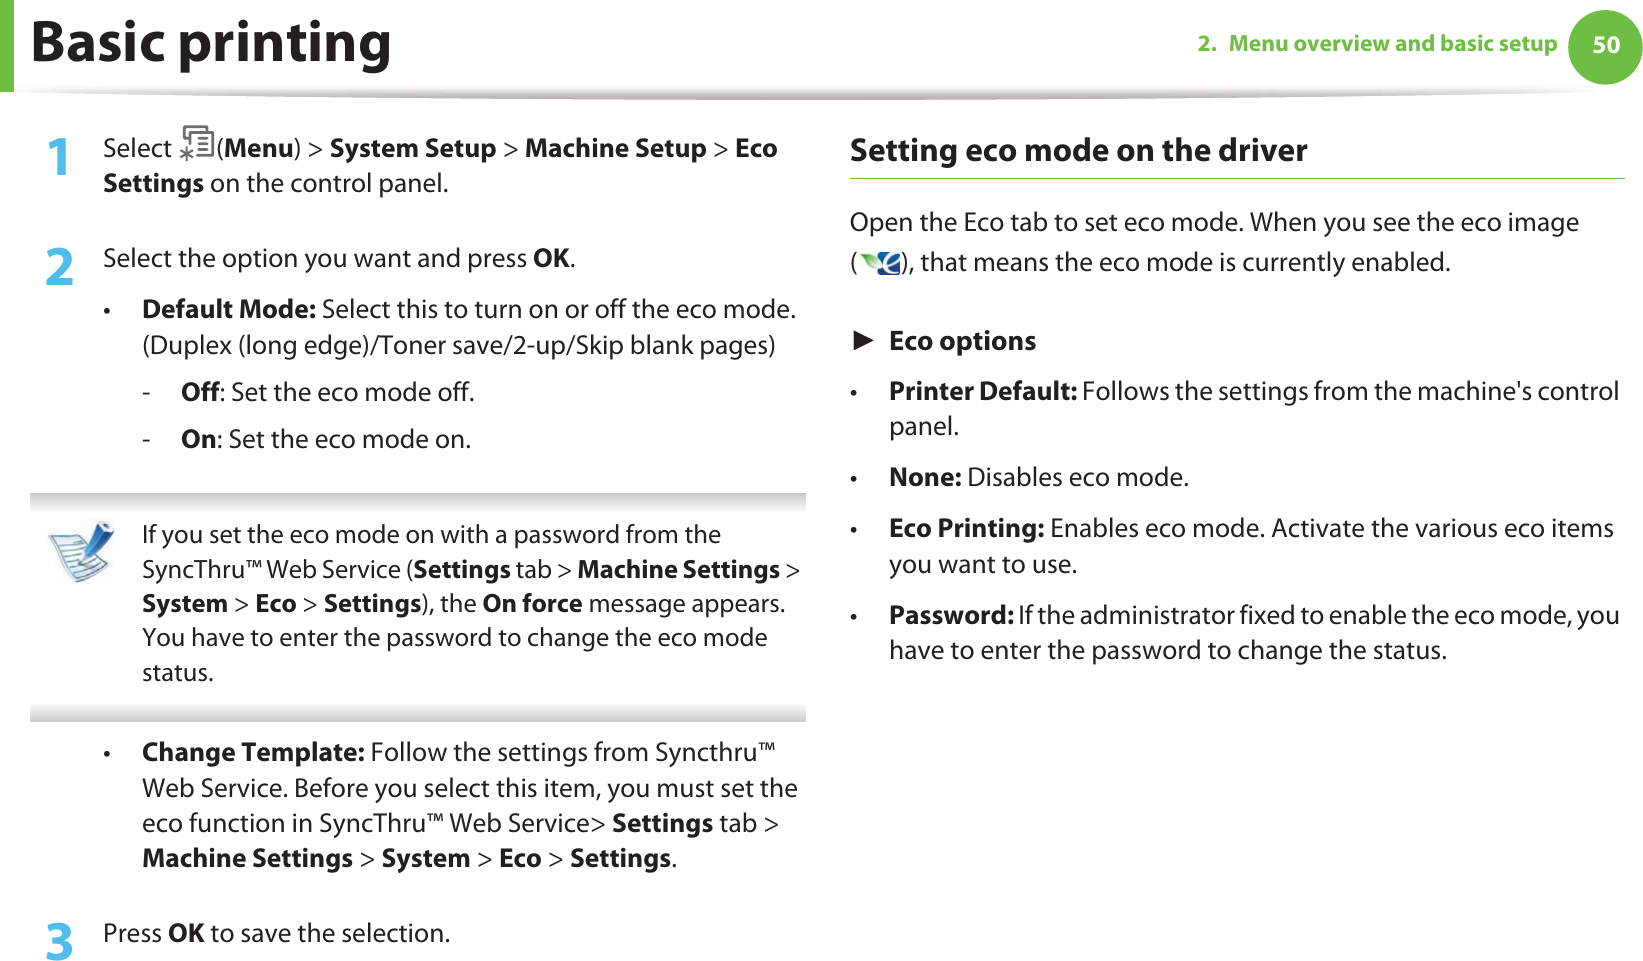
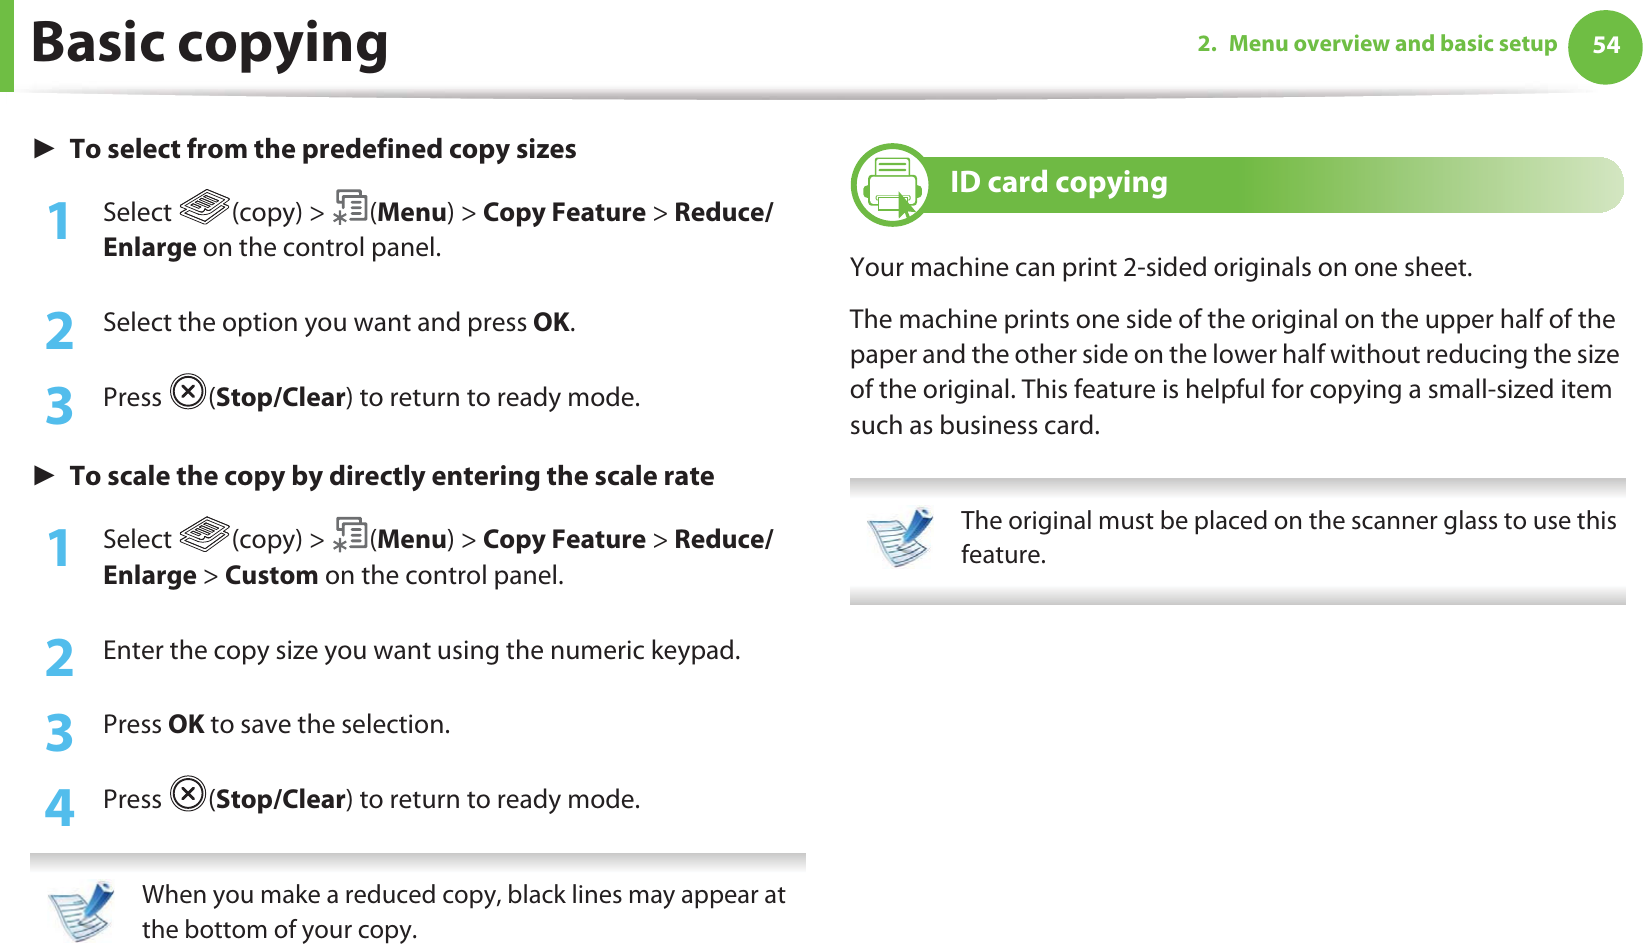
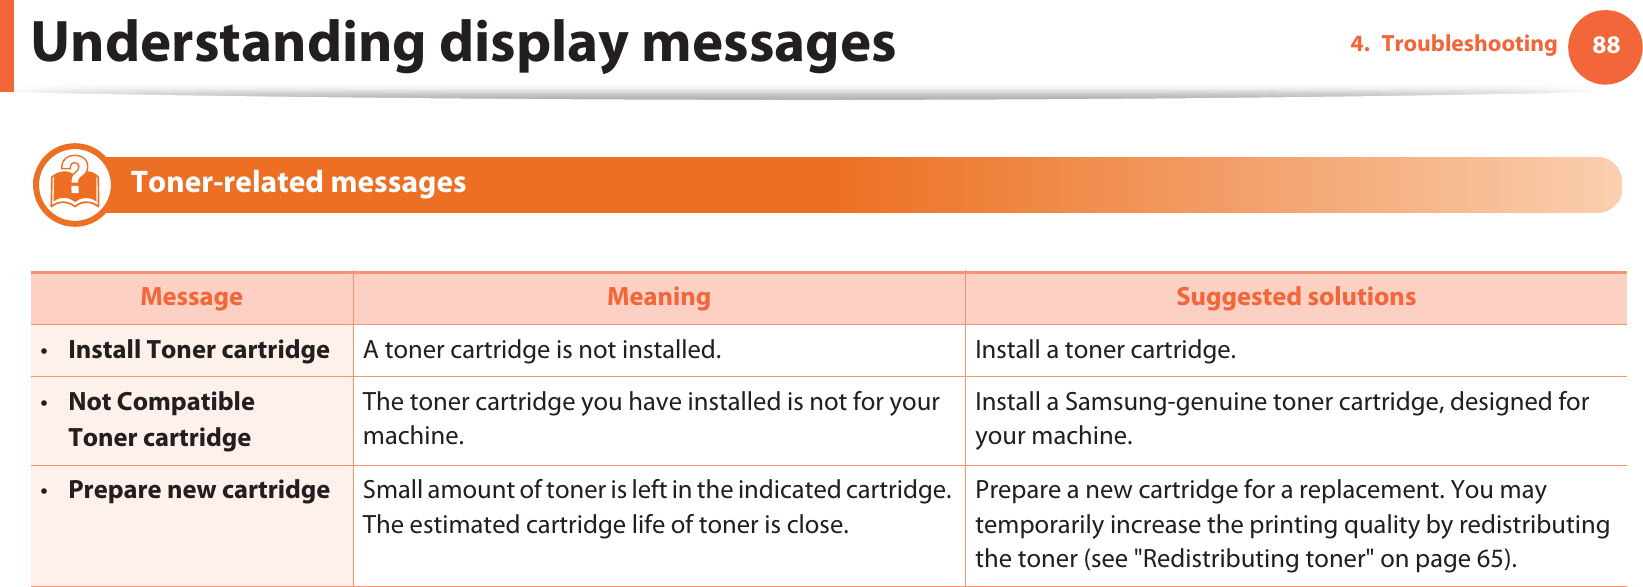
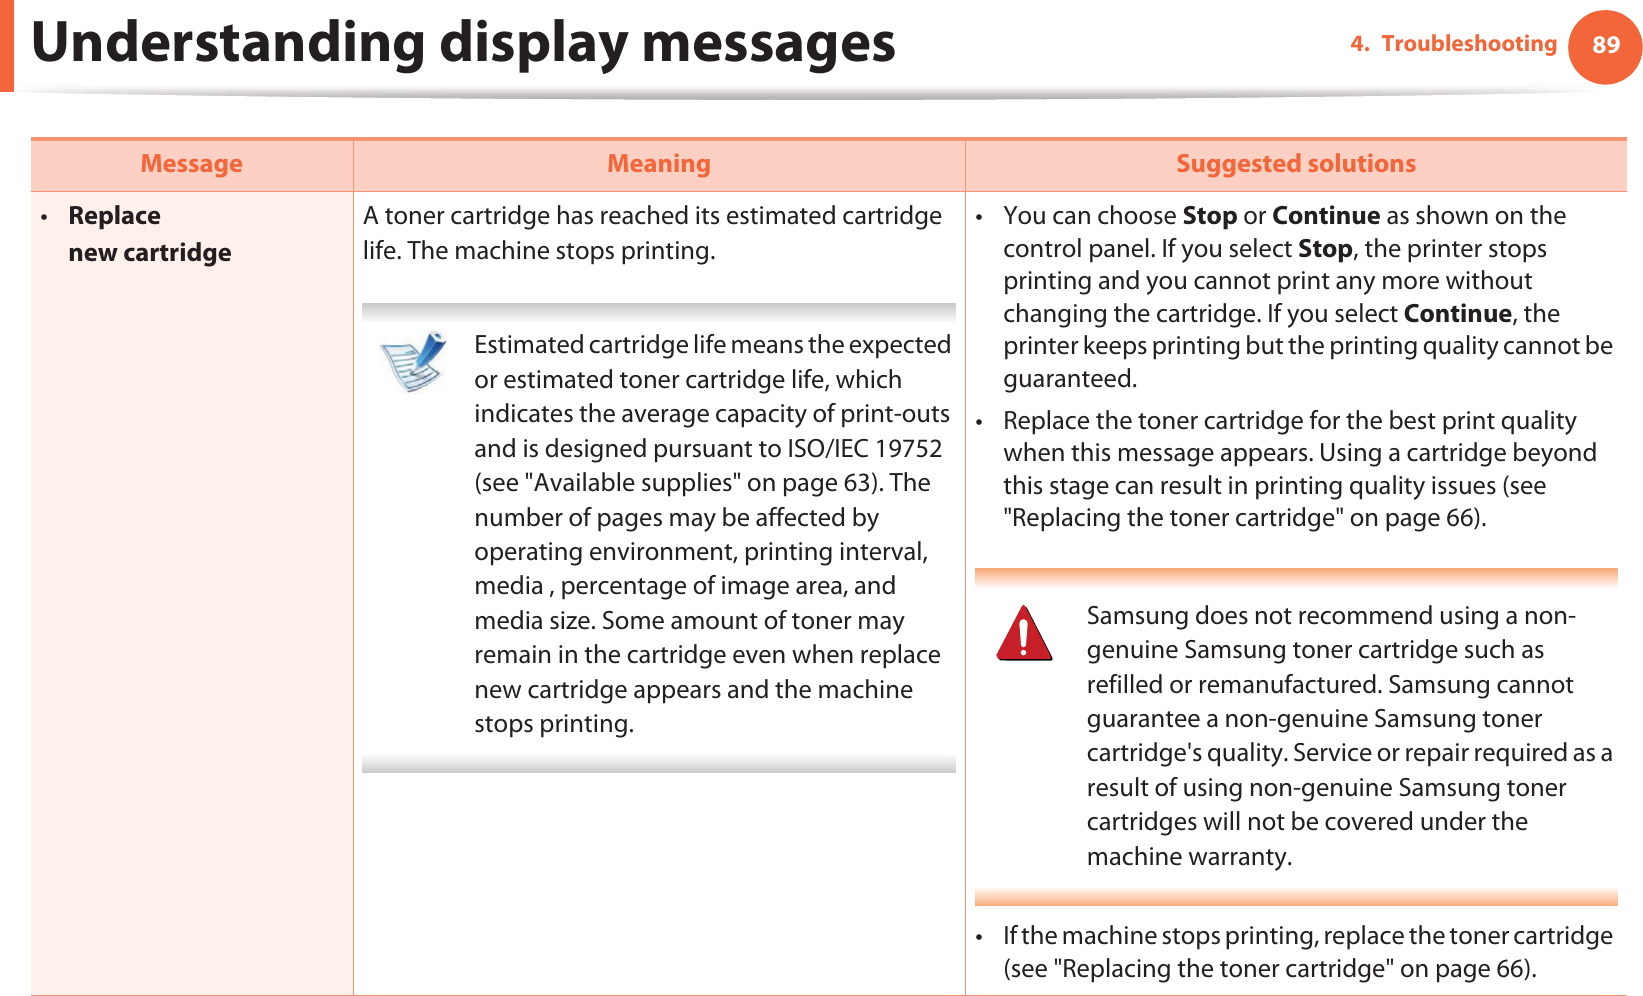
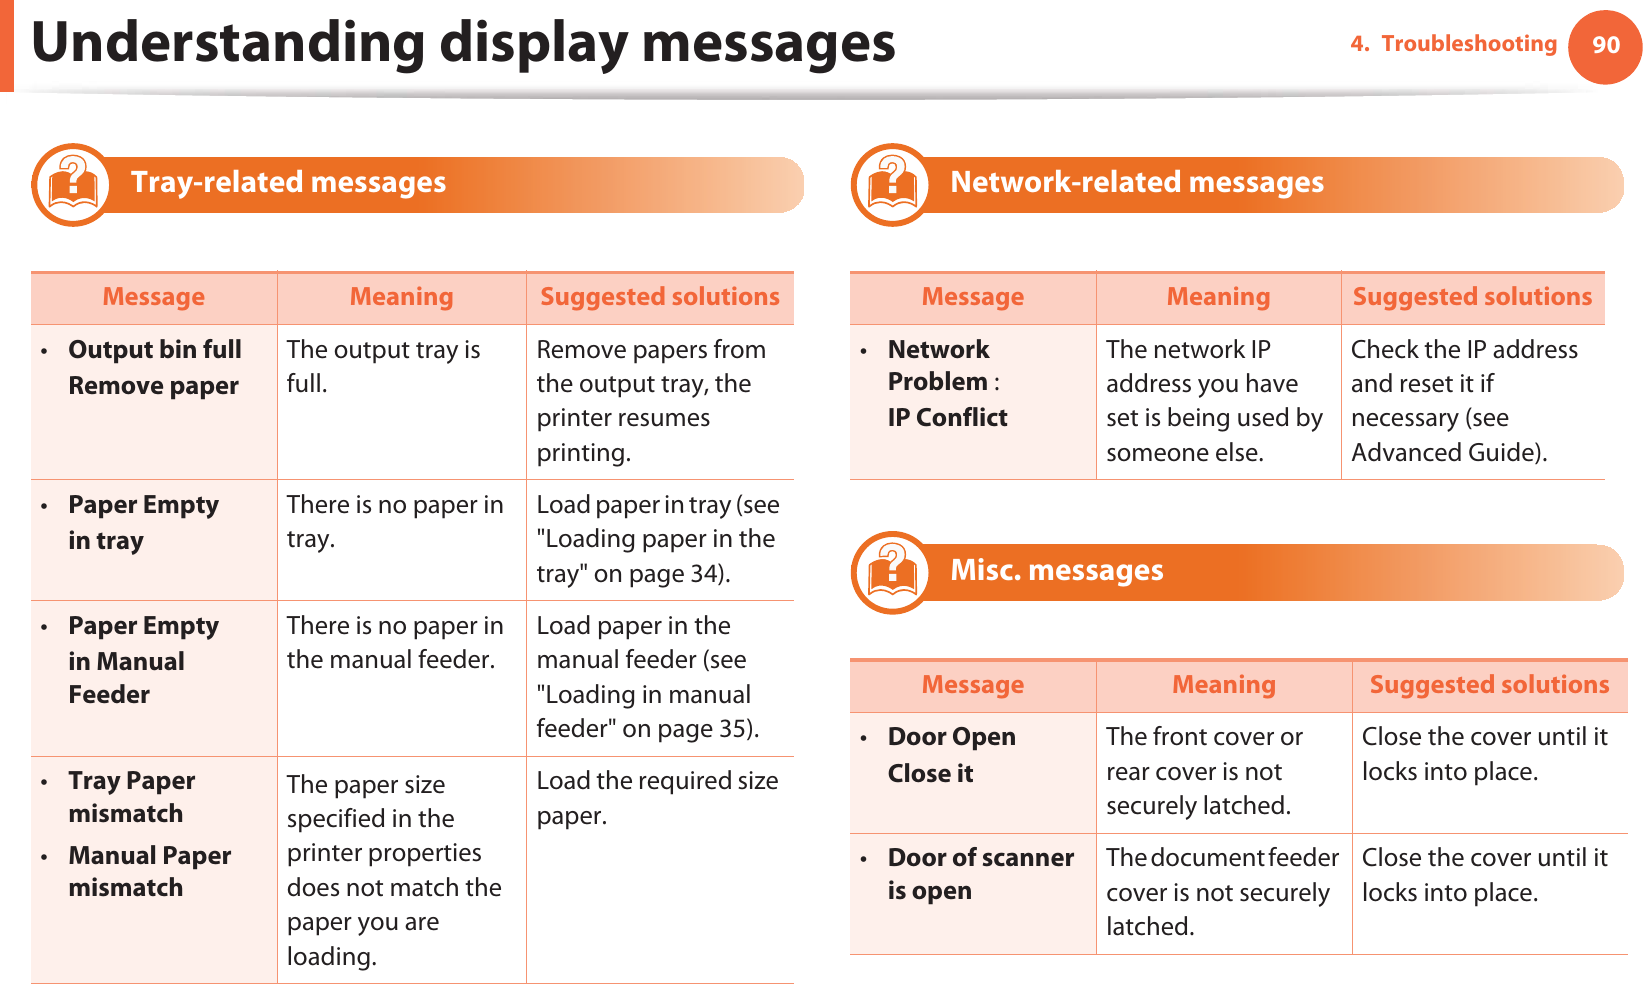
![874. TroubleshootingUnderstanding display messagesMessages appear on the control panel display to indicate the machine’s status or errors. Refer to the tables below to understand the messages’ and their meaning, and correct the problem, if necessary. • If a message is not in the table, reboot the power and try the printing job again. If the problem persists, call a service representative.• When you call for service, provide the service representative with the contents of display message.• Some messages may not appear on the display depending on the options or models.• [error number] indicates the error number. 9 Paper Jam-related messagesMessage Meaning Suggested solutions•Document jamRemove jamThe loaded original document has jammed in the document feeder.Clear the jam (see "Clearing original document jams" on page 76).•Paper Jamin tray•Paper Jam 0 in trayPaper has jammed in the paper feed area.Clear the jam (see "In tray" on page 80).•Paper Jamin Manual FeederPaper has jammed in the manual feeder.Clear the jam (see "In the manual tray" on page 81).•Paper Jaminside machinePaper has jammed in the inside machine.Clear the jam (see "Inside the machine" on page 82).•Paper Jamin exit areaPaper has jammed in the paper exit area.Clear the jam (see "In the exit area" on page 83).•Paper Jambottom of duplex•Paper Jam top of duplexPaper has jammed in the duplex area.Clear the jam (see "In the duplex unit area" on page 84).Message Meaning Suggested solutions](https://usermanual.wiki/Samsung-Electronics-Co/SCX4729FW.Users-Manual-1/User-Guide-1493407-Page-87.png)
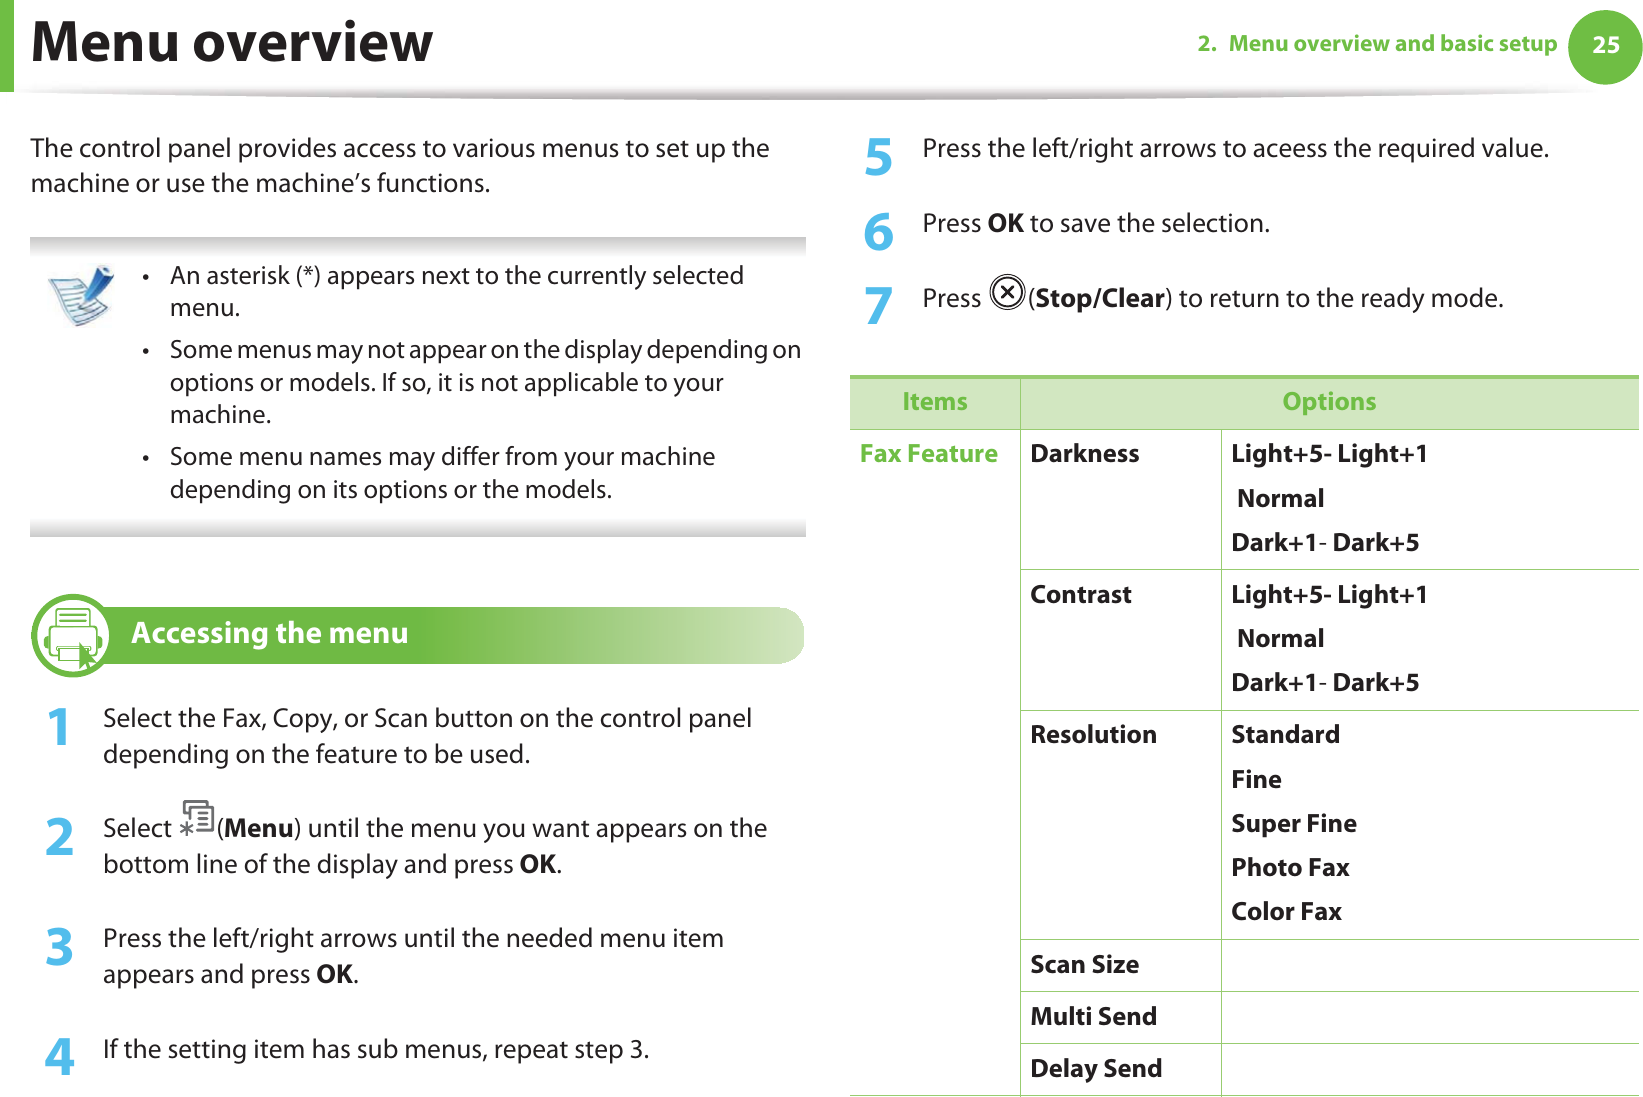
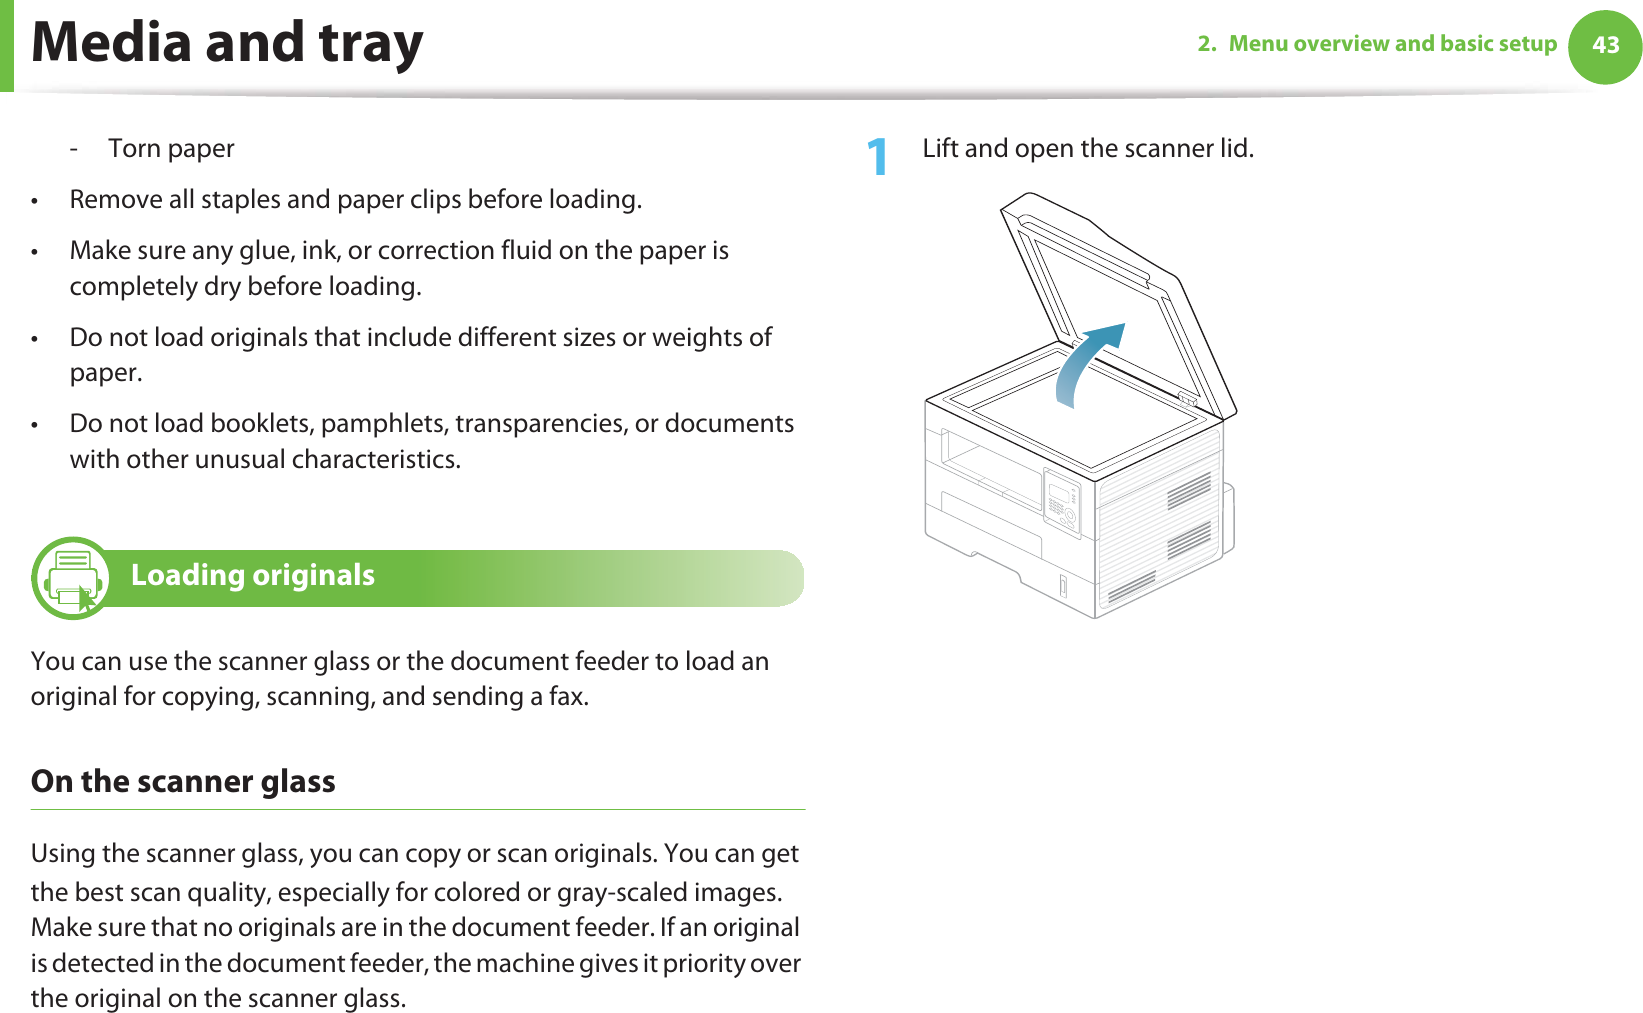
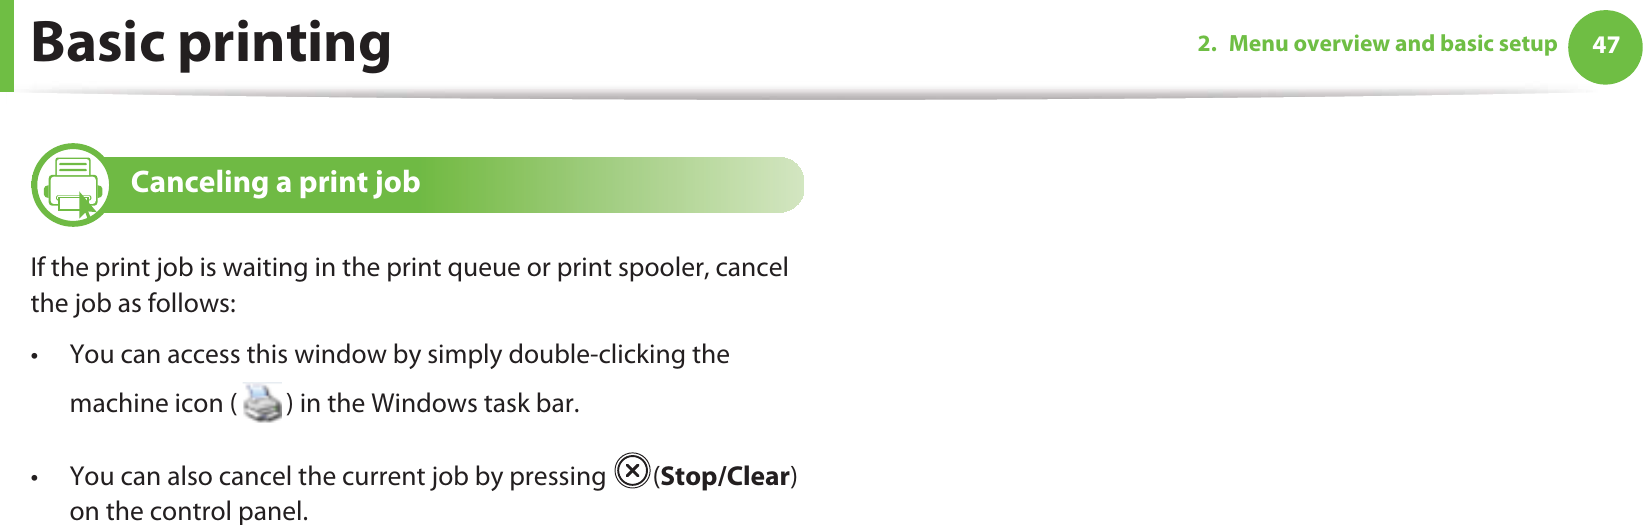
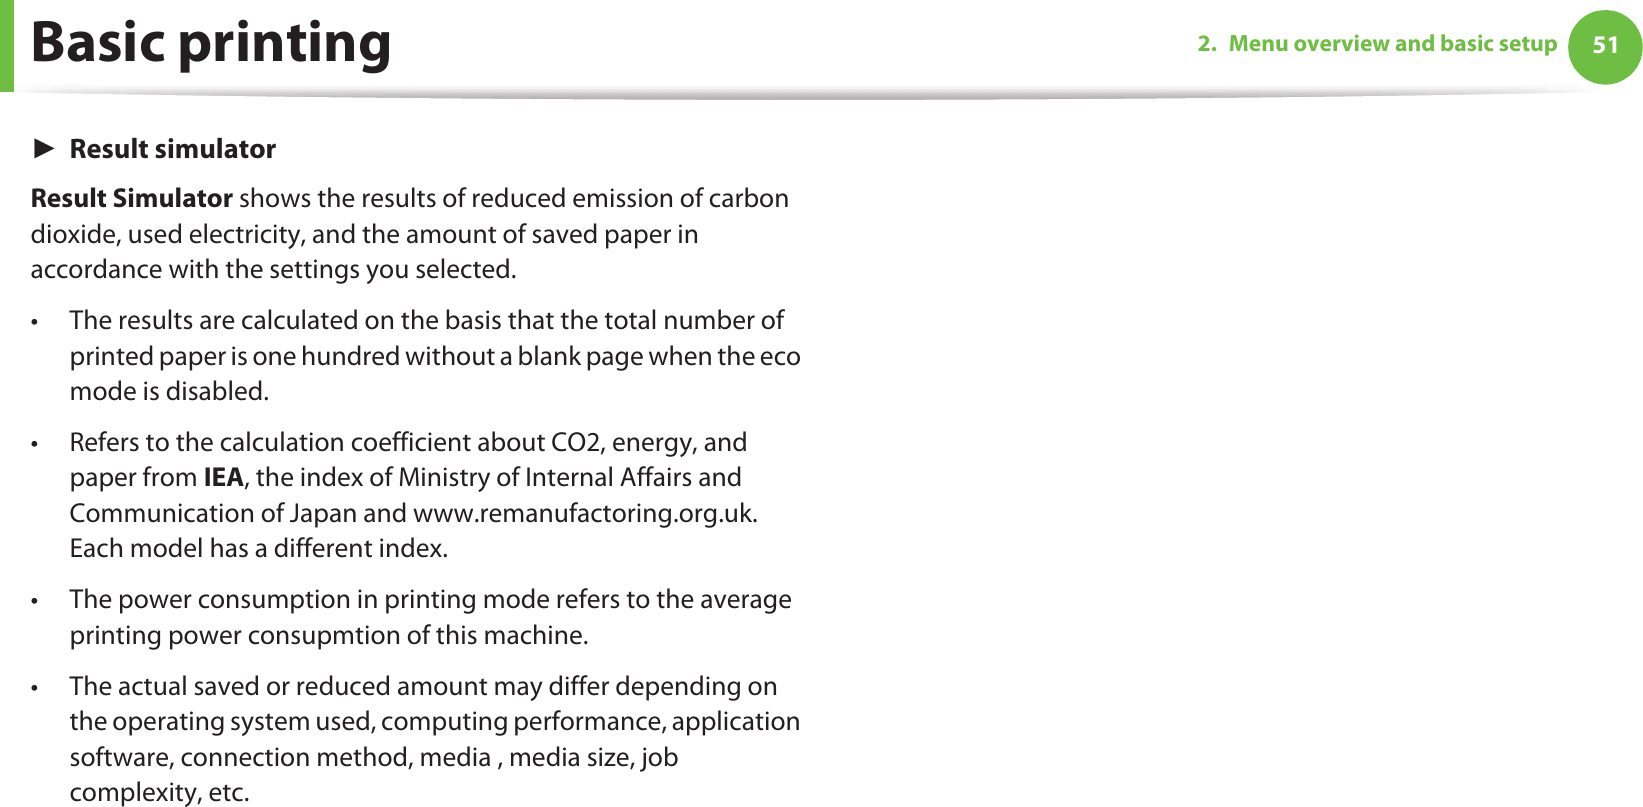
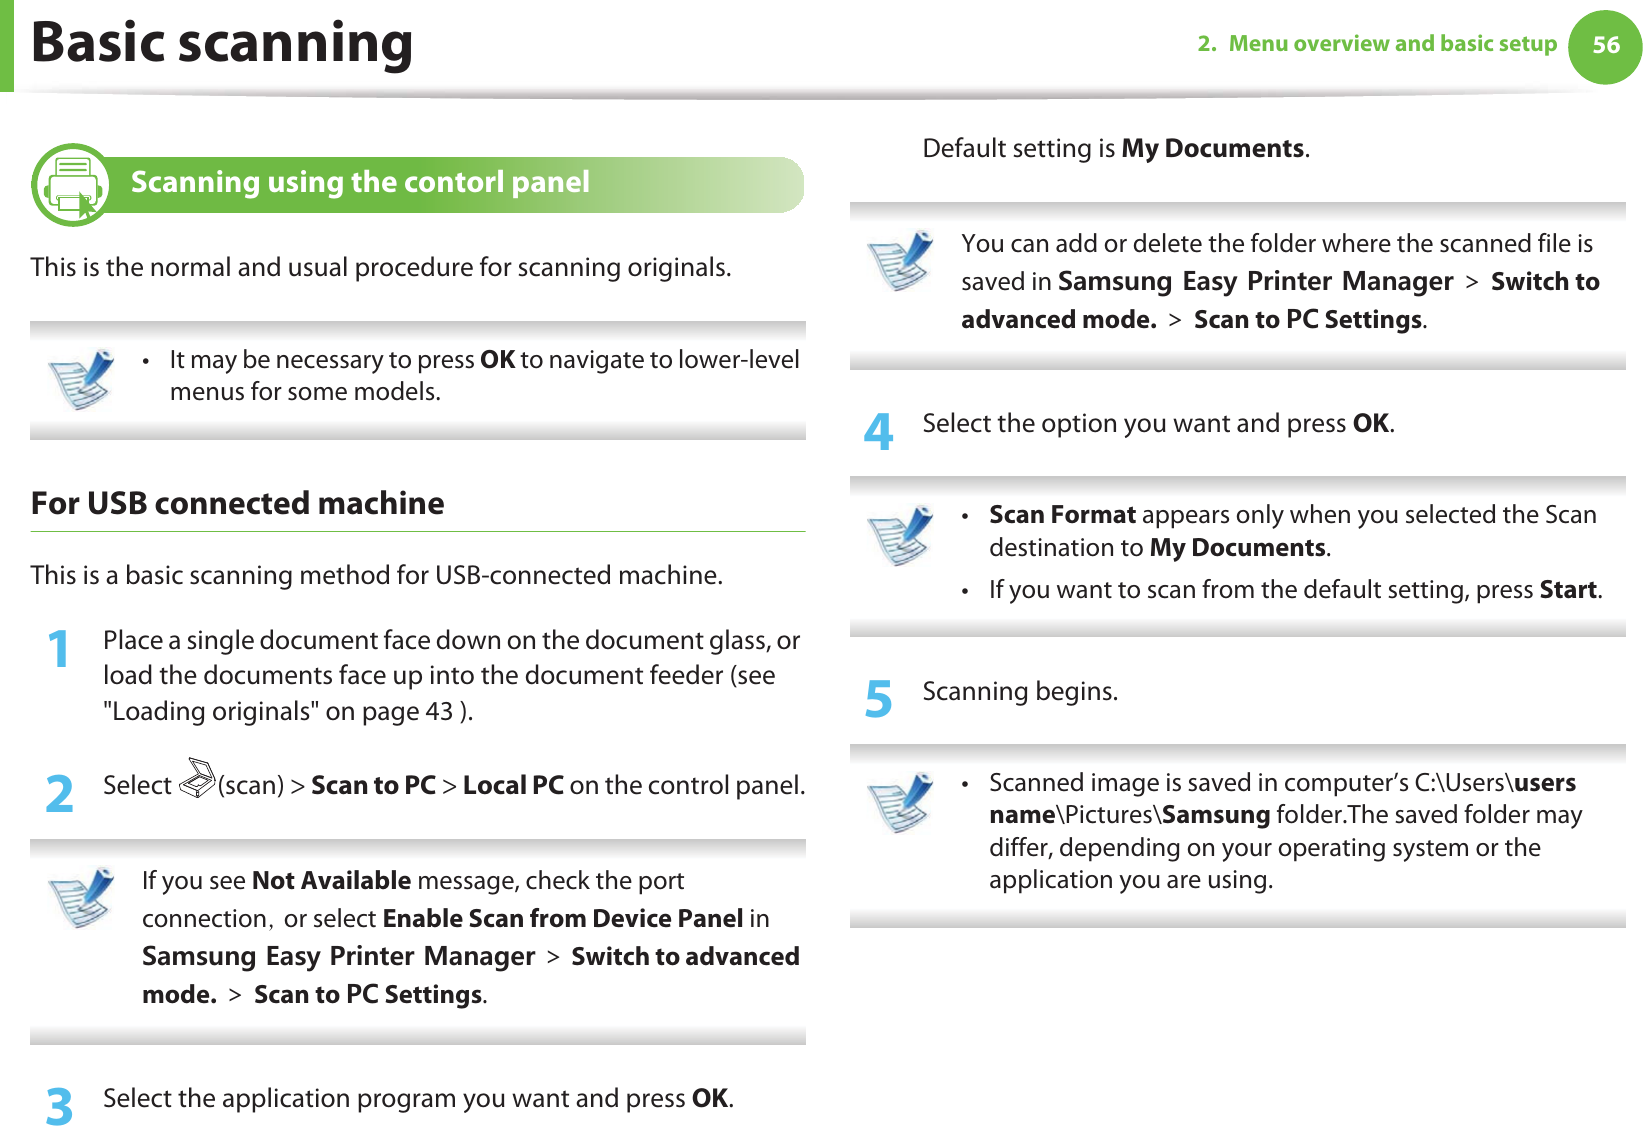
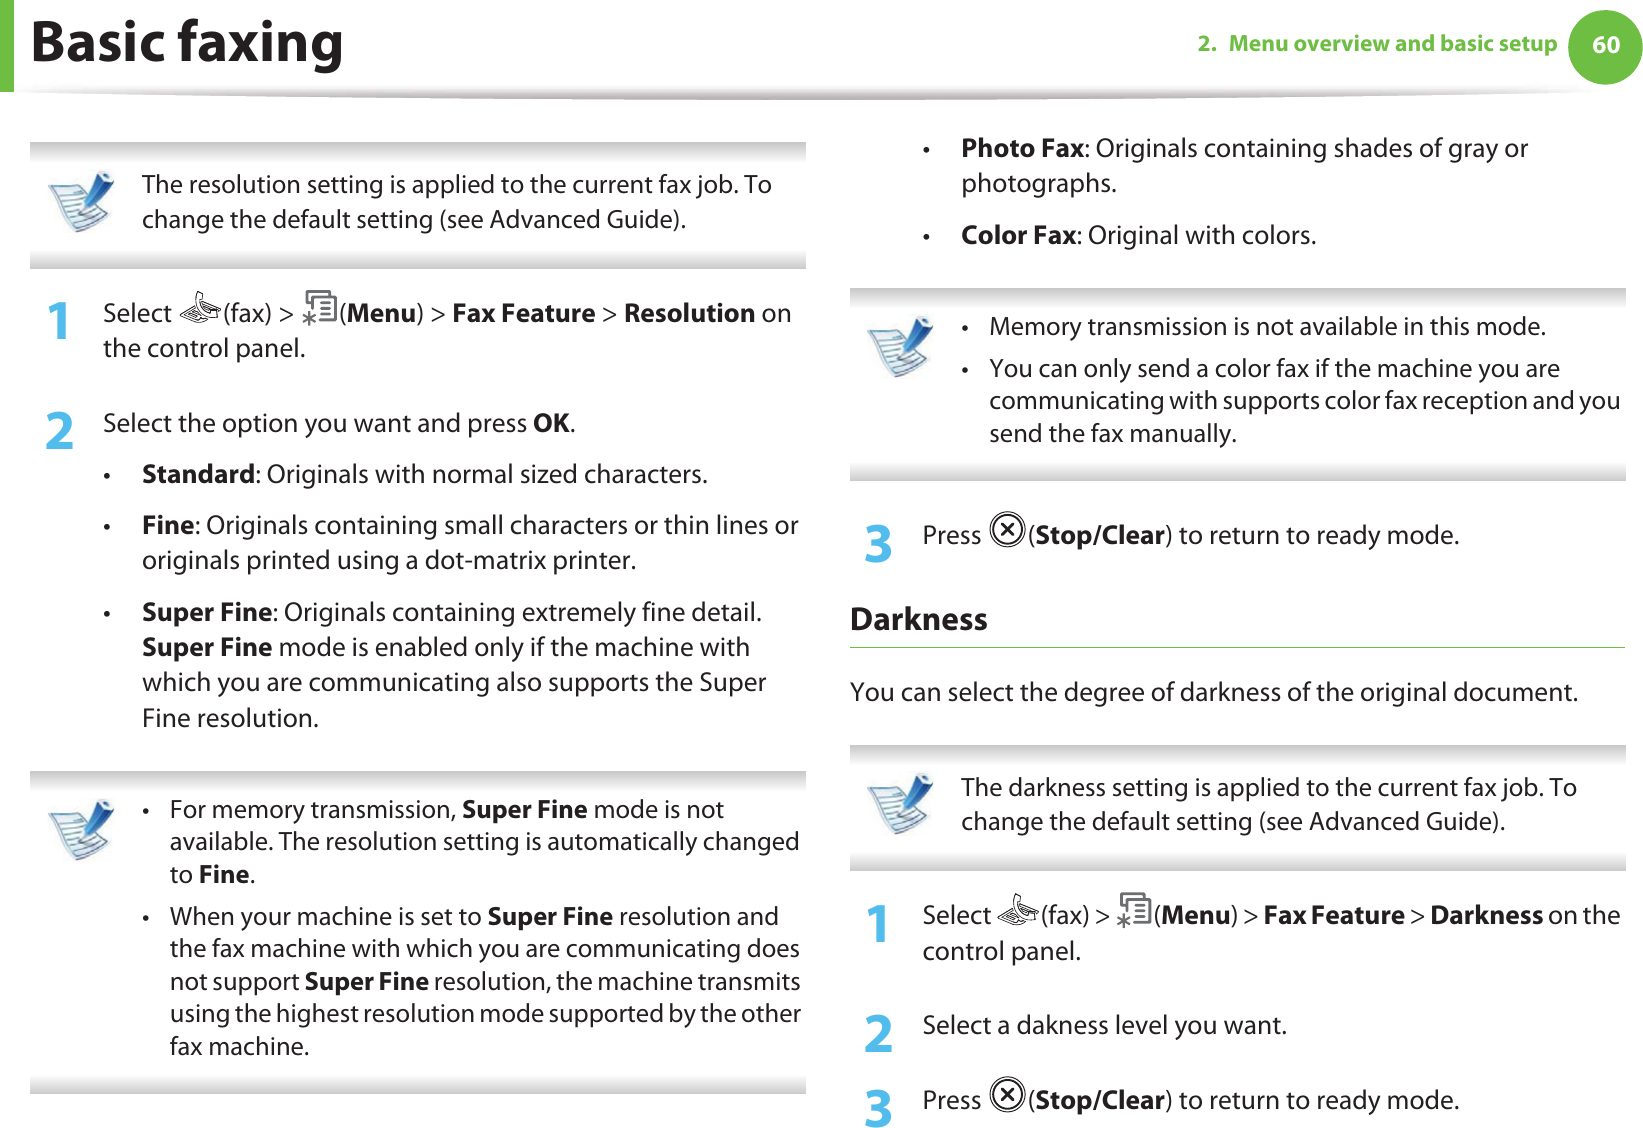
![Understanding display messages 914. Troubleshooting•Error [error number]Turn off then onThe machine unit cannot be controlled.Reboot the power and try the printing job again. If the problem persists, please call for service. •Memory Full The memory is full. Print or remove the received fax job in Secure Receive (see Advanced Guide).•Scanner Locked The scanner is locked. Reboot the power. If the problem persists, please call for service.Message Meaning Suggested solutions](https://usermanual.wiki/Samsung-Electronics-Co/SCX4729FW.Users-Manual-1/User-Guide-1493407-Page-91.png)