Samsung Electronics Co SGHA827 Celluar/PCS GSM/EDGE/WCDMA Phone with BT User Manual
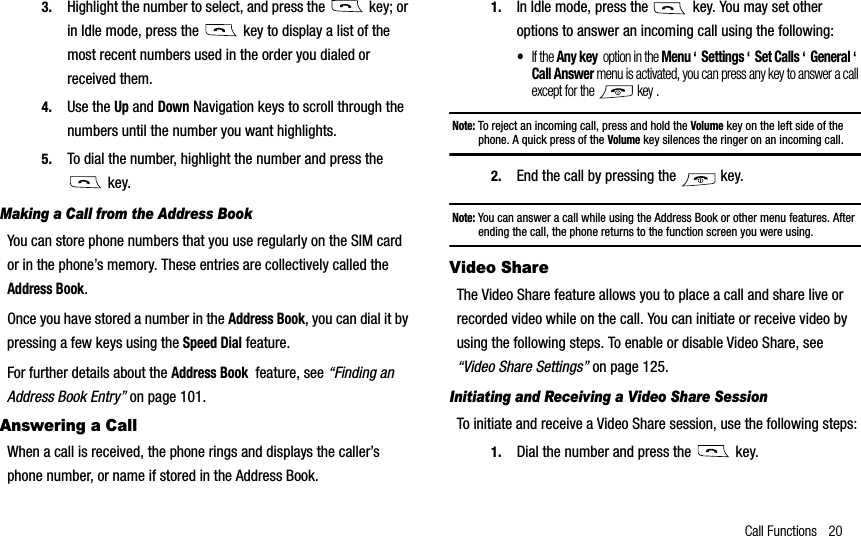
Samsung Electronics Co Ltd Celluar/PCS GSM/EDGE/WCDMA Phone with BT
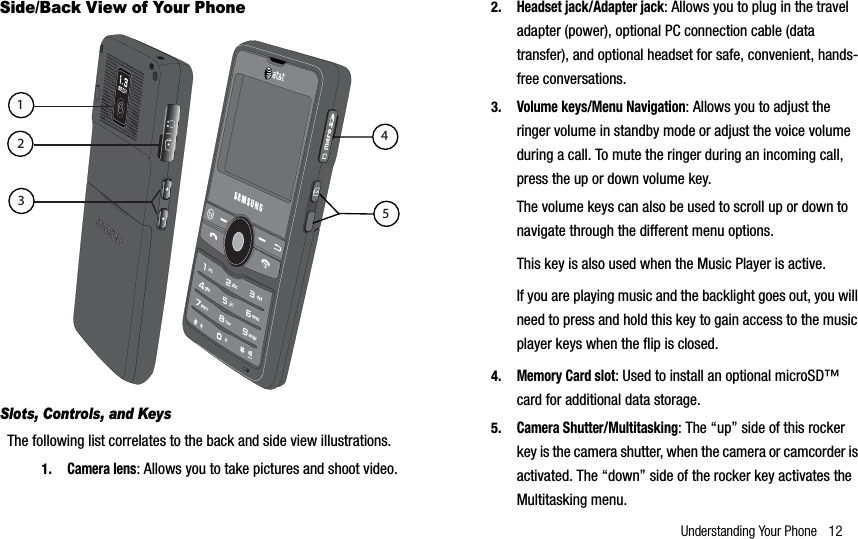
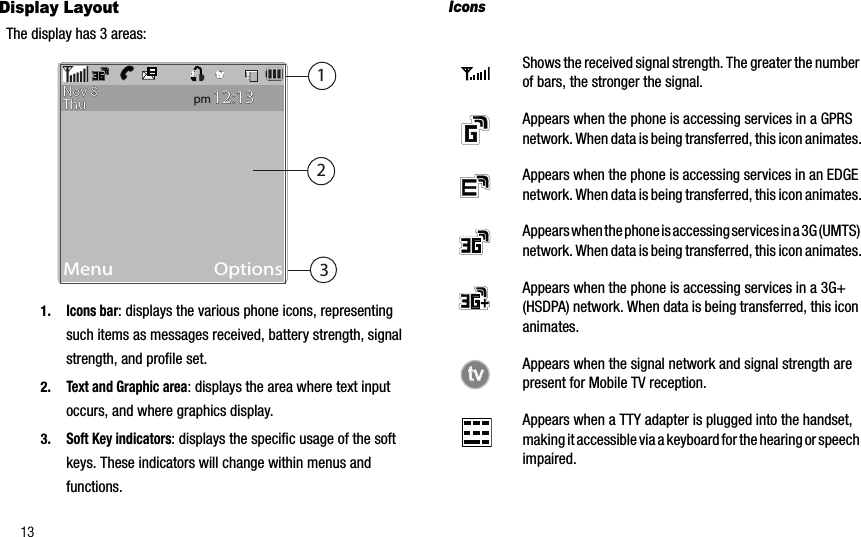
UserManual.wiki
>
Samsung Electronics Co
>
SGHA827 User Manual
Users Manual
Navigation menu
Upload a User Manual
Namespaces
Wiki Guide
HTML
PDF
Info
Views
User Manual
Discussion / Help
Navigation
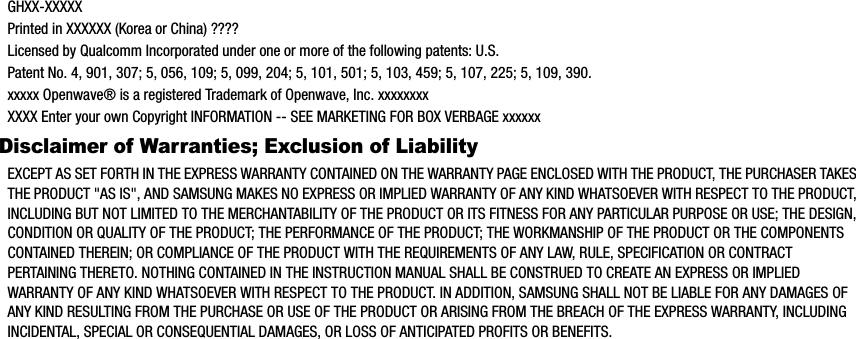

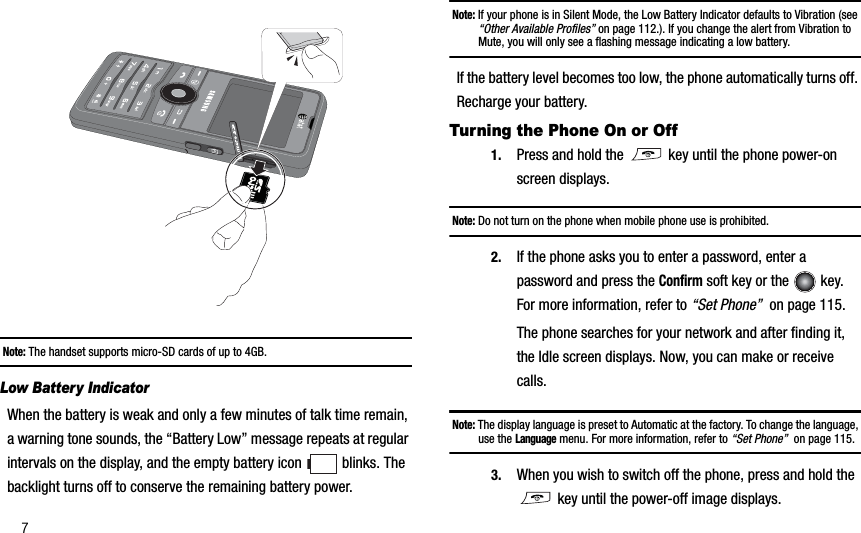
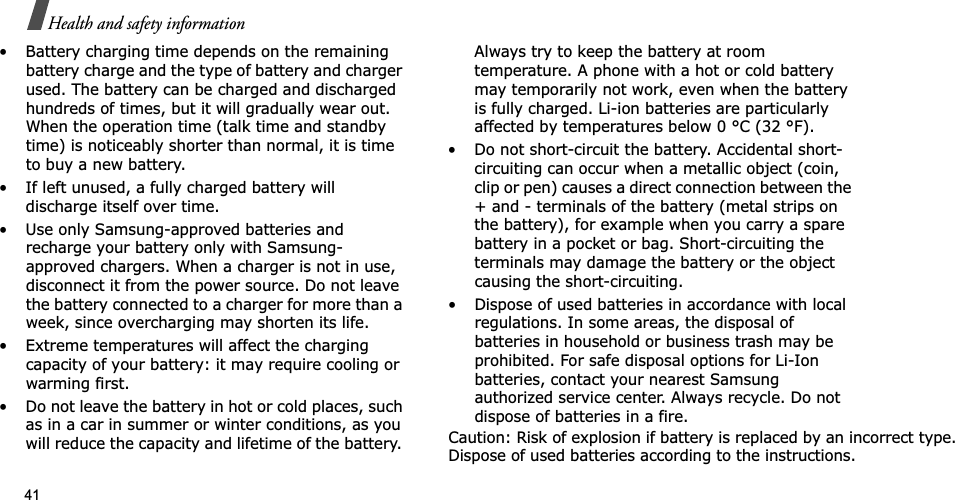
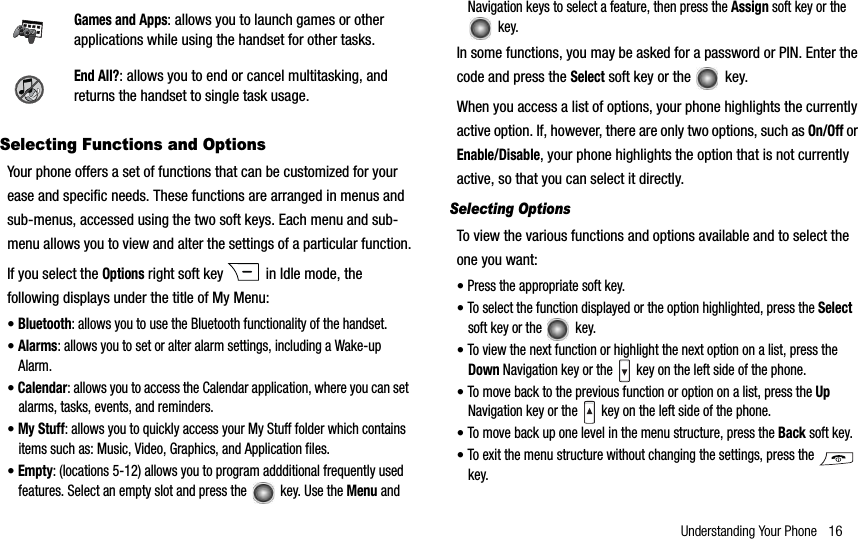
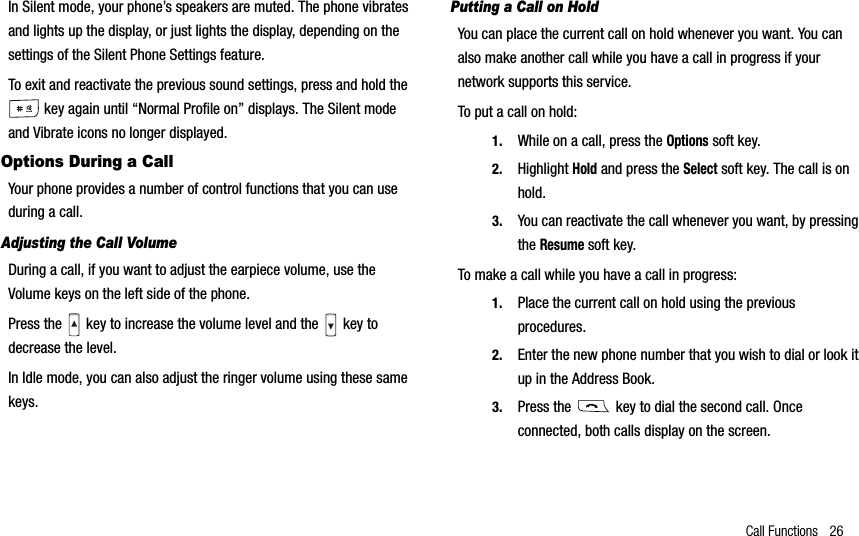
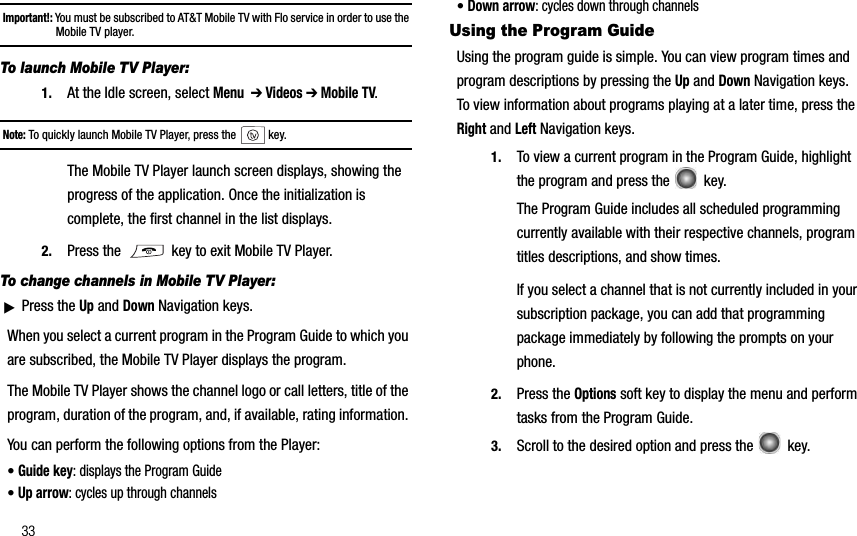
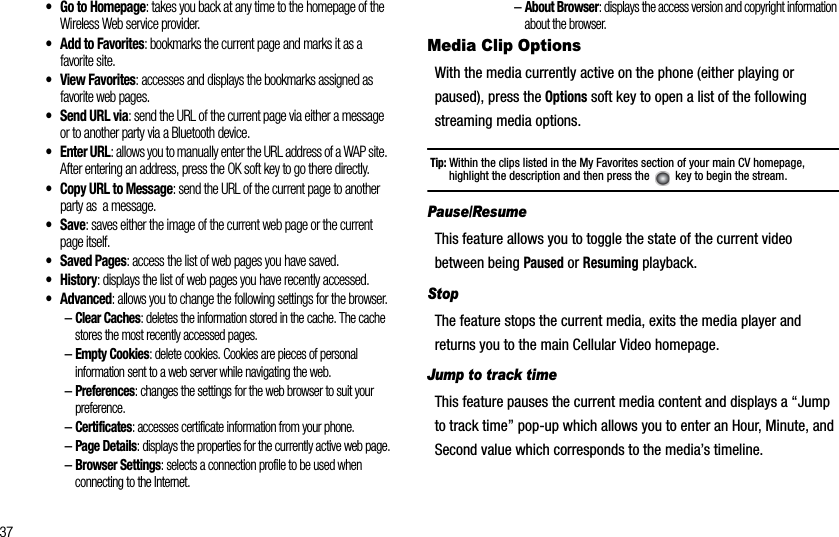
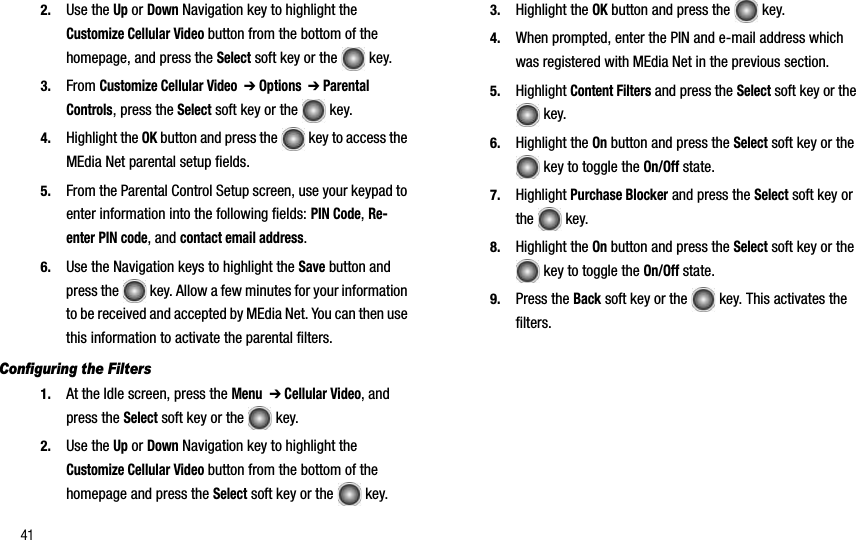
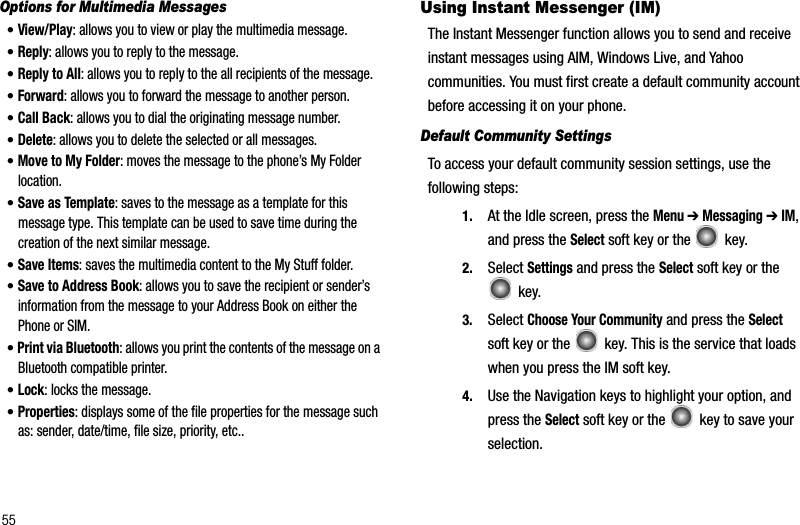
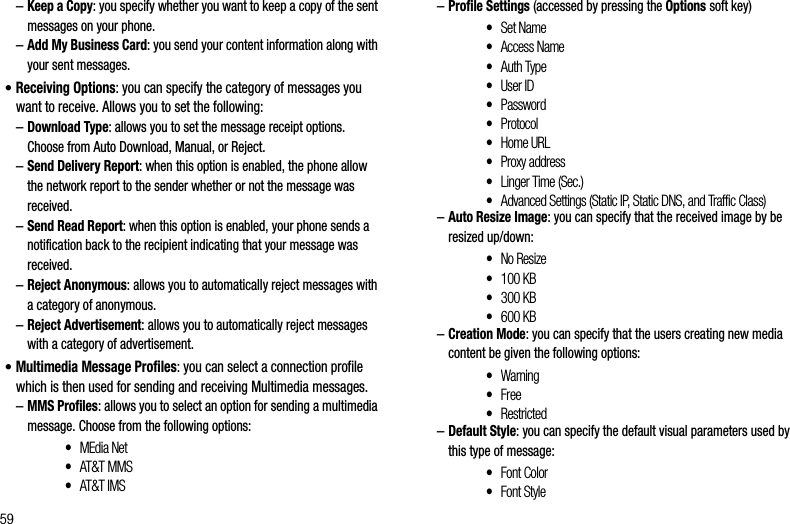
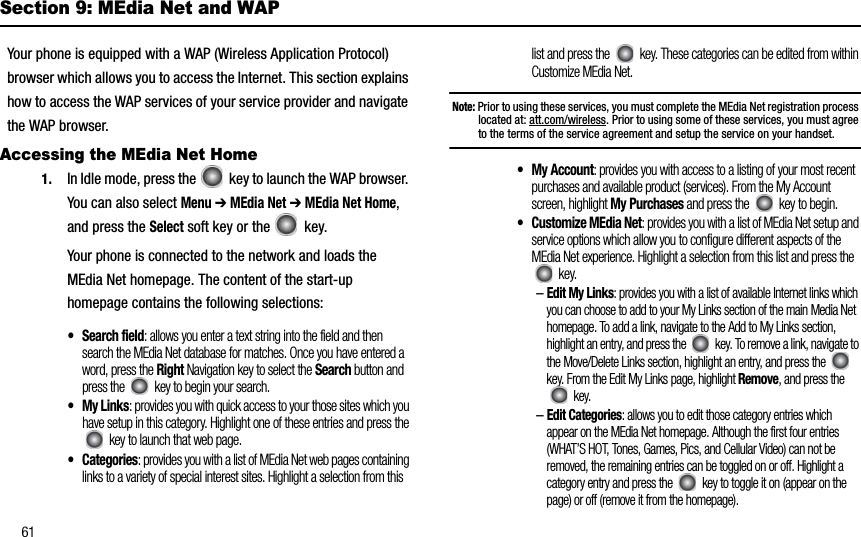
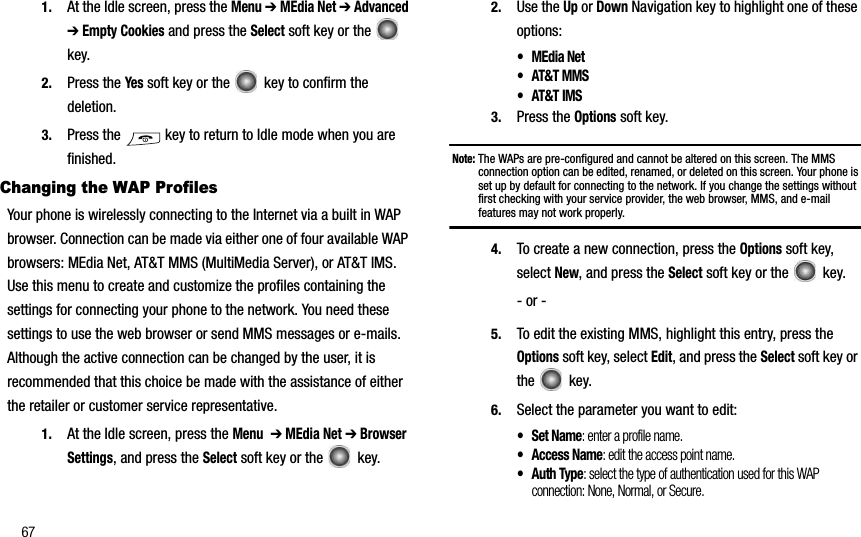
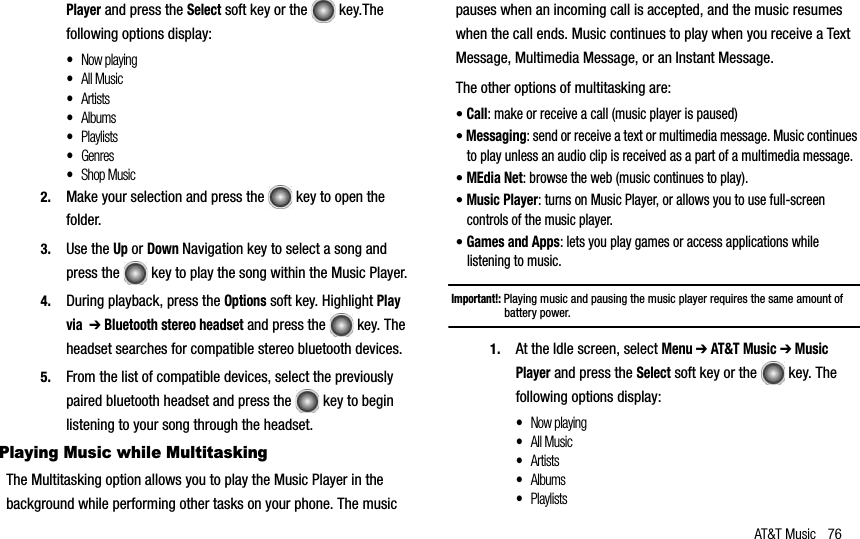
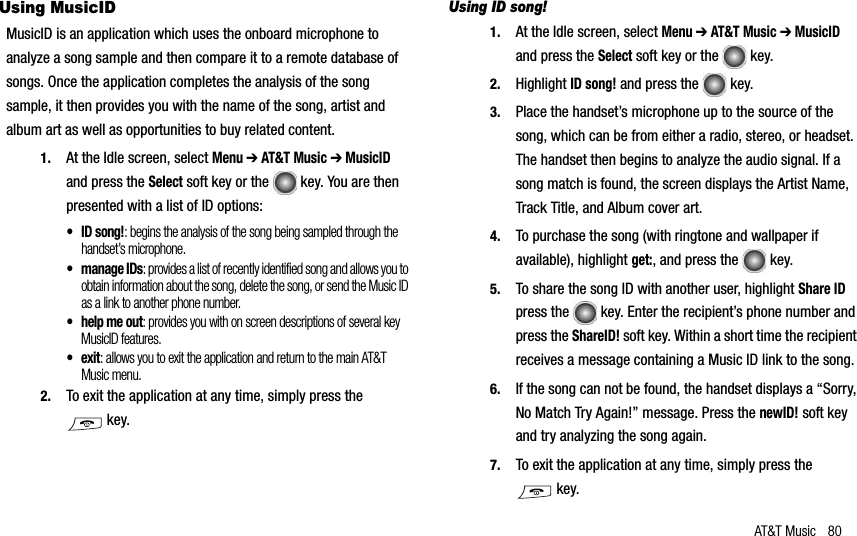
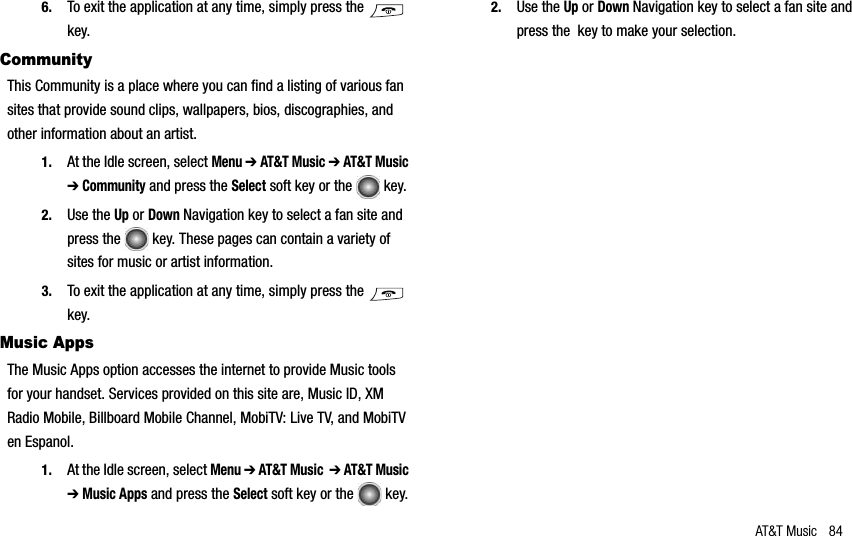
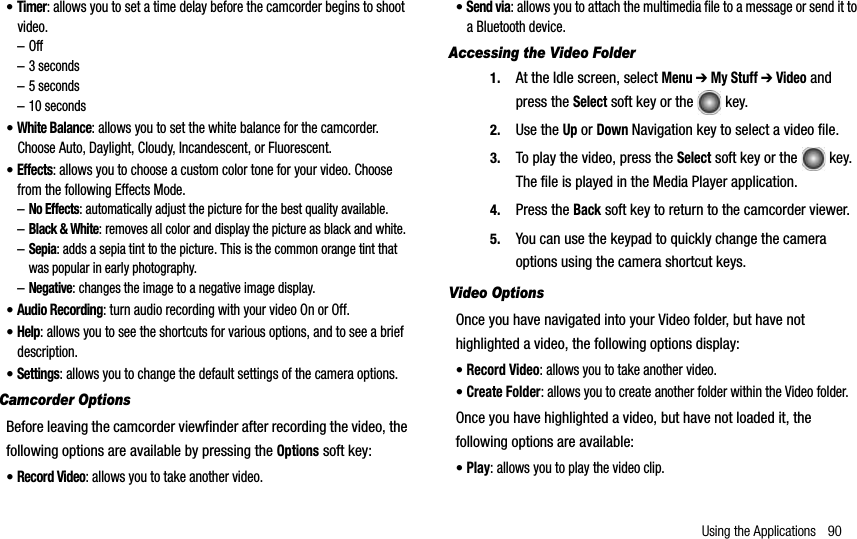
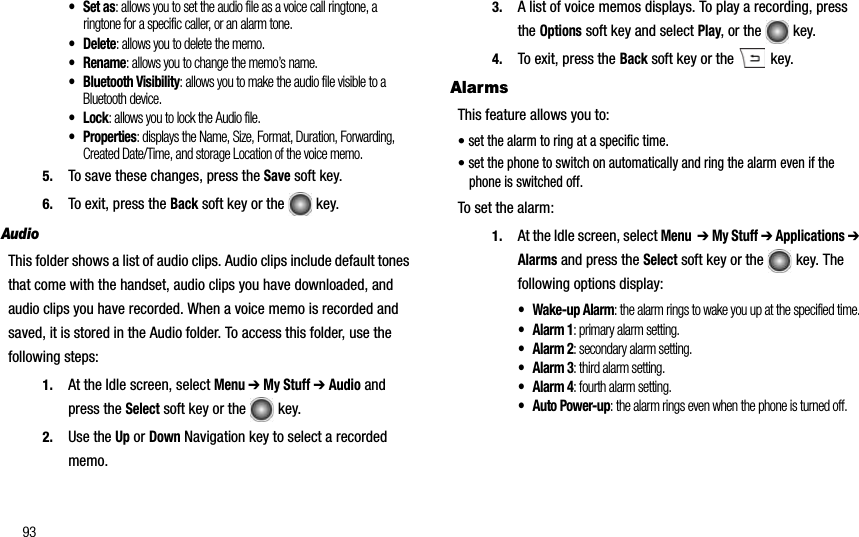
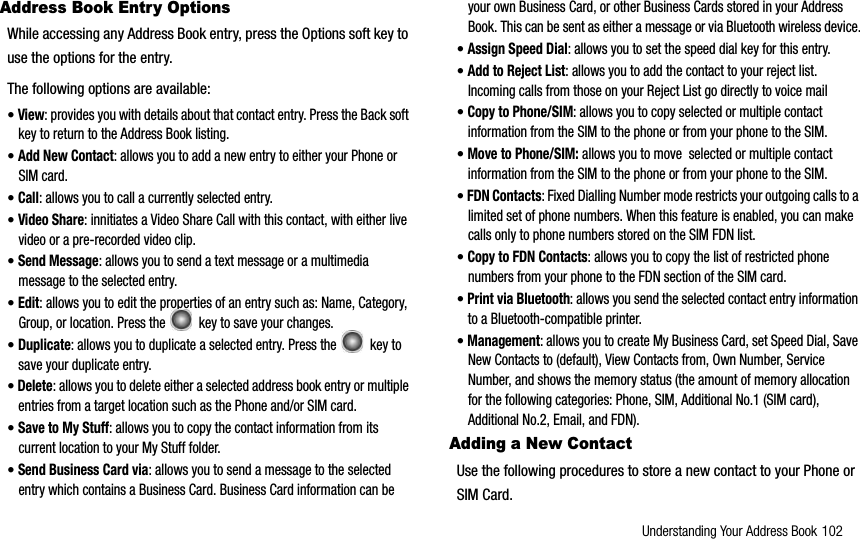
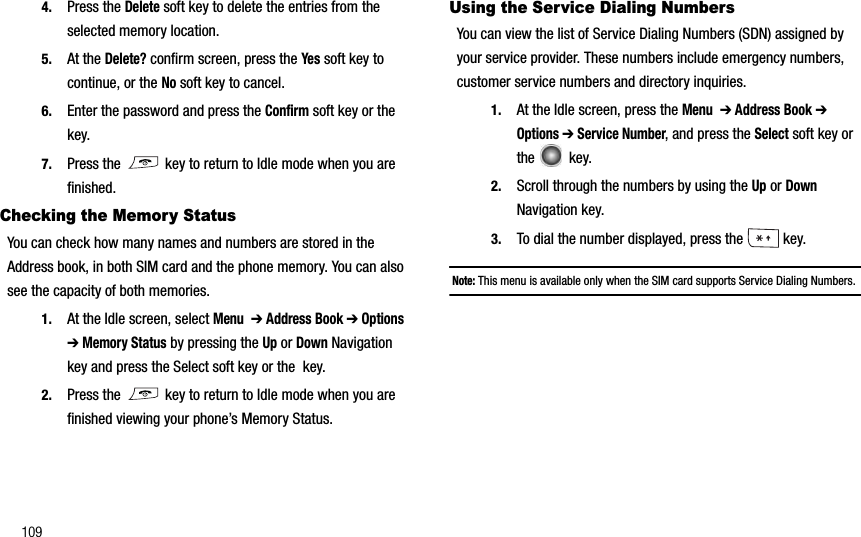
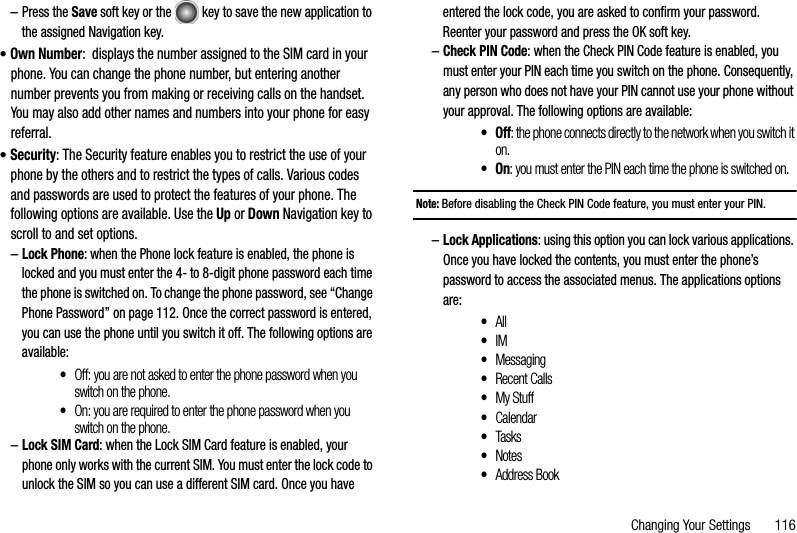
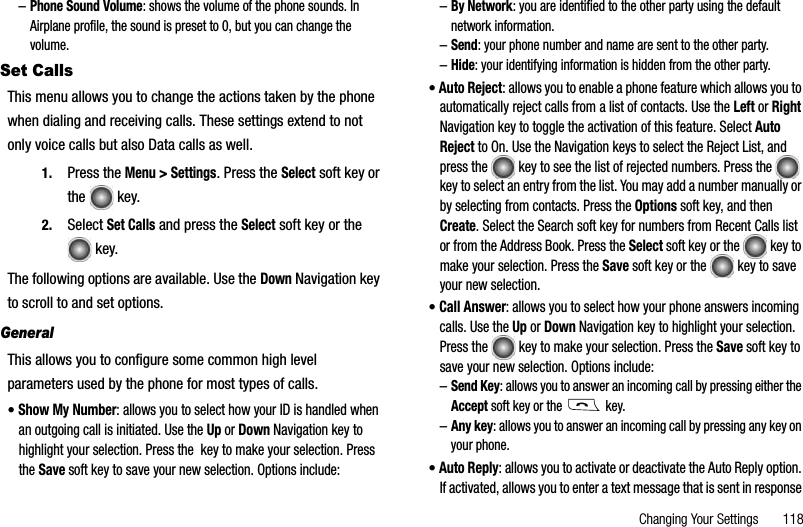
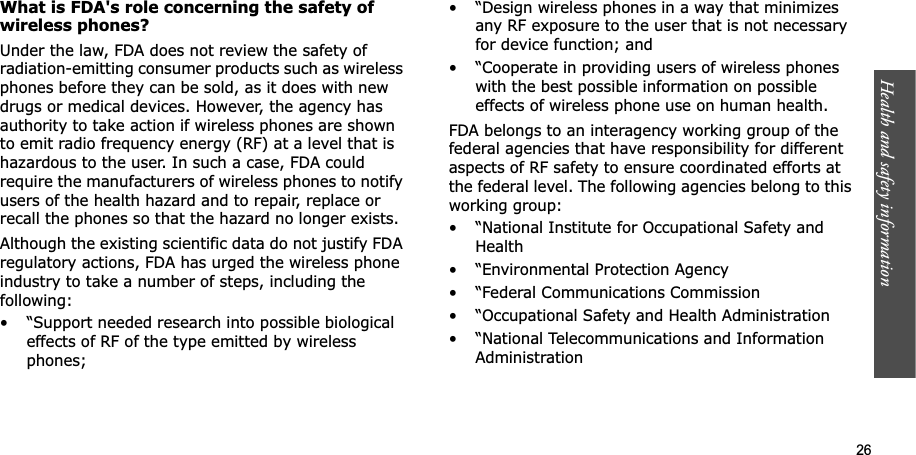
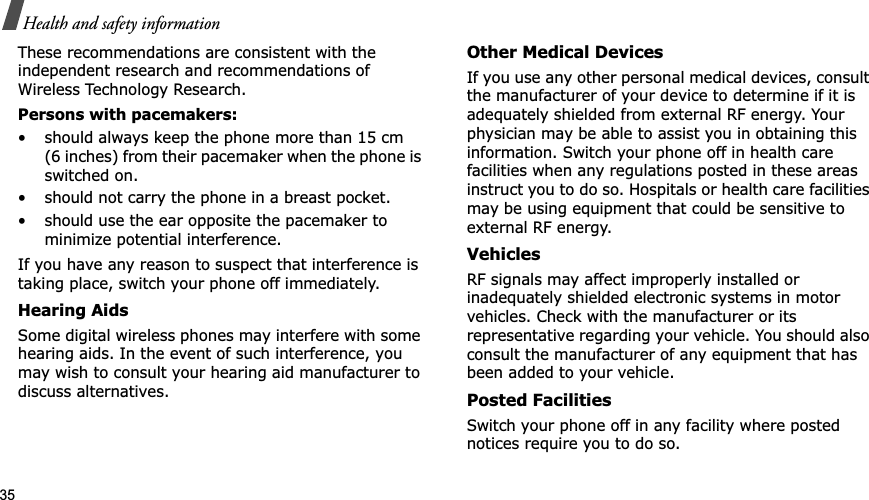
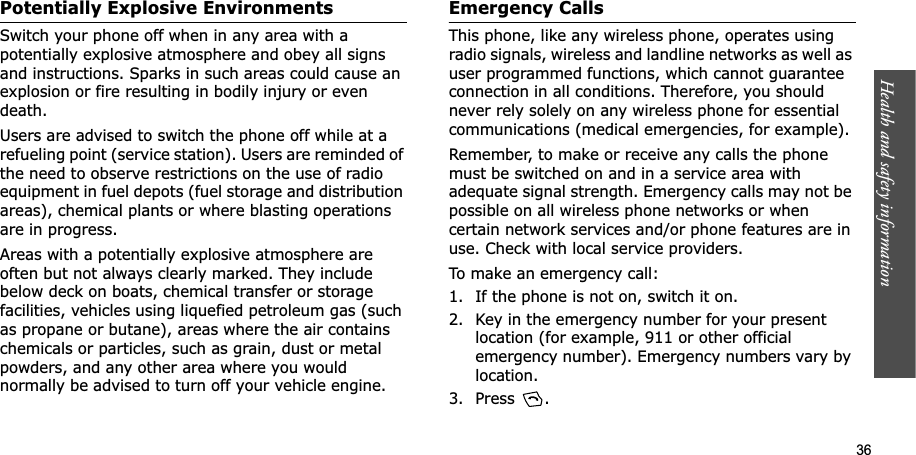
![Understanding Your Phone 10Slots, Controls and KeysThe following list correlates to the open and front view illustrations.1.Headset Jack Adapter: Allows you to plug in the travel adapter (power), PC connection cable (data transfer), and optional headset for safe, convenient, hands-free conversations.2.Display Screen: This screen displays all the information needed to operate your phone.3.Volume key: This key allows you to turn up or down the volume of the speaker. The volume key can also be used to scroll up or down to navigate through the different menu options. To mute the ringer during an incoming call, press the volume key up or down. Press and hold these keys to toggle the display on or off. This key is also used when the Music Player is active.4.Navigation keys: This key allows you to scroll through phone menu options and provides a shortcut to phone functions from standby mode. 5.Mobile TV key: Allows you to access the Mobile TV subscription service.6.Left soft key: Performs the functions indicated by the screen text on the bottom of the display.7.Send key: Allows you to place or receive a call. In standby mode, press the key once to access the Recent Call log. If you press and hold the key down, you will initiate the most recent call from the Recent Call log.8.Voice Mail key: Press and hold the key to automatically dial your voicemail.9.Special Function keys:Asterisk/Shift key - enters the [*] character for calling features. In text mode, press to change the character input type. Pound/Space key - enters the pound [#] character for calling features. In text entry mode, press to enter a space between characters.Press and hold the key to activate/deactivate the Silent profile. Press and hold to enter a pause between numbers.10.Microphone: Allows the other callers to hear you clearly when you are speaking to them.](https://usermanual.wiki/Samsung-Electronics-Co/SGHA827/User-Guide-887734-Page-13.png)


![o &RQQHFWWKHHTXLSPHQWLQWR DQ RXWOHW RQ D FLUFXLWGLIIHUHQW IURP WKDW WRZKLFK WKH UHFHLYHU LVFRQQHFWHG&RQVXOW WKHGHDOHURUDQ H[SHULHQFHG UDGLR79WHFKQLFLDQ IRUKHOS7KHSKRQH PD\ FDXVH 79 RU UDGLR LQWHUIHUHQFH LI XVHGLQ FORVH SUR[LPLW\ WR UHFHLYLQJHTXLSPHQW 7KH)&&FDQUHTXLUH \RX WR VWRS XVLQJ WKH SKRQH LI VXFKLQWHUIHUHQFH FDQQRW EH HOLPLQDWHG9HKLFOHVXVLQJOLTXHILHGSHWUROHXPJDVVXFK DVSURSDQH RU EXWDQHPXVW FRPSO\ ZLWK WKH 1DWLRQDO )LUH3URWHFWLRQ 6WDQGDUG 1)3$)RUDFRS\RIWKLVVWDQGDUG FRQWDFW WKH1DWLRQDO )LUH 3URWHFWLRQ$VVRFLDWLRQ 2QH %DWWHU\ PDUFK 3DUN 4XLQF\ 0$$WWQ 3XEOLFDWLRQ6DOHV 'LYLVLRQ2QO\ XVH DSSURYHG EDWWHULHV DQWHQQDVDQGFKDUJHUV7KH XVH RIDQ\XQDXWKRUL]HG DFFHVVRULHV PD\ EHGDQJHURXV DQG YRLG WKH SKRQH ZDUUDQW\LI VDLGDFFHVVRULHVFDXVHGDPDJH RU D GHIHFW WR WKH SKRQH$OWKRXJK \RXU SKRQHLV TXLWH VWXUG\ LW LV D FRPSOH[SLHFH RI HTXLSPHQW DQG FDQ EH EURNHQ $YRLGGURSSLQJ KLWWLQJ EHQGLQJ RUVLWWLQJ RQ LW2WKHU ,PSRUWDQW 6DIHW\ ,QIRUPDWLRQ 2QO\ TXDOLILHG SHUVRQQHO VKRXOG VHUYLFH WKH SKRQHRU LQVWDOO WKH SKRQH LQ D YHKLFOH )DXOW\ LQVWDOODWLRQRU VHUYLFH PD\ EH GDQJHURXV DQG PD\ LQYDOLGDWHDQ\ ZDUUDQW\ DSSOLFDEOH WR WKH GHYLFH &KHFN UHJXODUO\ WKDW DOO ZLUHOHVV SKRQH HTXLSPHQWLQ \RXU YHKLFOH LV PRXQWHG DQG RSHUDWLQJ SURSHUO\ 'R QRW VWRUH RU FDUU\ IODPPDEOH OLTXLGV JDVHV RUH[SORVLYH PDWHULDOV LQ WKH VDPH FRPSDUWPHQW DVWKH SKRQH LWV SDUWV RU DFFHVVRULHV )RU YHKLFOHV HTXLSSHG ZLWK DQ DLU EDJ UHPHPEHUWKDW DQ DLU EDJLQIODWHV ZLWK JUHDW IRUFH 'RQRWSODFH REMHFWV LQFOXGLQJ ERWK LQVWDOOHG RU SRUWDEOHZLUHOHVV HTXLSPHQW LQ WKH DUHD RYHUWKHDLUEDJRUVQRLWXD&WRQHQRKSRLGDUHKWQLHGDPVQRLWDFLILGRPURVHJQDK&V¶UHVXHKWGLRYOOLZJQXVPD6\EGHYRUSSD\OVVHUS[HWQHPSLXTHHKWHWDUHSRRW\WLURKWXD](https://usermanual.wiki/Samsung-Electronics-Co/SGHA827/User-Guide-887734-Page-148.png)