Samsung Electronics Co SGHI688 PCS GSM/EDGE Phone with Bluetooth User Manual SGH i688
Samsung Electronics Co Ltd PCS GSM/EDGE Phone with Bluetooth SGH i688
UserManual.wiki
>
Samsung Electronics Co
>
SGHI688 User Manual
Users Manual
Navigation menu
Upload a User Manual
Namespaces
Wiki Guide
HTML
PDF
Info
Views
User Manual
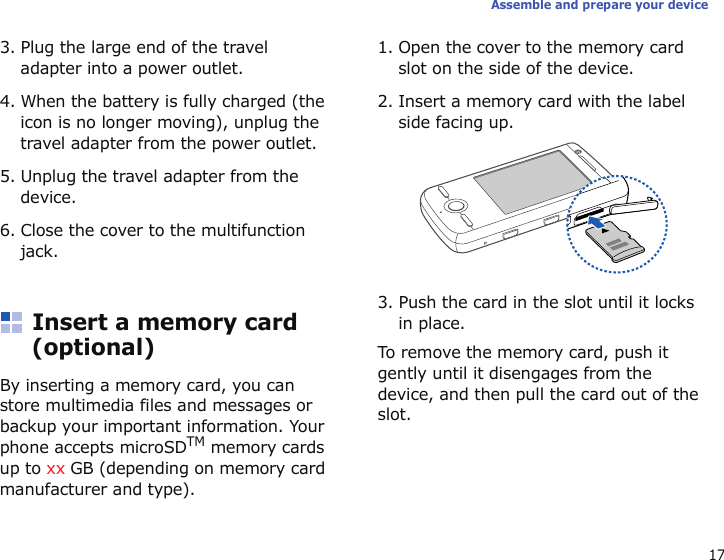
Discussion / Help
Navigation
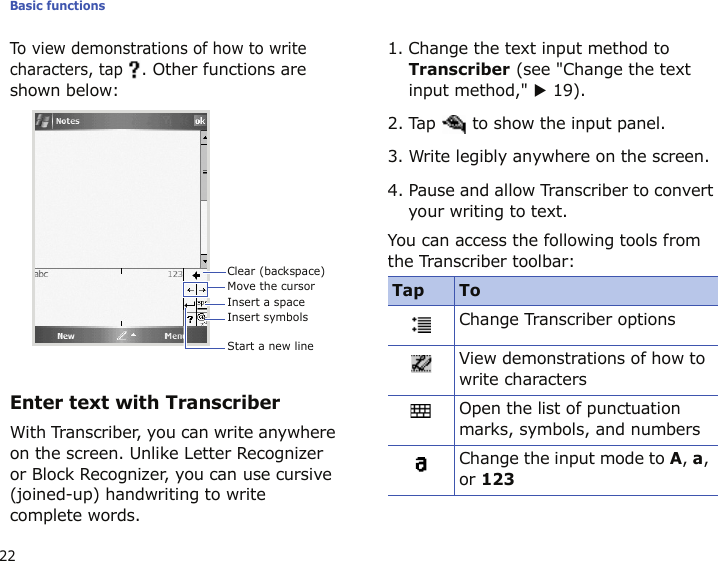
![Using this manualThis user manual has been specially designed to guide you through the functions and features of your device. To get started quickly, refer to Introduce your device and Basic functions.Instructional iconsBefore you start, familiarise yourself with the icons you will see in this manual:For any topics not covered in this guide, please refer to the Help embedded in the Windows Mobile® 6 Professional operating system.Warning—situations that could cause injury to yourself or othersCaution—situations that could cause damage to your phone or other equipmentNote—notes, usage tips, or additional informationXRefer to—pages with related information; for example: X p. 12 (represents “see page 12”)→Followed by—the order of options or menus you must select to perform a step; for example: Tap Start → Programs → Camera (represents Start, followed by Programs, followed by Camera)[ ]Square brackets—phone keys; for example: [ ] (represents the Power key)< >Angled brackets—softkeys thatcontrol different functions ateach screen; for example:<OK> (represents the OKsoftkey)](https://usermanual.wiki/Samsung-Electronics-Co/SGHI688/User-Guide-901643-Page-3.png)
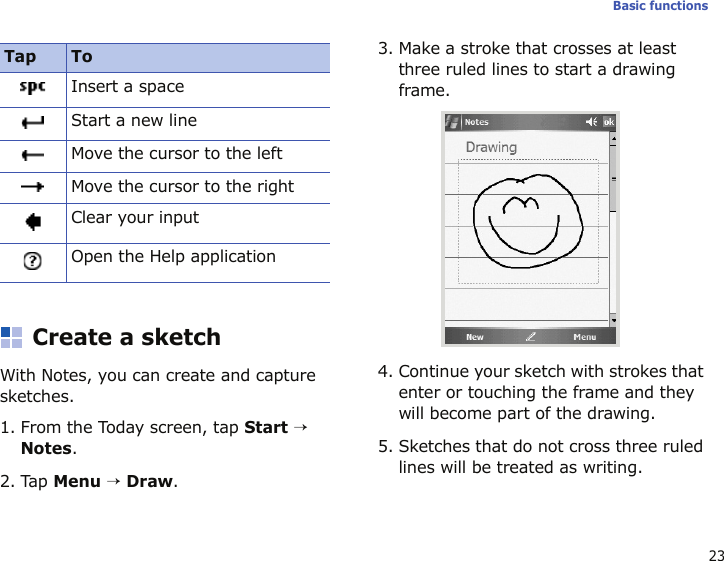
![183Basic functionsLearn how to perform basic operations and use the main features of your device.Switch the device on or offTo switch the device on,1. Press and hold [ ].2. Enter your PIN (if necessary) and tap .To switch the device off, repeat step 1 above.Disable wireless functionsBy disabling your device’s wireless functions, you can use non-network services in areas where wireless devices are prohibited, such as aeroplanes and hospitals.To disable wireless functions, 1. From the Today screen, tap to open.2. Tap Phone.Your device will show on the Today screen.To enable wireless functions, repeat steps 1 and 2 above.](https://usermanual.wiki/Samsung-Electronics-Co/SGHI688/User-Guide-901643-Page-24.png)
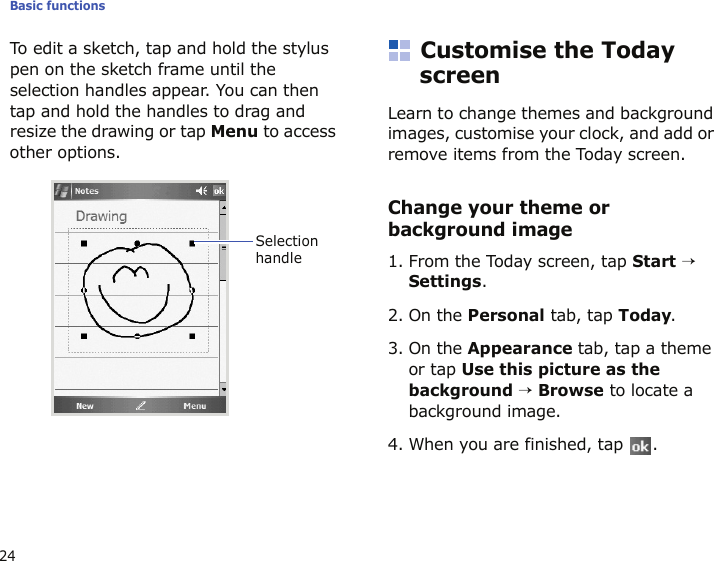
![264CommunicationYour device allows you to send and receive many types of calls and messages over cellular networks and the internet.CallsLearn to use your device’s call functions.Make a call1. Press [ ].2. Tap the number keys to enter a phone number.3. Tap Talk or press [ ].4. To end the call, tap End or press [].Answer a call1. Press [ ].2. To end the call, tap End or press [].Reject a callTa p Ignore or press [ ].To make a video call, tap Video Call.When you reject a call, the caller will hear a busy tone.](https://usermanual.wiki/Samsung-Electronics-Co/SGHI688/User-Guide-901643-Page-32.png)
![27CommunicationCall an international number1. Press [ ].2. Tap and hold 0 to insert the + character (this replaces the international access code).3. Tap the number keys to enter the complete number you want to dial (country code, area code, and phone number), and then tap Talk or press [].4. To end the call, tap End or press [].Make a call from the contact list1. From the Today screen, tap Start → Contacts.2. Scroll to a contact and tap the contact’s name.3. Tap the number you want to dial.4. To end the call, tap End or press [].Insert a pauseWhen calling automated systems, you can enter a pause between the phone number and another set of numbers. To insert an automatic pause, tap .To search for a contact, tap the Enter a name... field and enter a few letters of the contact’s name.](https://usermanual.wiki/Samsung-Electronics-Co/SGHI688/User-Guide-901643-Page-33.png)
![Communication28Make a call from Call History1. Press [ ].2. Tap Call History.3. Tap Menu → Filter → a call type to show only one type of calls (optional).4. Scroll to a contact and tap the contact’s name.5. Tap the number you want to call.6. To end the call, tap End or press [].Forward calls1. From the Today screen, tap Start → Settings → Phone.2. From the Services tab, tap Call Forwarding → Get Settings...3. Tap a forwarding option and enter a phone number.4. Tap .Bar (block) calls1. From the Today screen, tap Start → Settings → Phone.2. From the Services tab, tap Call Barring → Get Settings...3. Tap the type of calls you want to bar.4. Tap .](https://usermanual.wiki/Samsung-Electronics-Co/SGHI688/User-Guide-901643-Page-34.png)
![29CommunicationPush-to-Talk (PTT) Push-To-Talk (PTT) technology is a two-way radio style communication service over a cellular network. It provides real-time, direct voice contact with your friends, family, and co-workers at the push of a button. Learn to use the PTT feature. Add a new contact1. From the Today screen, tap Start → Programs → PTT or press [ ].2. Tap Add → New contact.3. Enter contact information.4. When you are finished entering information, tap OK to save the contact card.Make a PTT call1. Press [ ].2. Tap the number keys to enter a phone number. You can also select a number in Contacts or the call record, or select a contact or group in the contact list. 3. Press [ ] to make a call.4. Press and hold [ ] to speak and then release it to hear the other person.5. To end the call, press [].](https://usermanual.wiki/Samsung-Electronics-Co/SGHI688/User-Guide-901643-Page-35.png)

![Media34CameraYour device allows you to take digital photos (jpg format) or record videos (mp4 format).Capture a photo1. Tap Start → Programs → Camera or press and hold [ ].2. Rotate the device 90° counter-clockwise to the landscape orientation.3. Aim the lens at the subject and make adjustments:• Scroll right or left to adjust the brightness• Scroll up or down to zoom4. Press [ ] or the Centre key to capture the image.5. Tap to save the image and return to the view finder, or press the Centre key to send the image as a multimedia message.View a photo1. Tap Start → Programs → Contents Manager.2. Tap the drop-down menu in the top left of the screen and select My Device.3. In the list of folders, tap My Documents → My Pictures.4. Tap a photo name or thumbnail to open it.You cannot launch Mini Player while using the Camera.](https://usermanual.wiki/Samsung-Electronics-Co/SGHI688/User-Guide-901643-Page-40.png)
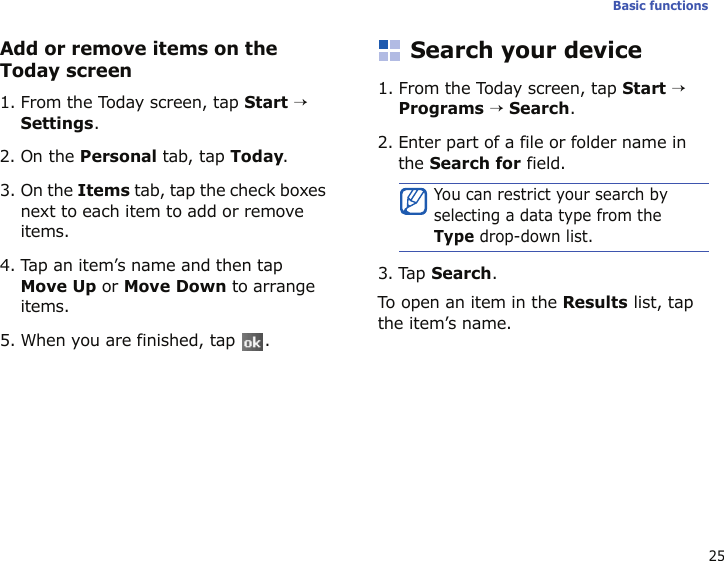
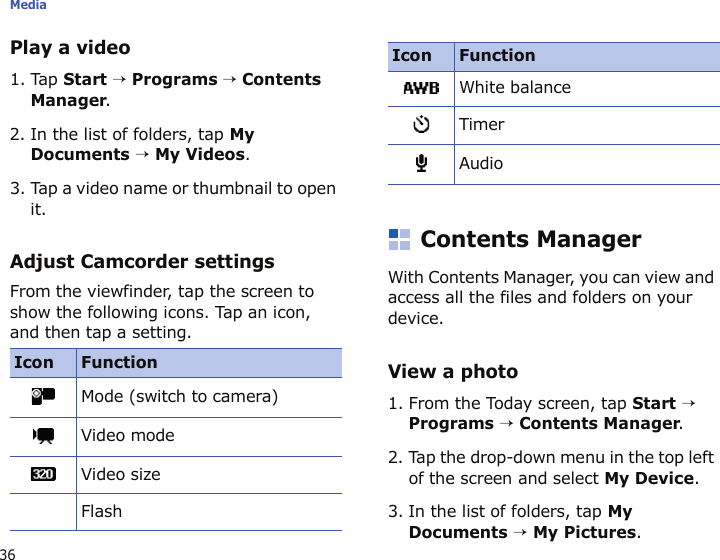
![35MediaAdjust Camera settingsFrom the viewfinder, tap the screen to show the following icons. Tap an icon, and then tap a setting.Record a video1. Tap Start → Programs → Camera or press and hold [ ].2. Rotate the device 90° counter-clockwise to the landscape orientation.3. Tap → Camcorder.4. Aim the lens at the subject and make adjustments:• Scroll right or left to adjust the brightness• Scroll up or down to zoom5. Press [ ] or the Centre key to begin recording.6. When you are finished, press the Centre key to stop recording.7. Tap to save the video and return to the viewfinder.Icon FunctionMode (switch to camcorder)Scene modeShot modePicture sizeFlashWhite balanceTimer](https://usermanual.wiki/Samsung-Electronics-Co/SGHI688/User-Guide-901643-Page-41.png)

![47Personal ProductivityBCRBCR allows you to quickly create new contacts from business cards. You can capture a photo of a business card and then extract the contact information to Outlook.Capture and convert an image of a single business card1. Place the business card on a flat, well-lit surface.2. From the Today screen, tap Start → Programs → BCR.3. Position the device over the business card, so that the green frame on the viewfinder aligns with the edges of the business card.4. Press [ ] to capture the image.5. Edit any contact details that were not converted correctly, and then tap Save.6. Tap to confirm.Capture and convert images of multiple business cardsIf you have multiple business cards to convert, you can capture images of each of them and then convert them to contacts all at once.As you align the frame in the viewfinder with the edges of the business card, they will change from green to yellow. If you can align all four edges of the frame at once, BCR will automatically capture the image.](https://usermanual.wiki/Samsung-Electronics-Co/SGHI688/User-Guide-901643-Page-53.png)
![Personal Productivity481. From the Today screen, tap Start → Programs → BCR.2. Tap Menu → Multi-shot.3. Place a business card on a flat, well-lit surface.4. Position the device over the business card, so that the green frame on the viewfinder aligns with the edges of the business card.5. Press [ ] to capture the image.6. Tap More.7. Repeat steps 3-6 as necessary to capture additional images.8. When you are finished capturing images, tap Load Image.9. Tap the check box on each thumbnail you want to convert.10.Tap Recognise.11.Edit any contact details that were not converted correctly, and then tap Save.12.Tap to confirm.13.Repeat steps 10-11 until you have saved all the contacts.As you align the frame in the viewfinder with the edges of the business card, they will change from green to yellow. If you can align all four edges of the frame at once, BCR will automatically capture the image.](https://usermanual.wiki/Samsung-Electronics-Co/SGHI688/User-Guide-901643-Page-54.png)


![Troubleshooting66Your device does not show a signal (no bars next to the network icon)• If you just turned on the device, wait about 2 minutes for your device to find the network and receive a signal.• You may not be able to receive a signal in tunnels or elevators. Move to an open area.• You may be between service areas. You should receive a signal when you enter a service area.You forgot a security, PIN, or PUK codeIf you forget or lose this or another code, contact the seller or your service provider.Your display shows white linesThe display may show white lines if you have turned the device on after a long period of disuse or if you removed the battery without first turning off the device. The display should correct itself in a short time.You enter a number, but the call is not dialled• Ensure that you have pressed the Dial key: [ ]. • Ensure that you have accessed the right cellular network.SIM card blocked.Your SIM card is blocked, usually as a result of entering your PIN incorrectly several times. You must enter the PUK supplied by your service provider.Message Try this to solve the problem:](https://usermanual.wiki/Samsung-Electronics-Co/SGHI688/User-Guide-901643-Page-72.png)