Samsung Electronics Co SGHT779 Tablet with WLAN,BT(EDR,LE),GSM/WCDMA/LTE User Manual 1010 Part 2
Samsung Electronics Co Ltd Tablet with WLAN,BT(EDR,LE),GSM/WCDMA/LTE 1010 Part 2
Contents
- 1. User Manual 1010 Part 1
- 2. User Manual 1010 Part 2
- 3. User Manual 1010 Part 3
User Manual 1010 Part 2
DRAFT
I
nterna
l
U
se
O
nl
y
Multimedia 116
9. From the
Registration
screen (Transfer), click T
ransfer
Video now
and select the location of the internal
storage or
USB
(the device) as the target destination for
the registration video (created in step 6) and click
Start
.
– or –
Locate the created file, copy and paste it into the new
drive letter corresponding to your device’s storage
location.
10. From a Home screen, tap
Apps
➔
My Files
.
11. Locate your registration DivX video file and tap the file
to play it. Once you play the registration file on your
device, your registration is complete.
12. Return to the DivX VOD Manager screen (from within
your computer’s DivX Player) and confirm both your
computer and your new device appears in the list of
registered DivX devices.
Important!
There is no special registration or configuration
necessary to playback DRM-free DivX movies.
Registration of your device is only required for
playback of protected DivX material.
Gallery
Your large LCD screen provides high-resolution display of
photos and videos. Use the Gallery to view, capture, and
manage photos and videos.
Selecting Photos and Videos to View
1. From a Home screen, tap
Apps
➔
Gallery
.
All albums display.
2. Tap
Albums
to display other ways to group your photos
and videos. Options are:
•Albums
: Based on the folder in which they are stored.
•Locations
: Based on where taken.
•Time
: Based on the time taken.
•Person
: Based on face tags applied.
•Group
: Based on group tags applied.
3. Tap
Camera
to launch the Camera app.
4. Tap
Menu
to display the following options:
• Select album / Select group:
Tap one or more albums or
groups that you want to share, stream to another device, or
delete.
DRAFT
I
nterna
l
U
se
O
nl
y
117
Viewing Groups of Photos and Videos
1. From a Home screen, tap
Apps
➔
Gallery
.
2. Tap a category and then a group to view it.
Thumbnails for each photo and video in the group
display.
3. Tap
Slideshow
to view a slideshow of the available
pictures and videos.
4. Tap
Menu
for these options:
• Select item:
Tap one or more items that you want to share,
stream to another device, or delete.
• Group by
: Further group this group by Location, Time, or Tags,
depending on the way you chose the group.
Viewing Photos and Videos
1. From a Home screen, tap
Apps
➔
Gallery
.
2. Select a category and then a group to view it, and then
tap a photo or video thumbnail.
3. Tap the screen to show or hide Gallery options.
4. Tap the screen with two fingers or double-tap on the
screen to zoom all the way in or out. For more
information, refer to “Pinch” on page 31.
5. Sweep across the screen to display the next or
previous photo or video. (Videos are indicated by the
Play
button.) The current photo or video is
outlined in the thumbnails at the bottom of the screen.
Tap a thumbnail to view the photo or video it
represents.
6. Tap
Share
to use Group Cast, Picasa (photos),
Photo editor (photos), Google+, Bluetooth, Wi-Fi Direct,
Messaging, Gmail, Email, or YouTube (videos) to share
the photo or video.
7. Tap
Delete
to delete the photo or video being
displayed. Tap
OK
to delete the photo or video or
Cancel
to exit.
8. Tap
Slideshow
to view a slideshow of photos and
video thumbnails in the category. Tap the screen to
stop the slideshow and view the photo or video being
displayed.
9. Tap
Menu
to display the following options for
photos:
• Face tag
: Activate/deactivate face tag technology for people in
your photo.

DRAFT
I
nterna
l
U
se
O
nl
y
Multimedia 118
•Copy to clipboard
: Copies the current image to your device’s
clipboard.
• Rotate left
: Allows you to rotate the picture counterclockwise
90 degrees.
•Rotate right
: Allows you to rotate the picture clockwise 90
degrees.
•Crop
: Allows you to crop the image. Tap and drag the crop box
or the sides or corners of the crop box to create the crop area,
then tap
Ok
. Tap
X
to stop without cropping the picture.
•Edit
: Launches the Photo Editor with the current image
selected.
• Show on map
: This option displays if a Location exists for the
photo. A Location is added to the photo if
GPS tag
is set
On
in
the Camera settings. Tap this option to open the Map app and
display the Location where the photo was taken. For more
information, refer to
“Camera Settings”
on page 105.
Caution!
Be aware that your location may be present on a
photo when posting your photos on the internet.
•Set as
: allows you to assign the current image as a Contact
photo, Home screen, Lock screen, or Home and lock screens.
• Buddy photo share
: allows you to share the current image
with detected person in the photo. The subject tag can be
added or deleted.
•Print
: Print the current photo to a compatible Samsung printer.
•Rename
: Changes the filename associated to the current
image.
•Details
: Displays the file information such as Title, Time, etc...
Note:
Photos are stored in the /Root/DCIM/Camera folder as
jpg files. For more information, refer to “My Files” on
page 182.
DRAFT
I
nterna
l
U
se
O
nl
y
119
There are only two options for videos that are not
playing:
•Rename
: Enter an new file name.
•Details
: Provides details about the video such as Title, Time,
Duration, File Size, and so on. Tap
Close
to close the pop-up.
For menu options while a video is playing and other
video options, see “Video Player” on page 113.
Note:
Videos are stored in the /Root/DCIM/Camera folder as
mp4 files. For more information, refer to “My Files” on
page 182.
10. Tap
Back
to return to the category screen.
Setting a Picture As
You can use the photos you take as a contact’s photo or as
wallpaper for the Home or Lock screen:
1. From a Home screen, tap
Apps
➔
Gallery
.
2. Select a category and then a group to view it, and then
tap a photo to select it.
3. Tap
Menu
➔
Set as
.
4. Tap
Contact photo
and then tap a contact entry.
– or –
Tap
Home and lock screens
,
Home screen wallpaper
, or
Lock screen wallpaper
.
The
Crop picture
screen displays.
5. Touch and drag the crop box or the sides or corners of
the crop box to create the crop area, then tap
Done
to
save the cropped photo as the contact’s icon or
wallpaper. Tap
Cancel
to stop without cropping the
photo.
Tip:
To remove a contact photo, see “Updating Contacts” on
page 67.
DRAFT
I
nterna
l
U
se
O
nl
y
Multimedia 120
Tip:
To change wallpaper, see “Wallpapers” on page 42.
Playing Videos
1. From a Home screen, tap
Apps
➔
Gallery
.
2. Select a category and then a group to view it, and then
tap a video thumbnail to play the video.
Note:
Videos are marked with a
Play
button.
3. Tap
Pause
to pause the video.
4. Tap
Resume
to resume playing the video.
5. Touch and drag the white dot on the progress
bar to fast forward or rewind the video. Tap the left end
of the progress bar to restart the video. Tap the right
end of the progress bar to end the video playback.
– or –
Tap
Rewind
to restart the video or
Fast Forward
to end the video.
Sharing Photos and Videos
To share photos and videos with your friends:
1. From a Home screen, tap
Apps
➔
Gallery
.
2. Select a category and then a group to display
thumbnails.
3. Tap
Menu
➔
Select item
.
4. Select one or more photos and videos to highlight them
for sharing.
5. Tap
Share
.
6. Tap
Deselect all
in the Selected drop-down to
unhighlight photos and videos.
7. Tap
Group Cast
,
Picasa
(photos only),
Google+
,
Bluetooth
,
Wi-Fi Direct, Messaging
,
YouTube
(videos
only),
Gmail
, or
Email
then follow the prompts.
DRAFT
I
nterna
l
U
se
O
nl
y
121
Photo Editor
The Photo editor application provides basic editing functions
for photos that you take on your device. Along with basic
image tuning like brightness, contrast, and color, it also
provides a wide variety of effects used for editing the photo.
1. From a Home screen, tap
Apps
➔
Photo editor
.
2. Tap
Select picture
to edit a picture in your Gallery.
– or –
Tap
Take a picture
to take a picture with the camera.
3. Tap the picture and it is loaded into the Photo editor.
4. Use the following Photo editor controls to edit your
photo:
Selection
: Tap the selection icon and then
tap
Magnetic
,
Lasso
,
Brush
,
Round
, or
Square
to set how to mark an area for cropping,
rotating, and so on.
• Tap to select a single area, to
add to a selected area, or to remove
part of a selected area.
Selection Size
: Set the size of the Grab selection
area. Drag the slider from small to large.
Inverse
: Select the entire picture except for the
selected area.
Undo
: Remove the last change.
Redo
: Restore a removed change.
Rotate
: Rotate a photo to the left or to the right
or create a mirror image of the photo.
Resize
: Touch and then drag the corners of the
photo to resize it.
Crop
: Tap to crop (cut-out) an area of a photo.
Color
: Set the
Auto adjustment
,
Exposure
,
Saturation
,
Contrast
,
Brightness
, and
Hue
of a
photo. You can also make it
Grey-scale
or add
a
Temperature
effect.

DRAFT
I
nterna
l
U
se
O
nl
y
Multimedia 122
5. When all updates to the photo have been made, tap
Save
. Use the keyboard to name the edited photo
and tap
OK
to save it.
6. While editing a photo, tap
Menu
to display the
following options:
• Select picture
: Open a new photo for editing.
• Take picture
: Open the Camera and take a new photo.
•Share via
: Send photos to another device or another person.
Options are: Bluetooth, Email, Gmail, Google+, Group Cast,
Messaging, Picasa, or Wi-Fi Direct.
•Set as
: Use this photo as a
Contact photo
, a
Home and lock
screens
,
Home screen wallpaper
, or
Lock screen wallpaper
image.
Media Hub
Samsung Media Hub is your one stop for the hottest movie
and TV content. With hundreds of titles available at your
fingertips, entertaining on the go has never been easier. You
can rent or purchase your favorite content and conveniently
watch anywhere. Featuring the stunning viewing quality
Samsung is known for, Samsung Media Hub is your gateway
to mobile video like you have never experienced it before.
Tip:
A shortcut to Media Hub appears on the main Home
screen by default.
Note:
Media Hub service requires a Samsung account and
depends on service availability.
1. From a Home screen, tap
Apps
➔
Media Hub
.
2. Read the End-User License Agreement (EULA), tap
I agree to the Terms and Conditions
, and then select
Accept
to continue or
Decline
to exit.
The Media Hub screen displays.
Effects
: Add various effects to your photo, such
as
Blur
,
Motion
,
Distortion
,
Filter
, or
Frames
.
Tools
: Copy and Paste to another image or to
the original image. You can use the Spot
healing option.

DRAFT
I
nterna
l
U
se
O
nl
y
123
3. To rent or buy media, you must have a Samsung
account. Tap
Menu
➔
My Profile
to sign in to your
Samsung account or to create an account. Follow the
prompts to complete log-in.
4. Browse content using these options:
•What’s New
: Recently-added titles for rent or purchase.
•Movies
: Movies you can rent or purchase.
• TV Shows
: TV shows you can rent or purchase.
•My Media
: Content you have previously purchased or rented.
5. When you find media you want to view, use these
options:
• View trailer
: View a short clip from the movie or show.
•Buy
: Purchase the media for unlimited viewing on your device.
Follow the prompts to enter payment details.
•Rent
: Purchase a time-limited download of the media. Follow
the prompts to enter payment details.
6. For additional information about Media Hub, tap
Menu
➔
Help
.
Media Hub Notices
•
Any media item (Media Content) may be rented or purchased after
you create an account in Media Hub.
•
Media Content that is downloaded may be viewed concurrently on
up to five (5) devices with Media Hub that are also registered to
the same account.
•
You may choose to remove a device from your account no more
than once every 90 days.
•
You may remove Media Content from a device as many times as
you like. You will have the ability to re-download the Media
Content at a later point in time subject to content re-download
availability and studio permissions.
•
You MUST be in network coverage to license Media Content you
have acquired through the Service.
•
You can use 3G, 4G, or Wi-Fi connectivity in order to download
Media Content.
•
Unlike purchased Media Content, rented Media Content will be
viewable on only 1 device in your account.
•
Media Content is downloaded and saved onto the SD card.

DRAFT
I
nterna
l
U
se
O
nl
y
Multimedia 124
•
Your Media Content may pause/stop or not download in networks
where there is a weak signal.
•
You may begin watching downloaded Media Content as soon as
a) license acquisition has occurred and b) sufficient amount of the
Media Content has been buffered.
•
You must finish watching rented Media Content within 24
consecutive hours of start of playback.
–
Stopping, pausing, or restarting rented Media Content does not
extend the available viewing time.
–
In no event will rented Media Content be available for a period
of more than thirty (30) days (or shorter on a title-by-title basis)
after the Media Content has been rented (e.g., if you begin
viewing rented Media Content on the 29th day after the rental
transaction, but do not finish viewing the entire title, that rented
Media Content may not be available for the entire twenty-four
(24) consecutive hour period if such period would extend the
viewable time beyond the thirty (30) day rental window).
•
You cannot play any media content downloaded from Media Hub
through any output on your mobile device, including All Share.
Play Movies & TV
This application allows you to connect to the Play Store,
download a movie and then watch it instantly.
Choose from thousands of movies, including new releases and
HD titles in the Play Store and stream them instantly on your
Android device or tablet.
Movies, previously rented via the Play Store are automatically
added to your My Movies library across your devices.
Learn more about Google Play Movies at:
http://play.google.com/about/movies
.
1. From a Home screen, tap
Apps
➔
Play Movies & TV
.
2. Log on to your Google account if you have not already
done so. A list of videos sorted on the SD card displays
in the Video list.
3. Following the on-screen instructions for renting and
viewing movies.
4. Tap the
MOVIES
tab to view movies you have rented.
5. Tap the
TV SHOWS
tab to view shows you have rented.
6. Tap the
PERSONAL VIDEOS
tab to view movies you have
on your device or memory card.
DRAFT
I
nterna
l
U
se
O
nl
y
125
Play Music
Also known as Google Music, allows you to browse, shop,
and playback songs purchased from the Play Store. The
music you choose is automatically stored in your Google
Music library and instantly ready to play or download.
Access the new music tab from within your Play Store
application.
The Music application contains a music player that plays
music and other audio files that you copy from your computer.
Accessing the Music App
1. From a Home screen, tap
Apps
➔
Play Music
.
The Play Music app searches your online library and
your device’s internal storage for music and playlists.
This can take from a few seconds to several minutes,
depending on the amount of new music added since
you last opened the application.
2. If prompted, follow the on-screen instructions to link
your current account to Google Play Music.
3. Tap an on-screen account to add it or select
Add
account
to use a new account.
4. At the free songs screen, select either
Get free songs
or
Skip
.
•
Get free songs are downloaded via either the Internet or Play
Store.
•
Follow the on-screen download and installation instructions.
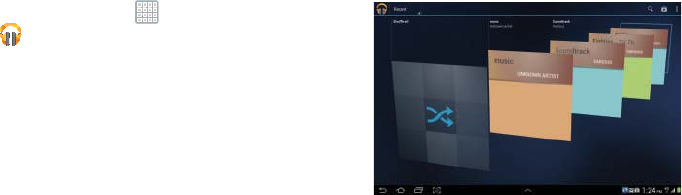
5. Swipe left or right to browse through your new and
available music. Music, albums, and artists are
grouped into categories.
It then displays a carousel view of your new and recent
music, organized by album.
6. Swipe left or right to spin the carousel and browse
through your new and recent music.
DRAFT
I
nterna
l
U
se
O
nl
y
Multimedia 126
7. Tap an album to open it.
8. Return to the Library screen from most other screens
in the Music application by tapping the Music
application icon
Music notification icon
at the
bottom-left of the screen.
Changing Library View
You can change the way you view the contents of your
library.
1. From a Home screen, tap
Apps
➔
Play Music
.
2. While in a selection or screen, tap (near the
top-left of the Application bar) or the tab name to back
up to the main Music App menu.
3. Tap the name of the current view, such as
Recent
, near
the top-left of the Application bar.
4. Tap an option to set how you view your library.
The choices are:
Recent
,
Albums
,
Artists
,
Songs
,
Playlists
, or
Genres
.
Tab Options
There are various options available from the various tabs:
1. From a Home screen, tap
Apps
➔
Play Music
.
2. From the upper-left of the application window, tap
Options
to access an available option.
• Recent:
to display the most recently played songs and albums
•Albums:
Play, Add to queue, Add to playlist, More by artist,
Shop for artist, or Search.
•Artists:
Play, Add to queue, Add to playlist, Shop for artist, or
Search.
•Songs:
Play, Add to queue, Add to playlist, Shop for artist,
Delete, or Search.
• Playlist:
Play, Add to queue, Rename, or Delete.
•Genres:
Play, Add to queue, or Search.
Note:
The contents of your library display in a scrolling grid,
list, or carousel, depending on the view.
DRAFT
I
nterna
l
U
se
O
nl
y
127
Searching for Music
1. From a Home screen, tap
Apps
➔
Play Music
.
2. Tap
Search
.
3. Type the name of an artist, album, song, or playlist.
4. Tap a matching song to play it, tap a matching album,
artist or playlist to view a list of its’ songs.
– or –
Tap
Options
next to an item in the list to play it,
add to queue, add it to a playlist, or shop for other
music by the artist online.
Changing Music Settings
1. From a Home screen, tap
Apps
➔
Play Music
.
2. Tap
Menu
. The following options display
depending on the library view:
• Shuffle all
: Play all songs in a random order.
• Hide now playing bar / Show now playing bar
: Hide or show
the Now Playing bar that displays at the bottom of the screen.
You can return to the
Now playing
screen from other Music
screens by tapping the name of the current song in the Now
Playing bar.
• Choose on-device music
: In addition to playing the music that
you add to your online library, you can play music stored on
your device’s internal storage. Then you can listen to music
when you have no Internet connection. To do this, make some
of your online music available offline.
For more information, refer to
“Making Online Music
Available Offline”
on page 132.
• On device only
: Display only the music that is available offline
and only on the device.

DRAFT
I
nterna
l
U
se
O
nl
y
Multimedia 128
• Hide labels / Show labels
: Hide or show labels. This option is
not available in all library views.
•Settings
: Provides access to the Play Music settings.
•Help
: Displays application help information.
Listening to Music
You can listen to music by using your device’s built-in
speakers, through a wired headset, or through a wireless
Bluetooth stereo headset. For more information, refer to
“Bluetooth” on page 154.
Press the
Volume Key
on the side of the device
to activate on-screen volume control, then touch and drag on
the scale to set volume. You can also press the Volume Key
to adjust playback volume.
Options While Selecting a Song
The following options are available for playing songs,
albums, or playlist, finding more information about artists,
finding more music, and deleting songs:
1. From a Home screen, tap
Apps
➔
Play Music
.
2. Select an album or song.
3. Tap the label area
Options
under an item.
The following options display depending on the item
view:
•Play
: Plays the selected song, album, or playlist.
•Add to queue
: Add the song to a new playback queue.
•Add to playlist
: Add the song to a new playlist or an existing
playlist.
•More by artist
: Searches for more songs by the same artist.
• Shop for artist
: Launches Google to search for more songs by
the selected artist.
• Delete
: Delete the song.
•Search
: Search Internet, Music player, Play Music, or YouTube
for an artist, album, or song.
DRAFT
I
nterna
l
U
se
O
nl
y
129
Playing Music
1. From a Home screen, tap
Apps
➔
Play Music
.
2. Tap a song in your library to listen to it.
– or –
While viewing a list of songs, tap
Options
next to a
song and select
Play
.
– or –
While viewing a list of albums, artists, playlists, or
genres, locate the label area
Options
under an
item and tap
Play
.
The
Now playing
screen opens and the song you
selected or the first song in the album or playlist starts
to play. The tracks in the current list play in order until
you reach the end of the list (unless you choose a
repeat option). Otherwise, playback stops only if you
stop it, even when you switch applications.
Note:
If you navigate away from the
Now playing
screen in the
Music application, the Now Playing bar displays at the
bottom of the screen. You can use this to control
playback or tap
Menu
➔
Hide now playing bar
.
Displaying the Now Playing Screen
If you navigate away from the
Now playing
screen, to return
to the
Now playing
screen from other Music screens:
Tap the name of the current song in the Now Playing
bar.
– or –
Tap the Music notification icon in the System Bar
(bottom-right of screen), and from the Status Details
panel, select the song title.
You can also pause and resume playback and skip to
the next or previous song in the Status Details panel.
For more information, refer to “Notifications” on
page 32.
DRAFT
I
nterna
l
U
se
O
nl
y
Multimedia 130
Options While Playing a Song
When you play a song, the
Now playing
screen displays.
There are various options and controls available while a song
is playing:
1. From a Home screen, tap
Apps
➔
Play Music
.
2. Tap an album or song. For more information, refer to
“Playing Music” on page 129.
The
Now playing
screen displays.
3. Tap the
SONG
title to add the song to a playlist.
4. Tap the
ARTIST
name to view information about the
artist associated with this song.
5. Tap
ALBUM
to list and play the songs on the album.
6. Tap
Menu
to display the following options:
•Clear queue
: Erases the current playback queue.
•Save queue
: Stores the current playback queue.
•Settings
: Displays the Music settings screen.
•Help
: Displays the application’s Help information.
7. Tap
Options
➔
Add to playlist
to add the song to a
playlist.
8. The
Now playing
screen contains several buttons that
you can tap to control the playback of songs, albums,
and playlists:
Tap Thumbs up or Thumbs down to add the
song to a Thumbs up or Thumbs down playlist.
Tap to go back to the previous song. Touch and
hold to scan backward through the current
song.
Tap to pause playback.
Tap to resume playback
DRAFT
I
nterna
l
U
se
O
nl
y
131
Creating a Playlist
1. From a Home screen, tap
Apps
➔
Play Music
.
2. Tap the
Playlists
library view.
3. Tap
Menu
➔
New playlist
. The New playlist pop-up
displays.
4. Tap the
NAME
field to enter a name for the playlist.
5. Tap
OK
to save the new playlist.
Adding Songs To a Playlist
To add a song to a new or existing playlist while the song is
playing:
1. From a Home screen, tap
Apps
➔
Play Music
.
2. Tap an album or song list and play a song.
3. Tap ➔
Options
➔
Add to playlist
field (at the
left of the screen).
•
If the
Add to new playlist
pop-up displays, tap the
NAME
field
to enter a name for the playlist.
4. Select the existing playlist. The playlist is saved with
the song added to it.
Tap to advance to the next song. Touch and hold
to scan forward through the current song.
When Shuffle mode is enabled, songs play in
random order. When disabled, songs play in the
order they appear in List view.
Tap to repeat the current song,
repeat all songs, or disable repeat mode.
DRAFT
I
nterna
l
U
se
O
nl
y
Multimedia 132
Playing, Renaming, or Deleting a Playlist
To play, rename, or delete a playlist:
1. From a Home screen, tap
Apps
➔
Play Music
.
2. Display the
Playlists
library view.
3. Tap next to a playlist title.
•
Tap
Play
to play the songs in the playlist.
Note:
Renaming and Deleting is only available with end-user
created playlists and not the device default entries.
•
Tap
Add to queue
to add the current playlist files to the queue.
•
Tap
Rename
and use the keyboard to enter a new name for
the playlist.
•
Tap
Delete
and then tap
OK
to delete the playlist. Only the
playlist is deleted. To delete individual songs, see
“Options
While Selecting a Song”
on page 128.
Shopping for Music at the Play Store
To visit the Google Play
TM
Store where you can find and buy
music:
1. From a Home screen, tap
Apps
➔
Play Music
.
2. Tap
Play Store
in the Application Bar.
The Google Play Store music section displays.
– or –
Tap
Menu
➔
Help
➔
Music
to view information
about finding and buying music.
Making Online Music Available Offline
In addition to playing the music that you add to your online
library, you can play music stored on your device’s internal
storage. Then you can listen to music when you have no
Internet connection. To do this, make some of your online
music available offline.
Tip:
You can also copy music directly from your computer to
your device. For more information, refer to “Synchronizing
with Windows Media Player” on page 160.
DRAFT
I
nterna
l
U
se
O
nl
y
133
To make your online music available offline on your device:
1. From a Home screen, tap
Apps
➔
Play Music
.
2. Change your library view to Albums, Artists, or
playlists. For more information, refer to “Changing
Library View” on page 126.
3. Tap
Menu
➔
Choose on-device music
and tap the
album or playlist you want to make available offline.
A green pin indicates that the item is already
available offline.
Gray pins appear next to the items you can make
available offline. A bar at the bottom of the screen
shows how much space is available on your device for
music and other files.
Dim green pins indicate songs or albums that you
copied directly from a computer to your device.
4. Tap the gray pin next to each item you want to make
available offline or tap a green pin to stop making it
available offline. You can switch to other views of your
library to make other kinds of items available offline as
well.
5. Tap
Done
in the bar at the bottom of the screen.
The Music application starts downloading the items to
your device.
Music Player
The Music Player plays
music and other audio files that you copy
from your computer.
The Music Player is an application that
can play music files. The music player supports files with
extensions AAC, AAC+, eAAC+, MP3, WMA, 3GP, MP4, and
M4A. Launching the Music Player allows you to navigate
through your music library, play songs, and create playlists
(music files bigger than 300 KB are displayed).
Playing Music
1. From a Home screen, tap
Apps
➔
Music Player
.
The Music Player application searches your device’s
internal storage for music and playlists. This can take
from a few seconds to several minutes, depending on
the amount of new music added since you last opened
the application. It then displays your music in several
ways.
DRAFT
I
nterna
l
U
se
O
nl
y
Multimedia 134
2. Tap
Songs
,
Playlists
,
Albums
,
Artists
,
Genres
,
Folders
,
Composers
,
Years
, or
Music square
from the left of the
screen to change the way you view the contents of
your library.
3. Scroll through the list and tap an entry to begin
playback.
4. Tap the Music application icon at the top-left of
the Application bar to return to the previous Music
screen.
Note:
The 5.1 channel sound effect works when earphones or
sound is connected through the headset jack only.
Managing Your Music
Searching for Music
1. From a Home screen, tap
Apps
➔
Music Player
.
2. Tap
Search
.
3. Type the name of an artist, album, or song.
Matching songs are displayed in a list below the search
box.
4. Tap a matching song to play it. Select a matching
album, or artist to view a list of its songs.
Making a Song a Ringtone
1. From a Home screen, tap
Apps
➔
Music Player
.
2. Tap
Menu
➔
Set as alarm tone
.
3. Tap the desired song.
4. Tap
Set
to assign the new ringtone.
Creating a Playlist
1. From a Home screen, tap
Apps
➔
Music Player
➔
Playlists
.
2. Tap
➔
New playlist
.
3. Select the name field to enter a name for the playlist.
4. Tap
OK
to save the new playlist.
DRAFT
I
nterna
l
U
se
O
nl
y
135
Renaming a Playlist
1. From a Home screen, tap
Apps
➔
Music Player
.
2. Tap
Playlists
, select a playlist, and then tap
Menu
➔
Rename playlist
.
3. Tap the name field to enter a new name for the playlist.
4. Tap
OK
to save the new playlist.
Adding Songs to Playlists
1. From a Home screen, tap
Apps
➔
Music Player
.
2. Tap
and select a playlist.
– or –
Tap
Playlists
, select a playlist, and then tap
Add music
.
All songs are displayed.
3. Tap
next to each song you want to add or next to
Add all
to add all songs to the playlist.
The songs appear under the playlist to the right of the
songs list.
4. Tap
Done
to save the playlist.
Removing Songs from Playlists
1. From a Home screen, tap
Apps
➔
Music Player
.
2. Tap
and select a playlist.
All songs are displayed to the left of the playlist and the
songs in the playlist are displayed on the right, under
the playlist name.
3. Tap
to remove a song from the playlist.
4. Tap
Done
to save the playlist.
Changing the Order of a Playlist
1. From a Home screen, tap
Apps
➔
Music Player
.
2. Tap
Playlists
and select a playlist.
3. Tap
Reorder
to change the order of the songs.
Tap the grid on an entry and drag the entry to a
new position in the list.
4. Tap
Done
to change the order and save the playlist.

DRAFT
I
nterna
l
U
se
O
nl
y
Multimedia 136
Playing a Playlist
1. From a Home screen, tap
Apps
➔
Music Player
.
2. Display the
Playlists
library view.
3. Tap
Favorites
,
Most played
,
Recently added
, or tap a
playlist title that you created.
4. Select a song to start playing the playlist at that song.
Deleting a Playlist
1. From a Home screen, tap
Apps
➔
Music Player
.
2. Tap
Playlists
and select a playlist.
3. Tap
Delete
in the Application bar.
4. Tap the box next to a playlist title. A check mark
indicates the playlist is to be deleted.
5. Tap
Remove
➔
OK
to delete the selected playlist.
Changing Music Settings
1. From a Home screen, tap
Apps
➔
Music Player
.
2. Tap
Menu
to display the following options:
• Delete
: Tap the box for any song or album you want to delete or
tap the box for
Select all
to select every song or album. A
check mark indicates the song or album is to be deleted.
Tap
Delete
to delete the selected items.
•Share via
: Share your music by using Group Cast, Bluetooth,
Wi-Fi Direct, Messaging, Gmail, or Email. Select the songs you
want to share and tap
Share
.
• Set as alarm tone
: Choose a song and tap
Set
to use the song
as an alarm tone.
•Settings
: The following settings display:
Advanced
–
Sound settings
: Choose
SoundAlive
and
Play speed
settings.
–
Lyrics
: Display the lyrics of the song, if available.
–
Music auto off
: Set the option Off or set your music to turn off
automatically After 15 mins, After 30 mins, After 1 hour,
After 1 hour 30 mins, or After 2 hours.

DRAFT
I
nterna
l
U
se
O
nl
y
137
Music menu
–
Music menu
: Enable or disable the music display options that
appear on the main music screen. A check mark
next to
an option means that it is enabled.
Listening to Music
You can listen to music by using your device’s built-in
speakers, through a wired headset or through a wireless
Bluetooth stereo headset. For more information, refer to
“Bluetooth” on page 154.
Press the
Volume Key
on the side of the device
to activate on-screen volume control, then touch and drag on
the scale to set volume. You can also press the Volume Key
to adjust playback volume.
Playing Music
To play a song:
1. From a Home screen, tap
Apps
➔
Music Player
.
2. Select a song in your library to listen to it.
– or –
While viewing a list of albums or genres, tap the album
thumbnail and then tap a song in the list of songs on
the album.
The song you tap starts to play. The tracks in the
current list play in order until you reach the end of the
list (unless you choose a repeat option). Otherwise,
playback stops only if you stop it, even when you
switch applications.
Accessing the Music Player
If you navigate away from the Music Player application and
music is playing, you can change songs or easily return to
the Music Player:
1. Tap the Music notification icon in the System Bar
(bottom-right of the screen).
2. In the Status Details, tap the song title to display the
Music Player. You can also pause and resume playback
and skip to the next or previous song in the panel. For
more information, refer to “Notifications” on page 32.
DRAFT
I
nterna
l
U
se
O
nl
y
Multimedia 138
Music Player Options
Music Player plays
music and other audio files that you copy from
your computer.
1. From a Home screen, tap
Apps
➔
Music Player
.
2. Tap a song or playlist to begin playback.
The music player displays below (portrait mode) or to
the right (landscape mode) of the music listing.
3. Tap the music player to enlarge it and tap the screen to
display the sound and playlist controls.
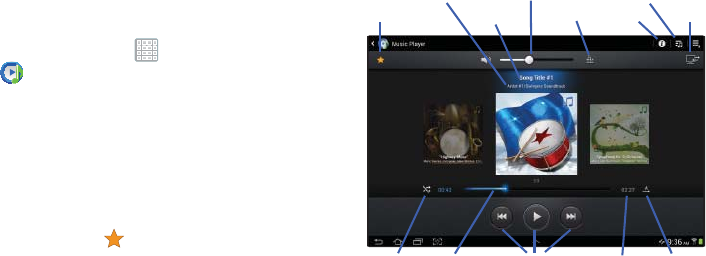
4. During playback, use the sound and playlist controls:
•Favorite
: Tap the star to mark the current song as a
favorite.
•Volume
: Tap to toggle Vibration or Silent mode and Sound
mode, then touch and drag on the scale to set volume. You can
also press the Volume Key on the side of the device to adjust
playback volume.
• SoundAlive
: Tap to view and set SoundAlive options.
•Info
: Tap to view information about the current song.
•List
Mode
: Tap to switch to the list of songs.
• Select Device
: Use AllShare to stream music to another
device. For more information, refer to
“AllShare Play”
on
page 164.
Info
List Mode
Song Title
Artist / Album
Favorite
Volume
SoundAlive
Shuffle Playback Repeat
Progress
Bar
Time
Indicators
Select
Device
Controls
DRAFT
I
nterna
l
U
se
O
nl
y
139
• Shuffle
: When enabled, songs play in random order. When
disabled, songs play in the order they appear in List view.
• Progress Bar
: Touch and drag the end of the progress bar to
scan forward or backward through the current song.
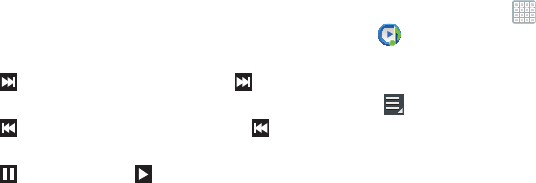
• Playback Controls
: These buttons control the playback of
songs:
–
Tap to advance to the next song. Touch and hold to
scan forward through the current song.
–
Tap to go back to the previous song. Touch and hold
to scan backward through the current song.
–
Tap to pause playback. Tap to resume playback.
• Time Indicators
: The time indicators show, in minutes and
seconds, how much of the song has played (left) and the length
of the song (right).
• Repeat
: Tap to repeat the current song, repeat all songs, or
disable repeat mode.
Options While Playing a Song
There are various options and controls available while a song
is playing:
1. From a Home screen, tap
Apps
➔
Music Player
, tap a song or an album, and then
a song.
2. Tap the music player to enlarge it.
3. Tap
Menu
to display the following options:
• Add to playlist
: Add the song to a new playlist or an existing
playlist.
• Via Bluetooth
: Play the current song by using a Bluetooth
device.
•Share via
: Share the current song by using Group Cast,
Bluetooth, Wi-Fi Direct, Messaging, Gmail, or Email.
• Set as alarm tone
: Use the current song as an alarm tone.
• Settings
: Displays Music Player settings.
For more information, refer to
“Changing Music Settings”
on page 136.
DRAFT
I
nterna
l
U
se
O
nl
y
Multimedia 140
T-Mobile TV
T-Mobile TV is an application that allows you to get live TV
and Video on Demand.
1. From a Home screen, tap
Apps
➔
(
T-Mobile TV
). The T-Mobile Terms and Conditions
page displays.
Note:
A data plan is required to use this feature. Charges may
apply. Please contact your service provider for further
details.
2. Tap
Accept
if you accept the Terms and Conditions.
– or –
Tap
Exit
to close the application.
Note:
T-Mobile TV must be initialized over a cellular network
before it can be used. During this initial registration
process, any current Wi-Fi connections must be
disabled.
3. Tap
Disable Wi-Fi
if you currently have an active Wi-Fi
connection.
4. Follow the on-screen setup instructions.
5. Tap any of the following categories to begin viewing:
Live TV
,
On Demand
,
My Media
,
More Info
,
Browse
, or
Live Channels
.
DRAFT
I
nterna
l
U
se
O
nl
y
141
Section 8: Web
This section describes the various Internet networking
applications available on your device such as Google+ and
Internet.
Google+
Share updates and see what is going on around you with
Google+ for mobile.
•
Share your thoughts and location.
•
Instantly upload your photos and videos as you take them.
•
Get updates from your circles in the stream.
•
Check in to a place.
•
Make plans on-the-go with group messaging.
•
View posts from people around you.
To get started:
1. From a Home screen, tap
Apps
➔
Google+
.
The Google+ home screen displays.
2. Tap
Menu
➔
Help
and then touch a topic to learn
more about using Google+.
Internet
Your device is equipped with a full HTML Browser that allows
you to access the Internet.
Tip:
Internet displays by default as a Primary shortcut on the
Home screen.
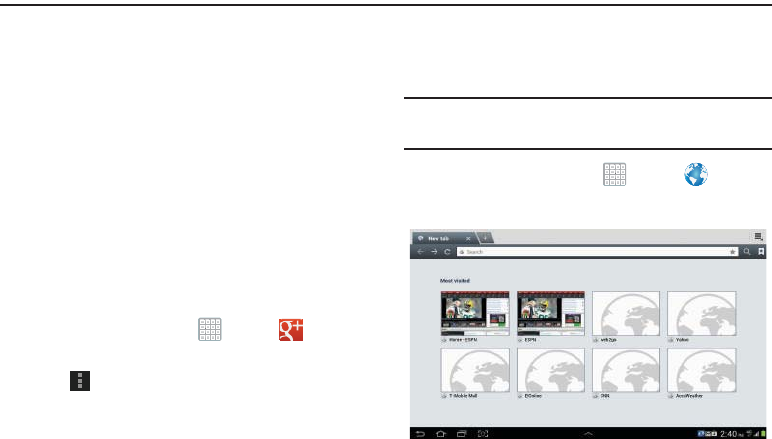
From a Home screen, tap
Apps
➔
Internet
.
The Most visited screen displays.

DRAFT
I
nterna
l
U
se
O
nl
y
Web 142
3. Tap an entry, such as Google. The Google home screen
displays.
Navigating the Internet
1. To select an item, tap an entry.
2. To scroll through a website, sweep the screen with
your finger in an up or down motion.
3. Tap
to return to the previous page.
The following options are available for Internet navigation.
Command Keys
•
Tap
Back
or to return to the previous page.
•
Touch and hold
Back
to display a list of Most visit pages.
•
Tap
Forward
to go forward to a recent page.
•
Tap
Refresh
to reload the current page.
Touching and Dragging
•
Touch and drag your finger on the screen to navigate pages and
to reposition pages within the screen.
Entering Text in a Field
•
While browsing, tap a text field to display the virtual QWERTY
keyboard to enter text.
Zoom
•
Tap the screen twice to zoom in or out.
• Use two fingers, such as your index finger
and thumb, to zoom out by making an
inward pinch motion on the screen. To zoom
in, make an outward motion by sweeping your fingers out.
Tip:
For convenient browsing, you can rotate the device to
landscape mode.
Selecting Items On a Page
While browsing, use gestures and menus to navigate:
•
Tap an item to select it.
•
Tap a hyperlink to follow the link.
•
Touch and hold on a hyperlink for these options:
–
Open
: Open the linked page.
–
Open in new tab
: Open a new window to display the linked
page.
–
Save link
: Save the linked page to Download history.
–
Copy link URL
: Save the link’s URL to the clipboard.
–
Select text
: Copy the link text to the clipboard.
DRAFT
I
nterna
l
U
se
O
nl
y
143
•
Touch and hold an image for the additional options:
–
Save image
: Download an image. View downloaded images in
Gallery.
–
Copy image
: Copy an image to the clipboard.
–
View image
: View the image source.
–
Set as wallpaper
: Use the image as your home screen
wallpaper.
Using Browser Windows
You can have multiple windows open at one time and easily
switch between windows.
To add a new window:
1. From a Home screen, tap
Apps
➔
Internet
.
2. To open a new window, tap
New window
at the
top of the screen.
3. To switch to another open window, tap its tab at the top
of the screen.
To delete an existing window:
To delete an open window, tap the tab at the top of the
screen, and then tap .
Entering a URL
Access a website quickly by entering the URL.
1. From a Home screen, tap
Apps
➔
Internet
.
2. Tap the
URL
field at the top of the screen, then enter
the URL using the virtual QWERTY keyboard.
As you enter characters, potential matches display.
Note:
Use the
Delete
key to clear the URL field, if
necessary.
3. Tap a match to complete the URL.
– or –
Tap to proceed to the desired Web address.
Go
DRAFT
I
nterna
l
U
se
O
nl
y
Web 144
Copying Fields or Text
Copy information from a webpage to the clipboard for
pasting, searching, or sharing.
Selecting, Copying, and Pasting Text
1. From a Home screen, tap
Apps
➔
Internet
.
2. Browse to a webpage.
3. On the webpage, touch and hold on the text until you
see the text you want highlighted, then stop tapping
the screen.
The text is highlighted.
4. Touch and drag the tabs to the left or right to
select more or less text.
5. Tap
Copy
at the top of the screen to copy the selected
text or tap
Done
to stop.
6. To paste the copied text, navigate to the desired field
(or to another application), then touch and hold in a text
field and tap
Paste
in the pop-up.
Copying and Pasting a Hyperlink or URL
1. From a Home screen, tap
Apps
➔
Internet
.
2. Browse to a webpage.
3. Touch and hold on the link or URL, then tap
Copy link
URL
on the pop-up menu.
4. To paste the copied link or URL, navigate to the desired
field (or to another application), then touch and hold in
a text field and tap
Paste
on the pop-up menu.
Using Bookmarks
While browsing, bookmark a site to quickly access it later.
Creating a bookmark
1. From a Home screen, tap
Apps
➔
Internet
.
2. Browse to a website, then tap
Add bookmark
.
The
Add bookmark
options list displays. Confirm the
Name
and URL
Address
for the bookmark.
3. In the
Account
field, tap the drop-down menu, and tap
Local
or an account.
4. In the
Folder
field, tap the drop-down menu, and select
Homescreen
,
Bookmarks
, or a
Other folder
.
5. Tap
OK
to save the bookmark.
A gold star displays on the Bookmarked page.

DRAFT
I
nterna
l
U
se
O
nl
y
145
Accessing Bookmarks and History
Launch a bookmarked page or reload recent pages.
1. From a Home screen, tap
Apps
➔
Internet
.
2. Tap
Bookmarks
,
History
, and
Saved pages
.
3. On the
Bookmarks
tab, use these options:
•
Tap a bookmark to load the page.
•
Touch and hold on a bookmark for these options:
–
Open
: Open the bookmarked page.
–
Open in new tab
: Open the linked page in a new window.
–
Edit bookmark
: Make changes to the bookmark description.
–
Add shortcut to home screen
: Create a bookmark on the
Home screen.
–
Share link
: Use Bluetooth, Email, Gmail, Google+, Messaging,
or Wi-Fi Direct to send the link.
–
Copy link URL
: Save the link’s URL to the clipboard.
–
Delete bookmark
: Remove the bookmark.
–
Set as homepage
: Assign the bookmarked link as the home
page.
4. On the
History
tab, tap
Today
,
Yesterday
,
Last month
,
Older
, or
Most visited
to use these options:
•
Tap a page to reload it.
•
Tap the next to a page to bookmark it. Tap a gold
star next to a page to remove the bookmark.
•
Touch and hold on a page for these options:
–
Open
: Open the webpage.
–
Open in new tab
: Launch the webpage in a new window.
–
Add bookmark/Remove from Bookmarks
: Bookmark the
page or remove the bookmark for this page.
–
Share link
: Use Bluetooth, Email, Gmail, Google+, Messaging,
or Wi-Fi Direct to send the link.
–
Copy link URL
: Save the link’s URL to the clipboard.
–
Remove from history
: Remove the record of this page.
–
Set as homepage
: Assign the bookmarked link as the home
page.
5. On the
Saved pages
tab, use these options:
•
Tap a page to reload it.
•
Touch and hold on a page and then select
Delete saved page
to remove the page from Saved pages.

DRAFT
I
nterna
l
U
se
O
nl
y
Web 146
Internet Menu
While viewing a webpage, tap
Menu
for the following
options:
•
New tab
: Open the webpage in a new window, under a new tab.
•
New incognito tab
: Open the webpage in a new window, under a
new tab, and the pages you view in the new window will not
appear in your browser history or search history. See the
on-screen explanation of
going incognito
.
•
Add shortcut to home screen
: Add the URL for this webpage as
a shortcut on the first home screen.
•
Share page
: Use Bluetooth, Email, Gmail, Google+, Messaging,
or Wi-Fi Direct to send the webpage URL.
•
Find on page
: Search for content on the current page.
•
Desktop view
: Your browser displays a website in a modified
format that makes it easier to read. Desktop view displays a
website the same way it would appear on a PC.
•
Save for offline reading
: Saves the webpage so you can read it
later even when offline.
•
Downloads
: View and manage recent downloads.
•
Print
: Print the current screen or page to a Samsung printer.
•
Settings
: Configure web settings.
Internet Settings
Use the browser settings to customize the browser.
1. From a Home screen, tap
Apps
➔
Internet
.
2. While viewing a webpage, tap
Menu
➔
Settings
.
Customize the Browser by using the following options:
General
• Set home page
: View and set the default first page that
displays when you launch Internet.
• Form auto-fill
: Enable or disable form auto-fill to complete
Internet forms with a single click.
• Auto-fill text
: If
Form auto-fill
is enabled, set up the following
information:
–
Full name
: Enter your name.
–
Company name
: Enter a company name.
–
Address line 1
: Enter your address.
–
Address line 2
: Enter any additional address information.
–
City/Town
: Enter your city and town.
–
County
: Enter your county.
–
Zip code
: Enter your ZIP code.
–
Country
: Enter your country.
DRAFT
I
nterna
l
U
se
O
nl
y
147
–
Phone
: Enter your telephone number.
–
Email
: Enter a valid email address.
Privacy and security
• Clear cache
: Delete content and databases stored on the
device.
• Clear history
: Delete the list of previously-visited pages.
• Show security warnings
: When enabled, the browser warns
you if there is a problem with a site’s security.
• Accept cookies
: When enabled, allows the browser to save
and read cookie information used by webpages.
• Clear all cookie data
: Delete cookie information saved to the
device.
• Remember form data
: When enabled, stores information you
enter into forms to make future forms easier.
• Clear form data
: Deletes saved form information.
• Enable location
: When enabled, sites you visit can request
access to your location.
• Clear location access
: Clear location access for all websites.
• Remember passwords
: When enabled, saves user names
and passwords for sites you visit, to make future visits easier.
• Clear passwords
: Clear all saved user names and passwords.
• Enable notifications
: Adjusts the notification status for Web
activity. Choose from: Always on, On demand, or Off.
• Clear notifications
: Removed Web notification access
information.
Accessibility
• Force zoom
: Override the website's request to control zoom.
• Text size
: Use
the Preview field and
the following controls to
configure text size:
–
Scale text up and down
: Scale the text size up or down using
a slider bar.
–
Zoom amount on double tap
: Set how much to zoom when
you double-tap the screen, from 175 to 225 percent.
–
Minimum font size
: Set the minimum font size, which can
range from 1 point to 24 points.
• Inverted screen rendering
: Use the Preview screen and the
following controls to configure inverted screen rendering:
–
Inverted rendering
: Enable the display of websites with
inverted colors – black becomes white and vice versa.
–
Contrast
: If Inverted rendering is enabled, use this slider to set
the contrast, which can range from 100 to 300 percent.
DRAFT
I
nterna
l
U
se
O
nl
y
Web 148
Advanced
• Select search engine
: Choose a search engine from Google,
Yahoo!, or Bing.
• Open in background
: When enabled, new windows open
behind the current window.
• Enable JavaScript
: When enabled, Internet automatically runs
JavaScript scripts on pages you visit.
• Enable plug-ins
: When enabled, Internet automatically loads
and runs plug-ins on pages you visit.
• Default storage
: Assigns the default storage location for
Browser downloads.
• Website settings
: View and manage settings for individual
websites.
•Default zoom
: Adjusts the zoom feature. Set to Far, Medium,
or Close.
• Open pages in overview
: When enabled, displays an overview
of newly-opened pages.
• Auto-fit pages
: When enabled, Internet automatically sizes
webpages to fit your device’s display.
• Block pop-ups
: When enabled, blocks pop-up windows.
• Text encoding
: Choose a default character set for webpages.
• Reset to default:
Clear all browser data and reset all settings to
the factory defaults.
Bandwidth management
• Preload search results
: Enable the browser to preload high
confidence search results in the background to help speed up
searches. Options are: Never, Only via Wi-Fi, or Always.
•Load images
: When enabled, images are automatically loaded
when you visit a page. When disabled, images are indicated by
a link, which you can tap to download the picture.
Labs
• Quick controls
: When enabled, the Application and URL bars
are hidden. To access the hidden controls, swipe inward from
the left or right edge of the screen to access Quick Controls. For
more information, refer to
“Internet Quick Controls”
on
page 149.
• Google Instant
: When enabled, you can use Google Instant
when you use Google Search to show results as you type.
Enabling this option can increase data use.
DRAFT
I
nterna
l
U
se
O
nl
y
149
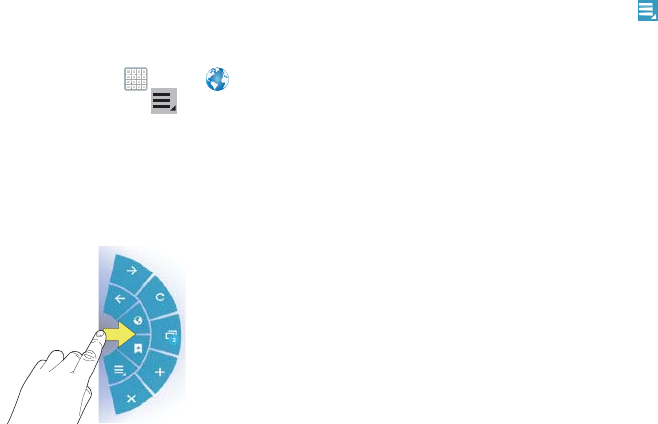
Internet Quick Controls
Use Quick Controls to maximize your viewing area while
browsing the internet.
1. From a Home screen, tap
Apps
➔
Internet
.
2. While viewing a webpage, tap
Menu
➔
Settings
➔
Labs
, and then tap
Quick Controls
to enable the
function.
The Application and URL bars are hidden.
3. Swipe inward from the left or right edge of the device
screen to access quick controls.
4. Without lifting your finger, move to an option and then
lift your finger to initiate the option.
5. To cancel, display the Quick controls and tap
Menu
➔
Settings
➔
Labs
and tap
Quick controls
to uncheck
it.

DRAFT
I
nterna
l
U
se
O
nl
y
Connections 150
Section 9: Connections
Your device includes features to connect to the internet and
to other devices by using Wi-Fi, Bluetooth, or a USB cable.
Wi-Fi
Wi-Fi is a wireless networking technology that provides
access to local area networks. Use your device’s Wi-Fi
feature to:
•
Access the internet for browsing or to send and receive email.
•
Access your corporate network.
•
Use hotspots provided by hotels or airports while traveling.
Wi-Fi communication requires access to an existing Wireless
Access Point (WAP). WAPs can be Open (unsecured, as with
most hotspots) or Secured (requiring you to provide login
credentials). Your device supports the 802.11 a/b/g/n Wi-Fi
protocol.
Configuring Wi
-
Fi Settings
For more information about configuring your device’s Wi-Fi
settings, see “Wi-Fi” on page 202.
Finding Wi
-
Fi Networks
You can have your device automatically notify you of
available networks. For more information, refer to “Advanced
Settings” on page 203.
Turning Wi
-
Fi On or Off
Turn your device’s Wi-Fi service on or off. When you turn
Wi-Fi service on, your device automatically searches for
available, in-range WAPs (Wireless Access Points).
By default, your device’s Wi-Fi feature is turned off
(deactivated). Activating Wi-Fi allows your device to discover
and connect to compatible in-range WAPs (Wireless Access
Points).
Turning Wi-Fi On:
1. From any screen, tap the Time in the Status Bar.
The Status Details displays.
2. Tap
Wi
-
Fi
to turn Wi-Fi On.
– or –
1. From a Home screen, tap
Apps
➔
Settings
.
DRAFT
I
nterna
l
U
se
O
nl
y
151
2. Under
Wireless and network
, on the Wi-Fi tab, tap the
OFF / ON
icon to turn Wi-Fi on.
Turning Wi-Fi Off:
1. From any screen, tap the Time in the Status Bar.
The Status Details displays.
2. Tap
Wi-Fi
to turn Wi-Fi Off.
Wi-Fi Status Indicators
The following icons indicate the Wi-Fi connection status:
Displays when Wi-Fi is active and there is an
available open wireless network.
Displays when Wi-Fi is connected, active, and
communicating with a Wireless Access Point
(WAP).
Scanning and Connecting to a Wi
-
Fi Network
When you turn on Wi-Fi, your device searches for available
Wi-Fi connections, then displays them on screen.
1. From any screen, tap the Time in the Status Bar.
The Status Details displays.
2. Tap
Wi-Fi
to turn Wi-Fi On. Your device automatically
scans for available Wireless Access Points.
3. When the scan is complete, select a Wi-Fi network to
connect. If the Wi-Fi network is open, your device
automatically connects. If the Wi-Fi network is
secured, enter the password at the prompt to connect.
4. Tap
Connect
.
Adding a Wi
-
Fi Network Manually
1. From a Home screen, tap
Apps
➔
Settings
.
2. Under
Wireless and network
, on the Wi-Fi tab, tap the
OFF / ON
icon to turn Wi-Fi on.
3. Tap
Add Wi-Fi network
, then enter network information:
• Network SSID
: Enter the name of the Wi
-
Fi Wireless Access
Point (WAP).
• Security
: Select the type of security used by the WAP.
DRAFT
I
nterna
l
U
se
O
nl
y
Connections 152
Note:
Depending on the Security protocol used by the WAP,
additional network information may be required, such as
a Password.
•Password
: If the WAP is secured, enter the password or hex
key.
4. Tap
Save
to save the settings.
Wi-Fi Sleep Policy
Specify when to disconnect from Wi-Fi.
1. From a Home screen, tap
Apps
➔
Settings
.
2. Under
Wireless and network
, tap
Wi-Fi
.
3. Tap
Menu
➔
Advanced
.
4. Tap
Keep Wi-Fi on during sleep
. Choose from:
Always
,
Only when plugged in
, or
Never (increases data usage)
.
Wi-Fi Direct
Wi-Fi Direct allows device-to-device connections so you can
transfer large amounts of data over a Wi-Fi connection.
1. From a Home screen, tap
Apps
➔
Settings
➔
More settings
➔
Wi-Fi Direct
.
2. Tap the
OFF / ON
icon to turn Wi-Fi Direct on.
If you are currently connected to a Wi-Fi network, a
prompt displays
Start Wi-Fi Direct operation. This will
turn off Wi-Fi client/hotspot operation
.
3. Tap
OK
to continue.
Your device will begin to search for other devices
enabled with Wi-Fi direct connections.
Note:
Confirm (
Wi-Fi Direct On
) appears at the bottom of
the screen.
4. Tap the Wi-Fi Direct field to display Available devices.
5. Enable Wi-Fi Direct (similar to Steps 1 and 2) on the
device to which you want to connect.

DRAFT
I
nterna
l
U
se
O
nl
y
153
Note:
The target device must also have Wi-Fi Direct service
active and running before it is detected by your device.
6. Tap
Scan
and select the single device name to begin
the connection process to another Wi-Fi Direct
compatible device.
7. Once the device you want to connect to is displayed,
tap it.
An Invitation to connect displays on the device to which
you want to connect.
8. On that target device, tap
Accept
.
You have 2 minutes to tap
Accept
on the device to
which you want to connect for the connection to be
made.
Once connected, the other device will show as
Connected
in your list of Wi-Fi Direct devices and the
icon will display at the bottom of your screen.
Sharing Information with a Connected Device
To share videos, photos, or other information with the
connected device, follow these steps:
1. View the information that you want to share. For
example, if you want to share a photo, find the photo in
your camera viewer or
Files
folder, then tap the
Share,
Share via,
or
Send via
option.
2. Tap the
Wi-Fi Direct
option.
The Wi-Fi Direct settings screen displays, Wi-Fi Direct
is turned on, and your device scans for other devices.
3. Tap a connected device name. For example,
Android_XXXX.
4. The other device displays a pop-up that indicates it is
receiving the file.
The file is transferred and can be found in
Files
within
the ShareViaWifi folder.
Note:
Depending on the other device model, the prompts and
shared folder information may differ.
DRAFT
I
nterna
l
U
se
O
nl
y
Connections 154
Bluetooth
Bluetooth is a short-range wireless communications
technology for exchanging information over a distance of
about 30 feet.
You do not need to line up the devices to send information
with Bluetooth. If the devices are in range, you can exchange
information between them, even if they are in different
rooms.
Configuring Bluetooth Settings
Configure your device’s Bluetooth settings. For more
information, refer to “Bluetooth” on page 204.
Turning Bluetooth On or Off
To turn Bluetooth on:
1. From a Home screen, tap
Apps
➔
Settings
.
2. Under
Wireless and network
, on the Bluetooth tab, tap
the
OFF / ON
icon to turn Bluetooth on.
Note:
When Bluetooth is on, the
Bluetooth
icon displays in
the Status Bar.
To turn Bluetooth on or off:
1. From a Home screen, tap
Apps
➔
Settings
.
2. Under
Wireless and network
, on the Bluetooth tab, tap
the
OFF / ON
icon again to turn Bluetooth off.
Bluetooth Settings
The Bluetooth settings menu allows you to set up many of
the characteristics of your device’s Bluetooth service,
including:
•
Entering or changing the name your device uses for Bluetooth
communication and description
•
Setting your device’s visibility (or “discoverability”) for other
Bluetooth devices
•
Displaying your device’s Bluetooth address
To access the Bluetooth Settings menu:
1. From a Home screen, tap
Apps
➔
Settings
.
2. Under
Wireless and network
, on the Bluetooth tab, tap
Menu.
3. Tap the
Rename device
,
Visible time-out,
and
Received
files
fields to set the options.
DRAFT
I
nterna
l
U
se
O
nl
y
155
To change your Bluetooth name:
1. Verify Bluetooth is active.
2. From the Bluetooth page, tap
Menu
➔
Rename
device
.
3. Enter a new name.
4. Tap
OK
to complete the rename process.
To change your Bluetooth visibility time out value:
1. Verify Bluetooth is active.
2. From the Bluetooth page, tap
Menu
➔
Visible
time-out
.
3. Select a time out value. Choose from: 2 min, 5 min,
1 hour, Never timeout.
To view files received via Bluetooth devices:
1. Verify Bluetooth is active.
2. From the Bluetooth page, tap
Menu
➔
Received
files
to display a list of files received from external
sources via Bluetooth communication.
3. Tap
to return to the previous page.
Pairing with a Bluetooth Device
Search for a Bluetooth device and pair with it, to exchange
information between your device and the target device.
Tip:
After pairing, your device and the target device recognize
each other and exchange information without having to
enter a passcode or PIN.
1. From a Home screen, tap
Apps
➔
Settings
.
2. On the Bluetooth field, tap the
OFF / ON
icon to
turn Bluetooth on.
3. Tap the
Bluetooth
tab and then enable the target
device’s discoverable or visible mode.
4. Tap
Scan
. Your device displays a list of discovered
in-range Bluetooth devices.
5. Tap
Stop
at any time to stop scanning.