Samsung Electronics Co SGHT999 Cellular/ PCS GSM/ WCDMA and AWS WCDMA Phone with WLAN, Bluetooth and RFID User Manual T Mobile SGH T989 Galaxy S II
Samsung Electronics Co Ltd Cellular/ PCS GSM/ WCDMA and AWS WCDMA Phone with WLAN, Bluetooth and RFID T Mobile SGH T989 Galaxy S II
Contents
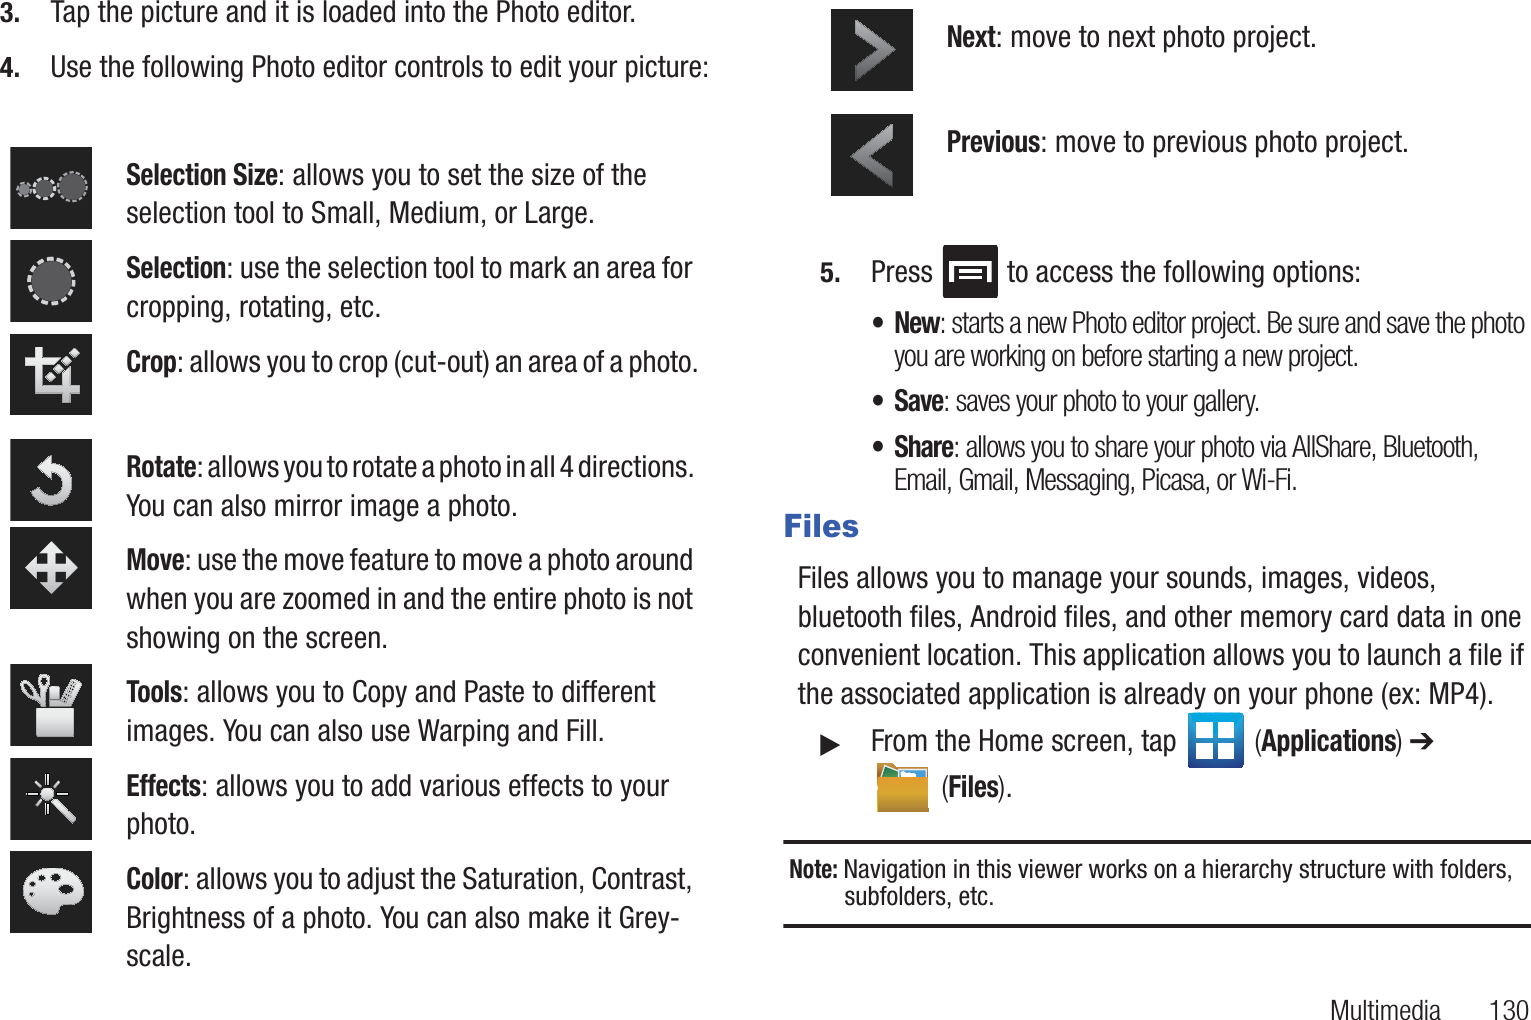
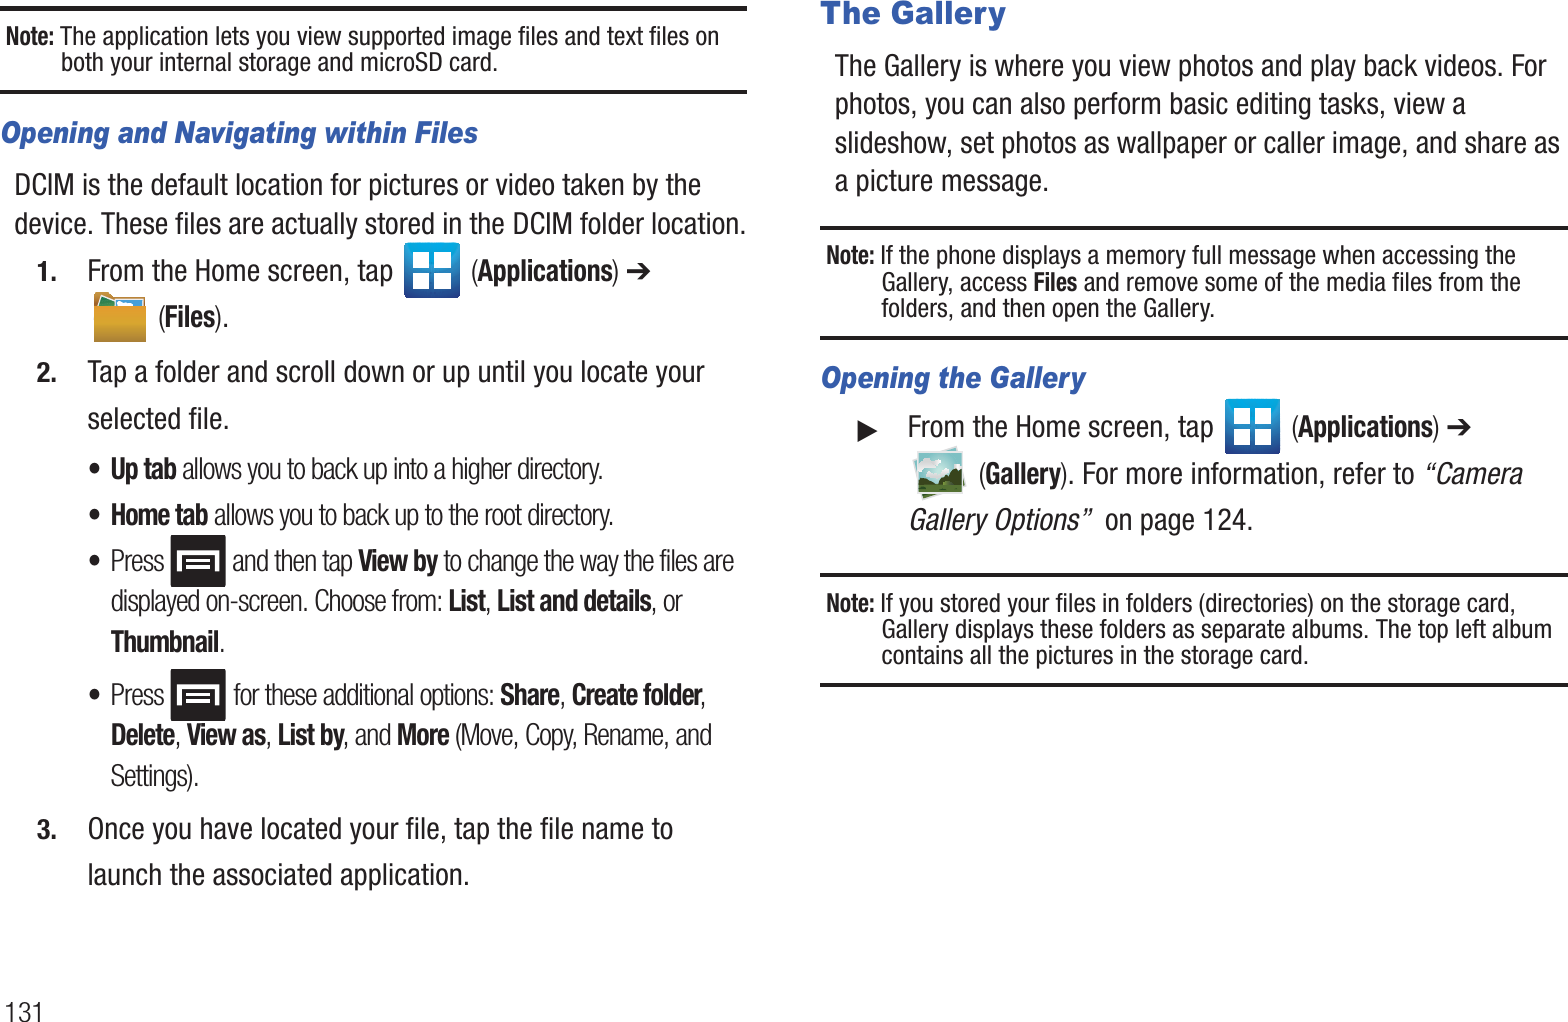
- 1. Users Manual 1
- 2. Users Manual 2
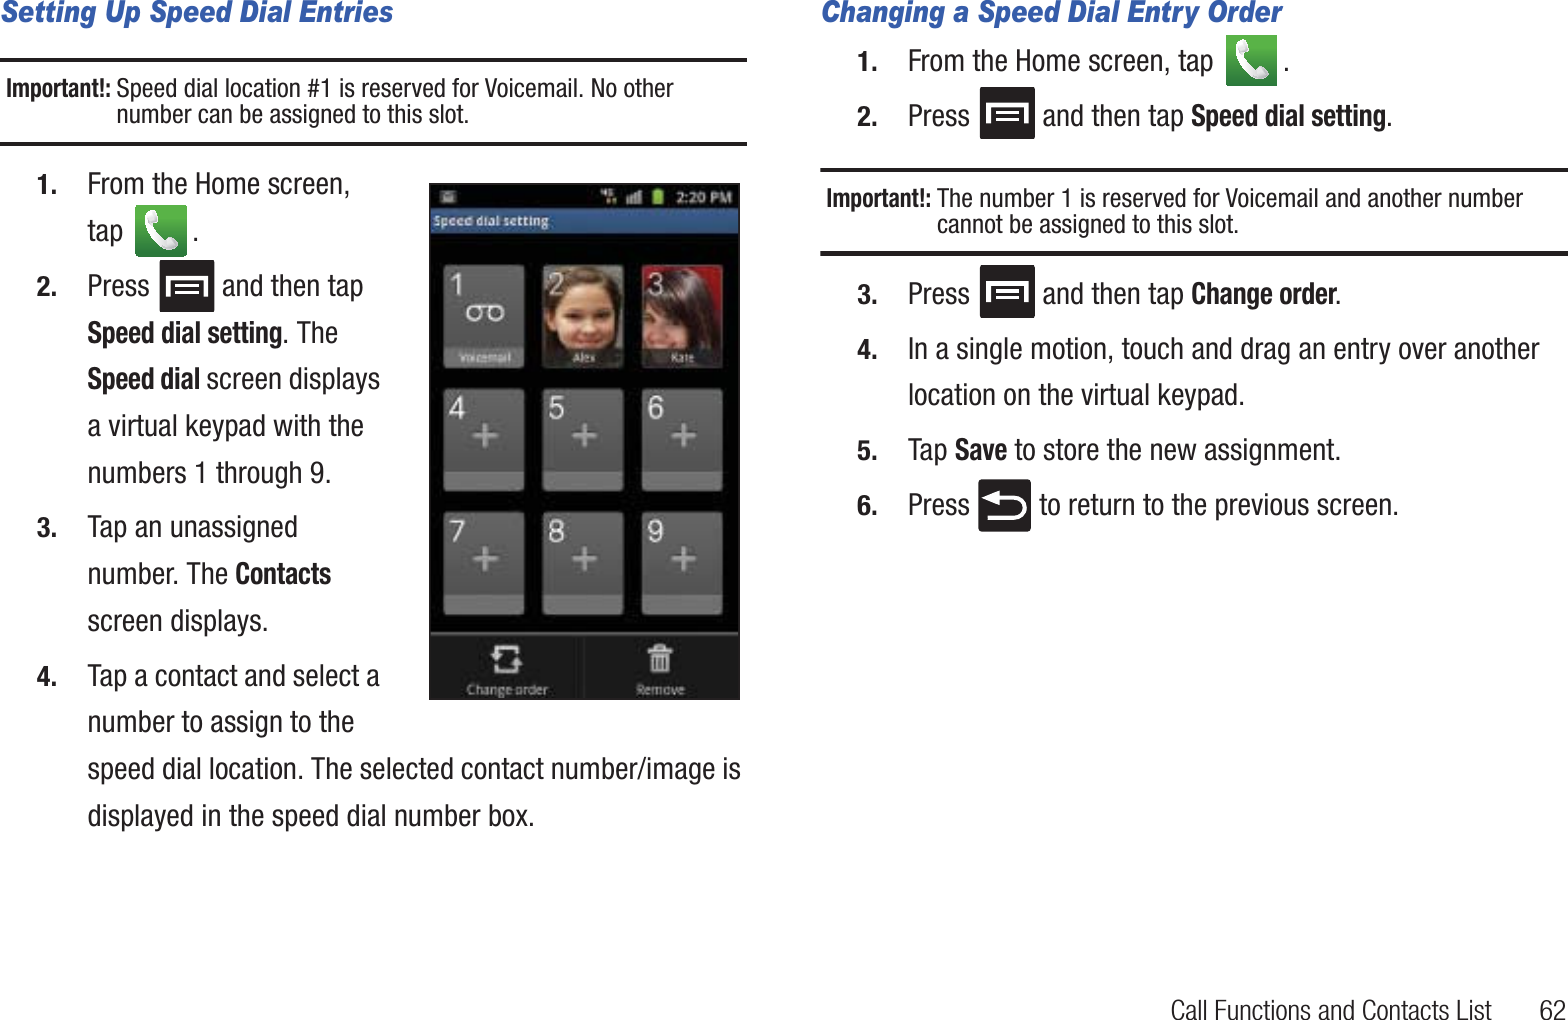
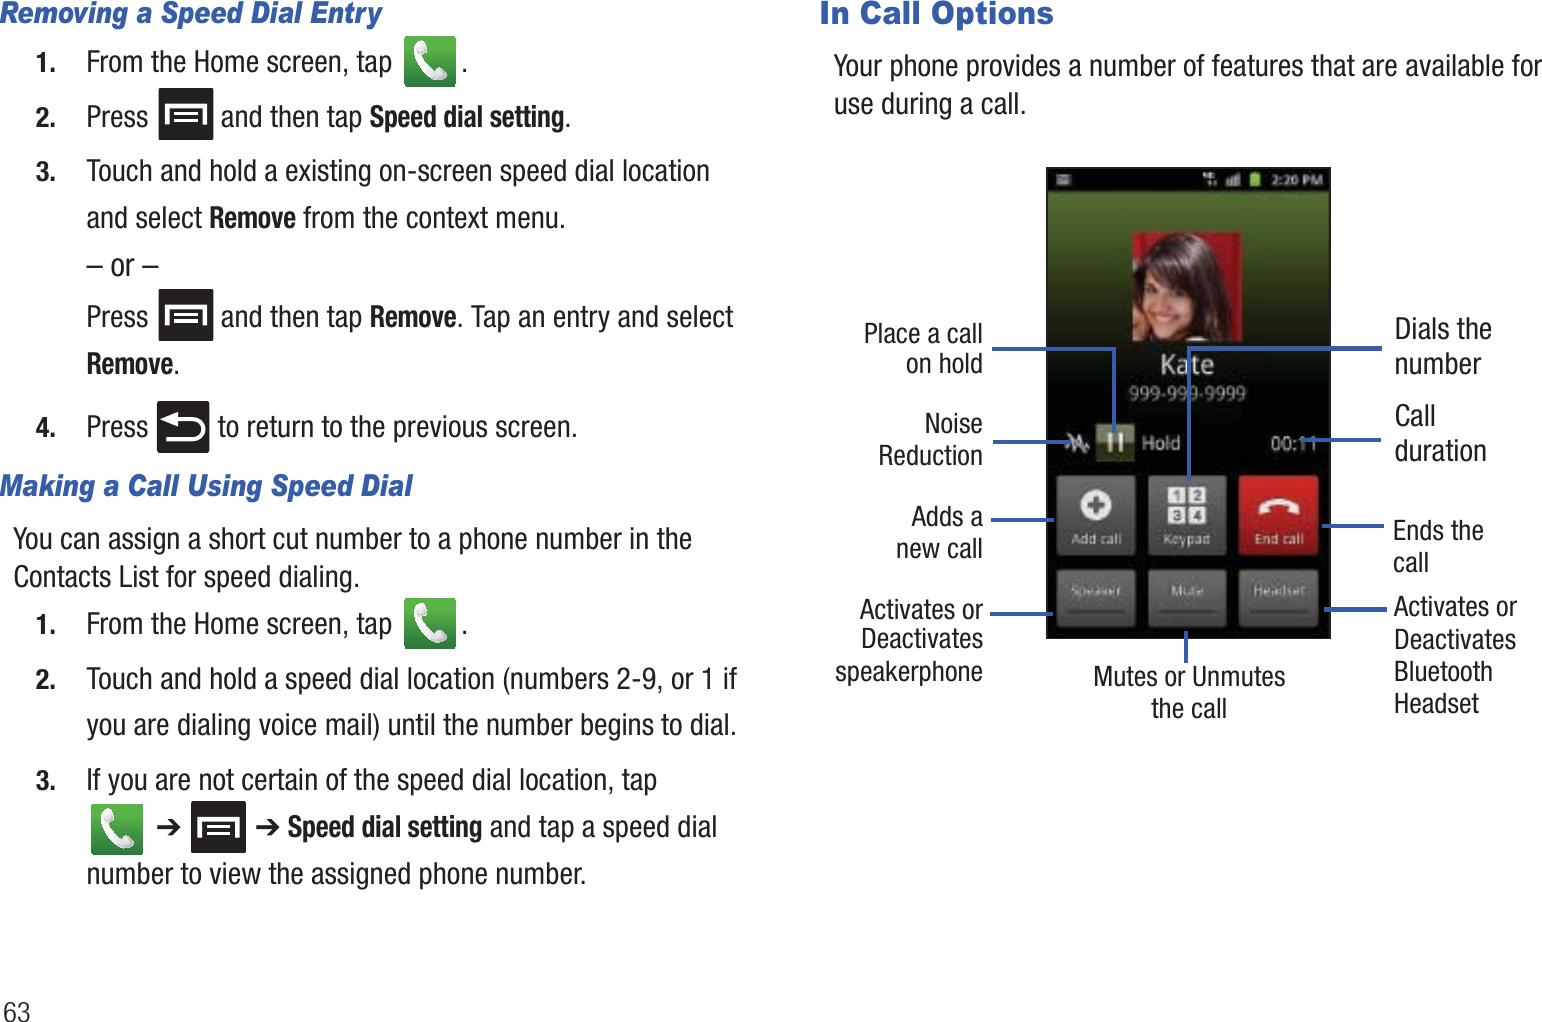
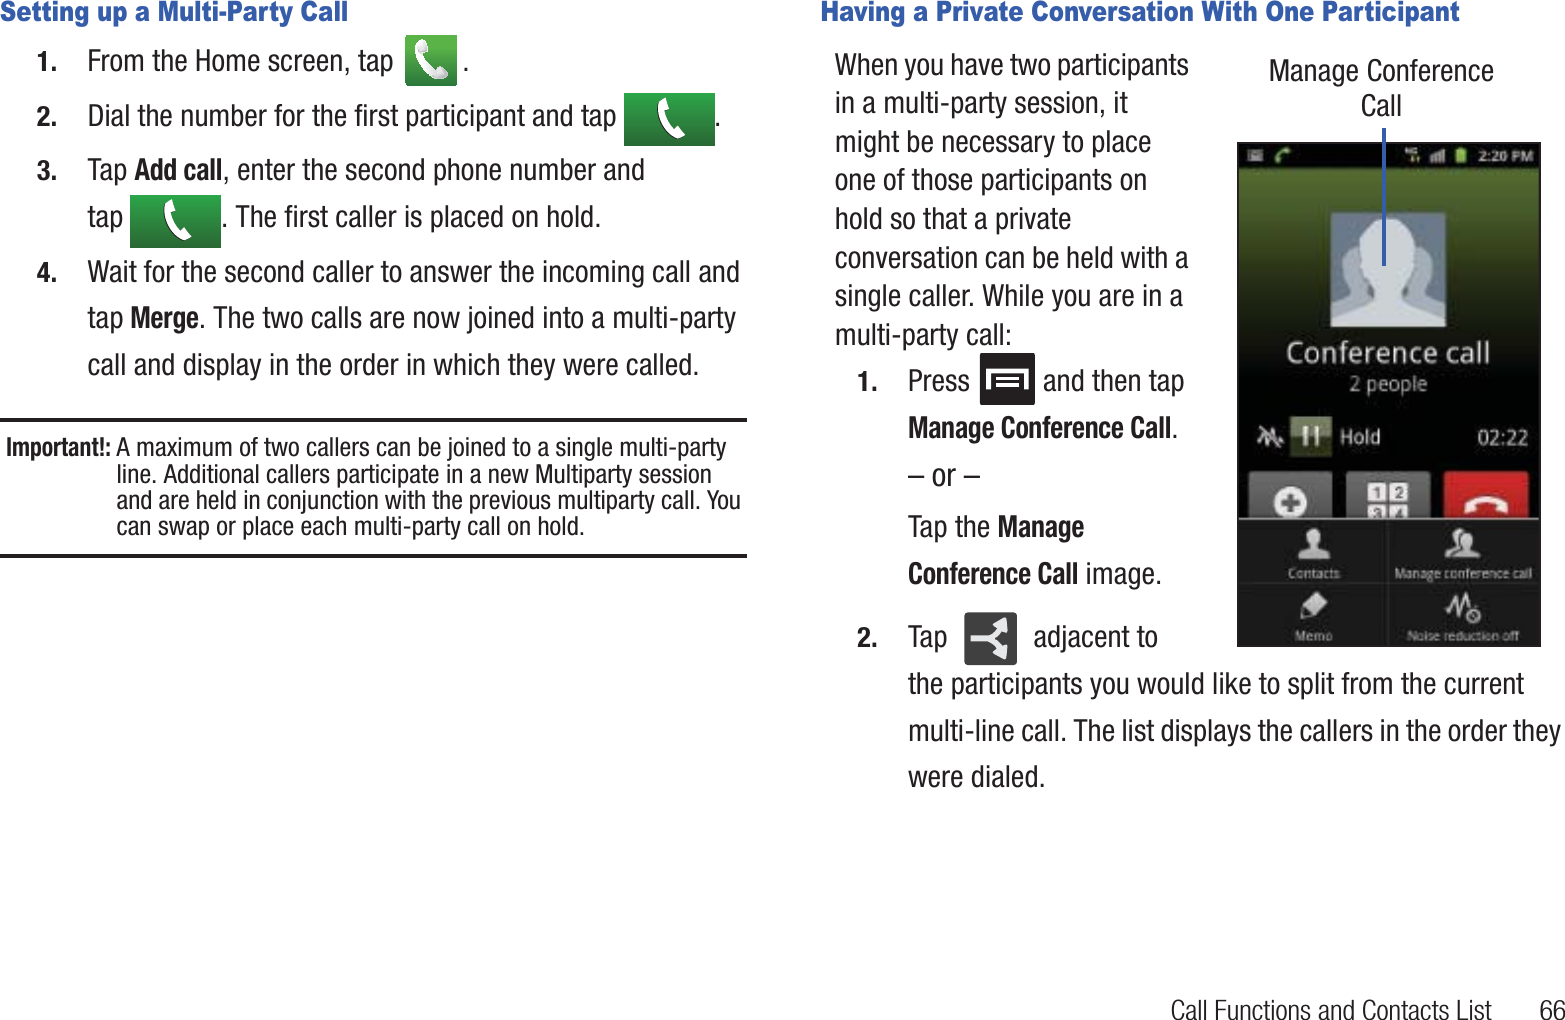
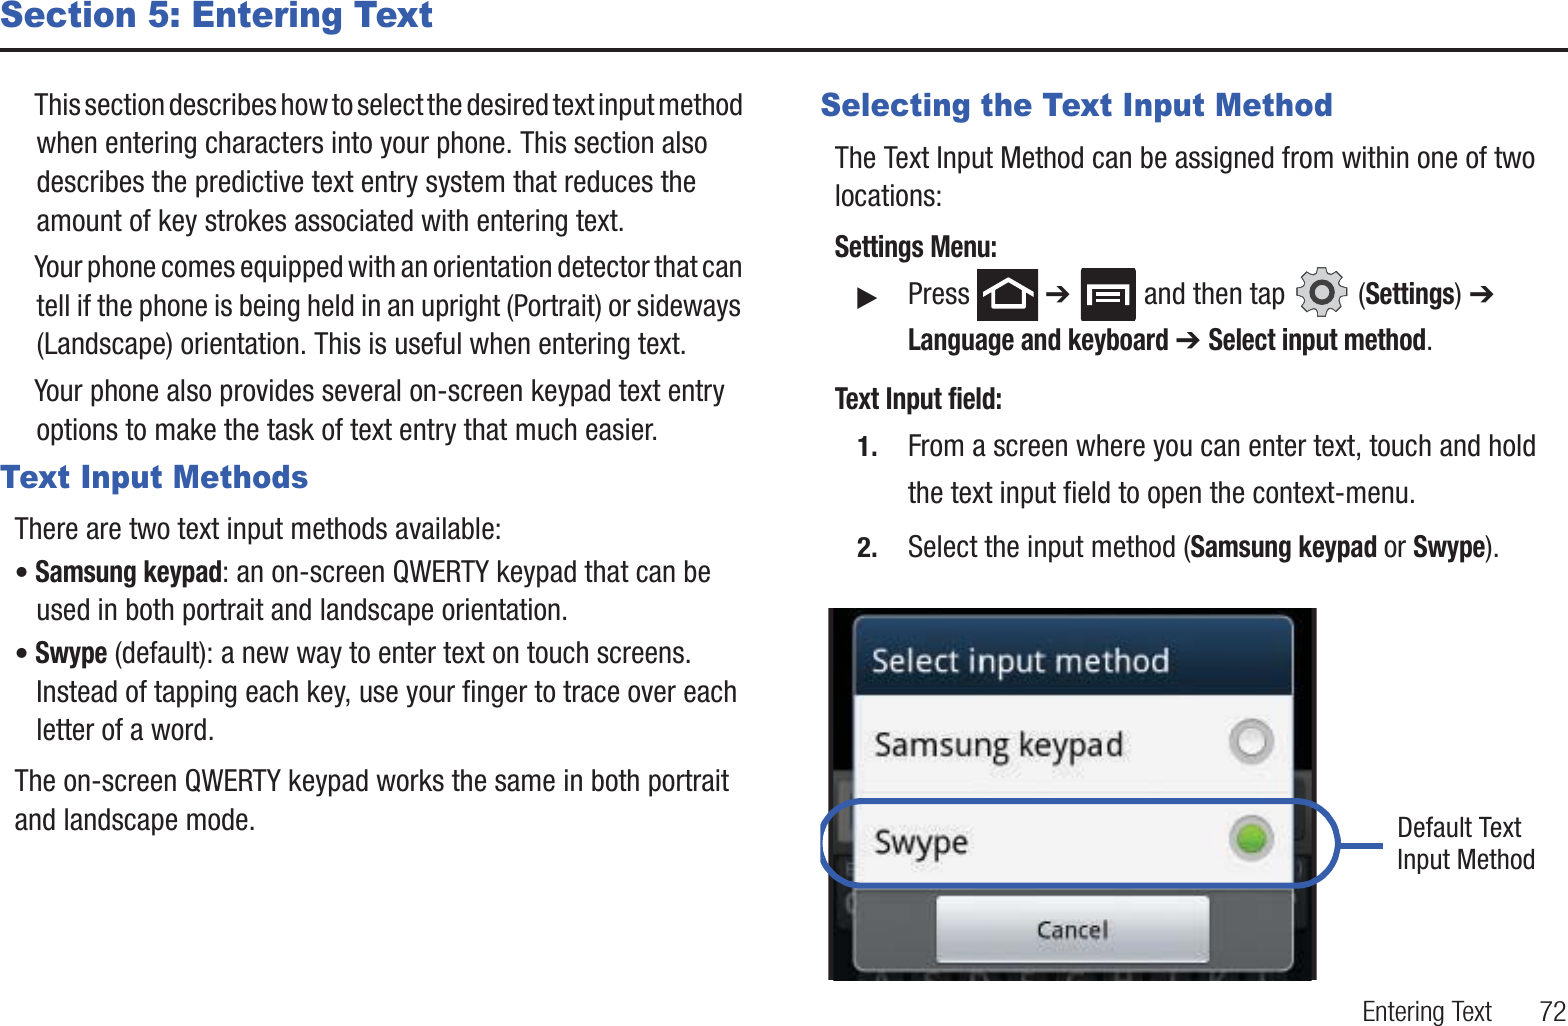
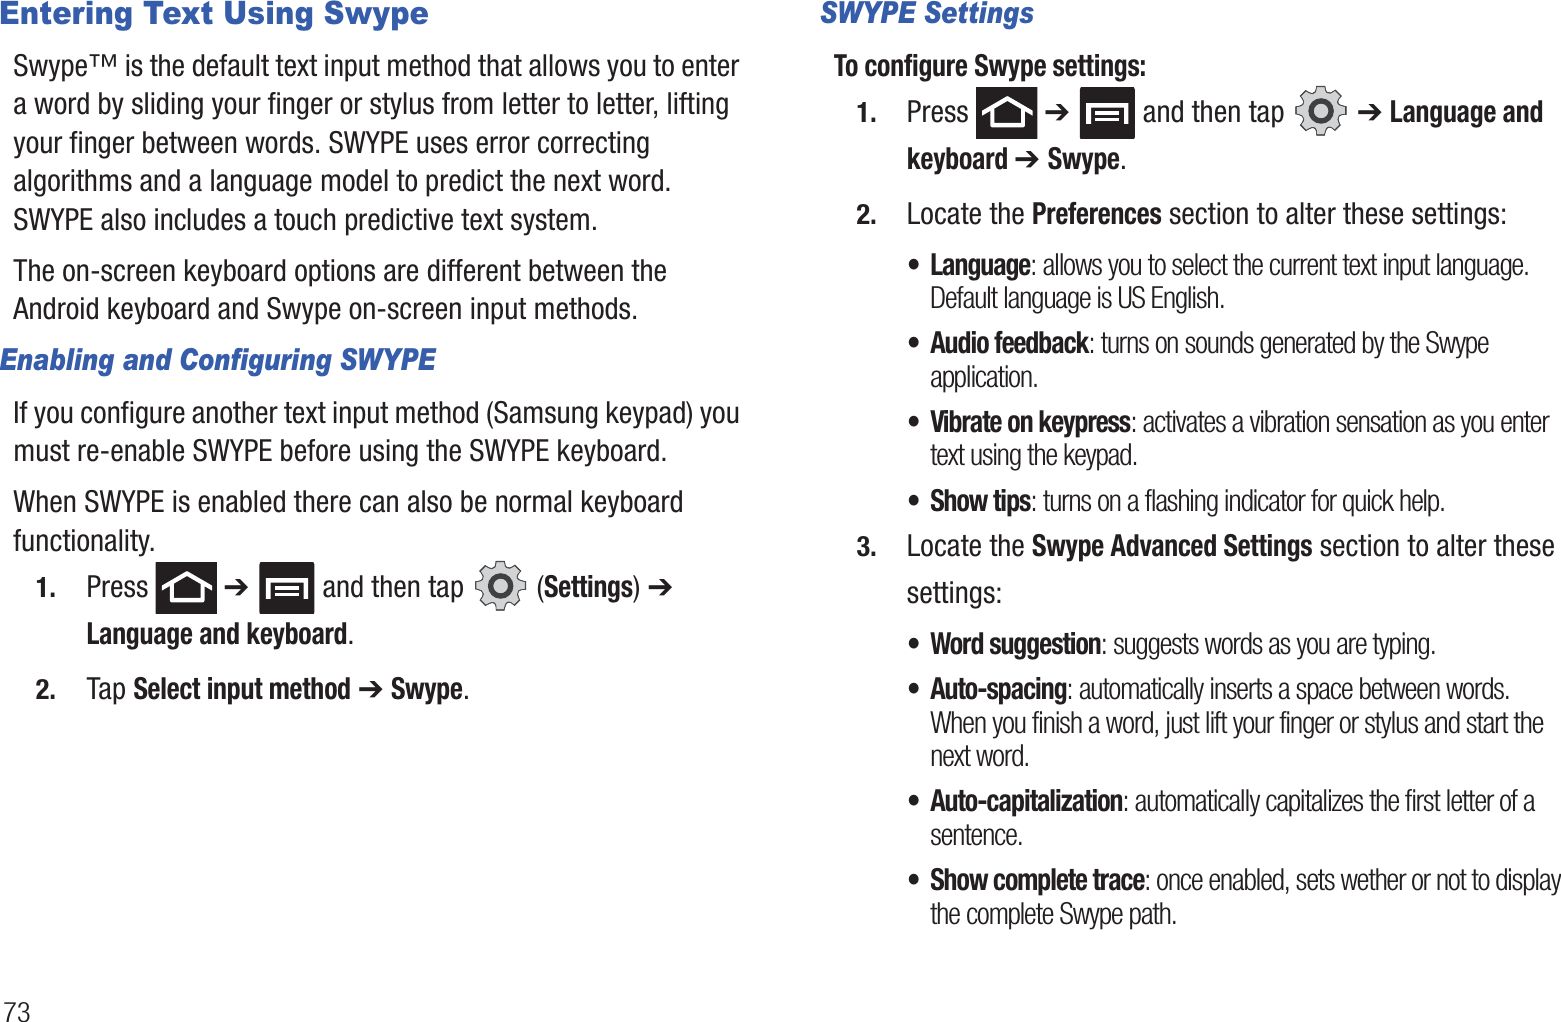
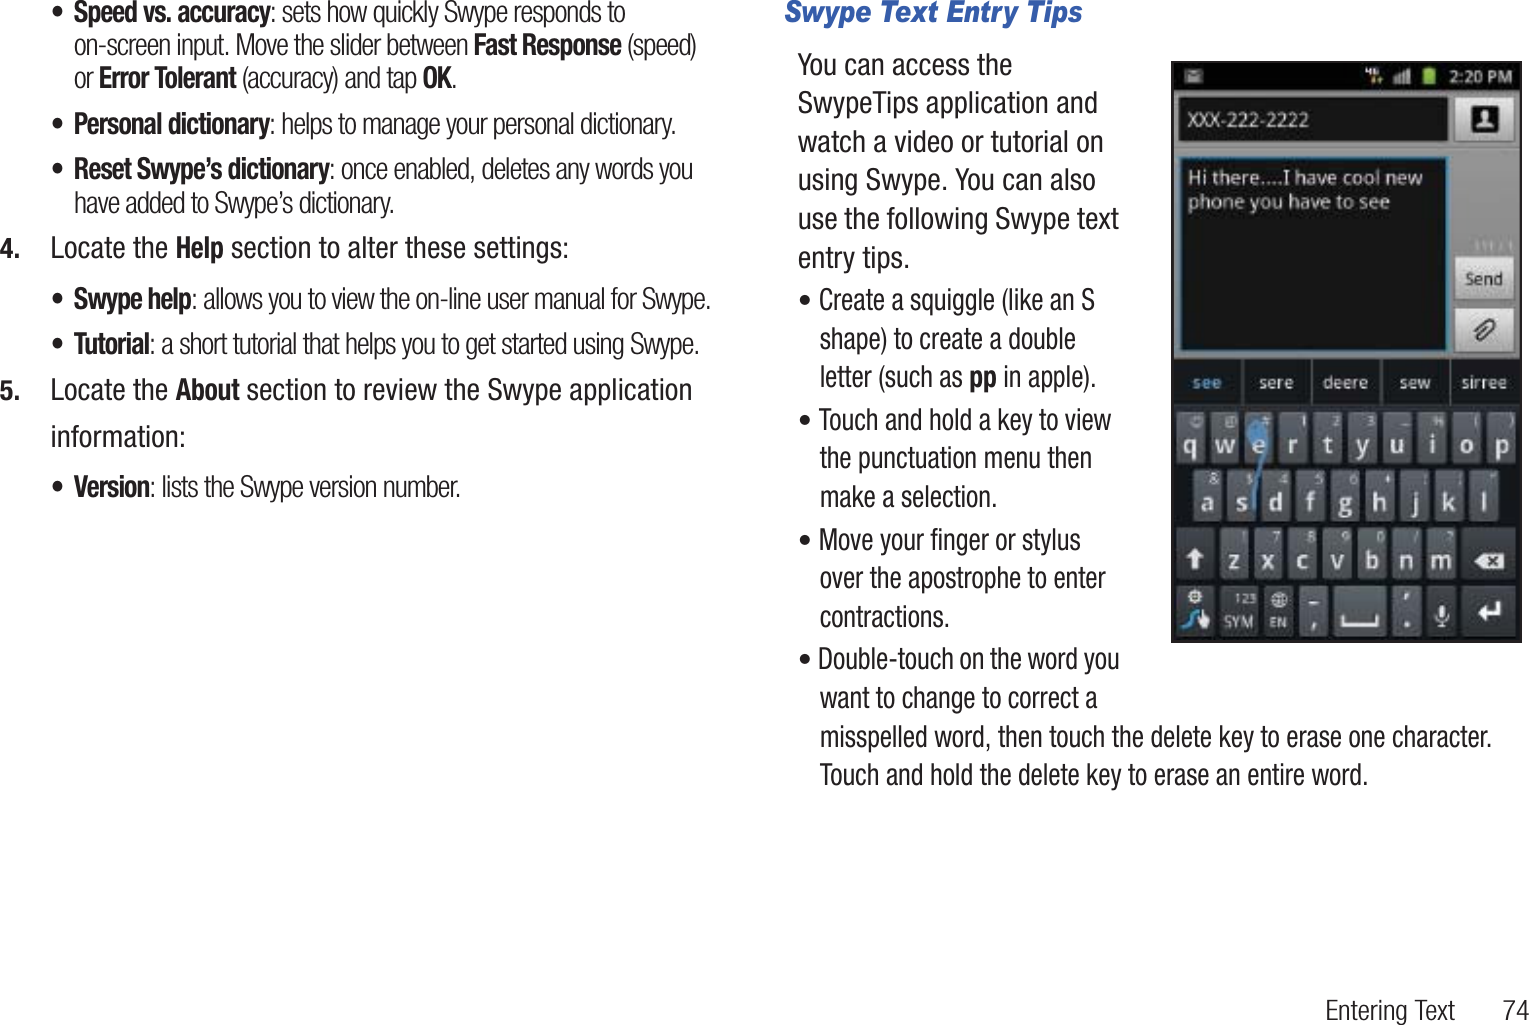
Users Manual 1


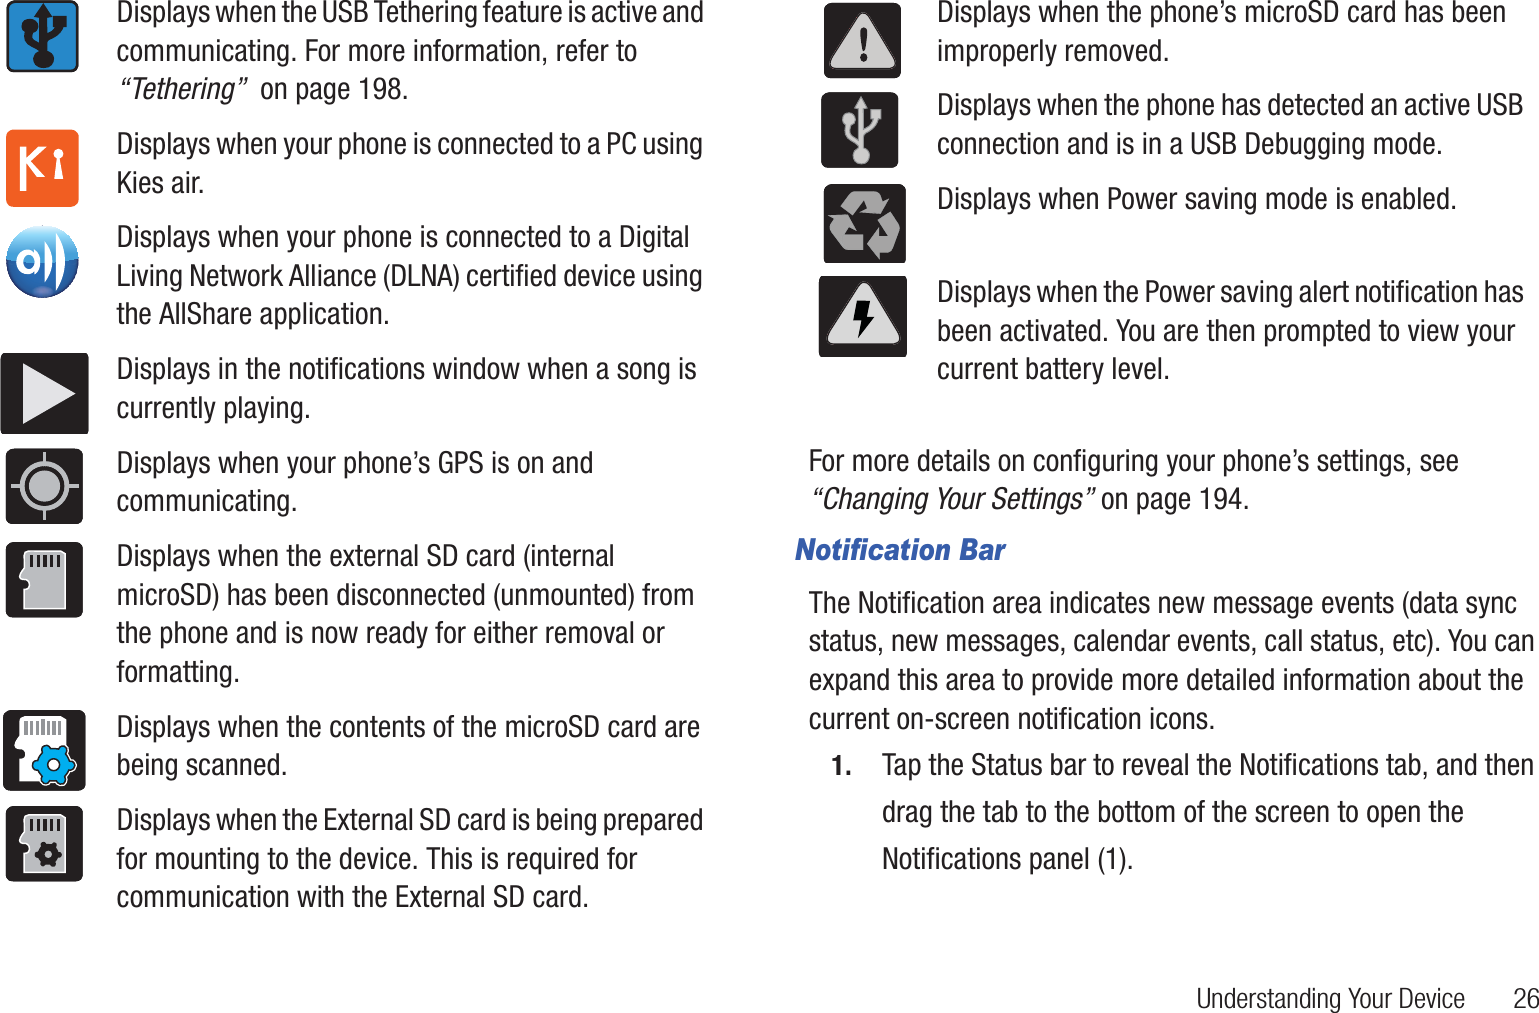

![Understanding Your Device 30Using Additional Voice Search FunctionsFor more information, refer to: http://www.google.com/mobile/voice-actions/.From an open Voice Search dialog, speak the following words to access additional features:• voice actions (such as: [your query]) allows you to search the web by speaking the search parameters.• listen to [artist/song/album] allows you to begin listening to the selected song on Slacker radio.• send text to [recipient] [message] allows you to open the Messaging screen.• navigate to [address/city/business name] allows you to receive directions via Google maps™. Use either an Address name, Business name, business type, or other navigation information to get the desired directions.• call [name] allows you to open the phone dial and automatically • send email to [recipient] [subject] allows you to open your email account and compose a new email message.• map of [location] allows you to view a map of an area via Google maps. Use either an Address name, Business name, zip code, or other navigation information.• go to [website] allows you to navigate to any component of your device. • note to self [message] allows you to search for a note save to your Memo Pad.• directions to [location] using your current location, allows you to receive directions to a selected destination.](https://usermanual.wiki/Samsung-Electronics-Co/SGHT999.Users-Manual-1/User-Guide-1701511-Page-35.png)
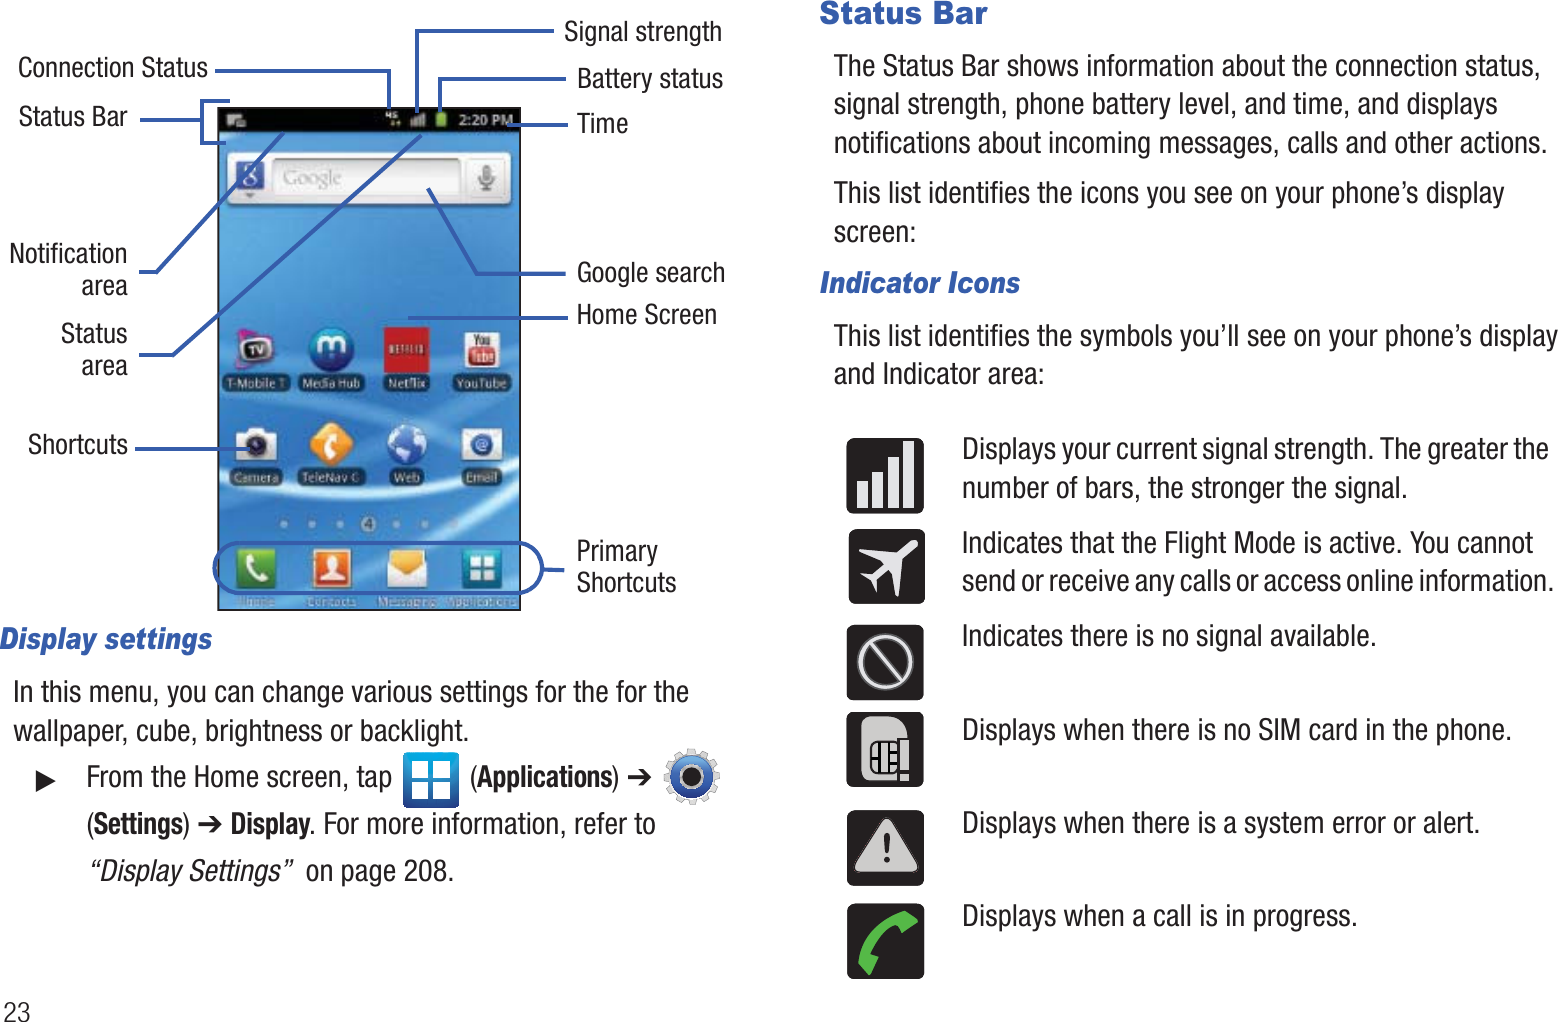
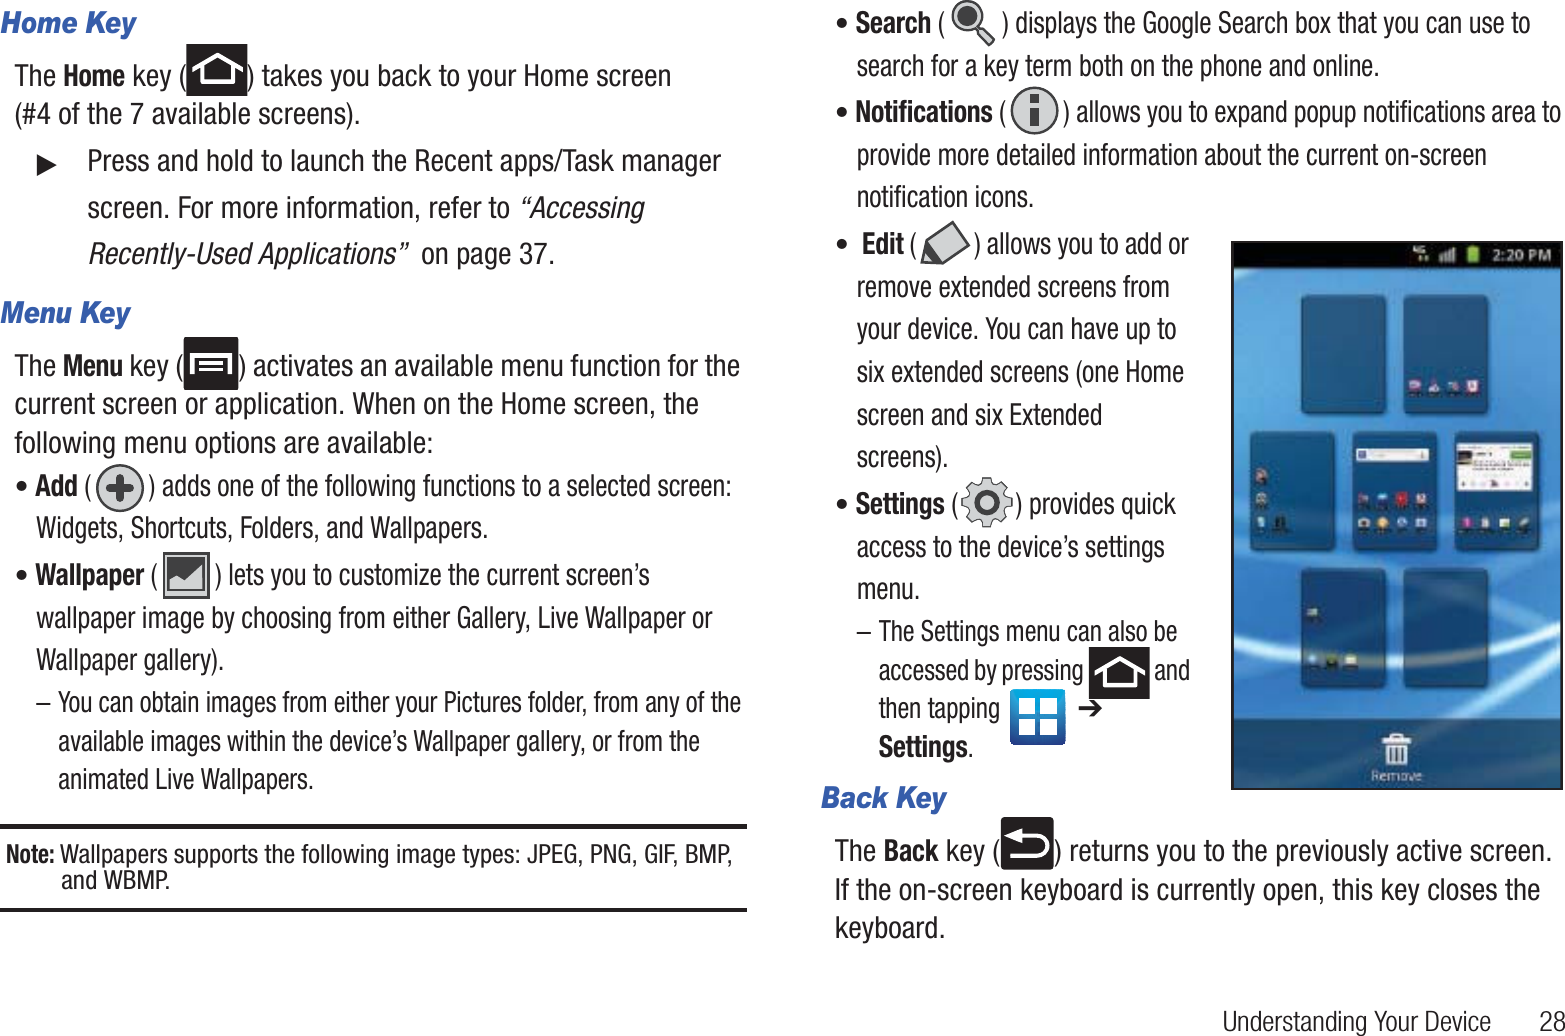
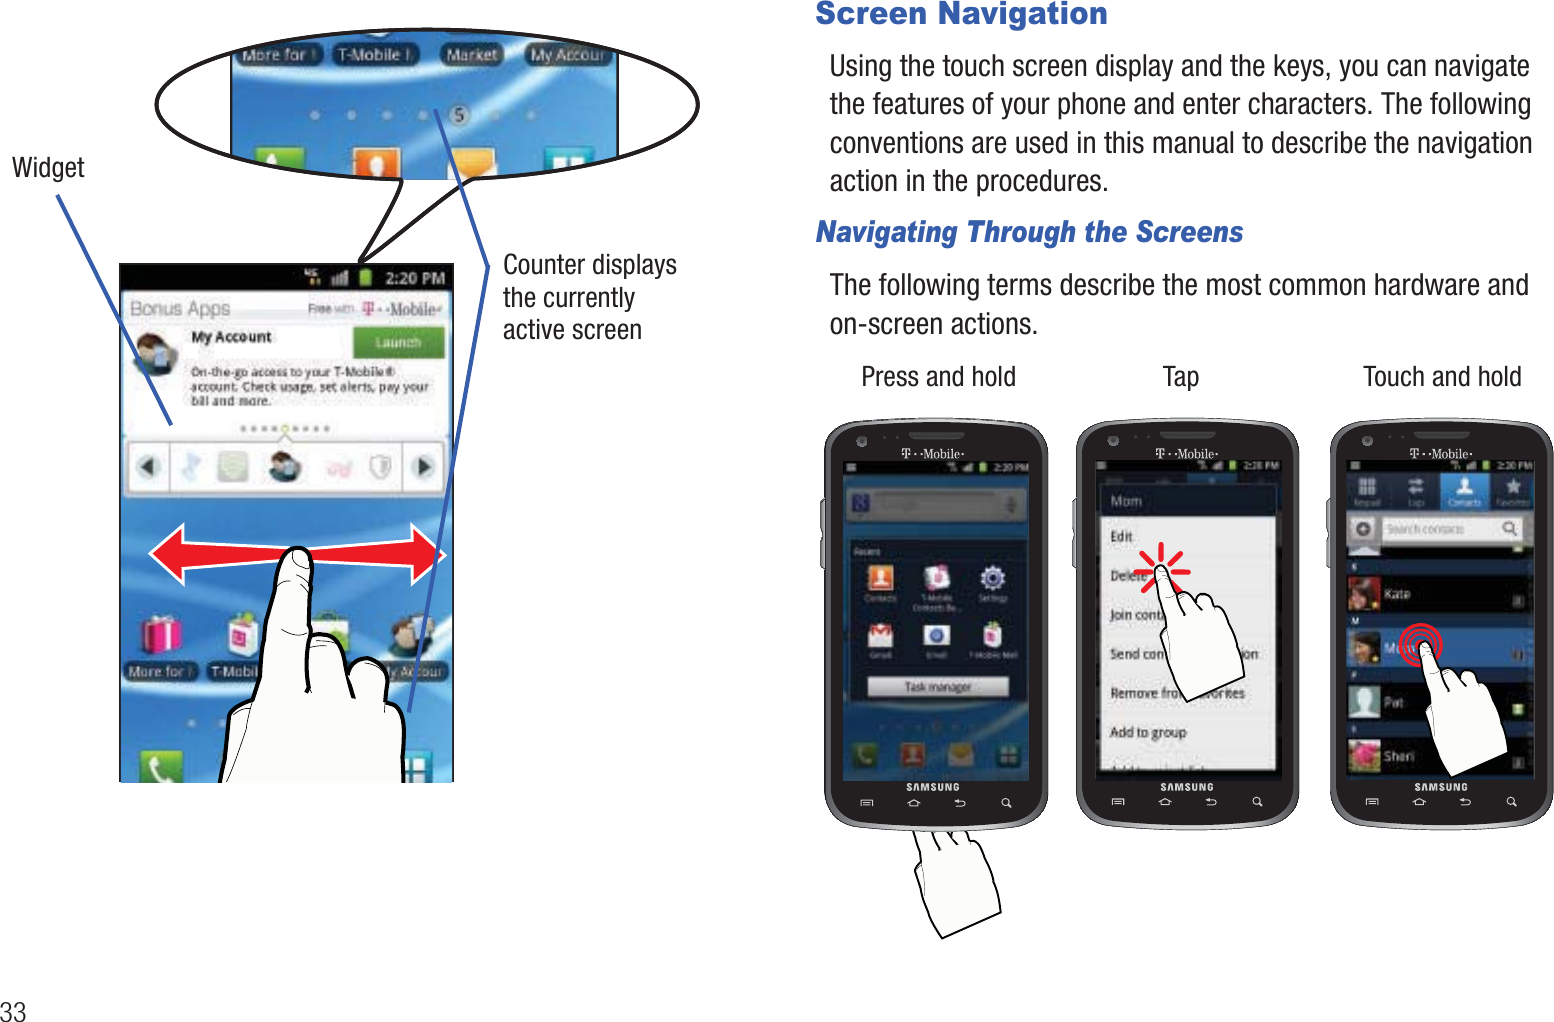
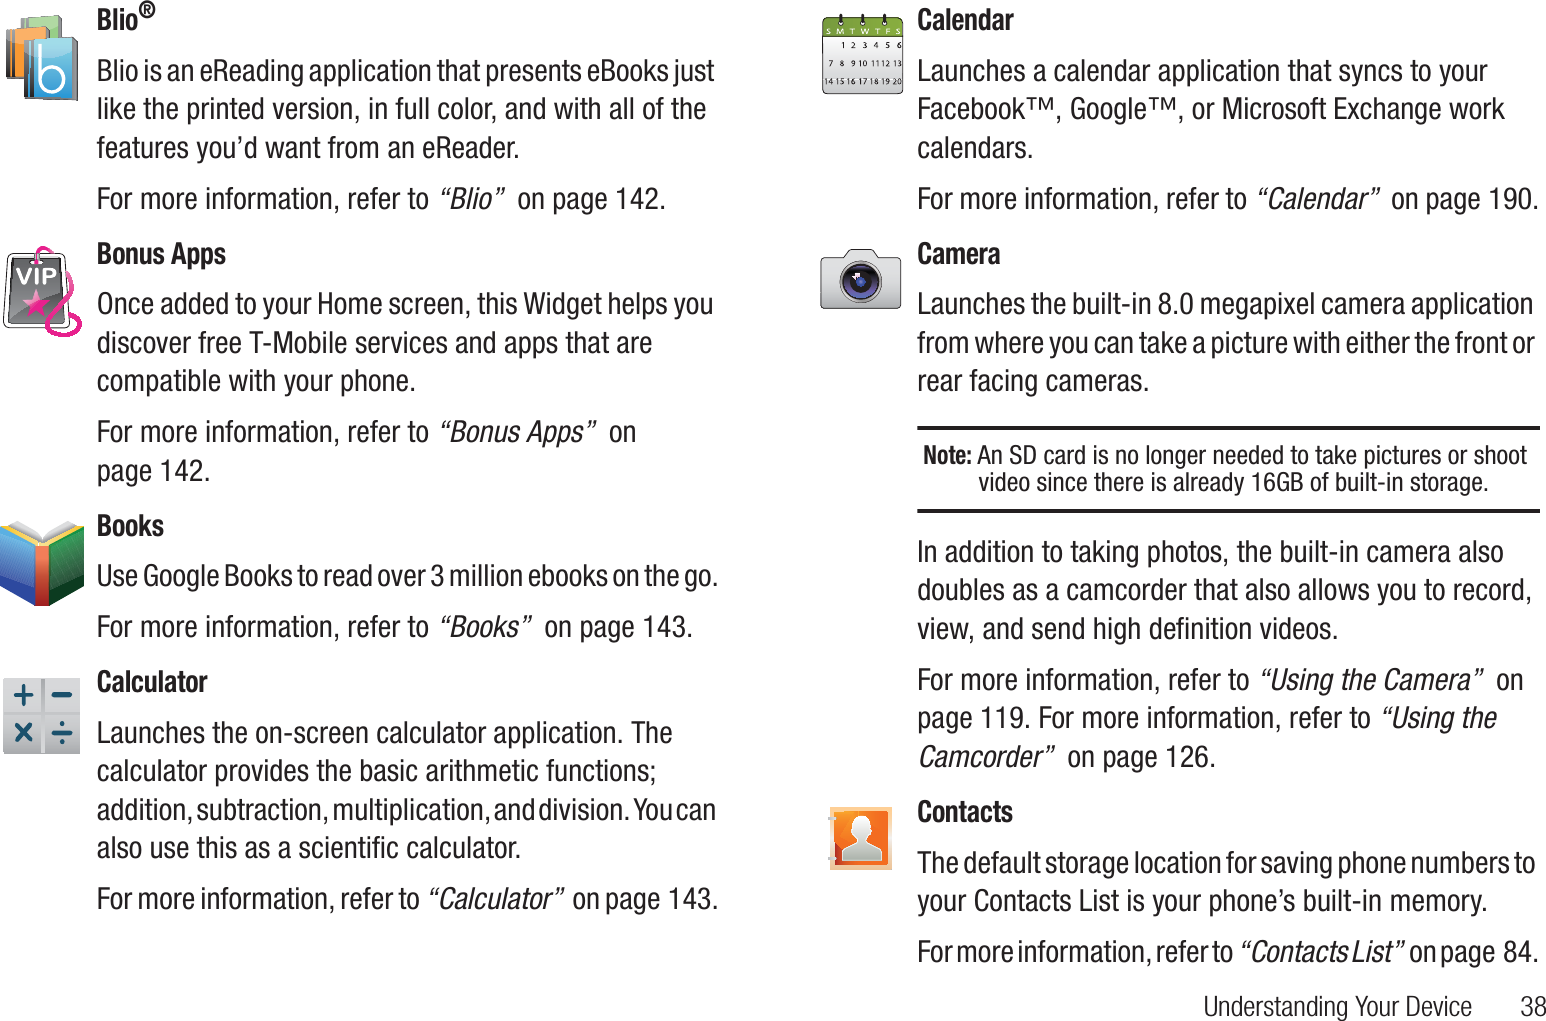
![31Home ScreenThe Home screen is the starting point for using the applications on your phone. There are initially seven available panels, each populated with default shortcuts or applications. You can customize each of these panels. • Notification area displays those icons associated with end-user notifications such as: email messages, calls (missed, call in progress), new voicemail, upcoming event, USB connection, emails, and Text/MMS messages.–These notifications appear at the top-left of the screen (within the Status bar area) and display important user information.–This information can be accessed by either swiping down from the Status bar (page 26) or by accessing the Notifications panel [ > Notifications ()].• Status area displays those icons associated with the status of the device such as communication, coverage, Bluetooth, 4G/3G, Wi-Fi communication, battery levels, GPS, etc.• Home Screen is a customizable screen that provides information about notifications and device status, and allows access to application Widgets. • Extended Home Screens extend beyond the current visible screen width to provide more space for adding icons, widgets, and other customization features.–There are six available extended screens (panels) each of which may be populated with its own shortcuts or widgets. These screens share the use of the three Primary Shortcuts.–The current screen is indicated at the bottom by a larger circle. Up to seven (7) total screens are available. Google searchHome ScreenPrimaryNotificationShortcutsStatus BarareaStatusareaShortcuts bar/Widget](https://usermanual.wiki/Samsung-Electronics-Co/SGHT999.Users-Manual-1/User-Guide-1701511-Page-36.png)


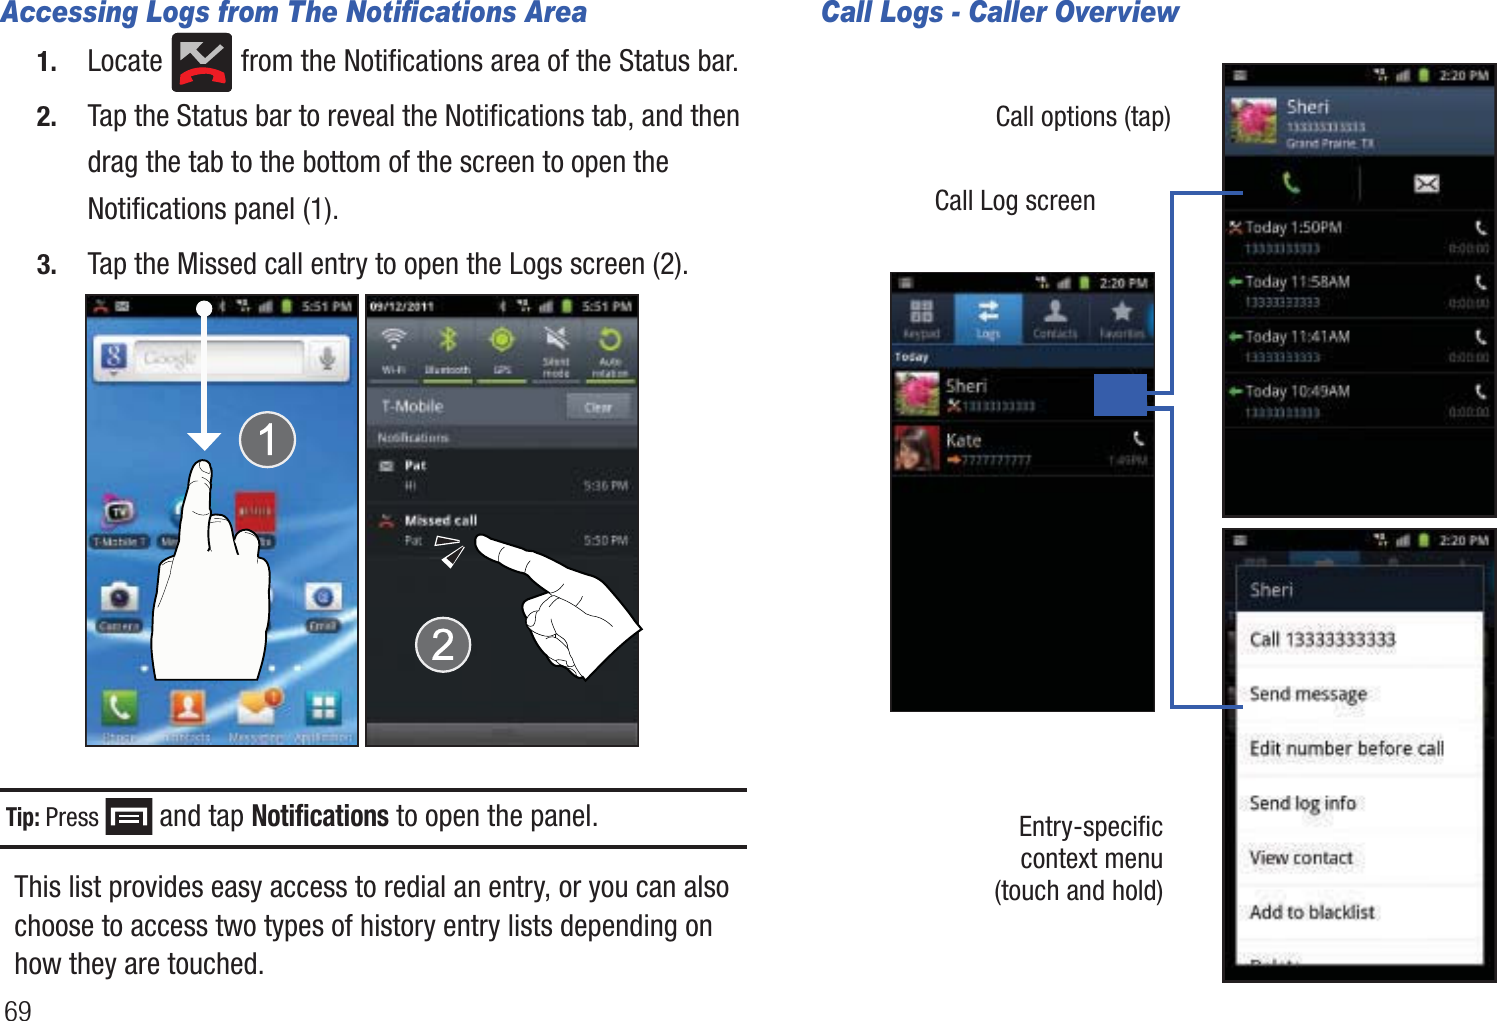
![Call Functions and Contacts List 70• Tap a contact entry name or number to reveal the Call options screen:•Call allows you to redial the entry by name or number.• Send message allows you to create a new text message to the selected entry.•Time provides the time and date of the call and its duration.• Create contact to save the number if it is not already in your Contacts.• Update existing to add the number to an existing Contacts entry.• Touch and hold an entry to display the entry-specific context menu:• Call [Number] to redial the current phone number. • Send message allows you to create a new text message to the selected entry.• Edit number before call to make alterations to the current phone number prior to redial. • Add to Contacts to save the number if it is not already in your Contacts.•View contact to view the information for the currently stored Contacts entry.• Send log info to send the Log entry information via text message.• Add to blacklist to add the current phone number to an automatic rejection list. Similar to a block list, the selected caller will be blocked from making an incoming calls to your phone.• Delete to delete the entry from the Logs list.Altering Numbers from the Logs ListIf you need to make a call from the Logs screen and you need to alter the number prior to dialing, you can add the appropriate prefix by prepending the number.1. From the Home screen, tap ➔ .2. Touch and hold an entry to access the entry-specific context menu.3. Tap Edit number before call.4. Edit the number using the on-screen keypad or delete digits by pressing to erase the numbers.5. Tap once the number has been changed.LogsLogs](https://usermanual.wiki/Samsung-Electronics-Co/SGHT999.Users-Manual-1/User-Guide-1701511-Page-75.png)
![812. Set any of the following options:• Portrait keypad types allows you to choose a keypad configuration (Qwerty Keypad [default] or 3x4 Keypad).• Input languages sets the input language. Tap a language from the available list. The keyboard is updated to the selected language.•XT9 enables predictive text entry mode. This must be enabled to gain access to the advanced settings. • XT9 advanced settings configuration of more advanced XT9 features. For more information, refer to “Using XT9 Predictive Text” on page 81.• Keypad sweeping allows changing between the input modes without having to use the Input Mode key. You can "sweep" the displayed keypad aside, in a similar manner to scrolling through the Home screens.• Character preview provides an automatic preview of the current character selection within the text string. This is helpful when multiple characters are available within one key.• Auto-capitalization automatically capitalizes the first letter of the first word in each sentence (standard English style). • Voice input activates the Voice input feature. This is an experimental feature that uses Google’s networked speech recognition application. • Auto full stop automatically inserts a full stop by tapping the space bar twice.• Tutorial launches a brief onscreen tutorial covering the main concepts related to the Samsung keypad.Using XT9 Predictive TextXT9 is a predictive text system that has next-letter prediction and regional error correction, which compensates for users pressing the wrong keys on QWERTY keyboards.1. Press ➔ and then tap ➔ Language and keyboard ➔ Samsung keypad.2. Tap the XT9 field. A checkmark indicates activation.3. Tap the XT9 advanced settings and configure any of the following advanced options:• Word completion tells your device to attempt to predict how to complete the word you have started. (A green check mark indicates the feature is enabled.)• Word completion point sets how many letters should be entered before a word prediction is made. Choose from 2 letters, 3 letters, 4 letters, or 5 letters.• Spell correction enables the automatic correction of typographical errors by selecting from a list of possible words that reflect both the characters of the keys you touched, and those of nearby characters. (A green check mark indicates the feature is enabled.)• Next word prediction predicts the next word you are like to enter. (A green check mark indicates the feature is enabled.)](https://usermanual.wiki/Samsung-Electronics-Co/SGHT999.Users-Manual-1/User-Guide-1701511-Page-86.png)