Samsung Electronics Co SGHX497 Dual-Band GSM Phone User Manual SGH X497 FCC
Samsung Electronics Co Ltd Dual-Band GSM Phone SGH X497 FCC
UserManual.wiki
>
Samsung Electronics Co
>
SGHX497 User Manual
>
Users Manual 1
Contents
1.
Users Manual 1
2.
Users Manual 2
Users Manual 1
Navigation menu
Upload a User Manual
Namespaces
Wiki Guide
HTML
PDF
Info
Views
User Manual
Discussion / Help
Navigation

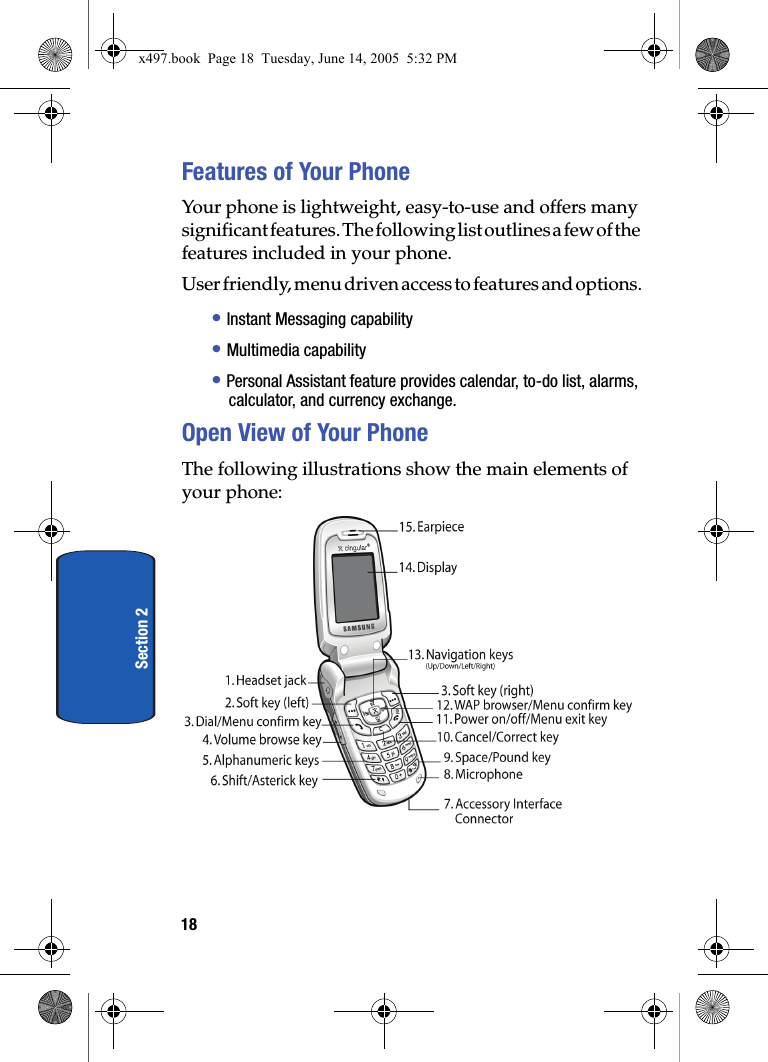
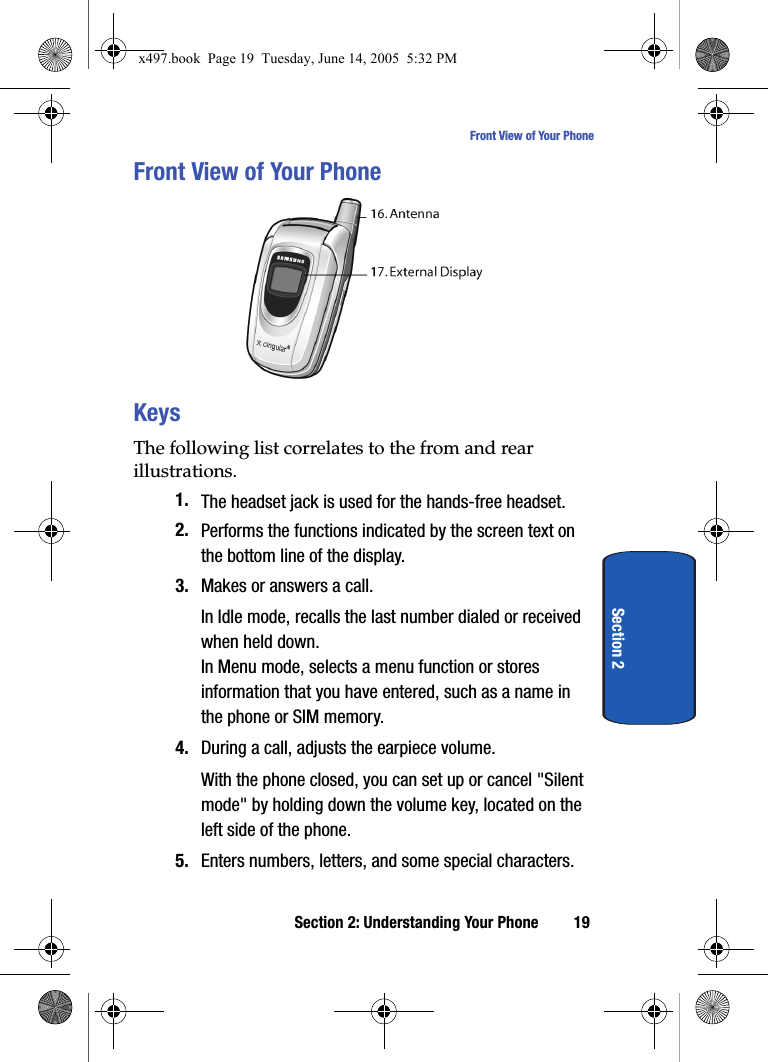
![20Section 26. Enters the asterick [*] character for calling features. In text entry mode, press to change the character input type.7. This connector is used to plug in the charging accessories. 8. The microphone used during phone calls and voice memo recordings.9. Enters the pound [#] character for calling features. In text entry mode, press to enter a space10. Deletes characters from the display. In Menu mode, returns you to the previous menu level.When you hold down key, you can access New memo in Organize menu directly.11. Ends a call. Also switches the phone on and off when held down. In Menu mode, cancels your input and returns the phone to Idle mode.12. In Idle mode, launches the WAP (Wireless Application Protocol) browser. In Menu mode, selects the highlighted menu options.13. In Menu mode, use to scroll through the menus and Phone book. In Idle mode, the Down key allows you to access the Address Book menu directly. When entering text, moves the cursor to the left or right, depending on which side you push.14. Display area where text and graphics are displayed.x497.book Page 20 Tuesday, June 14, 2005 5:32 PM](https://usermanual.wiki/Samsung-Electronics-Co/SGHX497.Users-Manual-1/User-Guide-565298-Page-20.png)