Samsung Electronics Co SLS-BU10A0 uFemto User Manual A3LSLS BU10A0 Part2 Quick Start Guide
Samsung Electronics Co Ltd uFemto A3LSLS BU10A0 Part2 Quick Start Guide
Contents
- 1. A3LSLS-BU10A0_User Manual_Part1_Rev.1
- 2. A3LSLS-BU10A0_User Manual_Part2_Quick Start Guide
A3LSLS-BU10A0_User Manual_Part2_Quick Start Guide
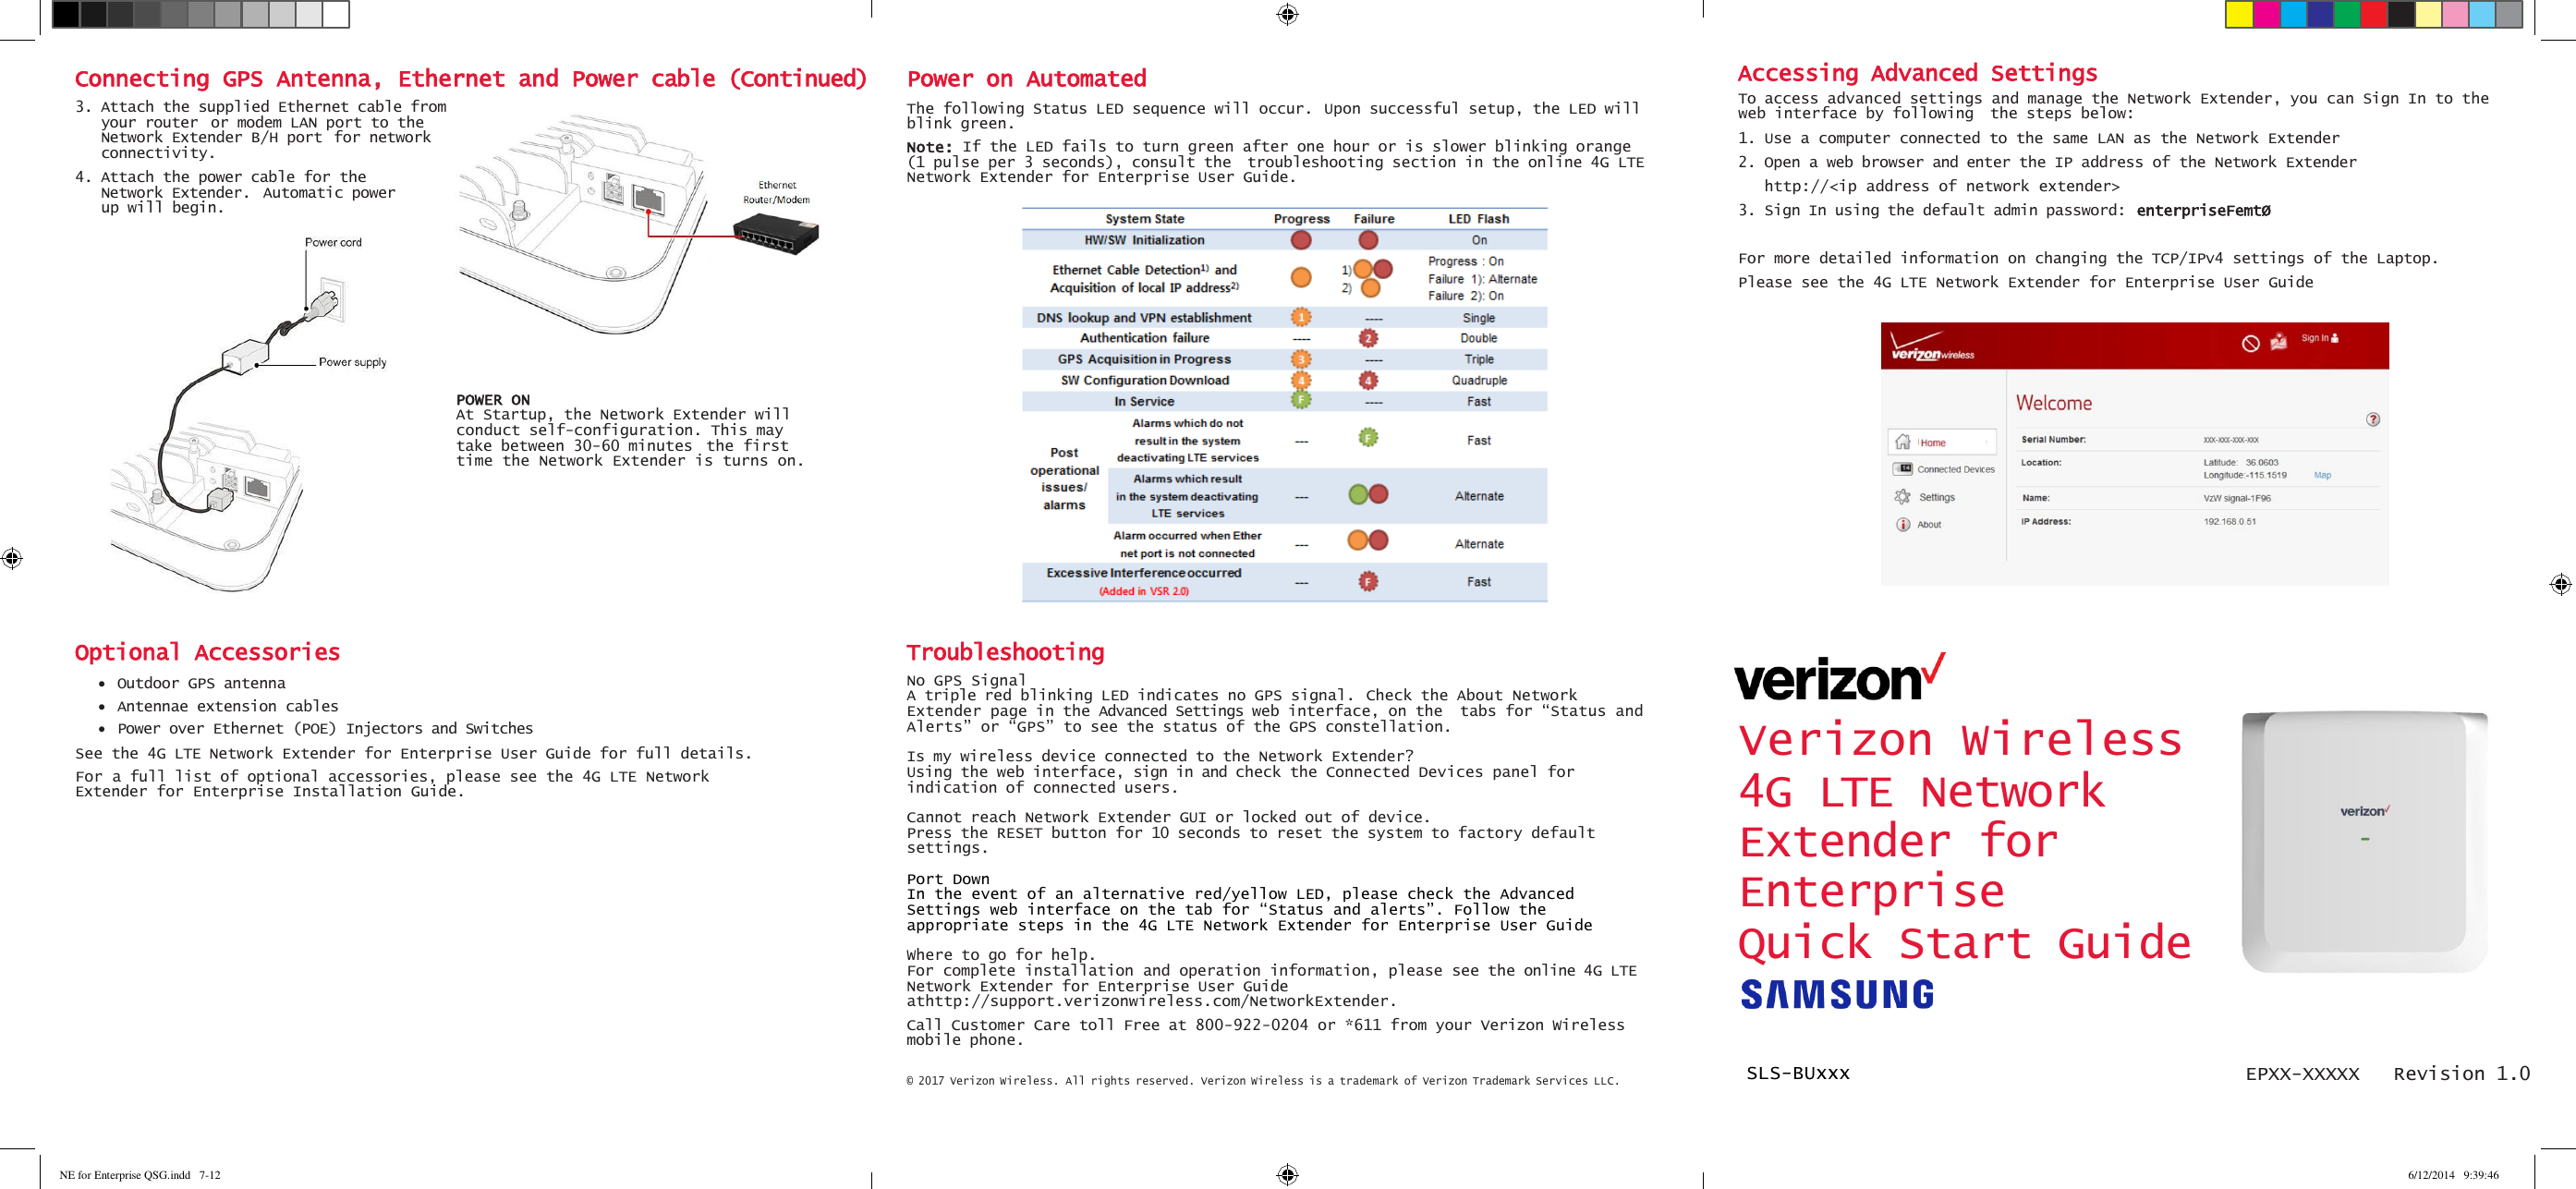
![NE for Enterprise QSG.indd 1-6 6/12/2014 9:39:45 AM Product Contents Your 4G LTE Network Extender for Enterprise contains the following components: Mounting Procedure The package contains screws and anchors for drywall mounting. Installation on alternate surfaces will require the purchase of the appropriate anchors and hardware. Mounting Steps: 1. Determine the mounting location and verify that no wires, pipes, etc., are at the point of mounting. 2. Use the wall mounting bracket to act as a template to mark anchor holes on the wall. 3. Drill holes into drywall and push in the supplied plastic drywall anchors. Installation on surfaces other than drywall may require different anchoring hardware which can be purchased at your local hardware store. Connection Overview For general safety and precautions, see Product Safety and Warranty and Warranty Manual. Mounting Procedure 4. Align the mounting bracket with the wall anchors and attach using the supplied screws. 5. Slide the Network Extender with mounting bracket into the wall mounting bracket. 6. Align the fixing hole and the torx lock of mounting bracket then Fasten the torx lock of the mounting bracket using a torx driver Prerequisites Ethernet and Backhaul (B/H) Requirements For optimum performance regarding backhaul bandwidth requirements and specific firewall settings, please refer to the online 4G LTE Network Extender for Enterprise User Guide found at http://support.verizonwireless.com/clc/devices/index.html?p=SLS-B102&m GPS Signal The Network Extender requires Strong GPS signal from the provided indoor GPS antenna. For installation other than with the provided GPS antenna, please refer to the online 4G LTE Network Extender for Enterprise User Guide. Placement The Network Extender can be installed: vertically or horizontally on a wall, floor, or ceiling. Place unit at least 10 feet away from products which generate electromagnetic radiation (e.g., microwave oven). 1. Identify a location for the Network Extender, central to users, but no more than 21 feet from an exterior window or wall to allow for a strong GPS signal. 2. Identify a power source for the Network Extender. 3. Follow device mounting, installation and power up steps. 4. For more detailed placement instructions, please see the 4G Network Extender Installation Manual. Connecting GPS Antenna, Ethernet and Power Cable 1. Gently remove protective covers for the power, Ethernet ports. 2. Connect the GPS antenna cable (indoor use only) to the GPS port of the Network Extender. Note: The GPS antenna must stay connected to the Network Extender at all times for operation. The initial GPS fix can take up to 60 minutes and may require an external outdoor GPS antenna(not supplied). [Ceiling]](https://usermanual.wiki/Samsung-Electronics-Co/SLS-BU10A0.A3LSLS-BU10A0-User-Manual-Part2-Quick-Start-Guide/User-Guide-3357107-Page-1.png)
