Samsung Electronics Co SM332 Internal CD-RW User Manual 01 SM 332 en
Samsung Electronics Co Ltd Internal CD-RW 01 SM 332 en
UserManual.wiki
>
Samsung Electronics Co
>
SM332 User Manual
Users Manual
Navigation menu
Upload a User Manual
Namespaces
Wiki Guide
HTML
PDF
Info
Views
User Manual
Discussion / Help
Navigation
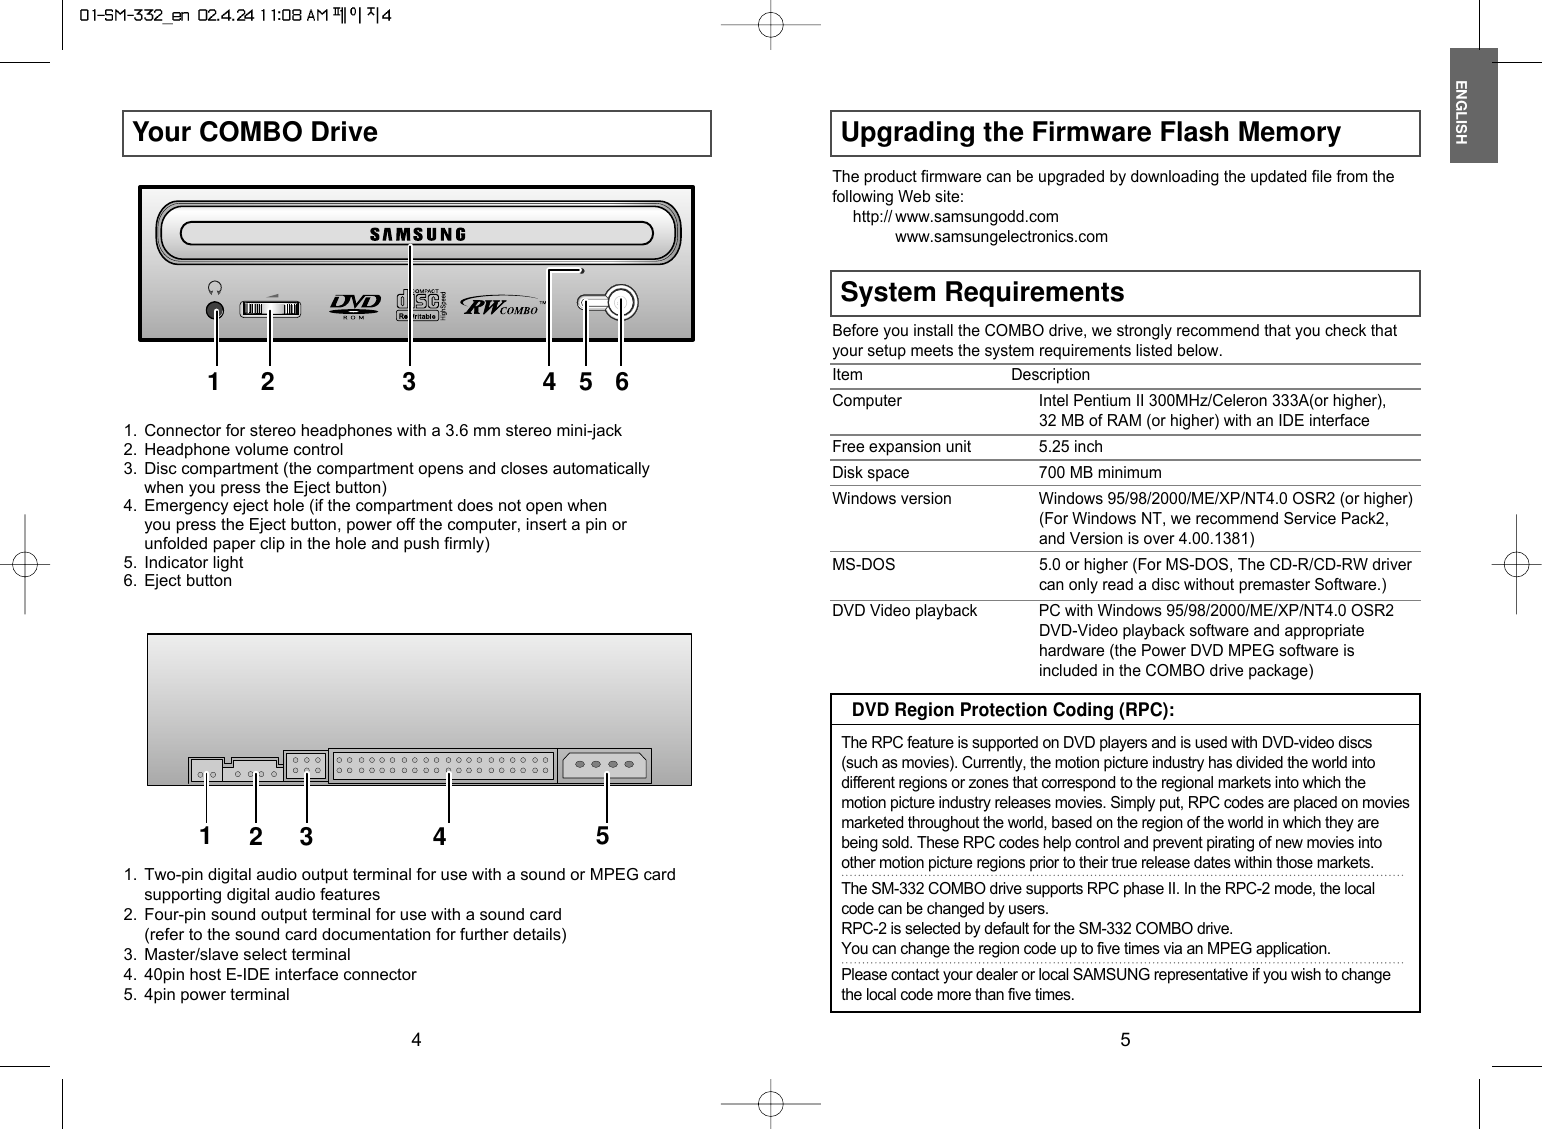

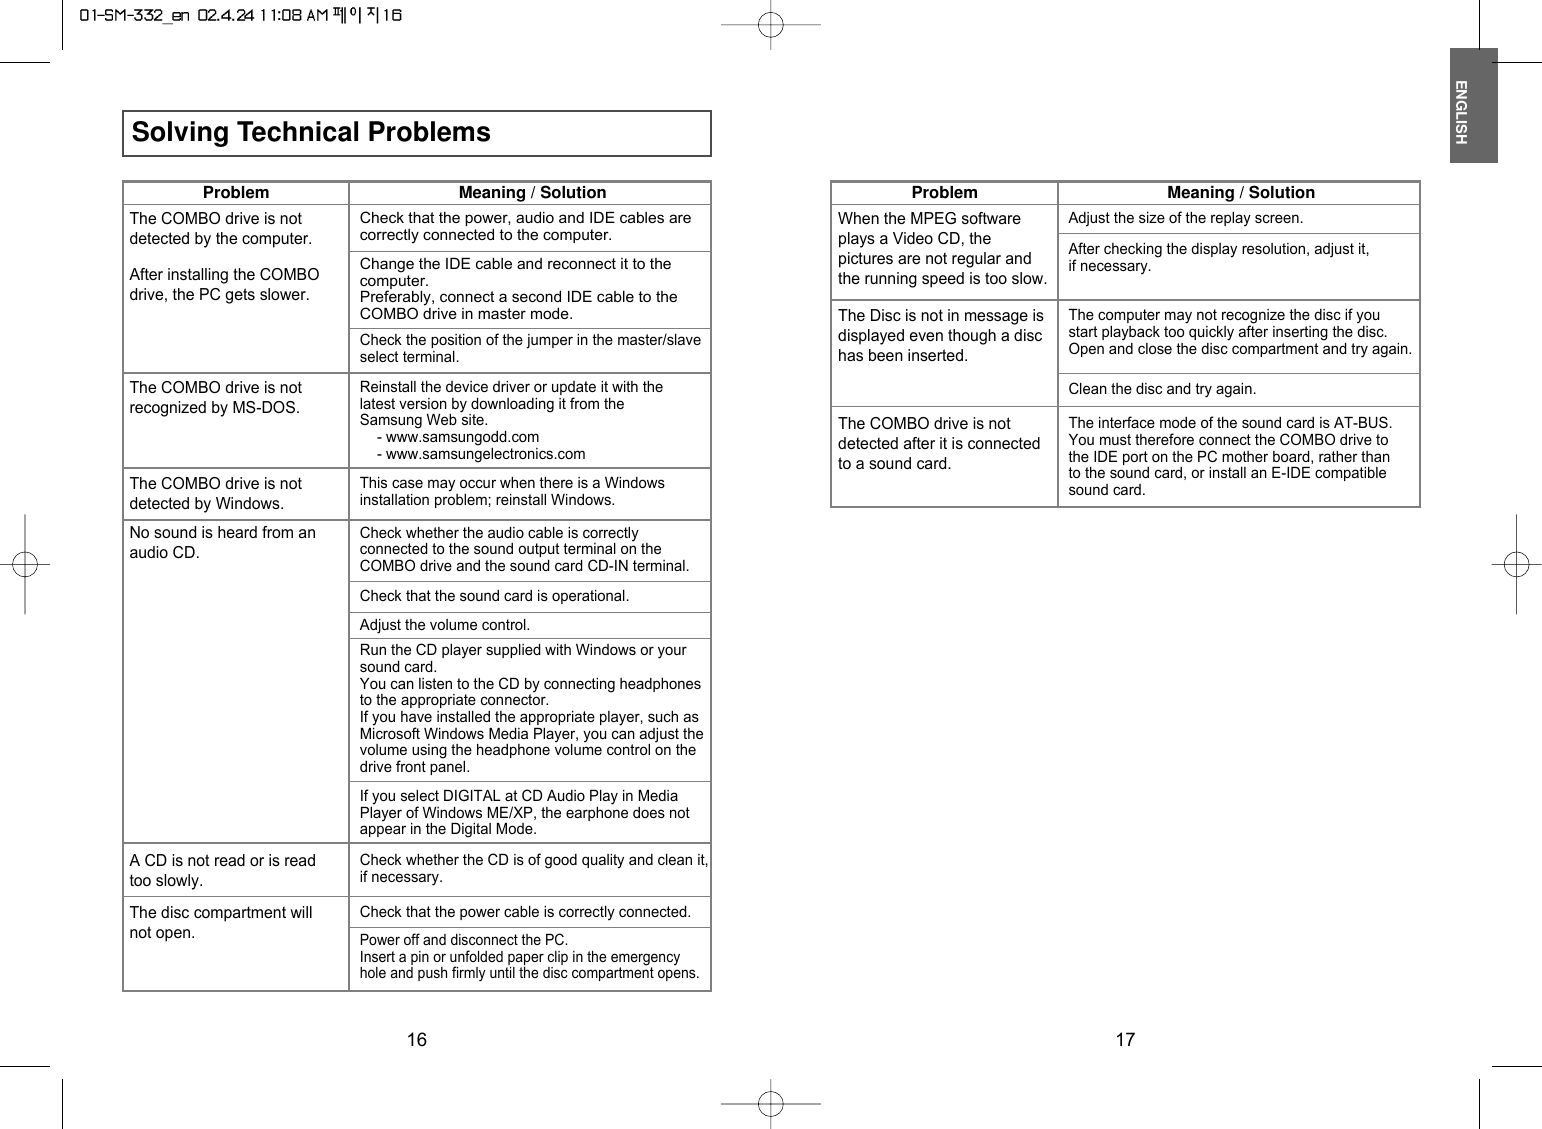
![ENGLISH11Using the COMBO DriveStoring and Cleaning Your DiscsTo play audio or video CDs and / or DVDs in your COMBO drive,proceed as follows.Playing Audio CDsRun the CD player supplied with Windows or your sound card. You can listen to the CD by connecting an earphone to the earphoneconnection terminal.Playing DVDs or Video CDsSet up and run the SOFT MPEG program supplied as an accessory.To ensure a long service life for your discs and drive, follow the pre-cautionsbelow when storing and cleaning your discs.1Push the power button and boot the computer.2After booting the computer, open the disccompartment by pressing the Eject button.3Insert the disc (CD/DVD) with the label on thedisc facing upwards and close the disccompartment by pressing the Eject button.The indicator light comes on.4Play the disc (CD/DVD).1Do not place a disc in direct sunlight.2Store a disc vertically in a well-ventilated and stable location.3Do not write or attach a label on a disc.4Do not drop a disc or place heavy objects on it.5Do not touch the surface of a disc; hold it by the edges.6To clean a disc, polish lightly from the inside of the disc to the outside with a soft cotton cloth.7Do not leave the disc compartment open when you are not using it.Setting Up the Device Driver10◆ Automatic Setup1Insert the setup diskette in the diskette drive and change the directory to A:,where A: is the diskette drive.To do so, type A: after the C:\ prompt and press [Enter].2Type CDSETUP and press [Enter].3Reboot the computer.◆ Manual Setup1Make the C:\SAMSUNG directory.2Copy the files from the diskette to the C:\SAMSUNG directory.To do so, type COPY A: * . * C:\SAMSUNG after the C:\prompt and press [Enter].3Edit the CONFIG.SYS file.Add the DEVICE=C:\SAMSUNG\SSCDROM.SYS \D:SSCD000/V entry.LAST DRIVE = Z- - - - - - - - - - - - - - - - - - - - - - - - - - - - - - - - - - - -- - - - - - - - - - - - - - - - - - - - - - - - - - - - - - - - - - - - DEVICE = C :\SAMSUNG\SSCDROM.SYS/D : SSCD000/V4Edit the AUTOEXEC.BAT file.Add the C:\SAMSUNG\MSCDEX/D:SSCD000 entry.5Reboot the computer.- - - - - - - - - - - - - - - - - - - - - - - - - - - - - - - - - - - - - - - - - - - - - - - - - - - - - - - - - - - - - - - - - - - - - - - - C :\SAMSUNG\MSCDEX /D:SSCD000](https://usermanual.wiki/Samsung-Electronics-Co/SM332/User-Guide-242079-Page-6.png)

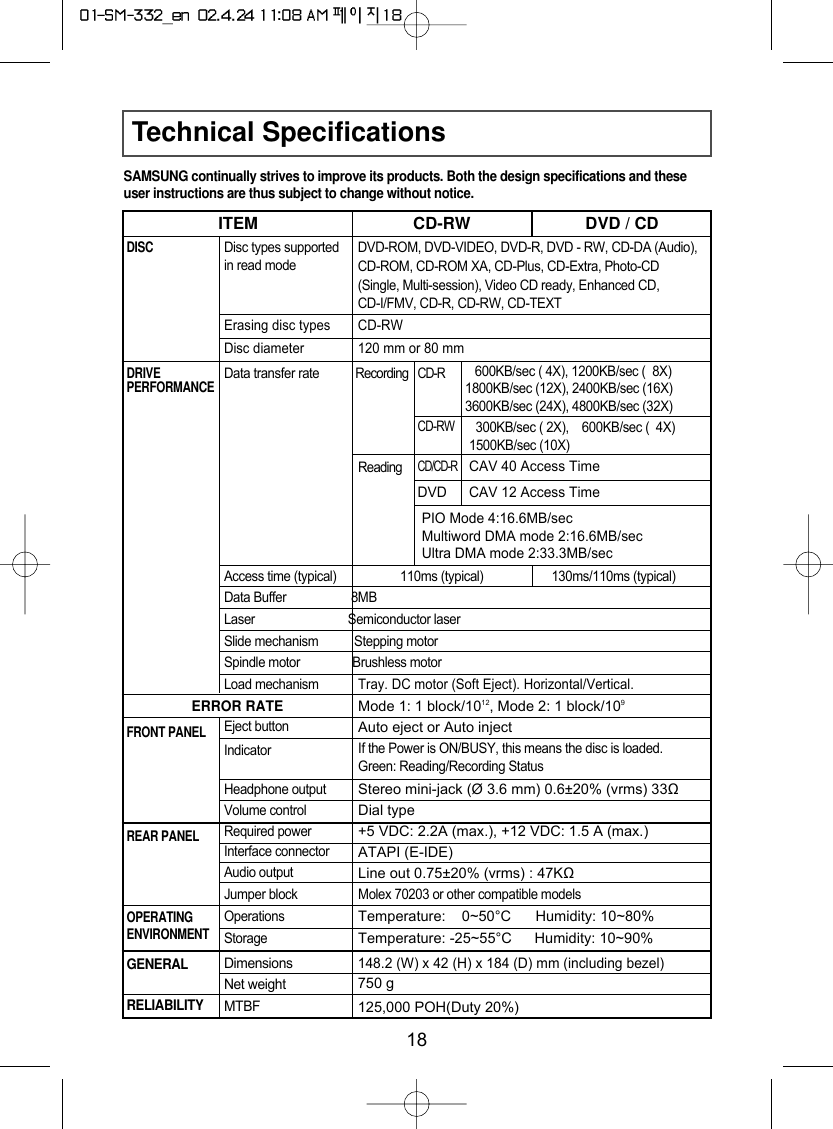
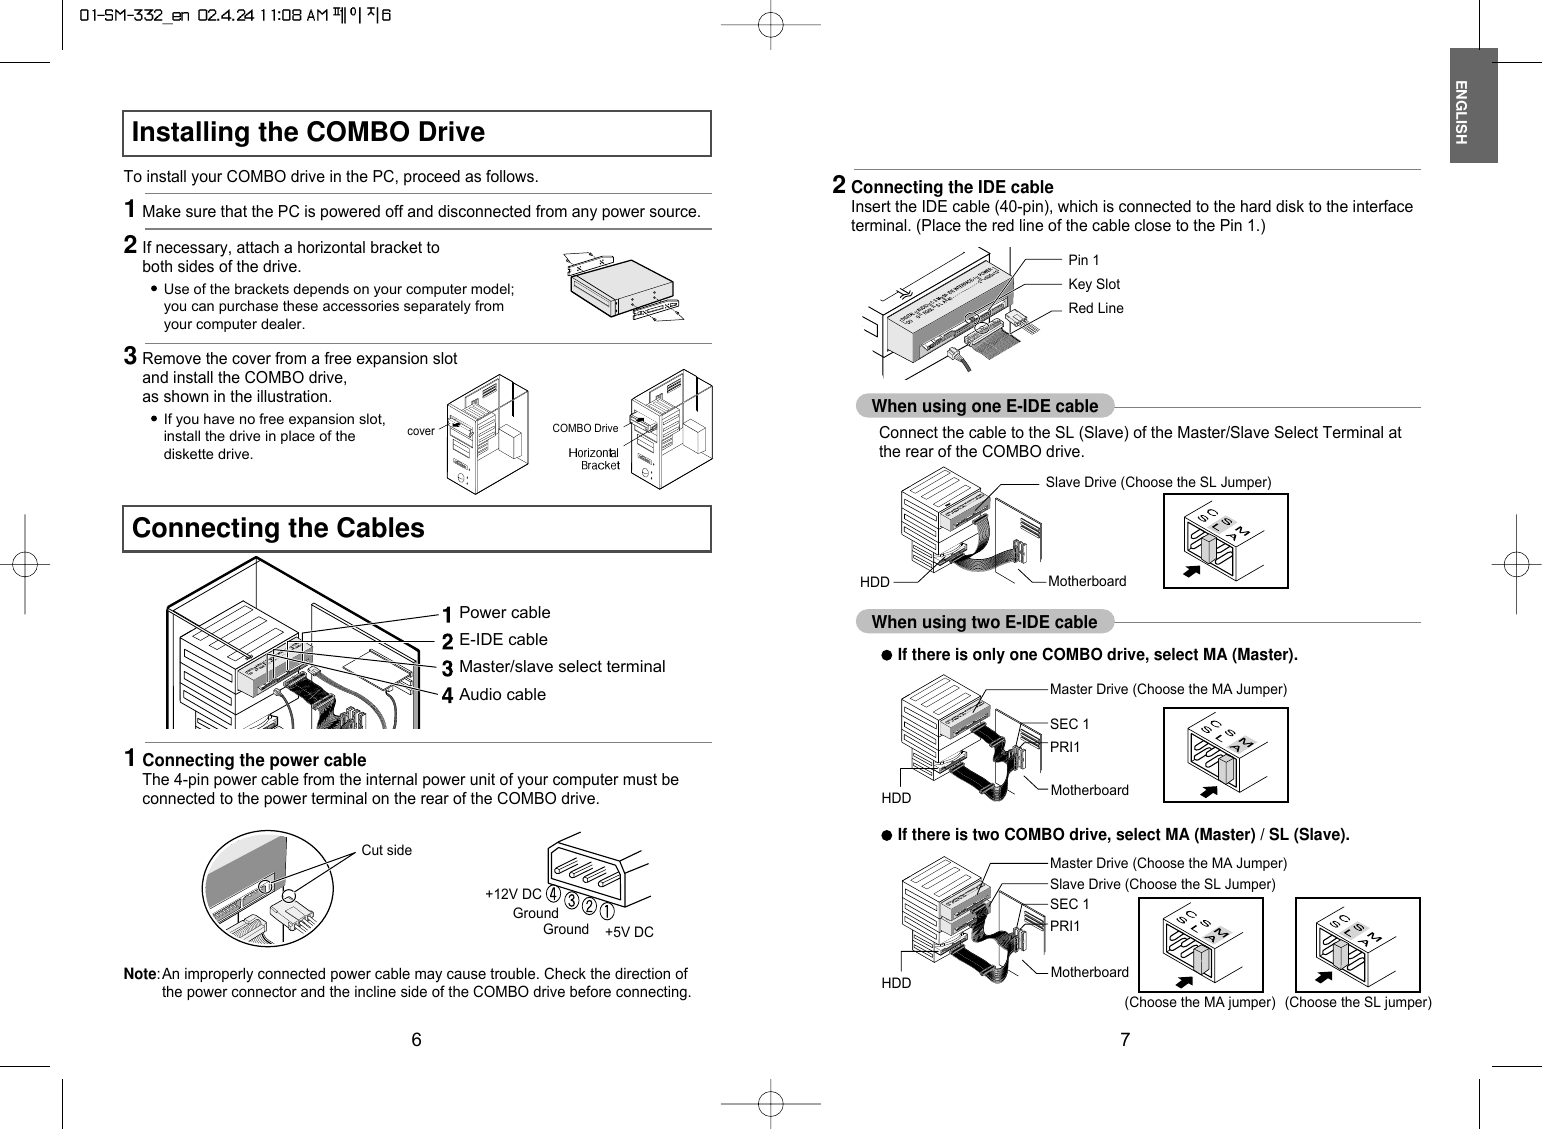
![ENGLISH15CD-RW Ricoh, Samsung, CMC, Ritek, SKCGeneral DMA Installation Guide(Windows 95/98/Me)Click on STARTClick on SettingsSelect Control PanelSelect the System IconSelect the Device Manager panel in System PropertiesExpand the CD-ROM iconSelect your CD-R/RW driveClick on the Properties buttonClick on the Settings tabCheck the DMA checkbox to enables DMA.Click OKRestart your PCWindows 2000/XPSelect the DMA mode by selecting [Start > Setting > Control Panel > System >Device Manager > IDEATA/ATAPI Controller > Default/Assistant IDE ChannelAdvanced Information] Recommended Disc TypesCD-R Ricoh, Taiyo Yuden, Samsung, Mitsui, SKC, CMC, Ritek, KodakFujifilm, POSTECHWhat is Buffer Under-Run?Every CD-R or CD-RW drive records the data that the Host PC wants to recorduntil the data flow ends. However, if the buffer becomes empty temporarily,this may cause errors in recording data.What is Auto-Run?If inserting a CD into a drive, the operating system executes the Autorun.inf fileof the CD automatically.Term DescriptionImportant!Please read the entire DMA installation guide before installing your COMBO drive.About DMA InstallationFor stable writing performance at high speeds, Installation of DMA transfer mode forE-IDE/ATAPI interface is strongly recommended. We recommend DMA mode for fast writing.DMA SettingBefore you install your COMBO drive, we recommend to set DMA to enabled on yourPC system. See the following procedure to set DMA transfer mode in windowsoprerating system. (Windows 95 OSR2/98/ME)14Caution with errorsEvery CD-R or CD-RW drive records data by applying recording laser onto a CD.If the CD is damaged or recording data is not possible, you need to remove thefollowing causes of the error before using the CD.It is recommended to set a CD-R or CD-RW drive as follows.1Do not work on a multi-tasking environment and remove screen savers.If you work on a multi-tasking environment while the CD-RW driveis recording/deleting data, Buffer Under-Run may occur.2Do not allow any external access to the Host PC while recording data.If another user accesses your printer through a network while you arerecording data, errors may occur.5Use an E-IDE cable, which has the specified length (46cm).Using E-IDE cables longer than 46cm may cause errors during data transaction.3Remove the Auto-Run function of the CD.If you insert a CD that has the Auto-Run function to a drive connected to aPC while recording/deleting data, this may cause errors.How to cancel (select) the Auto-Run functionCancel (Select) the Auto-Run function in [Start > Setting > Control Panel >System > Device Manager > CD-ROM Setting]6Use only one recording software program.To install a software program for recording, uninstall any other types or versionsof recording software programs first and then reboot the computer.Make sure you use the recording software CD (Nero Burning Rom /Roxio Easy CD Creator) provided by us. Using our software program withothers may cause errors in recording.4Use image files when you record many small files.If you use a lot of small size files for recording, this may reduce the transactionrate of the PC. Although Justlink function is often run, the recording qualitymay become low.If you copy a CD from another, you do not require making available space in thehard disk. However, when you use image files, you need to copy them on the harddisk first and then copy to a CD. In this case, you need to ensure maximum 700MBof available space in the hard disk for reliable recording process.Not compatible with Windows 95 in case of Roxio Software.](https://usermanual.wiki/Samsung-Electronics-Co/SM332/User-Guide-242079-Page-8.png)