Samsung Electronics Co SMC115 GSM/WCDMA/LTE Phone + Bluetooth, DTS/UNII a/b/g/n & NFC User Manual 3
Samsung Electronics Co Ltd GSM/WCDMA/LTE Phone + Bluetooth, DTS/UNII a/b/g/n & NFC 3
Contents
- 1. User manual-1
- 2. User manual-2
- 3. User manual-3
User manual-3


![using this manual This user manual has been specially designed to guide you through the functions and features of your mobile phone. To get started quickly, refer to “introducing your mobile phone, Instructional icons Before you start, familiarise yourself with the icons you will see in this manual: Warning—situations that could cause injury to yourself or others Caution—situations that could cause damage to your phone or other equipment Note—notes, usage tips, or additional information Refer to—(represents “see page 12”) Õ Followed by—the order of options or menus you must select to perform a step; for example: In Menu mode, select Messages Õ Create new message (represents Messages, followed by Create new message) [ ] Square brackets—phone keys; for example: [ ](represents the Power/ Menu exit key) < > Angled brackets—softkeys that control different functions at each screen; for example: <OK> (represents the OK softkey) Copyright information Rights to all technologies and products that comprise this device are the property of their respective owners: Bluetooth® is a registered trademark of the Bluetooth SIG, Inc. worldwide Java™ is a trademark of Sun Microsystems, Inc. Windows Media Player® is a registered trademark of Microsoft Corporation.](https://usermanual.wiki/Samsung-Electronics-Co/SMC115.User-manual-3/User-Guide-2240203-Page-70.png)

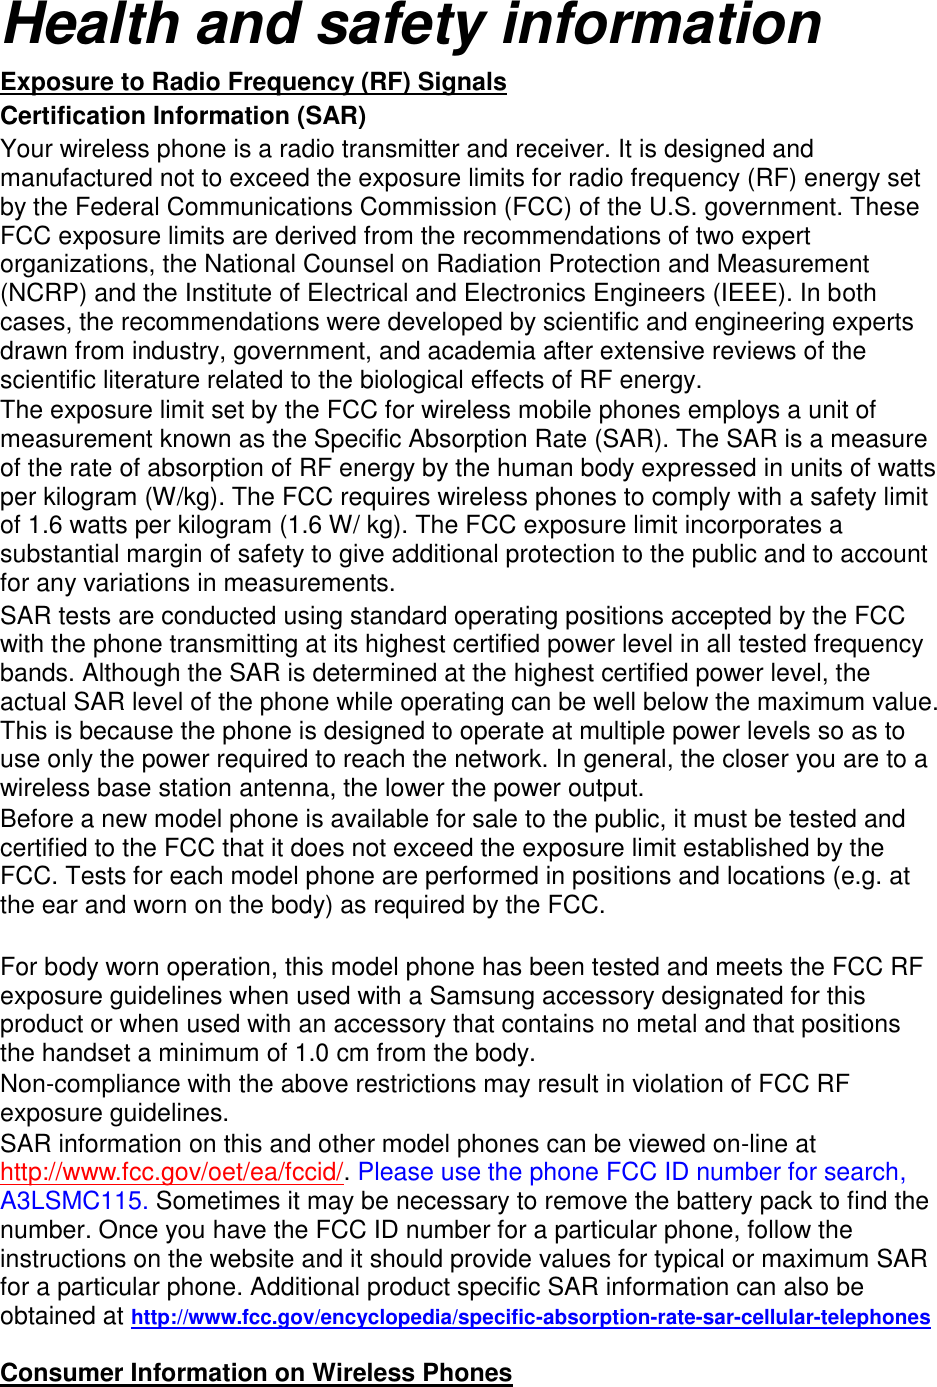

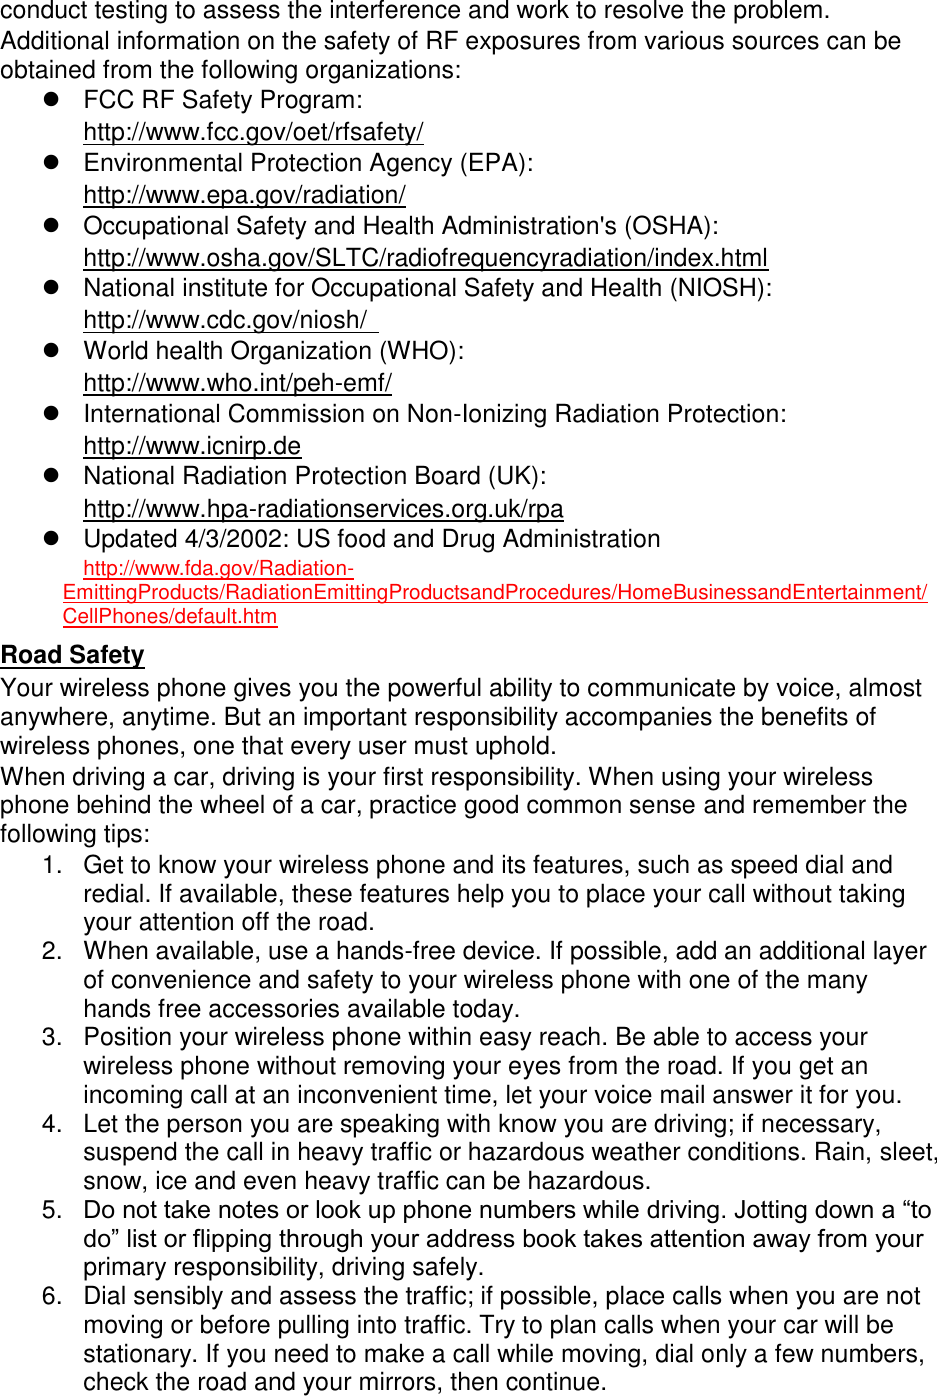

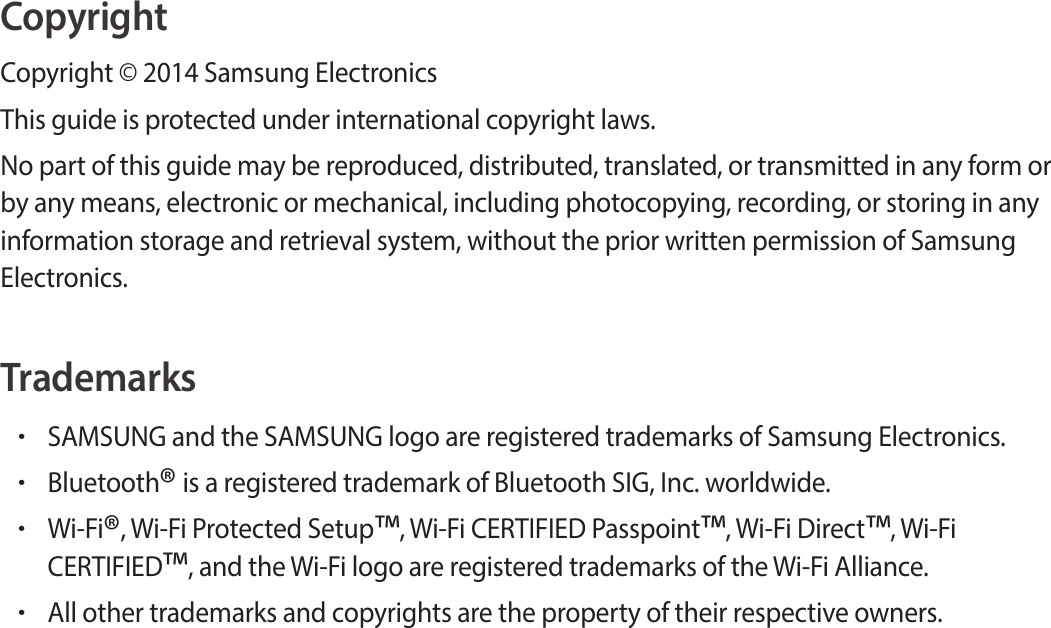
![Phone layout The front of your phone includes the following keys and features: The rear of your phone includes the following keys and features: Keys Key Function Softkeys Perform actions indicated at the bottom of the display; In Idle mode, press and hold the left softkey to access the simplified menus 4-way navigation In Idle mode, access user-defined menus (left/right/up/down); In Menu mode, scroll through menu options Confirm In Idle mode, launch the web browser; In Menu mode, select the highlighted menu option or confirm an input Dial Make or answer a call; In Idle mode, retrieve recently dialled, missed, or received numbers Power/ Menu exit Turn the phone on and off (press and hold); End a call; In Menu mode, cancel input and return to Idle mode Alpha-numeric Enter numbers, letters and special characters; In Idle mode, press and hold [1] to access voice mails and [0] to enter an international call prefix Special function Enter special characters or perform special functions; In Idle mode, press and hold [#] for the silent profile; Press and hold [*] to enter a pause between numbers Volume Adjust the phone’s volume Display Your phone’s display consists of three areas: Icon line Displays various icons Text and graphic area Displays messages, instructions, and information you enter Softkey line Displays the current actions assigned to each softkey Icons Learn about the icons that appear on your display. Definition](https://usermanual.wiki/Samsung-Electronics-Co/SMC115.User-manual-3/User-Guide-2240203-Page-89.png)
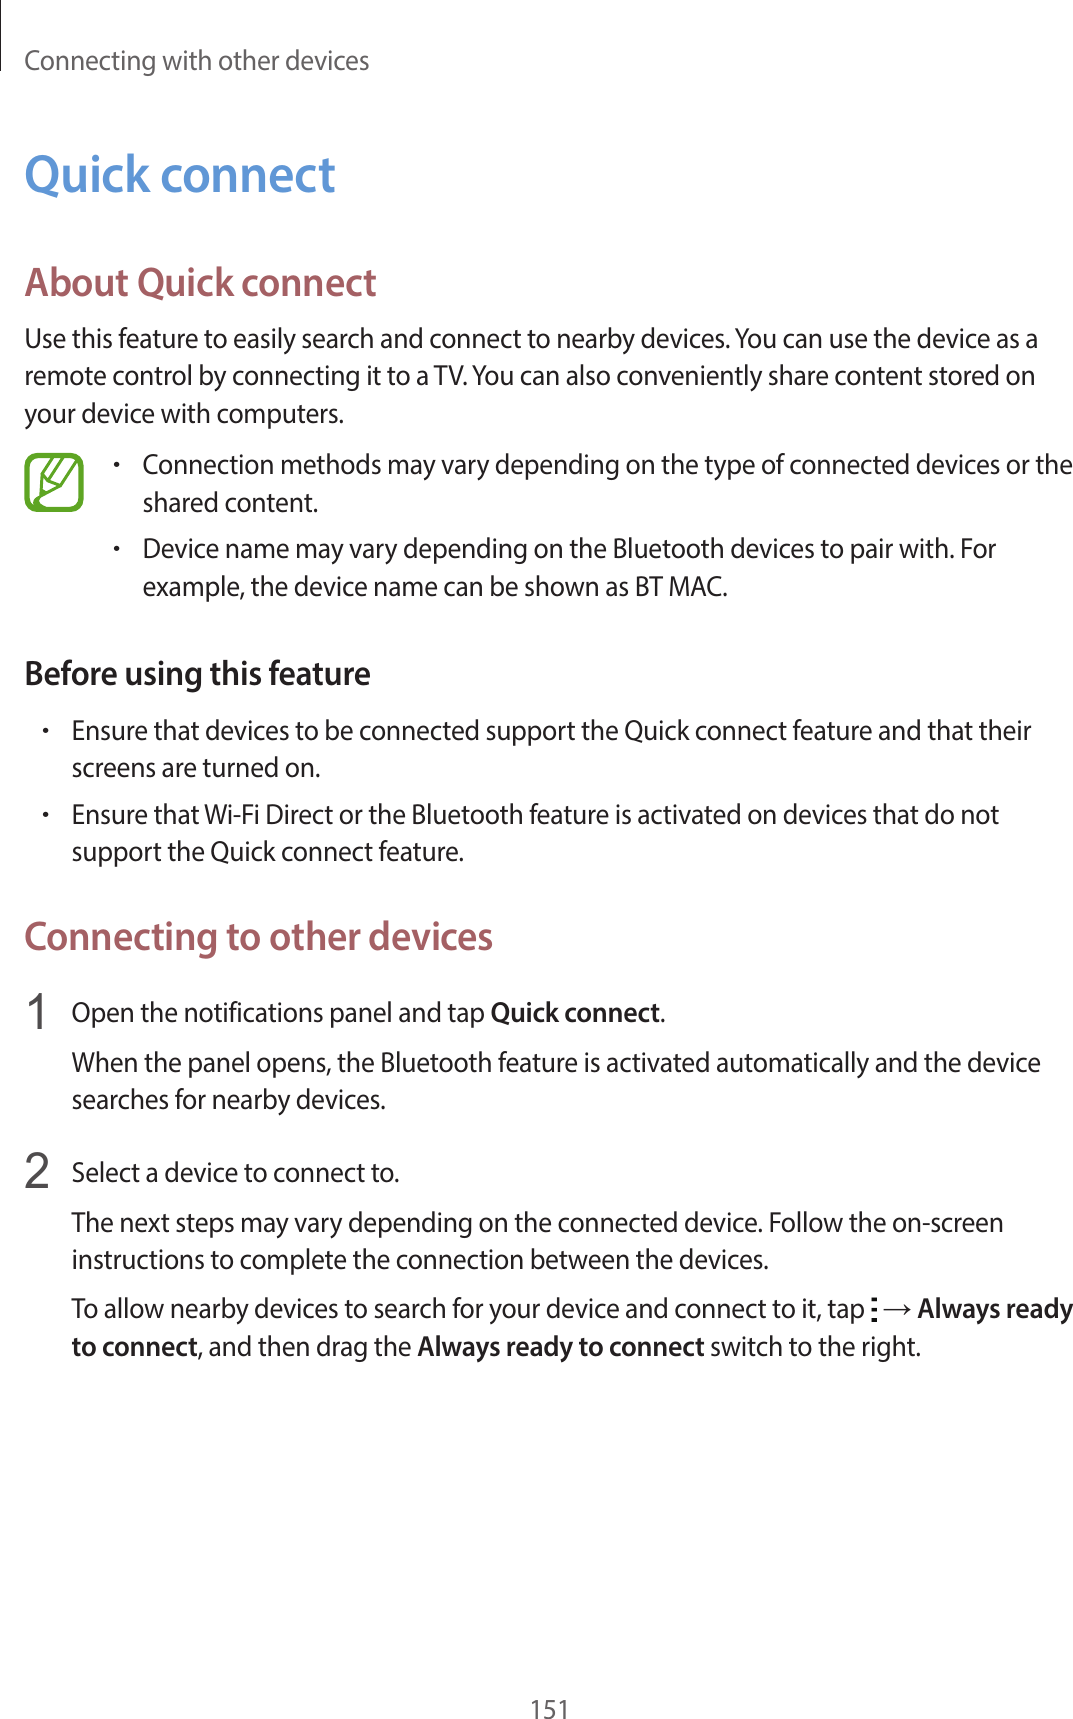
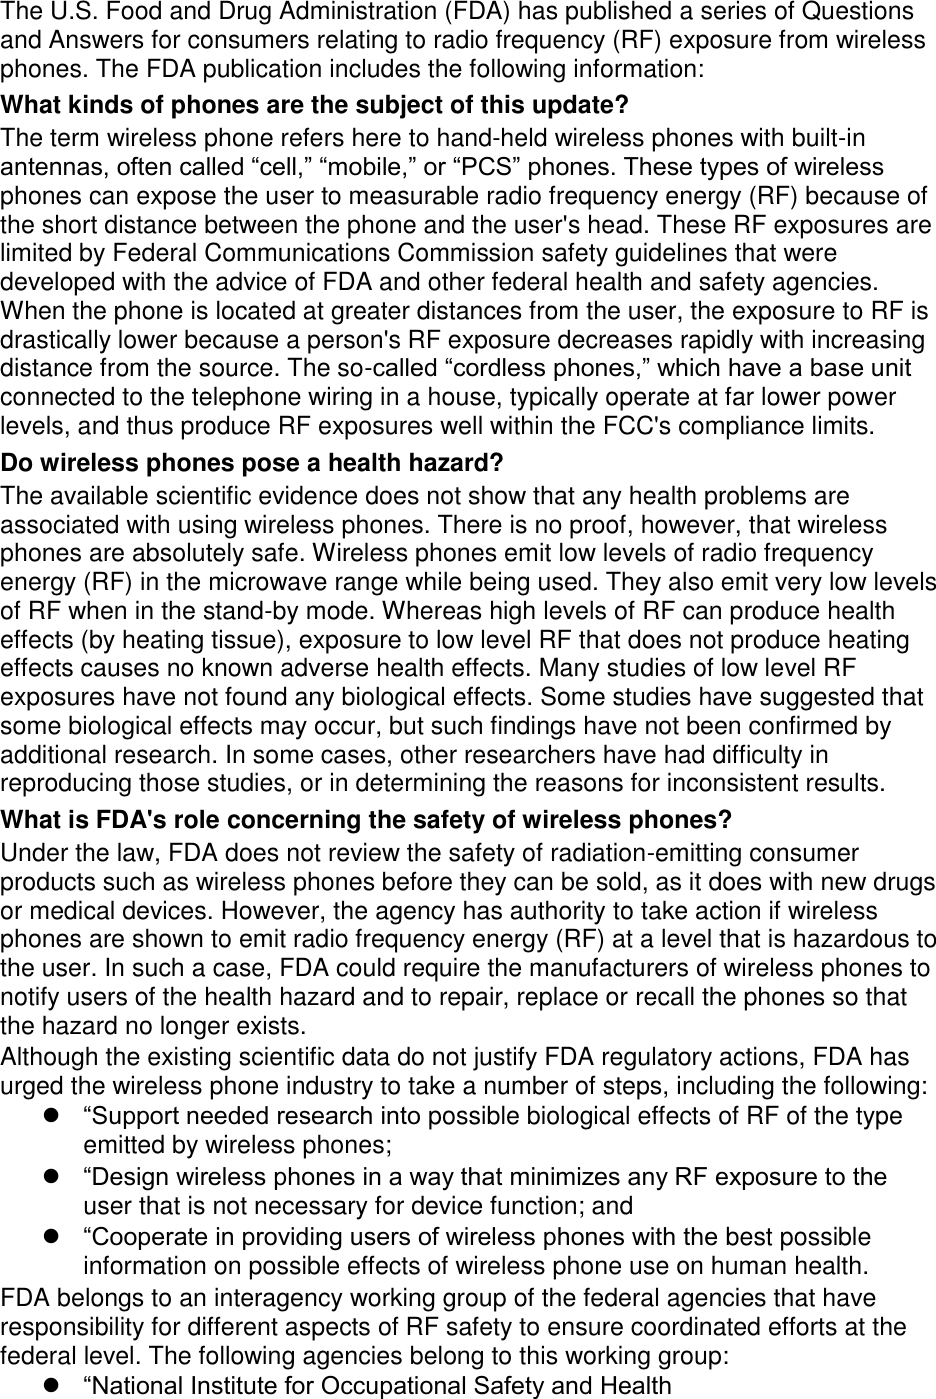
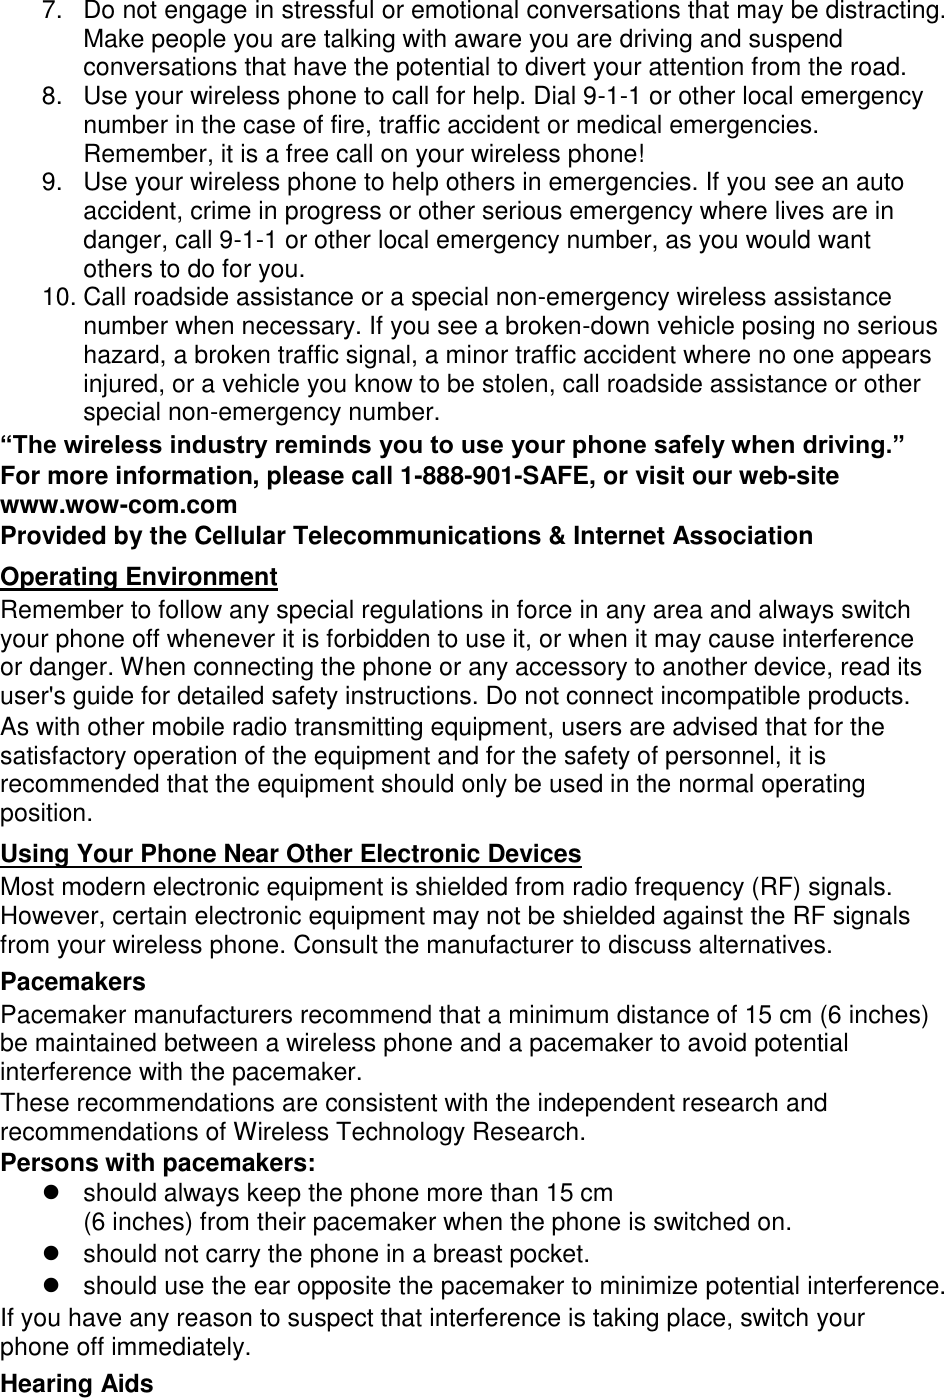
![Signal strength Call in progress New text message assembling and preparing your mobile phone Get started by assembling and setting up your mobile phone for its first use. Install the SIM card and battery When you subscribe to a cellular service, you will receive a Subscriber Identity Module, or SIM card, with subscription details, such as your personal identification number (PIN) and optional services. To install the SIM card and battery, 1. Remove the battery cover. If the phone is on, press and hold [ ] to turn it off. 2. Insert the SIM card. Place the SIM card in the phone with the gold-coloured contacts facing down. 3. Insert the battery. 4. Replace the battery cover. Charge the battery Before using the phone for the first time, you must charge the battery. 1. Open the cover to the multifunction jack on the side of the phone. 2. Plug the small end of the travel adapter into the multifunction jack. Improperly connecting the travel adapter can cause serious damage to the phone. Any damages by misuse are not covered by the warranty. 3. Plug the large end of the travel adapter into a power outlet. 4. When the battery is fully charged (the [|||||] icon is no longer moving), unplug the travel adapter from the power outlet. 5. Unplug the travel adapter from the phone. 6. Close the cover to the multifunction jack. About the low battery indicator When your battery is low, the phone will emit a warning tone and a low battery message. The battery icon will also be empty and blinking. If the battery level becomes too low, the phone will automatically power off. Recharge your battery to continue using your phone.](https://usermanual.wiki/Samsung-Electronics-Co/SMC115.User-manual-3/User-Guide-2240203-Page-90.png)
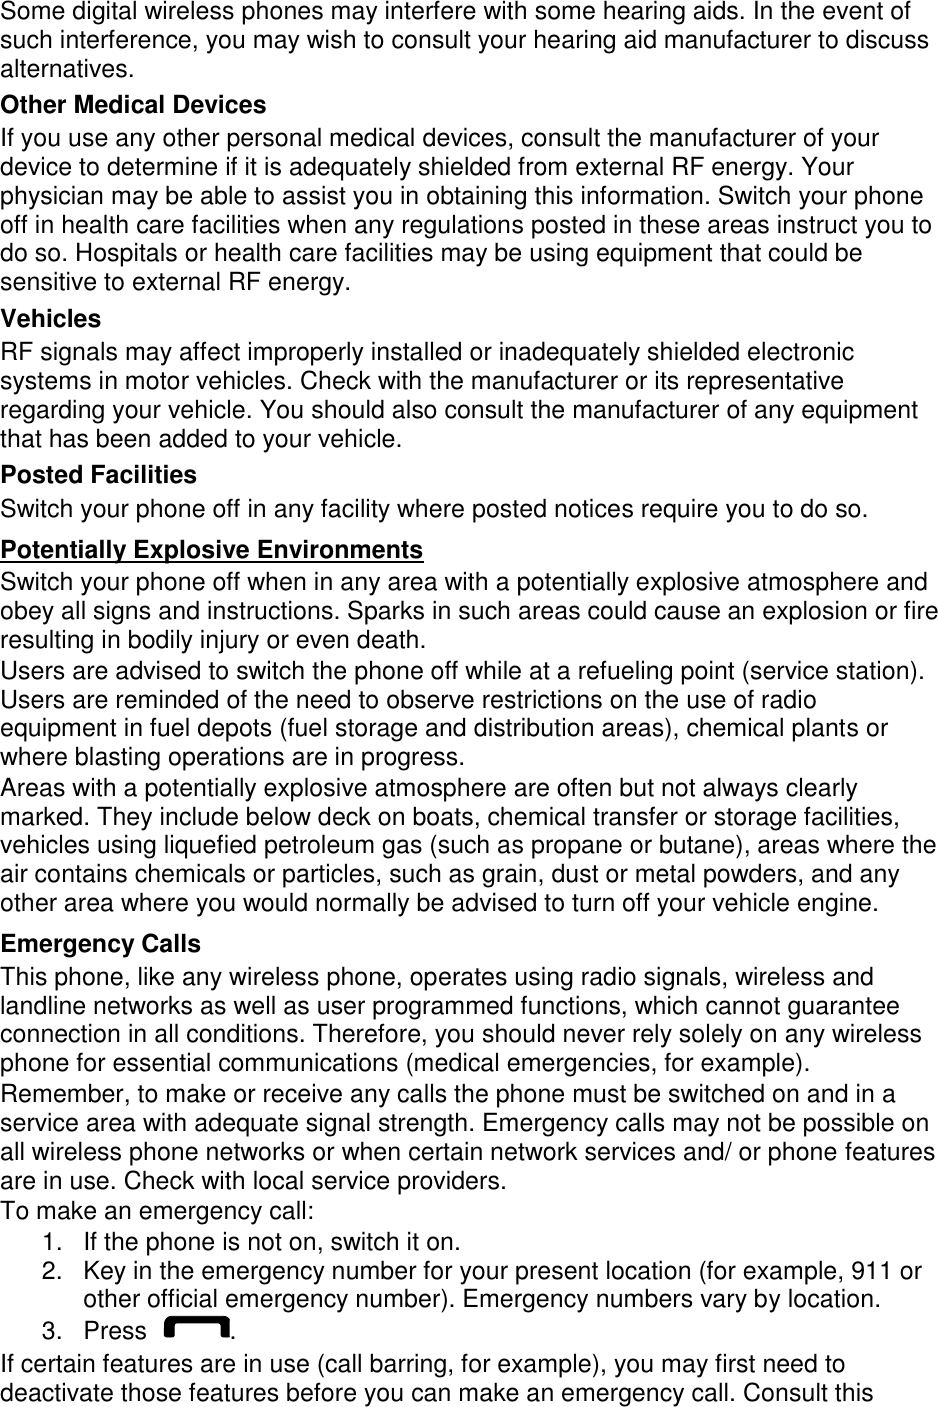
![using basic functions Learn how to perform basic operations and use the main features of your mobile phone. Turn your phone on and off To turn your phone on, 1. Slide open the phone. 2. Press and hold [ ]. 3. Enter your PIN and press <OK> (if necessary). 4. When the setup wizard opens, customise your phone as desired by following the screen. To turn your phone off, repeat steps 1 and 2 above. Switch to the offline profile By switching to the offline profile, you can use your phone’s non-network services in areas where wireless devices are prohibited, such as aeroplane and hospitals. To switch to the offline profile, in Menu mode, select Settings Õ Phone profiles Õ Offline. Follow all posted warnings and directions from official personnel when in areas where wireless devices are prohibited. Access menus To access your phone’s menus, 1. In Idle mode, press <Menu> to access Menu mode. 2. Use the navigation key to scroll to a menu or option. 3. Press [OK], <Select>, or <Save> to confirm the highlighted option. 4. Press <Back> to move up one level; Press [ ] to return to Idle mode. Customise your phone Get more from your phone by customising it to match your preferences. Adjust the volume of the key tones In Idle mode, press the Volume key up or down to adjust the key tone volume. Switch to or from the silent profile In Idle mode, press and hold [#] to silence or unsilence your phone.](https://usermanual.wiki/Samsung-Electronics-Co/SMC115.User-manual-3/User-Guide-2240203-Page-91.png)
![Use the simplified menus To set up simplified menu items, 1. In Idle mode, press [OK]. 2. Press <Options> Õ Customise menu. 3. Select your favourite menus. 4. Press <Options> Õ Open to select submenus (if necessary). 5. Press <Save>. 6. To access an item from the simplified menus, 7. In Idle mode, press [OK]. 8. Scroll to the menu item you want and press [OK]. Lock your phone 1. In Menu mode, select Settings Õ Security Õ Phone lock Õ On. 2. Enter a new 4- to 8-digit password and press <OK>. 3. Enter the new password again and press <OK>. Use basic call functions Learn to make or answer calls and use basic call functions. Make a call 1. In Idle mode, enter an area code and a phone number. 2. Press [ ] to dial the number 3. To end the call, press [ ]. Answer a call 1. When a call comes in, press [ ]. 2. To end the call, press [ ]. Adjust the volume To adjust the volume during a call, press the Volume key up or down. Use the speakerphone feature 1. During a call, press [OK] Õ <Yes> to activate the speaker. 2. To switch back to the earpiece, press [OK] again. In noisy environment, you may have difficulty hearing the calls while using the speakerphone feature. For better performance, use the normal phone mode.](https://usermanual.wiki/Samsung-Electronics-Co/SMC115.User-manual-3/User-Guide-2240203-Page-93.png)
![Use the headset By plugging the supplied headset into the multifunction jack, you can make and answer calls: To redial the last call, press and hold the headset button. To answer a call, press the headset button. To end a call, press the headset button. Send and view messages Learn to send or view text (SMS), multimedia (MMS), or email messages. Send a text or multimedia message 1. In Menu mode, select Messages Õ Create new message Õ Message. 2. Enter a destination number or an email address and scroll down. 3. Enter 4. For sending as a text message, skip to step 5. For attaching multimedia, continue with step 4. 5. Press <Options> Õ Add multimedia and add an item. 6. Press [OK] Õ Send to send the message. Send an email 1. In Menu mode, select Messages Õ Create new message Õ Email. 2. Enter an email address and scroll down. 3. Enter a subject and scroll down. 4. Enter your email text. 5. Press <Options> Õ Attach multimedia and attach a file (if necessary). 6. Press [OK] Õ Send to send the message. Enter text When entering text, you can change the text input mode: Press and hold [*] to switch between T9 and ABC modes. Depending on your country, you may be able to access an input mode for your specific language. Press [*] to change case or switch to Number mode. Press and hold [#] to switch to Symbol mode. Enter text in one of the following modes: Mode Function ABC Press the appropriate alphanumeric key until the character you want appears on the display. T9 1. Press the appropriate alphanumeric keys to enter an entire word. 2. When the word displays correctly, press [0] to insert a space. If the correct word does not display, select an](https://usermanual.wiki/Samsung-Electronics-Co/SMC115.User-manual-3/User-Guide-2240203-Page-94.png)
![alternate word from the list that appears. Number Press the appropriate alphanumeric key to enter a number. Symbol Press the appropriate alphanumeric key to select a symbol. View text or multimedia messages 1. In Menu mode, select Messages Õ My messages Õ Inbox. 2. Select a text or multimedia message. View an email 1. In Menu mode, select Messages Õ My messages Õ Email inbox. 2. Select Check new email. 3. Select an email or a header. 4. If you selected a header, press <Options> Õ Retrieve to view the body of the email. Add and find contacts Learn the basics of using the phonebook feature. Add a new contact 1. In Idle mode, enter a phone number and press <Options>. 2. Select Save Õ a memory location (phone or SIM) Õ New. 3. Select a number type (if necessary). 4. Enter contact information. 5. Press <Options> Õ Save to add the contact to memory. Find a contact 1. In Menu mode, select Phonebook. 2. Enter the first few letters of the name you want to find. 3. Select the contact’s name from the search list. Once you have found a contact, you can: call the contact by pressing [] edit the contact information by pressing [OK]](https://usermanual.wiki/Samsung-Electronics-Co/SMC115.User-manual-3/User-Guide-2240203-Page-95.png)

![troubleshooting If you are having trouble with your mobile phone, try these troubleshooting procedures before contacting a service professional. While using your phone, the following messages may appear: Message Try this to solve the problem: Please insert SIM card Ensure that the SIM card is installed correctly. Phone lock When the phone lock feature is enabled, you must enter the password you set for the phone. Enter PIN When using the phone for the first time or when the PIN requirement is enabled, you must enter the PIN supplied with the SIM card. You can disable this feature by using the PIN lock menu. Enter PUK Your SIM card is blocked, usually as a result of entering your PIN incorrectly several times. You must enter the PUK supplied by your service provider. Your phone displays “Network unavailable” or “Network error.” When you are in areas with weak signals or poor reception, you may lose reception. Move to another area and try again. You cannot access some options without a subscription. Contact your service provider for more details. You enter a number, but the call is not dialled. Ensure that you have pressed the Dial key: [ ]. Ensure that you have accessed the right cellular network. Ensure that you have not set call barring for the phone number. Another caller cannot reach you. Ensure that your phone is turned on. Ensure that you have accessed the right cellular network. Ensure that you have not set call barring for the phone number. Another caller cannot hear you speaking. Ensure that you are not covering the built-in microphone. Ensure that the microphone is close to your mouth. If using a headset, ensure that it is properly connected.](https://usermanual.wiki/Samsung-Electronics-Co/SMC115.User-manual-3/User-Guide-2240203-Page-103.png)