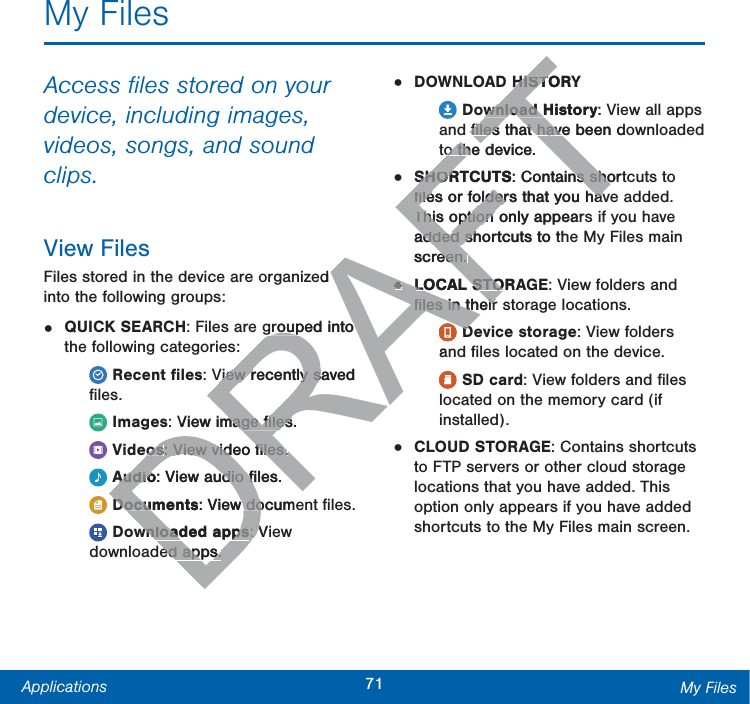
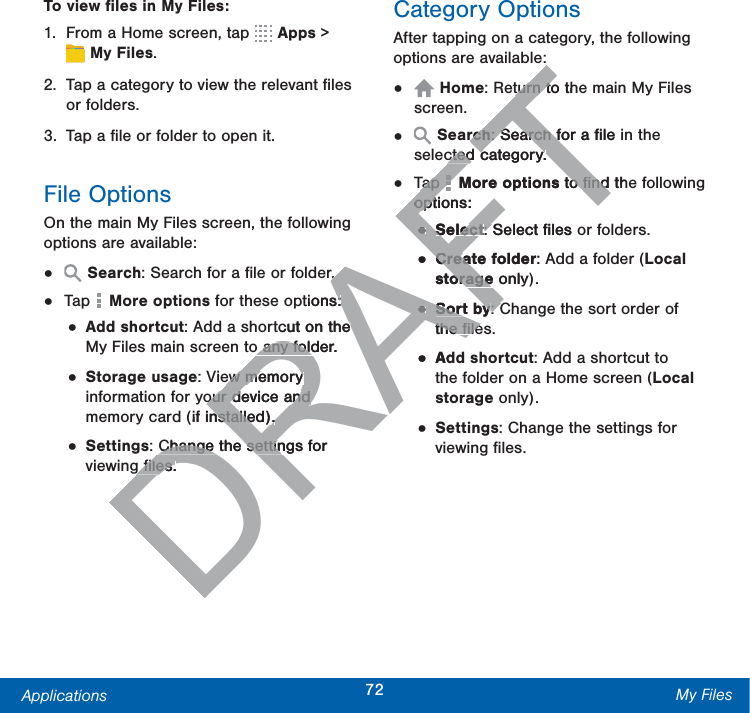
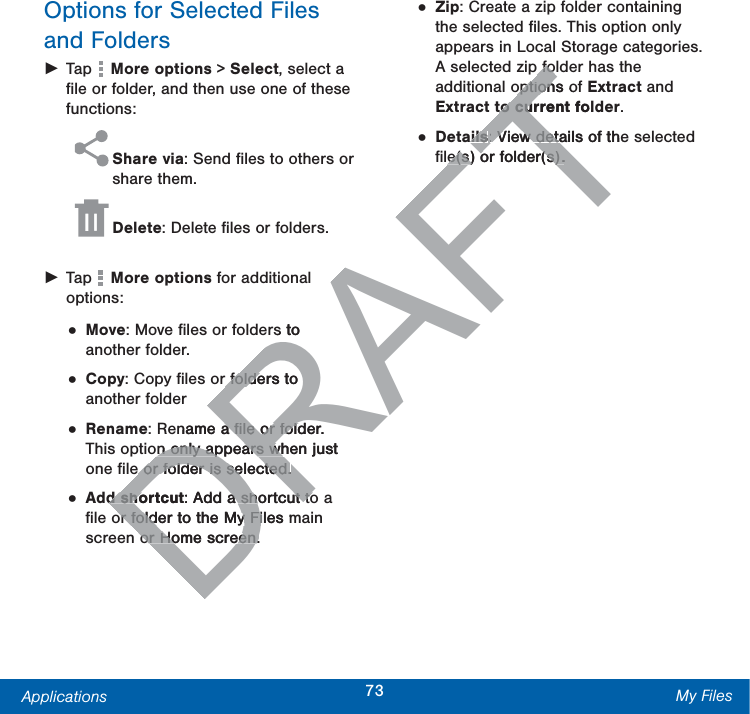
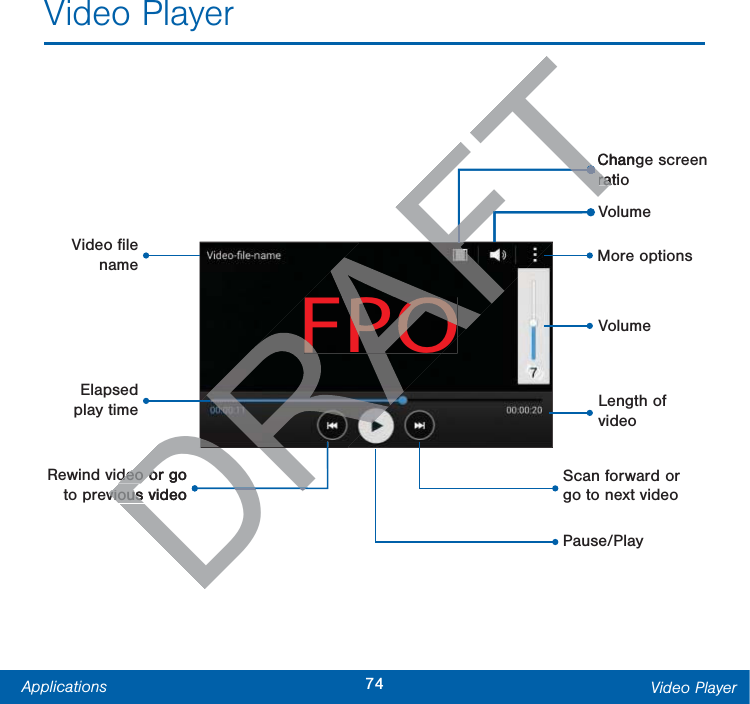
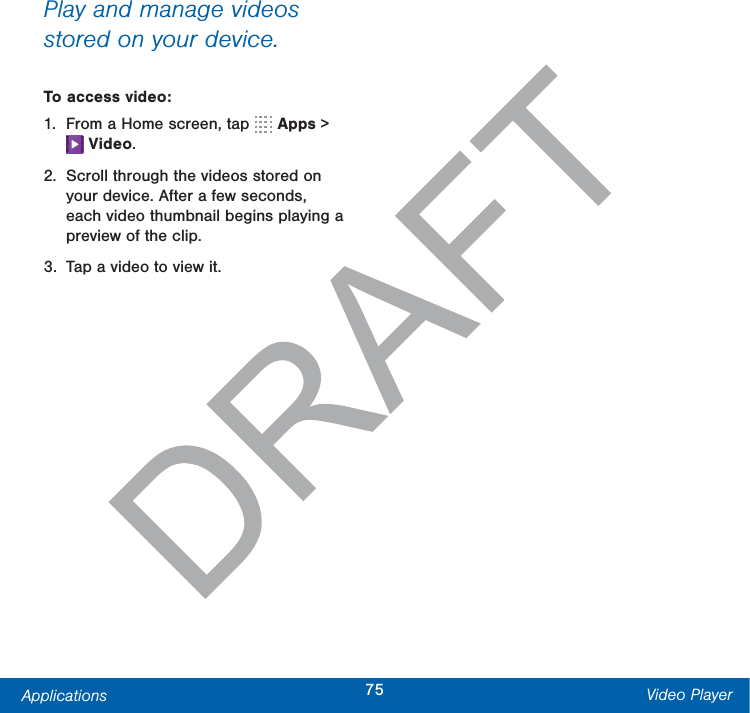
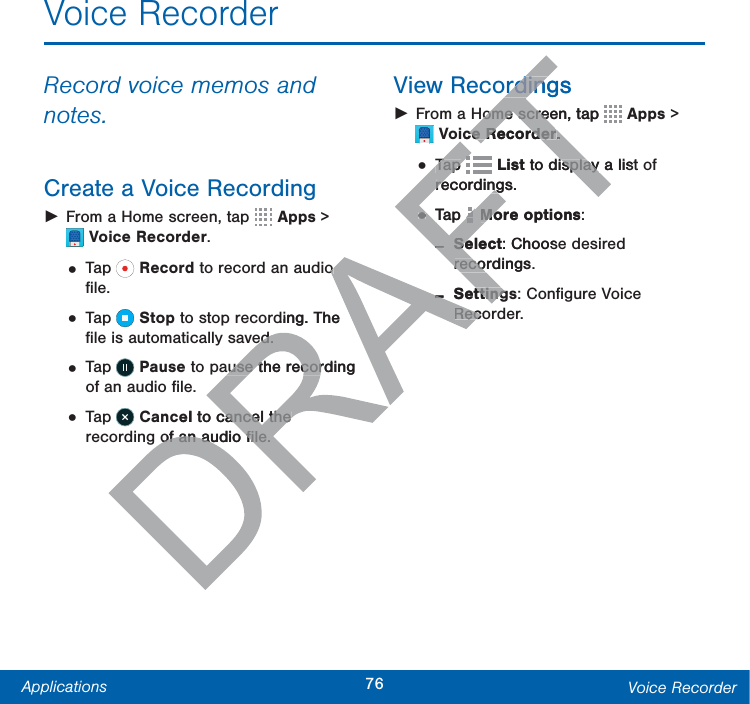
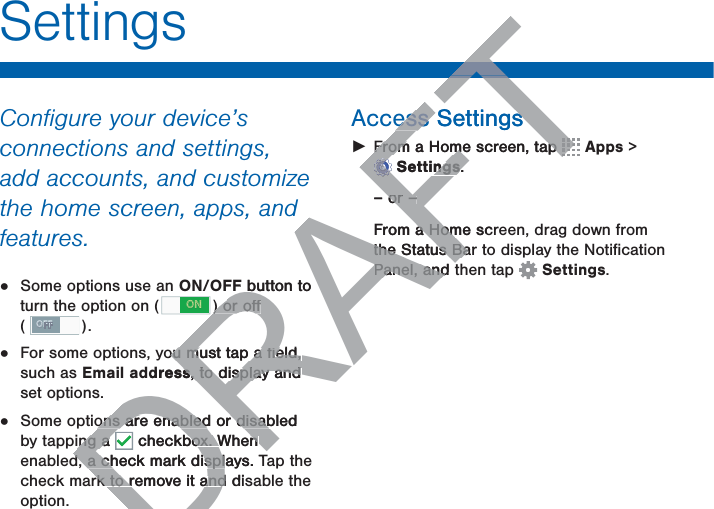
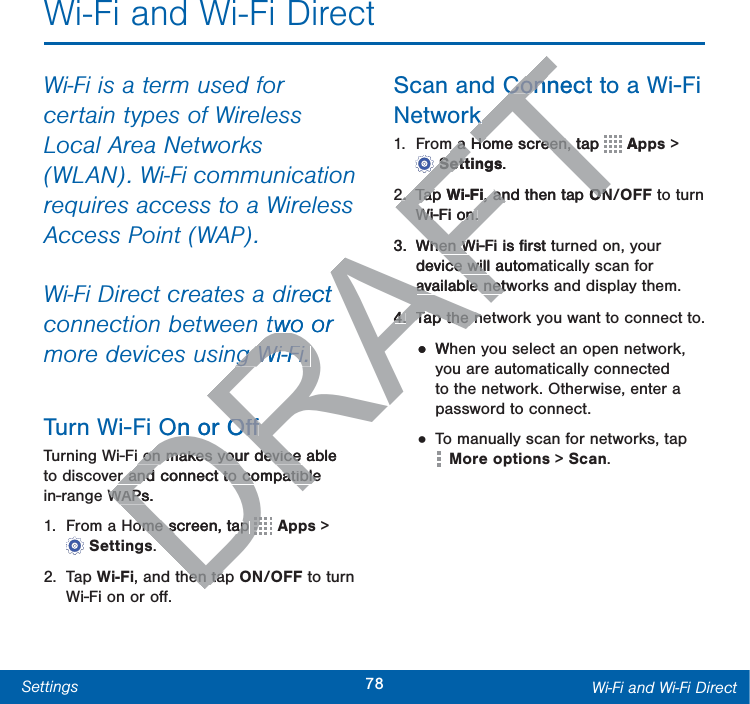
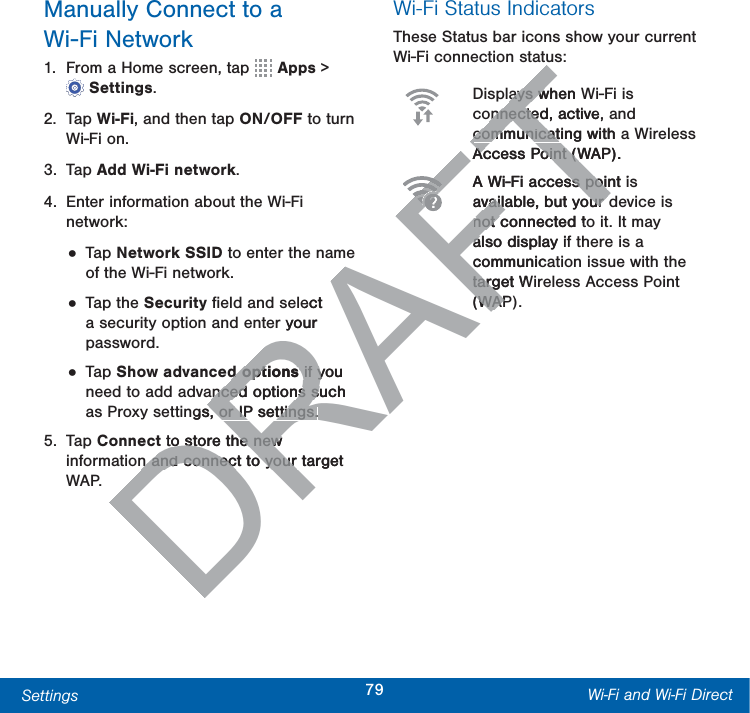
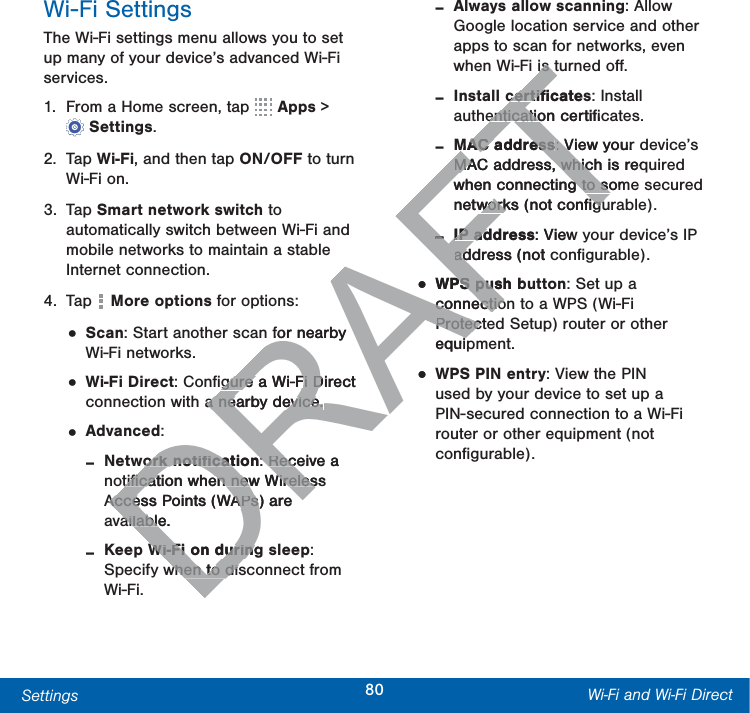
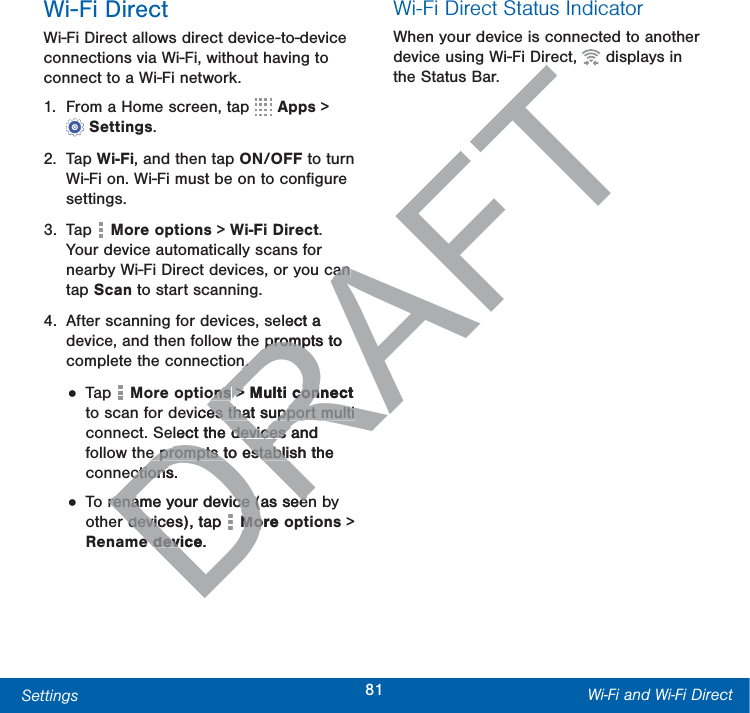
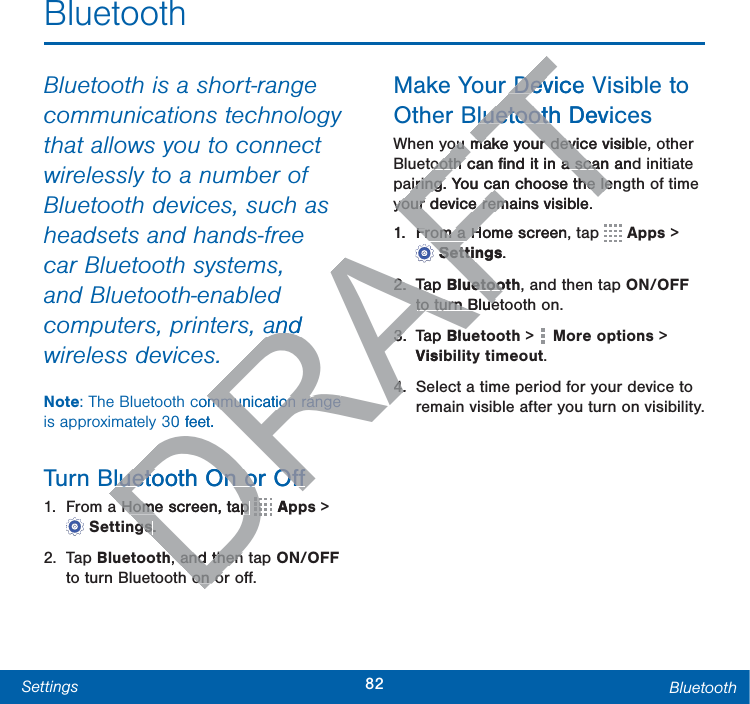
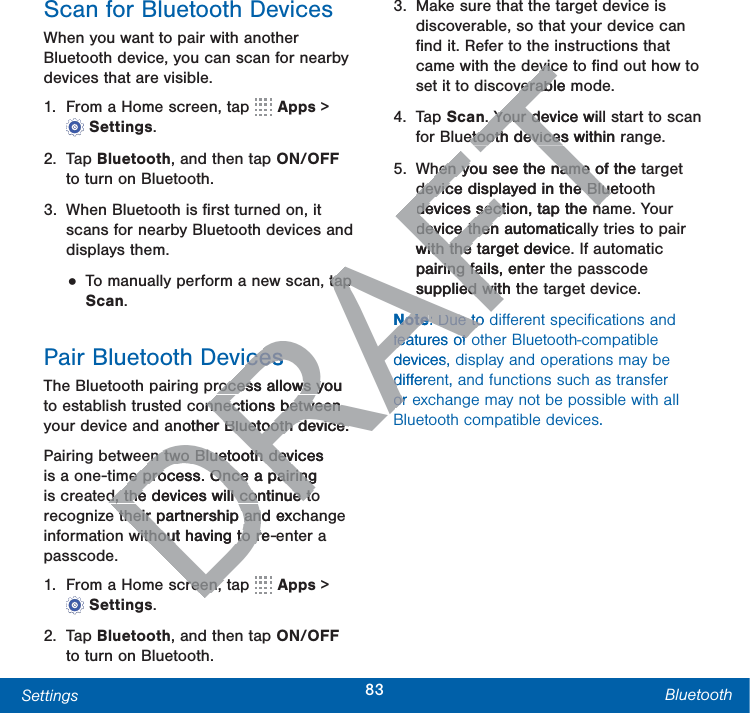
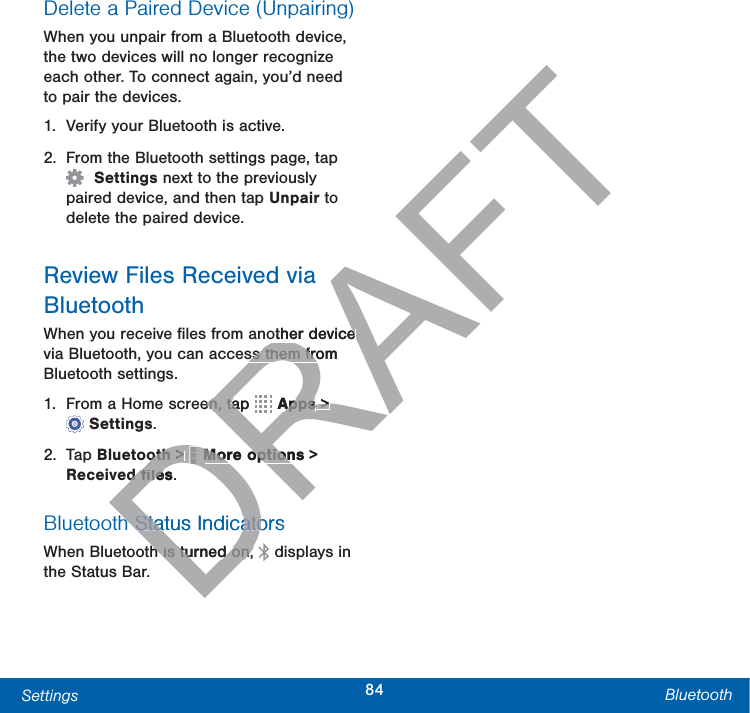
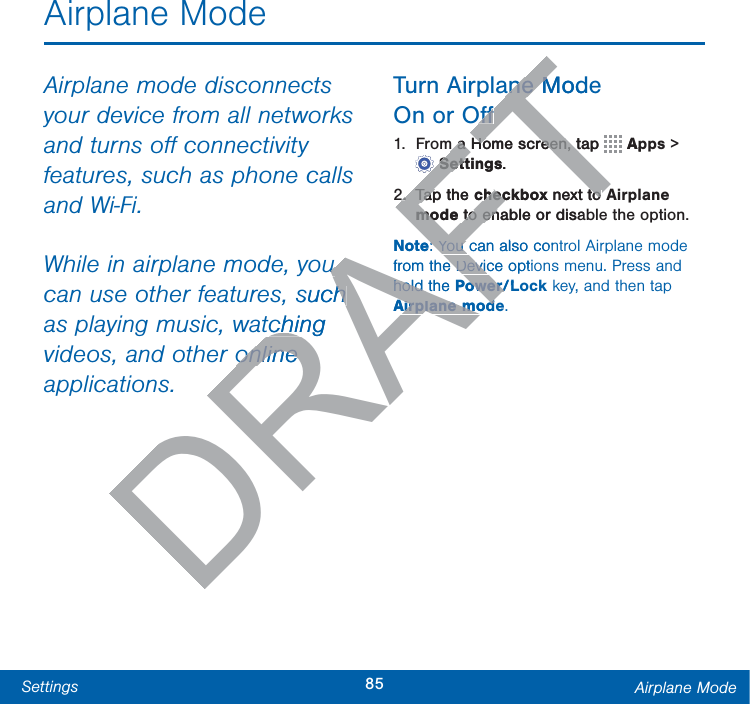
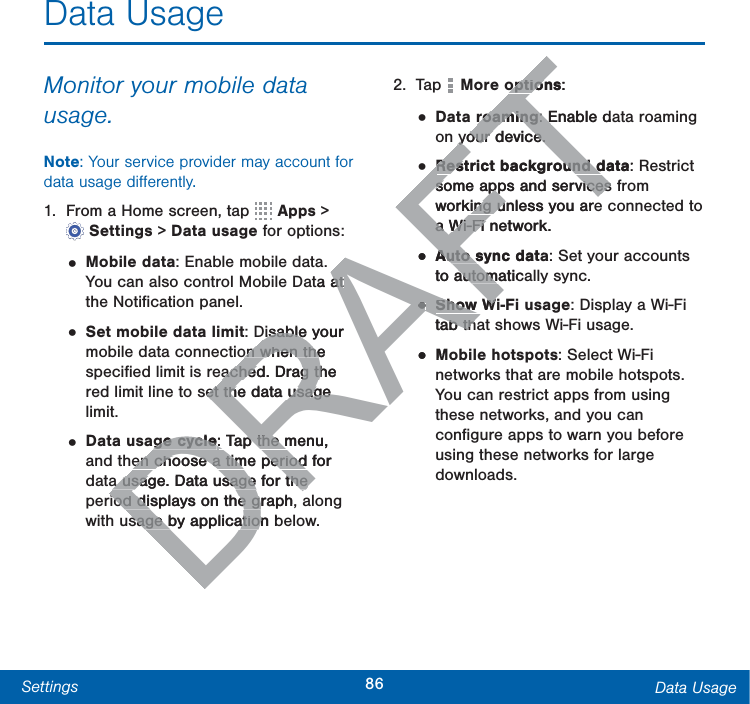
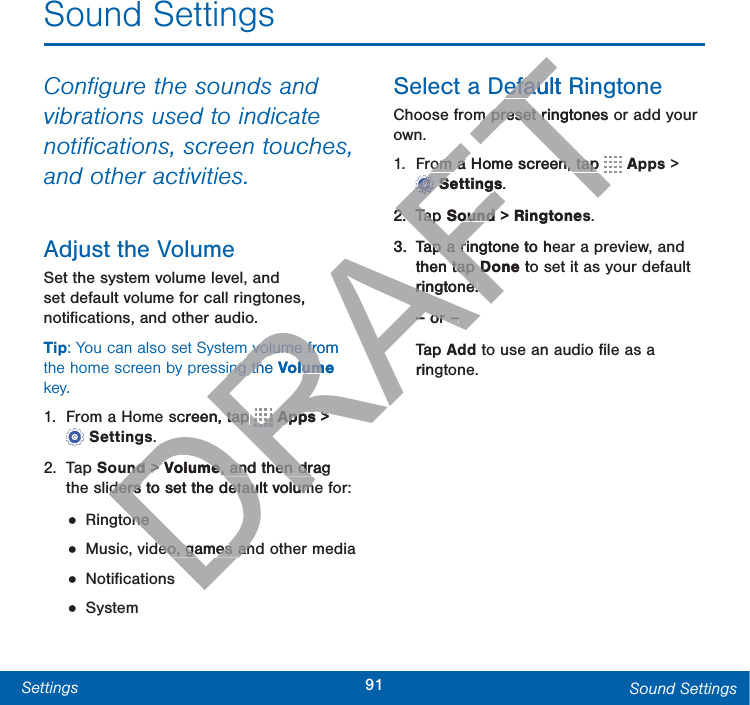
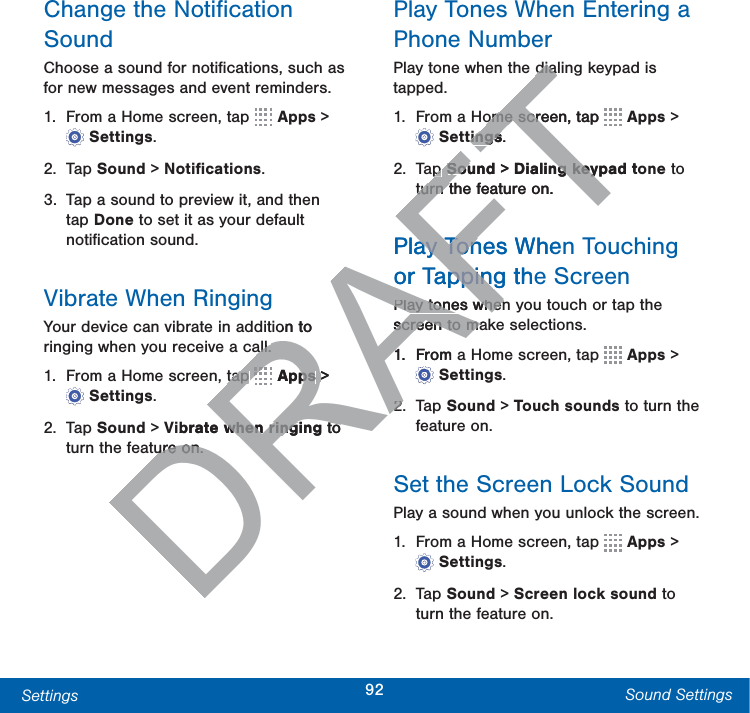
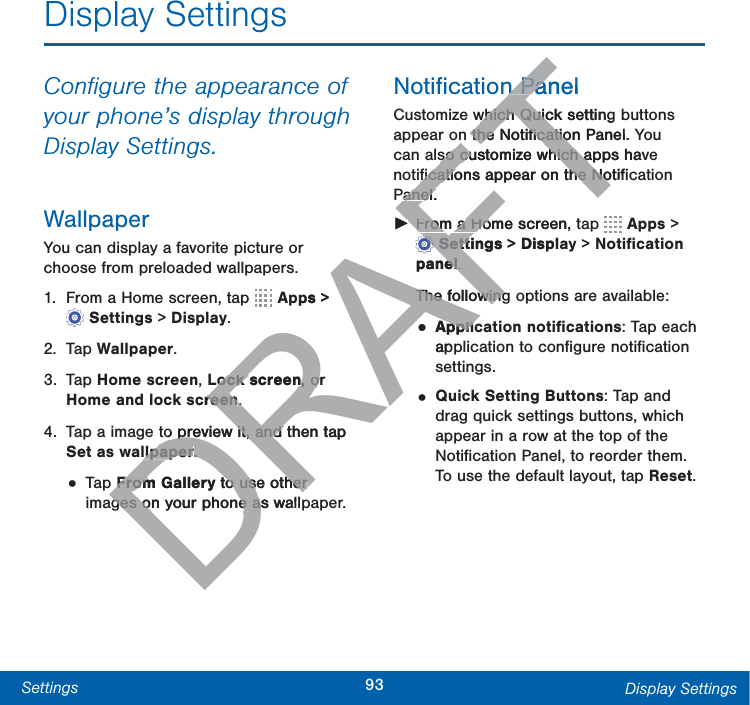
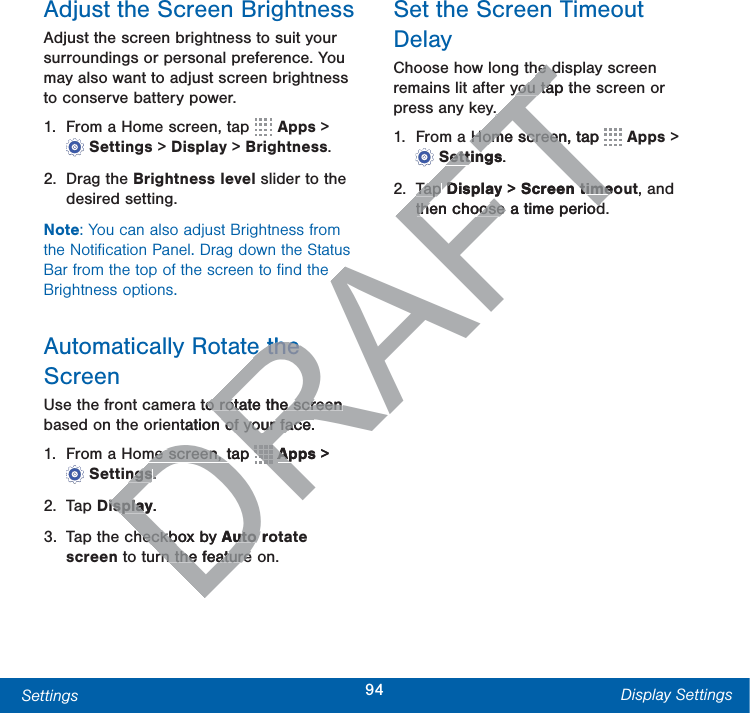
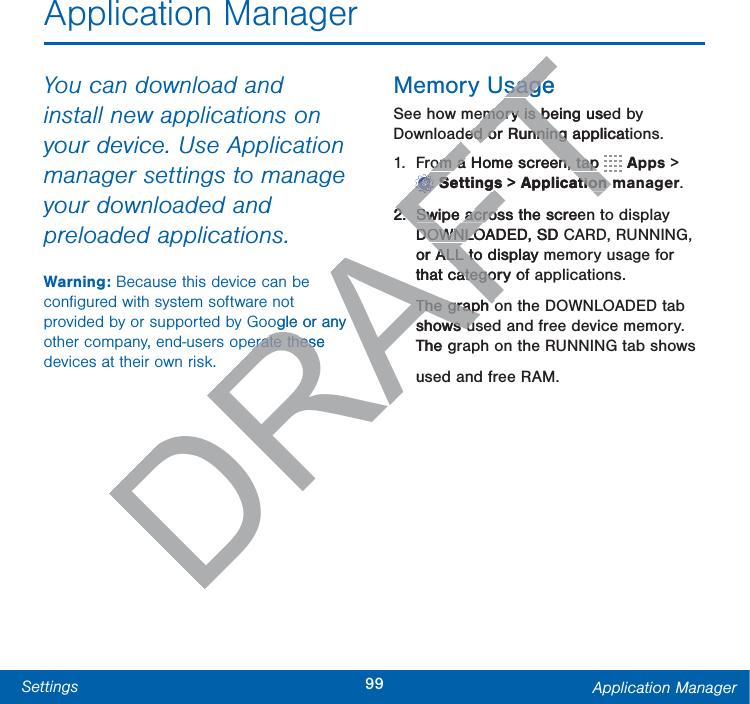
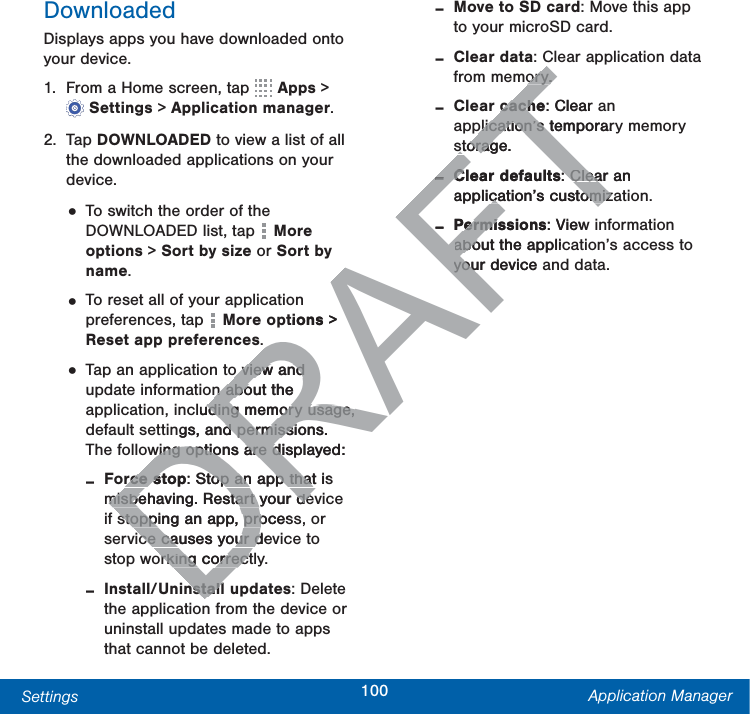
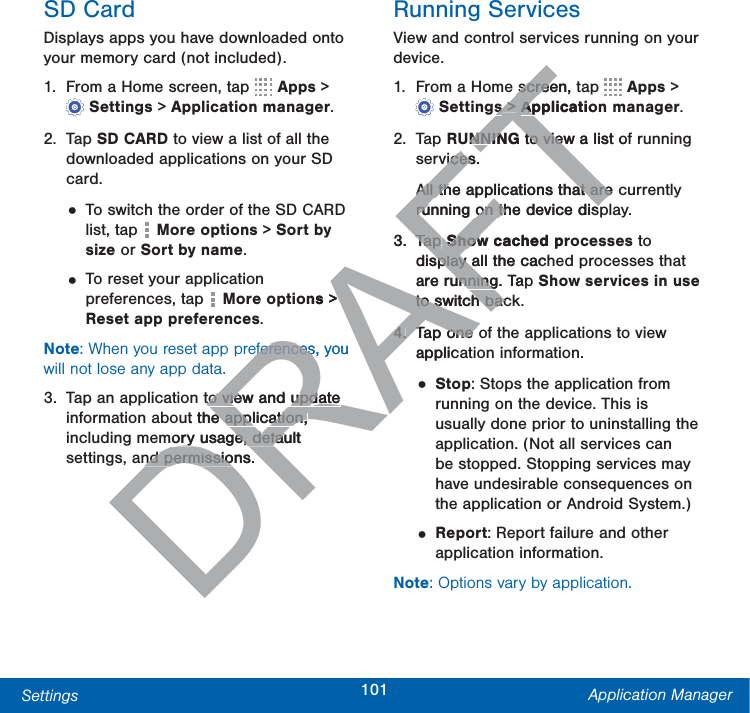
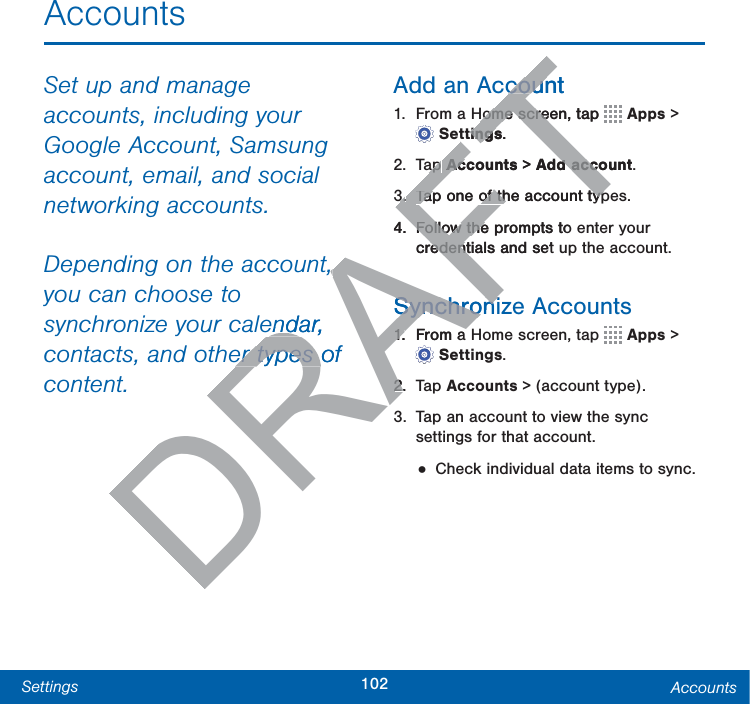
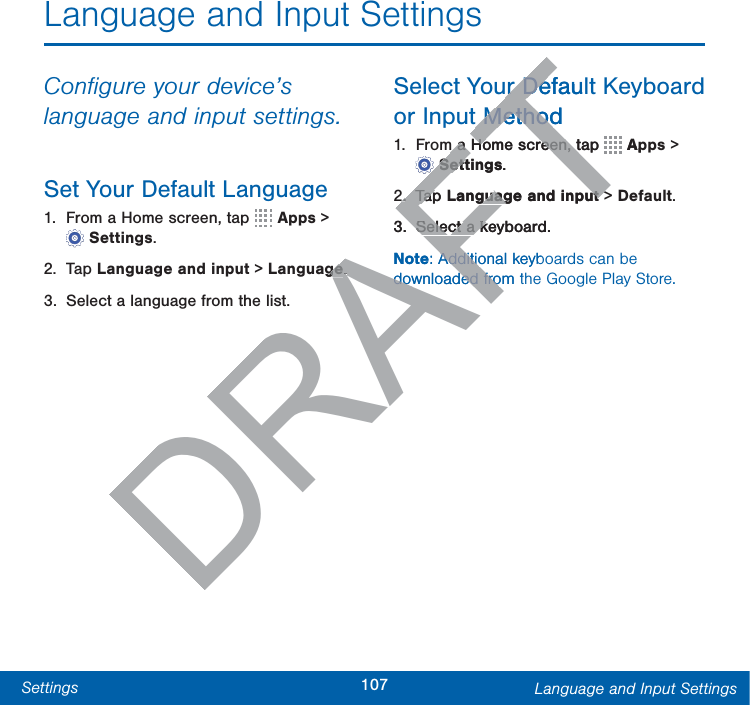
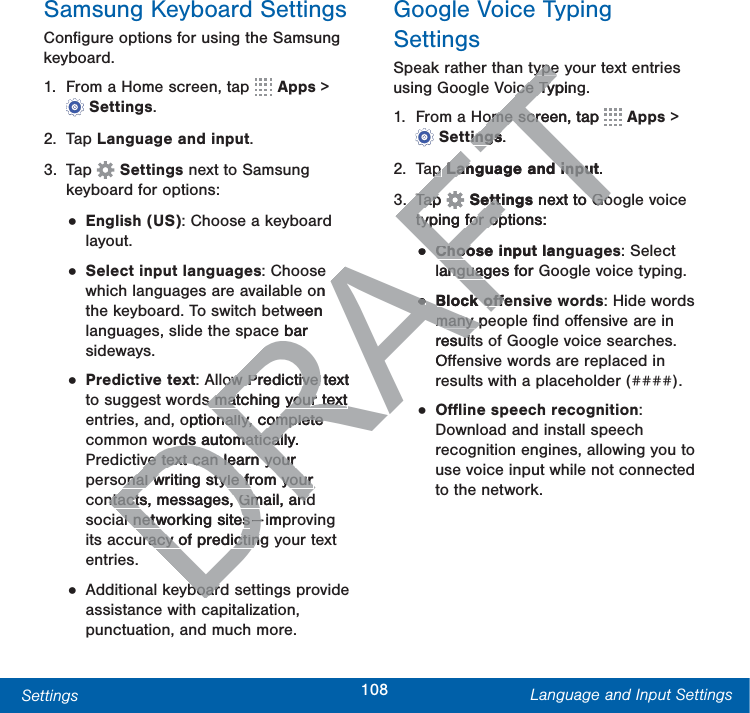
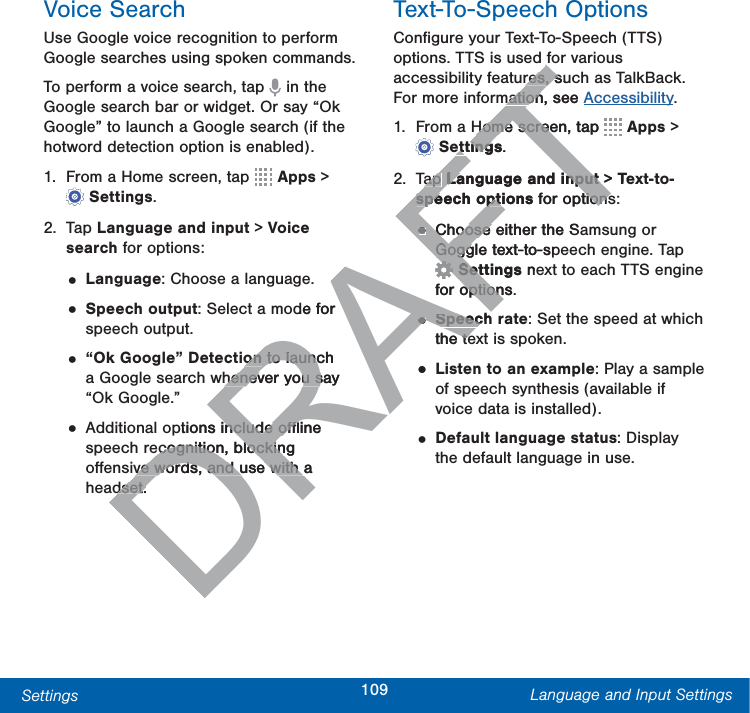
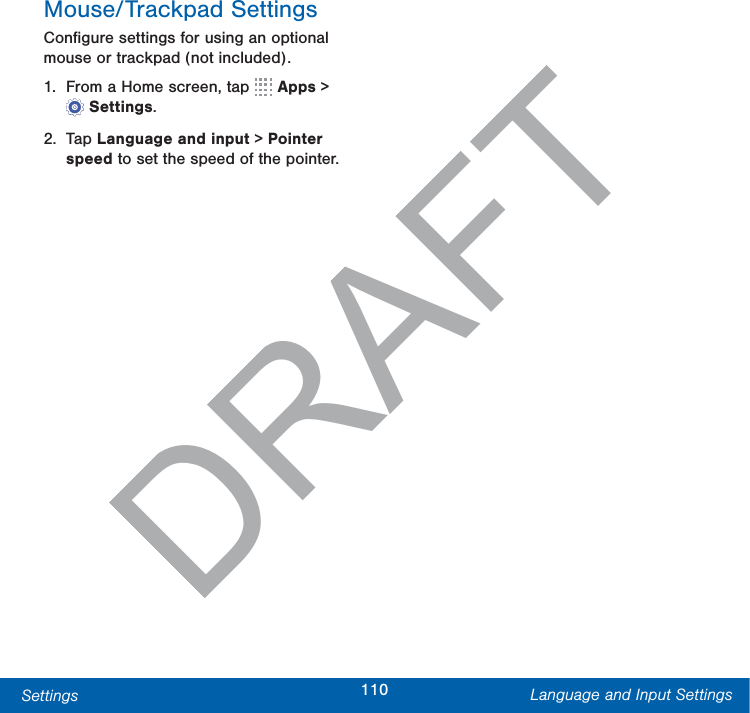
Samsung Electronics Co SMG360T Multi-band GSM/EDGE/UMTS/LTE Phone with WLAN and Bluetooth User Manual part 1 150508

Samsung Electronics Co Ltd Multi-band GSM/EDGE/UMTS/LTE Phone with WLAN and Bluetooth part 1 150508

Contents

Users Manual 1

SMARTPHONEUser ManualPlease read this manual before operating your device and keep it for future reference.DRAFTFTRTPHONTPHONUser ManuaUser MaPlease read this manual beforese read this manual beforeand keep it for futand keep it for futTFTFFTFTTT
iLegal Notices TMO_SM-G360T_ENG_UM_XXX_TN_050415_R0Legal NoticesWarning: This product contains chemicals known to the State of California to cause cancer and reproductive toxicity. For more information, please call 1-800-SAMSUNG (726-7864).Intellectual PropertyAll Intellectual Property, as defined below, owned by or which is otherwise the property of Samsung or its respective suppliers relating to the SAMSUNG Phone, including but not limited to, accessories, parts, or software relating there to (the “Phone System”), is proprietary to Samsung and protected under federal laws, state laws, and international treaty provisions. Intellectual Property includes, but is not limited to, inventions (patentable or unpatentable), patents, trade secrets, copyrights, software, computer programs, and related documentation and other works of authorship. You may not infringe or otherwise violate the rights secured by the Intellectual Property. Moreover, you agree that you will not (and will not attempt to) modify, prepare derivative works of, reverse engineer, decompile, disassemble, or otherwise attempt to create source code from the software. No title to or ownership in the Intellectual Property is transferred to you. All applicable rights of the Intellectual Property shall remain with SAMSUNG and its suppliers.Open Source SoftwareSome software components of this product incorporate source code covered under GNU General Public License (GPL), GNU Lesser GeneralPublic License (LGPL), OpenSSL License, BSD License and other open source licenses. Toobtain the source code covered under the opensource licenses, please visit: http://opensource.samsung.com.DRAFTve G Phone, e, cessories, essohere to (the here to (therietary to rietared under federal ed under federal d international treaty ternational treaty ectual Property includes, operty ined to, inventions (patentable ed to, inventions (patable), patents, trade secrets,able), patents, trade secrets, software, computer prograts, software, computer prograd documentation and othd documentation andhorship. You may nohorship. You may olate the rightsolate the rightsoperty. Moperty. Mot (aot (oftware. Noftwarthe Intellectual the Inted to you. All applicabled to you. All alectual Property shall remalectual Property sSUNG and its suppliers.SUNG and its suppliersOpen Source SoftwareOpen SourceSome software componme softwincorporate source corate GNU General PublGNU General PLesser GeneralLesser GeneralOpenSSL LicOpenSSL Liother opeotthe souopenohtht
iiLegal Notices  Disclaimer of Warranties; Exclusion of LiabilityEXCEPT AS SET FORTH IN THE EXPRESS WARRANTY CONTAINED ON THE WARRANTY PAGE ENCLOSED WITH THE PRODUCT, THE PURCHASER TAKES THE PRODUCT “AS IS”, AND SAMSUNG MAKES NO EXPRESS OR IMPLIED WARRANTY OF ANY KIND WHATSOEVER WITH RESPECT TO THE PRODUCT, INCLUDING BUT NOT LIMITED TO THE MERCHANTABILITY OF THE PRODUCT OR ITS FITNESS FOR ANY PARTICULAR PURPOSE OR USE; THE DESIGN, CONDITION OR QUALITY OF THE PRODUCT; THE PERFORMANCE OF THE PRODUCT; THE WORKMANSHIP OF THE PRODUCT OR THE COMPONENTS CONTAINED THEREIN; OR COMPLIANCE OF THE PRODUCT WITH THE REQUIREMENTS OF ANY LAW, RULE, SPECIFICATION OR CONTRACT PERTAINING THERETO. NOTHING CONTAINED IN THE INSTRUCTION MANUAL SHALL BE CONSTRUED TO CREATE AN EXPRESS OR IMPLIED WARRANTY OF ANY KIND WHATSOEVER WITH RESPECT TO THE PRODUCT. IN ADDITION, SAMSUNG SHALL NOT BE LIABLE FOR ANY DAMAGES OF ANY KIND RESULTING FROM THE PURCHASE OR USE OF THE PRODUCT OR ARISING FROM THE BREACH OF THE EXPRESS WARRANTY, INCLUDING INCIDENTAL, SPECIAL OR CONSEQUENTIAL DAMAGES, OR LOSS OF ANTICIPATED PROFITS OR BENEFITS.Modification of SoftwareSAMSUNG IS NOT LIABLE FOR PERFORMANCE ISSUES OR INCOMPATIBILITIES CAUSED BY YOUR EDITING OF REGISTRY SETTINGS, OR YOUR MODIFICATION OF OPERATING SYSTEM SOFTWARE. USING CUSTOM OPERATING SYSTEM SOFTWARE MAY CAUSE YOUR DEVICE AND APPLICATIONS TO WORK IMPROPERLY. YOUR CARRIER MAY NOT PERMIT USERS TO DOWNLOAD CERTAIN SOFTWARE, SUCH AS CUSTOM OS.Samsung KNOX™Samsung Knox™ is Samsung’s security platform and is a mark for a Samsung device tested for security with enterprise use in mind. Additional licensing fee may be required. For more information about Knox, please refer to:  www.samsung.com/us/knox. [030115]DRAFTOF NCE OF FNSHIP OF MPONENTS MPONENR COMPLIANCE R COMPLIANH THE H THF ANY LAW, RULE, ANY LAW, RULE, OR CONTRACT NTRACT HERETO. NOTHING HERETO. NOTHINGIN THE INSTRUCTION IN THE INSTRUCTION SHALL BE CONSTRUED TO SHALL BE CONSTRUED TOAN EXPRESS OR IMPLIEDAN EXPRESS OR IMPY OF ANY KIND WHATY OF ANY KIND WHT TO THE PRODT TO THE PROSUNG SHASUNG SHAAMAAMAFTof Softwaof SoS NOT LIABLE FOS NOT LIMANCE ISSUES OR ANCE ISSUESMPATIBILITIES CAUSED BY YMPATIBILITIES CAUSTING OF REGISTRY SETTINGTING OF REGISTRY SETTYOUR MODIFICATION OF OPYOUR MODIFICATION OF OPSYSTEM SOFTWARE. SYSTEM SOFTUSING CUSTOM OPERNG CUSOFTWARE MAY CAWARE DEVICE AND APPDEVICE AND AIMPROPERLY. IMPROPERLY. PERMIT USPERMIT USSOFTWASSaS
iiiLegal Notices  Samsung Electronics America (SEA), IncAddress:85 Challenger Road Ridgefield Park, New Jersey 07660 Phone: 1-800-SAMSUNG (726-7864)Internet Address: www.samsung.com ©2015 Samsung Electronics America, Inc. Samsung, Galaxy, Galaxy Note, S Pen, Multiwindow, and SHealth are registered trademarks of SamsungElectronics Co., Ltd.Do you have questions about your Samsung Mobile Device? For 24 hour information and assistance, we offer a new FAQ/ARS System (Automated Response System) at: www.samsung.com/us/supportThe actual available capacity of the internal memory is less than the specified capacity because the operating system and default applications occupy part of the memory. The available capacity may change when you upgrade the device.Nuance®, VSuite™, T9® Text Input, and the Nuance logo are trademarks or registered trademarks of Nuance Communications, Inc., or its affiliates in the United States and/or other countries.ACCESS® and NetFront™ are trademarks or registered trademarks of ACCESS Co., Ltd. in Japan and other countries.The Bluetooth® word mark, figure mark (stylized “B Design”), and combination mark (Bluetooth word mark and “B Design”) are registered trademarks and are wholly owned by the Bluetooth SIG.microSD™ and the microSD logo are Trademarks of the SD Card Association.Openwave® is a registered Trademark of Openwave,Inc.Google, the Google logo, Android, the Android logo, Google Play, Gmail, Google Mail, Google Maps, Google Music, Google Hangouts, Picasa, Play Newsstand, YouTube, and other marks are trademarks of Google Inc.Wi-Fi is a registered trademark of the WirelessFidelity Alliance, Inc.DRAFTDnc. nc. n, istered d nics Co., tions about your tions about yle Device? Device? ormation and assistance, ormation and assisew FAQ/ARS System ew FAQ/ARS System ed Response System) at: ed Response System) at: msung.com/us/supportmsung.com/us/supporgppvailable capacity of vailable capacity oy is less than ty is less than the operthe operonsonsiesiesNetFrontNetFr™ ad trademarks of ACd trademapan and other countriesan and other luetoothlueto® word mark, figure mmark, fiylized “B Design”), and combylized “B Design”), and commark (Bluetooth word mark amark (Bluetooth word mark aDesign”) are registered traDesign”) are reare wholly owned by thewholly omicroSDD™™ and the m andTrademarks of thTrademarks of tOpenwaveOpenwave®®iOpenwaveOGooglGAndA
ivLegal Notices  Online Legal InformationThe online version of the Health/Safety and Warranty guide for your device can be found at:English:www.samsung.com/us/Legal/Phone-HSGuideSpanish:www.samsung.com/us/Legal/Phone-HSGuide-SPDRAFT
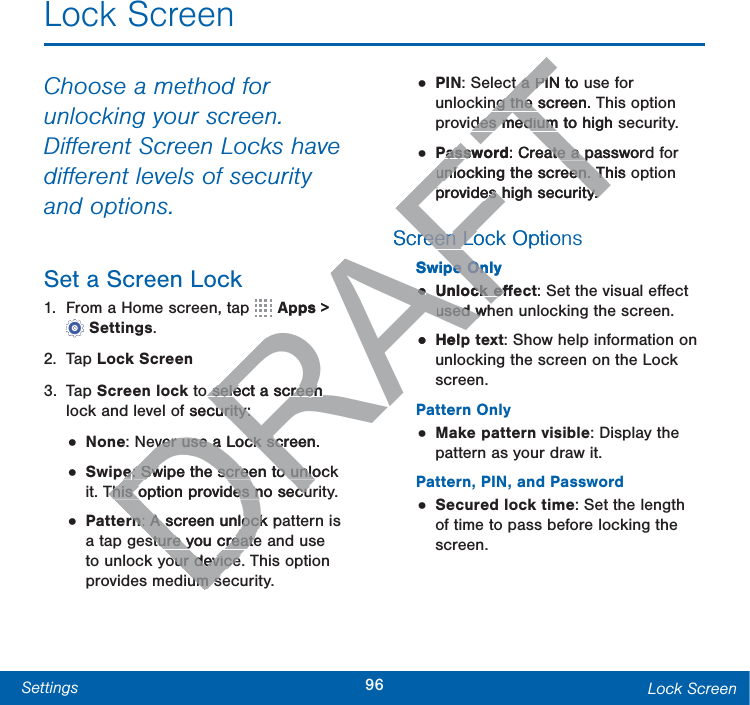
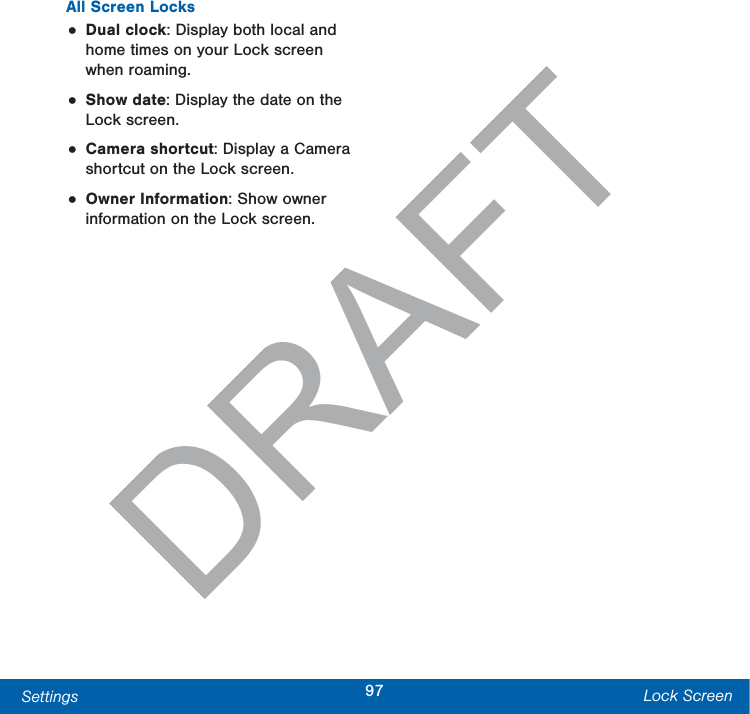
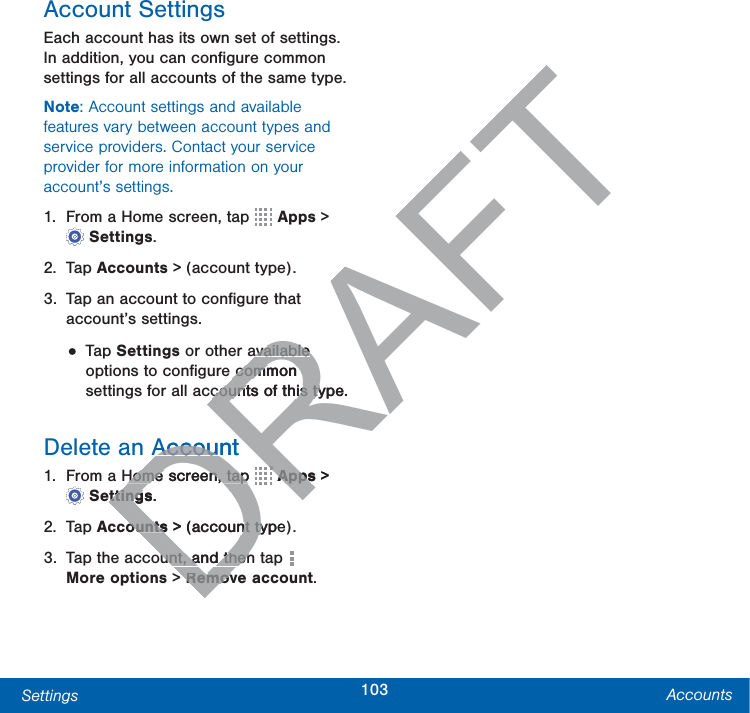
vTable of Contents  Table of ContentsGetting Started ......................................1Front View ...................................................2Back View ...................................................4Assemble Your Device .............................6Set Up Your Device ................................ 10Set Up Accounts on Your Device ....... 12Know Your Device ............................ 13Home Screen .......................................... 14Status Bar ................................................ 19Navigation, Motions, and Gestures ..... 21Notification Panel ................................... 23Enter Text ................................................. 25Calling ...................................................... 27Make and Answer Calls ........................ 28Applications .......................................... 34Apps Screen............................................ 35Google Applications .............................. 39T-Mobile Applications ............................ 43Calculator ................................................. 44Calendar ................................................... 45Camera and Video ................................. 47Clock ......................................................... 51Contacts ................................................... 53Email ......................................................... 59GALAXY Apps ......................................... 61Gallery ...................................................... 62Internet ..................................................... 64Memo ........................................................ 66Messages ................................................. 67MyFiles .................................................... 71Video Player ............................................ 74Voice Recorder ....................................... 76Settings ................................................... 77Wi-Fi and Wi-Fi Direct ............................ 78Bluetooth .................................................. 82Airplane Mode ......................................... 85Data Usage .............................................. 86Location Services .................................. 87Printing ..................................................... 89More Networks ....................................... 90Sound Settings ....................................... 91Display Settings ...................................... 93Lock Screen ............................................ 96Call Settings ............................................ 98Application Manager .............................. 99Accounts ................................................ 102DRAFT1414....199res.....21.............................23............................................25..........................................................2727er Calls..................................28onsons.................................................................3creencreen............................................pplicationspplica........................plicationsplicatio...............................................................................................................Y AppsApps......................................ryry...............................................................................ternetterne...............................................MemoMem...........................................MessagesMessages........................MyFilesFiles.....................Video PlayerPlayer......Voice RecordeVoice RecordeSettingsSettingsWi-Fi Bl
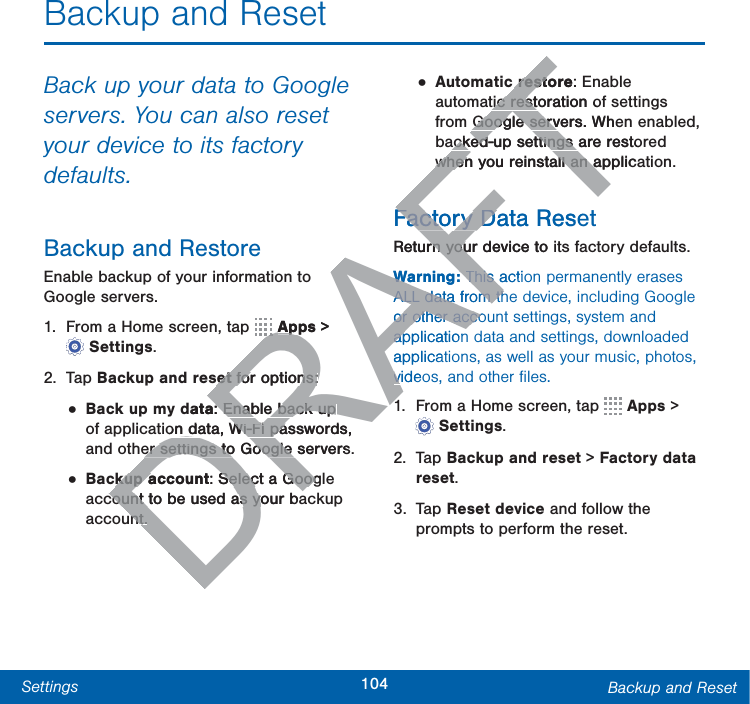
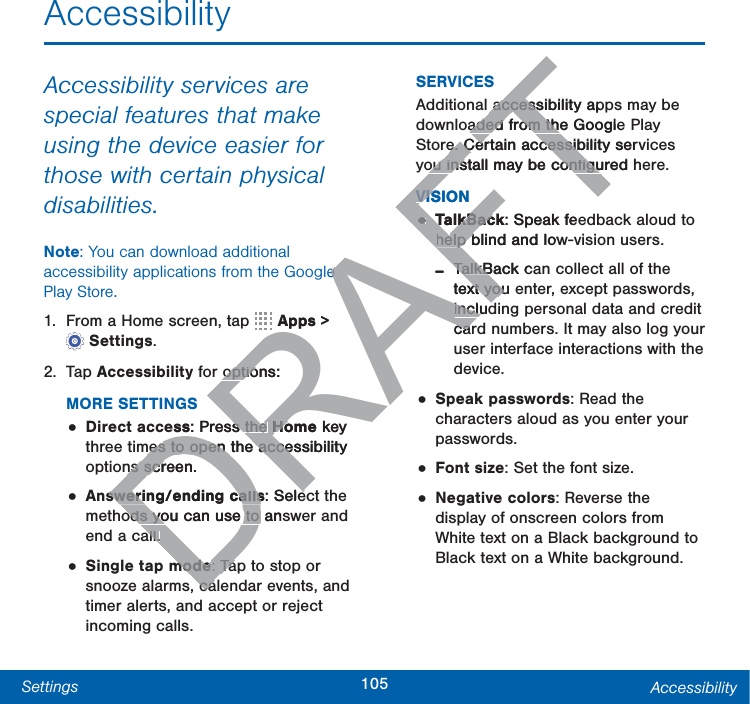
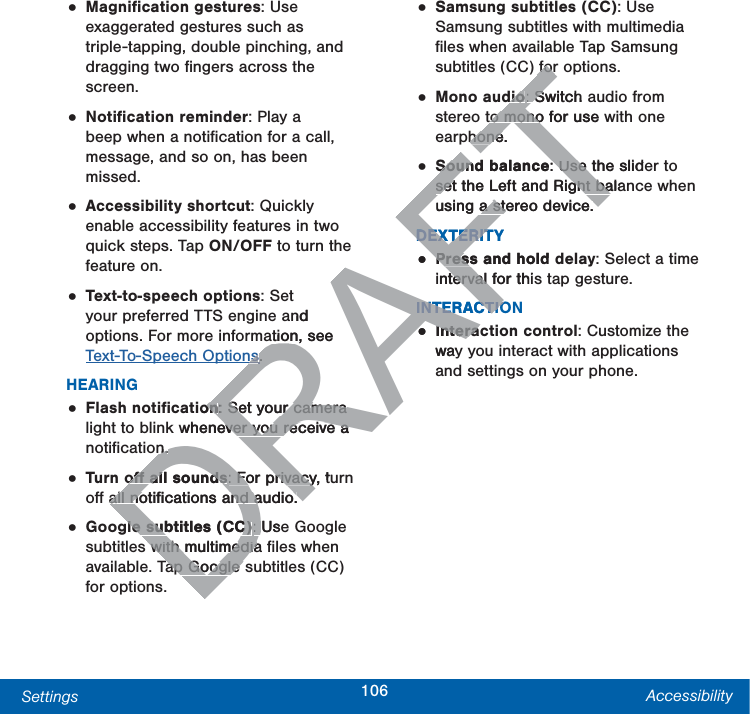
viTable of Contents  Backup and Reset ................................ 104Accessibility .......................................... 105Language and Input Settings............. 107Date and Time Settings ....................... 111Ultra Power Saving Mode ................... 112Battery .................................................... 113Storage ................................................... 114Security .................................................. 117About Your Device ............................... 120DRAFT
Getting StartedLearn about your mobile device hardware, assembly procedures, and how to get started using your new device.DRAFTTT
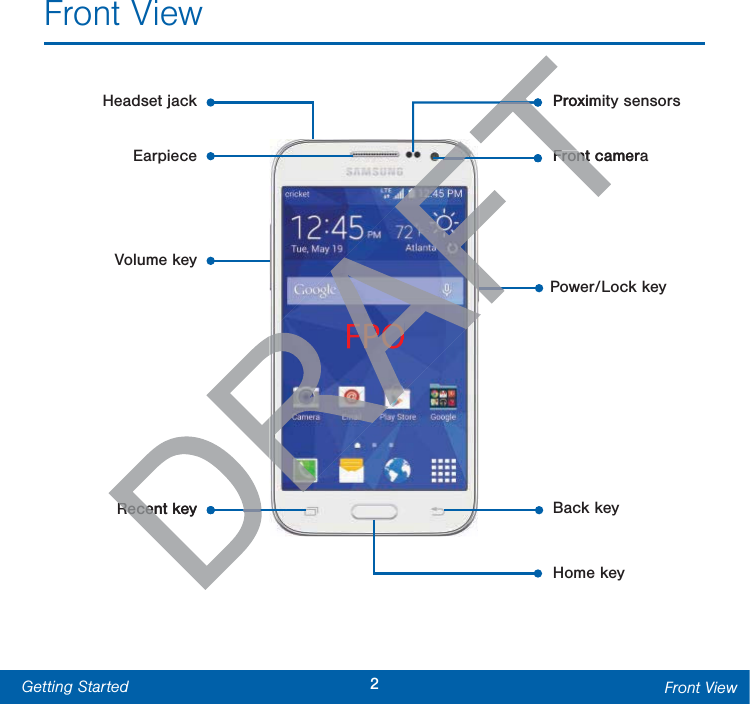
2Getting Started Front ViewFront ViewFPOHeadset jackEarpiece Volume keyPower/Lock keyBack keyHome keyFront cameraProximity sensorsRecent keyFPOAFFTFTDDTTFront cameraFrontProximRecent keyRecen
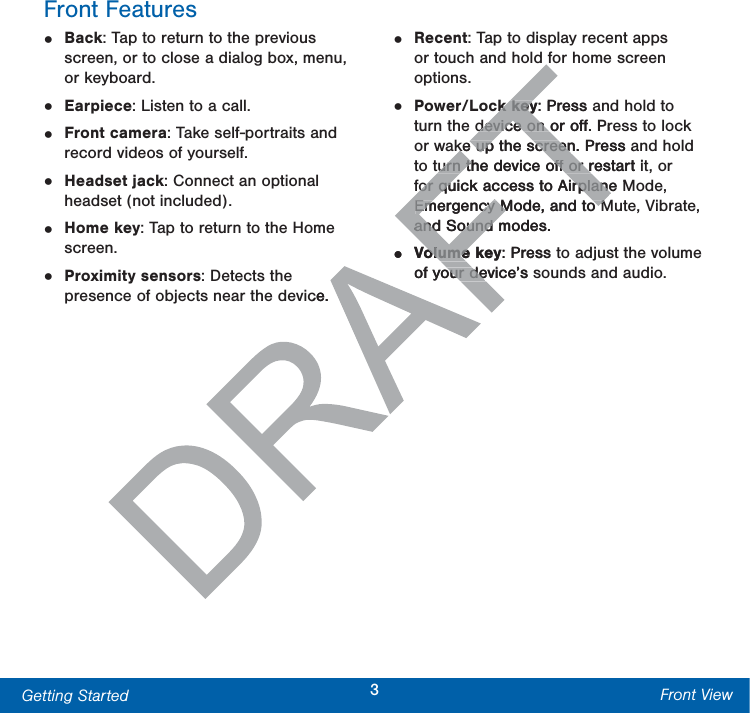
3Getting Started Front ViewFront Features•  Back: Tap to return to the previous screen, or to close a dialog box, menu, or keyboard.•  Earpiece: Listen to a call.•  Front camera: Take self-portraits and record videos of yourself.•  Headset jack: Connect an optional headset (notincluded).•  Home key: Tap to return to the Home screen.•  Proximity sensors: Detects the presence of objects near the device. •  Recent: Tap to display recent apps or touch and hold for home screen options.•  Power/Lock key: Press and hold to turn the device on or off. Press to lock or wake up the screen. Press and hold to turn the device off or restart it, or for quick access to Airplane Mode, Emergency Mode, and to Mute, Vibrate, and Sound modes.•  Volume key: Press to adjust the volume of your device’s sounds and audio.ce. ck keyck key: Press adevice on or off. Predevice on ke up the screen. Press ake up the screenturn the device off or restart iturn the device off or rfor quick access to Airplane Mfor quick access to AirplaneEmergency Mode, and to MEmergency Mode, and to Mand Sound modes.and Sound •Volume keyolume: Press tof your device’s sour de
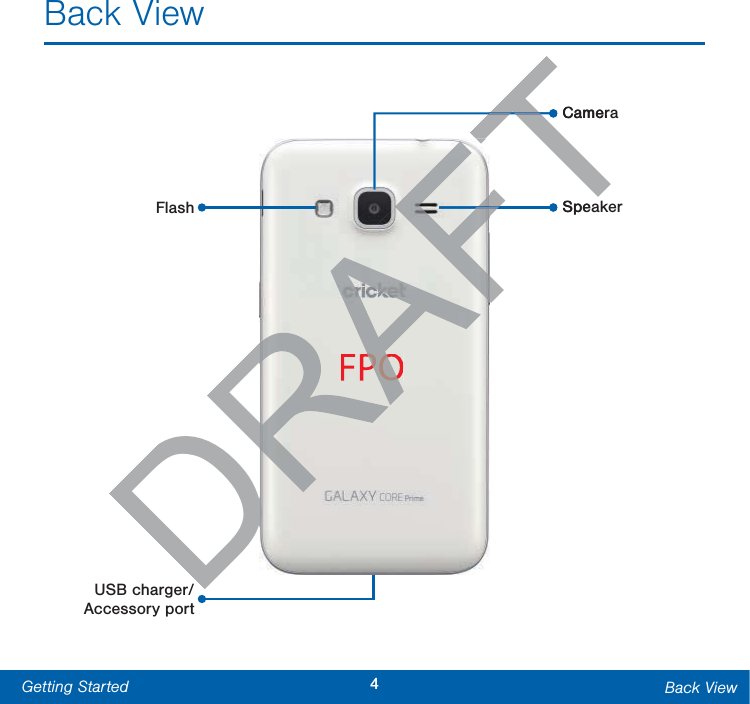
4Getting Started Back ViewBack ViewFPOFlashCameraSpeakerUSB charger/ Accessory portDRAFTPOTTFTFTCamerSpea
Back Features•  Camera: Take pictures and record videos. •  Flash: Illuminate subjects in low-light environments when taking a photo or recording video.•  Speaker: Plays music and other sounds.•  USB charger/Accessory port: Connect the Charger/USB cable (included), and other optional accessories (not included).5Getting Started Back ViewDRAFT/Accesso/Accer/USB cable (ir/USBer optional accessorer optional aded).ded).
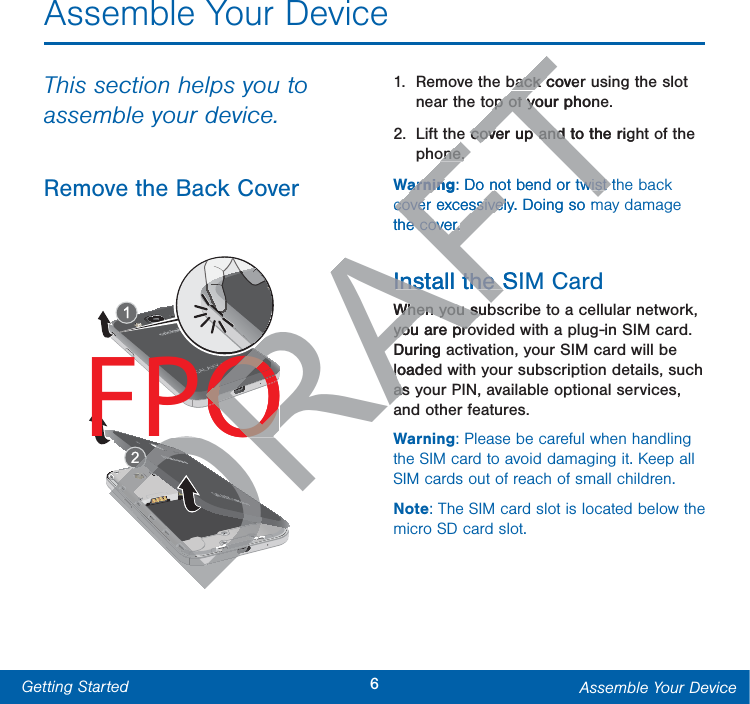
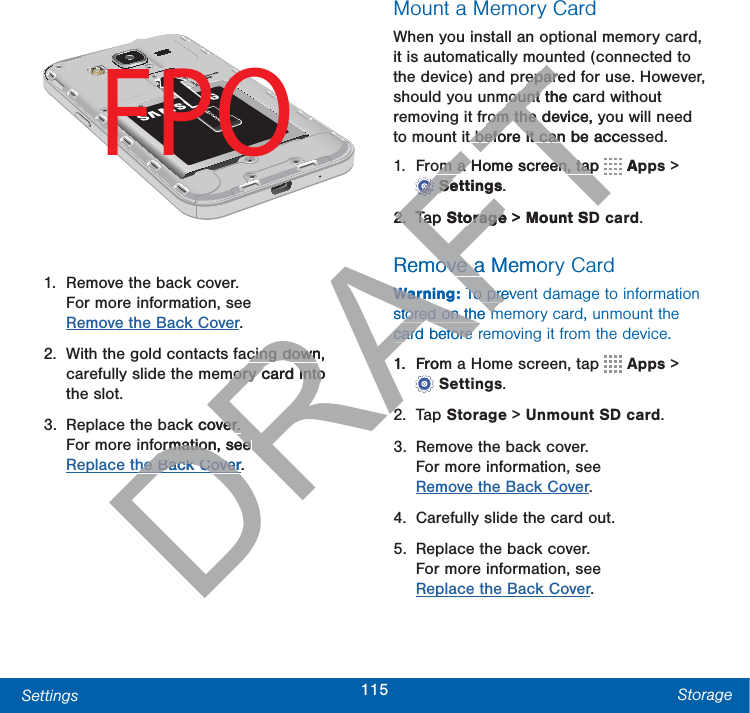
6Getting Started Assemble Your DeviceAssemble Your DeviceThis section helps you to assemble your device.Remove the Back CoverFPO1.  Remove the back cover using the slot near the top of your phone. 2.  Lift the cover up and to the right of the phone.Warning: Do not bend or twist the back cover excessively. Doing so may damage the cover.Install the SIM CardWhen you subscribe to a cellular network, you are provided with a plug-in SIM card. During activation, your SIM card will be loaded with your subscription details, such as your PIN, available optional services, and other features.Warning: Please be careful when handling the SIM card to avoid damaging it. Keep all SIM cards out of reach of small children.Note: The SIM card slot is located below the micro SD card slot.DRDRDRDRDRDDRDRDDRDDDDDDDDDDDDDDDDDDDDDDDDDDDDDDDDDDDDDDDDDDDDDDDDDDDDDDDDRAFTRRRRDDDDDDDDRDDDDDDDDDDDDDDDDDDRDDDDDDDDDDDDFTPOPOOOOOOback coverback cop of your phoneop of yoe cover up and to the rige cover up and one.one.arningarnin: Do not bend or twist tnot bend or twist cover excessively. Doing so mcover excessivelthe cover.e cover.Install the SIInstall the SWhen you subWhen you suyou are proyou are proDuring aloadelas as
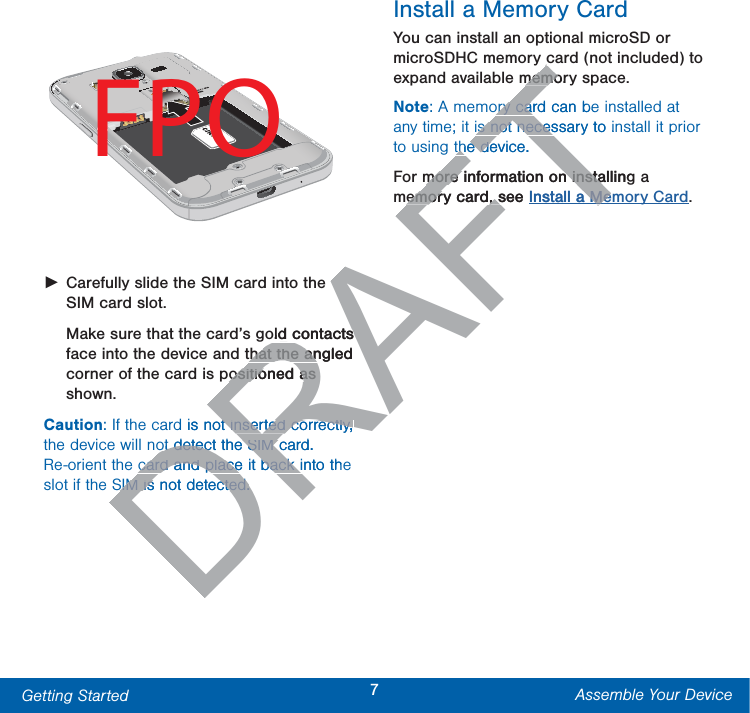
7Getting Started Assemble Your DeviceFPO ŹCarefully slide the SIM card into the SIM card slot. Make sure that the card’s gold contacts face into the device and that the angled corner of the card is positioned as shown. Caution: If the card is not inserted correctly, the device will not detect the SIM card. Re-orient the card and place it back into the slot if the SIM is notdetected.Install a Memory CardYou can install an optional microSD or microSDHC memory card (not included) to expand available memory space.Note: A memory card can be installed at any time; it is not necessary to install it prior to using the device. For more information on installing a memory card, see Install a Memory Card.DRAFTe old contacts d contacts that the angled that the anositioned as ositioned as d is not inserted correctly, t inserted correctly, ot detect the SIM card. ot detect the SIM card and place it back into thecard and place it back iSIM is notdetected.SIM is notdetected.FTFTmemormemoory card can beory cais not necessary to inis not necesthe device. the demore information on installingmore information on instaemory card, see emory card, sInstall a Mema Me
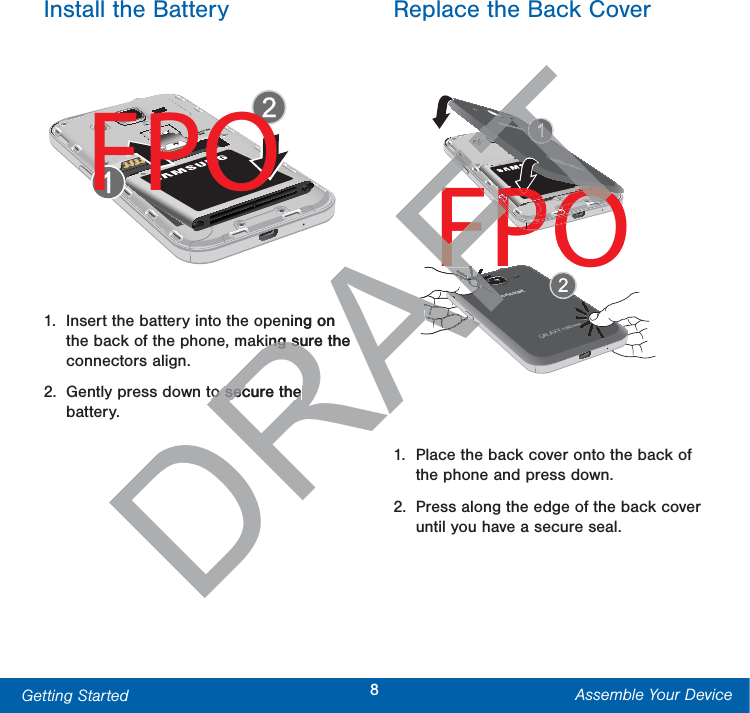
8Getting Started Assemble Your DeviceInstall the BatteryFPO1.  Insert the battery into the opening on the back of the phone, making sure the connectors align. 2.  Gently press down to secure the battery.Replace the Back CoverFPO1.  Place the back cover onto the back of the phone and press down.2.  Press along the edge of the back cover until you have a secure seal.DRAFTning on king sure the king suto secure the to secure the AFAFAFAFAFAFAFAFAFAFAAAAAAFAFAFFFAFAFAFAFAFAFFFFFFFAFAFAFAFAFAFAFAFFFAFAFFFFFFFFTFTFTFTFTFTFTFTFTFTFTTTTTTFTFTFFTFTFTFFFFTFTFTFTFTFTFTFTFTFTFTFTFTFTFTFTTFTTTTTTTTTTFTFTTTTTTTFTFTFTTFTFTTTTTTTTTFPOFPFPPOOOOOOOOOOO
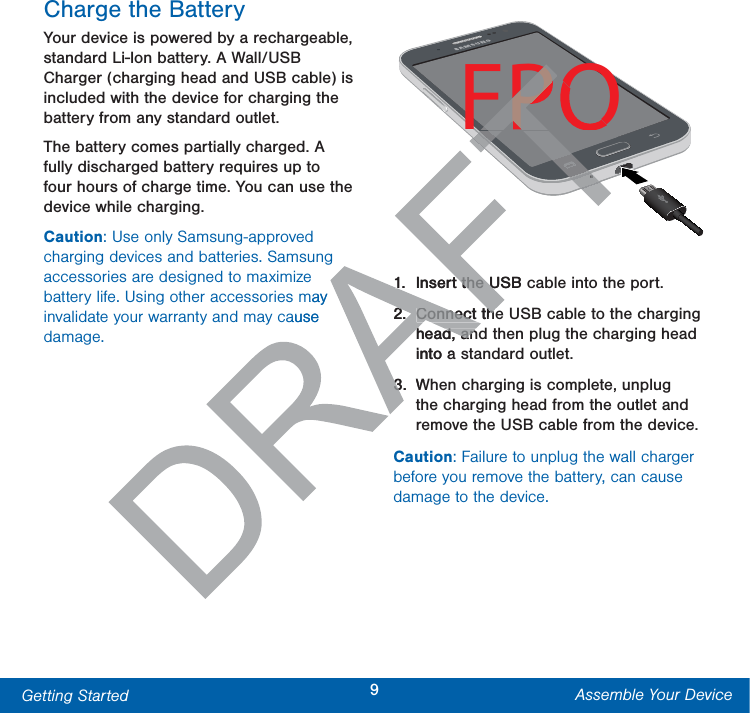
9Getting Started Assemble Your DeviceCharge the BatteryYour device is powered by a rechargeable, standard Li-Ion battery. A Wall/USB Charger (charging head and USB cable) is included with the device for charging the battery from any standard outlet. The battery comes partially charged. A fully discharged battery requires up to four hours of charge time. You can use the device while charging.Caution: Use only Samsung-approved charging devices and batteries. Samsung accessories are designed to maximize battery life. Using other accessories may invalidate your warranty and may cause damage.FPO1.  Insert the USB cable into the port.2.  Connect the USB cable to the charging head, and then plug the charging head into a standard outlet.3.  When charging is complete, unplug the charging head from the outlet and remove the USB cable from the device.Caution: Failure to unplug the wall charger before you remove the battery, can cause damage to the device.may ause FTFTFTFTFTFTFTTTTTTTTTTTFFP1.1Insert the USB t the U2.2.Connect theConnect thehead, anhead, aninto a 3.3W
10Getting Started Set Up Your DeviceSet Up Your DeviceTurn Your Device On or OffTurn the Device On ŹPress and hold the Power/Lock key until the device vibrates and starts up.Turn the Device Off1.  Press and hold the Power/Lock key until the Device options menu displays.2. Tap Power off.Welcome ScreenThe first time you turn your device on, the Welcome Screen displays. It will guide you through the basics of setting up your device.Follow the prompts to choose a default language, connect to a Wi-Fi network, set up accounts, choose location services, learn about your device’s features, and more.DRAFTlays.ys.ScreenScree you turn your deve you turnScreen displays. It will gScreen displayrough the basics of setting urough the basics of sce.ce.Follow the prompts to choosFollow the promlanguage, connect to a Wnguage, conup accounts, choose loccounlearn about your devbout ymore.mor
11Getting Started Set Up Your DeviceSecure Your DeviceUse your device’s screen lock features to secure your device. Lock the DeviceBy default, the device locks automatically when the screen times out. ŹTo lock the device, press the Power/Lock key.Unlock the DeviceThe default Screen lock on your device is Swipe. ŹTo unlock your device, press the Power/Lock key or Home key, and then touch and drag your finger across the screen. Set Up a Secure Screen LockThe default Screen lock is Swipe, which offers no security. To choose a more secure screen lock, see Set a Screen Lock.De is is  the ee key, and  key, anour finger across our finger acrure Screen Lockre Screen LoScreen lock is Swipe, Screen lock is Swipe, rs no security. To choose rs no security. To choose ecure screen lock, see ecure screen lock, seen Locken Loc.
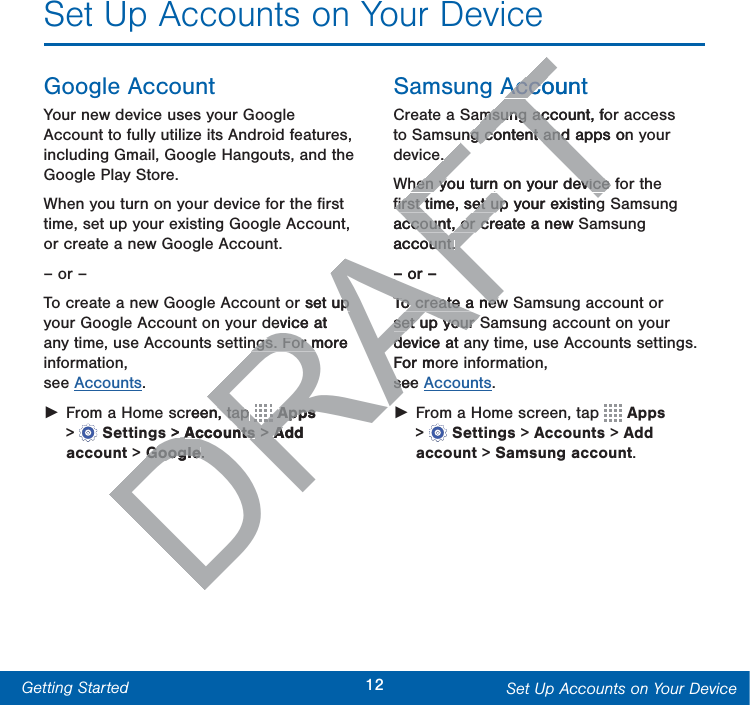
12Getting Started Set Up Accounts on Your DeviceSet Up Accounts on Your DeviceGoogle AccountYour new device uses your Google Account to fully utilize its Android features, including Gmail, GoogleHangouts, and the Google Play Store. When you turn on your device for the first time, set up your existing Google Account, or create a new GoogleAccount.– or –To create a new Google Account or set up your Google Account on your device at any time, use Accounts settings. Formore information, see Accounts. ŹFrom a Home screen, tap   Apps >  Settings> Accounts > Add account > Google.Samsung AccountCreate a Samsung account, for access to Samsung content and apps on your device. When you turn on your device for the first time, set up your existing Samsung account, or create a new Samsung account.– or –To create a new Samsung account or set up your Samsung account on your device at any time, use Accounts settings. Formore information, see Accounts. ŹFrom a Home screen, tap   Apps >  Settings> Accounts > Add account > Samsungaccount.DRAFTor set up p evice at ngs. Formore ngs. Formcreen, tap , tap DRDRDRDRRRRRDRDRDRDRRRRRApps Apps s>  AccountsAccounts >  > Add AGoogleGoogle..FTAccountAccomsung account, fomsung acung content and apps onung content and. . hen you turn on your device fhen you turn on your device first time, set up your existingfirst time, set upaccount, or create a new ccount, or caccount.ount.– or –To create a newTo create a newset up your set up your device at dFormoseese
Know Your DeviceLearn some of the key features of your mobile device, including the screens and icons, as well as how to navigate the device and enter text using the keyboard.Warning: Please note that a touch screen responds best to a light touch from the pad of your finger or a non-metallic stylus. Using excessive force or a metallic object when pressing on the touch screen may damage the tempered glass surface and void the warranty.DRAFTnter er d.FTTTngng: Please note that a touch sc: Please note that a onds best to a light touch fromonds best to a light touch frof your finger or a non-metallic f your finger or a non-metallic excessive force or a metallic xcessive force pressing on the touch scrsing on tthe tempered glass surmperedwarranty.wa
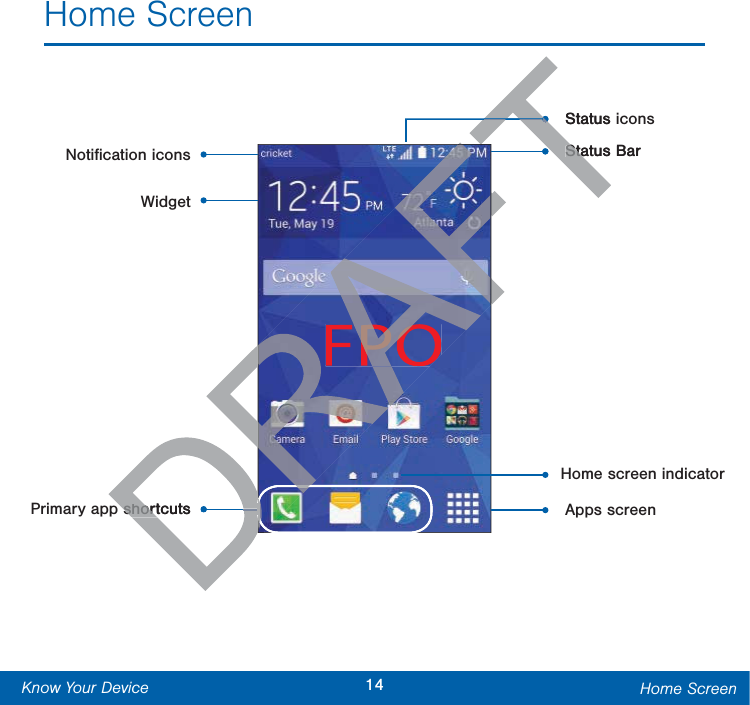
14Know Your Device Home ScreenHome ScreenFPOHome screen indicatorPrimary app shortcuts Apps screenStatus BarNotification iconsWidgetStatus iconsDRAFTDRAFTFTFTTTDDDRT shortcuts shortStatus BarStaStatus
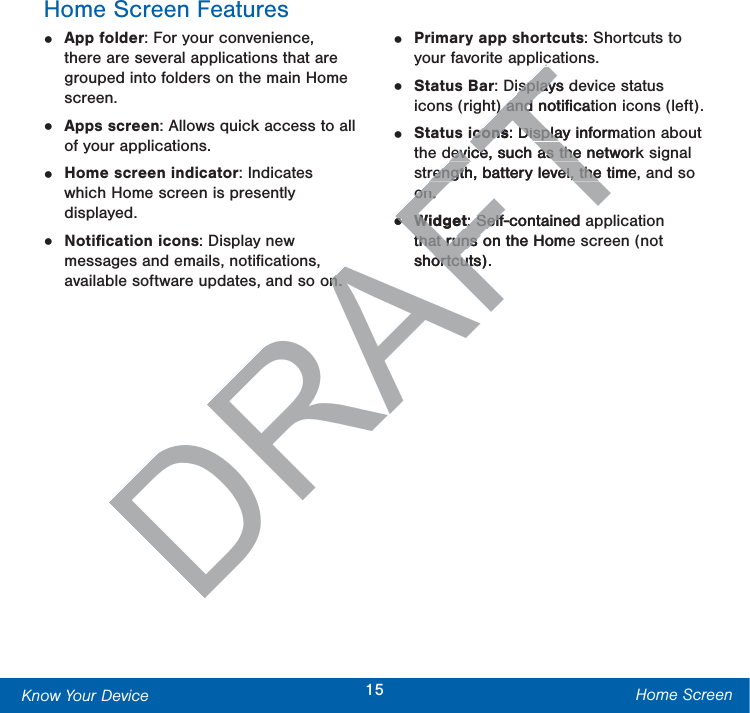
15Know Your Device Home ScreenHome Screen Features•  App folder: For your convenience, there are several applications that are grouped into folders on the main Home screen.•  Apps screen: Allows quick access to all of your applications.•  Home screen indicator: Indicates which Homescreen is presently displayed.•  Notification icons: Display new messages and emails, notifications, available software updates, and so on.•  Primary app shortcuts: Shortcuts to your favorite applications. •  Status Bar: Displays device status icons (right) and notification icons (left).•  Status icons: Display information about the device, such as the network signal strength, battery level, the time, and so on.•  Widget: Self-contained application that runs on the Home screen (not shortcuts). DRAFTon.n.isplays display) and notificat) andiconsicons: Display informaDispladevice, such as the networkdevice, such as therength, battery level, the timerength, battery level, theon.on.••WidgetWidget: Self-contained a: Selfthat runs on the Homethat runs shortcuts). ortcut
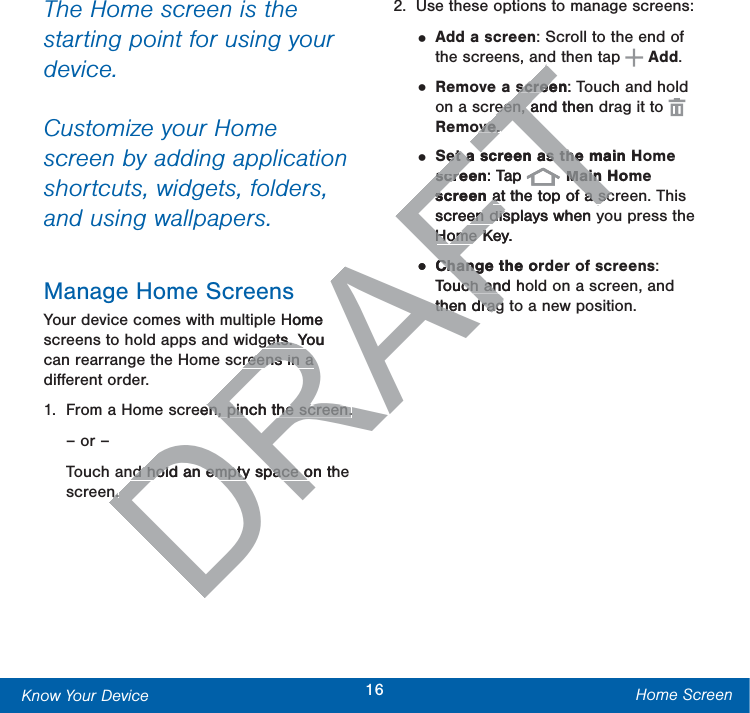
16Know Your Device Home ScreenThe Home screen is the starting point for using your device. Customize your Home screen by adding application shortcuts, widgets, folders, andusing wallpapers. Manage Home ScreensYour device comes with multiple Home screens to hold apps and widgets. You can rearrange the Home screens in a different order.1.  From a Home screen, pinch the screen.– or –Touch and hold an empty space on the screen.2.  Use these options to manage screens:• Add a screen: Scroll to the end of the screens, and then tap   Add.• Remove a screen: Touch and hold on a screen, and then drag it to   Remove. • Set a screen as the main Home screen: Tap   Main Home screen at the top of a screen. This screen displays when you press the Home Key.• Change the order of screens: Touch and hold on a screen, and then drag to a new position.DRAFTHome gets. You gets. Yreens in a reens in a een, pinch the screen.en, pinch the screen.nd hold an empty space on thnd hold an empty space on.n.screenscree: een, and then een, aoveove. . et a screen as the main Het a screen as thescreenscre: Tap FTMain HomMainscreen sat the top of a scat the top of a scscreen displays when en disHome Key.Home K•Change the orChangTouch and huch anthen dragthen drag
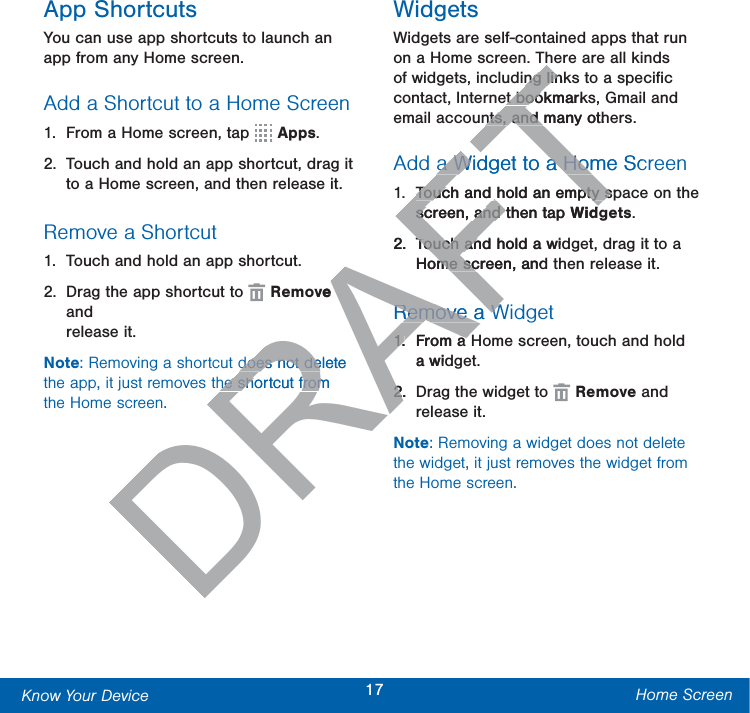
17Know Your Device Home ScreenApp ShortcutsYou can use app shortcuts to launch an app from any Home screen. Add a Shortcut to a Home Screen1.  From a Home screen, tap   Apps.2.  Touch and hold an app shortcut, drag it to a Home screen, and then release it.Remove a Shortcut1.  Touch and hold an app shortcut.2.  Drag the app shortcut to   Remove and release it.Note: Removing a shortcut does not delete the app, it just removes the shortcut from the Home screen.WidgetsWidgets are self-contained apps that run on a Homescreen. There are all kinds of widgets, including links to a specific contact, Internet bookmarks, Gmail and email accounts, and manyothers.Add a Widget to a Home Screen1.  Touch and hold an empty space on the screen, and then tap Widgets.2.  Touch and hold a widget, drag it to a Homescreen, and then release it.Remove a Widget1.  From a Home screen, touch and hold a widget.2.  Drag the widget to   Remove and releaseit.Note: Removing a widget does not delete the widget, it just removes the widget from the Home screen.DRAFTovedoes not delete does not dehe shortcut from he shortcut fromng linkng linet bookmarket boonts, and manyothnts, and a Widget to a Home Sca Widget to a HomTouch and hold an empty spTouch and hold an empty sscreen, and then tap screen, and Wid2.Touch and hold a widTouch anHomescreen, andmescRemove a WRemove a W1.1.From a aa wid2.2D
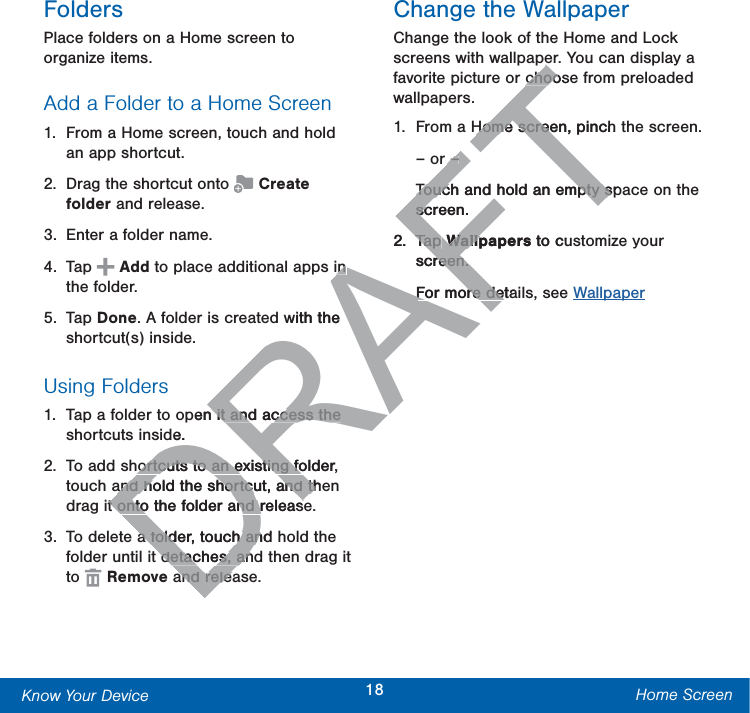
18Know Your Device Home ScreenFoldersPlace folders on a Home screen to organize items.Add a Folder to a Home Screen1.  From a Home screen, touch and hold an app shortcut.2.  Drag the shortcut onto   Create folder and release.3.  Enter a folder name.4. Tap   Add to place additional apps in the folder. 5. Tap Done. A folder is created with the shortcut(s) inside.Using Folders1.  Tap a folder to open it and access the shortcuts inside.2.  To add shortcuts to an existing folder, touch and hold the shortcut, and then drag it onto the folder and release.3.  To delete a folder, touch and hold the folder until it detaches, and then drag it to   Remove and release.Change the WallpaperChange the look of the Home and Lock screens with wallpaper. You can display a favorite picture or choose from preloaded wallpapers.1.  From a Home screen, pinch the screen.– or –Touch and hold an empty space on the screen.2. Tap Wallpapers to customize your screen. For more details, see WallpaperDRAFTin in with the pen it and access the  it and access the de.hortcuts to an existing folder, hortcuts to an existing foand hold the shortcut, and theand hold the shortcut, and tht onto the folder and releast onto the folder and releasa folder, touch and a folder, touch andetaches, andetaches, anand releaand relechooschooHome screen, pinch Home scree––Touch and hold an empty spTouch and hold an empty sscreen.sc2.Tap Tap WallpapersWallp to cuscreen. reen. For more detaFor more det
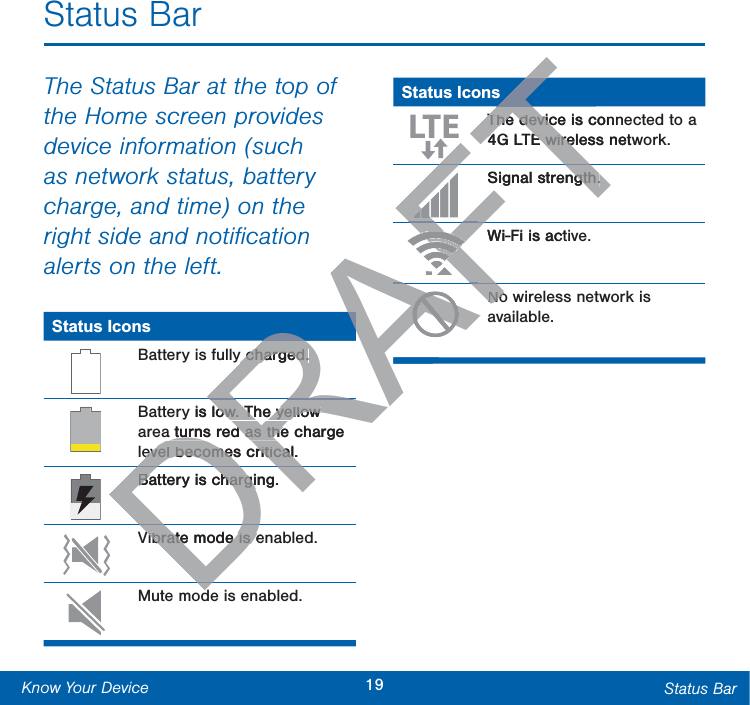
19Know Your Device Status BarStatus BarThe Status Bar at the top of the Home screen provides device information (such as network status, battery charge, and time) on the right side and notification alerts on the left. Status IconsBattery is fully charged.Battery is low. The yellow area turns red as the charge level becomes critical.Battery is charging.Vibrate mode is enabled.Mute mode is enabled.Status IconsThe device is connected to a 4G LTE wireless network.Signal strength.Wi-Fi is active.No wireless network is available.DRAFTRARADRDDy charged.y charged.y is low. The yellow ow. The yellow a turns red as the charge a turns red as theevel becomes critical.evel becomes criticalBattery is charging.Battery is chargiVibrate mode is eVibrate mode is eddAFTFTFTAFTAFTAFAFThe device is conThe devic4G LTE wireless netw4G LTE wireFFFFFSignal strength.ngth.AFAFAFAFAFAFAFAFAFAFAFWi-Fi is actAFNoNo
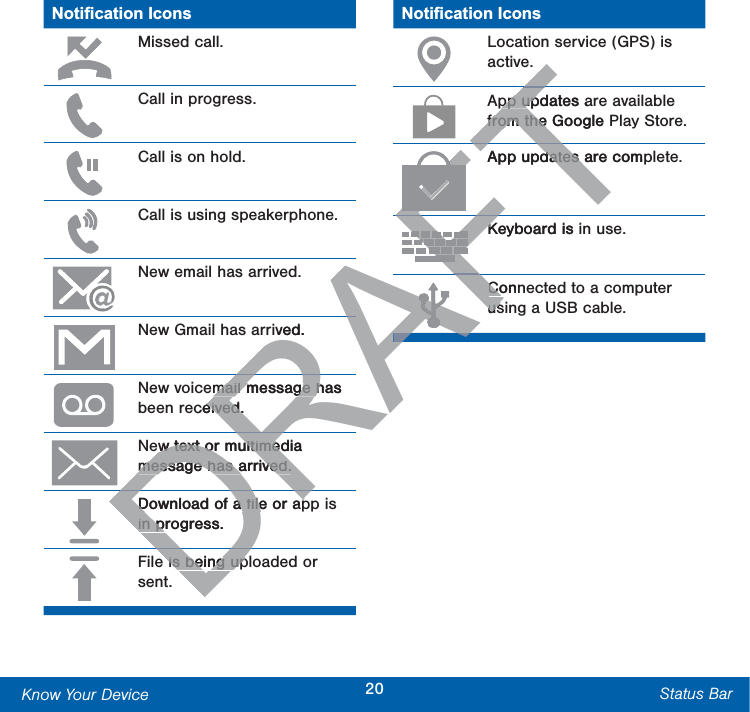
20Know Your Device Status Bar1RWL¿FDWLRQ,FRQVMissed call.Call in progress.Call is on hold.Call is using speakerphone.New email has arrived.New Gmail has arrived.New voicemail message has been received.New text or multimedia message has arrived.Download of a file or app is in progress.File is being uploaded or sent.1RWL¿FDWLRQ,FRQVLocation service (GPS) is active.App updates are available from the Google Play Store.App updates are complete.Keyboard is in use.Connected to a computer using a USBcable.DRAFTAARADRDDRDived.mail message has mail message hceived.eived.w text or multimedia w text or multimemessage has arrived.message has arrived.Download of a file or apDownload of a file or apin progress.in pis being upis being upATTTFTFTAFAFpp updates app upfrom the Google Pfrom the FFFFApp updates are comdates AFAFAFAFAFAFAFAFAFAFAFAFAFAFAFAFAFAFKeyboard is iKAFConnCousus
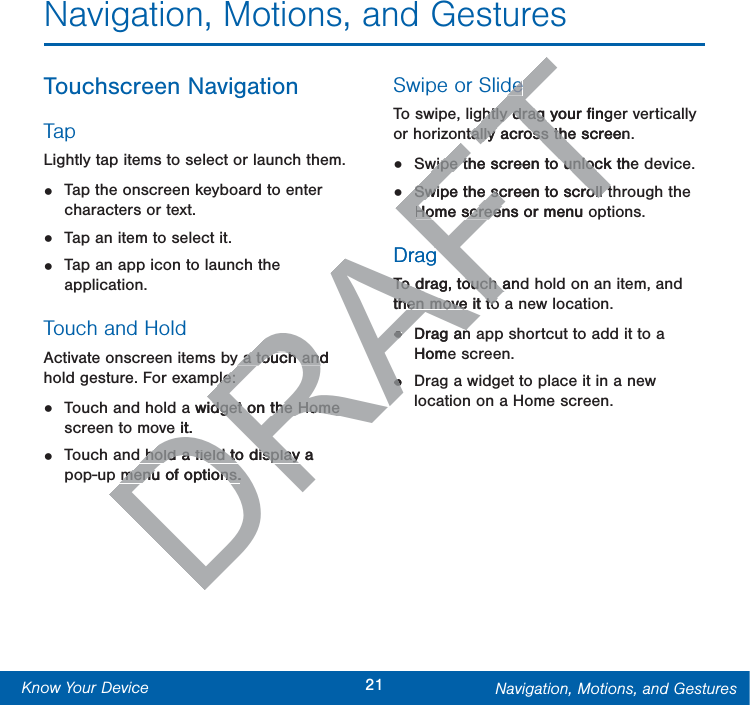
21Know Your Device Navigation, Motions, and GesturesNavigation, Motions, and GesturesTouchscreen NavigationTapLightly tap items to select or launch them.•  Tap the onscreen keyboard to enter characters ortext.•  Tap an item to select it.•  Tap an app icon to launch the application.Touch and HoldActivate onscreen items by a touch and hold gesture. For example: •  Touch and hold a widget on the Home screen to move it.•  Touch and hold a field to display a pop-up menu of options.Swipe or SlideTo swipe, lightly drag your finger vertically or horizontally across the screen.•  Swipe the screen to unlock the device.•  Swipe the screen to scroll through the Homescreens or menu options.DragTo drag, touch and hold on an item, and then move it to a new location.•  Drag an app shortcut to add it to a Home screen.•  Drag a widget to place it in a new location on a Homescreen.DRAFTy a touch and y a touch andple: ple: a widget on the Home dget on the Home e it.d hold a field to display a d hold a field to displaymenu of options.menu of options.dedeghtly drag your fingghtly drag ntally across the screentally across thwipe the screen to unlock thewipe the screen to unlocSwipe the screen to scroll tSwipe the screen to scroll tHomescreens or menu oHomescreeDragTo drag, touch anTo drag, touch athen move it tothen move it to••Drag anHom••D
22Know Your Device Navigation, Motions, and GesturesPinch and SpreadPinch the screen using your thumb and forefinger or spread by moving your fingers apart.•  Pinch or spread the screen to zoom in or out while viewing a picture or a webpage.•  Pinch or spread the screen to zoom in or out while taking a picture.DRAFT
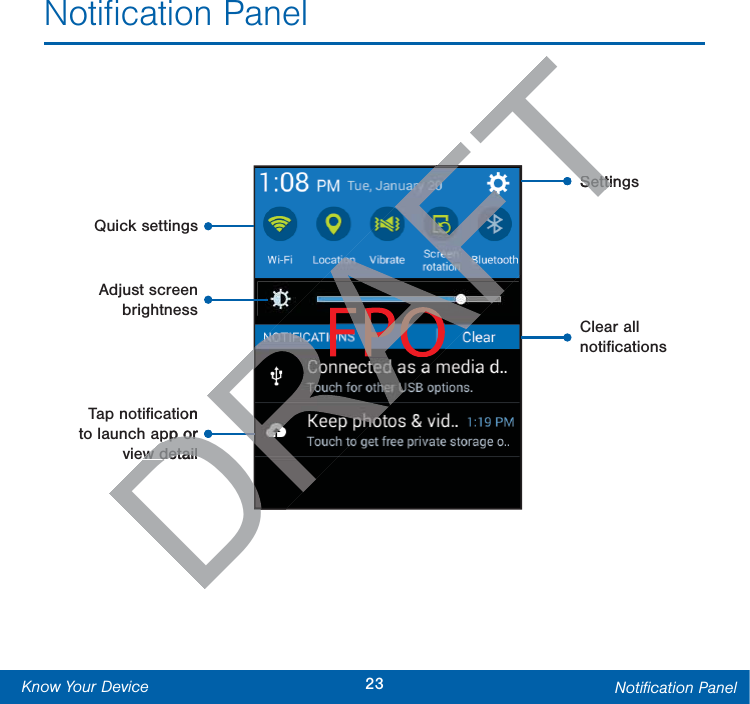
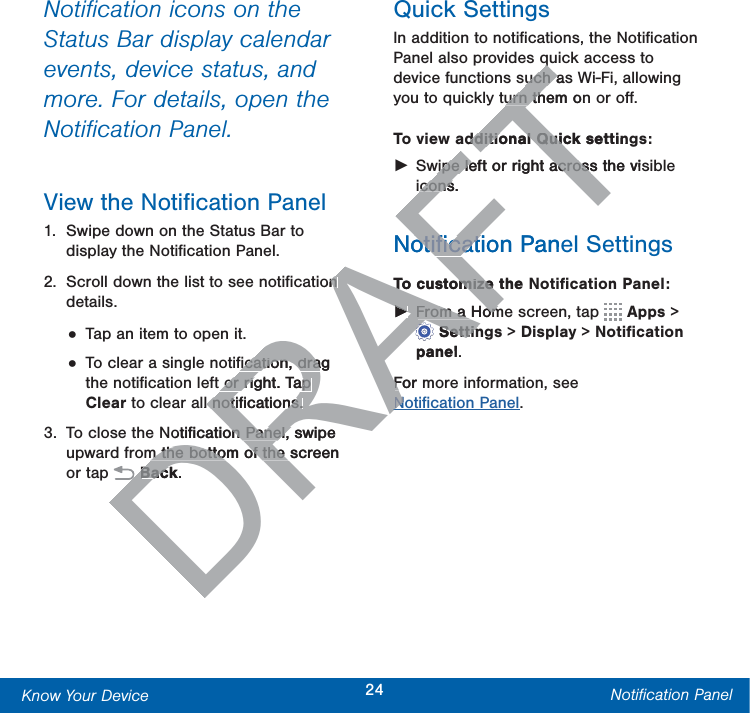
23Know Your Device Notification PanelNotification PanelFPOQuick settingsAdjust screen brightnessSettingsClear all notifications Tap notification to launch app or view detailDRAFTDRAFTDRDRFTTSettinSettion pp or pp or w detailw detail
24Know Your Device Notification PanelNotification icons on the Status Bar display calendar events, device status, and more. For details, open the Notification Panel.View the Notification Panel1.  Swipe down on the Status Bar to display the Notification Panel.2.  Scroll down the list to see notification details.• Tap an item to open it.• To clear a single notification, drag the notification left or right. Tap Clear to clear all notifications.3.  To close the Notification Panel, swipe upward from the bottom of the screen or tap  Back.Quick SettingsIn addition to notifications, the Notification Panel also provides quick access to device functions such as Wi-Fi, allowing you to quickly turn them on or off.To view additional Quick settings: ŹSwipe left or right across the visible icons.Notification Panel SettingsTo customize the Notification Panel: ŹFrom a Home screen, tap   Apps > Settings>Display > Notification panel.For more information, see Notification Panel.DRAFTon n fication, drag fication, draor right. Tap or right. Tap ll notifications. notifications.otification Panel, swipe on Panel, m the bottom of the screen m the bottom of the DBackBac.Aqquch asuch aurn them onurn thadditional Quick settindditional Quicwipe left or right across the viswipe left or right acrosscons.consNotification PaneotificatTo customize the To customize ŹŹFrom a HomFrom a HomAAAAAAAAASettinSettinpanelFor mFNoN
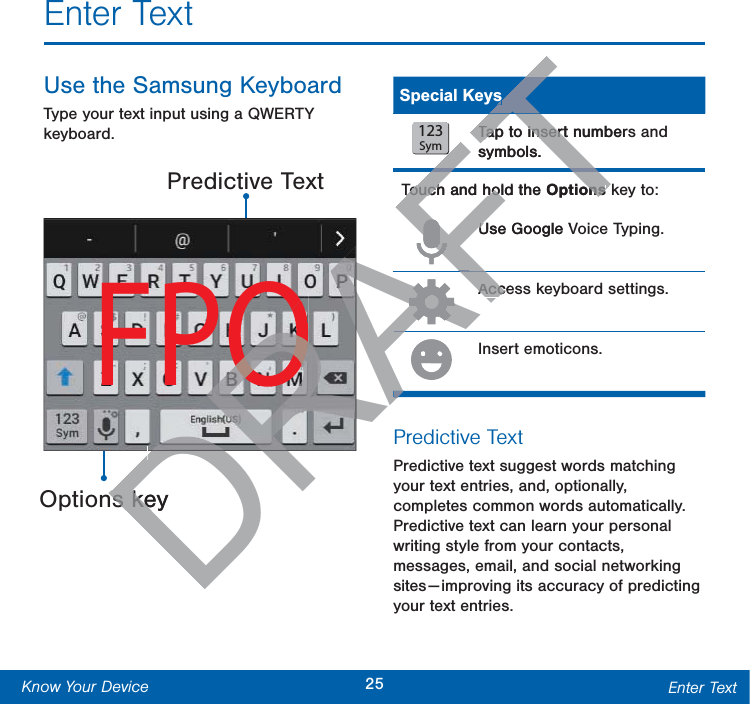
25Know Your Device Enter TextEnter TextUse the SamsungKeyboardType your text input using a QWERTY keyboard.Predictive TextFPOSpecial Keys123SymTap to insert numbers and symbols.Touch and hold the Options key to:Use Google Voice Typing.Access keyboard settings.Insert emoticons.Predictive TextPredictive text suggest words matching your text entries, and, optionally, completes common words automatically. Predictive text can learn your personal writing style from your contacts, messages, email, and social networking sites — improving its accuracy of predicting your text entries.Options keyDRAFTDRADAFTTAFAFAFFTsFTap to insert numbersTap to insertsymbols.Touch and hold the Touch and hoOptionsonsAFAFUse Google VUAFAcceAccAAAAns keyns ke
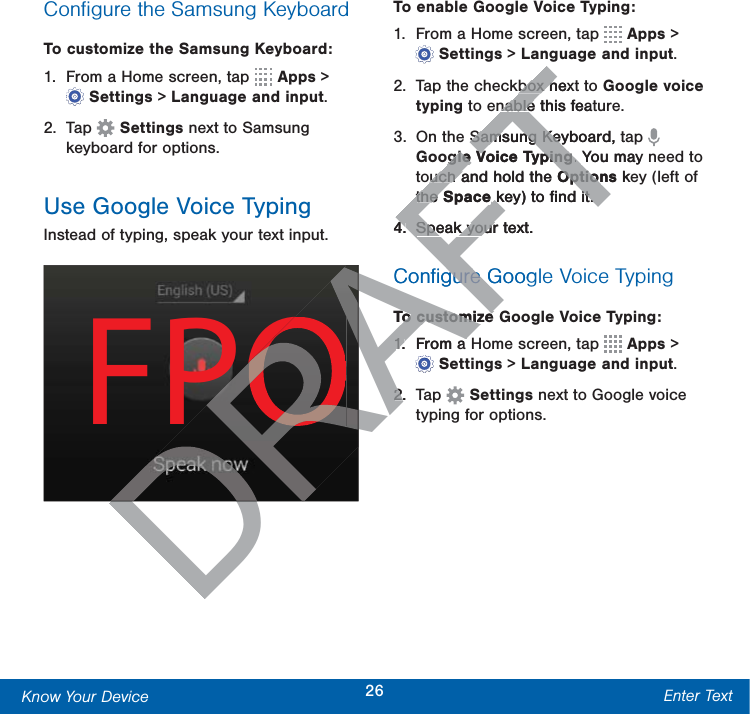
26Know Your Device Enter TextConfigure the Samsung KeyboardTo customize the Samsung Keyboard:1.  From a Home screen, tap   Apps > Settings> Language and input.2. Tap   Settings next to Samsung keyboard for options.Use Google Voice TypingInstead of typing, speak your text input.FPOTo enable Google Voice Typing:1.  From a Home screen, tap   Apps > Settings > Language and input.2.  Tap the checkbox next to Google voice typing to enable this feature.3.  On the Samsung Keyboard, tap   Google Voice Typing. You may need to touch and hold the Options key (left of the Space key) to find it.4.  Speak your text.Configure Google Voice TypingTo customize Google Voice Typing:1.  From a Home screen, tap   Apps > Settings> Language and input.2. Tap   Settings next to Google voice typing for options.DRAFTDRAkbox nexkbox nnable this feanableSamsung Keyboard, taSamsung Keyogle Voice Typingogle Voice Typing. You may. Yuch and hold the uch aOptionsOption kethe the Space key) to find it. key) to find it.4.4Speak your text.Speak yourConfigure Googgure GTo customize To customize 1.1.From a AAAAAAAAAS2.2
Make telephone calls using a variety of calling features and services.CallingDRAFTTT
28Calling Make and Answer CallsMake and Answer CallsLearn how to make or answer a call. Explore features and functionality associated with making or answering a call.Make a Call1.  From a Home screen, tap  Phone.2.  Enter a number and tap  Dial.Quickly Dial a Number from YourContactList1.  From a Home screen, tap   Apps > Contacts.2.  While viewing your contact list, swipe your finger across a contact to the right call the contact.Dial a Recent NumberAll incoming, outgoing, and missed calls are recorded in the Call log. If the number or caller is listed in your contacts list, the associated name is also displayed. 1.  From a Home screen, tap   Phone.2. Tap the Logs tab. A list of recent calls is displayed.3.  Tap a contact, and then tap   Call.End a Call ŹWhen you are ready to end your call, tap  End.hone.RRRDialDial..mber from mber from stme screen, tap me screen, tap DRDRDRDRDRDRDRDRDRDRDRDRDRDRDRDRApps A> ctscts..viewing your contact list, swviewing your contact list, swger across a contact to ger across a contacntact.ntact.t Numbet Nu, outgoing, and mis, outgoingded in the Call log. If theed in the Call er is listed in your contacts ler is listed in your coociated name is also displayeociated name is also displa1.1.From a Home screen, tapFrom a Home screen, tap2.Tap the Tap the Logs Ltab. A lis displayed.displa3.3.Tap a contact,Tap a contacEnd a EŹŹW
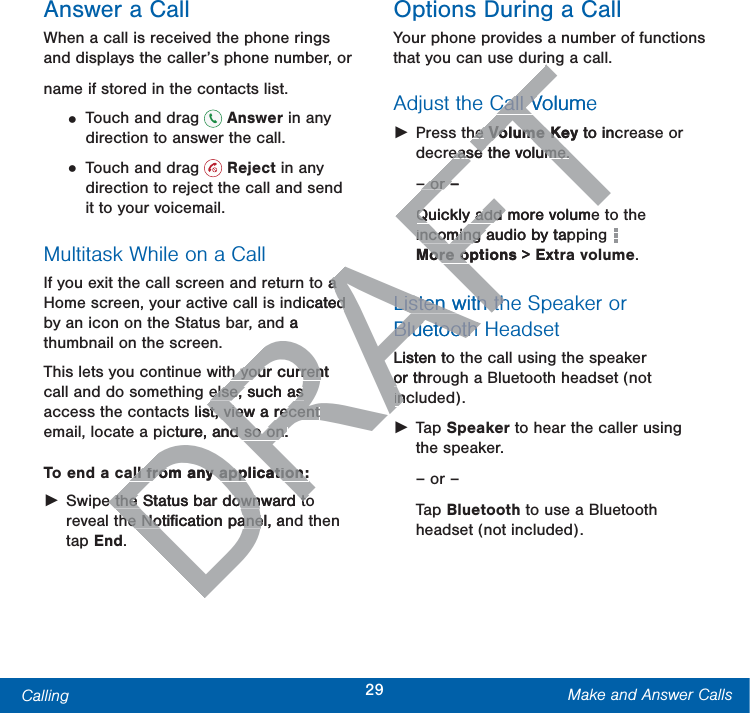
29Calling Make and Answer CallsAnswer a CallWhen a call is received the phone rings and displays the caller’s phone number, or name if stored in the contacts list.• Touch and drag   Answer in any direction to answer the call.• Touch and drag   Reject in any direction to reject the call and send it to your voicemail.Multitask While on a CallIf you exit the call screen and return to a Home screen, your active call is indicated by an icon on the Status bar, and a thumbnail on the screen.This lets you continue with your current call and do something else, such as access the contacts list, view a recent email, locate a picture, and so on.To end a call from any application: ŹSwipe the Status bar downward to reveal the Notification panel, and then tap End. Options During a CallYour phone provides a number of functions that you can use during a call.Adjust the Call Volume ŹPress the Volume Key to increase or decrease the volume.– or –Quickly add more volume to the incoming audio by tapping   Moreoptions > Extra volume. Listen with the Speaker or BluetoothHeadsetListen to the call using the speaker or through a Bluetoothheadset (not included). ŹTap Speaker to hear the caller using the speaker.– or –Tap Bluetooth to use a Bluetooth headset (notincluded).DRAFTo a a dicated d d a h your current h your currenelse, such as else, such as list, view a recent st, view a recent cture, and so on.d so on.all from any application:all from any application:e the Status bar downward toe the Status bar downward tohe Notification panel, anhe Notification paneCall VolumeCall Vhe he Volume KeyVolume K to incease the volume.ease the volume.– or –– or –Quickly add more volumeQuickly add incoming audio by tapincoming aMoreoptionsoreo > ExtListen with thListen with thBluetoothBluetoothListen toor throincin
30Calling Make and Answer CallsPlace a New Call While on a CallIf your service plan supports this feature, you can make another call while a call is in progress. 1.  From the active call, tap Add call to dial the second call. The first call is displayed as a thumbnail. 2.  Dial the new number and tap   Dial.• Tap Swap to switch between the two calls.• Tap Merge to hear both callers at once (multiconferencing). Call WaitingIf your service plan supports this feature, you can answer an incoming call while you have a call in progress. You are notified of an incoming call by a call waiting tone. To answer a new call while you have a call in progress:1. Slide   Answer in any direction to answer the new call. 2.  Tap an option:• Putting [caller] on hold to place the previous caller on hold while you answer the new incoming call.• Ending call with [caller] to end the previous call and answer the new call.3.  Tap the previous On hold number entry and select Swap to switch between the two calls. This places the new caller on hold and activates the previous call.DRAFTgress. Ygressll by a call wll by ar a new call while your a new call wprogress:progrSlide Slide FTFTFTAnswer in any direcny direanswer the new call. answer the n2.Tap an option:Tap an op•Putting [callerPuttinthe previousprevioanswer thanswer th•Endinndinpre33
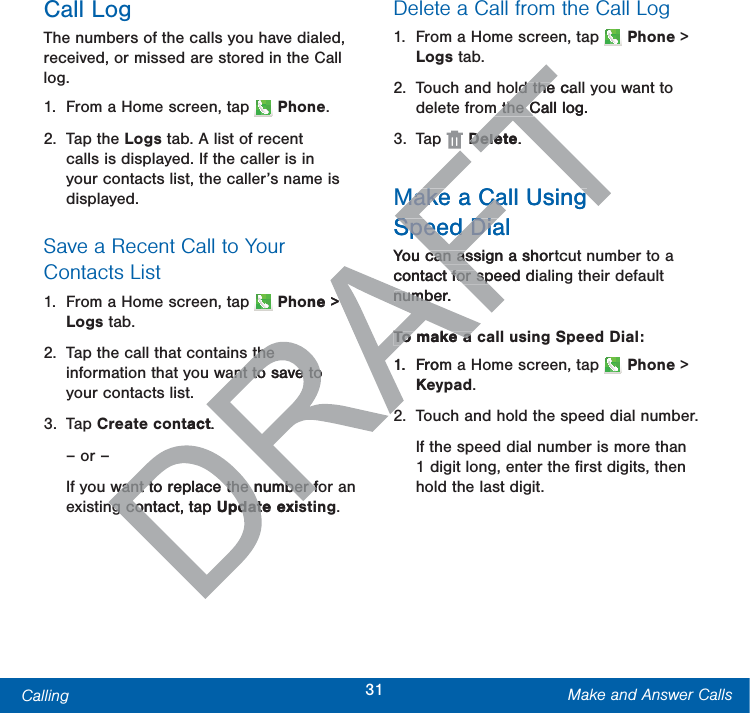
31Calling Make and Answer CallsCall LogThe numbers of the calls you have dialed, received, or missed are stored in the Call log.1.  From a Home screen, tap   Phone.2. Tap the Logs tab. A list of recent calls is displayed. If the caller is in your contacts list, the caller’s name is displayed.Save a Recent Call to Your Contacts List 1.  From a Home screen, tap   Phone > Logs tab.2.  Tap the call that contains the information that you want to save to your contacts list. 3. Tap Create contact.– or –If you want to replace the number for an existing contact, tap Update existing.Delete a Call from the Call Log1.  From a Home screen, tap   Phone > Logs tab.2.  Touch and hold the call you want to delete from the Call log.3. Tap   Delete.Make a Call Using SpeedDialYou can assign a shortcut number to a contact for speed dialing their default number.To make a call using Speed Dial:1.  From a Home screen, tap   Phone > Keypad.2.  Touch and hold the speed dial number.If the speed dial number is more than 1 digit long, enter the first digits, then hold the last digit.one > >the the ant to save to ant to save totact.want to replace the number fowant to replace the number fng contact, tap ng conUpdate exisdatld the cald them the Call log.m the CDeleteDele.Make a Call Using Make a Call Using SpeedDialSpeedDiaYou can assign a shorcan ascontact for speed dfor spnumber.numbTo make a To make a 1.FromK22
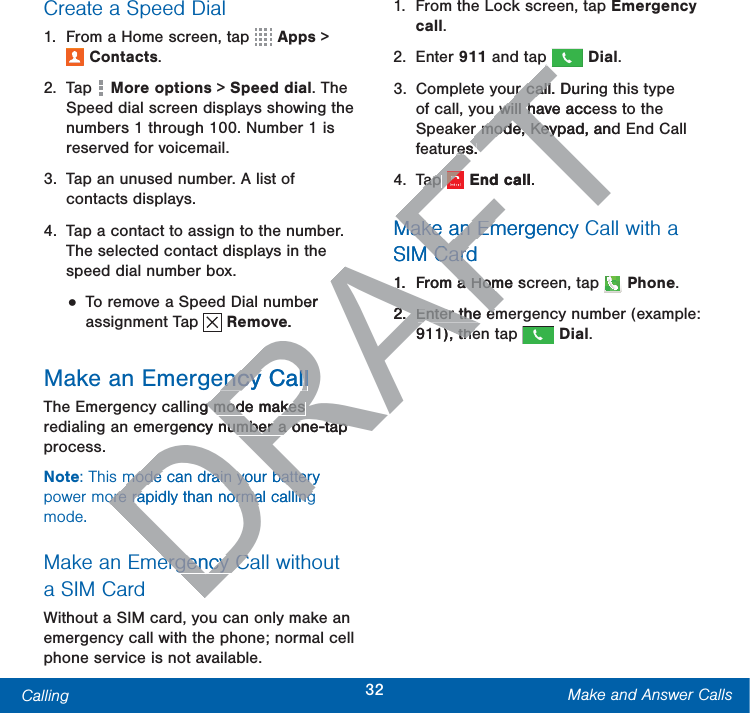
32Calling Make and Answer CallsCreate a Speed Dial1.  From a Home screen, tap   Apps > Contacts.2. Tap   Moreoptions > Speed dial. The Speed dial screen displays showing the numbers 1 through 100. Number 1 is reserved for voicemail.3.  Tap an unused number. A list of contacts displays.4.  Tap a contact to assign to the number. Theselected contact displays in the speed dial number box.• To remove a Speed Dial number assignment Tap   Remove. Make an Emergency CallThe Emergency calling mode makes redialing an emergency number a one-tap process. Note: This mode can drain your battery power more rapidly than normal calling mode. Make an Emergency Call without a SIMCardWithout a SIM card, you can only make an emergency call with the phone; normal cell phone service is not available. 1.  From the Lock screen, tap Emergency call. 2. Enter 911 and tap   Dial.3.  Complete your call. During this type of call, you will have access to the Speaker mode, Keypad, and End Call features.4. Tap  Endcall.Make an Emergency Call with a SIM Card1.  From a Home screen, tap   Phone.2.  Enter the emergency number (example: 911), then tap   Dial. DRAFTber e. ency Callency Callng mode makes g mode makes gency number a one-tap number a one-tap mode can drain your battery mode can drain your batteryore rapidly than normal callingore rapidly than normal callingergency Cergency Cppur call. Duur call will have acce will hr mode, Keypad, andr mode, Keyres.res.Tap Tap FFFFFFFFFFEndcall.Make an Emergency Make an EmSIM CardM Card1.1From a Home sa Hom2.2.Enter the eEnter the e911), the911) the
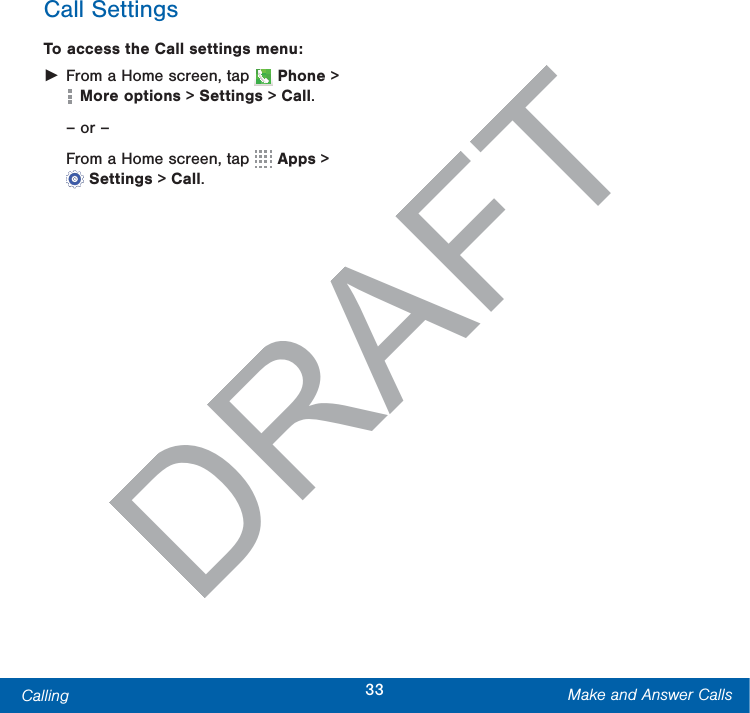
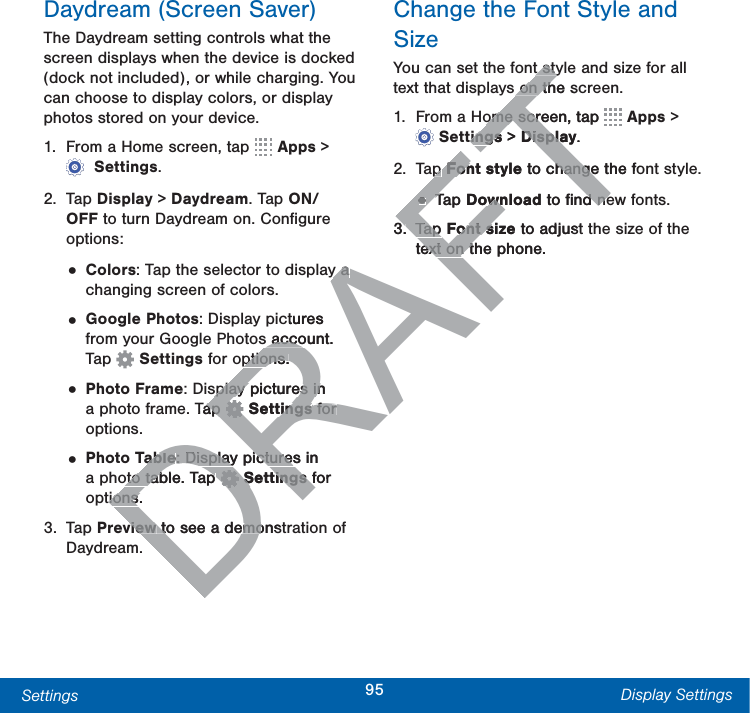
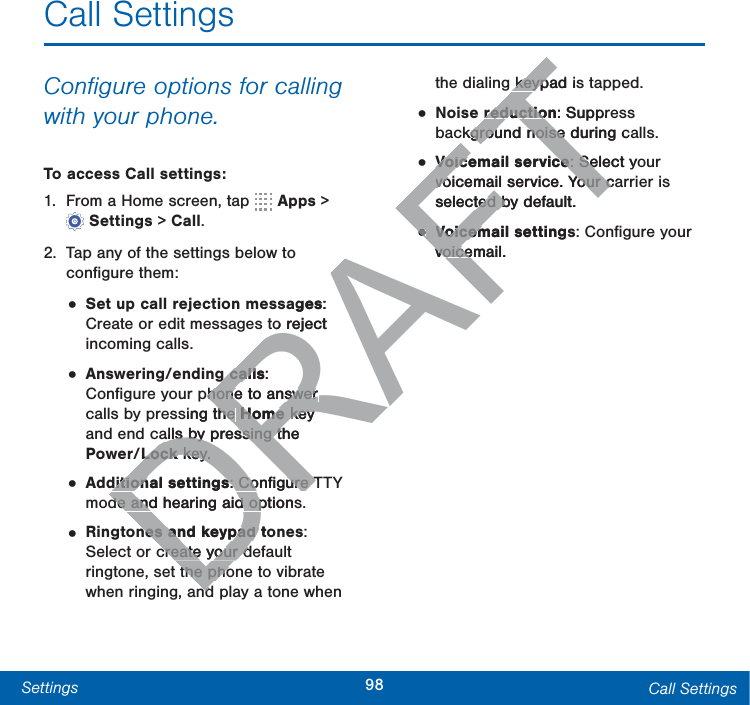
33Calling Make and Answer CallsCall SettingsTo access the Call settings menu: ŹFrom a Home screen, tap   Phone > Moreoptions > Settings > Call.– or –From a Home screen, tap   Apps > Settings> Call.DRAFT
ApplicationsThe Apps screen displays all applications installed on your device, both preloaded apps and apps you download and install yourself.Learn how to change the way apps appear, organize apps into folders, and uninstall or disable apps.DRAFTTTe the way e the wanize apps anize appsd uninstall or uninstall or s.
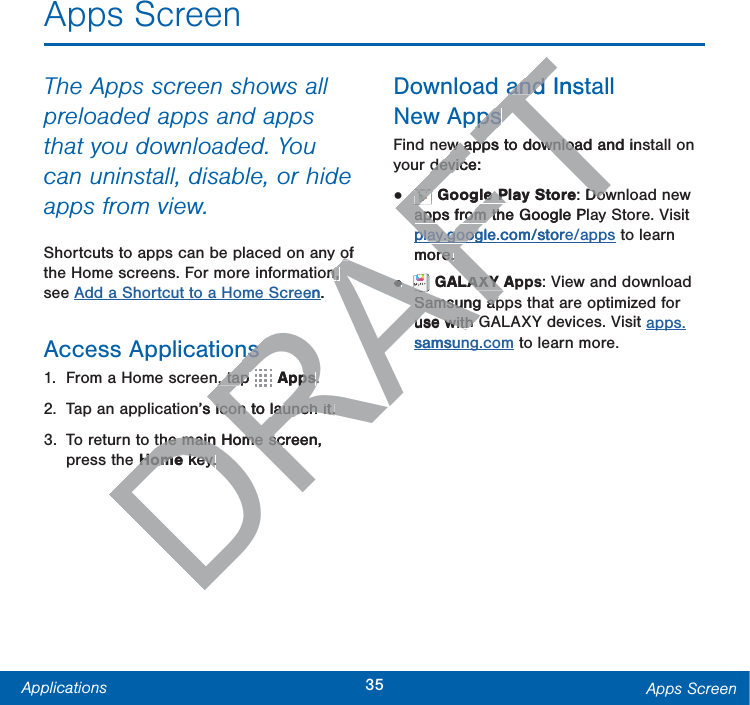
35Applications Apps ScreenApps ScreenThe Apps screen shows all preloaded apps and apps that you downloaded. You can uninstall, disable, or hide apps from view.Shortcuts to apps can be placed on any of the Home screens. For more information, see Add a Shortcut to a Home Screen.Access Applications1.  From a Home screen, tap   Apps.2.  Tap an application’s icon to launch it.3.  To return to the main Home screen, press the Home key.Download and Install NewAppsFind new apps to download and install on your device:•   Google Play Store: Download new apps from the Google Play Store. Visit play.google.com/store/apps to learn more.•   GALAXY Apps: View and download Samsung apps that are optimized for use with GALAXY devices. Visit apps.samsung.com to learn more.DRAFTAof ofon, n, en.nsns, tap , tap RRRRRRRRRRRRRRRRAppsps..on’s icon to launch it.icon to launch it.the main Home screen, the main Home scHomeHome key. key.AFAand Insand ppsppsw apps to download and inw apps to downloadevice:devicFFFFGoogle Play Storele P: DowDowapps from the Google Papps from thplay.google.com/storeplay.googygmore.re.••AFAFAFAFAFAFAFAFAFAFAFAFGALAXY ApLAXY Samsung apSamsung apuse with Guse with Gsamsu
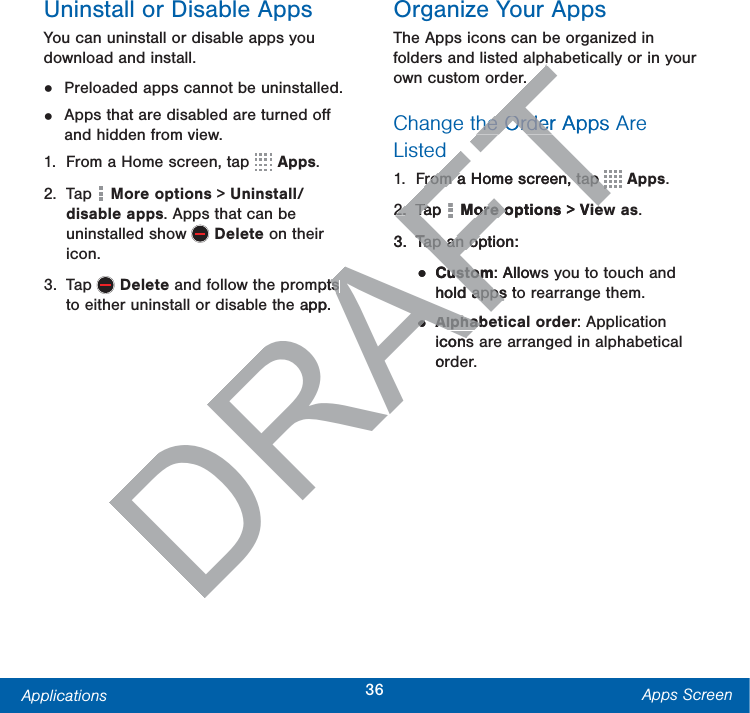
36Applications Apps ScreenUninstall or Disable AppsYou can uninstall or disable apps you download and install. •  Preloaded apps cannot be uninstalled.•  Apps that are disabled are turned off and hidden from view.1.  From a Home screen, tap   Apps.2. Tap   More options > Uninstall/disable apps. Apps that can be uninstalled show   Delete on their icon. 3. Tap   Delete and follow the prompts to either uninstall or disable the app.Organize Your AppsThe Apps icons can be organized in folders and listed alphabetically or in your own custom order.Change the Order Apps Are Listed 1.  From a Home screen, tap   Apps.2. Tap   More options > View as.3.  Tap an option:• Custom: Allows you to touch and hold apps to rearrange them.• Alphabetical order: Application icons are arranged in alphabetical order.DRAFTpts ts app.he Order Apps Ahe OrderFrom a Home screen, tap From a Home screen, tap TTTTTTTTTTTTTTTA2.2.Tap TaFFFFMore optionsore o > Vie3.Tap an option:Tap an op•CustomCustom: Allowhold apps t apps••AlphabAlphabiconsor
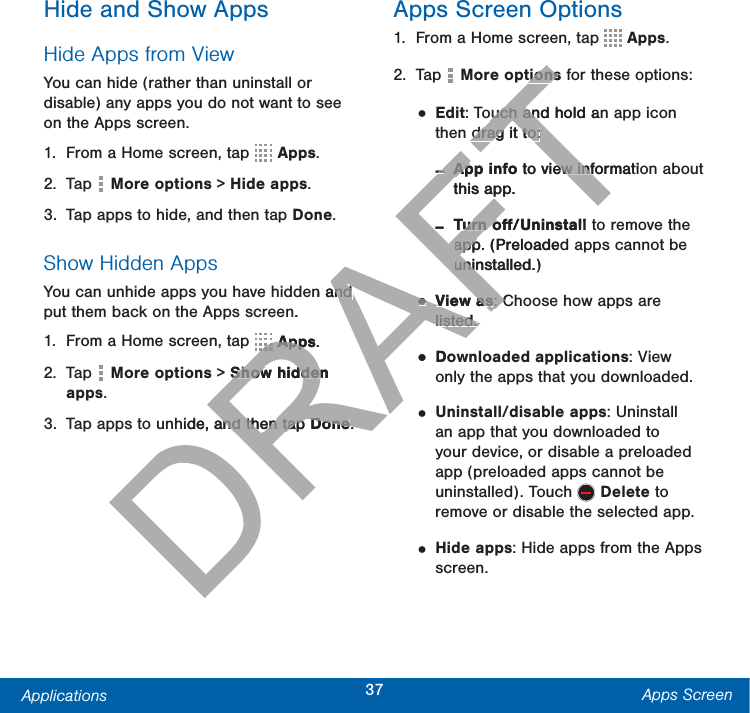
37Applications Apps ScreenHide and Show AppsHide Apps from ViewYou can hide (rather than uninstall or disable) any apps you do not want to see on the Apps screen.1.  From a Home screen, tap   Apps.2. Tap   More options > Hide apps.3.  Tap apps to hide, and then tap Done.Show Hidden AppsYou can unhide apps you have hidden and put them back on the Apps screen.1.  From a Home screen, tap   Apps.2. Tap   More options > Show hidden apps.3.  Tap apps to unhide, and then tap Done.Apps Screen Options1.  From a Home screen, tap   Apps.2. Tap   More options for these options:• Edit: Touch and hold an app icon then drag it to: -App info to view information about this app.  -Turn off/Uninstall to remove the app. (Preloaded apps cannot be uninstalled.)• View as: Choose how apps are listed.• Downloaded applications: View only the apps that you downloaded.• Uninstall/disable apps: Uninstall an app that you downloaded to your device, or disable a preloaded app (preloaded apps cannot be uninstalled). Touch   Delete to remove or disable the selected app.• Hide apps: Hide apps from the Apps screen.DRAFTen and and n.RRRRRRAppsApp.Show hidden Show hiddenhide, and then tap and then tap DoneDone.tionstions ouch and hold anouch andrag it to:drag it to:--App info Apto view informatioew infthis app. -Turn off/UninstallTurn oapp. (Preloadedappuninstalled.)unin••View asView as: C: Clisted.listed.•Do
38Applications Apps Screen• Show disabled apps: Display disabled apps.• Show hidden apps: Display hidden apps.Note: Options vary depending on the type of app being edited.DRAFT
39Applications Google ApplicationsGoogle ApplicationsEnjoy these applications from Google.Note: Certain applications require a Google account. Visit google.com to learn more.ChromeUse Google Chrome to browse the Internet and bring your open tabs, bookmarks and address bar data from your computer to your mobile device.Visit google.com/chrome/browser to learn more.DriveOpen, view, rename, and share your Google Docs and files.Visit drive.google.com to learn more.GmailSend and receive email with Gmail, Google’s web-based email service.Visit gmail.com to learn more.DRAFTRwse se ur and om your om your mobile r mobile com/chrome/browserrome/brow to more.more.FTveveOpen, view, rename,Open, viewyour Google Docs and your Google DVisit drive.google.comoogle.cg tomore.AFAFAFAFAFAFAFAFAFAFAFAFAFAFAFAFAFAFAFAFAFAFAFAFAFAFAFAFAFAFAFAFAFAFAFAFAFAFAFAFAFAFAFAFAFAFAFAFAFAFAFAFAFAFAFAFAFAFAFAFAFAFAFAFAFAFAFAFAFAFAFAFAFAFAFAFAFAFAFAFAFAFAFAFAFAFAFAFAFAFAFAFAFAFAFAFAFAFAFAFAFAFAFAFAFAFAFAFAFAFAFAFAFAFAFAFAFAFAFAFAFAFAFAFAFAFAFAFAFAFAFAFAFAFAFAFAFAFAFAFAFAFAFAFAFAFAFAFAFAFAFAFAFAFAFAFAFAFAFAFAFAFAFAFAFAFAFAFAFAFAFAFAFAFAFAFAFAFAFAFAFAFAFAFAFAFAFAFAFAFAFAFAFAFAFAFAFAFAFAFAFAFAFAFAFAFAFAFAFAFAFAFAFAFAFAFAFAFAFAFAFAFAFAFAFAFAFAFAFAFAFAFAFAFAFAFAFAFAFAFAFAFAFAFAFAFAFAFAFAFAFAFAFAFAFAFAFAFAFAFAFAFAFAFAFAFAFAFAFAFAFAFAFAFAFAFAFAFAFAFAFAFAFAFAFAFAFAFAFAFAFAFAFAFAFAFAFAFAFAFAFAFAFAFAFAFAFAFAFAFAFAFAFAFAFAFAFAFAFAFAFAFAFAFAFAFAFAFAFAFAFAFAFAFAFAFAFAFAFAFAFAFAFAFAFAFAFAFAFAFAFAFAFAFAFAFAFAFAFAFAFAFAFAFAFAFAFAFAFAFAFAFAFAFAFAFAFAFAFAFAFAFAFAFAFAFAFAFAFAFAFAFGmailGSend anSenGmailGmaiemem
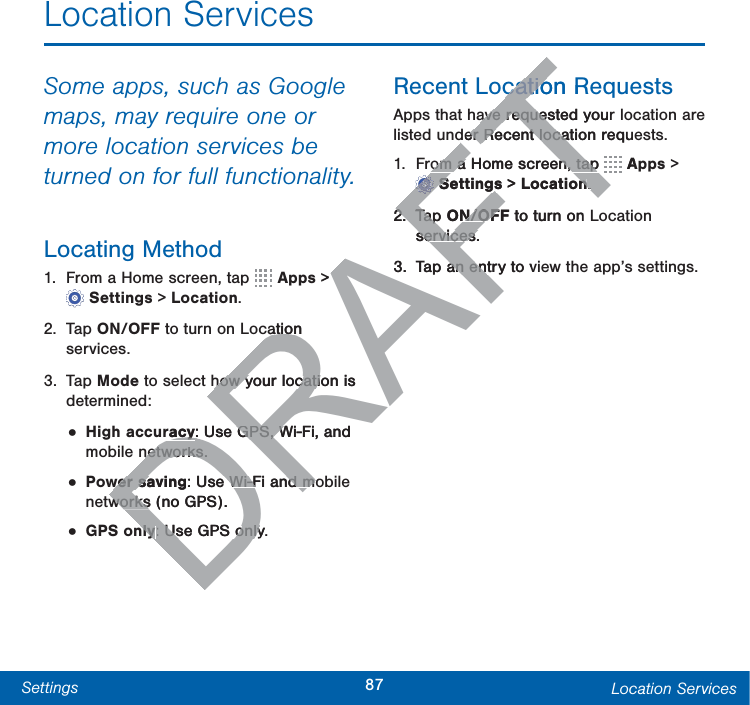
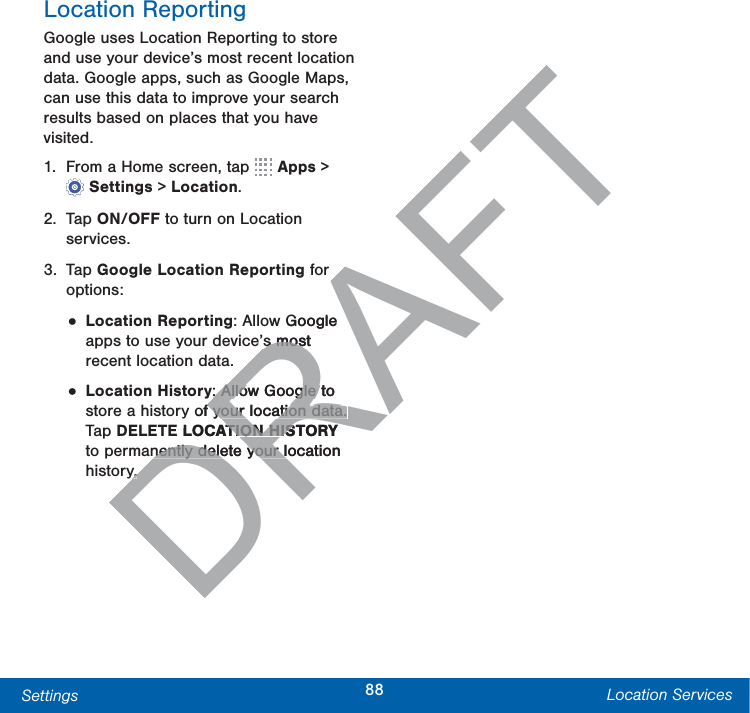
40Applications Google ApplicationsGoogleSearch not only the Internet, but also the apps and contents of your device. Google NowGoogle Now works in the background to collect information you regularly look up and organize it into convenient cards that appear when you need them.Visit google.com/landing/now to learn more. ŹPress and hold the Home key.Note: When Google Now is enabled, you can also access it by touching   Google.Google SettingsQuickly and easily change Google app settings to suit your preferences.Note: You must be signed in to the application you want to configure. For example, sign in to Google+ to configure Google+ settings.Google+Stay connected and share with Google+. Chat with friends and family, post photos, and see what others are sharing.Visit google.com/mobile/+ to learn more.HangoutsHangouts is an online place to meet friends and family, share photos, and host video calls. Conversation logs are automatically saved to a Chats area in your Gmail account.DRAFTAowwe Homeoogle Now is oogle Now is u can also access it u can also access it hing DRDRGoogleGoogle.ppeferencefereee: You must be: Youo the application youo the applicconfigure. For example, configure. For ein to Google+ to configurein to Google+ to cGoogle+ settings.gs.AFAFAFGoogle+GStay conStaGoogleGoogfamfamww
41Applications Google ApplicationsMapsUse Google Maps to find your current location, get directions, and other location-based information.Note: You must enable location services to use Maps. Please see Location Services.PhotosThis application automatically backs up your photos and videos to your Google+ account.Play BooksWith Google Play Books, you can find millions of free e-books and hundreds of thousands more to buy in the eBookstore.Visit play.google.com/store/books to learn more.Play GamesDiscover hundreds of games for download and purchase through the Google Play Store.Play Movies & TVWatch movies and TV shows purchased from Google Play. You can stream them instantly, or download them for viewing when you are not connected to the Internet. You can also view videos saved on your device.Play MusicWith Google Play Music, you can play music and audio files on your device. Play NewsstandSubscribe to your favorite magazines to read on your device at your leisure.DRAFTAFTksksle Play Books, e Play Books, n find millions of free illions of froks and hundreds of oks and hundredsousands more to buy in the ousands more to buy in eBookstore.eBooVisit Visit ay.google.com/storeay.google.com/stoggmore.morethe Gthe GFFFFFFFFFFFFFFFFFFFFFFFFPlay Movies & TPlay MoviWatch movies and TV shWatch movies andpurchased from Googm GooYou can stream theYou can stream theor download theor dwhen you arewthe Internethvideos svideoAAAAAAAAAAAAAAAAAAAAAAAAAAAAAAAAAAAAAAAAAAAAAAAAAAAAAAAAAAAAAAAAAAAAAAAAAAAAAAAAAAAAAAAAAAAAAAAAAAAAAAAAAAAAAAAAAAAAAAAAAAAAAAAAAAAAAAAAAAAAAAAAAAAAAAAAAAAAAAAAAAAAAAAAAAAAAAAAAAAAAAAAAAAAAAAAAAAAAAAAAAAAAAAAAAAAAAAAAAAAAAAAAAAAAAAAAAAAAAAAAAAAAAAAAAAAAAAAAAAAAAAAAAAAAAAAAAAAAAAAAAAAAAAAAAAAAAAAAAAAAAAAAAAAAAAAAAAAAAAAAAAAAAAAAAAAAAAAAAAAAAAAAAAAAAAAAAAAAAAAAAAAAAAAAAAAAAAAAAAAAAAAAAAAAAAAAAAAAAAAAAAAAAAAAAAAAAAAAAAAAAAAAAAAAAAAAAAAAAAAAAAAAAAAAAAAAAAAAAAAAAAAAAAAAAAAAAAAAAAAAAAAAAAAAAAAAAAAAAAAAAAAAAAAAAAAAAAAAAAAAAAAAAAAAAAAAAAAAAAAAAAAAAAAAAAAAAAAAAAAAAAAAAAAAAAAAAAAAAAAAAAAAAAAAAAAAAAAAAAAAAAAAAAAAAAAAAAAAAAAAAAAAAAAAAAAAAAAAAAAAAAAAAAAAAAAAAAAAAAAAAAAAAAAAAAAAAAAAAAAAAAAAAAAAAAAAAAAAAAAAAAAAAAAAAAAAAAAAAAAAAAAAAAAAAAAAAAAAAAAAAAAAAAAAAAAAAAAAAAAAAAAAAAAAAAAAAAAAAAAAAAAAAAAAAAAAAAAAAAAAAAAAAAAAAAAAAAAAAAAAAAAAAAAAAAAAAAAAAAAAAAAAAAAAAAAAAAAAAAAAAAAAAAAAAAAAAAAAAAAAAAAAAAAAAAAAAAAAAAAAAAAAAAAAAAAAAAAAAAAAAAAAAAAAAAAAAAAAAAAAAAAAAAAAAAAAAAAAAAAAAAAAAAAAAAAAAAAAAAAAAAAAAAAAAAAAAAAAAAAAAAAAAAAAAAAAAAAAAAAAAAAAAAAAAAAAAAAAAAAAAAAAAAAAAAAAAAAAAAAAAAAAAAAAAAAAAAAAAAAAAAAAAAAAAAAAAAAAAAAAAAAAAAAAAAAAAAAAAAAAAAAAAAAAAAAAAAAAAAAAAAAAAAAAAAAAAAAAAAAAAAAAAAAAAAAAAAAAAAAAAAAAAAAAAAAAAAAAAAAAAAAAAAAAAAAAAAAAAAAAAAAAAAAAAAAAAAAAAAAAAAAAAAAAAAAAAAAAAAAAAAAAAAAAAAAAAAAAAAAAAAAAAAAAAAAAAAAAAAAAAAAAAAAAAAAAAAAAAAAAAAAAAAAAAAAAAAAAAAAAAAAAAAAAAAAAAAAAAAAAAAAAAAAAAAAAAAAAAAAAAAAAAAAAAAAAAAAAAAAAAAAAAAAAAAAAAAAAAAAAAAAAAAAAAAAAAAAAAAAAAAAAAAAAAAAAAAAAAAAAAAAAAAAAAAAAAAAAAAAAAAAAAAAAAAAAAAAAAAAAAAAAAAAAAAAAAAAAAAAAAAAAAAAAAAAAAAAAAAAAAAAAAAAAAAAAAAAAAAAAAAAAAAAAAAAAAAAAAAAAAAAAAAAAAAAAAAAAAAAAAAAAAAAAAAAAAAAAAAAAAAAAAAAAAAAAAAAAAAAAAAAAAAAAAAAAAAAAAAAAAAAAAAAAAAAAAAAAAAAAAAAAAAAAAAAAAAAAAAAAAAAAAAAAAAAAAAAAAAAAAAAAAAAAAAAAAAAAAAAAAAAAAAAAAAAAAAAAAAAAAAAAAAAAAAAAAAA
42Applications Google ApplicationsPlay StoreFind new apps, movies and TV shows, music, books, magazines, and games in Google Play Store.Voice SearchUse voice commands to search the web with Google.YouTubeView and upload YouTube videos right from your device.DRAFTdevice.
43Applications T-Mobile ApplicationsT-Mobile ApplicationsEnjoy these applications from T-Mobile.Note: Certain applications require a data plan or paid subscription. Visit t-mobile.com to learn more, or contact your service provider for additional information.T-Mobile My AccountThis application provides you online access to account information such as your current activity, billing information, service plans, downloads, and more.T-Mobile Name IDThis application lets you modify onscreen Caller ID information. Name ID identifies unknown callers by Name, City, and State.T-Mobile TVThis application brings you live TV and Video on Demand.Note: A data plan is required to use this feature. Charges may apply. Please contact your service provider for further details.Visual VoicemailThis application allows you to easily manage your inbox without ever dialing into your voicemail.Mobile HotSpotThis application allows you to use your phone as a Mobile HotSpot.  DRAFTountntdes you count countas your as your y, billing y, bill, service plans, service plans, ds, and more.nd more.T-Mobile Name IDT-Mobile Name IDThis application lets youThis application letsodify onscreen Calleodify onscreen Camation. Name mation. Name n callersn callersobile TVobilhis application brinhis applicTV and Video on DemaTV and VideoNote: A data plan is reqa plan to use this feature. Chuse this feature. Cmay apply. Please may aservice providerserdetails.AFAFAFAAAAAAAAVisVis
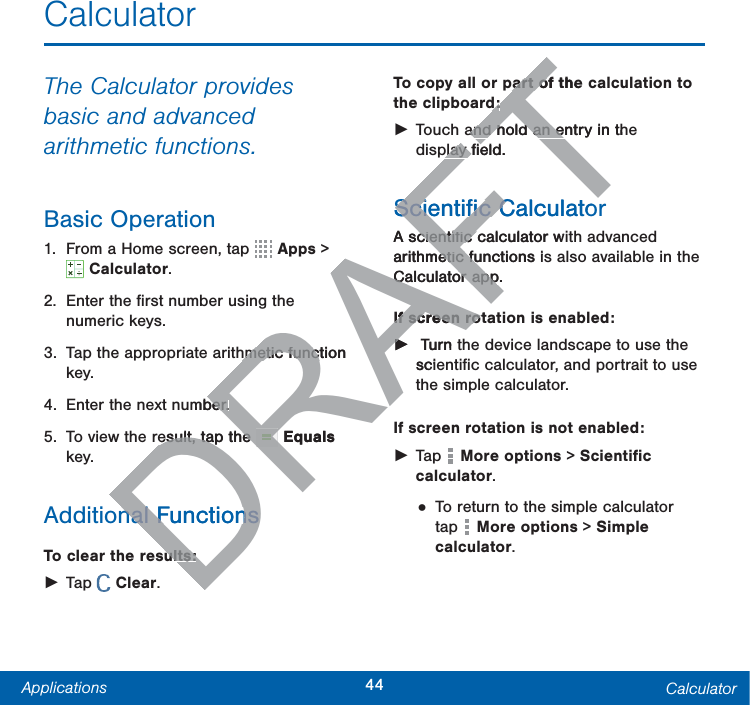
44Applications CalculatorCalculatorThe Calculator provides basic and advanced arithmetic functions.Basic Operation1.  From a Home screen, tap   Apps > Calculator.2.  Enter the first number using the numeric keys.3.  Tap the appropriate arithmetic function key.4.  Enter the next number.5.  To view the result, tap the   Equals key.Additional FunctionsTo clear the results: ŹTap   Clear.To copy all or part of the calculation to the clipboard: ŹTouch and hold an entry in the displayfield.Scientific CalculatorA scientific calculator with advanced arithmetic functions is also available in the Calculator app. If screen rotation is enabled: Ź Turn the device landscape to use the scientific calculator, and portrait to use the simple calculator.If screen rotation is not enabled: ŹTap  Moreoptions > Scientific calculator.• To return to the simple calculator tap  Moreoptions > Simple calculator.DRAFThmetic function hmetic funcmber.ber.esult, tap the esult, tap the DRDRDRDREqualsnal Functionsnal Functionsults:ults:part of thepart od:d:and hold an entry in thand hold an eplayfield.playScientific CalculatoScientific CA scientific calculator wcientific arithmetic functions isetic fuCalculator app. Calculator appIf screen rotIf screen roŹŹ Turn scit
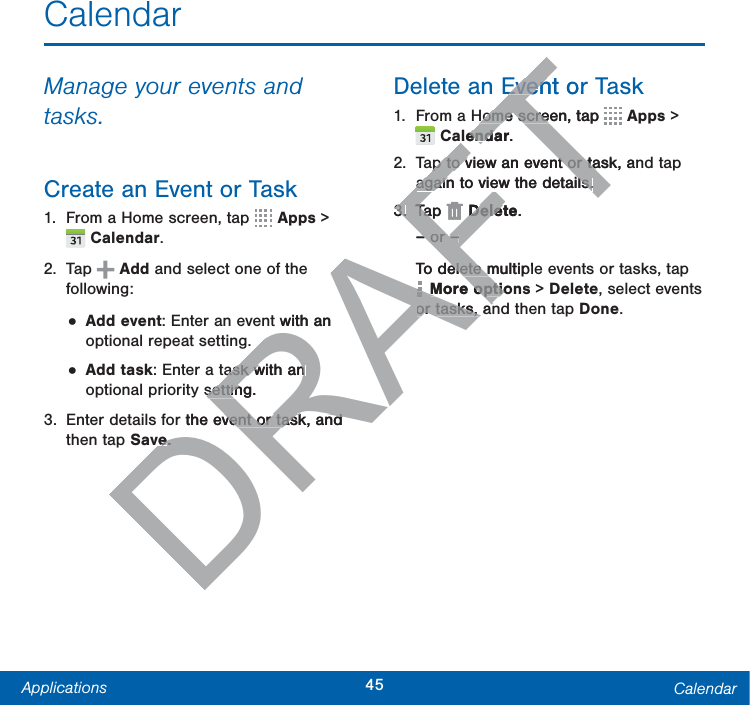
45Applications CalendarCalendarManage your events and tasks.Create an Event or Task1.  From a Home screen, tap   Apps > Calendar.2. Tap   Add and select one of the following:• Add event: Enter an event with an optional repeat setting.• Add task: Enter a task with an optional priority setting.3.  Enter details for the event or task, and then tapSave.Delete an Event or Task1.  From a Home screen, tap   Apps > Calendar.2.  Tap to view an event or task, and tap again to view the details.3. Tap  Delete.– or –To delete multiple events or tasks, tap Moreoptions > Delete, select events or tasks,and then tap Done.DRAFTwith an ask with an ask with an setting.settinr the event or task, and vent or task, and vee..Event orEvenHome screen, tap Home screTTTTTTlendarenda.ap to view an event or task, anap to view an event or taagain to view the details.again to view the details.3.3.Tap TaAFDeleteDelet.– or –– or –To delete multiplelete mAFAFAFAFMoreoptioMoreoptioor tasks,anor tasks,an
46Applications CalendarShare Events1.  From a Home screen, tap   Apps > Calendar.2.  Tap to view an event or task, and tap again to view the details.3. Tap   Share via, select a sharing method, and follow the prompts.Calendar SettingsThese settings allow you to modify settings associated with using the Calendar.1.  From a Home screen, tap   Apps > Calendar.2. Tap   More options > Settings.3.  Tap an option and follow the prompts.> ingsings..ow the prompts.ow the promp
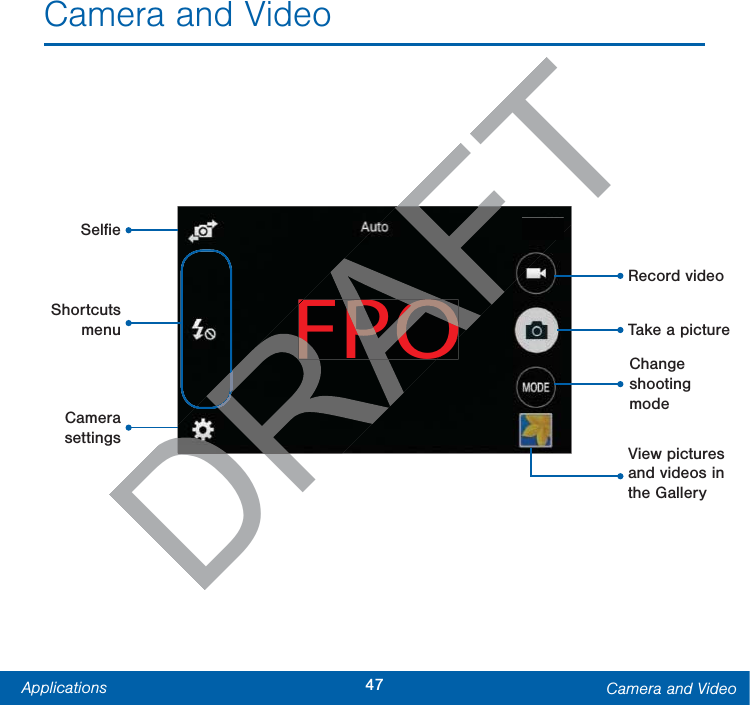
47Applications Camera and VideoCamera and VideoFPOCamera settingsSelfieChange shooting modeTake a pictureRecord videoView pictures  and videosin theGalleryShortcuts menuDRAFTDRAFTFTFPODR
48Applications Camera and VideoTake PicturesTake pictures with your device’s front or back camera, or combine shots with Dual mode.1.  From a Home screen, tap   Apps > Camera.2.  Using the display screen as a viewfinder, compose your shot by aiming the camera at the subject. While composing your picture, use the onscreen options or these gestures:• Touch the screen with two fingers and pinch or spread them on the screen to zoom in and out.• Tap the screen to focus on the area you touched.3. Tap   to take the picture. Note: You can also press the Volume key up or down to take a photo. The Volume key can be reassigned to act as the video record key or as a zoom key.Shooting ModeSeveral photo effects are available. Some modes are not available when taking self-portraits.1.  From a Home screen, tap   Apps > Camera.2. Tap MODE to display the following options:• Auto: Allow the camera to evaluate the surroundings and determine the ideal mode for the picture.• Beauty face: Take a photo with lightened faces for gentler images.• Panorama: Take a photo composed of many photos strung together.• Best photo: Take a series of pictures, and then select the best to save.• Continuous shot: Take pictures continuously by pressing and holding the Camera button.• Sports: Take clearer pictures of fast moving subjects.DRAFThe on the area on thecture. cturepress the s the Volume Volume key keyke a photo. The Volume e a photo. The Voassigned to act as the video assigned to act as the or as a zoom key.or as a zoom key.me screen, tapme sceraera.MODEMO to display the followplay thoptions:option••Auto: Allow the cameraAllow the camerathe surroundings anthe surroideal mode for theideal •Beauty faceeauty :lightened flightened ••PanoraPanoraof m•
49Applications Camera and VideoCamera Settings1.  From a Home screen, tap   Apps > Camera.2. Tap   Settings. Available options vary depending on the camera/recording mode used.• Picture size: Select a resolution. Use higher resolution for higher quality. Higher resolution pictures take up more memory.• ISO: Select an ISO value. This controls camera light sensitivity. It is measured in film-camera equivalents. Low values are for stationary or brightly-lit objects. Higher values are for fast-moving or poorly-lit objects.• Metering modes: Select a metering method. This determines how light values are calculated. Center-weighted measures background light in the center of the scene. Spot measures the light value at a specific location. Matrix averages the entire scene.• Tap to take pics: Tap the image on the preview screen to take photos.• Video size: Select a resolution. Use higher resolution for higher quality. Higher resolution videos take up more memory.• Recording mode: Select Normal, Limit for email, or Fast motion mode.• Effects: Add special graphical effects.• Flash: Activate or deactivate the flash.• Timer: Take time-delayed pictures or videos.• Location tags: Attach a GPS location tag to the photo.• Saved as flipped: Automatically save photos to your Gallery flipped. (Available only on the Front camera.)• Storage location: Select the memory location for storage.• White balance: Select an appropriate white balance, so images have a true-to-life color range. The settings are designed for specific lighting situations. These settings are similar to the heat range for white-balance exposure in professional cameras.DRAFTis is alents. nts. y or r values are ly-lit objects.ly-lit objeSelect a metering Select a meteretermines how light ermines how light lculated. Center-ted. Center-measures background measures backgrothe center of the scene. Spotthe center of the scenesures the light value at a specsures the light value at a speation. Matrix averages the eation. Matrix averages the eeeke picske pic: Tap thTap thscreen toscreen tog modeg mo: Seor email, or Fast mor email, ectsects: Add special graphic: Add speciaeffects.effect••FlashF: Activate or deactiActivate or deactiflash..•TimerTime: Take time-or videos.or vide••Location tLocation locationlocatio•Sav
50Applications Camera and Video• Exposure value: Change the exposure value. This determines how much light the camera’s sensor receives. For low light situations, use a higher exposure.• Grid lines: Display viewfinder grid lines to help composition when selecting subjects.• Shutter sound: Turn the shutter sound on or off.• The Volume key: Use the Volume key as the camera key, the record key, or as a zoom key.• Reset settings: Reset the camera settings.DRAFTamera
51Applications ClockClockThe Clock app offers features for keeping track of time and setting alarms.1.  From a Home screen, tap   Apps > Clock.2.  Tap a tab to use a feature:• Alarm: This feature allows you to set an alarm to ring at a specific time.• World clock: View the time of day or night in other parts of the world. World Clock displays time in hundreds of different cities, within all 24 time zones around the world.• Stopwatch: You can use this option to measure intervals of time.• Timer: You can use this option to set a countdown timer. Use a timer to count down to an event based on a preset time length (hours, minutes, and seconds).Create an AlarmCreate an alarm event. You can set one-time or recurring alarms, and choose options for how to be notified.1.  From a Home screen, tap   Apps > Clock.2. Tap  Create alarm for options: • Time: Set a time for the alarm.• Repeat: When enabled, the alarm repeats every week.• Alarm type: Choose whether the alarm will use Melody, Vibration, or Vibration and melody to alert you.• Alarm tone: If you have chosen an alarm type that includes sound, choose a sound to play for the alarm.• Volume: If you have chosen an alarm type that includes sound, drag the slider to set the volume of the alarm.DRAFTo set set time.e of arts of the arts of thedisplays time in displays timerent cities, within all rent cities, withiaround the world.ound the world.h: You can use this option : You can use thure intervals of time.ure intervals of time.erer: You can use this option to: You can use this option tountdown timer. Use a timeountdown timer. Use down to an event basdown to an event bme length (hourme length (hours).s).armarmarm event. You caarm evenecurring alarms, and chocurring alarmss for how to be notified.s for how to be notifieFrom a Home screen, tap From a Home screen, tap TTTTTTTTTTFFFFFClockk..2.Tap Tap AFCreate alarmC•Timeime: Set a tim: S••RepeatRepeat: W: Wrepeatsrepeat•Ala
52Applications Clock• Snooze: Allow snoozing, and set interval and repeat values for the alarm while snoozing.• Smart alarm: When on, the alarm will start playing a tone at a low volume at an interval before the alarm time, and slowly increase in volume. Choose a time interval and a tone to use with smart alarm. Available when you have chosen an alarm type that includes sound.• Name: Enter a name for the alarm.3. Tap Save.Delete an Alarm1.  From a Home screen, tap   Apps > Clock.2.  Touch and hold an alarm, and then tap Delete.DRAFTRRRRRRRRRRRRRApps Apps> alarm, and then tap alarm, and then tap
53Applications ContactsContactsStore and manage your contacts with the Contacts app, which can be synchronized with a variety of your existing personal accounts, including Google, Email, Facebook, and your Samsung account.For more information on connecting with and managing your accounts through your device, see Accounts.Manage ContactsAccess your list of contacts by using the Contacts app, which is a shortcut to the Contacts tab. To access your Contacts list: ŹFrom a Home screen, tap   Apps > Contacts.Find a ContactYou can search for a contact, or scroll the list to find one by name.1.  From a Home screen, tap   Apps > Contacts.2. Tap the Search field, and then enter characters to find contacts that match.necting with necting wnts through your nts through yontactsontar list of contacts byr list of coapp, which is a shortcutapp, which is aacts tab. To access your Conacts tab. To access yourŹŹFrom a Home screen, tap From a Home screen, tap TTTAFFAFAFFFContactsntact.Find a Contacta ConYou can search You can searchlist to find oneist to find on1.1From aAAAAAAC2.2.
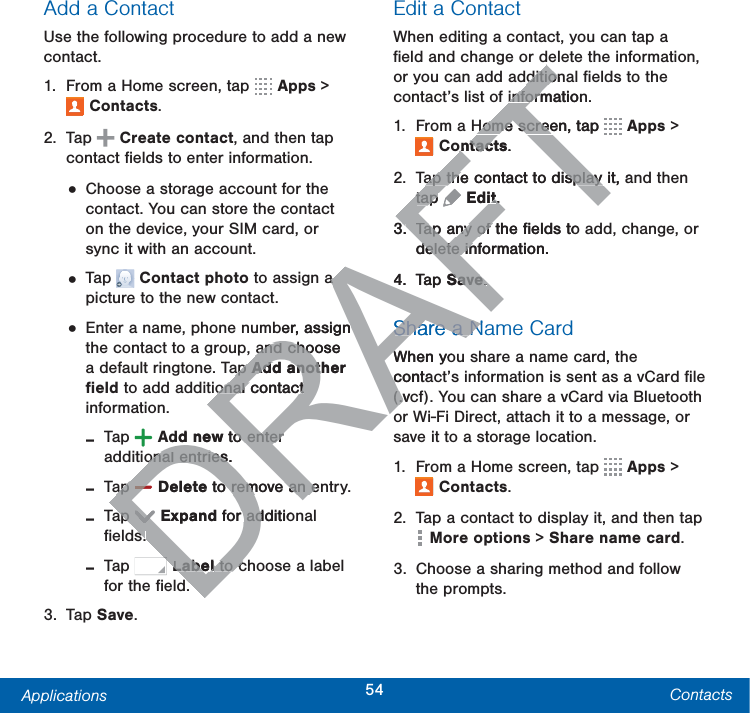
54Applications ContactsAdd a ContactUse the following procedure to add a new contact.1.  From a Home screen, tap   Apps > Contacts.2. Tap   Create contact, and then tap contact fields to enter information.• Choose a storage account for the contact. You can store the contact on the device, your SIM card, or sync it with an account.• Tap   Contact photo to assign a picture to the new contact.• Enter a name, phone number, assign the contact to a group, and choose a default ringtone. Tap Addanother field to add additional contact information. -Tap  Add new to enter additional entries. -Tap  Delete to remove an entry.  -Tap  Expand for additional fields. -Tap   Label to choose a label for the field.3. Tap Save.Edit a ContactWhen editing a contact, you can tap a field and change or delete the information, or you can add additional fields to the contact’s list of information.1.  From a Home screen, tap   Apps > Contacts.2.  Tap the contact to display it, and then tap  Edit.3.  Tap any of the fields to add, change, or delete information.4. Tap Save.Share a Name CardWhen you share a name card, the contact’s information is sent as a vCard file (.vcf). You can share a vCard via Bluetooth or Wi-Fi Direct, attach it to a message, or save it to a storage location.1.  From a Home screen, tap   Apps > Contacts.2.  Tap a contact to display it, and then tap Moreoptions > Share name card.3.  Choose a sharing method and follow the prompts.DRAFTa a ber, assign nand choose and choap ap Addanother Addanotonal contact onal contact Add new to enter o enter onal entries.onal entriesap ap DDelete to remove an eno remove an eap ap DDExpand for additioadssDLabelLabel to c to cditionaditioinformationinformHome screen, tap Home screeTTTTTTontactsontac.ap the contact to display it, aap the contact to display tap tap FEditt..3.Tap any of the fields to Tap any of delete information.delete in4.Tap SaveSave..Share a NShare a NWhen yoWcontac(.vc(.v
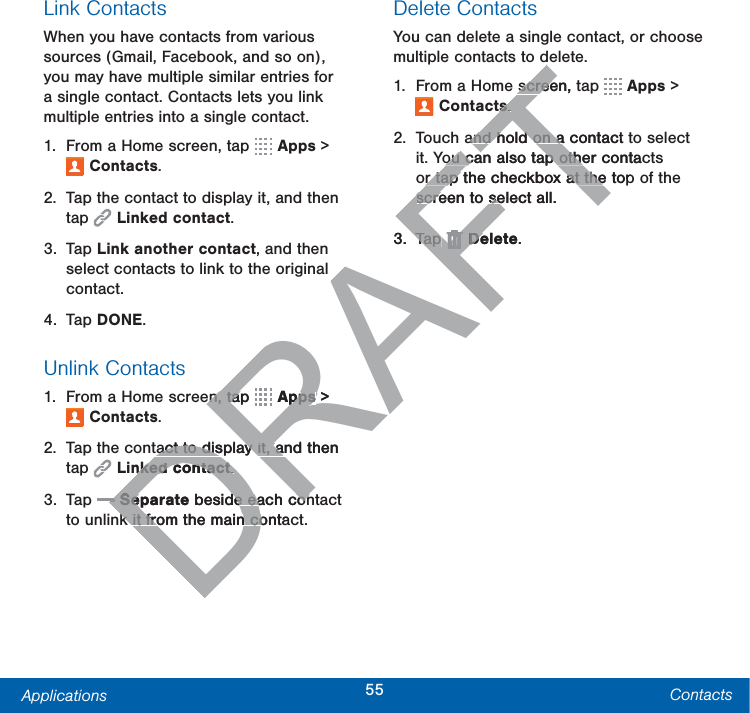
55Applications ContactsLink ContactsWhen you have contacts from various sources (Gmail, Facebook, and so on), you may have multiple similar entries for a single contact. Contacts lets you link multiple entries into a single contact.1.  From a Home screen, tap   Apps > Contacts.2.  Tap the contact to display it, and then tap  Linked contact.3. Tap Link another contact, and then select contacts to link to the original contact.4. Tap DONE.Unlink Contacts1.  From a Home screen, tap   Apps > Contacts.2.  Tap the contact to display it, and then tap  Linked contact.3. Tap   Separate beside each contact to unlink it from the main contact.Delete ContactsYou can delete a single contact, or choose multiple contacts to delete.1.  From a Home screen, tap   Apps > Contacts.2.  Touch and hold on a contact to select it. You can also tap other contacts or tap the checkbox at the top of the screen to select all.3. Tap   Delete.DRAFTen, tap en, taRRRRRRRRRRRRRRRRAppspps > tact to display it, and then tact to display it, anked contactnked contact..DSeparateSe beside each conde each conk it from the main contak it from the main coAFTscreen, screetsts..and hold on a contact and hold on aou can also tap other contacou can also tap other tap the checkbox at the topr tap the checkbox at thescreen to select all.screen to se3.Tap Tap AFDeleteDe.
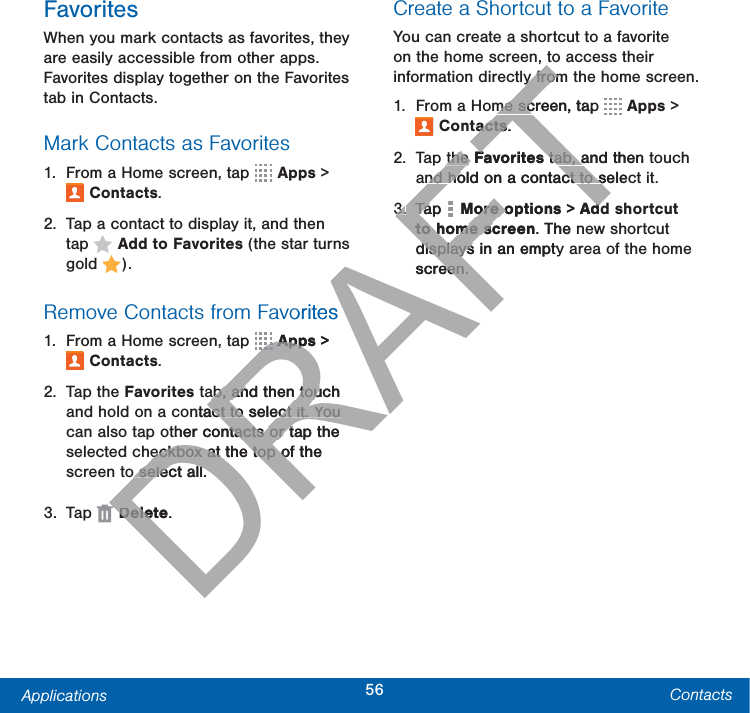
56Applications ContactsFavoritesWhen you mark contacts as favorites, they are easily accessible from other apps. Favorites display together on the Favorites tab in Contacts.Mark Contacts as Favorites1.  From a Home screen, tap   Apps > Contacts.2.  Tap a contact to display it, and then tap  AddtoFavorites (the star turns gold  ).Remove Contacts from Favorites1.  From a Home screen, tap   Apps > Contacts.2. Tap the Favorites tab, and then touch and hold on a contact to select it. You can also tap other contacts or tap the selected checkbox at the top of the screen to select all.3. Tap   Delete.Create a Shortcut to a FavoriteYou can create a shortcut to a favorite on the home screen, to access their information directly from the home screen.1.  From a Home screen, tap   Apps > Contacts.2. Tap the Favorites tab, and then touch and hold on a contact to select it.3. Tap  Moreoptions > Add shortcut to homescreen. The new shortcut displays in an empty area of the home screen.DRAFToritesRRRRRRAppsApp > ab, and then touch ab, and then tountact to select it. You act to select it. You ther contacts ortacts ortap the teckbox at the top of the eckbox at the top oo select all.o select all.DFTDeleteDele.y fromy fromme screen, tapme scactsacts.the the FavoritesF tab, and then tab, and hold on a contact to selecnd hold on a contact to s3.3.Tap TaFFFFMoreoptionsoreo > Addddto homescreento homesc. The ndisplays in an emptydisplaysscreen.een.
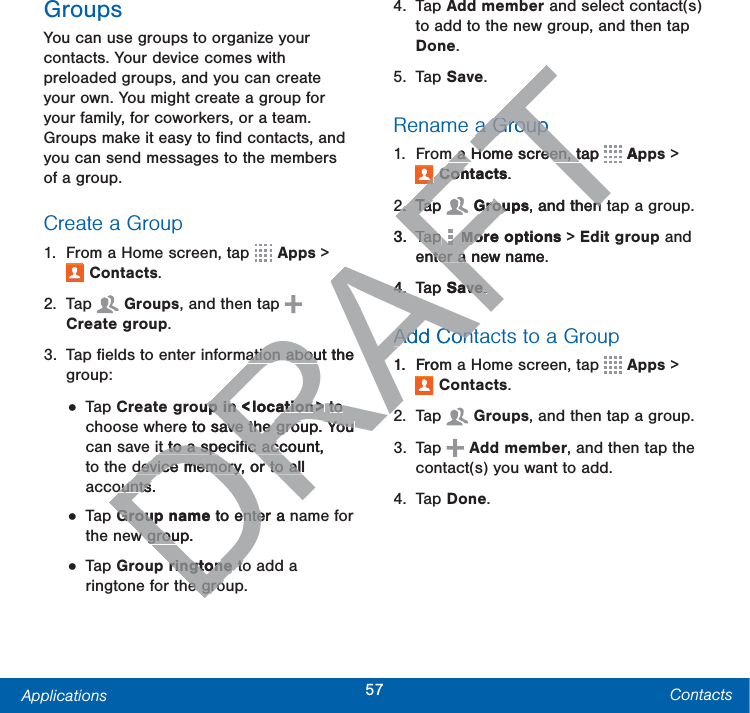
57Applications ContactsGroupsYou can use groups to organize your contacts. Your device comes with preloaded groups, and you can create your own. You might create a group for your family, for coworkers, or a team. Groups make it easy to find contacts, and you can send messages to the members of a group.Create a Group1.  From a Home screen, tap   Apps > Contacts.2. Tap   Groups, and then tap   Create group.3.  Tap fields to enter information about the group:• Tap Create group in < location > to choose where to save the group. You can save it to a specific account, to the device memory, or to all accounts.• Tap Group name to enter a name for the new group.• Tap Group ringtone to add a ringtone for the group.4. Tap Add member and select contact(s) to add to the new group, and then tap Done.5. Tap Save.Rename a Group1.  From a Home screen, tap   Apps > Contacts.2. Tap   Groups, and then tap a group.3. Tap  Moreoptions > Edit group and enter a new name.4. Tap Save.Add Contacts to a Group1.  From a Home screen, tap   Apps > Contacts.2. Tap   Groups, and then tap a group.3. Tap   Add member, and then tap the contact(s) you want to add.4. Tap Done.DRAFTation about the ation abououp in <up in <locaationtion> > to to re to save the group. You ave the group. You it to a specific account, it to a specific accdevice memory, or to all device memory, or to allounts.ountsGroup name Groupto enter a nentew group.w grouringtoneringtone to tohe grohe groa Groupa Groupm a Home screen, tap m a Home screen, tTTTTTTTTTTTTTTTTApFContactsCon.2.2.Tap TapFFGroupsGrou, and then en3.Tap Tap AFAFAFAFMoreoptionsMor >enter a new name.nter a 4.4.Tap Saveave..Add ContAdd Cont1.FromAA
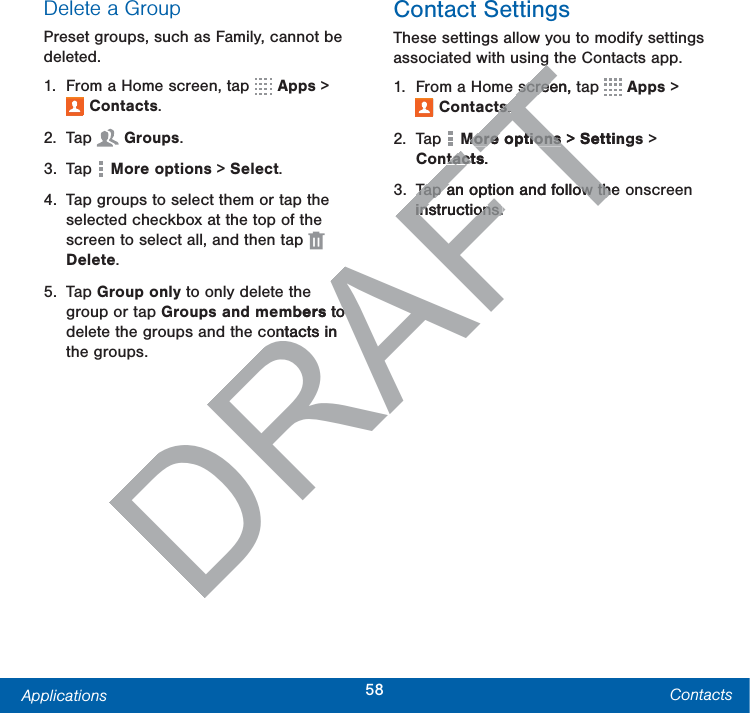
58Applications ContactsDelete a GroupPreset groups, such as Family, cannot be deleted.1.  From a Home screen, tap   Apps > Contacts.2. Tap   Groups.3. Tap  Moreoptions > Select.4.  Tap groups to select them or tap the selected checkbox at the top of the screen to select all, and then tap   Delete.5. Tap Group only to only delete the group or tap Groups and members to delete the groups and the contacts in the groups.Contact SettingsThese settings allow you to modify settings associated with using the Contacts app.1.  From a Home screen, tap   Apps > Contacts.2. Tap  Moreoptions > Settings > Contacts.3.  Tap an option and follow the onscreen instructions.DRAFTmbers to oontacts in FTggscreen, tscreetsts..MoreoptionsMoreoptions >  Settingtactstact.Tap an option and follow the Tap an option and follow thinstructions.instructions.
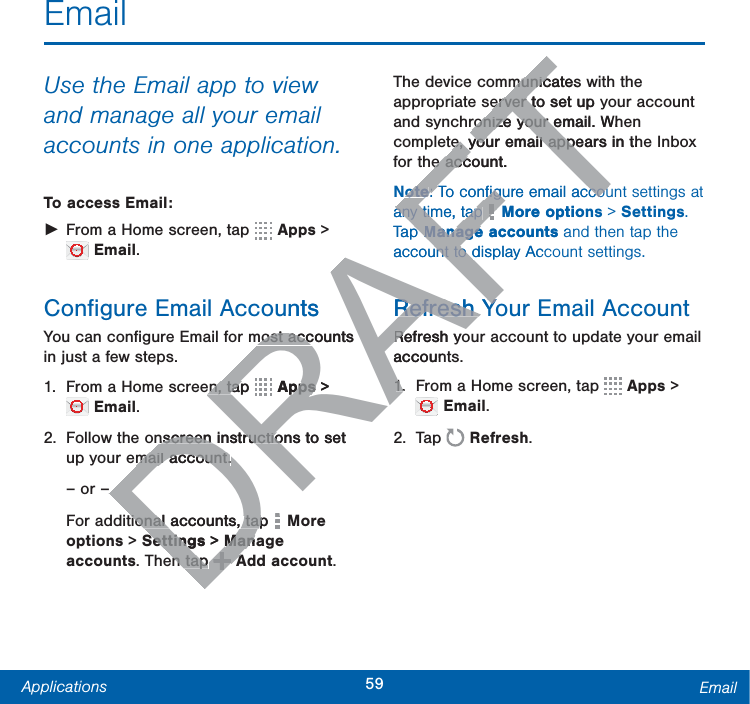
59Applications EmailEmailUse the Email app to view and manage all your email accounts in one application.To access Email: ŹFrom a Home screen, tap   Apps >  Email.Configure Email AccountsYou can configure Email for most accounts in just a few steps.1.  From a Home screen, tap   Apps >  Email.2.  Follow the onscreen instructions to set up your email account.– or –For additional accounts, tap   More options> Settings > Manage accounts. Then tap  Addaccount.The device communicates with the appropriate server to set up your account and synchronize your email. When complete, your email appears in the Inbox for the account.Note: To configure email account settings at any time, tap  More options > Settings. Tap Manageaccounts and then tap the account to display Account settings.Refresh Your Email AccountRefresh your account to update your email accounts.1.  From a Home screen, tap   Apps >  Email.2. Tap   Refresh.DRAFTuntsmost accounts most accen, tap en, tapRRRRRRRRRRRRRRRRApps pps >nscreen instructions to set nscreen instructiomail account.mail account.tional accounts, tap tional accounts, tapDDDSettingsSetting > ManaManen tap en tap DAAmunicatesmunicerver to set up yerver toronize your email. Whronize your ee, your email appears in the, your email appee account.e accoteote: To configure email accou: To configure email accouany time, tap any time, tap FTFTFTFTMore optionTap pManageaccountsManageaaccount to display Accunt to dRefresh YoRefresh YoRefresh yoReaccoun1.1.
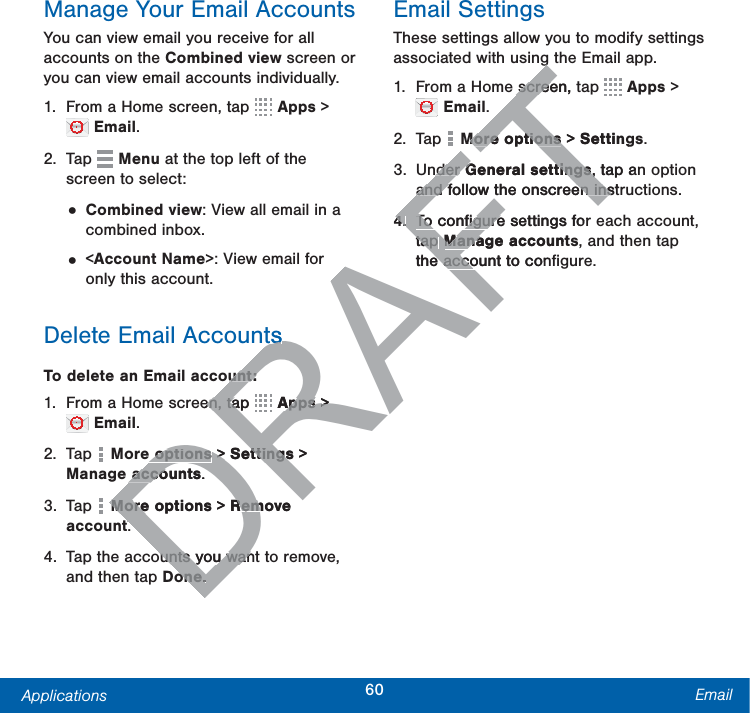
60Applications EmailManage Your Email AccountsYou can view email you receive for all accounts on the Combined view screen or you can view email accounts individually.1.  From a Home screen, tap   Apps >  Email.2. Tap   Menu at the top left of the screen to select:• Combined view: View all email in a combined inbox.• <Account Name>: View email for only this account.Delete Email AccountsTo delete an Email account:1.  From a Home screen, tap   Apps >  Email.2. Tap   More options > Settings > Manageaccounts.3. Tap   More options > Remove account.4.  Tap the accounts you want to remove, and then tap Done.Email SettingsThese settings allow you to modify settings associated with using the Email app.1.  From a Home screen, tap   Apps >  Email.2. Tap  Moreoptions > Settings.3. Under General settings, tap an option and follow the onscreen instructions.4.  To configure settings for each account, tap Manageaccounts, and then tap the account to configure.DRAFTtssunt:unt:en, tap en, taRRRRRRRRRRRRRRRRApps Apps >>e optionse options >  >Settingsttings > accountsacco.More optionsMore > Remove Remttounts you wanounts you wanoneone..FTggscreen, tscreeMoreoptionsMoreoptions >  Settingder der General settingsGeneral settings, tap an, and follow the onscreen instand follow the onscreen ins4.4.To configure settings forTo configuretap tap ManageaccountManathe account to cone acco
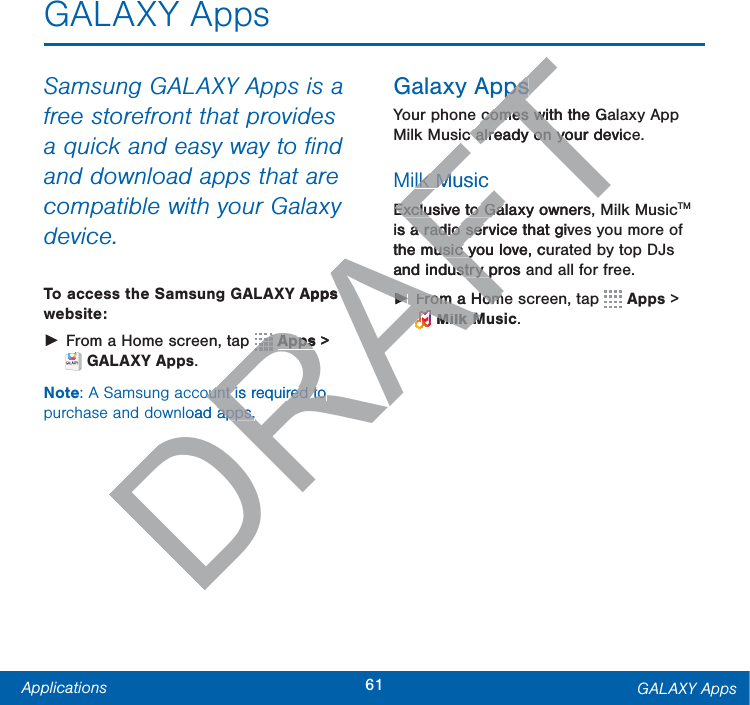
61Applications GALAXY AppsGALAXY AppsSamsung GALAXY Apps is a free storefront that provides a quick and easy way to find and download apps that are compatible with your Galaxy device.To access the Samsung GALAXY Apps website: ŹFrom a Home screen, tap   Apps > GALAXYApps.Note: A Samsung account is required to purchase and download apps.Galaxy AppsYour phone comes with the Galaxy App Milk Music already on your device.Milk MusicExclusive to Galaxy owners, Milk MusicTM is a radio service that gives you more of the music you love, curated by top DJs and industry pros and all for free. ŹFrom a Home screen, tap   Apps > MilkMusic.DRAFTApps RRRRRRRRRRAppsApps > FTount is required to ount is required to load apps.apps.pspscomes with the Gacomes wiic already on your deviceic already on yolk Musiclk MExclusive to Galaxy owners,Exclusive to Gais a radio service that giva radio serthe music you love, cumusic yand industry pros austry pŹŹFrom a HomFrom a HomAMilkMMilkM
62Applications GalleryGalleryView, edit, and manage pictures and videos.View Images and VideosLaunching Gallery displays available folders. When another application, such as Email, saves an image, a Download folder is automatically created to contain the image. Likewise, capturing a screenshot automatically creates a Screenshots folder.1.  From a Home screen, tap   Apps > Gallery.2. Tap   Menu, and then tap Album, All, or Locations to choose the way items display.• Tap   Menu > Album, and then tap  Newalbum to create a newalbum.• Tap an album to open it.• Tap an image or video to view it in fullscreen. Scroll left or right to view the next or previous image or video.Zoom In and OutUse one of the following methods to zoom in or out on an image:•  Double-tap anywhere on the screen to zoom in or zoom out.•  Spread two fingers apart on any place to zoom in. Pinch the screen to zoom out.Play Videos1.  From a Home screen, tap   Apps > Gallery.2.  Tap a folder to open it.3.  Tap a video to view it.er er enshot hots folder.r.p p RRRRRRRRRRRRRRRAppsApps >   then tap hen taAlbumbum, , AllAll, , o choose the way items se the way items DDMenuMe > Albumlbum, and then , and thenDDNewalbumN to create a o create a album.albumlbum to open it.lbum to open ite or videe or videollollOutOutthe following methothe followion an image:n an image:ouble-tap anywhere on the scouble-tap anywhere on tzoom in or zoom out.zoom••Spread two fingers apartSpread two fito zoom in. Pinch the to zoom inout.tPlay VideoPlay Video1.1.From a AAAAAAAAAAAAAAG2.2T
63Applications GalleryEdit Images ŹWhile viewing an image, tap Moreoptions:• Slideshow: Start a slideshow with the images and videos in the current folder.• Print: Print the image via a USB or Wi-Fi connection. Some printers may not be compatible with the device.• Rename: Rename the file.• Rotate left: Rotate the photo counter-clockwise.• Rotate right: Rotate the photo clockwise.• Crop: Resize the frame to crop the image.• Set as: Set the image as wallpaper or as a contact’s photo.• Details: View details about the image.For more advanced editing options: ŹTap   Edit to open Photo Editor.Delete Images1.  From a Home screen, tap   Apps > Gallery.2.  Tap an album and/or folder.3. Tap   More options > Select item, select images, and then tap  Delete.– or –When viewing a single image, tap Delete.Share ImagesUse one of the following methods:1.  From a Home screen, tap   Apps > Gallery.2.  Tap a folder to open it.3.  In a folder, tap  Moreoptions > Select item, select images, and then tap   Share via to send them to others or share them via social network services.– or –When viewing a single image, tap   Sharevia to send it to others or share it via social network services.DRAFTto e to crop the e to crop timage as wallpaper mage as wallpaper act’s photo.hoto.View details about the View details about te.e.advanced editing optioadvanced editing oitit to open Photo E to open Photo and/or foand/ore optionsore option > Seleimages, and then tap mages, and thTor –or –When viewing a single imagWhen viewing a single imaAFDeleteete..Share ImagesShare ImaUse one of the Use one of the 1.1.From a aAAAAAAAAAAAAAAG2.2T
64Applications InternetInternetAccess to the Internet with a fully featured web browser.Access the Internet ŹFrom a Home screen, tap   Apps > Internet.Command KeysThe following command keys are available:•   Back or   Back key to return to the previous page.•   Forward to go forward to a recent page.•   Home to display your Internet Home screen.•   Refresh to reload the current page.View a Web SiteTo view a web site: ŹTap the address field, enter the web address, and then tap Go.To share the current web page: ŹTap   More options > Share via.To zoom in or out: ŹTap the screen twice or pinch the screen to zoom out and stretch the screen to zoom in.DRAFTre available:ey to return to ey to return o forward to a recent forward to a recent o display your Internet Homeo display your Internefreshfresh to reload the current e current b Siteb Sitweb site:web site: the address field, enter the  the address field, enaddress, and then tap address, and then tap GoGo..To share the current web To share the cŹTap ap AFAFAFAFAFAFMore optionsMoTo zoom in or ouTo zoom in or oŹŹTap the scTap the sscreen scree
65Applications InternetBrowser TabsUse tabs to view multiple web pages at the same time.To open a new tab: ŹTap   Tab Manager and tap  Add.To close a tab: ŹTap   Tab Manager and tap Close.BookmarksTo bookmark the current web page: ŹTap  Bookmarks >   Add bookmark.To open a bookmarked web page: ŹTap  Bookmarks and tap an entry.HistoryTo view a list of recently visited web pages: ŹTap  Bookmarks > History.Incognito TabsPages viewed with incognito tabs do not appear within your browser history or search history, and leave no traces (such as cookies) on your device.Incognito tabs display   Incognito on their tab in the Window manager.Note: Any downloaded files will remain on your device after you close the incognito tab.To open a window in incognito mode: ŹTap   Moreoptions > New incognito tab.Internet SettingsThese settings allow you to modify settings associated with using the Internet app.1.  From a Home screen, tap   Apps > Internet.2. Tap  Moreoptions > Settings.3.  Tap an option and follow the onscreen instructions.DRAFTage:d d ked web page:ed web page:arks and tap an entry.d tap an eyyst of recently visitedst of recently visitrksrks >  > HiHid leaved leavyour deviceyour abs display abs display TTTIncogin the Window manager.in the Window mee: Any downloaded files will rem: Any downloaded files wour device after you close the our device after you close the tab.tab.To open a window in pen a ŹŹTap AFAFAFAFAFAFMoreoptMoretabtab..InternTheThaa
66Applications MemoMemoUse the Memo app to write and save notes on your device.Compose a Memo1. Tap   Apps >   Memo. 2. Tap   Create memo, type a memo.• To change the category, tap the   Category icon.• To insert an image into the memo, tap the  Image icon.• To use your voice to insert text into the memo, tap the   Voice icon.3.  When finished creating your memo, tap Save.Manage Memos1. Tap   Apps >   Memo.2.  Tap a memo thumbnail to open it.• To edit a memo, tap the content of the memo.3. Tap   Moreoptions > Select, and choose an option:• To delete memos, select memos, and tap  Delete.• To send a memo to others, select a memo, and tap   Share via.• Select memos and tap   Moreoptions to Move to a different category or Print.DRAFTmo.p the ARARAARARAnto the memo, nto the memoicon.icon.oice to insert text into to insert text into tap the pDRDRDRDRDRDRDRDRVoiceVoice icon.ished creating your memo, tapshed creating your memTemosemoAppsApps >  > TTTTTTTMemo.a memo thumbnail to open a memo thumbnail ••To edit a memo, tap the coTo edit a memo, tap the cthe memo.emo3.Tap Tap AFAFAFAFMoreoptions Mor>choose an option:hooseAF•To delete medeletetap tap AFDeDe•To seoseme•
67Applications MessagesMessagesLearn how to send and receive different messages using the default Messaging app on your phone.Types of MessagesYour default Messaging app provides the following message types:•  Text Messages (SMS)•  Multimedia Messages (MMS) The Short Message Service (SMS) lets you send and receive text messages to and from other mobile phones or email addresses. To use this feature, you may need to subscribe to your service provider’s message service.The Multimedia Messaging Service (MMS) lets you send and receive multimedia messages (such as picture, video, and audio messages) to and from other mobile phones or email addresses. To use this feature, you may need to subscribe to your service provider’s multimedia message service.Messaging icons are displayed at the top of the screen and indicate when messages are received and their type.DRAFTthe e MMS) MMS) rvice (SMS) lets rvice (SMS) letse text messages to text messages to obile phones or email ones or euse this feature, you use this feature, yoo subscribe to your service o subscribe to your servics message service.s message service.MessagingMessaand receive muand re(such as picture, vide(such as picessages) to and from otheessages) to and fes or email addresses. To usees or email addresses. ature, you may need to subscature, you may need to subsservice provider’s multimediaservice provider’s multimediaservice.erviceMessaging icons are daging of the screen and iof the screen are received andare received an
68Applications MessagesCreate and Send MessagesThis section describes how to create a send a message using the Messaging app.1.  From a Home screen, tap   Messages >  Compose.2. Tap the Enter recipients field to manually enter a recipient or tap   Add Recipient to select a recipient from your Contacts. You can also select the recipient based on Groups, Favorites, or Logs.• If adding a recipient from your Contacts, tap the contact to place a check mark then tap Done. The contact will be placed in the recipients field.• Enter additional recipients by separating each entry with a semicolon (;) and then using the previous procedure. More recipients can be added at any time before the message is sent.• For the Groups option, tap a Group and then tap the contacts to place a check mark then tap Done. The contacts will be placed in the recipients field.3. Tap the Enter message field and enter a message. 4. Tap   Send.Note: If you exit a message before you send it, the message is automatically saved as a draft.DRAFTace . d in the cipients by cipienentry with a entry with a and then using the then using the rocedure. More recipients ocedure. More readded at any time before the added at any time befsage is sent.sage is the Groups option, tap a G the Groups option, tahen tap the contacts then tap the contactmark then tap mark then tap DDts will be pts will be pddTa messagea mese is automaticale is au
69Applications MessagesView New MessagesWhen you receive a new message, a new message icon appears on the Status Bar.To view the message:1.  Open the Notification Panel and select the message.– or –From a Home screen, tap   Apps > Messages, and then tap the new message to view it.2.  To play a multimedia message (audio or video), tap   Play. 3.  To scroll through the list of messages, tap the screen and scroll up or down the page.Delete MessagesTo delete messages, follow these steps:1.  From a Home screen, tap   Apps > Messages.2. Tap  More options > Select.3.  Tap each message you want to delete.4. Tap   Delete.Message Search1.  You can search through your messages by using the Message Search feature.2.  From a Home screen, tap   Apps > Messages.3. Tap   Search.4.  Enter a word or phrase to search for, and then tap   Search on the keyboardMessages SettingsConfigure the settings for text messages, multimedia messages, push messages, and so on. ŹFrom a Home screen, tap   Apps >  Messages >  More options > Settings.DRAFTio or o or messages, up or down up or dowsagesessages, follow these stepsessages, follow these sa Home screen, tap a Home screen, tap DRDRDRDRDRDRDRDRDDDDDRDRDRDRAppsppsssagesssage.e optionse optio > SeleSeleage youage youscreen, tscregesges..SearchSea.nter a word or phrase to searcnter a word or phrase tofor, and then tap for, and theFTSearch earchkeyboardkeyboardMessages SetsageConfigure the seConfigure the smultimedia memultimedia mand so on.and so on.ŹFrom>
70Applications MessagesEmergency AlertsThis device is designed to receive wireless emergency alerts from the Commercial Mobile Alerting System (CMAS) which may also be known as the Personal Localized Alerting Network (PLAN). For more information, please contact your wireless provider.Emergency Alerts allows customers to receive geographically-targeted messages. Alert messages are provided by the US Department of Homeland Security and will alert customers of imminent threats to their safety within their area. There is no charge for receiving an Emergency Alert message.There are three types of Emergency Alerts:•  Alerts issued by the President•  Alerts involving imminent threats to safety of life (Extreme and Severe)•  AMBER Alerts (missing child alert)Users may choose not to receive Imminent Threats (Extreme and Severe) and AMBER Alerts. Alerts issued by the President cannot be disabled. To disable Imminent Threats and AMBER Alerts, follow the instructions below:1.  From a Home screen, tap   Apps > Messages.2. Tap   More options > Settings > Emergencyalerts.3. Tap Emergency alerts.4.  All alerts are enabled by default (check mark showing). Tap an alert option to disable it.DRAFTeir eir harge rge message.ge.gency Alerts:ency Alerts:esidentesideninent threats to inent threats to reme and Severe)me and Severe)s (missing child alert)s (missing child ahoose not to receive Imminenhoose not to receive ImExtreme and Severe) and AMBExtreme and Severe) and AMerts issued by the Presidenerts issued by the Predisabled. disableFTe optionse opti > Sencyalertsncyalerts.Emergency alertsEmergency alerts.All alerts are enabled by defaAll alerts are enabled by demark showing). Tap an alemark showing). Tap an aledisable it.disable it.
71Applications MyFilesMyFilesAccess files stored on your device, including images, videos, songs, and sound clips.View FilesFiles stored in the device are organized into the following groups:•  QUICK SEARCH: Files are grouped into the following categories: Recent files: View recently saved files. Images: View image files. Videos: View video files. Audio: View audio files. Documents: View document files. Downloaded apps: View downloaded apps.•  DOWNLOAD HISTORY Download History: View all apps and files that have been downloaded to the device.•  SHORTCUTS: Contains shortcuts to files or folders that you have added. This option only appears if you have added shortcuts to the MyFiles main screen. •  LOCAL STORAGE: View folders and files in their storage locations. Device storage: View folders and files located on the device. SD card: View folders and files located on the memory card (if installed).•  CLOUD STORAGE: Contains shortcuts to FTP servers or other cloud storage locations that you have added. This option only appears if you have added shortcuts to the MyFiles main screen.DRAFTed grouped into rouped into View recently saved View recently s View image files.mage filesosos: View video files.: View video files.AudioAudio: View audio files.udio fiDocumentsDocu: View documew downloaded appswnloaded apps: V: Ved apps.ed apps.HISTORYHISTwnload Historywnload H: V files that have been dfiles that haveo the device.o thSHORTCUTSSHOR: Contains shortns shofiles or folders that you havfiles or folders that you havThis option only appearThis option added shortcuts to thadded shscreen. een. ••LOCAL STORALOCAL STOfiles in theirfiles in theirAAA DDan
72Applications MyFilesTo view files in My Files:1.  From a Home screen, tap   Apps > MyFiles.2.  Tap a category to view the relevant files or folders.3.  Tap a file or folder to open it.File OptionsOn the main My Files screen, the following options are available:•   Search: Search for a file or folder.•  Tap   More options for these options:• Add shortcut: Add a shortcut on the My Files main screen to any folder.• Storage usage: View memory information for your device and memory card (ifinstalled).• Settings: Change the settings for viewing files.Category OptionsAfter tapping on a category, the following options are available:•   Home: Return to the main My Files screen.•   Search: Search for a file in the selected category.•  Tap   More options to find the following options:• Select: Select files or folders.• Create folder: Add a folder (Local storageonly).• Sort by: Change the sort order of the files.• Add shortcut: Add a shortcut to the folder on a Home screen (Local storage only).• Settings: Change the settings for viewing files.DRAFT..tions::cut on the eo any folder.o any foldew memory ew memory our device and our device and (ifinstalled).nstalled).Change the settings for Change the setting files.g files.turn to thturn trchrch: Search for a file i: Search fcted category.cted category.Tap Tap FFFFMore options to find tho findoptions:opt••SelectSelect: Select files o:•Create folderCrea: Astorageorageonly)••Sort bySort by:C:Cthe filethe file•Ad
73Applications MyFilesOptions for Selected Files and Folders ŹTap   More options > Select, select a file or folder, and then use one of these functions: Share via: Send files to others or share them. Delete: Delete files or folders.  ŹTap   More options for additional options:• Move: Move files or folders to another folder.• Copy: Copy files or folders to another folder• Rename: Rename a file or folder. This option only appears when just one file or folder is selected.• Add shortcut: Add a shortcut to a file or folder to the My Files main screen or Home screen.• Zip: Create a zip folder containing the selected files. This option only appears in Local Storage categories. A selected zip folder has the additional options of Extract and Extract to current folder.• Details: View details of the selected file(s) or folder(s).DRAFTs to r folders to r foldename a file or folder. a file or folder. on only appears when just n only appears whe or folder is selected.e or folder is selected.d shortcutd sho: Add a shortcut toa shortcut toor folder to the My Files mor folder to the My FiTor Home screen.or Home screen.p fop fooptions ooptionto current folto cuailsails: View details of the: View detae(s) or folder(s).e(s) or folder(s).
74Applications Video PlayerVideo PlayerFPOVolumeVolumeMore optionsVideo file nameLength of videoRewind video or go toprevious videoScan forward or gotonext videoPause/PlayChange screen  ratioElapsed play timeDRAFTDRAFFPODRAFDRAFRFTAFTTDRDdeo or go deo ovious videovious Changratiora
75Applications Video PlayerPlay and manage videos stored on your device.To access video:1.  From a Home screen, tap   Apps > Video.2.  Scroll through the videos stored on your device. After a few seconds, each video thumbnail begins playing a preview of the clip.3.  Tap a video to view it.
76Applications Voice RecorderVoice RecorderRecord voice memos and notes.Create a Voice Recording ŹFrom a Home screen, tap  Apps > VoiceRecorder.• Tap   Record to record an audio file.• Tap   Stop to stop recording. The file is automatically saved.• Tap   Pause to pause the recording of an audio file.• Tap   Cancel to cancel the recording of an audio file.View Recordings ŹFrom a Home screen, tap  Apps > VoiceRecorder.• Tap   List to display a list of recordings.• Tap  More options: -Select: Choose desired recordings. -Settings: Configure Voice Recorder.o o ding. The ed.ed.ause the recording ause the recorel to cancel the cancel the of an audio file.of an audio file.ordingsordingHome screen, tap Home screTTTceRecorderceRecorder..Tap Tap FTFTFTFTFTFTList to display a listisplay recordings.recording••Tap AFTFTFTAFTMore optionsMo:--SelectSe: Choosrecordings.reco--SettingttingRecoRec
SettingsConfigure your device’s connections and settings, add accounts, and customize the home screen, apps, and features.•  Some options use an ON/OFF button to turn the option on ( ON ) or off ( OFF ). •  For some options, you must tap a field, such as Email address, to display and set options.•  Some options are enabled or disabled by tapping a   checkbox. When enabled, a check mark displays. Tap the check mark to remove it and disable the option.Access Settings ŹFrom a Home screen, tap   Apps > Settings.– or –From a Home screen, drag down from the Status Bar to display the Notification Panel, and then tap  Settings.DRAFTTTF button to ) or off) or offou must tap a field, ou must tap a field, ddresss, to display and , to display and ons are enabled or disabled ons are enabled or disabing a ing a DD checkbox. When box. When d, a check mark displays. Td, a check mark displrk to remove it and dirk to remove it andess Settingsess SettingsFrom a Home screen, tap From a Home screen, tap TTTTTTTTTTFFFFFFFFFSettingsngs.– or –or –From a Home scra Homthe Status Barthe Status BaPanel, and tPanel, and
78Settings Wi-Fi and Wi-Fi DirectWi-Fi and Wi-Fi DirectWi-Fi is a term used for certain types of Wireless Local Area Networks (WLAN). Wi-Fi communication requires access to a Wireless Access Point (WAP).Wi-Fi Direct creates a direct connection between two or more devices using Wi-Fi. Turn Wi-Fi On or OffTurning Wi-Fi on makes your device able to discover and connect to compatible in-range WAPs.1.  From a Home screen, tap   Apps > Settings.2. Tap Wi-Fi, and then tap ON/OFF to turn Wi-Fi on or off.Scan and Connect to a Wi-Fi Network1.  From a Home screen, tap   Apps > Settings.2. Tap Wi-Fi, and then tap ON/OFF to turn Wi-Fi on.3.  When Wi-Fi is first turned on, your device will automatically scan for available networks and display them.4.  Tap the network you want to connect to.• When you select an open network, you are automatically connected to the network. Otherwise, enter a password to connect.• To manually scan for networks, tap Moreoptions > Scan.DRAFTrect two or ng Wi-Fi. ng Wi-Fi. On or OffOff on makes your device able  on makes your device r and connect to compatible r and connect to compatibleWAPs.WAPsome screen, tap ome screen, tap DDDDDDDDDDDDDhen tahen taConnecConkkm a Home screen, tap m a Home screen, tTTTTTTTTTTTTTTTTApSettingsSett.2.2.Tap TapWi-Fi, and then tap , anONONWi-Fi on.Wi-Fi on.3.When Wi-Fi is first tWhen Wdevice will automce willavailable netwavailable net4.4.Tap the nTap the n•Wh
79Settings Wi-Fi and Wi-Fi DirectManually Connect to a Wi-FiNetwork1.  From a Home screen, tap   Apps > Settings.2. Tap Wi-Fi, and then tap ON/OFF to turn Wi-Fi on.3. Tap Add Wi-Fi network.4.  Enter information about the Wi-Fi network:• Tap Network SSID to enter the name of the Wi-Fi network.• Tap the Security field and select a security option and enter your password.• Tap Show advanced options if you need to add advanced options such as Proxy settings, or IPsettings.5. Tap Connect to store the new information and connect to your target WAP.Wi-Fi Status IndicatorsThese Status bar icons show your current Wi-Fi connection status:Displays when Wi-Fi is connected, active, and communicating with a Wireless Access Point (WAP).A Wi-Fi access point is available, but your device is not connected to it. It may also display if there is a communication issue with the target Wireless Access Point (WAP).DRAFTe ect r your d optionsd options if you  if yanced options such anced options sngs, or IPsettings.s, or IPsettings.to store the new o store the new n and connect to your target n and connect to your ays when Ways wonnected, active,onnectecommunicating with acommunicatAccess Point (WAP).Access Point (WFFFFFFA Wi-Fi access point iss poiavailable, but your vailable, but your not connected tonot also display ifacommunicatarget Wtarg(WAP(WAP
80Settings Wi-Fi and Wi-Fi DirectWi-Fi SettingsThe Wi-Fi settings menu allows you to set up many of your device’s advanced Wi-Fi services.1.  From a Home screen, tap   Apps > Settings.2. Tap Wi-Fi, and then tap ON/OFF to turn Wi-Fi on.3. Tap Smart network switch to automatically switch between Wi-Fi and mobile networks to maintain a stable Internet connection.4. Tap   Moreoptions for options:• Scan: Start another scan for nearby Wi-Fi networks.• Wi-Fi Direct: Configure a Wi-Fi Direct connection with a nearby device. • Advanced: -Network notification: Receive a notification when new Wireless Access Points (WAPs) are available. -Keep Wi-Fi on during sleep: Specify when to disconnect from Wi-Fi. -Always allow scanning: Allow Google location service and other apps to scan for networks, even when Wi-Fi is turned off. -Install certificates: Install authentication certificates. -MAC address: View your device’s MAC address, which is required when connecting to some secured networks (not configurable). -IP address: View your device’s IP address (not configurable).• WPS push button: Set up a connection to a WPS (Wi-Fi Protected Setup) router or other equipment.• WPS PIN entry: View the PIN used by your device to set up a PIN-secured connection to a Wi-Fi router or other equipment (not configurable).DRAFTfor nearby gure a Wigure -Fi Direct Fi Da nearby device. a nearby device. ork notificationork notification: Receive a : Rectification when new Wireless tification when new WirelesAccess Points (WAPs) are Access Points (WAPs)ailable.ailableWi-Fi on duringWi-Fi on duringwhen to diswhen to disis is certificatecertifientication certificenticatioMAC addressMAC address: View your : VMAC address, which is reqMAC address, whicwhen connecting to somwhen connecting to sonetworks (not configuworks (not configu--IP addressIP ad: Viewaddress (not cad•WPS push bPS pusconnectioconnectioProtectProtecequi•W
81Settings Wi-Fi and Wi-Fi DirectWi-Fi DirectWi-Fi Direct allows direct device-to-device connections via Wi-Fi, without having to connect to a Wi-Fi network.1.  From a Home screen, tap   Apps > Settings.2. Tap Wi-Fi, and then tap ON/OFF to turn Wi-Fi on. Wi-Fi must be on to configure settings.3. Tap   Moreoptions > Wi-Fi Direct. Your device automatically scans for nearby Wi-Fi Direct devices, or you can tap Scan to start scanning.4.  After scanning for devices, select a device, and then follow the prompts to complete the connection.• Tap   Moreoptions > Multi connect to scan for devices that support multi connect. Select the devices and follow the prompts to establish the connections.• To rename your device (as seen by other devices), tap   Moreoptions > Renamedevice.Wi-Fi Direct Status IndicatorWhen your device is connected to another device using Wi-Fi Direct,   displays in the Status Bar.DRAFTan an lect a prompts to prompn.n.ons ons >> Multi connect  Multi convices that support multi es that support multi lect the devices and devices ae prompts to establish the e prompts to establictions.ctionsrename your device (as seerename your device (as seer devices), tap r devicDDDDMoreoMoedeviceedev.
82Settings BluetoothBluetoothBluetooth is a short-range communications technology that allows you to connect wirelessly to a number of Bluetooth devices, such as headsets and hands-free car Bluetooth systems, and Bluetooth-enabled computers, printers, and wireless devices. Note: The Bluetooth communication range is approximately 30 feet.Turn Bluetooth On or Off1.  From a Home screen, tap   Apps > Settings.2. Tap Bluetooth, and then tap ON/OFF to turn Bluetooth on or off.Make Your Device Visible to Other BluetoothDevicesWhen you make your device visible, other Bluetooth can find it in a scan and initiate pairing. You can choose the length of time your device remains visible.1.  From a Home screen, tap   Apps > Settings.2. Tap Bluetooth, and then tap ON/OFF to turn Bluetooth on. 3. Tap Bluetooth >   Moreoptions > Visibilitytimeout.4.  Select a time period for your device to remain visible after you turn on visibility.DRAFTand andcommunication range mmunication range 0 feet.luetooth On or Offluetooth On or Off Home screen, tap  Home screen, tap DDDDDDDDDDDDDDDDApgsgs..hh, and then, and thenon oon oDeviceDevluetoothDeviluetoothou make your device visibleou make your deviooth can find it in a scan andooth can find it in a scaairing. You can choose the lenairing. You can choose the leyour device remains visible.your device rem1.From a Home screenFrom a HAFAFAFAFAFAFAFAFAFSettingsSetti.2.2.Tap TaBluetoothuetooto turn Blueto turn Blue3.3.Tap BluVisib4.4.
83Settings BluetoothScan for Bluetooth DevicesWhen you want to pair with another Bluetooth device, you can scan for nearby devices that are visible.1.  From a Home screen, tap   Apps > Settings.2. Tap Bluetooth, and then tap ON/OFF to turn on Bluetooth.3.  When Bluetooth is first turned on, it scans for nearby Bluetooth devices and displays them.• To manually perform a new scan, tap Scan.Pair Bluetooth DevicesThe Bluetooth pairing process allows you to establish trusted connections between your device and another Bluetooth device. Pairing between two Bluetooth devices is a one-time process. Once a pairing is created, the devices will continue to recognize their partnership and exchange information without having to re-enter a passcode.1.  From a Home screen, tap   Apps > Settings.2. Tap Bluetooth, and then tap ON/OFF to turn on Bluetooth.3.  Make sure that the target device is discoverable, so that your device can find it. Refer to the instructions that came with the device to find out how to set it to discoverable mode.4. Tap Scan. Your device will start to scan for Bluetooth devices within range.5.  When you see the name of the target device displayed in the Bluetooth devices section, tap the name. Your device then automatically tries to pair with the target device. If automatic pairing fails, enter the passcode supplied with the target device.Note: Due to different specifications and features of other Bluetooth-compatible devices, display and operations may be different, and functions such as transfer or exchange may not be possible with all Bluetooth compatible devices.DRAFT, tap tap cescesrocess allows you rocess allows yonnections between nnections between nother Bluetooth device. Bluetooth device. en two Bluetooth devices en two Bluetooth devme process. Once a pairing me process. Once a pairingd, the devices will continue tod, the devices will continue totheir partnership and exctheir partnership anwithout having to re-without having to rreen, reen, FTevicevicverable mverab. Your device will. Your detooth devices within raetooth deviceshen you see the name of the hen you see the name device displayed in the Bluetdevice displayed in the Bluedevices section, tap the ndevices section, tap the ndevice then automaticadevice thenwith the target devicwith the pairing fails, enterring fasupplied with tsupplied witNoteNote: Due to : Due tofeatures of features of devices,differedor or
84Settings BluetoothDelete a Paired Device (Unpairing)When you unpair from a Bluetooth device, the two devices will no longer recognize each other. To connect again, you’d need to pair the devices.1.  Verify your Bluetooth is active.2.  From the Bluetooth settings page, tap  Settings next to the previously paired device, and then tap Unpair to delete the paired device.Review Files Received via BluetoothWhen you receive files from another device via Bluetooth, you can access them from Bluetooth settings.1.  From a Home screen, tap   Apps > Settings.2. Tap Bluetooth >   Moreoptions > Received files.Bluetooth Status IndicatorsWhen Bluetooth is turnedon,   displays in the Status Bar.DRAFTother device ther device ss them from ss them froeen, tap en, taRRRRRRRRRRRRRRRRAppsApps >  > oth oth > > DDDDMoreoptions Moreoption>d filesd files.h Status Indicatorsh Status Indicatoh is turnedon, h is turnedon,
85Settings Airplane ModeAirplane ModeAirplane mode disconnects your device from all networks and turns off connectivity features, such as phone calls and Wi-Fi.While in airplane mode, you can use other features, such as playing music, watching videos, and other online applications.Turn Airplane Mode OnorOff1.  From a Home screen, tap   Apps > Settings.2. Tap the checkbox next to Airplane mode to enable or disable the option.Note: You can also control Airplane mode from the Device options menu. Press and hold the Power/Lock key, and then tap Airplane mode.DRAFTu u such h tching conline online ane Modane MOffOffm a Home screen, tap m a Home screen, tTTTTTTTTTTTTTTTTApSettingsSett.2.2.Tap theTap checkboxhec next to toxmodemo to enable or disato enNote: You can also con: You from the Device optioe Devichold the hold Power/Lower/Airplane modAirplane mod
86Settings Data UsageData UsageMonitor your mobile data usage.Note: Your service provider may account for data usage differently.1.  From a Home screen, tap   Apps > Settings > Datausage for options:• Mobile data: Enable mobile data. You can also control Mobile Data at the Notification panel.• Set mobile data limit: Disable your mobile data connection when the specified limit is reached. Drag the red limit line to set the data usage limit.• Data usage cycle: Tap the menu, and then choose a time period for data usage. Data usage for the period displays on the graph, along with usage by application below.2. Tap   More options:• Data roaming: Enable data roaming on your device.• Restrict background data: Restrict some apps and services from working unless you are connected to a Wi-Fi network.• Auto sync data: Set your accounts to automatically sync.• Show Wi-Fi usage: Display a Wi-Fi tab that shows Wi-Fi usage.• Mobile hotspots: Select Wi-Fi networks that are mobile hotspots. You can restrict apps from using these networks, and you can configure apps to warn you before using these networks for large downloads.DRAFTta at at Disable your Disableon when the on when theached. Drag the ached. Drag thset the data usage et the data usage age cyclege cycle: Tap the menu,: Tap the men choose a time period for en choose a time perioda usage. Data usage for the a usage. Data usage for the iod displays on the graph, iod displays on the gsage by application bsage by applicationFToptionsoptio:roamingroaming: Enable da: Eyour device.your device.Restrict background dataRestrict background d:some apps and services some apps and servicesworking unless you areing ua Wi-Fi network.a Wi-Fi •Auto sync dataAuto sto automaticaautom••Show WShow Wtab thab th•M
87Settings Location ServicesLocation ServicesSome apps, such as Google maps, may require one or more location services be turned on for full functionality.Locating Method1.  From a Home screen, tap   Apps > Settings > Location.2. Tap ON/OFF to turn on Location services.3. Tap Mode to select how your location is determined:• High accuracy: Use GPS, Wi-Fi, and mobile networks.• Power saving: Use Wi-Fi and mobile networks (no GPS).• GPS only: Use GPS only.Recent Location RequestsApps that have requested your location are listed under Recent location requests. 1.  From a Home screen, tap   Apps > Settings > Location.2. Tap ON/OFF to turn on Location services.3.  Tap an entry to view the app’s settings.DRAFT> ation atiohow your location is how your locatiracyacy: Use GPS, Wi-Fi, and : Use GPS, Wnetworks.networks.wer savingwer sa: Use Wi-Fi and moe Wi-Fi and moworks (no GPS).worksnlynly: Use GPS only.: Use GPS onlycation Rcatioave requested yourave requesder Recent location requder Recent locaom a Home screen, tap om a Home screen, tapTTTTTTTTTTTTTTTTAFFFFFFFFFSettingsSettings > Locationn..2.2Tap TapON/OFFN/OF to turn on services.services.3.Tap an entry to van ent
88Settings Location ServicesLocation ReportingGoogle uses Location Reporting to store and use your device’s most recent location data. Google apps, such as Google Maps, can use this data to improve your search results based on places that you have visited.1.  From a Home screen, tap   Apps > Settings > Location.2. Tap ON/OFF to turn on Location services.3. Tap Google Location Reporting for options:• Location Reporting: Allow Google apps to use your device’s most recent location data. • Location History: Allow Google to store a history of your location data. Tap DELETELOCATION HISTORY to permanently delete your location history.DRAFTGoogle ’s most s mosyy: Allow Google to : Allow Google of your location data. f your location data. ELOCATION HISTORY TION HISnently delete your location nently delete your ly.y.
89Settings PrintingPrintingPrint images and documents to Samsung printers and other compatible printers (notincluded).1.  From a Home screen, tap   Apps > Settings > Printing.2. Tap Add printer and choose a print service.DRAFTt
90Settings More NetworksMore NetworksThe More Networks settings allow you to configure a variety of communication settings for your device.Default Messaging AppIf you have multiple messaging apps installed, you can select which app should be your default messaging app.1.  From a Home screen, tap   Apps > Settings.2. Tap More networks > Default Messaging App to select a default.Mobile NetworksControl your device’s access to networks and mobile data service.1.  From a Home screen, tap   Apps > Settings. 2. Tap More networks > Mobile networks for options:• Mobile data: Allow your device to connect to a mobile data network.• Data Roaming: Allow your device to connect to data services while roaming. Significantly higher charges may result.• Access Point Names: Select the Access Point Name (APN) to use for mobile connection to the Internet.• Network operators: Choose available and preferred networks.DRAFTp should ld p p RRRRRRRRRRRRRRRAppsApps >  ks s> > Default Default p to select a default.lect a defauworksworr device’s access tr device’s le data service.e data serviceom a Home screen, tap om a Home screen, tapTTTTTTTTTTTTTTTTAFFFFFFFFFSettingsSettings. 2.2Tap TapMore networksore n > Mfor options:for option•Mobile dataobile:Aconnect to nect to••Data RData Rto coro
91Settings Sound SettingsSound SettingsConfigure the sounds and vibrations used to indicate notifications, screen touches, and other activities.Adjust the VolumeSet the system volume level, and set default volume for call ringtones, notifications, and other audio.Tip: You can also set System volume from the home screen by pressing the Volume key.1.  From a Home screen, tap   Apps > Settings.2. Tap Sound > Volume, and then drag the sliders to set the default volume for:• Ringtone• Music, video, games and other media• Notifications• SystemSelect a Default RingtoneChoose from preset ringtones or add your own.1.  From a Home screen, tap   Apps > Settings.2. Tap Sound > Ringtones.3.  Tap a ringtone to hear a preview, and then tap Done to set it as your default ringtone.– or –Tap Add to use an audio file as a ringtone.DRAFTs,  volume from  volume froing the ing thVolume lumcreen, tap  tap DRDRDRDRDRDRDRDRDRDRDRDRRRRRAppsApps > >nd nd >> VolumeVolume, and then drag , and then drders to set the default volumders to set the default volumoneoneeo, games aneo, games anefault Riefaum preset ringtones m preset riom a Home screen, tap om a Home screen, tapTTTTTTTTTTTTTTTTAFFFFFFFFFSettingsSettings.2.2Tap TapSound ound > Ringtones3.Tap a ringtone to heap a rithen tap tap DoneD toringtone.ringtone.– or –– or –Tap Arin
92Settings Sound SettingsChange the Notification SoundChoose a sound for notifications, such as for new messages and event reminders.1.  From a Home screen, tap   Apps > Settings.2. Tap Sound > Notifications.3.  Tap a sound to preview it, and then tap Done to set it as your default notification sound.Vibrate When RingingYour device can vibrate in addition to ringing when you receive a call.1.  From a Home screen, tap   Apps > Settings.2. Tap Sound > Vibrate when ringing to turn the feature on.Play Tones When Entering a Phone NumberPlay tone when the dialing keypad is tapped.1.  From a Home screen, tap   Apps > Settings.2. Tap Sound > Dialing keypad tone to turn the feature on.Play Tones When Touching or Tapping theScreenPlay tones when you touch or tap the screen to make selections.1.  From a Home screen, tap   Apps > Settings.2. Tap Sound > Touch sounds to turn the feature on.Set the Screen Lock SoundPlay a sound when you unlock the screen.1.  From a Home screen, tap   Apps > Settings.2. Tap Sound > Screen lock sound to turn the feature on.DRAFTon to all.all.tap tap RRRRRRRRRRRRRRRRAppsps >  ibrate when ringingwhen ring to toureureon.on.diadiaome screen, tap ome screTtingstings.p p Sound Sou> Dialing keypad tong keyturn the featureturn ton.Play Tones Whenay Tonor Tapping theor TappinPlay tones whenPlay tones whenscreen to mascreen to ma1.1From AAAAAAAAA2.2.
93Settings Display SettingsDisplay SettingsConfigure the appearance of your phone’s display through Display Settings.WallpaperYou can display a favorite picture or choose from preloaded wallpapers.1.  From a Home screen, tap   Apps > Settings > Display.2. Tap Wallpaper.3. Tap Home screen, Lock screen, or Homeandlock screen.4.  Tap a image to preview it, and then tap Setaswallpaper.• Tap From Gallery to use other images on your phone as wallpaper.Notification PanelCustomize which Quicksetting buttons appear on the Notification Panel. You can also customize which apps have notifications appear on the Notification Panel. ŹFrom a Home screen, tap   Apps > Settings > Display >Notification panel.The following options are available:• Application notifications: Tap each application to configure notification settings. • Quick Setting Buttons: Tap and drag quick settings buttons, which appear in a row at the top of the Notification Panel, to reorder them. To use the default layout, tap Reset.DRAFTpps > ock screenock screen, or , ocreenreen..to preview it, and then tap o preview it, and llpaperllpaper..From Gallery Fromto use other o use other ges on your phone as wallges on your phone asn Paneln Pawhich Quicksettingwhich Quicn the Notification Panel. n the Notificatioso customize which apps havso customize which afications appear on the Notififications appear on the NoPanel.Panel.ŹŹFrom a Home screen, tFrom a HoAFAFAFAFAFAFAFAFAFSettingsSett > Displpanelel..The followingThe following•Applicpplicapp
94Settings Display SettingsAdjust the Screen BrightnessAdjust the screen brightness to suit your surroundings or personal preference. You may also want to adjust screen brightness to conserve battery power.1.  From a Home screen, tap   Apps > Settings > Display > Brightness.2. Drag the Brightness level slider to the desired setting.Note: You can also adjust Brightness from the Notification Panel. Drag down the Status Bar from the top of the screen to find the Brightness options.Automatically Rotate the ScreenUse the front camera to rotate the screen based on the orientation of your face.1.  From a Home screen, tap   Apps > Settings.2. Tap Display.3.  Tap the checkbox by Auto rotate screen to turn the feature on.Set the Screen Timeout DelayChoose how long the display screen remains lit after you tap the screen or press any key. 1.  From a Home screen, tap   Apps > Settings.2. Tap Display > Screen timeout, and then choose a time period.DRAFTe the e the to rotate the screen o rotate the screen ntation of your face.of your face.me screen, tap me screen, tDRDRDRDRDRDRDRDRDRDRDRDRDRDRDRDRAppsAp > ngsngs..isplayisplay.heckbox by heckbAuto routo rn the featurern the featurehe dhe dyou tap thyou taa Home screen, tap Home screenTTTTTTTTTTTTTSettingsSettin.Tap Tap Display D> Screen timeo timethen choose a time periodthen choose a time period
95Settings Display SettingsDaydream (Screen Saver)The Daydream setting controls what the screen displays when the device is docked (dock not included), or while charging. You can choose to display colors, or display photos stored on your device.1.  From a Home screen, tap   Apps > Settings.2. Tap Display > Daydream. Tap ON/OFF to turn Daydream on. Configure options:• Colors: Tap the selector to display a changing screen of colors.• Google Photos: Display pictures from your Google Photos account. Tap   Settings for options.• Photo Frame: Display pictures in a photo frame. Tap   Settings for options.• Photo Table: Display pictures in a photo table. Tap   Settings for options.3. Tap Preview to see a demonstration of Daydream.Change the Font Style and SizeYou can set the font style and size for all text that displays on the screen.1.  From a Home screen, tap   Apps > Settings > Display.2. Tap Font style to change the font style. • Tap Download to find new fonts.3. Tap Font size to adjust the size of the text on the phone.DRAFTy a y a ctures s account. s accoptions.ptions.splay pictures in splay pictures inTap ap RSettingstings for  for ableable: Display pictures in : Display picturesoto table. Tap oto table. Tap DRTSettings Settings for tions.tions.viewview to see a demonst to see a demot styt styon the son thome screen, tap ome screTtingstings > DisplayDispla.p p Font styleFon to change the fohange••Tap TDownloadwn to find ned ne3.Tap Tap Font sizeont s to adjusttext on the phone.ext on t
96Settings Lock ScreenLock ScreenChoose a method for unlocking your screen. Different Screen Locks have different levels of security and options.Set a Screen Lock1.  From a Home screen, tap   Apps > Settings.2. Tap Lock Screen3. Tap Screen lock to select a screen lock and level of security:• None: Never use a Lock screen. • Swipe: Swipe the screen to unlock it. This option provides no security.• Pattern: A screen unlock pattern is a tap gesture you create and use to unlock your device. This option provides medium security.• PIN: Select a PIN to use for unlocking the screen. This option provides medium to high security.• Password: Create a password for unlocking the screen. This option provides high security.Screen Lock OptionsSwipe Only• Unlock effect: Set the visual effect used when unlocking the screen.• Help text: Show help information on unlocking the screen on the Lock screen.Pattern Only• Make pattern visible: Display the pattern as your draw it.Pattern, PIN, and Password• Secured lock time: Set the length of time to pass before locking the screen.DRAFTApps > o select a screen  select a screen f security:urity:ver use a Lock screen. ver use a Lock scee: Swipe the screen to unloc: Swipe the screen to unloThis option provides no secuThis option provides no securnrn: A screen unlock p: A screen unlocksture you createsture you createour deviceour deviceum sum st a PIN to t a PIng the screen. Tng the des medium to high sdes mediumPasswordPassw: Create a passworate a punlocking the screen. This unlocking the screen. Thprovides high security.provides high security.Screen Lock Optionreen LoSwipe Onlype On••Unlock effck effused whused w•Helpu
97Settings Lock ScreenAll Screen Locks• Dual clock: Display both local and home times on your Lock screen when roaming.• Show date: Display the date on the Lockscreen.• Camera shortcut: Display a Camera shortcut on the Lock screen.• Owner Information: Show owner information on the Lock screen. DRAFT
98Settings Call SettingsCall SettingsConfigure options for calling with your phone.To access Call settings:1.  From a Home screen, tap   Apps > Settings > Call.2.  Tap any of the settings below to configure them:• Set up call rejection messages: Create or edit messages to reject incoming calls.• Answering/ending calls: Configure your phone to answer calls by pressing the Home key and end calls by pressing the Power/Lock key.• Additional settings: Configure TTY mode and hearing aid options.• Ringtones and keypad tones: Select or create your default ringtone, set the phone to vibrate when ringing, and play a tone when the dialing keypad is tapped.• Noise reduction: Suppress background noise during calls.• Voicemail service: Select your voicemail service. Your carrier is selected by default.• Voicemail settings: Configure your voicemail.DRAFTages: to reject g callsg call: phone to answer phone to answer sing the he Home Home key key alls by pressing the alls by pressing tLock Lock key.key.ditional settingsditional settings: Configure T: Configure Tde and hearing aid optionsde and hearing aid opnes and keypad tones and keypad Tcreate your dcreate your dthe phothe phondndkeypad iskeypreductionreductio: Supprckground noise during ckground noise Voicemail serviceVoicemail service: Select yo: Sevoicemail service. Your cavoicemail service. Your cselected by default.ted b••Voicemail settingsVoicemvoicemail.voice
99Settings Application ManagerApplication ManagerYou can download and install new applications on your device. Use Application manager settings to manage your downloaded and preloaded applications.Warning: Because this device can be configured with system software not provided by or supported by Google or any other company, end-users operate these devices at their own risk.Memory UsageSee how memory is being used by Downloaded or Running applications.1.  From a Home screen, tap   Apps> Settings > Applicationmanager.2.  Swipe across the screen to display DOWNLOADED, SD CARD, RUNNING, or ALL to display memory usage for that category of applications.The graph on the DOWNLOADED tab shows used and free device memory. The graph on the RUNNING tab shows used and free RAM.DRAFTogle or any erate these erate thessagesageemory is being usedemory is bded or Running applicatided or Running om a Home screen, tap om a Home screen, tapTTTTTTTTTTTTTTTTAFFFFFFFFFSettingsSettings > Applicationmtion2.2Swipe across the screeSwipe acrosDOWNLOADED, SD CDOWNLOor ALL to display mALL tothat category ofategoThe graph oThe graph oshows ushows uThe gu
100Settings Application ManagerDownloadedDisplays apps you have downloaded onto your device.1.  From a Home screen, tap   Apps> Settings > Applicationmanager.2. Tap DOWNLOADED to view a list of all the downloaded applications on your device.• To switch the order of the DOWNLOADED list, tap   More options > Sort by size or Sort by name.• To reset all of your application preferences, tap  More options > Reset app preferences.• Tap an application to view and update information about the application, including memory usage, default settings, and permissions. The following options are displayed: -Force stop: Stop an app that is misbehaving. Restart your device if stopping an app, process, or service causes your device to stop working correctly. -Install/Uninstall updates: Delete the application from the device or uninstall updates made to apps that cannot be deleted. -Move to SD card: Move this app to your microSD card. -Clear data: Clear application data from memory. -Clear cache: Clear an application’s temporary memory storage. -Clear defaults: Clear an application’s customization. -Permissions: View information about the application’s access to your device and data.DRAFTptions > o view and o view and n about the n abocluding memory usage, uding memory usage, ngs, and permissions. d permissiwing options are displayed:wing options are dirce stoprce s: Stop an app that istop an app thatmisbehaving. Restart your demisbehaving. Restart your destopping an app, processtopping an app, proce causes your dece causes your dorking correctorking correctTnstallnstallory.ory.cachecach: Clearplication’s temporarplication’s tstorage.storag--Clear defaultsC: Clear an : Cleaapplication’s customizacation’s customiz-Permissionsermi: Viewabout the applicaboyour device ayou
101Settings Application ManagerSD CardDisplays apps you have downloaded onto your memory card (not included).1.  From a Home screen, tap   Apps> Settings > Applicationmanager.2. Tap SD CARD to view a list of all the downloaded applications on your SD card.• To switch the order of the SD CARD list, tap  More options > Sort by size or Sort by name.• To reset your application preferences, tap  More options > Reset app preferences.Note: When you reset app preferences, you will not lose any app data.3.  Tap an application to view and update information about the application, including memory usage, default settings, and permissions.Running ServicesView and control services running on your device.1.  From a Home screen, tap   Apps> Settings > Applicationmanager.2. Tap RUNNING to view a list of running services.All the applications that are currently running on the device display.3. Tap Show cached processes to display all the cached processes that are running. Tap Showservices in use to switch back.4.  Tap one of the applications to view application information.• Stop: Stops the application from running on the device. This is usually done prior to uninstalling the application. (Not all services can be stopped. Stopping services may have undesirable consequences on the application or Android System.)• Report: Report failure and other application information.Note: Options vary by application.DRAFTons > eferences, you eferencesto view and update to view and update ut the application, e application, mory usage, default ory usage, defaund permissions.nd permissioscreen, tscreess >  > ApplicatioApUNNING NNINto view a list ofto viewices.icesAll the applications that are cAll the applications that arerunning on the device disrunning on the device dis3.Tap Tap Show cached prShowdisplay all the cachsplay aare running. Tapunningto switch bacto switch bac4.4.Tap one Tap one applic•
102Settings AccountsAccountsSet up and manage accounts, including your Google Account, Samsung account, email, and social networking accounts.Depending on the account, you can choose to synchronize your calendar, contacts, and other types of content.Add an Account1.  From a Home screen, tap   Apps > Settings.2. Tap Accounts > Add account.3.  Tap one of the account types.4.  Follow the prompts to enter your credentials and set up the account.Synchronize Accounts1.  From a Home screen, tap   Apps > Settings.2. Tap Accounts > (account type).3.  Tap an account to view the sync settings for that account.• Check individual data items to sync.DRAFTt,  endar, edaer types of er types countcounHome screen, tap Home screTTTttingsttings.ap ap AccountsAc > Add accountd acc3.3.Tap one of the account typTap one of the account typ4.Follow the prompts to Follow thecredentials and setredentSynchroniSynchroni1.1.From a AAAAAAAAAS2.2.
103Settings AccountsAccount SettingsEach account has its own set of settings. In addition, you can configure common settings for all accounts of the same type.Note: Account settings and available features vary between account types and service providers. Contact your service provider for more information on your account’s settings.1.  From a Home screen, tap   Apps > Settings.2. Tap Accounts > (account type).3.  Tap an account to configure that account’s settings.• Tap Settings or other available options to configure common settings for all accounts of this type.Delete an Account1.  From a Home screen, tap   Apps > Settings.2. Tap Accounts > (account type).3.  Tap the account, and then tap   Moreoptions > Removeaccount.DRAFTavailable available common common counts of this type.counts of this tyAccountAccouHome screen, tap Home screen, tapDRDRDRDRDRDRDRDRDRDRDRDRDRDRDRDRAppsApps > ettingsetting.ountsounts > (account typent tyount, and thenount, and thenRemovRemov
104Settings Backup and ResetBackup and ResetBack up your data to Google servers. You can also reset your device to its factory defaults.Backup and RestoreEnable backup of your information to Google servers.1.  From a Home screen, tap   Apps > Settings.2. Tap Backup and reset for options:• Back up my data: Enable back up of application data, Wi-Fi passwords, and other settings to Google servers.• Backup account: Select a Google account to be used as your backup account.• Automatic restore: Enable automatic restoration of settings from Google servers. When enabled, backed-up settings are restored when you reinstall an application.Factory Data ResetReturn your device to its factory defaults.Warning: This action permanently erases ALL data from the device, including Google or other account settings, system and application data and settings, downloaded applications, as well as your music, photos, videos, and other files.1.  From a Home screen, tap   Apps > Settings.2. Tap Backup and reset > Factory data reset.3. Tap Reset device and follow the prompts to perform the reset.DRAFTRRRAppsp > setset for options: for options:data: Enable back up : Enable back up on data, Wi-Fi passwords, n data, Wi-Fi paer settings to Google servers.er settings to Google kup accountkup a: Select a GoogSelect a Googcount to be used as your bacount to be used as yount.unt.restorerest: tic restoration otic restGoogle servers. WheGoogle servacked-up settings are restoacked-up settings when you reinstall an applicawhen you reinstall an aFactory Data ReseFactory DaReturn your device to rn youWarning: Warning: This actiThis ALL data from thALL data from thor other accoor other accoapplicationapapplicatvideov
105Settings AccessibilityAccessibilityAccessibility services are special features that make using the device easier for those with certain physical disabilities. Note: You can download additional accessibility applications from the Google Play Store.1.  From a Home screen, tap   Apps > Settings.2. Tap Accessibility for options:MORE SETTINGS• Direct access: Press the Home key three times to open the accessibility options screen. • Answering/ending calls: Select the methods you can use to answer and end a call.• Single tap mode: Tap to stop or snooze alarms, calendar events, and timer alerts, and accept or reject incoming calls. SERVICESAdditional accessibility apps may be downloaded from the Google Play Store. Certain accessibility services you install may be configured here. VISION• TalkBack: Speak feedback aloud to help blind and low-vision users. -TalkBack can collect all of the text you enter, except passwords, including personal data and credit card numbers. It may also log your user interface interactions with the device.• Speak passwords: Read the characters aloud as you enter your passwords.• Font size: Set the font size.• Negative colors: Reverse the display of onscreen colors from White text on a Black background to Black text on a White background.DRAFTgle e RApps > options:optioSess: Press the s the HomeHo key mes to open the accessibility mes to open the accens screen. ns scrswering/ending callsswering/ending calls: Seleods you can use to ansods you can use to all.all.modemode: Ta: Tacacaaccessibility apaccessaded from the Googleaded from thee. Certain accessibility serve. Certain accessibou install may be configured hou install may be configuVISIONVIS••TalkBackTalkBac: Speak feehelp blind and lowhelp b-TalkBack cTalkBtext you xt youincludincludcaca
106Settings Accessibility• Magnification gestures: Use exaggerated gestures such as triple-tapping, double pinching, and dragging two fingers across the screen. • Notification reminder: Play a beep when a notification for a call, message, and so on, has been missed. • Accessibility shortcut: Quickly enable accessibility features in two quick steps. Tap ON/OFF to turn the feature on.• Text-to-speech options: Set your preferred TTS engine and options. For more information, see Text-To-Speech Options.HEARING• Flash notification: Set your camera light to blink whenever you receive a notification.• Turn off all sounds: For privacy, turn off all notifications and audio.• Google subtitles (CC): Use Google subtitles with multimedia files when available. Tap Google subtitles (CC) for options.• Samsung subtitles (CC): Use Samsung subtitles with multimedia files when available Tap Samsung subtitles (CC) for options.• Mono audio: Switch audio from stereo to mono for use with one earphone. • Sound balance: Use the slider to set the Left and Right balance when using a stereo device.DEXTERITY• Press and hold delay: Select a time interval for this tap gesture.INTERACTION• Interaction control: Customize the way you interact with applications and settings on your phone.DRAFTRand ation, see nsns..ionon: Set your camera : Set your camera whenever you receive a ever you receive a n.n.off all soundsoff all sounds: For privacy, tu: For privacyall notifications and audio.all notifications and audio.le subtitles (CC)le subtitles (CC): Use: with multimedia with multimediaap Google ap Google forfordiodio: Switch : Sto mono for use to monophone. honeSound balanceSoun: Use the slid: Use set the Left and Right balaset the Left and Right bausing a stereo device.a stereo device.DEXTERITYDEXTERIT•Press and hold Pressinterval for thiterval INTERACTIOINTERACTIO•InteraInterawaya
107Settings Language and Input SettingsLanguage and Input SettingsConfigure your device’s language and input settings.Set Your Default Language1.  From a Home screen, tap   Apps > Settings.2. Tap Language and input > Language.3.  Select a language from the list.Select Your Default Keyboard orInput Method1.  From a Home screen, tap   Apps > Settings.2. Tap Language and input > Default.3.  Select a keyboard.Note: Additional keyboards can be downloaded from the Google Play Store.DRAFTgege..ur Defaulur Det Methodt Methodm a Home screen, tap m a Home screen, tTTTTTTTTTTTTTTTTApSettingsSett.2.2.Tap TapLanguage and inputguage and input>3.Select a keyboard.Select a kNote: Additional keybAdditiodownloaded from tdownloaded fro
108Settings Language and Input SettingsSamsung Keyboard SettingsConfigure options for using the Samsung keyboard.1.  From a Home screen, tap   Apps > Settings.2. Tap Language and input.3. Tap   Settings next to Samsung keyboard for options:• English (US): Choose a keyboard layout.• Select input languages: Choose which languages are available on the keyboard. To switch between languages, slide the space bar sideways. • Predictive text: Allow Predictive text to suggest words matching your text entries, and, optionally, complete common words automatically. Predictive text can learn your personal writing style from your contacts, messages, Gmail, and social networking sites — improving its accuracy of predicting your text entries.• Additional keyboard settings provide assistance with capitalization, punctuation, and much more. Google Voice Typing SettingsSpeak rather than type your text entries using Google Voice Typing. 1.  From a Home screen, tap   Apps > Settings.2. Tap Language and input.3. Tap   Settings next to Google voice typing for options:• Choose input languages: Select languages for Google voice typing. • Block offensive words: Hide words many people find offensive are in results of Google voice searches. Offensive words are replaced in results with a placeholder (####).• Offline speech recognition: Download and install speech recognition engines, allowing you to use voice input while not connected to the network.DRAFTon ween e bar ow Predictive text ow Predictive s matching your text s matching your text optionally, complete nally, complete words automatically. ords automaticalve text can learn your ve text can learn youronal writing style from your onal writing style from your ntacts, messages, Gmail, andntacts, messages, Gmail, andal networking sitesal networking sites——impuracy of predicting uracy of predictinboarboarypeypeice Typingice Tyome screen, tap ome screTtingstings.p p Language and inputLanguage and input...Tap TapFSettings ettinext to Goo Gotyping for options:typing for op•Choose input lanChoolanguages for anguag••Block offeBlock offemany pemany presululOff
109Settings Language and Input SettingsVoice SearchUse Google voice recognition to perform Google searches using spoken commands.To perform a voice search, tap   in the Google search bar or widget. Or say “Ok Google” to launch a Google search (if the hotword detection option is enabled).1.  From a Home screen, tap   Apps > Settings.2. Tap Language and input > Voice search for options:• Language: Choose a language.• Speech output: Select a mode for speech output.• “Ok Google” Detection to launch a Google search whenever you say “OkGoogle.”• Additional options include offline speech recognition, blocking offensive words, and use with a headset.Text-To-Speech OptionsConfigure your Text-To-Speech (TTS) options. TTS is used for various accessibility features, such as TalkBack. For more information, see Accessibility.1.  From a Home screen, tap   Apps > Settings.2. Tap Language and input > Text-to-speech options for options:• Choose either the Samsung or Goggle text-to-speech engine. Tap  Settings next to each TTS engine for options.• Speech rate: Set the speed at which the text is spoken.• Listen to an example: Play a sample of speech synthesis (available if voice data is installed).• Default language status: Display the default language in use.DRAFTde for on on to launch to launchenever you say henever you sptions include offline nclude offlecognition, blocking ecognition, blockinve words, and use with a ve words, and use with dset.dset.Tres, sures, smation, see mationAHome screen, tap Home screeTTTTTTettingsetting.Tap Tap Language and inputLanguage and input >  Tespeech optionsspeech opt for optionstions••Choose either the SChoose Goggle textGogg-to-spAFSettings Setnefor options.option••SpeechSpeecthe teete•L
110Settings Language and Input SettingsMouse/Trackpad SettingsConfigure settings for using an optional mouse or trackpad (not included).1.  From a Home screen, tap   Apps > Settings.2. Tap Language and input > Pointer speed to set the speed of the pointer.DRAFT
111Settings Date and Time SettingsDate and Time SettingsBy default, your device receives date and time information from the wireless network. When you are outside network coverage, you may want to set date and time information manually using the date and time settings.1.  From a Home screen, tap   Apps > Settings.2. Tap Date and time.3.  Set the date, time, time zone, time format, and date format.y y e using ussettings.settings.een, tap en, tapRRRRRRRRRRRRRRRRAppsApps >  > and timeand time..e date, time, time zone, time e date, time, time zone, time , and date format., and
112Settings Ultra Power Saving ModeUltra Power Saving ModeConserve battery power by automatically adjusting the screen brightness, limiting the performance of the CPU, and other power reduction activities.Ultra power saving mode saves even more battery power by using a gray scale theme on the Home screen and limiting the number of usable apps.1.  From a Home screen, tap   Apps >  Settings > Ultra power saving mode.2. Tap ON/OFF to turn the feature on.3.  Read the information on the page that appears and tap Turn on to activate Ultra power saving mode.4. Tap the   Add icons to add more apps to the Home screen.5.  To turn off Ultra power saving mode, tap Moreoptions > Turn off Ultra power saving mode > Turn off.DRAFTe tery eygray scale gray scaHome screen Home screethe number of number of pps.pps.e screen, tae screngsngs > > Ultra pow Up p ON/OFF ON/to turn the featurern the Read the information on theRead the information on theappears and tap appears andTurn onUltra power saving moUltra pow4.Tap the the AFAdd icto the Home scHome5.5.To turn off To turn offAAAAMoreresavin
113Settings BatteryBatteryView how battery power is used for device activities.1.  From a Home screen, tap   Apps > Settings.2. Tap Battery > Show battery percentage to display the battery charge percentage next to the battery icon on the Status Bar.Battery ChartThe battery level displays as a percentage. The amount of time the battery has been used also displays. ŹTap the Battery chart to see History details.Apps and OS UsageBattery usage displays in percentages per application.1. Tap Screen, Wi-Fi, Android System, Cellstandby, Android OS, or an app to view how they are affecting battery use.2. Tap   Refresh to update the listing.Note: Other applications may be running that affect battery use.DRAFTas a percentage. as a percentbattery has been battery has beeery charty to see History o see HOS UsagOS Uge displays in percge displayon.on.ap ap ScreenSc, Wi-Fi, Android SyAndroCellstandbyCellstandb, AndroidOSOSview how they are affectinview how the2.Tap Tap AFRefreshR to upNote: Other applicatOther athat affect battery that affect batter
114Settings StorageStorageView the device memory and usage, or mount, unmount, or format an optional memory card (not included).Device MemoryView and manage the memory used by the device.1.  From a Home screen, tap   Apps > Settings.2. Tap Storage.• The DEVICE MEMORY displays Total space and Available space.• The amounts of memory used by Applications, Pictures and videos, Audio, Downloads, Cached data, and Miscellaneous files are also displayed.To increase available memory:1. Tap Cached data to clear all cached data for all apps.2. Tap Miscellaneous files, select unnecessaryfiles (or tap Select all), andthentap   Delete.Memory Card (SD Card)Once an optional memory card (not included) has been installed in your device, the card memory displays as Total space and Available space.Install a Memory CardYou can use an optional microSD or microSDHC card (not included) to add additional memory space to your device. Note: The micro SD card slot is above the SIM card slot.DRAFTy the the RRRAppsp > MEMORYMORYdisplays Total splays Total Available space.vailable space.mounts of memory used by mounts of memory used lications, Pictures and videoslications, Pictures and videodio, Downloads, Cached dadio, Downloads, CachMiscellaneous files areMiscellaneous files addailable meailableed data ed datato clear or all apps.r all apps.p p Miscellaneous filesMiscellaneous files, select,unnecessaryfiles (or tap unnecessaryfiles (or tap SeSFTandthentap andthentapFTDelete.Memory Card mory Once an optionaOnce an optionincluded) has ncluded) has device, the device, the space anInIn
115Settings StorageFPO1.  Remove the back cover. For more information, see Remove the Back Cover.2.  With the gold contacts facing down, carefully slide the memory card into the slot.3.  Replace the back cover. For more information, see Replace the Back Cover.Mount a Memory CardWhen you install an optional memory card, it is automatically mounted (connected to the device) and prepared for use. However, should you unmount the card without removing it from the device, you will need to mount it before it can be accessed. 1.  From a Home screen, tap   Apps > Settings.2. Tap Storage > Mount SD card.Remove a Memory CardWarning: To prevent damage to information stored on the memory card, unmount the card before removing it from the device.1.  From a Home screen, tap   Apps > Settings.2. Tap Storage > Unmount SD card.3.  Remove the back cover. For more information, see Remove the Back Cover.4.  Carefully slide the card out.5.  Replace the back cover. For more information, see Replace the Back Cover.DRAFTcing down, cing downmory card into mory card intock cover. ver. ormation, see ormation, see he Back Coverhe Back Cover.epareeparmount the camount rom the device, yorom the dt before it can be accet before it canom a Home screen, tap om a Home screen, tapTTTTTTTTTTTTTTTTApFFFFFFFFFASettingsSe.2.2.Tap TaStorageorage > Mount SDRemove a Memoove aWarning: WarnTo prevTo prestored on the mtored on the mcard before card before 1.FromAAAAAAAA22
116Settings StorageFormat a Memory CardWarning: When formatting an SD card, you should backup your music and photo files that are stored on the card because formatting the SD card deletes all the stored data.1.  From a Home screen, tap   Apps > Settings.2. Tap Storage > Format SD card and follow the prompts.DRAFT
117Settings SecuritySecuritySecure your device and protect your data with Security settings.Device AdministrationManage your device administrators and application installation privileges.1.  From a Home screen, tap   Apps > Settings.2. Tap Security for options:• Device administrators: Add or remove device administrators.• Unknown sources: Enable installation of applications that are not from the Google Play Store.• Verify apps: Block or warn before installing apps that may cause harm.Warning: Enabling installation of third-party applications can cause your device and personal data to be more vulnerable to attacks by unknown sources.Encrypt Your DataRequire a numeric PIN or password to decrypt your device each time you power it on or encrypt the data on a memory card (not included) each time it is connected.1.  From a Home screen, tap   Apps > Settings.2. Tap Security for options:• Tap Encrypt device and follow the prompts to encrypt all data on your device.• Tap Encrypt external SD card to encrypt data on a memory card (not included).DRAFTpps > atorsators: Add or or administrators.dministrators.sources: Enable Enable on of applications that are on of applications thaom the Google Play Store.om the Google Play Store.rify appsrify ap: Block or warn ber waing apps that may cauing apps that may cing installationing installationause youause youoreoreour Dataour Dumeric PIN or passumeric PINyour device each time yoyour device eacr encrypt the data on a memr encrypt the data ont included) each time it is cont included) each time it is c1.1.From a Home screen, tapFrom a HomeAFAFAFAFAFAFAFAFAFSettingsSetting.2.Tap pSecuritySec for o••Tap EncrypEncryprompts prompts deviceevice•Ta
118Settings SecuritySet Up or Change Your SIMCard LockUse this option to set up your password when one is first required or change your current password.1.  From a Home screen, tap   Apps > Settings.2. Tap Security > Set up SIM card lock and follow the prompts.Prevent Others From Reactivating Your DeviceStop others from reactivating your device after it has been reset.1.  From a Home screen, tap   Apps > Settings.2. Tap Security > Reactivation lock to enable the feature.View PasswordsDisplay password characters briefly as you type them.1.  From a Home screen, tap   Apps > Settings.2. Tap Security > Make passwords visible to turn the feature on.Credential StorageManage your security certificates. If a certificate authority (CA) certificate gets compromised or for some other reason you do not trust it, you can disable or remove it.1.  From a Home screen, tap   Apps > Settings.2. Tap Security for options: • Storage type: Select a storage location for credential contents.• Trusted credentials: Display certificates in your device’s ROM and other certificates you have DRAFTeur device tap tap RRRRRRRRRRRRRRRRAppsps >  Reactivation lockivation lock to eature.ature.screen, tscreess..ecurity curit> Make passwoMakeble ble to turn the featureto turn the featuon.Credential StorageCredential Manage your security cenage youcertificate authority (Ccate acompromised or focompromised oyou do not trustyou do not trustremove it.remove it.1.1From AAAAAAAAA2.2.
119Settings Securityinstalled.• Install from phone storage: Install a new certificate from storage.• Clear credentials: Erase the credential contents from the device and reset the password.DRAFT
120Settings About Your DeviceAbout Your DeviceView information about your device, including status, legal information, hardware and software versions, and a tutorial.1.  From a Home screen, tap   Apps > Settings.2. Tap About device, and then tap items for more details:• Software update: Check for and install available software updates.• Status: View the status of the battery, network, and other information about your device.• Legal information: View your device’s open source licenses and Google legal information.• Device name: View and change your device’s name.• Additional device information includes the Model number, Android version, Build number, and more.Software UpdateUse Software update to update your device’s software.1.  From a Home screen, tap   Apps > Settings.2. Tap About device > Software update.3.  Follow the prompts to check for available software updates to download and install.DRAFTp items eck for and eck for andftware updates.ftware updateshe status of the status of the work, and other d other on about your device.on about your devical informational information: View your : View your vice’s open source licenses vice’s open source licenses gle legal information.gle legal informationmeme: View : V name. nameitional device informatiotional device ncludes the Model number, Ancludes the Model nversion, Build number, and version, Build number, aSoftware UpdateSoftware Use Software updateoftwardevice’s software.device’s softwa1..From a HomFrom a HomAAAAAAAAASettiSetti2.Tap 3.3

Navigation menu