Samsung Electronics Co SMT377A Multi-band UMTS/LTE Tablet with WLAN, Bluetooth, and ANT+ User Manual 1
Samsung Electronics Co Ltd Multi-band UMTS/LTE Tablet with WLAN, Bluetooth, and ANT+ Users Manual 1
Contents
- 1. Users Manual 1
- 2. Users Manual 2
- 3. Users Manual 3
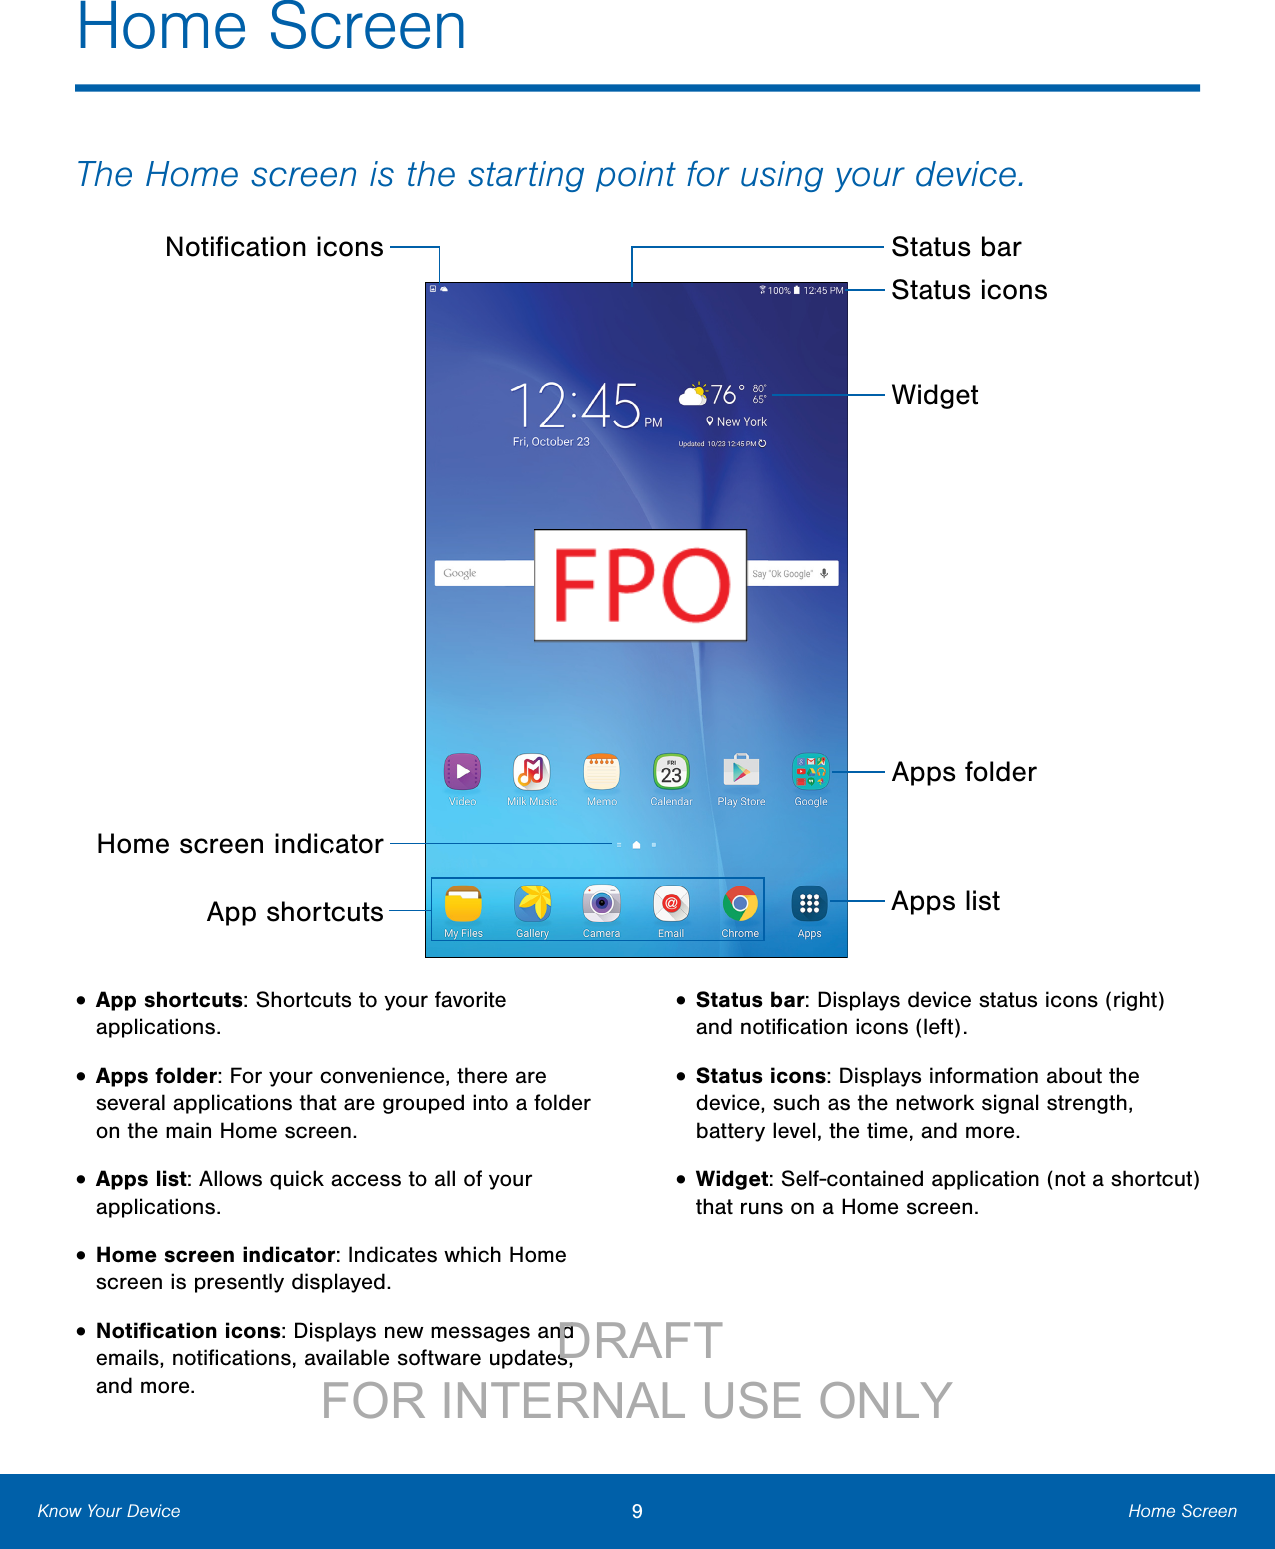
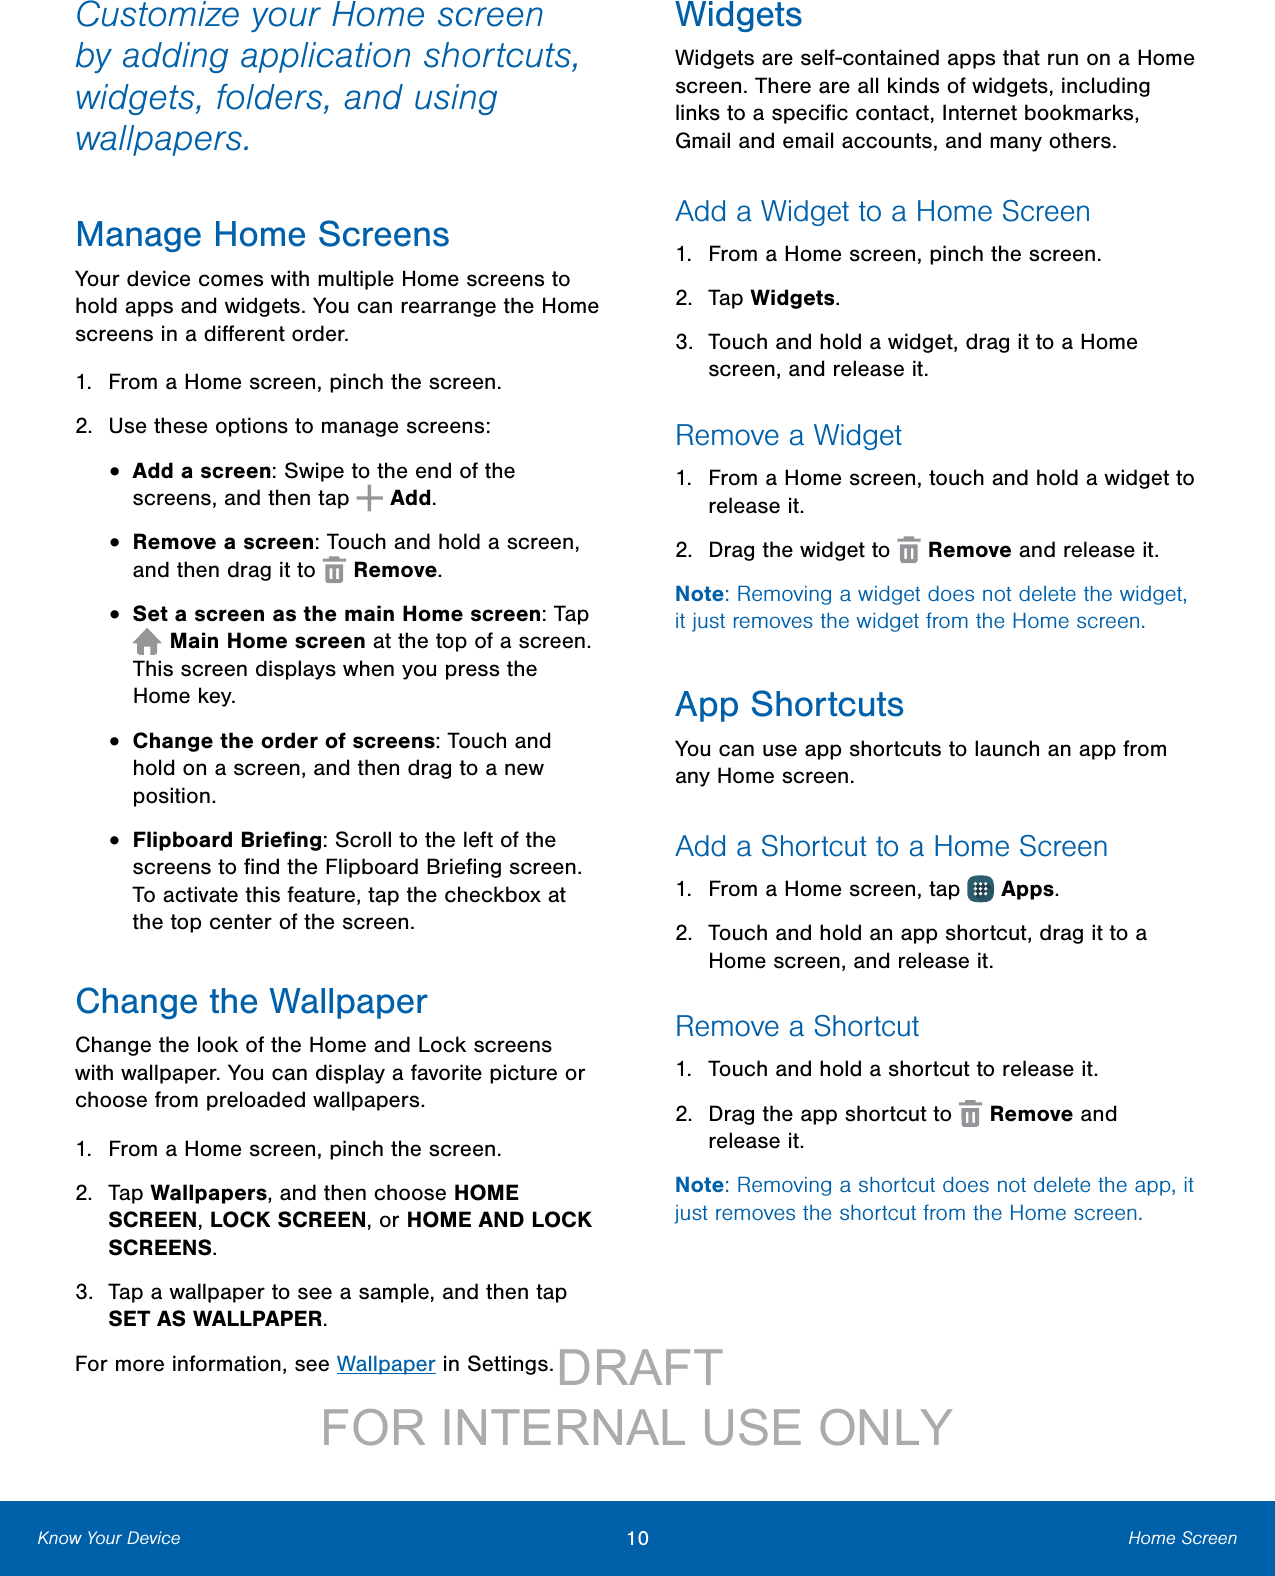
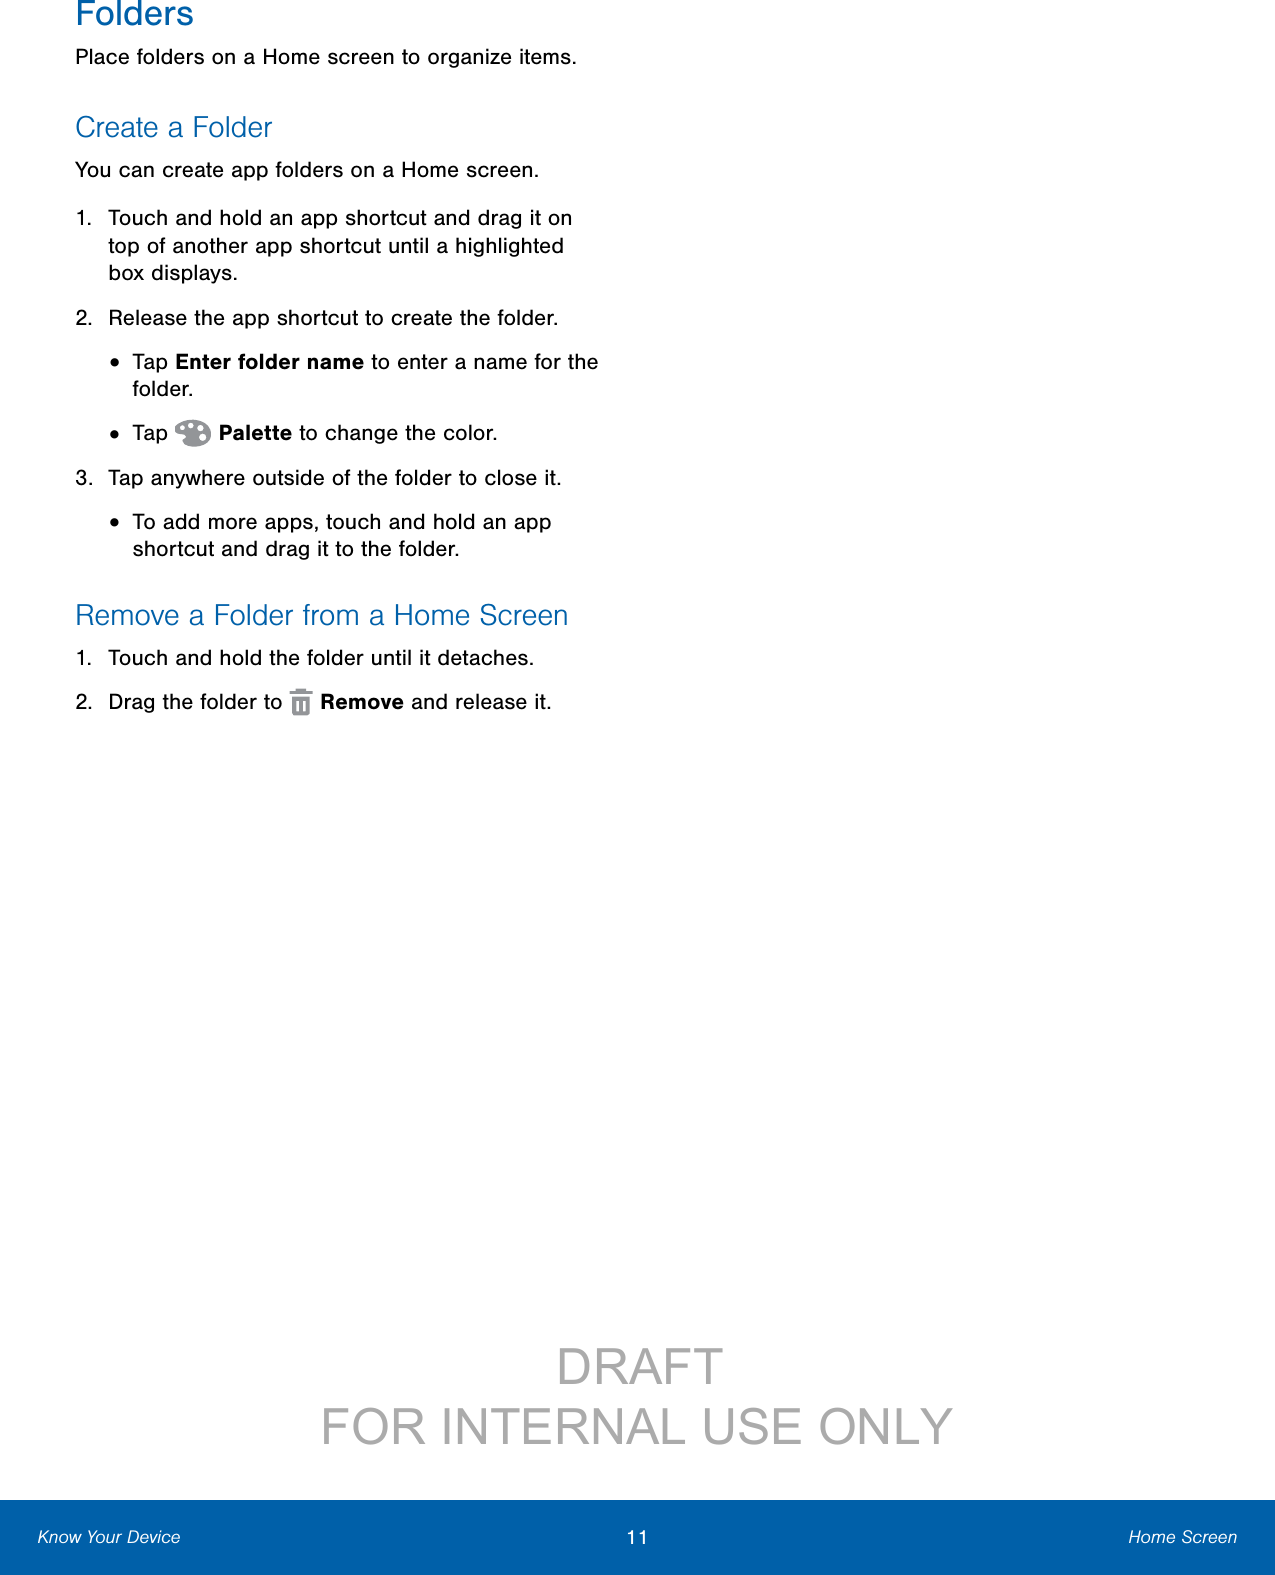
Users Manual 1
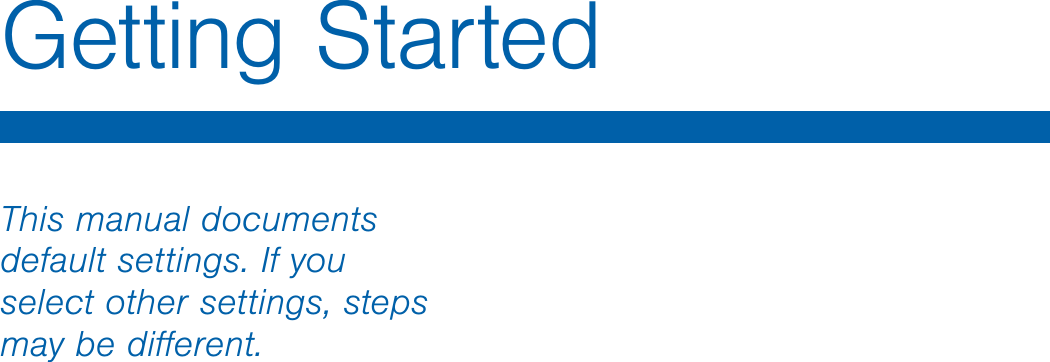
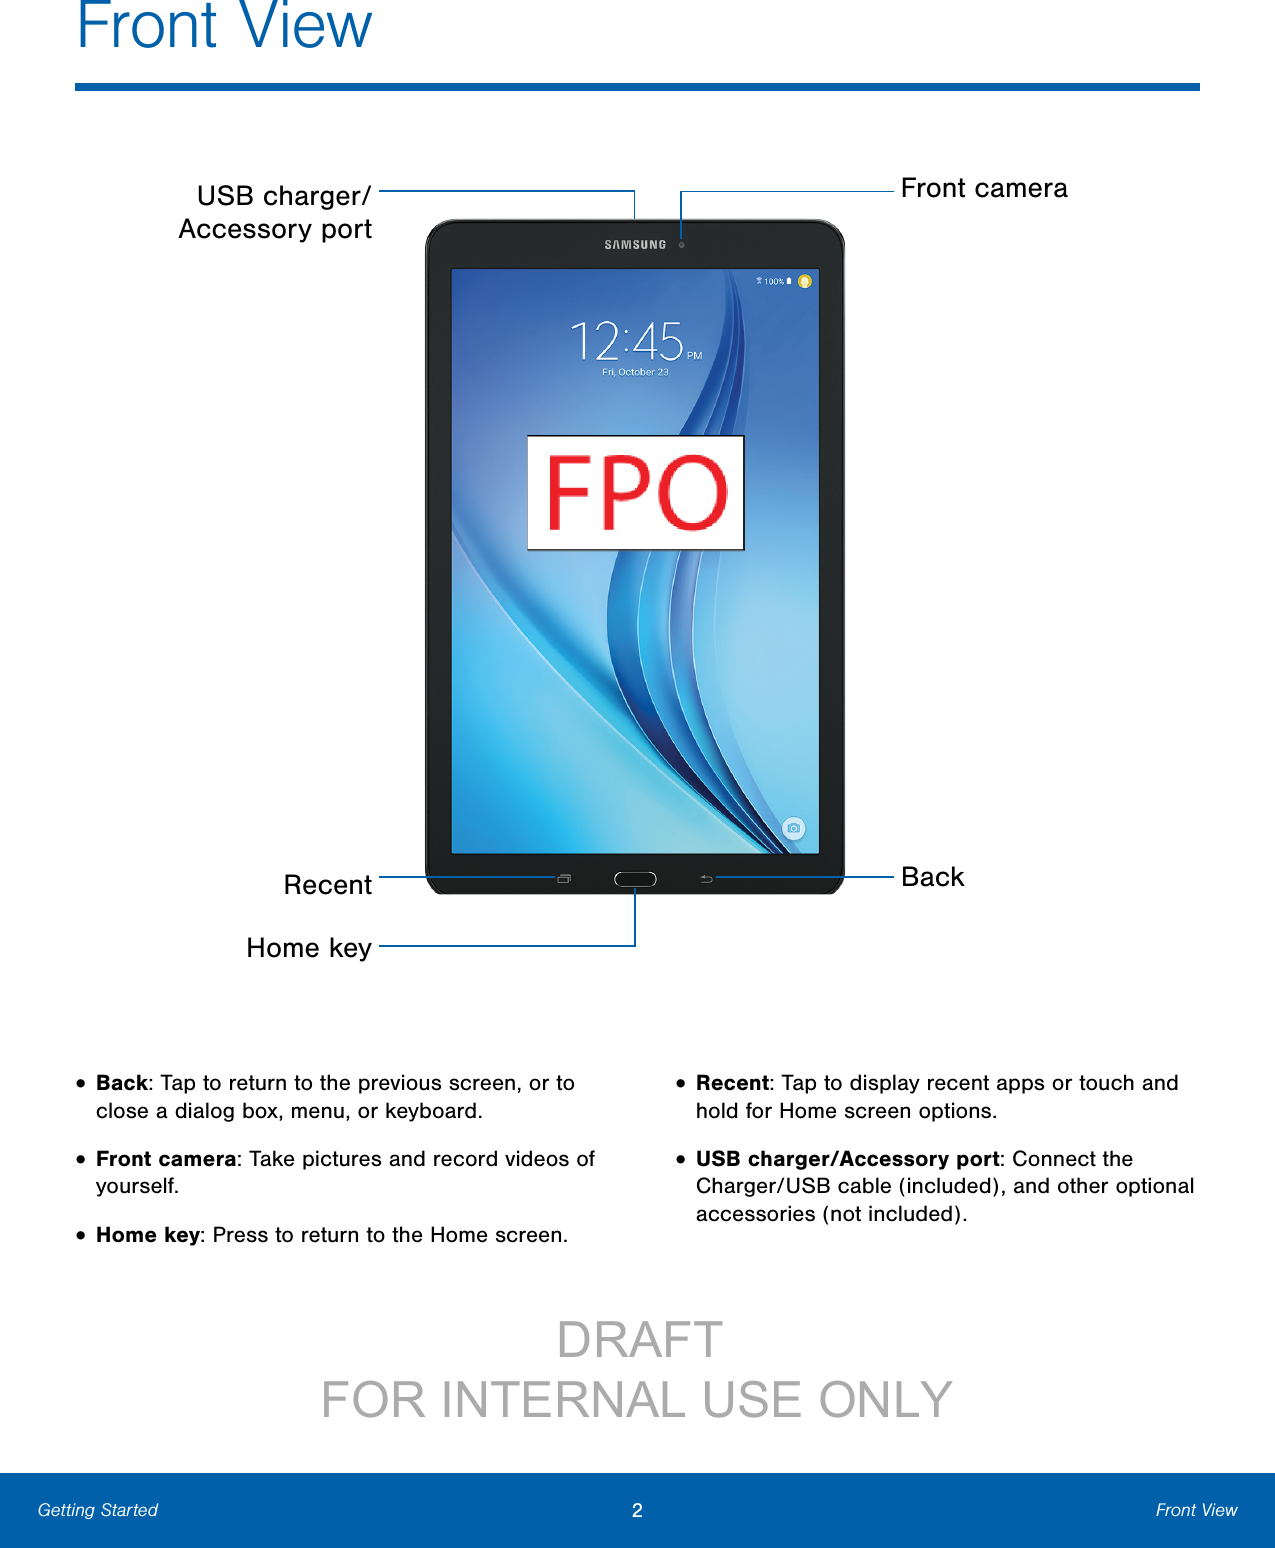
![iiLegal NoticesIF YOUR CARRIER PROHIBITS THIS, IF YOU ATTEMPT TO DOWNLOAD SOFTWARE ONTO THE DEVICE WITHOUT AUTHORIZATION, YOU WILL BE NOTIFIED ON THE SCREEN THAT UNAUTHORIZED SOFTWARE HAS BEEN DETECTED. YOU SHOULD THEN POWER DOWN THE DEVICE AND CONTACT YOUR CARRIER TO RESTORE THE DEVICE TO THE CARRIER AUTHORIZED SETTINGS.Diagnostic SoftwareThis device is equipped with diagnostic software reporting usage and performance information used solely to deliver improved network quality and overall device experience to AT&T customers. Please refer to your AT&T Wireless Customer Agreement and/or the AT&T Privacy Policy (att.com/privacy) for more information.Notice from AT&TThis device is intended for use exclusively on AT&T’s system. You agree that you won’t make any modifications to the Equipment or programming to enable the Equipment to operate on any other system. A voice plan is required on all voice-capable devices, unless specifically noted otherwise in the terms governing your agreement. Some devices or plans may require you to subscribe to a data plan.Your device is designed to make it easy for you to access a wide variety of content. For your protection, AT&T wants you to be aware that some applications that you enable may involve the location of your device being shared. For applications available through AT&T, AT&T offers privacy controls that let you decide how an application may use the location of your device and other devices on your account. However, AT&T’s privacy tools do not apply to applications available outside of AT&T. Please review the terms and conditions and the associated privacy policy for each location-based service to learn how location information will be used and protected.Your device may be used to access the Internet and to download, and/or purchase goods, applications, and services from AT&T or elsewhere from third parties. AT&T provides tools for you to control access to the Internet and certain Internet content. These controls may not be available for certain devices which bypass AT&T controls.AT&T may collect certain types of information from your device when you use AT&T services to provide customer support and to improve its services. For more information on AT&T’s Privacy Policy, visit att.com/privacy.Samsung KNOXSamsung Knox™ is Samsung’s security platform and is a mark for a Samsung device tested for security with enterprise use in mind. Additional licensing fee may be required. For more information about Knox, please refer to: samsung.com/us/knox. [030115]Samsung Electronics America (SEA), IncAddress:85 Challenger Road Ridgefield Park, New Jersey 07660Phone:1-800-SAMSUNG (726-7864)Internet Address:samsung.com©2015 Samsung Electronics America, Inc. Samsung, Samsung Galaxy, and MultiWindow are all trademarks of SamsungElectronics Co., Ltd. Note: Screen images are simulated. Appearance of device may vary.Do you have questions about your Samsung Mobile Device? For 24 hour information and assistance, we offer a new FAQ/ARS System (Automated Response System) at: samsung.com/us/supportThe actual available capacity of the internal memory is less than the specified capacity because the operating system and default applications occupy part of the memory. The available capacity may change when you upgrade the device.Nuance®, VSuite™, T9® Text Input, and the Nuance logo are trademarks or registered trademarks of Nuance Communications, Inc., or its affiliates in the United States and/or other countries.DRAFT FOR INTERNAL USE ONLY](https://usermanual.wiki/Samsung-Electronics-Co/SMT377A.Users-Manual-1/User-Guide-2768875-Page-3.png)

![42 EmailApplicationsEmailUse the Email app to view and manage all your email accounts in one application.To access Email: ►From a Home screen, tap Apps > Email.Configure Email AccountsYou can configure Email for most accounts in just a few steps.1. From a Home screen, tap Apps > Email.2. Follow the instructions to set up your email account.3. Tap DONE WITH ACCOUNTS when finished to open the inbox.• To add another email account, tap MORE > Settings > Add account.The device communicates with the appropriate server to set up your account and synchronize your email. When complete, your email appears in the Inbox for the account.Note: To configure email account settings at any time, tap MORE > Settings. Tap the account to display Account settings.Manage Multiple Email AccountsYou can view email you receive for all email accounts on the Combined view screen, or you can view email accounts individually.1. From a Home screen, tap Apps > Email.2. Tap the drop down menu on the left side of the screen to select:• Combined view: View all email accounts in a combined inbox.• [Account Name]: View email for only this account.Manage Your InboxThere are several tools available from the Inbox screen. ►From a Home screen, tap Apps > Email.• Tap a message to read and reply or forward it.• Tap SEARCH to search for key words in your email inbox.• Tap MORE for additional message options like sorting, deleting, sharing and more. DRAFT FOR INTERNAL USE ONLY](https://usermanual.wiki/Samsung-Electronics-Co/SMT377A.Users-Manual-1/User-Guide-2768875-Page-47.png)