Samsung Electronics Co SMT377A Multi-band UMTS/LTE Tablet with WLAN, Bluetooth, and ANT+ User Manual 2
Samsung Electronics Co Ltd Multi-band UMTS/LTE Tablet with WLAN, Bluetooth, and ANT+ Users Manual 2
Contents
- 1. Users Manual 1
- 2. Users Manual 2
- 3. Users Manual 3
Users Manual 2

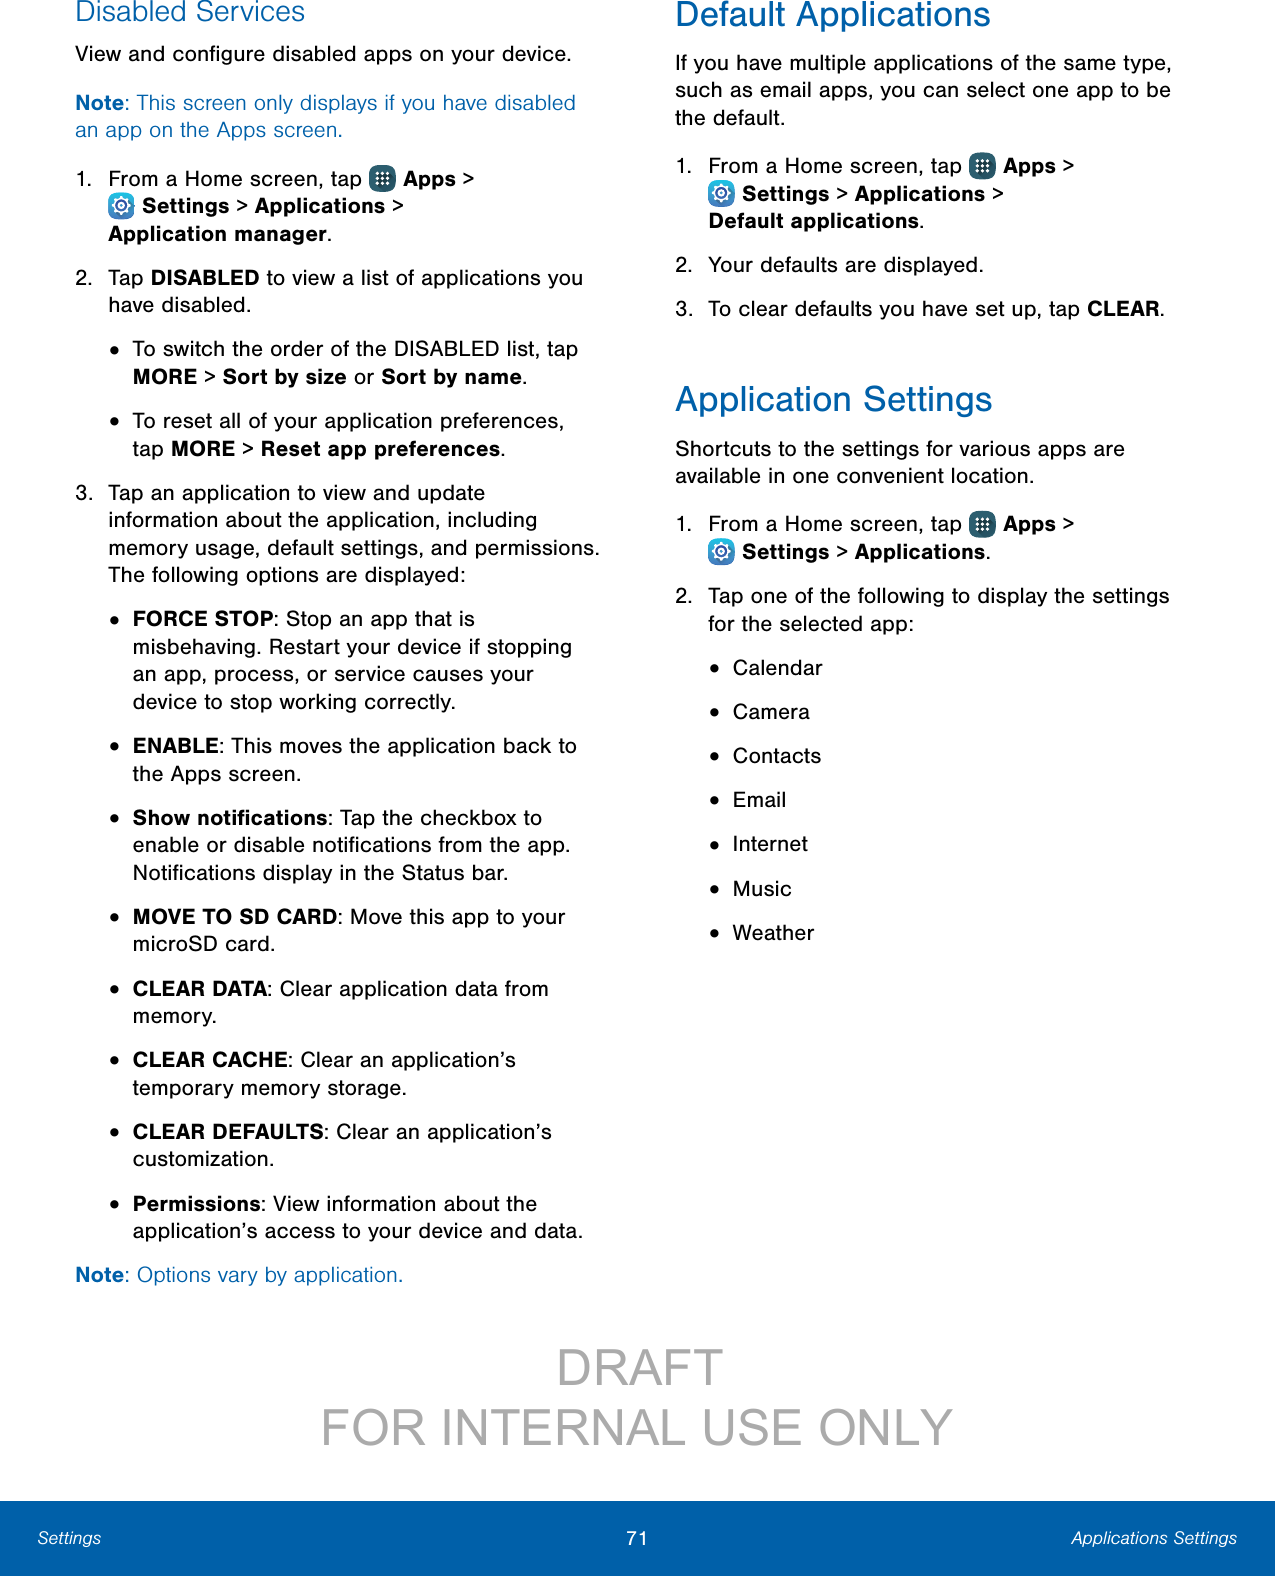
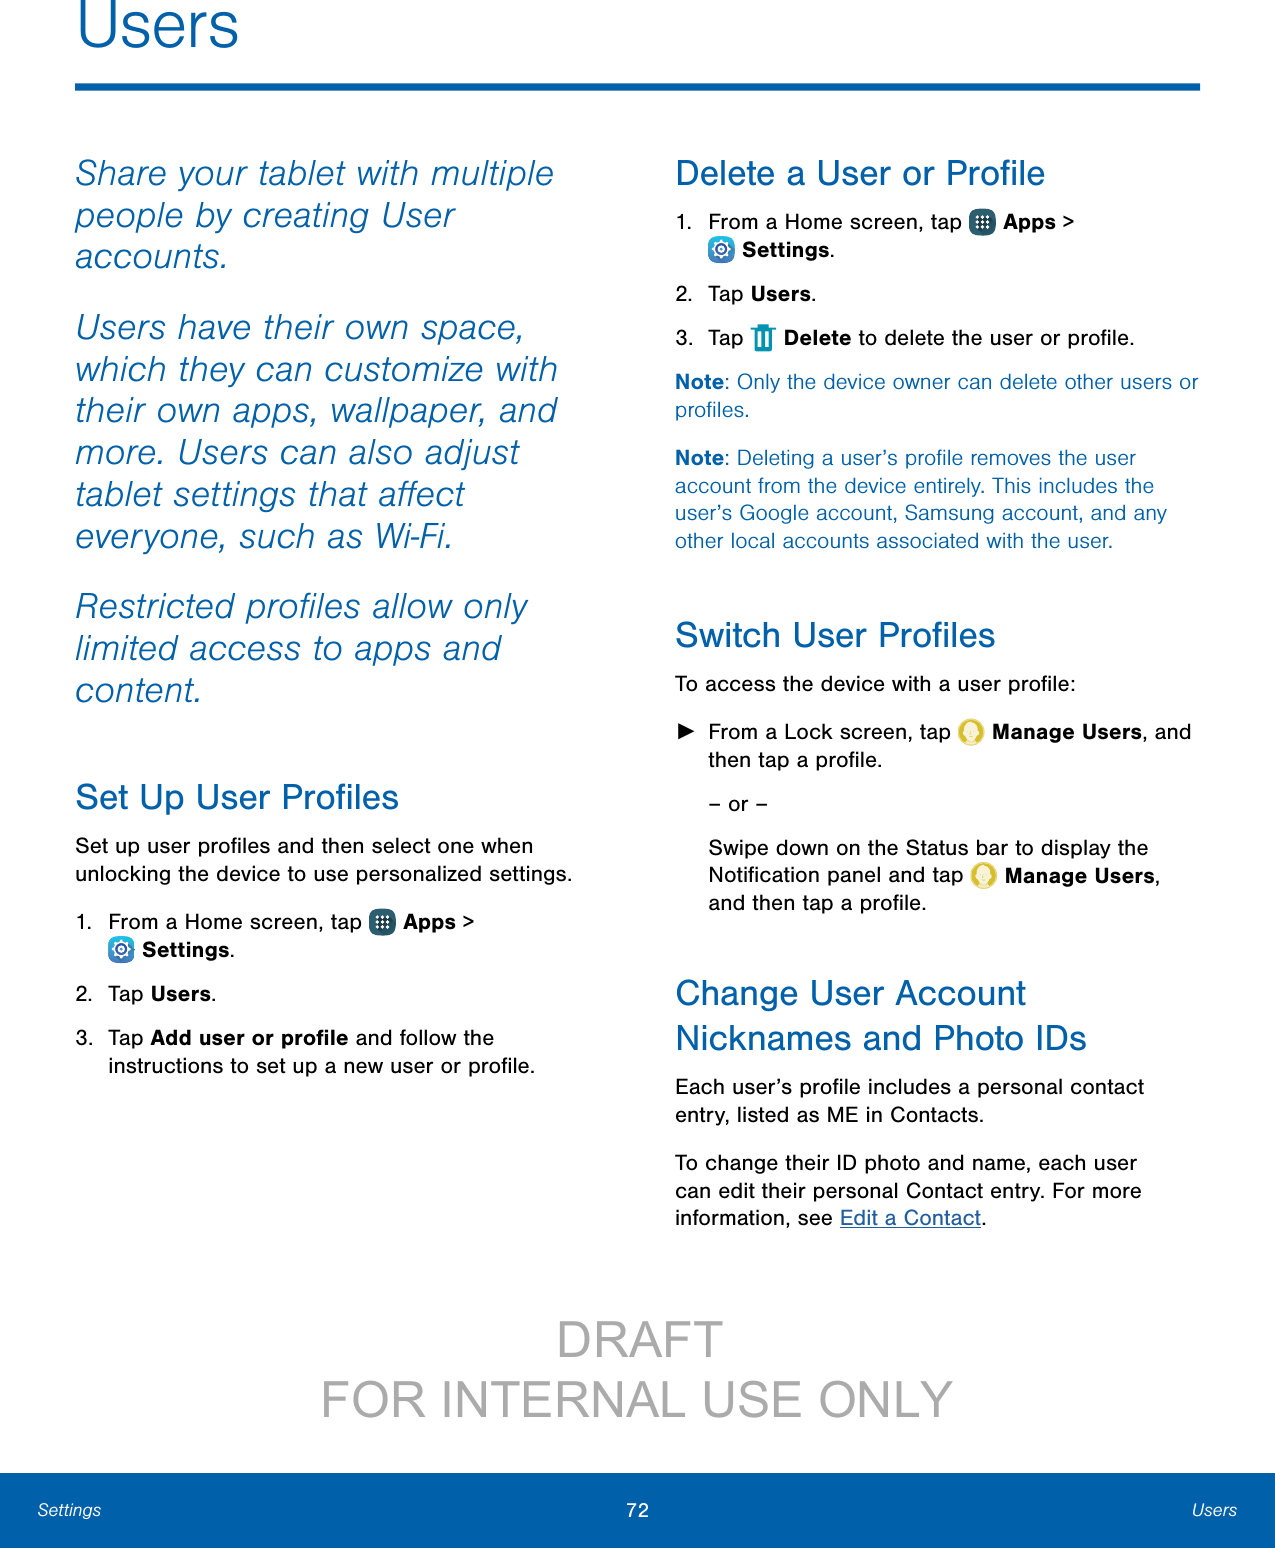
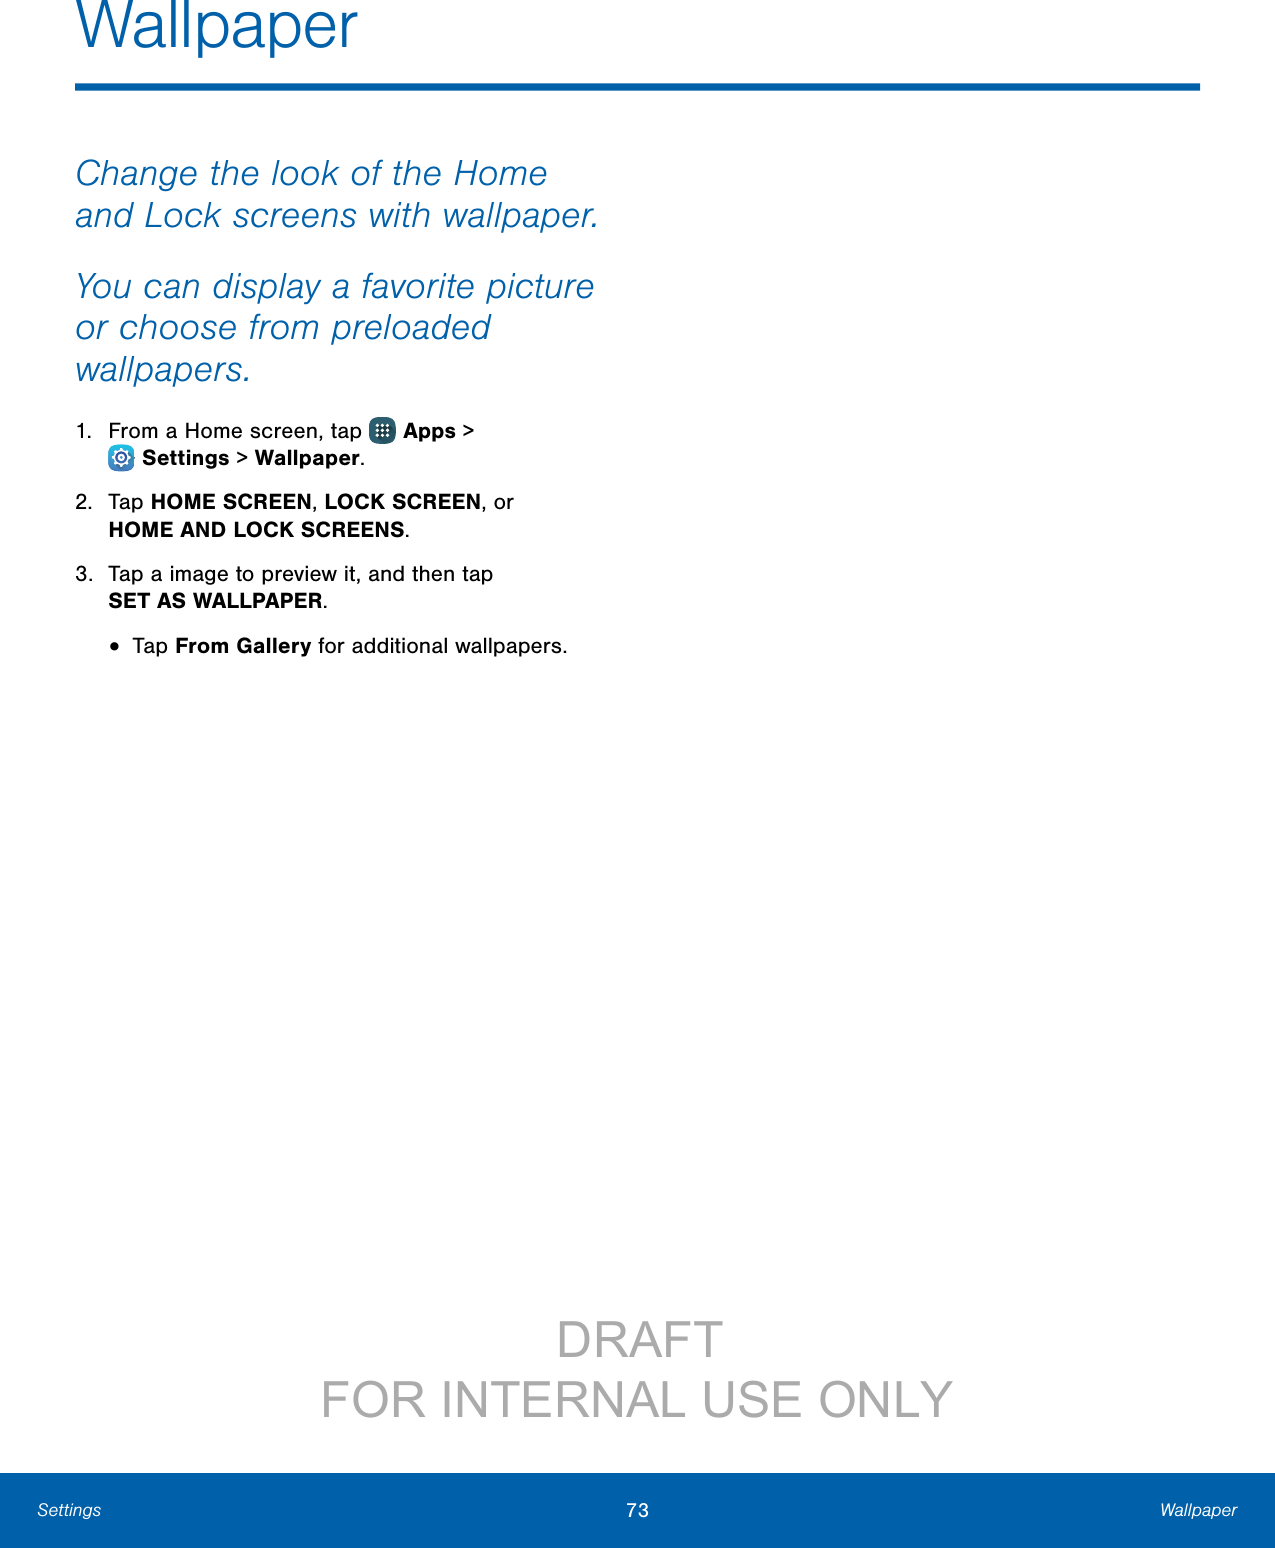
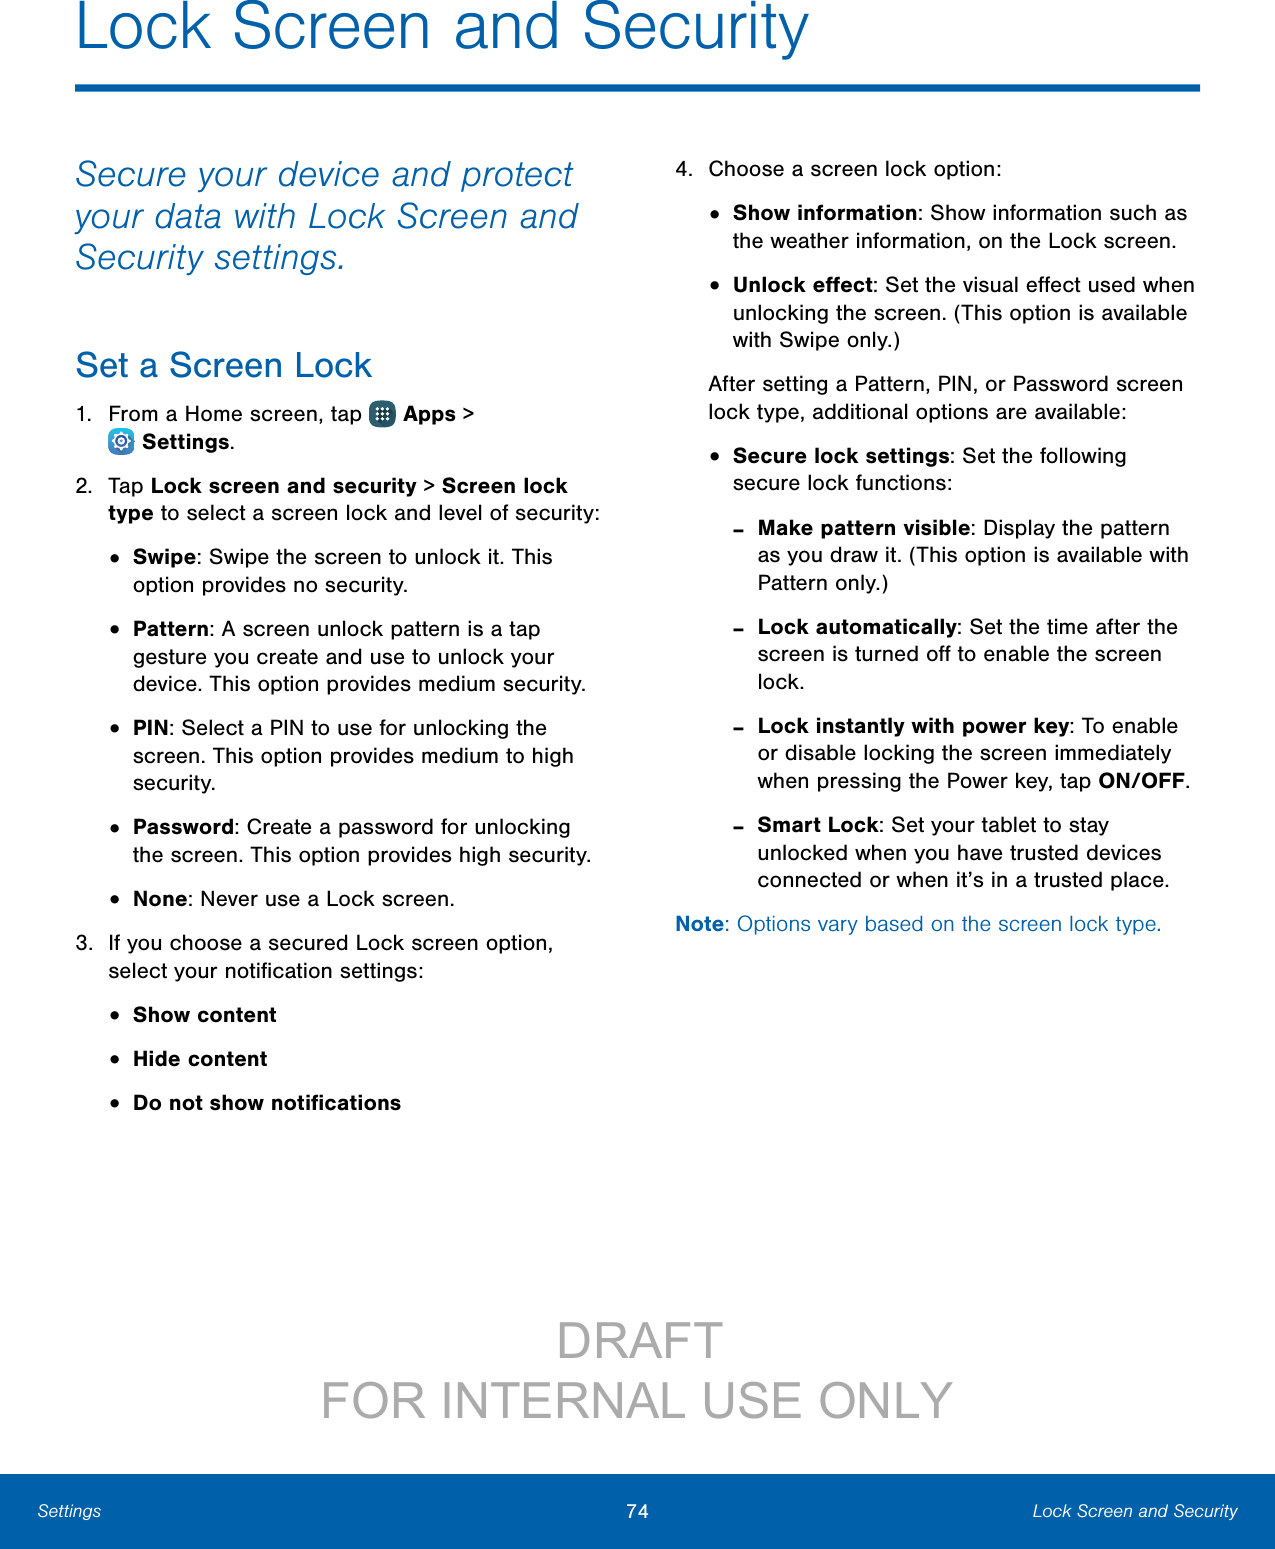
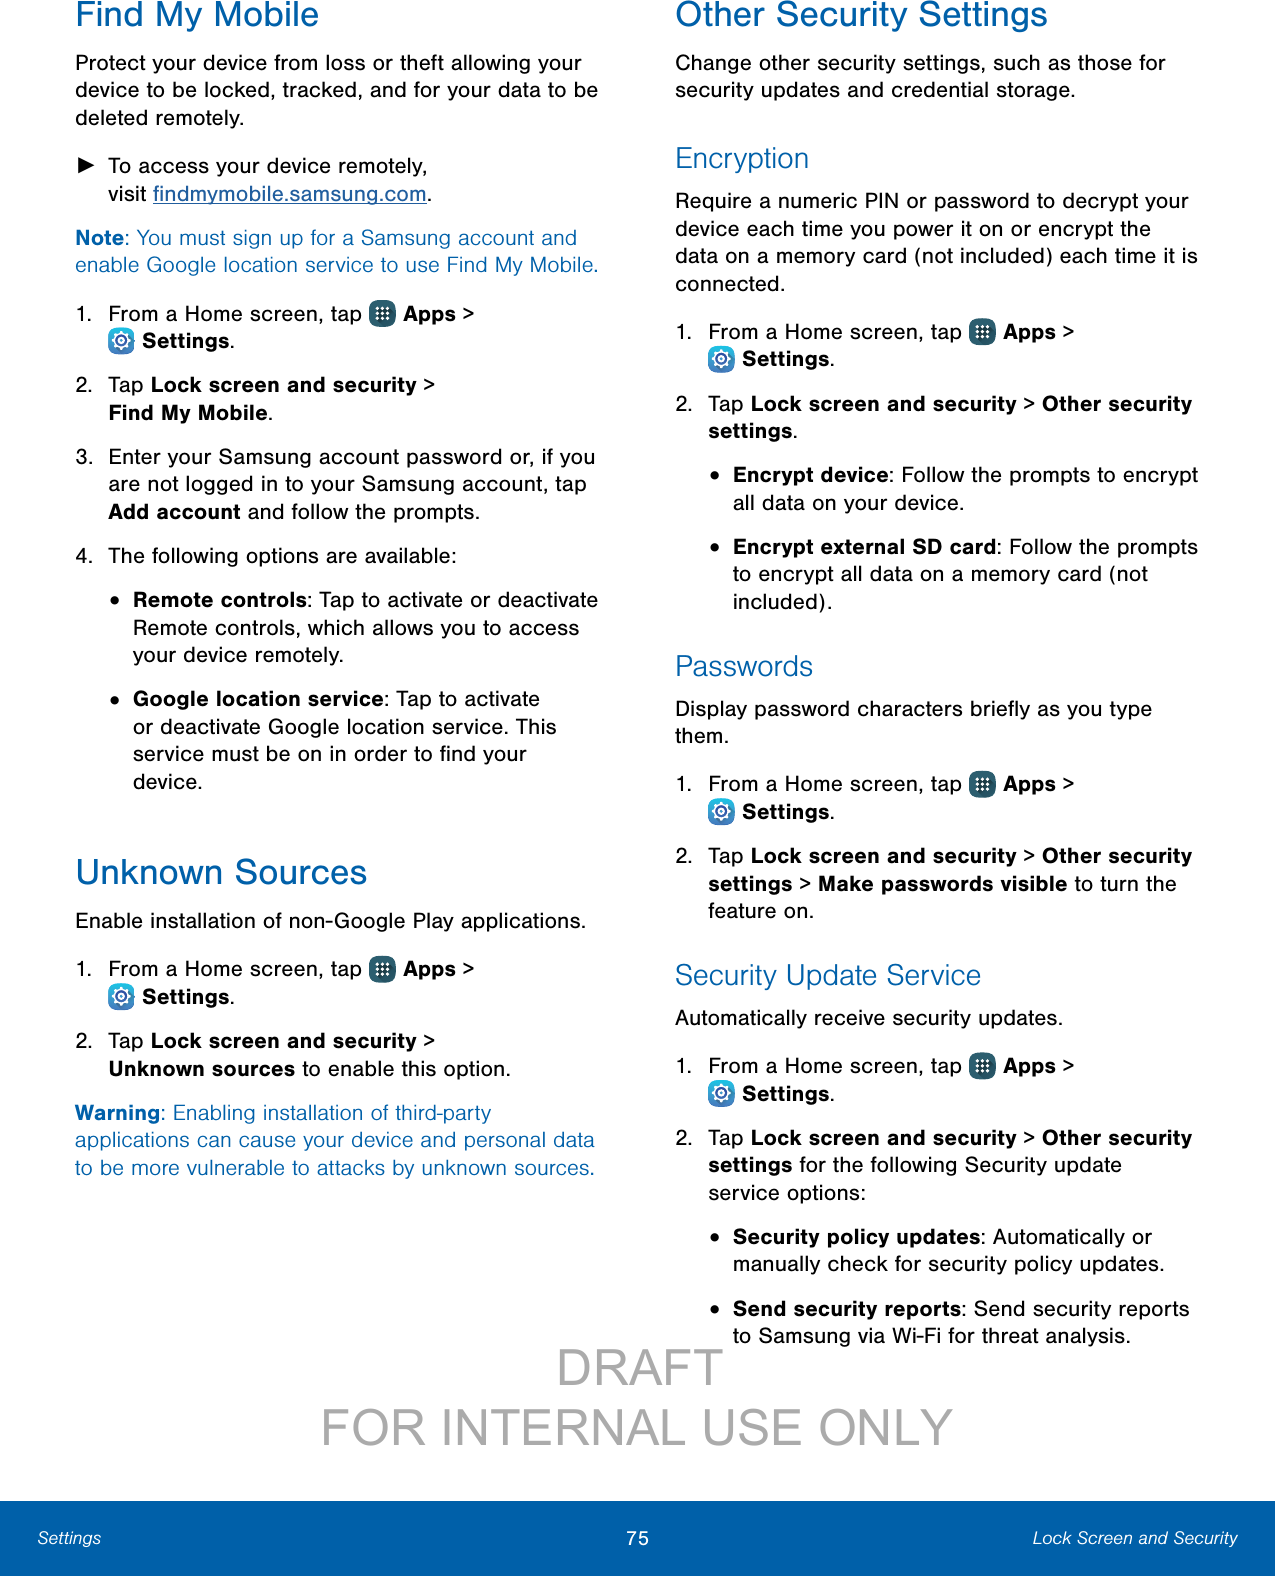

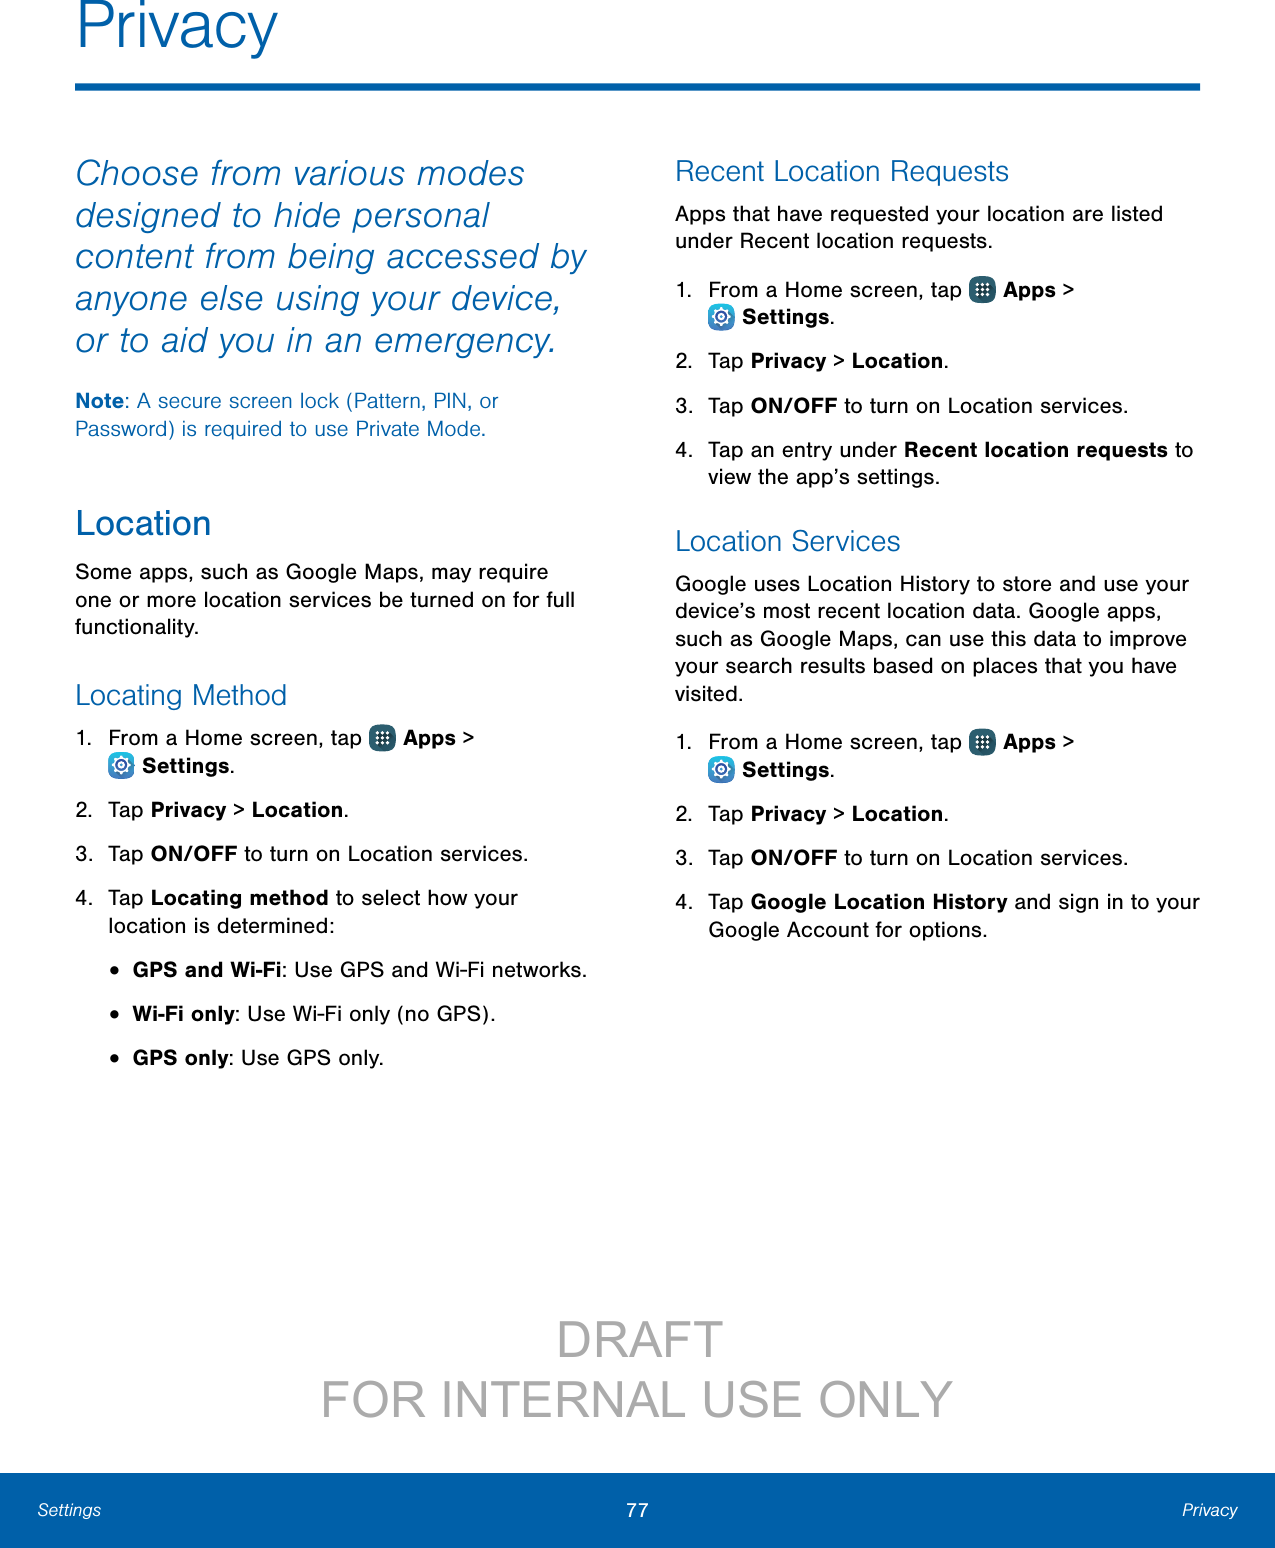
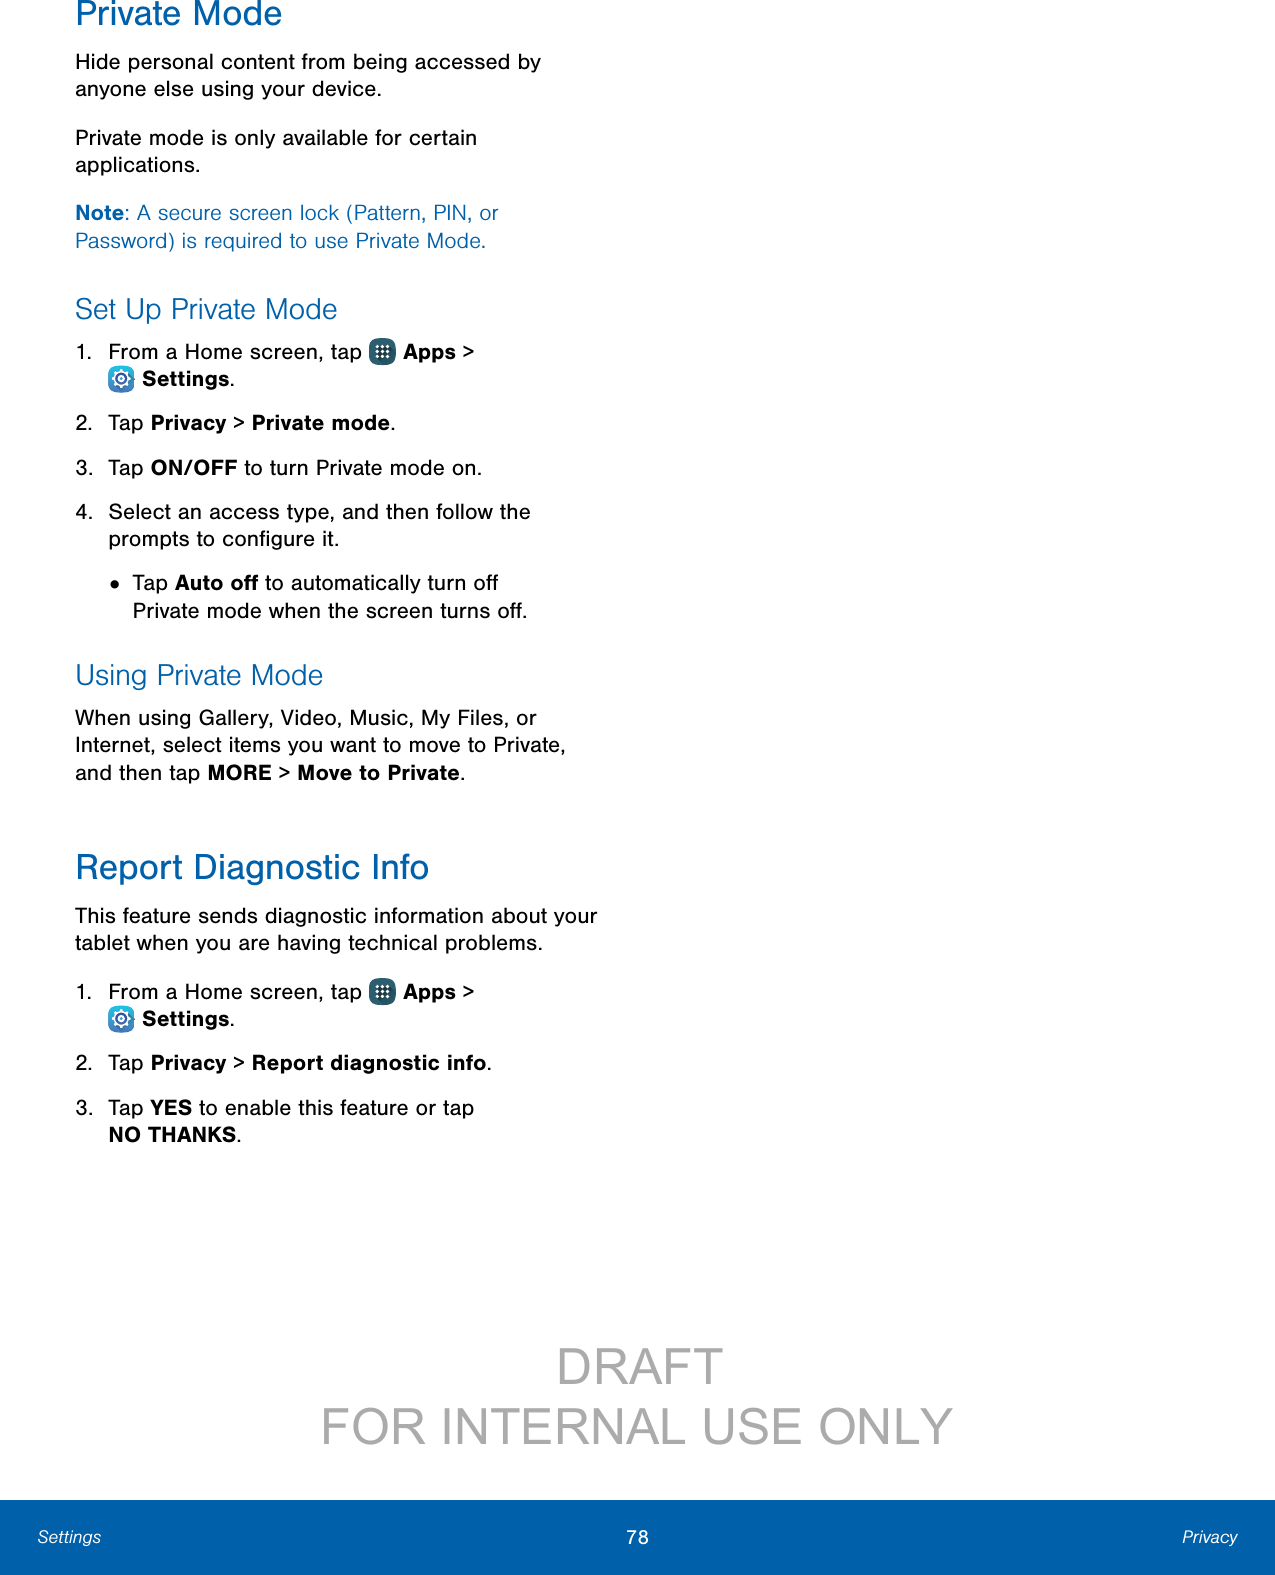
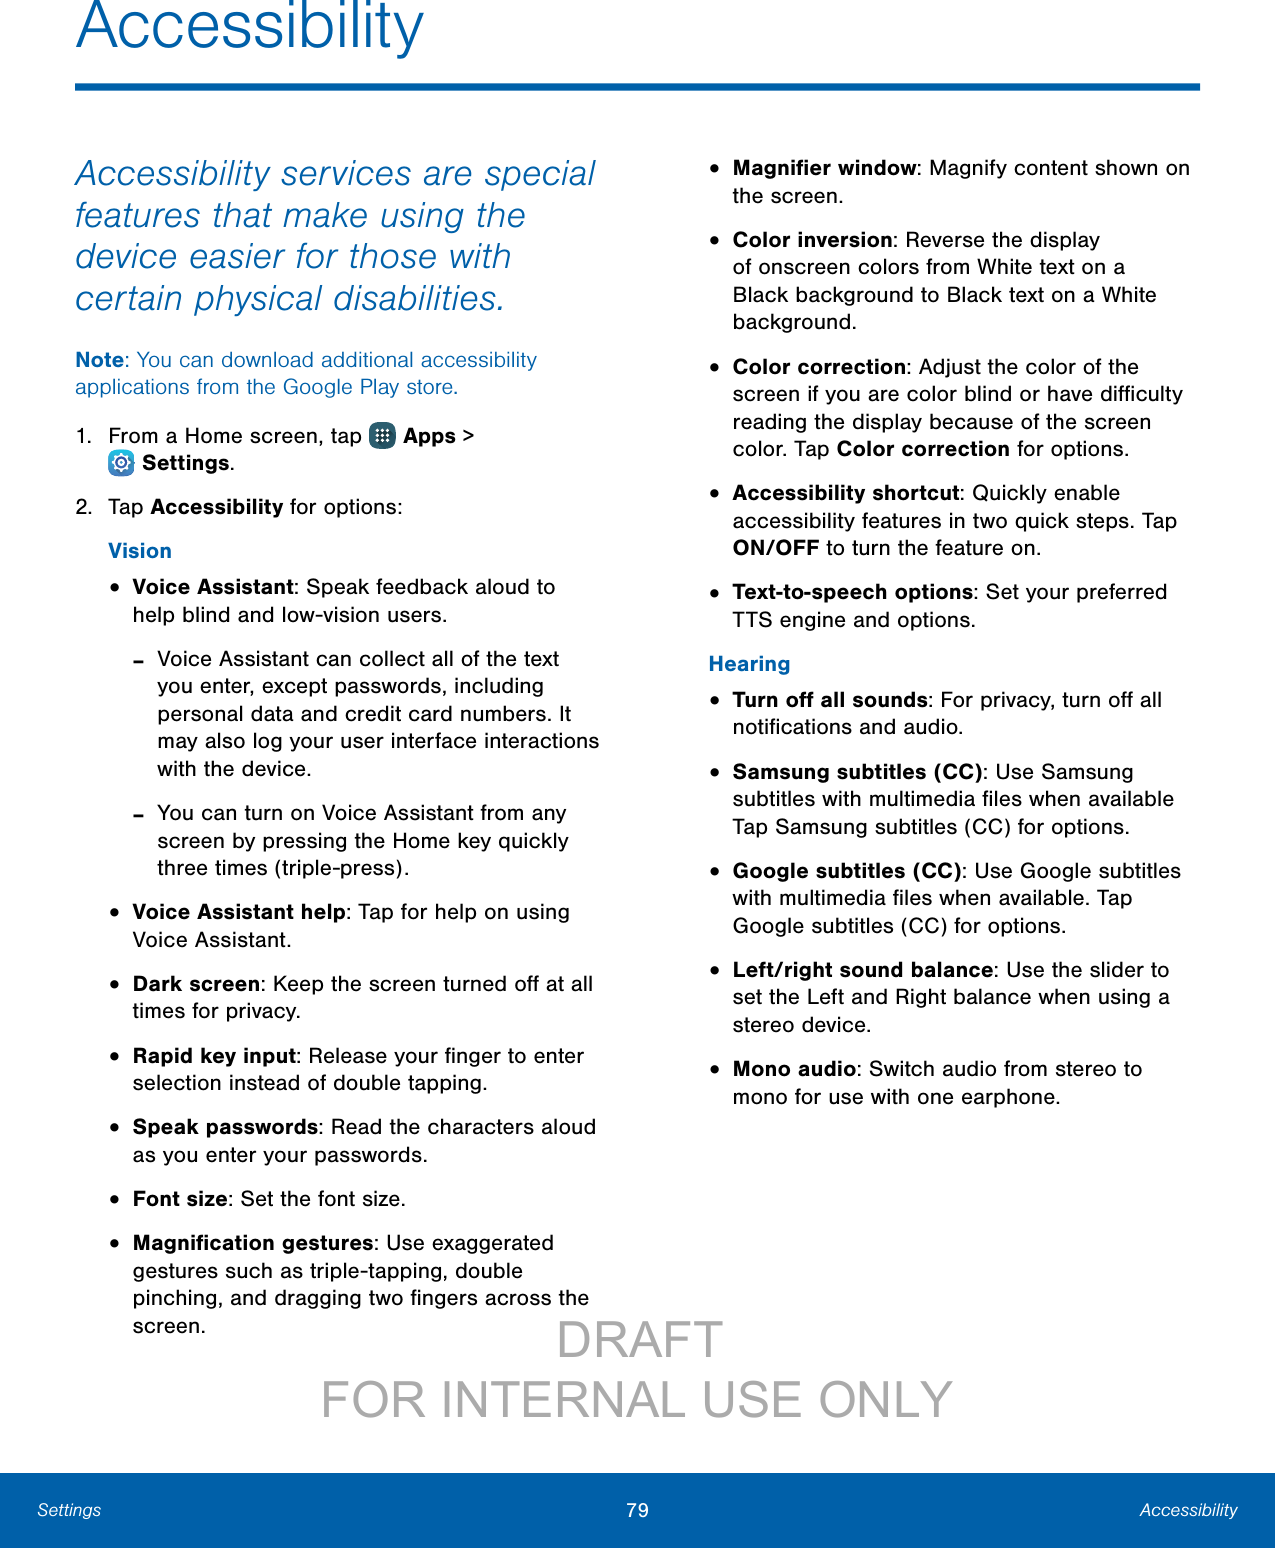
![81 AccountsSettingsAccountsSet up and manage accounts, including your Google Account, Samsung account, email, and social networking accounts.Depending on the account, you can choose to synchronize your calendar, contacts, and other types of content.Add an Account1. From a Home screen, tap Apps > Settings.2. Tap Accounts > Add account.3. Tap one of the account types.4. Follow the prompts to enter your credentials and set up the account.Synchronize Accounts1. From a Home screen, tap Apps > Settings.2. Tap Accounts > [Account type].3. Tap an account to view the sync settings for thataccount.4. Tap individual data items to sync.5. Tap MORE > Sync all or Sync now to synchronize the account.Note: Sync options and the location of the sync command differ depending on the account type.Account SettingsEach account has its own set of settings. In addition, you can configure common settings for all accounts of the same type.Note: Account settings and available features vary between account types and service providers. Contact your service provider for more information on your account’s settings.1. From a Home screen, tap Apps > Settings.2. Tap Accounts > [Account type].• Tap an account to configure that account’s sync settings.• Tap other available options for the account.Delete an Account1. From a Home screen, tap Apps > Settings.2. Tap Accounts > [Account type].3. Tap the account and then tap MORE > Removeaccount. DRAFT FOR INTERNAL USE ONLY](https://usermanual.wiki/Samsung-Electronics-Co/SMT377A.Users-Manual-2/User-Guide-2768876-Page-34.png)