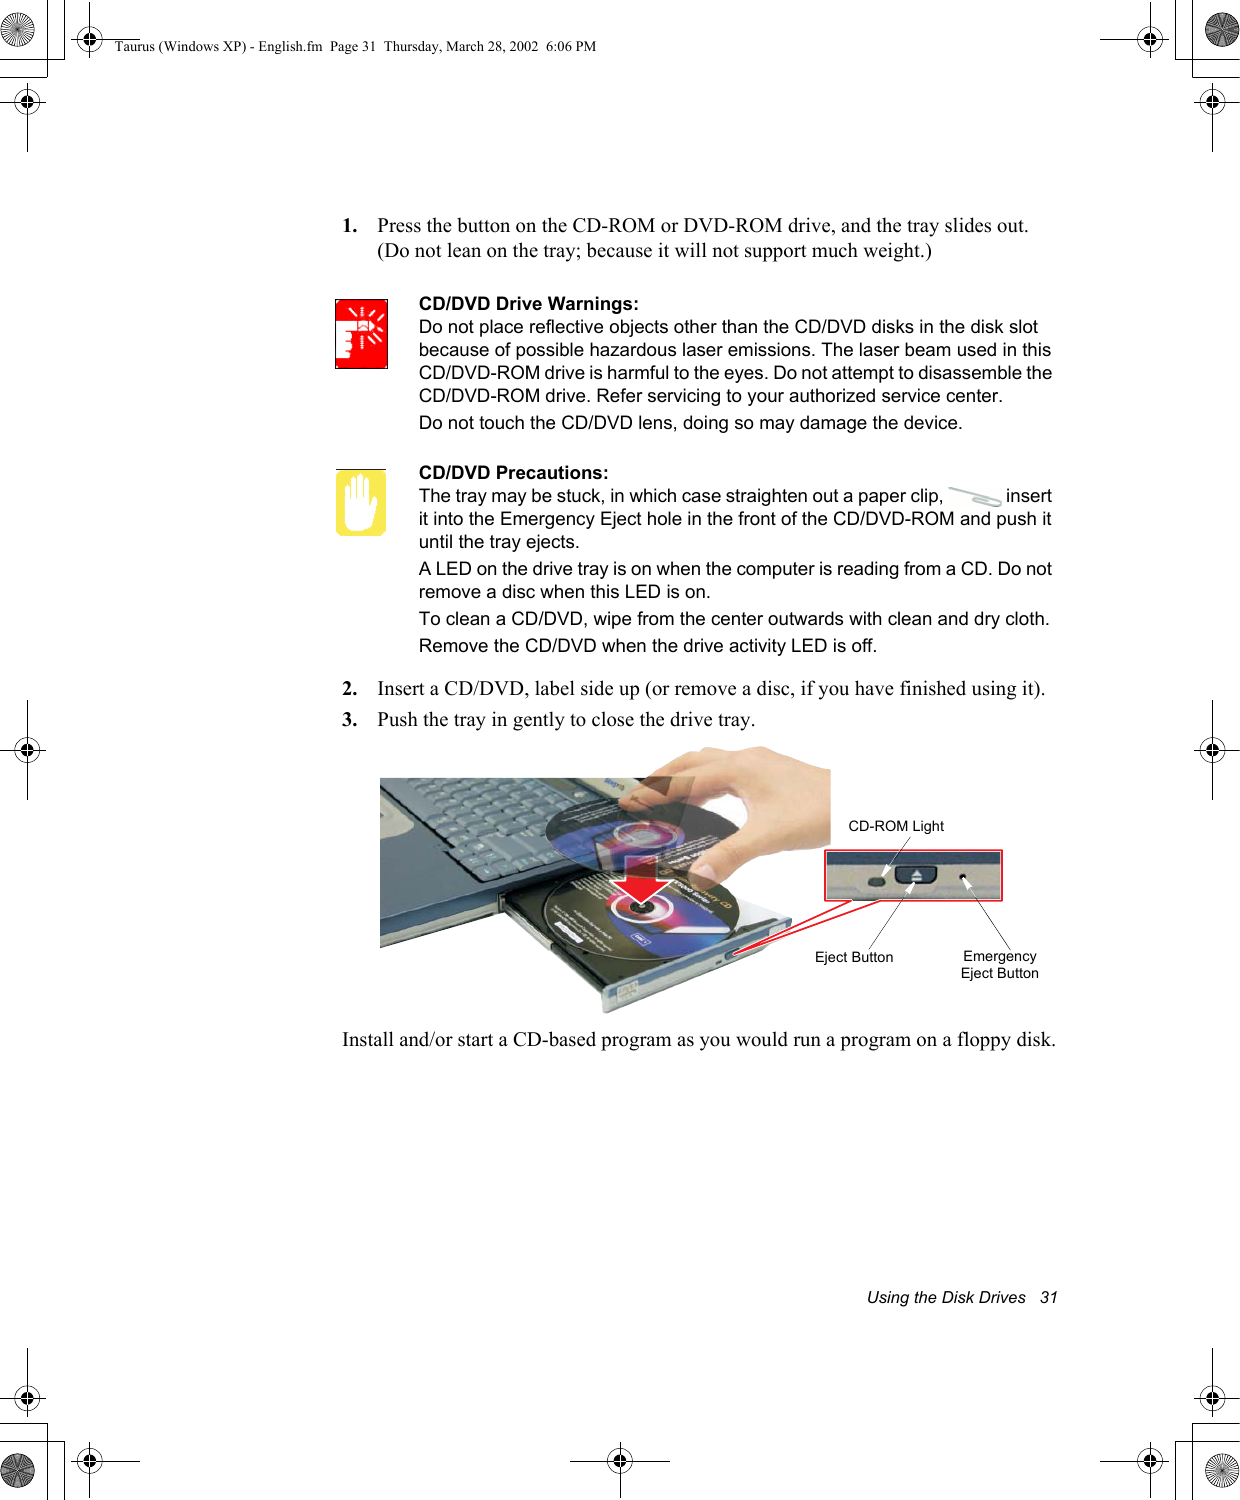
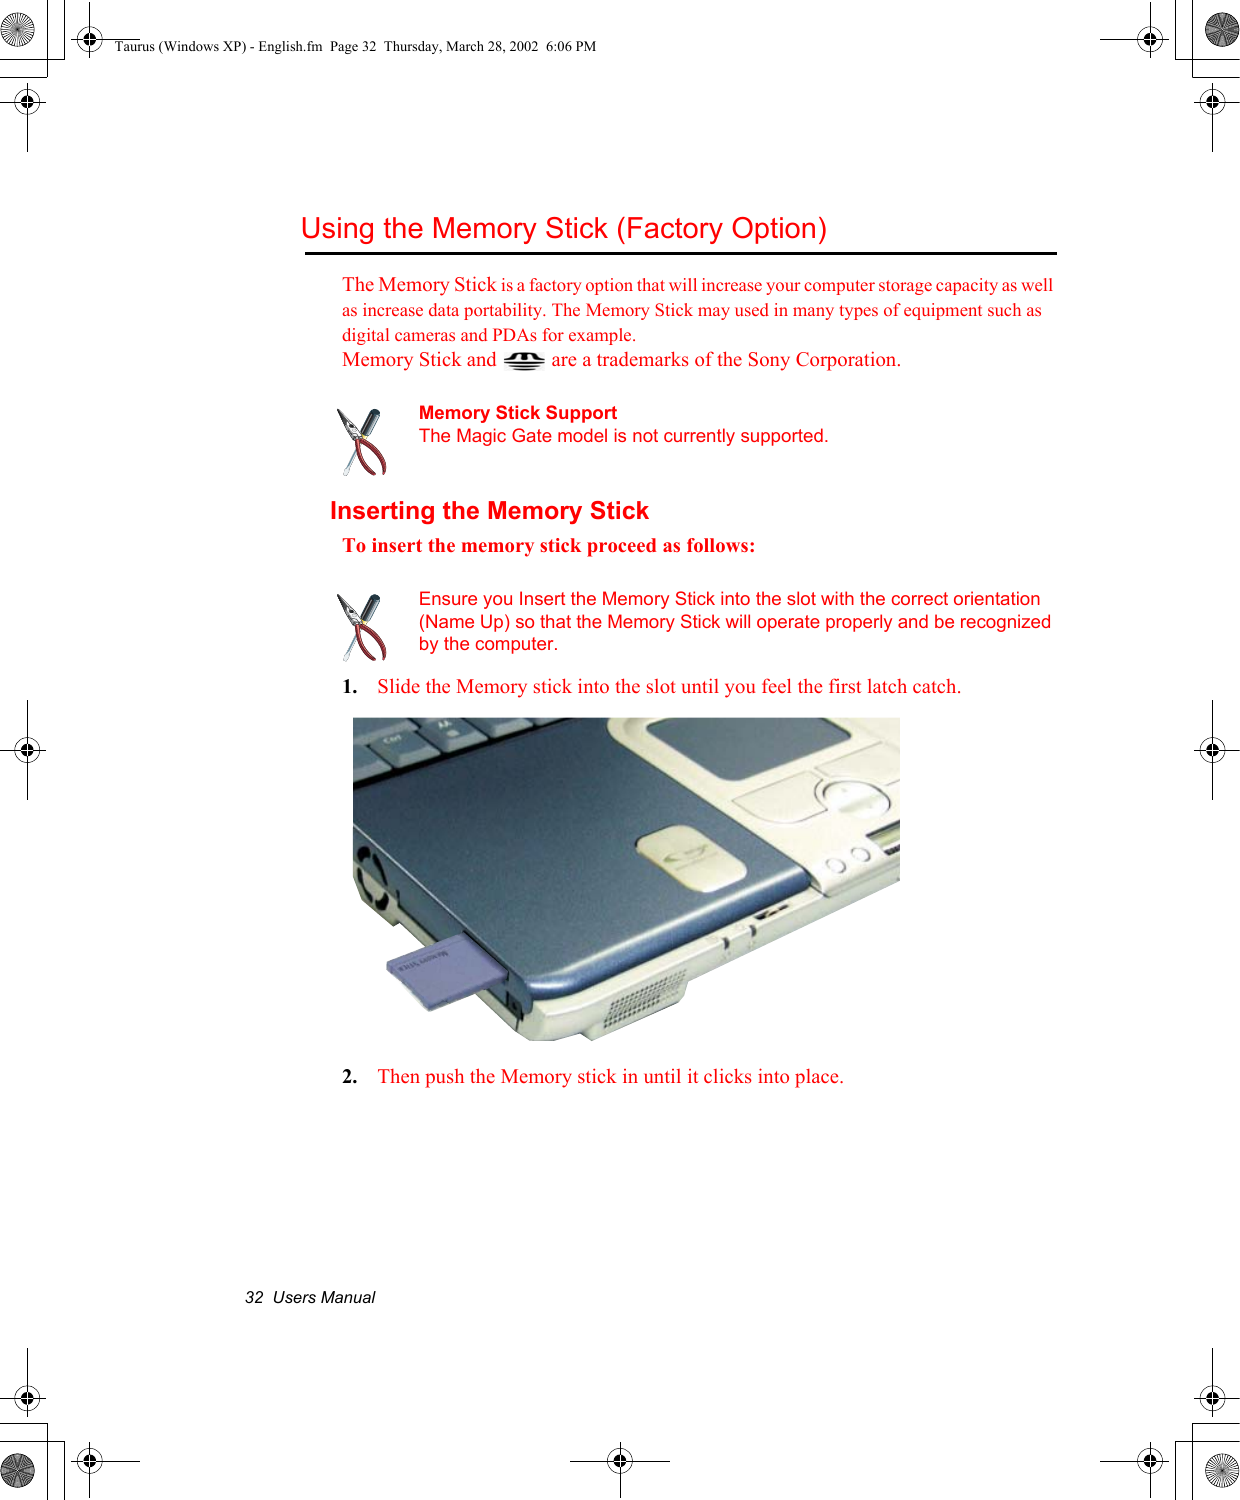
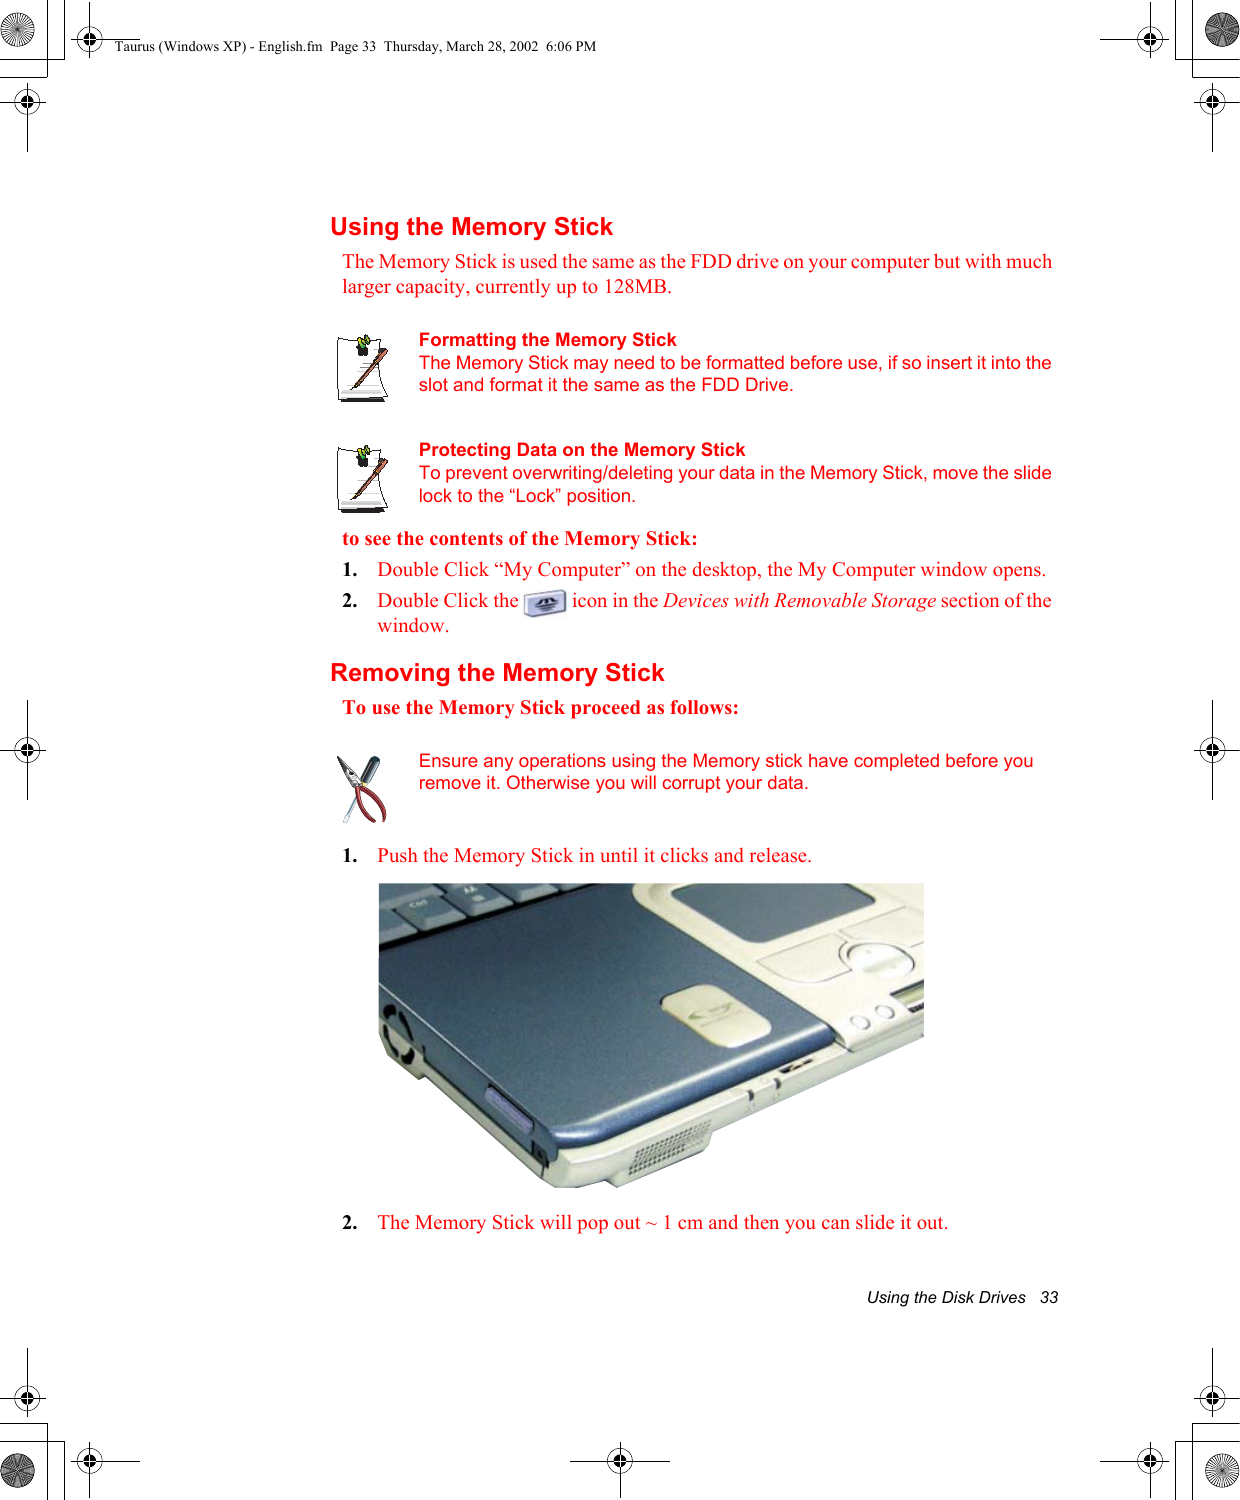
Samsung Electronics Co SP10 Notebook PC User Manual manual English 0328
Samsung Electronics Co Ltd Notebook PC manual English 0328
UserManual.wiki
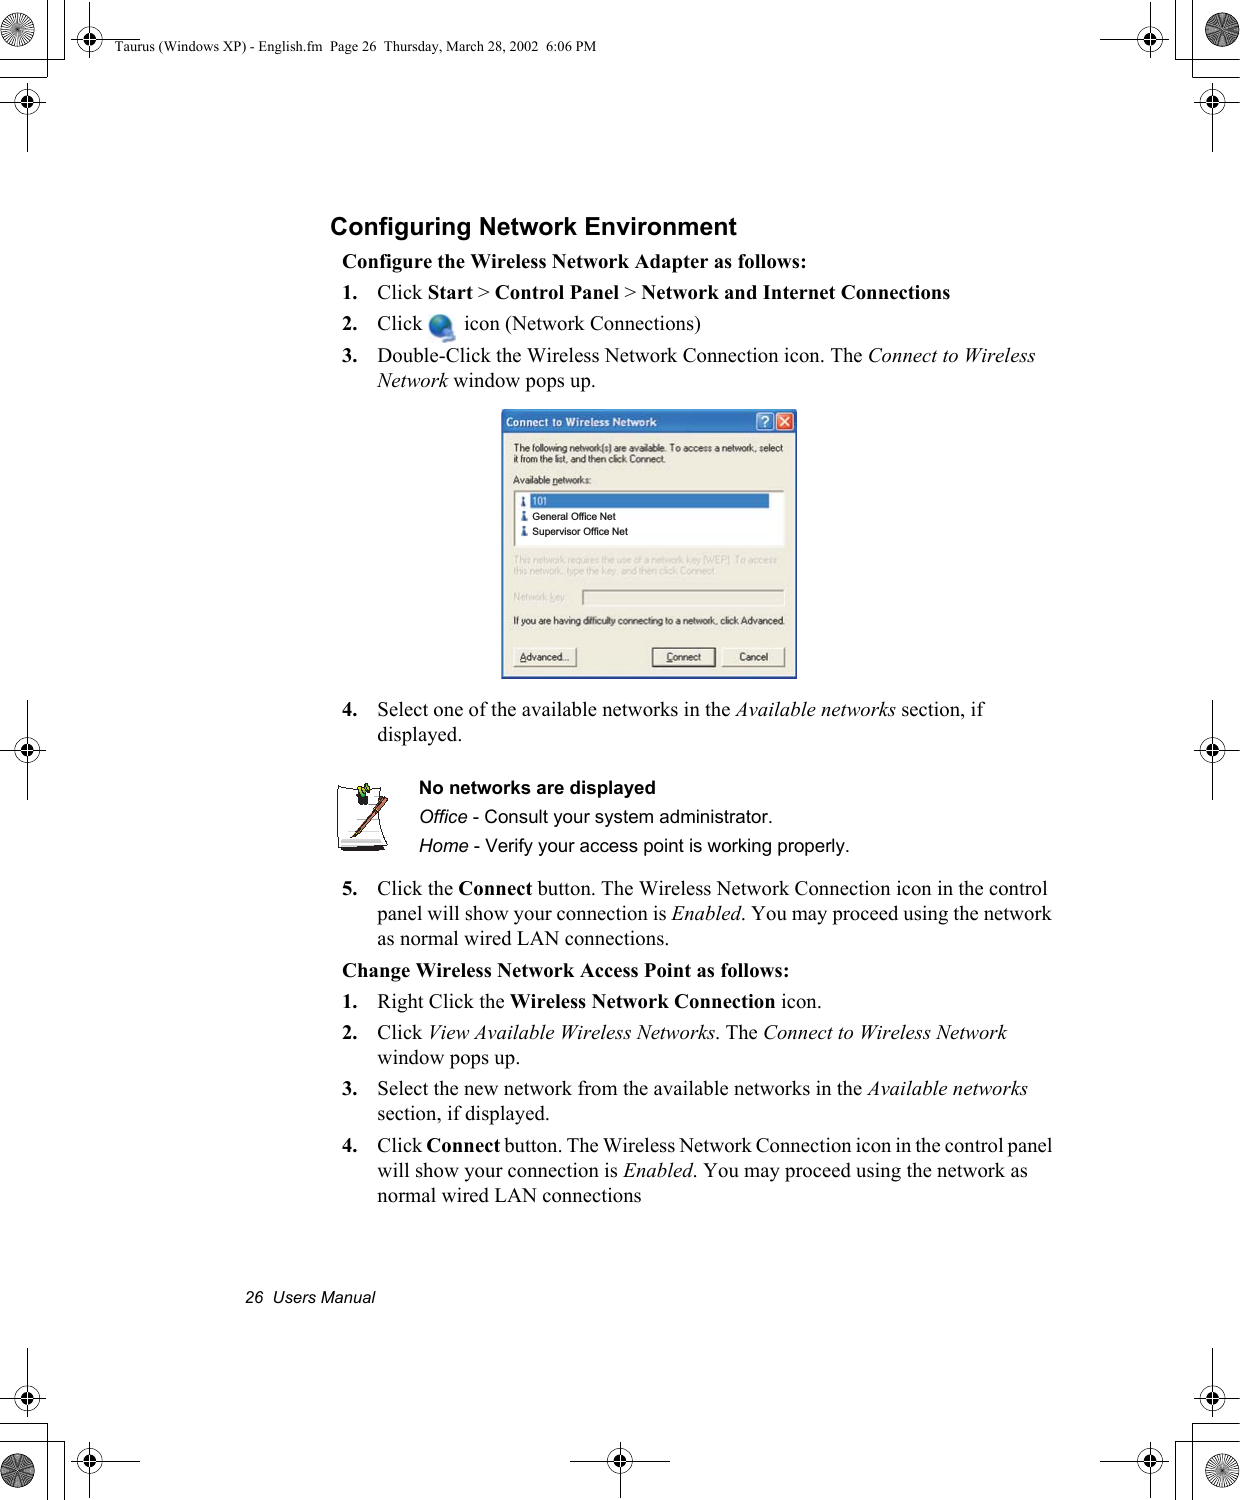
>
Samsung Electronics Co
>
SP10 User Manual
>
Users Manual 1
Contents
1.
Users Manual 1
2.
Users Manual 2
Users Manual 1
Navigation menu
Upload a User Manual
Namespaces
Wiki Guide
HTML
PDF
Info
Views
User Manual
Discussion / Help
Navigation


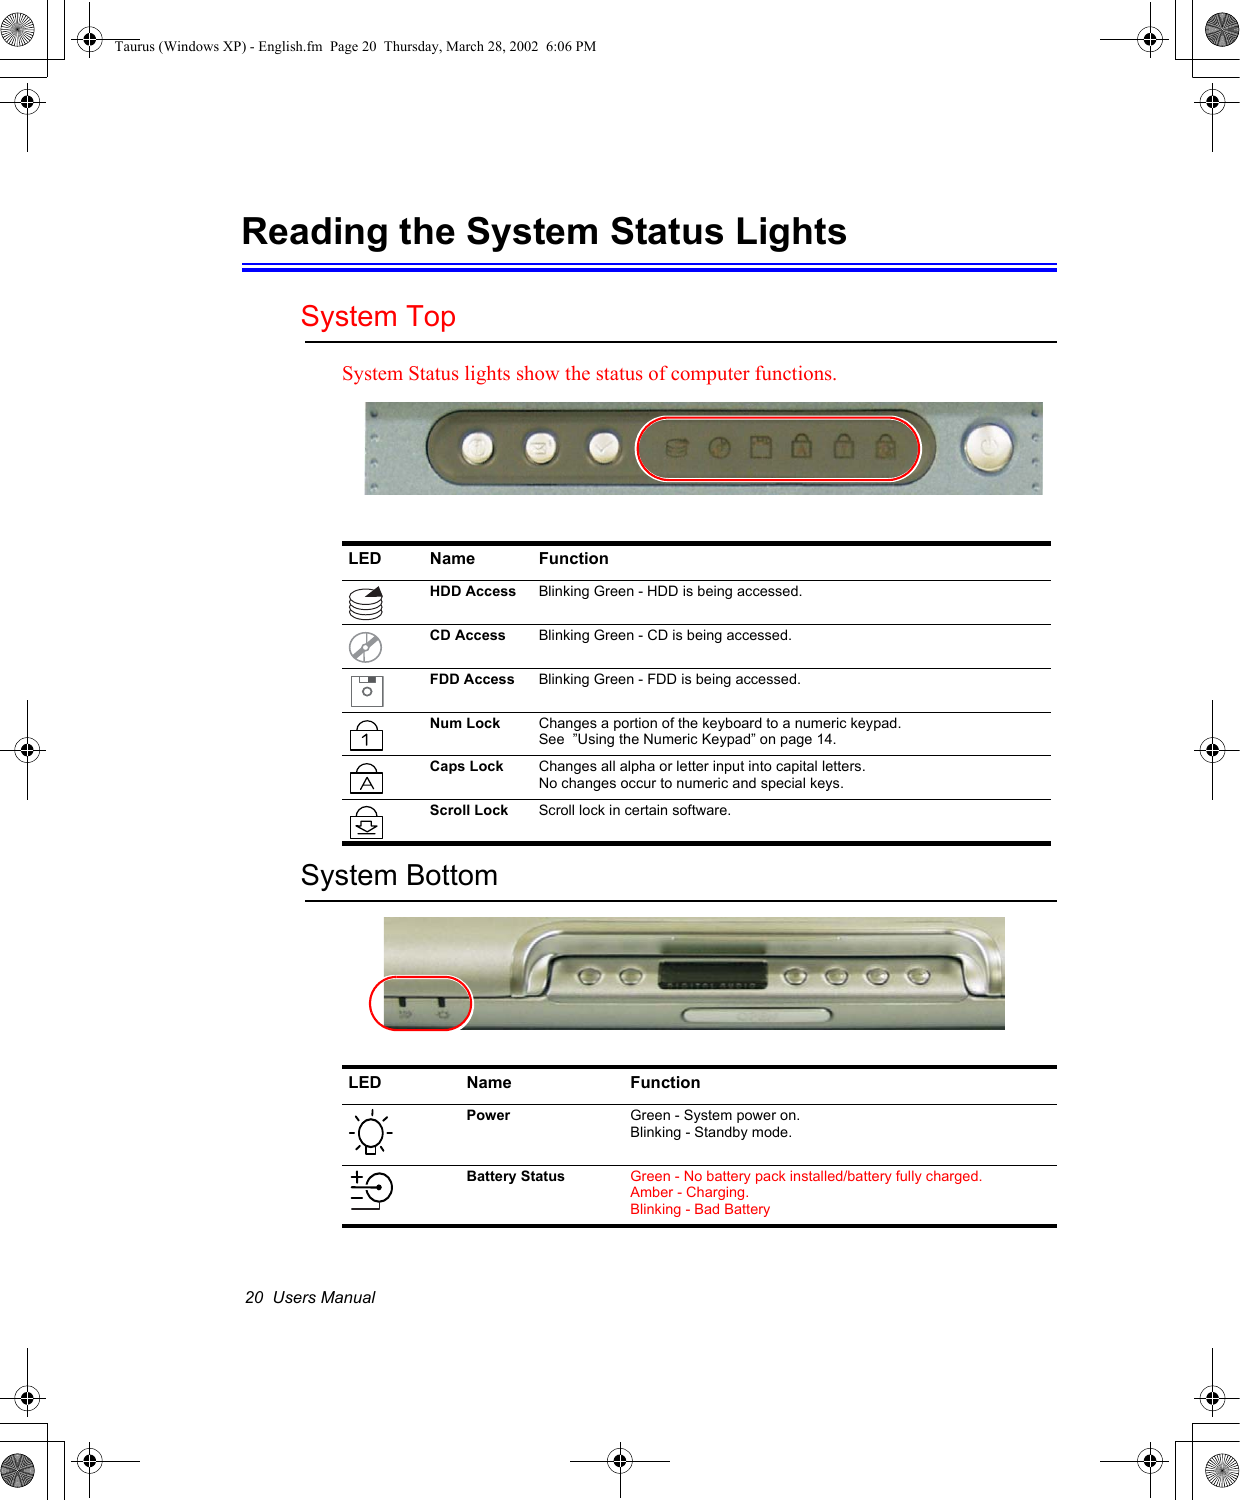
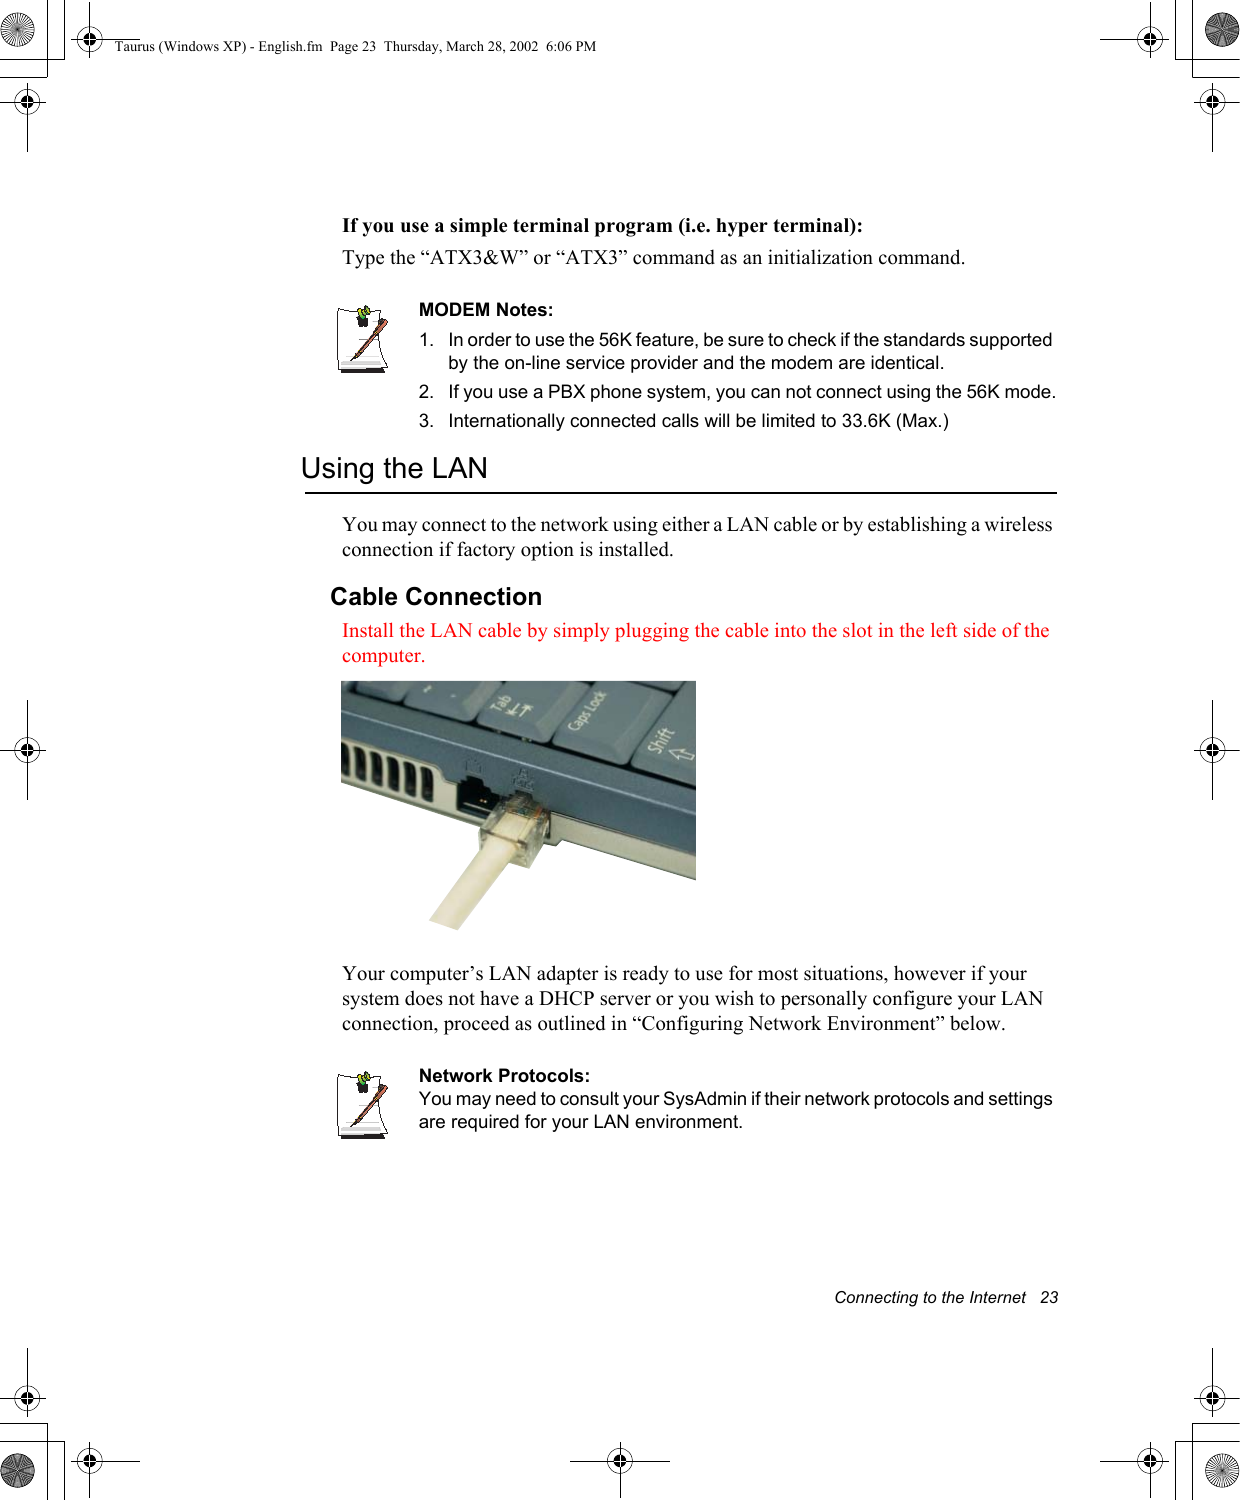
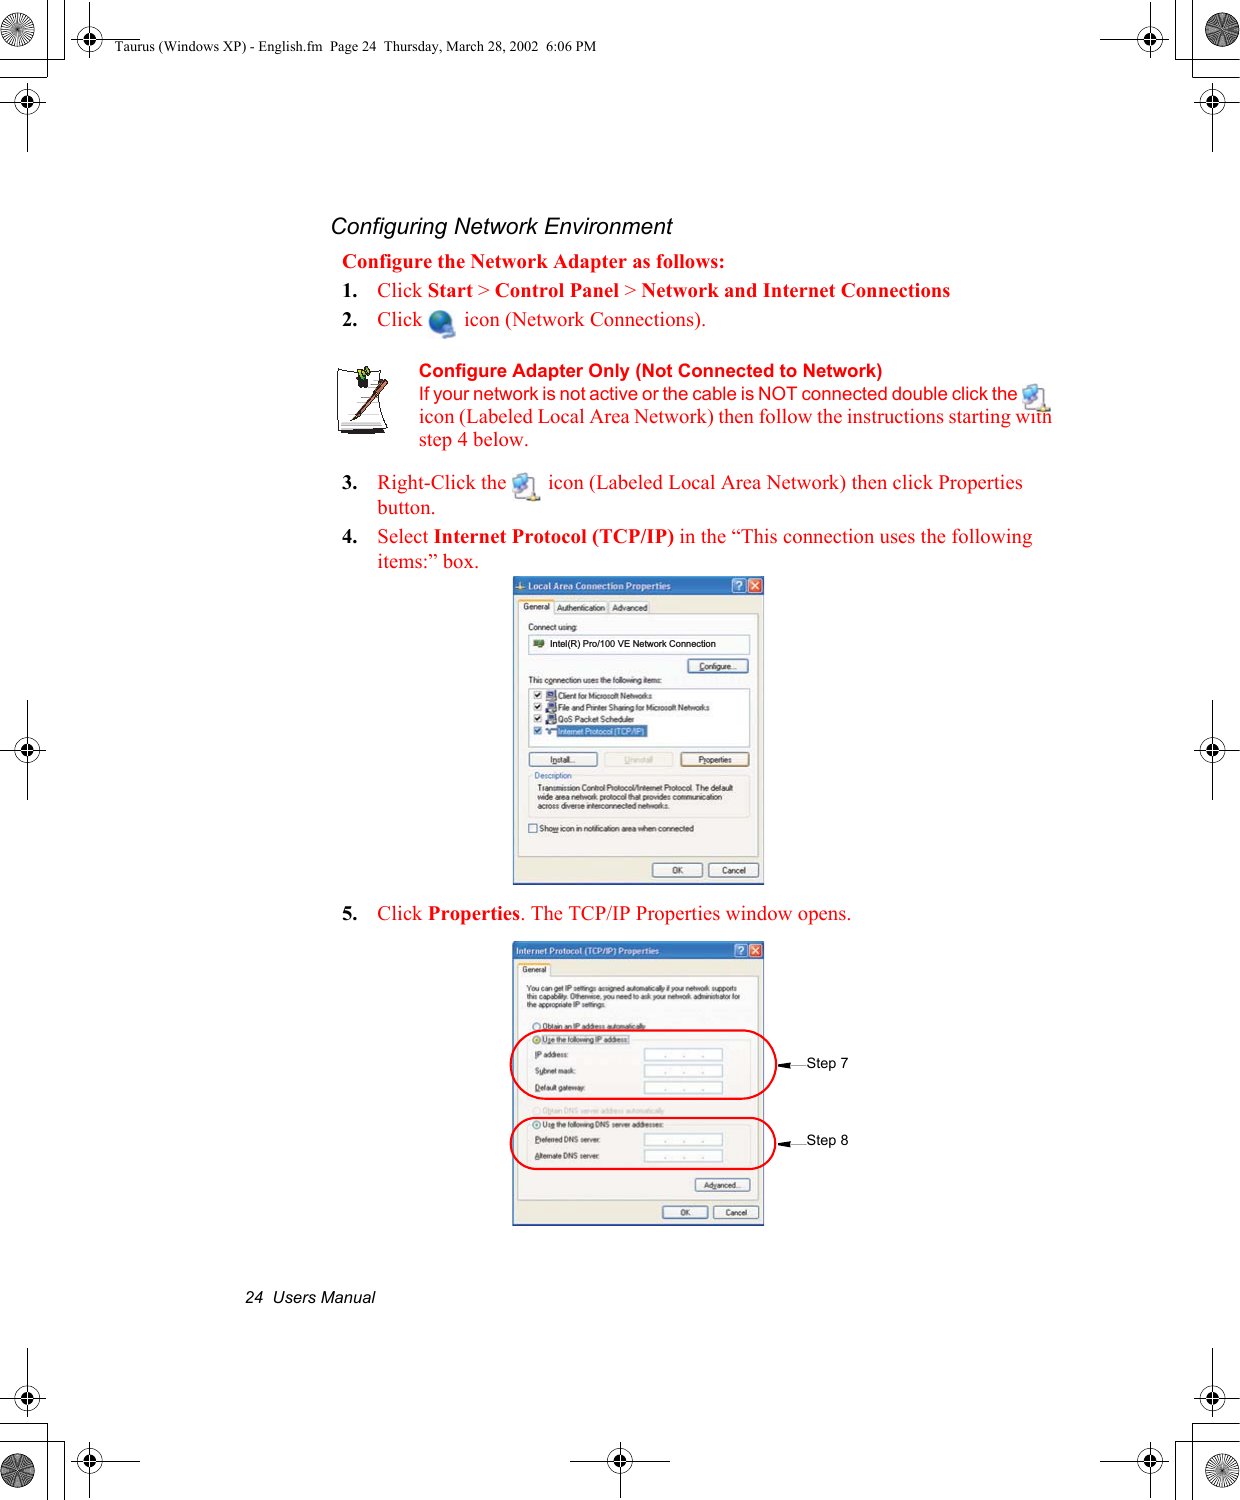
![Connecting to the Internet 21Connecting to the InternetThis section explains how to connect you to the internet. For details on how to establish the connection contact the Internet Service Provider [ISP] or system administrator [SysAdmin].Using the ModemInstall the Modem cable by simply plugging the cable into the modem slot as shown in the figure below. Your Notebook computer will have a Modem/LAN installed.1. Contact your Internet Service Provider to obtain information or CD required to make the connection in your area.2. After the cable is connected create a “Dialup” connection by clickingStart > Control Panel > Network and Internet Connections.3. Click Set up or change your Internet connection > Setup to start the connection wizard.4. Follow the instructions in provided in the Make New Connection wizard.Taurus (Windows XP) - English.fm Page 21 Thursday, March 28, 2002 6:06 PM](https://usermanual.wiki/Samsung-Electronics-Co/SP10.Users-Manual-1/User-Guide-249624-Page-38.png)