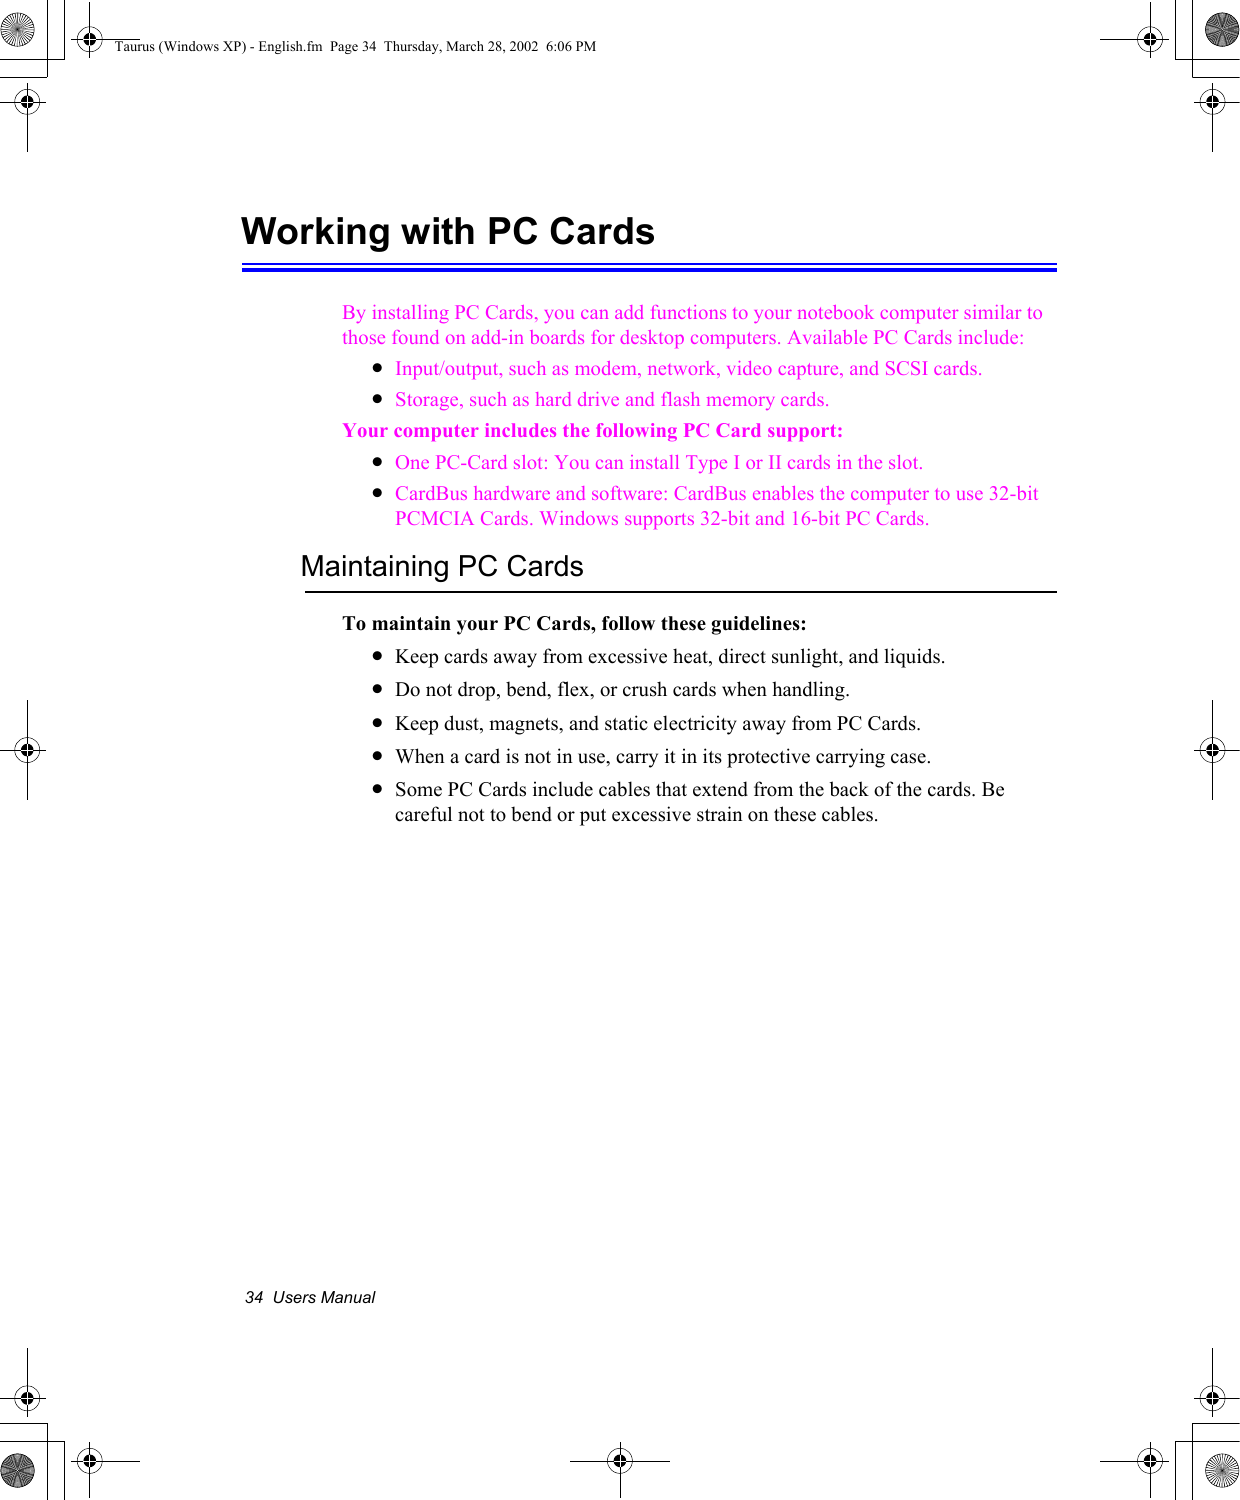
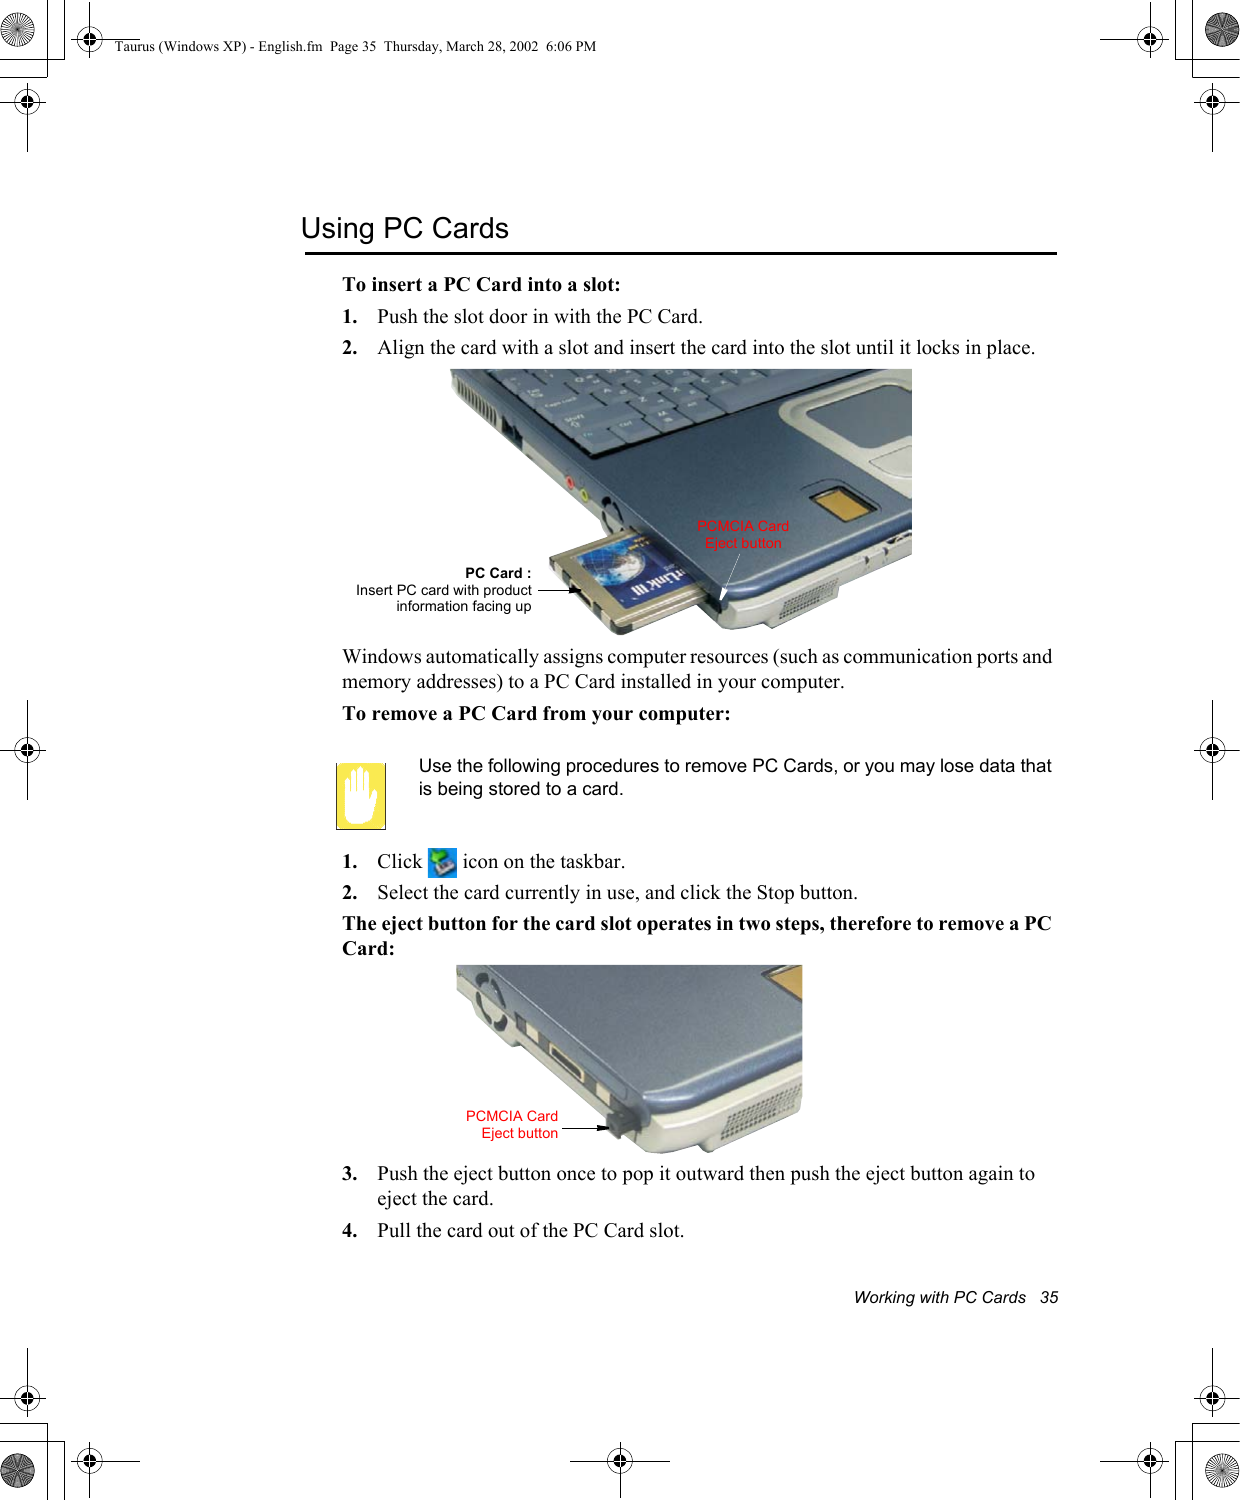
Samsung Electronics Co SP10 Notebook PC User Manual manual English 0328
Samsung Electronics Co Ltd Notebook PC manual English 0328
UserManual.wiki
>
Samsung Electronics Co
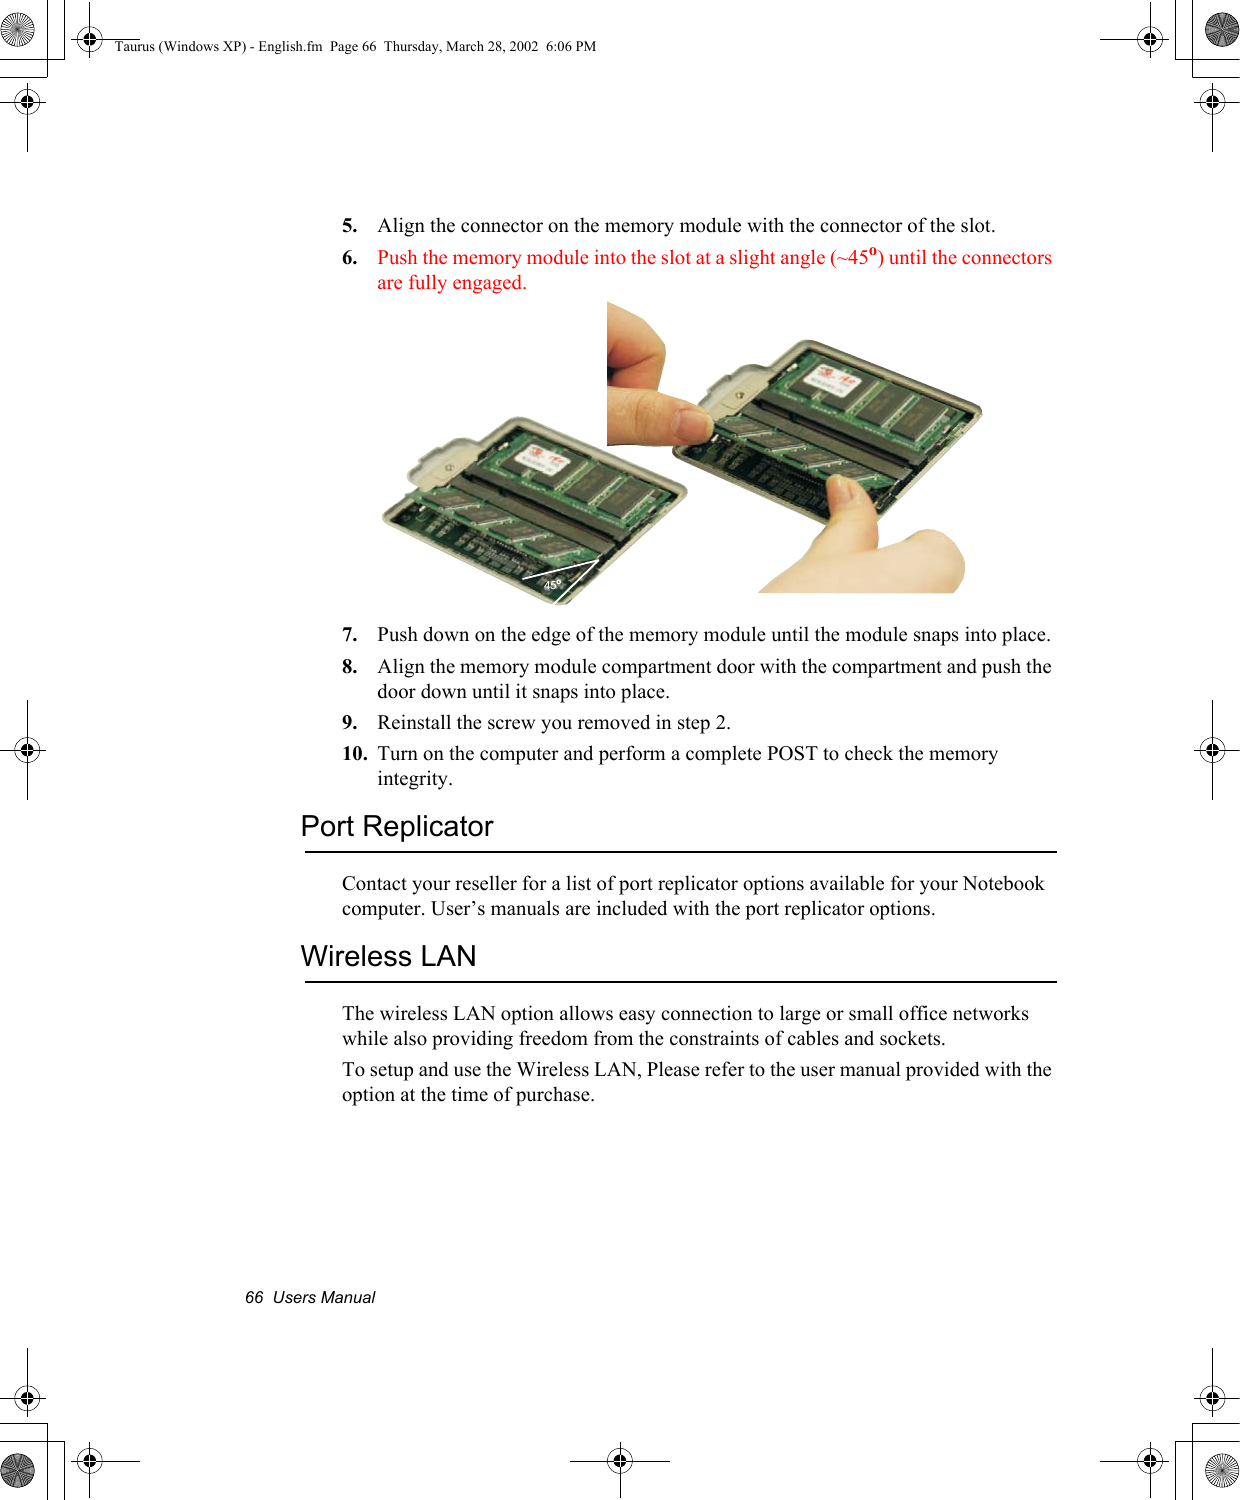
>
SP10 User Manual
>
Users Manual 2
Contents
1.
Users Manual 1
2.
Users Manual 2
Users Manual 2
Navigation menu
Upload a User Manual
Namespaces
Wiki Guide
HTML
PDF
Info
Views
User Manual
Discussion / Help
Navigation
![38 Users ManualUsing the Audio DJPlay an Audio CD 1. Verify the computer is off and that a CD-ROM device is in the flex-bay.Audio DJ Power Buttons:If a CD-ROM device is not in the flex-bay, the Audio DJ power button will not energize the Audio DJ player.Computer Button Operation:All computer and SENS keyboard buttons are non functional while Audio DJ is operating except the Computer Power Button.2. Press the Audio DJ power button until the icon is displayed in the track display window [Labeled: DIGITAL AUDIO].3. Press the eject button on the CD-ROM drive or the button on the Audio DJ button bar.4. Insert a Audio CD into your CD-ROM drive label side up.5. Press the button on the Audio DJ.Pause/Resume an Audio CD 1. Press the CD button to pause the CD.2. Press the button again to restart the CD.Stop an Audio CD1. Press the button to stop and eject the CD.2. Remove the Audio CD, then close the tray.3. Press the Audio DJ power button for ~ 1 second to turn off the Audio DJ player.Fast Search an Audio CD1. Press the or buttons for ~1 second while the music is playing to start Fast Search .2. Press the button and or buttons to stop the Fast Search.Taurus (Windows XP) - English.fm Page 38 Thursday, March 28, 2002 6:06 PM](https://usermanual.wiki/Samsung-Electronics-Co/SP10.Users-Manual-2/User-Guide-249625-Page-5.png)


![Using the Hard Drive 57Using the Hard DriveYour computer includes a removable IDE (integrated drive electronics) hard drive. The IDE hard drive can store the data and programs your computer uses. The drive plugs into a connector on the system board.The hard drive that comes with your computer has already been formatted. Do not format the hard drive. Doing so destroys all data contained on the drive. If you need to format a new drive, or want to erase all data on your existing hard drive, refer to the manual for your operating system.Installing/Reinstalling a HDDTo install a new HDD you must contact your local service representative. He will do the physical change of the drive. You should complete the instructions below before you go to the service center.See the information below before you install your HDD:•Back up data files of your old hard drive.•For system boot with CD-ROM, under the Boot menu in System setup, set Bootable CD Check to Enabled and set Boot Device Priority is ordered starting from the [DVD/CD-ROM].When you are ready to install the new HDD use the Recovery CD-ROM to install the device driver. (Re)Installing Windows and Device DriversUse System Recovery CD to (re)install OS and System Software CD to (re)install device' drivers.The System Recovery CD is used to (re)install the OS and System Software to a new HDD or recover from a system crash.Notebook computers that ship from the factory include System Recover CD-ROM and System Software CD-ROM, which contains a copy of the applications and drivers needed for computer's operating system.In the unlikely event that programs on the computer hard drive become corrupted or are erased, you can use the System Recovery CD-ROM to reinstall your operating system and then System Software CD-ROM to reinstall your original applications and drivers.Taurus (Windows XP) - English.fm Page 57 Thursday, March 28, 2002 6:06 PM](https://usermanual.wiki/Samsung-Electronics-Co/SP10.Users-Manual-2/User-Guide-249625-Page-24.png)