Samsung Electronics Co ST200F Digital camera User Manual 2 of 2
Samsung Electronics Co Ltd Digital camera 2 of 2
UserManual.wiki
>
Samsung Electronics Co
>
ST200F User Manual
>
User manual 2 of 2
Contents
1.
User manual 1 of 2
2.
User manual 2 of 2
User manual 2 of 2
Navigation menu
Upload a User Manual
Namespaces
Wiki Guide
HTML
PDF
Info
Views
User Manual
Discussion / Help
Navigation


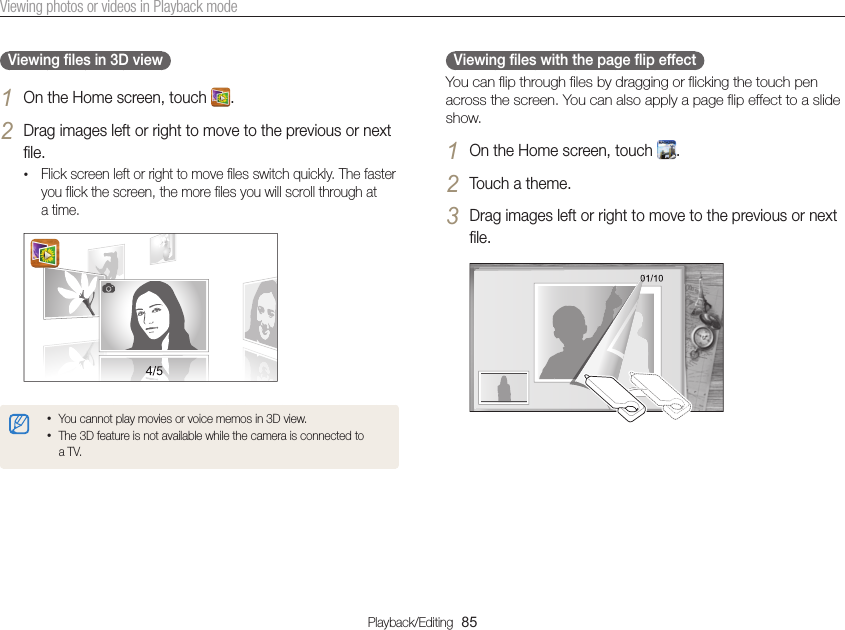
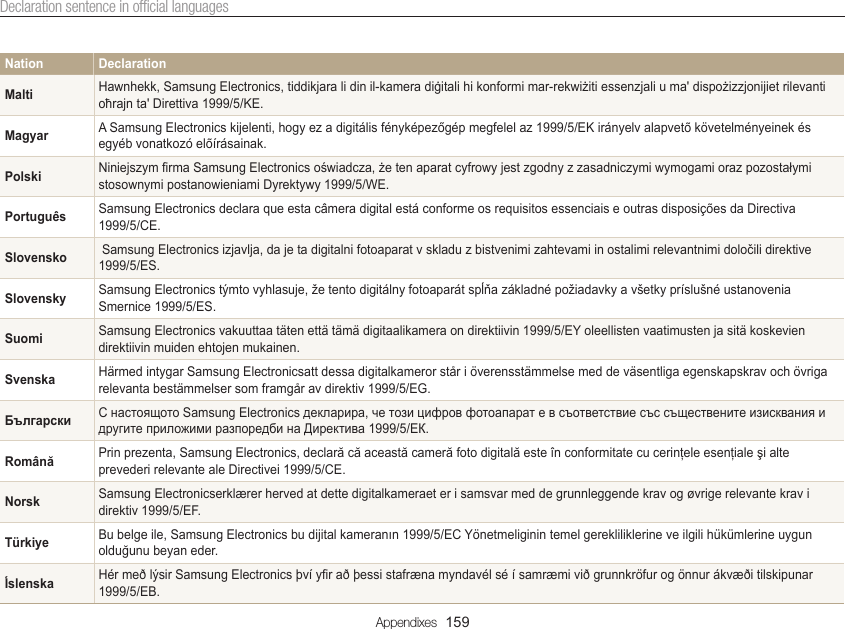
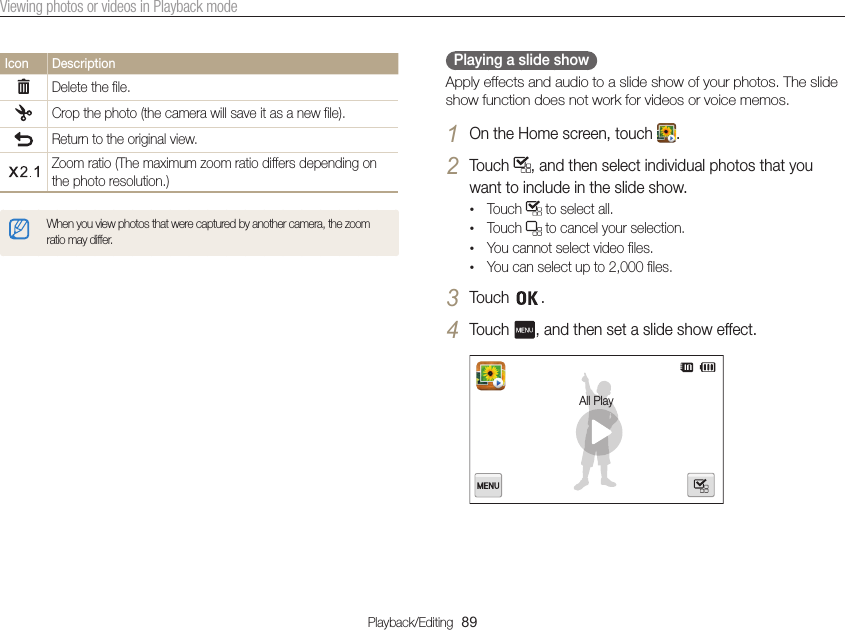
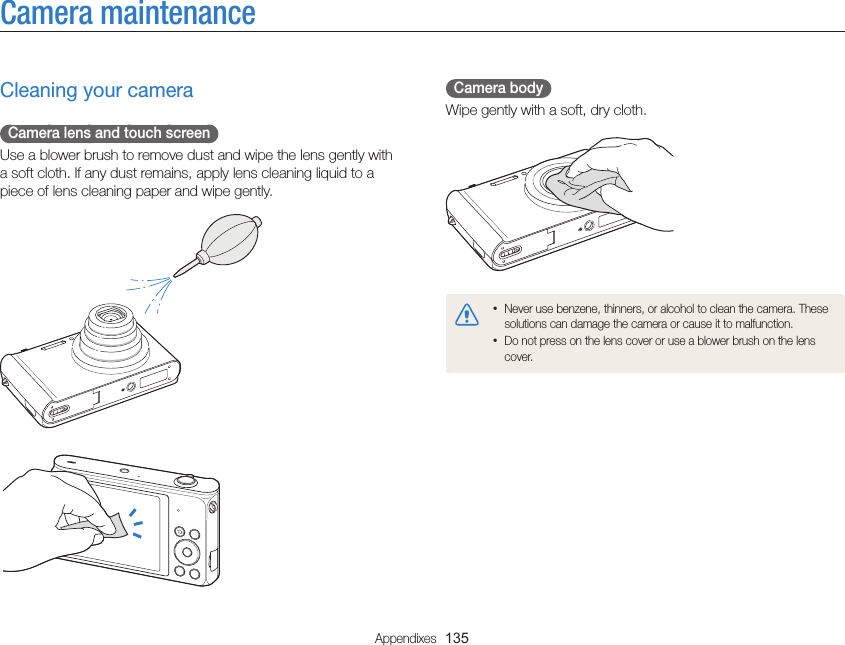
![Playback/Editing 86Viewing photos or videos in Playback modeTouch a file to display it in full screen view.Icon DescriptionDelete filesSelect files to upload to FacebookPhoto includes a voice memoVideo fileVoice memo fileDrag the screen up or down to move to the previous or next page of thumbnails.Icon DescriptionPlay a slide show.•Touch the screen to pause the slide show and adjust the volume or mute the sound.•Touch to stop the slide show.Return to the theme selection screen.You can view only photos when you use the page flip effect. Viewing files as thumbnails Scan thumbnails of files.In Playback mode, rotate [Zoom] to the left to view thumbnails (9 at a time). Rotate [Zoom] to the left once or twice more to display more thumbnails (16 or 36 at a time).Rotate [Zoom] to the right to return to the previous view.](https://usermanual.wiki/Samsung-Electronics-Co/ST200F.User-manual-2-of-2/User-Guide-1594221-Page-4.png)
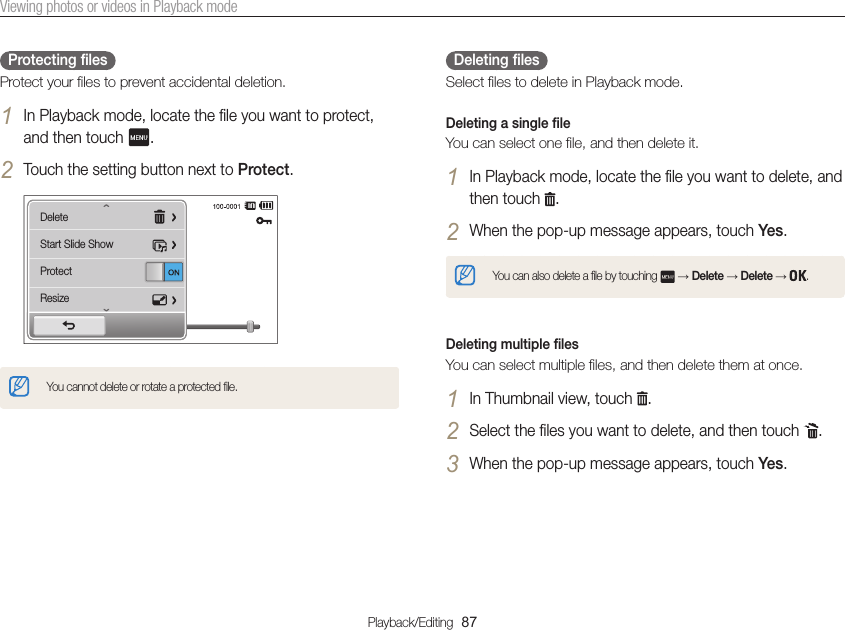
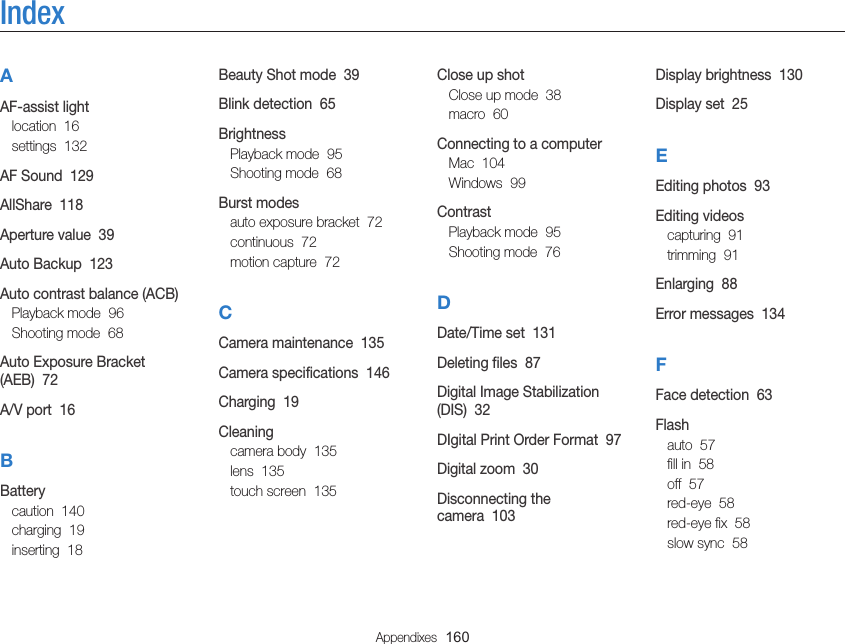
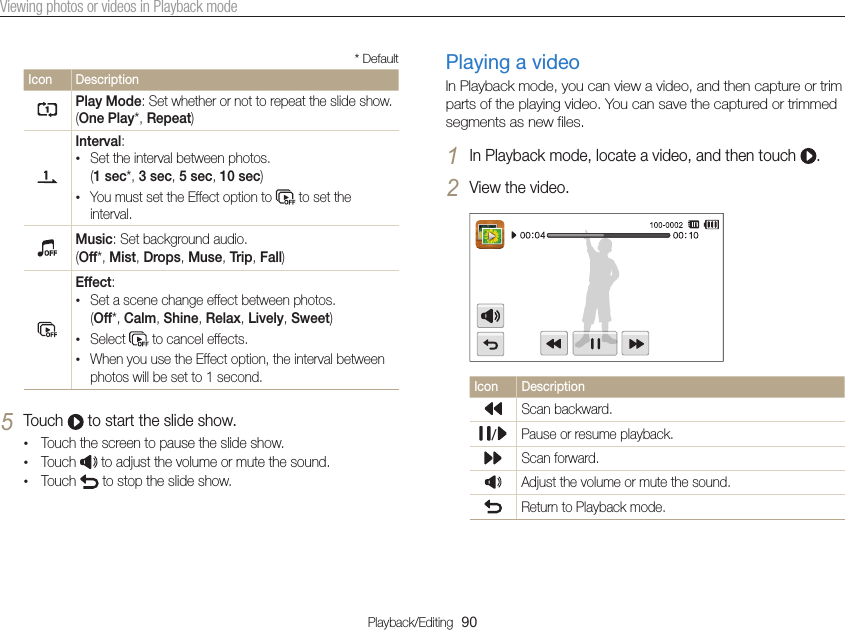
![Playback/Editing 88Viewing photos or videos in Playback modeViewing photosEnlarge part of a photo or view photos as a slide show. Enlarging a photo In Playback mode, rotate [Zoom] to the right to enlarge a portion of the photo. Rotate [Zoom] to the left to zoom out.Drag the screen to see another part of the photo.Deleting all filesYou can select all files, and then delete them at once.1 In Playback mode, touch → Delete.•You can also delete files in Thumbnail view by touching → Delete.2 Select All, and then touch .3 When the pop-up message appears, touch Yes. Copying files to a memory card Copy files from the internal memory to a memory card.1 In Playback mode, touch .•You can also copy files to a memory card in Thumbnail view or in Smart Albumby touching → Copy to Card.2 Touch Copy to Card.3 When the pop-up message appears, touch Yes.](https://usermanual.wiki/Samsung-Electronics-Co/ST200F.User-manual-2-of-2/User-Guide-1594221-Page-6.png)
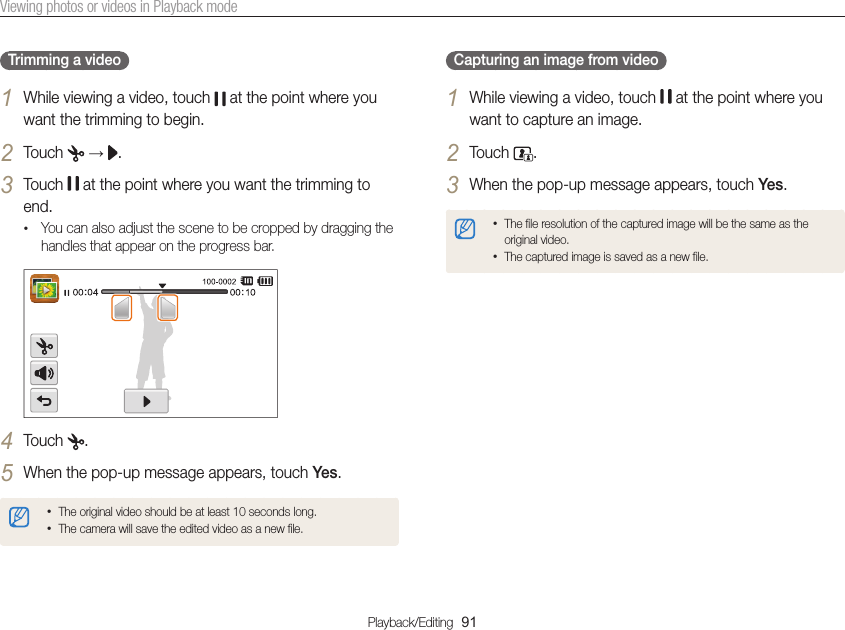
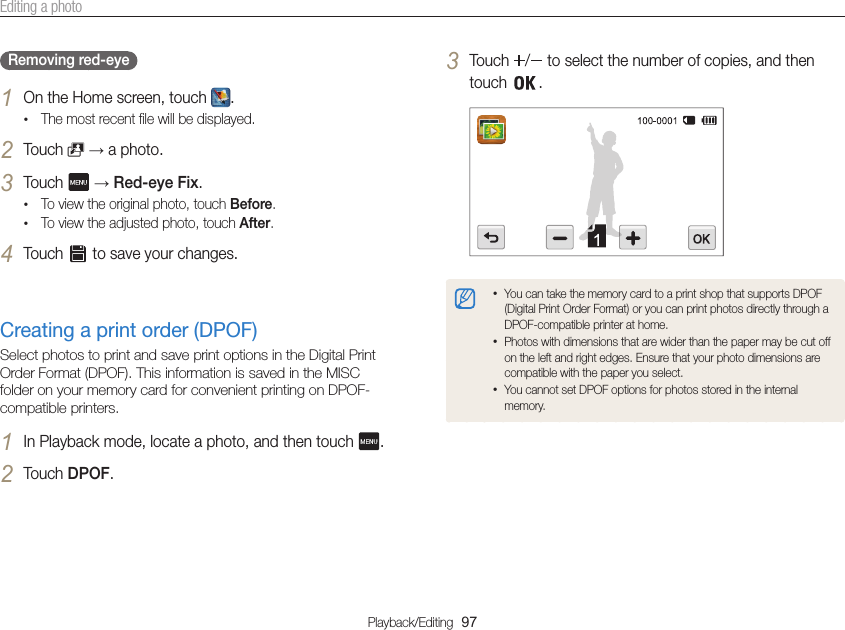
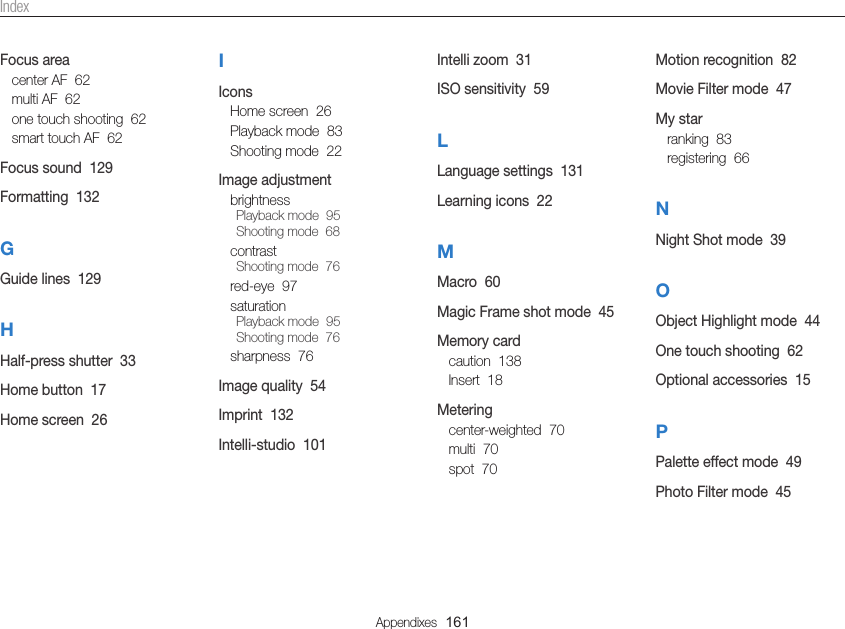
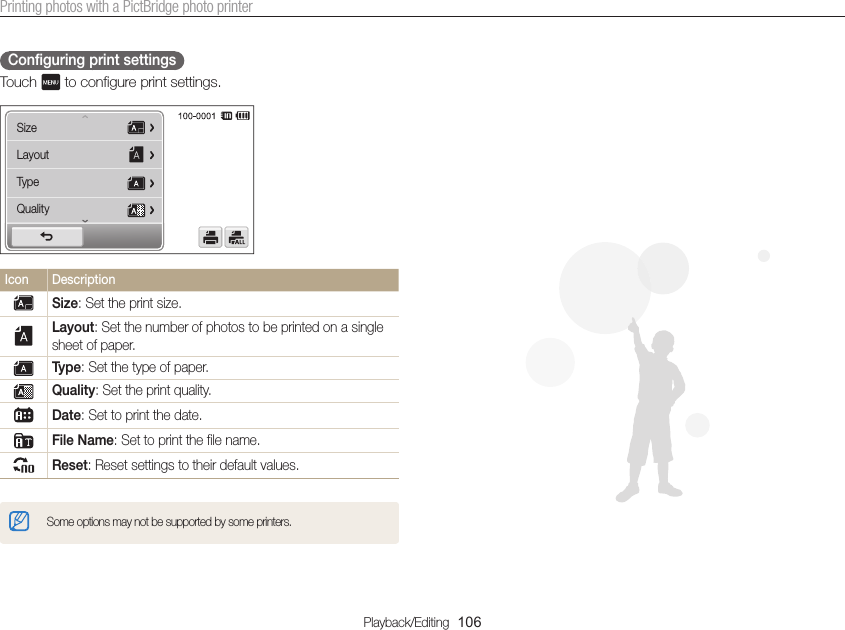
![Playback/Editing 105Printing photos with a PictBridge photo printerPrint photos with a PictBridge-compatible printer by connecting your camera directly to the printer.7 Touch to print.•Touch to print all photos.8 When the pop-up window appears, touch Yes to begin printing.•To cancel printing, touch Cancel on the pop-up window.1 On the Home screen, touch .2 Touch Connectivity → USB → Printer.3 Turn on the printer, and then connect your camera to the printer with the USB cable.4 If the camera is off, press [POWER] or [Playback] to turn it on.•The printer recognizes the camera automatically.5 Select a file to print.6 Touch / to select the number of copies.•To set printer options, touch . (p. 106)](https://usermanual.wiki/Samsung-Electronics-Co/ST200F.User-manual-2-of-2/User-Guide-1594221-Page-23.png)

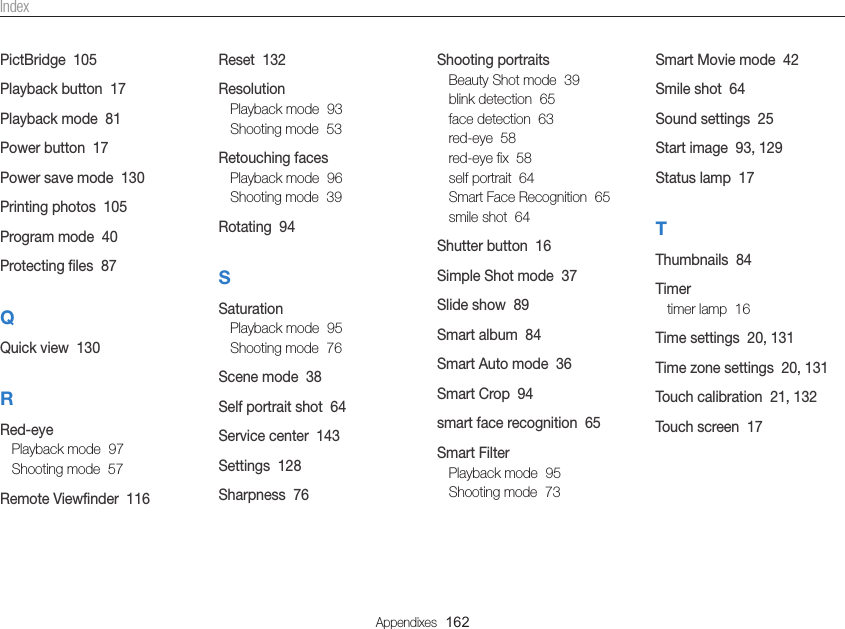
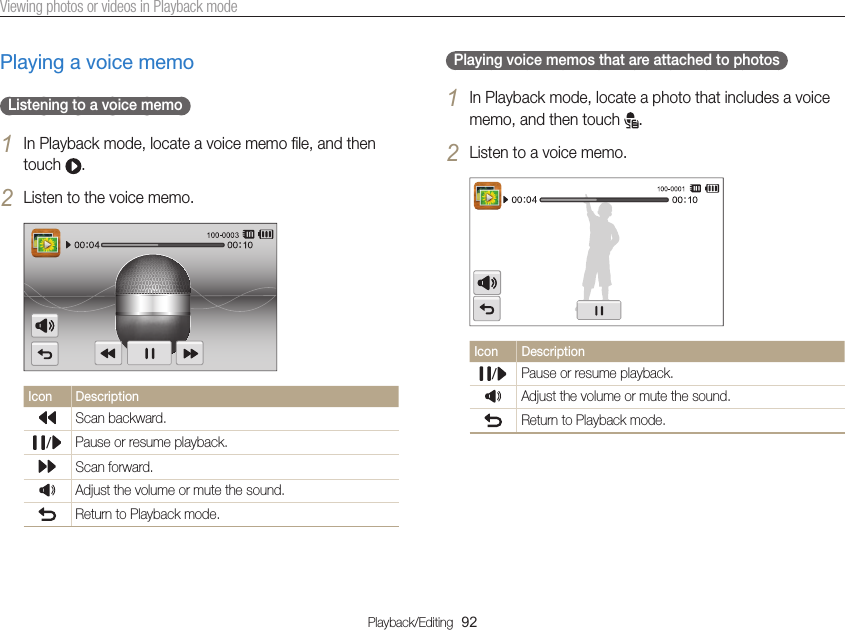
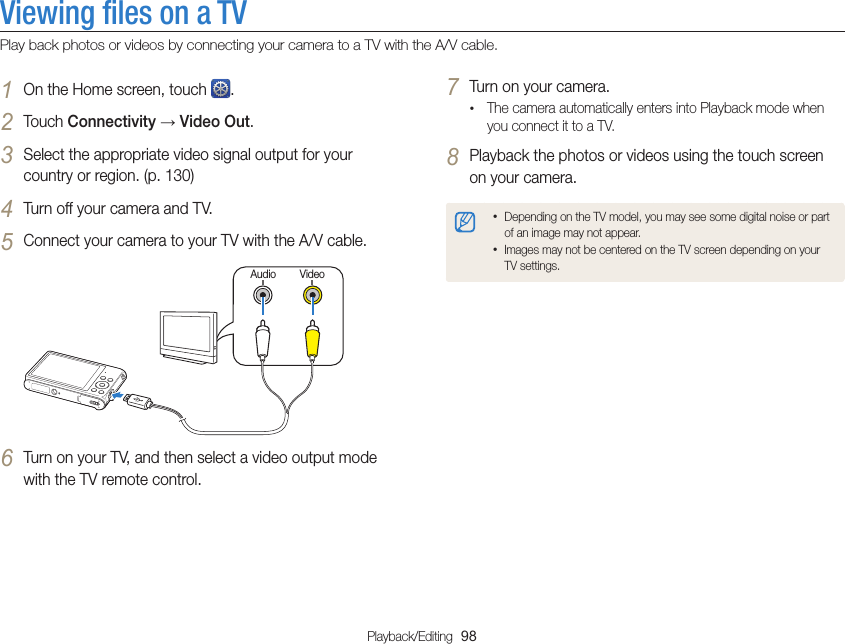
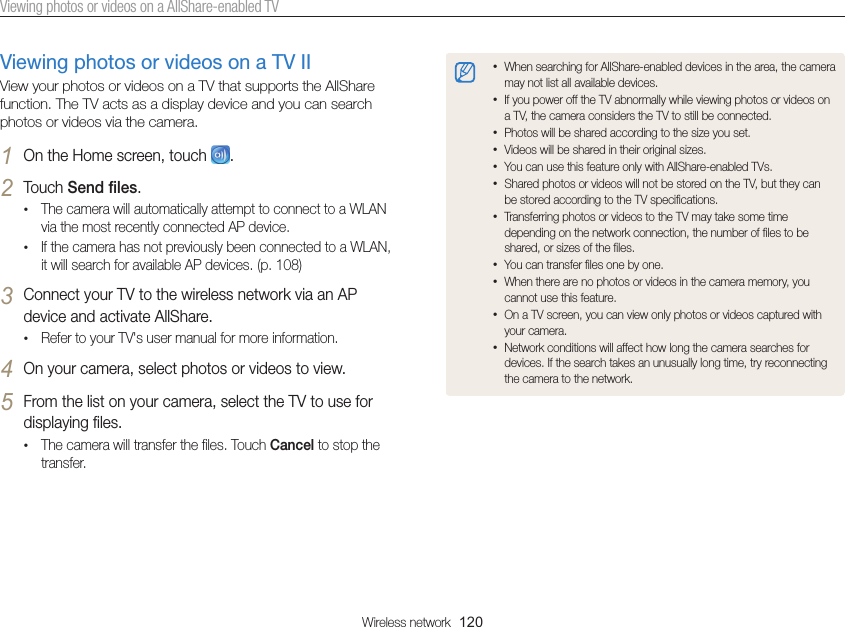
![Wireless network 116Using a smart phone as a remote shutter releaseThe camera connects to a smart phone via a WLAN. Use the smart phone as a remote shutter release with the Remote Viewfinder feature. The captured photo will display on the smart phone.•This feature is supported only by Galaxy S smart phones with the Android 2.2 OS or higher. If your smart phone uses the Android 2.1 OS, upgrade your smart phone to Android 2.2. This feature is also supported by 7 inch. Galaxy Tab and iPhone 4 with the iOS 4.3.•You can download the application from Samsung Apps, Android market, or Apple App Store.Icon DescriptionFlash optionTimer optionPhoto size•While using this feature, only the touch screen and [POWER] are available on your camera.•The zoom button and the shutter button on your smart phone will not function when using this feature.•Remote Viewfinder mode supports the and photo sizes only.5 On the smart phone, touch and hold to focus.•The focus is automatically set to multi-AF.6 Release to capture the photo.•The photo will be saved in your camera.•Touch the photo in the bottom right corner of the screen to save it to the smart phone. The photo will be resized to VGA (640x480) size.1 On your smart phone, turn on the Remote Viewfinder application.•If you are using an iPhone, activate Personal Hotspot before using the application.2 On the Home screen of the camera, touch .3 Select your smart phone from the list of available devices found by the camera.•If the smart phone connected to the camera recently, it will reconnect to the camera automatically.•You can choose only one camera at a time.•If you are using an iPhone, enter your password.4 On the smart phone, set the following shooting options.](https://usermanual.wiki/Samsung-Electronics-Co/ST200F.User-manual-2-of-2/User-Guide-1594221-Page-34.png)
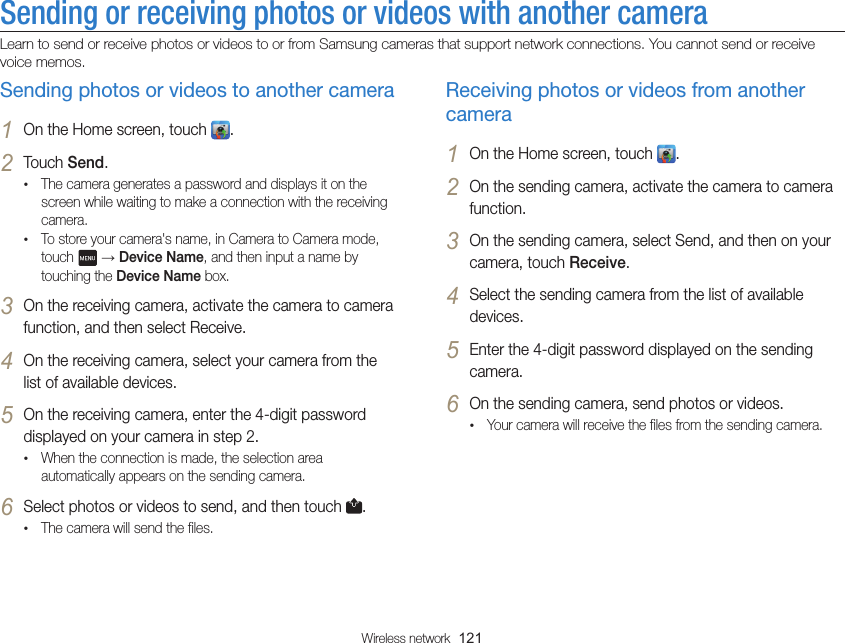
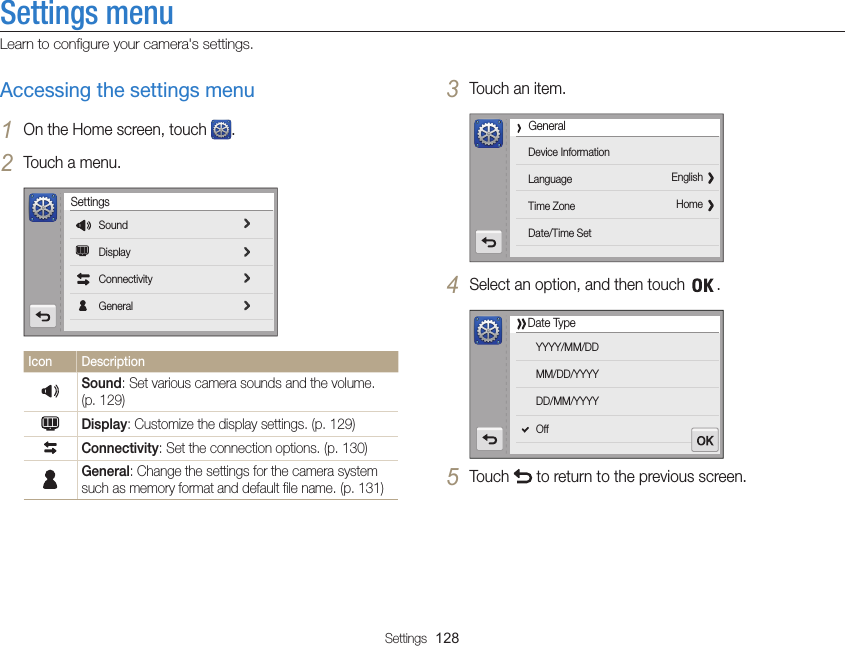
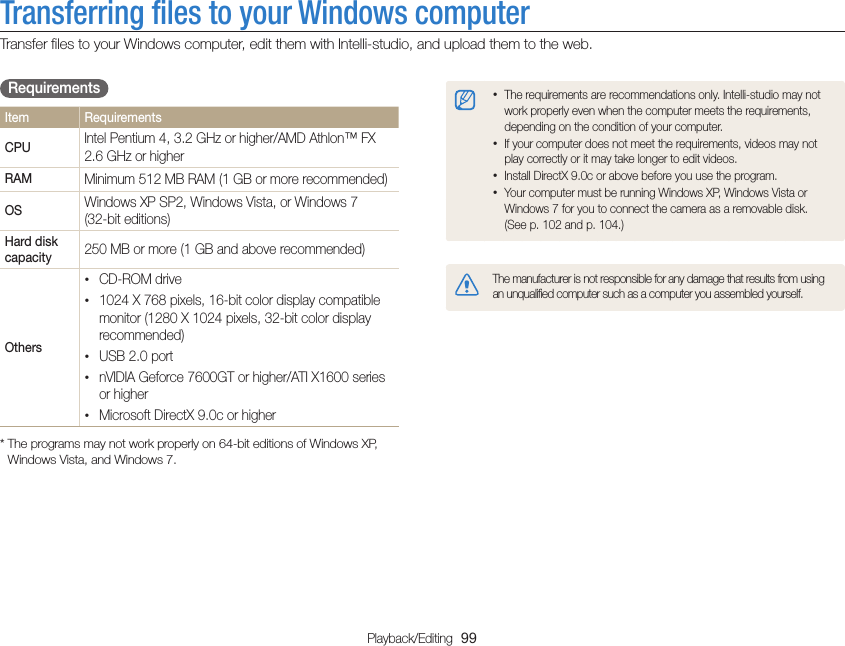
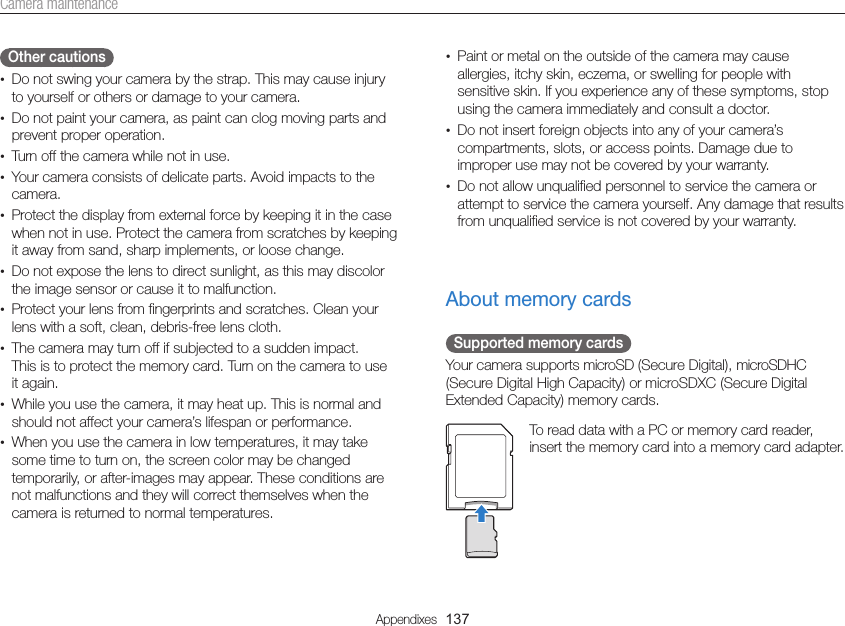
![Settings 130Settings menuItem DescriptionDisplay BrightnessAdjust the brightness of the screen. (Auto, Dark, Normal, Bright*)Normal is fixed in Playback mode even if you have selected Auto. Quick ViewSet the duration for reviewing a captured image before returning to the Shooting mode. (Off, 0.5 sec*, 1 sec, 3 sec)Power SaveIf you perform no operations for 30 seconds, the camera automatically switches to Power save mode. (Off*, On)•In Power save mode, press any button other than [POWER] to resume using the camera.•Even if you do not set the Power save mode, the screen will dim in 30 seconds after the last operation to save power.Connectivity* DefaultItem DescriptionVideo OutSet the video signal output for your region.•NTSC*: USA, Canada, Japan, Korea, Mexico, Taiwan•PAL (supports only BDGHI): Australia, Austria, Belgium, China, Denmark, England, Finland, Germany, Italy, Kuwait, Malaysia, Netherlands, New Zealand, Norway, Singapore, Spain, Sweden, Switzerland, ThailandUSBSelect the mode to use when you connect the camera to a computer or printer with a USB cable.•Computer*: Connect your camera to a computer for transferring files.•Printer: Connect your camera to a printer for printing files.•Select Mode: Manually select the USB mode when you connect your camera to a device.PC Software Set Intelli-studio to launch automatically when you connect your camera to your computer. (Off, On*)* Default](https://usermanual.wiki/Samsung-Electronics-Co/ST200F.User-manual-2-of-2/User-Guide-1594221-Page-48.png)

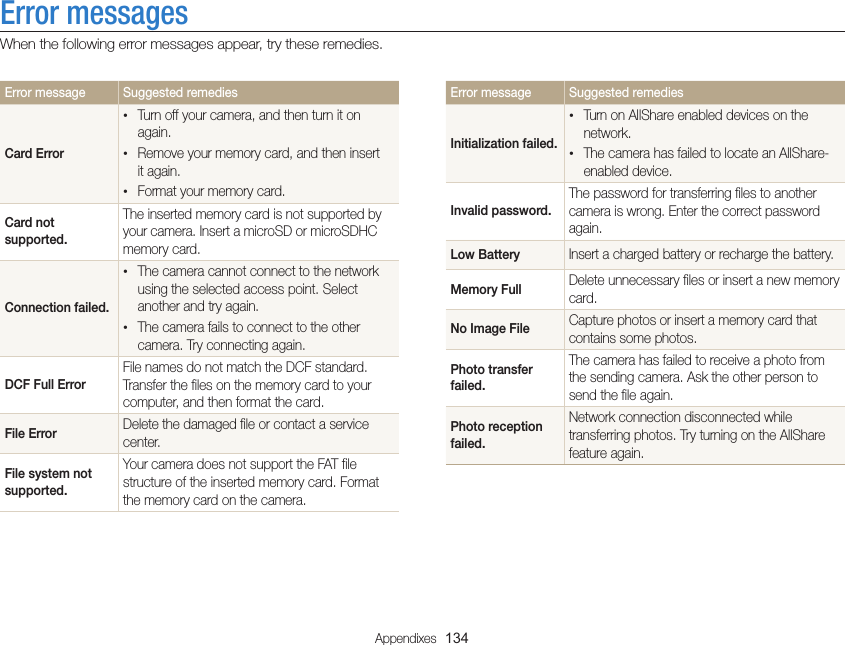

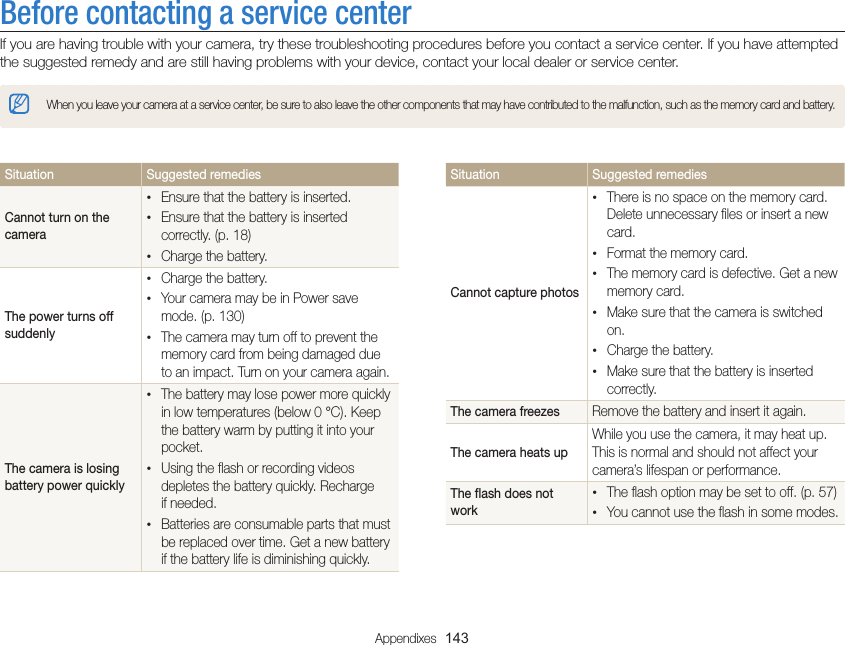
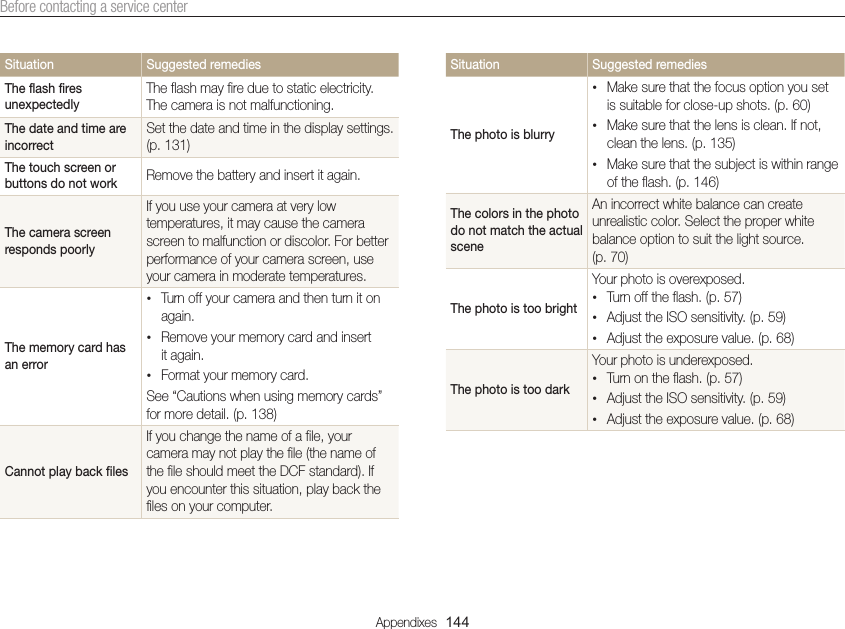
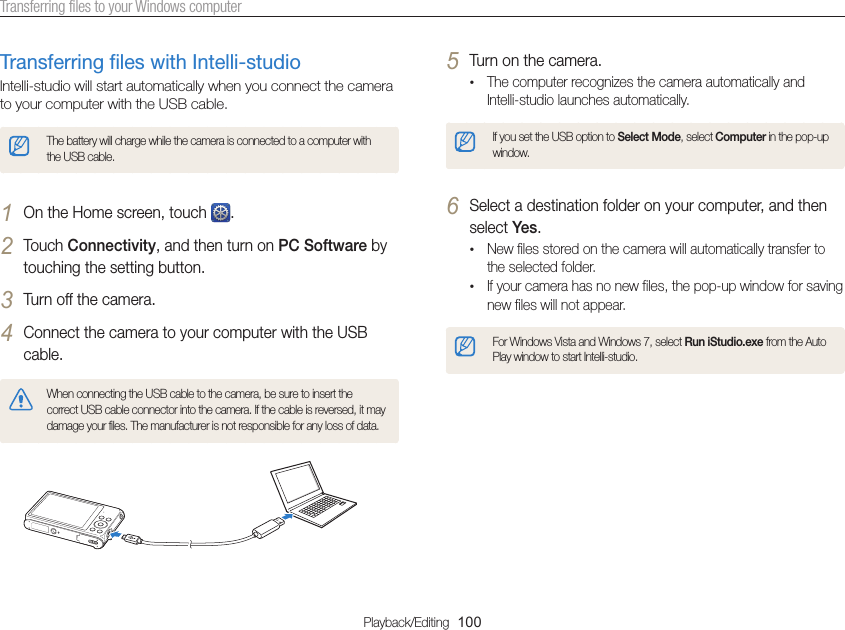
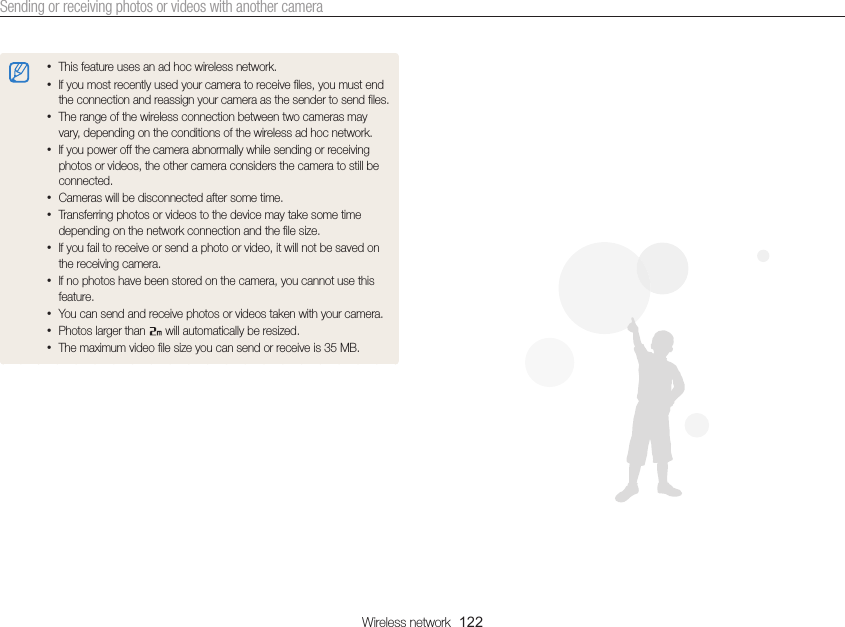
![Appendixes 146Camera specificationsShutter speed•Smart Auto: 1/8-1/2,000 sec.•Program: 1-1/2,000 sec.•Night Shot: 8-1/2,000 sec.ExposureControl Program AEMetering Multi, Spot, Center-weighted, Face DetectionCompensation ±2EV (1/3 EV Step)ISO equivalent Auto, ISO 80, ISO 100, ISO 200, ISO 400, ISO 800, ISO 1600, ISO 3200FlashMode Auto, Red-eye, Fill in, Slow Sync, Off, Red-eye FixRange•Wide: 0.3 m-3.5 m (ISO Auto)•Tele: 0.5 m-2.0 m (ISO Auto)Recharging time Approximately 4 sec.Digital Image Stabilization (DIS)Dual IS [OIS(Optical Image Stabilization) + DIS(Digital Image Stabilization)]Image sensorType 1/2.3" (Approximately 7.76 mm) CCDEffective pixels Approximately 16.1 mega-pixelsTotal pixels Approximately 16.4 mega-pixelsLensFocal length Schneider 10X Zoom Lens f = 4.85-48.5 mm(35 mm film equivalent: 27 mm-270 mm)F-stop range F3.1 (W)-F5.6 (T)Digital zoom•Still image mode: 1.0X-5.0X (Optical Zoom x Digital Zoom: 25.0X)•Playback mode: 1.0X-14.4XDisplayType TFT LCDFeature 3.0" (7.2 cm), 460KFocusingTypeTTL auto focus (Multi AF, Center AF, Selection AF, Tracking AF, Face Detection AF, Smart Face Recognition AF)RangeWide (W) Tele (T)Normal (AF) 80 cm-infinity 200 cm-infinityMacro 5 cm-80 cm 150 cm-200 cmAuto Macro 5 cm-infinity 150 cm-infinity](https://usermanual.wiki/Samsung-Electronics-Co/ST200F.User-manual-2-of-2/User-Guide-1594221-Page-64.png)
![Appendixes 154Correct Disposal of This Product (Waste Electrical & Electronic Equipment)(Applicable in the European Union and other European countries with separate collection systems) This marking on the product, accessories or literature indicates that the product and its electronic accessories (e.g. charger, headset, USB cable) should not be disposed of with other household waste at the end of their working life. To prevent possible harm to the environment or human health from uncontrolled waste disposal, please separate these items from other types of waste and recycle them responsibly to promote the sustainable reuse of material resources. Household users should contact either the retailer where they purchased this product, or their local government office, for details of where and how they can take these items for environmentally safe recycling. Business users should contact their supplier and check the terms and conditions of the purchase contract. This product and its electronic accessories should not be mixed with other commercial wastes for disposal.Correct disposal of batteries in this product(Applicable in the European Union and other European countries with separate battery return systems)This marking on the battery, manual or packaging indicates that the batteries in this product should not be disposed of with other household waste at the end of their working life. Where marked, the chemical symbols Hg, Cd or Pb indicate that the battery contains mercury, cadmium or lead above the reference levels in EC Directive 2006/66. If batteries are not properly disposed of, these substances can cause harm to human health or the environment. To protect natural resources and to promote material reuse, please separate batteries from other types of waste and recycle them through your local, free battery return system.This Class [B] digital apparatus complies with Canadian ICES-003.PlanetFirst represents Samsung Electronics' commitment to the sustainable development and social responsibility through eco-driven business and management activities. Dispose unwanted electronics through an approved recycler. To find the nearest recycling location, go to our website: www.samsung.com/recyclingdirect Or call, (877) 278 - 0799](https://usermanual.wiki/Samsung-Electronics-Co/ST200F.User-manual-2-of-2/User-Guide-1594221-Page-72.png)