Samsung Electronics Co SWDSC01E Cellular/ PCS GSM/ EDGE and Cellular WCDMA Tablet PC with WLAN and Bluetooth User Manual 4
Samsung Electronics Co Ltd Cellular/ PCS GSM/ EDGE and Cellular WCDMA Tablet PC with WLAN and Bluetooth Users Manual 4
Contents
- 1. Users Manual 1
- 2. Users Manual 2
- 3. Users Manual 3
- 4. Users Manual 4
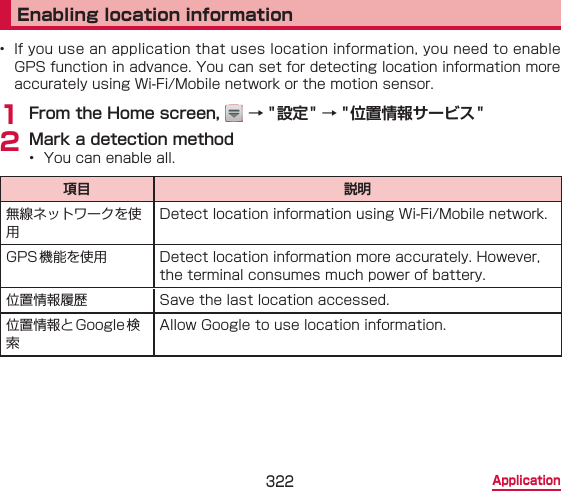
Users Manual 4


![353 Overseas UseInternational roamingOverview of international roaming (WORLD WING)The international roaming (WORLD WING) is a service that allows you to use the same device number and Email address as ones used in Japan within the service area of overseas network operator that is associated with DOCOMO. You can use without changing of SMS settings. ■ Supported networkThis terminal is a Class 4 device. You can use the terminal in 3G network and GSM/GPRS network service area. Services are also available in countries and areas supporting 3G850MHz/GSM850MHz. Check supported area. For areas out of Xi area such as overseas, connect to 3G or GSM/GPRS network. ■ Before using the terminal overseas, refer to the followings• “User’s Guide [International Services]”• DOCOMO International Services websiteInformation• For country codes/international call access codes/universal number international prex, supported countries/areas and network operators, refer to “Mobile device User’s Guide [International Services]” or the DOCOMO International Services website.](https://usermanual.wiki/Samsung-Electronics-Co/SWDSC01E.Users-Manual-4/User-Guide-1816185-Page-75.png)
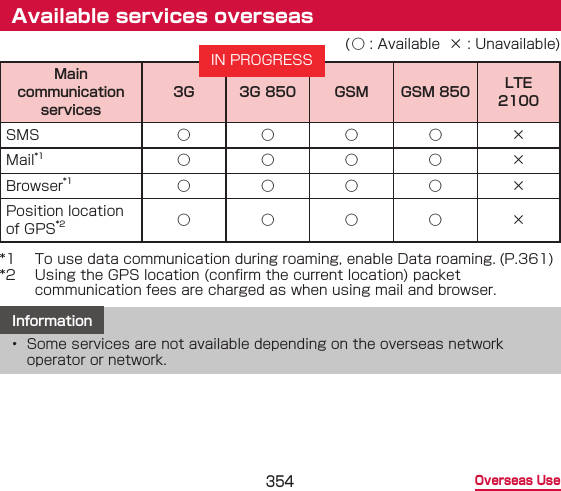
![356 Overseas UseChecking in the country you stayWhen you arrive overseas and turn on the terminal, an available network is automatically connected. ■ ConnectionThe optimum network will be selected automatically if “自動選択” is selected for “Available networks” in “ネットワークオペレーター”.When you connect to the network operator conducted in at-rate service, you can use the service with at-rate packet communication charges overseas up to the specied upper limit per day. Also, you need to subscribe packet at-rate service in Japan to use it. For details, see “User’s Guide [International Services]” or DOCOMO International Services website.• Network operator setting → P.360 ■ DisplayA network type in use is displayed on the status bar. : During International roaming / : GPRS connecting/in use / : 3G (Packet) connecting/in use / : FOMA high speed (Packet) connecting/in use• Connected network operators are viewable on the notication panel.IN PROGRESS](https://usermanual.wiki/Samsung-Electronics-Co/SWDSC01E.Users-Manual-4/User-Guide-1816185-Page-78.png)

![375 Appendix/Index ■ Overseas UseTrouble Check and remedyCannot use the terminal overseas. ■ When antenna mark is displayed• Do you subscribe WORLD WING? Conrm your application status of WORLD WING. ■ When (Out of service area) appears• Check if you are out of the international roaming service area or in an area with poor signal strength. Check if the service area and network operator are available, referring to “User’s Guide [International Services]” or DOCOMO International Services website. Try to change the network settings or overseas network operator settings.• Set “ネットワークオペレーター” to “自動的に選択”. → P.360• Turning the terminal power to “OFF” and then turning “ON” again may work for the restoration.](https://usermanual.wiki/Samsung-Electronics-Co/SWDSC01E.Users-Manual-4/User-Guide-1816185-Page-97.png)