Samsung Electronics Co SWDSC01E Cellular/ PCS GSM/ EDGE and Cellular WCDMA Tablet PC with WLAN and Bluetooth User Manual 4
Samsung Electronics Co Ltd Cellular/ PCS GSM/ EDGE and Cellular WCDMA Tablet PC with WLAN and Bluetooth Users Manual 4
Contents
- 1. Users Manual 1
- 2. Users Manual 2
- 3. Users Manual 3
- 4. Users Manual 4
Users Manual 4
279 Application
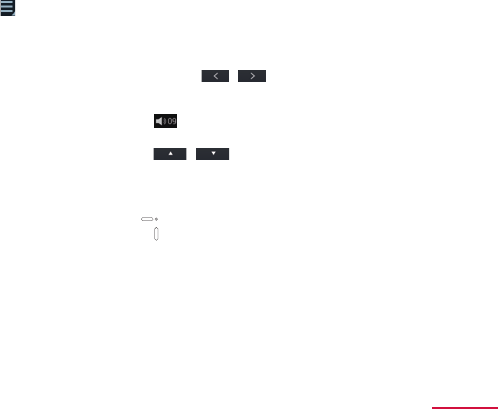
a Image
• Channel can be switched by icking to the left or right.
• Details of the program displays by touching and holding the image.
b Subtitle
• → "設定" → "画面設定 " → Mark "字幕 " to show subtitles.
c Broadcast data
d Channel/Program name
e TV operation panel
• Channel can be switched with / .
• "CH" tab of the operation screen appears by tapping the number of the
channel.
• Adjust the volume with .
f Operation panel for broadcast data
• Adjust the cursor with / and select an item tap " 選択 " to select
an item. The broadcast data of the link displays.
• Tap " 戻る " to return to the previous linked program.
■ Key operations on viewing screen
• Lock the screen with (Power/screen lock key).
• Adjust the volume with (Volume key).
280 Application
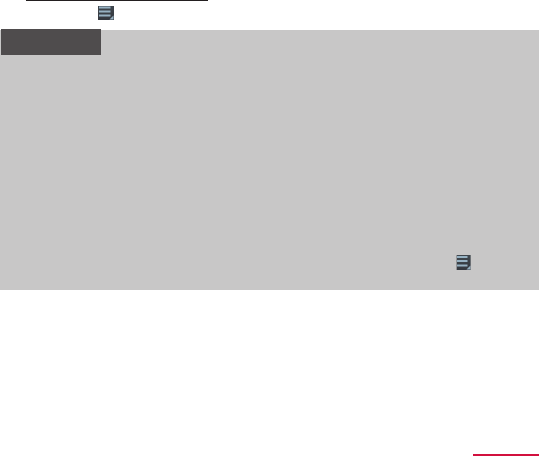
Operation screen
1 On the watching screen, tap a channel number
2 Tap a tab at the top of the screen
Ch. list
1
25
6
3
4
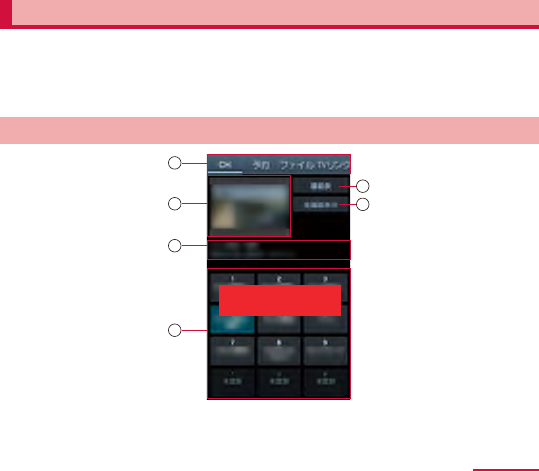
Operation screen (Ch. list tab)
IN PROGRESS

281 Application
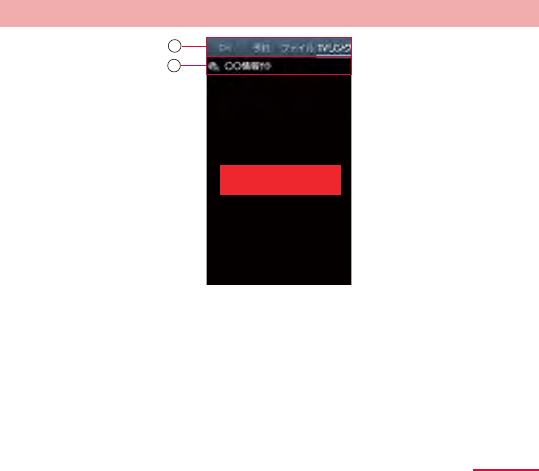
a Tab
• Switch the operating target by tapping the tab.
b Preview image
• The watching screen appears by tapping it.
c Channel/Program name
d Channel list
• Watching screen appears by tapping the channel.
• Channel can be deleted from the Channel list by touching and holding the
channel → Tap "
削除
".
e Program list
• The watching program list appears by tapping it.
f TV full view
• The watching screen appears by tapping it.
■ Key operations on Ch. list tab
• Adjust the volume with (Volume key).
282 Application
Schedule tab
2
1
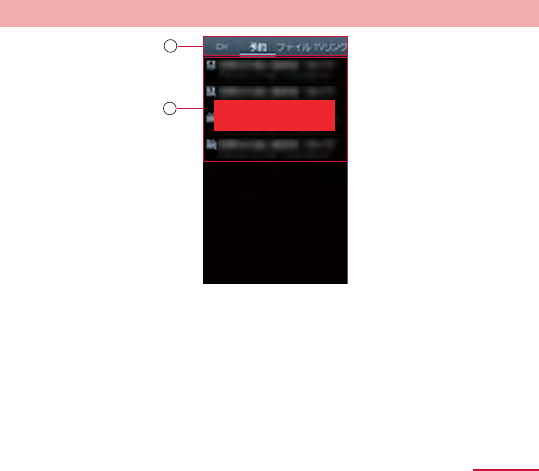
Operation screen (Schedule tab)
IN PROGRESS

283 Application
a Tab
• Switch the operating target by tapping the tab.
b Schedule list
: Recording schedule (including the completed schedule)
: Watching schedule (including the completed schedule)
: Failed recording schedule
: Failed watching schedule
• Change the schedule by tapping the unexecuted schedule.
• Delete the schedule by touching and holding the unexecuted schedule →
Tap "削除 ".
• Confirm the result and delete the schedule from the list by tapping the
executed schedule.
284 Application
TV les tab
2
3
4
5
1
8
6
7
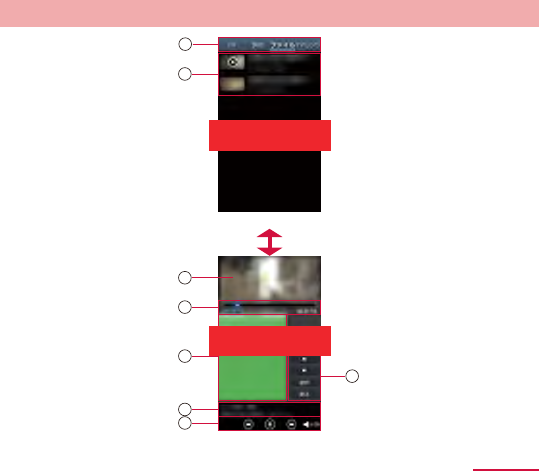
Operation screen (TV files tab)
Playing file screen
IN PROGRESSIN PROGRESS
IN PROGRESS
285 Application
a Tab
• Switch the operating target by tapping the tab.
b TV le list
• Play or display TV le by tapping it.
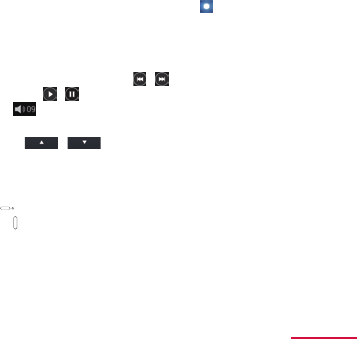
c Image
• TV le to be played can be switched by icking to the left or right.
d Play time, slider
• Tap video screen to display.
• Change any time point of the le to be viewed with .
e Broadcast data
f Channel/Program name
g Play operation panel
• TV le to be played can be changed with / .
• Play/Pause the TV le with / .
• Adjust the volume with .
h Broadcast data operation panel
• Adjust the cursor with / and select an item with "選択". The
broadcast data of the link displays.
• Tap " 戻る " to return to the previous linked program.
■ Key operations on the playing le screen
• Lock the screen with (Power/screen lock key).
• Adjust the volume with (Volume key).
286 Application
TV link tab
2
1
Operation screen (TV link tab)
a Tab
• Switch the operating target by tapping the tab.
b TV link
• Connect to registered site (P. ●● ).
IN PROGRESS

287 Application
Recording 1Seg
1 On the watching screen, → " 録画 "
• To stop recording, tap " 停止 ".
Information
• According to the airwave status, the images and sounds may be
interrupted.
• During recording, channel cannot be changed.
• If you activate any other application during recording, the program may not
be recorded correctly.
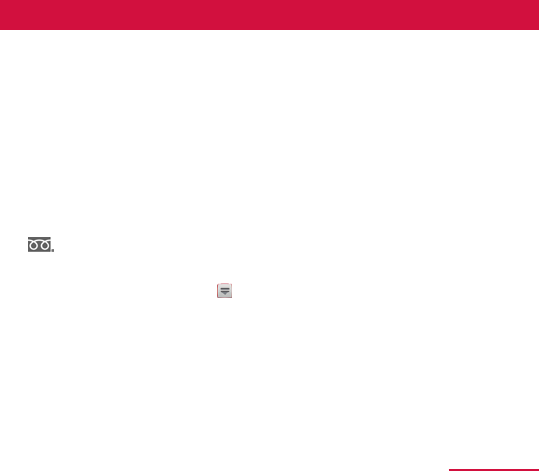
Playing recorded programs
1 On the watching screen, → " ファイル "
2 Tap a program to be played
Capturing the watching screen
1 On the watching screen, → " キャプチャ "
• Captured images can be checked in "ファイル" tab on the operation
screen.
288 Application
Reserving to record or watch 1Seg
Reserving from channel schedule
1 On the watching screen, tap a channel number
• "CH" tab of the operation screen appears.
2 " 番組表" → Tap the program to be scheduled
• Channel can be changed by tapping the channel name on the top of the
screen.
• Detail of the program can be conrmed by tapping the program.
3 " 予約" → "録画予約"/" 視聴予約 "
Reserving from G-Guide program list
1 On the watching screen, → "G ガイド番組表を起動 "
• For the first activation, an agreement appears. Read the contents and
then tap "利用規約に同意する (Agree with Terms of Use)". Then perform " 地
域設定 (Select regions)".
2 Select a program from the G-Guide program list, " ワンセグ連携 (link
to 1Seg)" → "ワンセグ録画予約 (1Seg recording reservation)"/"ワン
セグ視聴予約 (1Seg watching reservation)"
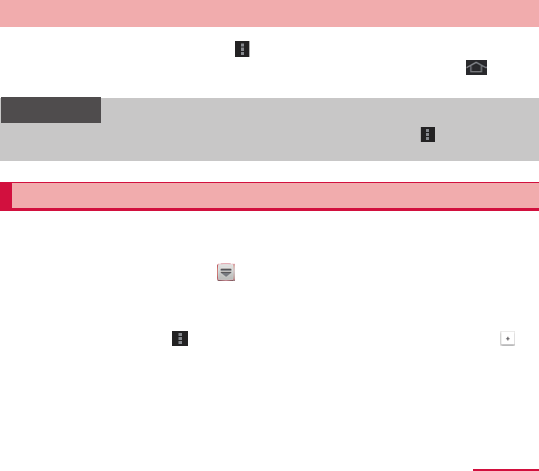
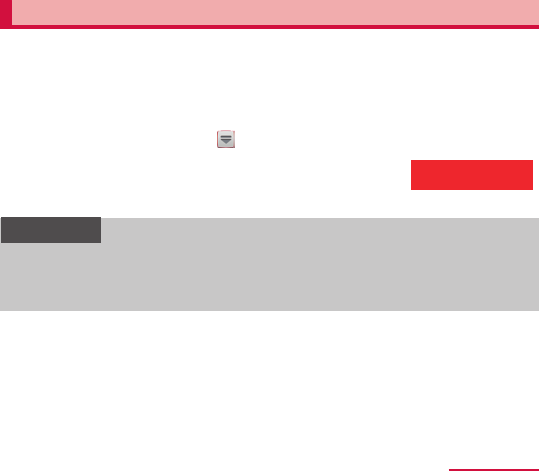
289 Application
3 Conrm/Change each items at the New program reservation
screen
• Details of the item can be changed by tapping it.
4 Tap
Scheduling manually
1 On the watching screen, tap a channel number
• "CH" tab of the operation screen appears.
2 " 予約" tab
3 → " マニュアル予約 "
4 Enter each items on New program reservation screen
5 Tap
Deleting reservations
1 On the watching screen, tap a channel number
• "CH" tab of the operation screen appears.
2 " 予約" tab
3 Touch and hold the reservation to be deleted
4 " 削除" → "OK"
290 Application
Setting channels
Setting area information
1 On the watching screen, tap a channel number
• "CH" tab of the operation screen appears.
2 → " エリア情報設定 " → Select the area to be registered
3 Select regions → Select province → Select local area
• Channels are searched and the selected area is registered to the channel
list.
4 "OK"
Switching area information
1 On the watching screen, tap a channel number
• "CH" tab of the operation screen appears.
2 → " エリア切替 " → Tap the area to be switched
• When the area to be switched to is not registered to the channel list,
area information is set (P.●● ).
291 Application
Deleting area information
1 On the watching screen, tap a channel number
• "CH" tab of the operation screen appears.
2 → " エリア情報設定 " → Touch and hold the area to be deleted
3 " 設定リセット"
292 Application
Using TV link
Registering TV link
1 Operate broadcast data and select the item which can be
registered to TV link
• The registration method of TV link varies depending on each program.
Information
• TV link may not be registered depending on each link.
Displaying TV link
1 On the watching screen, tap a channel number
• "CH" tab of the operation screen appears.
2 "TV リンク" tab
3 Select a TV link
• Connect to the registered website.

293 Application
Deleting TV link
1 On the watching screen, tap a channel number
• "CH" tab of the operation screen appears.
2 "TV リンク" tab
3 Touch and hold the TV link to be deleted
4 " 削除" → "OK"
294 Application
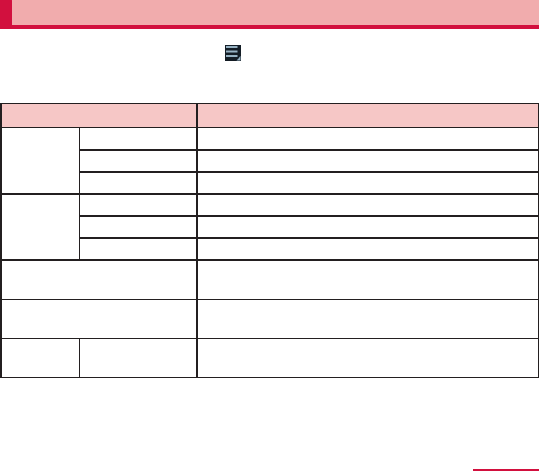
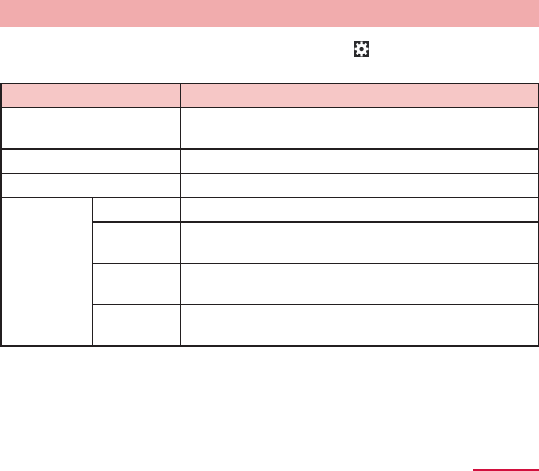
Setting Mobile TV
1 On the watching screen, → " 設定 "
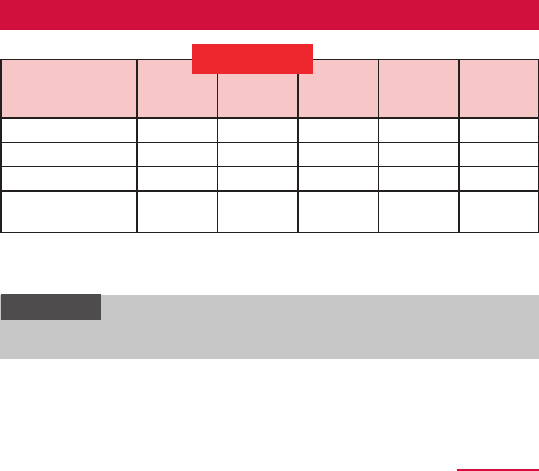
2 Set the items
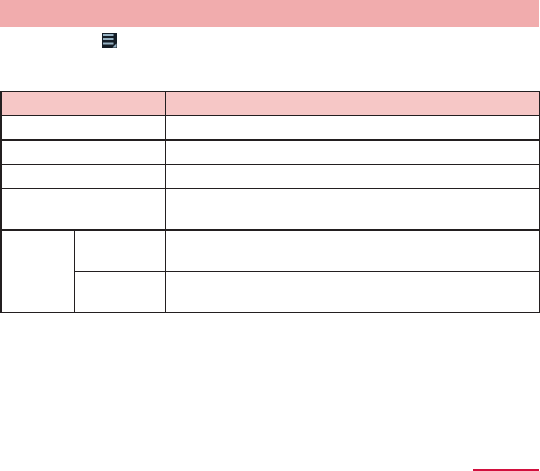
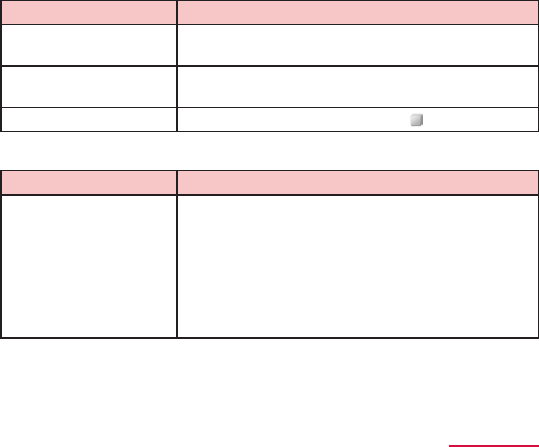
項目 説明
画面設定 明るさ Adjust the screen brightness.
フレーム補間 Set whether to perform frame interpolation.
字幕 Set whether to display subtitles.
オーディオ
設定
オーディオ効果 Select audio eects from 5 options.
音声言語 Set sound to be heard for sound
5.1チャンネル Set whether to watch with 5.1 channel audio.
保存先設定 Set a saving location of recorded or captured
data.
TVオフタイマー設定 Set time before stopping Mobile TV
automatically.
データ放送 録画設定 Set to record image and text or only image.
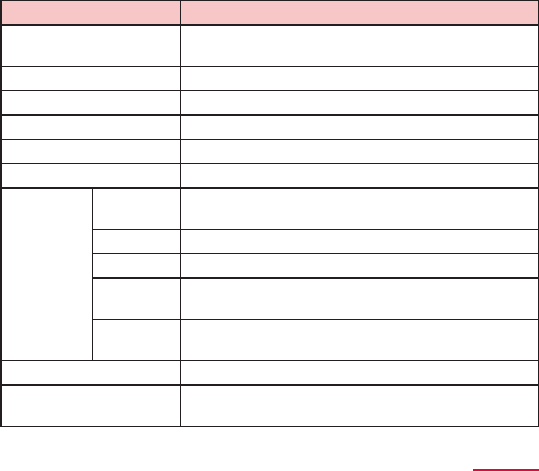
295 Application
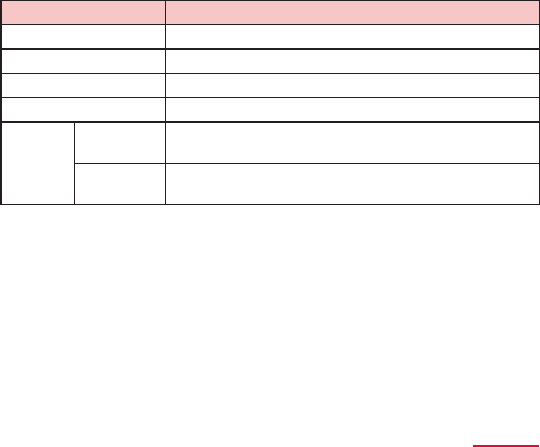
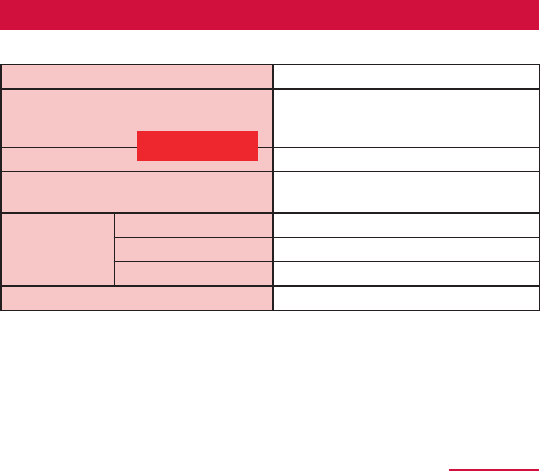
項目 説明
データ放送 画像保存先設定 Set an image saving location.
通信接続確認 Set whether to check communication connection.
位置情報 Set whether to check location information.
製造番号通知 Set whether to notify serial number.
放送局データ削除 Delete broadcasting data.
296 Application
Camera
Copyrights and portrait rights
Avoid copyright infringements when you handle photos taken with your
terminal, e.g. copy/alter/edit except for the purpose of personal use. Please
refrain from unauthorized use of portraits or names of other persons that
may infringe on portrait rights. Note that capturing or recording a stage
performance, entertainment or exhibition may be prohibited even if for personal
use.
If you cause the public any trouble using the terminal, you may be punished
under law or regulations (for example, nuisance prevention ordinance).
Please be considerate of the privacy of individuals around you when taking
and sending photos using camera-equipped mobile device.

297 Application
Before using Camera
• Though the camera is manufactured using extremely accurate technology, some
dots and lines may always be displayed to be lighter or darker than you expect.
Images shot under very low light intensity contain increased noise such as white
lines or random dots, but it is not a malfunction.
• Note that, a stripe pattern may appear on the screen when Camera is activated,
but it is not a malfunction.
• Still images or videos shot by Camera may differ from actual subjects in color
and brightness.
• When attempting to take a photo of a strong light source such as the sun or a
lamp, images may become dark or degraded.
• If the lens is contaminated with fingerprints or skin oil, you cannot shoot clear
still images/videos. Use a soft cloth to remove any such contaminants on the
lens before taking photos.
• When shooting, hold the terminal firmly with your hand not to move. Moving the
terminal when shooting may cause blur shot images.
• Do not cover the lens with your nger or hair when shooting.
• Using Camera consumes much power of battery. Note that, if you shoot with low
battery, the screen may become dark or a shot image may be blurred.
• If you use camera for a long time such as continuous shooting of still images
and long-time shooting of videos, the terminal may become hot and camera may
be terminated automatically, but it is not a malfunction. Please use after a while.
• Even in Silent mode, shutter sound for still image shooting, focus sound and
start/stop sound of shooting video sounds.
298 Application
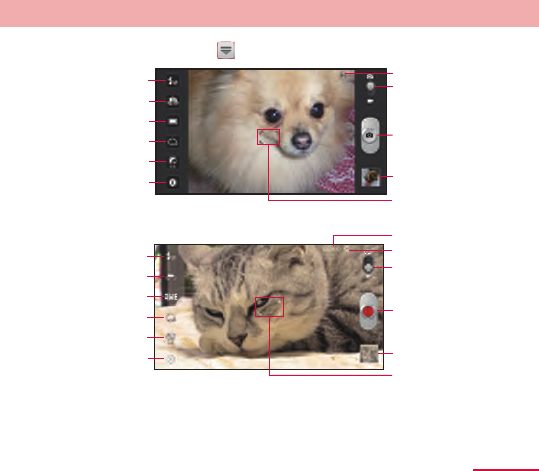
Shooting screen
1 From the Home screen, → "カメラ"
Still Image Capture Screen
b
a
c
d
e
f
g
h
i
k
j
ScreenVideo Recording Screen
b
a
c
d
e
f
l
h
i
k
j
g
299 Application
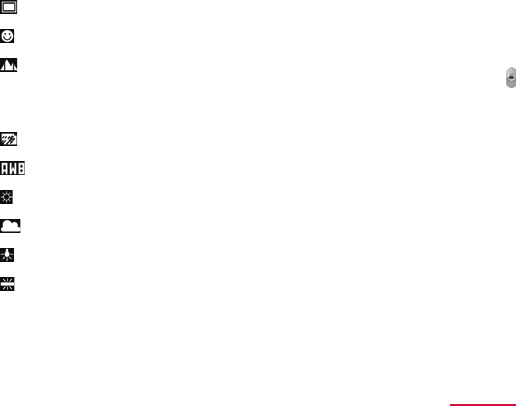
a Set Flash
Set whether to use ash.
b Switch between In-camera and Out-camera
c Switch shooting mode※1 / Switch White balance※2
(Single shot)※1
Capture still images.
(Smile shot)※1
Detect and capture a smile.
(Panorama)※1
Capture maximum 8 still images and make them into a panorama picture.Tap
, take the 1st photo, and move the camera from right to left or up and down to
display green frame. Point the camera to nd the frame in the middle of the screen,
the 2nd photo is taken automatically.
(Action shooting)※1
You can shoot moving object continuously to t in a panorama.
(Automatic)※2
Adjust color to be natural color in various situations automatically.
(Clear weather)※2
Adjust color to suit shooting in clear weather.
(Cloudy weather)※2
Adjust color to suit shooting in cloudy weather.
(Incandescent lamp)※2
Adjust color to suit shooting under light from an incandescent lamp.
(Fluorescent lamp)※2
Adjust color to suit shooting under light from a uorescent lamp.
d Timer
e Exposure value
f Setting (P.305)
g Saving location of shot still images/videos
300 Application
h Switch capturing still image mode and capturing video mode
i Shutter
j Thumbnail
Tap to display the preview screen, and you can check the still image/video you
have taken.
k Automatic focus frame
Green: Succeeded in automatic focus Red: Failed
Tap the shooting screen, or touch and hold to fix the condition to bring the
camera into focus.
l Recordable time※2
※1 Appears only for still image settings.
※2 Appears only for videos.
Information
• If no operation is performed with Camera activated for approximately 2
minutes, Camera ends.
• Tap the shooting screen to keep the fixed condition to focus camera on
the object in the automatic focus frame. Tap for shooting.
301 Application
Setting before shooting
1 On the still image/video shooting screen, → Set required items
• Some items may not be set together.
項目 説明
ショートカットを編集 Add up to 4 shortcuts for frequently used setting
menus on the left.
自分撮り Capture image with in-camera.
フラッシュ Whether to use ash when capturing images.
撮影モード※1 通常撮影※1 Capture still images.
スマイル
撮影※1
Detect and capture a smile.
パノラマ※1 Capture maximum 8 still images and make them
into a panorama picture.
アクション
撮影※1
You can shoot moving object continuously to t in
a panorama.
302 Application
項目 説明
シーン撮影※1 Set mode suitable for the scene such as portrait
shooting or night scene shooting.
露出補正 Set exposure value.
フォーカス※1 Set focus mode.
タイマー Set self-timer.
撮影効果 Shoot images with special eect.
解像度 Select resolution (size) for shooting.
ホワイトバラ
ンス
自動※2 Adjust color to be natural color in various situations
automatically.
晴天※2 Adjust color to suit shooting in clear weather.
曇り※2 Adjust color to suit shooting in cloudy weather.
白熱灯※2 Adjust color to suit shooting under light from an
incandescent lamp.
蛍光灯※2 Adjust color to suit shooting under light from a
uorescent lamp.
測光※1 Set photometry.
補助グリッド Set whether to display a guideline on the shooting
screen.

303 Application
項目 説明
GPSタグ※1 Set whether to add location information on still
images.
保存先 Select saving location of shot still images/videos.
リセット Reset Camera settings
※1 Appears only for still image settings.
※2 Appears only for videos.
2 When setting is complete, tap or a place other than menu.
304 Application
Shooting still images
1 On the sill image shooting screen, point Camera at an object →
• Shutter sound sounds and then an image is shot.
• The shot still images are automatically saved.
• Touch and hold when shooting to keep fixing the focus on an object in
auto-focus frame. Release your nger to capture.
Information
• Shot still image is saved in JPEG format.
Shooting videos
1 On the still image shooting screen, slide to switch for video
shooting
2 Aim the camera at object →
• Starting sound plays and start the shooting.
• Recording time is displayed on the upper rigth of the shooting screen.
3 To stop shooting,
• Stop sound sounds and video is saved automatically.
Information
• Before shooting video, check if the memory space is enough.
305 Application
Gallery
You can view or organize still images/videos saved to the terminal or
microSD card.
Supported type of le and the format are as follows.
種類 ファイル形式
静止画 BMP、WBMP、GIF、AGIF、JPEG、PNG
動画 MP4/3GP、AVI/DivX、MKV、WMV/ASF、FLV、WebM
1 From the Home screen, → "ギャラリー "
• An album list screen appears.
• Tap to activate Camera.
2 Tap an album
• A data list screen appears.
306 Application
Viewing still image/video
1 On the data list screen, tap a still image/video to view
• Still image is displayed in magnified view and you can select the video
player (P.●● ).
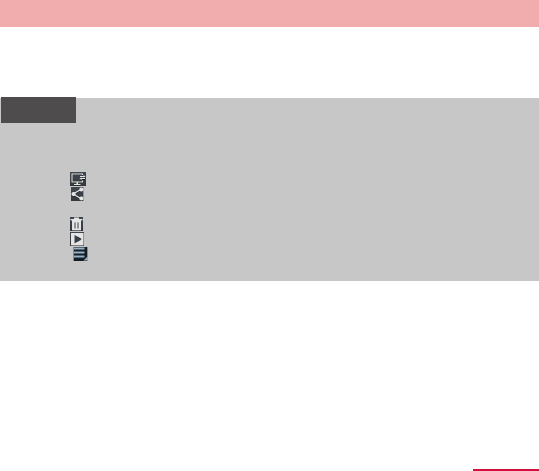
お知らせ
• Touch and hold an album or a data on the album/data list screen or tap
the screen while displaying a still image to operate followings. (Displayed
items depend on the screen you are using.)
- Tap to switch devices to display.
- Tap to upload to Picasa and YouTube, share data on AllShare, send
via Bluetooth and Gmail etc.
- Tap to delete data.
- Tap to display still image and video as slide show.
- Tap to confirm details, save as wallpaper or save on contact
information, operate to cut and rotate sideways etc.
307 Application
Video Player
You can play moving pictures saved to the terminal easily.
1 From the Home screen, → "動画"
2 Tap " サムネイル", "リスト" or " フォルダ " tab
3 Tap a moving picture
• Playing moving picture starts.
• When you tap the screen, an operation icon appears and you can perform
the following operations.
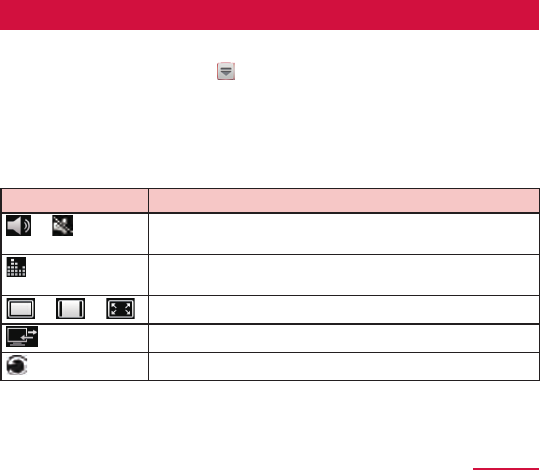
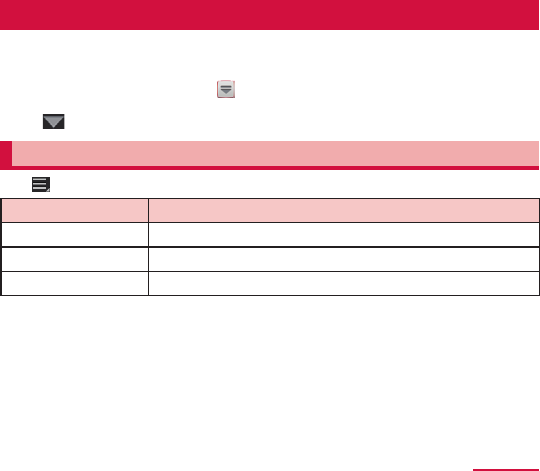
項目 説明
/ Tap to activate/deactivate muting. Adjust volume by
volume bar.
Switch the SoundAlive setting between "標準 ", "音声 ", "映
画" and "5.1 チャンネル".
/ / Switch view size of moving picture.
Connect to device.
Switch between longitudinal display and lateral display.

308 Application
項目 説明
Indicate the current play position. Drag left and right to
change the play position.
/ Tap to skip to data top/next data. Touch and hold to
rewind/fast forward.
/ Play/Pause.
When playing moving picture, register a preferable
position as a bookmark.
Information
• Press while the replay screen is displayed to lock the screen.
on the video replay screen is displayed, and the functions will not be
activated even by tapping the screen.
309 Application
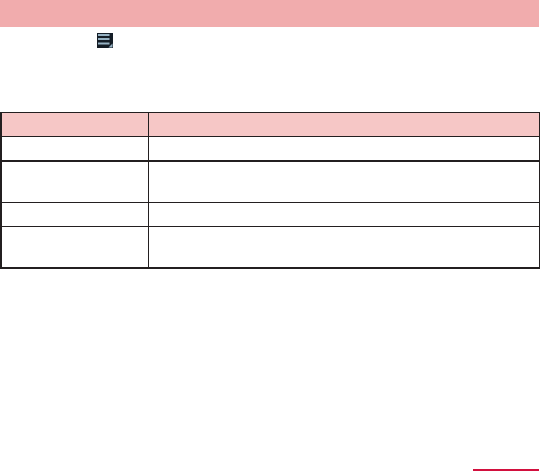
Menu of the Video player
When you tap on the list screen or play screen, the following operation menu
appear.
• Available function varies by data type or screen.
■ List screen
項目 説明
ソート Change order of list view.
共有 Upload to YouTube, share data by AllShare, or send via
Bluetooth or Gmail.
削除 Delete from list view.
次の動画を自動再生 Set whether to start playing the next moving picture le
automatically after the end of playing.

310 Application
■ Play screen
項目 説明
共有 Upload le to YouTube, share le with AllShare, Wi-Fi,
send via Bluetooth or Gmail can be done.
トリミング Crop video.
Bluetooth Output voice sound to Bluetooth device.
設定 Set replay speed on the replay screen, subtitles etc.
詳細 Check data details.
Checking DivX® VOD register key
To play DivX® Video On Demand contents (VOD) in the terminal, registration is
required.
You can check the code necessary for registration in the following steps.
1 From the Home screen, → "設定" → " 端末情報 " → " 法定情報 " → "
ライセンス設定" → "DivX® VOD" → "登録"
• A register code appears.
• For registration etc., refer to http://vod.divx.com.
311 Application
Music Player
You can play music saved in the terminal or microSD card easily.
Available file formats for playing are as follows. However, even if in an
available le format, some tune may not be played.
File format
AAC, AMR, WMA, 3GP, MP4/M4A, MP3, FLAC, OGG, WAV, MID/XMF/MXMF,
RTTTL/RTX, OTA, IMY
1 From the Home screen, → "音楽プレーヤー "
• A tab screen for selecting sort method of music.
2 Select tabs on the left of the screen → Tap data you want to
play
• Playing starts.
• When you play music on the selected tab screen, tapping the jacket icon
displayed at the right or bottom of the screen displays the play screen
and you can operate followings.
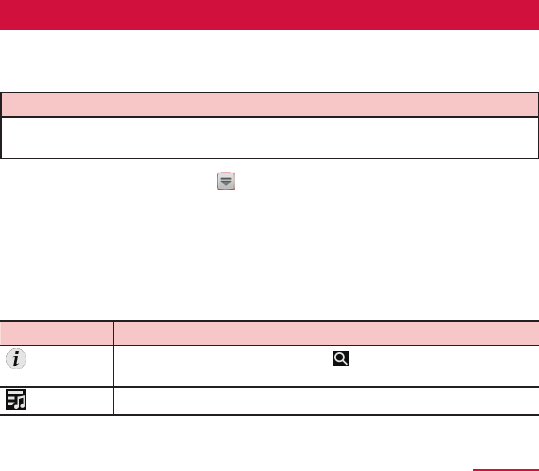
Item Description
Display details of the data. Tap to search related
information while displaying detailed information.
A list screen appears.
312 Application
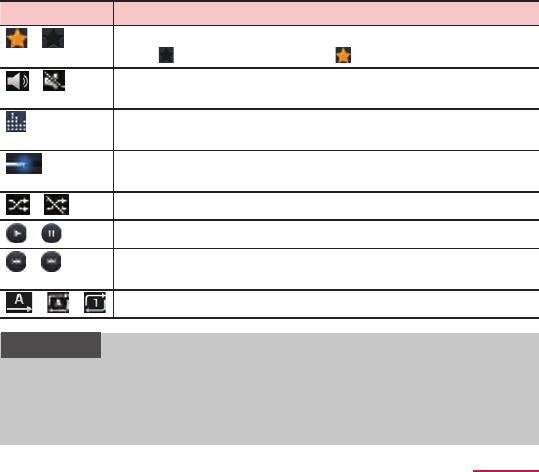
Item Description
/ Displayed in "Favorites" eld on the "Playlists" tab screen
when is tapped to change to .
/ Tap to activate/deactivate muting. Adjust volume by volume
bar.
Enjoy 5.1ch surround sound with a Stereo Headset with
Microphone (sample) connected.
Indicate the current play position. Drag left and right to
change the play position.
/ Set shue function to on/o.
/ Play/pause.
/ Tap to skip to data top/next data. Touch and hold to rewind/
fast forward.
/ / Set repeat mode (No repeat/All repeat/Repeat the track).
Information
• When Stereo Headset with Microphone (sample) is connected (P.●●),
press the switch for 1 second or longer to activate via this application.
While the application is activated, you can switch play/pause each time
you press the switch.
• Even when the screen lock is set during music play, the play continues.
313 Application
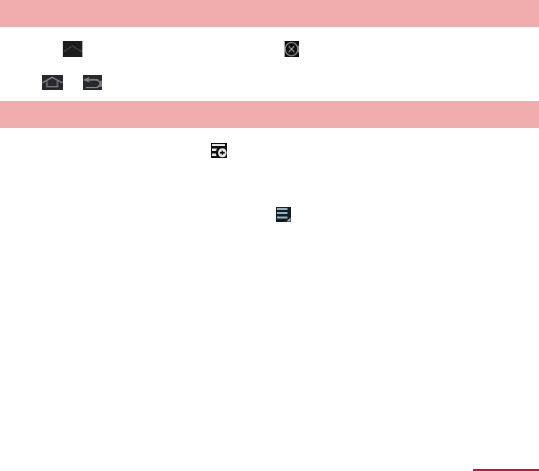
Ending Music playback
1 Tap → " タスクマネージャー " → of "音楽プレーヤー "
• When you play music, even if you return to the Home screen by tapping
or , the music playback does not end.
Creating playlist
1 On any of tab screens, → "新しいプレイリスト"
2 Enter a playlist name → "OK" → Tap data you want to add → " 完
了"
Alternatively, on the playing screen, → Tap "プレイリストに追加 " to add to
the playlist.
314 Application
Editing playlist
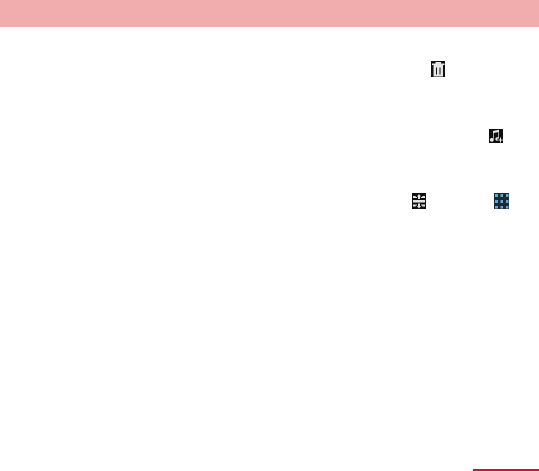
■ To delete playlist or data in a playlist
1 On the " プレイリスト" tab, tap a playlist to delete → → Mark a
playlist/data to delete → "削除" → "OK"
■ Adding songs to a playlist
1 On the " プレイリスト" tab, tap a playlist you want to edit → →
Tap data you want to add → "完了"
■ To sort songs in a playlist
1 On the " プレイリスト" tab, tap a playlist to edit → → Drag to
the point you want to move → "完了"
315 Application
Menu of Music player
When you tap on each tab screen or play screen, the following operation
menu appear.
■ Each tab screen
項目 説明
削除※1 Delete data.
共有※2 Share data by AllShare or send via Bluetooth or Gmail.
アラーム音として設定 Set as alarm sound.
プレイリストの名前を
変更※3
Change playlist name.
設定 詳細設定 Make sound settings or set time to end playing
automatically.
音楽メニュー
設定
Set items to display on a tab.
※1 Displayed on screens other than " プレイリスト " tab.
※2 Displayed on " 曲 " and " プレイリスト " tab.
※3 Displayed on the created playlist screen.
316 Application
■ Play screen
項目 説明
プレイリストに追加 Register or add a song to the playlist.
Bluetooth経由 Connect to Bluetooth and play music via Bluetooth.
共有 Send data via Bluetooth or Gmail.
アラーム音として設定 Set as alarm sound.
設定 詳細設定 Make sound settings or set time to end playing
automatically.
音楽メニュー
設定
Set items to display on a tab.
317 Application
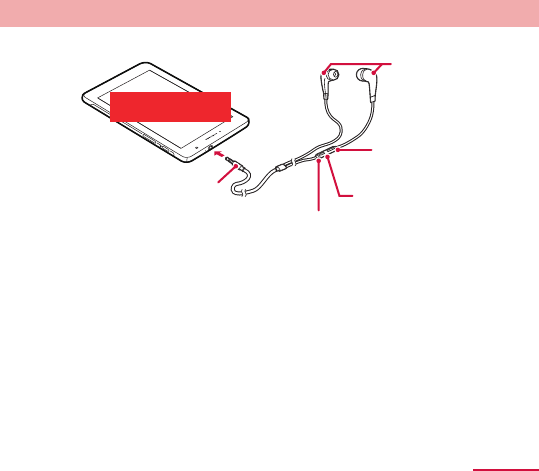
Using Stereo Headset with Microphone
Connect Stereo Headset with Microphone (sample) to the terminal.
Connection plug
Earpieces
Switch
Microphone (under side)
Volume
Controller
1 Insert the connection plug of Stereo Headset with Microphone to
the headphone connection jack of the terminal
• Insert the connection plug into the end of the headphone connection jack
properly.
IN PROGRESS
318 Application
Play Store
To use Google play, you need to set Google account (P.<?>).
Installing an application
1 From the Home screen, "Play ストア "
When you open Google play for the first time, the Terms of Use appears.
Tap "同意する ".
2 Search for an application you want to download, then tap it →
Check details
3 " ダウンロード"(if the application is free) or "Amount column"(if the
application is not free)
If the application needs to access the data or functions of the terminal,
functions to be used by that application are indicated on the screen.
4 " 同意してダウンロード" (if the application is free) or "同意して購入"
(if the application is not free)
• After the completion of downloading and installing, appears in the
status bar.
• Be very cautious about applications that have access to many functions
or a significant amount of your data. Once you select "同意してダウンロー
ド" or " 同意して購入" on the screen, you are responsible for the results of
using the application on the terminal.
319 Application
To purchase an application
For detail, → Tap "ヘルプ " to refer to Google play Help.
Information
• Be sure to check the security of application, and then install it at your
own risk. The terminal may be infected with a virus and the data may be
damaged.
• NTT DOCOMO is not liable for malfunctions, if any, caused by the
application you installed. In such case, the repair is charged even during
the warranty period.
• NTT DOCOMO is not liable for any disadvantage brought to you or any
third party due to an application you installed.
• Some applications automatically perform packet communications. Packet
communication is kept active unless you disconnect it or the time-out is
occurred.
• If you are not satisfied with the purchased application, you can ask for a
deletion and refund within 24 hours of the purchase. For detail, → Tap "
ヘルプ" to refer to Google play Help.

320 Application
Samsung Apps
You can download a lot of applications Samsung recommended easily
using Samsung Apps.
Opening Samsung Apps
1 From the Home screen, → "Samsung Apps"
For the first time of opening Samsung Apps, the disclaimer appears. Tap "
同意する".
2 Search an application you want to use and download it
Information
• Samsung Apps may not available depending on the country or region. For
details, refer to the Support in Samsung Apps site.

321 Application
GPS/Navigation
By using Google Map, you can search for the current location or other
locations, or obtain guide information to destination.
• To use Google Map, enable data connection (LTE/3G/GPRS) or connect to
Wi-Fi.
• Google Map does not cover the whole world or region.
322 Application
Enabling location information
• If you use an application that uses location information, you need to enable
GPS function in advance. You can set for detecting location information more
accurately using Wi-Fi/Mobile network or the motion sensor.
1 From the Home screen, → "設定" → " 位置情報サービス "
2 Mark a detection method
• You can enable all.
項目 説明
無線ネットワークを使
用
Detect location information using Wi-Fi/Mobile network.
GPS機能を使用 Detect location information more accurately. However,
the terminal consumes much power of battery.
位置情報履歴 Save the last location accessed.
位置情報とGoogle 検
索
Allow Google to use location information.

323 Application
Precautions on using GPS
• Use the GPS system with great care. DOCOMO is not liable for any damage
caused by abnormality of the system.
• Note that DOCOMO shall have no liabilities for any purely economic loss
including those due to missing a chance to check the measurement
(communication) results because of external factors (including the running
out of the battery), such as a failure, malfunction, or any other problems of
the terminal or the power failure.
• You cannot use the terminal as a navigation device for an aircraft, vehicle,
and person. Note that DOCOMO shall have no liabilities whatsoever even if
you suffer damage or loss while performing a navigation using the location
information.
• You cannot use the terminal as a high-accuracy measurement GPS. Note
that DOCOMO shall have no liabilities whatsoever even if you suffer damage
or loss due to a deviation of the location information.
• GPS is operated by the U.S. Department of Defense. The department controls
the accuracy of the system, and manages the system. Therefore, GPS radio
wave condition may be controlled (degradation of accuracy, suspension of
radio wave transmission, etc.) at the discretion of the U.S. Department of
Defense.

324 Application
• Some wireless communications products (mobile device, data detectors
and some others) block satellite signals and also cause instability of signal
reception.
• Some map displays based on location information (latitude/longitude
information) may be not accurate due to some countries' or regions'
regulations.
■ Where radio waves are dicult to receive
Note that radio waves may not be received or it may be difficult to receive
radio waves in the following conditions, since GPS uses radio waves from a
satellite.
- Inside or immediately under a building
- Inside a basement or tunnel, and below the ground or water
- Inside a bag or box
- Building area or residential area
- Inside or under a thick covering of trees
- Near a high-voltage cable
- In a car, inside a train compartment
- Bad weather such as heavy rain or snow
- When there are obstructions (people or objects) near the terminal
325 Application
Opening Google Map
1 From the Home screen, → "マップ"
Checking the current location with Google Latitude
You can check where a friend is on the map and vice versa or send a
mail. You can also search the route to the friend's current location.
• To share the location information, you need to join Latitude and invite friend
whom gives your location information to, or to receive an invitation from friend.
Joining/Opening Latitude
1 From the Home screen, → "Latitude"
• When a map is displayed with Google Map, tap → "Join Latitude" /
"Latitude".
Information
• For detail of Latitude, on the Latitude screen, tap → " ヘルプ " to refer to
Mobile Help.
326 Application
Using Google Map Navi
You can check driving route to the destination and use navigation.
• Note that the accuracy and currency of map, route information, etc. are not
guaranteed.
• While driving, the person other than the driver must operate it.
Starting navigation
1 From the Home screen, → "ナビ"
• For the rst activation, a usage precaution screen appears. Tap " 同意する
" and a destination selection screen appears.
2 " 目的地をキーボードで入力" → Enter name of place in the "目的地"
eld → Tap the destination from the candidate place list
Navigation starts.
• By tapping " 目的地を音声入力 ", " 連絡先 ", etc., you can input a destination by
voice or use an address saved in a contact.
327 Application
Exiting navigation
1 On the navigation screen, → "ナビゲーションの終了 "
• Even when you return to the Home screen by pressing on the
navigation screen, the navigation does not end.
Information
• For detail of Google Map Navi, on the navigation screen, → "ヘルプ " to
refer to Mobile Help.
Using Places
You can search restaurants, attraction, etc. in the current location area
using Google Map.
1 From the Home screen, → "ローカル" → Tap a category you
want to search → Tap information to check
• If there is no category you want to search, tap at the top of the screen,
and enter desired search categories or shop names, etc. in keyword eld.
• To add a category, → "検索を追加 " → Enter a category etc. → Tap .
328 Application
Google Talk
You can use Google Talk to chat with registered parties.
• To use Google Talk, you need to set Google account. When a setting
screen of Google account appears, perform the settings and then operate it
(P.<?>).
1 From the Home screen, → "トーク"
Information
• For detail of Google Talk, from Google Talk screen, → Tap " ヘルプ" to
refer to Google Talk Help.
329 Application
YouTube
YouTube is a free online video streaming service. You can view or post video.
Playing video
1 From the Home screen, → "YouTube"
2 Tap a video you want to play
• The video is played.
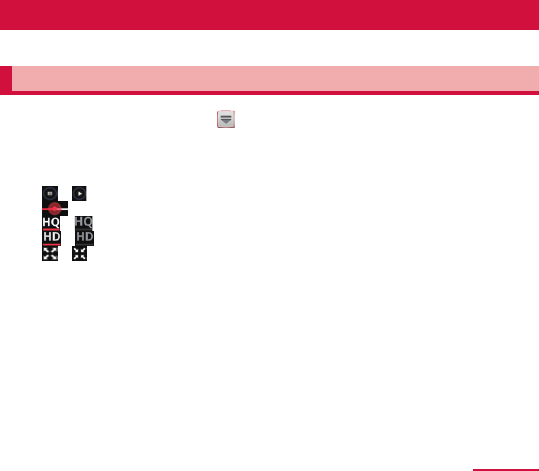
• Tap the screen to display the following icons.
• / : Tap to switch pause/start playback.
• : Drag left and right to rewind/ fast forward.
• / : Tap to turn on/o high quality playback (HQ).
• / : Tap to turn on/o high quality playback (HD).
• / : Tap to zoom in/out playback screen. Alternatively, double tapping
the screen zooms in/out the playback screen.

330 Application
Posting video
You can post video you shot from the terminal.
• To post videos to YouTube, you need to log in YouTube via Google account or
YouTube account.
1 From the Home screen, " アプリ" → "YouTube" → "アカウント" tab
• If you are not login to YouTube, tap an account on the displayed login
screen, or " アカウントを追加 " → input user name and password → tap "ログ
イン".
2 " アップロード" → tap video on gallery to post
• When the screen regarding network settings for uploading is displayed,
tap a network to use.
3 Enter/Set required items → " アップロード"
• Video will be uploaded.
331 Application
S Planner
By using S Planner, you can manage your schedule. You can also
synchronize the terminal S Planner with online service S Planners such
as Google Calendar.
Displaying a S Planner schedule
1 From the Home screen, → "Sプランナー "
2 Select a display method by a tab at the top of the screen → Tap
schedule
Creating a S Planner schedule
1 一覧画面で をタップ
• If a screen related to Google calendar synchronization appears, check
and tap "完了 ".
2 " イベント登録" or "タスク登録"
3 Set each item
• To notify the start time of schedule with alarm, set " 通知 ".
• If you have multiple calendar accounts, tap "S Planner" and select one.
4 "保存"
332 Application
Information
• Tap schedule from the event list to delete/edit the schedule → tap "削除
"/"編集 ".
• Tap schedule from the event list to send schedule in vCalendar format →
→ tap "転送 ".
• Tap schedule from the event list → → tap " 共有 " to share via "フォトコ
レクション" "Bluetooth" "ChatON" "E メール" "Wi-Fi Direct".
• You can input schedule for an hour or whole day easily by holding and
touching the time or date on the "日 "/"週 "/"月 " screen.
333 Application
Releasing the alarm of a schedule or setting snooze
When an alarm is notied, operate the followings.
1 Tap on the status bar → Tap a notication → Mark schedules
you want to cancel alarm/set snooze* → "スヌーズ"/"解除 "
• Tap " スヌーズ時間を設定 " to cancel all alarm, or to set snooze on schedule.
※ Snooze is a function that sounds the alarm again in a while even after it
is stopped.
Changing the S Planner settings
You can set details of calendar view, etc.
1 On S Planner screen, → "設定 "
2 Select setting item you want to change
334 Application
Alarm
Notify you with sound or vibration at the specied time.
1 From the Home screen, → "アラーム"
2 → Set time, alarm sound, etc. → " 完了 "
• Tap to set alarm volume, snooze, etc.
Information
• Alarm operates when set time arrives. To stop alarm sounding, drag . If
you drag , the alarm sounds again after set time for snoozing is passed.
• To make the set alarm OFF, tap to change to .
• To delete saved alarm, tap a saved alarm, " 削除 " → "OK".
• The alarm sounds and operates even while manner mode is set.
335 Application
World clock
You can check date and time of registered city/country by a list.
1 From the Home screen, → "世界時計"
2 → Select a city/country to register →
Information
• To rearrange the order of registered cities/countries, → to the
position you want to move to → Tap "Done".
• To delete registered city/country, → Mark a city/country to delete →
Tap "Remove".
336 Application
Calculator
You can four arithmetic operations (+, -, ×, ÷), percent calculus,
functional calculus, etc.
1 From the Home screen, → "電卓"
• Turning the terminal sideways switches to the alpha calculator.
• Tap to display history.
Menu of calculator
Tap to display the following items.
項目 説明
履歴を消去 Clear history.
関数電卓※Display alpha calculator.
テキストサイズ Set character size.
※ Display only when the terminal is in vertical position.
337 Application
Pen memo
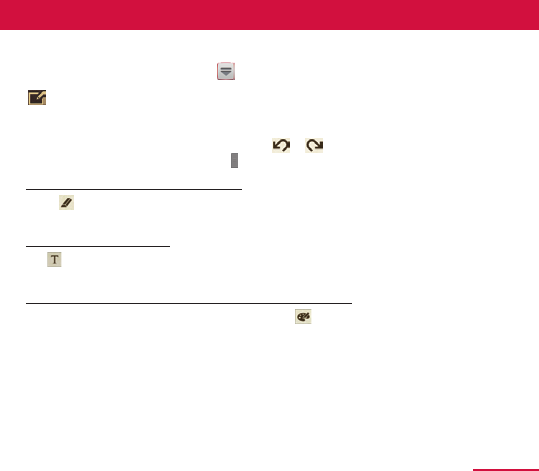
You can create Pen memo by handwriting, etc.
1 From the Home screen, → "ペンメモ"
2 • The handwriting screen appears. Touch the screen lightly with your nger
for handwriting input.
• You can cancel/retry by tapping / at the bottom of the screen or
scroll the page by dragging .
To delete handwritten character
Tap on the handwriting screen to delete content entered by touching
with the nger.
To enter a text string
a on the handwriting screen → Tap the position to enter a text string.
bEnter a text string by keypad → Tap the input screen
To set color and width of lines, background color
In the handwritten entry screen, tap to set brush, eraser, color, line
breadth or theme.
3 "完了"
• Created Pen memos are listed. Tap a Pen memo on the list screen to
display all text screen. Tap displayed Pen memo to edit.
338 Application
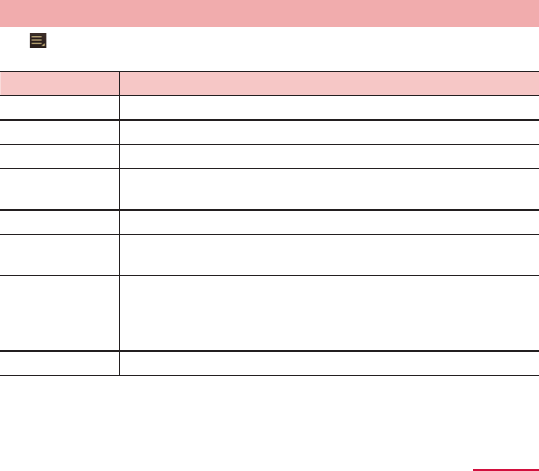
Menu of Pen memo
Tap on the list screen, all text screen or creating/editing screen, the
following operation menu appears.
項目 説明
ソート※1 Change sort order of Pen memos.
全て消去※2 Delete all entered/inserted contents.
挿入※2 Insert an image.
共有方法を選択 Upload to Picasa, share data by AllShare, or send via
Bluetooth or Gmail.
エクスポート Save a created Pen memo as an image/memo.
登録※3 Set a still image as Home screen wallpaper, lock screen
wallpaper or save it to contacts.
印刷 Print Pen memo with a compatible Samsung printer
connected via Wi-Fi or USB cable.
• Printers corresponding to this function do not exist in
Japan as of ●● 2012.
メモの同期※1 Synchronize with Google Docs.
339 Application
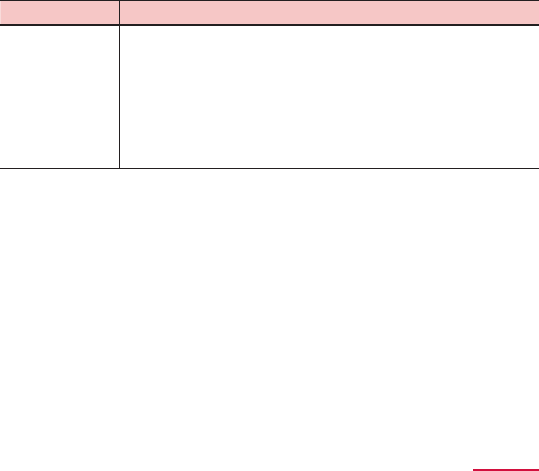
項目 説明
自動タグの設定※1 Set whether to enable auto tagging or delete information
saved by auto tagging.
• Mark " 自動タグを有効 " to save running application names,
etc. on a Pen memo saved using Pen memo in mini
applications (P.<?>). Saved information can be checked
while displaying list or on an all text screen/editing memo
screen. Some applications can be activated by tapping
saved information.
※1 Displayed only on the list screen.
※2 Displayed only on the creating/editing screen.
※3 Displayed only on all text screen, creating/editing screen.
340 Application
Polaris Oce
You can display/edit Office document in the terminal, or create new
one. If you have an account of Box. net account, you can manage the
document online.
Compatible le type and version are as follows.
• Some les with password may not be available.
Type Version/Extension
Microsoft Word Word 97-Word 2010/doc, docx
Microsoft Excel Excel 97-Excel 2010/xls, xlsx, csv
Microsoft
PowerPoint
PowerPoint 97-PowerPoint 2010/ppt, pptx, pps
Adobe Acrobat Acrobat 3.0 - 9.0 (PDF version 1.2 - 1.7)*
Other txt, hwp, rtf
※ PDF is only to be read.
1 From the Home screen, → "Polaris Oce"
The home screen of Polaris Oce appears.
• When "User registration" appears, enter Email address and tap " 登録 " to
subscribe.
341 Application
Creating a new document
1 On the home screen of Polaris Oce, "New le" → Select a
document type
• Tap "設定" to generate backup files, display extensions, or update
applications.
2 Enter a document
3 To save the document, → Enter a le name and select saving
location
4 "保存"
After saved, document editing screen appears. To return to the home
screen of Polaris Oce, tap twice or 3 times.
342 Application
Displaying/Editing document
1 On the home screen of Polaris Oce, tap a document to display/
edit
• " 最近使用した文章 ": Search from recently used document.
• " ブラウザ ": Search document from the destination to save.
• " クラウド ": Search document saved on the online data storage.
• " フォームダイプ ": Search by types of document.
• " お気に入り ": Search from document added to favorites.
2 Tap document to display/edit
■ Deleting saved document
1 On the home screen of Polaris Oce, "Local Storage" → Select
saving location
2 Mark the document → → "OK" → "OK"
343 Application
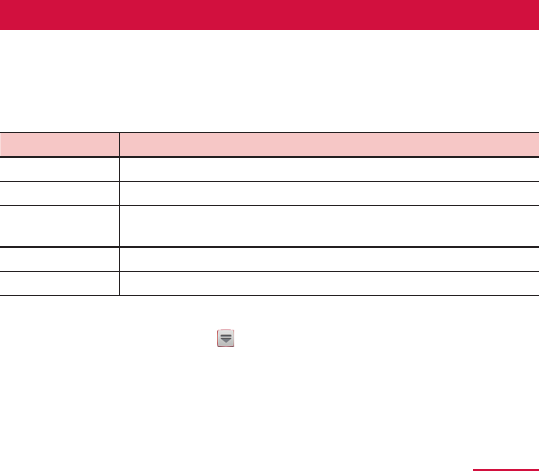
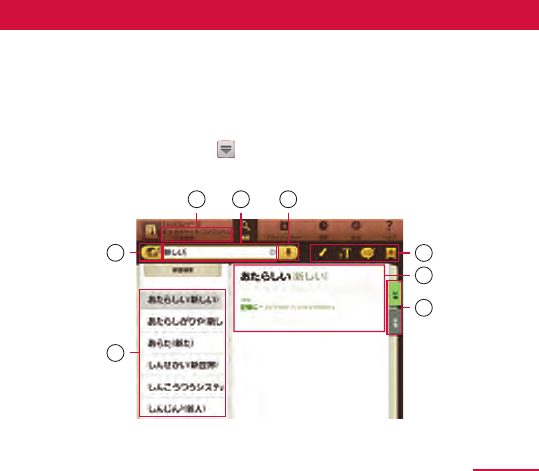
Dictionaries
Use three foreign language dictionaries (Japanese, English, Korean) to
search for words and phrases.The following dictionaries are included at
time of purchase.
• 旺文社ポケットコンプリヘンシブ英和・和英辞典 ©2010 Obunsha Co.,Ltd
• ニューエース日韓・韓日辞典 ©DIOTEK Co.,Ltd
1 From the Home screen, → "辞典"
2 Enter a search word in the keyword entry eld
1
2
3
4
5
7 8
6
344 Application
a Change dictionary
• Switch between "ENG-JPN"/"JPN-ENG" or "JPN-KOR"/"KOR-JPN"
b Search candidates list
c Special functions toolbar
• :Highlight selected portions of text.
• :Change the font size of text.
• :Add memos to displayed words.
• :Save displayed words in ashcard.
d Words and text
• Tap text or drag it to the left of the screen and search candidates list does not
show. To show search candidates list again, drag text to the right of the screen.
e Switch contents of text display
f Dictionary currently in use
• Tap to switch types of dictionaries.
g Keyword input eld
h Voice search
お知らせ
• Tap → select " 作成 " to create new ash card folder.
345 Application
Dictionary menus
The folliwing items are displayed on the top of the screen.
項目 説明
検索 Return to dictionary screen.
フラッシュカード Show saved vocabulary lists.
履歴 Show search histories.
設定 Customize fonts.
ヘルプ Check dictionary app usage methods, notation rules, and
product information.
346 Application
Downloading
You can record/manage the downloaded file using application such as
browser of the terminal.
1 From the Home screen, → "ダウンロード"
• The downloaded file list downloaded by browser on the internet on the "
インターネットダウンロード" tab screen is displayed. The downloaded file
downloaded by other than the internet is displayed on the " その他のダウン
ロード" tab screen.
Tap the le name to display the corresponding le with the terminal.
Sharing the downloaded le
Place a check mark on the le to share on the le list screen, → tap the
sharing method.
Deleting the downloaded le
Place a check mark on the le to delete on the le list screen, tap .
Information
• "失敗" etc. will be displayed on the file list screen for the file failed to
download. Tap the le name to download again.
• Every time you tap "サイズ順"/"日付順" on the file list screen, you can
switch the displaying order of the list.

347 Application
Backing up SD card
You can move and back up phonebook entries, sp-mode mails, bookmarks,
etc. using external media such as microSD card.
• Do not remove the battery pack or micro SD card from the terminal while
backing up or restoring data. Data on the terminal may be damaged.
• When item name of contacts of another terminal (phone number etc.) is
different from the terminal, the item name may be changed or deleted. And
registered character may be removed because the characters that can be
registered to phonebook vary by terminal.
• Phonebook data available to back up is phonebook saved in docomo account
and the terminal.
• When backing up phonebook entries to microSD card, data without a name
registered cannot be copied.
• Backup may not be performed if the microSD card does not have enough
memory. In this case, delete unnecessary les to make available memory.
• Backup or restoration may not be performed if the battery level is low. In that
case, charge the terminal then try to back up or restore again.
• When a microSD card is not inserted, data such as still images and videos are
stored on the terminal. With this application, image data only stored on the
terminal can be backed up. Data stored in microSD card cannot be backed up.
348 Application
Backing up data
You can back up data such as phonebook entries, sp-mode mails, media les.
1 From the Home screen,
→ "SDカードバックアップ"
• For the first activation, an agreement appears. Read the contents and
then tap "同意する ".
2 " バックアップ" → Mark data to be backed up → "バックアップ開始"
→ "OK"
3 Enter DOCOMO apps password →"OK"
• Selected data is stored in microSD card.
4 " トップに戻る"
Restoring backup le to the terminal
You can restore data such as phonebook entries, sp-mode mails, media les.
1 From the Home screen,
→ "SD カードバックアップ"
2 " 復元" → "選択 " of data type to be restored → Mark data to be
restored → "選択"
3 Select restoration method → " 復元開始" → "OK"
4 Enter DOCOMO apps password → "OK"
• Selected data is restored to the terminal.
5 " トップに戻る"
349 Application
Copying phonebook entries saved in the Google account
or the terminal to docomo account
Contacts saved in Google account phonebook and in "連絡先" application
provided by Samsung can be copied to docomo account.
1 From the Home screen,
→ "SD カードバックアップ"
2 " 電話帳アカウントコピー " → "選択 " on the phonebook entry to be
copied → "上書き"/"追加 "
• Copied data is saved to docomo account.
3 "OK"
Setting schedule to back up automatically
1 From the Home screen,
→ "SD カードバックアップ"
2 " 定期バックアップ設定" → "スケジュール追加" → Mark " スケジュールを
ONにする"
3 " 選択" → Mark data to be backed up → "選択 "
4 Select a repeat task → Set an execution time → " 決定"
5 " 設定" → Enter password → "OK" → "OK"
350 Application
Pulse
The latest information is automatically acquired from the registered
websites and listed.
1 From the Home screen, → "Pulse"
• Information for websites registered to Pulse listed in rows.
• By default, using tips for Pulse (HINTS) are displayed on the rst line (in
English only).
2 Tap information you want to view
Information
• The following items appear when you tap on the information list screen
for Pulse.
- "Settings": Set display, refresh interval, conditions, etc.
- "Refresh All": Refresh list display with the latest information.
- "Hide Read"/"Show All": Set whether to display read information in the
list.
- "Info/Support": Display support forum or inquire by Email.
• Tap to select/add the website.
351 Application
Social Hub
Social Hub is a messaging application for integrating SMS, Email, SNS
(Social Network Service). You can check and send SMS or email, or
update information of SNS.
1 From the Home screen, "Social Hub"
2
「フィード」/「メッセージ」 → Tap an account you want to check
or use
• Tap to create SMS or email.
お知らせ
• To add an account such as SNS, → Tap "Accounts" (P.<?>).
352 Application
Photo editor
You can edit the shot image or saved image on the terminal or microSD
card.
1 From the Home screen, → "フォトエディター "
2 " 画像を選択"/"写真撮影" → select image
• The editing screen of photo editor is displayed.
• Tap "画像を保存 " to activate camera, and you can shoot still images. Tap "
保存" after shooting to switch to the edit screen.
3 Edit
4 → enter le name → "OK"

353 Overseas Use
International roaming
Overview of international roaming (WORLD WING)
The international roaming (WORLD WING) is a service that allows
you to use the same device number and Email address as ones used
in Japan within the service area of overseas network operator that
is associated with DOCOMO. You can use without changing of
SMS settings.
■ Supported network
This terminal is a Class 4 device. You can use the terminal in 3G network and
GSM/GPRS network service area. Services are also available in countries and
areas supporting 3G850MHz/GSM850MHz. Check supported area. For areas
out of Xi area such as overseas, connect to 3G or GSM/GPRS network.
■ Before using the terminal overseas, refer to the followings
• “User’s Guide [International Services]”
• DOCOMO International Services website
Information
• For country codes/international call access codes/universal number
international prex, supported countries/areas and network operators,
refer to “Mobile device User’s Guide [International Services]” or the
DOCOMO International Services website.
354 Overseas Use
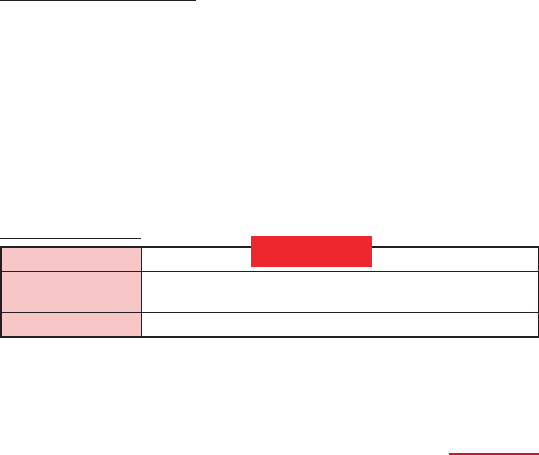
Available services overseas
(○ : Available × : Unavailable)
Main
communication
services
3G 3G 850 GSM GSM 850 LTE
2100
SMS ○ ○ ○ ○ ×
Mail*1 ○○○○×
Browser*1 ○○○○×
Position location
of GPS*2 ○○○○×
*1 To use data communication during roaming, enable Data roaming. (P.361)
*2 Using the GPS location (conrm the current location) packet
communication fees are charged as when using mail and browser.
Information
• Some services are not available depending on the overseas network
operator or network.
IN PROGRESS

355 Overseas Use
Before using terminal overseas
Checking before leaving Japan
To use the terminal overseas, check the following in Japan.
■ Subscription
• Conrm your application status of WORLD WING. For details, contact
“General inquiries” on the last page of this manual.
■ Usage fee
• Overseas usage charge (packet communication) diers from those
in Japan.
• Since some applications automatically perform communication, your packet
communication charges may be higher. For operation status of each
application, please check it to the application provider.
356 Overseas Use
Checking in the country you stay
When you arrive overseas and turn on the terminal, an available network
is automatically connected.
■ Connection
The optimum network will be selected automatically if “自動選択” is selected
for “Available networks” in “ネットワークオペレーター”.
When you connect to the network operator conducted in at-rate service, you
can use the service with at-rate packet communication charges overseas
up to the specied upper limit per day. Also, you need to subscribe packet
at-rate service in Japan to use it. For details, see “User’s
Guide [International Services]” or DOCOMO International Services website.
• Network operator setting → P.360
■ Display
A network type in use is displayed on the status bar.
: During International roaming
/ : GPRS connecting/in use
/ : 3G (Packet) connecting/in use
/ : FOMA high speed (Packet) connecting/in use
• Connected network operators are viewable on the notication panel.
IN PROGRESS

357 Overseas Use
■ Date and time
When you marked “自動日時設定” in “日付と時刻”, the time or time dierence
of the terminal is corrected by receiving information about time or time
dierence from the network overseas operator in connection (P.237).
• Correction of the time and time dierences may not be performed correctly
depending on the network of overseas network operator. In that case, set
time zone manually.
• Correction timing varies by overseas network operator.
• Date and time setting → P.237
■ About inquiries
• If the terminal or the UIM is misplaced or stolen overseas, immediately
contact DOCOMO from the spot and request for suspension of usage.
Please see “General inquiries” on the last page of this manual for contact
information. Be careful that you are charged also for communications,
if any, occurring after misplacement or stealage.
• For contact from a land-line phone etc., add “International call access
code” or “Universal number international prex” assigned to the countries.

358 Overseas Use
After returning to Japan
When you return to Japan, the terminal automatically connects to the
DOCOMO network. If you do not connect it, set the followings.
• Set network mode in “ネットワークモード” to “GSM/WCDMA (Auto mode)”
(P.359).
• Set “ネットワークオペレーター” in “モバイルネットワーク” to “自動的に選択”
(P.360).
359 Overseas Use
Setting for overseas network connection
When you use the terminal overseas, switching to network available
in the country you stay is required. By default, the terminal is set to
automatically search and switch to an available network. You can also
change the settings manually.
Setting Network Mode
1 From the Home screen, → “設定” → “その他...” → “モバイルネッ
トワーク” → “ネットワークモード”
2 Tap the network mode to be used rst
• GSM/WCDMA (Auto mode): Select from GSM network or 3G network
automatically.
• GSM only: Use only GSM networks.
• WCDMA only: Use only 3G networks.
360 Overseas Use
Checking an available network operator and setting it
manually
1 From the Home screen, → “設定” → “その他...” → “モバイルネッ
トワーク” → “ネットワークオペレーター”
• A list of searched network operator’s name appears.
• If information screen appears, tap “OK”.
• To search again, tap “ネットワークを検索”.
2 Tap a network operator name to connect
Information
• If you set a network operator to connect manually, the terminal cannot be
connected automatically to the other network operator when you move
out of the service area.
Selecting an available network operator automatically
1 From the Home screen, → “設定” → “その他...” → “モバイルネッ
トワーク” → “ネットワークオペレーター”
• If information screen appears, tap “OK”.
2
“自動的に選択”
361 Overseas Use
Enabling data roaming
1 From the Home screen, → “設定” → “その他...” → “モバイルネッ
トワーク”
2 Mark “データローミング”
• A warning message appears.
3
“OK”

362 Appendix/Index
Appendix/Index
Introduction of options and related devices
Combining terminal with optional accessories supports a wide variety of
uses from personal use to business use. Some products are unavailable
depending on the area. For details, contact a sales outlet such as a
docomo Shop.
For details about the optional devices, refer to the instruction manual for
each device.
• AC adapter SC01/SC02
• USB cable SC01
• USB conversion adapter SC01
• Desktop holder SC04
• HDMI cable SC02*1
• In-Car Hands-Free Kit 01*2
• Bone conduction microphone/receiver 02*2
• FOMA Portable Charging Adapter 02*1
*1 USB cable SC01 is required to connect with the terminal. If you charge the
terminal with the power on or using functions, charging may stop before
reaching the sucient battery level.
*2 You can connect to the terminal via Bluetooth communication.
IN PROGRESS
363 Appendix/Index
Sample (microSD card (1GB), Stereo Headset with
microphone)
• Sample is not covered by free repair warranty.
Usage
■ microSD card
Usage note
• Check how to correctly remove/install. Installing or removing forcefully might
cause malfunctions.
• When using microSD card, be sure to back up data.
• Samsung Electronics is not responsible for damage or loss of data on
microSD cards, regardless of the malfunctions, damage/causes.
• The microSD card has a limited lifespan.If used for long periods of time or
repeatedly used, data writing and reading might no longer be able to be done,
and will slow down.
• Do not install microSD card and SD adaptor with labels and stickers stuck on
them. It will no longer be able to be installed/removed, and contact defects
might be caused.
• Dispose of microSD cards in accordance with local regulations.
364 Appendix/Index
In regards to liability items
Please be forewarned that Samsung Electronics shall bear no
responsibility whatsoever in regards to that which pertains to the
following items.
• Caused damages, lost earnings, or claims by third persons due to the use of
microSD card or unusable microSD card.
• Damage caused by failure to follow the information contained in
INSTRUCTION MANUAL when handling microSD card.
• Caused damages or data lost due to the use of microSD card.
- Samsung Electronics does not provide data recovery services.
• Damages caused by malfunctions in combination with connected devices or
software.
Main specications
Operating voltage 2.7 V – 3.6 V
External
dimensions
length : approx. 15 mm width: approx. 11 mm
thickness : approx. 1 mm
Weight approx. 0.29 g
IN PROGRESS
365 Appendix/Index
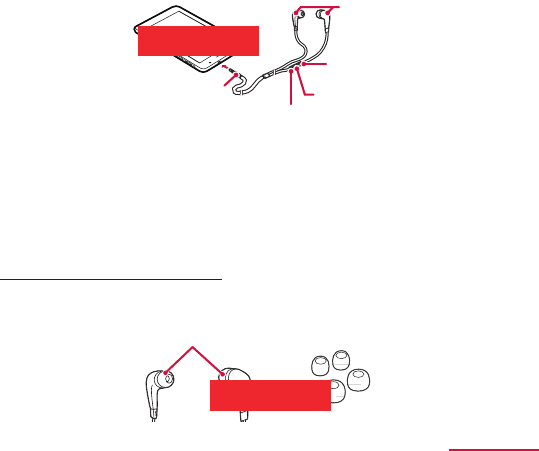
■ Stereo Headset with microphone
Connection
plug
Earpieces
Switch
SwitchMicrophone
(under side)
Volume
Controller
1 Insert the connection plug for the Stereo Headset with
microphone into the headphone jack
• Press the switch for 1 second or longer to activate the Music player.
While the Music player is activated or playing movies, press the switch to
play/pause.
• After using it, reverse the connection procedure to disconnect it.
When Earpiece sized do not t
Stereo Headset with microphone comes with two dierent sized earpieces.
If you feel they do not t, please change them.
Earpiece Earpiece (accessory)
IN PROGRESS
IN PROGRESS
366 Appendix/Index
Main specications
Connector shape 3.5 mm stereo mini plug
Impedance 32 Ω
Maximum input 40 mW
Sound pressure sensitivity 95 ± 3 dB/mW
Size Length Approx. 1180 mm
Weight Approx. 12.7 g (unit only)
• Specications and external appearance may be changed in order to improve
performance without prior notice.
IN PROGRESS
367 Appendix/Index
Troubleshooting (FAQ)
Troubleshooting
• First, check if software update is needed and if it is necessary, update the
software (P.385).
• When problems do not improve after checking the following items, contact
the phone number given in “Repairs” on the last page (in Japanese only) or
DOCOMO-specied repair oce.
■ Power supply
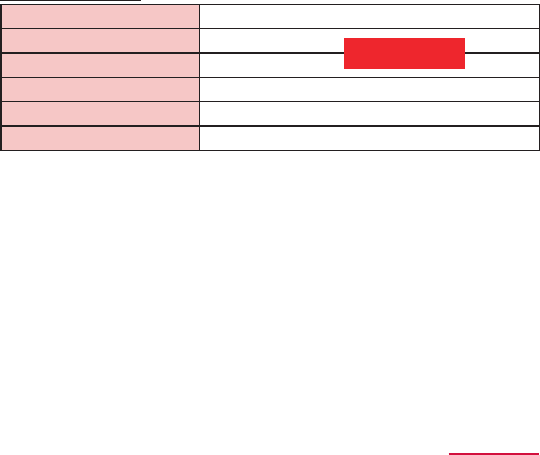
Trouble Check and remedy
Cannot power on the
terminal.
• Is the battery exhausted? → P.110
368 Appendix/Index
■ Charging
Trouble Check and remedy
Cannot charge the
terminal.
• Is the AC adapter connector correctly inserted to
an outlet?
• Are AC adapter and USB cable, or USB cable and
the terminal set correctly?
• When charging using USB cable for PC
connection (sample), does the power of the PC
turn on?
• If you execute data, communications or other
operation for a long time while charging, the
terminal may become hot and charging may
be unavailable. In this case, wait until the
temperature of the terminal down and retry
charging.
369 Appendix/Index
■ Terminal operation
Trouble Check and remedy
Become hot while
operating/charging.
• While operating or charging, or when you shoot a
moving picture while charging for a long time, the
terminal, battery pack or accessory AC adapter
may become hot. There is no problem about
safety and continue to use it.
The operation time
provided by the battery
pack is short.
• Is the terminal left for a long time out of service
area? Out of service area, much power is
consumed to search available radio waves for
communication.
• The operating time of the internal battery varies
depending on the operating environment and the
secular degradation of the battery pack.
• The internal battery is a consumable accessory.
The usage duration of the battery per one charge
decreases gradually each time the battery is
recharged. When the operation time is too short
even in the full charge state, contact “Repairs”
on the last page of this manual (in Japanese only)
or a DOCOMO-specied repair oce.
370 Appendix/Index
Trouble Check and remedy
No operation is performed
even by tapping the
touch screen.
• Does the screen lock set? Cancel the screen lock
by pressing . → P.98
The touch screen reacts
slowly when a button is
tapped.
• It may be occurred when large amount of data
is saved in the terminal or transferring large-size
data between the terminal and microSD card.
The UIM is not
recognized.
• Is the docomo mini UIM installed in the right
direction? → P.47
The clock is not on time. • The clock time may become wrong while turning
on the power for a long time. Check if Automatic
date and time is marked and turn the terminal
power o and then turn on again in a place with
strong radio wave conditions.
371 Appendix/Index
Trouble Check and remedy
The terminal operation
is unstable.
• It may be caused by some applications you
installed after purchase. If you activate the terminal
with safe mode, and the trouble is improved,
uninstalling those applications may work.
* Safe mode is a function to activate the terminal
with near-rst activation.
• Activating Safe Mode
With the power o, press the power key. While
“GALAXY Tab” appears on the screen, press
(volume down) for a while.
* When safe mode activates, “Safe mode” is
displayed at the bottom left of screen.
* To terminate safe mode, turn the terminal
power o and then turn on again.
• Back up some necessary data before activating
with safe mode.
• Some widget you created may be deleted.
• Safe mode is not normal activation. Terminate
safe mode for normal use.

372 Appendix/Index
Trouble Check and remedy
Data is not displayed
correctly/Cannot
operate the touch
screen correctly.
• Try “Factory data reset” (P.195).
Cannot cancel the
screen lock.
• Do you set unlock pattern for the screen lock/
PIN/password? → P.200
Cannot connect to the
network.
• Do you use in radio wave weak area?
→ P.116
The terminal does not
respond and cannot
operate.
• Press and hold for 10 to 15 seconds.
The terminal restarts automatically. Even if the
terminal is restarted, the trouble is not resolved,
try “Factory data reset” (P.195).
Application does not
work properly (cannot
activate, errors occur
frequently, etc.).
• Are there any applications being disabled? Enable
the disabled applications and try again.
→ P.●●
373 Appendix/Index
■ Display
Trouble Check and remedy
The display is dim. • Do you set elapsed time to turn o the screen
display? → P.198
• Do you change brightness setting of the display?
→ P.217
• Check if you activate Power saving mode.
→ P.219
• Check if you activate Auto adjust screen power.
→ P.217
• Is the battery level low? → P.56
■ Data display
Trouble Check and remedy
Images/sounds set
to each function do
not work, but default
images/sounds work.
• Is it the same docomo mini UIM card as when you
obtained the images/sounds? → P.47
374 Appendix/Index
■ Mail
Trouble Check and remedy
Email is not received
automatically.
• Is Email check frequency in the email settings set
to “設定なし”? → P.177
■ Camera
Trouble Check and remedy
Still images and moving
pictures shot with the
camera are blurred.
• When shooting a close object, switch to macro
shooting.
• Check if clouds or dirt attach to the lens of
camera.
An error message
appears when activating
Camera.
• Check the battery level. → P.110
• Check the memory space.
• Restart the terminal.

375 Appendix/Index
■ Overseas Use
Trouble Check and remedy
Cannot use the terminal
overseas.
■ When antenna mark is displayed
• Do you subscribe WORLD WING? Conrm your
application status of WORLD WING.
■ When (Out of service area) appears
• Check if you are out of the international roaming
service area or in an area with poor signal
strength.
Check if the service area and network operator
are available, referring to “User’s
Guide [International Services]” or DOCOMO
International Services website. Try to change the
network settings or overseas network operator
settings.
• Set “ネットワークオペレーター” to “自動的に選択”.
→ P.360
• Turning the terminal power to “OFF” and then
turning “ON” again may work for the restoration.
377 Appendix/Index
■ Data management
Trouble Check and remedy
Data transfer is not
performed.
• Do you use USB hub? When USB hub is used, the
terminal may not be operated correctly.
Data saved in microSD
card is not displayed.
• Remove and attach microSD card. → P.69
Image is not displayed. • If it is unsupported image data, appears.
■ Bluetooth function
Trouble Check and remedy
The terminal cannot
be connected
to a Bluetooth
communication
device/A Bluetooth
communication device
cannot be found from
the terminal.
• Make Bluetooth communication device
(commercial item) registering stand-by state
and then register the device on the terminal. If
you delete already registered device and register
the device again as a new device, delete the
registrations on both Bluetooth communication
device (commercial item) and the terminal and
then perform registration of the devices.
379 Appendix/Index
Device Anshin Remote Support
By sharing screens of your terminal with NTT docomo, you can receive
technical support to make settings.
• This service is not available if your docomo mini UIM card is not inserted,
during international roaming, or in Airplane mode.
• Device Anshin Remote Support is a service requiring subscription.
• Some operations and settings are not supported.
• For details of device Anshin Remote Support, refer to NTT DOCOMO’s
website.
1 Call スマートフォン遠隔サポートセンター (Remote support center for
device)
0120-783-360
Business hours 9:00 a.m. to 8:00 p.m. (open all year round)
2 From the Home screen, → “遠隔サポート”
• For the rst using, agree to “ソフトウェア使用許諾書 (License Agreement)”.
3 Enter connection number notied by DOCOMO
4 Remote support starts when you are connected

380 Appendix/Index
Warranty and After-Sales ServiceWarranty and
After-Sales Service
Warranty
• This terminal is provided with a written warranty. Make sure that you receive
it. Check the written contents and items such as “販売店名・お買い上げ日 (Shop
name/date of purchase)” and keep it in a safe place. If it does not contain the
necessary information, immediately contact the shop where you bought it.
The warranty is valid for a period of one year from the date of purchase.
• This product and all accessories are subject to change, in part or whole, for
the sake of improvement without prior notice.
• Since troubles, repair or other handling of the terminal may cause contents in
the Contacts etc. to be modied or deleted. DOCOMO recommends making a
copy of the Contacts data etc., in case.
* With the terminal, data such as phonebook entries can be saved to microSD
card.

381 Appendix/Index
After-Sales Service
When problems occur
Before requesting repair, read the section on “Troubleshooting” (P.367)
in this manual.
If the problem still persists, contact “Repairs” on the last page of this
manual (in Japanese only).
If the result of inquiries indicates that a repair is required
Take your terminal to DOCOMO-specied repair oce. Be sure to check
the business hours of the repair oce before you go. Also, you must
bring the warranty. Note that, repair may take longer time depending on
the state of damage.
■ In the warranty period
• The terminal is repaired at no charge subject to the conditions of the
warranty.
• The warranty must be presented to receive warranty service. The subscriber
is charged for the repair of items not covered in the warranty or repairs of
defects resulting from misuse (damage of the liquid crystal/connector etc.),
accident, neglect, etc. even during the warranty period.
• The subscriber is charged even during the warranty period for the repair
of failures caused by the use of devices or consumable items that are not
DOCOMO-specied.

382 Appendix/Index
■ Repairs may not be possible in the following cases.
• When corrosion due to moisture, condensation, perspiration, etc. is
detected, or if any of the internal boards are damaged or deformed (repairs
may not be possible if external connection jack/headphone connection jack
or the display is damaged, or the terminal outer case is lifted)
* Even in case that a repair is possible, since those conditions are outside
the range of the warranty, a repair is charged.
■ After expiration of the warranty
All repairs that are requested are charged.
■ Replacement parts
Replacement parts (parts required to maintain the product functions) are
basically kept in stock for at least 4 years after termination of production.
However, repair may not be possible due to lack of repair parts etc.
Depending on the nature of the required repair, it may still be possible to
repair your device even after this period. Call the contacts listed on the last
page of this manual, “Repairs” (in Japanese only).

383 Appendix/Index
Notes
• Do not modify terminal or its accessories.
- Doing so may cause re, injury or damage.
- Modied terminals etc. are repaired only after the customer accepts that the
modied parts are to be restored to the condition at the time of purchase.
However, repair may be refused depending on the nature of modication.
The following cases may be regarded as modications.
- A sticker etc. is put on the display part or keypad part
- The terminal is embellished with adhesive material etc.
- Exteriors are replaced with other than DOCOMO’S genuine parts
- Repair of failures or damage caused by modication is charged even during
the warranty period.
• Do not remove any inscription stickers attached to terminal. The inscription
stickers certify that the terminal satises specic technical standards. Note
that, if stickers are removed intentionally or reattached in such a way that
conrmation of the sticker’s contents is impossible, repair or servicing may
be refused because conrmation of whether the device conforms to relevant
technical standards cannot be made.
• Data such as settings for each function may be cleared (reset) by
malfunctions, repair or other handling of terminal. Should that happen, set up
the functions again.
• When the repair is executed, MAC address of Wi-Fi/Bluetooth address in the
terminal may be changed regardless of repaired part.

384 Appendix/Index
• Magnetic components are used in the parts that are described below. Do not
allow cash cards or other devices that are vulnerable to magnetism to come
into contact with the device.
Used parts: speaker, camera, vibrator section (around the Back key), around
the headphone connection jack
• If the terminal gets wet or moist, immediately turn the power o, remove the
battery pack, and bring the terminal to a repair oce as soon as possible.
However, repair may not be possible depending on the condition of terminal.
Precautions on Memory Dial (Contacts function) and downloaded
data
Note that data you created, retrieved or downloaded from sources other than
your terminal may be changed or lost when you change the model or have
repairs done to the terminal. DOCOMO shall have no liability for any change
or loss of any kind. Under some circumstances, DOCOMO may replace your
terminal with its equivalent instead of repairing it. When replacing your device,
most of the above-mentioned data cannot be transferred to the new device.

385 Appendix/Index
Software update
Software update
Download revision le for the terminal from the download site on the Internet
and update the software. For software update, connect to the network directly
on the terminal.
Precautions on software update
• Software update can be done with the data saved to the terminal remained.
However, note that depending on your terminal condition, the data may not be
protected. You are recommended to backup the user information and data in
the terminal just in case. However, some data may not be backed up.
• Prepare the followings before software update.
- Exit all programs running on the terminal (P.95).
- Charge the terminal (P.54) to make the battery level enough.
• It may take time to update software (download and installation of update
les).
• During installing the update les for software update, all functions are not
available.
• When you cannot perform any operations because of the failure of the
software update, please take your terminal to DOCOMO-specied repair oce.
IN PROGRESS
386 Appendix/Index
Connecting to the Internet by the terminal to update
You can connect to the network with the terminal to update the software of the
terminal.
• To use Software update, you need to set Google account. When a setting
screen of Google account appears, perform the settings and then operate it
(P.101).
1 From the Home screen, → “設定” → “端末情報” → “ソフトウェア
更新” → “更新”
2 Set according to the onscreen instructions
• When software update is completed, the terminal restarts automatically.
Information
• To suspend installation temporarily after downloading software, tap “後で”
on the conrmation screen for continuing installation.
When you suspend installation, the installation can be started immediately
by tapping “更新”.
IN PROGRESS

387 Appendix/Index
Connecting to a PC and updating
You can update software of the terminal using “Samsung Kies” (P.248)
installed to a PC.
1 Start Samsung Kies on a PC
2 Connect the terminal and a PC with USB cable
3 After this step, follow the onscreen instructions of the PC
388 Appendix/Index
Main specications
■device
Product name SC-01E
Size
Approx. 197 (H) x 183 (W) x 7.9 (T)
(Unit: mm)
(Maximum thickness: Approx. 7.9 mm)
Weight Approx. 345 g
Memory ROM 16 GB
RAM 1 GB
Continuous
stand-by time
FOMA / 3G Stationary (Auto): Approx. ●● H
GSM Stationary (Auto): Approx. ●● H
LTE Stationary (Auto): Approx. ●● H
Charging time Approx. 290 min.
IN PROGRESS
389 Appendix/Index
Display
Type AMOLED
Size Approx. 7.7 inches
Number of colors 16,777,216 colors
Number of dots 800× 1280 dots
Wide XGA(WXGA)
Image pickup
device
Type CMOS
Size Front camera: 1/5.0 inches
Rear camera: 1/5.0 inches
Number of eective pixels
Front camera:
Approx. 1,900,000 pixels
Rear camera:
Approx. 3,200,000 pixels
Number of recording pixels (Max.)
Front camera:
Approx. 1,900,000 pixels
Rear camera:
Approx. 3,200,000 pixels
Playing music
Windows Media Audio
(WMA) le
Continuous play time
Approx. ●● min.
MP3 le Continuous play time
Approx. ●● min.
Wireless LAN IEEE802.11a/b/g/n compliant*1
IN PROGRESS
390 Appendix/Index
Bluetooth
function
Version*2 Bluetooth standard Ver.3.0+EDR
Output Bluetooth standard Power Class 1
Vistaed
communication
distance*3
Within approx. 10 m
Bluetooth
function Compatible prole*4
Headset Prole (HSP)
Object Push Prole (OPP)
Serial Port Prole (SPP)
Human Interface Device Prole (HID)
Advanced Audio Distribution Prole
(A2DP)
Audio/Video Remote Control Prole
(AVRCP)
Personal Area Network Prole (PAN)
*1 IEEE802.11n supports 2.4 GHz and 5 GHz.
*2 It is conrmed that the terminal and all Bluetooth devices are compliant
with Bluetooth standards designated by Bluetooth SIG, and they are
authenticated. However, procedures may dier or data transfer may not be
possible depending on the device’s characteristics or specications.
*3 May vary by the signal status and/or whether there is interference
between communications devices.
*4 Standardized connection steps of Bluetooth communication by product
property.
IN PROGRESS
391 Appendix/Index
• Continuous transmit time is an estimate of the operation time for transmit when
radio wave reception is normal.
• Continuous stand-by time is an estimate of the stand-by time when radio
signal reception is normal.
The stand-by time may be decreased as low as half the time depending on
the conditions of battery charge, function settings, temperature, or radio
signal reception in the area (no reception or weak), etc.
• A use of the Internet connection reduces the communication)/stand-by
time. Composing emails or applications also reduces communication)/
stand-by time even if you do not communicate or use the Internet.
• Stationary continuous stand-by time is the estimated average operation time
when radio signal reception is normal in the stationary state.
• Charging time is an estimate for charging an empty internal battery with the
terminal power o. For charging with the terminal power on, it takes longer.
■ Internal battery
Battery used Li-ion battery
Nominal voltage ●.● V
Nominal capacity 5,100 mAh
IN PROGRESS
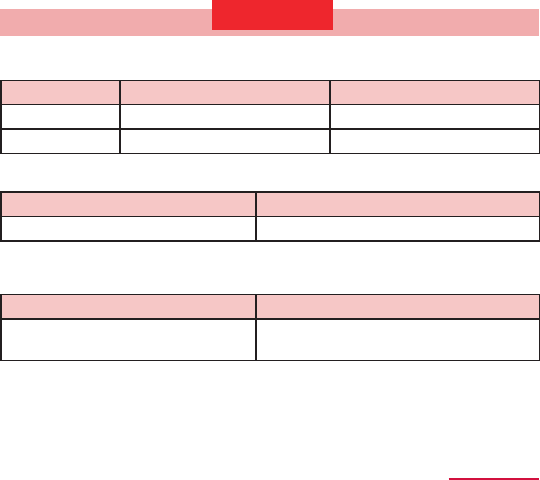
392 Appendix/Index
File format
Still images and moving pictures taken with the terminal will be saved in
following le formats.
Type File format Extension
Still image JPEG jpg
Moving picture MP4 mp4
■ Shooting number of still images (estimate)
Shooting size SC-01E *
1024× 768 Up to approx. 34,000
* Savable numbers by default.
■ Shooting time of moving pictures (estimate)
Shooting size SC-01E *
640× 480 Up to approx. 512 min.
(Up to approx. 60 min. per one shot)
* Savable numbers by default.
IN PROGRESS
393 Appendix/Index
Approval and compliance
For details (including identication number and approval number) regarding
approval and compliance mark on the terminal, you can check by operating the
terminal as following procedure.
From the Home screen, tap → “設定” → “端末情報” → “認証”.

Health and safety information
Exposure to Radio Frequency (RF) Signals
Certification Information (SAR)
Your wireless device is a radio transmitter and receiver. It is designed and
manufactured not to exceed the exposure limits for radio frequency (RF) energy set
by the Federal Communications Commission (FCC) of the U.S. government. These
FCC exposure limits are derived from the recommendations of two expert
organizations, the National Counsel on Radiation Protection and Measurement
(NCRP) and the Institute of Electrical and Electronics Engineers (IEEE). In both
cases, the recommendations were developed by scientific and engineering experts
drawn from industry, government, and academia after extensive reviews of the
scientific literature related to the biological effects of RF energy.
The exposure limit set by the FCC for wireless mobile devices employs a unit of
measurement known as the Specific Absorption Rate (SAR). The SAR is a measure
of the rate of absorption of RF energy by the human body expressed in units of watts
per kilogram (W/kg). The FCC requires wireless devices to comply with a safety limit
of 1.6 watts per kilogram (1.6 W/ kg). The FCC exposure limit incorporates a
substantial margin of safety to give additional protection to the public and to account
for any variations in measurements.
SAR tests are conducted using standard operating positions accepted by the FCC
with the device transmitting at its highest certified power level in all tested frequency
bands. Although the SAR is determined at the highest certified power level, the
actual SAR level of the device while operating can be well below the maximum value.
This is because the device is designed to operate at multiple power levels so as to
use only the power required to reach the network. In general, the closer you are to a
wireless base station antenna, the lower the power output.
Before a new model device is available for sale to the public, it must be tested and
certified to the FCC that it does not exceed the exposure limit established by the
FCC. Tests for each model device are performed in positions and locations (e.g. at
the ear and worn on the body) as required by the FCC.
This model device has been tested and meets the FCC RF exposure guidelines.
SAR information on this and other model devices can be viewed on-line at
http://www.fcc.gov/oet/ea/fccid/. Please use the device FCC ID number for search,
A3LSWDSC01E. Sometimes it may be necessary to remove the battery pack to find
the number. Once you have the FCC ID number for a particular device, follow the
instructions on the website and it should provide values for typical or maximum SAR
for a particular device. Additional product specific SAR information can also be
obtained at http://www.fcc.gov/encyclopedia/specific-absorption-rate-sar-cellular-telephones
FCC Notice and Cautions
FCC Notice
This device complies with Part 15 of the FCC Rules. Operation is subject
to the following two conditions: (1) this device may not cause harmful interference,
and (2) this device must accept any interference received, including interference that
may cause undesired operation.
z This equipment has been tested and found to comply with the limits for a
Class B digital device, pursuant to part 15 of the FCC Rules. These limits are
designed to provide reasonable protection against harmful interference in a
residential installation. This equipment generates, uses and can radiate radio
frequency energy and, if not installed and used in accordance with the
instructions, may cause harmful interference to radio communications.
However, there is no guarantee that interference will not occur in a particular
installation. If this equipment does cause harmful interference to radio or
television reception, which can be determined by turning the equipment off
and on, the user is encouraged to try to correct the interference by one or
more of the following measures:
-Reorient or relocate the receiving antenna.
-Increase the separation between the equipment and receiver.
-Connect the equipment into an outlet on a circuit different from that to which the
receiver is connected.
-Consult the dealer or an experienced radio/TV technician for help.
The device may cause TV or radio interference if used in close proximity to receiving
equipment. The FCC can require you to stop using the device if such interference
cannot be eliminated.
Vehicles using liquefied petroleum gas (such as propane or butane) must comply
with the National Fire Protection Standard (NFPA-58). For a copy of this standard,
contact the National Fire Protection Association, One Battery march Park, Quincy,
MA 02269, Attn: Publication Sales Division.
Cautions
Changes or modifications made in the radio device, not expressly approved by
Samsung, will void the user’s authority to operate the equipment.
The use of any unauthorized accessories may be dangerous and void the device
warranty if said accessories cause damage or a defect to the device.
Although your device is quite sturdy, it is a complex piece of equipment and can be
broken. Avoid dropping, hitting, bending or sitting on it.