Samsung Electronics Co WM55H LFD monitor User Manual
Samsung Electronics Co Ltd LFD monitor
UserManual.wiki
>
Samsung Electronics Co
>
WM55H User Manual
User Manual
Navigation menu
Upload a User Manual
Namespaces
Wiki Guide
HTML
PDF
Info
Views
User Manual
Discussion / Help
Navigation

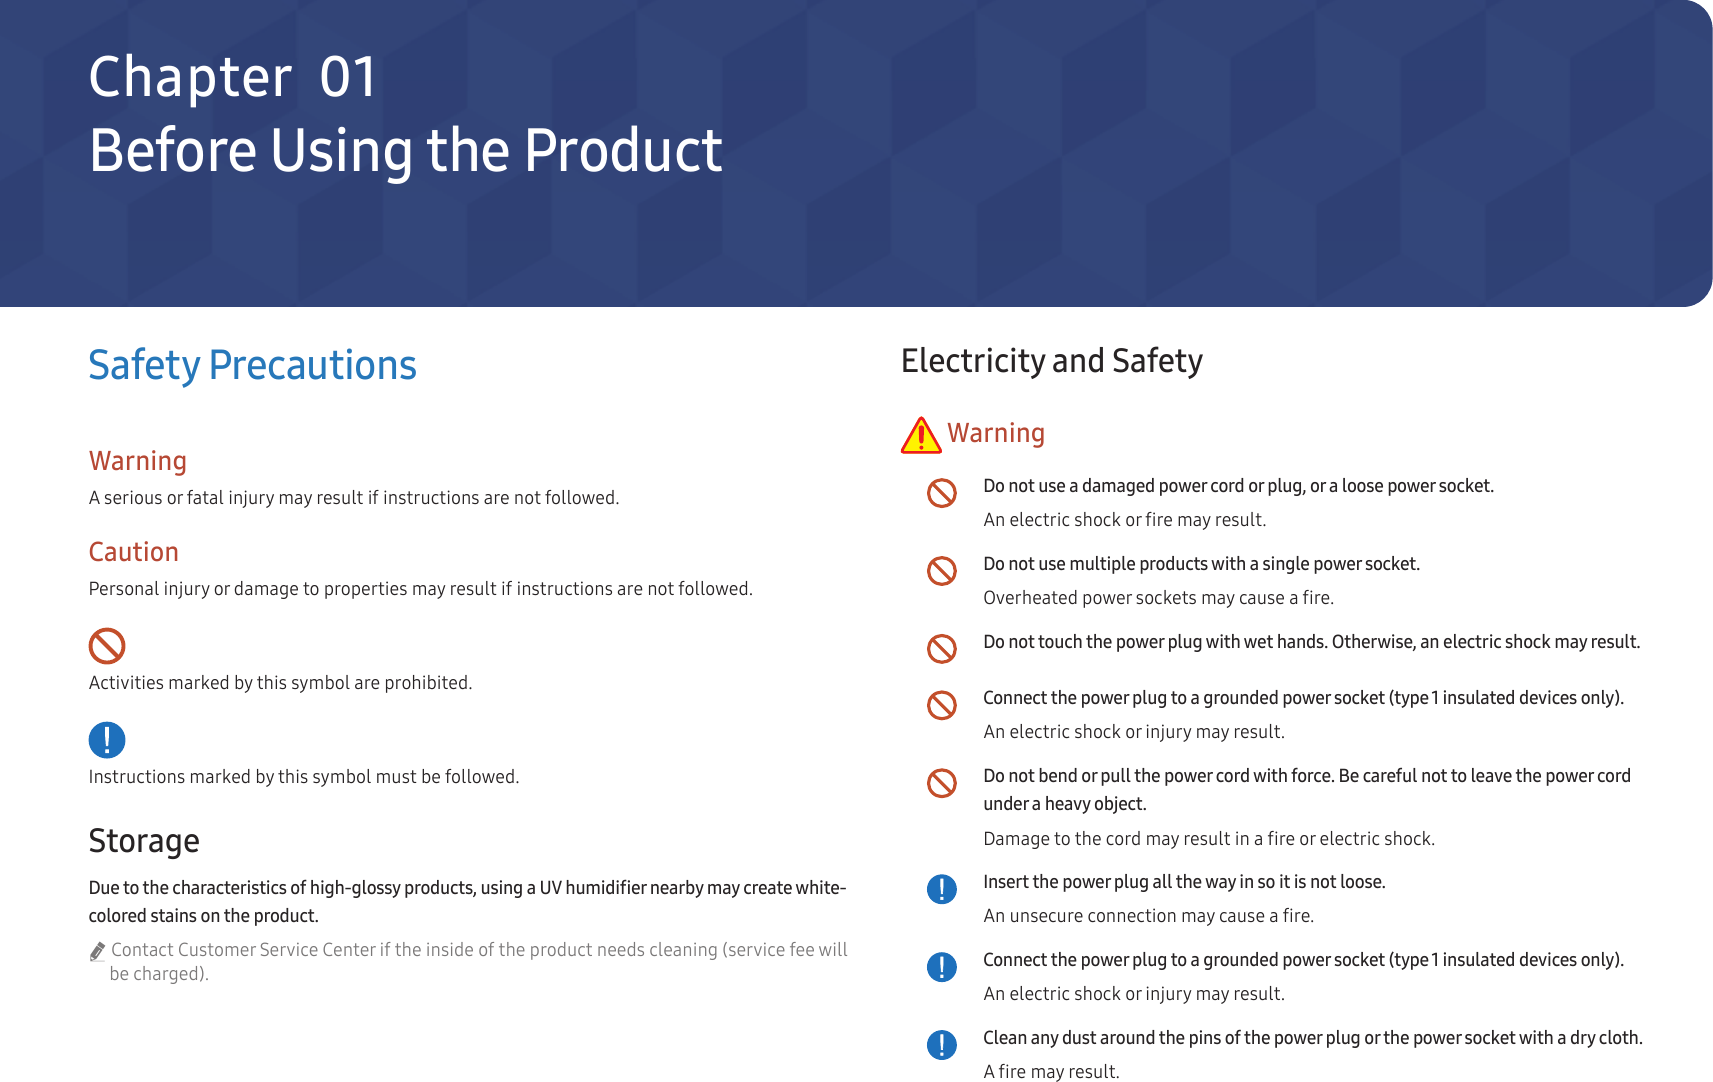
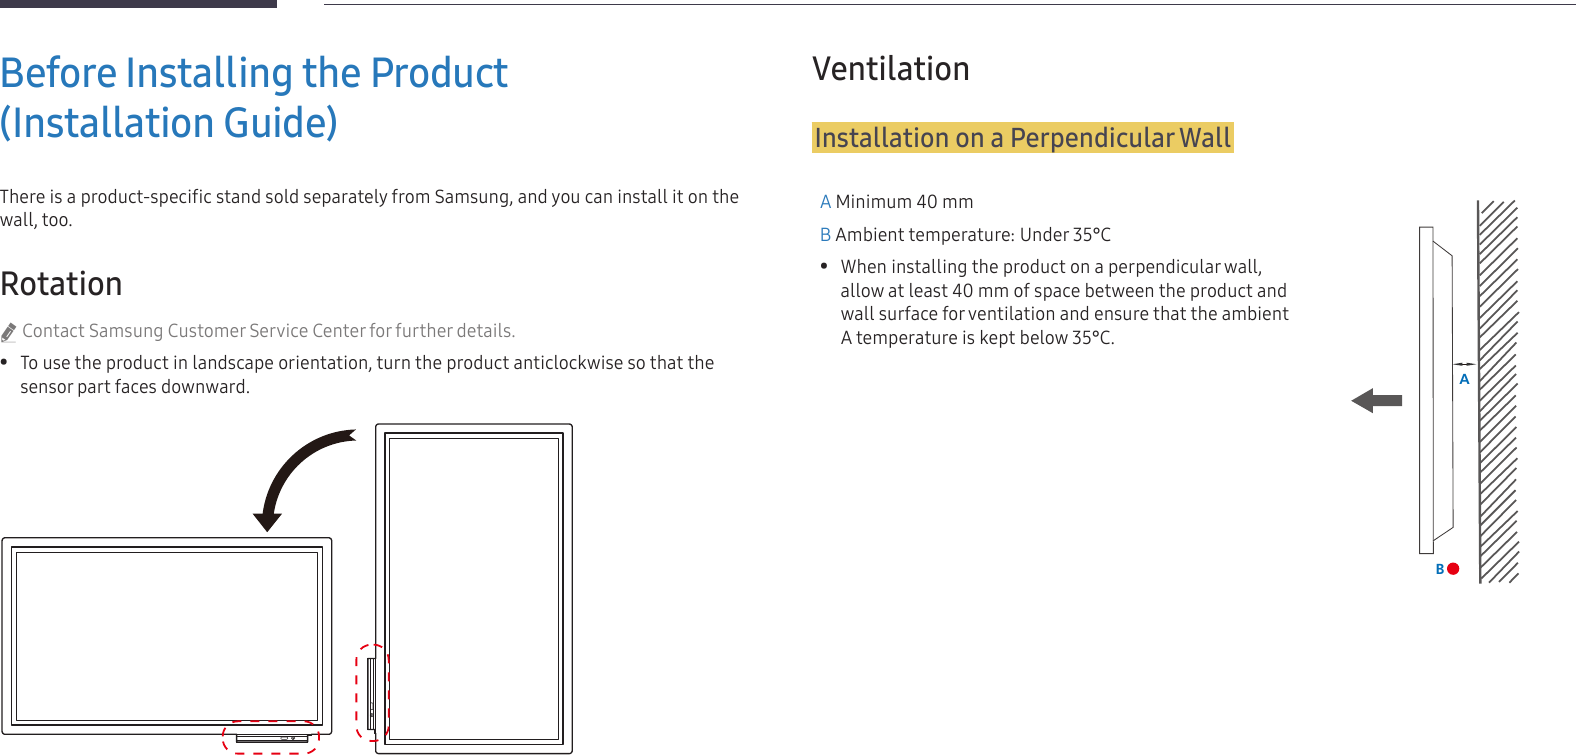
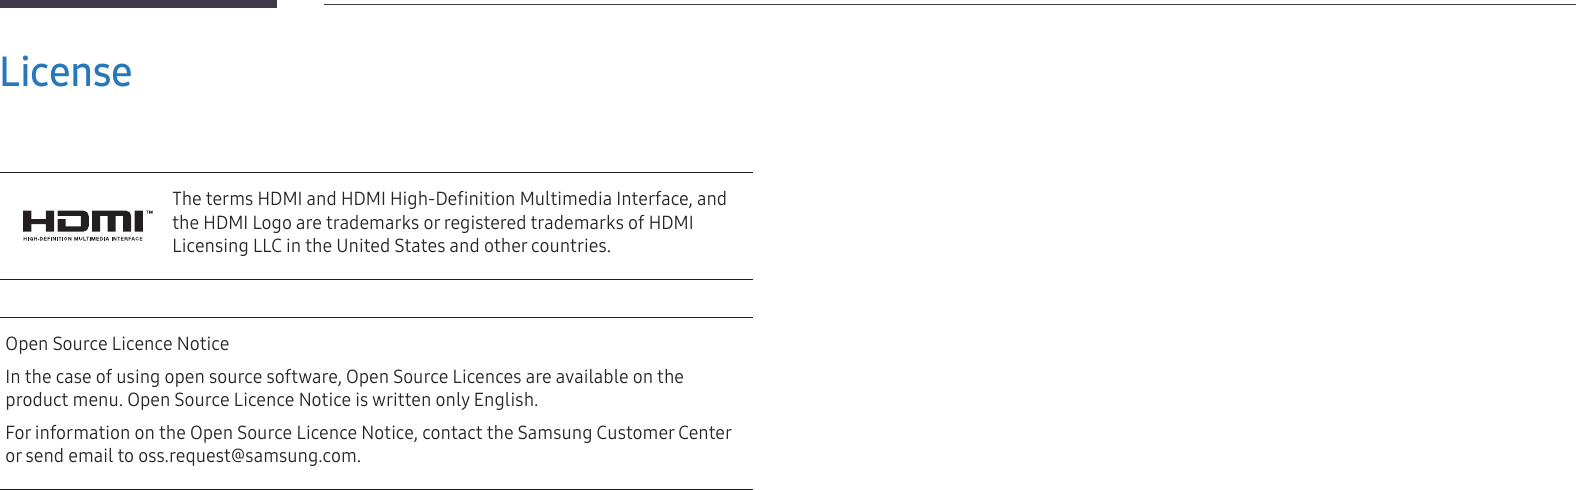
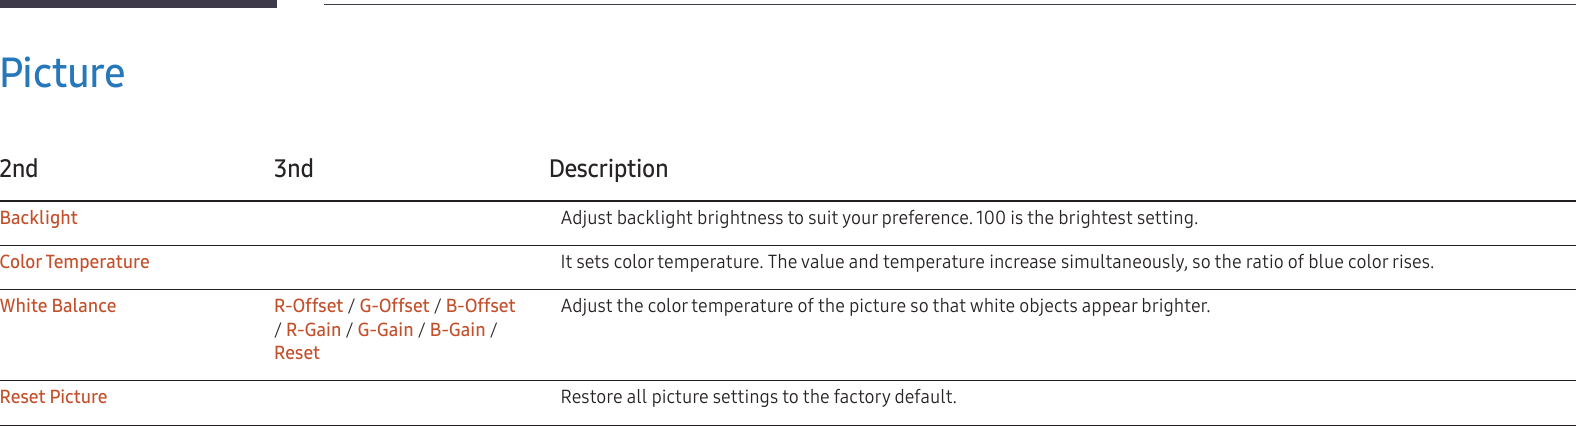
![26Connecting to a Mobile DeviceConnecting using screen mirroring1 Drag down the top bar on the mobile device screen to start Smart View or Screen Mirroring.2 Select this product from the list of devices displayed on the screen. "The initial device name is [Flip] Samsung WMH Series.Connecting using NFC tagging "Only some models of Samsung mobile devices are supported.1 Turn on the NFC feature on a supported mobile device.2 Tag the mobile device to the NFC pad at the side of the product. "You can control the mobile device from the product screen.](https://usermanual.wiki/Samsung-Electronics-Co/WM55H/User-Guide-3628201-Page-26.png)
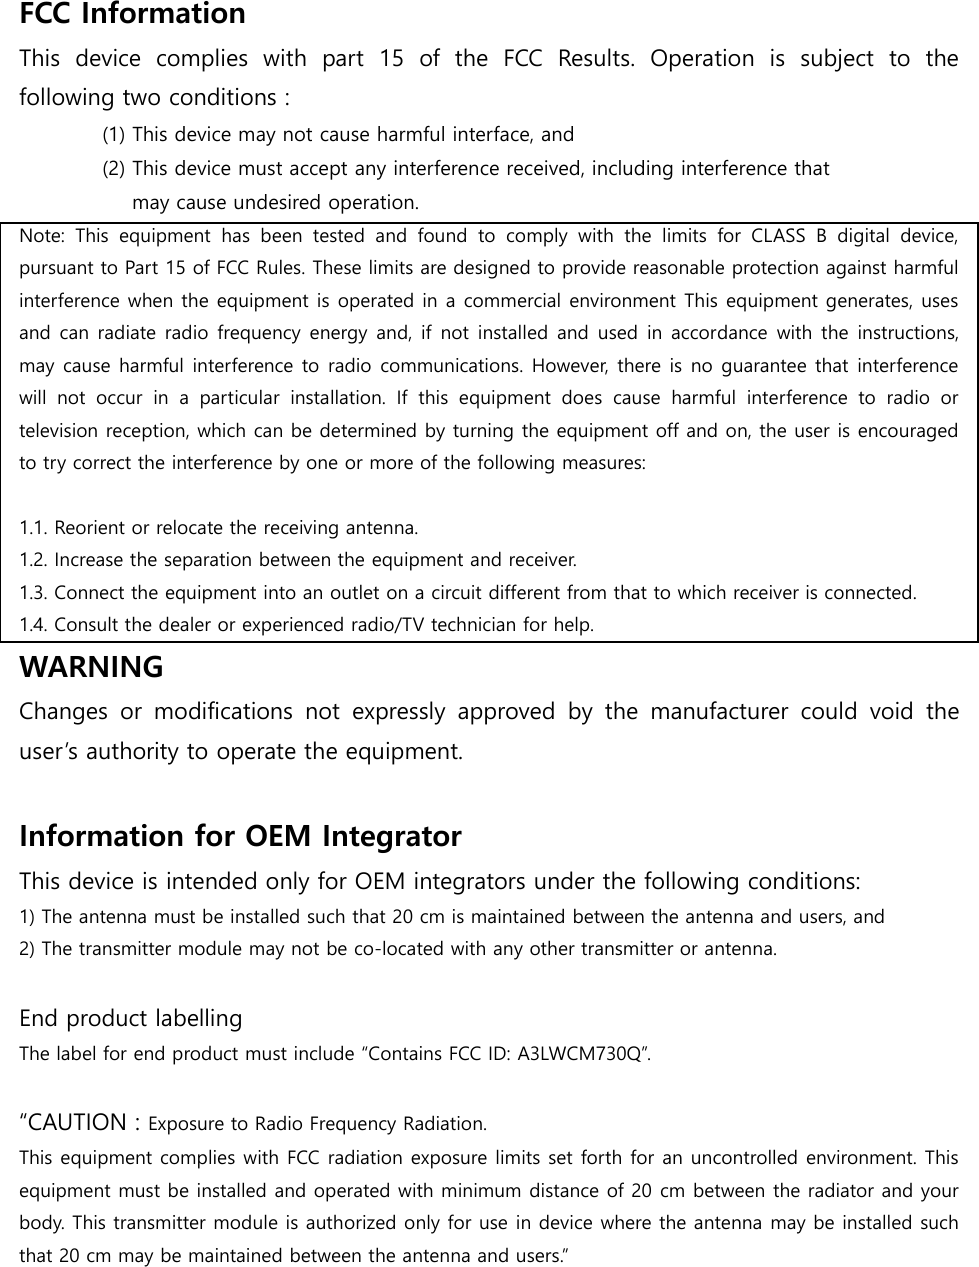
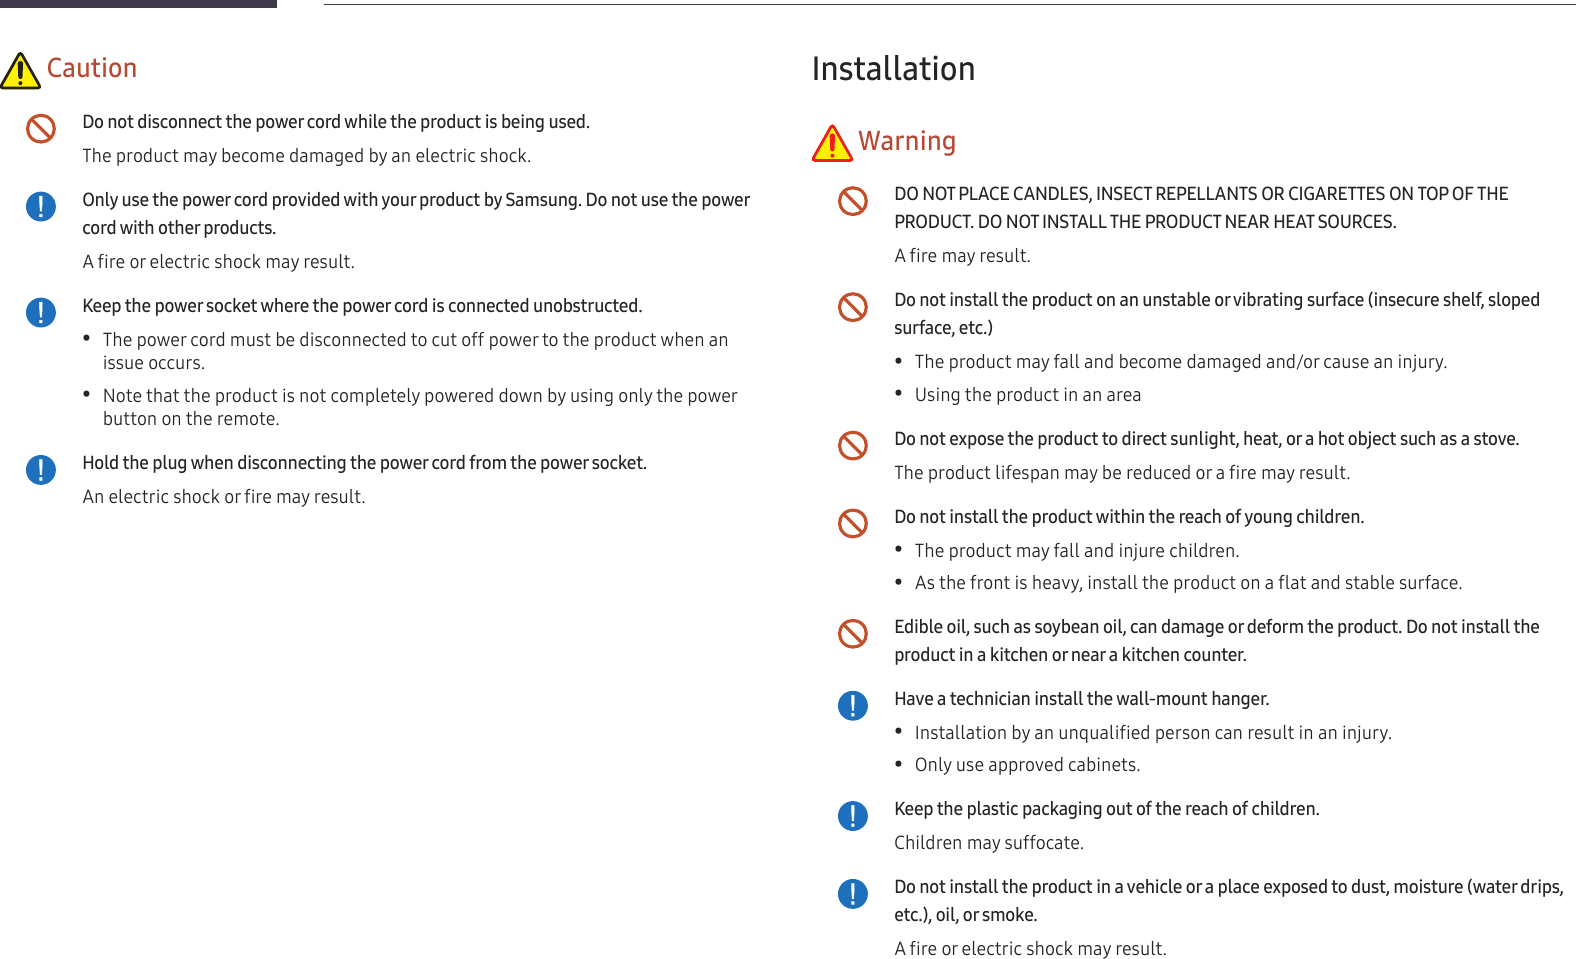
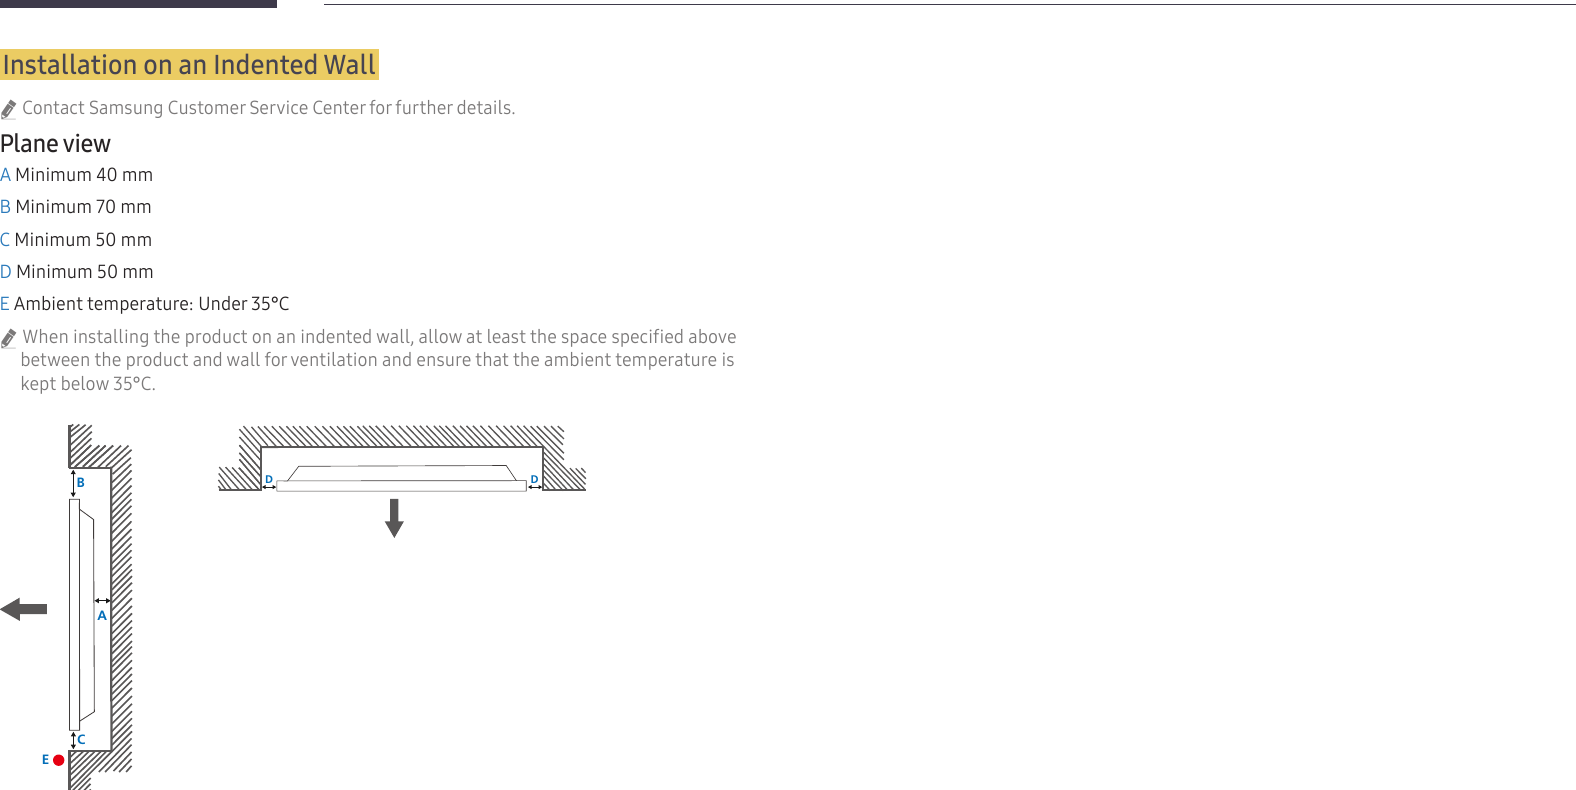
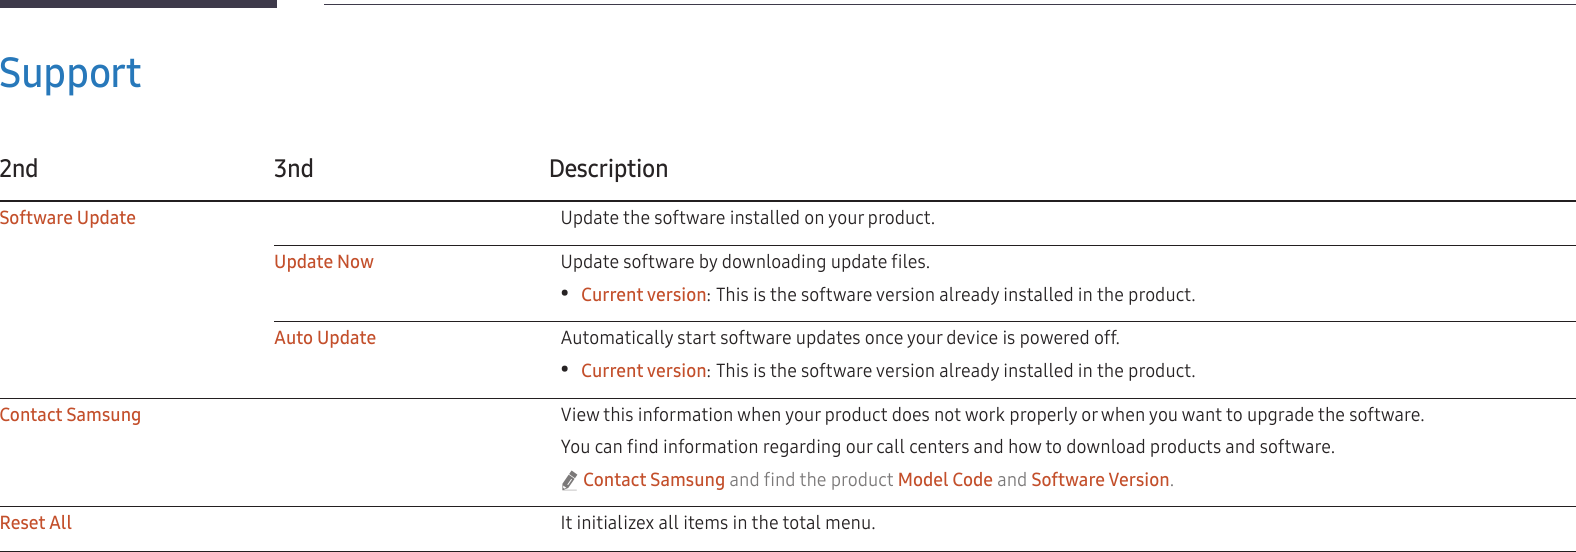
![27Connecting to a LaptopMOBILE LAPTOPLAPTOPUSB NETWORK DRIVEIMPORTHDMI1 WirelessConnecting using a cableConnecting using an HDMI cable1 Connect the product to the laptop using an HDMI cable.HDMI 2 Select IMPORT → LAPTOP → HDMI1 from the top of the screen.Connecting using an USB cableTo control the laptop from the product screen, connect the supplied USB cable to the TOUCH OUT port on the product. "This function is supported only when the laptop screen is in both landscape orientationand the full screen mode.TOUCH OUTConnecting using a screen mirroring "This function is only available for laptops that support screen mirroring.1 Select 'Action Center' or 'Devices' in the taskbar notification area of the laptop.2 Click 'Connect' or 'Project' and select a [Flip] Samsung WMH Series device to complete the connection. "The connection procedure may vary depending on the laptop. "After connecting to a laptop using screen mirroring, you can control the laptop screen from the product screen.](https://usermanual.wiki/Samsung-Electronics-Co/WM55H/User-Guide-3628201-Page-27.png)
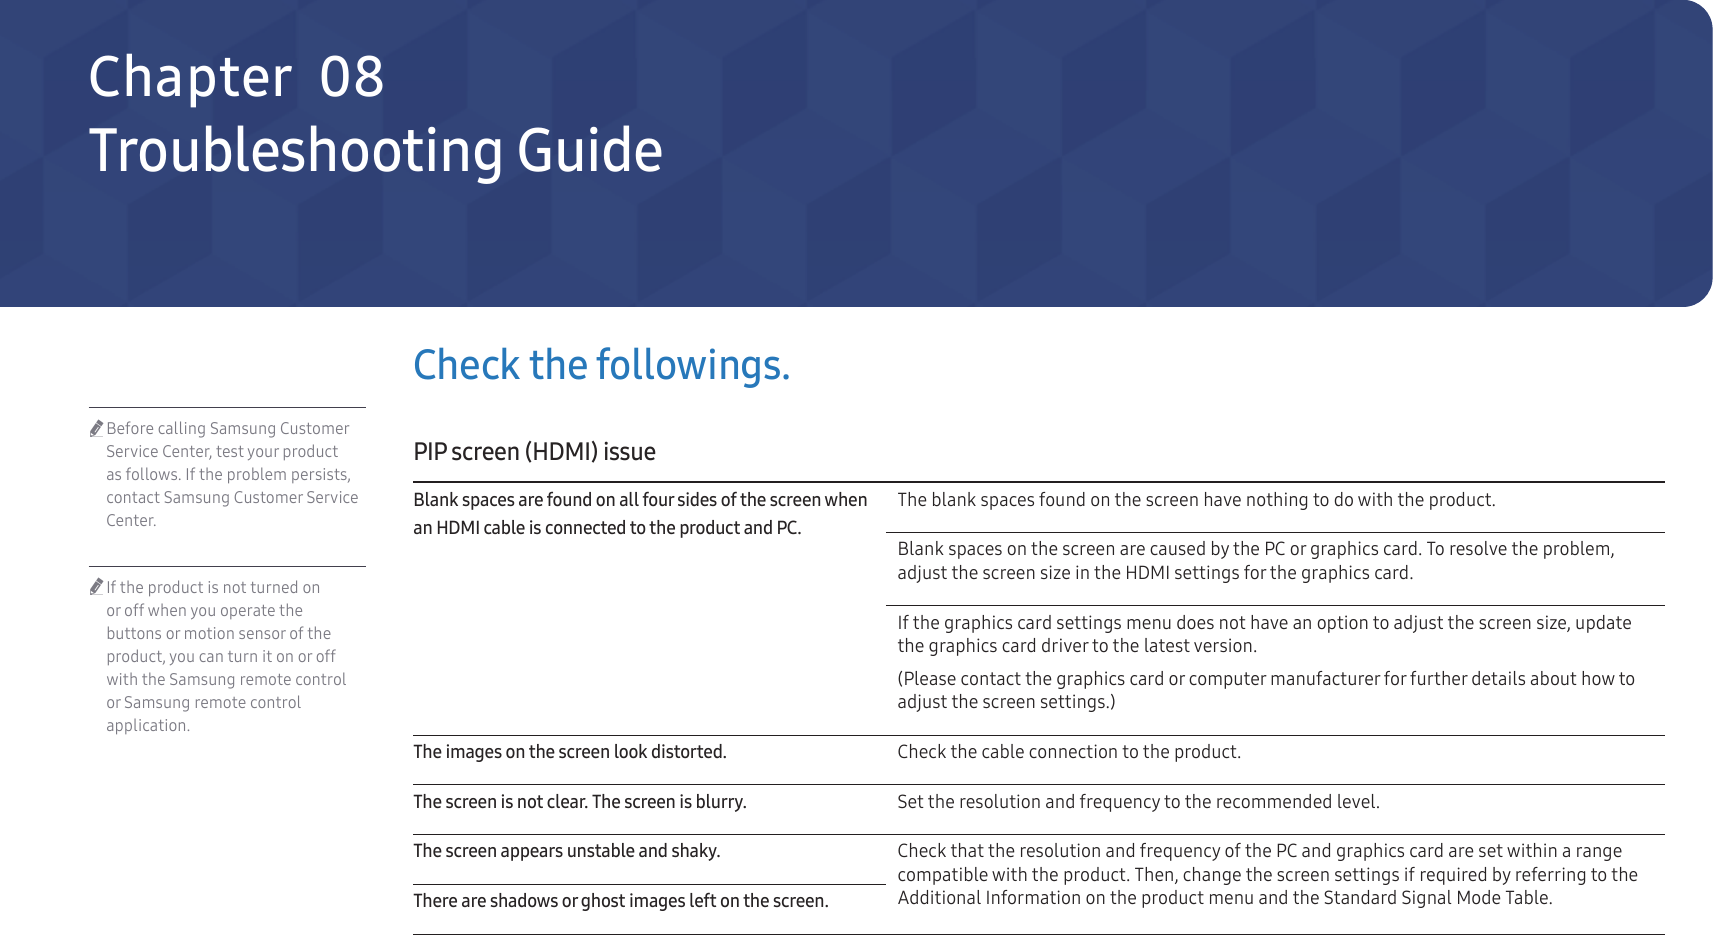


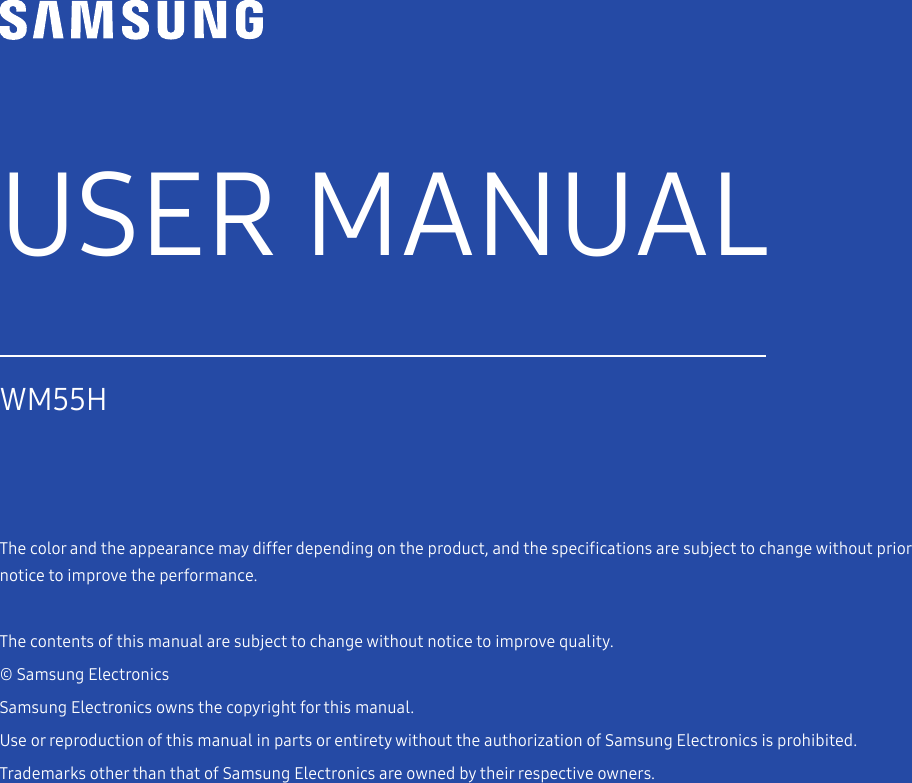
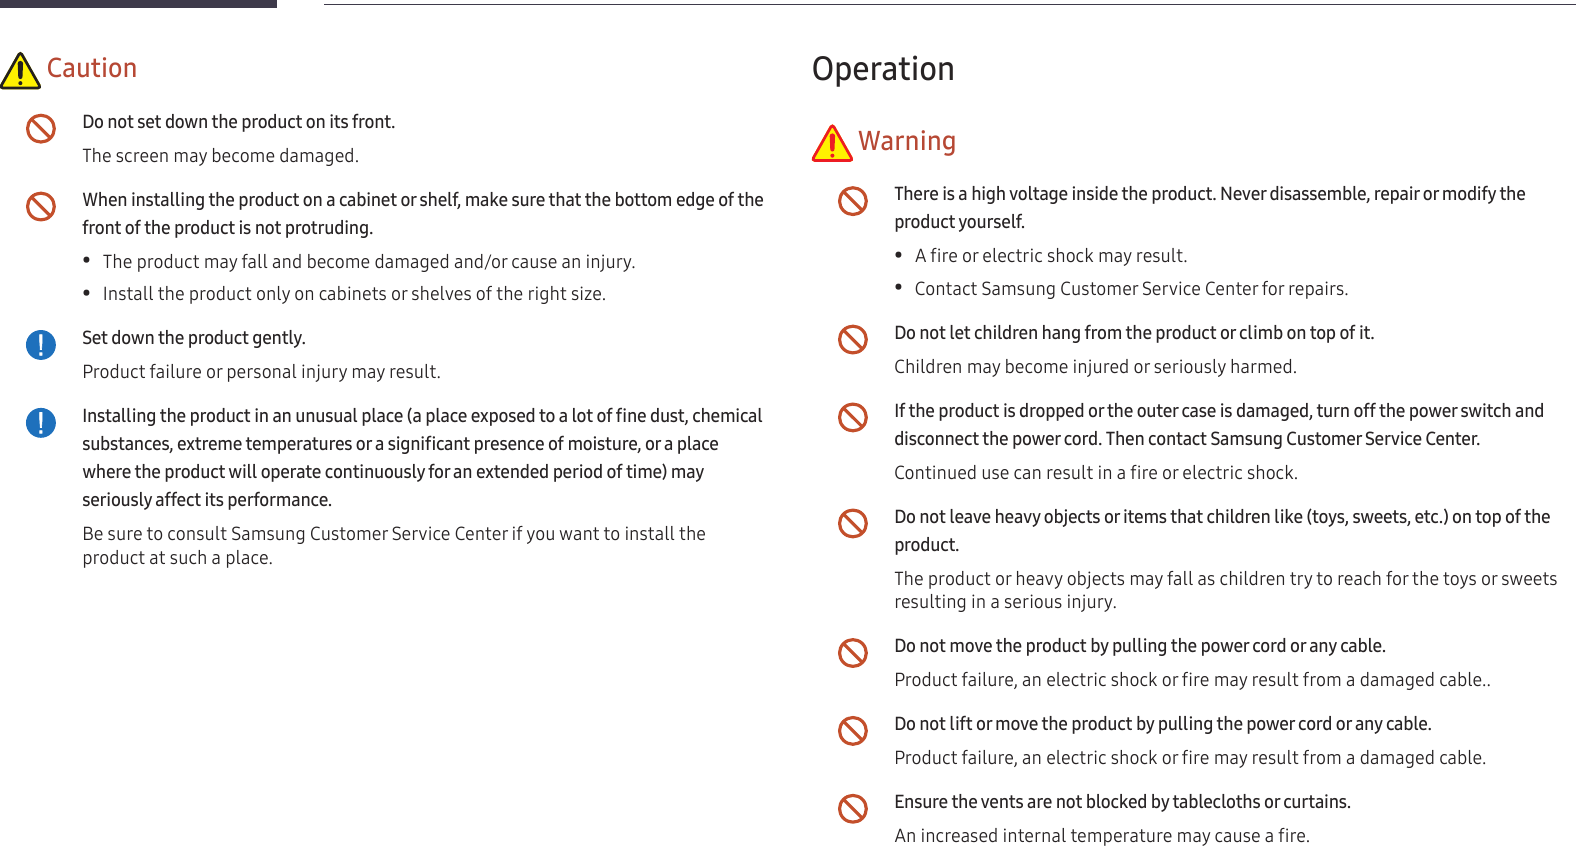
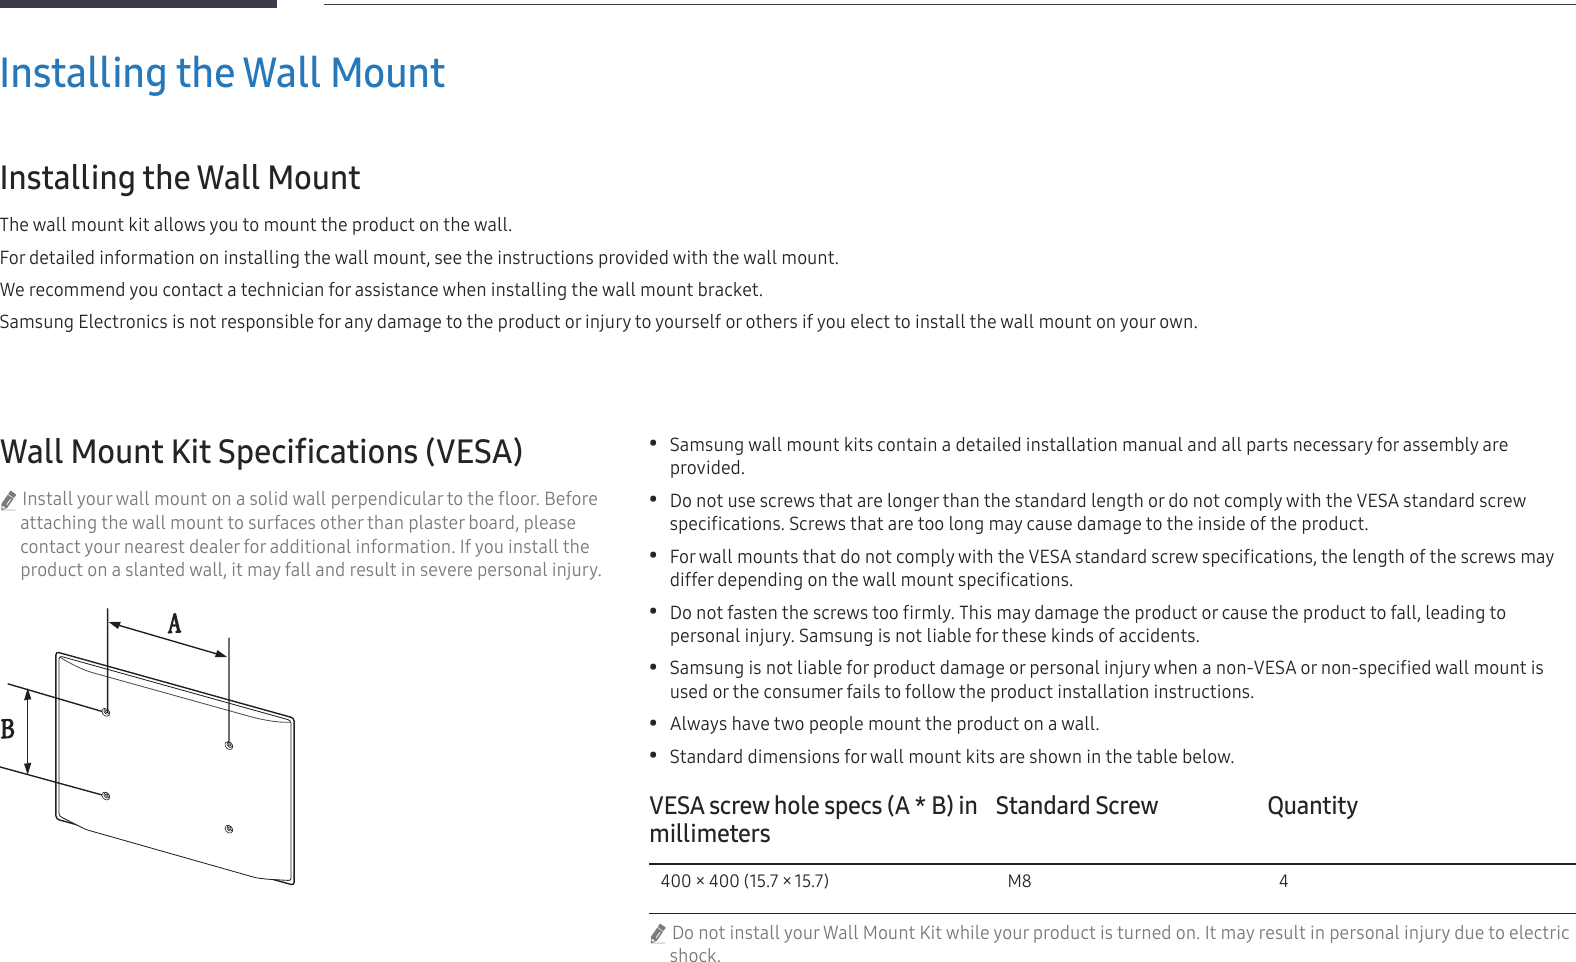
![51Preventing afterimage burn-in "The best way to protect the product from afterimage burn-in is switching the power off or setting the PC or system to run a screen saver when not in use. Also, Warranty service may be limited depending on instruction guide. •Powering Off, Screen Saver and Power Saving Mode –Power off the product for 2 hours after using it for 12 hours. –Go to Display Properties > Power Supply on your PC and set the product to power off as required. –Using a screen saver is recommended.It is best to use a single-color or moving-image screen saver. •Regular color Change –Use 2 colorsSwitch between 2 colors every 30 minutes as shown above.FLIGHT FLIGHTTIME TIMEOZ348UA102 21:1020:30OZ348UA102 21:1020:30Type 1 Type 2 •Avoid combinations of a text color and background color of contrasting brightness.(Brightness: refers to the lightness or darkness of a color which varies depending on the amount of light emitted.) "Avoid using gray as it may contribute to afterimage burn-in. "Avoid using colors of contrasting brightness (black and white; gray).FLIGHT TIMEOZ348 20:30::FLIGHT TIMEOZ348 20:30:: •Regular Text color Change –Use bright colors of similar brightness.Interval: Change text color and background color every 30 minutesFLIGHT TIMEOZ348 20:30::FLIGHT TIMEOZ348 20:30::FLIGHT TIMEOZ348 20:30::FLIGHT TIMEOZ348 20:30:: –Move and change text every 30 minutes as shown below.FLIGHT TIMEOZ348 20:30::[ Step 3 ] [ Step 2 ]FLIGHT TIMEOZ348::[ Step 1 ]20:30 –Regularly display a moving image along with a logo.Interval: Display a moving image along with a logo for 60 seconds after using for 4 hours.](https://usermanual.wiki/Samsung-Electronics-Co/WM55H/User-Guide-3628201-Page-51.png)