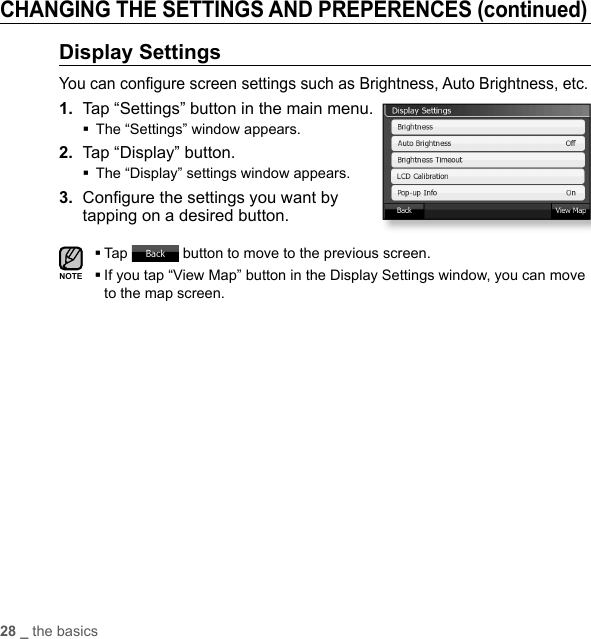
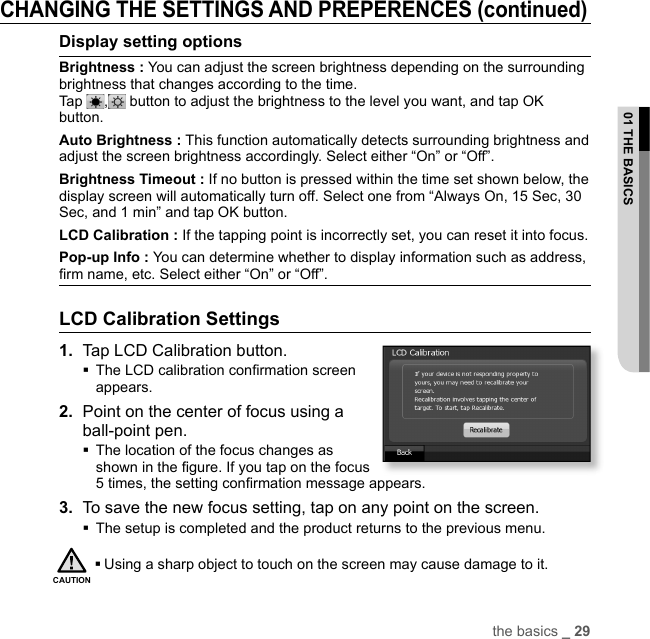
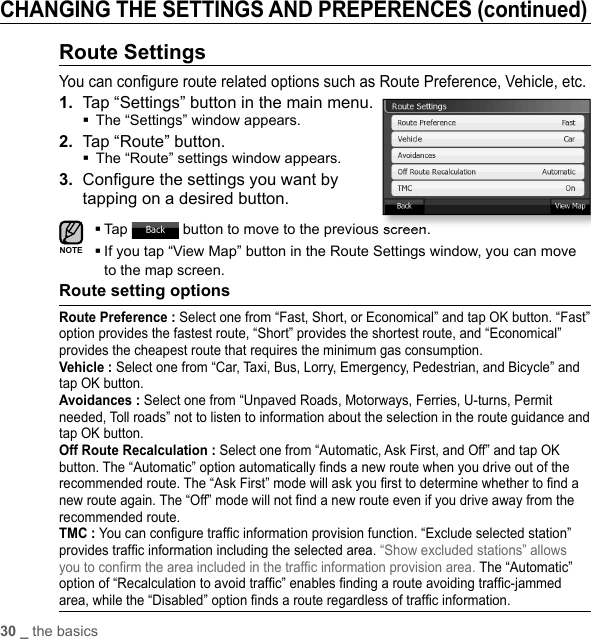
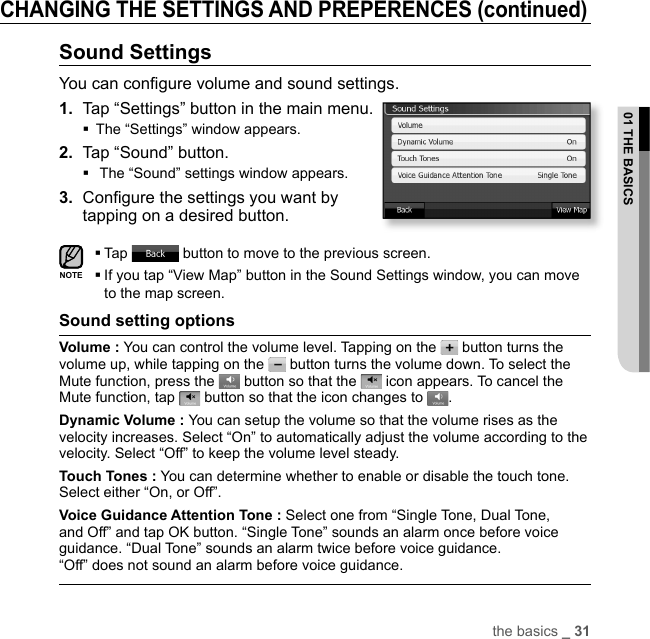
Samsung Electronics Co YPN1 Personal Navigation Device with Bluetooth User Manual YPN1 USA ENGLISH0 0 indd
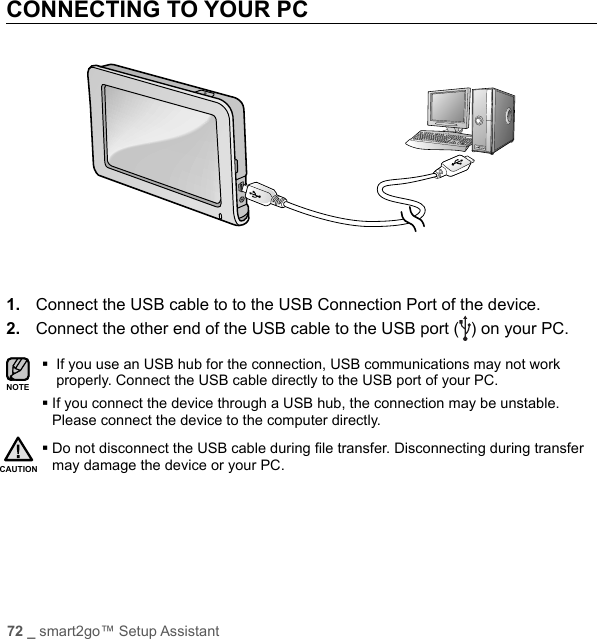
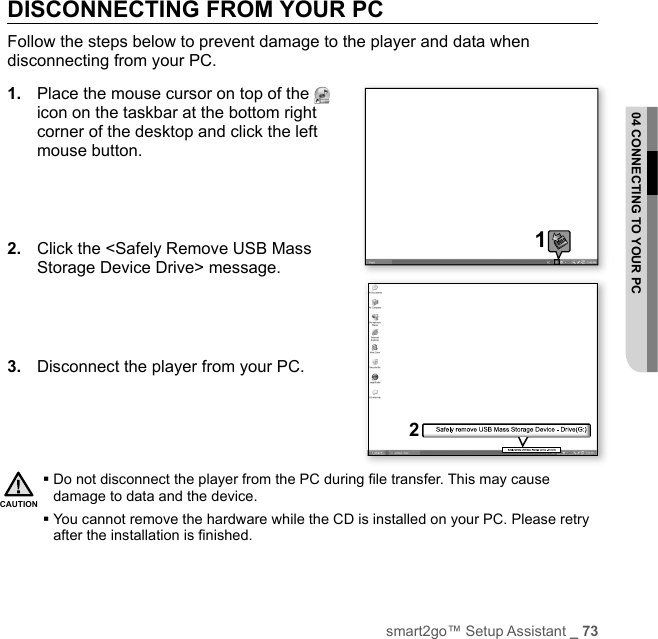
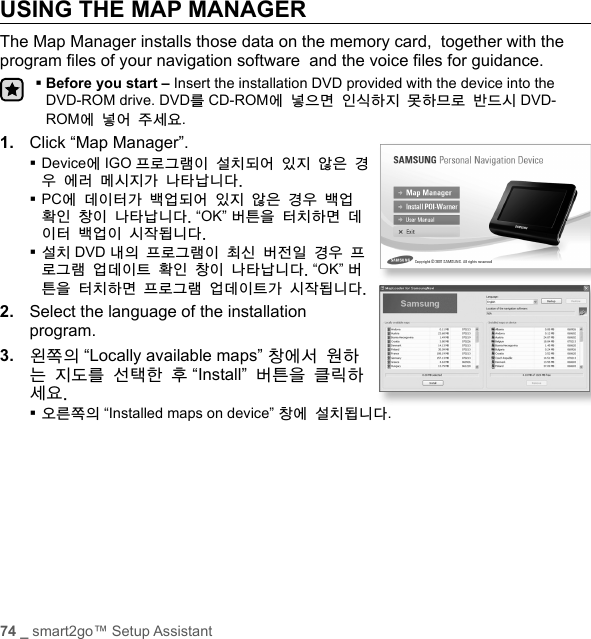
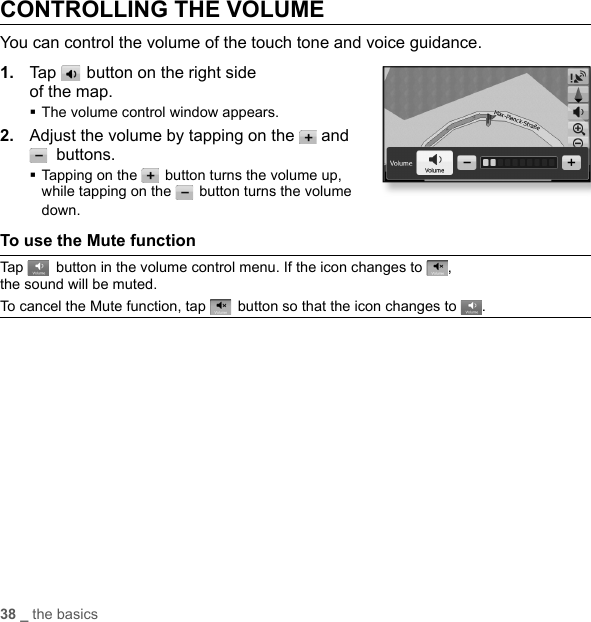
Samsung Electronics Co Ltd Personal Navigation Device with Bluetooth YPN1 USA ENGLISH0 0 indd
UserManual.wiki
>
Samsung Electronics Co
>
YPN1 User Manual
Users Manual
Navigation menu
Upload a User Manual
Namespaces
Wiki Guide
HTML
PDF
Info
Views
User Manual
Discussion / Help
Navigation


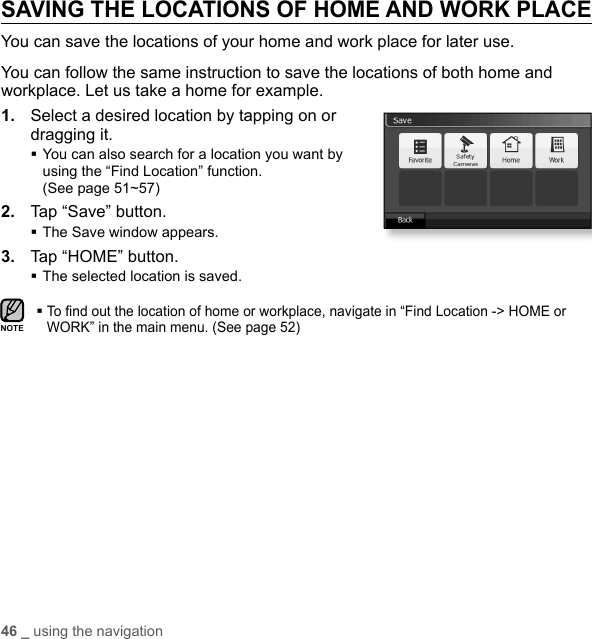
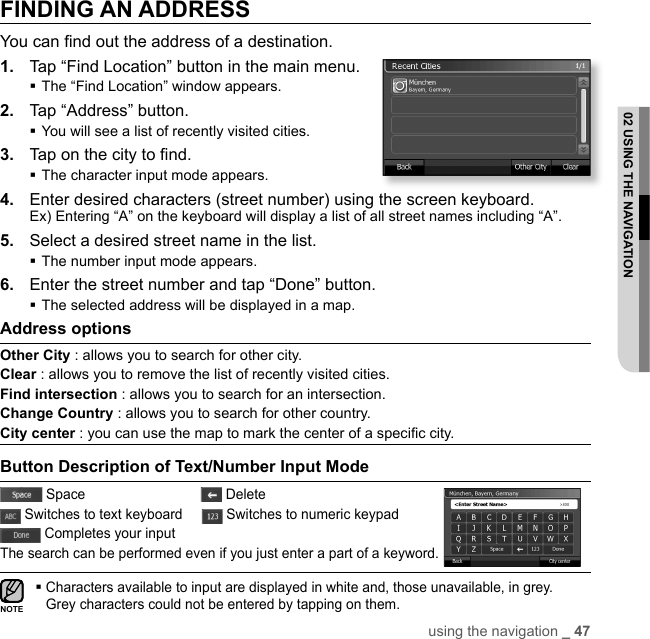
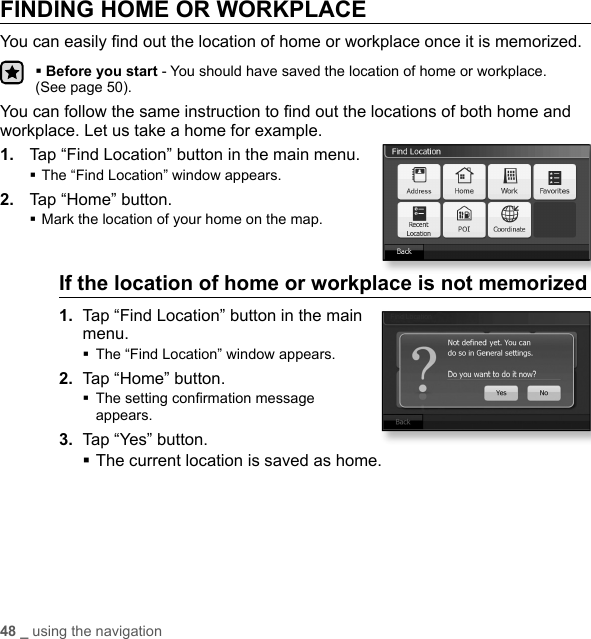
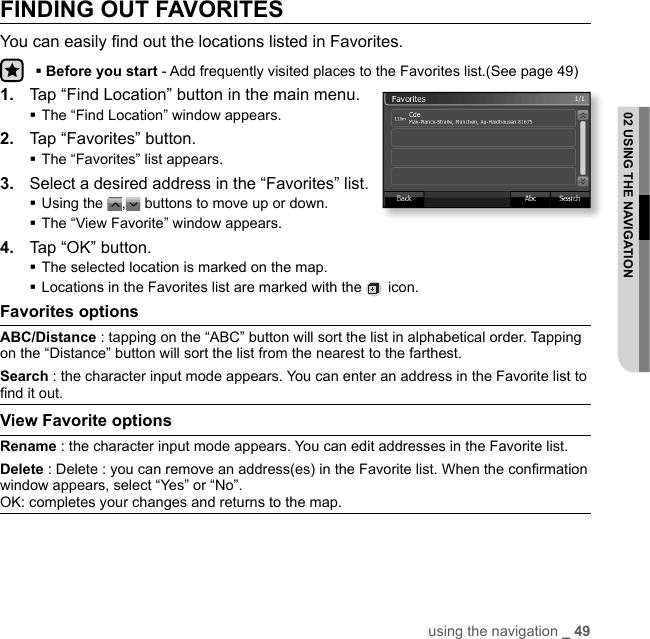
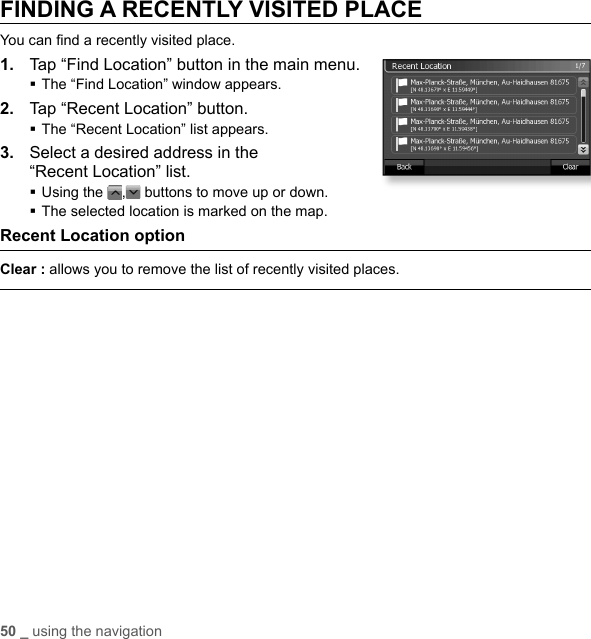
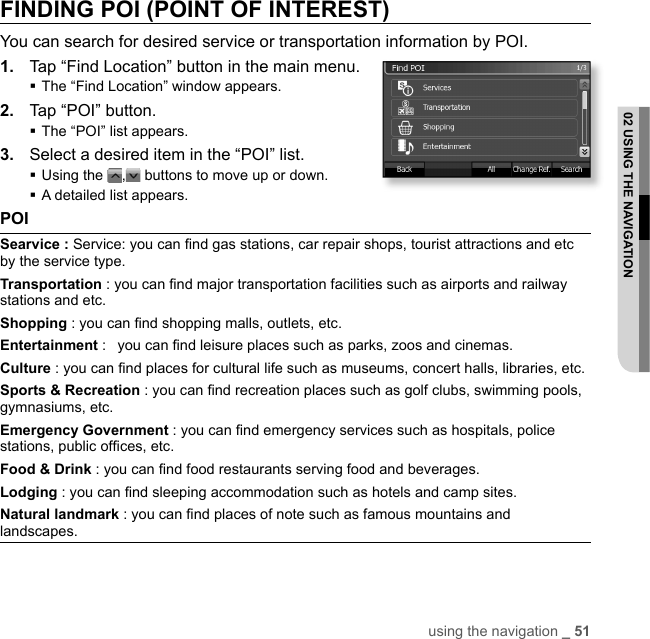
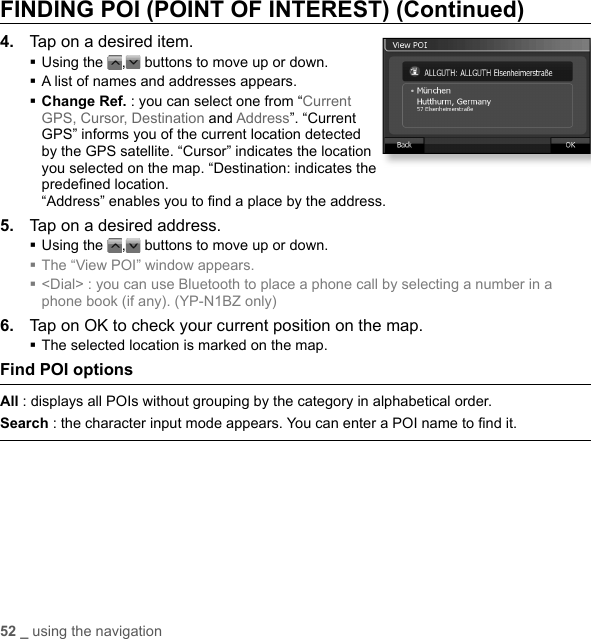
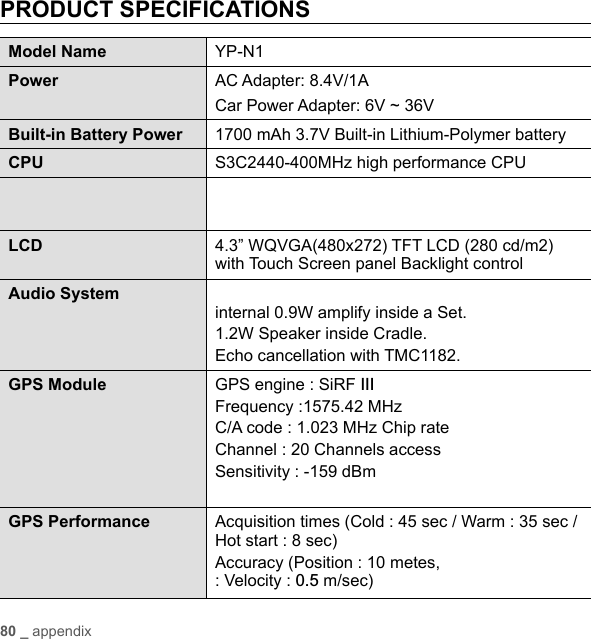
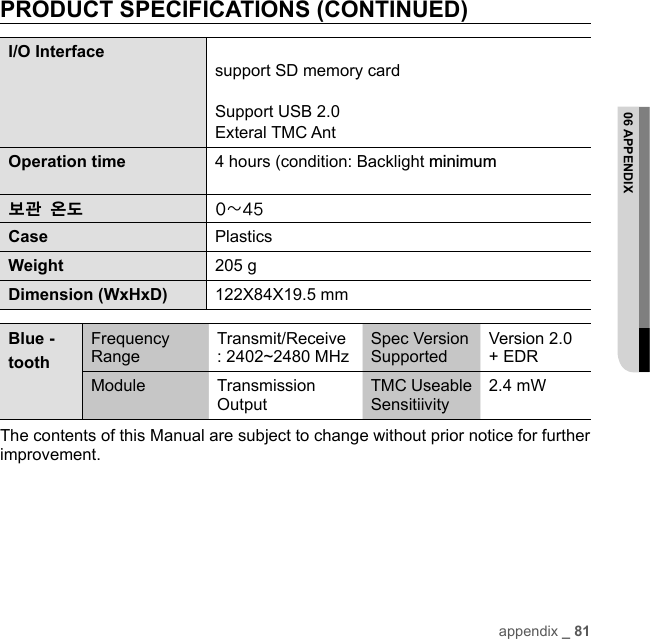
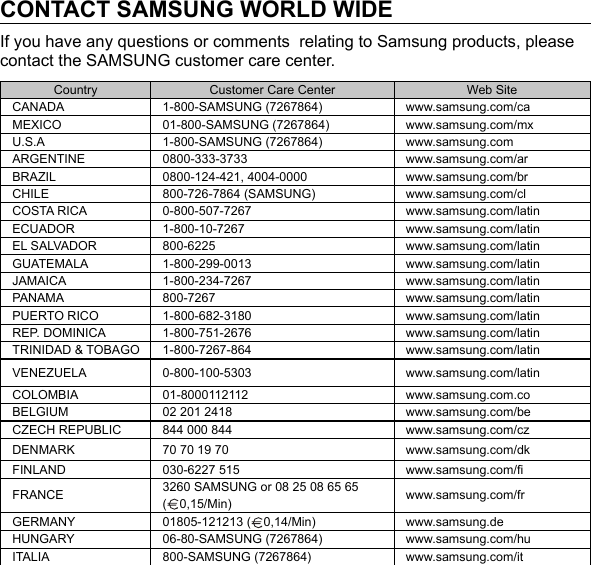
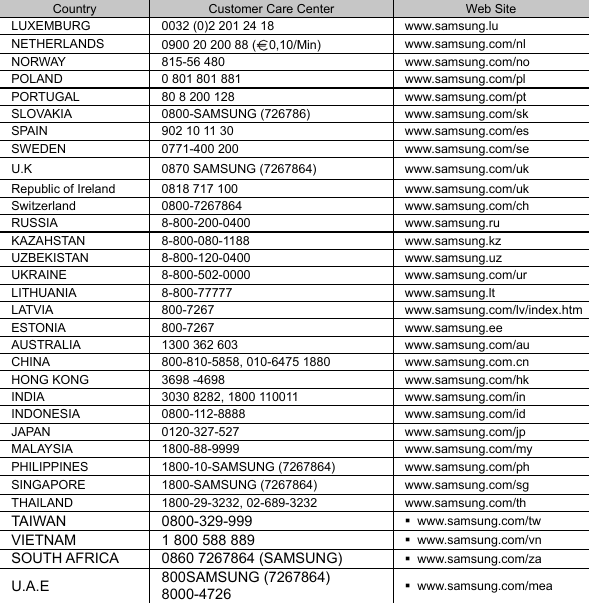
![using the navigation _ 4502 USING THE NAVIGATIONSAVING THE LOCATION OF SAFETY CAMERAYou can save and refer to information of the safety camera including position, type, direction and speed limit for your safe driving.1. Select a desired location by tapping on or dragging it. You can also search for a location you want by using the “Find Location” function. (See page 51~57)2. Tap “Save” button.The Save window appears. 3. Tap “Safety Cameras” button.The “Safety Cameras” setup window appears.4. Set the camera type, direction and speed and tap [OK] button. When done, the product will return to the previous menu.Safety Camera options Camera Type : allows you to set the type of the safety camera. Fixed Removable Red-light Section : a section-detection camera that measures the average speed between the two end points of the section Normal Traffi c LightCamera Direction : allows you to set the direction of the safety camera.Camera Speed : allows you to set the speed limit.](https://usermanual.wiki/Samsung-Electronics-Co/YPN1/User-Guide-782161-Page-45.png)