Sangean Electronics 010 INTERNET RADIO User Manual 20070830 WFR 20 381R101 A GB p65
Sangean Electronics Inc INTERNET RADIO 20070830 WFR 20 381R101 A GB p65
UserManual.wiki
>
Sangean Electronics
>
010 User Manual
>
User manual II
Contents
1.
User manual I
2.
User manual II
User manual II
Navigation menu
Upload a User Manual
Namespaces
Wiki Guide
HTML
PDF
Info
Views
User Manual
Discussion / Help
Navigation
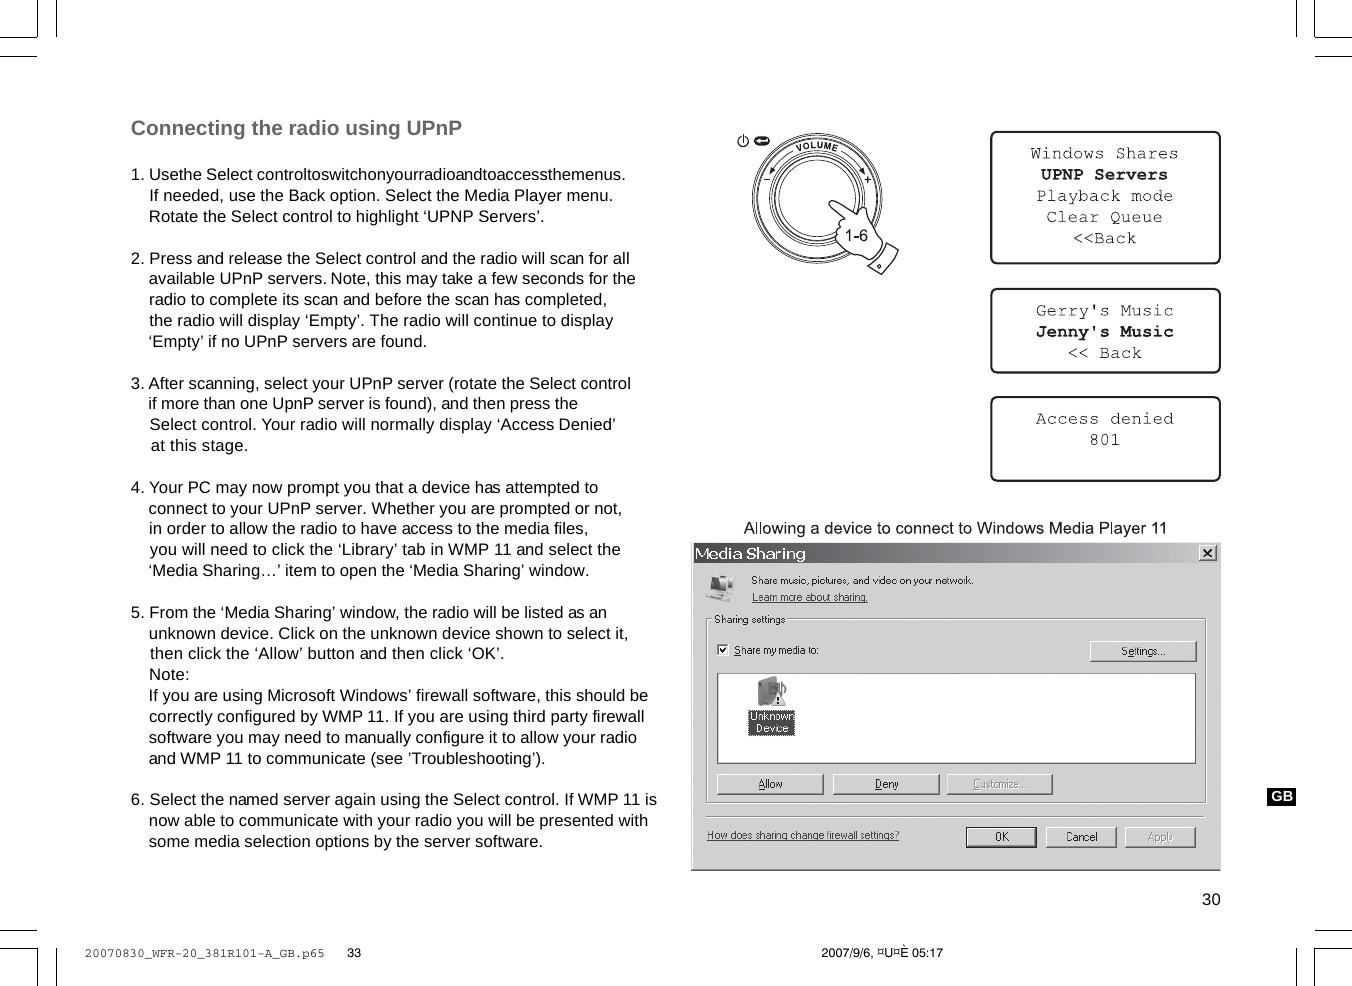
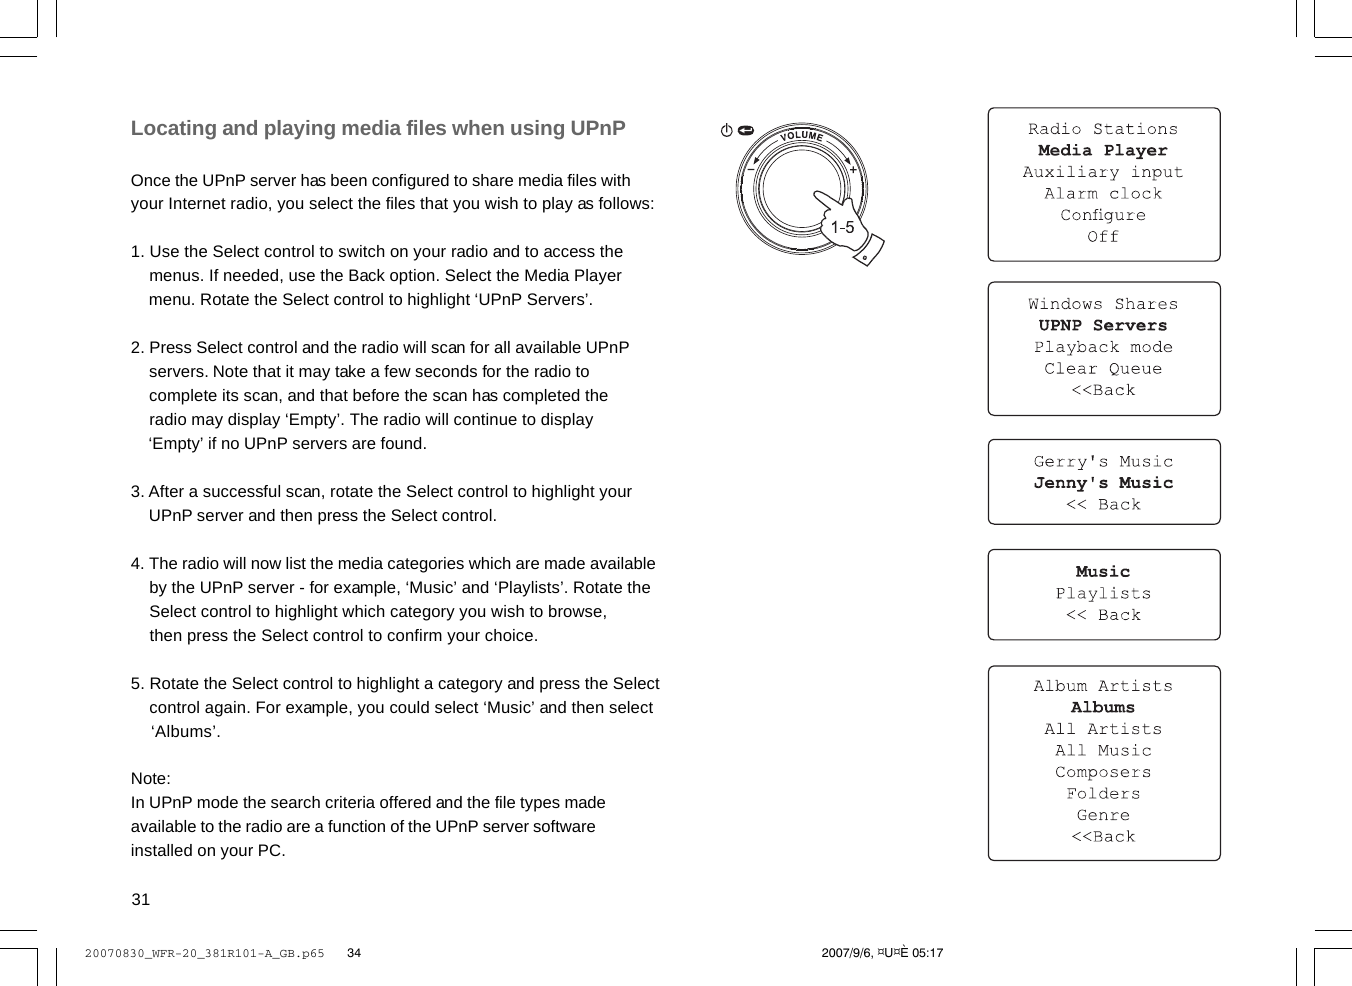
![32GB6. Rotate the Select control to highlight the media files that you wish to play and then press the Select control. Do not worry if not all of your media appear in the menus immediately. Windows Media Player needs to look inside each file to identify the artist, album and track information from ‘tags’ embedded in each file. Additionally, Windows Media Player may take time to access the Internet to obtain additional information such as ‘album art’ which it can display when you examine your music library on your PC.7. The radio will display ‘[Add to Queue]’. Press the Select control and the radio will add all the tracks in the album to its queue and begin playing them automatically.20070830_WFR-20_381R101-A_GB.p65 2007/9/6, ¤U¤È 05:1735](https://usermanual.wiki/Sangean-Electronics/010.User-manual-II/User-Guide-879228-Page-3.png)
![33Media selectionWhether you access your files using Windows Shares or using UPnP,the file selection mechanisms are the same. The only differencebetween the two methods is that when using UPnP you will generallyhave a wider choice of search criteria, as determined by the UPnPserver software on your computer. Some third party server applicationsallow customisation of the search criteria and indexing methods, whichcan be useful if you have a very large collection of stored music files.The selection mechanism allows you to search by a given informationtype (Album, Artist, etc.) and then to narrow the search, either just to analbum or to a particular track within an album. The selected album ortrack is then added to a queue of tracks to be played. You can add morealbums or tracks to the queue while music is playing, or you can jumpbetween tracks in the queue. You can also clear the queue if you wishto make a fresh selection. The searches described here are examples ofthe possibilities available.Listening to a complete album1. Rotate the Select control until ‘By Artist’ is highlighted on the display. Press the Select control.2. Rotate the Select control until the required artist is highlighted on the display. Press the Select control.3. Rotate the Select control until the required album name is highlighted on the display. Press the Select control. ‘[Add to Queue]’ will be highlighted at the head of a list of tracks.4. Press the Select control. The album will begin playing and all of the tracks in the album will be stored in the queue.20070830_WFR-20_381R101-A_GB.p65 2007/9/6, ¤U¤È 05:1736](https://usermanual.wiki/Sangean-Electronics/010.User-manual-II/User-Guide-879228-Page-4.png)
![34Listing to a single track1. If you wish to play only a particular tracks from an album, first choose the album as described in steps 1 - 3 on the preceding section (section ‘Listening to a complete album’).2. ‘[Add to Queue]’ will be highlighted at the head of a list of tracks.3. Rotate the Select control until the required track is highlighted.4. Press and release the Select control. The track will begin playing.Queuing up albums for playback laterWhile the Media Player is playing, you may add additional albums ortracks to the media queue.1. Use rotary control (with the back option as needed) to search for and highlight the required album (or use the Select, Back and Menu up and Menu down buttons on the remote control).2. Press the Select control (or button) to choose the album. The list of tracks for the album will be displayed, headed by ‘[Add to Queue]’.3. If needed, rotate the Select control or the Menu up button on the remote control so that ‘[Add to Queue]’ is highlighted. Press and release the Select control. ‘Tracks Added to Queue’ will be displayed. GB20070830_WFR-20_381R101-A_GB.p65 2007/9/6, ¤U¤È 05:1737](https://usermanual.wiki/Sangean-Electronics/010.User-manual-II/User-Guide-879228-Page-5.png)