Sanyo Electric Co A5505SA Dual-Band CDMA Phone User Manual
Sanyo Electric Co Ltd Dual-Band CDMA Phone Users Manual
Users Manual

For more information about RF exposure, please visit the FCC website at www.fcc.gov
FCC RF EXPOSURE INFORMATION
In August 1996 the Federal Communications Commission (FCC) of the United States
with its action in Report and Order FCC 96-326 adopted an updated safety standard for
human exposure to radio frequency electromagnetic energy emitted by FCC regulated
transmitters. Those guidelines are consistent with the safety standard previously set
by both U.S. and international standards bodies. The design of this phone complies
with the FCC guidelines and these international standards.
Use only the supplied or an approved antenna. Unauthorized antennas, modifications,
or attachments could impair call quality, damage the phone, or result in violation of FCC
regulations.
Do not use the phone with a damaged antenna. If a damaged antenna comes into
contact with the skin, a minor burn may result. Please contact your local dealer for
replacement antenna.
Body-worn Operation
This device was tested for typical body-worn operations with the back of the phone kept
1.9 cm. from the body. To maintain compliance with FCC RF exposure requirements,
use only belt-clips, holsters or similar accessories that maintain a 1.9 cm. separation
distance between the user’s body and the back of the phone, including the antenna,
whether extended or retracted. The use of belt-clips, holsters and similar accessories
should not contain metallic components in its assembly. The use of accessories that
do not satisfy these requirements may not comply with FCC RF exposure
requirements, and should be avoided.
WARNING! Read this information before using your phone
Operating Instructions
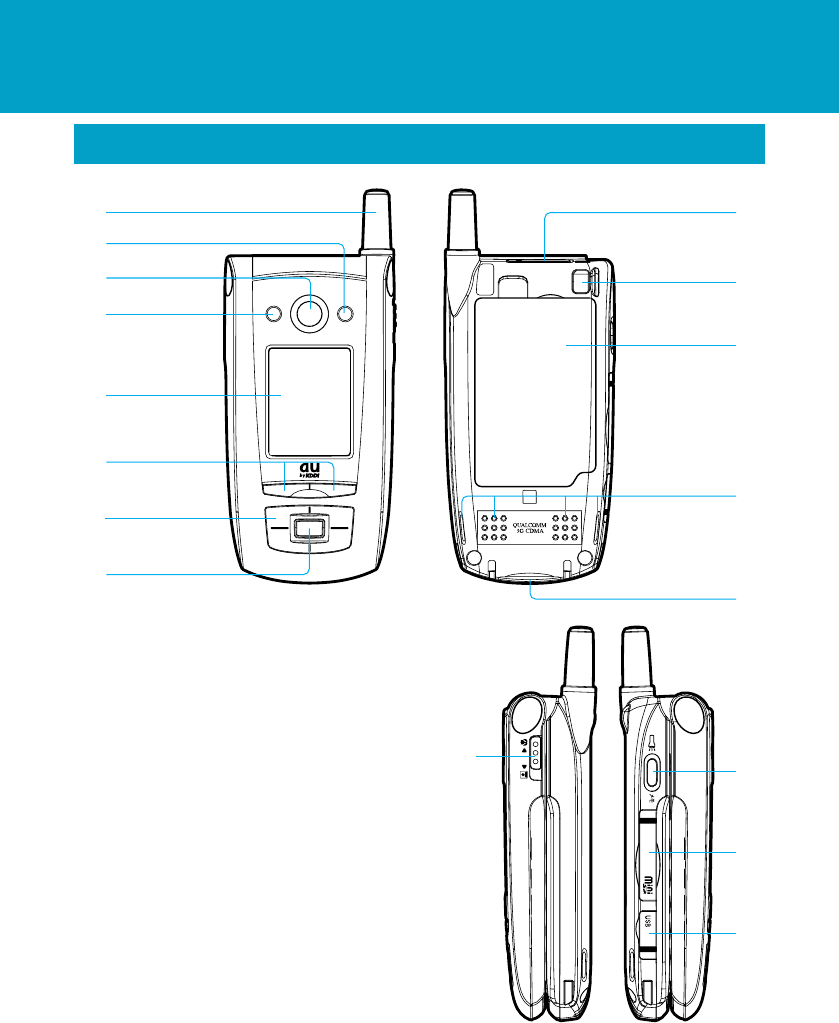
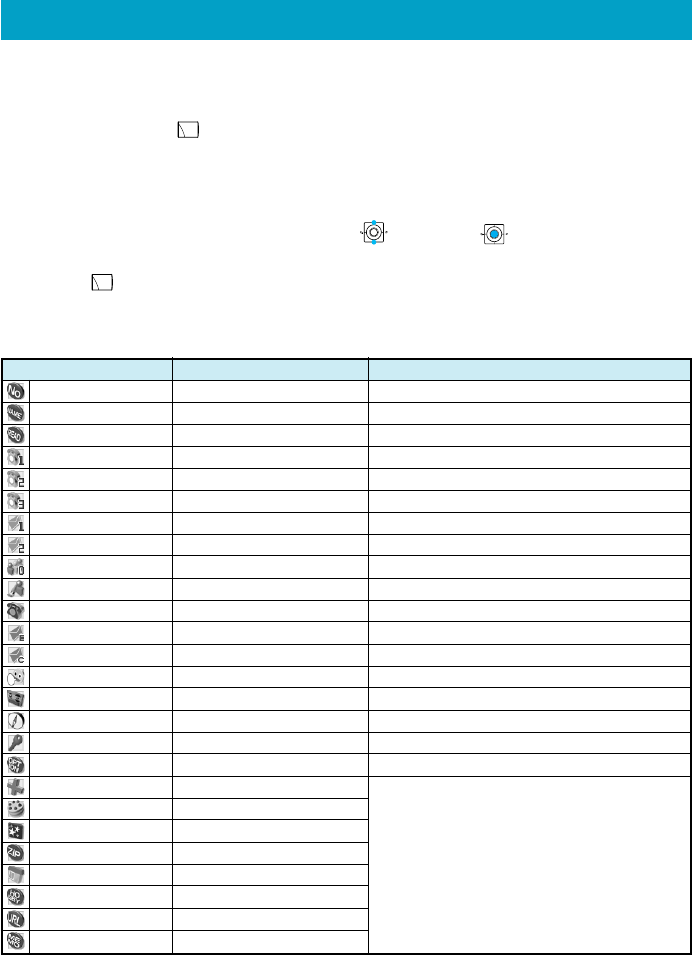
Name & Function of Parts
1
Antenna
Incoming call light
Built-in camera (Lens)
Flash pocket light
Sub-display (External display)
Strap hole
Speaker
miniSD card slot
Battery pack
Camera zoom select switch (Macro ←→ Normal)
Ear-microphone jack (Flat-plug)
Flexible keys (External)
OK keys (External)
Cursor key (External)
External connection terminal
USB terminal
Side key
q
w
e
r
t
y
u
i
o
!0
!1
!2
!3
!4
!5
!6
!7
q
w
e
r
t
y
u
i
o
!0
!1
!2
!3
!4 !5
!6
!7
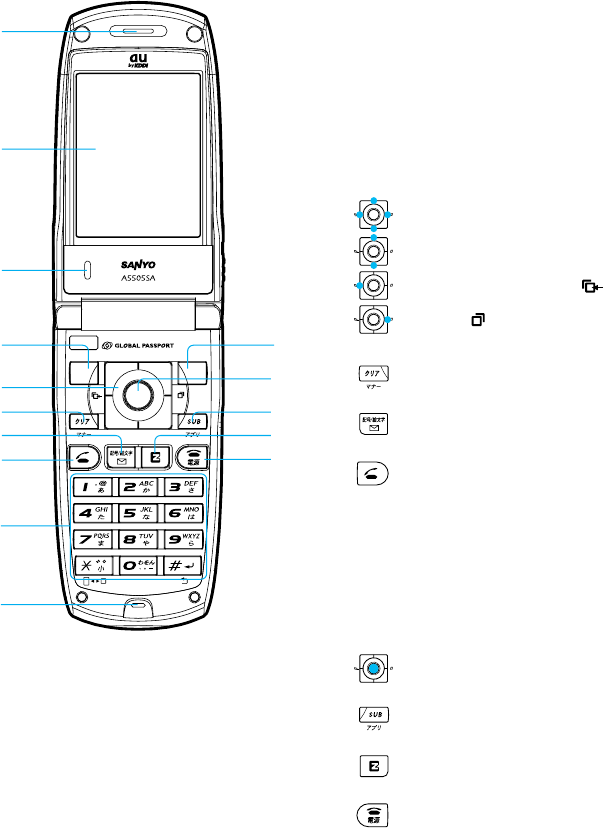
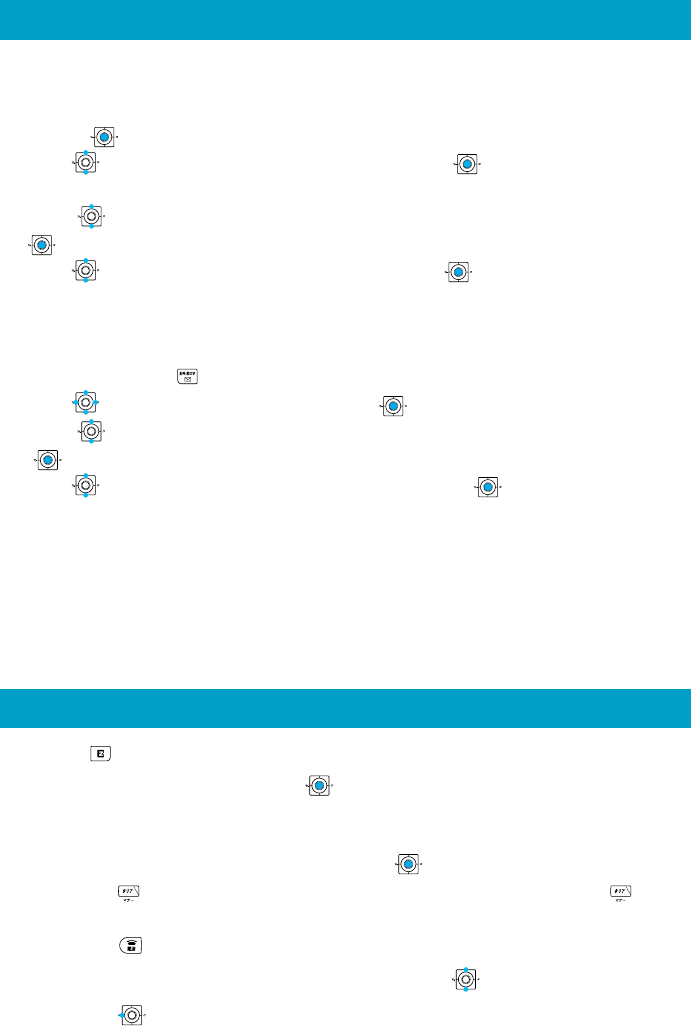
2
Earpiece
Display
Flexible key (left)
Search/Cursor key
Volume/Conversion key
Receiving History ( ) key
Redial ( ) key
(Clear/Manner)key
(Mail) key
(Start) key
Dial keys
Microphone
(End) key
Flexible key (center)
key
(EZweb)key
Optical sensor
!8
!9
@0
@1
@2
@3
@4
@5
@6
@7
@9
#0
#1
#2
Flexible key (right)
@8
!8
!9
@0
@1
@2
@3
@4
@5
@6
@7
@8
@9
#0
#1
#2

2Turning the power on
Press and hold for more than one second.
◆ Turning the power off
Press and hold for more than one second.
1Charging with the Sanyo AC Adapter 02
Getting Ready to Make a Call
3
■ key
In this manual, the point at which to press the
key is indicated as shown below.
Example) Press or →
In order to minimize the power consumption, the A5505SA display turns
automatically to power saving mode when key operation is stopped for a while.
The indication restores with key operation.
■Power saving during standby
The battery charger can also be charged by derectly inserting the SANYO AC
Adapter 02 connector into the external connection terminal onthe A5505SA
Main Unit.
1. Press (メインメニュー).
2. Select "基本設定 " and press (選択).
3. Press .
4. Select "English" and press (Set).
Switch to English
4
1. Enter the phone number you want to call using the following pattern.
International dial code - Country code - Area code - Subscriber's number
2. Press to make a call.
Example: to call United States, number 212-123-XXXX.
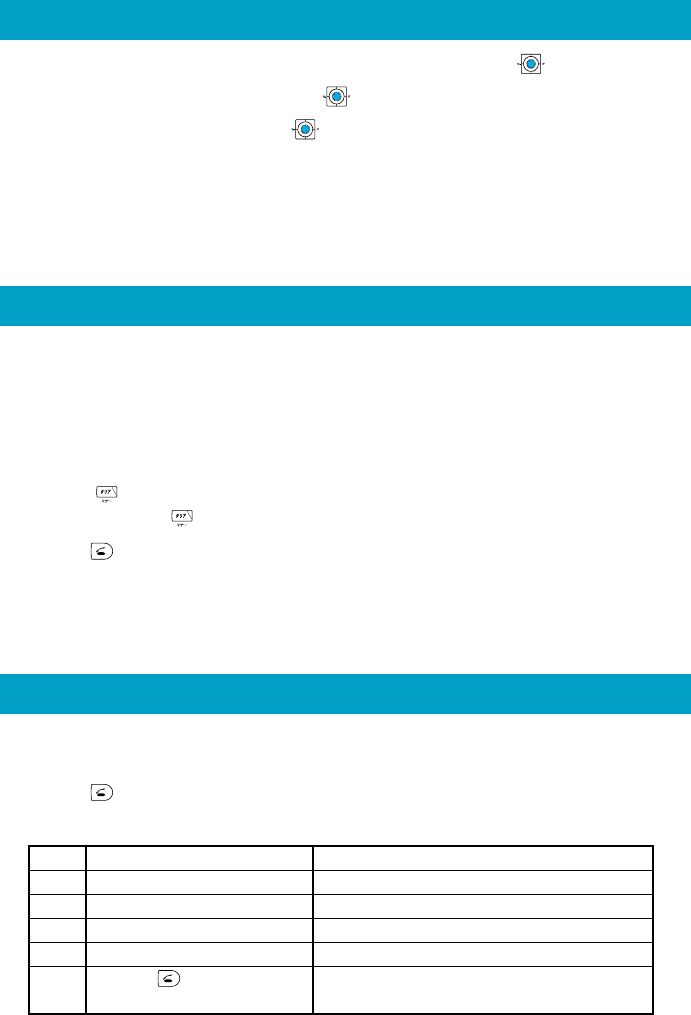
Operation Explanation
1Pressing "005345" Access code
2Pressing "1" Country code of United States: 1
3Pressing "212" Area code※ : 212
4Pressing "123-XXXX" Subscriber's number: 123-XXXX
5 Press The following operation is the same
as the normal telephone operation.
※When the first number of the area code is "0", press the area code number
without "0".
Making an International Call
Calling to general, mobile and PHS phones
1. Enter the phone number you want to call.
Area code - Local code - Subscriber's number.
Example: 03-0001-XXXX
Always include the area code, even when calling to a number in the same area
you are in.
If you enter a wrong number:
●Press briefly - the last dialed digit will be deleted.
●Press and hold - the entire phone number will be deleted.
2. Press to make a call.
1. While in standby mode or while making a call, press (MeinMenu).
2. Select "Private Info" and press (Select).
3. Select "Profile" and press (Select) to display your au telephone
number.
Displaying your own phone number
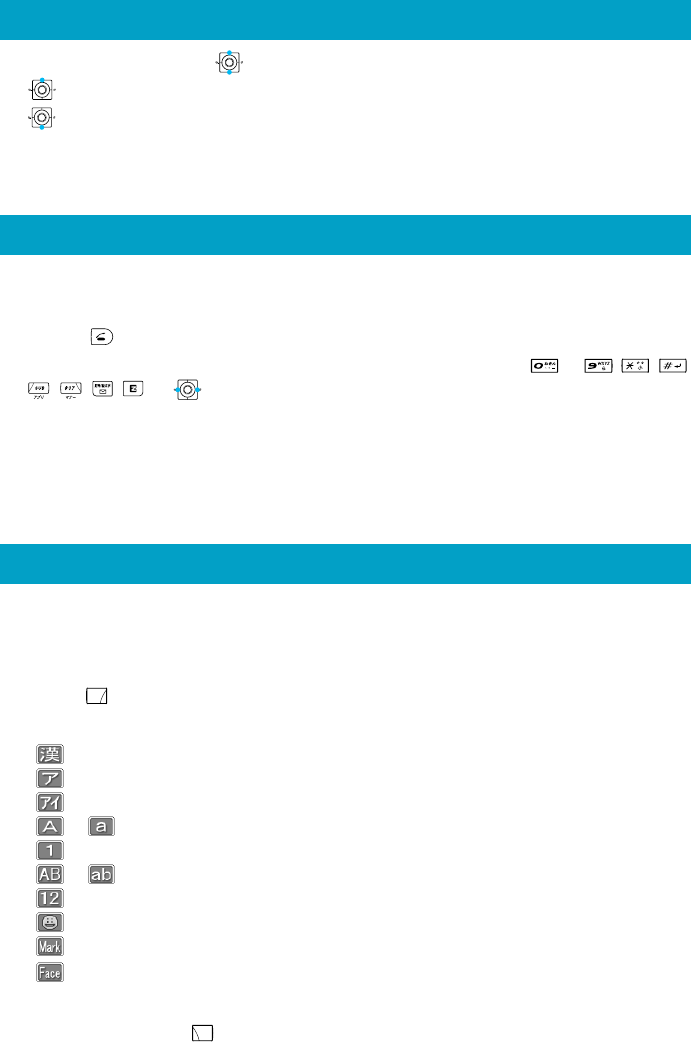
This is the method of entering names for registering address book and
writing mail.
1. Press (Char.).
2. Select the entry mode you want.
「」:"Kanji", "Hiragana" entry mode (full size)
「」:"Katakana" entry mode (full size)
「」:"Katakana" entry mode (half size)
「」「」:"Alphanumeric" entry mode (full size)
「」:"Number" entry mode (full size)
「」「」:"Alphanumeric" entry mode (half size)
「」:"Number" entry mode (half size)
「」:"Pictographs" entry mode (full size)
「」:"Symbol" entry mode
「」:"Face marks" entry mode
When you press the (Undo) just after the characters are confirmed, the
characters return to the previous state.
Entering characters
1. The ringer tone sounds/vibrator buzzes, and the incoming call lamp
flashes.
2. Press to answer the call.
An incoming call can also be answered by pressing any of the ∼ , , ,
, , , , or keys when M52: Any Key Answer is set.
If you do not answer the call or the caller disconnects before the call is answered,
"Missed Call X" will be displayed. (A number appears in the "X".)
Answering a call
1. During a call, press .
: Volume level raised
: Volume level lowered
Adjusting the receiver volume
5
6
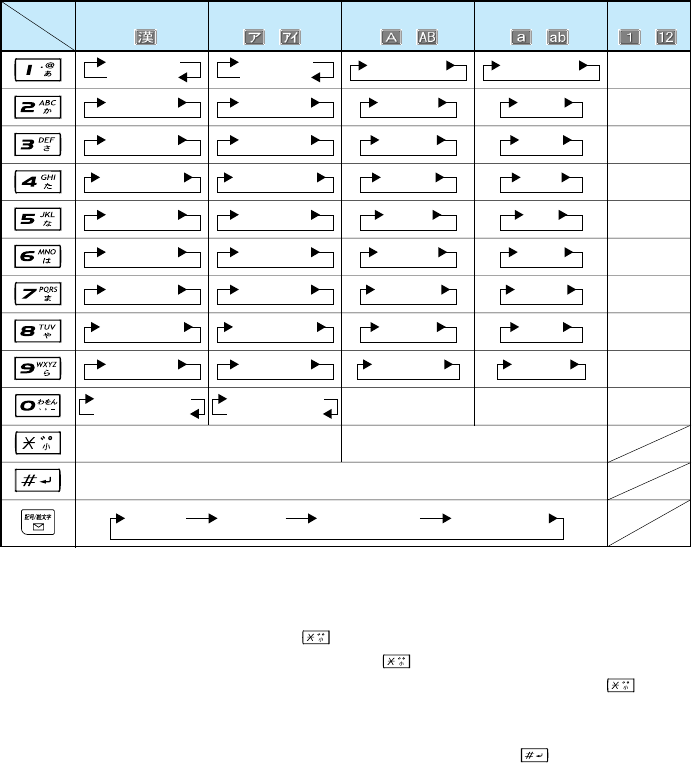
[Assignment of characters and key functions]
Characters are assigned to each key as shown below. Press a key
repeatedly to cycle through characters assigned to that key.
Remarks:
■To enter a Japanese character with (゛) or (゜), enter the desired character
without confirming and press in this order. When you enter a capital
character without confirming and press , the character changes to the
lowercase, and when you enter a lowercase character and press , the
character changes to the capital.
(Example: た→だ→た…/は→ば→ぱ→は…/つ→づ→っ→つ…/ A → a→A…)
■A character is switched into reverse order by pressing after entering
character using the dial keys. (Example: か→こ→け→く→き→か)
Kanji・Hiragana
Katakana Alphanumeric Number
key
entry mode
1
2
3
4
5
6
7
8
9
0
Reverse toggle of entered characters,
line change(after confirm)
あいうえお
ぉぇぅぃぁ
かきくけこ
さしすせそ
たちつてとっ
なにぬねの
はひふへほ
まみむめも
やゆよゃゅょ
らりるれろ
わをんゎ、。−
(space)
?!∼・
アイウエオ
ォェゥィァ
カキクケコ
サシスセソ
タチツテトッ
ナニヌネノ
ハヒフヘホ
マミムメモ
ヤユヨャュョ
ラリルレロ
ワヲン 、 。
ー−
(space)
? !
~・
ABC2
DEF3
GHI4
JKL5
MNO6
PQRS7
TUV8
WXYZ9
0
゛ ゜
Switches lowercase/uppercase Switches lowercase/uppercase
.@-_/:~1
Alphanumeric
abc2
def3
ghi4
jkl5
mno6
pqrs7
tuv8
wxyz9
0
.@-_/:~1
Symbol
(full size) Symbol
(half size) Pictographs Face marks
・ ・ ・ ・
You can register frequently used phone numbers and E-mail addresses.
Up to 500 addresses can be registered in the address book.
■Registering in the address book
1. Press and hold (Adrs.Bk.) for more than one second.
The address book item list is displayed.
The smallest free memory number (No.000 - No.499) is displayed.
2. Enter the item you want.
Select the icon of the item you want by and press (Select) to enter it.
As for the items you can enter, see "Items to register in the address book".
3. Press (Reg.) to complete registration.
Registering in the Address Book
■Items to register in the address book
The following data can be put in the address book.
(※ 1)Up to 100 entries for any optional item can be registered in any memory number.
Memory No.
Name
Pronunciation
Phone No.1
Phone No.2
Phone No.3
E-mail address 1
E-mail address 2
Group
Link image
Voice reception
E-mail reception
C-mail reception
Chat reception
Message
GPS information
Secret Setup
Option
Blood type
Birthday
Constellation
Postal code
Address
Hobby
URL
Memo
−
Up to 12 full size (24 half size) characters
Up to 24 half size characters
Up to 36 digits
Up to 36 digits
Up to 36 digits
Up to 64 half size alphanumeric characters
Up to 64 half size alphanumeric characters
−
−
−
−
−
−
−
−
−
−
−
−
−
Up to 7 half size numbers
Up to 40 full size (80 half size) characters
Up to 10 full size (20 half size) characters
Up to 256 half size alphanumeric characters
Up to 40 full size (80 half size) characters
000 - 499
−
Registered automatically after "Name" is entered.
Used for speed call. (→ Page 16)
You can register only when "Phone No.1" is entered.
You can register only when "Phone No.2" is entered.
Used for speed mail.
You can register only when "E-mail address 1" is entered.
You can classify it into 20 classes for managing.
An image stored in the data folder is selected.
You can prevent disclosing the content of registration to other persons.
You cannot register it.
Behavior for specified caller to be changed.
Behavior for specified E-mail sender to be changed.
Behavior for specified C-mail sender to be changed.
Behavior for specified chat mailer to be changed.
Message for specified caller to be changed.
Optional items YES/NO to be preset.
Optional items(※1)
Item
Maximum entry characters
Remarks
7

8
Calling from the Address Book
Saved phone number in the Address Book can be loaded and a call is placed to that
number.
1. Press (Adrs.Bk.).
2. Use to scroll through and display the name you want.
3. Press (Detail).
4. Select the phone number, and press .
Creating and Sending E-Mail
1. Press in the Standby Screen.
2. Use to select “Create New”and press (Select).
Icons
:”To” to which you send E-Mail
:”Title” of E-Mail
:”Attachment data” of E-Mail
:”Body” which is the mail contents.
3. Use to select “ [Address]” and press (Select).
4. Use to select “Address Entry” and press (OK).
5. Enter the address and press (OK).
6. Use to select “ [Title]” and press (Select).
7. Enter the title and press (OK).
8. Use to select “ [Body]” and press (Select).
9. Enter the body sentences and press (OK).
10. Press (Send).
11. Use to select “Send” and press (“OK”).
Using the EZweb Service
1. Press in the standby display.
2. Select "Top Menu" and press (Select).
To access information sites (sites that provide information):
Select the desired information site,and press (Select).
■Pressing returns the display to the previous display.Holding down for a
longer time returns you to EZ Top menu.
Pressing exits EZweb.
you can scroll the display up and down by turning .
Pressing returns the display to the previous display.
9
■When you receive C-Mail
The message “New C-Mail #” appears when receive new C-Mail.
The received C-Mail is stored in the Inbox.
1. Press (Confirm).
2. Use to select“New C-Mail #”and press (OK) .
The received C-Mail is usually stored in the“メインフォルダ”(Main folder).
3. Use to select the folder with stored new C-Mail and press
(Select) .
4. Use to select the new C-Mail and press (Disp.) .
■Reading C-Mail from the Inbox
C-Mail can be read from the Standby Screen when any now-read mail read again.
1. Press and hold for over a second in the Standby Screen.
2. Use to select“Inbox”and press (Select) .
3. Use to select the folder with the C-Mail to read and press
(Select) .
4. Use to select the C-Mail to read and press (Disp.) .
Reading Received C-Mail
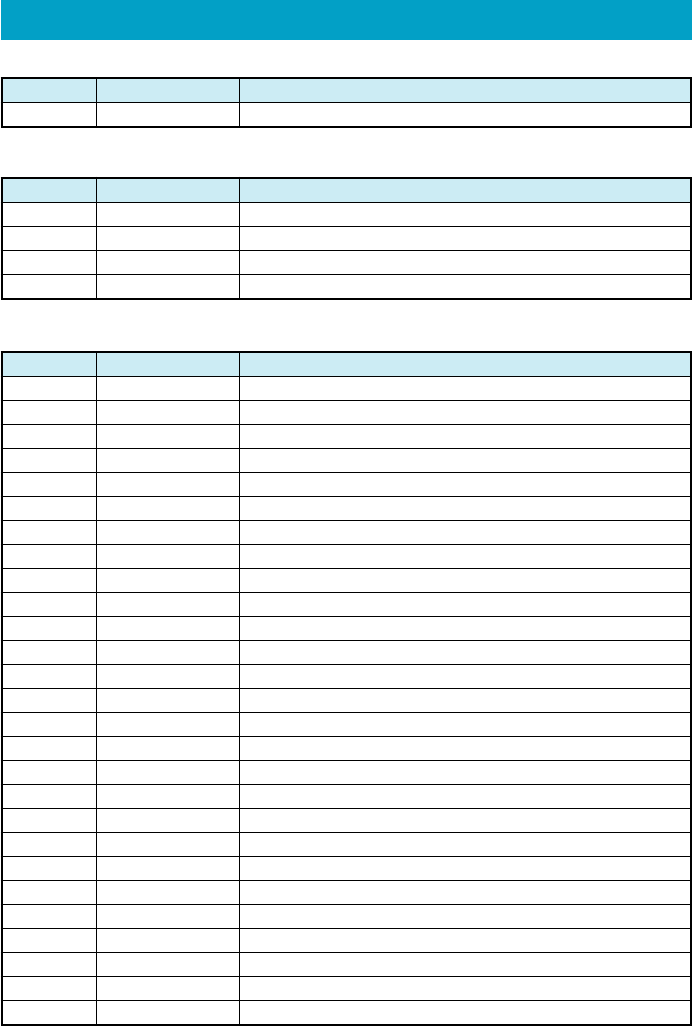
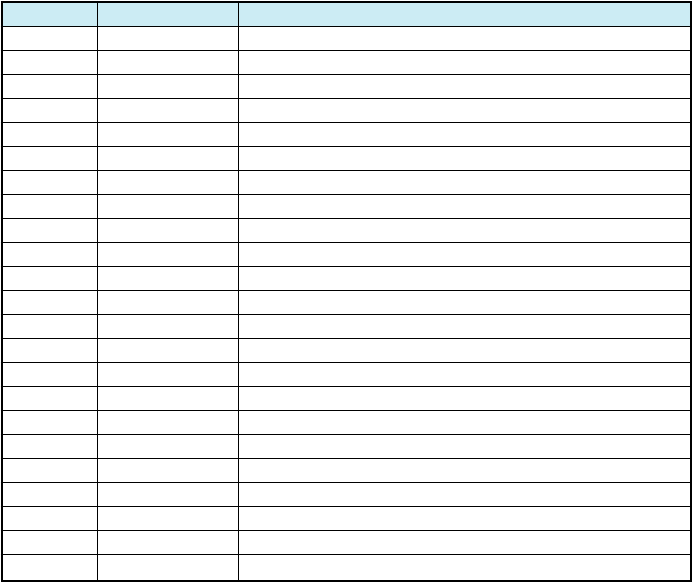
List of Basic Setup
■M2 Sounds/Vibes
M21
M211
M212
M213
M214
M215
M216
M217
M218
M22
M221
M222
M223
M224
M225
M226
M23
M231
M232
M233
M234
M235
M24
M25
M26
M27
M28
Speaker Volume
Ringer Volume
E-Mail Notice
Unreg.E-Mail
Server Notice
C-Mail Notice
Chat Notice
Alarm Volume
Browser Volume
Ringer/Vibes
Call Notice
E-Mail Notice
Unreg.E-Mail
Server Notice
C-Mail Notice
Chat Notice
Effect Sound
Key Tone
OK Tone
NG Tone
Opening Tone
Closing Tone
Wake-Up
Power Off
Quality Alert
Rcvr. Vol.Adj.
Call Viberation
Mode No. Function
Adjusting speaker sound volume
Setting speaker sound volume for voice call reception
Setting speaker sound volume for E-mail reception
Setting speaker sound volume for unspecified E-mail
Setting speaker sound volume for Server Notice reception
Setting speaker sound volume for C-mail reception
Setting speaker sound volume for chat
Setting speaker sound volume for alarm
Setting speaker sound volume for browser
Selecting ringer tone/vibrater
Setting voice reception mode
Setting E-mail reception mode
Setting unspecified E-mail reception mode
Setting Server Notice reception mode
Setting C-mail reception mode
Setting chat reception mode
Setting sound effects
Setting key-in confirm tone
Setting OK sound effects
Setting NG sound effects
Setting sound effects when opening the handset
Setting sound effects when closing the handset
Setting wake-up tone
Setting power-off tone
Announcing in case of talk interruption
Adjusting receiver volume
Setting the call-up vibrator
Description
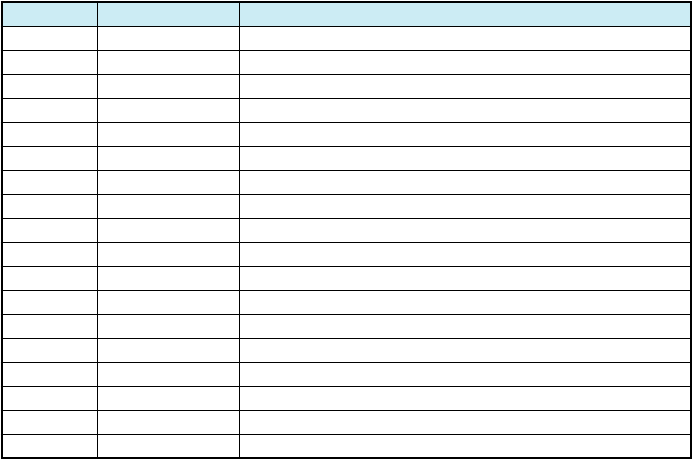
■M0 Profile
M0 Profile
Mode No. Function
Displaying own phone number and E-mail address
Description
■M1 Call/Toll
M11
M12
M13
M14
Time/Toll
TalkTime Disp.
Toll Display
Toll Rate
Mode No. Function
Displaying estimated talk time during call
Displaying estimated charge after call
Setting the multiplication of charge
Description
10
11
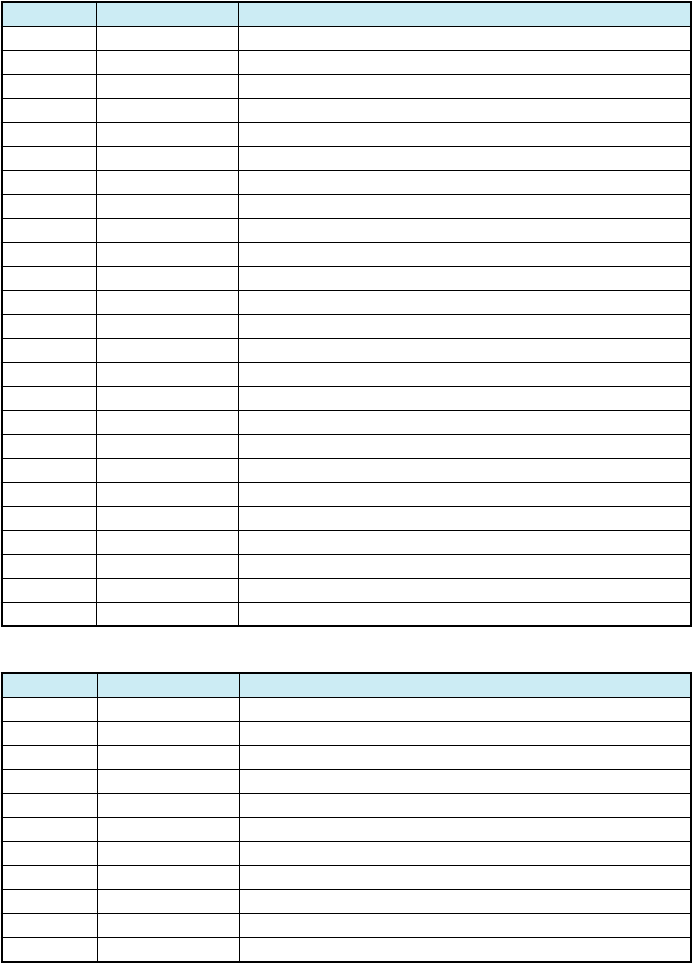
■M3 Screen
M31
M311
M312
M313
M314
M315
M32
M321
M322
M323
M33
M331
M332
M333
M34
M341
M342
M35
M36
M37
M371
M372
M38
Main Display
Standby Screen
Screen-Saver
Mail Xmit Image
EZ Connect Img.
Power Saving
Sub Display
Standby Screen
Notice Disp.
On Calling Disp.
Lighting
Usual Screen
Mail Screen
EZweb Screen
Switch Font
Font Size
Font Type
バイリンガル機能
Coloration
Illumination
Call Illum.
Notice Lamp
KeyLight Save
Mode No. Function
Setting Main display
Setting wallpaper on standby screen
Setting screen saver
Setting E-mail, C-mail connection screen
Setting EZweb connection screen
Setting Power save screen
Setting Sub display
Setting wallpaper on Sub display's standby screen
Setting notice screen of Sub display
Setting Sub display during call
Setting lighting of display and keys
Setting lighting for Main display
Setting lighting for mail screen
Setting lighting for EZweb screen
Setting character size
Setting character font
Setting the English/Japanese display
Setting the display's colors
Setting illumination during call
Setting key illumination during power save
Description
12
■M4 Privacy
M41
M4
M43
M431
M432
M433
M434
M435
M436
M437
M44
M45
M46
M461
M462
M463
M464
M465
Change LockNo.
Number Notice
User Restrict
Auto Lock
Dial Restrict
AddressBookRstr
Mail Restrict
EZweb Restrict
EZappli Restrict
Secret Mode
Incoming Reject
One Call Reject
Reset
Reset Learning
Reset Function
Reset Memory
Reset EZappli
Reset All
Mode No. Function
Changing Lock Number
Announcing your number to the other party
Restricted Setting
Setting Auto Lock
Disabling dial-up calls
Restricting Address Book access
Restricting mail access
Restricting EZweb access
Setting Secret
Rejecting designated unwanted phone numbers
Rejecting nuisance calls
Initializing all functions
Initializing the memory
Initializing all functions and memories
Description
13
■M5 User Support
M51
M511
M512
M513
M514
M515
M52
M53
M54
M55
M551
M552
M553
M554
M555
M56
M57
M571
M572
M573
M574
M575
M576
M577
M58
Char.Entry
Entry Setup
Edit Format
Edit Face Mark
Edit User Dict.
D/L Dict.
Any Key Answer
Jpn.Area Code
Set Open Close
Transmission
XMSN Mode
XMSN Speed
Data Transfer
Print Mode
MassStorageMode
Voice Notice
Network
Play Voice Mail
VoiceMail1 ON
VoiceMail2 ON
VoiceMail OFF
Change Ans.Msg.
Eng.Guidance
Jpn.Guidance
Earphone Setup
Mode No. Function
Setting character entry method
Setting character entry method/forecast conversion
Editing formatted text
Editing face marks
Registering/Editing User dictionary
Registering the dictionary downloaded from EZweb
Answering calls using the digit keys
Registering frequently used area code
Setting actions for incoming calls when opening and closing the handset
Setting transmission mode
Setting transmission speed
Listening to messages
Setting the answering message service 1
Setting the answering message service 2
Stopping the answering message service
Recording/Confirming/Changing response messages
Switching to English language guidance
Switching to Japanese language guidance
Description
■M6 Ans.Ph./Manner
M61
M62
M63
M631
M632
M633
M634
M64
M65
M66
M67
Answer Phone
Answer Message
Voice Data Opr.
Record MyVoice
Rec.Phone Memo
Ans.Ph/Ph.Memo
MyVoice Folder
Manner Mode
Emission
Charging Mode
Rear Key Setup
Mode No. Function
Setting simple absence memo
Selecting simple absence memo message
Playing, deleting and recording Voice data
Recording own voice during standby
Recording other party's voice during call
Playing and deleting the absence memo
Playing My Voice
Setting the manner mode and its styles
Setting the home mode
Setting the key(External) usage
Description
※The height and depth are the dimensions when the telephone is folded.
★Used Japan
●The continuous talk time and continuous standby time are the average values of
when the signals can be received normally while the telephone is in the standstill
status.
The operation time may be reduced to utmost half due to charging conditions,
temperature, and other operation environment conditions, signal condition at the
location of use, function setting, roaming area.
Weight: approximately XX g (including battery pack)
Continuous talk time: approximately XX minutes ★
Continuous standby time: approximately XX hours ★
Dimensions (H/W/D): approximately XX mm x XX mm x XX mm※
(not including the antenna and protuberances)
Specifications
14
■M7 Clock
M71
M72
M73
Auto Correct
Auto Power ON
Auto Power OFF
Mode No. Function
Setting the date and time
Power on at specified time
Power off at specified time
Description
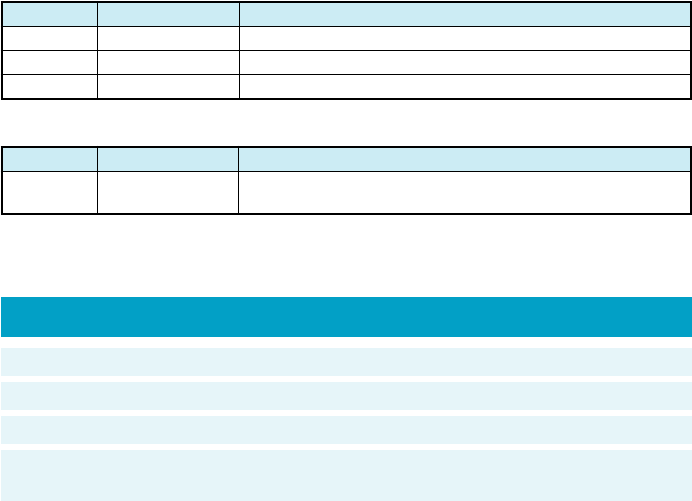
■Guidance(M#)
M# Guide Function
Mode No. Function
Displaying the operation instructions for functions other than
M functions
Description