Sanyo Electric Co SCP-53H Tri-Mode Dual-Band Analog/PCS Phone (AMPS/CDMA) User Manual fcc1 5300
Sanyo Electric Co Ltd Tri-Mode Dual-Band Analog/PCS Phone (AMPS/CDMA) fcc1 5300
UserManual.wiki
>
Sanyo Electric Co
>
SCP 53H User Manual
Users Manual
Navigation menu
Upload a User Manual
Namespaces
Wiki Guide
HTML
PDF
Info
Views
User Manual
Discussion / Help
Navigation


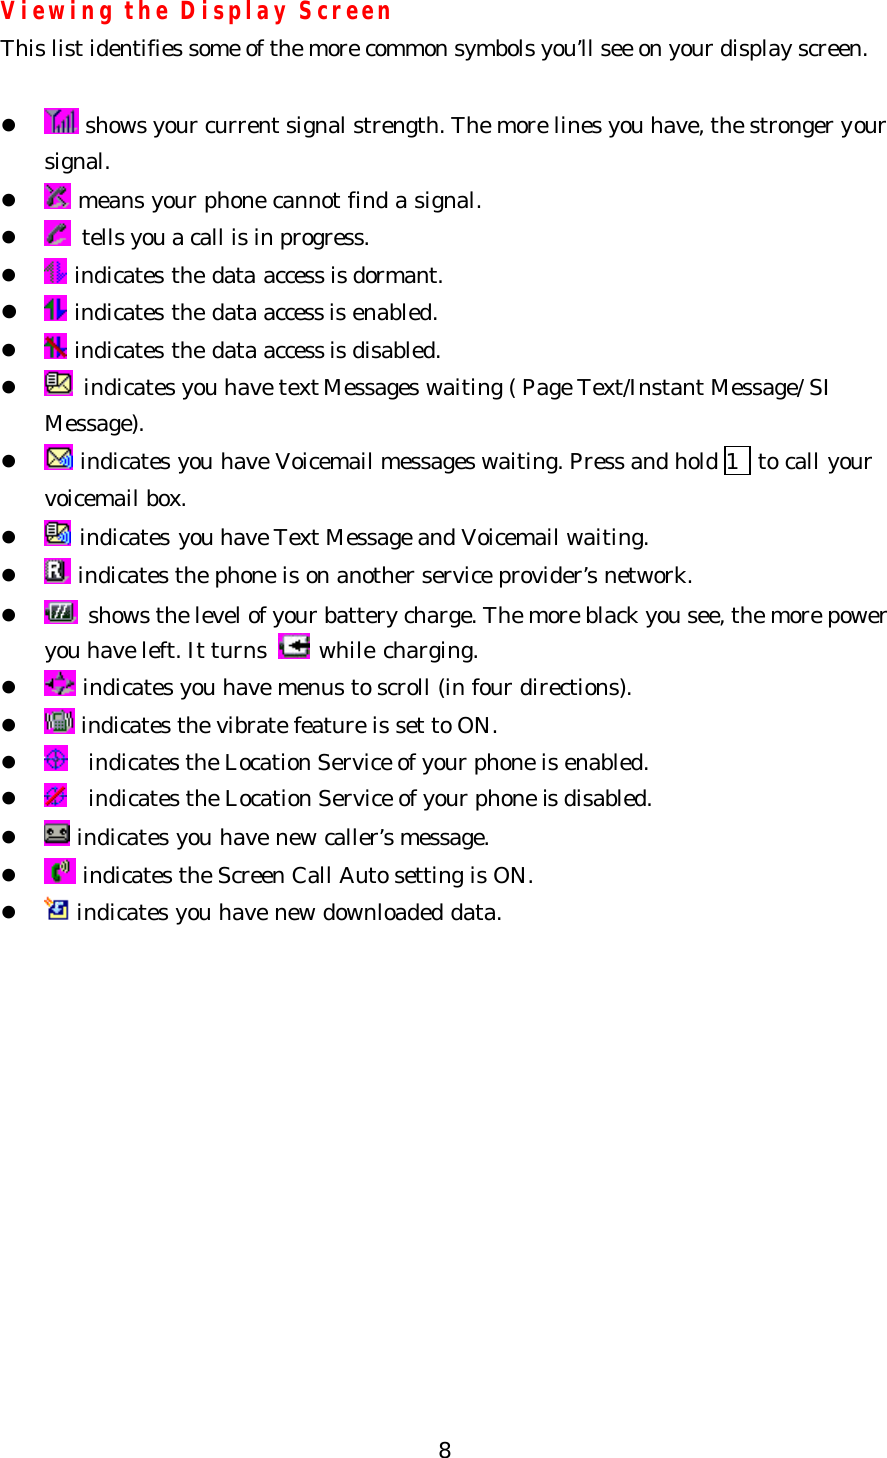


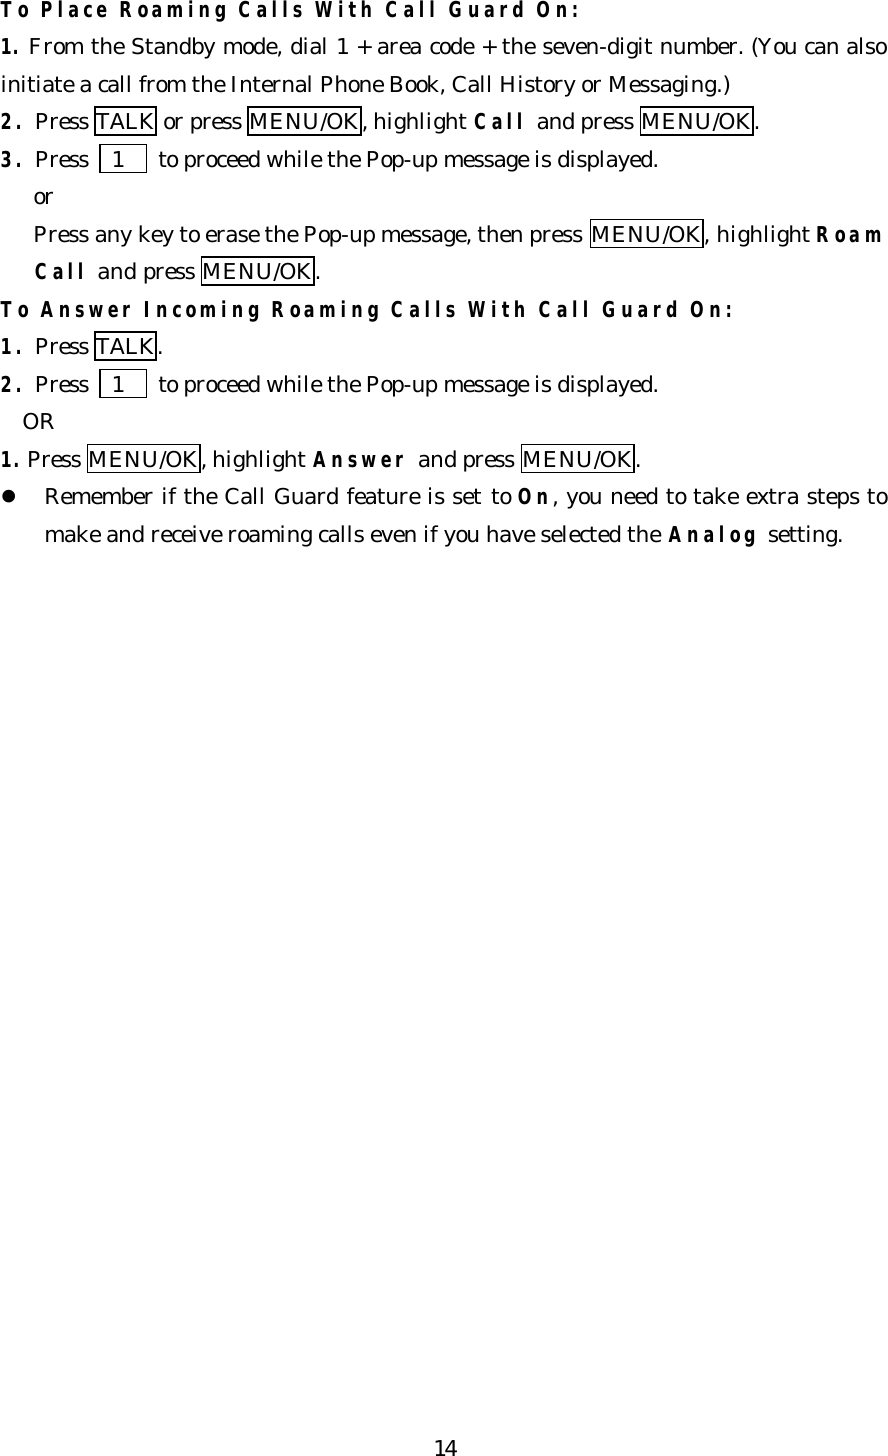


![27 Tip: Press Shift * to change: abc – Unshifted Abc – One-character-shifted ABC – Caps Lock These settings are shown on the display. Using Smart Punctuation “Smart punctuation” is available using in T9 mode. It’s a quick and easy way to type email domains, possessive forms and contractions. When you press 1 , T9 displays a period. However, as you continue to type, T9 determines the appropriate mark based on your word database. For example, to type “It’s easy.” Press 4 8 1 7 Space # 3 2 7 9 1 . Tip: The beginning of the word after the space is changed to upper/lower case depending on the entry field. You can change the shift by pressing Shift *. Entering Symbols, Numbers and Smile Pictures Entering SYMBOL To enter symbols, select the SYMBOL mode. (See “Selecting a Character Input Mode” on page 25.) 1. In a text entry field, press right soft key. 2. Highlight SYMBOL. 3. Press MENU/OK. 4. Highlight the line that includes your desired symbol. 5. Press the corresponding key (1 ~ 0) with each symbol. or Highlight your desired symbol by using the Navigation key, and press MENU/OK. Symbol List 1 2 3 4 5 6 7 8 9 0 . - ’ / : @ , ? ! ` ( ) “ ; % & * # ¢ { } ~ | = ^ _ [ ] £ < > + $ « » ° ¿ ¡ §](https://usermanual.wiki/Sanyo-Electric-Co/SCP-53H/User-Guide-266463-Page-28.png)