Savi Technology 600R-V2 EchoPoint Reader User Manual
Savi Technology Inc EchoPoint Reader
UserManual.wiki
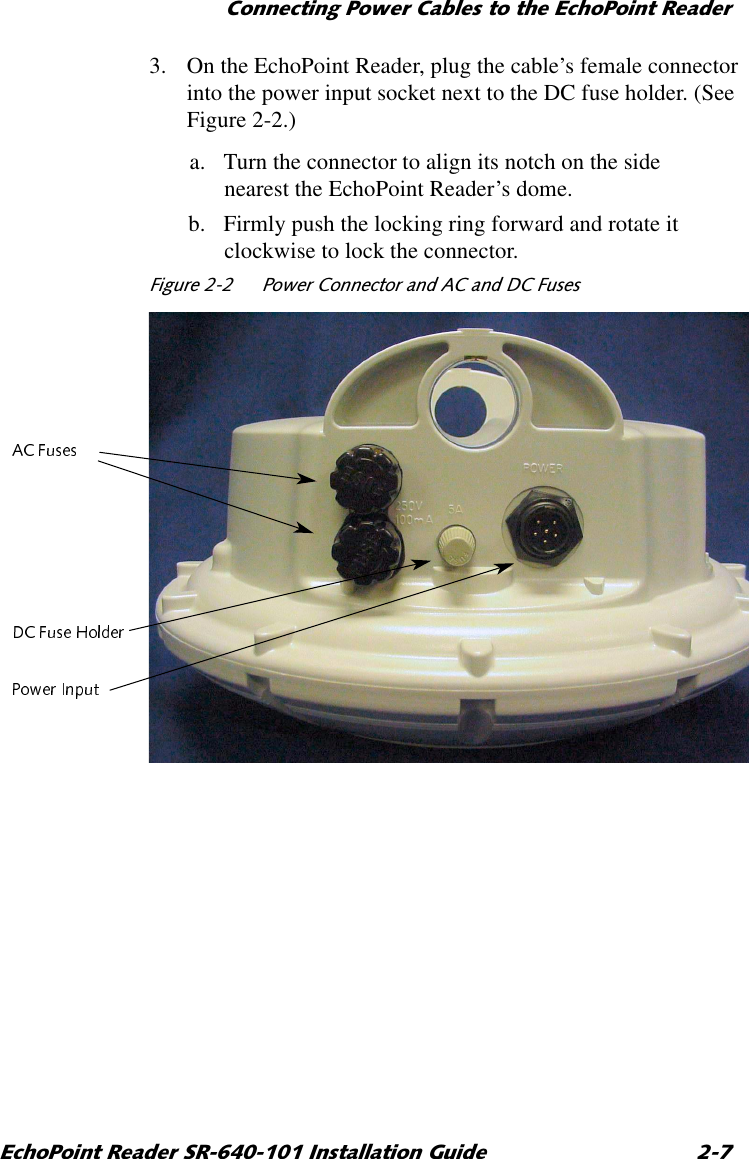
>
Savi Technology
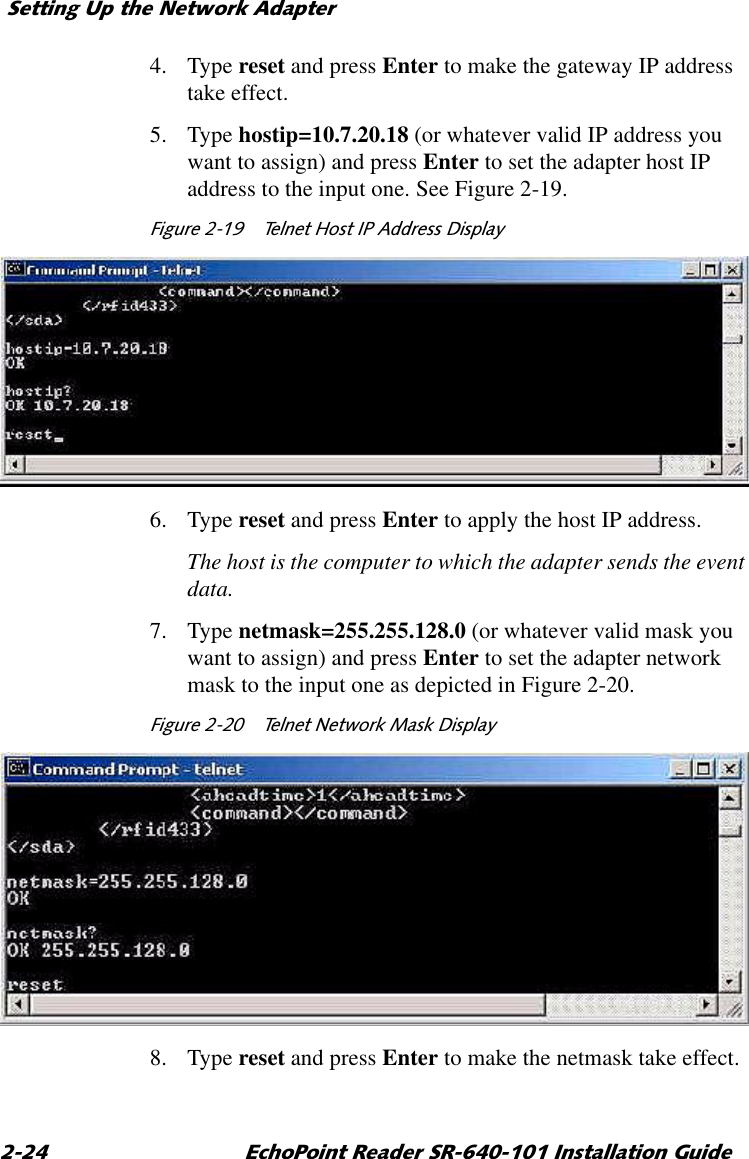
>
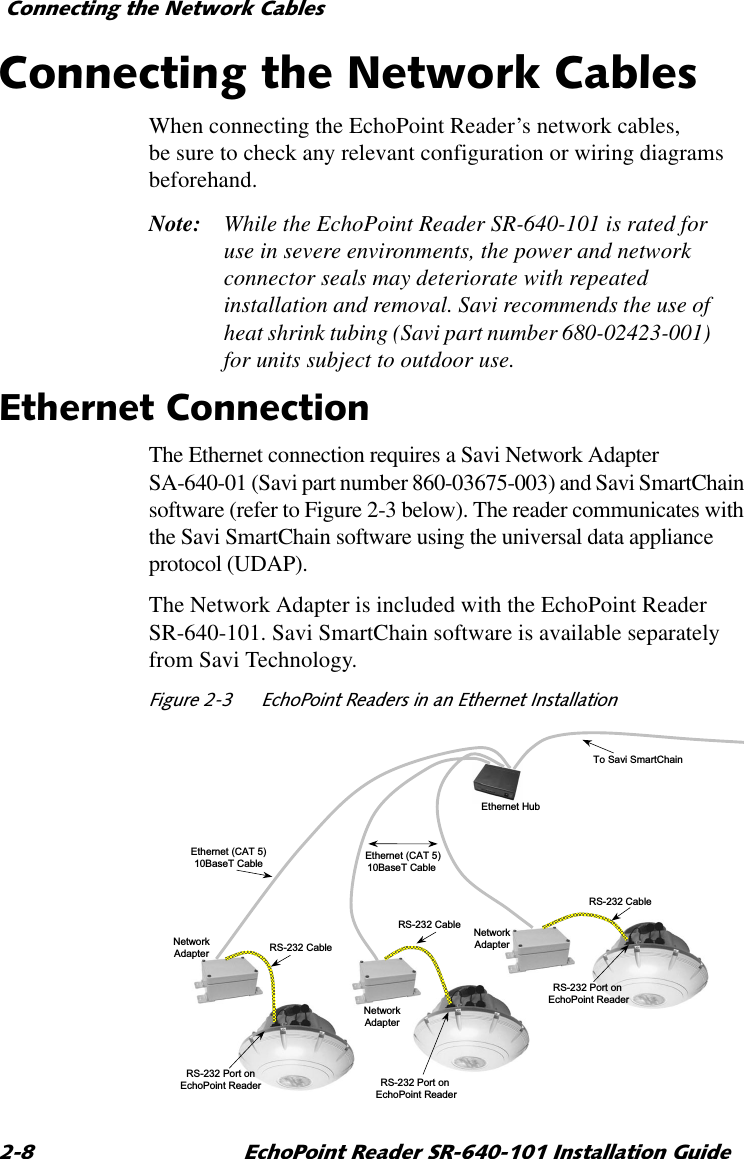
600R V2 User Manual
Users Manual
Navigation menu
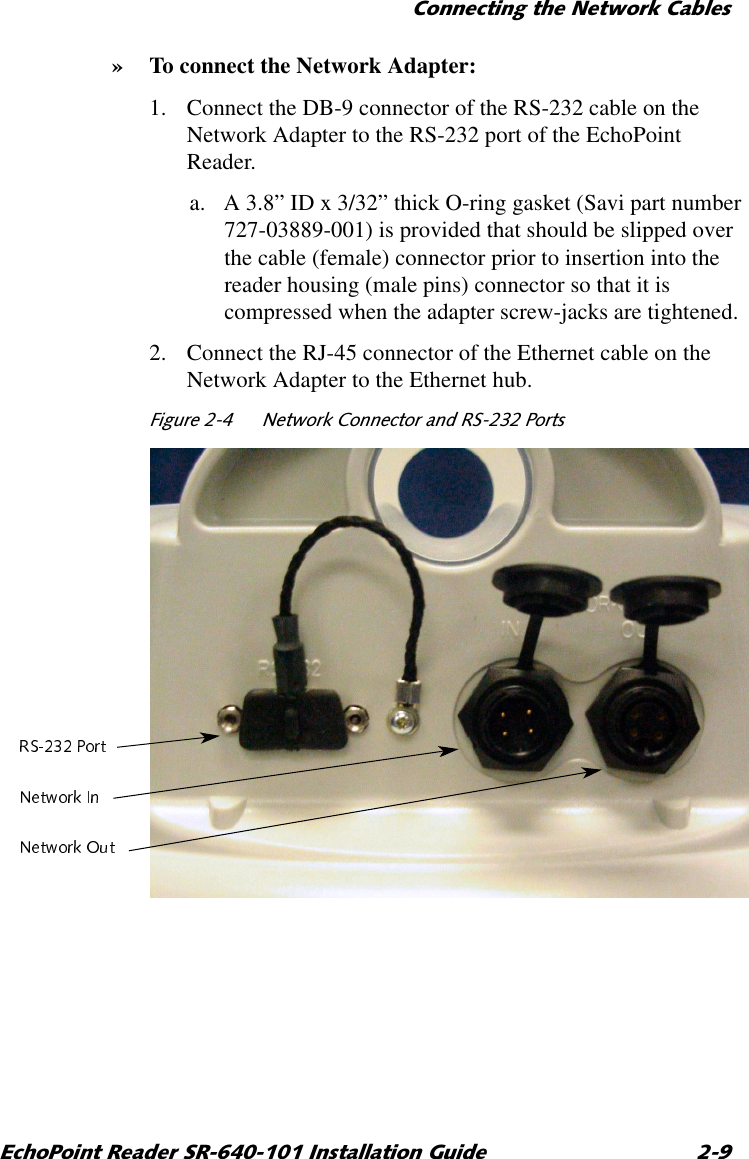
Upload a User Manual
Namespaces
Wiki Guide
HTML
PDF
Info
Views
User Manual
Discussion / Help
Navigation


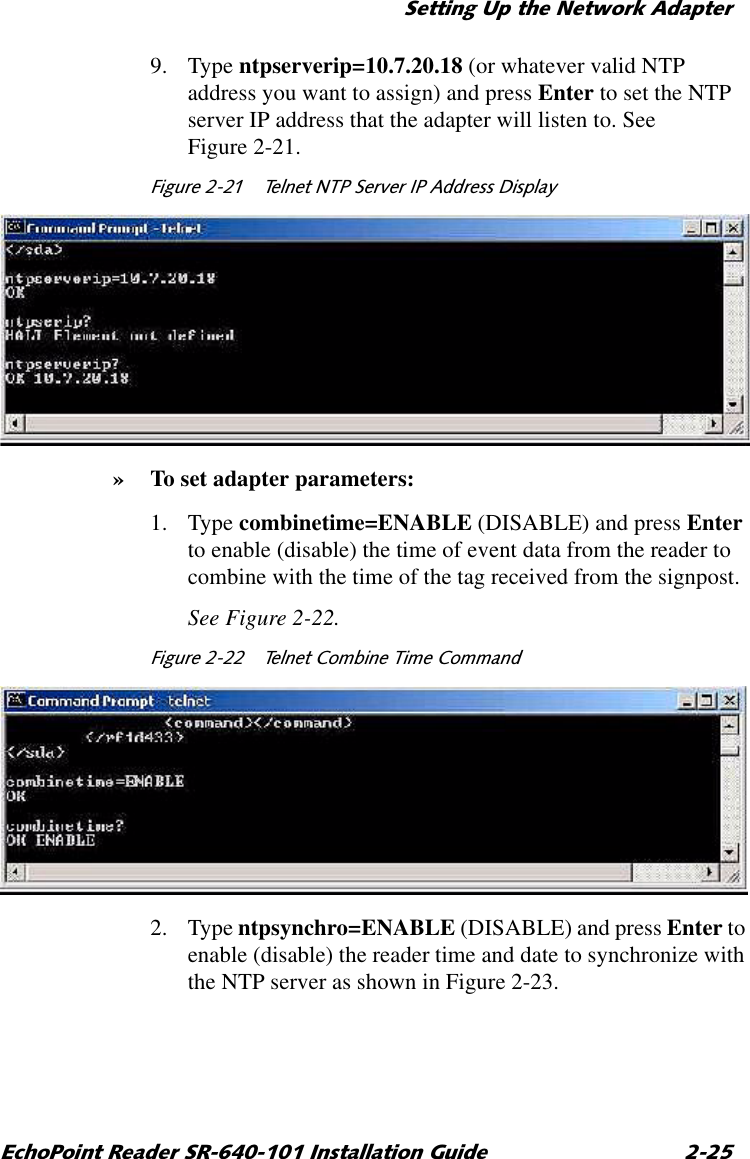
![6HWWLQJ8SWKH1HWZRUN$GDSWHU (FKR3RLQW5HDGHU65,QVWDOODWLRQ*XLGH)LJXUH 7HOQHW1736HUYHU6\QFKURQL]DWLRQ&RPPDQG3. Type timeoutntp=8 (unit: minutes) and press Enter to set the period (in minutes) for which, if the reader has not received time information, it will assume it has lost time synchronization with the NTP server. See Figure 2-24.)LJXUH 7HOQHW1736HUYHU7LPH2XW&RPPDQG4. Type aheadtime=2 (unit: seconds) and press Enter to set the time (in seconds) that the reader will take ahead of the synchronized NTP server time. Refer to Figure 2-25.)LJXUH 7HOQHW5HDGHU$KHDG7LPH&RPPDQG](https://usermanual.wiki/Savi-Technology/600R-V2/User-Guide-273900-Page-42.png)