Schneider Electric Buildings ROAMIO2 HVAC CONTROL TRANSCEIVER User Manual BACnet Service Tool User s Guide
Schneider Electric Buildings LLC HVAC CONTROL TRANSCEIVER BACnet Service Tool User s Guide
UserManual.wiki
>
Schneider Electric Buildings
>
ROAMIO2 User Manual
users manual
Navigation menu
Upload a User Manual
Namespaces
Wiki Guide
HTML
PDF
Info
Views
User Manual
Discussion / Help
Navigation


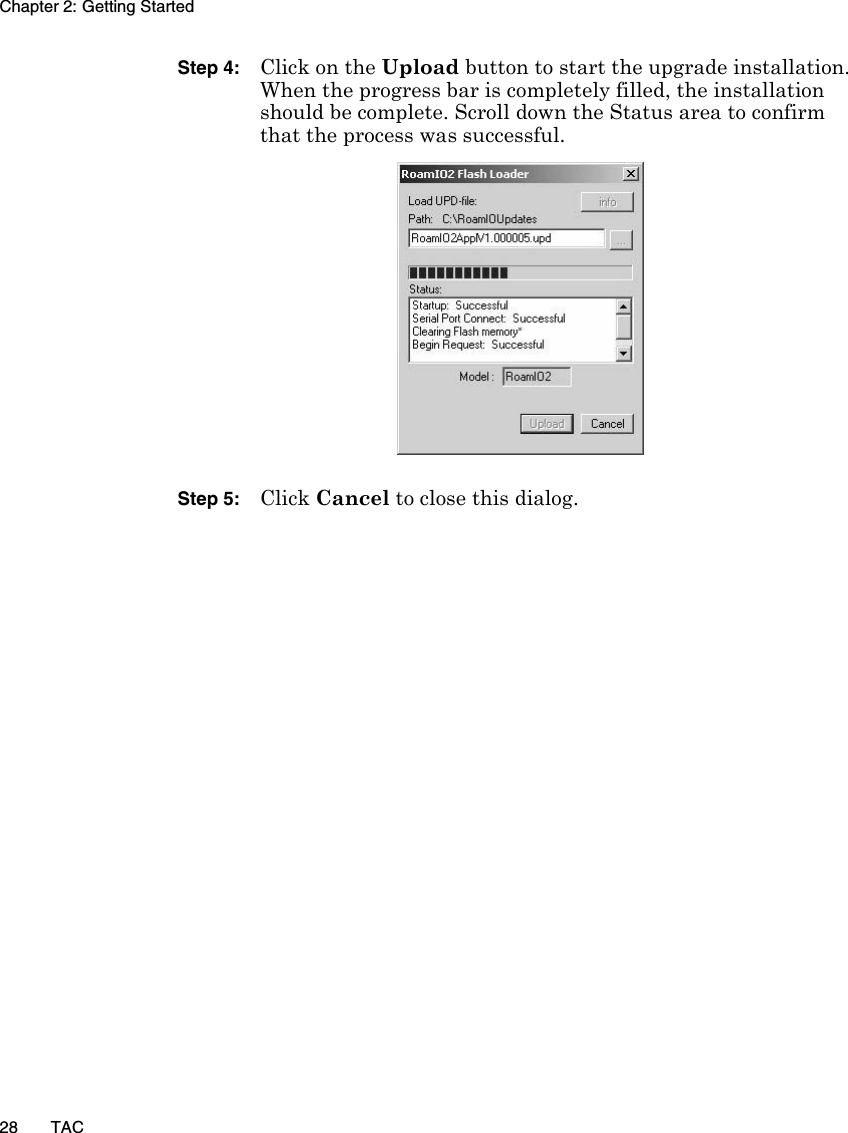
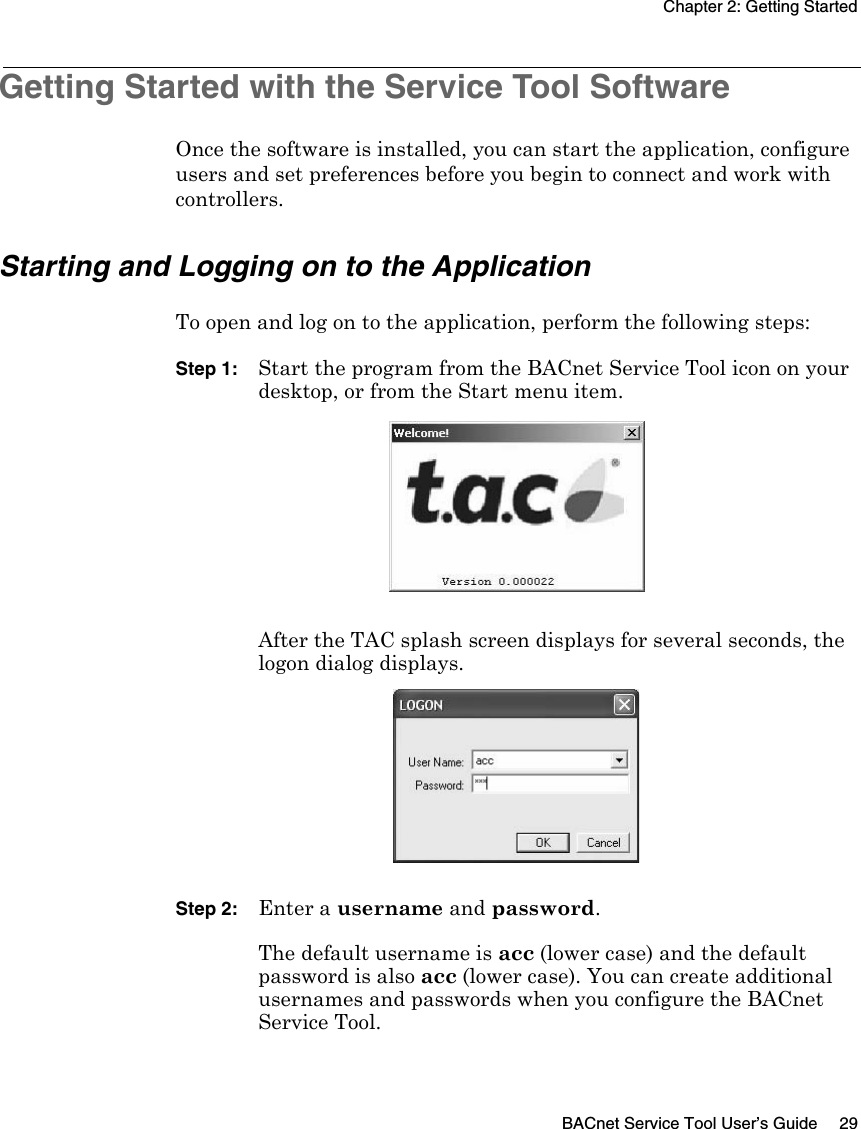
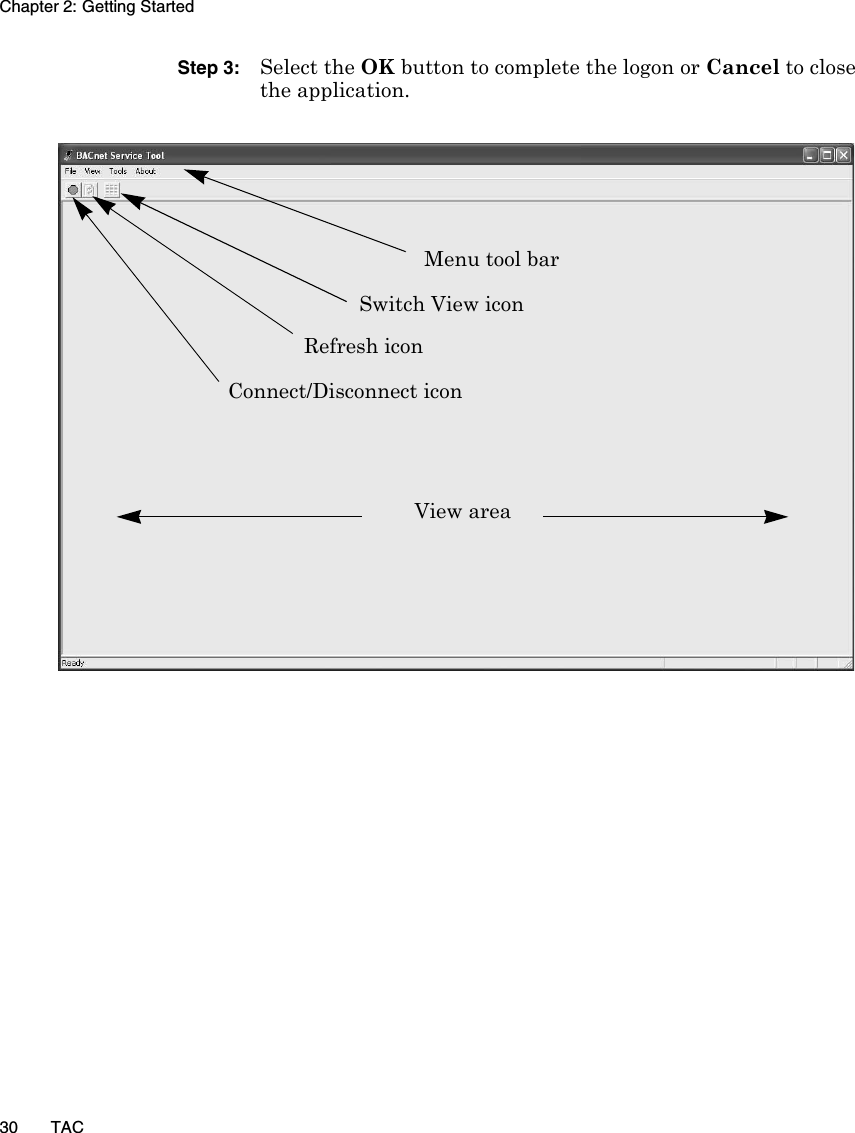
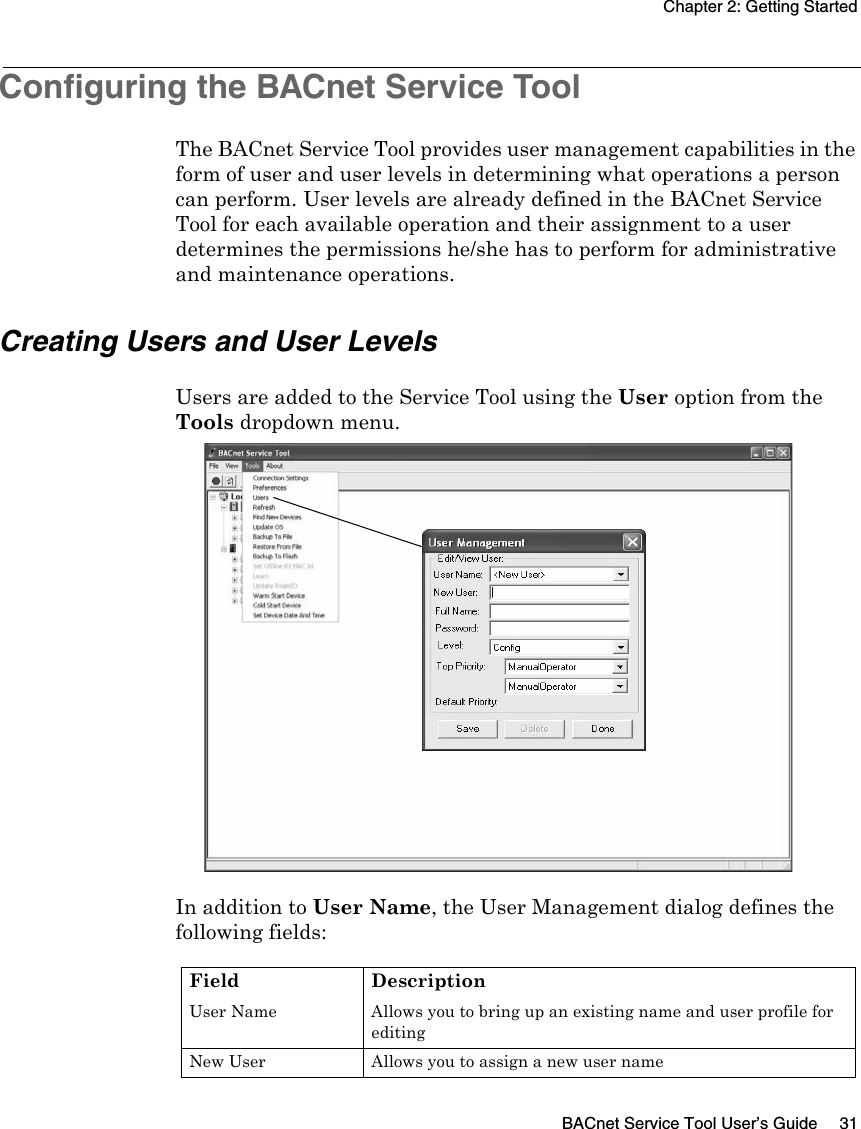


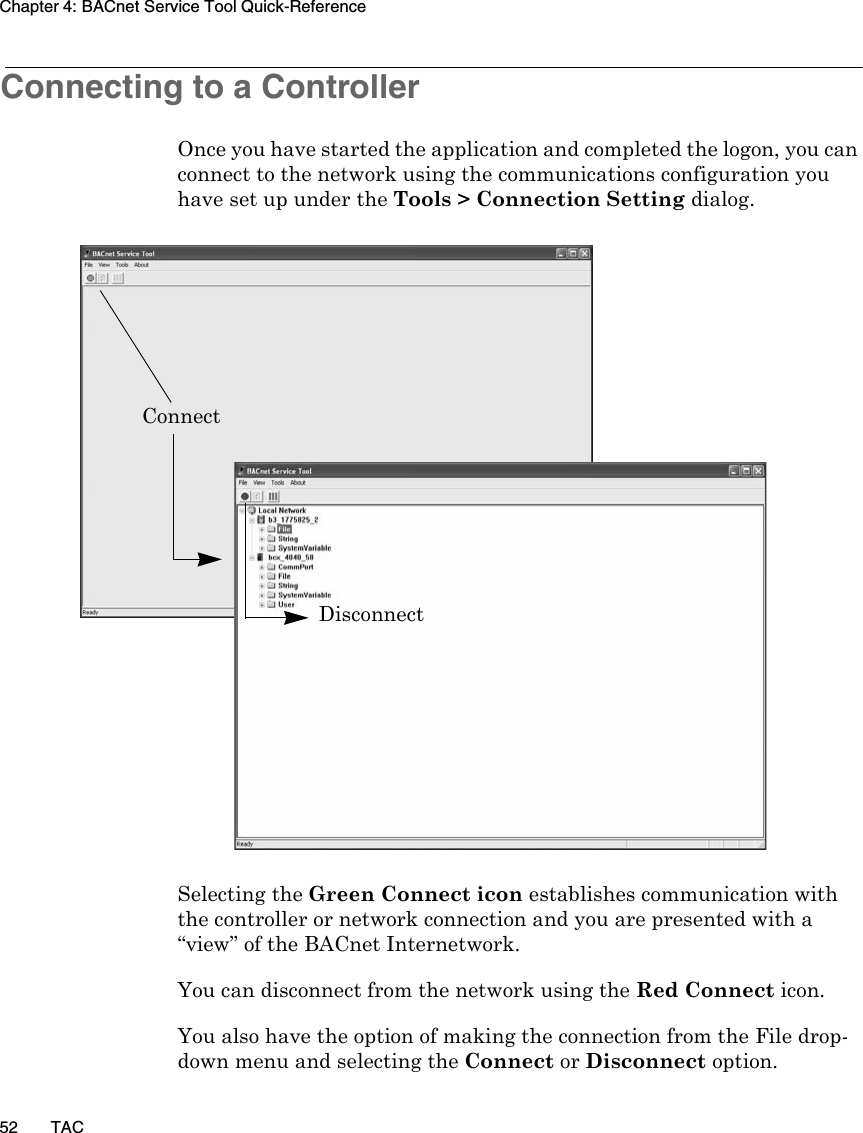
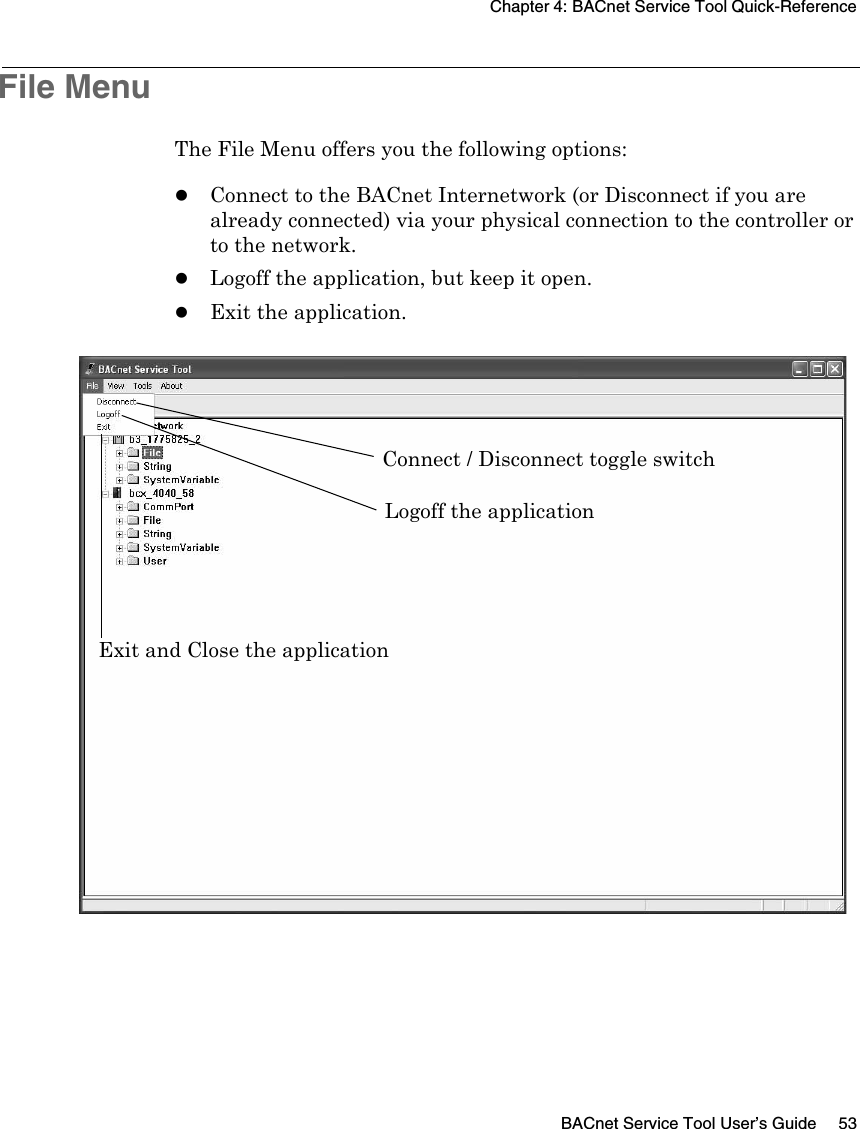
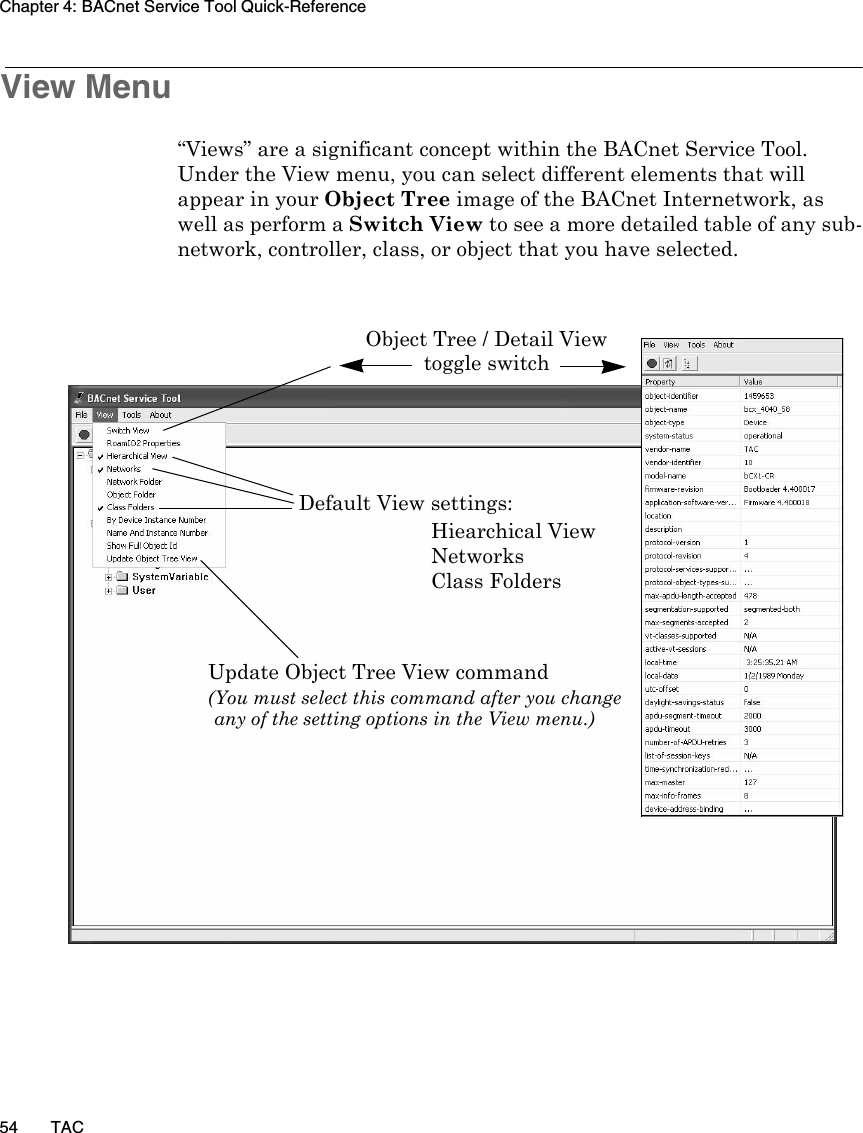
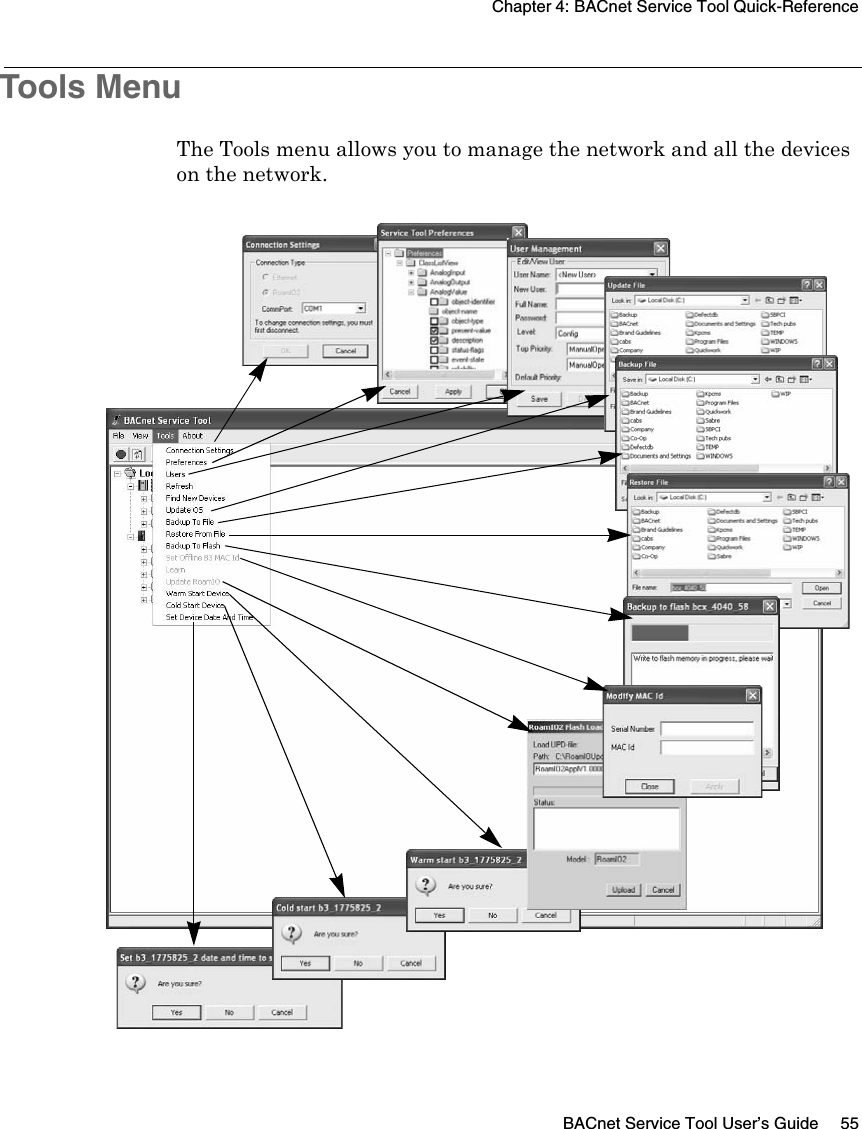

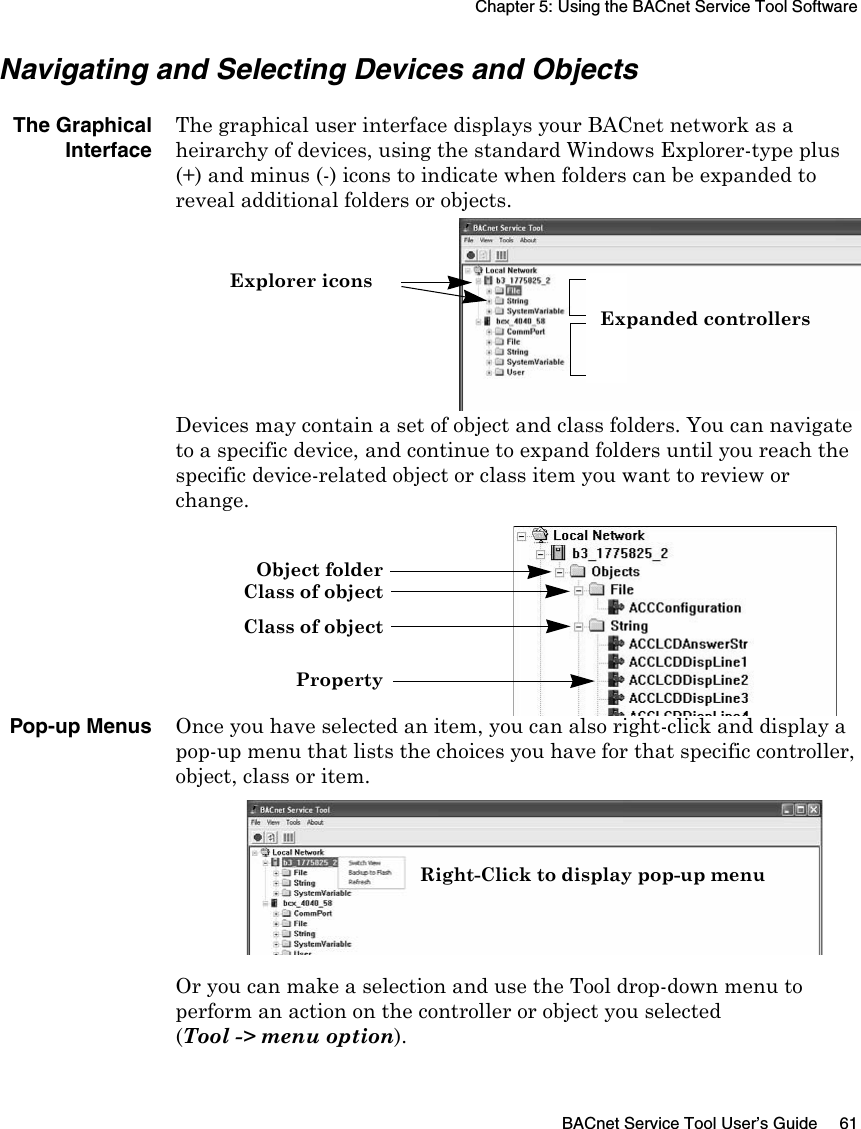
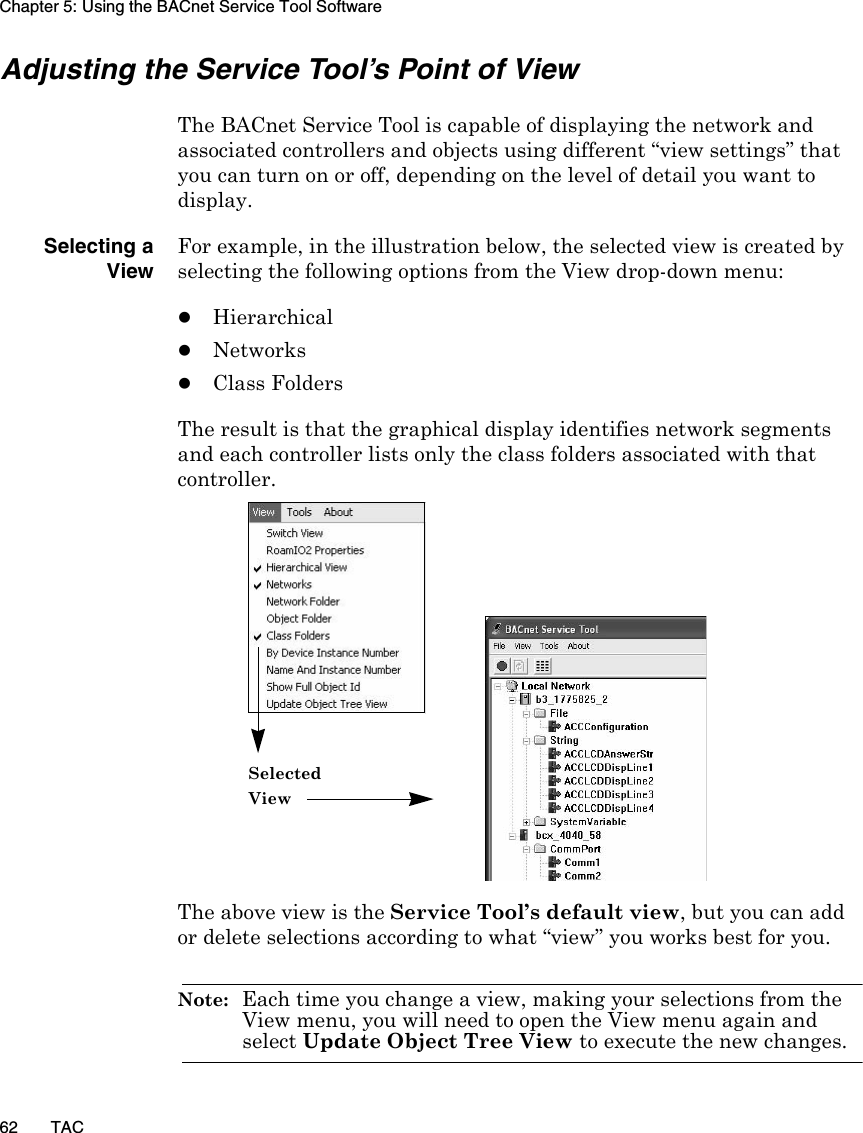
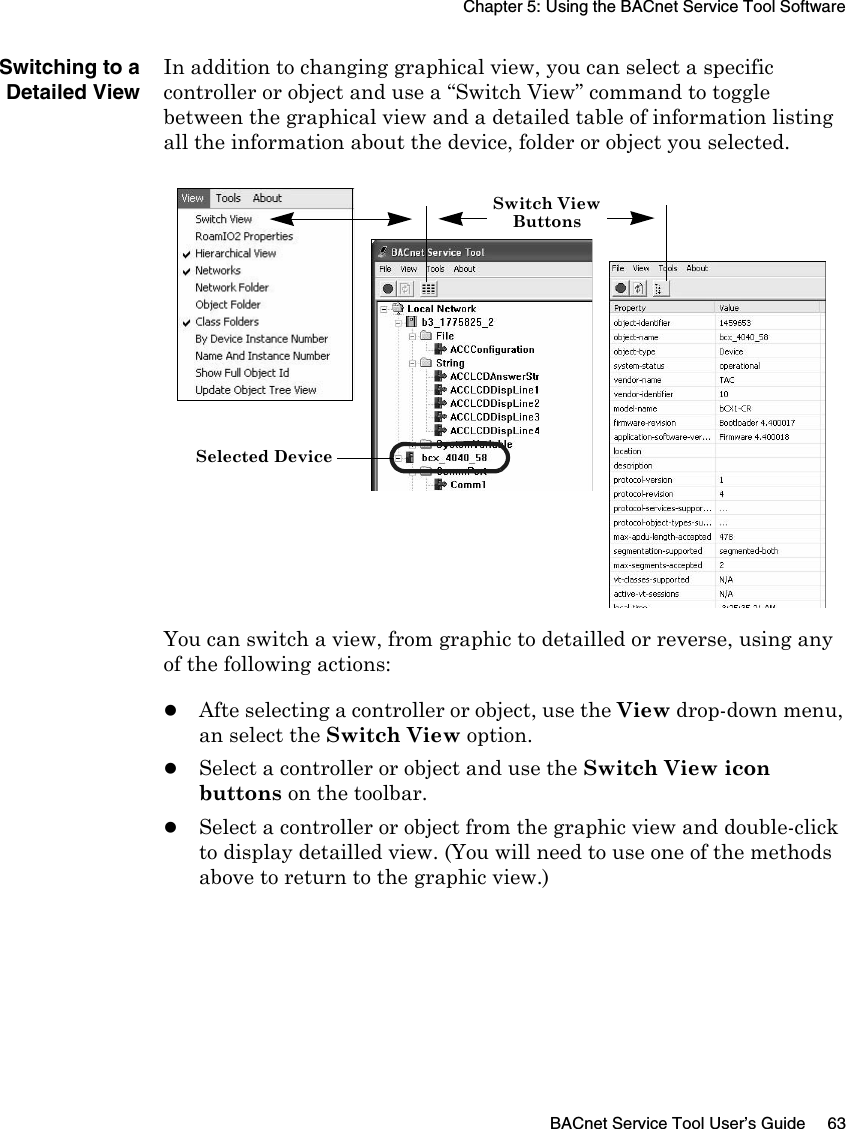
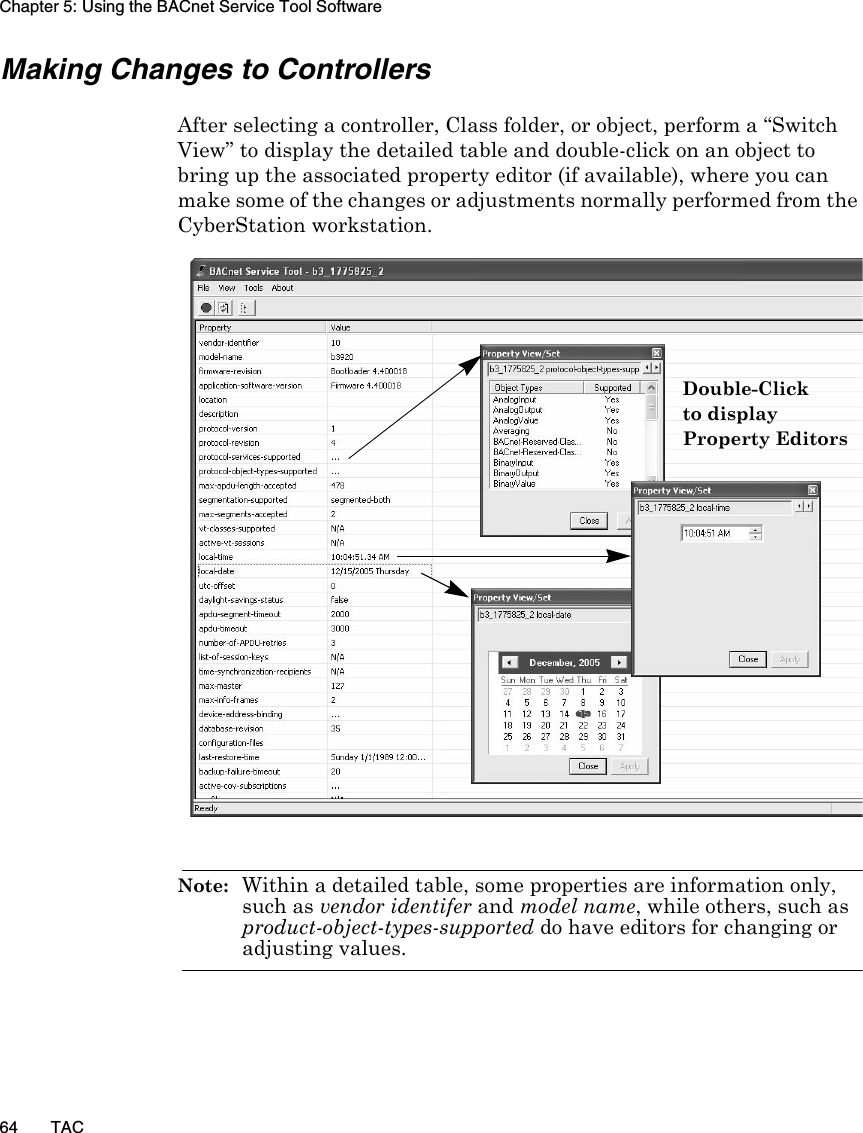
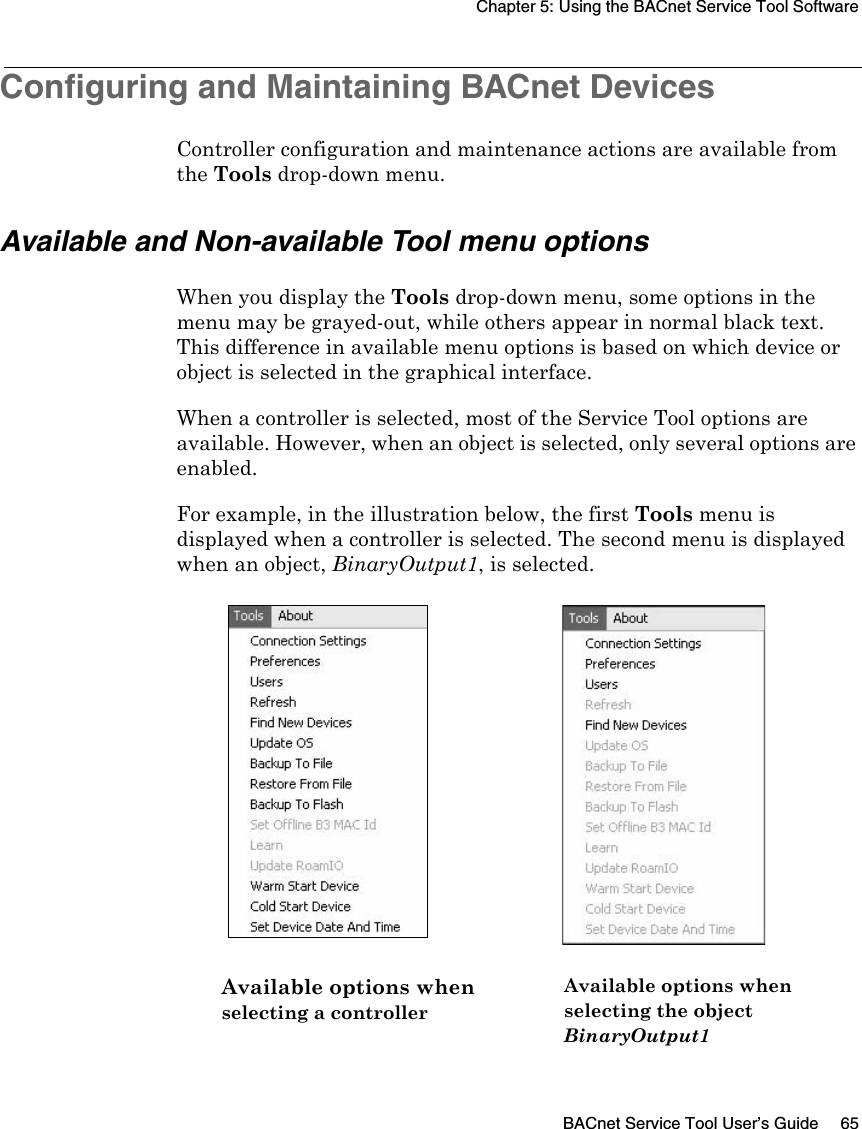
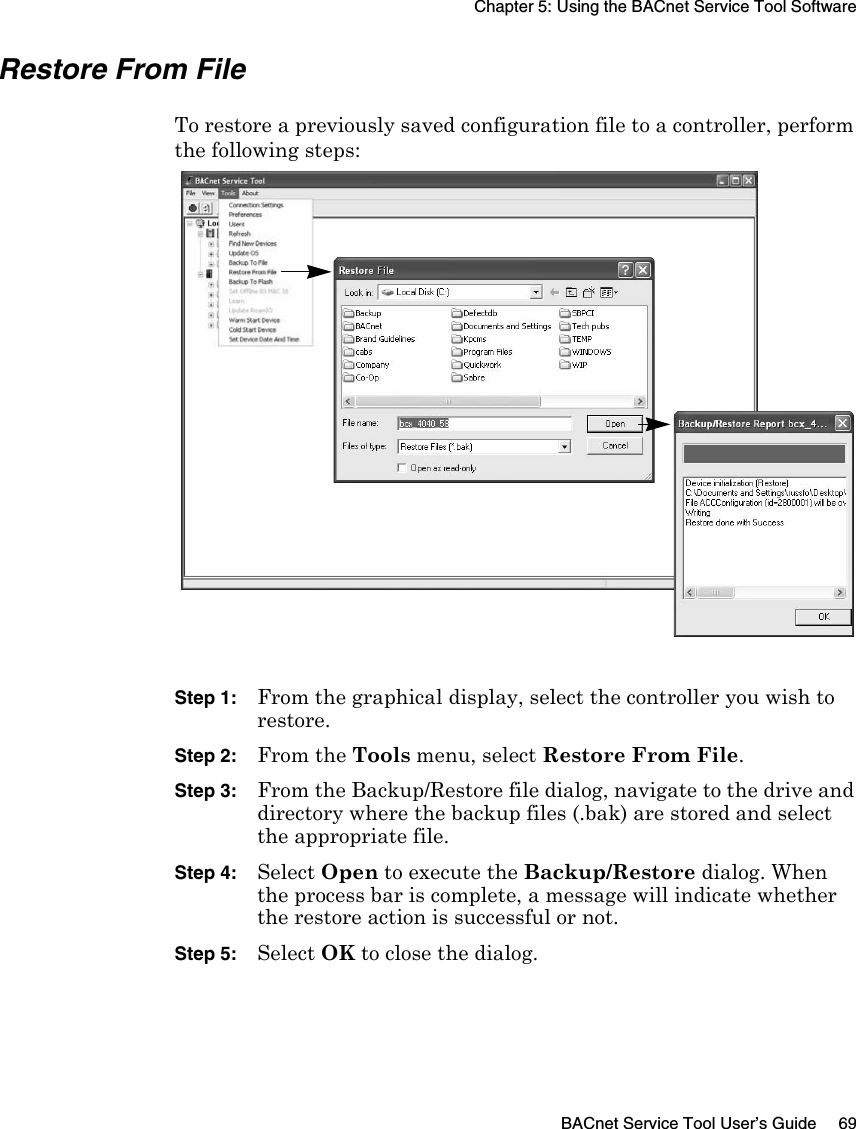
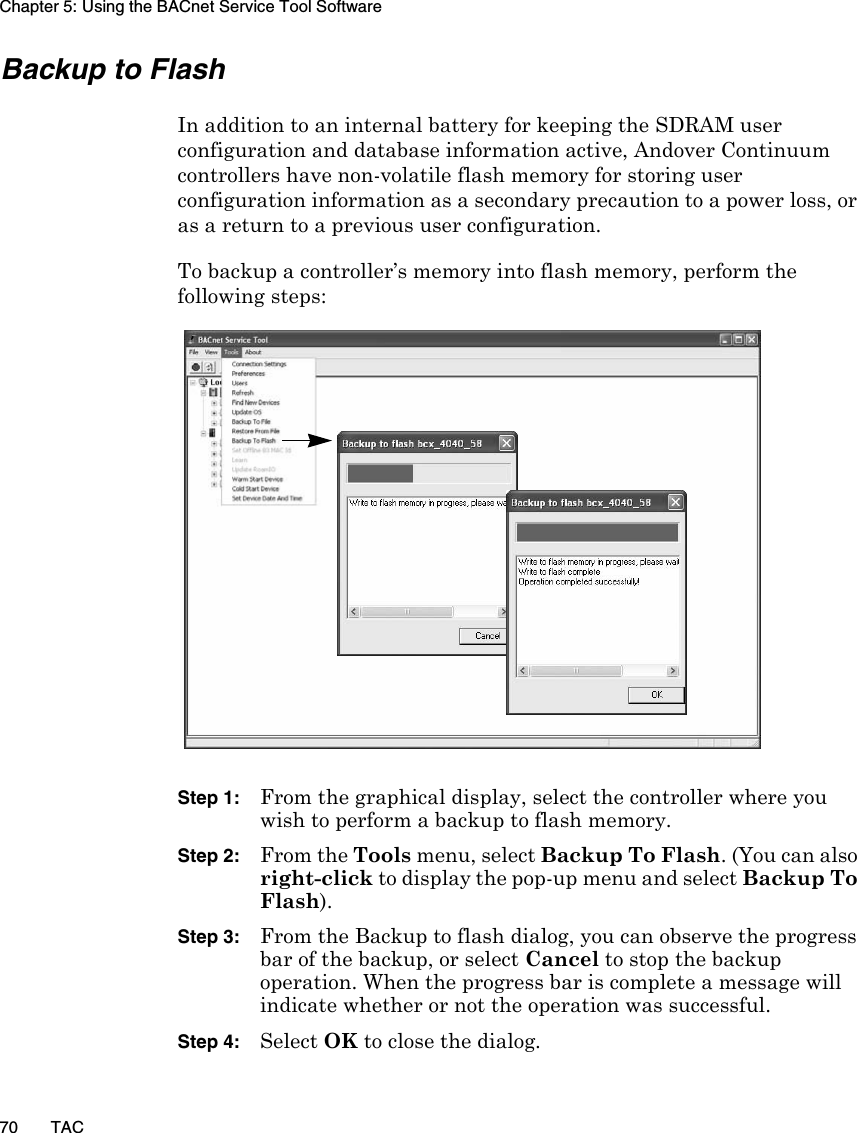
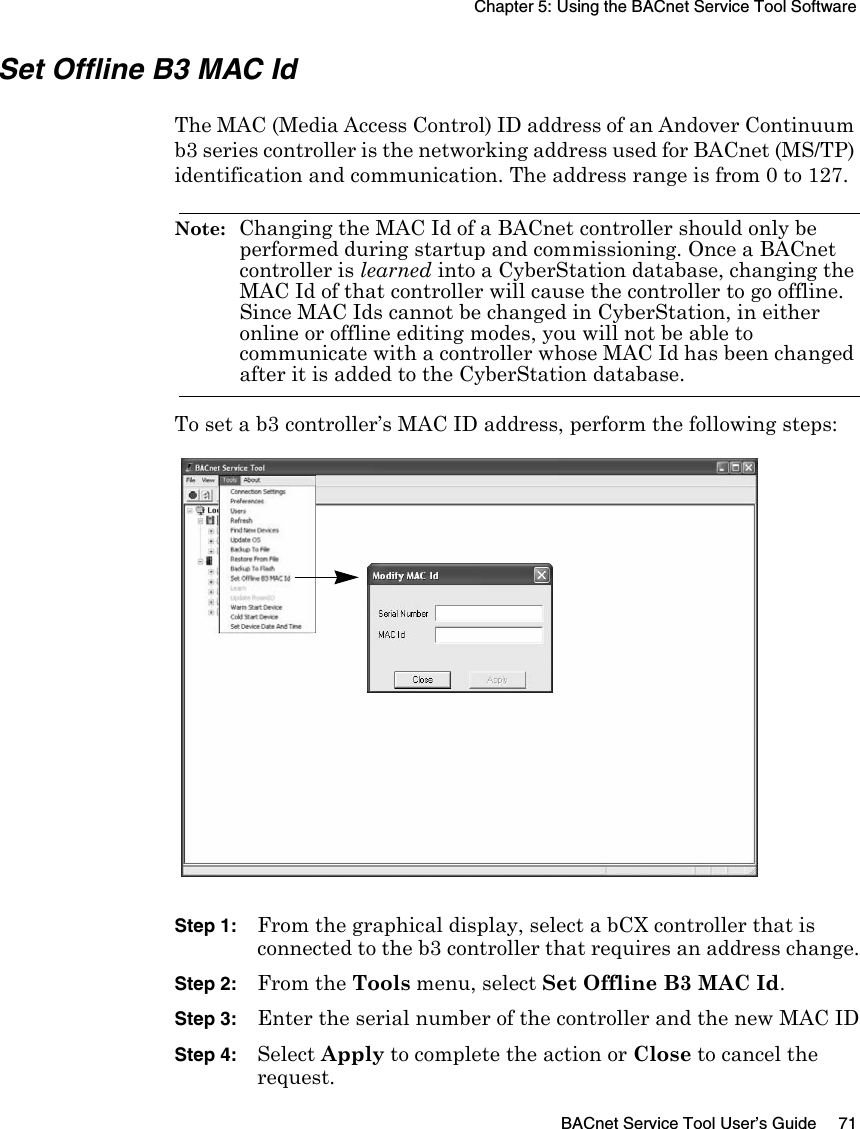

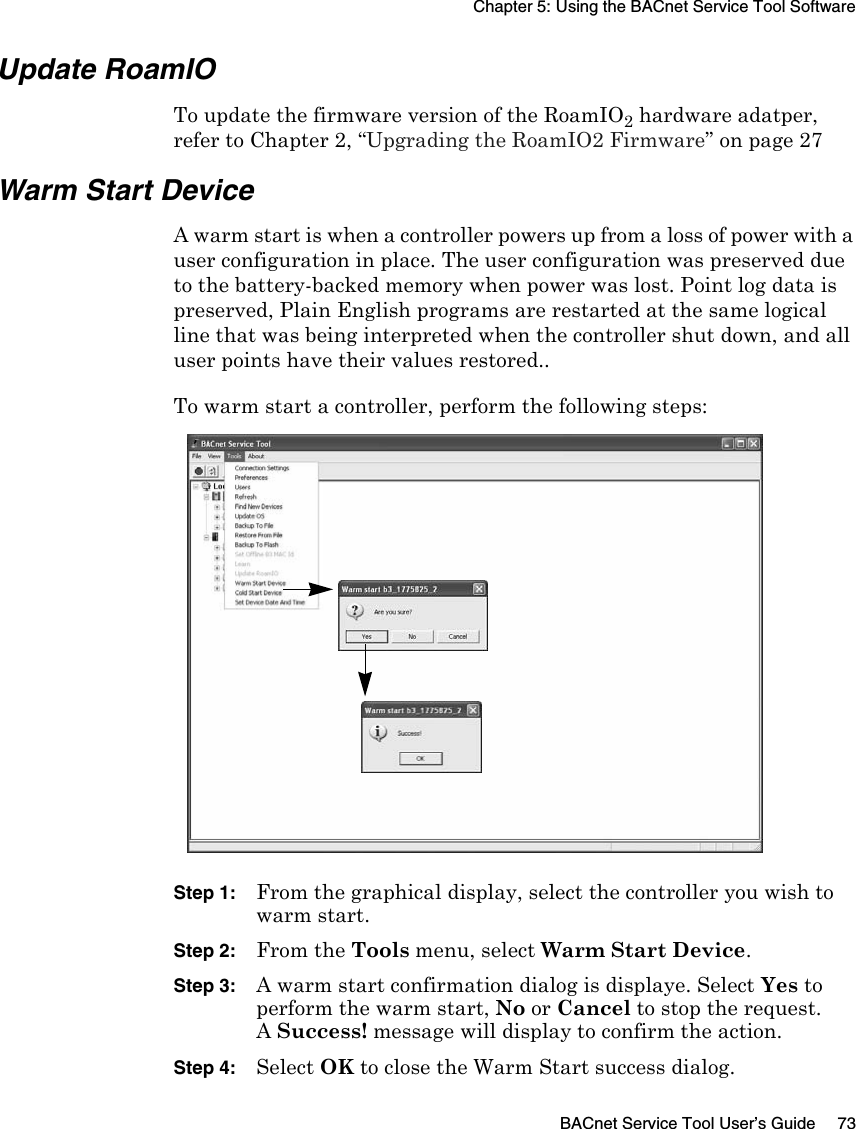


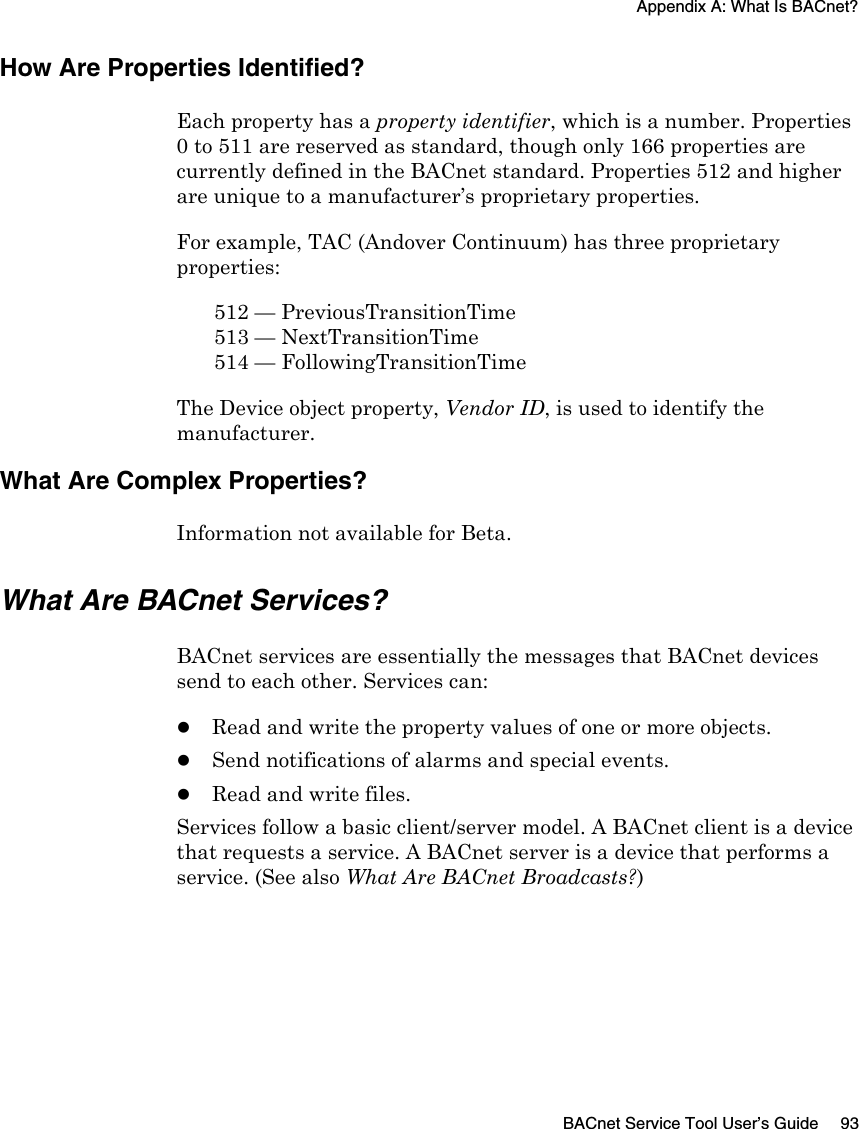
![Appendix A: What Is BACnet?96 TACzBroadcasts that inform other devices that the value of one or more objects/points has changed. In the BACnet world, these are known as Change Of Value (COV) messages.Broadcasts are sent and received through a UDP port on each device. Each device on a network has a unique UDP port number. The default port number is [0xBAC0]. They are also sent using an IP router and a BACnet Broadcast Managment Device (BBMD).For more information on routers and BBMDs, please see the section, Routers, Gateways, BBMDs, and Foreign Devices, later in this appendix. See also: What Are BACnet Services?What Is BACnet Command Priority?In an Andover Continuum building control system, an object may be manipulated by a number of different entities. The current value of an object is set by several applications and other sources.Each application has a well-defined function that it needs to perform. When the actions of two or more applications conflict, with regard to the value of an object property, there is a need to arbitrate between them. Arbitration ensures that several program and non-program sources can properly manipulate the value of the same object. For example, a start/stop program may command a particular BinaryOutput to turn ON, while a demand-metering program may command the same BinaryOutput to turn OFF. In this case, the OFF takes precedence. However, an operator might override the demand-metering program and force the BinaryOutput ON, in which case the ON takes precedence.The Command Priority ProcessIn BACnet, arbitration is provided by a process known as command priority, which assigns varying levels of priorities to commanding entities throughout the system. Each object that contains a "commandable" property is responsible for acting on prioritized commands, in the order of their established priorities.](https://usermanual.wiki/Schneider-Electric-Buildings/ROAMIO2/User-Guide-639213-Page-96.png)