Seeed Technology EAGLEYE530S IoT Development Platform User Manual ARTIK 530 Development Board User Guide
Seeed Technology Co., Ltd. IoT Development Platform ARTIK 530 Development Board User Guide
UserManual.wiki
>
Seeed Technology
>
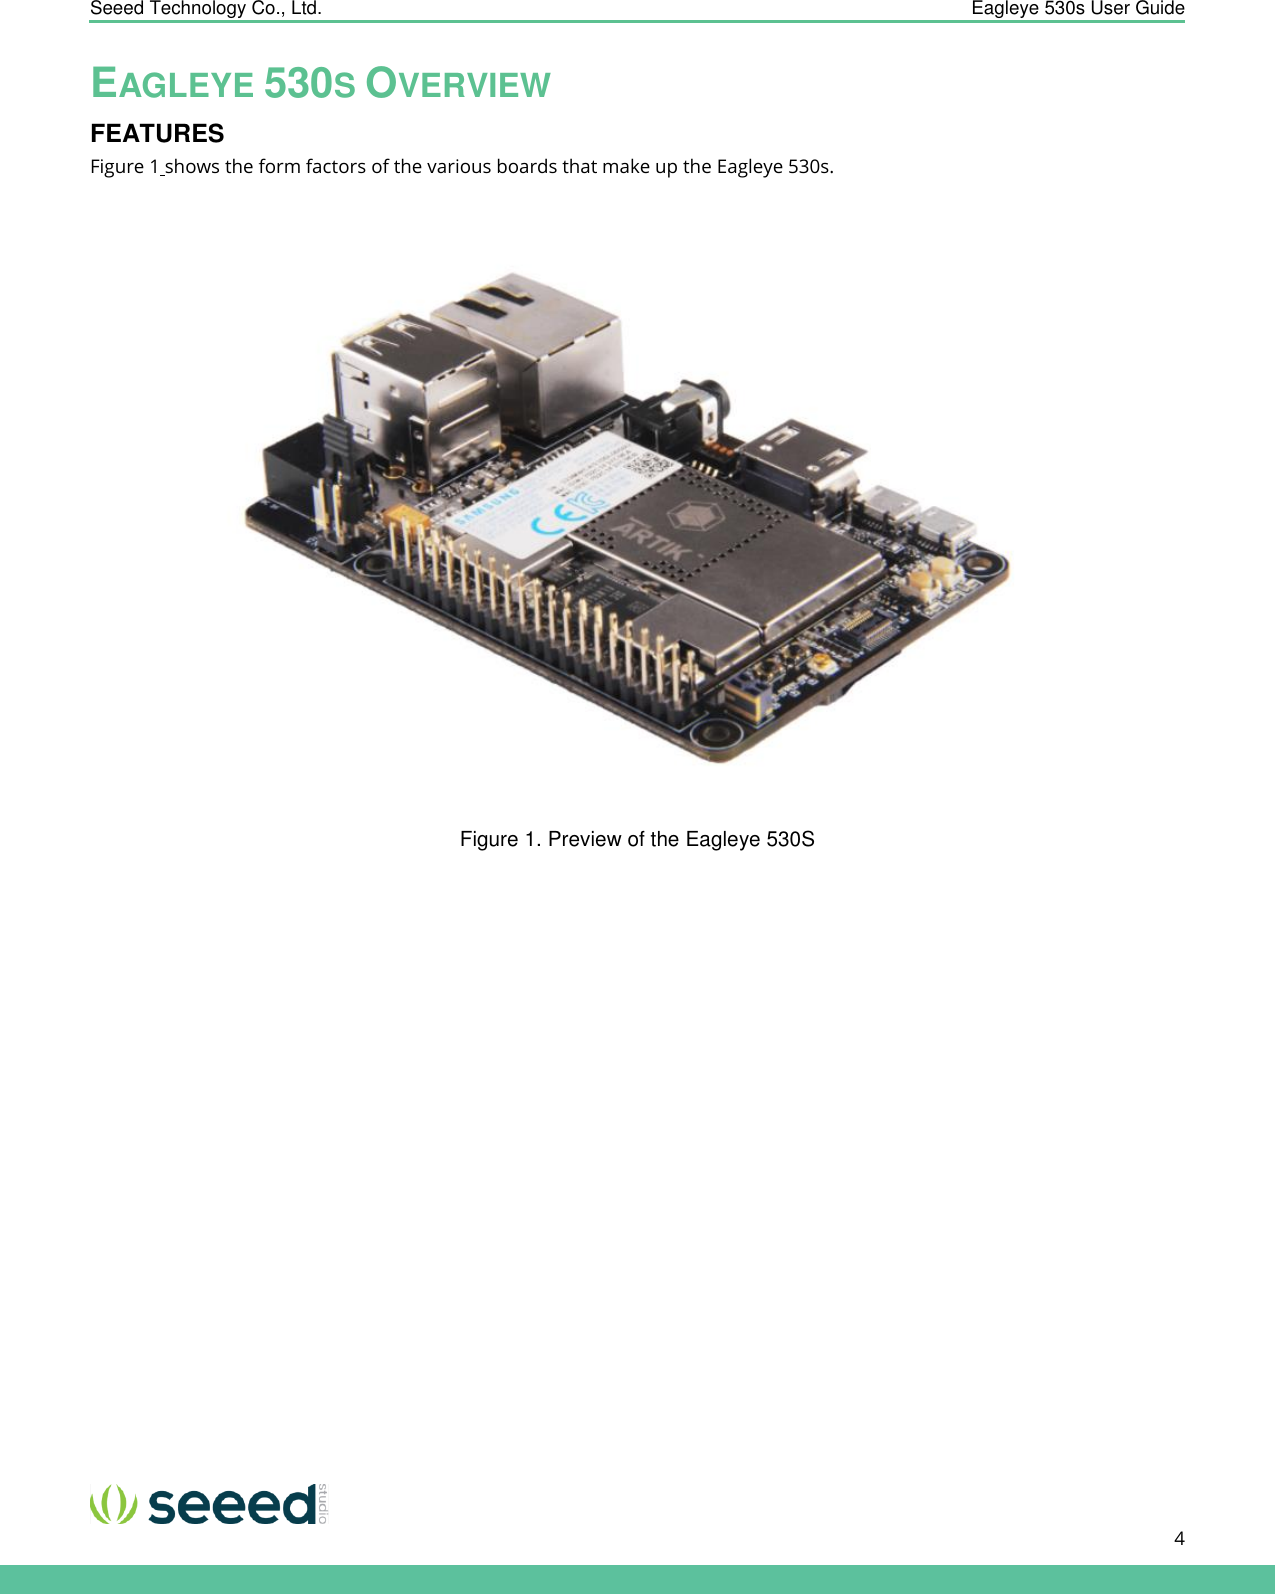
EAGLEYE530S User Manual
Users Manual
Navigation menu
Upload a User Manual
Namespaces
Wiki Guide
HTML
PDF
Info
Views
User Manual
Discussion / Help
Navigation

![Seeed Technology Co., Ltd. Eagleye 530s User Guide 6 MECHANICAL DRAWINGS Figure 3 and Figure 4 show the Mechanical structure and size of the Eagleye 530s Figure 3. Mechanical Drawing Eagleye 530s all dimensions are in [mm]](https://usermanual.wiki/Seeed-Technology/EAGLEYE530S/User-Guide-3846552-Page-6.png)
![Seeed Technology Co., Ltd. Eagleye 530s User Guide 7 Figure 4. Mechanical Drawing Eagleye 530s all dimensions are in [mm]](https://usermanual.wiki/Seeed-Technology/EAGLEYE530S/User-Guide-3846552-Page-7.png)
![Seeed Technology Co., Ltd. Eagleye 530s User Guide 14 ETHERNET The Eagleye 530s has one Ethernet Interface, its location can be seen in Figure 10. The Ethernet Interface is based on 802.3az-2010 complying to the Energy Efficient Ethernet (EEE) standard. The maximum theoretical speed of the interface is 1000Mbps. Figure 10. Ethernet Interface location on the Eagleye 530s Interposer BoardRJ45TX DATA LANE [0 ]TX DATA LANE [2]TX CLOCK LANERX DATA LANE [0 ]TX DATA LANE [1]TX DATA LANE [3]TX CTL LANERX DATA LANE [1]RX DATA LANE [2]RX DATA LANE [3]RX CLOCK LANERX CTL LANEARTIK 530Module EthernetPHYMDCMDIO](https://usermanual.wiki/Seeed-Technology/EAGLEYE530S/User-Guide-3846552-Page-14.png)

![Seeed Technology Co., Ltd. Eagleye 530s User Guide 17 SD-CARD INTERFACE The Eagleye 530s has one SD-CARD interface supporting SD3.0 located as can be seen in Figure 13 Figure 13. SD-Card Interface location on the Eagleye 530s Platform BoardSD CARDARTIK 530ModuleDATA [0 ]CMDCLKCDNDATA [1]DATA [2]DATA [3]Interposer Board](https://usermanual.wiki/Seeed-Technology/EAGLEYE530S/User-Guide-3846552-Page-17.png)
![Seeed Technology Co., Ltd. Eagleye 530s User Guide 19 MIPI CSI INTERFACE The Eagleye 530s has one MIPI CSI interface. The location of the MIPI CSI interface can be seen in Figure 15. The MIPI CSI interface can have a static resolution of 5M pixels or a dynamic resolution for video capturing of 1080P. Figure 15. MIPI CSI Interface Location on the Eagleye 530s Platform BoardMIPI CSIARTIK 530ModuleDifferential Data Lane[0]Differential Clock LaneI2CLCD_ResetDifferential Data Lane[1]Differential Data Lane[2]Differential Data Lane[3]Interposer Board](https://usermanual.wiki/Seeed-Technology/EAGLEYE530S/User-Guide-3846552-Page-19.png)


![Seeed Technology Co., Ltd. Eagleye 530s User Guide 30 5G Wi-Fi Use Notice LE-LAN devices are restricted to indoor operation in the band 5150-5250 MHz to reduce the potential for harmful interference to co-channel mobile satellite systems. However, original equipment manufacturer (OEM) devices, which are installed in vehicles by vehicles manufacturers, are permitted. Les appareils LE-LAN sont limités à un fonctionnement en intérieur dans la bande 5150-5250 MHz afin de réduire le risque de brouillage préjudiciable aux systèmes mobiles par satellite dans le même canal. Cependant, les dispositifs du fabricant d'équipement d'origine (OEM), qui sont installés dans les véhicules par les fabricants de véhicules, sont autorisés. the maximum antenna gain permitted for devices in the band 5725-5825 MHz shall comply with the e.i.r.p. limits specified for point-to-point and non point-to-point operation as appropriate. le gain maximal d’antenne permis (pour les dispositifs utilisant la bande 5 725-5 825 MHz) doit se conformer à la limite de p.i.r.e. spécifiée pour l’exploitation point à point et non point à point, selon le cas. Manufacturer Information Company Name: Seeed Technology Co., Ltd. Company Address: 1F, Tower B, Building 2, Shanshui Building, NanshanYungu Innovation Industry Park, Liuxian Ave, Nanshan District, Shenzhen, Guangdong, P.R.C. Zip:518055 Tel:0086 755 86524359 Fax:0086 755 26978025 CE Doc Hereby, Seeed Technology Co., Ltd. declares that the radio equipment type [Eagleye 530s] is in compliance with Directive 2014/53/EU.The full text of the EU declaration of conformity is available at the following internet address: https://www.seeedstudio.com/Eagleye-530s-p-3035.html](https://usermanual.wiki/Seeed-Technology/EAGLEYE530S/User-Guide-3846552-Page-30.png)