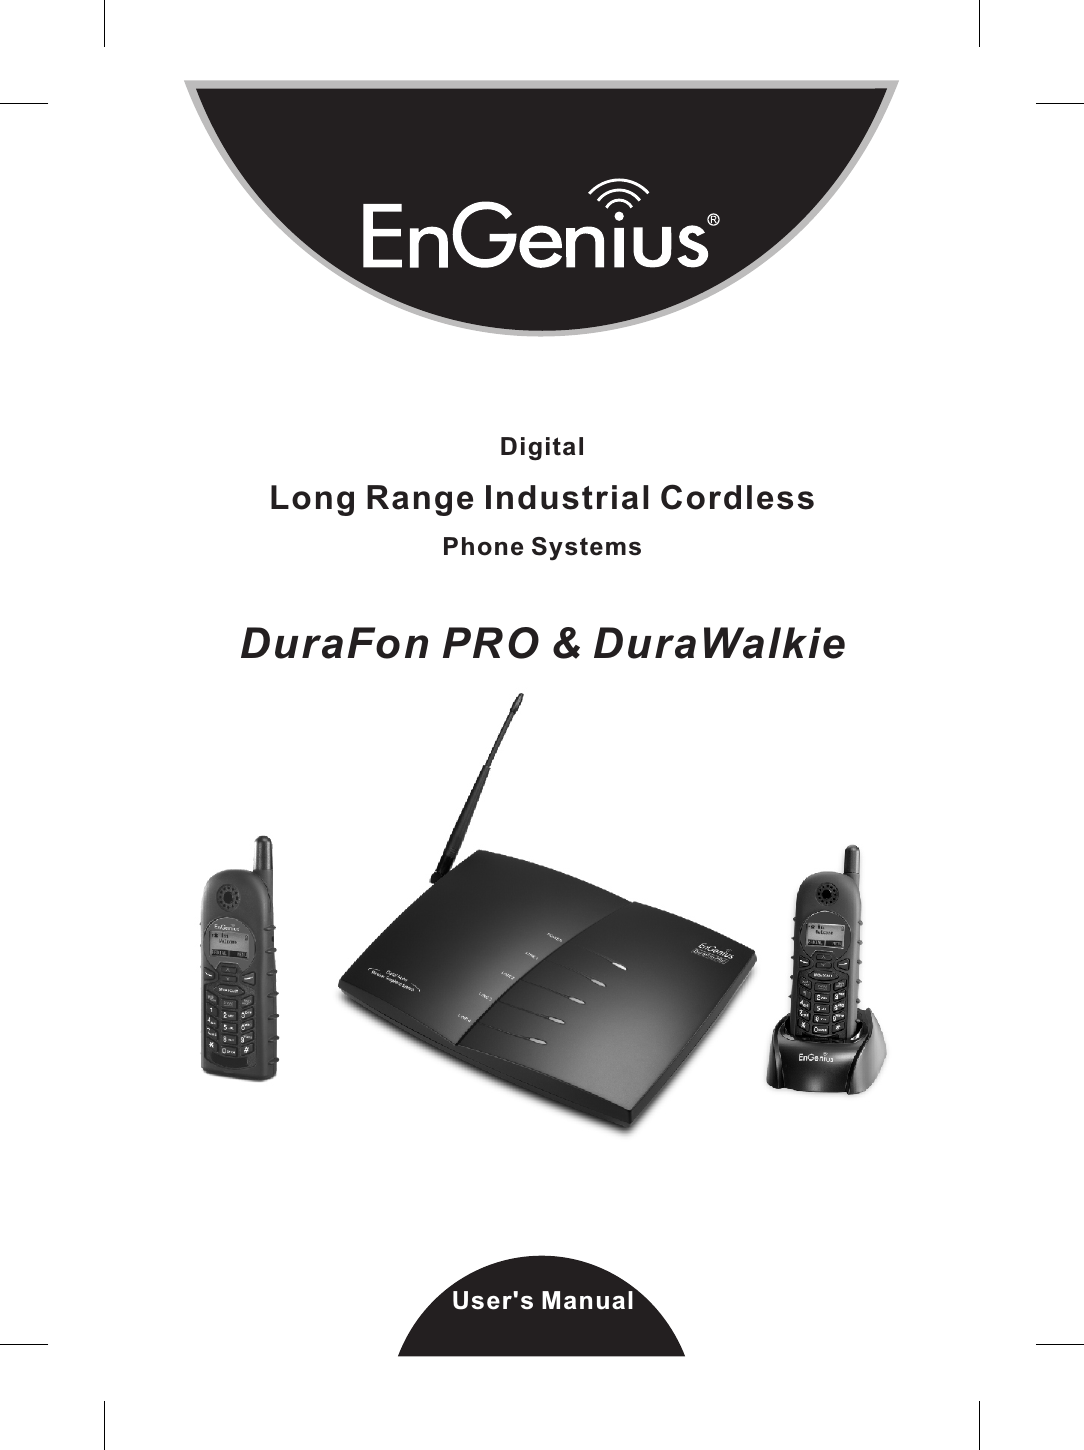
Senao Networks SP922PRO 4-Line Cordless Phone System User Manual 6709A0243140 SP 922PRO V3

Senao Networks, Inc. 4-Line Cordless Phone System 6709A0243140 SP 922PRO V3

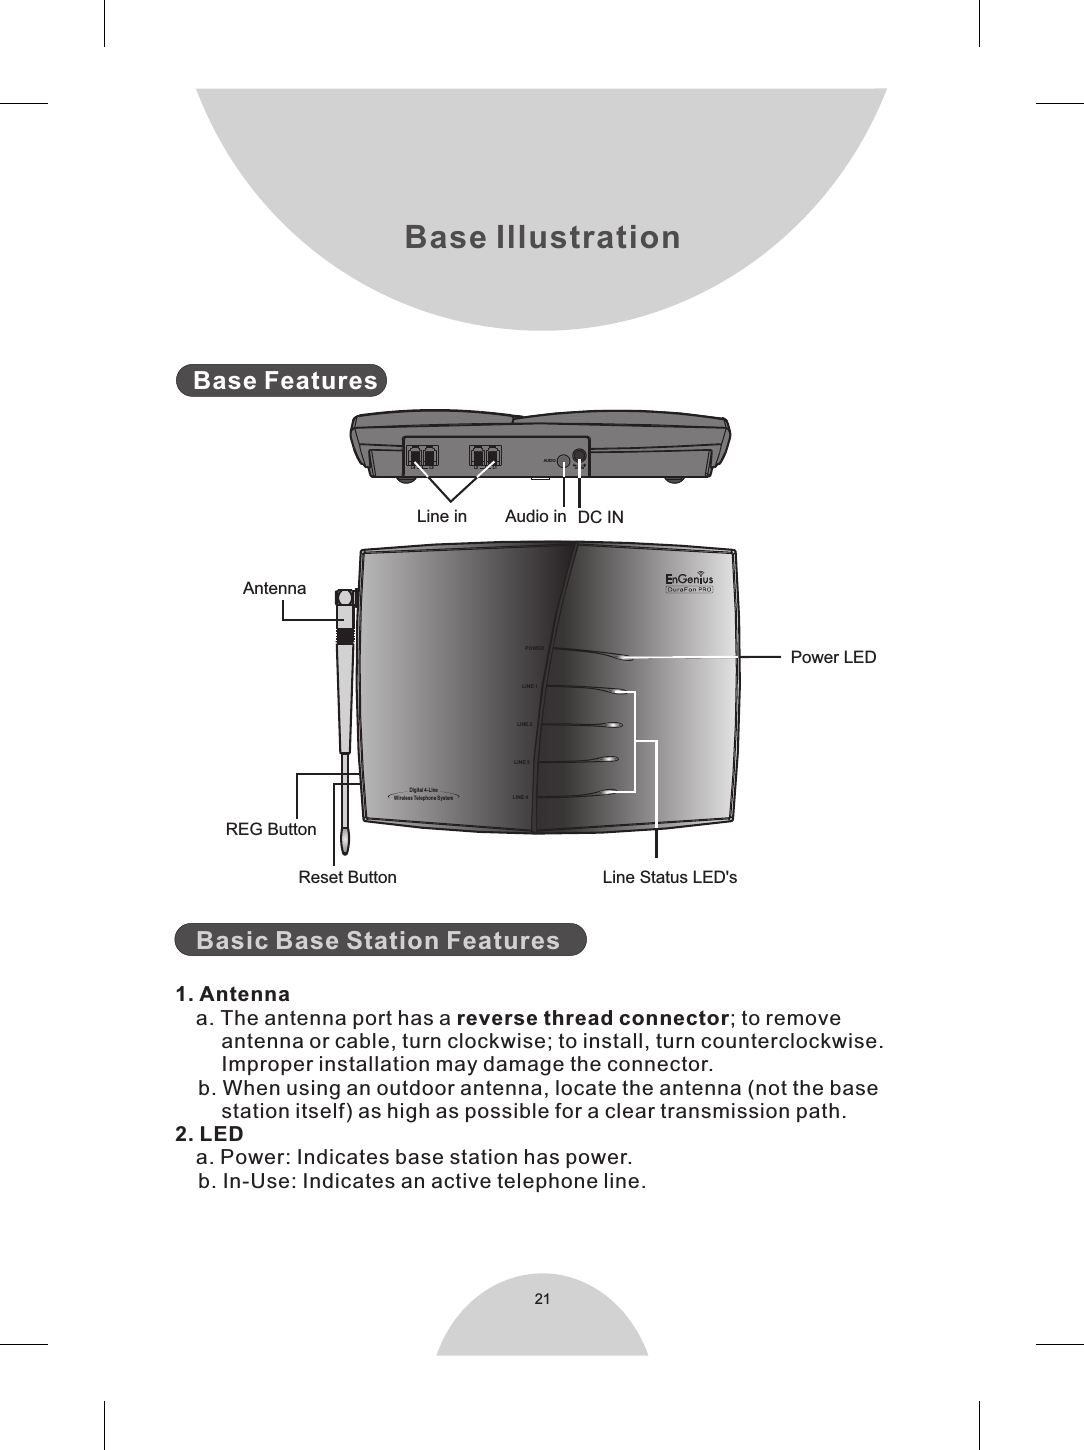
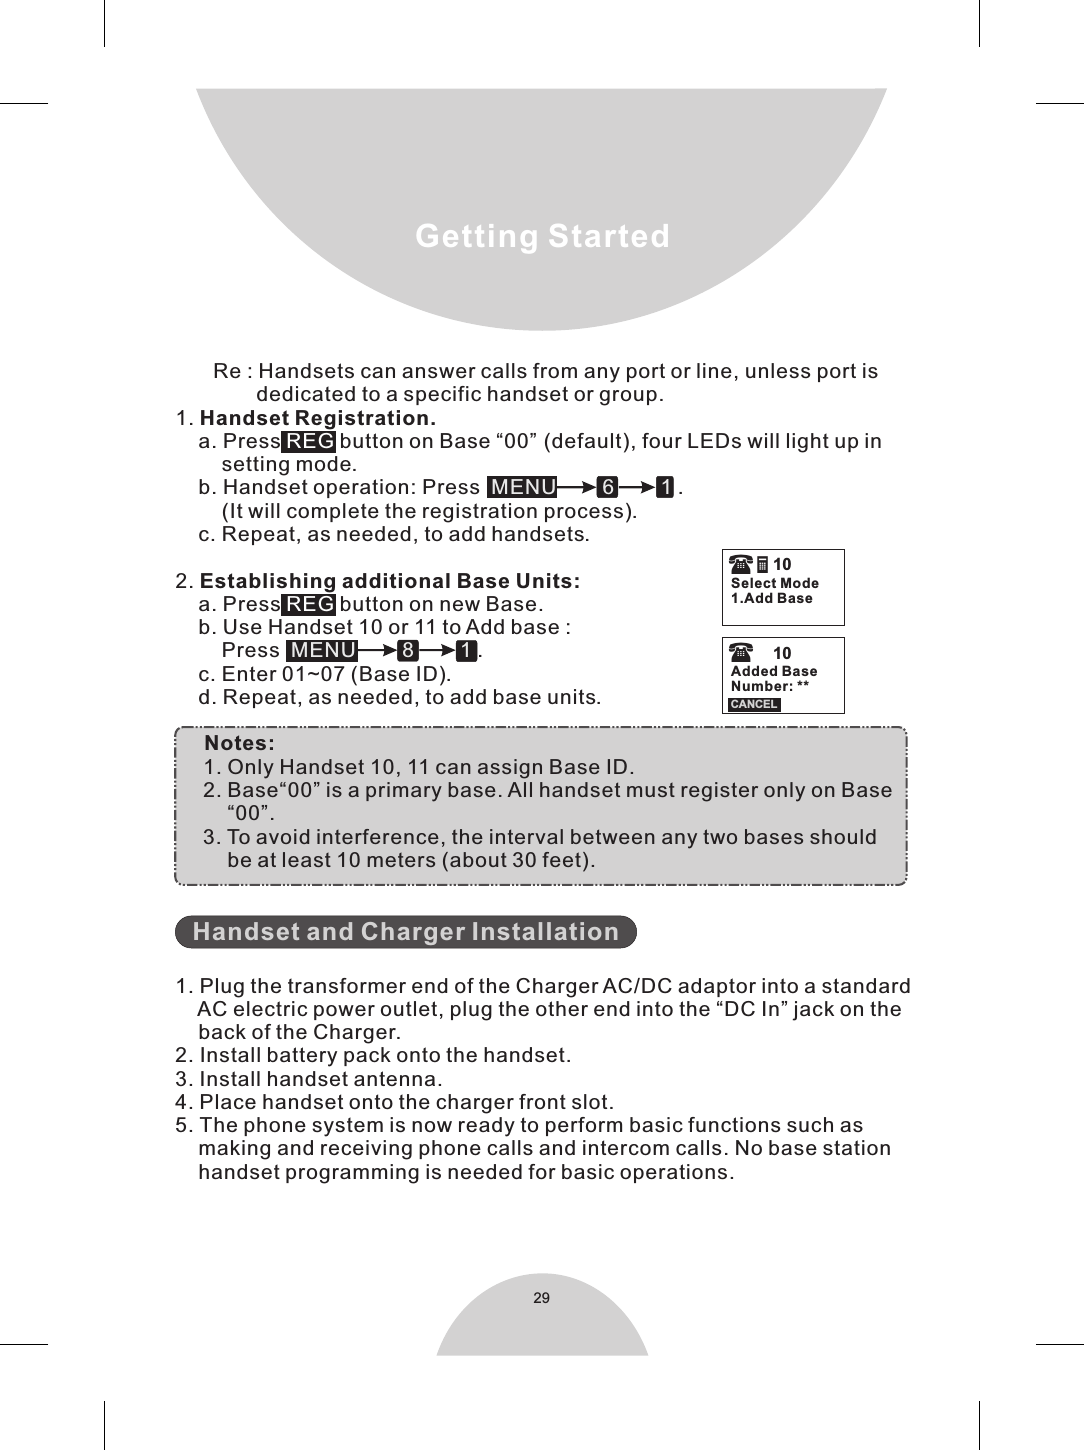
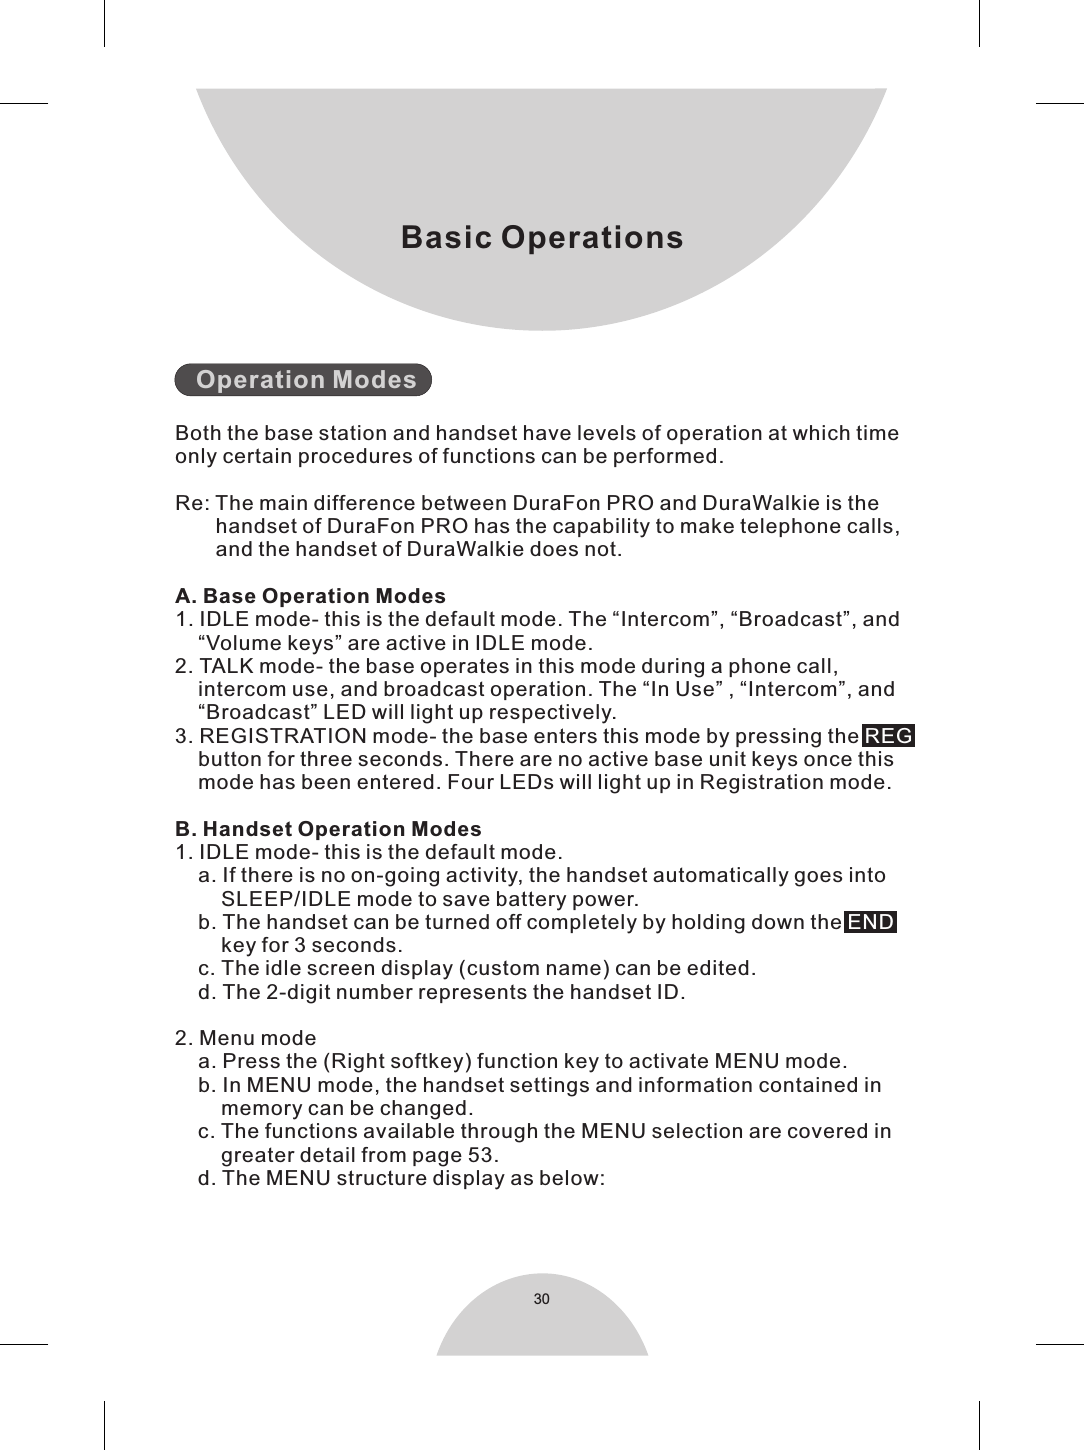
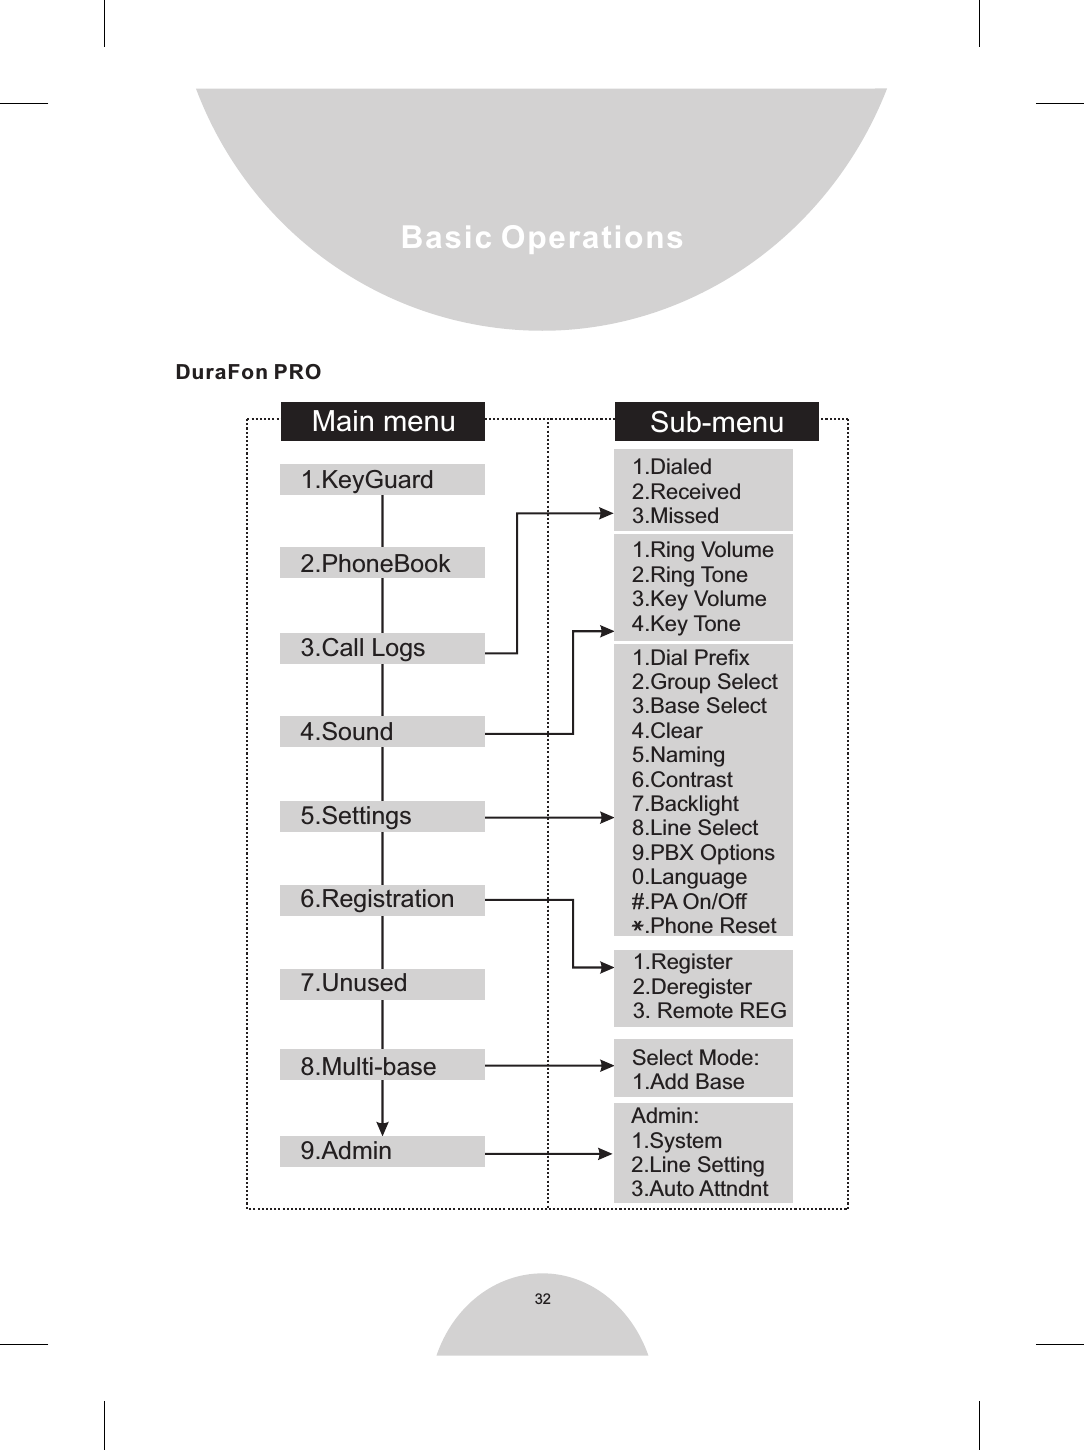
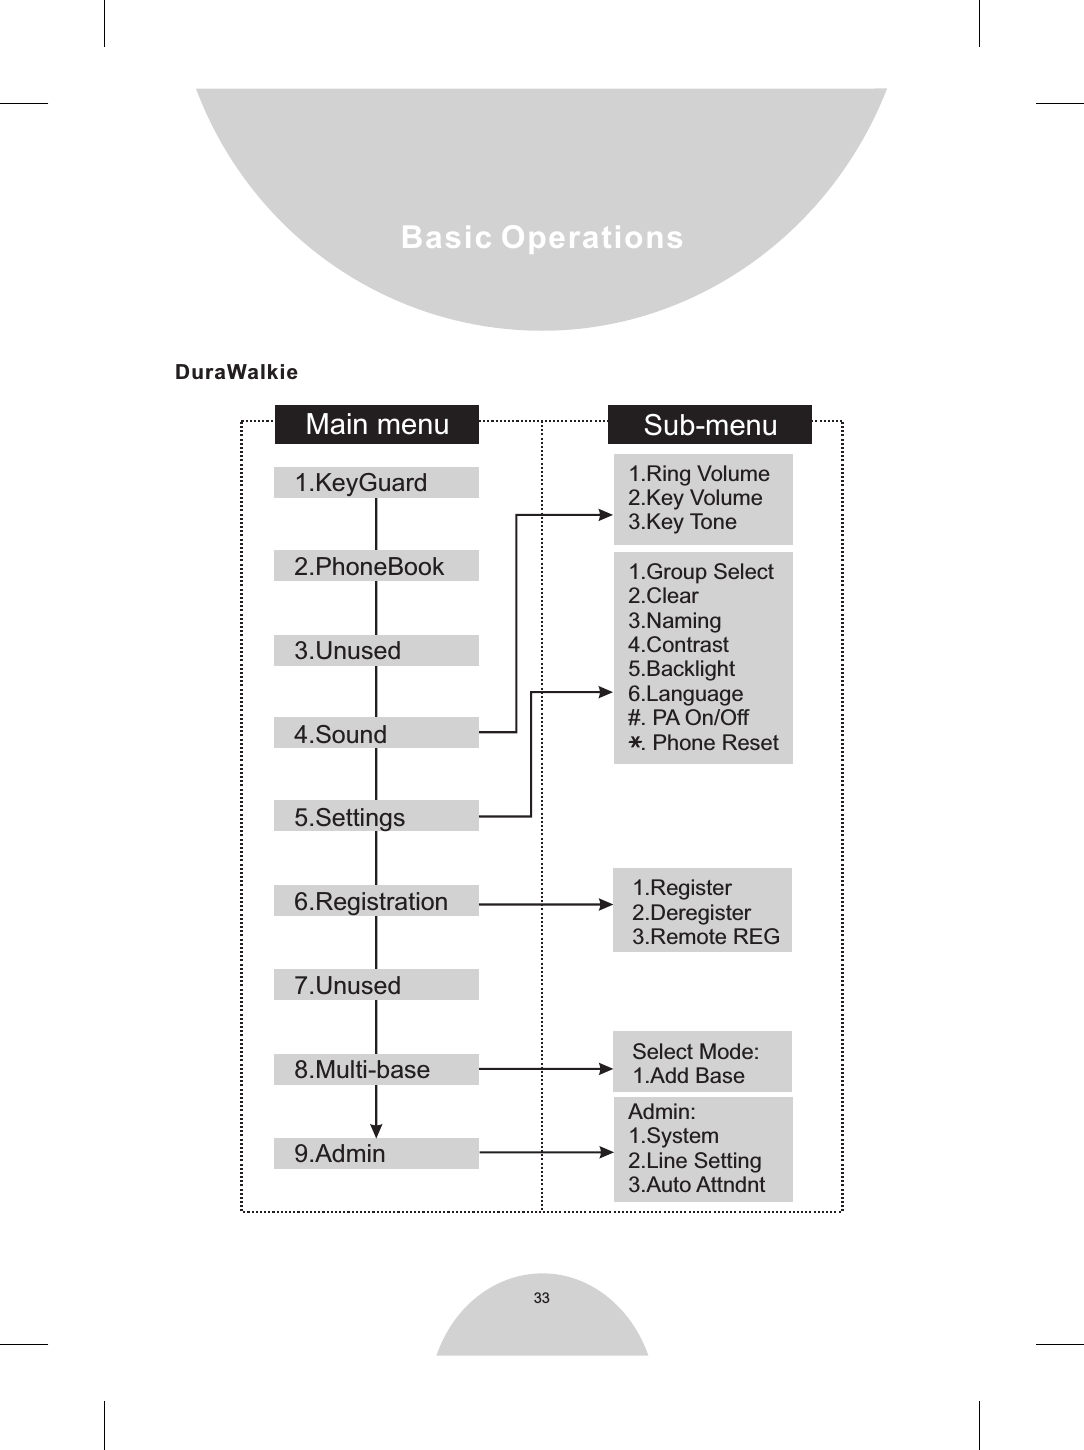
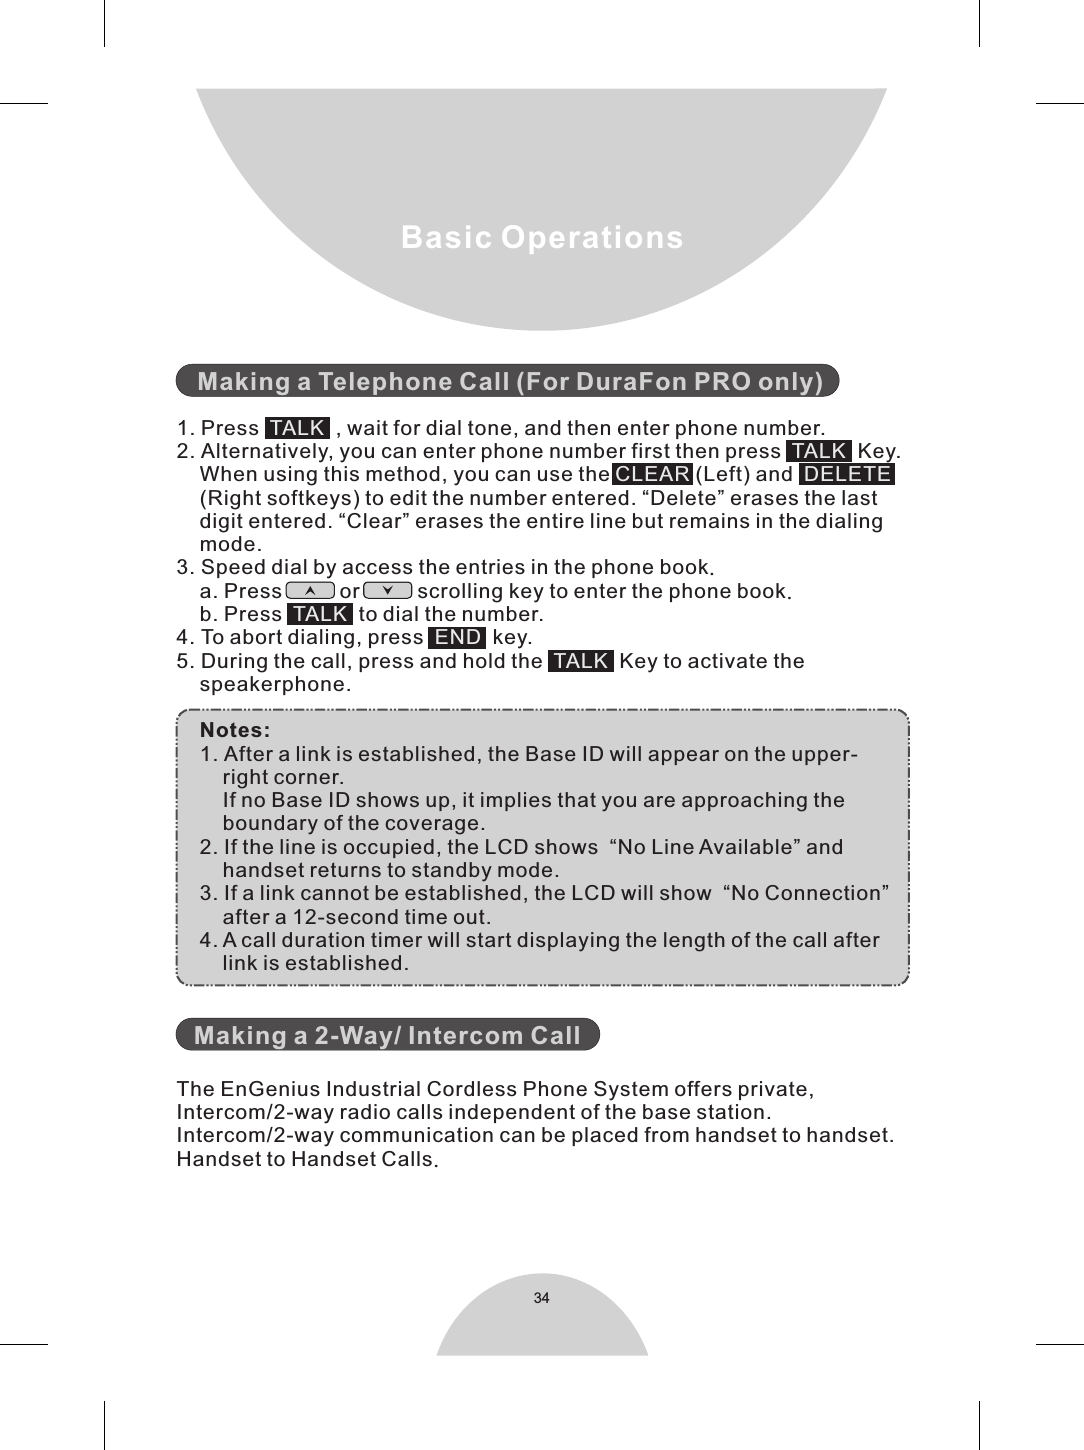
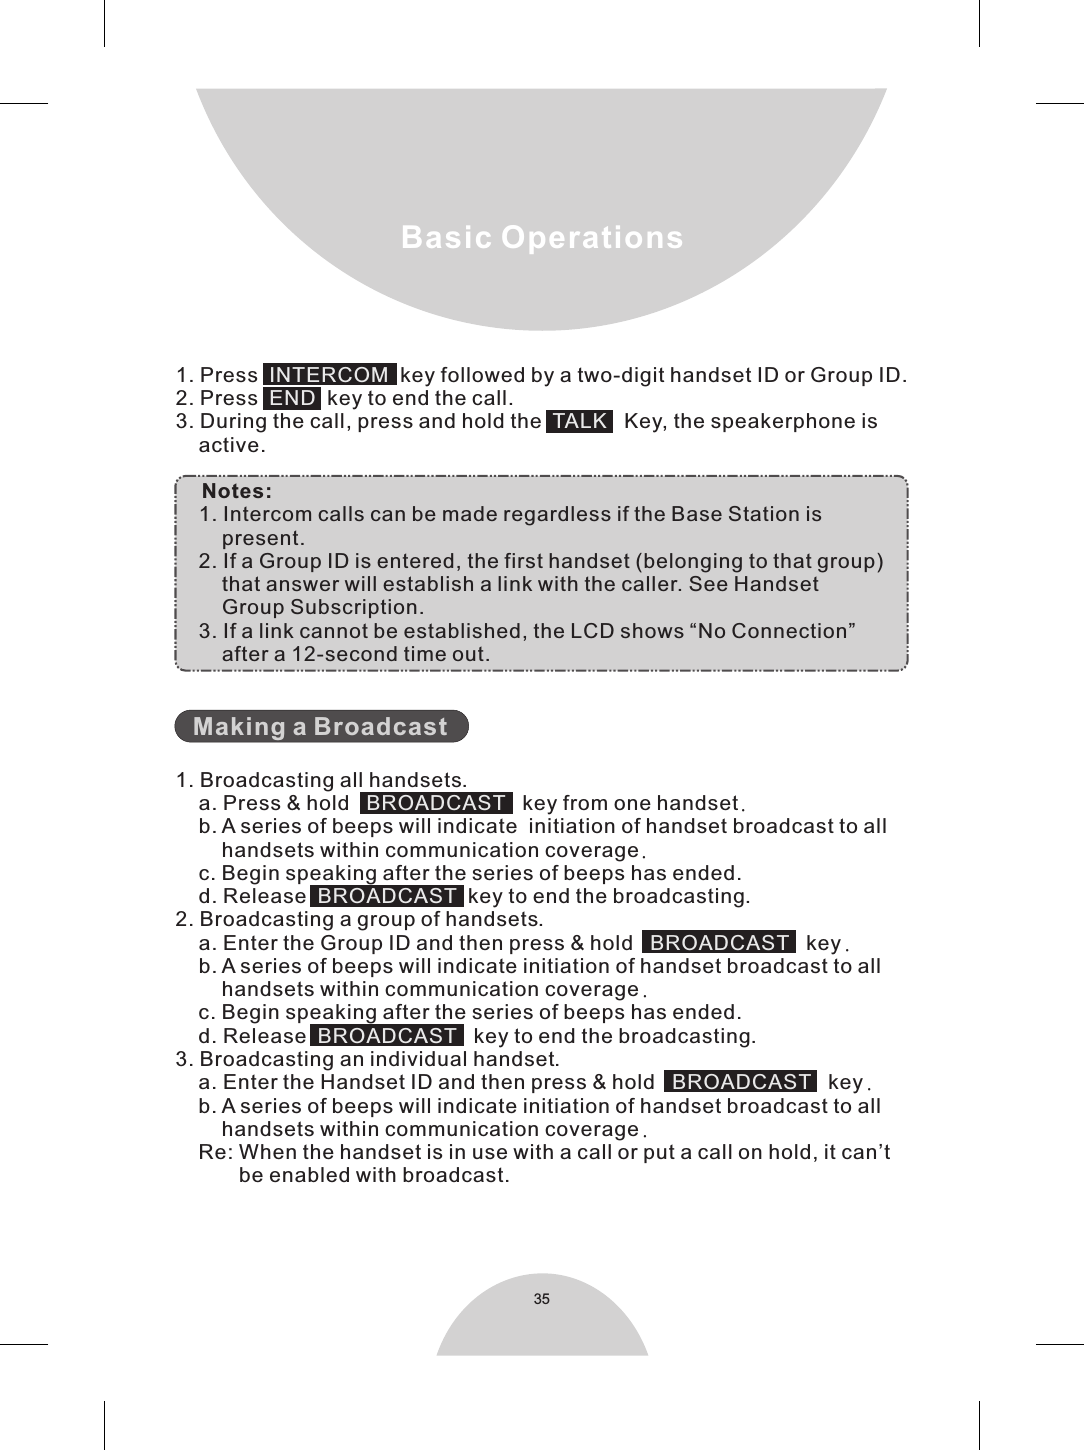
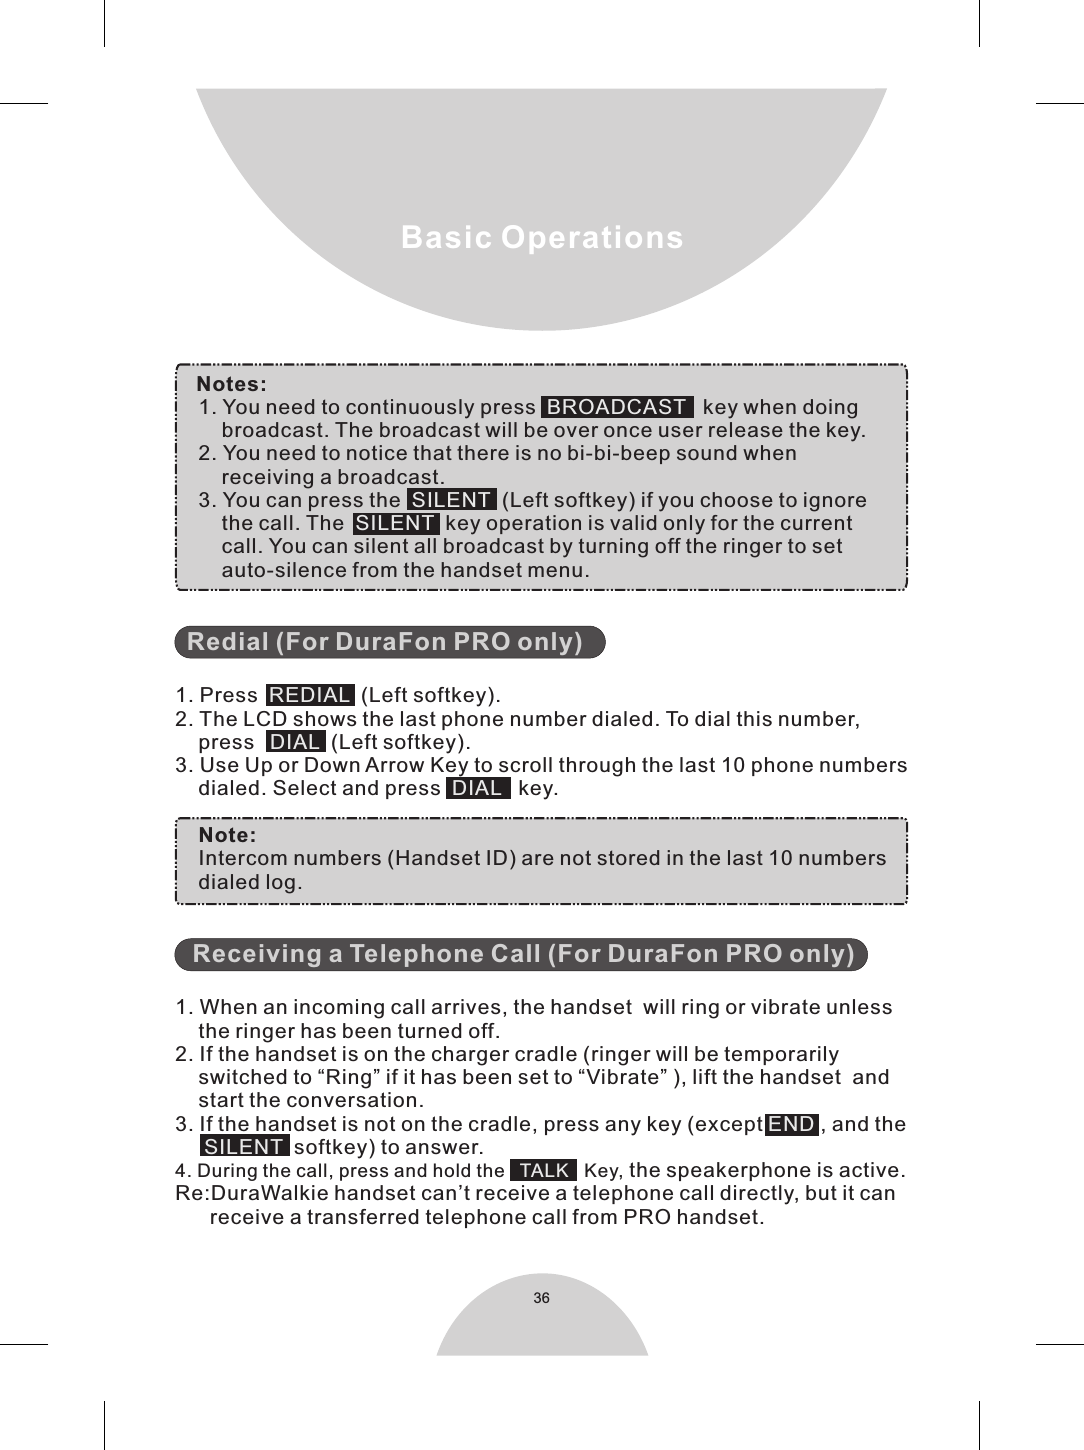
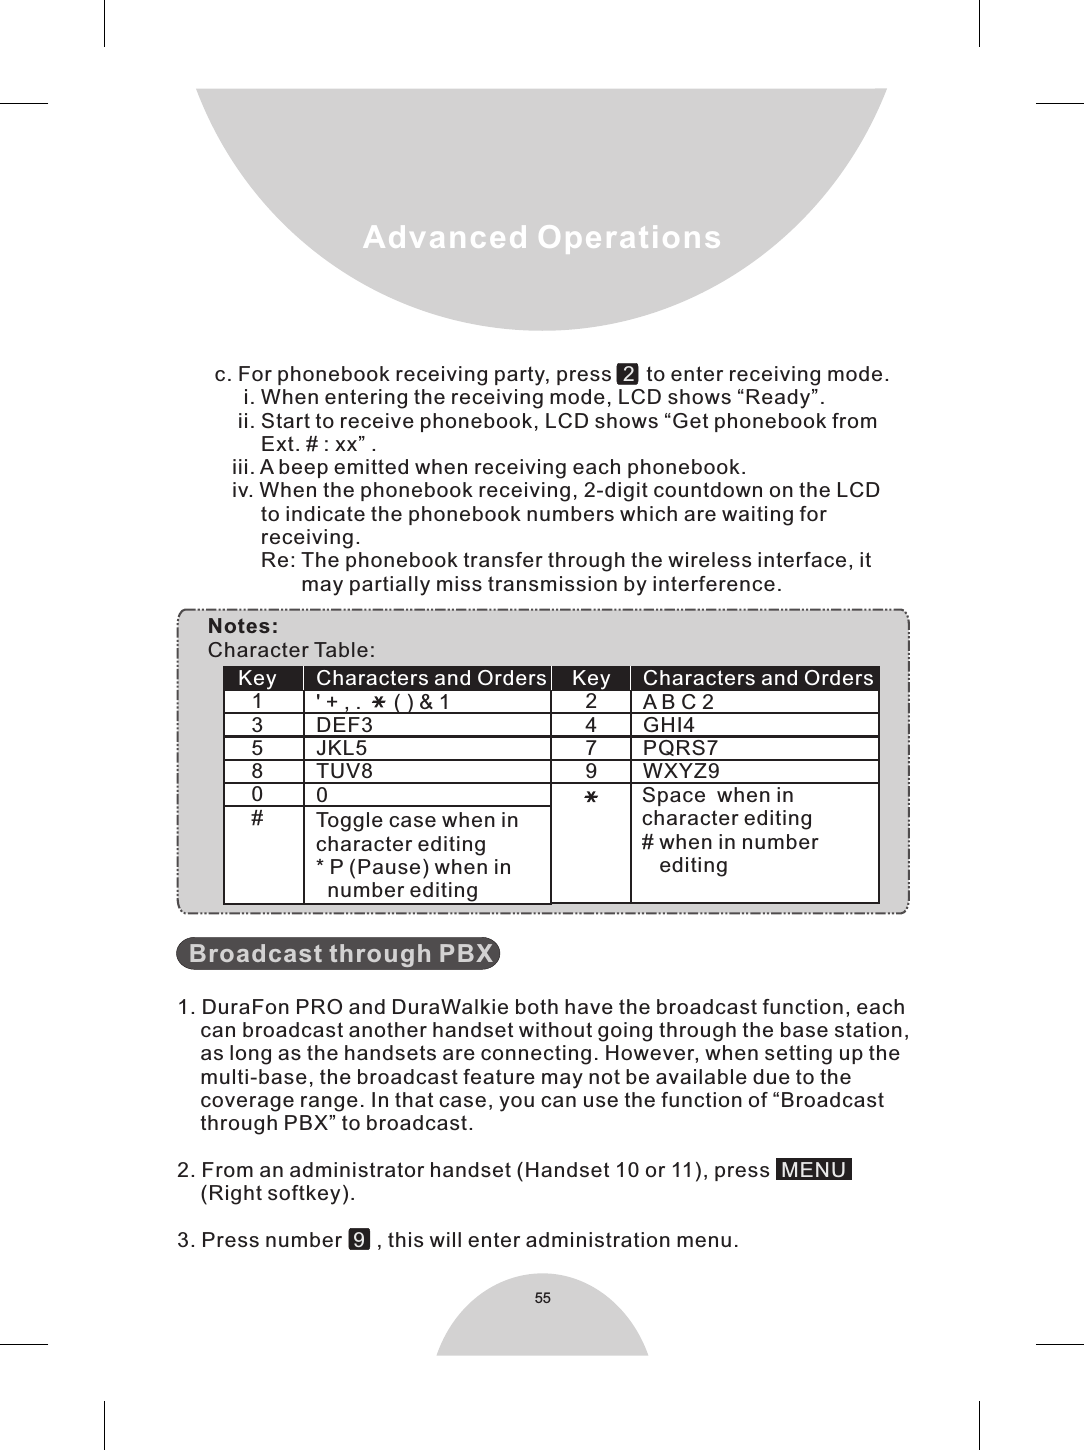
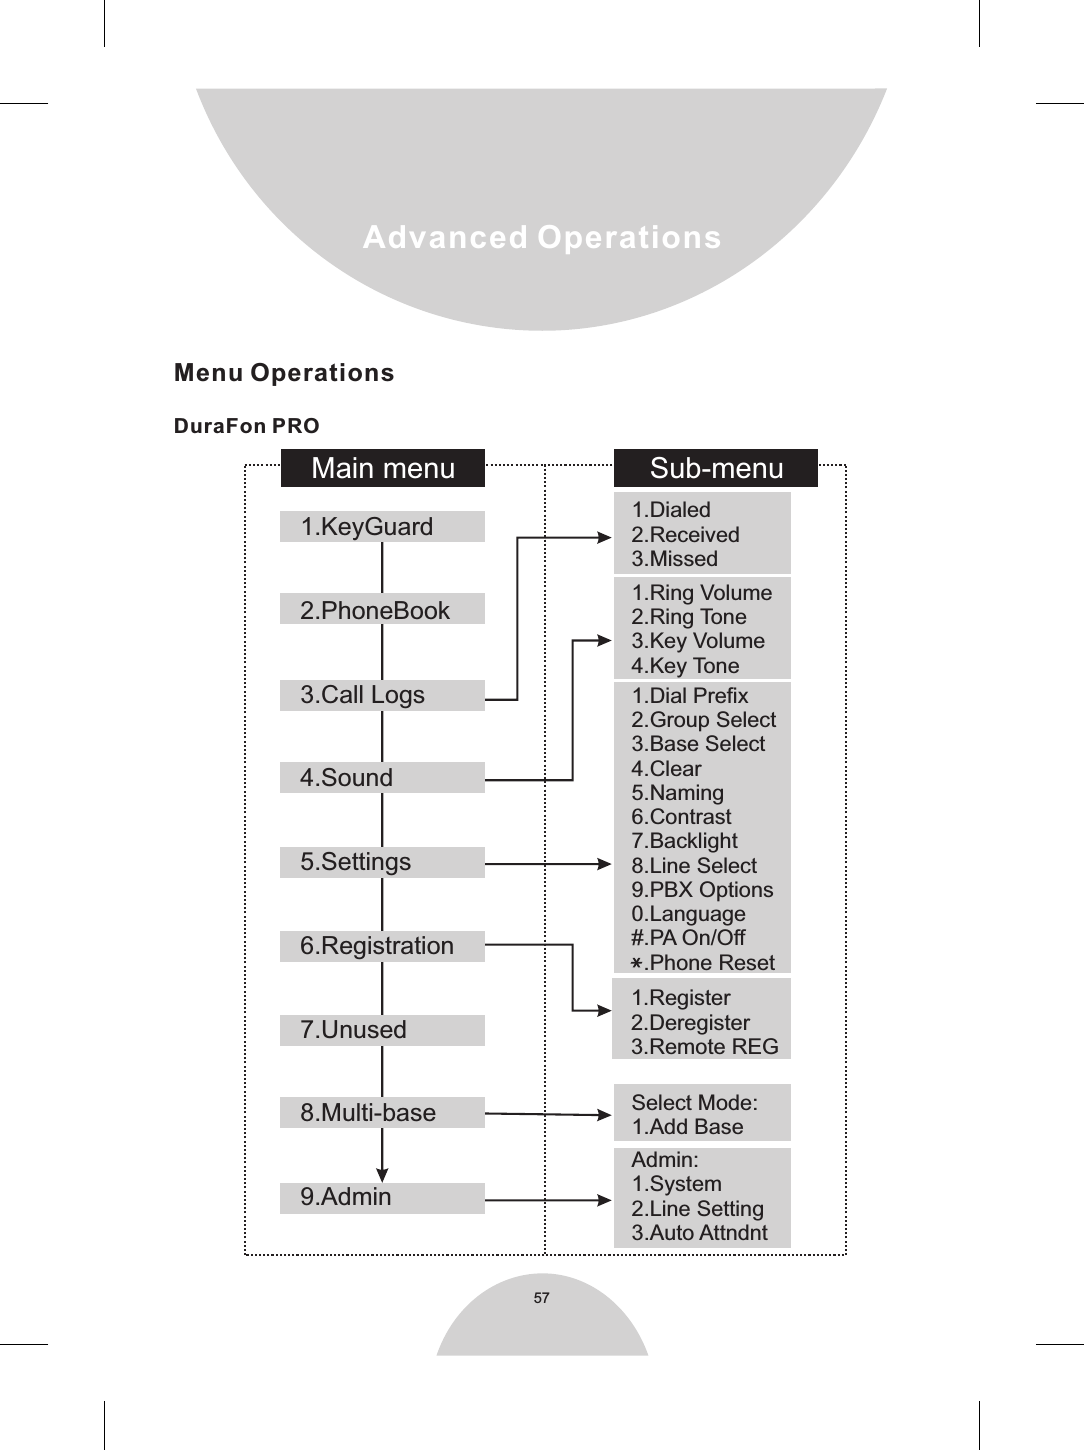
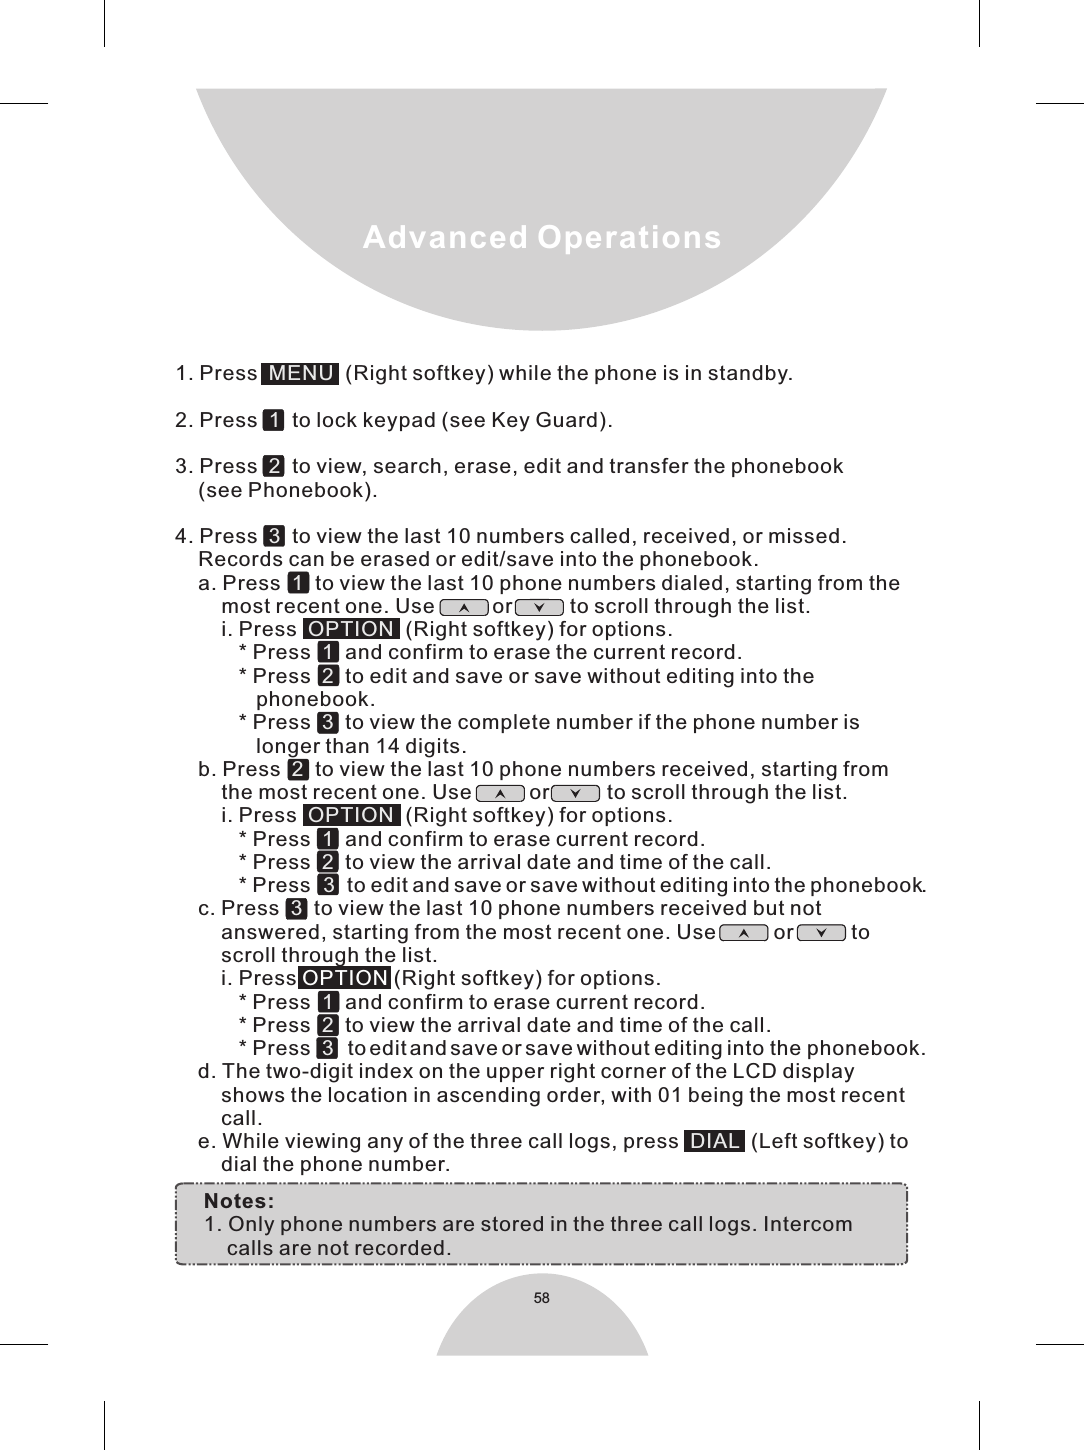
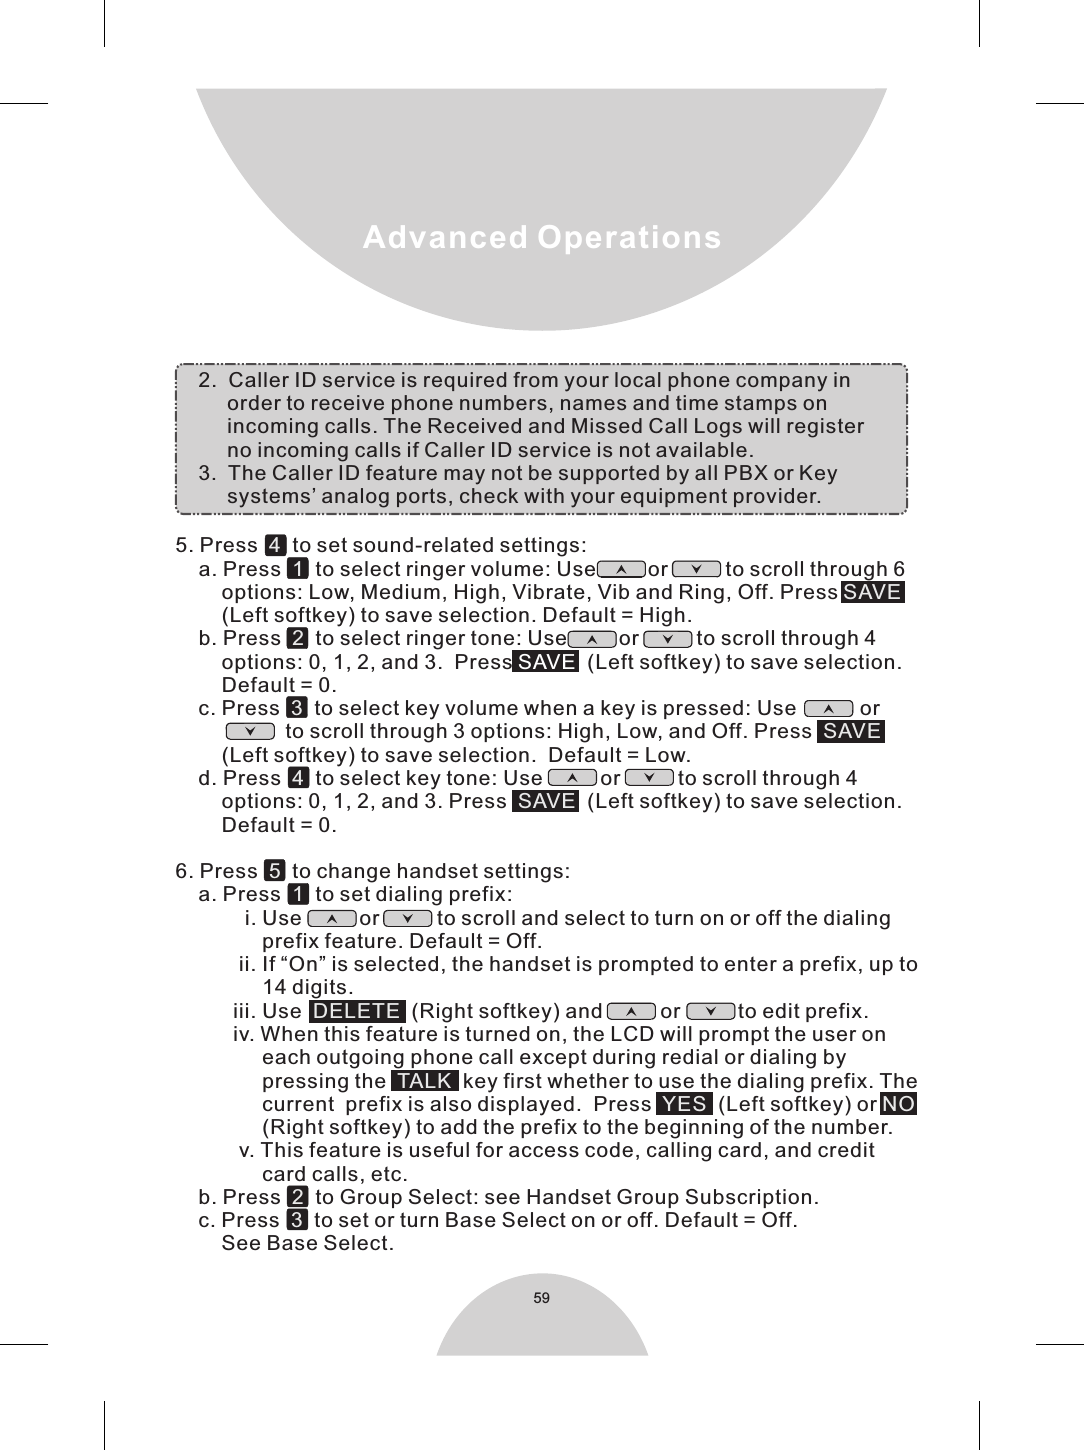
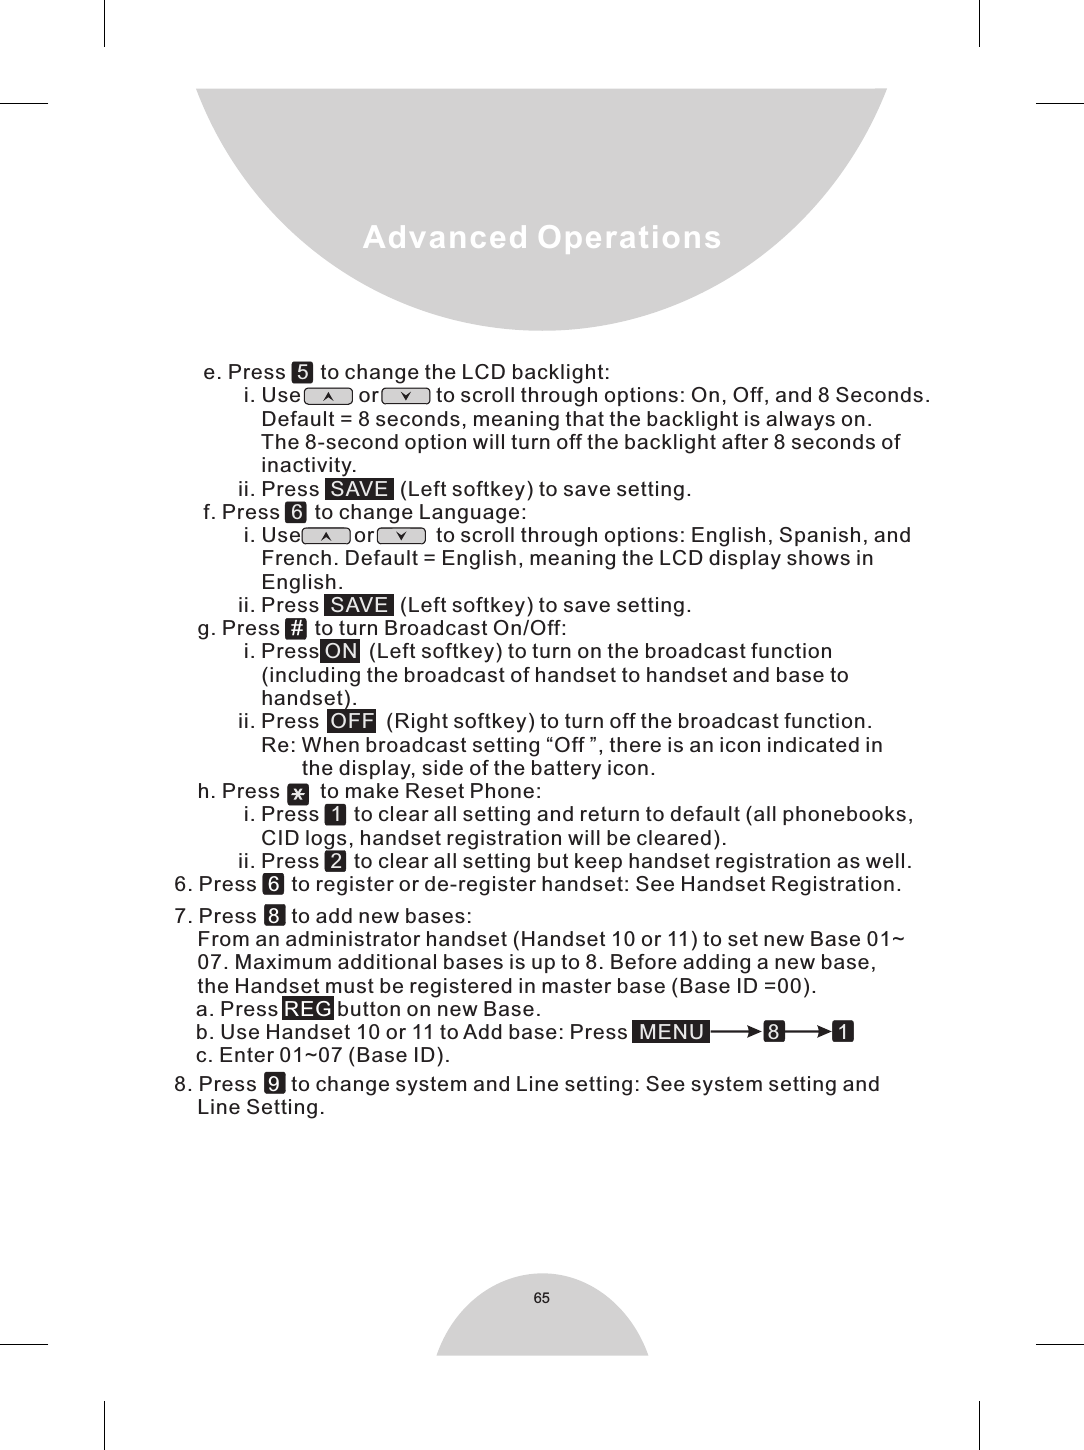
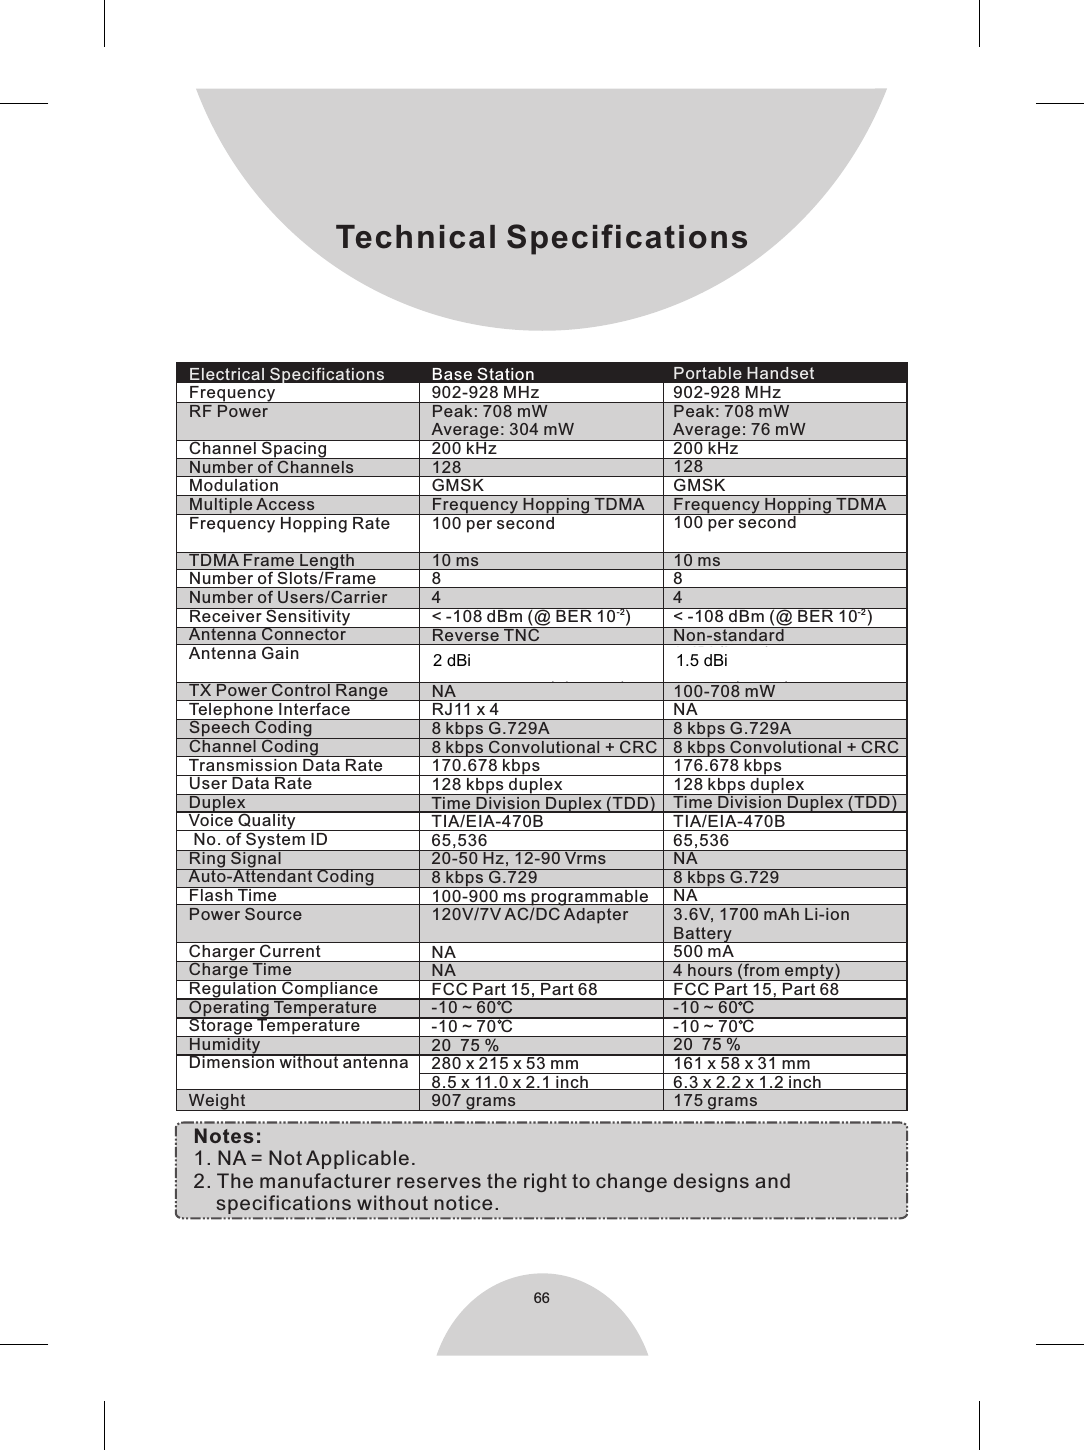
User Manual (operation)

DigitalLong Range Industrial CordlessPhone SystemsDuraFon PRO & DuraWalkieUser's Manual
1Safety Instructions..................................................4    General Safety Instructions............................................4    Product Safety Instructions.............................................5    Battery Safety Instructions................................................7Regulatory Information............................................8Congratulations.....................................................10Equipment Checklist...............................................11Handset Illustration................................................13Handset Features...................................................14    Basic Handset Features..................................................14    Additional Handset Features..........................................16Base Illustration....................................................21   Base Features...........................................................21    Basic Base Station Features............................................21    Additional Base Station Features....................................22    Administrator Features....................................................22Charger Illustration................................................24    Charger Features..................................................24Getting Started.......................................................26    Base Station Installation....................................................26
2    Handset and Charger Installation..............................29Basic Operations.......................................................30    Operation Modes.....................................................30    Making a Telephone Call(For DuraFon PRO only).......34    Making a 2-Way/ Intercom Call..................................34    Making a Broadcast.................................................35    Redial(For DuraFon PRO only).................................36    Receiving a Telephone Call(For DuraFon PRO only). . . 3 6    Receiving an Intercom Call.......................................37    Ending a Call...........................................................38    Adjusting Receiver (Earpiece) Voice Volume..............38    Placing a Call On Hold(For DuraFon PRO only)..........  38    Mute.......................................................................39    Do Not Disturb (Silent Ring)......................................39    Key Guard...............................................................39    To View Missed Call(s) (For DuraFon PRO only).........39    To Call back from Call Log (For DuraFon PRO only).....40    Battery Recharge and Replacement..........................40Advanced Operations................................................41    Handset Registration................................................41
3Advanced Registration.... .....................................42Handset Group Subscription.....................................43Call Transfer(For DuraFon PRO only)........................443-Way Conferencing(For DuraFon PRO only).............45Base Select (For DuraFon PRO only)..................... ..45Call Waiting(For DuraFon PRO only).........................46Auto-Attendant(AA)................................................47AA Configuration by Administrator............................48Change  AA  Parameters...........................................48Line Dedication.......................................................50Outbound Line Selection (For DuraFon PRO only)......50Change System Settings by Administrator..................51Phonebook Operations............................................52Broadcast through PBX............................................55Menu Operations.....................................................57Technical Specifications...........................................66....
4       1. When using your wireless phone, ensure your safety and the safety of    others:    a. Always watch where you are walking and standing.    b. Don't let a phone call distract you from working safely.2. In an emergency:    a. If an emergency occurs, dial the emergency phone number.         Remember: If you are in an area where your phone does not have a        clear signal from the base, it is highly probable that the call may not        go through. Locate the nearest  telephone or other         communications device to call for help.    b. Emergency calls may not automatically provide emergency        personnel with your name, phone number or location. Tell the        operator         i) Your name and phone number.        ii) The nature of the emergency.        iii) Whether police, fire, or medical assistance is needed.        iv) The exact location of the emergency, including address, cross             streets, mileposts or landmarks.3. Notice to Hearing Aid Users: This phone system is compatible with     inductively coupled hearing aids.4. Notice to Cardiac Pacemaker Users: Preliminary studies done by the    US FDA and others have shown that, although interference to the    implanted cardiac pacemaker may occur when operating very closely,    wireless telephones  do not seem to pose a significant problem forGeneral Safety Instructionslandline Caution: Your wireless telephone gives you freedom and flexibilityto stay in touch while you move around.  However, the safe and responsible use of the phone depends entirely on you. When using your phone equipment, safety instructions should befollowed to avoid the risks of fire, electric shock, injury to person,and damage to property.''
5    pacemaker wearers  .    However, until more is known, FDA suggests that people with    pacemakers may want to take precautions when using or carrying a    wireless telephone to ensure that there is ample distance between the    telephone and the pacemaker. Do not carry the handset in a breast    pocket. If you have any reason to suspect that interference is taking    place, turn off your handset immediately.   1. Read and understand all instructions.2. Follow all warnings and instructions including those marked on the     product.3. Changes or modifications to this product not expressively approved by    the manufacturer will void the warranty and the FCC authorization to    operate the equipment. Use only manufacturer provided accessories.4. Do not use the telephone near water. Never spill liquid of any kind on    this product.5. Unplug the product from the wall telephone jack and power outlet    before cleaning. Do not use liquid or aerosol cleaners.  Use damp cloth    for cleaning.6. Do not place this product on an unstable cart, stand or table. The    product may fall and cause personal injury or damage to the product or    other property. Place the base station and the charger on hard, flat    surfaces.7. Power Outage:    In the event of a power outage, your handset charger will not recharge    the handset battery, and the base station will not allow you to make an    outgoing call or take an incoming call. Both the charger and the base    station require electricity for operation.    You should have a telephone, that does not require electricity,    available for use during power outage, or have a temporary backup.Product Safety Instructions''
68. Slots or openings in the product's housing are provided for ventilation.    These openings must not be blocked or covered. Placing the product    on a bed, carpeting, or other similar surface may block these openings    and should be avoided. This product should never be placed near or    over a radiator or heat register, or in a built-in installation unless proper    ventilation is provided.9. Never push objects of any kind into this product through housing slots/   openings as they may damage the product, touch dangerous     points or short out parts that could result in fire, electric shock, or injury.  10. This product should be operated only from the type of power source      indicated on the marking label. If you are not sure of the type of power      supply to your home, consult your dealer or local power company.11. Do not overload wall power outlets and extension cords as this may      result in fire or electric shock.12. To avoid electric shock or burn, do not disassemble this product. Send       this product to an authorized service center when service or repair       work is required. Call Customer Service for locations near you.      Opening or removing covers may expose you to dangerous voltages,      electrical currents or other risks. Incorrect reassembling of the product      may cause electric shock when the product is subsequently used.13. Avoid using the product during a storm. There may be a risk of electric      shock from lightning.14. Do not place the product where persons can step, trip, or fall on the      product.15. Do not place conductive objects over or near the antenna.16. Do not use the product to report a gas leak while in the vicinity of the      leak.    power supply.voltage
717. Do not install the base station or the handset charger near microwave      ovens, radios, TV sets, speakers, or other electrical equipment.      These appliances may cause interference to the product or      experience interference from the product.18. Unplug the base station or the charger adaptor from the wall power      outlet and refer servicing to an authorized service center under the      following conditions:      a. If liquid had been spilled into the product.      b. When the power supply cord or plug is damaged or frayed.      c. If the product has been exposed to rain or water.      d. If the product does not operate normally by following the operating          instructions.      e. If the product has been dropped or housing has been damaged.      f. If the product shows a distinct change in performance.    1. Use only manufacturer approved Lithium-Ion (Li-Ion) rechargeable    batteries and charger. Do not use other types of rechargeable batteries    or non-rechargeable batteries. The batteries could short-circuit, and    the battery enclosure may be damaged causing a hazardous condition.2. Follow the charging instruction in this manual and instruction labels    and markings in the handset and charger compartments.3. Battery must be recycled or disposed of properly. Do not dispose the    battery in a fire. The cells may explode.  4. Do not dispose of the battery in municipal waste. Check with local     codes for disposal instructions.5. Exercise care in handling the batteries in order not to short-circuit the    battery with conductive materials such as rings, bracelets, keys,    pocketknife, and coins.  The battery or conductive material may    overheat and cause burn or fire.6. Do not expose batteries to rain or water.7. Do not open or mutilate the battery.  Released electrolyte is corrosive    and may cause injury to eyes or skin. The electrolyte may be toxic if    swallowed.8. During charging, the battery heats up.  This is normal and is not    dangerous.Battery Safety Instructions
8DuraFon PRO & DuraWalkieFCC ID: U2M-SP922PROIC: 3616C-SP922PROThis device complies with Part 15 of the FCC Rules.  Operation issubject to the following two conditions:  1) this device may not cause harmful interference, and  2) this device must accept any interference received, including      interference that may cause undesired operation.Privacy of communications may not be ensured when using thisphone.1. The term “IC”: before the radio certification number only signifies that    Industry of Canada technical specifications were met.2. This telephone system complies with rules of the FCC Part 68 and    Canadian IC/DOC CS-03. On the bottom of the base station is a label    that contains, among other information, the FCC Registration Number,    Ringer Equivalence Number (REN) and the Universal Service Order    Code, which is RJ-11C in the U.S. or CA-11A in Canada. Your    telephone company may ask you for this information.3. The REN is useful to determine the quantity of devices you may    connect to your telephone line and still have all devices ring when your    telephone number is called.  In most, but not all, areas the sum of the    REN's of all devices connected to one line should not exceed 5.0. To be    certain of the number of devices you may connect to your phone line,    you should contact your local telephone company for the maximum    REN in your area.4. If your telephone equipment causes problems to the telephone    network, the telephone company may ask you to disconnect your     phone system from the line until the problem has been corrected.    Consult with your local phone company for your rights if this happens.
95. Your telephone company may make changes in its facilities, equipment,    operations, or procedures that could affect the proper functioning of    your telephone system. Consult with your local phone company for    your rights if this happens.6. This telephone system may not be used on coin service provided by    the telephone company. Connection to party lines is subject to state    tariffs.7. This telephone system has been tested and found to comply with the    limits for Class B digital devices, pursuant to Part 15 of the FCC Rules    and RSS210 of the DOC Rules. These limits are designed to provide    reasonable protection against harmful interference in a general public    installation. Operations of these devices may still encounter    interference from/to nearby TV's, VCR's, radios, computers, or other    electronic devices. To minimize or prevent such interference, the    telephone system should not be placed or operated near other    electronic devices. If interference occurs, moving the base station and    the handset farther away from them will often reduce or eliminate the    interference.  8. However, there is no guarantee that interference will not occur in a    particular installation. If this telephone system does cause    interference to other electronic devices, which can be determined by    turning the system off and on, the user is encouraged to try to correct    the interference by one or several of the following measures:    a. Increase the space separation between the handset or base station        and the device that is experiencing interference. We recommend at        least 1 meter (about 3 feet) between the system and other electronic         devices.    b. Connect the base station to a power outlet on a circuit separate from        that used by the device experiencing interference.    c. Consult the dealer or an experienced electronic technician for help.
10You have purchased an exceptional business communications tool from aleading telephone system manufacturer.The EnGenius DuraFon PRO 4-port Industrial Cordless TelephoneSystem is ideal for the users in various business settings. The DuraFonPRO is the longest range, multi-base, multi-line telephone and 2-wayradio communications system providing users unparallel mobility andflexibility. The EnGenius DuraWalkie handset provides long range 2-wayintercom and broadcast communication, without telephone capability.With sophisticated digital signal processing and high quality hardwaredesigns, the DuraFon PRO provides long-range telephone connections,multi-base installation and 2-way handset-to-handset communications ina wide variety of business settings from multi-level office buildings,factories, hotels/resorts, convention facilities, warehouses, farms,business complexes, construction sites, school, car dealerships, grocery,retail stores and other demanding business environments.The unique 2-way radio feature allows handsets to communicate witheach other as digital, full-duplex 2-way radios. Members of work group(s)can be in contact with their co-workers while leaving phone lines availablefor incoming and outgoing calls. Handsets that are within range of eachother can use the 2-way feature even while out of range of the base station. DuraFon PRO can support up to 90 handsets.Important Warranty Note: U.S. customers: This EnGenius product has NO manufacturer's warrantyunless purchased from an EnGenius Authorized Reseller. To verify areseller is authorized, please visit our website at: or contact us at 714-432-8668.www.engeniustech.com
111.   In a Base + Handset package(DuraFon PRO), please find the       following components:     a. Base Station x 1     b. Base Antenna x 1     c. Base AC/DC Adaptor x 1     d. Handset x 1     e. Low Profile Handset Antenna x 1      f . Optimal Performance Handset Antenna x 1     g. 1700mA Li-ion Battery Pack x 1     h. Charger x 1     i . Charger AC/DC Adaptor x 1     j . Telephone Cord x 4     k. Audio-in Cable x 1     l . Belt Clip x 1     m. User's Manual, Quick Guide, and Warranty Card2. In a Handset package(DuraFon PRO HC or DuraWalkie), please   find the following components:a. Handset x 1     b. Low Profile Handset Antenna x 1c. Optimal Performance Handset Antenna x 1d. 1700mA Li-ion Battery Pack x 1e. Charger x 1f . Charger AC/DC Adaptor x 1g. Belt Clip x 1h. Quick Guide, and Warranty Card3. In a Base package(DuraFon PRO BU), please find the following       components:     a. Base Station x 1     b. Base Antenna x 1     c. Base AC/DC Adaptor x 1     d. Telephone Cord x 4     e. Warranty Card     f . Audio-in Cable x 1Equipment Checklistf. 1700mA Li-ion Battery Pack x 1 g. Charger x 1h. Charger AC/DC Adaptor x 1i . Telephone Cord x 4 j . Belt Clip x 1k. User's Manual, Quick Guide, and Warranty Cardc. 1700mA Li-ion Battery Pack x 1 d. Charger x 1e. Charger AC/DC Adaptor x 1f . Belt Clip x 1g. Quick Guide, and Warranty Card
124. Optional Accessories       a. Outdoor Antenna Kit (including antenna and cable)       b. Lightning Protection Kit (including cable)       c. DuraPouch       d. Belt Clip       e. Spare Battery        f .  Low Profile Handset Antenna       g. Optimal Performance Handset Antenna       h.  Antenna Splitter (including cable)Equipment Checklist
ReceiverRight soft keyEND &Power ON/OFF 2-WAY//IntercomMicrophoneTravel/charger jackHeadset jack(2.5mm)Belt Clip holderBattery pack4-Line LCDVolume control/ScrollingLeft soft keyBROADCASTTALK/(For PRO)KEY LOCK/(For Walkie)Antenna13Handset Features112233445566778899101011111212131315151414
14Handset Features   Basic Handset Features1. 4-line LCD (Liquid Crystal Display)    a. The LCD display has LED (Light Emitting Diode) for backlighting.st    b. The 1  line of LCD consists of icons.    c. Icons explanation from left to right.        (1) RSSI (Receive Signal Strength Indicator)             During a call, the number of bars is proportional to the radio signal             strength received.        (2) Call in-progress (ON/OFF-Hook)               Indicates if phone line mode is active.        (3) Intercom in-progress              Indicates if Intercom mode is active.        (4) Handset ID              Displays a handset icon and a 2-digit Handset ID.        (5) Text Envelope              Indicates if there is new text message.        (6) Two-Digit Address Index              Shows address index when viewing contents of the call logs,              text messages or phonebook.        (7) Line Indicator              Indicates the number of the line being accessed by the handset.        (8) Speaker phone              Indicates if speaker phone is active.        (9) Battery Strength               * Number of bars is proportional to the amount of battery time                  remaining.               * Indicates charging when in charger cradle.MENUREDIAL(1) (2) (3) (4) (5) (6)(7) (8) (9)ddee◎◎◎
15   nd rd   d. The 2  and 3  lines of the LCD, maximum 14 characters each,          display status, message, menu selections, or user-editable         alphanumerical characters.     e. The last line displays the left and right soft keys.         Re: There is only right soft key in idle mode of DuraWalkie.         Note: “◎” means only shown on DuraFon PRO handset. 2. Ringer    a. Rings to an incoming call.    b. Distinctive alert sounds indicating various events:        i. Single Beep: successful key entry.       ii. Double beep: failed operation or invalid key entry, also indicates            power on/off.      iii. Periodic 1-Long-2-Short Beeps (repeat every 10 seconds):             low battery warning.      iv. Periodic 1-Long-2-Short Beeps (repeat every 30 seconds):            indicates a call is on-hold.(         )3. TALK/ SPEAKERPHONE  (For DuraFon PRO only)    a. Places or answers a telephone or intercom call.    b. Sends a Flash signal to phone line to retrieve a dial tone after the        call ends, or to perform the call waiting feature provided by local        phone companies during a call.    c. Press and hold the key for one second to enable/disable        speakerphone.4. KEYLOCK(         ) (For DuraWalkie only)     a. In Idle mode, press to lock up the keypad.    b. In 2-Way/Intercom mode, press and hold          to enable/disable        speakerphone.5. 2-WAY/INTERCOM(            )    a. Places an intercom call to another handset ID or a group ID.    b. Intercom calls are digital, full duplex, and are conducted without the        assistance from the base.    c. Press and hold for one second to enable/disable                   speakerphone.Handset Features
16Handset Features6. BROADCAST(                )     a. Half duplex broadcasting to handsets for immediate announcement.        Note: Unless necessary, it is better not to assign ID 10 and 11 to                   DuraWakie handsets. landline 7. Left/Right (          /          ) Softkeys    a. Make menu selection.8. Up(              ) /Down(              ) Scrolling Keys    a. Scroll through records and menu selections.    b. Adjust receiver voice volume when in Talk mode.9. END; On/Off (            )Key    a. Ends a call.    b. Leaves current menu operation, up one level.    c. Press for 3 seconds to off the power.   1. Multiple handsets registration    a. Up to 90 handsets.     b. ID 10 and 11 are the first two ID's assigned by the base and are        designated “administrators” who can change base settings such as        greeting message and other base administrative functions.c. ID 01-07: Group IDs. Handsets can “subscribe”  from the handset        menu to group(s) and be paged when a caller or an intercom        caller enters a Group ID.2. Ringer / Vibrator    a. Six ringer volume selections     (high/medium/low/vibrate/vibrate-and-ring/off).    b. Four ringer type selections.Additional Handset Features
17Handset Features3. Caller ID(For DuraFon PRO    a. Displays incoming call phone number and name on the LCD(needs        Caller ID service from local telephone company).        Note: If behind a PBX or Key system, Caller ID information will only                    be recognized if the PBX or Key system passes that                    information through the analog ports. Note: If behind a PBX or Key system, Caller ID information will only                   be recognized if the PBX or Key system passes that                    information through the analog ports.Note: If behind a PBX or Key system, Caller ID information will only                    be recognized if the PBX or Key system passes that                    information through the analog ports.Note: If behind a PBX or Key system, Caller ID information will only                   be recognized if the PBX or Key system passes that                   information through the analog ports. only)4. Call Waiting with Caller ID(For DuraFon PRO only)nd    a. Displays 2  incoming call information on the same phone line whenst        1  call is in progress (needs Call Waiting with Caller ID service from         local telephone company).             5. Name Tagging with Caller ID(For DuraFon PRO only)    a. Matches the Caller ID with the phone book entries; once matched,        the LCD screen will display the name or nickname instead of pure        Caller ID info (needs Call Waiting with Caller ID service from local        telephone company).             6. DND (Do Not Disturb, i.e., Silent Ring)     Silences the incoming call ring for current call only.7. Three Call Logs(For DuraFon PRO  )only    a. Called Log: Stores 10 phone numbers (up to 28 digits each) dialed         most recently. Can perform last-number redial on all 10 numbers.    b. Received Call Log: 10 entries (14-digit phone number, 14-character         names, and time stamp), needs Caller ID service from local         telephone company.
18Handset Features    c. Missed Call Log: 10 entries (14-digit phone number, 14-character        names, and time stamp), needs Caller ID service from local        telephone company.        d. Phone numbers and names can be saved into phonebook while in         display.8. Any Key Answer (except END, Silent Soft Key)9. Key-guard10. Dialing Prefix(For DuraFon PRO only)    a. Up to 14 digits, including pause(s), one access code can be pre-        programmed to be added automatically in front of the dialed        number when dialing from call logs, phonebook, and dial-and-send        dialing.11. Call Hold(For DuraFon PRO only)    a. Places call on hold.    b. Battery Hot Swap: Change battery while call is on hold.12. Mute13. Phonebook    a. 90 entries, each stores a phone number or handset ID (up to 28-           digit) and name (up to 14-character).    b. Alphabetically sorted display and searched by letter.    c. Dial from display.    d. During the stand-by mode, you can enter the phonebook by           pressing or scrolling key.    e. Phone book transfer via wireless link.           i. Transfer specific phonebook to one handset or all registered              handsets.          ii. Transfer all phonebooks to one handset or all registered              handsets.       Re: For DuraWalkie, it can only store 2-digit handset ID(or Group              ID).     Note: If behind a PBX or Key system, Caller ID information will only                be recognized if the PBX or Key system passes that                information through the analog ports.
19Handset Features14. Key Tone    a. Three key-tone volume selections (high/low/off).    b. Four key-tone type selections.15. Call Timer(For DuraFon PRO only)    a. Display call time duration for current call during and immediately           after the call.16. Call Transfer    a. Direct Transfer: transfer a telephone call to another handset        without announcement.    b. Announced Transfer a telephone call to another handset before        transferring a telephone call.17. Call Conferencing(For DuraFon PRO only)    a. 2-handset and 1-line conferencing.    b. 1-handset and 2-line conferencing.18. Line Selection(For DuraFon PRO only)    a. When enabled from the handset menu, a handset user will be        prompted to select from a list of available lines before making an        outgoing call.  19. PBX option transfer(For DuraFon PRO only)    a. PBX options transfer via wireless link.    b. Transfer specific PBX option to one handset or all registered         handsets.    c. Transfer all PBX options to one handset or all registered handsets.20. Base Selection(For DuraFon PRO only)      When enable from the handset menu, a handset user can manually       select the base which is the nearest one with user before making       an outgoing call.
21Base Illustration  1. Antenna  a. The antenna port has a reverse thread connector; to remove        antenna or cable, turn clockwise; to install, turn counterclockwise.        Improper installation may damage the connector.     b. When using an outdoor antenna, locate the antenna (not the base        station itself) as high as possible for a clear transmission path.2. LED  a. Power: Indicates base station has power.    b. In-Use: Indicates an active telephone line. Basic Base Station FeaturesBase FeaturesAntennaREG ButtonPOWERLINE 1LINE 2LINE 3LINE 4Wireless Telephone SystemDigital 4-LineReset Button Line Status LED'sPower LEDLine in Audio in DC INAUDIOL4 L2 DC  INL3 L1
22Base Illustration3. Reset Button  a. Restores base station to factory settings.    b. Reset button is indented to prevent accidental system reset.    c. All handsets (including administrator) and additional base(s)         need to be re-registered after a base station reset.4. Registration Key (REG)    Enters registration mode along with handset, assigns handset ID    (10-99).5. L1~L4  Standard RJ-11C/CA-11A connector to plug in the telephone line.6. Audio-in Jack (3.5mm)7. DC In: to plug in the power adaptor  1. 4-channel Auto-Attendant    a. 4 Auto-Attendant can be active at the same time in case of 4         simultaneous incoming calls.    b. Allows private paging to a single handset (with individual        Handset ID) or group paging to a group of handsets (with Group        ID).    c. Per line AA enable/disable by administrator.         When disabled for a line, the administrator can set all handsets          to ring with an incoming call on that line, or a particular          Handset/Group ID (either one; not simultaneously) can be         assigned to have both incoming and outgoing call privileges         on that line. See AA Configuration by Administrator.    d. Up to 128 seconds customizable main greeting message.    e. Default of 4 lines AA is OFF.  Additional Base Station Features
23        9  1 2               to select flash key timing.    b. 9-level (100 ms - 900 ms) timing selections, default= 600 ms.    c. The default value (600 ms) works in most areas. Changing this        setting may result in Flash function not working. Change only when        you are certain the new value will work.3. Call Transfer to PBX Extension(For DuraFon PRO only)    a. When the DuraFon PRO is installed behind a PBX system, you can        pre-program the feature code of call transfer function.    b. The Flash time is set at 600ms, by default, and may be changed to         match PBX settings.    Re:If loosing administrator handsets (handset 10 and 11), all settings          must be reset (reset the base and re-register all handsets).Base Illustration2. Optional Outdoor Antenna Kit with cable   Administrator FeaturesHandsets 10 and 11 are designated administrators. Both have the sameauthority to perform base station administrative functions from theirhandset menu selections.  No password is required.1. Supports both DTMF and Pulse dialing (For DuraFon PRO only)    a. From an administrator handset (Handset 10 or 11 ), press enter base ID(00 – 07)     to select Tone or Pulse       dialing mode.    b. Default is Tone dialing.2. Administrator programmable Flash key timing (For DuraFon PRO    only)    a. From an administrator handset (Handset 10 or 11), press          MENU          9        1          1   MENU
24Charger IllustrationDC INSpare BatteryCharging SlotSpare BatteryCharging IndicatorHandset ChargingSlotCharger Features
251. DC In    Connects to Charger AC Adaptor.2. Handset Charging Slot    a. Charge handset battery when handset is placed in cradle.     b. Refer to the handset LCD for charging status.         i. Charging: LCD screen showed “Charging”.        ii. Fully Charged: battery status bar stands still and the LCD screen                                       would display “Fully Charged”.       iii. Charge Fail: Should an error occur during charging mode, the                                   LCD screen would display “Charge Fail”.3. Spare Battery Charging Slot    a. Charge spare battery when battery is placed in slot.      B. LED as the spare battery charging indicator.         i. Slot is empty and the power is on: LED is Green light.        ii. Charging: LED is Orange light.       iii. Fully Charged: LED returns to Green light.4. It is impossible to overcharge the battery using this charger.5. The AC adapter can be used as a travel charger and plugged directly     into the handset’s DC port (located next to the headset port).      However, you can not turn off the power while charging with    the travel charger. A Warning message: “Unplug Travel Charger then    OFF” will be shown on the LCD display.    Notes:     1. Fully charge battery packs before first use.    2. Both handset and spare batteries can be charged at the same time.    3. Handset will be “power on” automatically when placing on the        charging slot.      4. However, if you run down the battery, it will take around one        minute for handset to auto power on.    5. Removing a ringing handset from the charging cradle will auto         answer the call. Charger Features
26Getting Started   Base Station InstallationFor best performance, maintain a distance of at least 1 meter (about 3feet) between the base station and other electronic devices (e.g., TV,computer, stereo, fax machine, answer machine, cordless phone, etc.).1. Install base station antenna.    The base station's antenna port has a reverse-thread connector; to    install antenna or cable, turn counter-clockwise; to remove, turn    clockwise. Improper installation may damage the connector.2. Plug the transformer end of the base station AC/DC adaptor into a     standard AC electrical power outlet, plug the other end into the “DC In”     jack on the back of the base station.    a. The base adaptor's DC plug is larger in dimension than the charger's        DC plug. The charger adaptor's DC plug will not fit into the base's        DC In jack.    b. The base station's power supply (DC Adaptor) and telephone line        should be plugged into a surge protector with phone line protection.3. Plug one end of the phone cord into one of the 4 phone jacks marked L1    ~ L4 and plug the other end into the telephone outlet. Since DuraFon    PRO has the built-in “line detection” feature, it is okay to plug in the    phone jacks in random order.4. Connect an external telephone answering device by following the    instructions that come with the answering device. An exemplary    configuration: install the external answering device in-between the     wall phone jack(s) and the Base Station. Either a multiple of single-    line answering devices or a multiple-line answering device can be     used.
27  5. To use the Music/Message-On-Hold feature: Connect one end of a     standard audio cable into a radio or audio player, and plug the other    (3.5 mm) end into the MOH jack on back of the base.    Notes:     Recommended phone line features from the local phone company:    Multiple phone lines  hunt group” is a useful feature and works well    with this phone system. This feature “ties” multiple phone lines to a    single phone number. When an outside caller calls this common    phone number, the phone company automatically finds a free line.    In a hunt group, the Call Waiting and the Caller ID with Call Waitingnd    (or called Type II Caller ID) features are unnecessary because a 2        call will come in on a separate line, rather than on the same line. For nd      a 2 call coming in on a separate line, the phone system's built-in    Call Waiting feature will alert the user and allow the user to toggle    between 2 lines.Multi-base setups:EnGenius DuraFon PRO has the capability to expand the coverage orcapacity.Re: For best performance, maintain a distance of at least 10 meters       (about 30 feet) between any two base stations. * Expanding coverage :  Parallel connects all L1/L2/L3/L4 in each base as below schematic  (up to 8 bases), the use coverage will be several times increased.  Note: Telephone calls cannot be handed off  between base units.“ Legacy PBX 1234 1234 1234 Base-1 Base-2 Base-3                Getting Started
28LegacyPBX Base-1 Base-2 Base-31234     1234     1234    Getting Started 10( Select Mode1.Add BaseË  10( Added BaseNumber: **CANCEL       Re : when a call is coming in from L1, any handset can pick up the                 call, as long as the handset are in the coverage of base1~3.1. Handset Registration.    a. Press  button on Base “00” (default), four LEDs will light up in        setting mode.    b. Handset operation: Press    (It will complete the        registration process).    c. Repeat, as needed, to add handsets.      Note: Additional handsets should be added to the system before  adding additional base units.                 2. Establishing additional Base Units:a. Press  button on new Base.     b. Use Handset 10 or 11 to add base :        Press   .    c. Enter 01~07 (Base ID).    d. Repeat, as needed, to add base units.Notes:     1. Only Handset 10, 11 can assign Base ID.     2. Base ”00” is a primary base. All handsets must register only on        Base “00”.*Expanding capacity:  User capacity can be   increased by adding   additional base units.    Up to 8 base units can   be supported.REG  REG MENU  6 1MENU        8        1
 10( Select Mode1.Add BaseË  10( Added BaseNumber: **CANCEL29Getting Started       Re : Handsets can answer calls from any port or line, unless port is               dedicated to a specific handset or group.1. Handset Registration.    a. Press  button on Base “00” (default), four LEDs will light up in        setting mode.    b. Handset operation: Press   .          (It will complete the registration process).    c. Repeat, as needed, to add handsets.2. Establishing additional Base Units:    a. Press   button on new Base.     b. Use Handset 10 or 11 to Add base :        Press      c. Enter 01~07 (Base ID).    d. Repeat, as needed, to add base units.     Notes:     1. Only Handset 10, 11 can assign Base ID.     2. Base“00” is a primary base. All handset must register only on Base         “00”.    3. To avoid interference, the interval between any two bases should         be at least 10 meters (about 30 feet).     1. Plug the transformer end of the Charger AC/DC adaptor into a standard    AC electric power outlet, plug the other end into the “DC In” jack on the    back of the Charger.2. Install battery pack onto the handset.3. Install handset antenna.4. Place handset onto the charger front slot.5. The phone system is now ready to perform basic functions such as    making and receiving phone calls and intercom calls. No base station    handset programming is needed for basic operations.REG REG MENU 6 1MENU        8        1                  .Handset and Charger Installation
30Basic Operations   Operation ModesBoth the base station and handset have levels of operation at which timeonly certain procedures of functions can be performed. Re: The main difference between DuraFon PRO and DuraWalkie is the       handset of DuraFon PRO has the capability to make telephone calls,       and the handset of DuraWalkie does not.  A. Base Operation Modes1. IDLE mode- this is the default mode. The “Intercom”, “Broadcast”, and    “Volume keys” are active in IDLE mode. 2. TALK mode- the base operates in this mode during a phone call,     intercom use, and broadcast operation. The “In Use” , “Intercom”, and    “Broadcast” LED will light up respectively. 3. REGISTRATION mode- the base enters this mode by pressing the     button for three seconds. There are no active base unit keys once this    mode has been entered. Four LEDs will light up in Registration mode. B. Handset Operation Modes1. IDLE mode- this is the default mode.      a. If there is no on-going activity, the handset automatically goes into        SLEEP/IDLE mode to save battery power.    b. The handset can be turned off completely by holding down the         key for 3 seconds.     c. The idle screen display (custom name) can be edited.     d. The 2-digit number represents the handset ID.2. Menu mode    REGENDa. Press the (Right softkey) function key to activate MENU mode.    b. In MENU mode, the handset settings and information contained in        memory can be changed.     c. The functions available through the MENU selection are covered in        greater detail from page 53.    d. The MENU structure display as below:
“ ”     used for support under the cradle to avoid breaking mounting slots.     An “L” bracket is not included, but can be purchased from a local home    center.    Note:     1. The handset packaged along with a Base Station is pre-registered        at the factory. If you have a new handset, you will need to register        the handset with the base station in order to be recognized as a        member handset by the base and by other handsets. See Handset        Registration.    2. Fully charge battery packs before the first usage.6. Charging cradle may be wall mounted, but an   L bracket should be31Basic Operations
DuraFon PRO32Main menu1.KeyGuard2.PhoneBook3.Call Logs4.Sound5.Settings6.Registration7.Unused8.Multi-base9.AdminSub-menu1.Dialed2.Received3.Missed1.Ring Volume2.Ring Tone3.Key Volume4.Key Tone1.Dial Prefix2.Group Select3.Base Select4.Clear5.Naming6.Contrast7.Backlight8.Line Select9.PBX Options0.Language#.PA On/Off  .Phone ResetSelect Mode:1.Add BaseAdmin:1.System2.Line Setting3.Auto AttndntBasic Operations1.Register2.Deregister3. Remote REG
DuraWalkie33Main menu Sub-menu1.Ring Volume2.Key Volume3.Key Tone1.Group Select2.Clear3.Naming4.Contrast5.Backlight6.Language#. PA On/Off  . Phone ResetAdmin:1.System2.Line Setting3.Auto AttndntBasic Operations1.KeyGuard2.PhoneBook3.Unused4.Sound5.Settings6.Registration7.Unused8.Multi-base9.Admin1.Register2.Deregister3.Remote REGSelect Mode:1.Add Base
34   1. Press     , wait for dial tone, and then enter phone number.2. Alternatively, you can enter phone number first then press     Key.    When using this method, you can use the   (Left) and        (Right softkeys) to edit the number entered. “Delete” erases the last    digit entered. “Clear” erases the entire line but remains in the dialing    mode.3. Speed dial by access the entries in the phone book.     a. Press          or          scrolling key to enter the phone book.    b. Press     to dial the number.4. To abort dialing, press    key.5. During the call, press and hold the     Key to activate the    speakerphone.    Notes:    1. After a link is established, the Base ID will appear on the upper-        right corner.        If no Base ID shows up, it implies that you are approaching the        boundary of the coverage.     2. If the line is occupied, the LCD shows  “No Line Available” and        handset returns to standby mode.    3. If a link cannot be established, the LCD will show  “No Connection”         after a 12-second time out.     4. A call duration timer will start displaying the length of the call after        link is established.      The EnGenius Industrial Cordless Phone System offers private, Intercom/2-way radio calls independent of the base station. Intercom/2-way communication can be placed from handset to handset.Handset to Handset Calls.Making a Telephone Call (For DuraFon PRO only)Making a 2-Way/ Intercom CallTALKTALKCLEAR DELETETALKENDTALK Basic Operations
1. Press     key followed by a two-digit handset ID or Group ID.2. Press     key to end the call.3. During the call, press and hold the     Key, the speakerphone is    active.     Notes:    1. Intercom calls can be made regardless if the Base Station is        present.    2. If a Group ID is entered, the first handset (belonging to that group)        that answer will establish a link with the caller. See Handset        Group Subscription.    3. If a link cannot be established, the LCD shows “No Connection”         after a 12-second time out.   1. Broadcasting all handsets.    a. Press & hold       key from one handset.    b. A series of beeps will indicate  initiation of handset broadcast to all        handsets within communication coverage.    c. Begin speaking after the series of beeps has ended.    d. Release    key to end the broadcasting.2. Broadcasting a group of handsets.    a. Enter the Group ID and then press & hold       key.     b. A series of beeps will indicate initiation of handset broadcast to all        handsets within communication coverage.     c. Begin speaking after the series of beeps has ended.    d. Release    key to end the broadcasting.3. Broadcasting an individual handset.    a. Enter the Handset ID and then press & hold       key.     b. A series of beeps will indicate initiation of handset broadcast to all        handsets within communication coverage.     Re: When the handset is in use with a call or put a call on hold, it can’t           be enabled with broadcast.INTERCOMENDTALK BROADCASTBROADCASTBROADCASTBROADCASTBROADCASTMaking a Broadcast   35Basic Operations
36Basic Operations    Notes:     1. You need to continuously press    key when doing        broadcast. The broadcast will be over once user release the key.    2. You need to notice that there is no bi-bi-beep sound when        receiving a broadcast.    3. You can press the   (Left softkey) if you choose to ignore        the call. The     key operation is valid only for the current        call. You can silent all broadcast by turning off the ringer to set        auto-silence from the handset menu.  1. Press     (Left softkey).2. The LCD shows the last phone number dialed. To dial this number,     press   (Left softkey).3. Use Up or Down Arrow Key to scroll through the last 10 phone numbers    dialed. Select and press     key.    Note:    Intercom numbers (Handset ID) are not stored in the last 10 numbers    dialed log.   1. When an incoming call arrives, the handset  will ring or vibrate unless    the ringer has been turned off.2. If the handset is on the charger cradle (ringer will be temporarily    switched to “Ring” if it has been set to “Vibrate” ), lift the handset  and    start the conversation.3. If the handset is not on the cradle, press any key (except  , and the        softkey) to answer.4. During the call, press and hold the      Key, the speakerphone is active.Re:DuraWalkie handset can’t receive a telephone call directly, but it can        receive a transferred telephone call from PRO handset.      BROADCASTSILENTSILENTREDIALDIAL  DIALENDSILENTTALK       Redial (For DuraFon PRO only)Receiving a Telephone Call (For DuraFon PRO only)
37Basic Operations    Notes:    1. You can press     (Left softkey) if you choose to ignore the        call.         Unlike turning off the ringer (from the handset menu), the          key operation is valid only for the current call.     2. If Caller ID service is available, the LCD will display the incoming        call information. If the LCD shows “Private” or “Unknown” , the        caller's information may have been blocked by the caller or the        originating phone company. 1. When an intercom call arrives, the handset will ring or vibrate unless    the ringer has been turned off. Press    key to answer the intercom     call.2. If the handset is on the charger cradle (ringer will be temporarily    switched to “Ring” if it has been set to “Vibrate” ), lift the handset and    start the conversation.3. If the handset is not on the cradle, press any key (except    and the       softkey) to answer.4. During the call, press and hold the    Key, the speakerphone is    active.     Notes:     1. The LCD displays the caller's Handset ID.     2. You can press the     if you choose to ignore the call. Unlike         turning off the ringer the     key operation is valid only for         the current call.SILENTSILENTTALKENDSILENTTALK SILENTSILENT  Receiving an Intercom Call        Also it can transfer the same telephone call to other DuraWalkie or        PRO handset. (Details refer to call transfer)
38Basic Operations  To end a telephone or intercom call, press     key or place handset intocharging cradle.  1. Voice volume can only be adjusted during a call.2. There are 6 levels of volume selections. Default as volume 4. Use              and           scrolling key to adjust.3. The new setting remains effective for all future calls until changed      or handset is power down.  1. For calls held at DuraFon PRO Base only2. When a call is in progress, it can be put on hold by pressing the      (Right softkey).3. To return to the conversation, press    .     Notes:     1. The call being placed on hold can only be removed from     by         the handset that puts it on hold.     2. Handset LCD displays a call is being on hold.  An alert tone (double         beep) every 30 seconds will remind the handset that a call is being         on hold.     3. If the operation (e.g., call transfer) after putting a call on-hold fails,         the held call may be dropped.     4. You can power off the handset (e.g., change battery) while call is         on hold.      5. After power on again, you can continue the call by pressing           (Left softkey) or select     from the Option menu to         terminate the hold state. You can only unhold the call when within         Ending a CallAdjusting Receiver (Earpiece) Voice VolumePlacing a Call On Hold (For DuraFon PRO only)ENDHOLDUNHOLDHOLDUNHOLD 3
39Basic Operations     1. After a link is established, you can press    (Left softkey) and    press     to mute the handset microphone.2. When mute is active, the other party will not hear your voice, but you    can still hear the other party.3. To end the mute, press    (Left softkey) and press     to unmute    the handset microphone.    Re: If established an intercom call, when end the mute, press              (Left softkey).   1. Enter the key sequence  , then     select “Off” . Press     to confirm your choice. This will turn off the     ringer until it is turned on again from the menu.2. For temporary silencing the ringer when an incoming call arrives, press        (Left softkey).    1. To prevent accidental dialing, you can press     (Right softkey),    then press      to select KeyGuard option. The handset keypad is    locked. No key entry is accepted except the power on/off key.2. To unlock the keypad, press    (Left softkey) then within 2    seconds, press the digit     to unlock.3. Key Guard is in effect until unlocked or powered off.   1. Whenever you have missed incoming call(s), you can press        softkey to enter the call logs information. MuteDo Not Disturb (Silent Ring)Key GuardTo View Missed Call(s) (For DuraFon PRO only)OPTION0OPTION 0UNMUTEMENU            Sounds         Ring Volume  SAVESILENTMENU1UNLOCK1VIEW          the coverage area of the base. Once you're out of the base         coverage, you can return to stand-by using “Clear hold” function         in the “OPTION” list item #3.
 1. When you review missed incoming call(s), you can directly call back by    pressing     Key.2. The displayed CID number in most cases will be a 10-digit number with    the 3-digit area code followed by the 7-digit telephone number. If the    area code is unnecessary for calling back, you can follow below rule to    adjust the calling back number:    a. Press    key once, the 3-digit area code will be removed.    b. Press    key twice, “1”  will be added in front of the displayed        number.    c. Press    key three times, it will loop back original displayed         number.        Re: The CID default is 10 digits,  when press   key, it will be               7-digit         11-digit         10-digit in circle.3. After the displayed number chosen, press the   key to call back.   To Call back from Call Log (For DuraFon PRO only)Battery Recharge and ReplacementTALKFORMAT FORMAT FORMAT FORMAT TALK 1. Charge the battery when one or several of the following happen:    a. Phone beeps twice every two seconds.    b. Battery icon is empty.    c. Phone does not respond when a key is pressed.    d. LCD and backlighting become dim.    e. A decrease in coverage is experienced.2. You can replace the handset battery after placing the call-in-progress    on hold.3. Battery talk time and standby time vary depending on the talk/standby    pattern and the operating distance. Returning the handset back to the    charging cradle as often as possible is recommended for best    performance. Use only manufacturer provided battery and charger!40Basic Operations2. You need to subscribe the caller ID service from local telephone    company to retrieve this data.
41Advanced Operations   Handset Registration1. If your handset is purchased as part of a system, it has been pre-    registered with the base station at the factory.2. If the Handset ID reads “00”, that means it is a new handset or the ID    has been erased. You need to register the handset with the base    station. In certain situations, you may want to change a handset's ID.    For example, you want to change a particular handset from a user to an    administrator (ID 10 or 11), or vice versa. Or in some rare occasions,    you find another handset having the same Handset ID. 3. Registration:    a. Press  -6 to enter the registration mode    b. Press and hold the base's Registration   button for 2 seconds        until the L1, L2, L3, and L4 LED come on.    c. Press handset key    , this completes the registration process.         The base station will assign a handset ID between 10 and 99. The        assigned ID will be displayed on the handset LCD, indicating        successful registration.    d. Repeat above steps for all additional handsets.    e. The first two handsets registered will be given ID 10 and 11, which        gives them administrator privileges.        Re : Base “00” is a primary base. All handsets must register to                 Base “00”.4. De-registration:    a. You can de-register a handset from a base.  De-registration will reset        the Handset ID to 00, erase the system security code, and free up the        old ID for future registration.    b. After deregistration, the handset will not be able to use the base to        make or receive phone calls, nor can it use the intercom to reach        other handsets.    c. Press handset     (Right softkey).    MENUREG  1MENUd. Press the handset number key  , this will enter the handset        registration menu.    e. Press and hold the base's   button for 2 seconds until L1, L2, L3,        and L4 LED come on.6REG
42Advanced Operations    f. Press the handset number key     , this completes the de-registration       process. Upon successful de-registration, the handset will show ID “00”.    Notes:    1. The base has a 30 second registration timeout starting from        pressing the   button. The handset has a 12 second registration        timeout starting from the time registration or de-registration option        has been selected. The base and handset will automatically exit        registration mode after timeout.    2. Repeat registration or de-registration process if unsuccessful.  1. Advanced registration functions can be performed by administrator    handsets (ID 10 and 11) only.2. Administrator handsets can perform advanced registration function    as long as it is within range with the base station. The base station    does not need to be in registration mode.3. De-register a Handset ID by administrator:    a. Make sure that the administrator handset is within the coverage        range of the base station.    b. Press administrator handset    (Right softkey).    c. Press number    , this will enter the handset administration menu.    d. Press number    , handset enters system setting menu.    e. Press number    , and enter the two-digit Handset ID to be cleared.     f. Upon successful operation, the handset LCD will display “Done”,         otherwise it will show “Message not received, try again”.4. Obtain a Specific Handset ID:    a. If a particular Handset ID is preferred over sequentially assigned ID,        the administrator can “tel” the base in advance what the next ID        assignment should be.    b. Press administrator handset     (Right softkey).    c. Press the number    , this will enter the handset administration menu.    d. Press number    , handset enters system setting menu.    e. Press number    , and enter the two-digit Handset ID to be assigned        next by the base.    f. Upon successful operation, the handset LCD will display “Done” ,        otherwise it will show “Message not received, try again”.2MENU 912MENU915REGAdvanced Registration
43Advanced Operations    g. If the handset ID is already in use by another handset, the         administrator will be alerted. In that case, the administrator can         choose another ID or asks the handset having the desired ID to         vacate by de-registering with the base.    h. Perform registration immediately afterward for the handset desiring         a specific ID to ensure that the ID is not taken by another handset.5. Remotely register Handset:    a. If base install in ceil or higher location, administrator handsets can         perform remote registration.    b. Press administrator handset   (Right softkey).    c. Press the number   , this will enter registration mode.    d. Press the number   , this will replace the procedures to press & hold         the base   button until the L1, L2, L3 and L4 LED come on.    e. Proceeding the handset registration process for new handsets.  MENU6 3 REG    Notes:    1. De-registration by the administrator will disable a handset's ability         to use the base station to make or receive phone calls. This also         frees up the ID for future registration.    2. Handsets de-registered by the administrator can still perform        intercom to other handsets.    1. Up to seven handset groups (01-07) can be defined and handsets can    decide which group(s) they want to be in.2. For example, Group 1 represents the Customer Service Group, Group    2 represents the Sales Group, and Group 3 is the Marketing Group.    Suppose that Handset 11 wants to receive incoming rings for all Sales    and Marketing related calls. Then handset 11 will need to “subscribe”    to Group 2 and Group 3.Handset Group Subscription
Advanced Operations44  1. While a telephone call is in progress, you can place it on hold and    transfer the call.2. Press     softkey to put call on hold.3. Press     softkey to enter feature list for selection.4. Press number     and enter a two-digit Handset ID to call another    handset extension.    a. Un-announced Call Transfer:        Press   before the destination handset answers, the call is        automatically transferred to the destination handset.    b. Announced Call Transfer:        (1) Speak to the destination handset.        (2) Press   softkey or the     to end announcement. The call              is transferred to the destination handset.    Notes:    1. If the destination handset does not answer after handset paging        timeout, the call is routed back to the originating handset.    2. Above described “Call Transfer” is for DuraFon PRO handset-to-        handset call transfers.       Call Transfer (For DuraFon PRO only)HOLDOPTION2XFER  ENDEND3. Group Selections:    a. Press handset             to enter the handset setting menu    b. Press number    , handset enters group select menu.    c. Press     softkey and enter two-digit group number (01~07) to        add membership in a group.    d. Repeat for all desired groups.    e. Delete group selections by pressing     (Right softkey) and        enter group number.    Notes:    1. The handset can change group affiliations at any time.    2. The base (administrator) is not responsible for group assignments.          Consequently, it cannot unsubscribe a handset from a group.MENU   52ADDDELETE
45Advanced Operations   3-Way Conferencing (For DuraFon PRO)Base Select (For DuraFon PRO only)1. While a telephone call is in progress, you can place call on hold and    bring in another phone line or another handset for a 3-way conference.2. Press   (Right softkey) to put the current call on hold.3. Press    (Right softkey) to enter selection menu. (5. 3-Way Conferencing with a Second Phone Line:    a. Press number     and enter a phone number to call another phone        line.    b. After the second line answers, press the     (Left softkey).       c. One handset and two phone lines can now talk simultaneously.              i. If one phone line hangs up, the handset continues talking to the               remaining phone line.           ii. If the handset presses    key, the 2nd phone line will be               dropped.                The handset and the first phone line continue conversation.    Notes:     1. 3-way conferencing between 3 handsets is not supported.     2. Unlike 3-way conferencing provided by the phone company, 3-way         conferencing involving 2 phone lines will take up two physical lines,         leaving only two lines left available for other handsets.           The handset must have access to a second line.   HOLDOPTION 2CONF 1CONFEND 4. 3-Way Conferencing with a Second Handset:    a. Press number     and enter a two-digit Handset ID to call another        handset extension.    b. After the second handset answers, press the   Left softkey).    c. Two handsets and one phone line can now talk simultaneously.          Any one party can drop out of the 3-way conferencing, leaving the         remaining two parties still connected.1. A handset can manually select the desired base station before access    outbound line.2. Press handset    (Right softkey).3. Press the number    , this will enter the handset setting menu.MENU5
46Advanced Operations        35functions on two separate phone lines.rd2. This feature only works for 2 lines, if a 3  phone call comes for the             same handset, the call will not be routed to the handset.             Call Waiting (For DuraFon PRO only)                1. A handset, while talking on one phone line, can be informed of the    arrival of a new incoming phone call.2. For example, suppose that Handset 15 is talking on Line 1. When a    new call comes in on Line 4 and the caller enters extension number    *15* when prompted by the AA, or if the call is set to be routed to     Handset 15 when AA is disabled. . The base station recognizes that Handset     15 is busy. Instead of announcing to Line 4 that Handset 15 is busy, the     base sends an alert to Handset 15.. Upon receiving the alert, the handset sounds an audible double beep4    alert and LCD displays “New call on Line 4”.. Handset 15 can:a. Ignore the new call; continue talking to Line 1.b. Press    key to switch to Line 4.c. Subsequent pressing of     key will toggle between Line 1 and        Line 4.d. Press   key while talking to a line will terminate that particular        call and automatically switch back to talking to the remaining line.    Notes:1. This built-in call waiting is separate from the Call Waiting feature          available from the local phone company.  The phone company         provided Call Waiting functions on the same phone line, while the         DuraFon Call Waiting  SwitchFLASHEND 4. Press number    , handset enters Base Select setting mode.5. Use          or          arrow to scroll up and down the selection (On/Off)6. Make a selection (default =off), and press    (Left softkey).    Re: When turns on the Base Select, you must enter 2-digit Base    ID after press the   key.3SAVE TALK         Notes:1. Because this setting allows handset manually select the base             station, the handset must be in range with the desired base station.
47Advanced Operations1. When enabled by the administrator, an automated attendant would    greet a telephone line incoming call.2. The caller will be prompted by the greeting message to enter a two-digit    extension number (Handset ID) or press     for operator.3. The greeting message is user programmable. The Handset ID that is     designated as the operator is also user programmable.      i. Default greeting message (Main OGM): “Please enter the extension         number or press    for the operator”.     ii. Default operator: Handset 10.4. AA will ask for another handset ID if the first entry is invalid (no     registered handset with that ID) with the announcement (OGM2): “The    extension you entered is invalid, please try another extension or press        for the operator”.5. If there is no entry time out, AA will announce (OGM3): “Please hold,     your call is being transferred to the operator”. And automatically ring     the operator handset.6. If the destination handset does not answer (busy, power off, or out of    range) after handset paging time out, the AA prompts the caller for     another extension number by announcing (OGM5): “The extension     you’ve entered is busy or not available. Please enter another extension     number or press   for the operator”.nd7. If the 2   try is still not successful, AA will announce (OGM4): “Sorry,    nobody can answer your call right now. Please try again later, goodby”.    Then drops the call.8. When the DURAFON PRO base station is connected to wired PBX     extension lines, calls addressed/routed to the AA operator can be sent    back to the operator of the wired PBX system. From an administrator    handset, up to 10 keys/digits are allowed to program a specific code in     order to transfer the calls back to the wired PBX. This feature can only    be enabled and pre-programmed by an administrator handset (Handset    ID 10 or 11). Consult with the wired PBX manual for operation instructions    and correct key sequence for transfer calls to the operator from an     extension.             00 00      Auto-Attendant (AA)            3. It is recommended to order from the local phone company Hunt         Group feature for all your lines and not subscribe to the Call Waiting          feature.
48Advanced OperationsNotes:1. Intercom calls are not routed by Auto-Attendant.2. Routing messages OGM2,3,4 and 5 are not user programmable.3. The timeout is 5 seconds for entering extension number.4. The calls can be routed to either a Handset ID or an extension      number of the wired PBX system, There can be only one operator      for the AA, which is either an DURAFON PRO handset or the wired     PBX operator.   st nd5. Call routing is at most 2 hops. That is, if both the  1  and th 2    handsets do not answer, the call will be terminated if the operator     does not answer.  AA Configuration by Administrator  Change AA Parameters:   1. Administrator can change the following AA settings:    a. Record/playback new main greeting message.    b. Set number of rings before AA picks up a call.    c. Turn on/off the AA line-by-line.    d. Set Designated Handset ID for AA disabled line(s). Either the         Designated Handset ID or the Group ID can use that particular line          for incoming and outgoing calls. Which means this specific line(s)        will be dedicated to a particular handset (Handset ID 10-99) or a         calling group (Group ID 01-07).    e. Designate an operator, the handset which would answer un-routable        calls or when the caller chooses “Operator” when prompted.a. From an administrator handset (Handset 10 or 11), press           (Right softkey).    b. Press number   , this will enter administration menu.    c. Press    , handset enters AA setting menu.           i. Press     and follow instruction to record new greeting message.          ii. Press     to playback the current greeting message.         iii. Press     to set number of rings before the AA picks up a call. Use               Up/Down arrow to choose between 2 and 9 rings.       Menu9 3123
Notes:1. Only administrator can change AA settings.2. Because AA setting is stored on the base station, the handset must    be in range with the base to make changes.3. The maximum recording time for the greeting message is 128     seconds.4. Allowing each line’s AA to be turned on or off separately is useful if    different lines are used for different purposes.5. When AA is disabled, the line can be dedicated to either an      individual Handset ID or a Group ID.6. The operator can be any individual handset or a group; it doesn’t    need to be an administrator handset (Handsets 10 and 11).7. The minimum number of rings before the AA picks up cannot be     lower than two for the purpose of receiving the Caller ID message.49Advanced Operations     iv. Press    to turn AA On/Off. This can be done separately for each           phone line by using Up/Down arrows to scroll through Line 1 to           Line 4, and press     or   softkey to turn AA On/Off.If turning           off the AA may be useful when:                 The line is not used by a group of people.                 External answering machine is to be attacked to the line.      v. Press     and select from the following two options to set Operator           for AA:                 “Handset” : assign a specific handset as operator by entering a                   two-digit handset ID (default=Handset 10) as operator for all                   calls addressed to the operator when AA is on, or                 “PBX” : transfer calls to be answered by the operator back to the                   designated wired PBX operator. System administrators must                   know the proper programming and “call transfer” feature code                  (available from the user manual of the wired PBX system) in                   order to perform this function correctly.                                    The following example is the instruction to route a call back to                   the brand N’s PBX system by pressing “Flash-7-0-1-8-3-0”,                   where a Flash key is pressed followed by the call transfer code                  “70”, then enter the extension number “1830” immediately.                  Confirm the set up by press     using the (Left softkey).               4 On Off  5SAVE
50Advanced Operations  1. Line dedication function can be performed by administrator handsets    (ID 10 and 11) only.2. By default all incoming calls will ring all handsets .3. With the administrative handset, press     for    Line Dedication setting.4. It will first show Line 1 and status. If you wish to dedicate line 1 to a    specific handset or group, you need to press   . To dedicate lines 2-4    use             or             scrolling key on the  keypad.5. After choosing a line, it will show      and     , when choosing       , you need to enter the handset ID or group ID for extension    number. If you choose     , it will go back to Line setting menu.    Notes:    1. When entering Line Dedication setting, it will show line and status.        If line is already dedicated to a specific handset or group, it will        show the handset or group ID behind the line. If line isn't dedicated        to a specific handset yet, it will show “ALL HS” behind the line.     2. When setting Line Dedication, make sure the handset or group ID        is correct to avoid losing calls sents to an DuraWakie handset  or        invalid ID.   3.Handsets dedicated to a port will also receive calls from non-       dedicated line as well as the handset’s dedicated line. Use Line        Dedication for a group on other lines to further manage calls.    1. Press                          while the phone is in standby to enter Line    Select menu.2. Use            or             to switch between On and Off, default = Off.3. If set to On, when pressing  or entering a phone number followed    by pressing     Key, the handset LCD display will show “Select Line”    followed by available lines (1~4). Select from one of the available lines    i.e. press     to select line 1 and press      to select line 2.4. This feature is also supported when selecting a second line during call    conferencing.    Line DedicationOutbound Line Selection (For DuraFon PRO only)MENU          9          2          2OKYES NOYESNOMENU 5 8TALK1 2   TALK
51Advanced Operations 1. There are two system parameters that can be changed by the    administrator: clear (de-register) handset ID and set the next handset    ID to be assigned by the base.2. From an administrator handset (Handset 10 or 11), press  (Right softkey).3. Press number      , this will enter the administration menu.4. Press number      , handset enters System setting menu.    a. Dial tone:         Press     to set up the dial tone to be either “Tone” or  “Pulse” . Press             to choose “Tone” or press     to choose “Pulse”.    b. Flash time:        Press     to set up the flash time from 100ms, 200ms, to 900ms (9        levels to choose from.) For example, press     if the desired flash        time is 200ms. Default flash is 600ms.    c. Line Detect:        Press     to set up the line detect to be either “On” or “Off” Press          to choose “On” or press     to choose “OFF”. Default is ON .    d. Clear Handset ID:        Press     and enter a two-digit Handset ID when prompted to clear        this ID for later assignment.    e. Set next Handset ID to be assigned:         Press     and enter a two-digit Handset ID when prompted. This is        the ID that will be given out by the base to the next handset        registering with the base.5. Press number     , handset enters Line Setting menu.    a. Enter Base ID(00~07) to access base.    b. Press     to enter Broadcast setting.        i. Press          or           to select L3 or L4 (the status of setting will be            displayed on  LCD)       ii. Press   to enter the setting mode, and the base ID will be           displayed on LCD.      iii. Press   (Left softkey) to enable the broadcast function. Press              (Right softkey) to disable the broadcast function.               Change System and Line Settings by Administrator  MENU    9111 222345211 2CHANGEONOFF
  1. You can store up to 90 entries in the phonebook. Each entry can      contain a phone number or handset ID (up to 28 digits) and a name     (up to 14 characters).    Re: For DuraWalkie, each entry can store 2 digits handset ID or Group           ID. 2. To access phonebook, press   followed by  or          or              scrolling key when handset in standby mode.3. To add a new entry:    a. Press  softkey.    b. Enter a phone number when LCD prompts “Number?” Use         softkey to delete the last digit entered.  Press    when        completed.     c. You will then be prompted to enter a name for the phone number just        entered.          Phonebook Operations MENU 2  ADD DELETESAVE 52Advanced Operations    Re: L3 and L4 can be setting as two broadcast lines, repeated nd           above items for setting 2  broadcast line.     Notes:    1. De-registration by the administrator will disable a handset's ability        to use the base station to make or receive phone calls. This also        frees up the ID for future registration.c. Press     to enter Line dedication setting.     i. Select base's line and press handset      (Right softkey).    ii. Line Dedicate confirm:         Press    (Right softkey) to go back Line Setting Menu.        Press     (Left softkey) then enter extension number.2OKNO YES        (1) Press  softkey to enter a phone number without a name.               All records without a name will be placed on top of the list, in the              order they are entered.        (2) To enter the name, press the corresponding keypad number one              or more times according to the order of the character on the key.          (3) Use  softkey to delete the last character entered. When              completed, press  softkey to confirm your selection.SAVE  DELETE  SAVE        iv. After setting broadcast, press    (Left softkey) to enable the AA.           Press    (Right softkey) to disable the AA.ONOFF
53Advanced Operations4. The entries are alphabetically sorted and stored as a list in an    ascending order (A to Z) from the top of the list.    a. If the phonebook is entered from the menu, the first entry displayed        is from the top of the list.    b. If the phonebook is entered using the           arrow, the first entry        displayed is from the top of the list.    c. If the phonebook is entered using the           arrow, the first entry        displayed is from the bottom of the list.nd5. The first line of LCD display shows name and the 2  line shows the    phone number. If the phone number is longer than 14 digits, press      softkey and select Option 3 to view the complete number.6. To search for a record:     a. Use          or          scrolling key to enter the Phone Book mode.      b. Press a key that corresponds to the first character of the name you        are looking for.OPTION Notes:     1. When entering a phone number, the cursor automatically advances         to the next digit field. Use           or           scrolling key to move the         cursor backward or forward to insert or delete.     2. When entering a name, the cursor automatically advances to the         next character field if you press a different key for the next         character. If you need to enter consecutive characters from the         same key, you can wait for the cursor to advance or use          or           scrolling key to move the cursor backward or forward manually.         Also use          or          to move the cursor to insert or delete.    3. By default, all letters are entered in the upper case. Use the      key        to toggle between upper and lower cases.    4. A “Pause” entry represents a 2.8 second delay in dialing the        following digits, which is useful when calling a sequence of        segmented numbers (e.g., access code, credit card number, auto-        attendant entries, etc.) Pause is entered by pressing the * key         twice (LCD displays P).        Entering pause twice (PP) will result in 5.6 seconds pause in the        dialing.
54Advanced Operations        8. To edit phonebook entry:    a. Use          or          scrolling key or the alphabetical search method to        locate the record to be edited.    b. Press   softkey to enter editing menu.    c. Press   to edit the designated phone entry. 9. Dial from display:     a. Press     or Intercom to dial the phone number or Handset ID         displayed.   OPTION2TALKOPTION  41TX ALL  TX ONE  10. To transfer (cloning) phonebook:      To transfer phonebook, both parties have to enter the phonebook        transfer mode firstly by following below:      a. Press    follow by     or          or          scrolling key when          handset in phonebook mode.       b. For phone sending party, press     to enter sending mode.            i. Either press   (Left softkey) to transfer all phonebook               entries to another handset(s).           ii. Or press     (Right softkey) to transfer one entry to another               handset(s).          iii. Press 2-digit handset ID or group ID, then select all phonebook               entries or one entry to be transferred.               Re : “00” means all handsets           iv. During phonebook transferring, LCD shows “Sending” and 2-               digit countdown on the LCD to indicate the phonebook numbers               which are waiting for sending.      c. For example, you are looking for “EnGenius”, and then press the     number   once.d. Use          or          scrolling key to locate the exact record you are     looking for . 3  7. To erase phonebook entry:    a. Use          or          scrolling key or the alphabetical search method to          located the record to be erased.    b. Press    softkey to enter editing menu.    c. Press     to erase the designated phone entry.    d. LCD shown “Are you sure?” Press Yes to double confirm your change.OPTION1
c. For phonebook receiving party, press    to enter receiving mode.     i. When entering the receiving mode, LCD shows “Ready”.    ii. Start to receive phonebook, LCD shows “Get phonebook from        Ext. # : xx” .    iii. A beep emitted when receiving each phonebook.   iv. When the phonebook receiving, 2-digit countdown on the LCD         to indicate the phonebook numbers which are waiting for         receiving.        Re: The phonebook transfer through the wireless interface, it                may partially miss transmission by interference.2 55Advanced Operations  1. DuraFon PRO and DuraWalkie both have the broadcast function, each    can broadcast another handset without going through the base station,    as long as the handsets are connecting. However, when setting up the    multi-base, the broadcast feature may not be available due to the    coverage range. In that case, you can use the function of “Broadcast    through PBX” to broadcast. 2. From an administrator handset (Handset 10 or 11), press        (Right softkey).3. Press number     , this will enter administration menu.Broadcast through PBXMENU9    Notes:    Character Table:Key13580#Key*2479Characters and Orders*' + , .   ( ) & 1DEF3JKL5TUV80Characters and OrdersA B C 2GHI4PQRS7WXYZ9Toggle case when incharacter editing* P (Pause) when in  number editingSpace  when incharacter editing# when in number   editing
56    a. The greeting message: “Please enter the extension number” .    b. If there is no entry after 5 seconds, the broadcast will be enabled to        all handsets.  Note:    1. Line 3 and or 4 can be reserved for broadcast function.    2. For a single broadcast port; reserve Line 3 for broadcast and         line dedicate (see pg. 46) Line 4 to a non-existent handset (ie:        99).    3. A base unit configured with a single broadcast port Lines 1 and         2 may be used as standard telephone ports or lines.    4. For dual broadcast ports; reserve Line 3 and 4 for broadcast and         line dedicate Lines 1 and 2 to a non-existent handset (ie: 99)    5. Broadcast is limited to 30 seconds.Advanced Operations4. Press number     , handset enters Line setting menu.    a. Enter Base ID (00~07) to access base.    b. Press      to enter Broadcast setting.            5. When calling through the line 3 or 4, the caller will be prompt ed by the    greeting message to enter a two-digit extension number ( “01” ~ “07”      for Group ID: “10” ~ “99” for Handset ID: “00” for all).  21i. Press          or           to select L3 or L4 (the status of setting will be                displayed on  LCD)           ii. Press   to enter the setting mode, and the base ID will be               displayed on LCD.          iii. Press   (Left softkey) to enable the broadcast function. Press                  (Right softkey) to disable the broadcast function.          iv.  After setting broadcast, press   (Left softkey) to enable the AA.               Press   (Right softkey) to disable the AA.               Re: L3 and L4 can be setting as two broadcast lines, repeated nd                      above items for setting 2  broadcast line. CHANGEONOFFONOFF
Menu OperationsDuraFon PRO57Main menu1.KeyGuard2.PhoneBook3.Call Logs4.Sound5.Settings6.Registration7.Unused8.Multi-base9.AdminSub-menu1.Dialed2.Received3.Missed1.Ring Volume2.Ring Tone3.Key Volume4.Key Tone1.Dial Prefix2.Group Select3.Base Select4.Clear5.Naming6.Contrast7.Backlight8.Line Select9.PBX Options0.Language#.PA On/Off  .Phone ResetSelect Mode:1.Add BaseAdmin:1.System2.Line Setting3.Auto AttndntAdvanced Operations1.Register2.Deregister3.Remote REG
581. Press    (Right softkey) while the phone is in standby.2. Press     to lock keypad (see Key Guard).3. Press     to view, search, erase, edit and transfer the phonebook     (see Phonebook).4. Press     to view the last 10 numbers called, received, or missed.    Records can be erased or edit/save into the phonebook.    a. Press     to view the last 10 phone numbers dialed, starting from the        most recent one. Use          or          to scroll through the list.        i. Press    (Right softkey) for options.           * Press     and confirm to erase the current record.           * Press     to edit and save or save without editing into the               phonebook.           * Press     to view the complete number if the phone number is              longer than 14 digits.    b. Press     to view the last 10 phone numbers received, starting from        the most recent one. Use          or          to scroll through the list.        i. Press     (Right softkey) for options.           * Press     and confirm to erase current record.           * Press     to view the arrival date and time of the call.           * Press     to edit and save or save without editing into the phonebook.    c. Press     to view the last 10 phone numbers received but not         answered, starting from the most recent one. Use          or          to        scroll through the list.        i. Press   (Right softkey) for options.           * Press     and confirm to erase current record.           * Press     to view the arrival date and time of the call.           * Press      to edit and save or save without editing into the phonebook.    d. The two-digit index on the upper right corner of the LCD display         shows the location in ascending order, with 01 being the most recent        call.    e. While viewing any of the three call logs, press     (Left softkey) to        dial the phone number.     MENU 1231OPTION 1232OPTION1233123DIALOPTIONNotes:  1. Only phone numbers are stored in the three call logs. Intercom         calls are not recorded.   Advanced Operations
    5. Press     to set sound-related settings:    a. Press     to select ringer volume: Use         or          to scroll through 6        options: Low, Medium, High, Vibrate, Vib and Ring, Off. Press         (Left softkey) to save selection. Default = High.    b. Press     to select ringer tone: Use         or          to scroll through 4        options: 0, 1, 2, and 3.  Press    (Left softkey) to save selection.        Default = 0.    c. Press     to select key volume when a key is pressed: Use           or                          to scroll through 3 options: High, Low, and Off. Press          (Left softkey) to save selection.  Default = Low.      d. Press     to select key tone: Use          or          to scroll through 4          options: 0, 1, 2, and 3. Press   (Left softkey) to save selection.        Default = 0.6. Press     to change handset settings:    a. Press     to set dialing prefix:             i. Use          or          to scroll and select to turn on or off the dialing               prefix feature. Default = Off.           ii. If “On” is selected, the handset is prompted to enter a prefix, up to                14 digits.            iii. Use     (Right softkey) and          or          to edit prefix.          iv. When this feature is turned on, the LCD will prompt the user on                each outgoing phone call except during redial or dialing by               pressing the    key first whether to use the dialing prefix. The               current  prefix is also displayed.  Press     (Left softkey) or                (Right softkey) to add the prefix to the beginning of the number.           v. This feature is useful for access code, calling card, and credit                 card calls, etc.         b. Press to Group Select: see Handset Group Subscription.         c. Press to set or turn Base Select on or off. Default = Off.        See Base Select.    2.  Caller ID service is required from your local phone company in         order to receive phone numbers, names and time stamps on         incoming calls. The Received and Missed Call Logs will register         no incoming calls if Caller ID service is not available.    3.  The Caller ID feature may not be supported by all PBX or Key          systems’ analog ports, check with your equipment provider.41SAVE23SAVE4SAVE51DELETETALK YES NO23SAVE59Advanced Operations
    d. Press   to clear call logs and phonebook:             i. Press   and confirm to delete the entire phonebook. ii. Press   and confirm to clear the three call logs (Called,                         Received, and Missed).    e. Press     to edit the name of Custom or Line:        e-1. Press   to change the power-up LCD display to show, e.g.,         customer name or other greeting message:         e-2 Press   to change the name of line, when calls coming, it will        indicate the calls came from which line.            i. Use         or          to move the cursor backward or forward to insert               (to the left of the cursor) or delete (the character above the cursor,               or left of the cursor if cursor is on the right of the last character).           ii. Enter characters using the Character Table and method discussed               in the Phonebook section.          iii. When finished, press     (Left softkey) to save change.     f. Press     to change LCD display contrast:            i. Use          or          to scroll through values 1 to 12. Pick one that is               most suitable to you. Default = 10.           ii. Press     (Left softkey) to save setting.    g. Press     to change the LCD backlight:            i. Use          or          to scroll through options: On, Off, and 8 Seconds.                 Default = 8 seconds, meaning that the backlight is always on.                 The 8-second option will turn off the backlight after 8 seconds of               inactivity.           ii. Press    (Left softkey) to save setting.    h . Press     to change the Line selection:            i. Use         or          to scroll through options: On or Off. Default = Off,               meaning that you can not select the other available lines to dial.            ii.Press    (Left softkey) to save setting.    i. Press  9  to change the PBX options:            i. Press    soft key to edit a PBX feature to be memorized and key                in the name of the PBX features just like editing a phonebook entry.           ii. Press    (Left softkey) to save setting.          iii. Press    and     following by entering PBX options mode,               you can erase the PBX option.          iv. Press    and     following by entering PBX options mode,              you can edit the PBX option.           v. Press   and   following by entering PBX options mode,               4  1  2  51  2  SAVE6SAVE7SAVE8ADD OPTION  1OPTION   2OPTION   3  SAVESAVE 60Advanced Operations
61Advanced Operations           Re: To transfer PBX options, both parties have to enter the PBX                  option mode firstly by following bellow:                  For sending party, press     to enter sending mode.                  * Either press     (Left softkey) to transfer all PBX                     options to another handset(s).                  * Or press     (Right softkey) to transfer a specific entry                     to another handset(s).                  * Press 2-digit handset ID or group ID, then select all PBX                     options or a specific entry to be transferred ( “00” means all                     handsets)                  * During PBX options transferring, LCD shows “Sending” , and                    2-digit countdown on the LCD to indicate the numbers of PBX                    options which are waiting for sending.             For receiving party, press     to enter receiving mode.                  * When entering the receiving mode, LCD shows  “Ready” .                  * Start to receive PBX options, LCD shows “Get PBX options                     from Exit. #: x mm x” .                  * When the PBX options is receiving, 2-digit countdown on the                     LCD indicates the number of PBX options which are waiting to                    be received.    Note:    1. Different PBX makers use different analog codes to control PBX         function, like call transfer, call park, etc.; Please refer to your PBX         maker’s manual for this information.    2.  Errors may occur in PBX options and phonebook entries transferred          wirelessly due to interference. Please re-enter entry manually if          problems occur with a entry.    J. Press     to change Language:            i. Use          or           to scroll through options: English, Spanish, and               French. Default = English, meaning the LCD display shows in               English.           ii. Press    (Left softkey) to save setting.   1TX ALLTX ONE20SAVE you can transfer the PBX options to other handset(s).
62Advanced Operations            K. Press    to turn Broadcast On/Off.                    i. Press     (Left softkey) to turn on the broadcast function                        (including the broadcast of handset to handset and base                        to handset).                   ii. Press     (Left softkey) to turn off the broadcast function                       Re: When broadcast setting “Off”, there is an icon indicated                               in the display, side of the battery icon.            I. Press     to make phone Reset.                     i. Press     to clear all setting and return to default (all phonebooks,                        CID logs, handset registration will be cleared).                    ii. Press     to clear all setting but keep handset registration as will.                7. Press    to register or de-register handset: See Handset Registration.                8. Press     to add new bases:            From an administration handset (Handset 10 or 11) to set new Base 01            ~07.            Maximum bases is up to 8. Before adding a new base, the Handset must            be registered in master base (Base ID=00).            A. Press    button on new Base.            B. Use Handset 10 or 11 to Add base: Press                       c. Enter 01~07 (Base ID).                9. Press     to change system and Line setting: See System setting and             Line Setting.#ON OFF12 68 REGMENU 8        19
63DuraWalkieAdvanced OperationsMain menu Sub-menu1.Ring Volume2.Key Volume3.Key ToneSelect Mode:1.Add BaseAdmin:1.System2.Line Setting3.Auto Attndnt1.KeyGuard2.PhoneBook3.Unused4.Sound5.Settings6.Registration7.Unused8.Multi-base9.Admin1.Group Select2.Clear3.Naming4.Contrast5.Backlight6.Language#.PA On/Off  .Reset Phone1.Register2.Deregister3.Remote REG
641. Press    (Right softkey) while the phone is in standby.2. Press     to lock keypad (see Key Guard).3. Press     to view, search, erase, edit and transfer and edit the    phonebook (see Phonebook).4. Press     to set sound-related settings:    a. Press     to select ringer volume: Use           or            to scroll through        6 options: Low, Medium, High, Vibrate, Vib and Ring, Off. Press           (Left soft key) to save selection. Default = High.    b. Press     to select ringer tone: Use           or          to scroll through 4        options: 0, 1, 2, and 3. Press     (Left softkey) to save selection.        Default = 0.    c. Press     to select key volume when a key is pressed: Use           or                       to scroll through 3 options: High, Low, and Off. Press          (Left softkey) to save selection. Default = Low.      d. Press     to select key tone: Use          or           to scroll through 4        options: 0, 1, 2, and 3. Press     (Left softkey) to save selection.        Default = 0.5. Press     to change handset settings:    a. Press     to Group Select: see Handset Group Subscription.    b. Press     to clear phonebook:             i. Press     and confirm to delete the entire phonebook.    c. Press     to change the power-up LCD display to show, e.g.,        customer name or other greeting message:             i. Use           or          to move the cursor backward or forward to insert               (to the left of the cursor) or delete (the character above the cursor,               or left of the cursor if cursor is on the right of the last character).           ii. Enter characters using the Character Table and method discussed               in the Phonebook section.          iii. When finished, press     (Left softkey) to save change.     d. Press     to change LCD display contrast:            i. Use           or           to scroll through values 1 to 12. Pick one that                is most suitable to you. Default = 10.           ii. Press     (Left softkey) to save setting.    MENU121SAVE 2SAVE3SAVE4SAVE1213SAVE4SAVE45Advanced Operations
65Advanced Operations     e. Press     to change the LCD backlight:            i. Use          or          to scroll through options: On, Off, and 8 Seconds.               Default = 8 seconds, meaning that the backlight is always on.               The 8-second option will turn off the backlight after 8 seconds of               inactivity.           ii. Press     (Left softkey) to save setting.     f. Press     to change Language:            i. Use         or           to scroll through options: English, Spanish, and               French. Default = English, meaning the LCD display shows in               English.           ii. Press     (Left softkey) to save setting.    g. Press    to turn Broadcast On/Off:            i. Press   (Left softkey) to turn on the broadcast function                (including the broadcast of handset to handset and base to                handset).           ii. Press     (Right softkey) to turn off the broadcast function.               Re: When broadcast setting “Off ”, there is an icon indicated in                        the display, side of the battery icon.    h. Press     to make Reset Phone:            i. Press     to clear all setting and return to default (all phonebooks,                CID logs, handset registration will be cleared).           ii. Press     to clear all setting but keep handset registration as well. 6. Press    to register or de-register handset: See Handset Registration.. Press     to add new bases:7    From an administrator handset (Handset 10 or 11) to set new Base 01~    07. Maximum additional bases is up to 8. Before adding a new base,    the Handset must be registered in master base (Base ID =00).     a. Press   button on new Base.    b. Use Handset 10 or 11 to Add base: Press        c. Enter 01~07 (Base ID).. Press    to change system and Line setting: See system setting and8    Line Setting.               5SAVE6SAVEON OFF   12 MENU           8          1# 68REG 9
Technical SpecificationsNotes:1. NA = Not Applicable.2. The manufacturer reserves the right to change designs and    specifications without notice.Electrical SpecificationsFrequencyRF PowerChannel Spacing Number of ChannelsModulationMultiple AccessFrequency Hopping RateTDMA Frame LengthNumber of Slots/FrameNumber of Users/CarrierReceiver SensitivityAntenna ConnectorAntenna GainTX Power Control Range Telephone Interface Speech CodingChannel CodingTransmission Data RateUser Data RateDuplexVoice Quality No. of System IDRing SignalAuto-Attendant CodingFlash TimePower SourceCharger Current Charge Time Regulation ComplianceOperating TemperatureStorage TemperatureHumidityDimension without antennaWeightBase Station902-928 MHzPeak: 708 mWAverage: 304 mW200 kHz128GMSKFrequency Hopping TDMA100 per second10 ms84-2< -108 dBm (@ BER 10 )Reverse TNC2 dBi     dBi External (optional)NARJ11 x 48 kbps G.729A8 kbps Convolutional + CRC170.678 kbps128 kbps duplexTime Division Duplex (TDD)TIA/EIA-470B65,53620-50 Hz, 12-90 Vrms8 kbps G.729100-900 ms programmable120V/7V AC/DC AdapterNANAFCC Part 15, Part 68-10 ~ 60 C-10 ~ 70 C20  75 %280 x 215 x 53 mm8.5 x 11.0 x 2.1 inch907 gramsPortable Handset902-928 MHzPeak: 708 mWAverage: 76 mW200 kHz128GMSKFrequency Hopping TDMA100 per second10 ms84-2< -108 dBm (@ BER 10 )Non-standard2 dBi (Long)0.5 dBi (Short)100-708 mWNA8 kbps G.729A8 kbps Convolutional + CRC176.678 kbps128 kbps duplexTime Division Duplex (TDD)TIA/EIA-470B65,536NA8 kbps G.729NA3.6V, 1700 mAh Li-ionBattery500 mA4 hours (from empty)FCC Part 15, Part 68-10 ~ 60 C-10 ~ 70 C20  75 %161 x 58 x 31 mm6.3175 grams x 2.2 x 1.2 inch6662 dBi1.5 dBi
Index672-WAY/INTERCOM, 13, 15,19, 3433-Way Conferencing, 44, 45AAdjusting Receiver (Earpiece) Voice Volume, 38Administrator Features, 22Audio-in Jack, 22Auto Attendant, 47,48,49BBase Select, 45Base Station Features, 21, 22Base Station Installation, 26Battery, 5, 7, 11, 12, 13, 14, 15, 18,  25,   29, 30, 31, 38, 40, 59, 63, 65Battery Recharge and Replacement, 40Battery Strength, 14BROADCAST, 13, 16, 30, 35, 36, 48, 49,    52, 53, 58, 59, 63Broadcast through PBX, 52Broadcasting a group of handsets, 35Broadcasting all handsets, 35Broadcasting an individual handset, 35CCall Conferencing, 20, 48Call Forwarding, 19, 45, 46, 56Call Hold, 18Call in-progress, 14, 40Call Timer, 19Call Transfer, 19, 23, 38, 44, 58Call Waiting, 15, 17, 27, 46, 472Call Waiting with Caller ID, 17Caller ID, 17, 18, 27, 37, 40, 56Cardiac Pacemaker, 4Charger Features, 24, 25DDC In: Jack, 22De-registration, 41, 42, 43, 49Dialing Prefix, 18, 56DND, 17Do Not Disturb (Silent Ring), 39Eemergency, 4Ending a Call, 38Equipment Checklist, 11, 12Expanding coverage, 27Expanding capacity, 28External telephone answering    device, 26FFCC, 5, 8, 9, 65FDA, 4, 5GGroup ID, 15, 16, 19, 35, 47, 51, 53, 58, 59, 64HHandset and Charger    Installation, 29Handset Charging Slot, 24, 25Handset Features, 13, 14, 15,    16, 17, 18, 19, 20Handset Group Subscription,    43, 56, 62
Index68Handset ID, 14, 15, 18, 19, 22,    30, 35, 36, 37, 41, 42, 43, 44,   45, 49, 51, 53, 58, 59, 64Handset Registration, 28, 29,    41, 59, 63Handset to Handset Calls, 34Headset Jack, 13Hearing Aid Users, 4IIC, 8IDLE mode, 15, 30Intercom in-progress, 14interference, 4, 5, 7, 8, 9, 29, 52, 58KKey Guard, 39, 55, 62Key-guard, 18LLine Dedication, 47, 49Line Indicator, 14Line Selection, 20, 47, 57Lithium-Ion (Li-Ion), 7MMaking a 2-Way/ Intercom Call, 34Making a Broadcast, 35Making a Telephone Call, 34MENU mode, 30Multi-base setups, 27Multiple handsets registration, 16Mute, 18, 39NName Tagging, 17Ooutdoor antenna, 12, 21, 22PPBX option, 20, 57, 58PBX option transfer, 20Phonebook, 14, 18, 49, 50, 51,    52, 55, 57, 59, 62, 63Placing a Call On Hold, 38Power Outage, 5RReceiving a Telephone Call, 36Receiving an Intercom Call, 37Redial, 17, 36, 56Registration, 8, 22, 28, 29, 30,    31, 41, 42, 43, 49, 59, 63Registration Key, 22REGISTRATION mode, 22, 30,    41, 42Regulatory Information, 8REN, 8Reset Button, 22Restores base station to factory    settings, 22Reverse thread connector, 21Ringer / Vibrator, 15, 16, 36, 37,    39, 56, 62RSSI, 14SSafety Instructions, 4, 5, 7Spare Battery Charging Slot,    24, 25Speaker phone, 14, 15, 34,    35, 37Speed dial, 34
TTALK mode, 16, 30TALK/SPEAKERPHONE, 15Technical Specifications, 65Text Envelope, 14Text Messaging, 14, 19, 59, 60, 63, 64Three Call Logs, 17, 55, 57To Call back from Call Log, 40To View Missed Call(s), 39Transformer, 26, 29Two-Digit Address Index, 14, 55VVibrator, 16Volume, 16, 19, 30, 38, 39, 59, 60, 64WWall mounted, 31Index69
P/N:6709A0243140Literature order number: 120-0009-01
W148mmH210mm6709A0554040SP-922PRO V22011/06/13 ChrisAustinRennierH.C MeiAllen商業設計工程師機構設計工程師該專案經理人或業務之內容核准該專案經理人或業務之內容核准部門主管檢圖INSTRUCTION MANUAL 148*210mm (SP-922PRO V2) (EN) LFP

Navigation menu