Sendo SND331 S331 User Manual S331 User Guide
Sendo International Ltd S331 S331 User Guide
UserManual.wiki
>
Sendo
>
SND331 User Manual
Users Guide
Navigation menu
Upload a User Manual
Namespaces
Wiki Guide
HTML
PDF
Info
Views
User Manual
Discussion / Help
Navigation


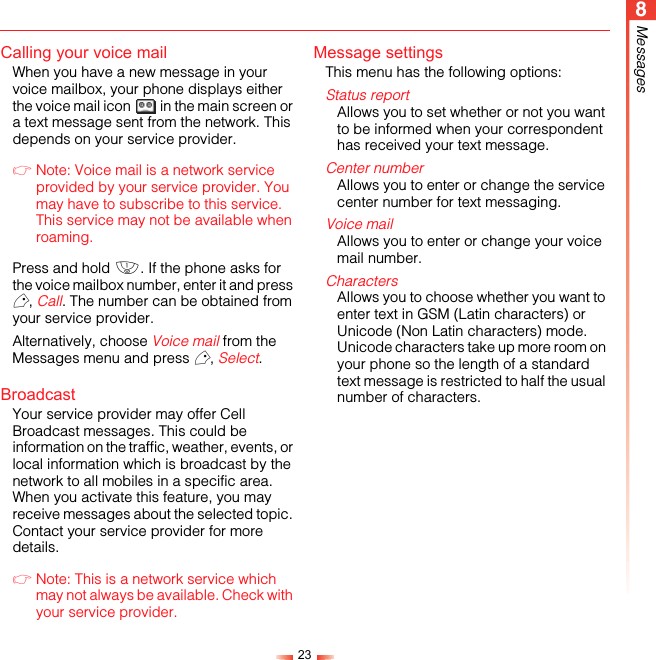
![228MessagesPredictive text inputTo save time when you are writing a text message, your phone has a built-in dictionary feature which uses the letters that you are typing to complete the word.This input method allows you to simply press each key once. For example, to write the name "Ross", press 7, then 6, then 7, then 7 just once each.The word may change as you type, but don’t worry about what is on the screen until you have finished the word. Sometimes different words share the same sequence of key presses. If the finished word is wrong, press 0 to scroll through other possibilities. If the word that you are looking for is still not there, press * repeatedly to change the text mode to β or α and enter the word again.After you have completed a word, press the space key # to move on to the next word. Press and hold # to pick a symbol to insert from the character table (see the Entering symbols section below).Some intelligent punctuation (including full stops, hyphens and apostrophes) are also available on 1. The punctuation mark is completed when you enter the next keystroke.Entering numbersTo enter a number in upper case or lower case text input mode, simply press the number key repeatedly until the number is displayed.To enter a number in predictive text input mode, press the number key and then scroll through the characters (by pressing 0) until the number is displayed.If you have multiple numbers to enter, it is often more convenient to use the numeric input mode. Press * repeatedly to change the mode to θ. Now whenever you press any of the number keys, only the number is entered.Entering symbolsFor all input modes, a long press on # displays a table, similar to the one below, showing all the symbols available to you:To enter a symbol:1Using the : and ; keys, scroll to the row containing the symbol you want.2Press the numeric key (1 to 9) to select the symbol..,-!?@():&‘"\/_[];$%+* =~<>#£¥e¤` À ´ ª§ÿŸ¿ìà äæçËéèÄÅÉòñÆ123456789](https://usermanual.wiki/Sendo/SND331/User-Guide-400797-Page-24.png)