Senseonics orporated 3401 FG-3300-01-001 User Manual
Senseonics Incorporated FG-3300-01-001
UserManual.wiki
>
Senseonics orporated
>
3401 User Manual
user manual
Navigation menu
Upload a User Manual
Namespaces
Wiki Guide
HTML
PDF
Info
Views
User Manual
Discussion / Help
Navigation


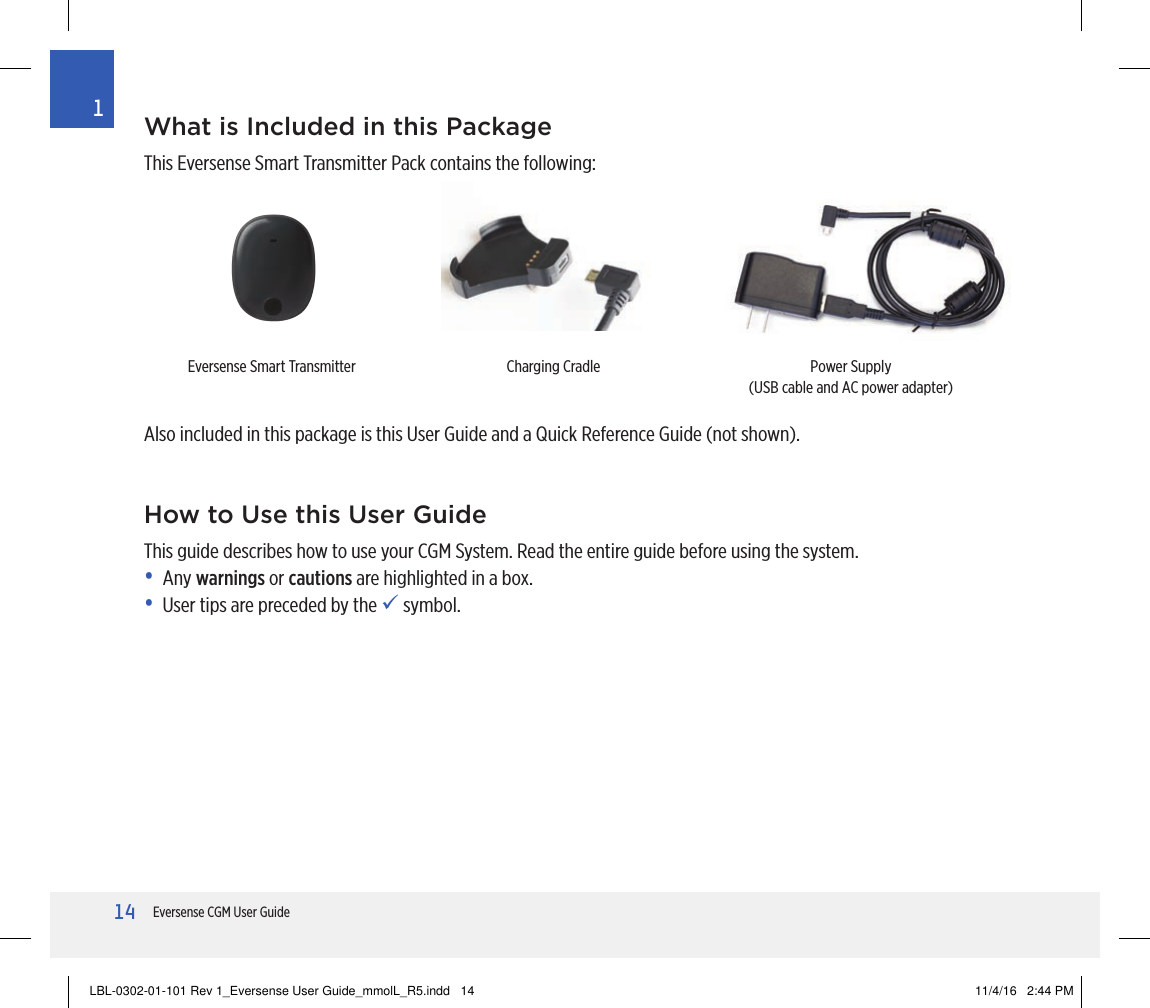


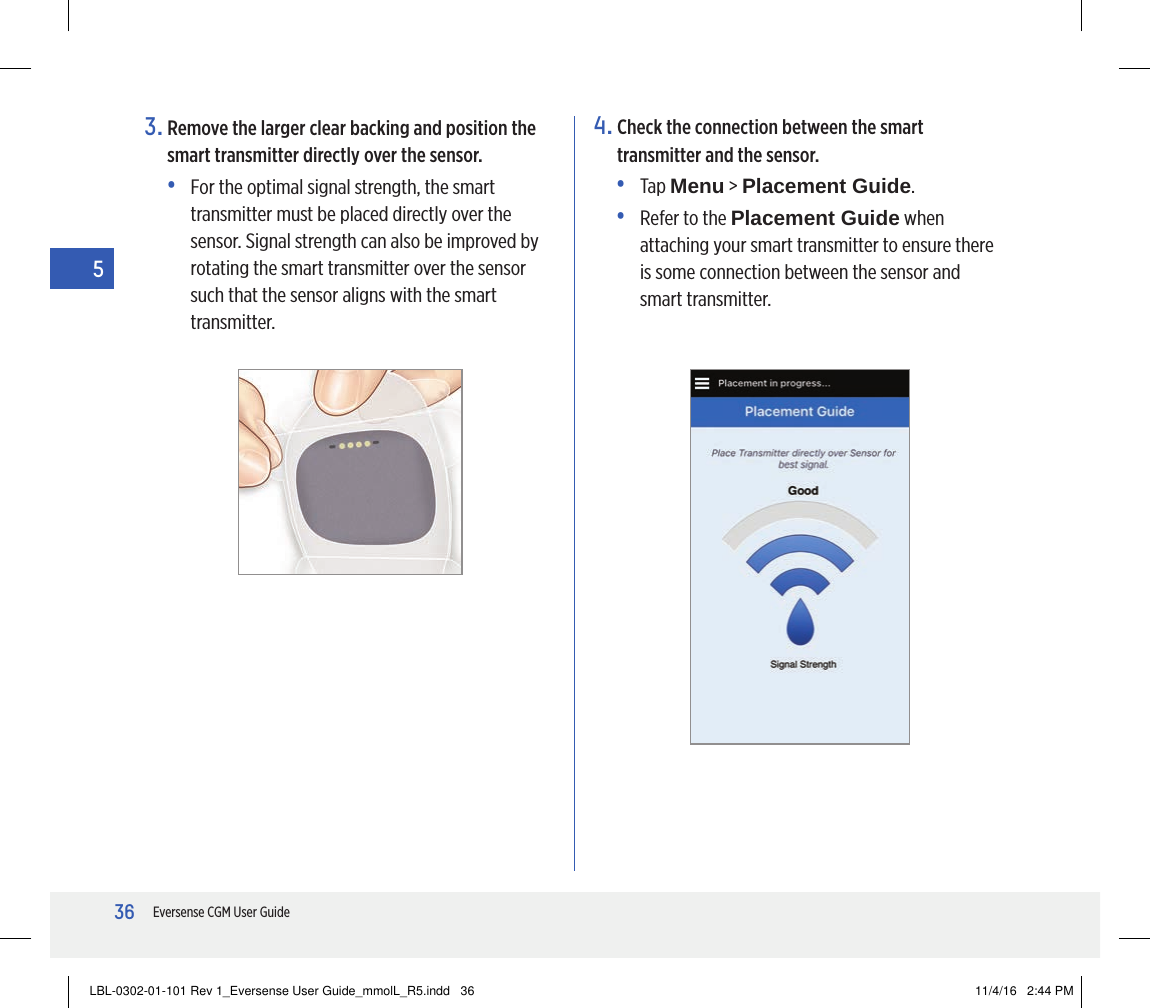
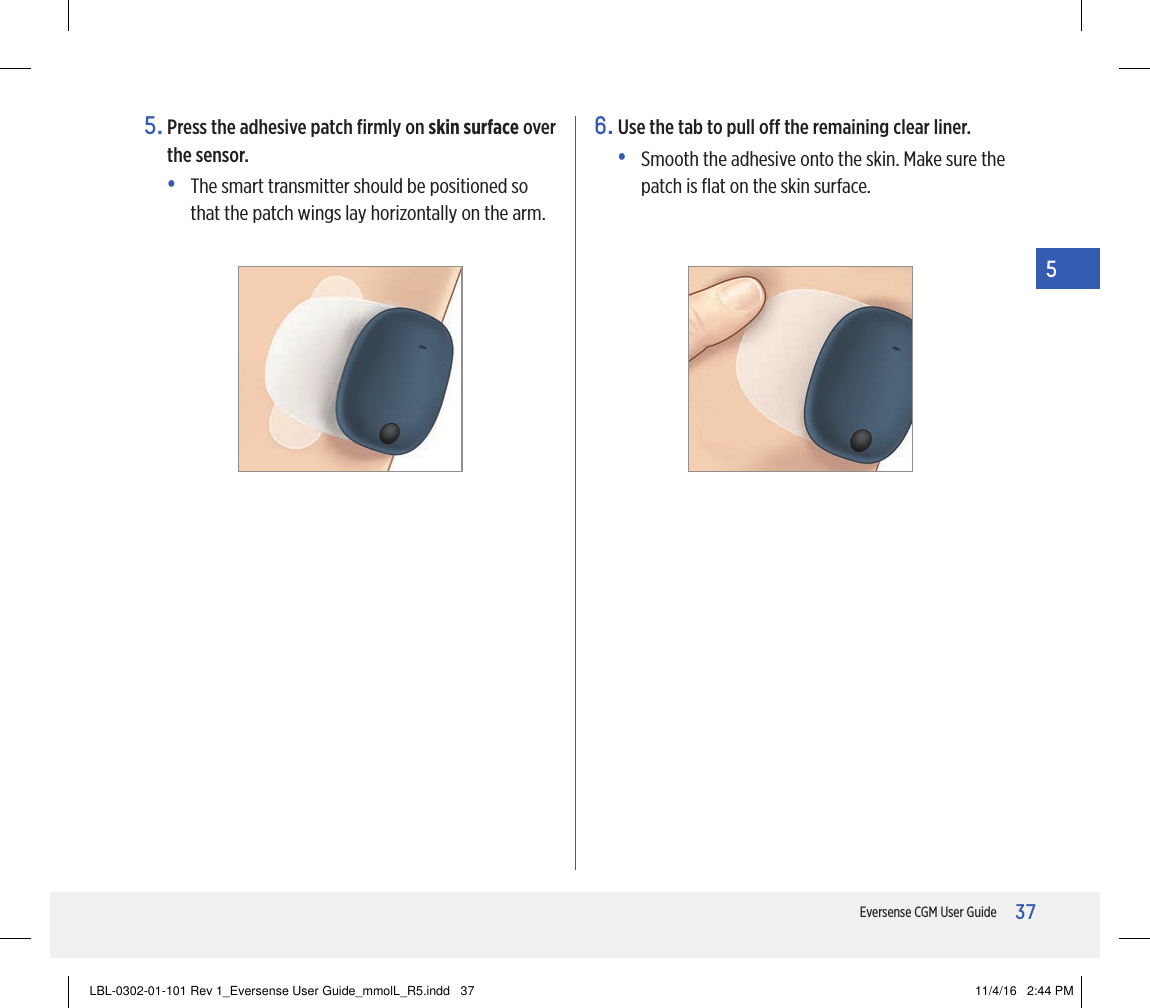
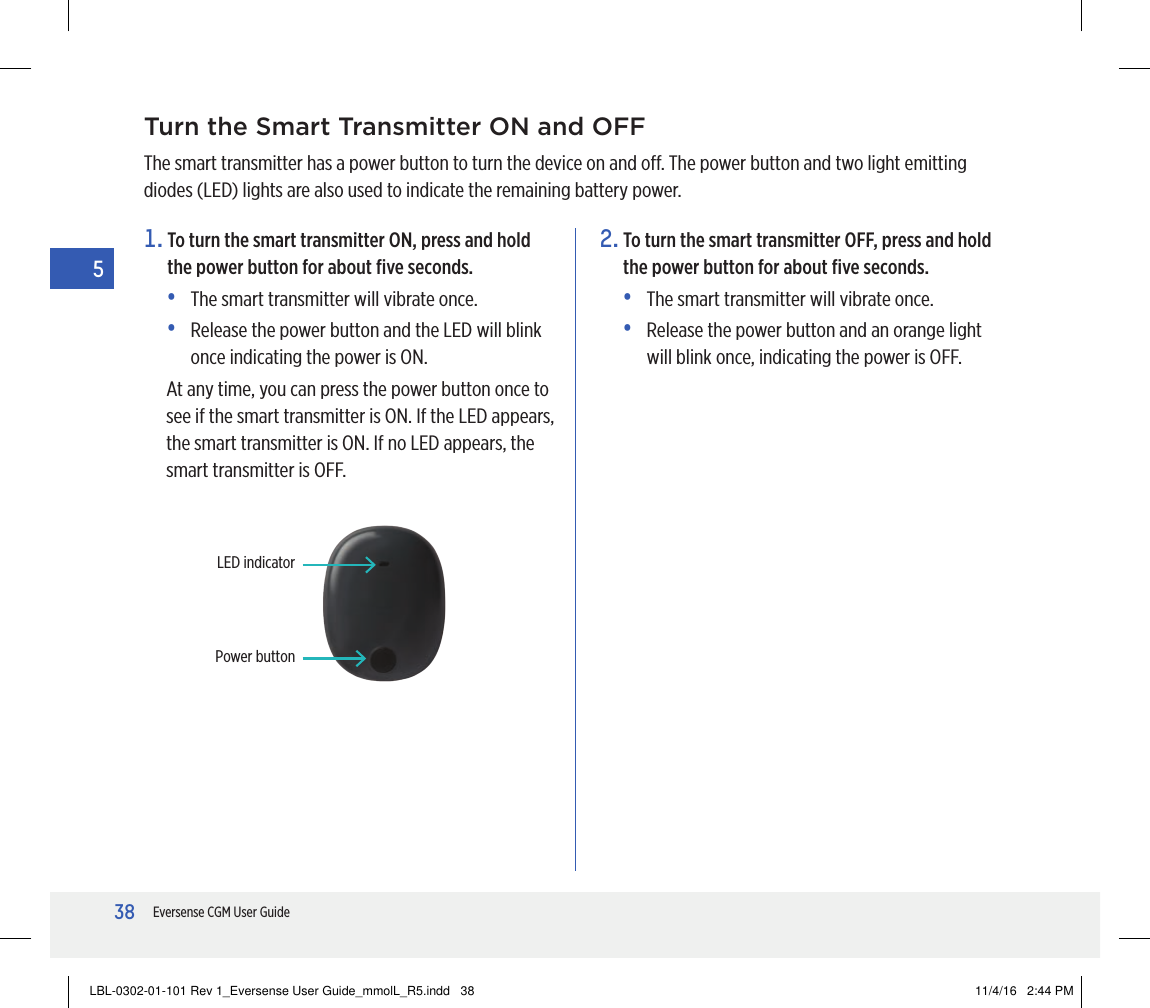
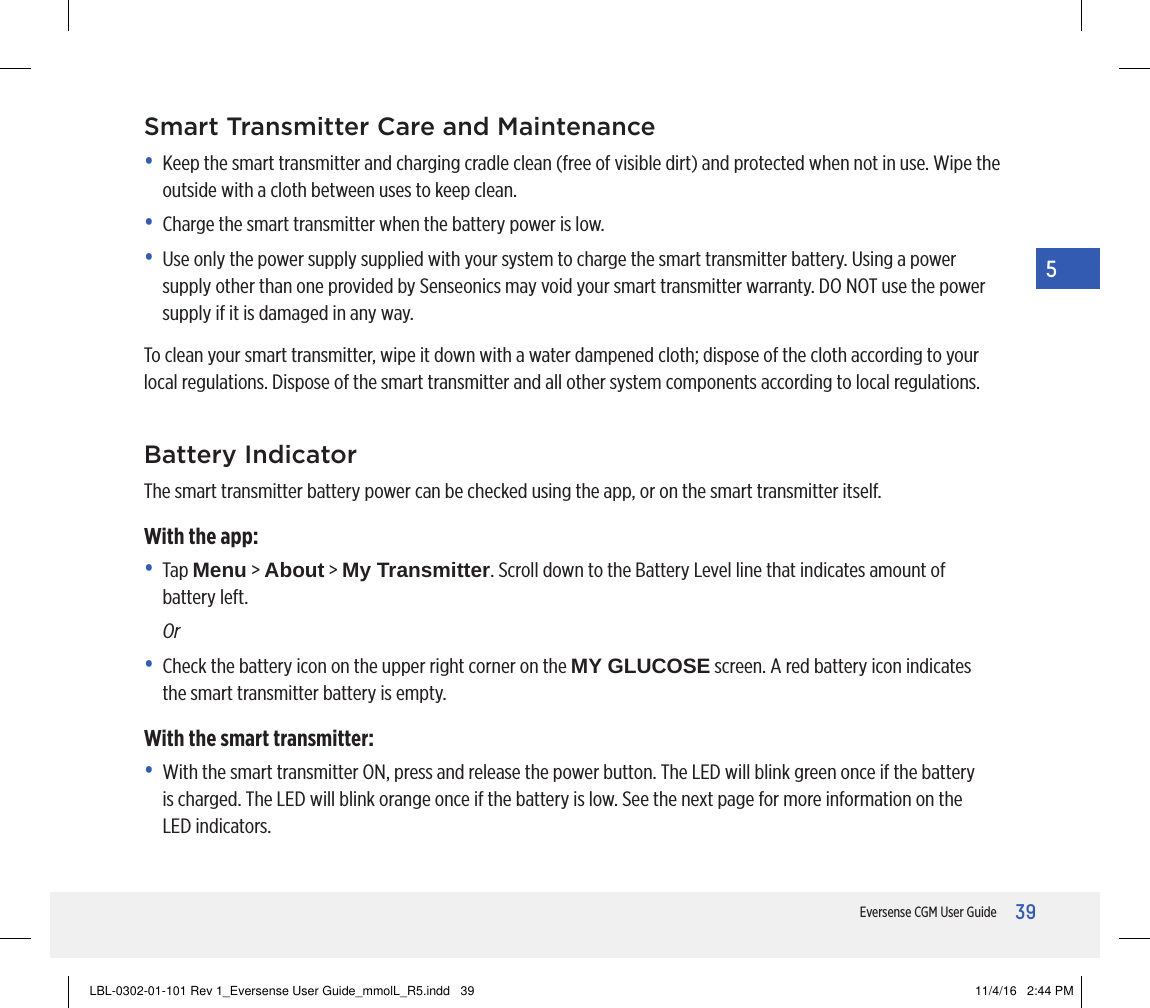


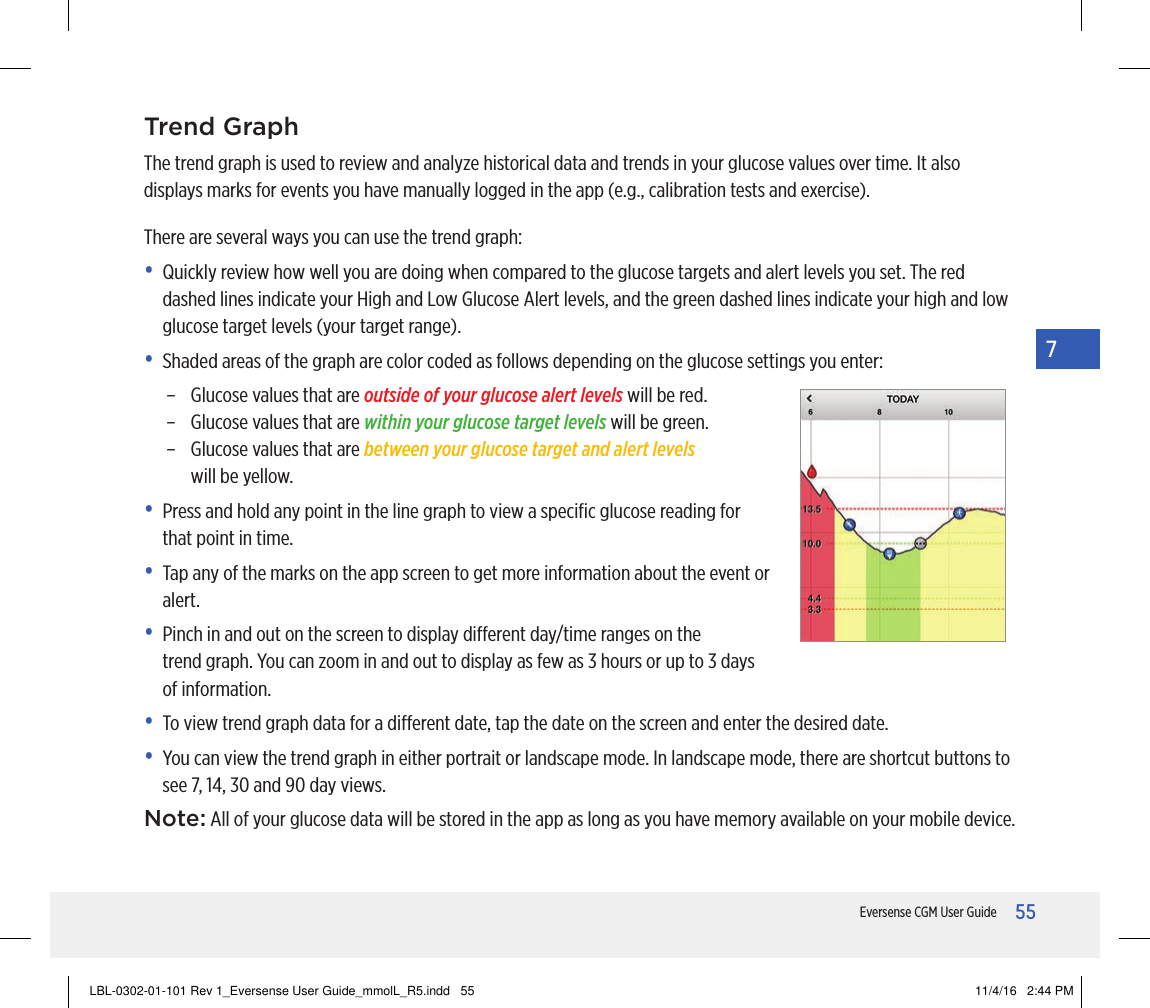
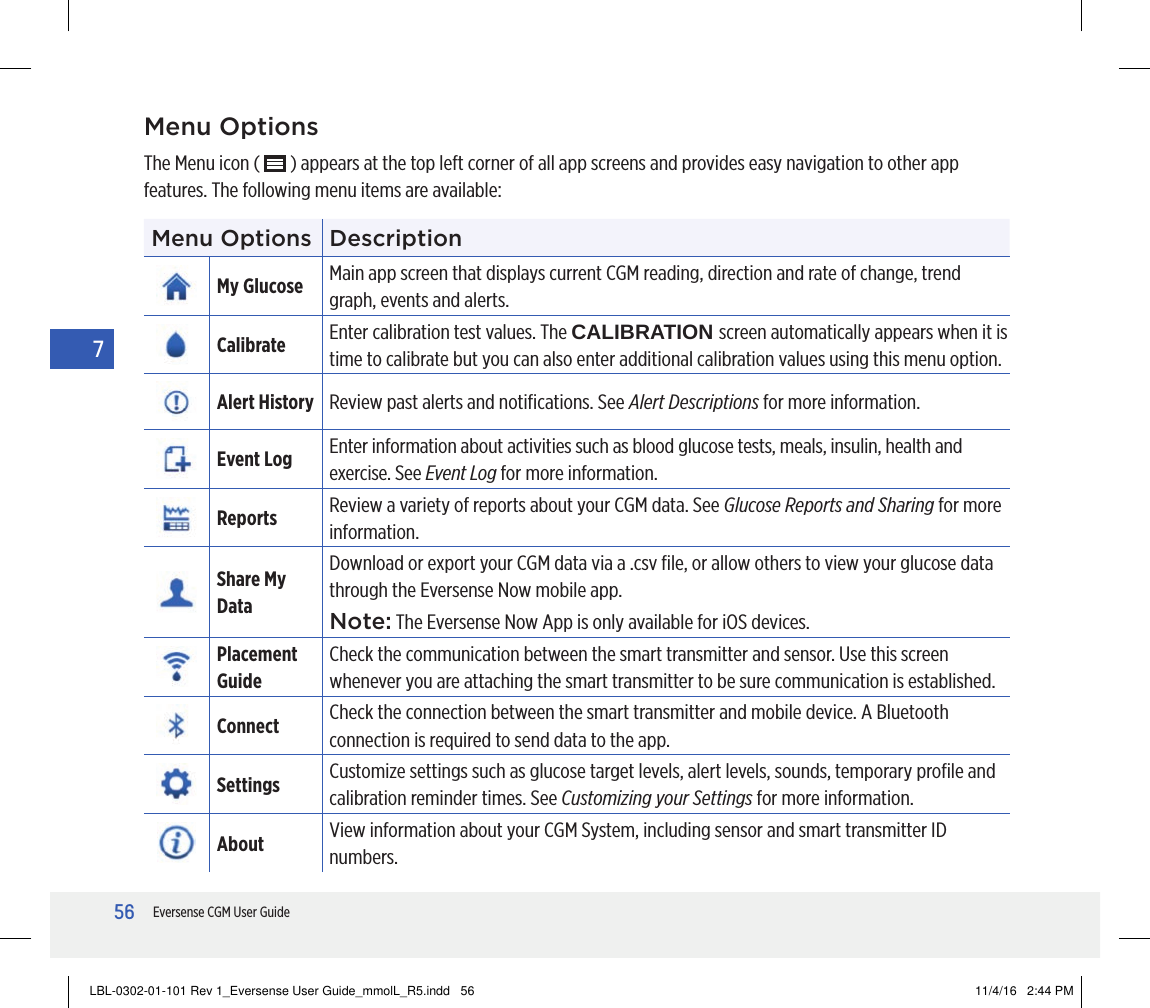
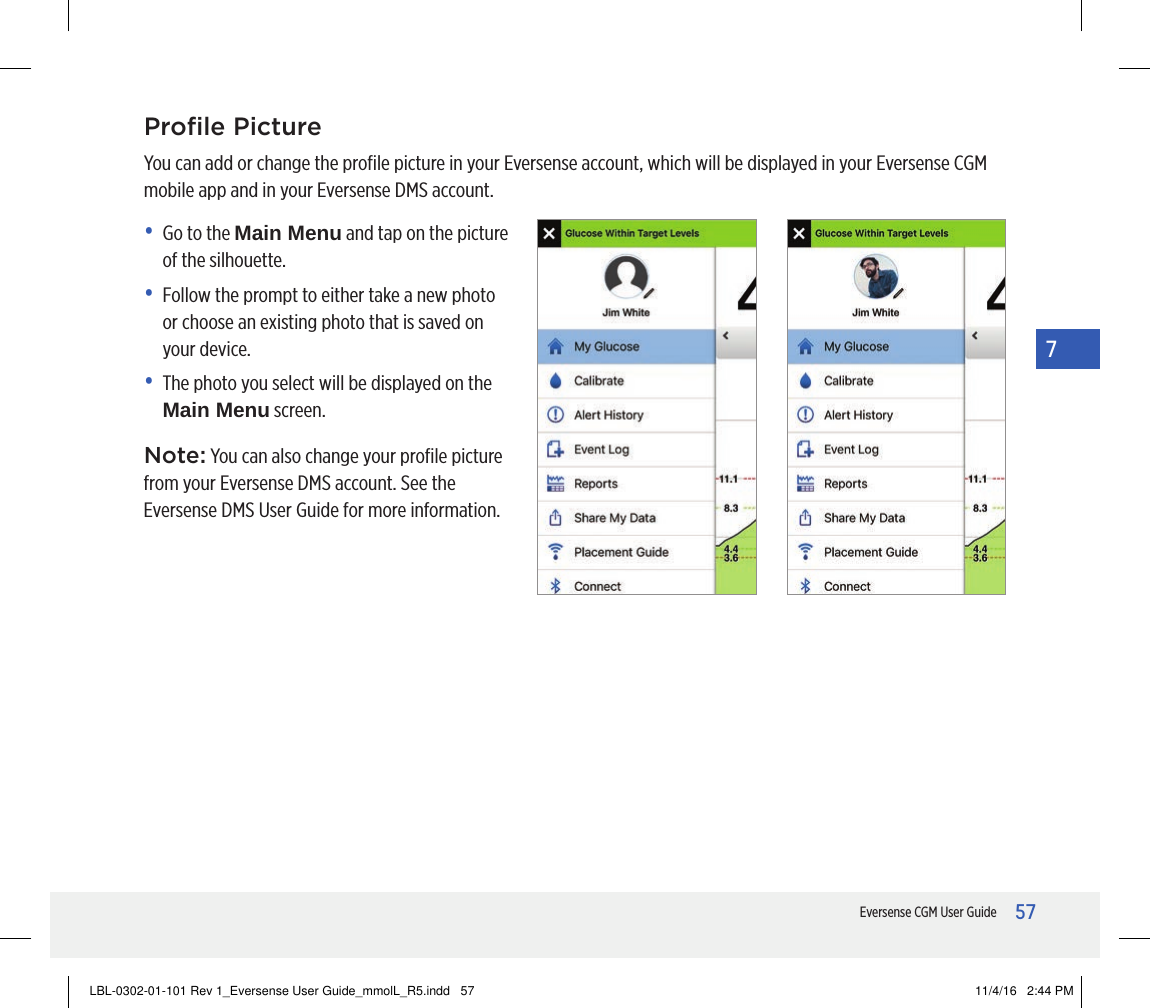


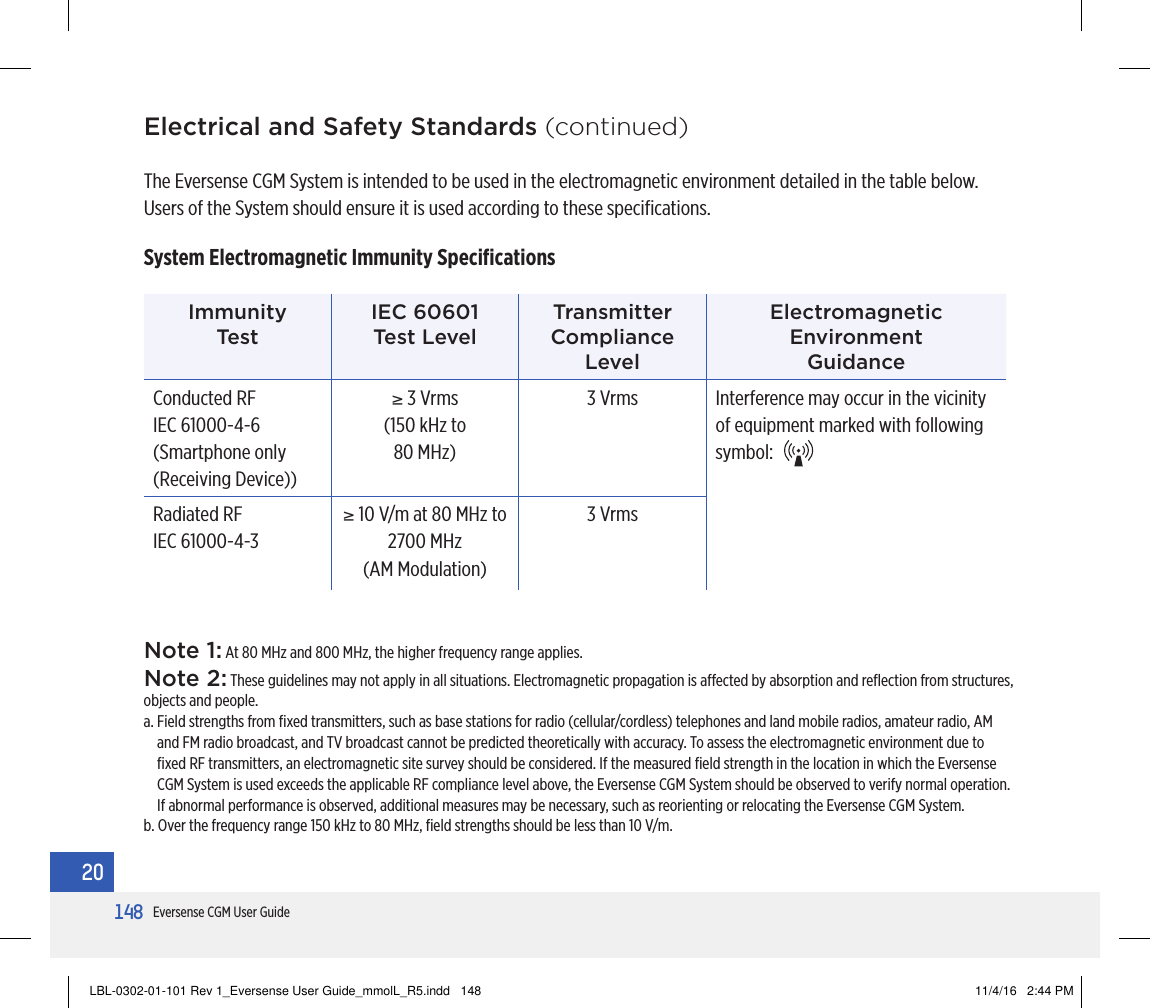
![155Eversense CGM User Guide203. Senseonics’ obligations under the limited warranty.Your sole and exclusive remedy, and the sole and exclusive obligation of Senseonics under this limited warranty is to repair or replace, at its sole discretion, without charge to you, any defective Smart Transmitter, provided that the defect arises and a valid claim is received by Senseonics within the Limited Warranty Period. You must return the defective Smart Transmitter to an authorized Senseonics Customer Service Department in an appropriate shipping container that will adequately protect the Smart Transmitter from further damage, accompanied by your name and address, the name and address of the physician from whom you obtained the Smart Transmitter, and the date and the ID number of the Smart Transmitter. To find out where to send the Smart Transmitter, please visit our website www.eversensediabetes.com. Upon receipt, if Senseonics determines that the Smart Transmitter is covered by the limited warranty and that coverage is not excluded, Senseonics will promptly replace the Smart Transmitter. If Senseonics determines that the Smart Transmitter is not covered by the limited warranty, you may purchase a replacement or if you want the original Smart Transmitter returned, you must prepay all shipping charges.A repaired or replacement Smart Transmitter assumes the remaining warranty of the original Smart Transmitter, or [30] days from the date of replacement or repair, whichever is longer.4. Limits of Senseonics’ obligations under the limited warranty.THE LIMITED WARRANTY OF SENSEONICS DESCRIBED ABOVE IS EXCLUSIVE AND IN LIEU OF ALL OTHER WARRANTIES, EXPRESS OR IMPLIED, EITHER IN FACT OR BY OPERATION OF LAW, STATUTORY OR OTHERWISE, AND SENSEONICS EXPRESSLY EXCLUDES AND DISCLAIMS ALL SUCH OTHER WARRANTIES, INCLUDING WITHOUT LIMITATION, ANY IMPLIED WARRANTY OR CONDITION OF MERCHANTABILITY, FITNESS FOR A PARTICULAR PURPOSE, NON-INFRINGEMENT, SATISFACTORY QUALITY, NON-INTERFERENCE, ACCURACY OF INFORMATIONAL CONTENT, OR ARISING FROM A COURSE OF DEALING, LAW, USAGE, OR TRADE PRACTICE.. EXCEPT TO THE EXTENT PROHIBITED BY APPLICABLE LAW, SENSEONICS SHALL NOT BE LIABLE FOR ANY SPECIAL, INCIDENTAL, CONSEQUENTIAL, OR INDIRECT DAMAGES, HOWEVER CAUSED AND ON ANY THEORY OF LIABILITY, ARISING IN ANY WAY OUT OF THE SALE, USE, MISUSE OR INABILITY TO USE THE SMART TRANSMITTERS OR ANY SENSEONICS EVERSENSE SYSTEM. THIS LIMITATION SHALL APPLY EVEN IF SENSEONICS OR ITS AGENT HAS BEEN ADVISED OF SUCH DAMAGES AND NOTWITHSTANDING ANY FAILURE OF ESSENTIAL PURPOSE OF THIS LIMITED REMEDY. LBL-0302-01-101 Rev 1_Eversense User Guide_mmolL_R5.indd 155 11/4/16 2:44 PM](https://usermanual.wiki/Senseonics-orporated/3401/User-Guide-3216455-Page-157.png)