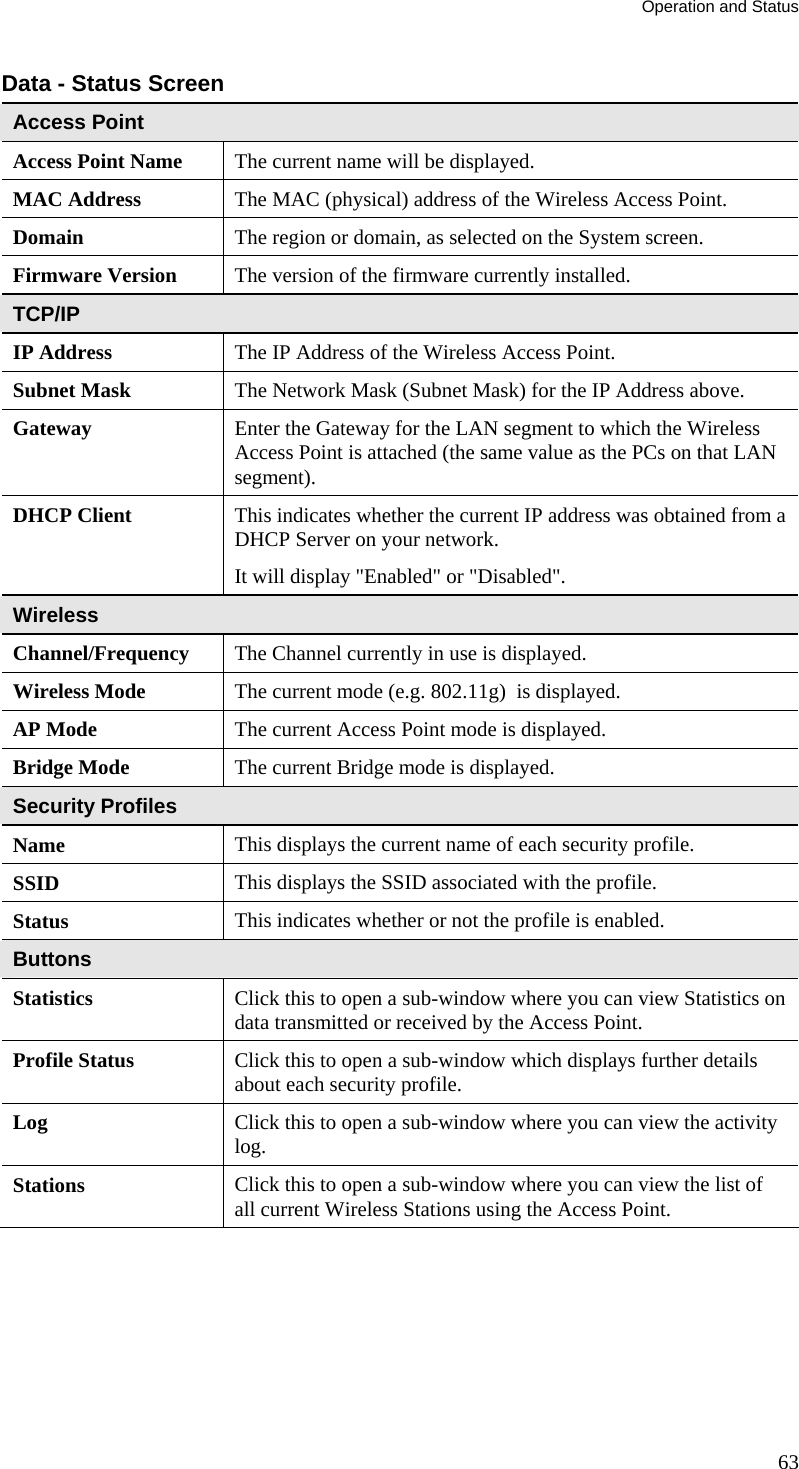
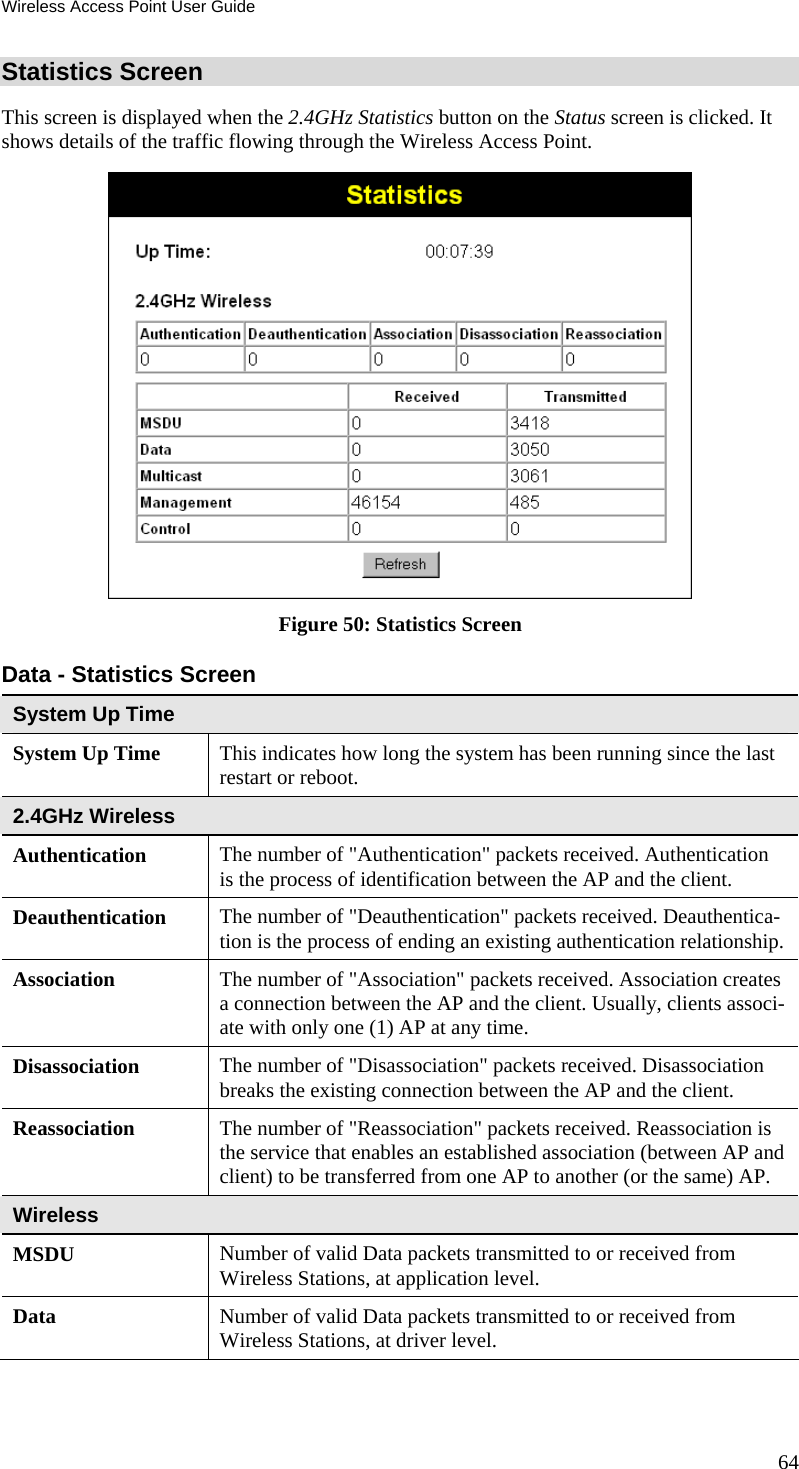
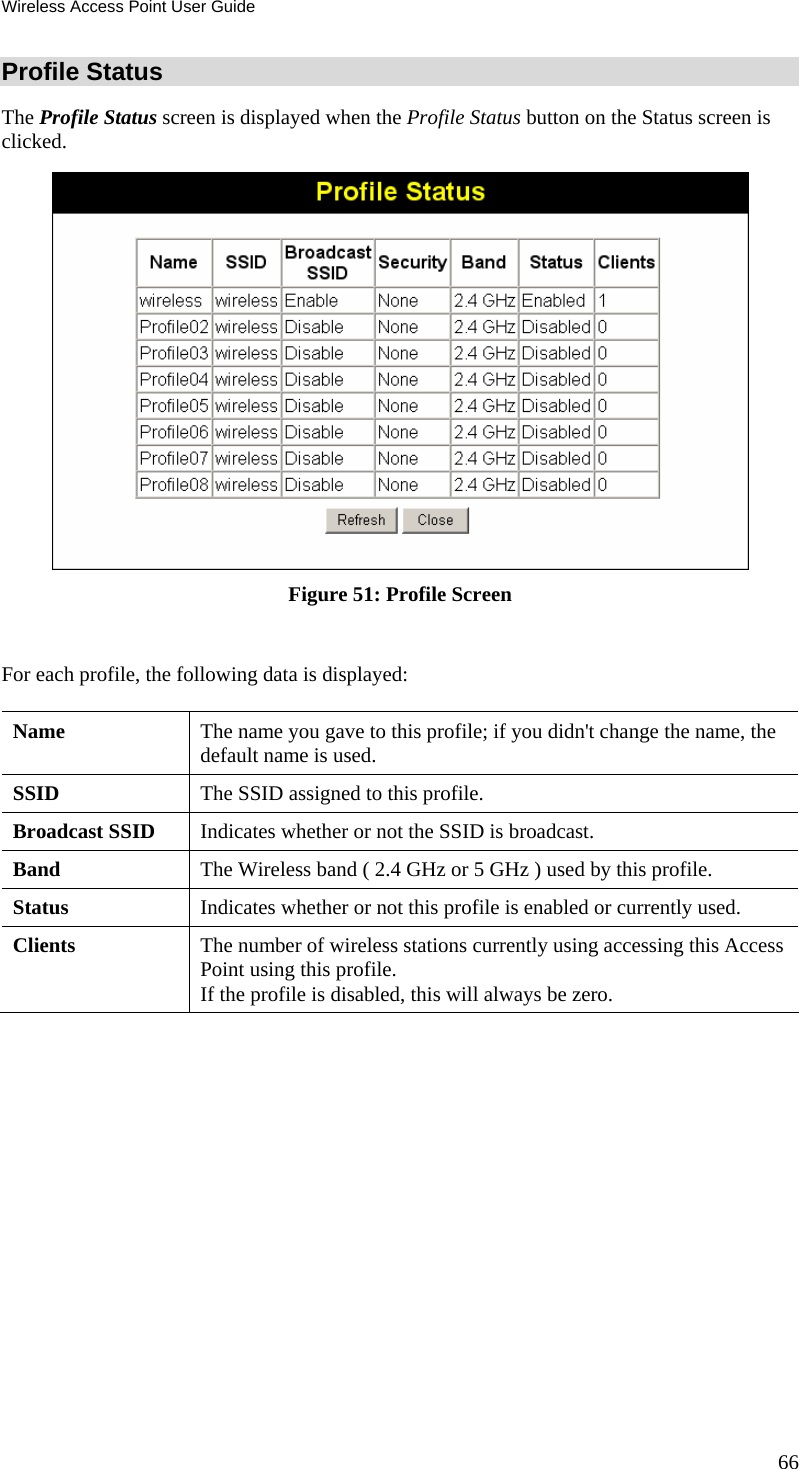
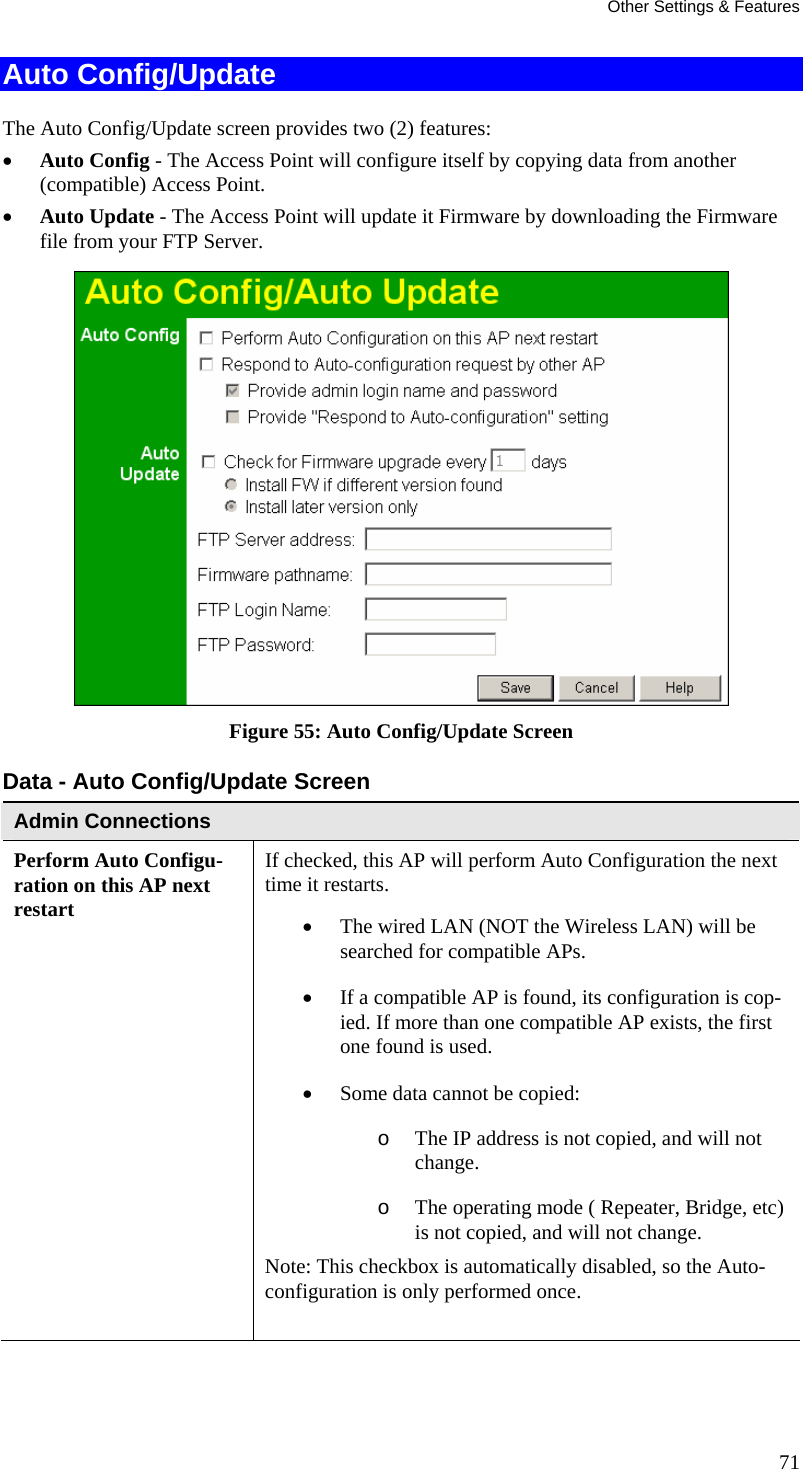
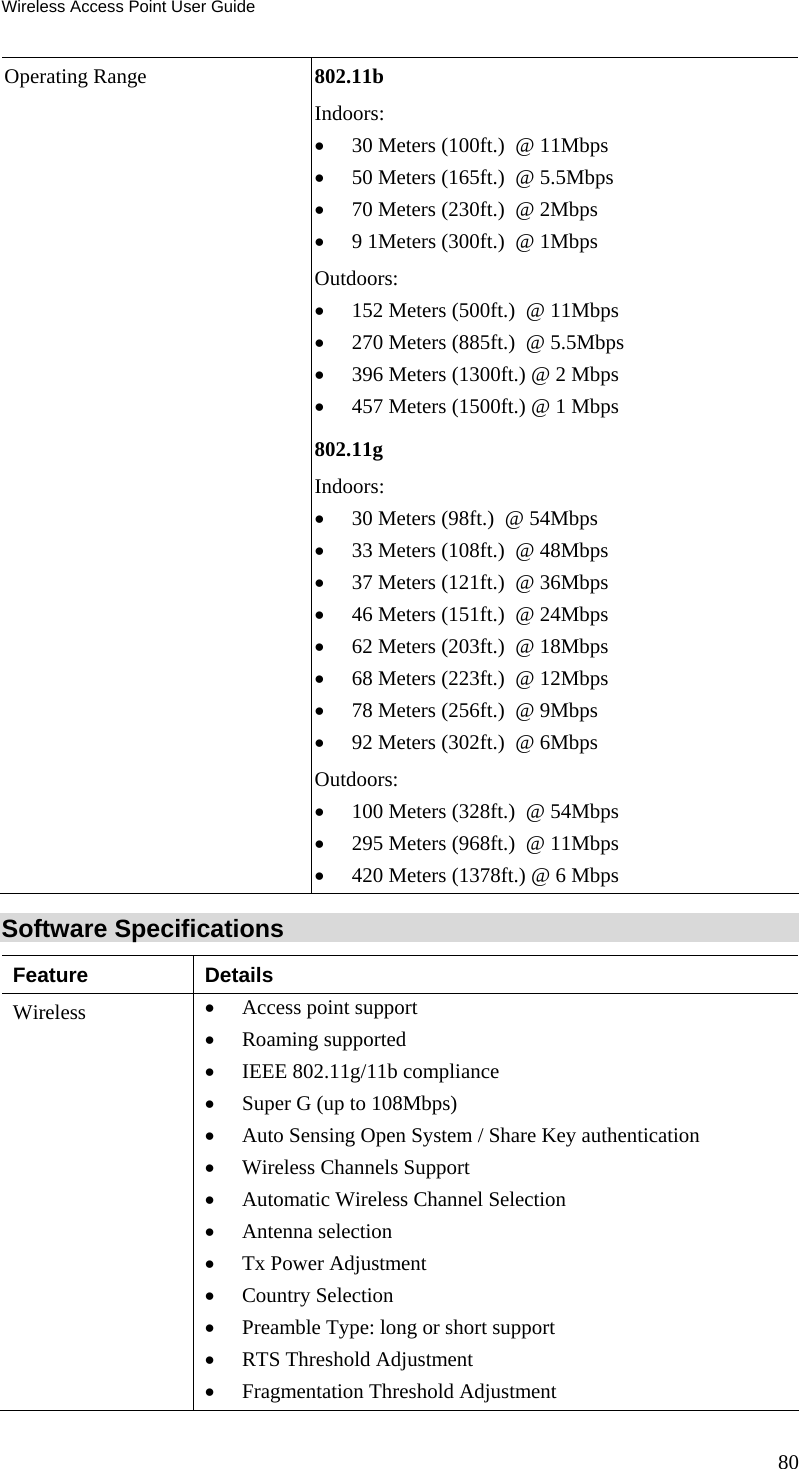
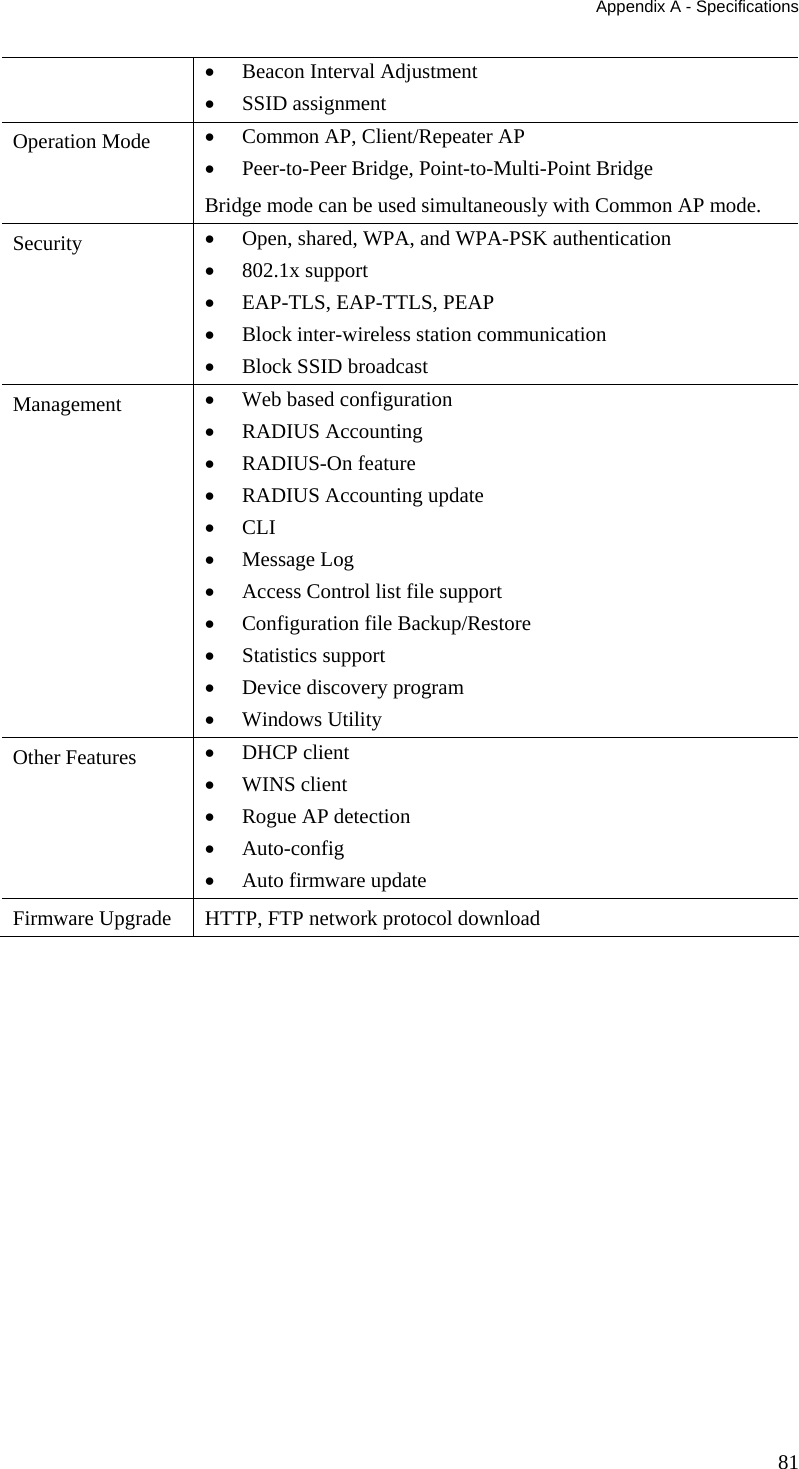
Sercomm AP51GA Wireless Internet Access Server Applicance User Manual 802 11b 802 11 g 802 1x Wireless Access Point
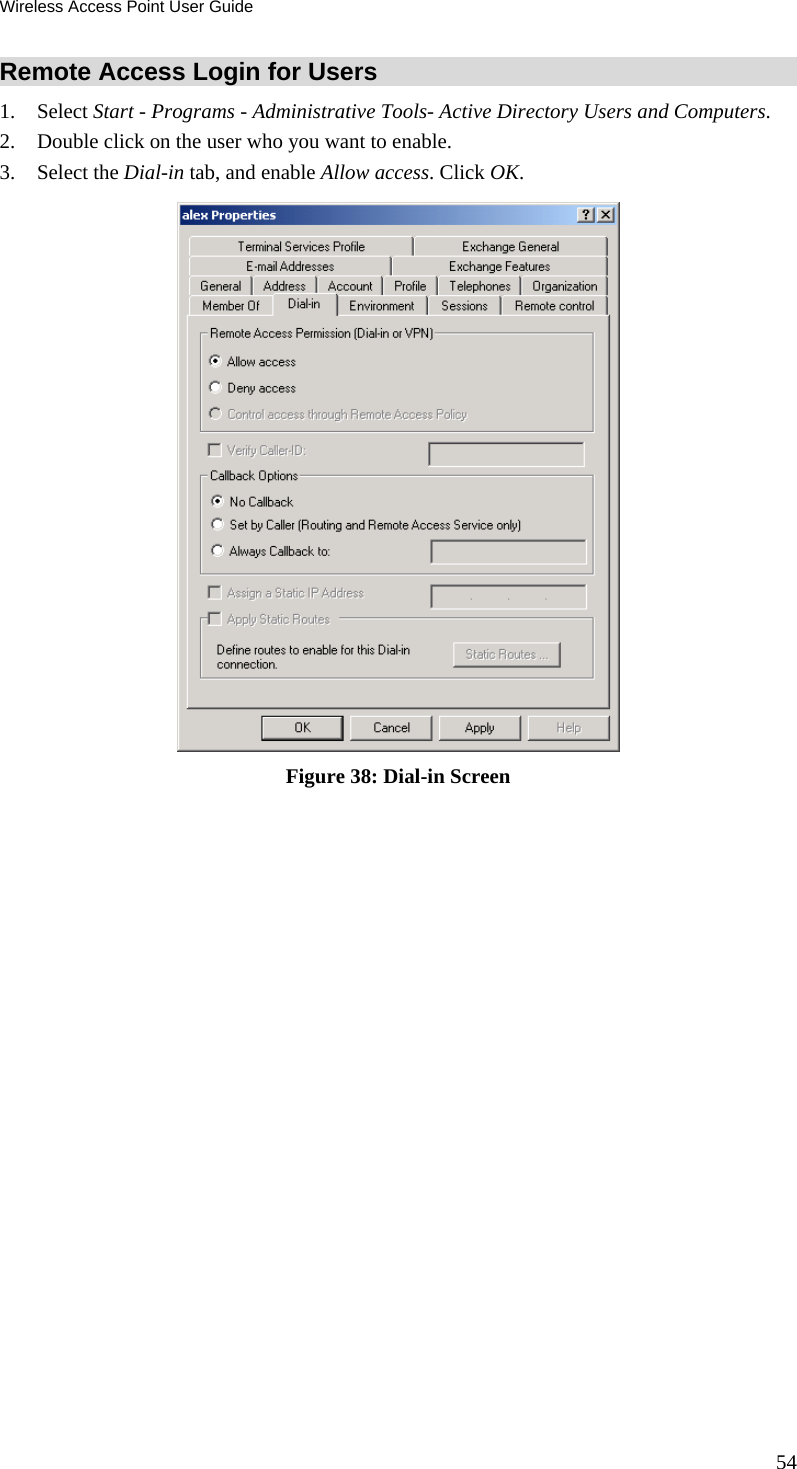
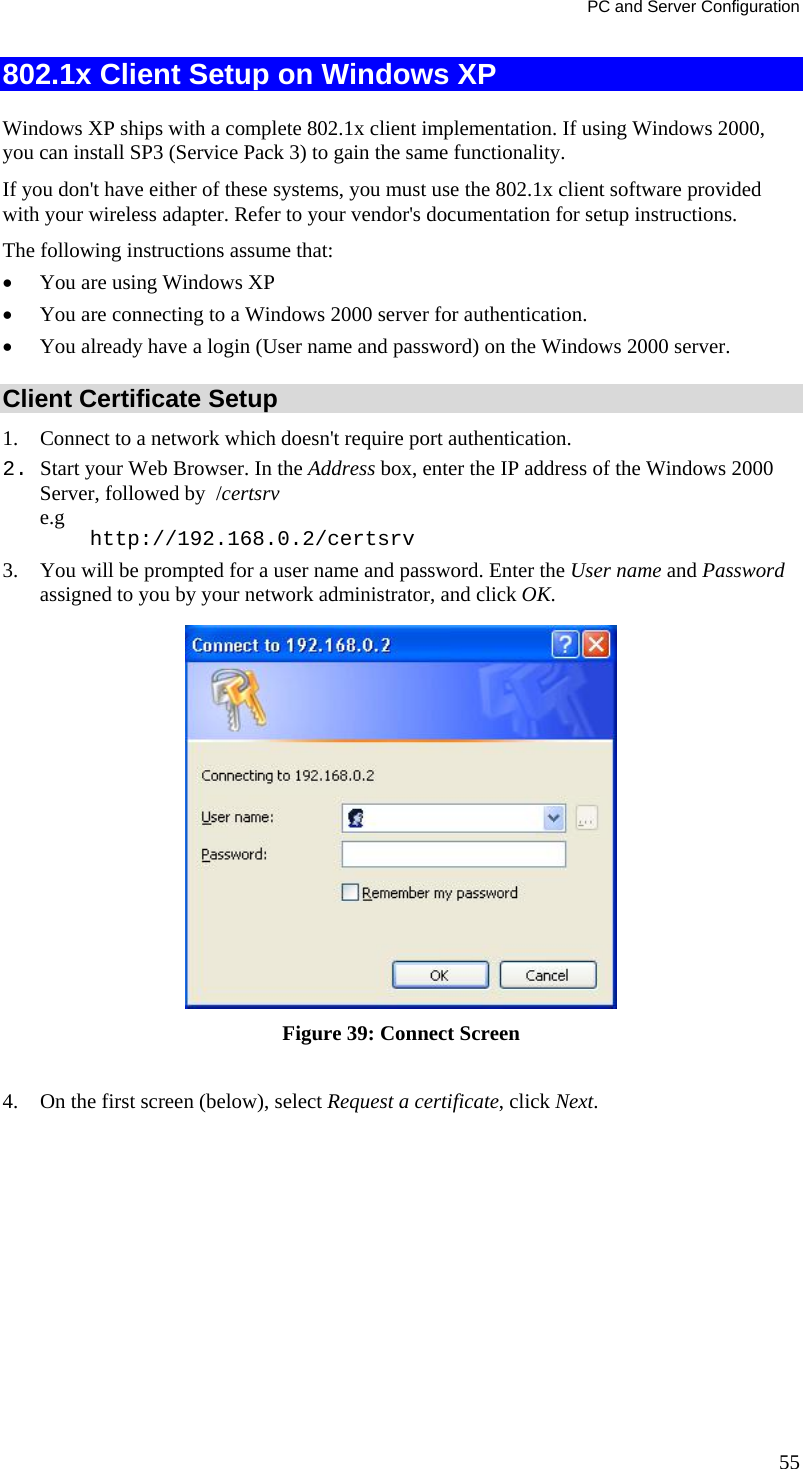
Sercomm Corporation Wireless Internet Access Server Applicance 802 11b 802 11 g 802 1x Wireless Access Point
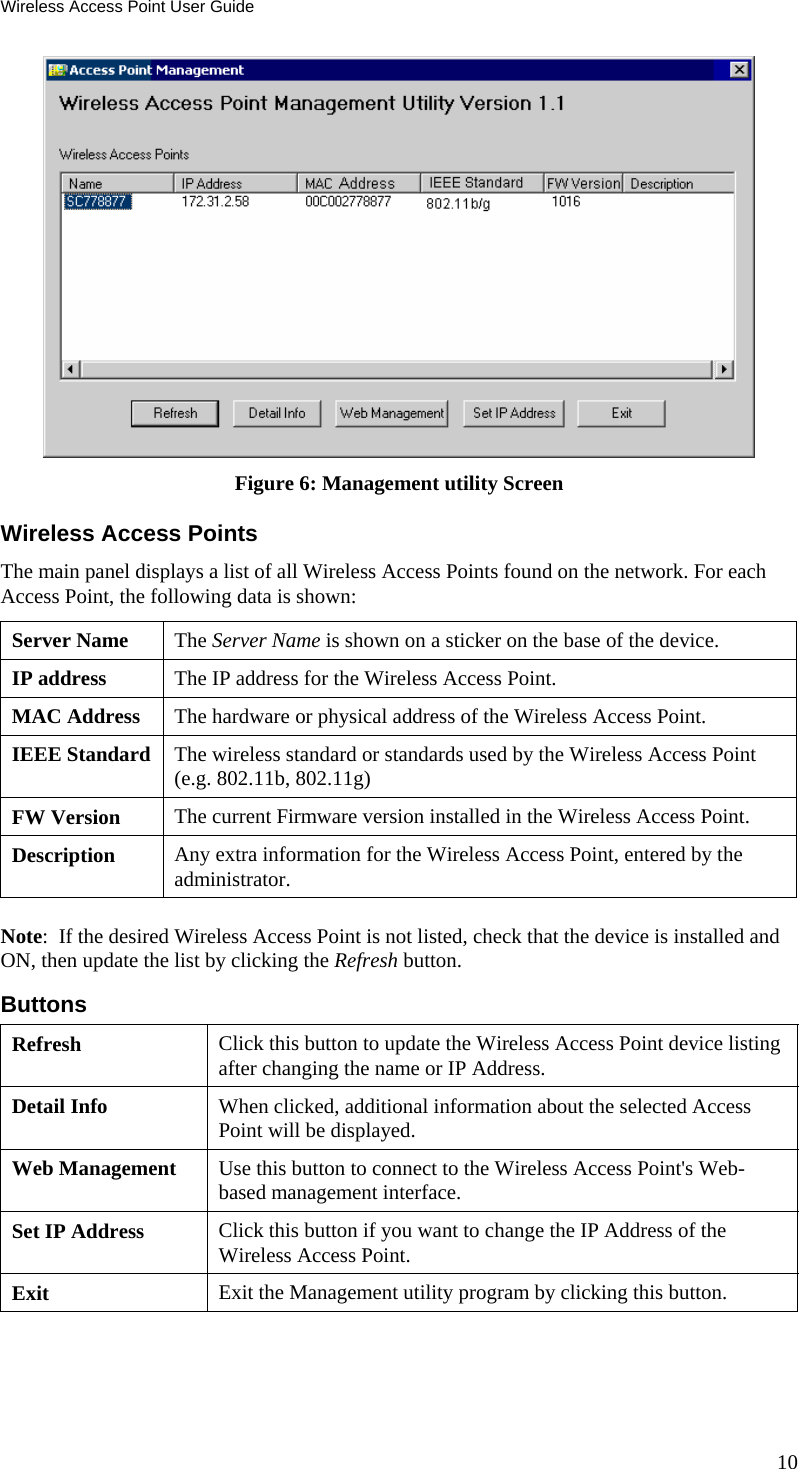
Sercomm >
Contents
- 1. UserMan
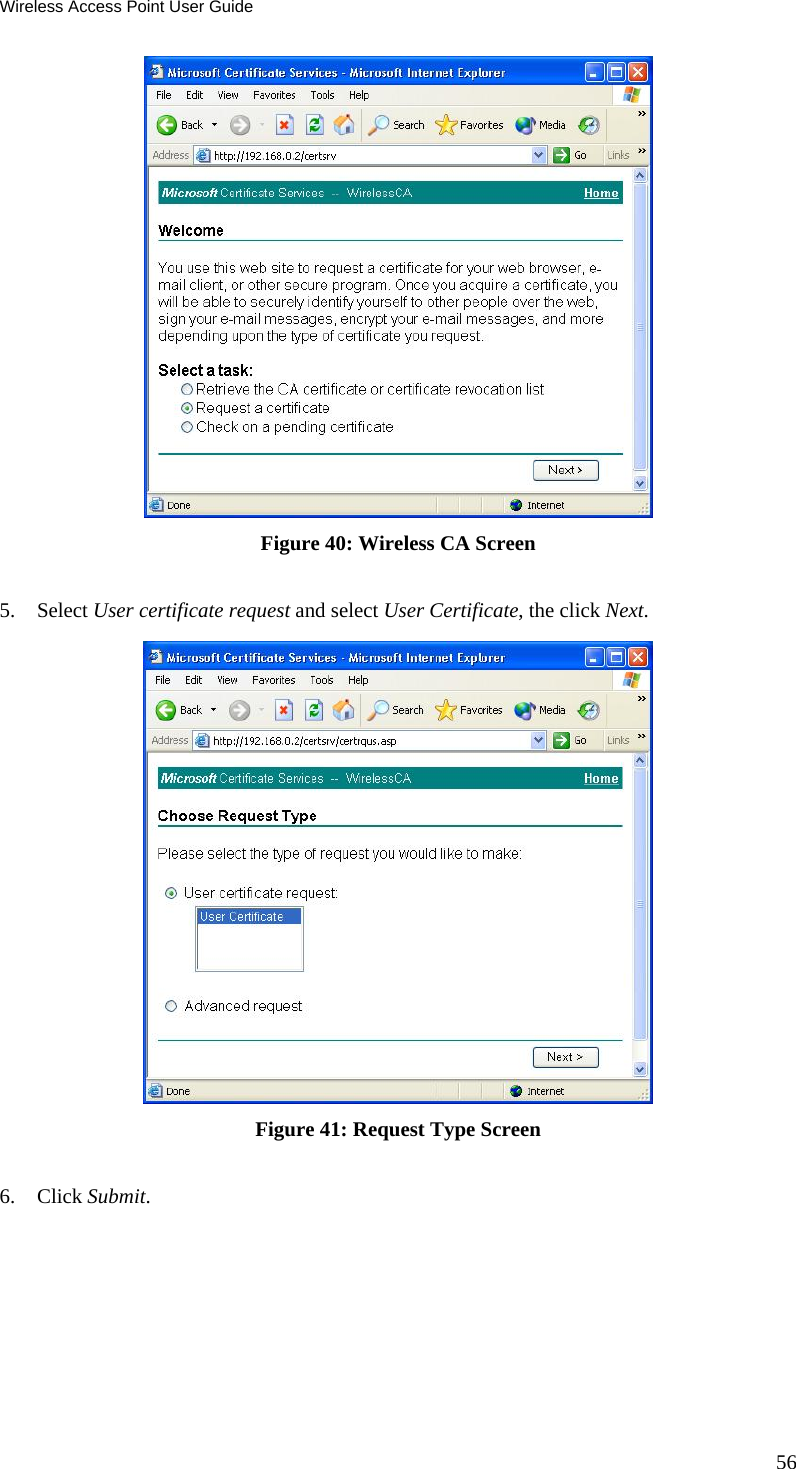
- 2. UserMan rev
- 3. Manual
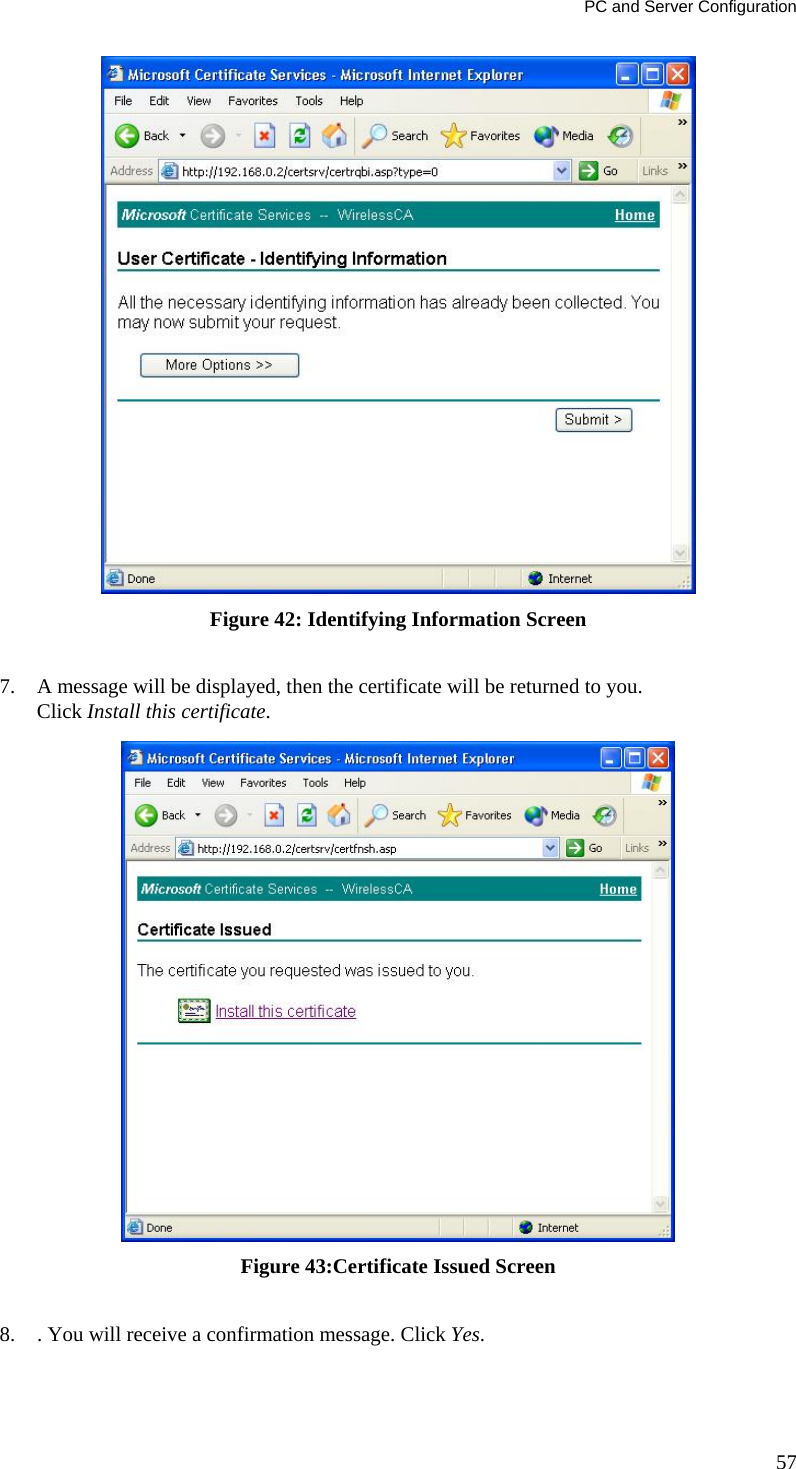
UserMan rev

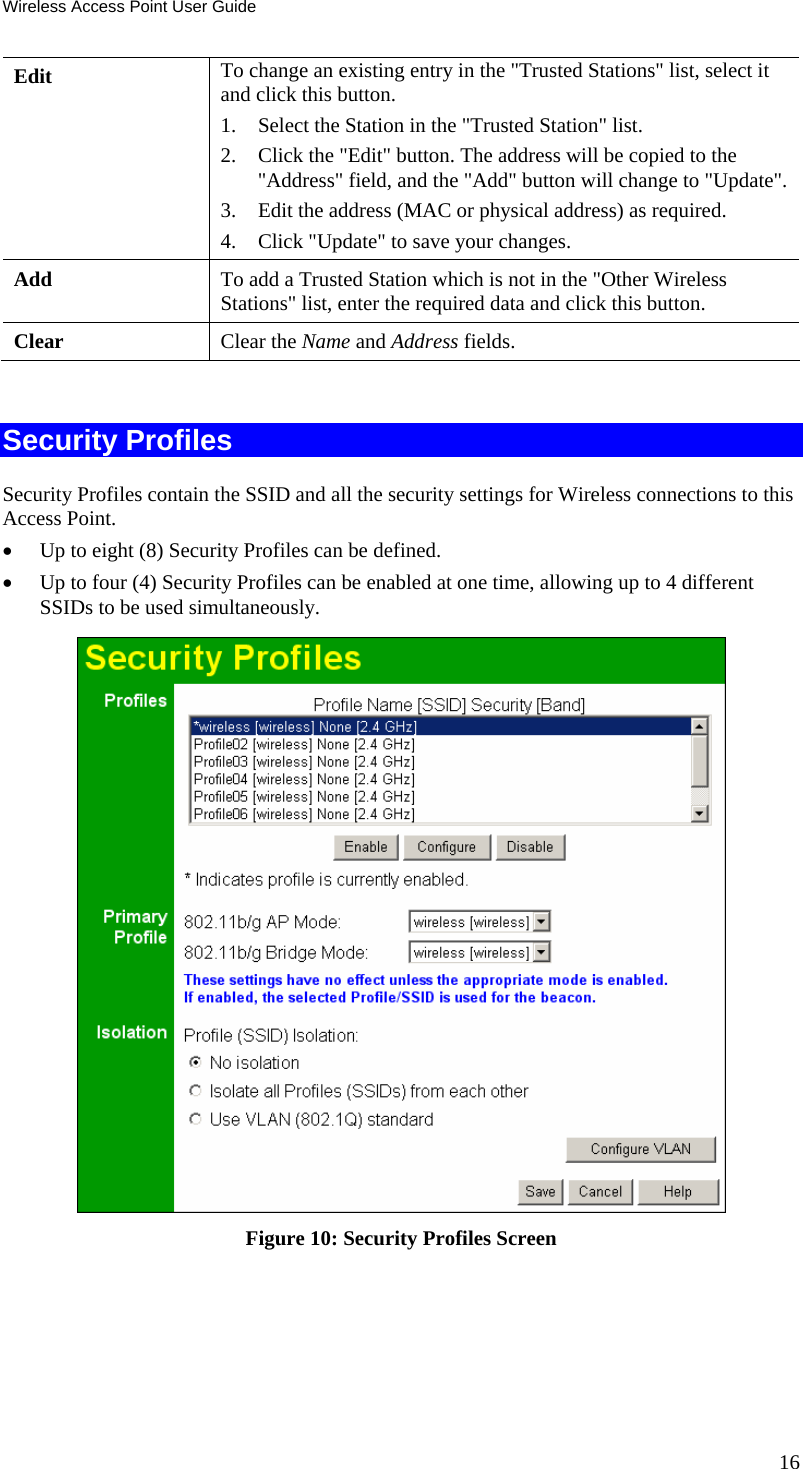
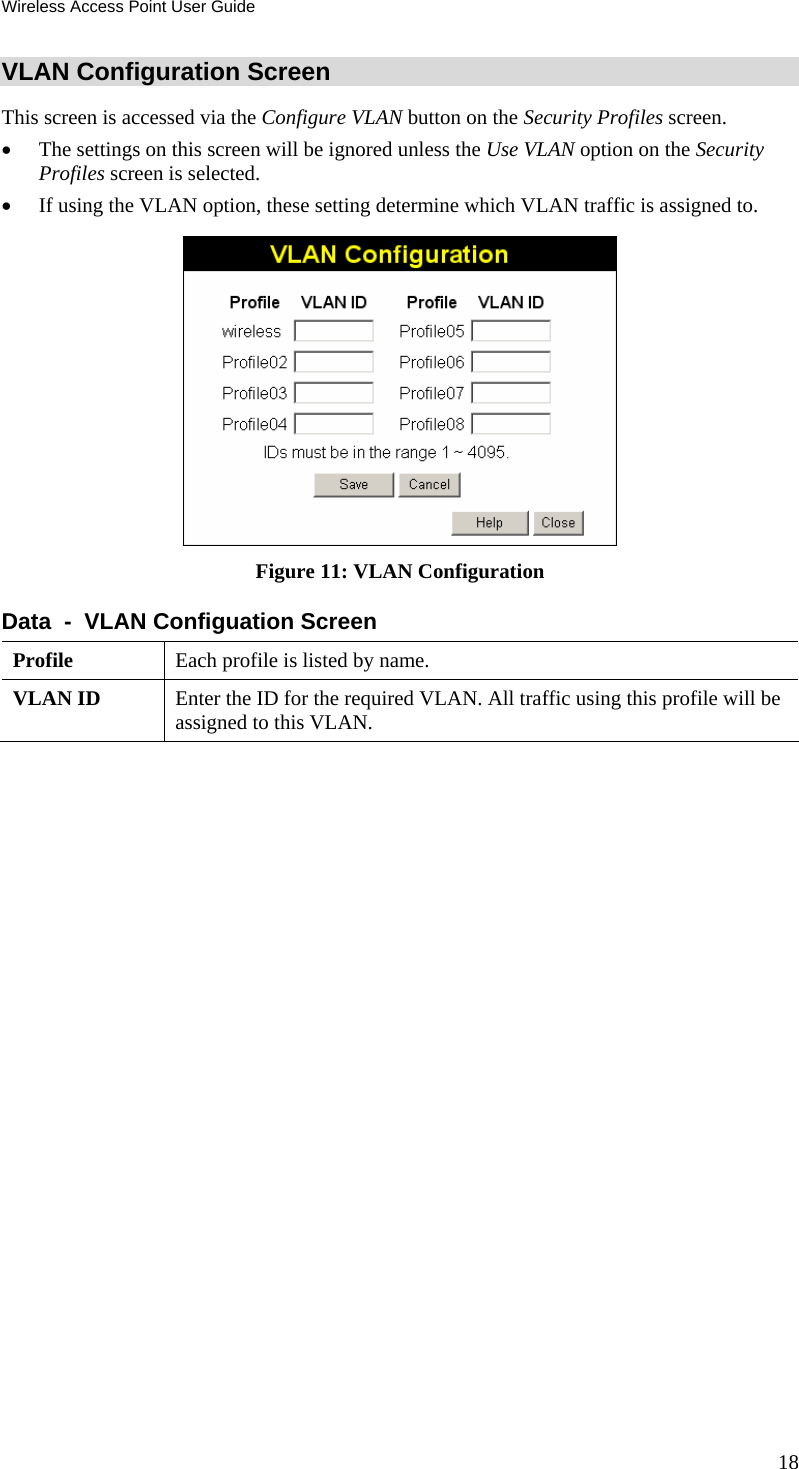
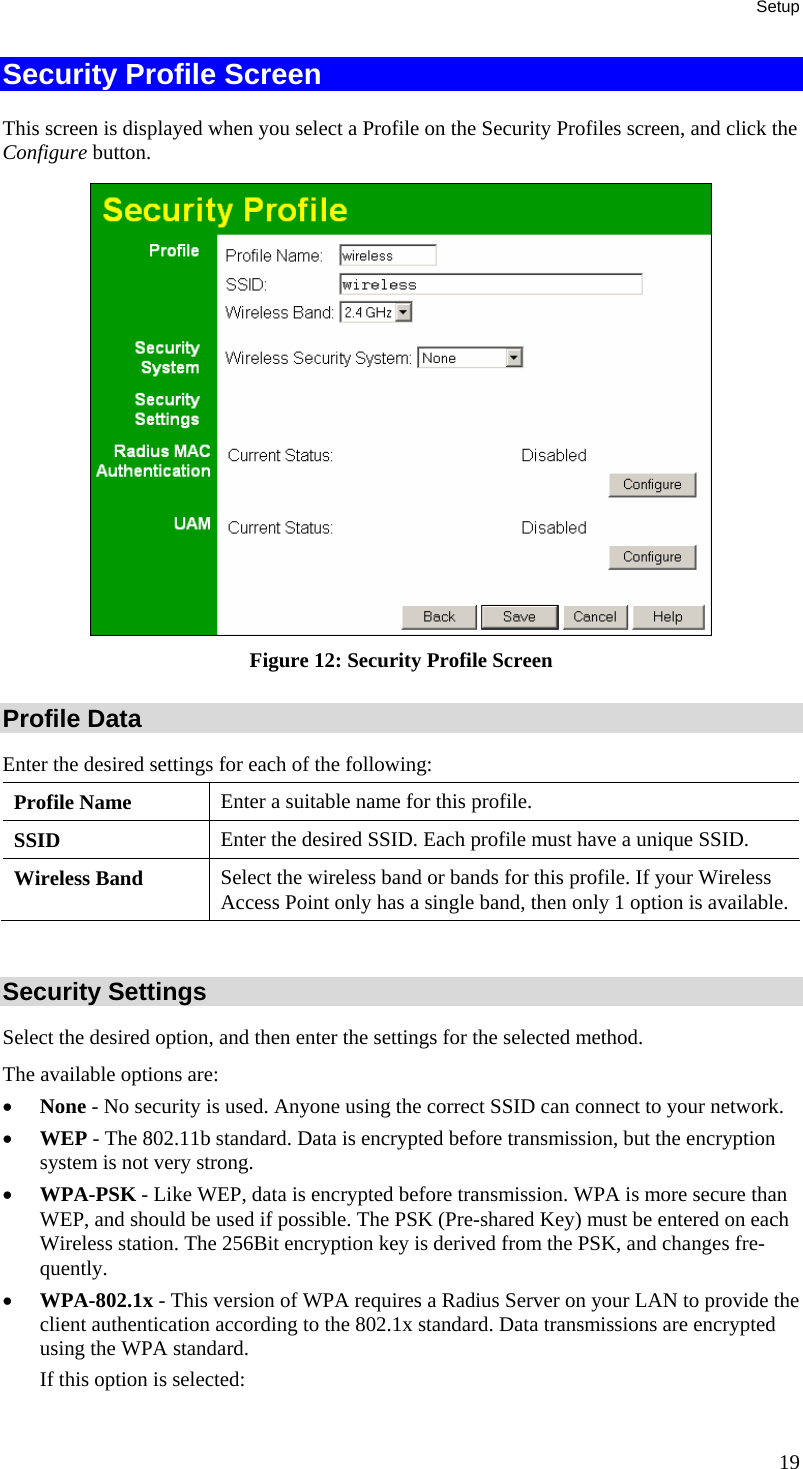
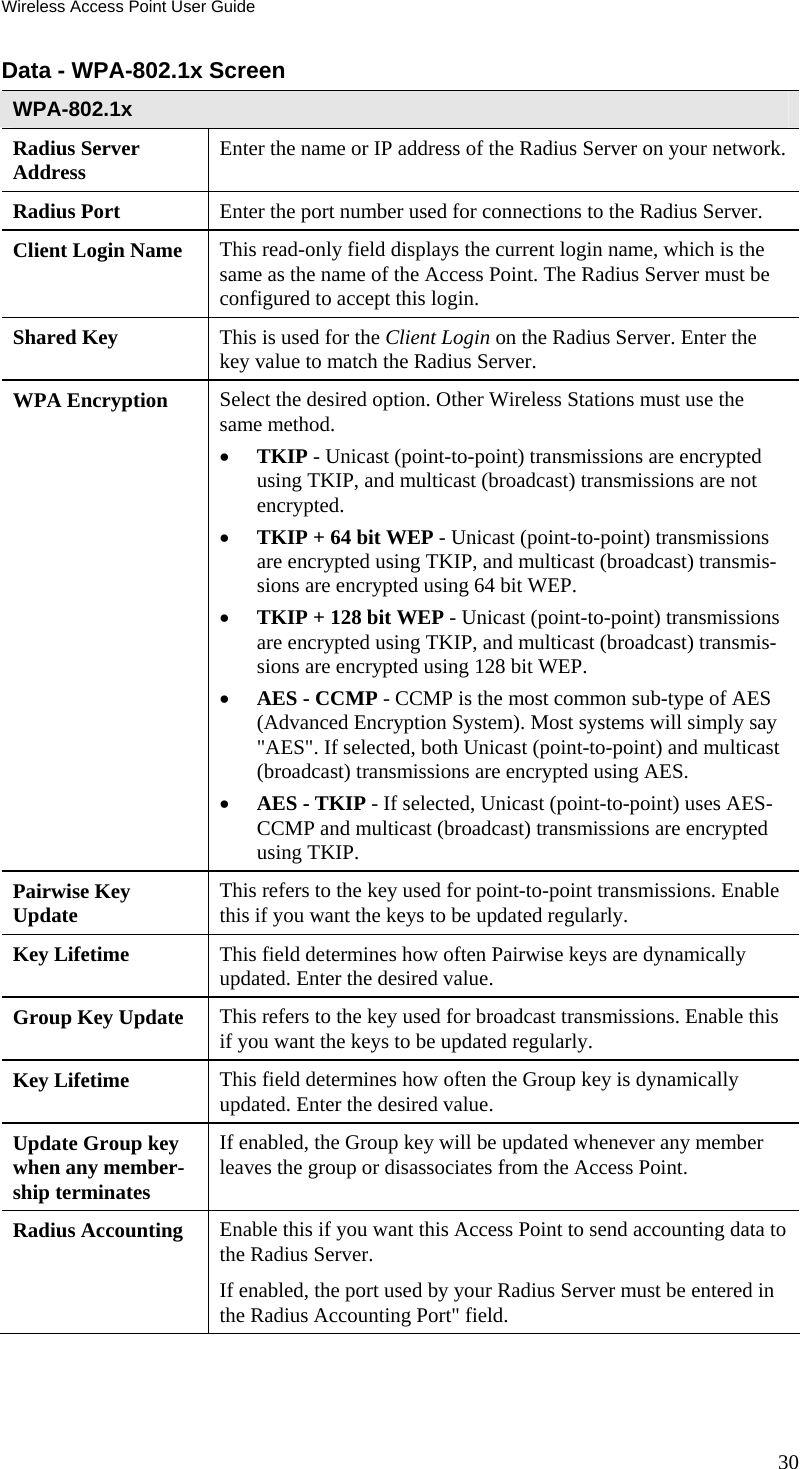
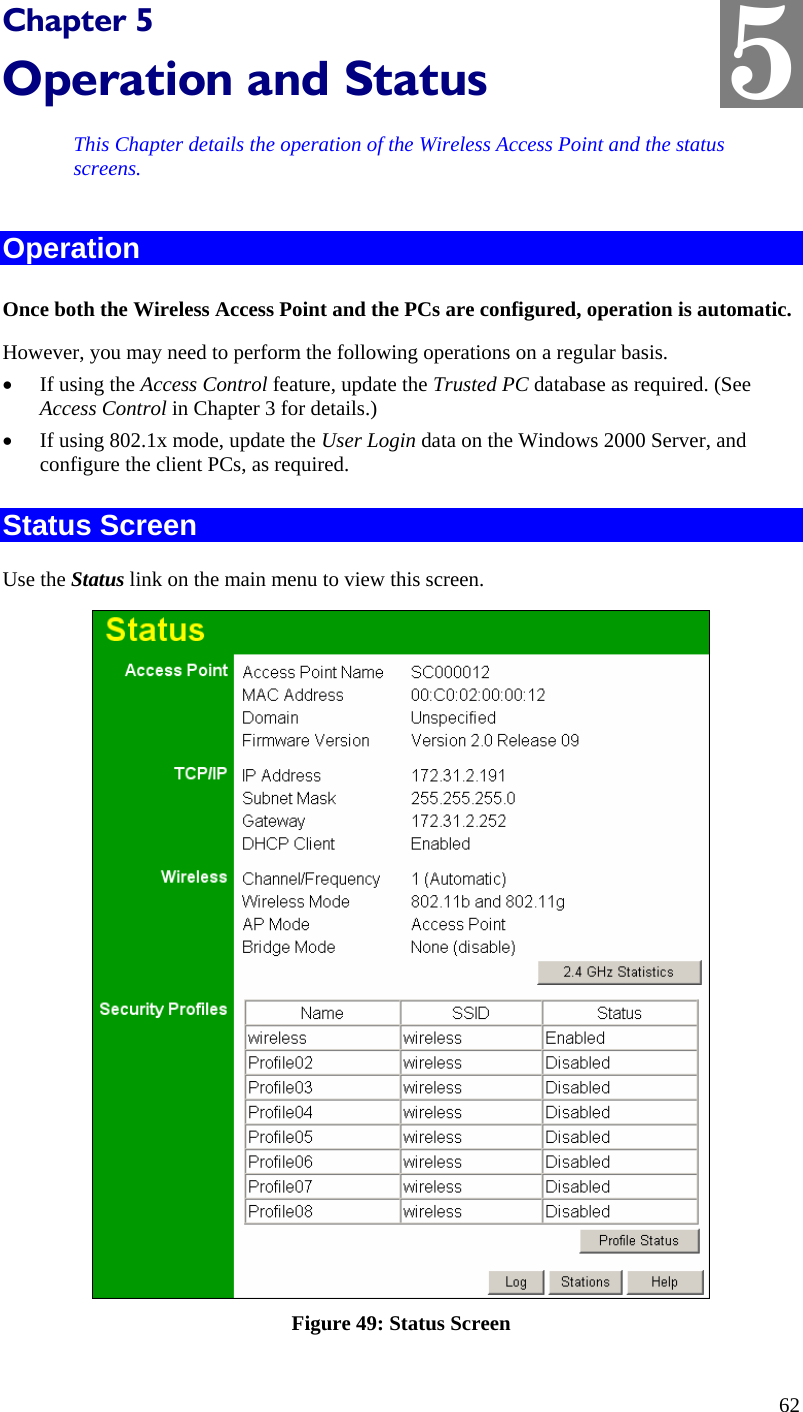
![Setup Data - Security Profiles Screen Profile Profile List All available profiles are listed. For each profile, the following data is displayed: • * If displayed before the name of the profile, this indicates the profile is currently enabled. If not displayed, the profile is cur-rently disabled. • Profile Name The current profile name is displayed. • [SSID] The current SSID associated with this profile. • Security System The current security system (e.g. WPA-PSK ) is displayed. • [Band] The Wireless Band (2.4 GHz, 5GHz) for this profile is dis-played. Profiles may be assigned to either or both Wireless Bands. Buttons • Enable - Enable the selected profile. • Configure - Change the settings for the selected profile. • Disable - Disable the selected profile. Primary Profile 802.11b/g AP Mode Select the primary profile for 802.11b and 802.11g (2.4 GHz band) AP mode. Only enabled profiles are listed. The SSID associated with this profile will be broadcast if the "Broadcast SSID" setting on the Basic screen is enabled. 802.11b/g Bridge Mode Select the primary profile for 802.11b and 802.11g (2.4 GHz band) Bridge Mode. This setting determines the SSID and security settings used for the Bridge connection to the remote AP. Isolation None If this option is selected, wireless clients using different profiles (different SSIDs) are not isolated from each other, so they will be able to communicate with each other. Isolate all If this option is selected, wireless clients using different profiles (different SSIDs) are isolated from each other, so they will NOT be able to communicate with each other. They will still be able to communicate with other clients using the same profile, unless the "Wireless Separation" setting on the "Advanced" screen has been enabled. Use VLAN This option is only useful if the hubs/switches on your LAN sup-port the VLAN (802.1Q) standard. When VLAN is used, you must select the desired VLAN for each security profile when configuring the profile. (If VLAN is not selected, the VLAN setting for each profile is ignored.) Click the Configure VLAN button to configure the IDs used by each VLAN. See below for further details. 17](https://usermanual.wiki/Sercomm/AP51GA.UserMan-rev/User-Guide-550989-Page-20.png)