Sercomm PS801H-V2 Wireless USB Print Server User Manual Wireless USB Print Server User Guide
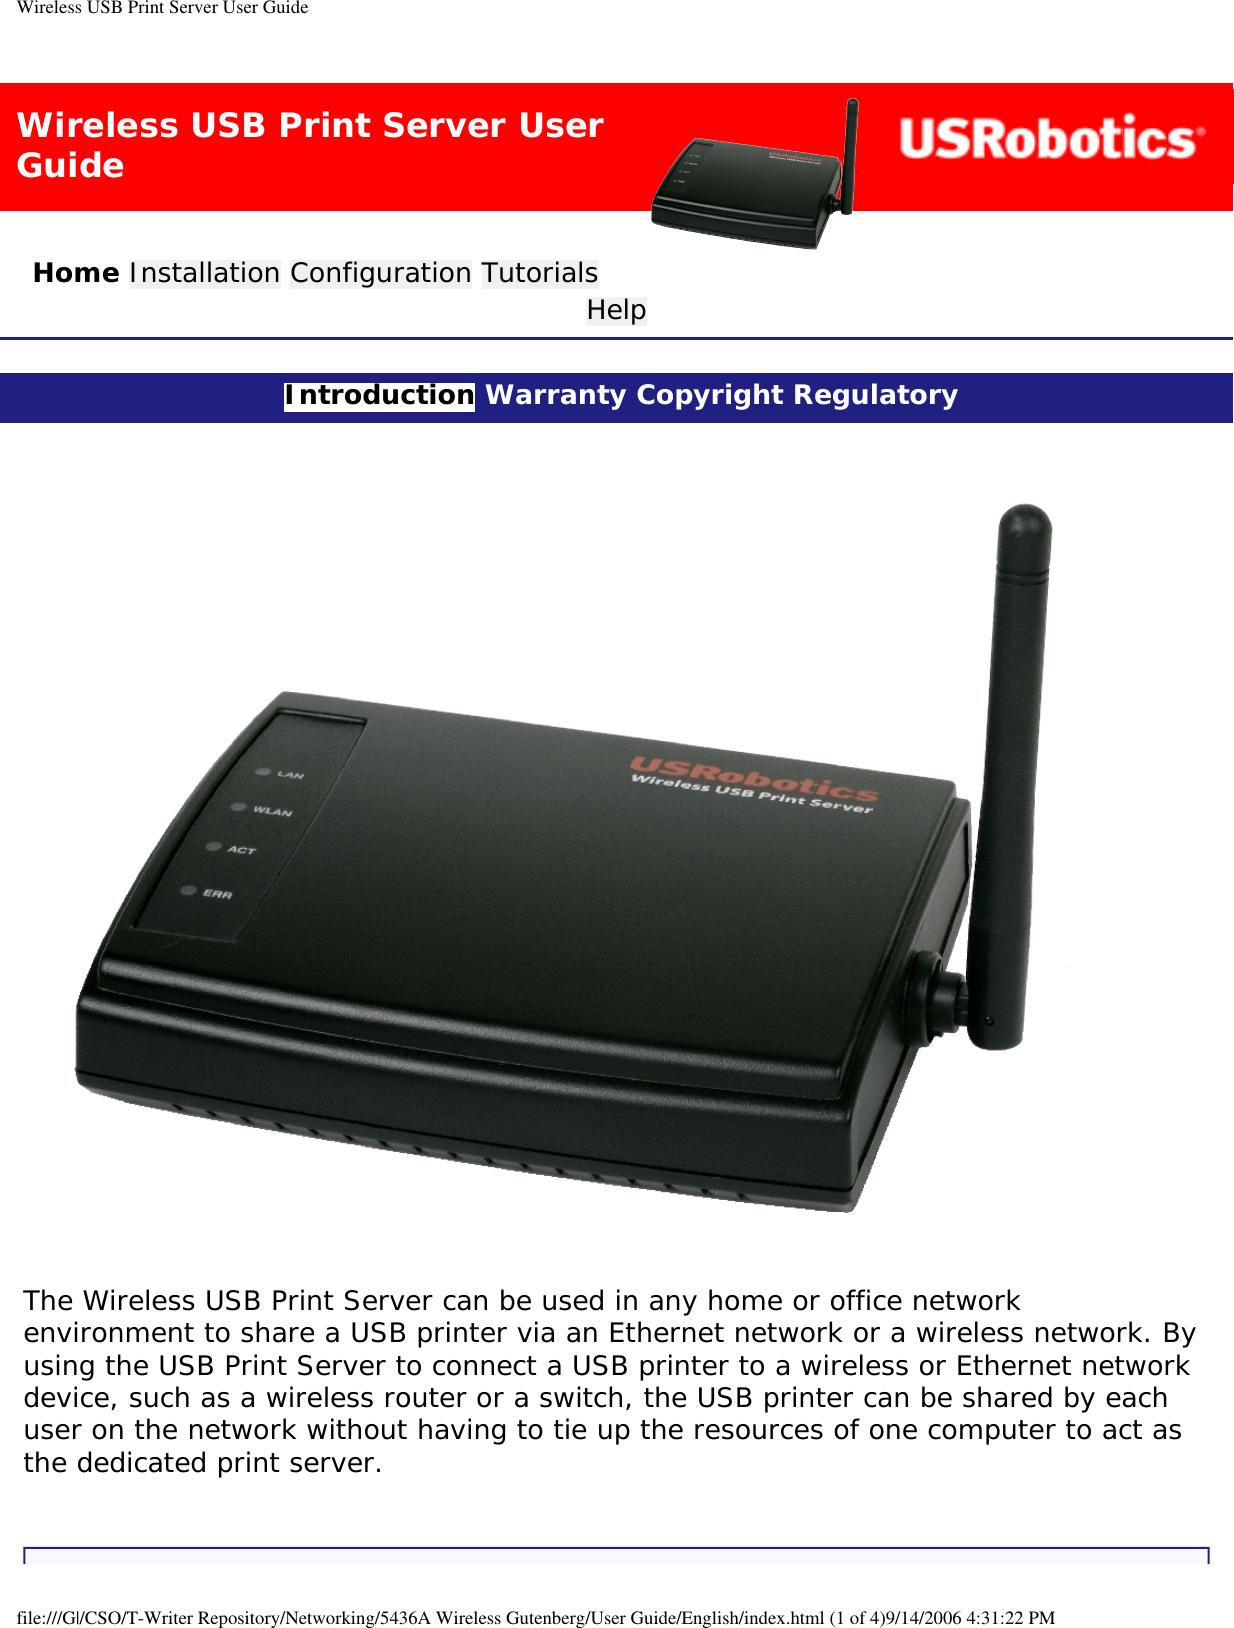
Sercomm Corporation Wireless USB Print Server Wireless USB Print Server User Guide
UserManual.wiki
>
Sercomm
>
PS801H V2 User Manual
Users Manual
Navigation menu
Upload a User Manual
Namespaces
Wiki Guide
HTML
PDF
Info
Views
User Manual
Discussion / Help
Navigation
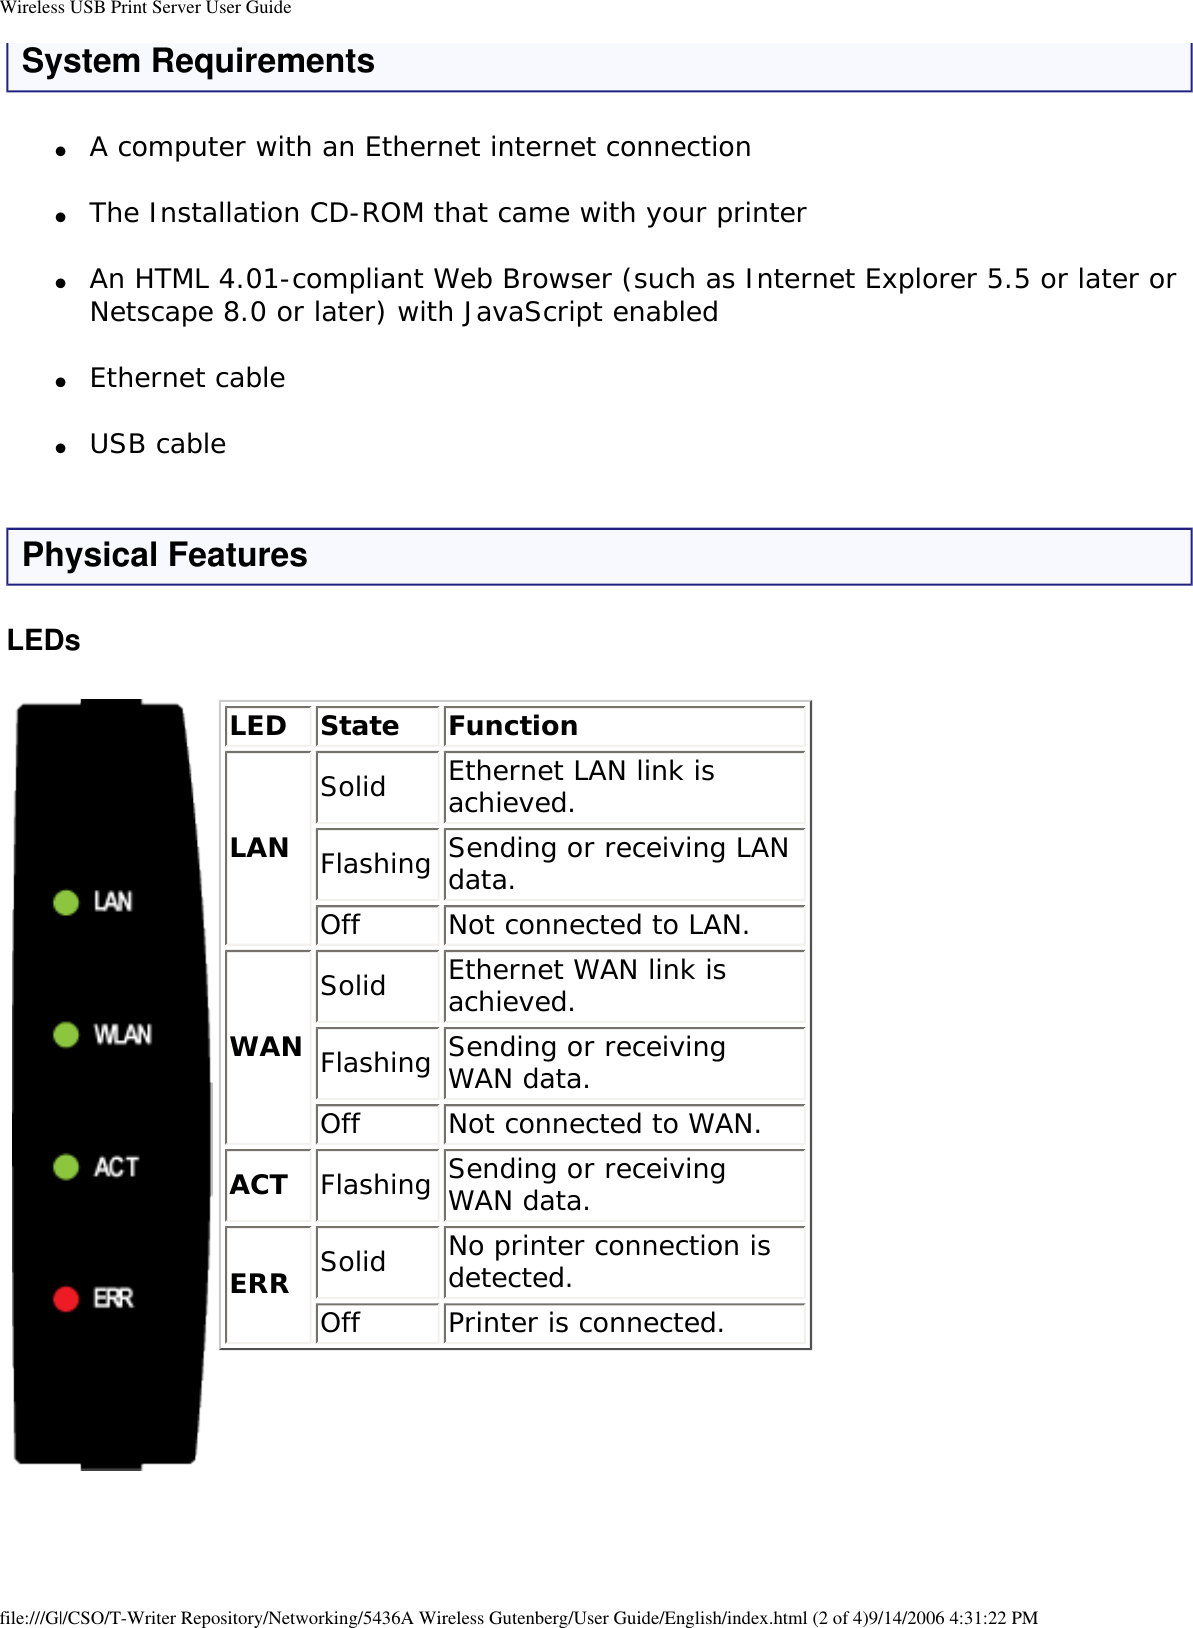

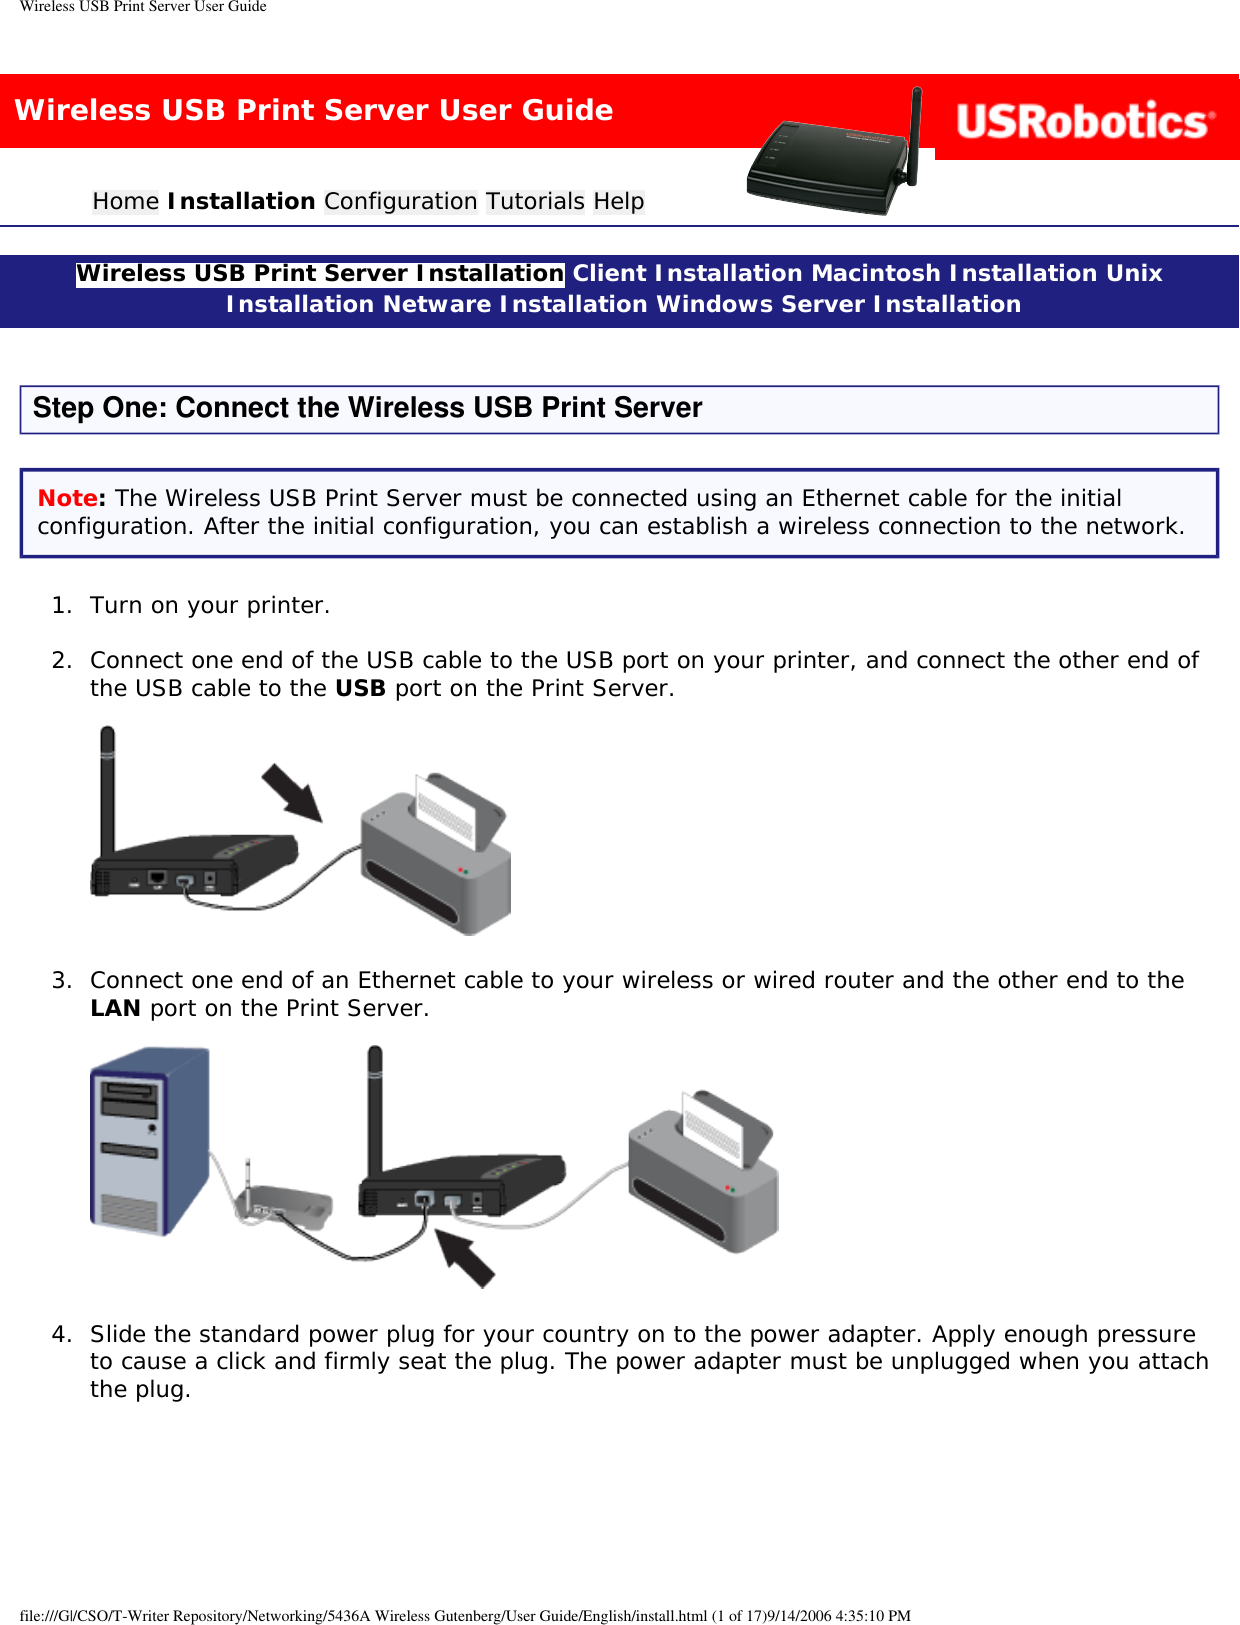
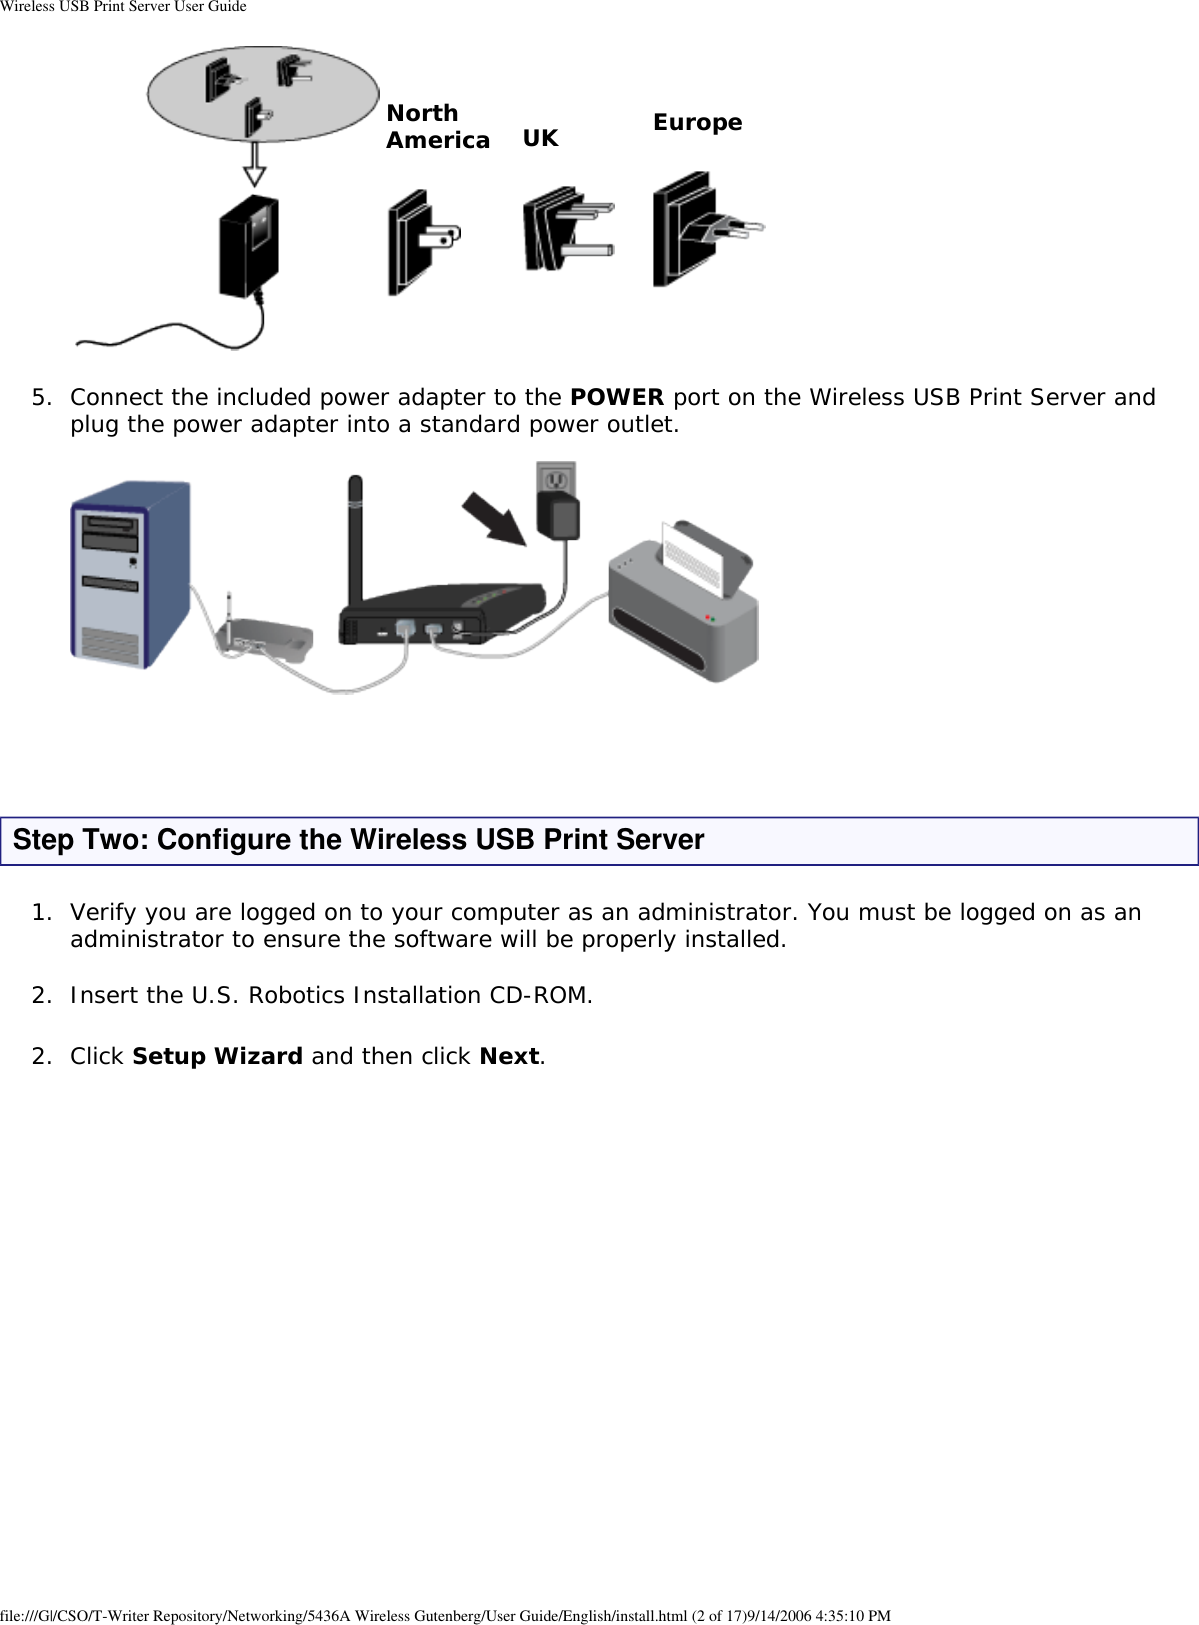
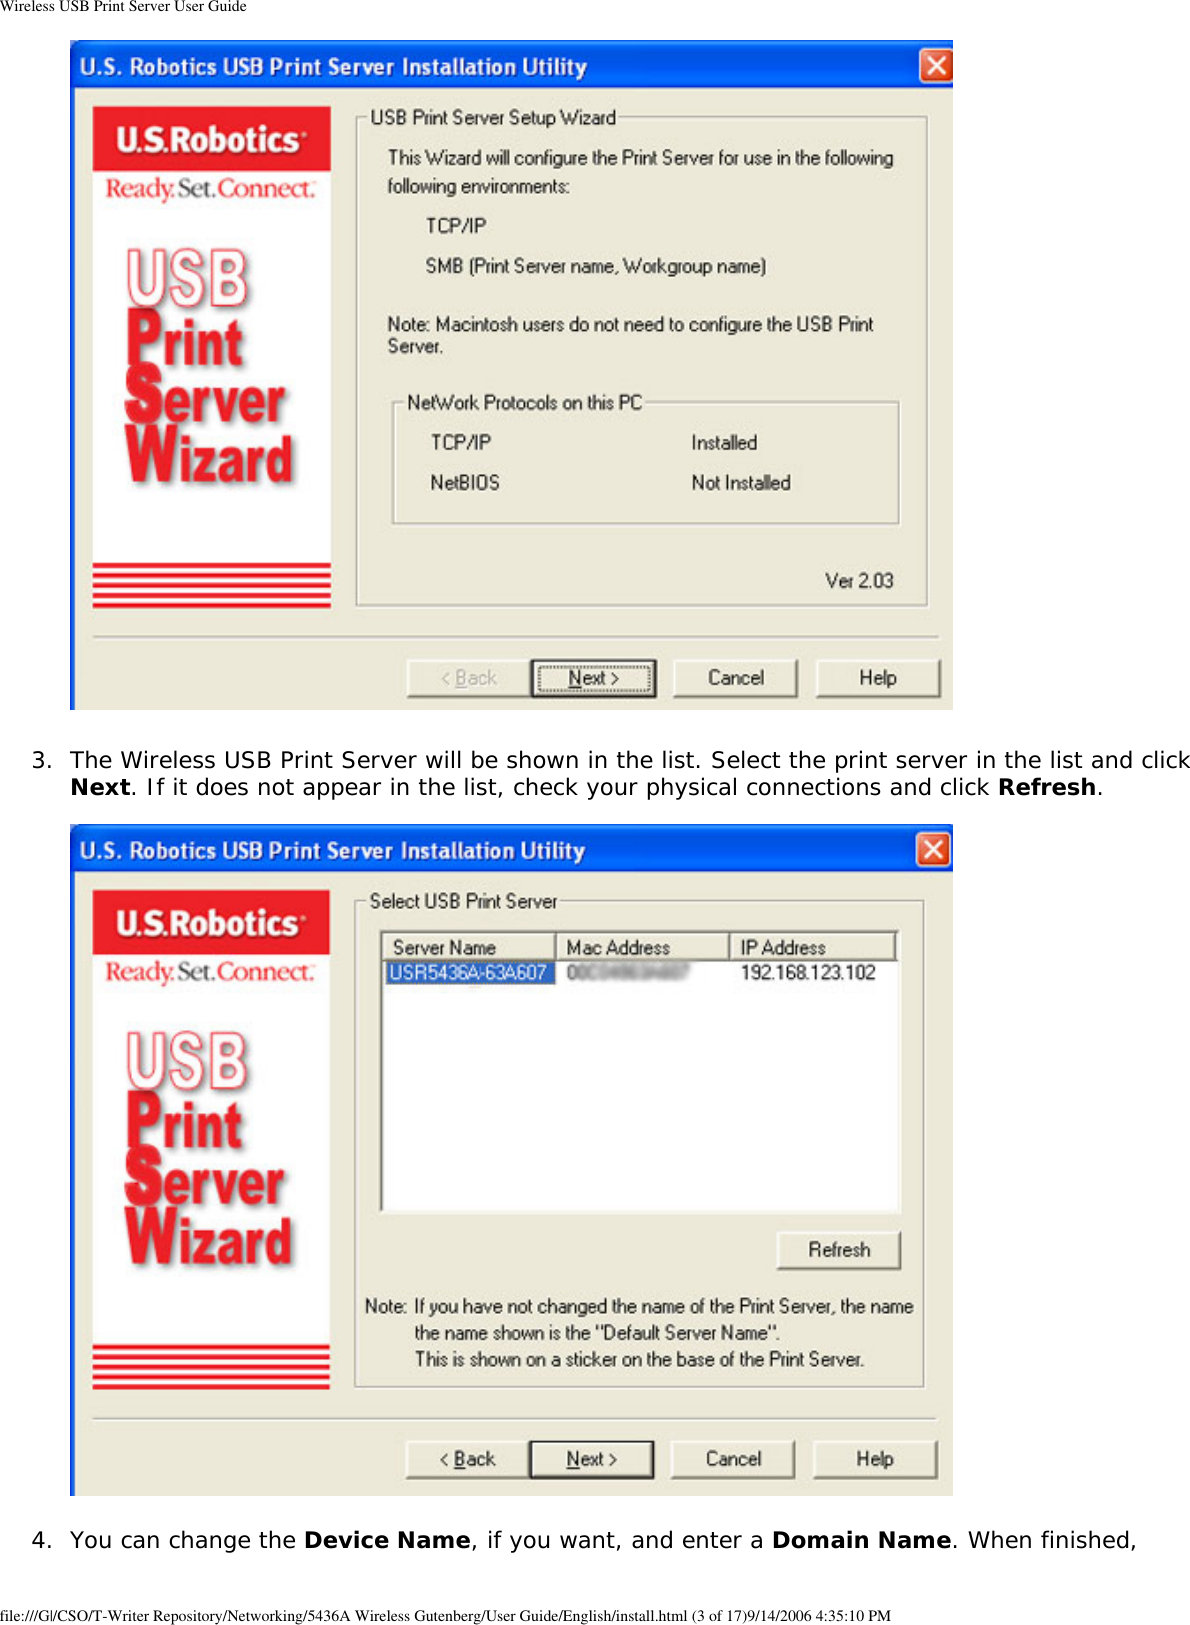
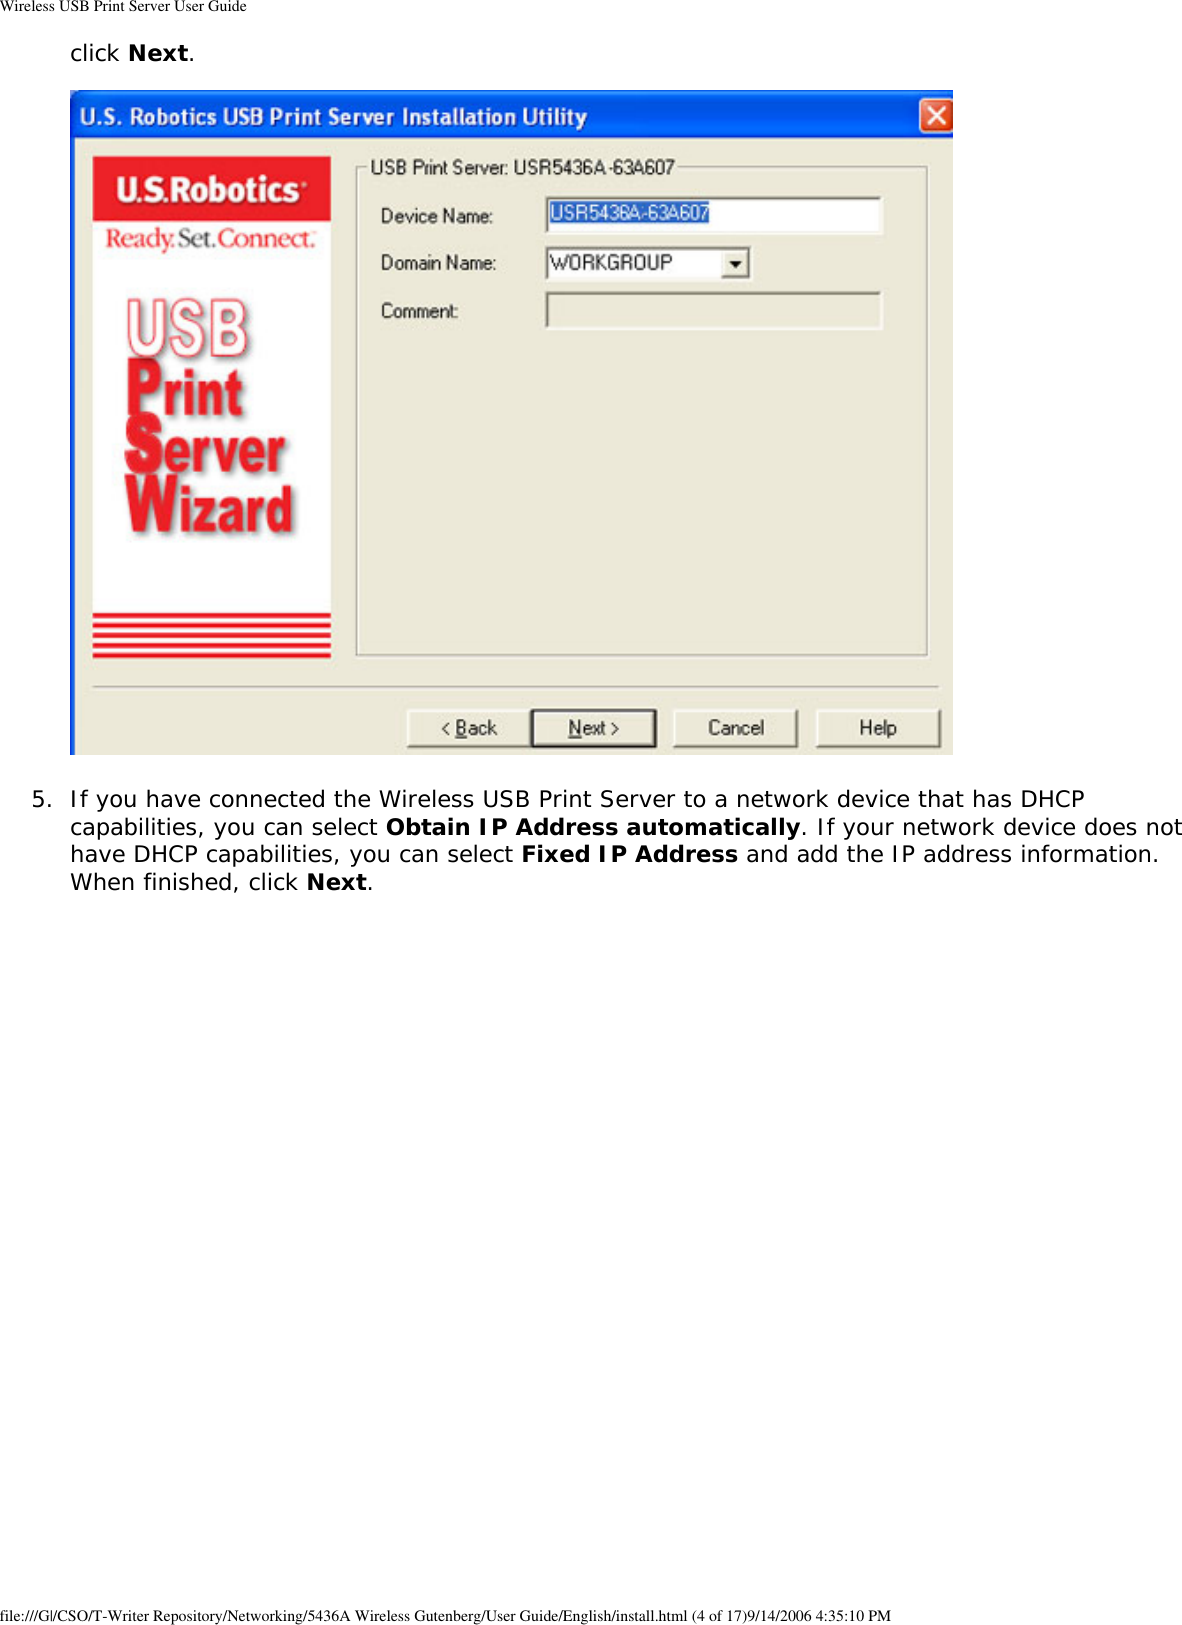
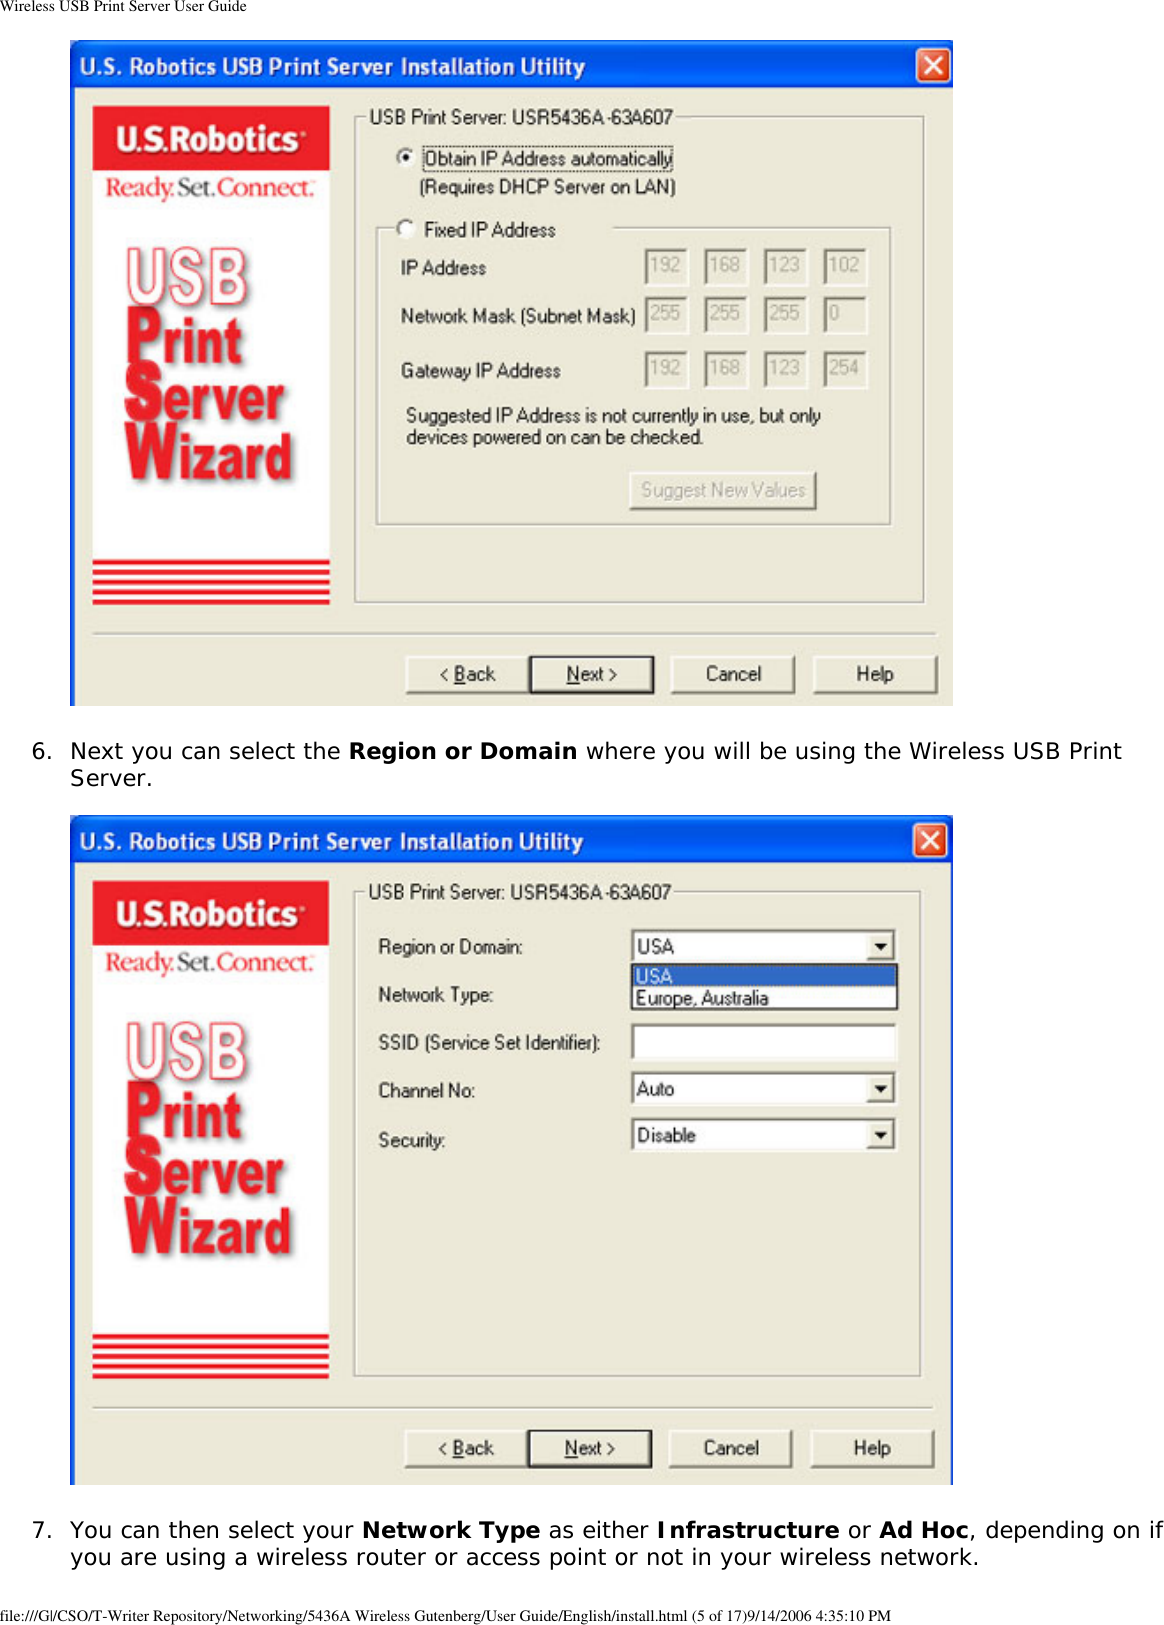
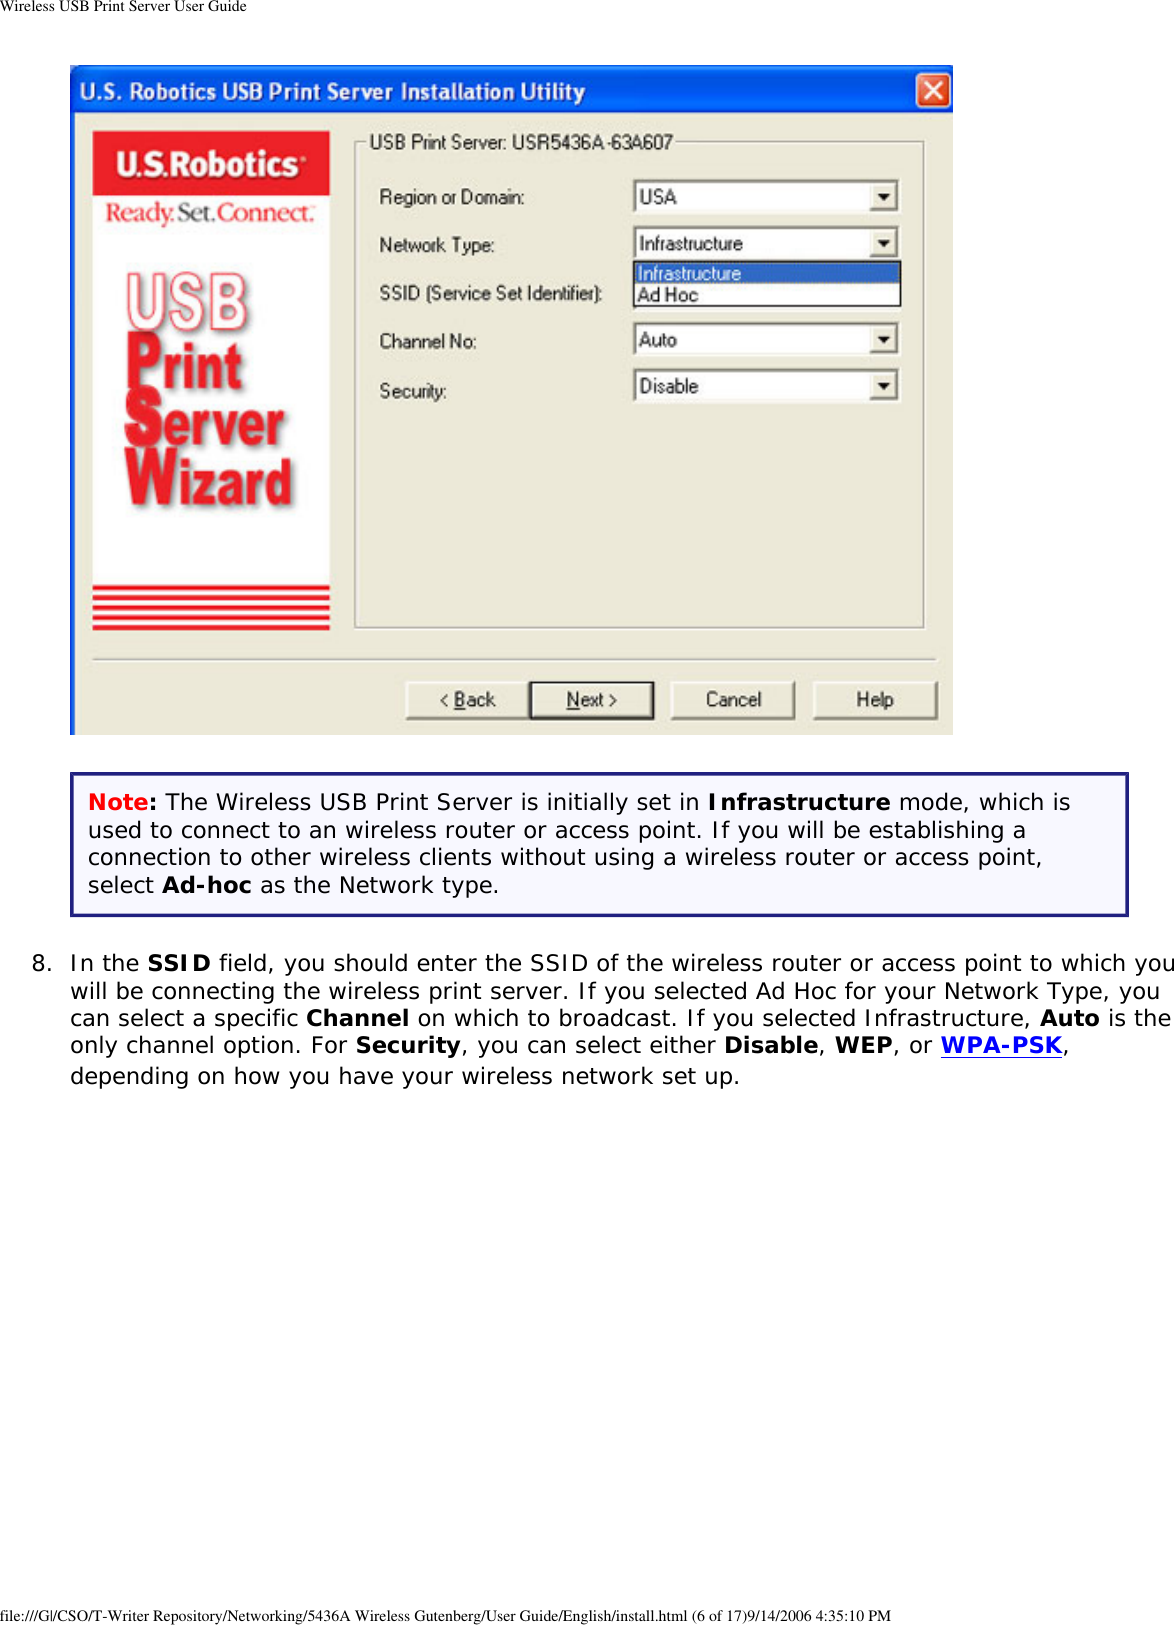
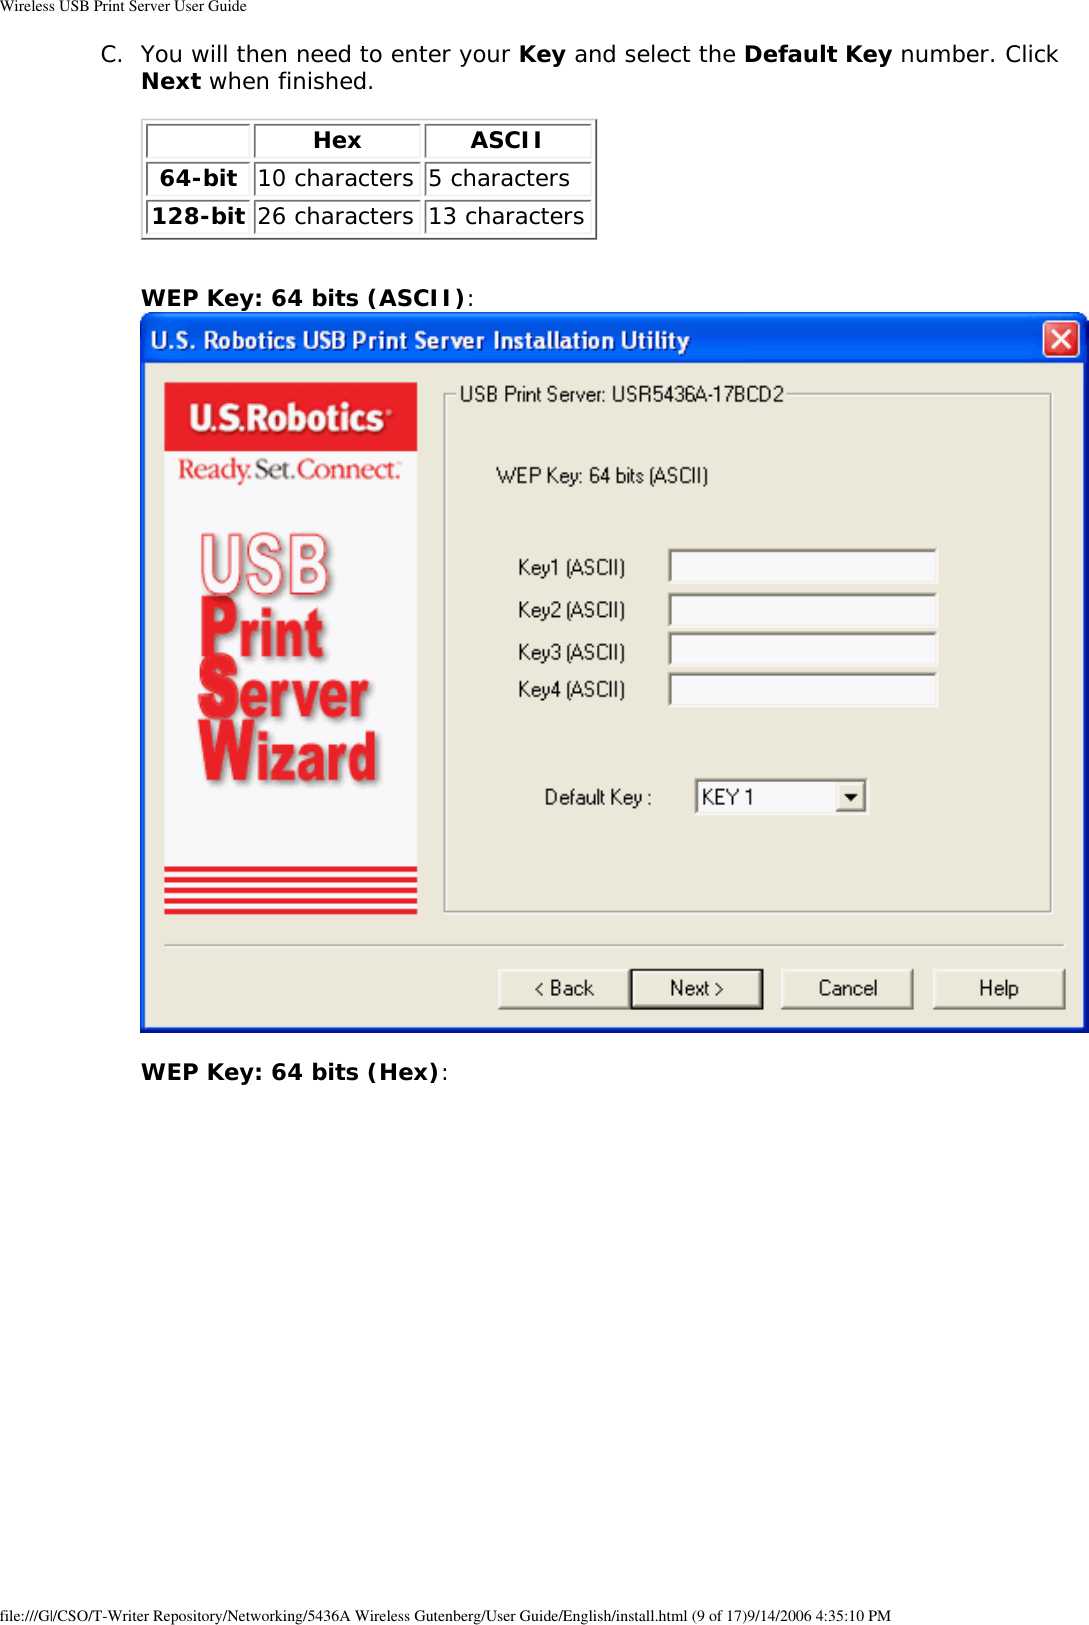
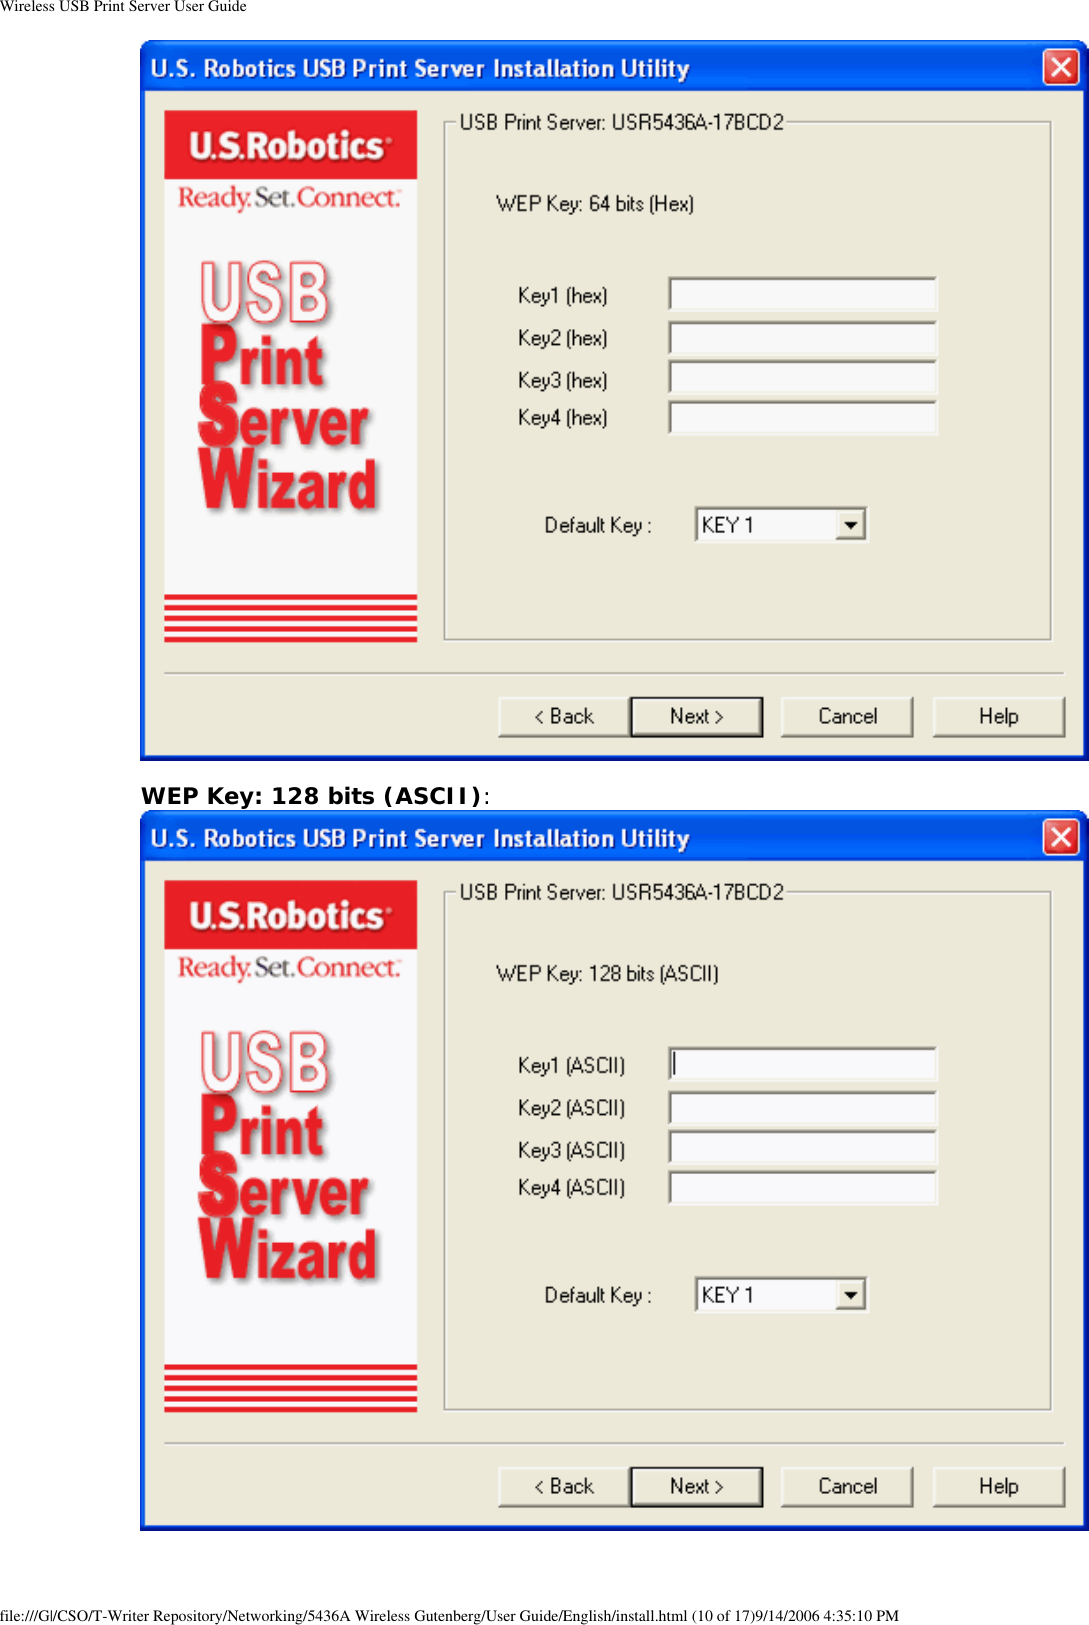
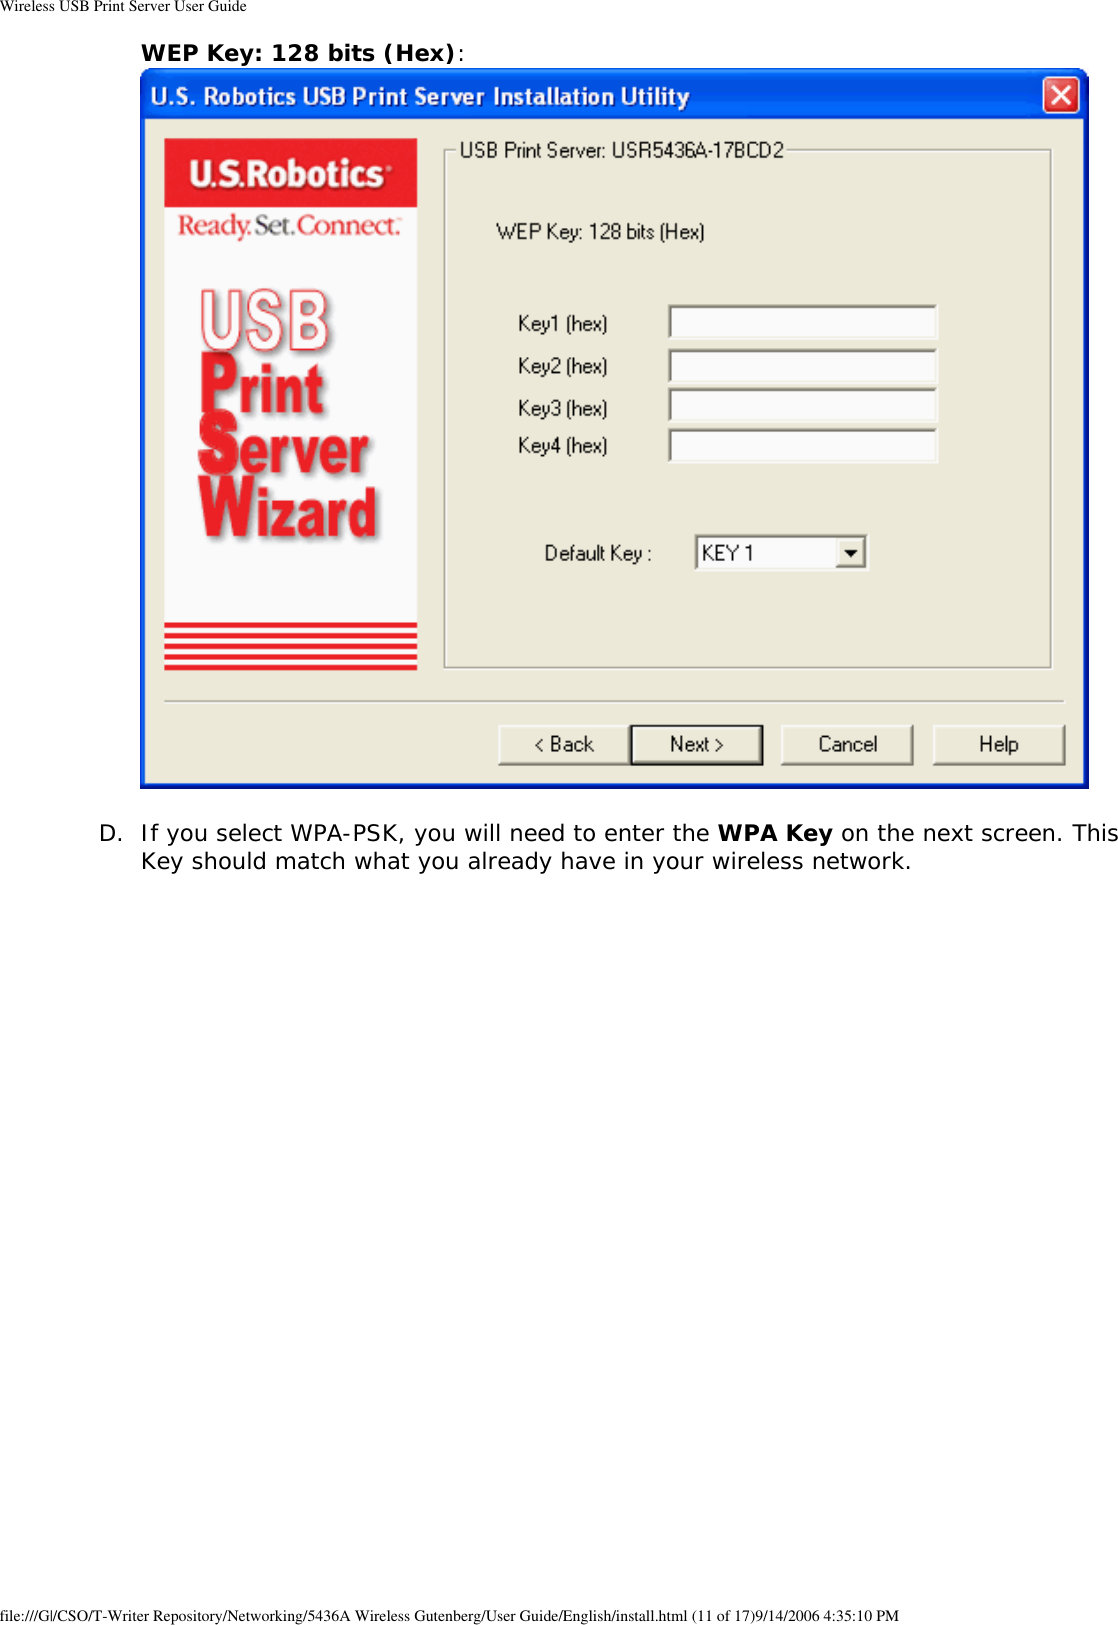
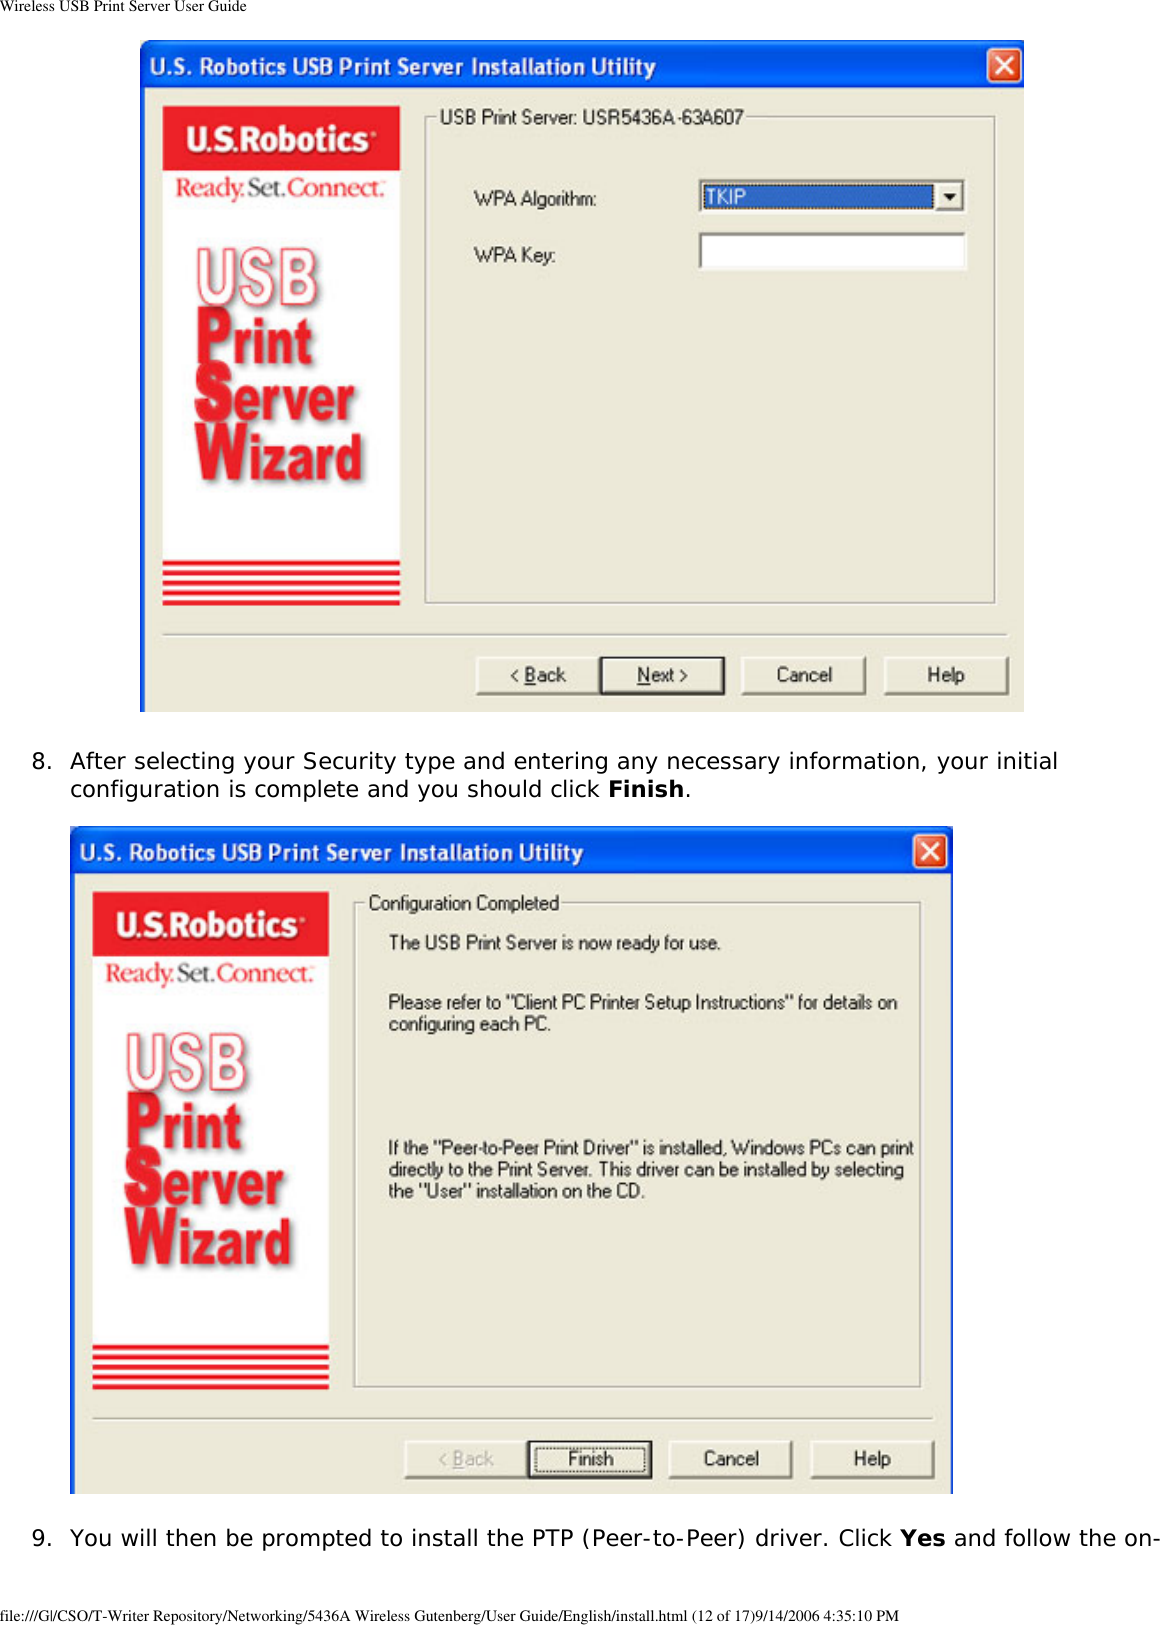
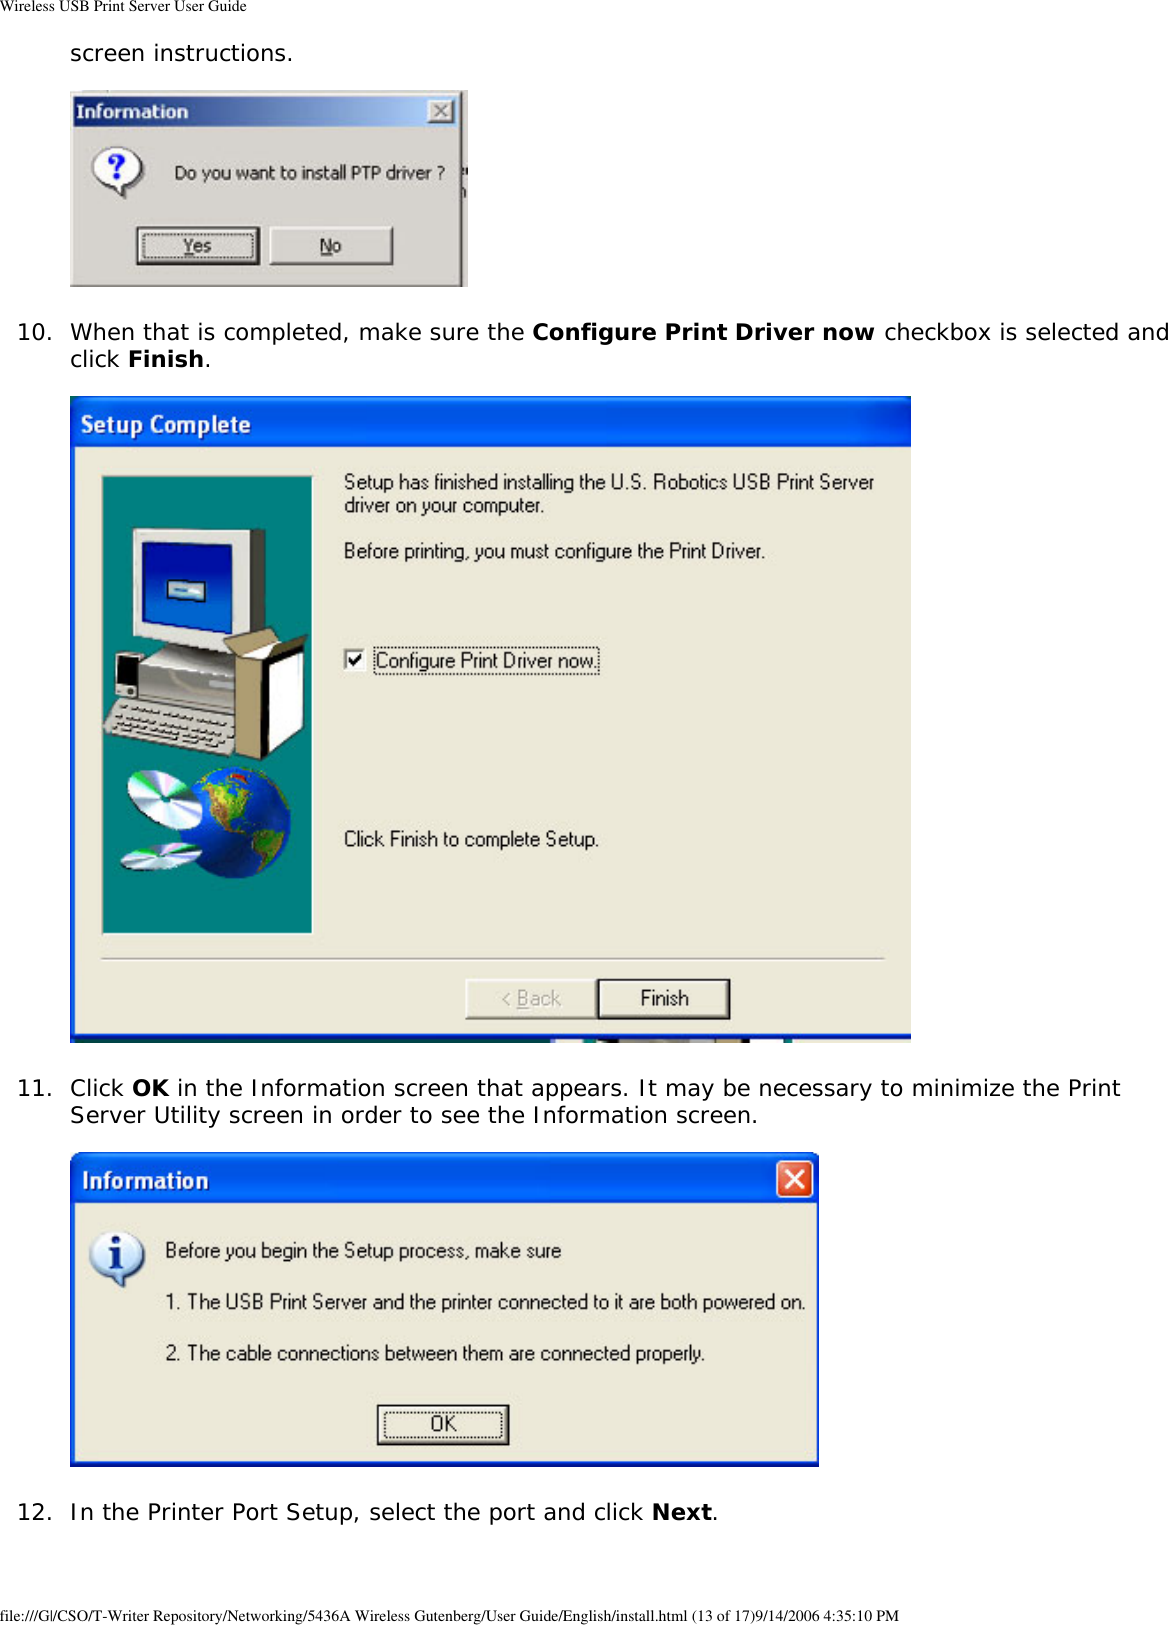
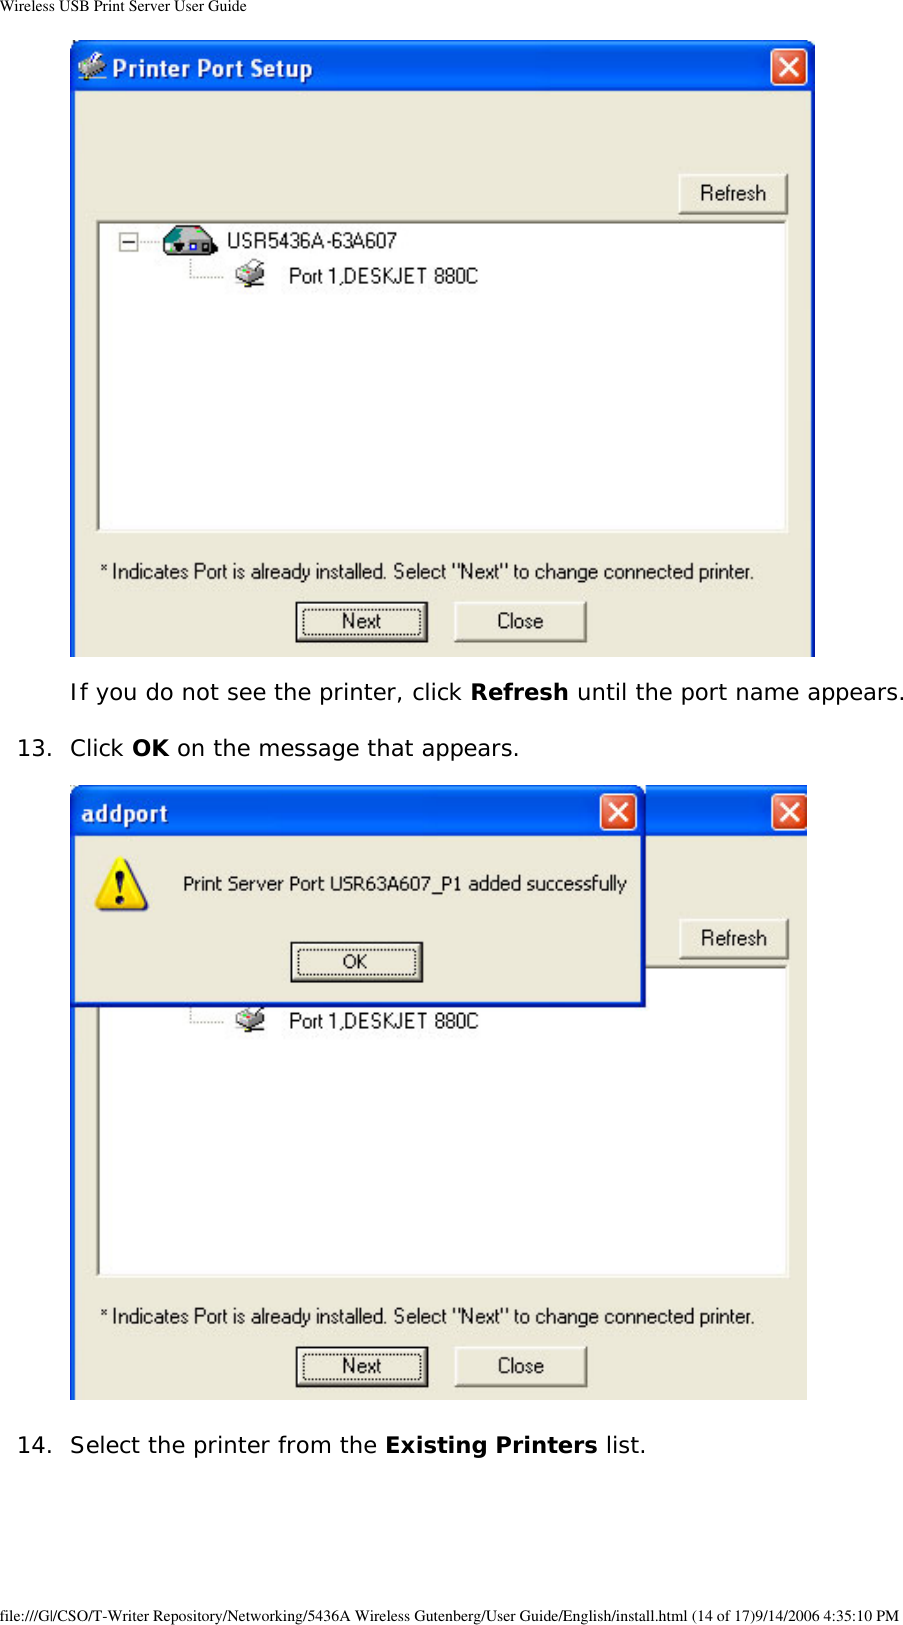
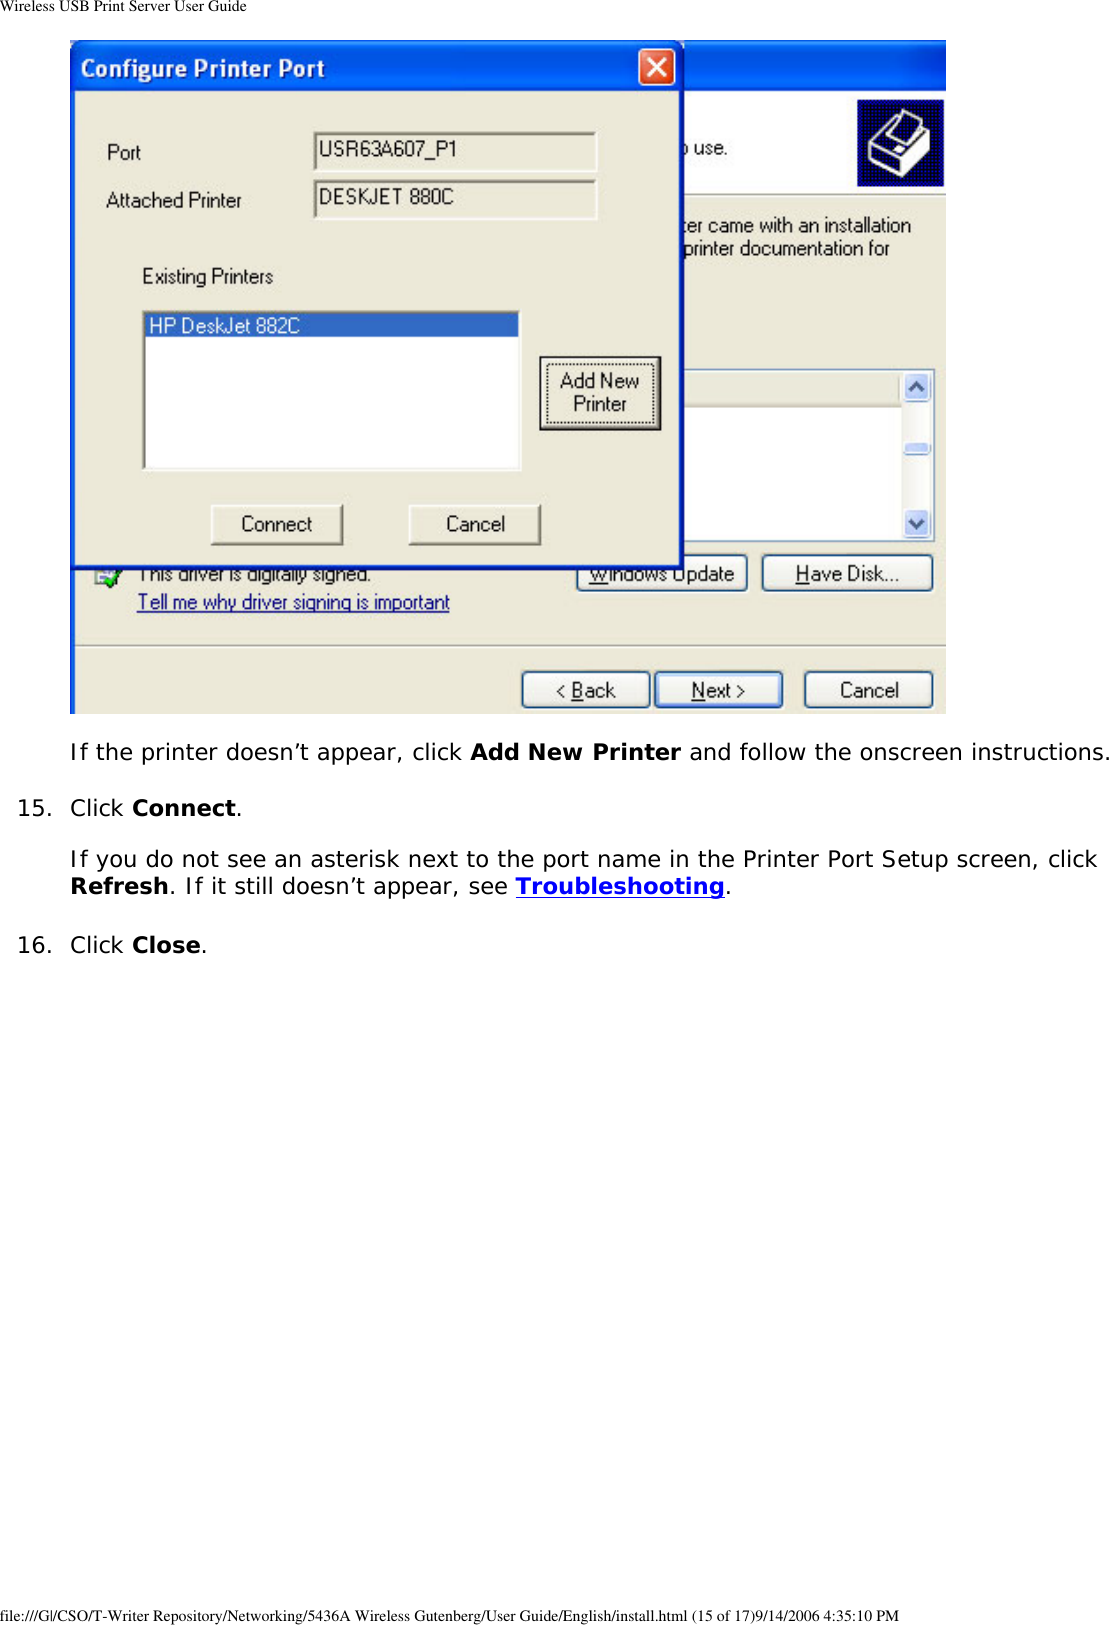
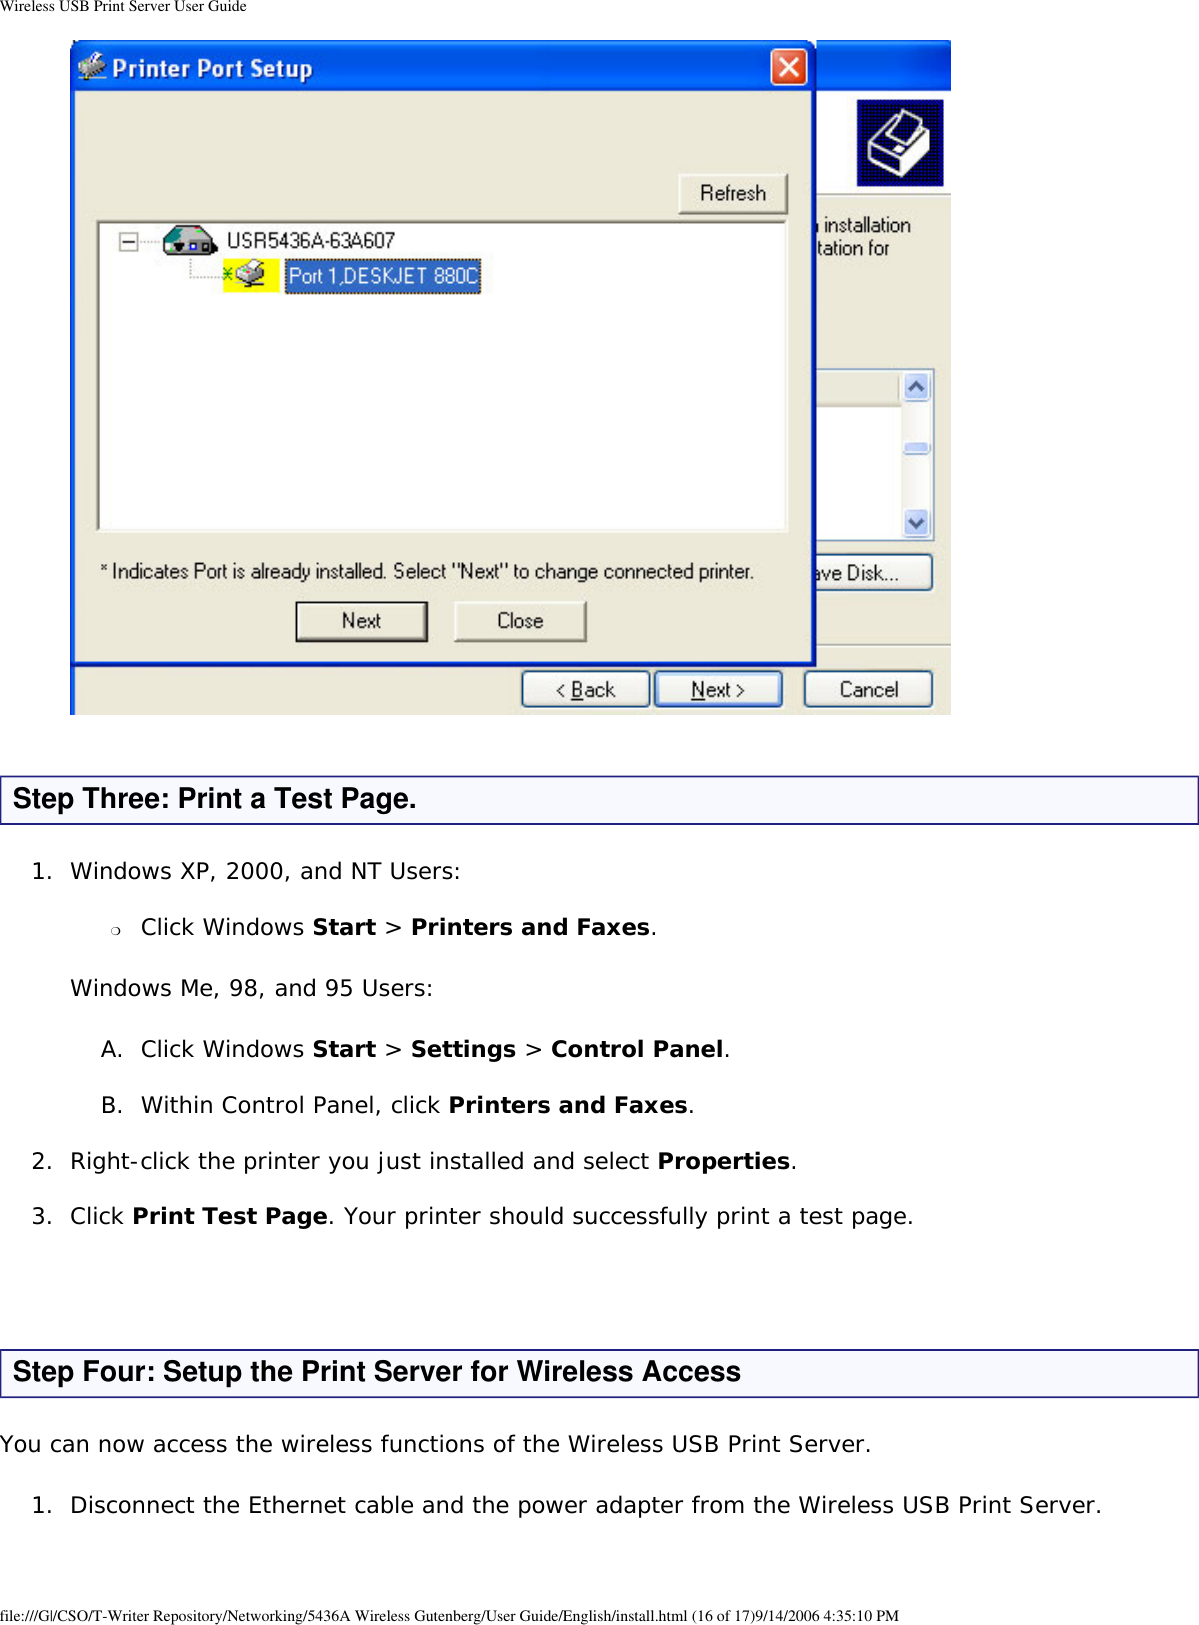


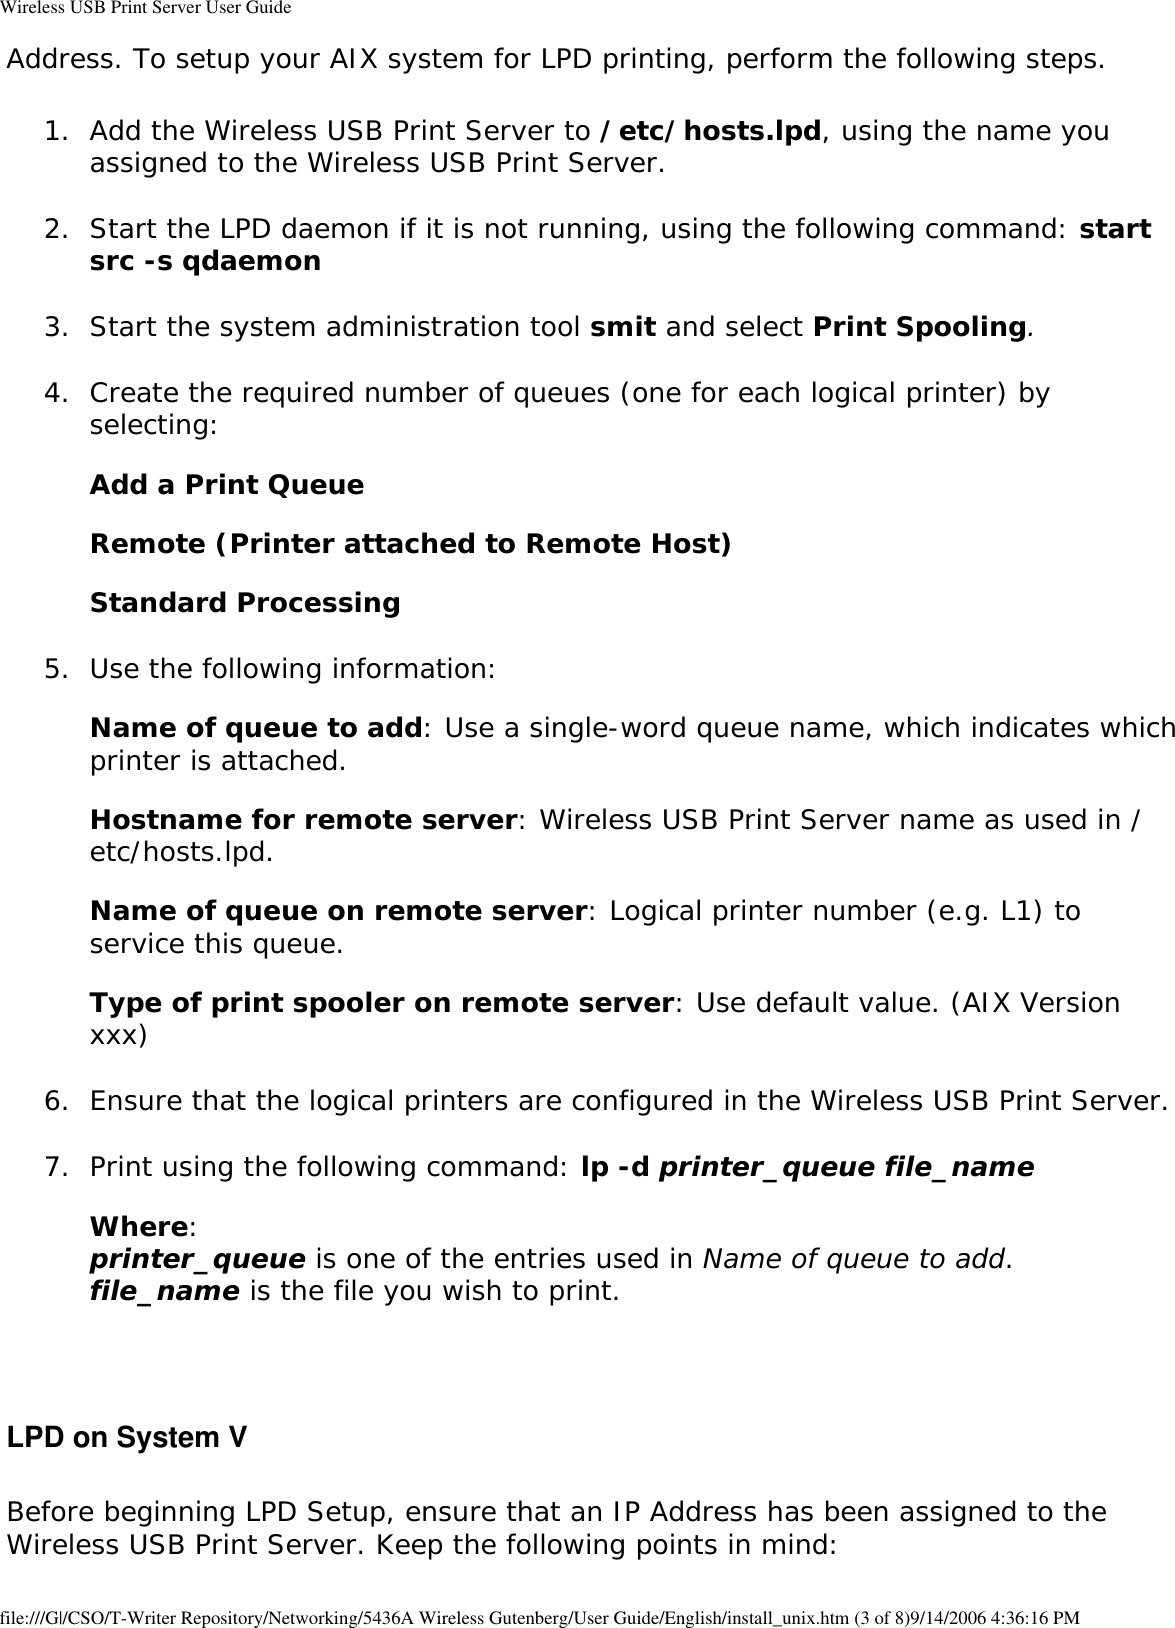

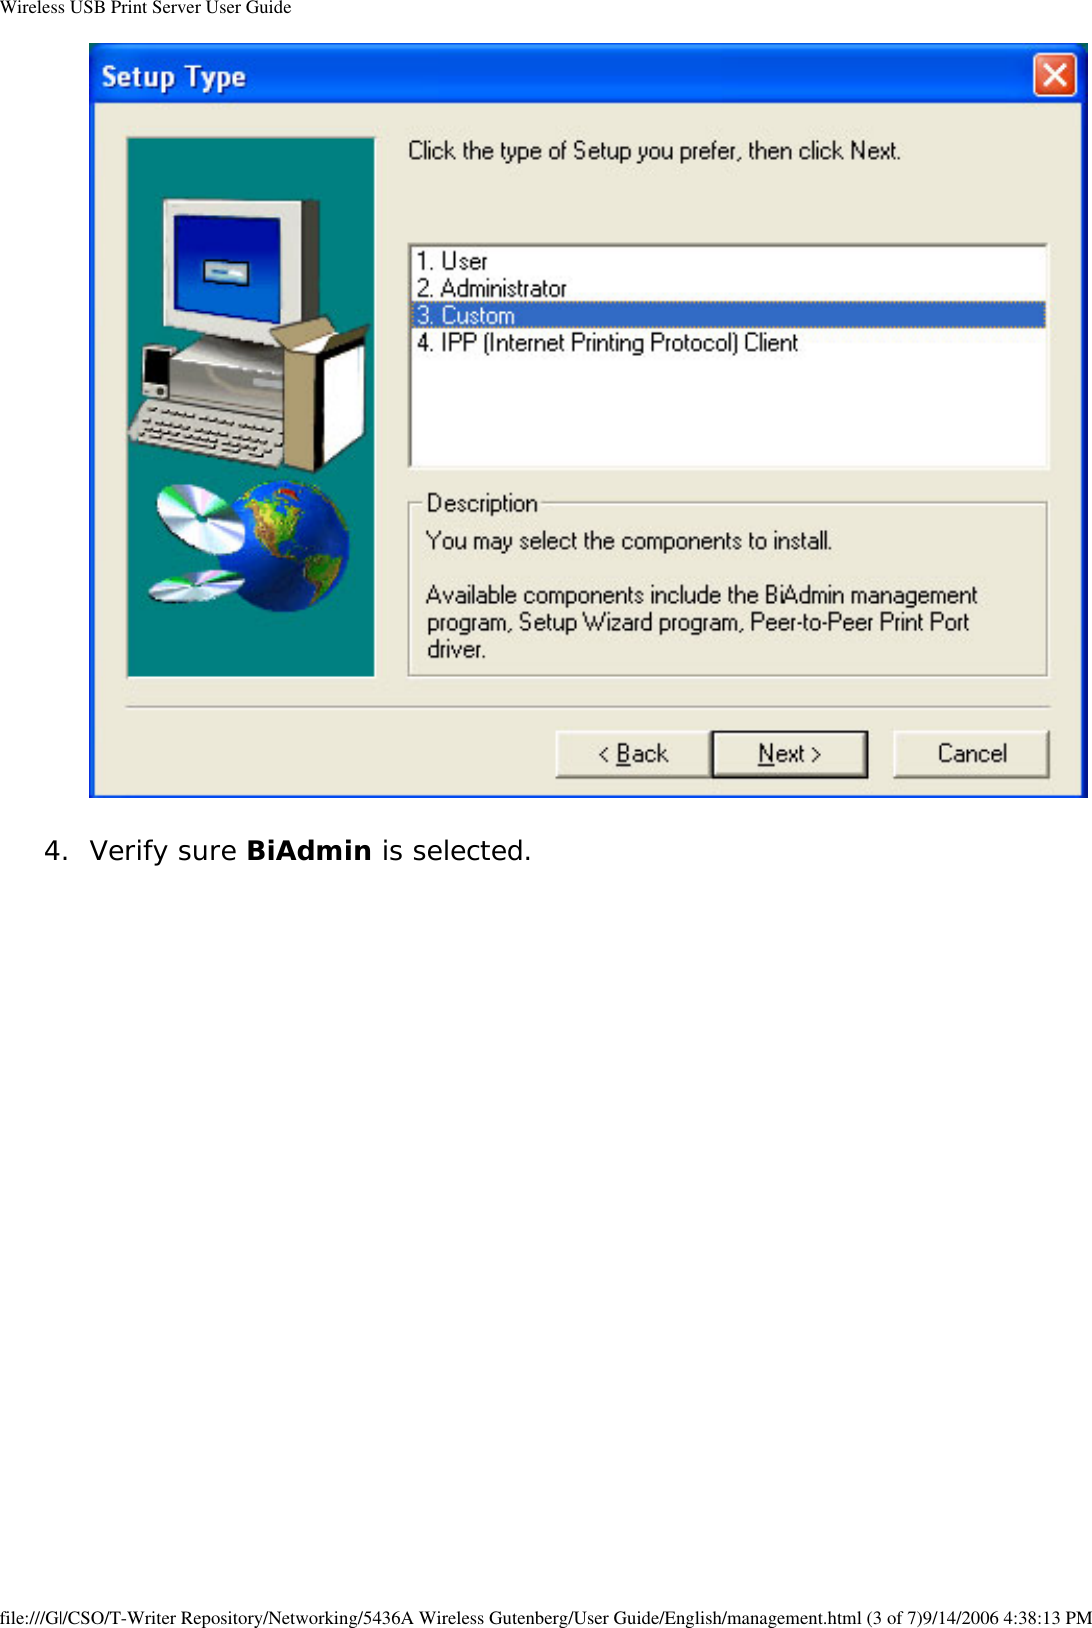
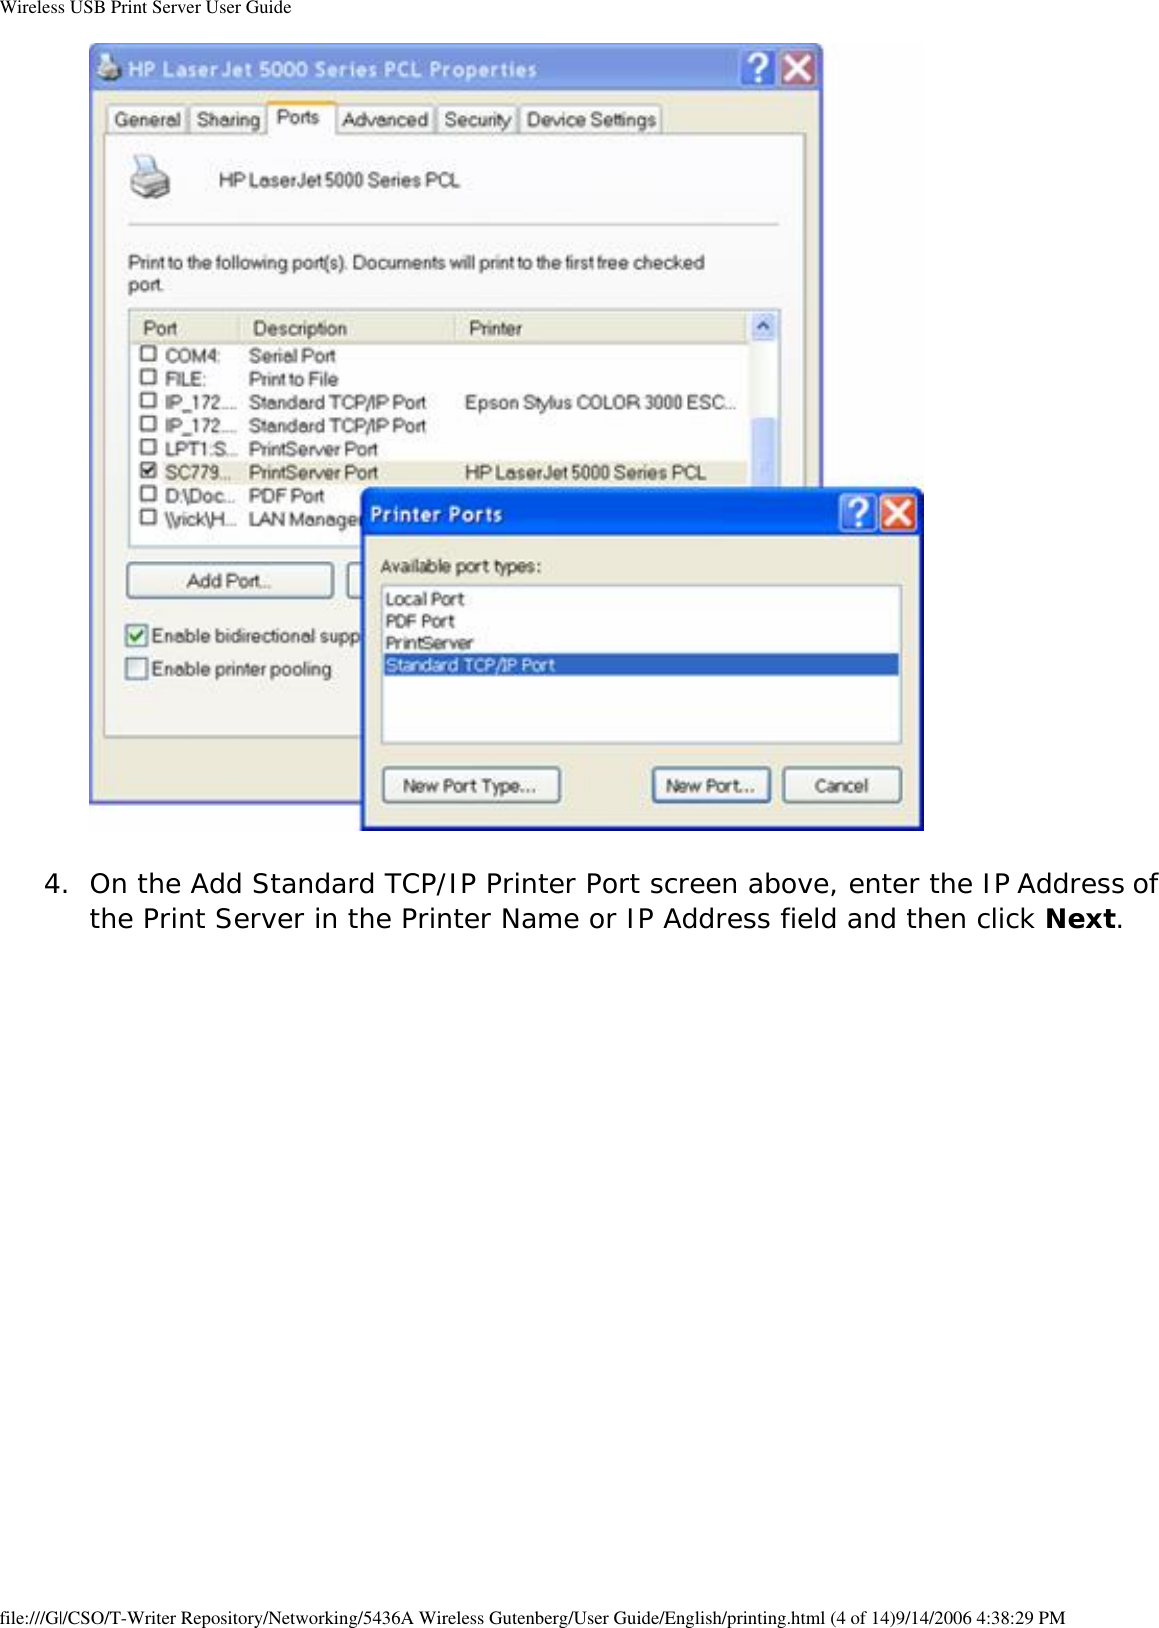
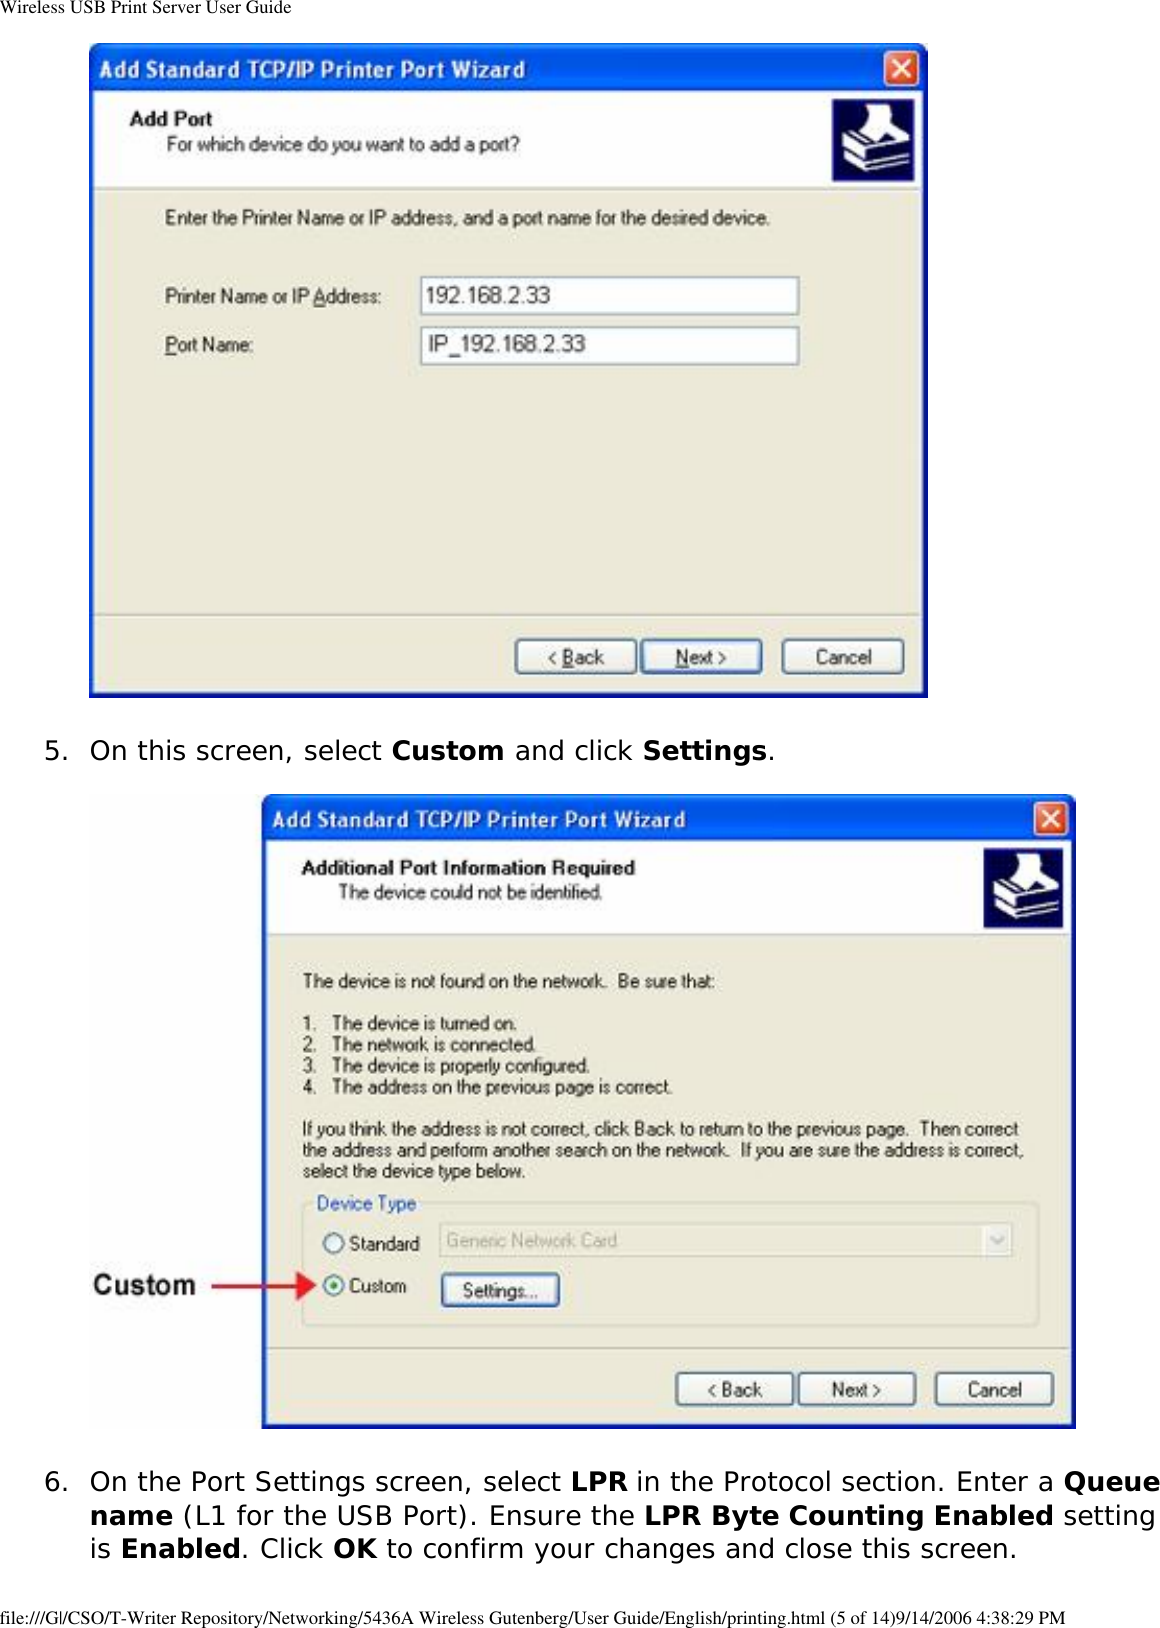
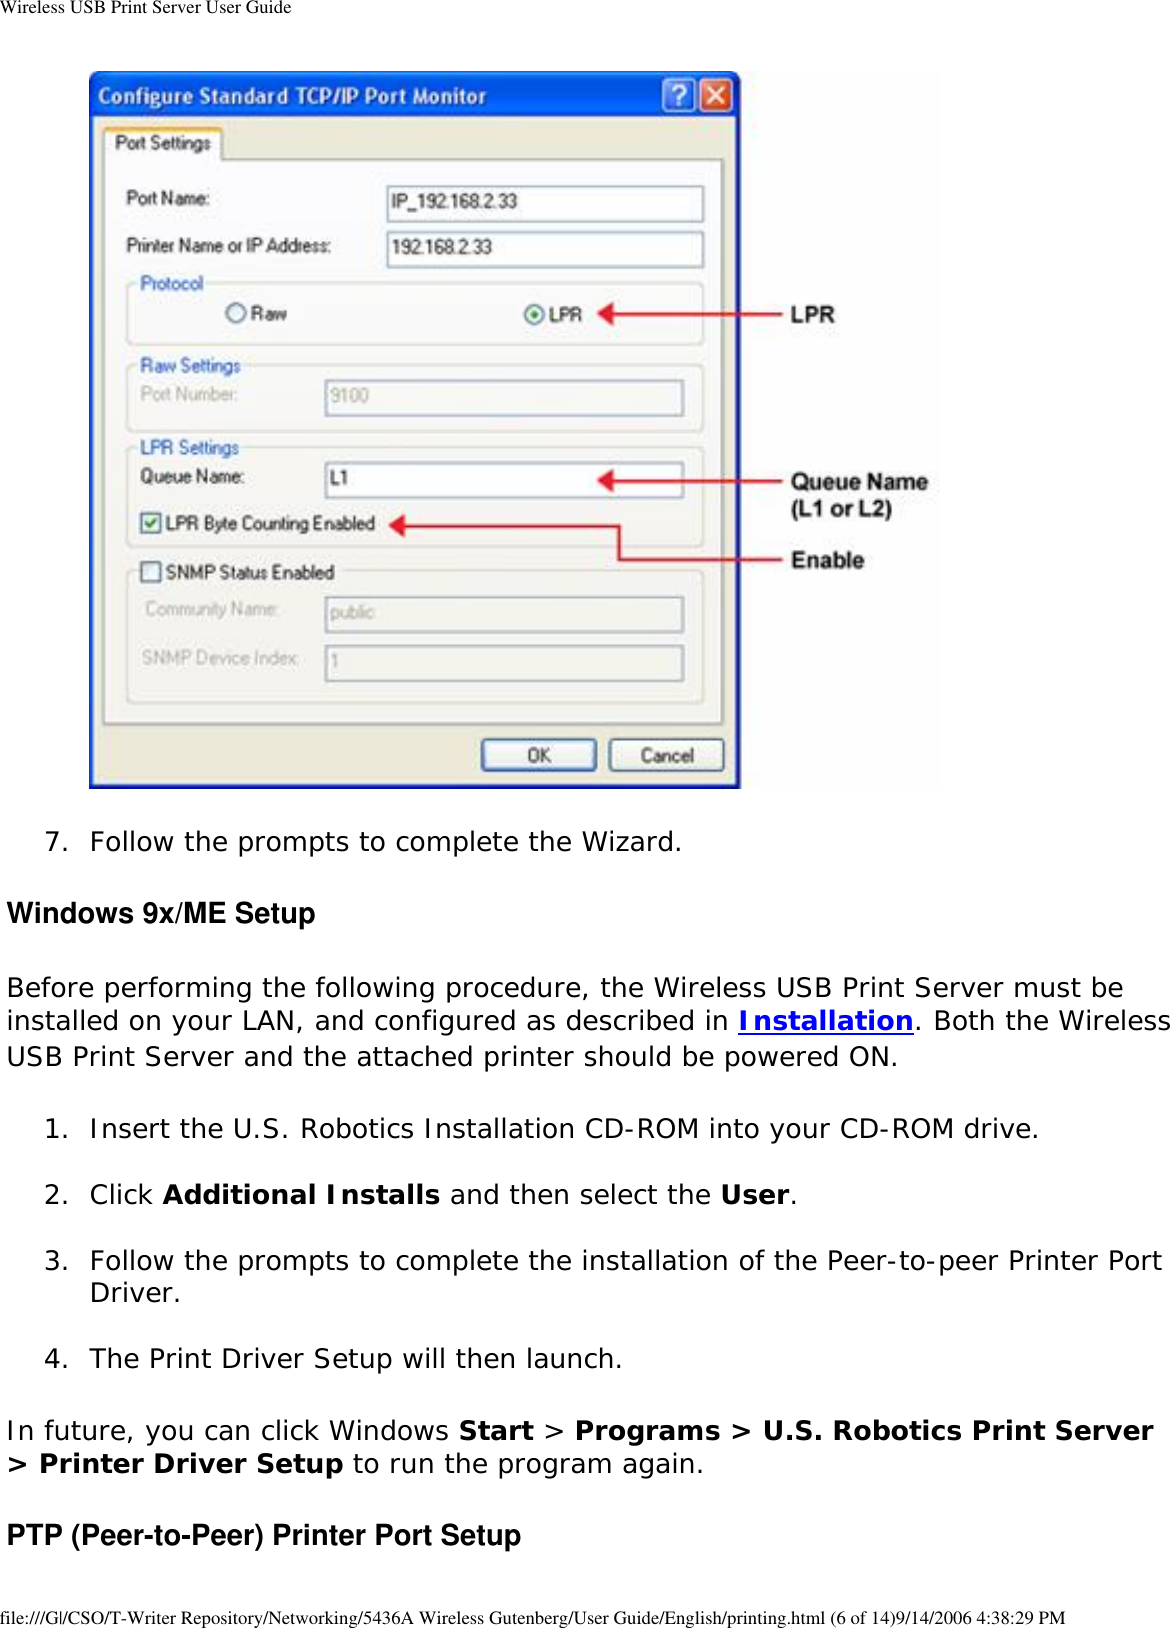
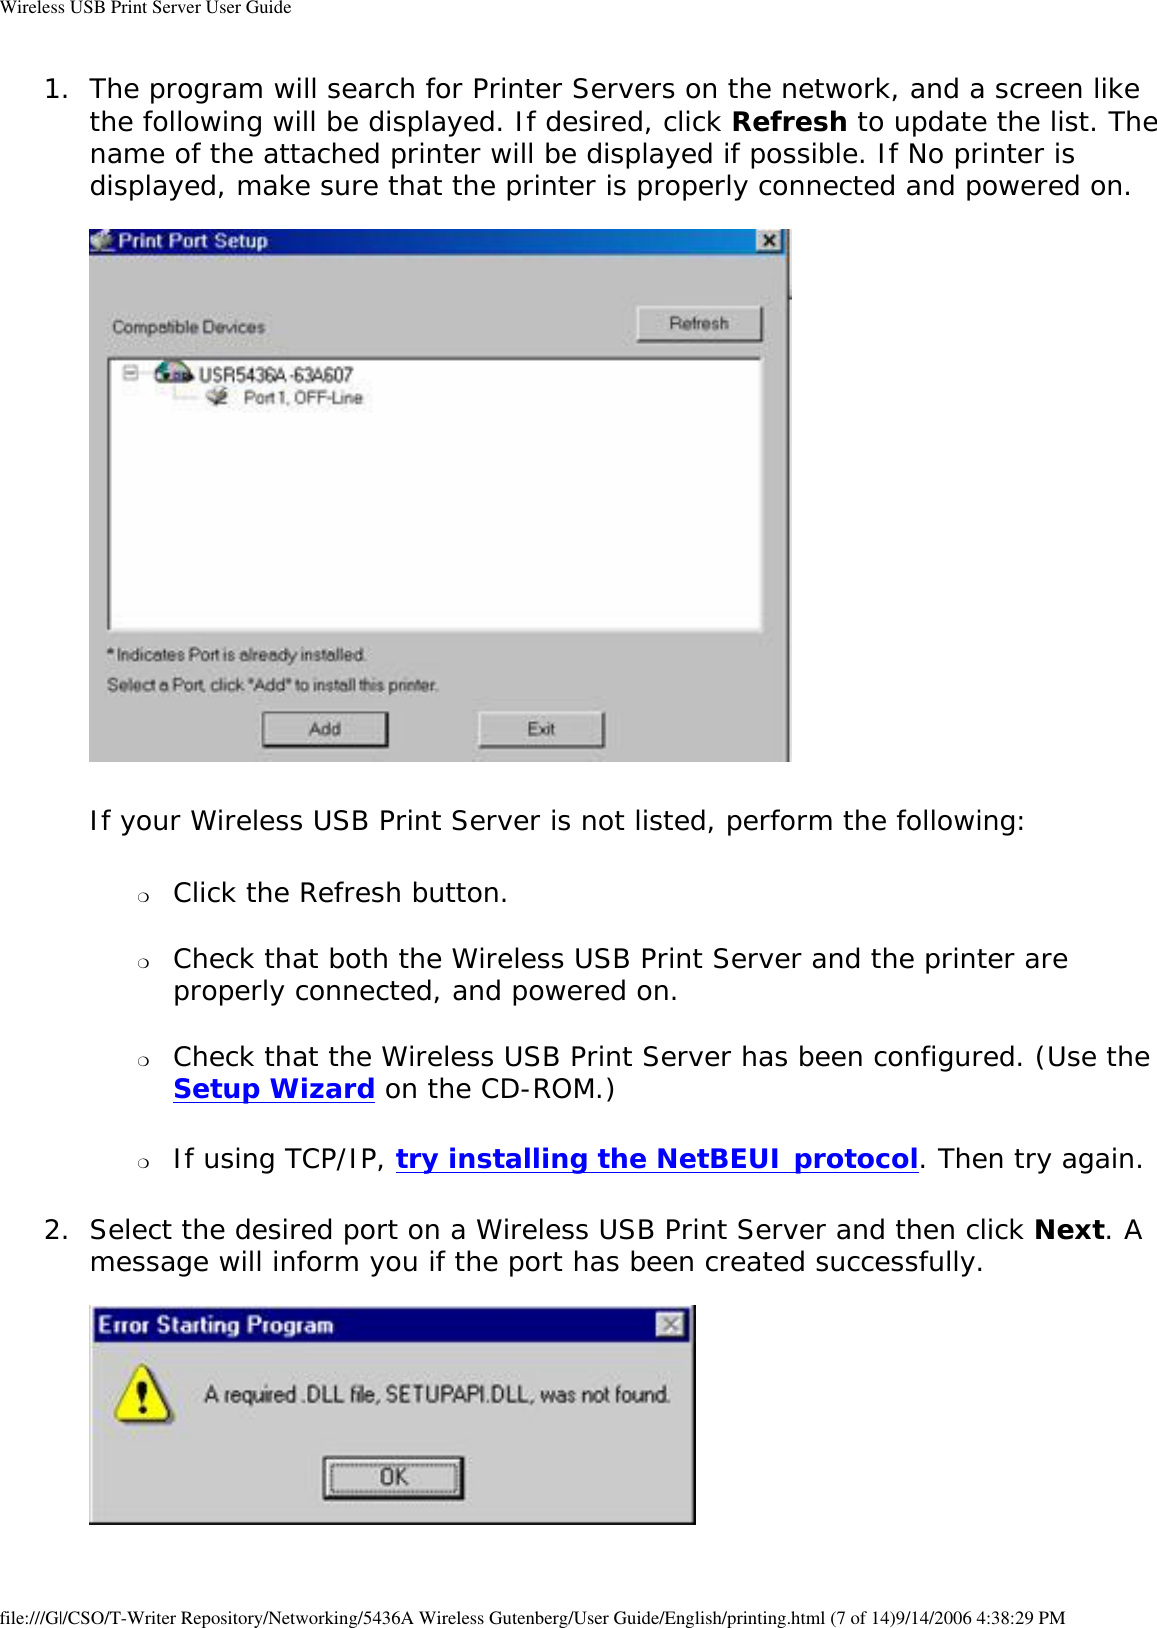
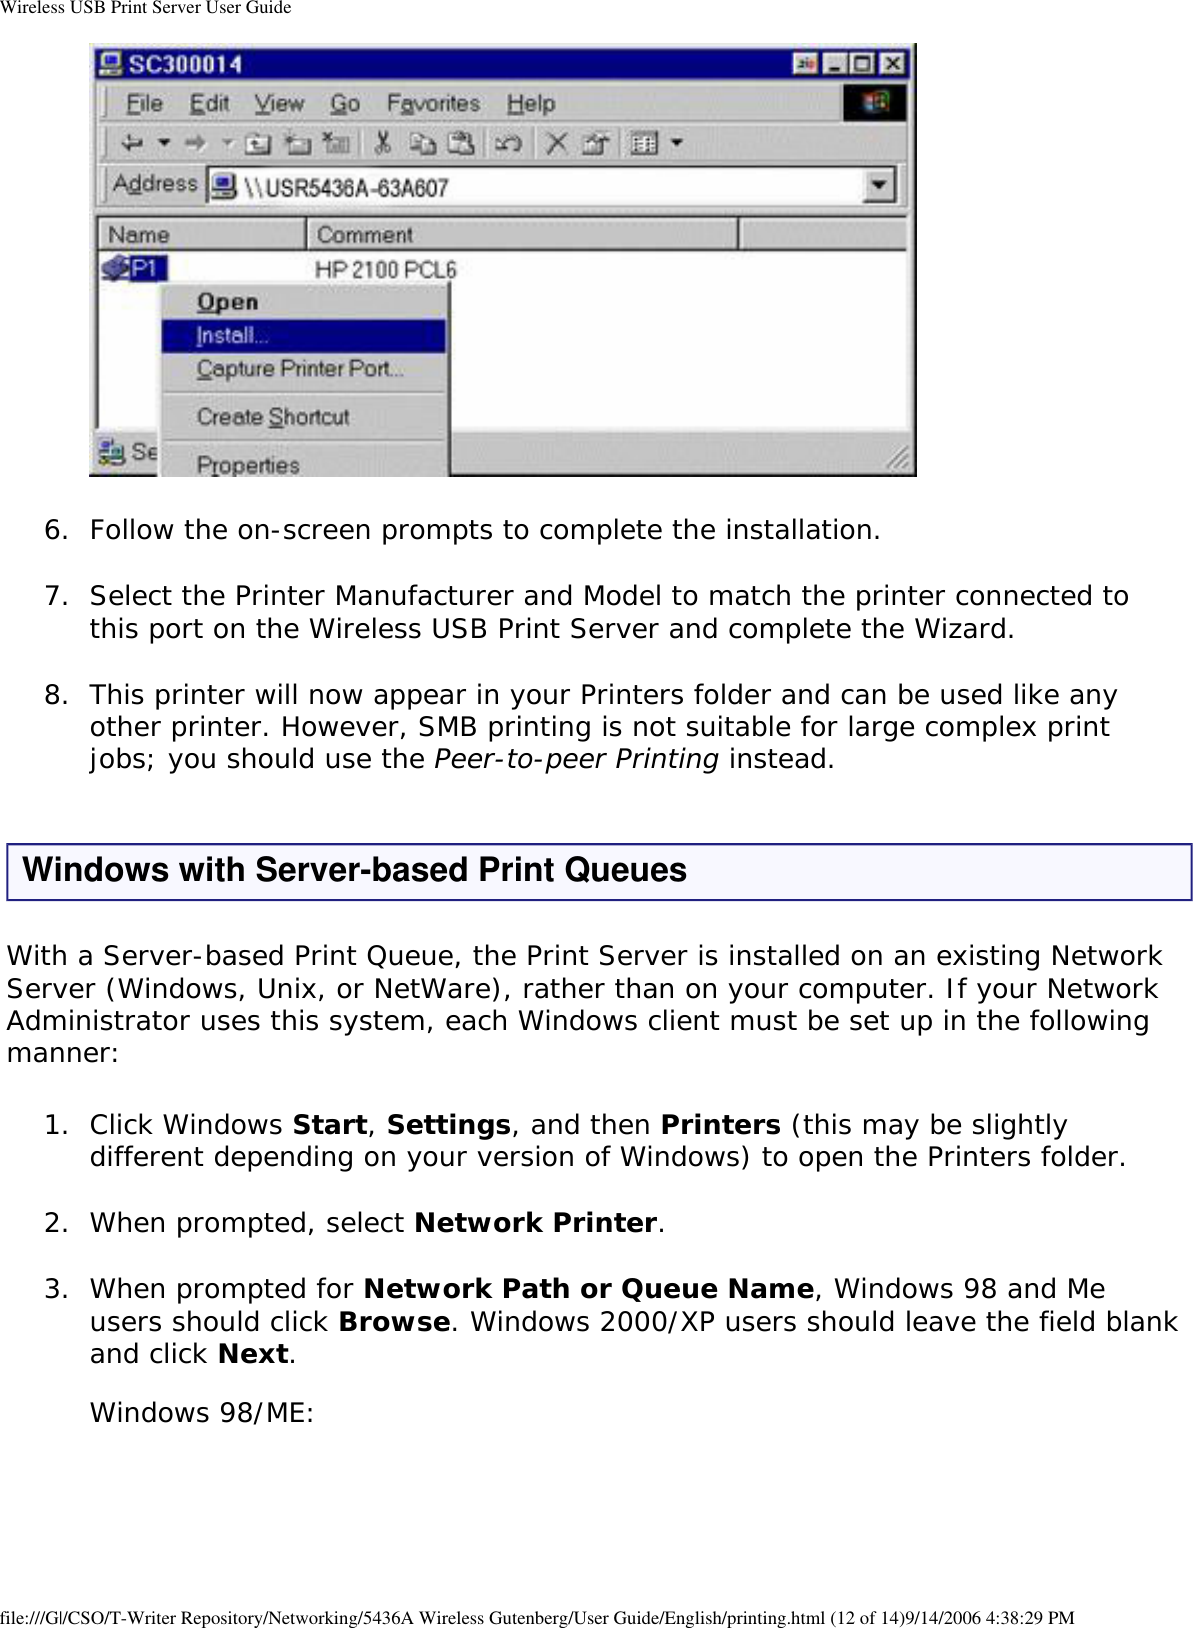
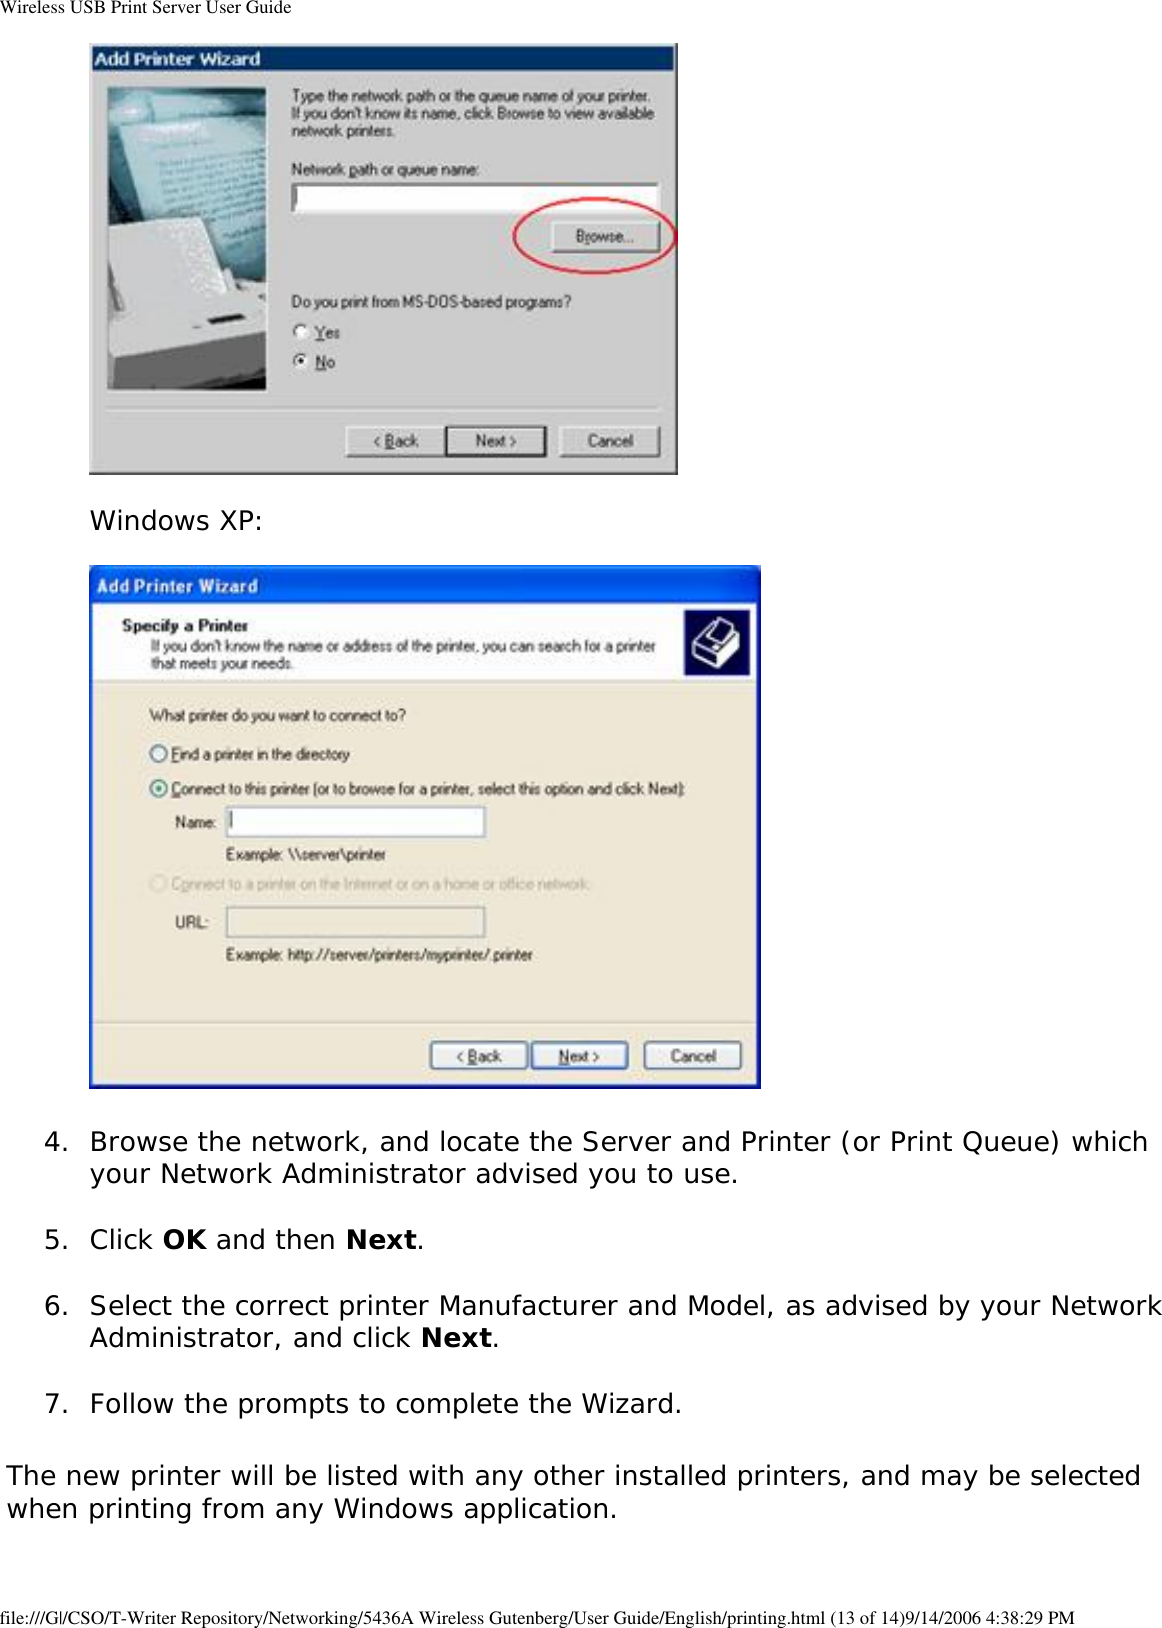
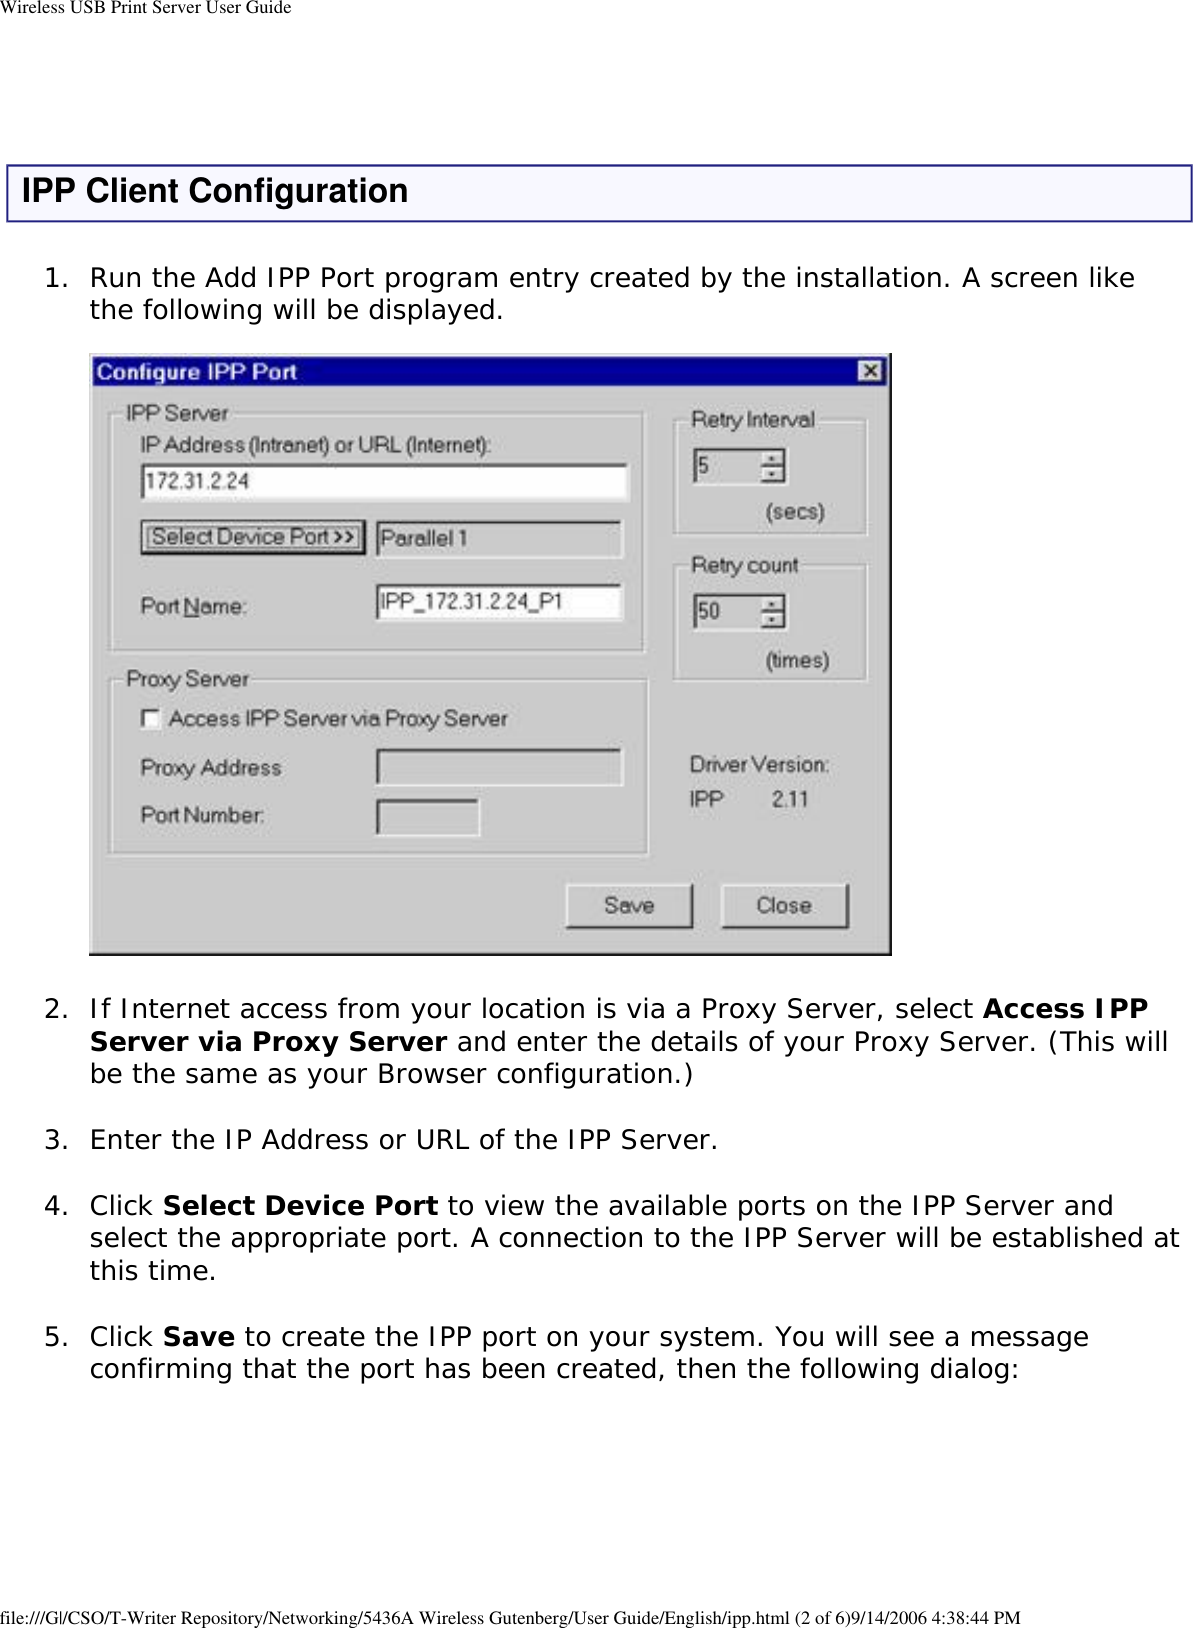
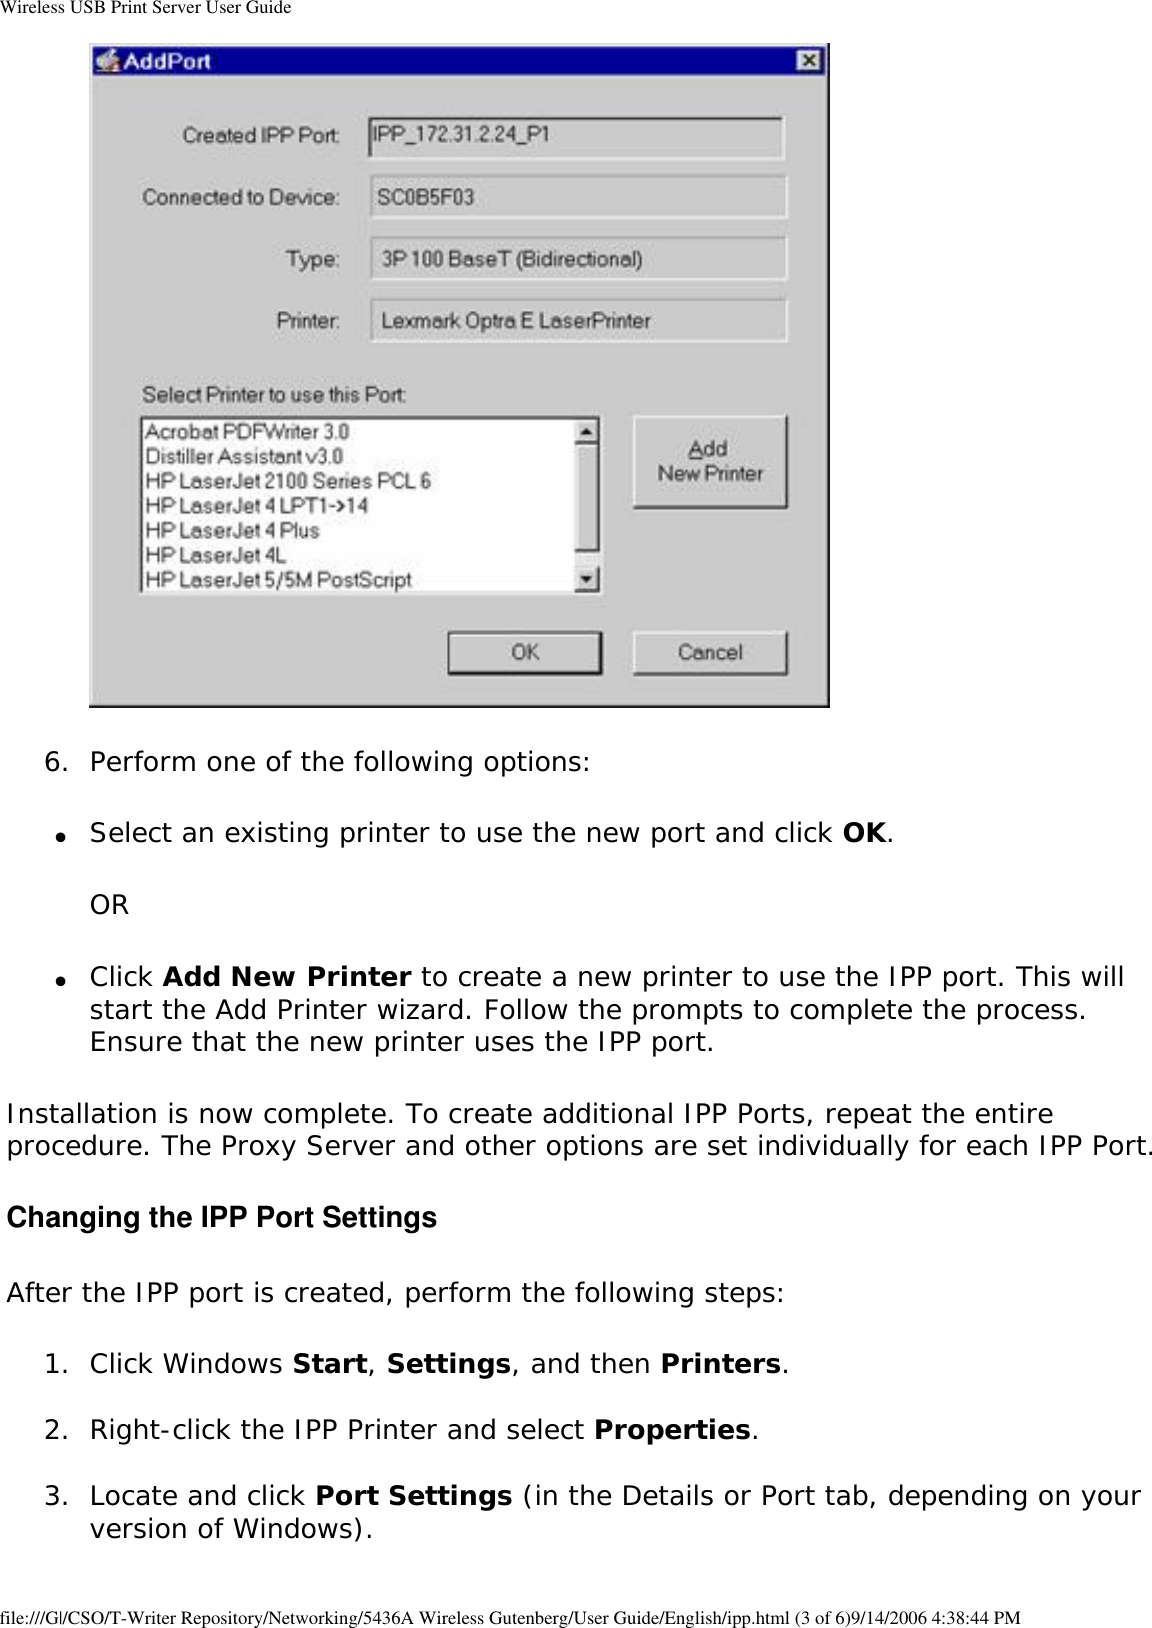
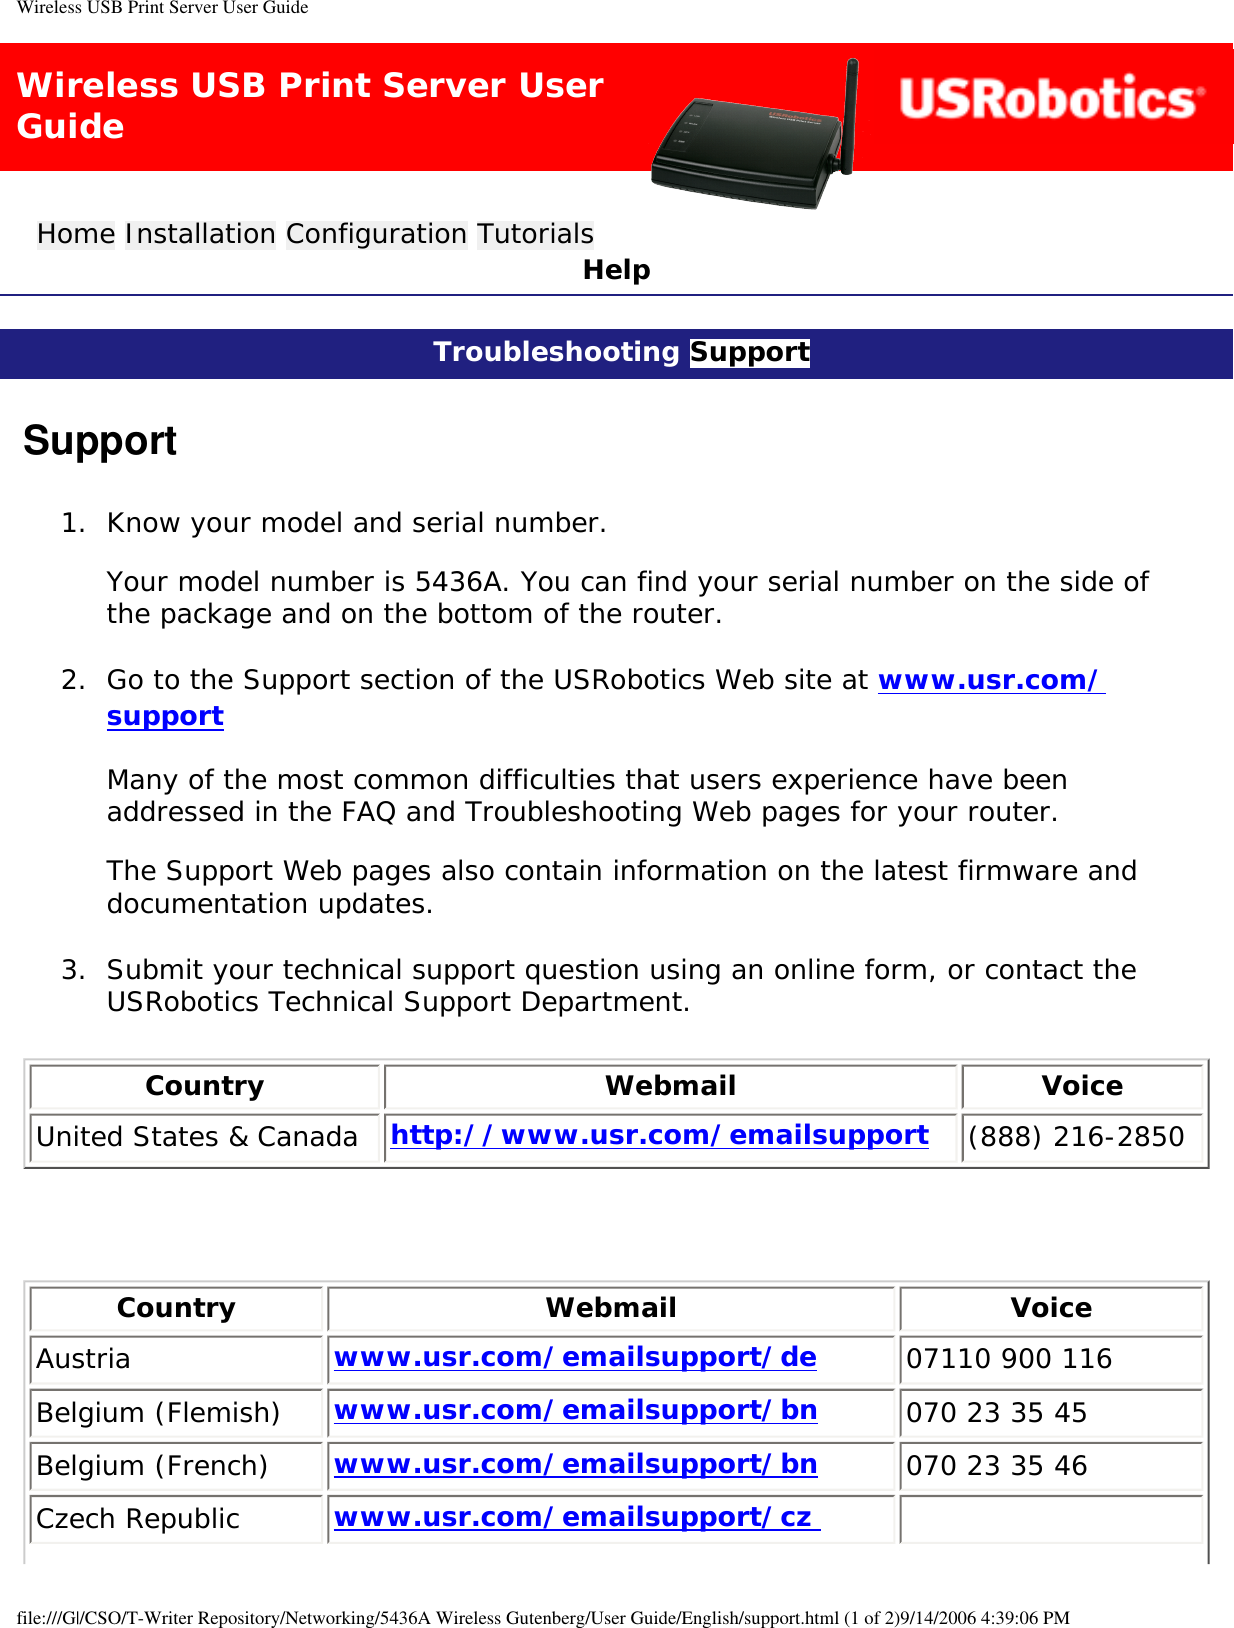
![Wireless USB Print Server User GuideNote: The entry is really one line, but can be entered as shown. Use a TAB character where shown.Printer_name|Remote_Printer_Alias:\ [Tab] :lp=:\ [Tab] :rm=PS_NAME:\ [Tab] :rp=Logical_Printer_name:\ [Tab] :sd=Spooler_directory:\ [Tab] :mx#0:Example:Marketing|RP1_PS123456:\ [Tab] :lp=:\ [Tab] :rm=PS_Rm203:\ [Tab] :rp=L1:\ [Tab] :sd=/usr/spool/Marketing:\ [Tab] :mx#0:Repeat this process for each Logical Printer/Print Queue combination that you wish to create. LPD on LinuxIf using the command line, the procedure is the same as for System V. (above)On recent Linux distributions, you can use the graphical X-windows interface instead of the command line. The procedure is described below, but may vary according to your version of Linux.1. Start your X-windows shell. 2. Select Control Panel and then Printer Configuration. 3. Select Add. For the printer type, select Remote Unix (lpd) Queue. 4. Use the following data to complete the resulting dialog: Name: Enter a name for this printer file:///G|/CSO/T-Writer Repository/Networking/5436A Wireless Gutenberg/User Guide/English/install_unix.htm (5 of 8)9/14/2006 4:36:16 PM](https://usermanual.wiki/Sercomm/PS801H-V2/User-Guide-714352-Page-59.png)
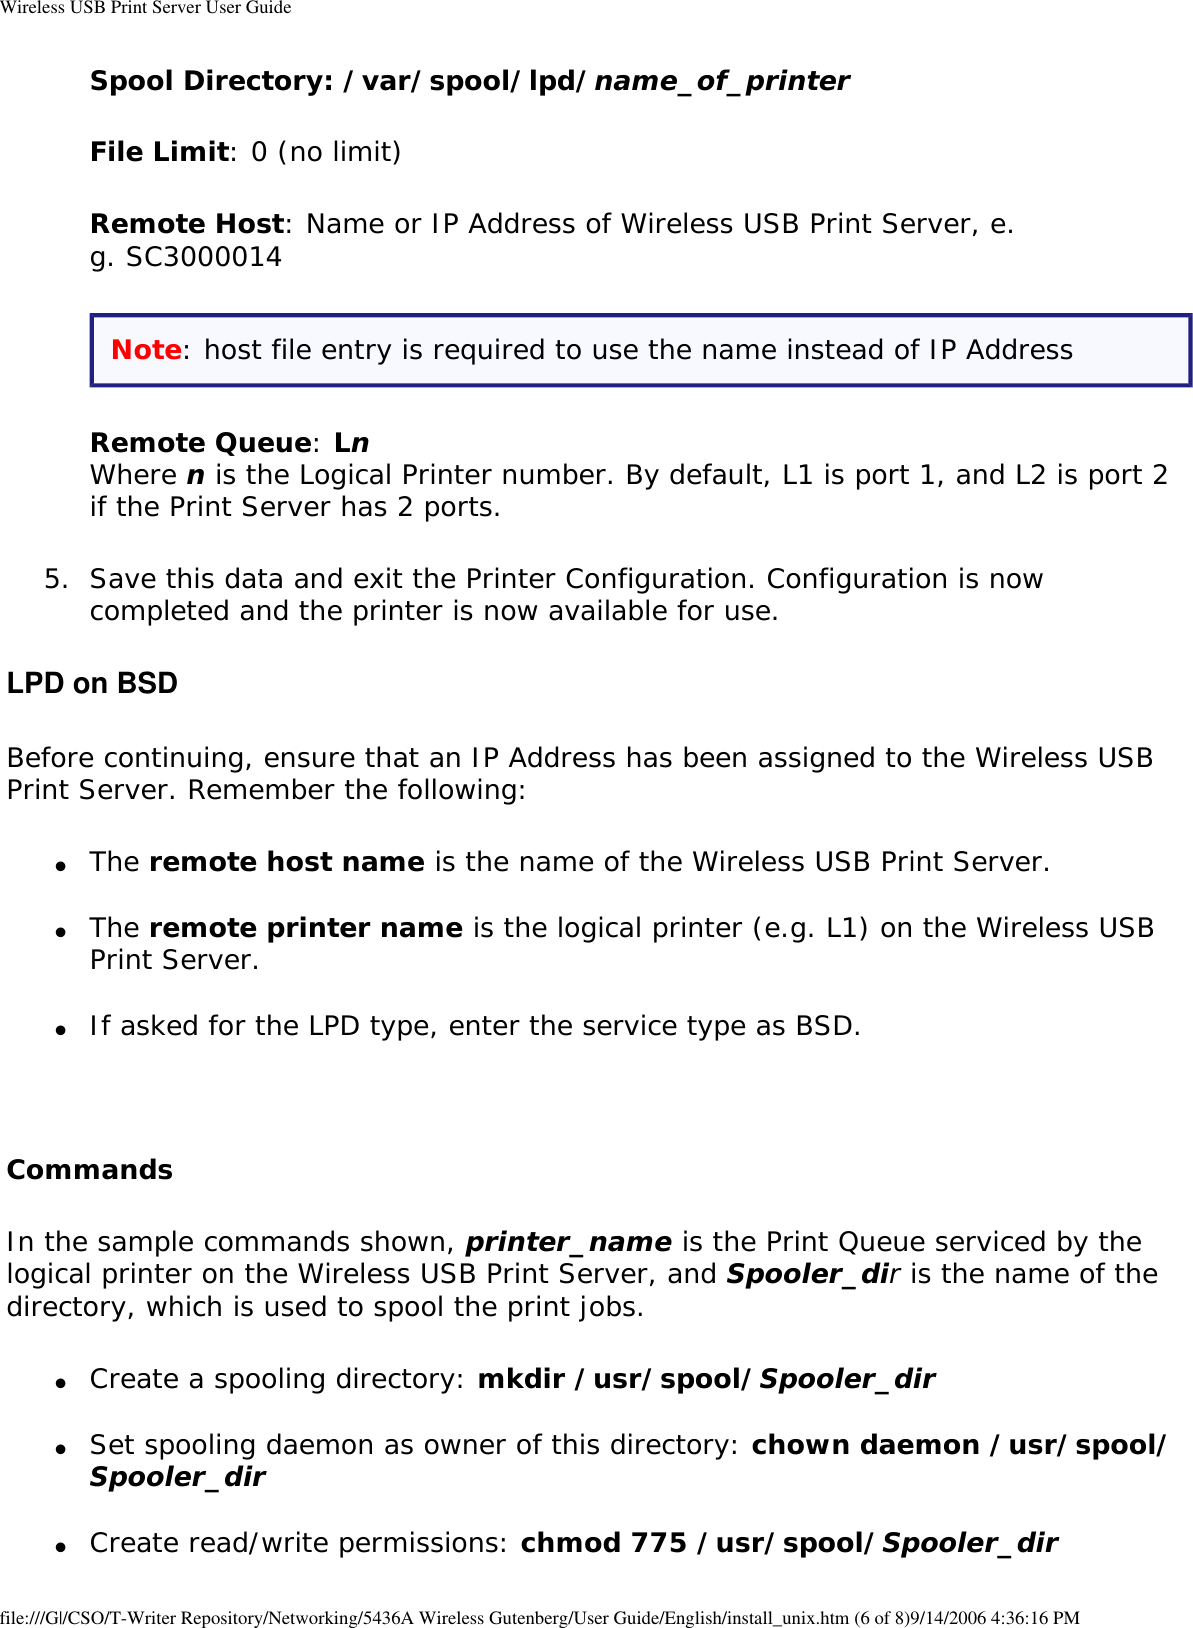
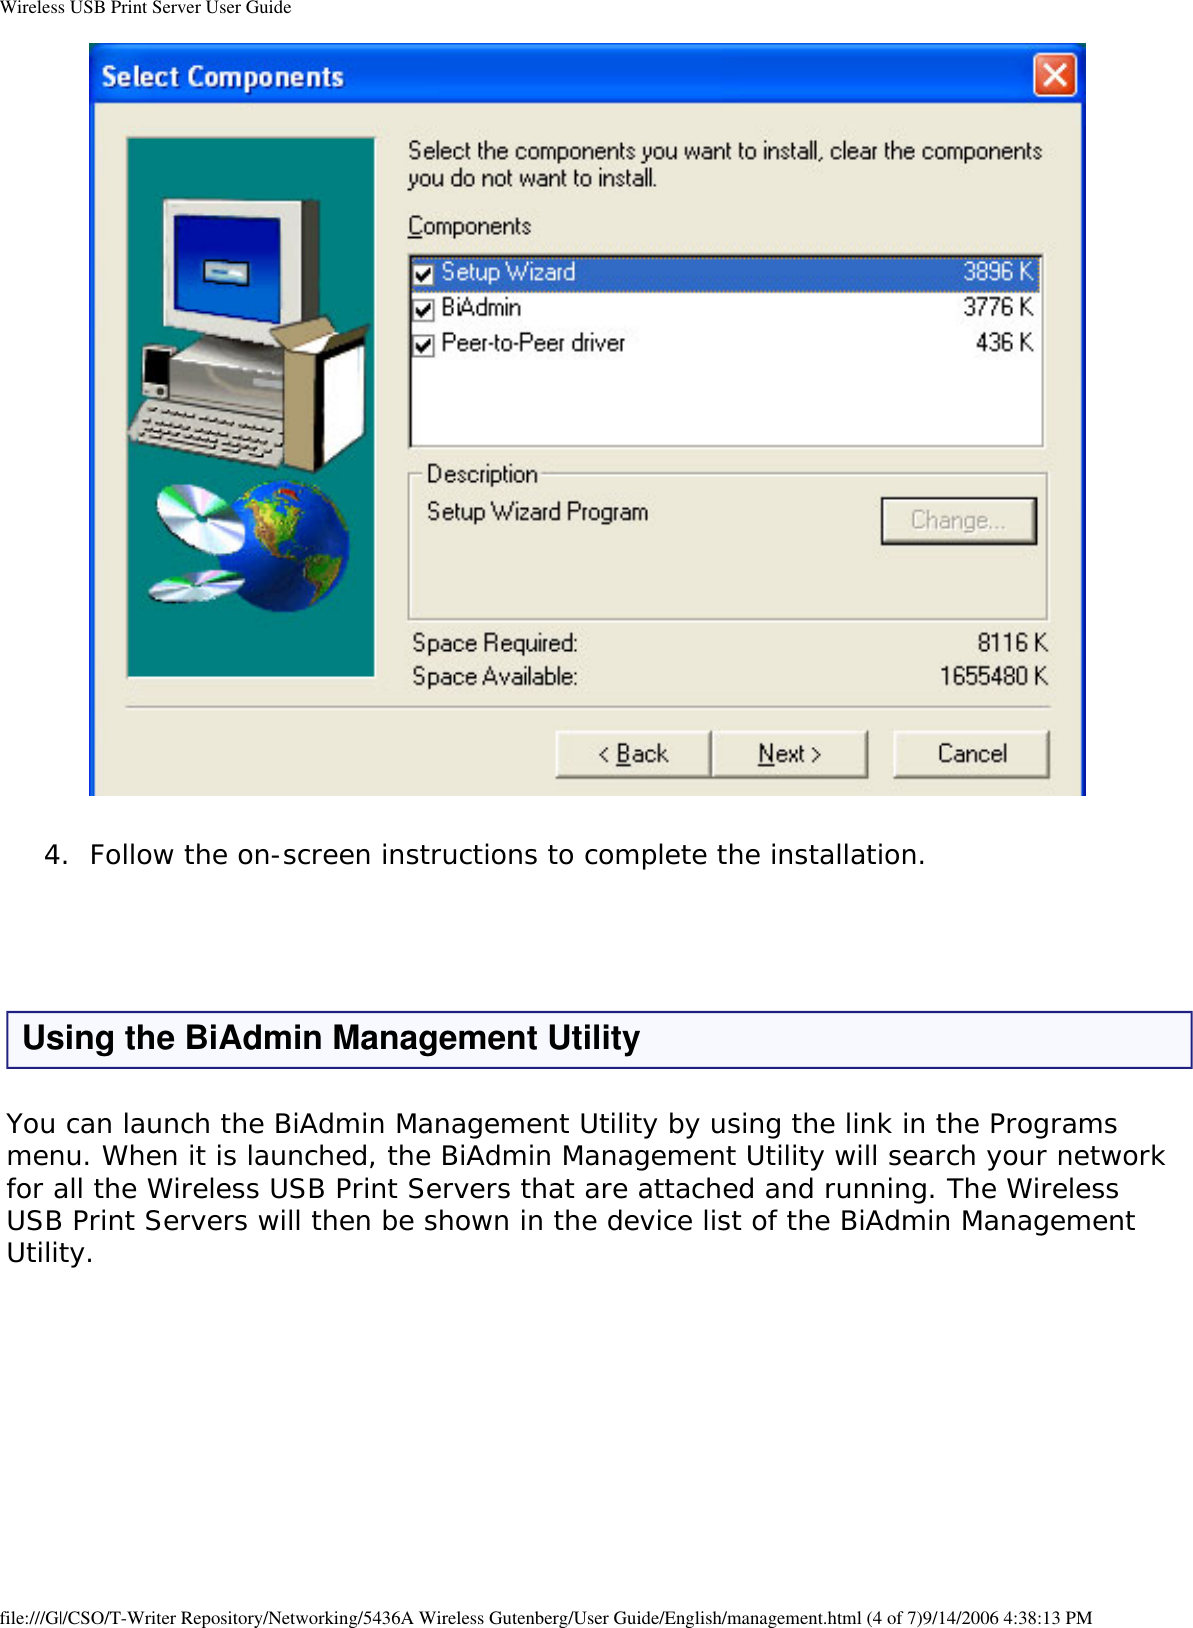
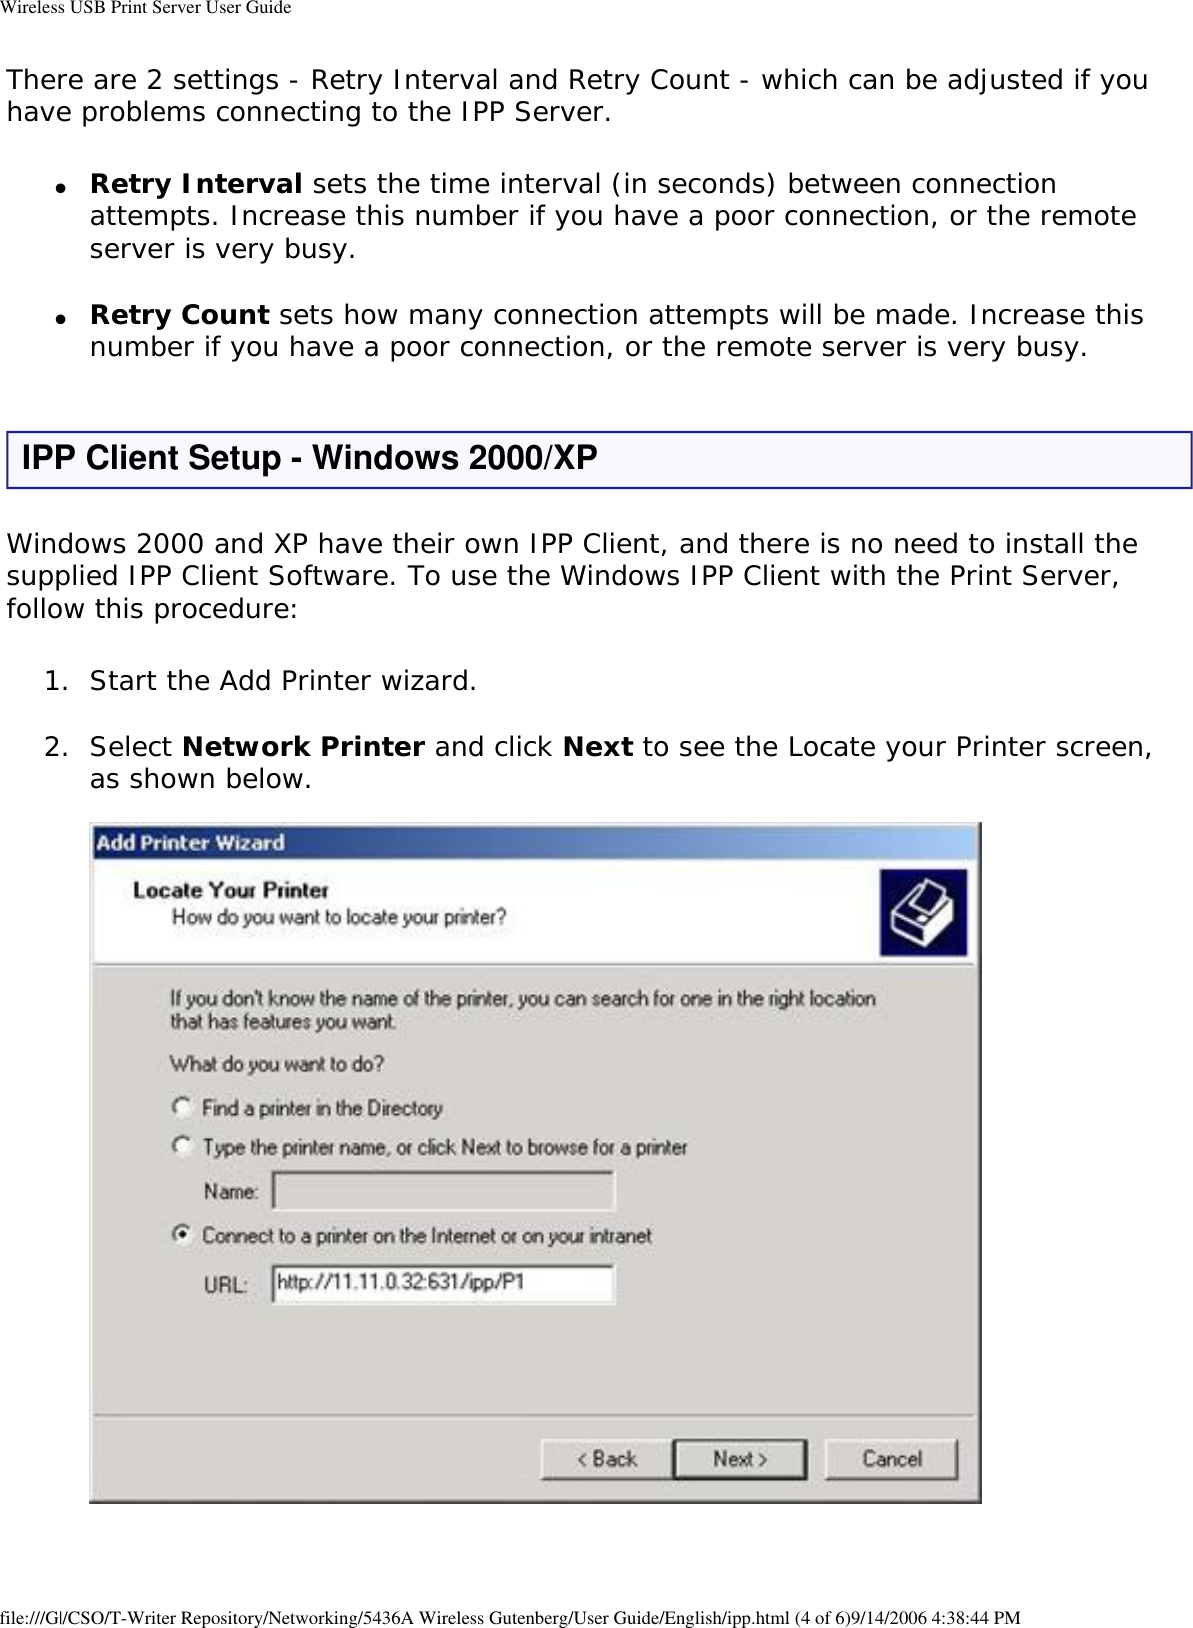
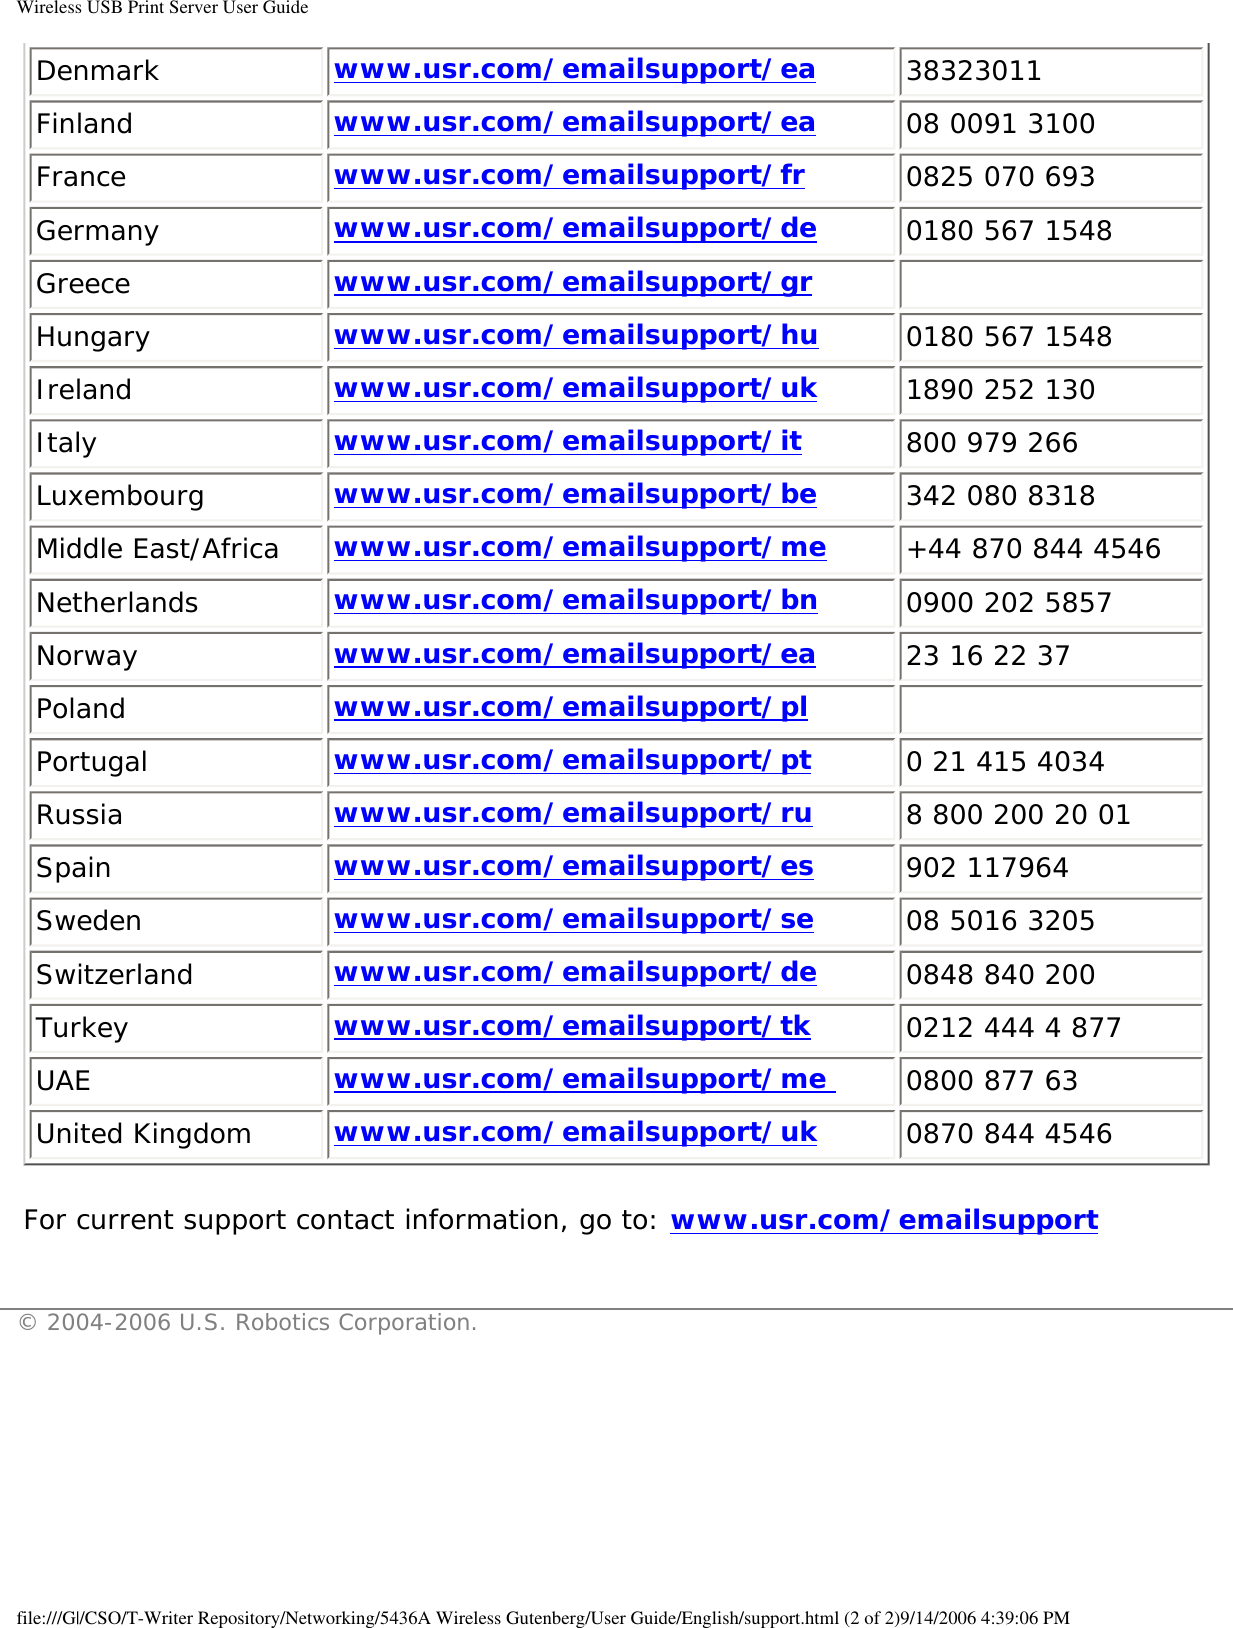
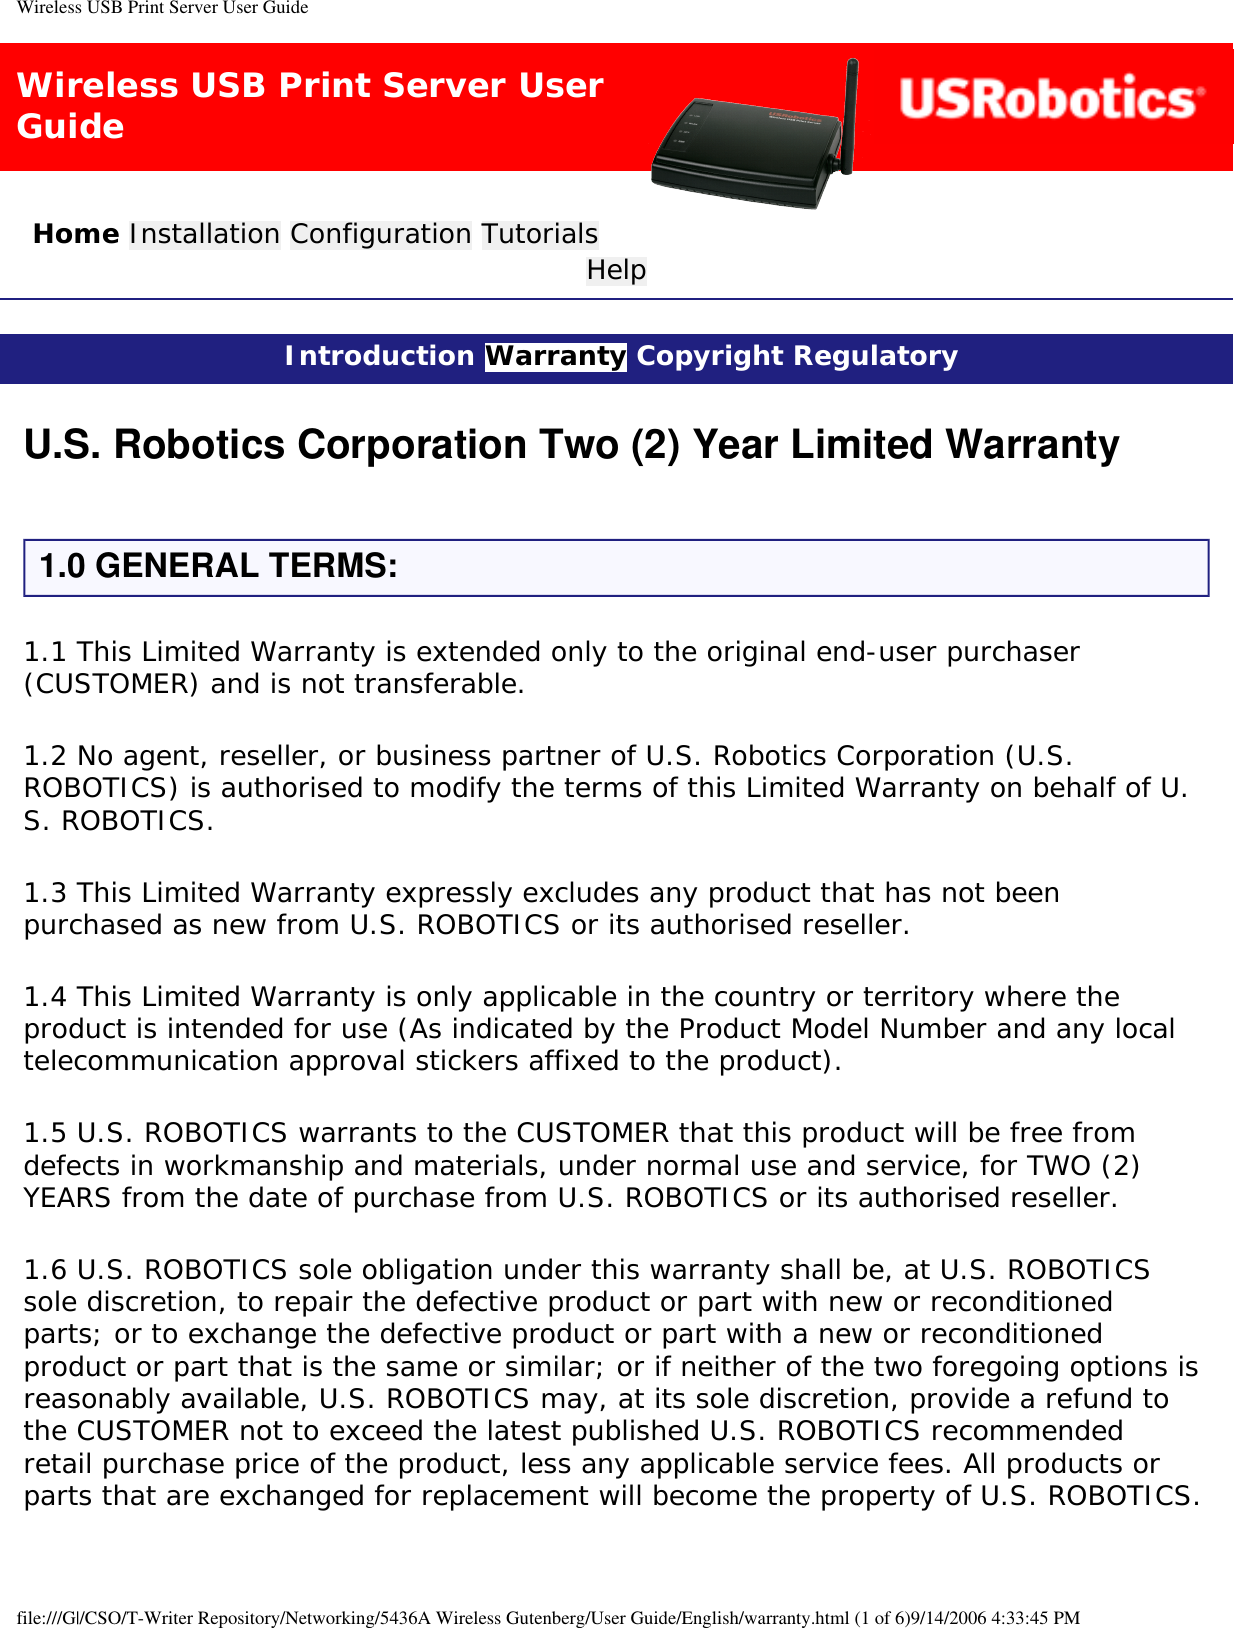
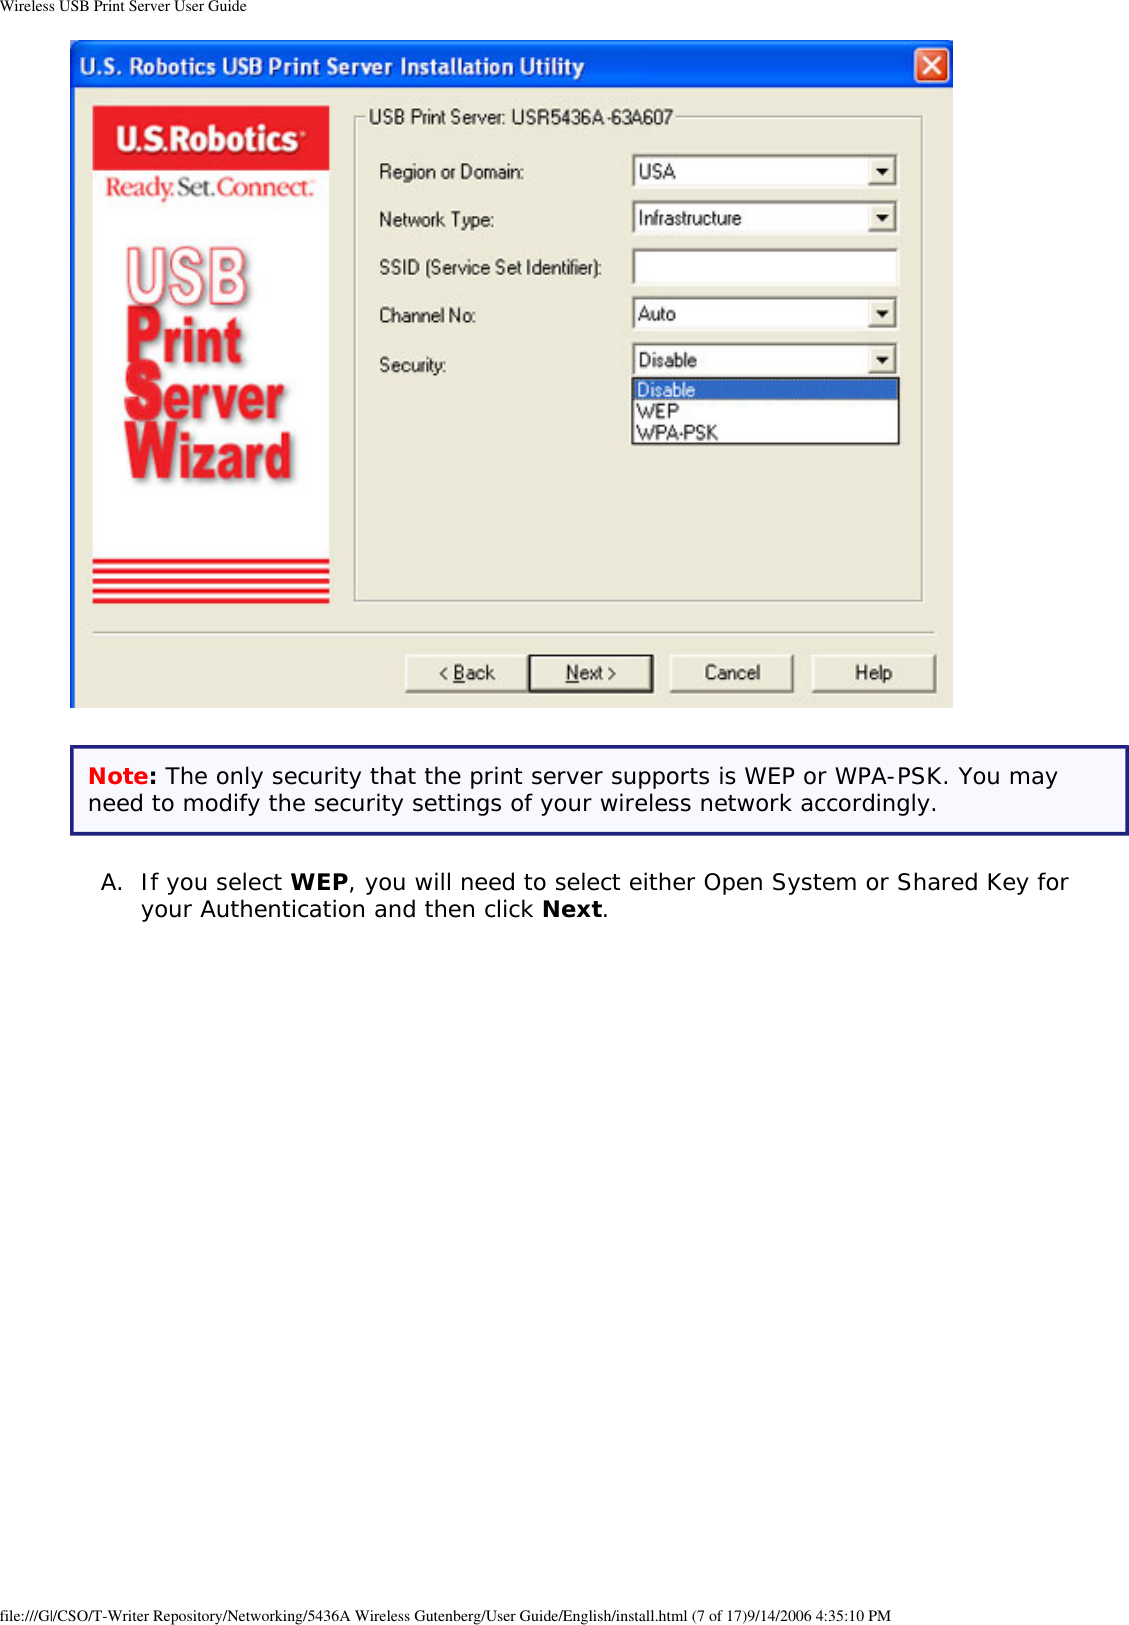
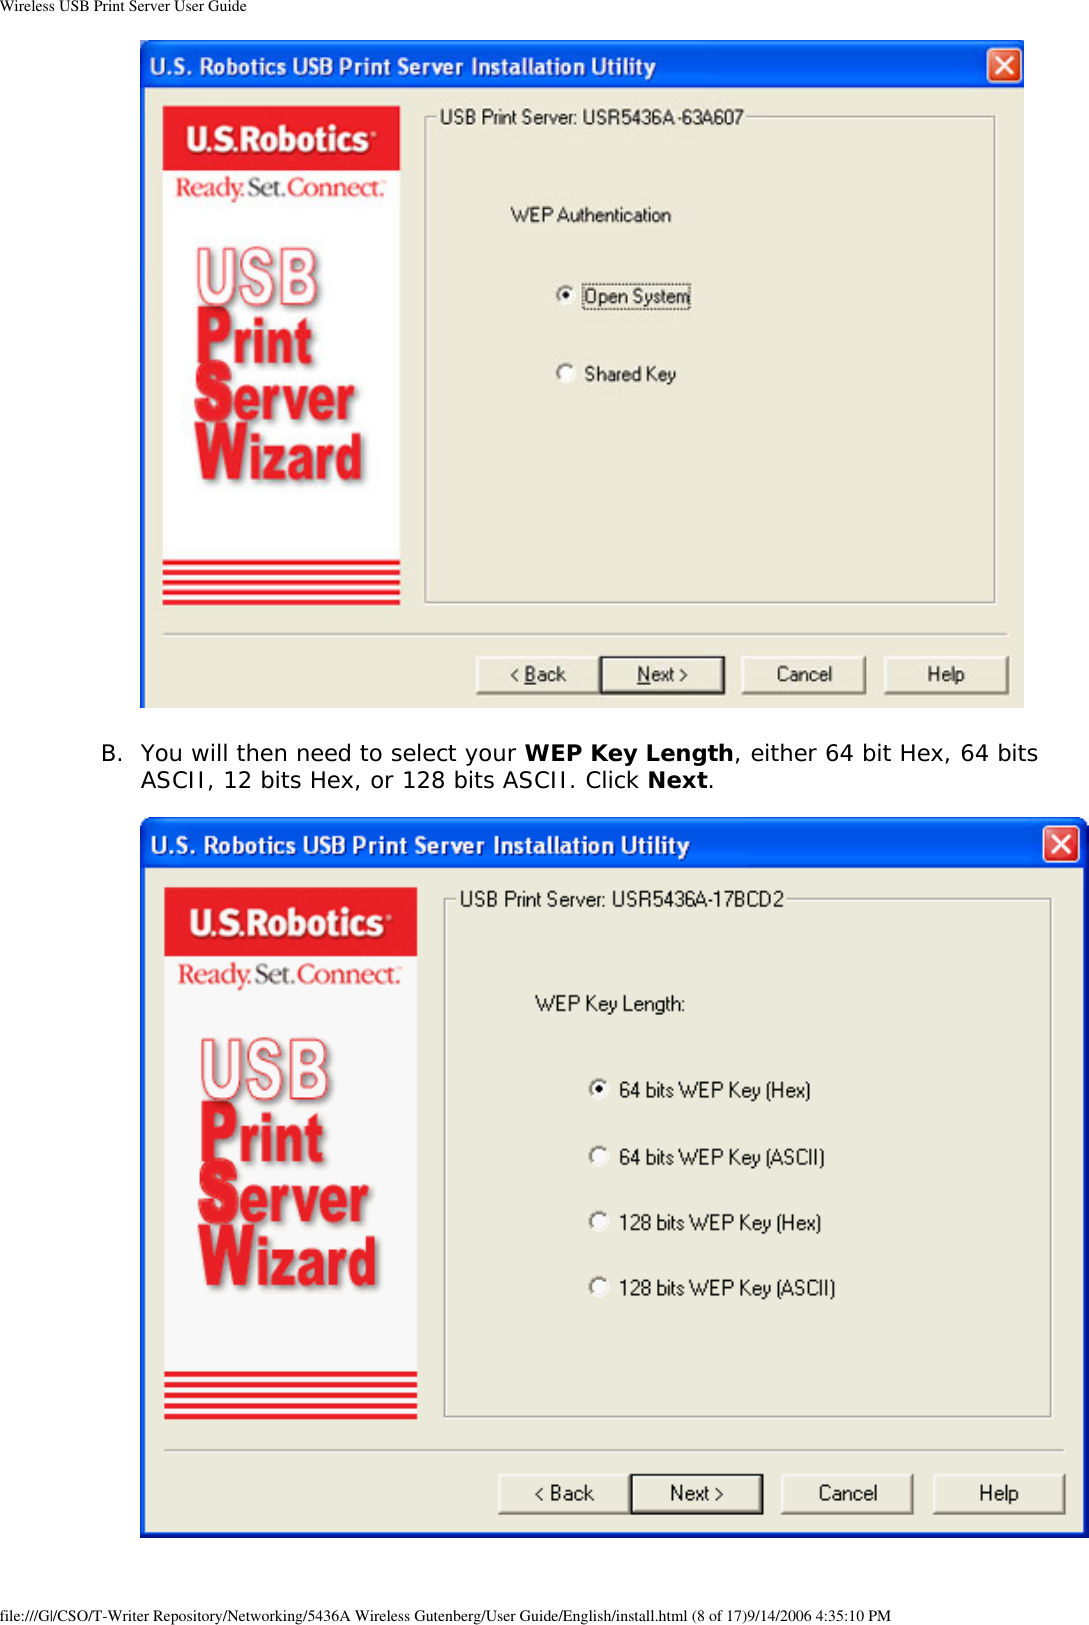
![Wireless USB Print Server User Guide● Give permissions to LPD processes: chgrp daemon /usr/spool/Spooler_dir ● Start lcomputer print mechanism: lcomputer start printer_name Adding Remote PrintersA remote printer is added by inserting the following line in the /etc/printcap file.Note: The entry is really one line, but can be entered as shown. Use a TAB character where shown.Printer_name|Remote_Printer_Alias:\ [Tab] :lp=:\ [Tab] :rm=PS_NAME:\ [Tab] :rp=Logical_Printer_name:\ [Tab] :sd=Spooler_directory:\ [Tab] :mx#0:Where:Printer_name is the Print Queue name used to store jobs for the corresponding logical printer. PS_NAME is the Wireless USB Print Server name defined in /etc/hosts. Logical_Printer_name is the logical printer name on the Wireless USB Print Server. (e.g. L1) Spooler_directory is the directory you created.Example:Marketing|RP1_PS123456:\ [Tab] :lp=:\ [Tab] :rm=PS_Rm203:\ [Tab] :rp=L1:\ [Tab] :sd=/usr/spool/Marketing:\ [Tab] :mx#0: Repeat this process for each Logical Printer/Print Queue combination that you wish to create.Printing using LPDfile:///G|/CSO/T-Writer Repository/Networking/5436A Wireless Gutenberg/User Guide/English/install_unix.htm (7 of 8)9/14/2006 4:36:16 PM](https://usermanual.wiki/Sercomm/PS801H-V2/User-Guide-714352-Page-61.png)