Sercomm PS801H-V2 Wireless USB Print Server User Manual Wireless USB Print Server User Guide
Sercomm Corporation Wireless USB Print Server Wireless USB Print Server User Guide
Sercomm >
Users Manual
Wireless USB Print Server User Guide
Wireless USB Print Server User
Guide
Home Installation Configuration Tutorials
Help
Introduction Warranty Copyright Regulatory
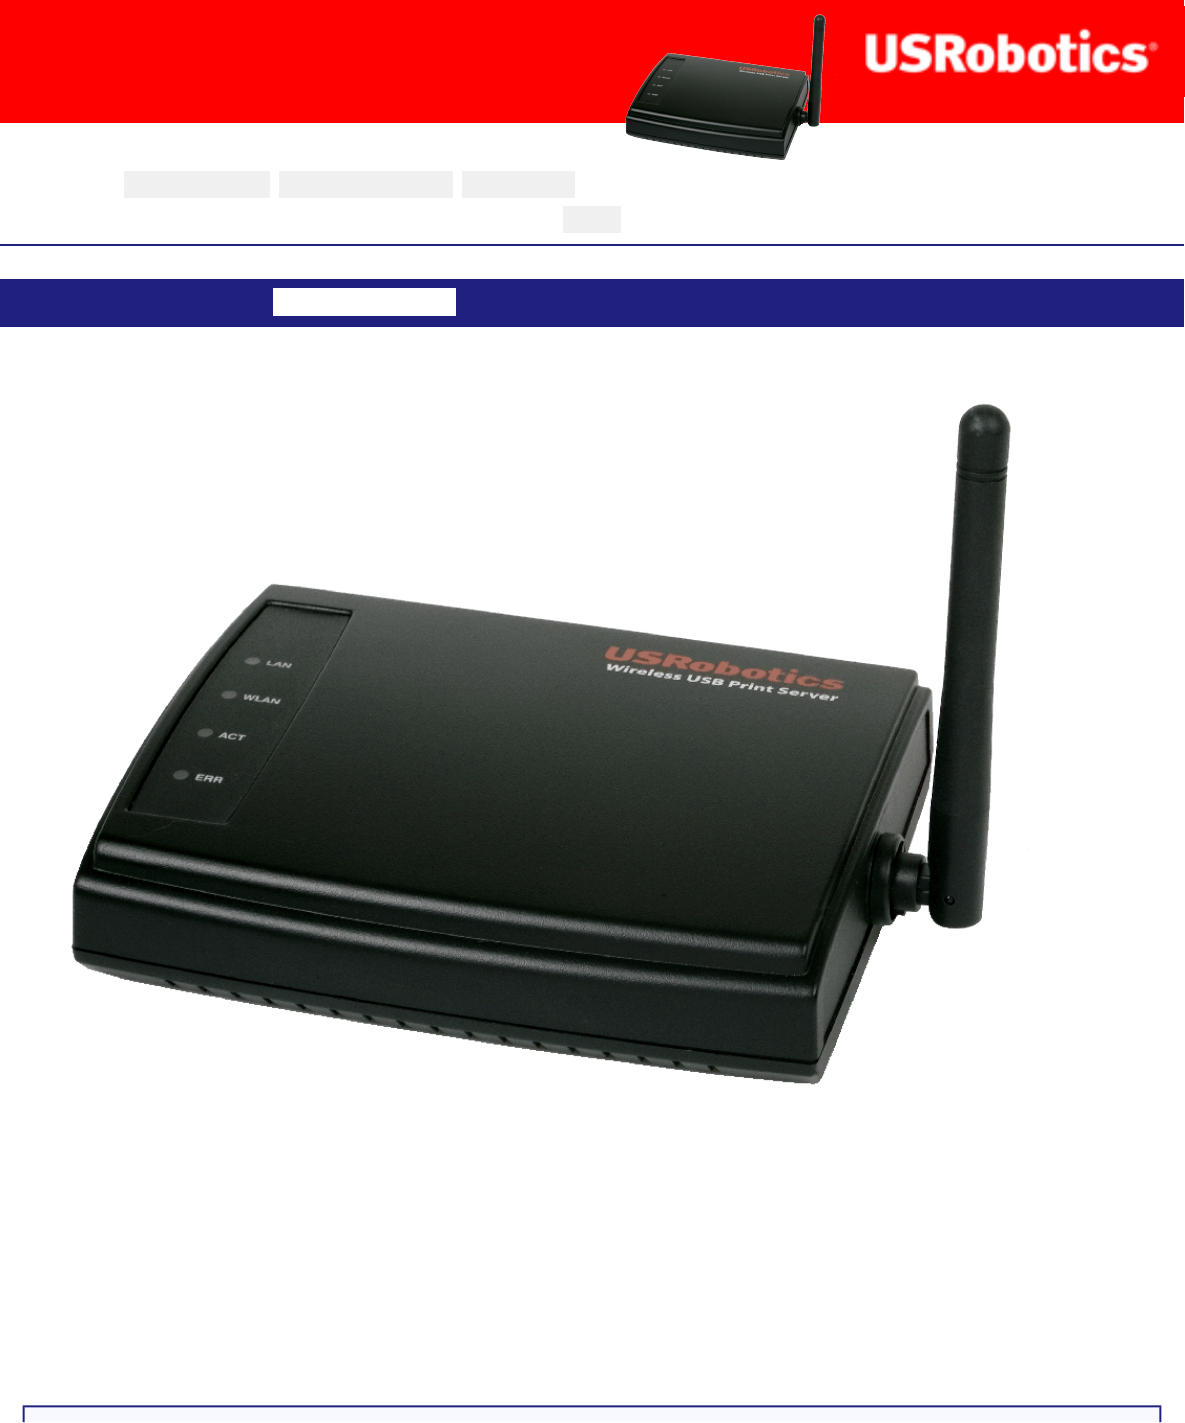
The Wireless USB Print Server can be used in any home or office network
environment to share a USB printer via an Ethernet network or a wireless network. By
using the USB Print Server to connect a USB printer to a wireless or Ethernet network
device, such as a wireless router or a switch, the USB printer can be shared by each
user on the network without having to tie up the resources of one computer to act as
the dedicated print server.
file:///G|/CSO/T-Writer Repository/Networking/5436A Wireless Gutenberg/User Guide/English/index.html (1 of 4)9/14/2006 4:31:22 PM
Wireless USB Print Server User Guide
System Requirements
● A computer with an Ethernet internet connection
● The Installation CD-ROM that came with your printer
● An HTML 4.01-compliant Web Browser (such as Internet Explorer 5.5 or later or
Netscape 8.0 or later) with JavaScript enabled
● Ethernet cable
● USB cable
Physical Features
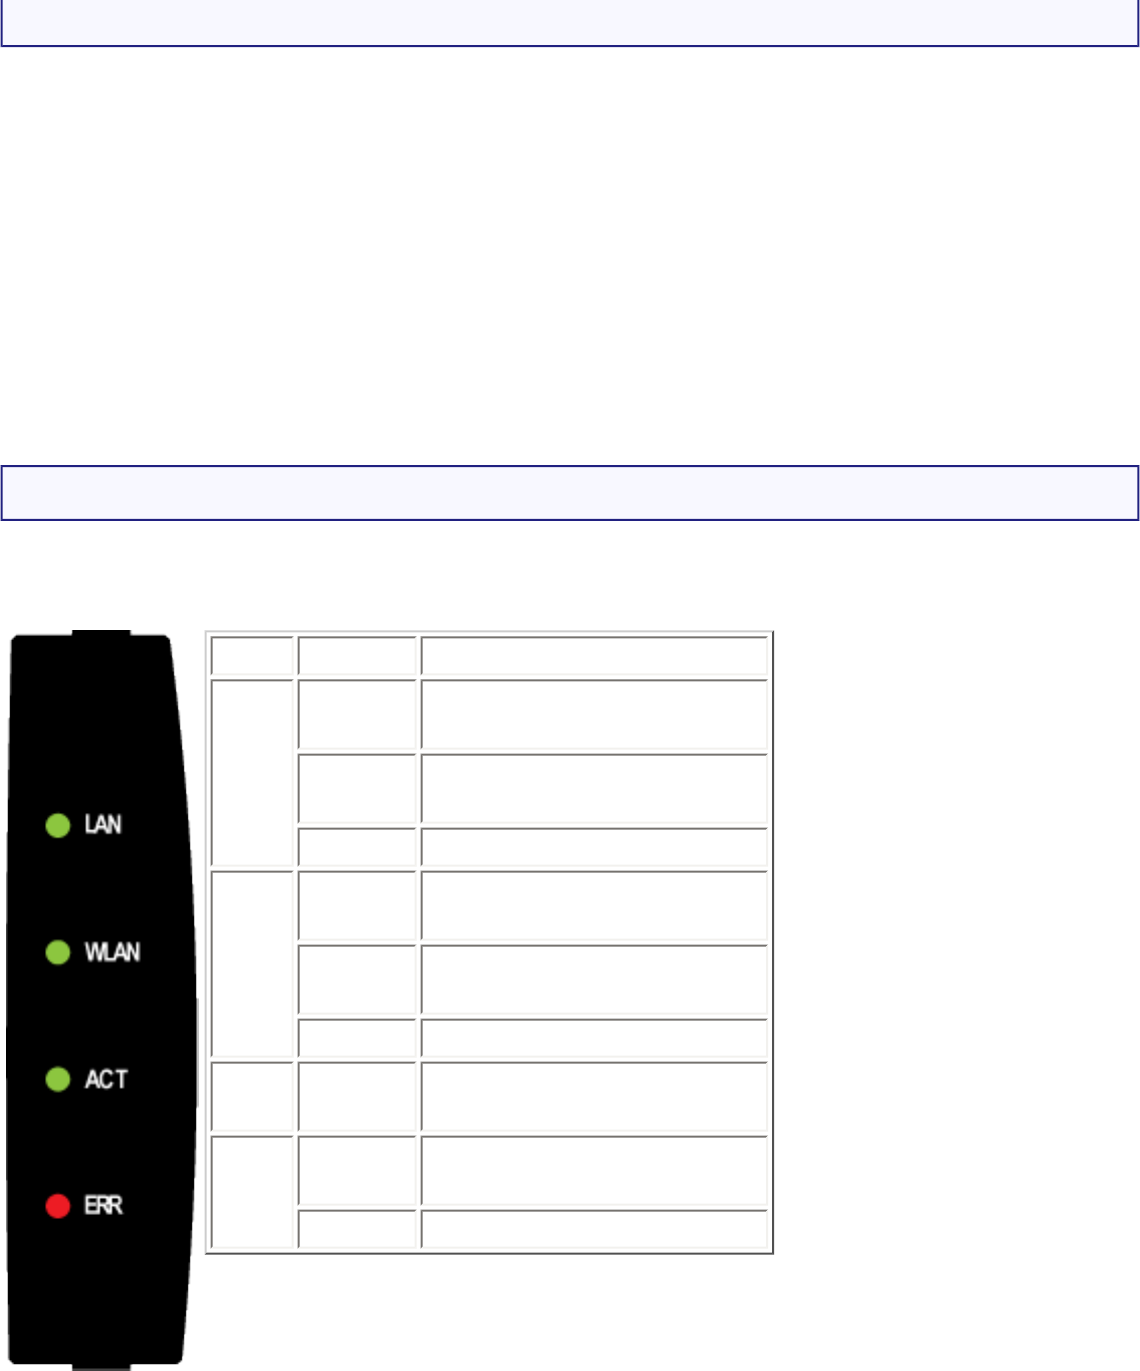
LEDs
LED State Function
LAN
Solid Ethernet LAN link is
achieved.
Flashing Sending or receiving LAN
data.
Off Not connected to LAN.
WAN
Solid Ethernet WAN link is
achieved.
Flashing Sending or receiving
WAN data.
Off Not connected to WAN.
ACT Flashing Sending or receiving
WAN data.
ERR Solid No printer connection is
detected.
Off Printer is connected.
file:///G|/CSO/T-Writer Repository/Networking/5436A Wireless Gutenberg/User Guide/English/index.html (2 of 4)9/14/2006 4:31:22 PM
Wireless USB Print Server User Guide
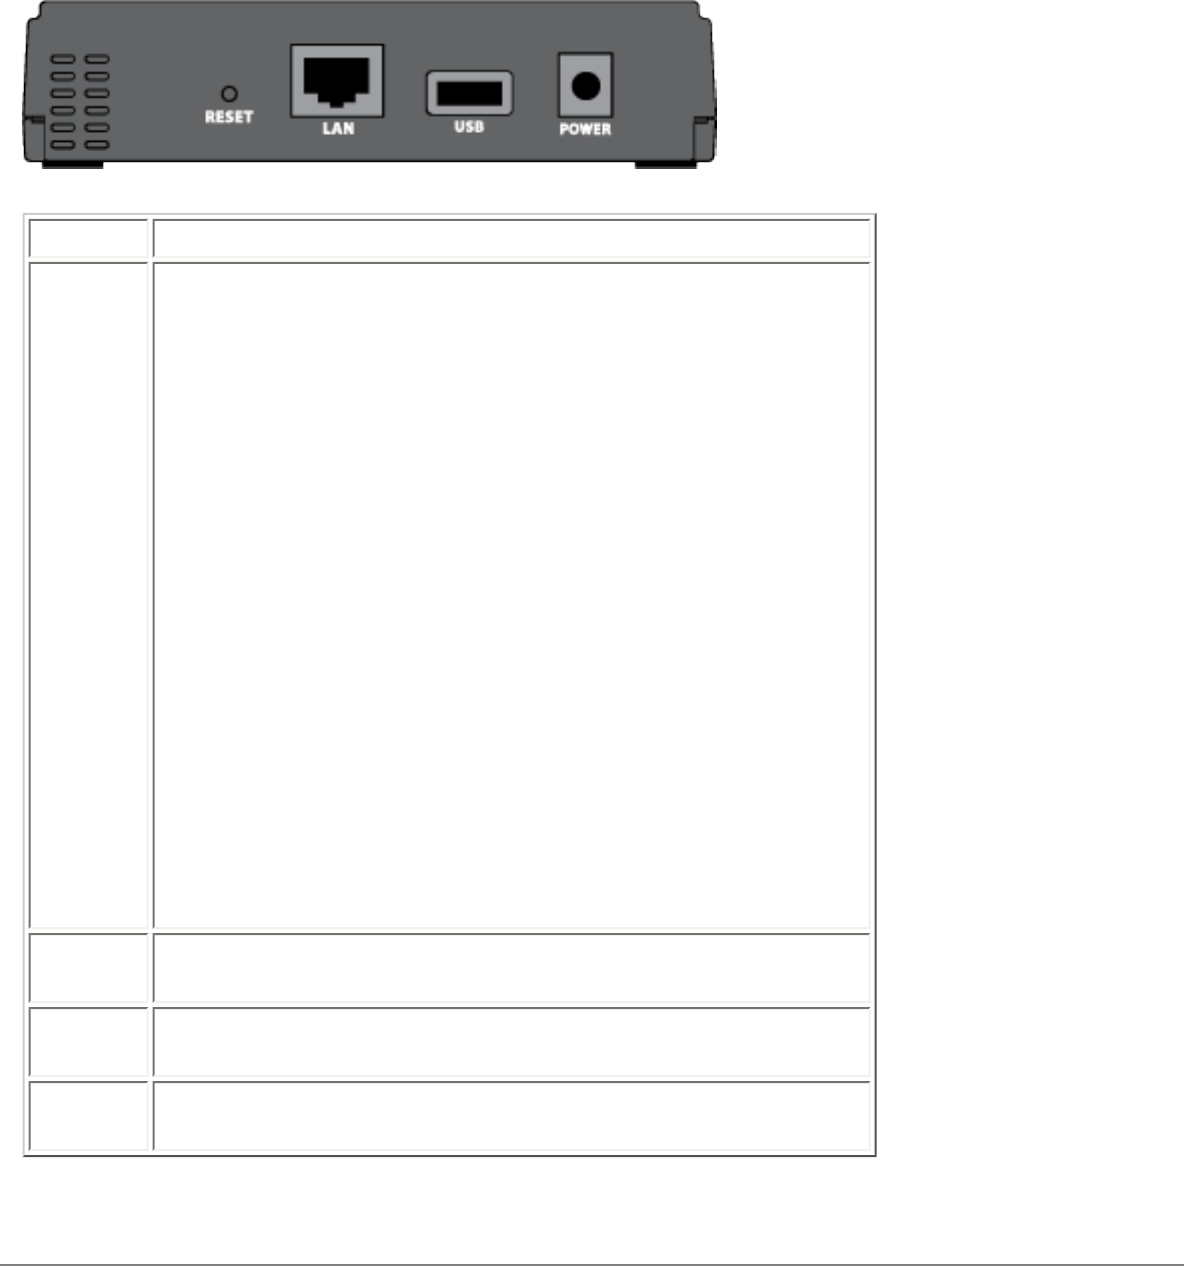
Back
Item Function
RESET
Restores your print server to the factory default
setting, or prints a test page.
To restore your print server to the factory default
settings:
1. Unplug the power adapter from the print
server.
2. Press and hold the RESET button
3. Plug the power adapter back in to the print
server.
4. Release the RESET button.
To print a status page:
● Press the RESET button once.
LAN Connects the print server to your computer’s
Ethernet adapter.
USB Connects the print server to your computer’s USB
adapter.
POWER Connects your print server to the supplied power
adapter.
© 2004-2006 U.S. Robotics Corporation.
R46.1414.00
rev 0.4
6/06
file:///G|/CSO/T-Writer Repository/Networking/5436A Wireless Gutenberg/User Guide/English/index.html (3 of 4)9/14/2006 4:31:22 PM
Wireless USB Print Server User Guide
Wireless USB Print Server User
Guide
Home Installation Configuration Tutorials
Help
Introduction Warranty Copyright Regulatory
U.S. Robotics Corporation Two (2) Year Limited Warranty
1.0 GENERAL TERMS:
1.1 This Limited Warranty is extended only to the original end-user purchaser
(CUSTOMER) and is not transferable.
1.2 No agent, reseller, or business partner of U.S. Robotics Corporation (U.S.
ROBOTICS) is authorised to modify the terms of this Limited Warranty on behalf of U.
S. ROBOTICS.
1.3 This Limited Warranty expressly excludes any product that has not been
purchased as new from U.S. ROBOTICS or its authorised reseller.
1.4 This Limited Warranty is only applicable in the country or territory where the
product is intended for use (As indicated by the Product Model Number and any local
telecommunication approval stickers affixed to the product).
1.5 U.S. ROBOTICS warrants to the CUSTOMER that this product will be free from
defects in workmanship and materials, under normal use and service, for TWO (2)
YEARS from the date of purchase from U.S. ROBOTICS or its authorised reseller.
1.6 U.S. ROBOTICS sole obligation under this warranty shall be, at U.S. ROBOTICS
sole discretion, to repair the defective product or part with new or reconditioned
parts; or to exchange the defective product or part with a new or reconditioned
product or part that is the same or similar; or if neither of the two foregoing options is
reasonably available, U.S. ROBOTICS may, at its sole discretion, provide a refund to
the CUSTOMER not to exceed the latest published U.S. ROBOTICS recommended
retail purchase price of the product, less any applicable service fees. All products or
parts that are exchanged for replacement will become the property of U.S. ROBOTICS.
file:///G|/CSO/T-Writer Repository/Networking/5436A Wireless Gutenberg/User Guide/English/warranty.html (1 of 6)9/14/2006 4:33:45 PM

Wireless USB Print Server User Guide
1.7 U.S. ROBOTICS warrants any replacement product or part for NINETY (90) DAYS
from the date the product or part is shipped to Customer.
1.8 U.S. ROBOTICS makes no warranty or representation that this product will meet
CUSTOMER requirements or work in combination with any hardware or software
products provided by third parties.
1.9 U.S. ROBOTICS makes no warranty or representation that the operation of the
software products provided with this product will be uninterrupted or error free, or
that all defects in software products will be corrected.
1.10 U.S. ROBOTICS shall not be responsible for any software or other CUSTOMER
data or information contained in or stored on this product.
2.0 CUSTOMER OBLIGATIONS:
2.1 CUSTOMER assumes full responsibility that this product meets CUSTOMER
specifications and requirements.
2.2 CUSTOMER is specifically advised to make a backup copy of all software provided
with this product.
2.3 CUSTOMER assumes full responsibility to properly install and configure this
product and to ensure proper installation, configuration, operation and compatibility
with the operating environment in which this product is to function.
2.4 CUSTOMER must furnish U.S. ROBOTICS a dated Proof of Purchase (copy of
original purchase receipt from U.S. ROBOTICS or its authorised reseller) for any
warranty claims to be authorised.
3.0 OBTAINING WARRANTY SERVICE:
3.1 CUSTOMER must contact U.S. ROBOTICS Technical Support or an authorised U.S.
ROBOTICS Service Centre within the applicable warranty period to obtain warranty
service authorisation.
3.2 Customer must provide Product Model Number, Product Serial Number and dated
Proof of Purchase (copy of original purchase receipt from U.S. ROBOTICS or its
authorised reseller) to obtain warranty service authorisation.
3.3 For information on how to contact U.S. ROBOTICS Technical Support or an
file:///G|/CSO/T-Writer Repository/Networking/5436A Wireless Gutenberg/User Guide/English/warranty.html (2 of 6)9/14/2006 4:33:45 PM

Wireless USB Print Server User Guide
authorised U.S. ROBOTICS Service Centre, please see the U.S ROBOTICS corporate
Web site at: www.usr.com
3.4 CUSTOMER should have the following information / items readily available when
contacting U.S. ROBOTICS Technical Support:
● Product Model Number
● Product Serial Number
● Dated Proof of Purchase
● CUSTOMER contact name & telephone number
● CUSTOMER Computer Operating System version
● U.S. ROBOTICS Installation CD-ROM
● U.S. ROBOTICS Installation Guide
4.0 WARRANTY REPLACEMENT:
4.1 In the event U.S. ROBOTICS Technical Support or its authorised U.S. ROBOTICS
Service Centre determines the product or part has a malfunction or failure attributable
directly to faulty workmanship and/or materials; and the product is within the TWO
(2) YEAR warranty term; and the CUSTOMER will include a copy of the dated Proof of
Purchase (original purchase receipt from U.S. ROBOTICS or its authorised reseller)
with the product or part with the returned product or part, then U.S. ROBOTICS will
issue CUSTOMER a Return Material Authorisation (RMA) and instructions for the
return of the product to the authorised U.S. ROBOTICS Drop Zone.
4.2 Any product or part returned to U.S. ROBOTICS without an RMA issued by U.S.
ROBOTICS or its authorised U.S. ROBOTICS Service Centre will be returned.
4.3 CUSTOMER agrees to pay shipping charges to return the product or part to the
authorised U.S. ROBOTICS Return Centre; to insure the product or assume the risk of
loss or damage which may occur in transit; and to use a shipping container equivalent
to the original packaging.
4.4 Responsibility for loss or damage does not transfer to U.S. ROBOTICS until the
returned product or part is received as an authorised return at an authorised U.S.
ROBOTICS Return Centre.
file:///G|/CSO/T-Writer Repository/Networking/5436A Wireless Gutenberg/User Guide/English/warranty.html (3 of 6)9/14/2006 4:33:45 PM

Wireless USB Print Server User Guide
4.5 Authorised CUSTOMER returns will be unpacked, visually inspected, and matched
to the Product Model Number and Product Serial Number for which the RMA was
authorised. The enclosed Proof of Purchase will be inspected for date of purchase and
place of purchase. U.S. ROBOTICS may deny warranty service if visual inspection of
the returned product or part does not match the CUSTOMER supplied information for
which the RMA was issued.
4.6 Once a CUSTOMER return has been unpacked, visually inspected, and tested U.S.
ROBOTICS will, at its sole discretion, repair or replace, using new or reconditioned
product or parts, to whatever extent it deems necessary to restore the product or part
to operating condition.
4.7 U.S. ROBOTICS will make reasonable effort to ship repaired or replaced product
or part to CUSTOMER, at U.S. ROBOTICS expense, not later than TWENTY ONE (21)
DAYS after U.S. ROBOTICS receives the authorised CUSTOMER return at an
authorised U.S. ROBOTICS Return Centre.
4.8 U.S. ROBOTICS shall not be liable for any damages caused by delay in delivering
or furnishing repaired or replaced product or part.
5.0 LIMITATIONS:
5.1 THIRD-PARTY SOFTWARE: This U.S. ROBOTICS product may include or be
bundled with third-party software, the use of which is governed by separate end-user
license agreements provided by third-party software vendors. This U.S. ROBOTICS
Limited Warranty does not apply to such third-party software. For the applicable
warranty refer to the end-user license agreement governing the use of such software.
5.2 DAMAGE DUE TO MISUSE, NEGLECT, NON-COMPLIANCE, IMPROPER
INSTALLATION, AND/OR ENVIRONMENTAL FACTORS: To the extent permitted by
applicable law, this U.S. ROBOTICS Limited Warranty does not apply to normal wear
and tear; damage or loss of data due to interoperability with current and/or future
versions of operating system or other current and/or future software and hardware;
alterations (by persons other than U.S. ROBOTICS or authorised U.S. ROBOTICS
Service Centres); damage caused by operator error or non-compliance with
instructions as set out in the user documentation or other accompanying
documentation; damage caused by acts of nature such as lightning, storms, floods,
fires, and earthquakes, etc. Products evidencing the product serial number has been
tampered with or removed; misuse, neglect, and improper handling; damage caused
by undue physical, temperature, or electrical stress; counterfeit products; damage or
loss of data caused by a computer virus, worm, Trojan horse, or memory content
corruption; failures of the product which result from accident, abuse, misuse
(including but not limited to improper installation, connection to incorrect voltages,
and power points); failures caused by products not supplied by U.S. ROBOTICS;
file:///G|/CSO/T-Writer Repository/Networking/5436A Wireless Gutenberg/User Guide/English/warranty.html (4 of 6)9/14/2006 4:33:45 PM

Wireless USB Print Server User Guide
damage cause by moisture, corrosive environments, high voltage surges, shipping,
abnormal working conditions; or the use of the product outside the borders of the
country or territory intended for use (As indicated by the Product Model Number and
any local telecommunication approval stickers affixed to the product).
5.3 TO THE FULL EXTENT ALLOWED BY LAW, THE FOREGOING WARRANTIES AND
REMEDIES ARE EXCLUSIVE AND ARE IN LIEU OF ALL OTHER WARRANTIES, TERMS,
OR CONDITIONS, EXPRESS OR IMPLIED, EITHER IN FACT OR BY OPERATION OF LAW,
STATUTORY OR OTHERWISE, INCLUDING WARRANTIES, TERMS, OR CONDITIONS OF
MERCHANTABILITY, FITNESS FOR A PARTICULAR PURPOSE, SATISFACTORY QUALITY,
CORRESPONDENCE WITH DESCRIPTION, AND NON-INFRINGEMENT, ALL OF WHICH
ARE EXPRESSLY DISCLAIMED. U.S. ROBOTICS NEITHER ASSUMES NOR AUTHORISES
ANY OTHER PERSON TO ASSUME FOR IT ANY OTHER LIABILITY IN CONNECTION
WITH THE SALE, INSTALLATION, MAINTENANCE, WARRANTY, OR USE OF ITS
PRODUCTS.
5.4 LIMITATION OF LIABILITY. TO THE FULL EXTENT ALLOWED BY LAW, U.S.
ROBOTICS ALSO EXCLUDES FOR ITSELF AND ITS SUPPLIERS ANY LIABILITY,
WHETHER BASED IN CONTRACT OR TORT (INCLUDING NEGLIGENCE), FOR
INCIDENTAL, CONSEQUENTIAL, INDIRECT, SPECIAL, OR PUNITIVE DAMAGES OF ANY
KIND, OR FOR LOSS OF REVENUE OR PROFITS, LOSS OF BUSINESS, LOSS OF
INFORMATION OR DATA, OR OTHER FINANCIAL LOSS ARISING OUT OF OR IN
CONNECTION WITH THE SALE, INSTALLATION, MAINTENANCE, USE, PERFORMANCE,
FAILURE, OR INTERRUPTION OF ITS PRODUCTS, EVEN IF U.S. ROBOTICS OR ITS
AUTHORISED RESELLER HAS BEEN ADVISED OF THE POSSIBILITY OF SUCH
DAMAGES, AND LIMITS ITS LIABILITY TO REPAIR, REPLACEMENT, OR REFUND OF
THE PURCHASE PRICE PAID, AT U.S. ROBOTICS OPTION. THIS DISCLAIMER OF
LIABILITY FOR DAMAGES WILL NOT BE AFFECTED IF ANY REMEDY PROVIDED HEREIN
SHALL FAIL OF ITS ESSENTIAL PURPOSE.
6.0 DISCLAIMER:
Some countries, states, territories or provinces do not allow the exclusion or limitation
of implied warranties or the limitation of incidental or consequential damages for
certain products supplied to consumers, or the limitation of liability for personal
injury, so the above limitations and exclusions may be limited in their application to
CUSTOMER. When the implied warranties are not allowed by law to be excluded in
their entirety, they will be limited to the TWO (2) YEAR duration of this written
warranty. This warranty gives CUSTOMER specific legal rights, which may vary
depending on local law.
7.0 GOVERNING LAW:
file:///G|/CSO/T-Writer Repository/Networking/5436A Wireless Gutenberg/User Guide/English/warranty.html (5 of 6)9/14/2006 4:33:45 PM

Wireless USB Print Server User Guide
This Limited Warranty shall be governed by the laws of the State of Illinois, U.S.A.
excluding its conflicts of laws principles and excluding the United Nations Convention
on Contracts for the International Sale of Goods.
U.S. Robotics Corporation
935 National Parkway
Schaumburg, IL, 60173
U.S.A
© 2004-2006 U.S. Robotics Corporation.
file:///G|/CSO/T-Writer Repository/Networking/5436A Wireless Gutenberg/User Guide/English/warranty.html (6 of 6)9/14/2006 4:33:45 PM

Wireless USB Print Server User Guide
Wireless USB Print Server User
Guide
Home Installation Configuration Tutorials
Help
Introduction Warranty Copyright Regulatory
Copyright Information
U.S. Robotics Corporation
935 National Parkway
Schaumburg, Illinois
60173-5157
USA
No part of this documentation may be reproduced in any form or by any means or
used to make any derivative work (such as a translation, transformation, or
adaptation) without written permission from U.S. Robotics Corporation. U.S. Robotics
Corporation reserves the right to revise this documentation and to make changes in
the products and/or content of this document from time to time without obligation to
provide notification of such revision or change. U.S. Robotics Corporation provides
this documentation without warranty of any kind, either implied or expressed,
including, but not limited to, implied warranties of merchantability and fitness for a
particular purpose. If there is any software on removable media described in this
documentation, it is furnished under a license agreement included with the product as
a separate document, in the hard copy documentation, or on the removable media in
a directory file named LICENSE.TXT or !LICENSE.TXT. If you are unable to locate a
copy, please contact U.S. Robotics and a copy will be provided to you.
UNITED STATES GOVERNMENT LEGEND If you are a United States government
agency, then this documentation and the software described herein are provided to
you subject to the following:
All technical data and computer software are commercial in nature and developed
solely at private expense. Software is delivered as “Commercial Computer Software”
as defined in DFARS 252.227-7014 (June 1995) or as a “commercial item” as defined
in FAR 2.101(a) and as such is provided with only such rights as are provided in U.S.
Robotics standard commercial license for the Software. Technical data is provided
with limited rights only as provided in DFAR 252.227-7015 (Nov 1995) or FAR 52.227-
14 (June 1987) whichever is applicable. You agree not to remove or deface any
portion of any legend provided on any licensed program or documentation contained
file:///G|/CSO/T-Writer Repository/Networking/5436A Wireless Gutenberg/User Guide/English/copyright.html (1 of 2)9/14/2006 4:34:14 PM

Wireless USB Print Server User Guide
in, or delivered to you in conjunction with, this Quick Installation Guide.
Copyright © 2006 U.S. Robotics Corporation. All rights reserved. U.S. Robotics and
the U.S. Robotics logo are registered trademarks of U.S. Robotics Corporation. Other
product names are for identification purposes only and may be trademarks of their
respective companies. Product specifications subject to change without notice.
© 2004-2006 U.S. Robotics Corporation.
file:///G|/CSO/T-Writer Repository/Networking/5436A Wireless Gutenberg/User Guide/English/copyright.html (2 of 2)9/14/2006 4:34:14 PM
Wireless USB Print Server User Guide
Wireless USB Print Server User
Guide
Home Installation Configuration Tutorials
Help
Introduction Warranty Copyright Regulatory
Regulatory Information
Manufacturer’s Declaration of Conformity
U.S. Robotics Corporation
935 National Parkway
Schaumburg, IL 60173
U.S.A.
declares that this product conforms to the FCC’s specifications:
Part 15, Class B
Operation of this device is subject to the following conditions:
1) this device may not cause harmful electromagnetic interference, and
2) this device must accept any interference received including interference that may
cause undesired operations.
This equipment complies with FCC Part 15 for Home and Office use.
Caution to the User: Any changes or modifications not expressly approved by the
party responsible for compliance could void the user’s authority to operate the
equipment.
FCC Radiation Exposure Statement
file:///G|/CSO/T-Writer Repository/Networking/5436A Wireless Gutenberg/User Guide/English/regulatory.html (1 of 6)9/14/2006 4:34:39 PM

Wireless USB Print Server User Guide
This equipment complies with FCC radiation exposure limits set forth for an
uncontrolled environment. This equipment should be installed and operated with
minimum distance 20 cm between the radiator and your body.
Radio and Television Interference:
This equipment has been tested and found to comply with the limits for a Class B
digital device, pursuant to Part 15 of the FCC Rules. These limits are designed to
provide reasonable protection against harmful interference in a residential installation.
This equipment generates, uses and can radiate radio frequency energy. If this
equipment is not installed and used in accordance with the manufacturer’s
instructions, it may cause harmful interference to radio communications. However,
there is no guarantee that interference will not occur in a particular installation. If this
equipment does cause harmful interference to radio or television reception, which can
be determined by turning the equipment off and on, the user is encouraged to try to
correct the interference by one or more of the following measures:
● Reorient or relocate the receiving antenna.
● Increase the separation between the equipment and receiver.
● Connect the equipment to an outlet on a circuit different from that to which the
receiver is connected.
● Consult the dealer or an experienced radio/TV technician for help.
USR declares 5436 and 5436A are limited in CH1~11 from 2412 to 2462 MHz by
specified firmware controlled in USA.
This transmitter must not be co-located or operating in conjunction with any other
antenna or transmitter.
UL Listing/CUL Listing:
This information technology equipment is UL Listed and C-UL Listed for both the US
and Canadian markets respectively for the uses described in the User Guide. Use this
product only with UL Listed Information Technology Equipment (ITE).
For Canadian Users
file:///G|/CSO/T-Writer Repository/Networking/5436A Wireless Gutenberg/User Guide/English/regulatory.html (2 of 6)9/14/2006 4:34:39 PM

Wireless USB Print Server User Guide
Industry Canada (IC)
This equipment complies with the Industry Canada Spectrum Management and
Telecommunications policy, RSS-210, standard Low Power License-Exempt Radio
Communication Devices.
Operation is subject to the following two conditions:
1. This device may cause interference.
2. This device must accept any interference, including interference that may cause
undesired operation of the device.
To prevent radio interference to the licensed service, this device is intended to be
operated indoors and away from windows to provide maximum shielding.
Equipment (or its transmit antenna) that is installed outdoors is subject to licensing.
To reduce potential radio interference to other users, the antenna type and its gain
should be so chosen that the Equivalent Isotropic Radiated Power (EIRP) is not more
than that required for successful communication.
Users should ensure for their own protection that the electrical ground connections of
the power utility, telephone lines, and internal metallic water pipe system, if present,
are connected together. This precaution may be particularly important in rural areas.
Caution: Users should not attempt to make electrical ground connections by
themselves, but should contact the appropriate inspection authority or an electrician,
as appropriate.
CE Compliance
Declaration of Conformity
We, U.S. Robotics Corporation of 935 National Parkway, Schaumburg, Illinois, 60173-
5157 USA, declare under our sole responsibility that the products, U.S. Robotics
Wireless USB Print Server, Models 5436 and 5436A, to which this declaration relates,
are in conformity with the following standards and/or other normative documents.
file:///G|/CSO/T-Writer Repository/Networking/5436A Wireless Gutenberg/User Guide/English/regulatory.html (3 of 6)9/14/2006 4:34:39 PM

Wireless USB Print Server User Guide
EN300 328
EN301 489-1
EN301 489-17
EN60950
EN61000-3-2
EN61000-3-3
EN50392
We, U.S. Robotics Corporation, hereby declare the above named product is in
compliance and conformity with the essential requirements and other relevant
provisions of Directive 1999/5/EC.
The conformity assessment procedure referred to in Article 10 and detailed in Annex
IV of Directive 1999/5/EC has been followed.
This equipment is in compliance with the European recommendation 1999/519/ECC,
governing the exposure to the electromagnetic radiation.
This product can be used in the following countries:
Germany, Austria, Belgium, Switzerland, Netherlands, Luxembourg, Italy, France, UK,
Ireland, Spain, Portugal, Sweden, Norway, Denmark, Finland, Czech Republic, Poland,
Hungary, and Greece
An electronic copy of the original CE Declaration of Conformity is available at the U.S.
Robotics website: www.usr.com
Regarding IEEE 802.11b/g frequencies, we currently have the following information
about restrictions in the European Union (EU) countries:
● Italy: Please be aware that use of the wireless device is subject to the following
Italian regulation:
1. D.Lgs 1.8.2003, number 259, articles 104 (activities where General
Authorization is required) and 105 (free use), for private use;
2. D.M 28.5.03 and later modifications, for the supplying to public RadioLAN
access for networks and telecommunication services
● France
In France metropolitan, outdoor power is limited to 10mW (EIRP) within
2454MHz – 2483, 5MHz frequency band
file:///G|/CSO/T-Writer Repository/Networking/5436A Wireless Gutenberg/User Guide/English/regulatory.html (4 of 6)9/14/2006 4:34:39 PM
Wireless USB Print Server User Guide
In Guyana and Reunion Islands, outdoor use is forbidden within 2400MHz
– 2420MHz frequency band
Regulatory Channel Frequency
Channel Frequency
(MHz) FCC Canada ETSI
1 2412 X X X
2 2417 X X X
3 2422 X X X
4 2427 X X X
5 2432 X X X
6 2437 X X X
7 2442 X X X
8 2447 X X X
9 2452 X X X
10 2457 X X X
11 2462 X X X
12 2467 X
13 2472 X
Operating
Channels :
● IEEE 802.11g compliant
● 11 channels (US, Canada)
● 13 channels (ETSI)
EU Health Protection
This device complies with the European requirements governing exposure to
file:///G|/CSO/T-Writer Repository/Networking/5436A Wireless Gutenberg/User Guide/English/regulatory.html (5 of 6)9/14/2006 4:34:39 PM

Wireless USB Print Server User Guide
electromagnetic radiation. This equipment should be installed and operated with
minimum distance 20 cm between the radiator and your body. This wireless device is
a transmitter/receiver and has been designed and manufactured to comply with the
exposure limits recommended by the Council of the European Union and the
International Commission on Non-Ionizing Radiation Protection (ICNIRP, 1999) for the
entire population. The exposure standard for portable equipment uses the "Specific
Absorption Rate" as unit of measure. The maximum SAR value of this wireless device
measured in the conformity test is 0.002 W/kg.
Go to www.usr.com to see the most recent channel restriction information.
© 2004-2006 U.S. Robotics Corporation.
file:///G|/CSO/T-Writer Repository/Networking/5436A Wireless Gutenberg/User Guide/English/regulatory.html (6 of 6)9/14/2006 4:34:39 PM
Wireless USB Print Server User Guide
Wireless USB Print Server User Guide
Home Installation Configuration Tutorials Help
Wireless USB Print Server Installation Client Installation Macintosh Installation Unix
Installation Netware Installation Windows Server Installation
Step One: Connect the Wireless USB Print Server
Note: The Wireless USB Print Server must be connected using an Ethernet cable for the initial
configuration. After the initial configuration, you can establish a wireless connection to the network.
1. Turn on your printer.
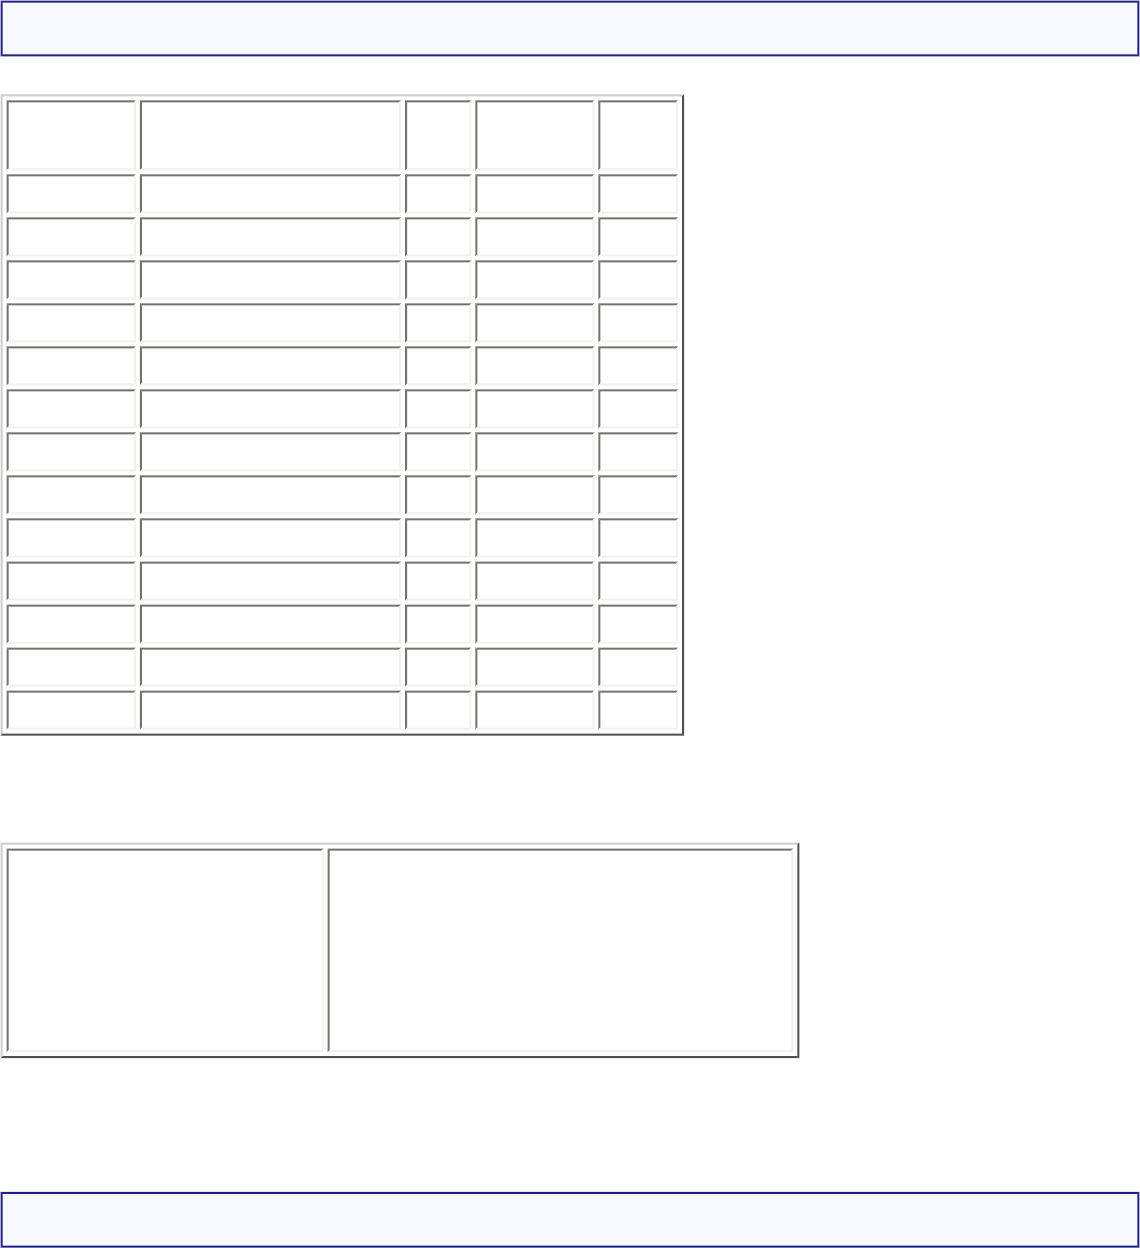
2. Connect one end of the USB cable to the USB port on your printer, and connect the other end of
the USB cable to the USB port on the Print Server.
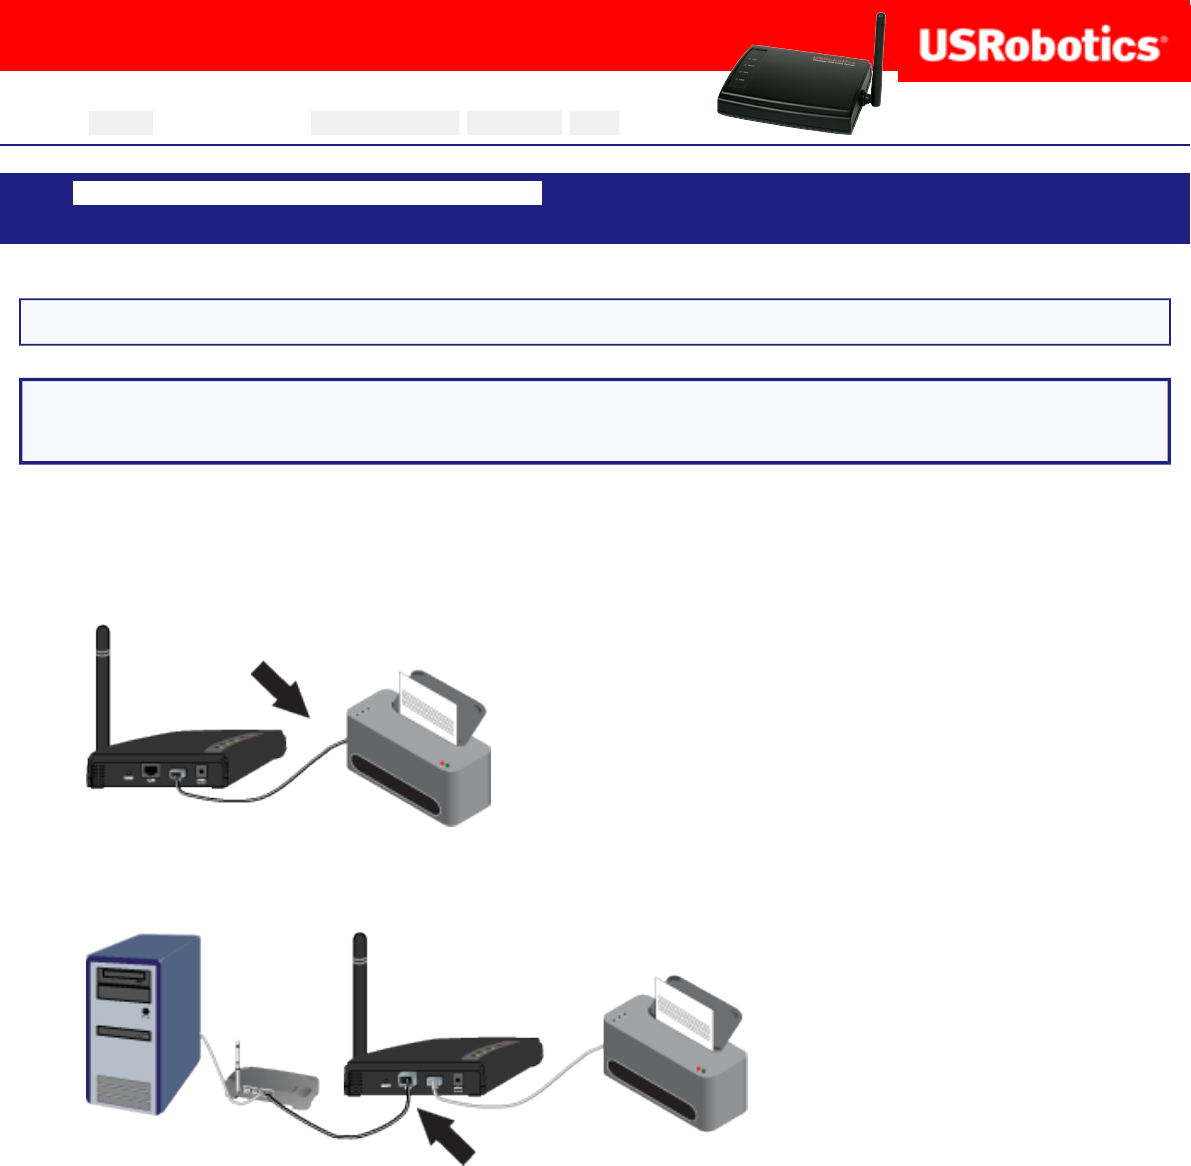
3. Connect one end of an Ethernet cable to your wireless or wired router and the other end to the
LAN port on the Print Server.
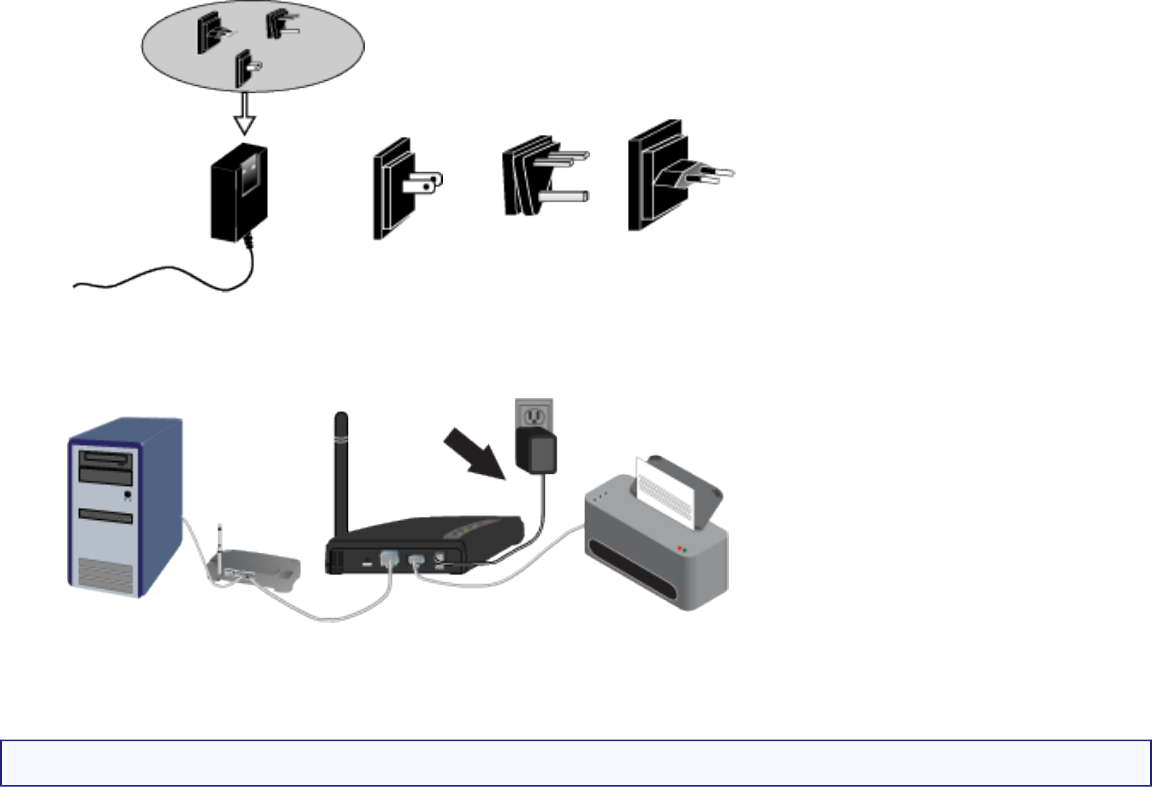
4. Slide the standard power plug for your country on to the power adapter. Apply enough pressure
to cause a click and firmly seat the plug. The power adapter must be unplugged when you attach
the plug.
file:///G|/CSO/T-Writer Repository/Networking/5436A Wireless Gutenberg/User Guide/English/install.html (1 of 17)9/14/2006 4:35:10 PM
Wireless USB Print Server User Guide
North
America UK Europe
5. Connect the included power adapter to the POWER port on the Wireless USB Print Server and
plug the power adapter into a standard power outlet.
Step Two: Configure the Wireless USB Print Server
1. Verify you are logged on to your computer as an administrator. You must be logged on as an
administrator to ensure the software will be properly installed.
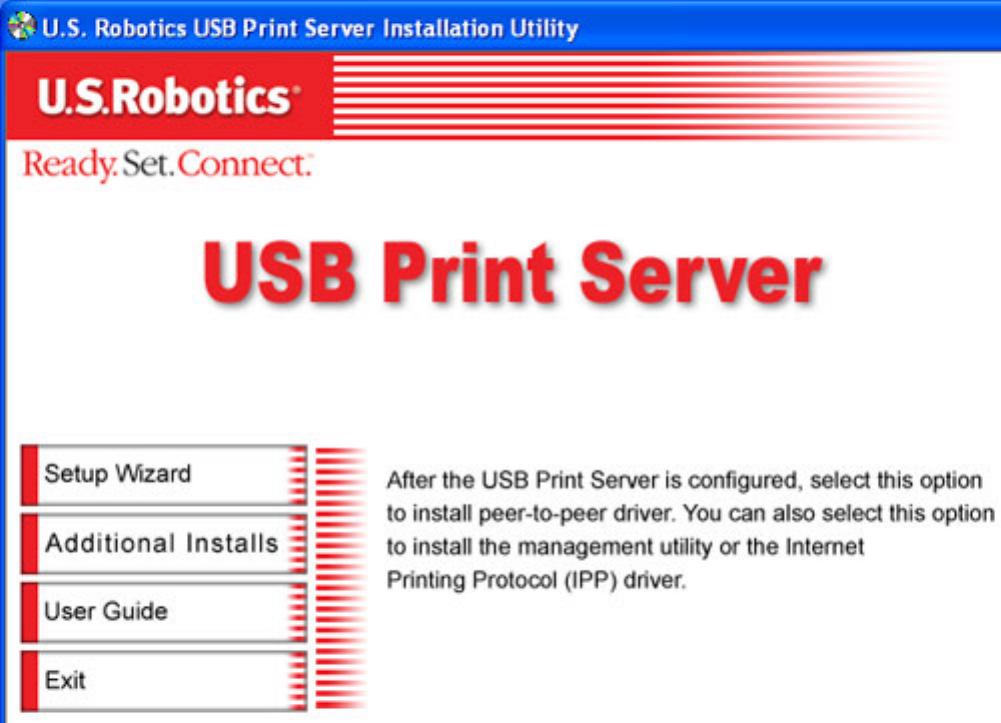
2. Insert the U.S. Robotics Installation CD-ROM.
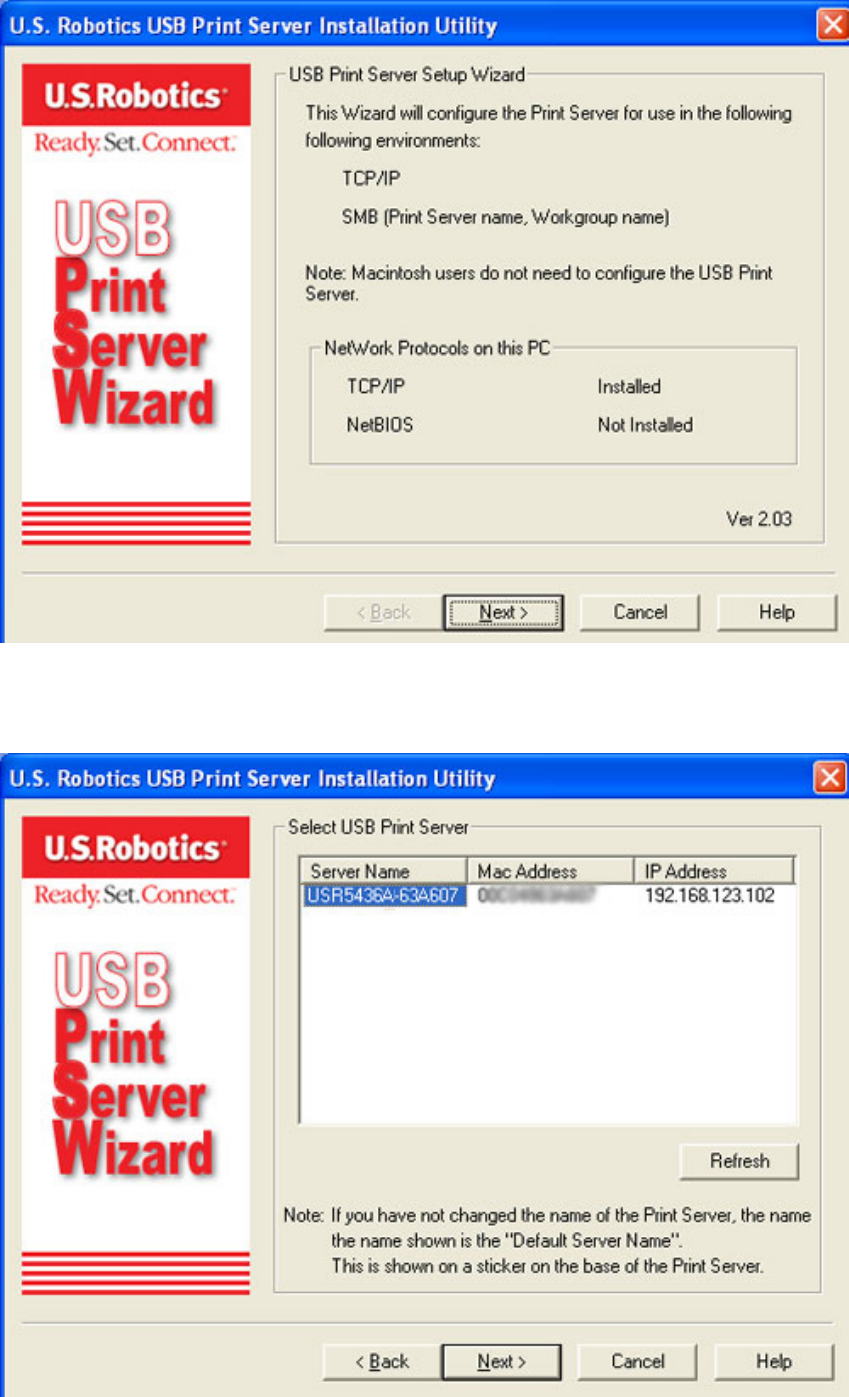
2. Click Setup Wizard and then click Next.
file:///G|/CSO/T-Writer Repository/Networking/5436A Wireless Gutenberg/User Guide/English/install.html (2 of 17)9/14/2006 4:35:10 PM
Wireless USB Print Server User Guide
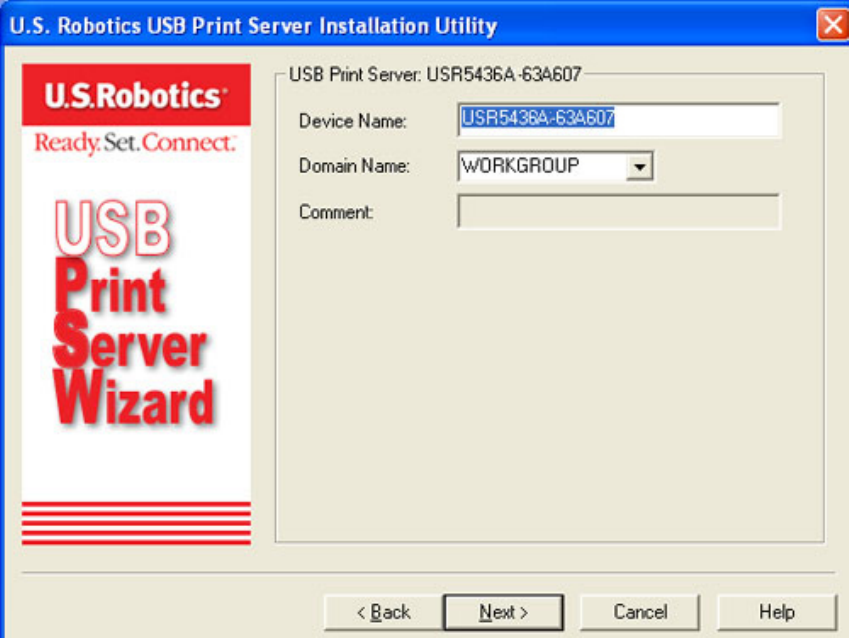
3. The Wireless USB Print Server will be shown in the list. Select the print server in the list and click
Next. If it does not appear in the list, check your physical connections and click Refresh.
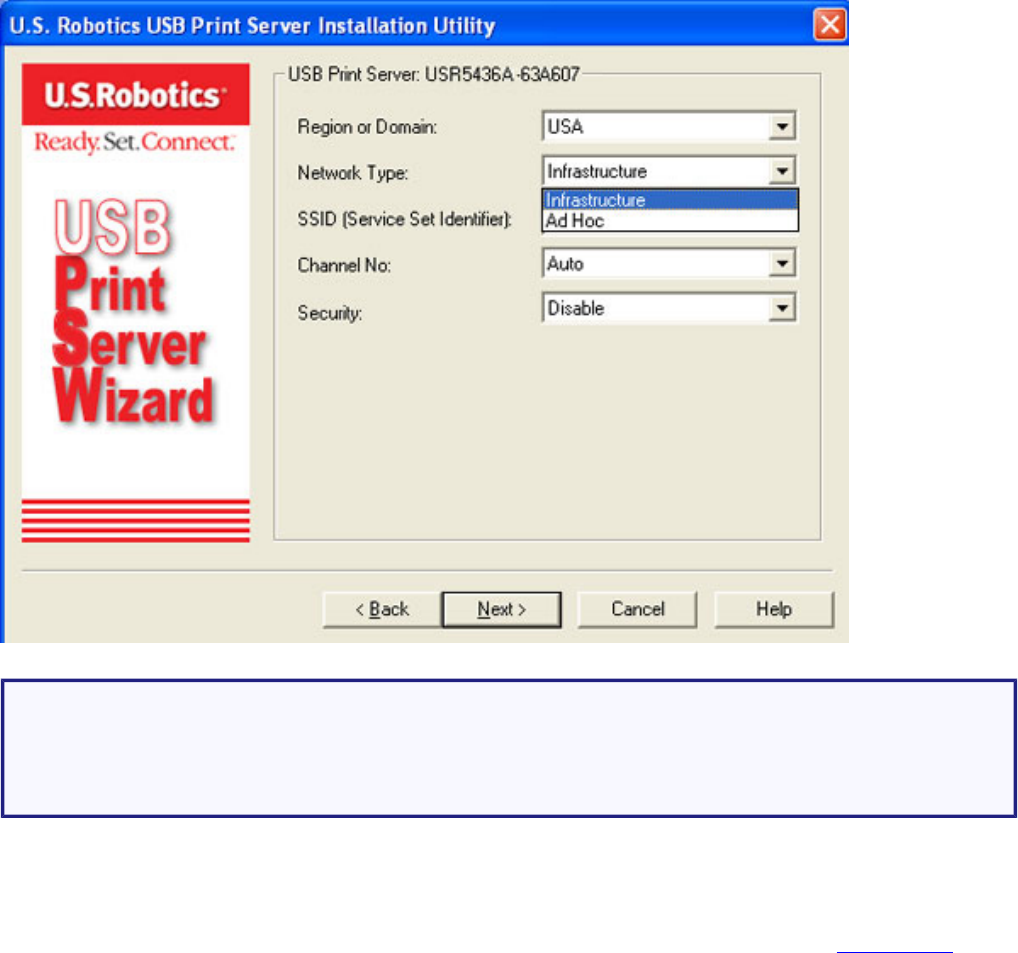
4. You can change the Device Name, if you want, and enter a Domain Name. When finished,
file:///G|/CSO/T-Writer Repository/Networking/5436A Wireless Gutenberg/User Guide/English/install.html (3 of 17)9/14/2006 4:35:10 PM
Wireless USB Print Server User Guide
click Next.
5. If you have connected the Wireless USB Print Server to a network device that has DHCP
capabilities, you can select Obtain IP Address automatically. If your network device does not
have DHCP capabilities, you can select Fixed IP Address and add the IP address information.
When finished, click Next.
file:///G|/CSO/T-Writer Repository/Networking/5436A Wireless Gutenberg/User Guide/English/install.html (4 of 17)9/14/2006 4:35:10 PM

Wireless USB Print Server User Guide
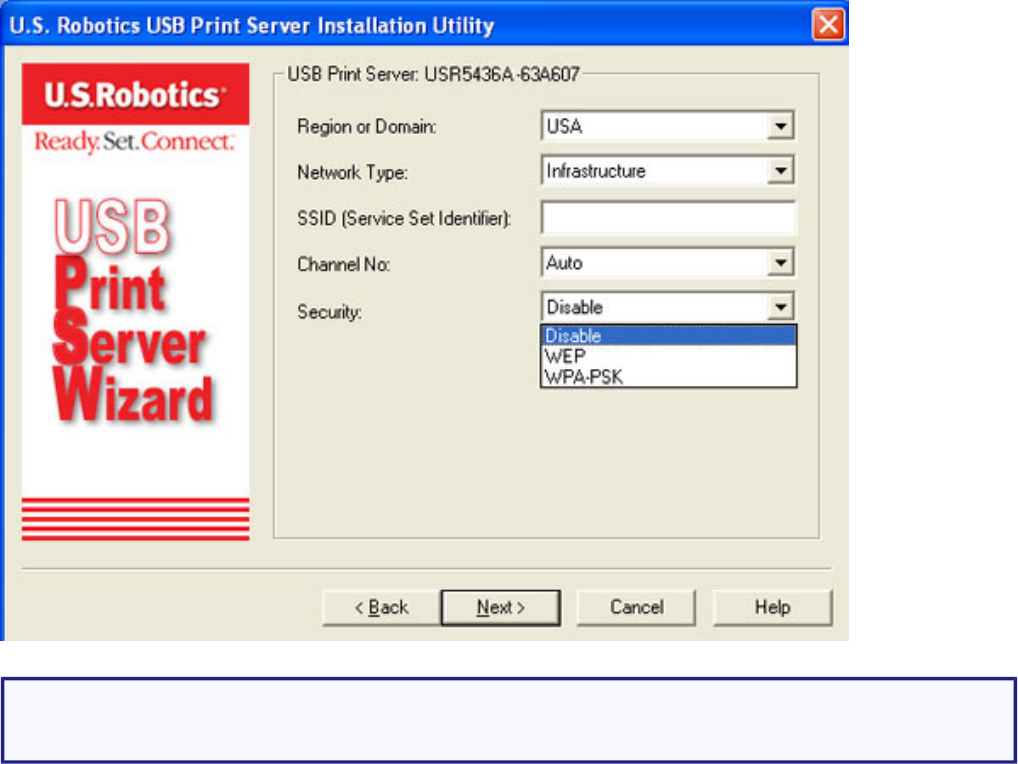
6. Next you can select the Region or Domain where you will be using the Wireless USB Print
Server.
7. You can then select your Network Type as either Infrastructure or Ad Hoc, depending on if
you are using a wireless router or access point or not in your wireless network.
file:///G|/CSO/T-Writer Repository/Networking/5436A Wireless Gutenberg/User Guide/English/install.html (5 of 17)9/14/2006 4:35:10 PM
Wireless USB Print Server User Guide
Note: The Wireless USB Print Server is initially set in Infrastructure mode, which is
used to connect to an wireless router or access point. If you will be establishing a
connection to other wireless clients without using a wireless router or access point,
select Ad-hoc as the Network type.
8. In the SSID field, you should enter the SSID of the wireless router or access point to which you
will be connecting the wireless print server. If you selected Ad Hoc for your Network Type, you
can select a specific Channel on which to broadcast. If you selected Infrastructure, Auto is the
only channel option. For Security, you can select either Disable, WEP, or WPA-PSK,
depending on how you have your wireless network set up.
file:///G|/CSO/T-Writer Repository/Networking/5436A Wireless Gutenberg/User Guide/English/install.html (6 of 17)9/14/2006 4:35:10 PM
Wireless USB Print Server User Guide
Note: The only security that the print server supports is WEP or WPA-PSK. You may
need to modify the security settings of your wireless network accordingly.
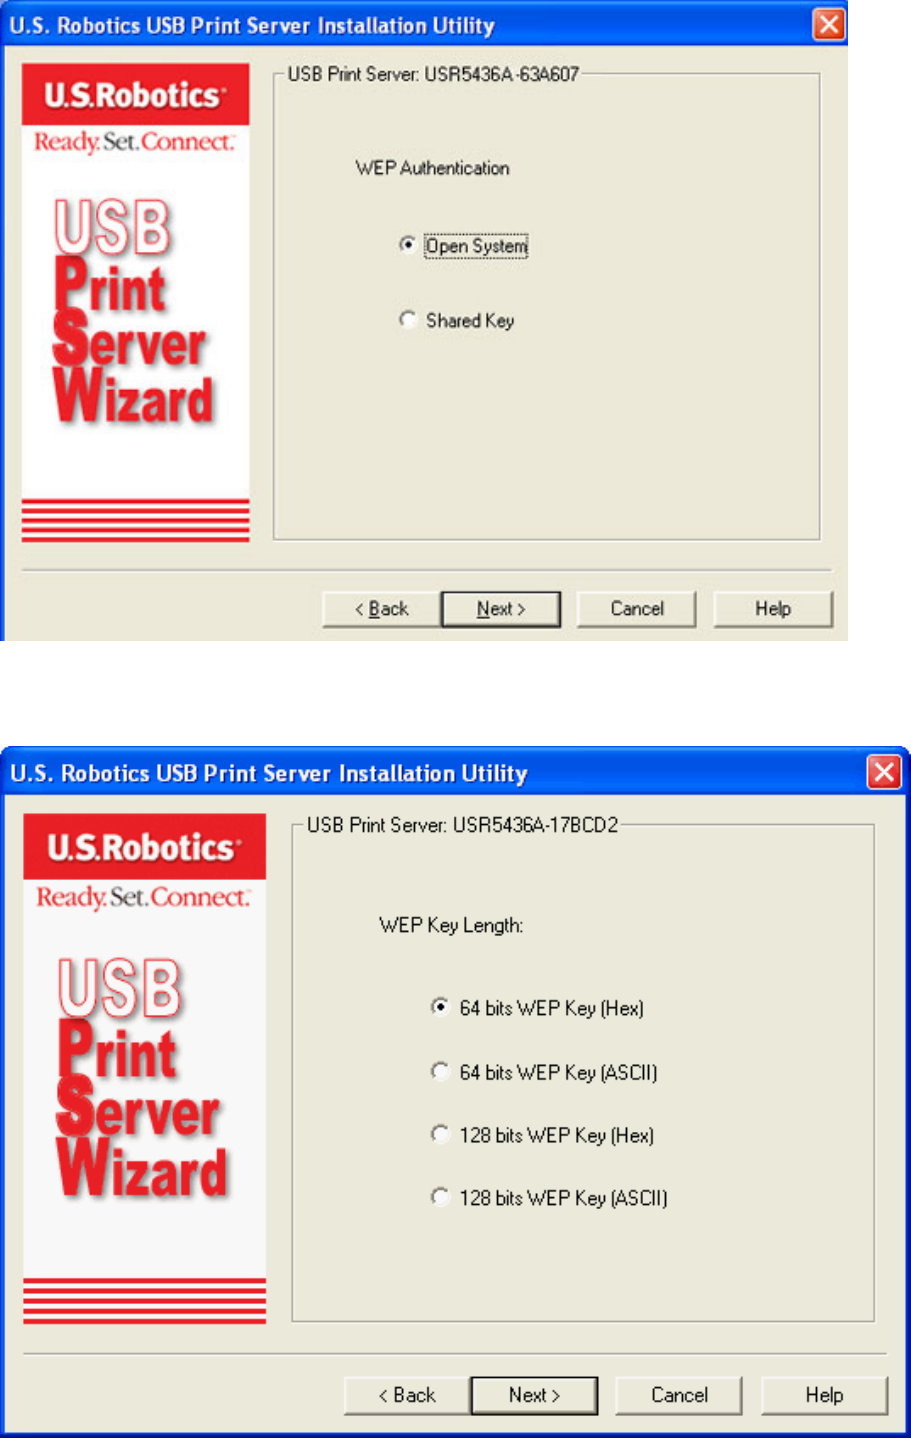
A. If you select WEP, you will need to select either Open System or Shared Key for
your Authentication and then click Next.
file:///G|/CSO/T-Writer Repository/Networking/5436A Wireless Gutenberg/User Guide/English/install.html (7 of 17)9/14/2006 4:35:10 PM
Wireless USB Print Server User Guide
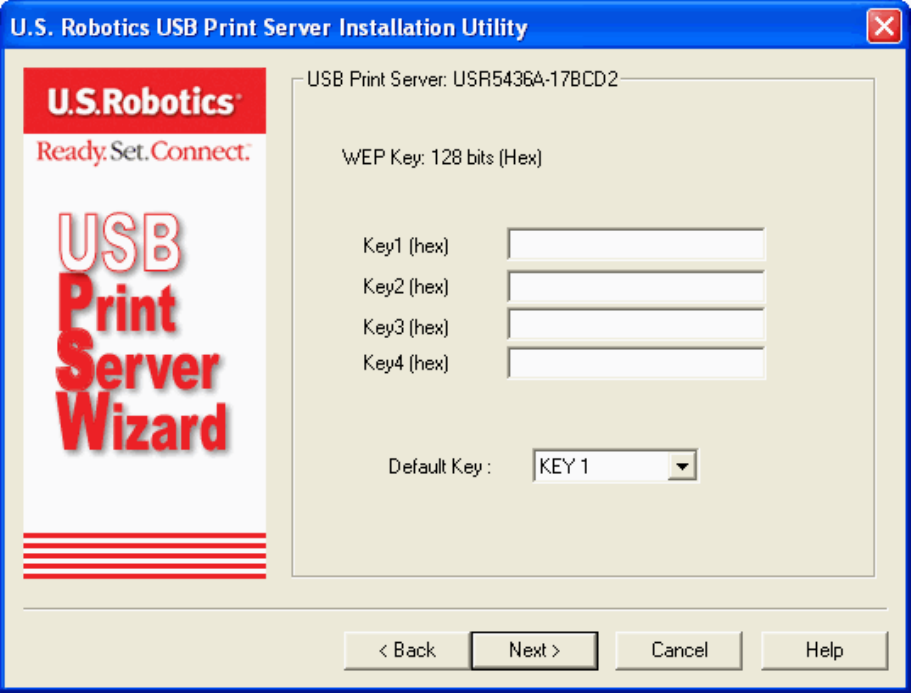
B. You will then need to select your WEP Key Length, either 64 bit Hex, 64 bits
ASCII, 12 bits Hex, or 128 bits ASCII. Click Next.
file:///G|/CSO/T-Writer Repository/Networking/5436A Wireless Gutenberg/User Guide/English/install.html (8 of 17)9/14/2006 4:35:10 PM

Wireless USB Print Server User Guide
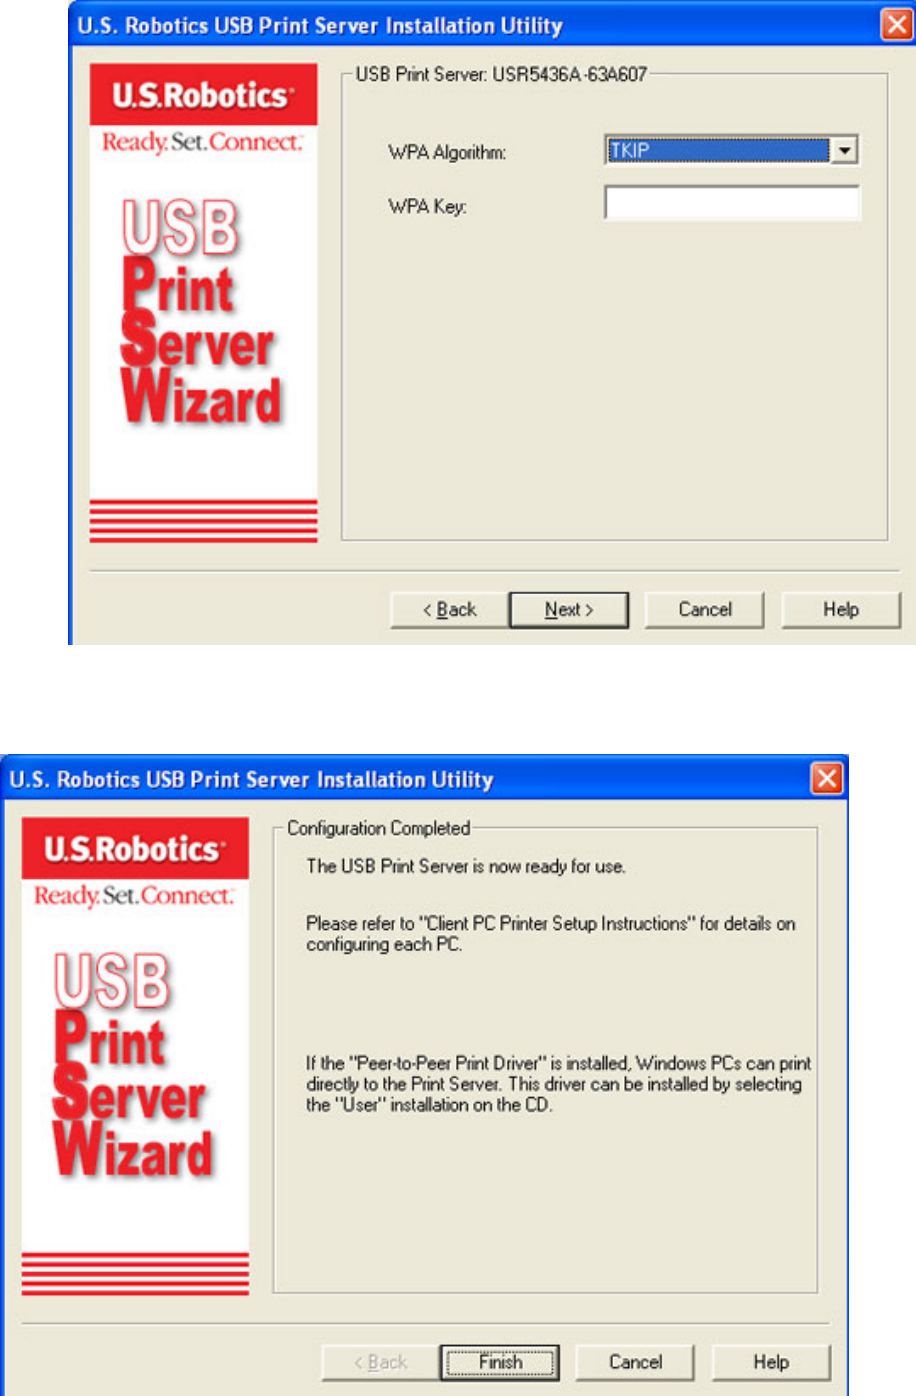
C. You will then need to enter your Key and select the Default Key number. Click
Next when finished.
Hex ASCII
64-bit 10 characters 5 characters
128-bit 26 characters 13 characters
WEP Key: 64 bits (ASCII):
WEP Key: 64 bits (Hex):
file:///G|/CSO/T-Writer Repository/Networking/5436A Wireless Gutenberg/User Guide/English/install.html (9 of 17)9/14/2006 4:35:10 PM

Wireless USB Print Server User Guide
WEP Key: 128 bits (ASCII):
file:///G|/CSO/T-Writer Repository/Networking/5436A Wireless Gutenberg/User Guide/English/install.html (10 of 17)9/14/2006 4:35:10 PM
Wireless USB Print Server User Guide
WEP Key: 128 bits (Hex):
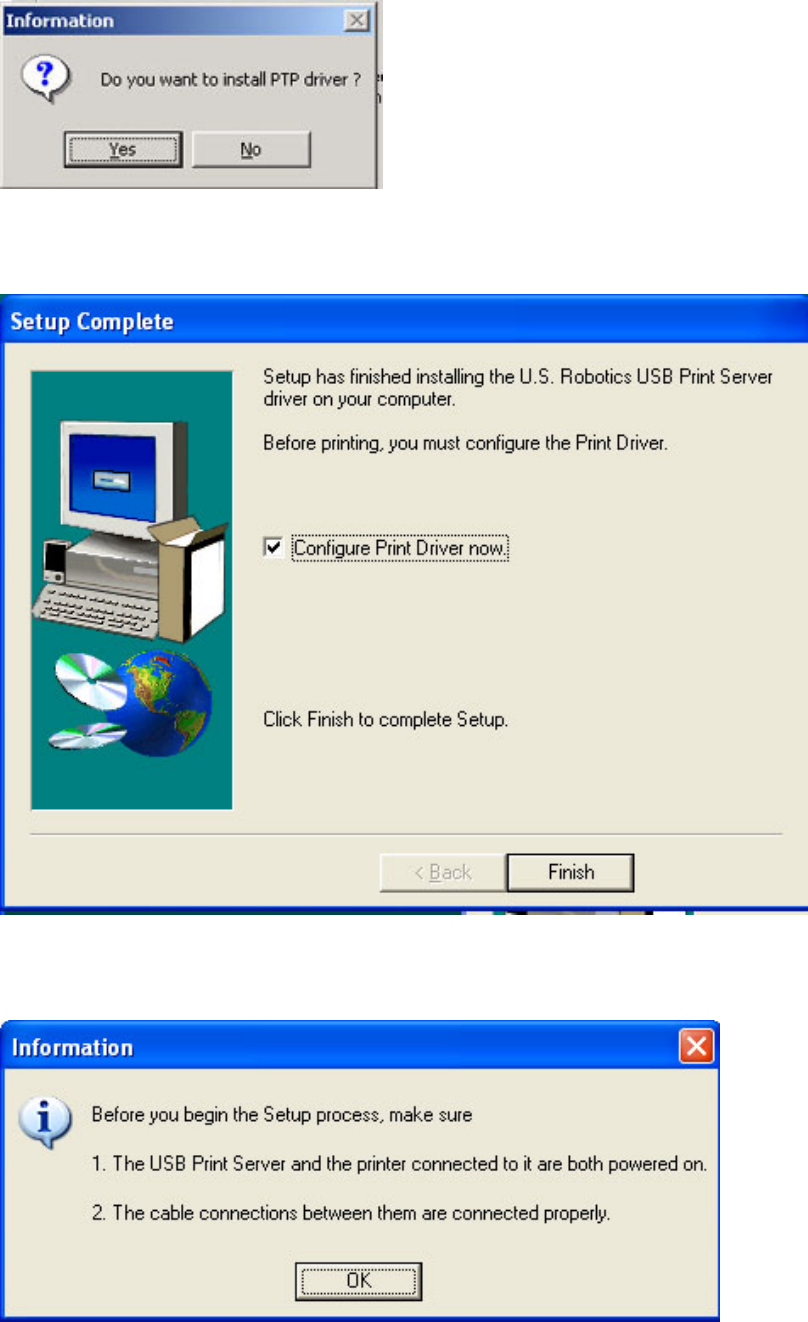
D. If you select WPA-PSK, you will need to enter the WPA Key on the next screen. This
Key should match what you already have in your wireless network.
file:///G|/CSO/T-Writer Repository/Networking/5436A Wireless Gutenberg/User Guide/English/install.html (11 of 17)9/14/2006 4:35:10 PM
Wireless USB Print Server User Guide
8. After selecting your Security type and entering any necessary information, your initial
configuration is complete and you should click Finish.
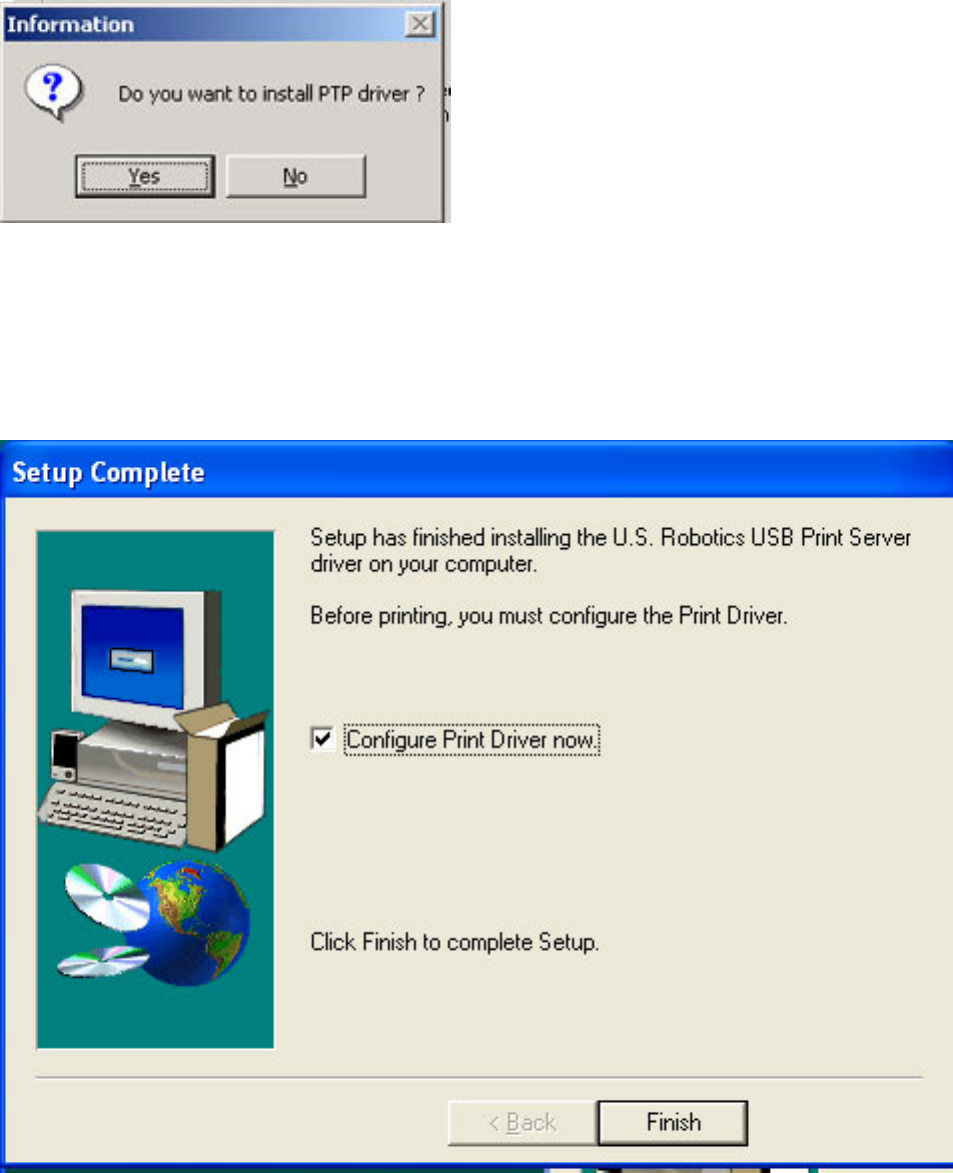
9. You will then be prompted to install the PTP (Peer-to-Peer) driver. Click Yes and follow the on-
file:///G|/CSO/T-Writer Repository/Networking/5436A Wireless Gutenberg/User Guide/English/install.html (12 of 17)9/14/2006 4:35:10 PM
Wireless USB Print Server User Guide
screen instructions.
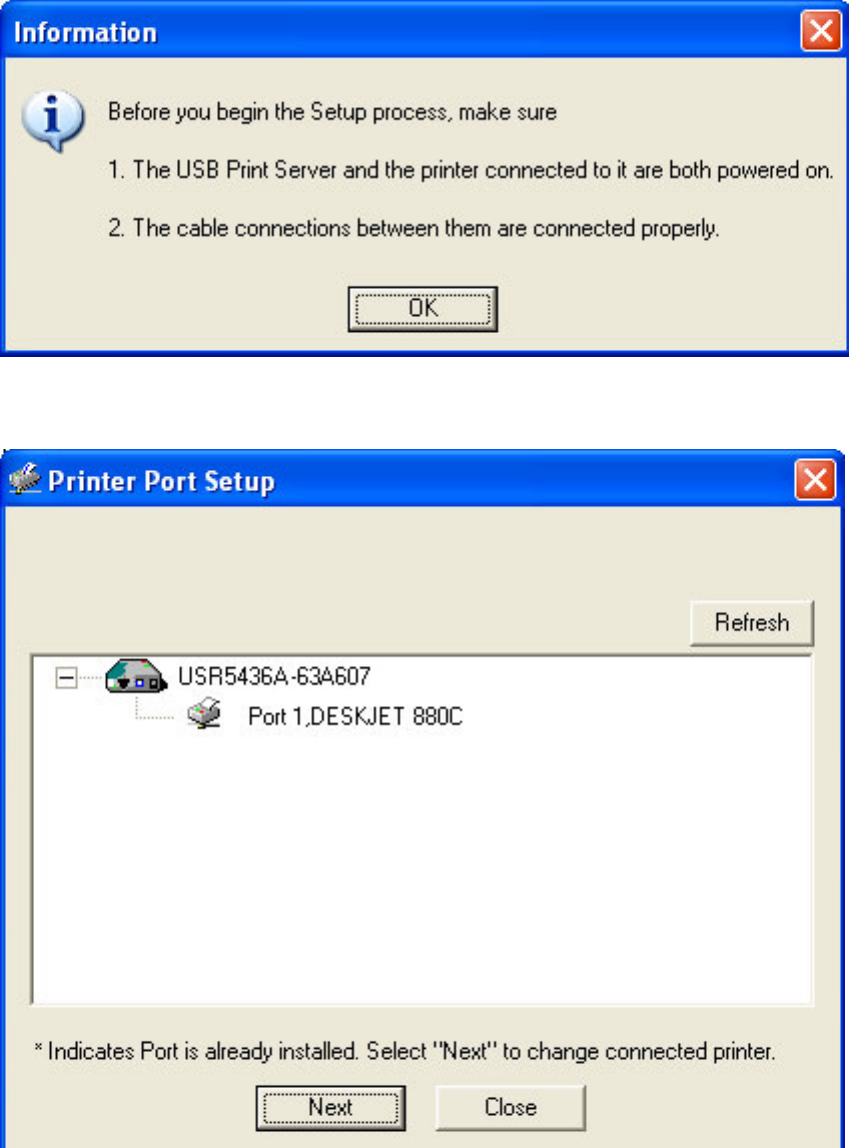
10. When that is completed, make sure the Configure Print Driver now checkbox is selected and
click Finish.
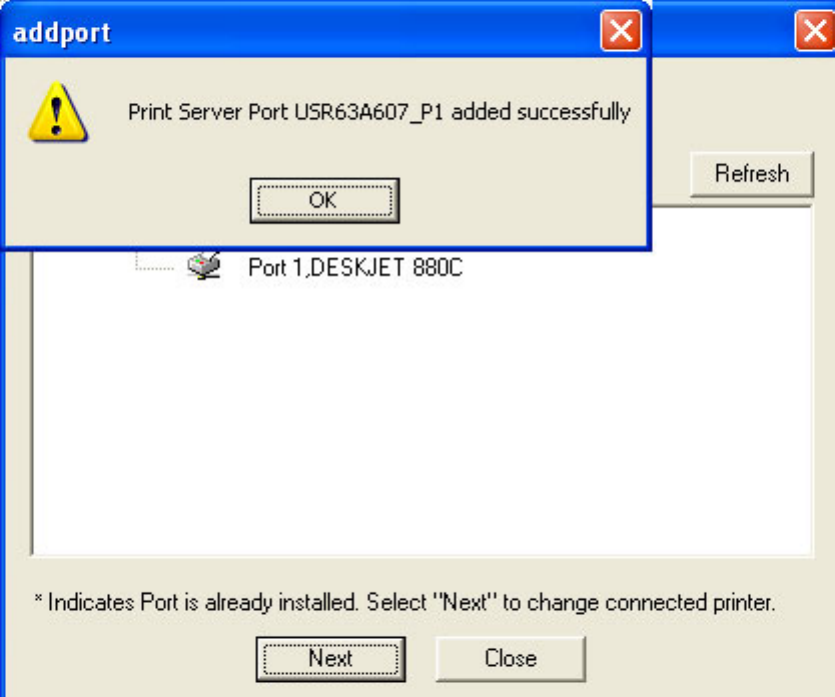
11. Click OK in the Information screen that appears. It may be necessary to minimize the Print
Server Utility screen in order to see the Information screen.
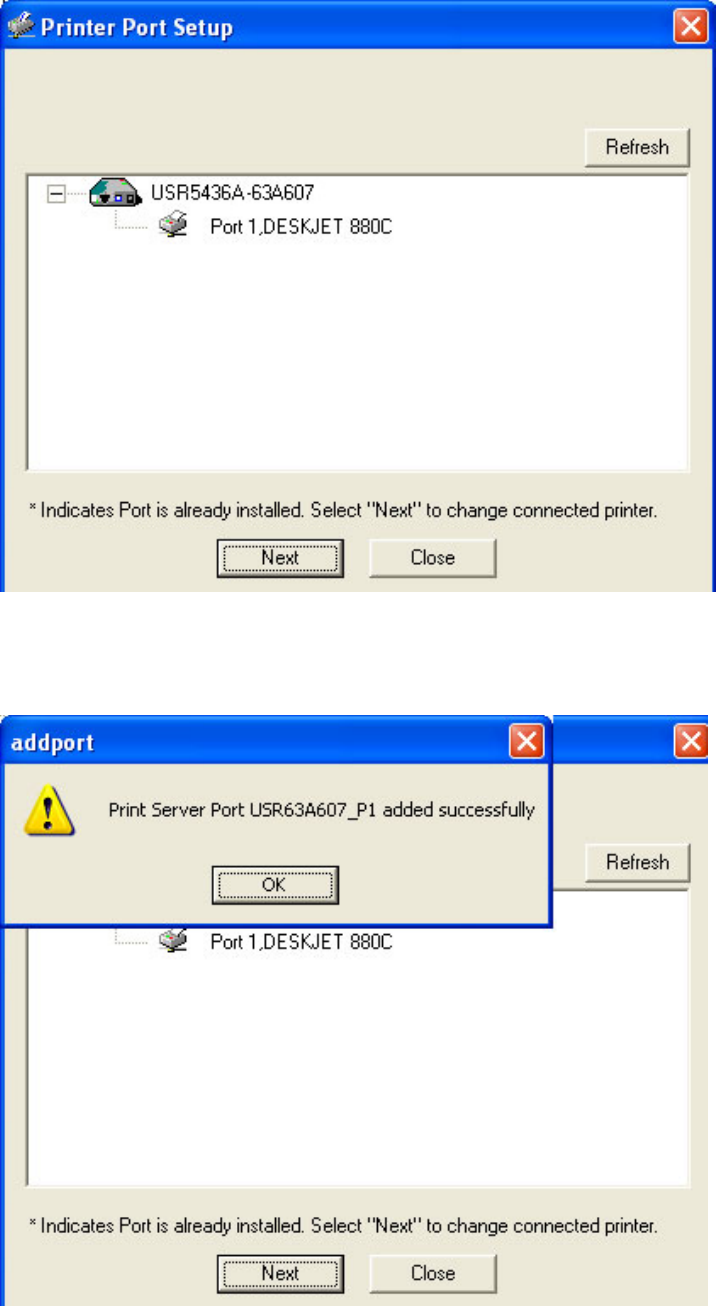
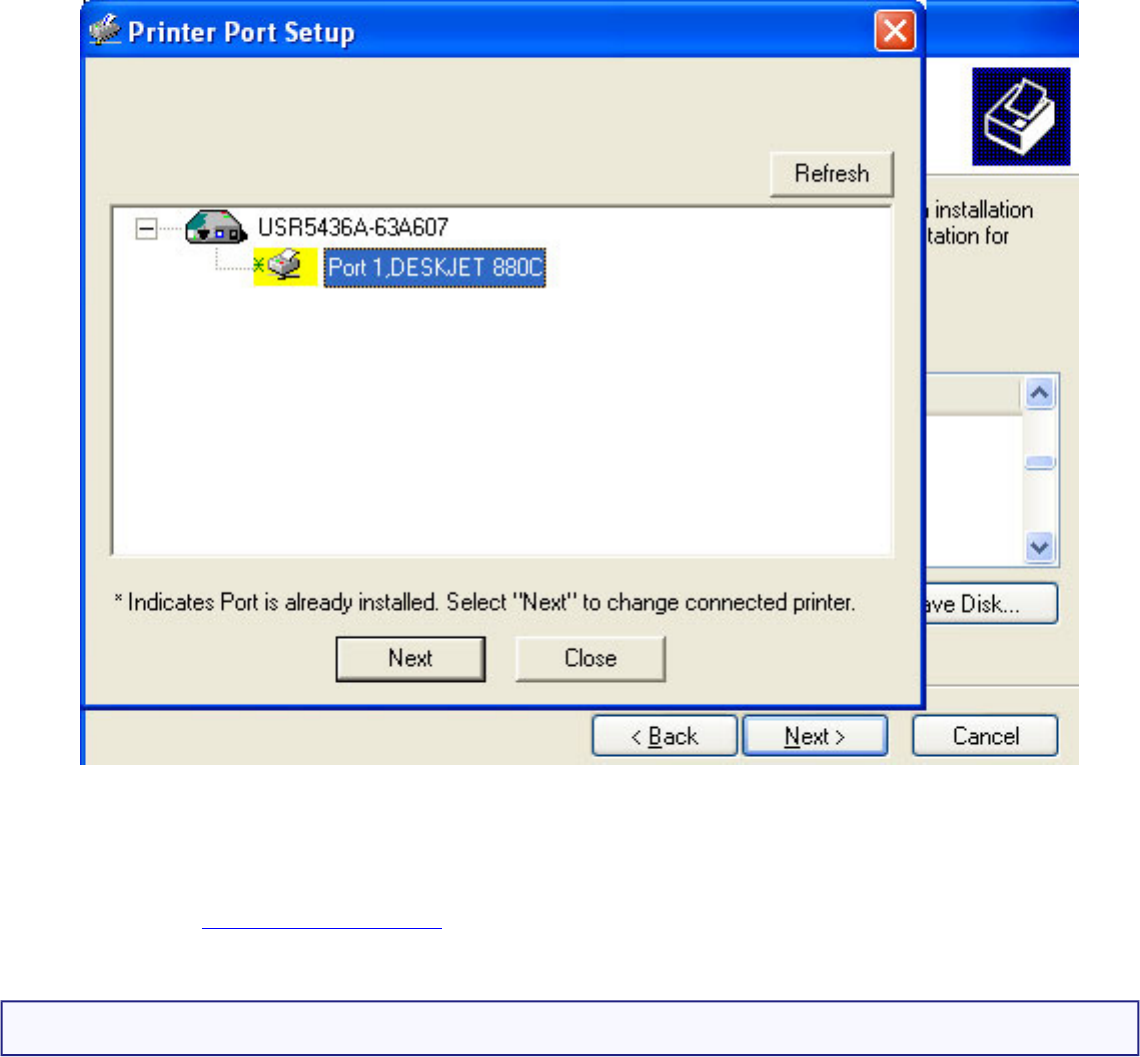
12. In the Printer Port Setup, select the port and click Next.
file:///G|/CSO/T-Writer Repository/Networking/5436A Wireless Gutenberg/User Guide/English/install.html (13 of 17)9/14/2006 4:35:10 PM
Wireless USB Print Server User Guide
If you do not see the printer, click Refresh until the port name appears.
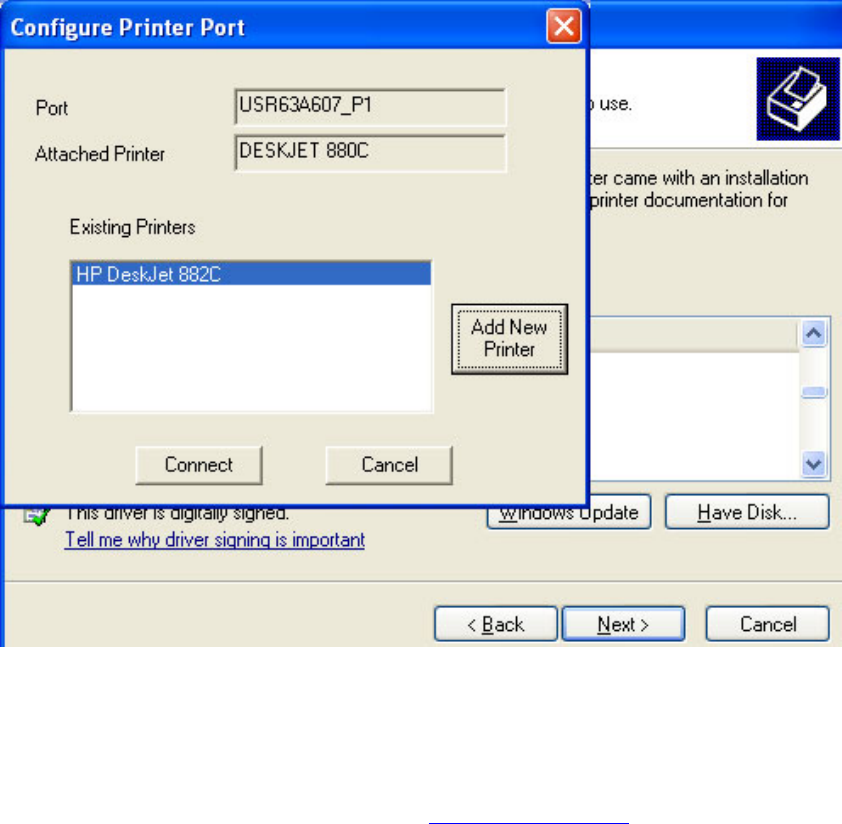
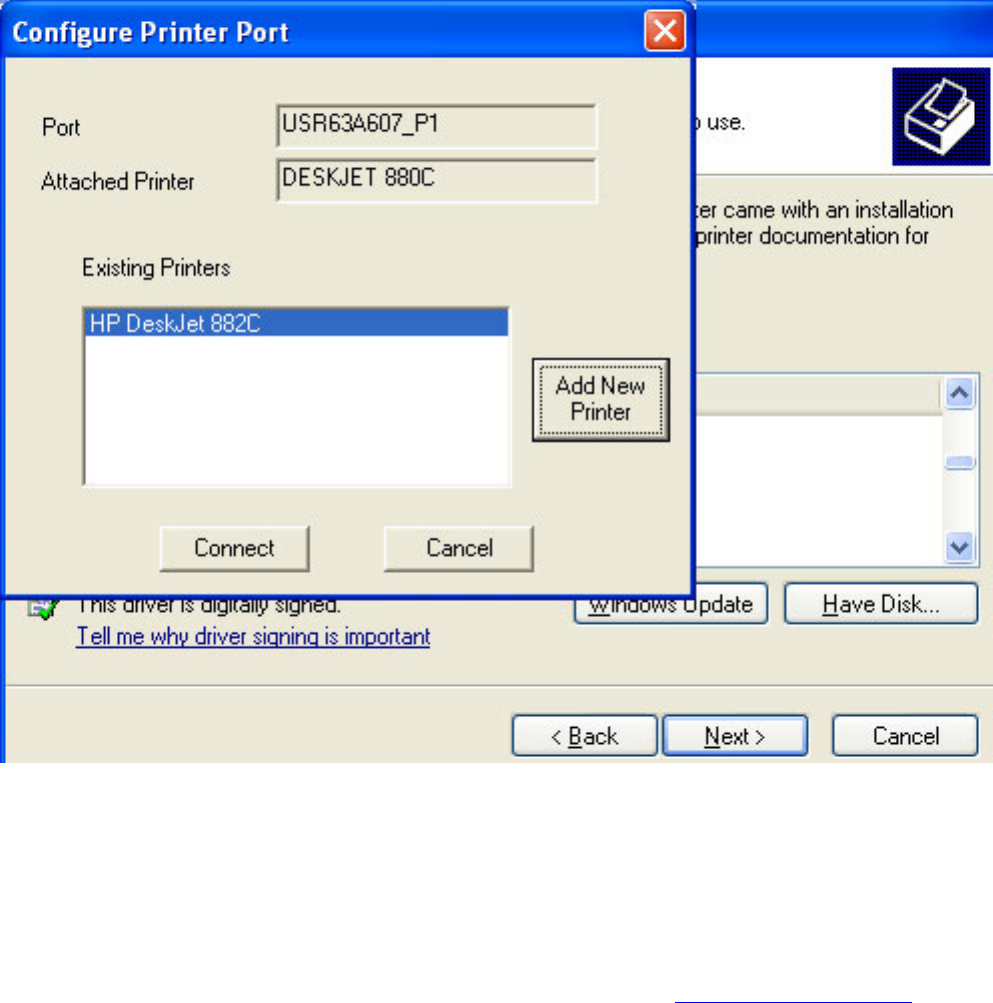
13. Click OK on the message that appears.
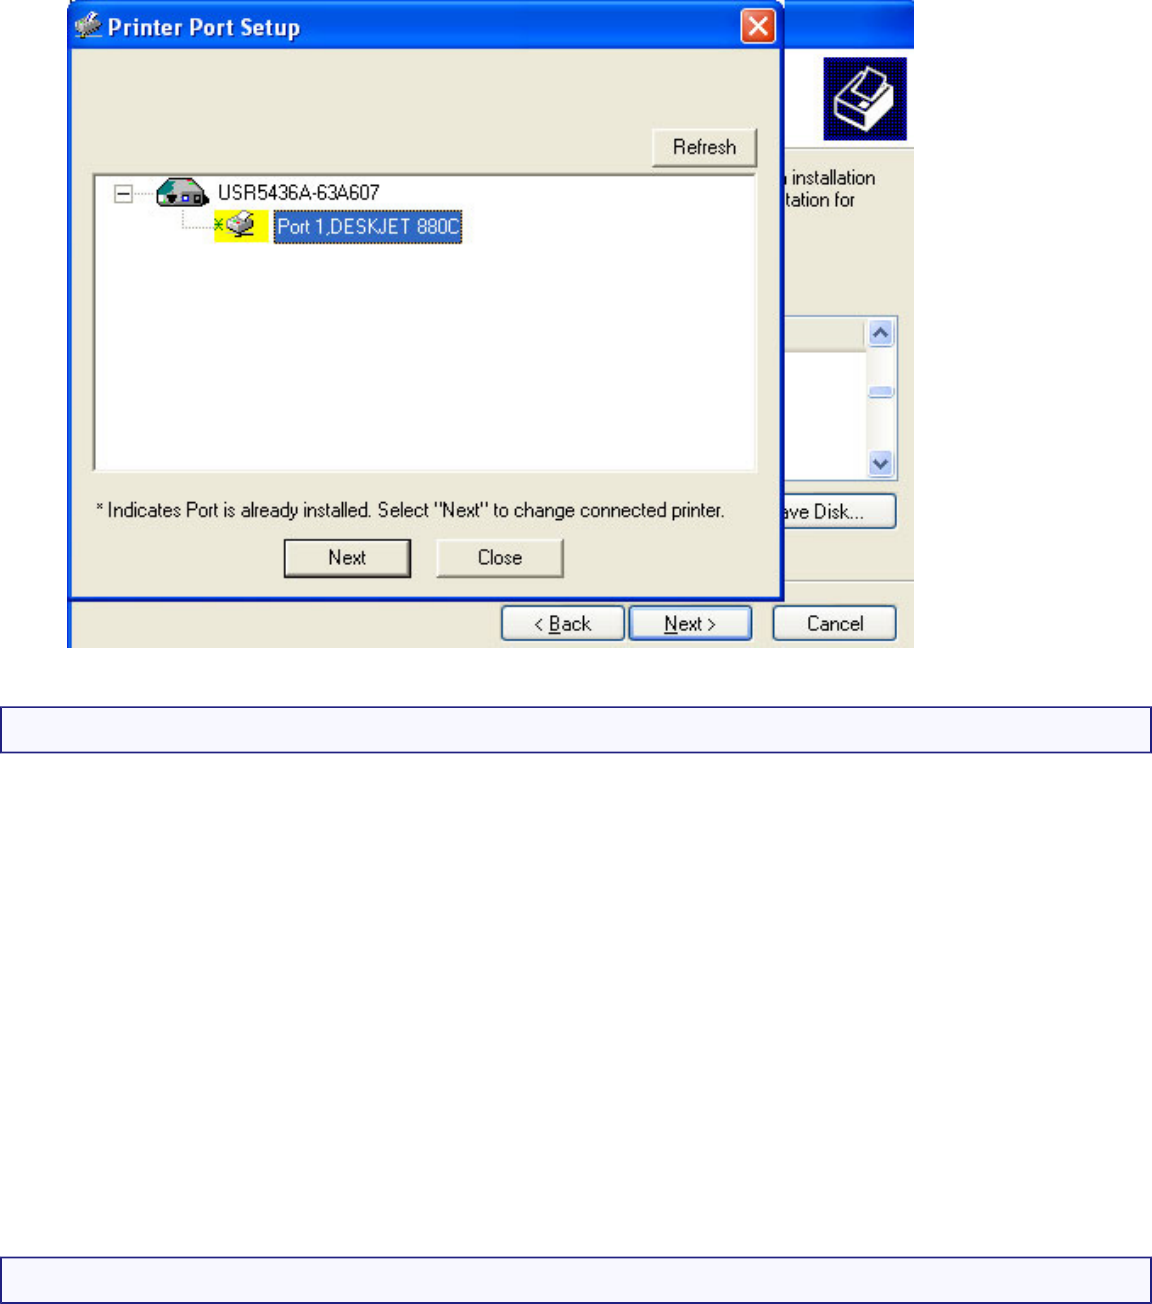
14. Select the printer from the Existing Printers list.
file:///G|/CSO/T-Writer Repository/Networking/5436A Wireless Gutenberg/User Guide/English/install.html (14 of 17)9/14/2006 4:35:10 PM
Wireless USB Print Server User Guide
If the printer doesn’t appear, click Add New Printer and follow the onscreen instructions.
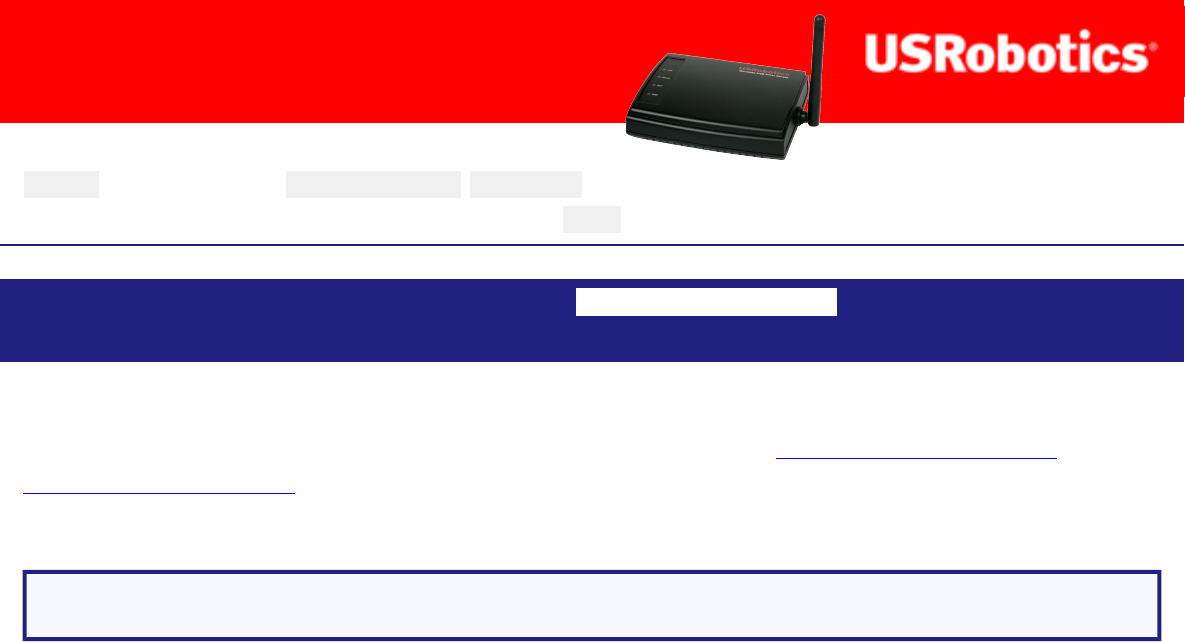
15. Click Connect.
If you do not see an asterisk next to the port name in the Printer Port Setup screen, click
Refresh. If it still doesn’t appear, see Troubleshooting.
16. Click Close.
file:///G|/CSO/T-Writer Repository/Networking/5436A Wireless Gutenberg/User Guide/English/install.html (15 of 17)9/14/2006 4:35:10 PM
Wireless USB Print Server User Guide
Step Three: Print a Test Page.
1. Windows XP, 2000, and NT Users:
❍ Click Windows Start > Printers and Faxes.
Windows Me, 98, and 95 Users:
A. Click Windows Start > Settings > Control Panel.
B. Within Control Panel, click Printers and Faxes.
2. Right-click the printer you just installed and select Properties.
3. Click Print Test Page. Your printer should successfully print a test page.
Step Four: Setup the Print Server for Wireless Access
You can now access the wireless functions of the Wireless USB Print Server.
1. Disconnect the Ethernet cable and the power adapter from the Wireless USB Print Server.
file:///G|/CSO/T-Writer Repository/Networking/5436A Wireless Gutenberg/User Guide/English/install.html (16 of 17)9/14/2006 4:35:10 PM

Wireless USB Print Server User Guide
2. Reconnect the power adapter to restart the print server. The print server should now establish a
wireless connection to your wireless router or access point.
3. Repeat the instructions from Step Three: Print a Test Page. If you are able to print, your
wireless connection is working correctly. If you are not able to print the test page, there is a
problem with your wireless connection, see Troubleshooting.
Step Five: Connect Clients to the Wireless USB Print Server
To connect additional client computers to the printer, you will need to perform the client
installation on each computer.
To install the management tools for the Wireless USB Print server, you need to perform an
Administrator installation.
Congratulations! You have successfully completed the installation procedure. Please register your
Wireless USB Print Server at www.usr.com/productreg.
To print out a diagnostic page with the setting information for the Wireless USB Print Server, press the
RESET button once.
© 2004-2006 U.S. Robotics Corporation.
file:///G|/CSO/T-Writer Repository/Networking/5436A Wireless Gutenberg/User Guide/English/install.html (17 of 17)9/14/2006 4:35:10 PM
Wireless USB Print Server User Guide
Wireless USB Print Server User
Guide
Home Installation Configuration Tutorials
Help
Wireless USB Print Server Installation Client Installation Macintosh Installation
Unix Installation Netware Installation Windows Server Installation
Before performing client configuration, the Wireless USB Print Server must be
installed on your LAN, and configured as described in the Wireless USB Print
Server Installation section. Both the Wireless USB Print Server and the attached
printer must be powered ON.
Note: You may need the Installation CD-ROM that came with your printer.
1. Insert the U.S. Robotics Installation CD-ROM.
2. Click Additional Installs and then click Next.
file:///G|/CSO/T-Writer Repository/Networking/5436A Wireless Gutenberg/User Guide/English/install_client.html (1 of 16)9/14/2006 4:35:27 PM


Wireless USB Print Server User Guide
2. Follow the on-screen instructions to complete the client installation.
User
User is the most common option that the majority of network clients will want to
choose. This should be selected if the Wireless USB Print Server has already been
configured and you just need printing capabilities on this computer.
1. Click User and then click Next and follow the on-screen instructions.
2. You will then be prompted to install the PTP (Peer-to-Peer) driver. Click Yes.
file:///G|/CSO/T-Writer Repository/Networking/5436A Wireless Gutenberg/User Guide/English/install_client.html (3 of 16)9/14/2006 4:35:27 PM
Wireless USB Print Server User Guide
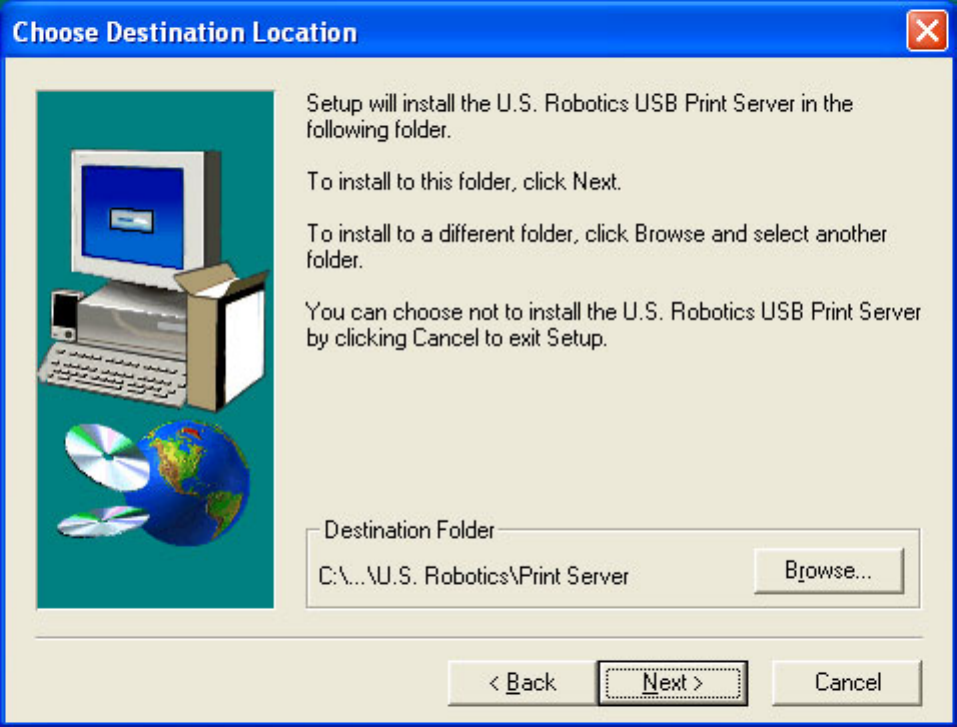
3. Follow the on-screen instructions to select the location and install the PTP (Peer-
to-Peer) driver.
4. When that is completed, make sure the Configure Print Driver now checkbox
is selected and click Finish.
5. Click OK in the Information screen that appears. It may be necessary to
minimize the Print Server Utility screen in order to see the Information screen.
file:///G|/CSO/T-Writer Repository/Networking/5436A Wireless Gutenberg/User Guide/English/install_client.html (4 of 16)9/14/2006 4:35:27 PM
Wireless USB Print Server User Guide
6. In the Printer Port Setup, select the port and click Next.
If you do not see the printer, click Refresh until the port name appears.
7. Click OK on the message that appears.
file:///G|/CSO/T-Writer Repository/Networking/5436A Wireless Gutenberg/User Guide/English/install_client.html (5 of 16)9/14/2006 4:35:27 PM
Wireless USB Print Server User Guide
8. Select the printer from the Existing Printers list.
file:///G|/CSO/T-Writer Repository/Networking/5436A Wireless Gutenberg/User Guide/English/install_client.html (6 of 16)9/14/2006 4:35:27 PM
Wireless USB Print Server User Guide
If the printer doesn’t appear, click Add New Printer and follow the onscreen
instructions.
9. Click Connect.
If you do not see an asterisk next to the port name in the Printer Port Setup
screen, click Refresh. If it still doesn’t appear, see Troubleshooting.
10. Click Close.
file:///G|/CSO/T-Writer Repository/Networking/5436A Wireless Gutenberg/User Guide/English/install_client.html (7 of 16)9/14/2006 4:35:27 PM
Wireless USB Print Server User Guide
11. Repeat this step on each computer.
You will now be able to use your USB printer from this computer. To validate your
setup, you can print a test page.
Administrator
Administrator will install the necessary tools for initial configuration, as well as the
BiAdmin Management Utility. This should only be chosen by more advanced network
clients.
1. Select Administrator from the list and click Next.
2. Click Next.
file:///G|/CSO/T-Writer Repository/Networking/5436A Wireless Gutenberg/User Guide/English/install_client.html (8 of 16)9/14/2006 4:35:27 PM

Wireless USB Print Server User Guide
3. Click Next and then Finish.
file:///G|/CSO/T-Writer Repository/Networking/5436A Wireless Gutenberg/User Guide/English/install_client.html (9 of 16)9/14/2006 4:35:27 PM
Wireless USB Print Server User Guide
This will add the BiAdmin Management Utility to your computer. Click the icon on your
desktop or the program menu link to launch the BiAdmin Management Utility. You can
use the BiAdmin Management Utility to configure the settings of the Wireless USB
Print Server.
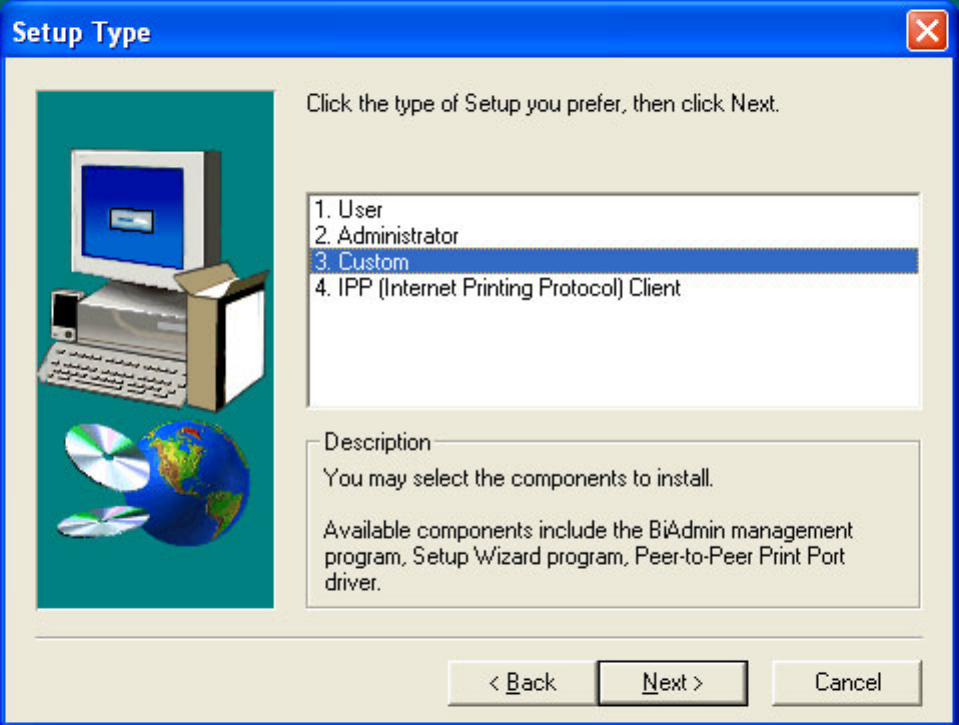
Custom
Custom allows the network client to select the options that will be installed from any
combination of the BiAdmin Management Utility, the Setup Wizard, and the Peer-to-
Peer Print Port driver. This should only be chosen by more advanced network clients.
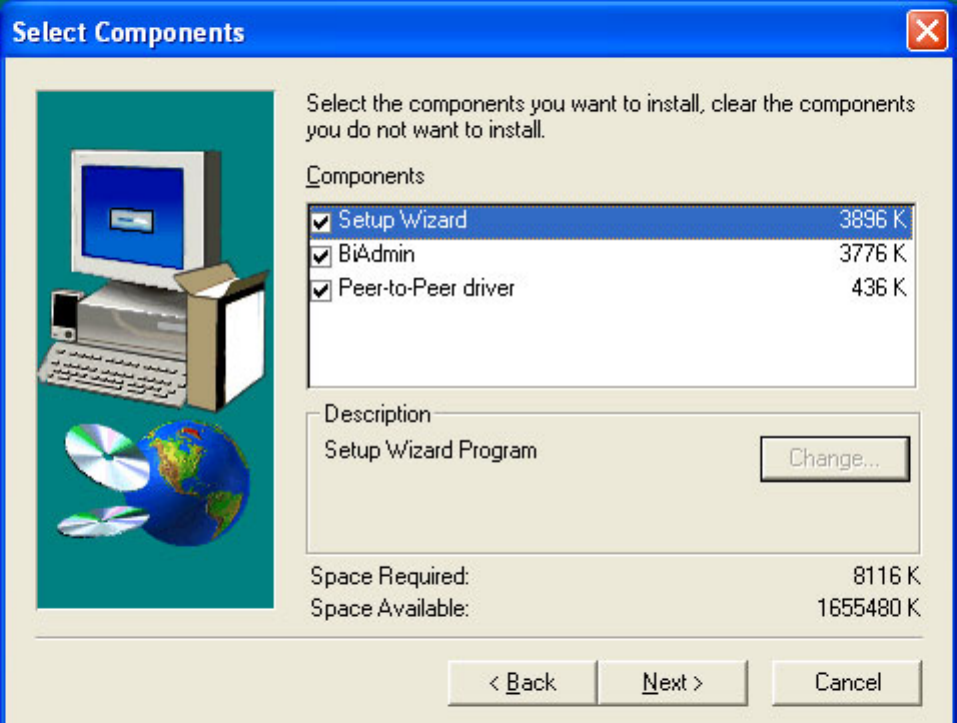
1. Select Custom from the list and click Next.
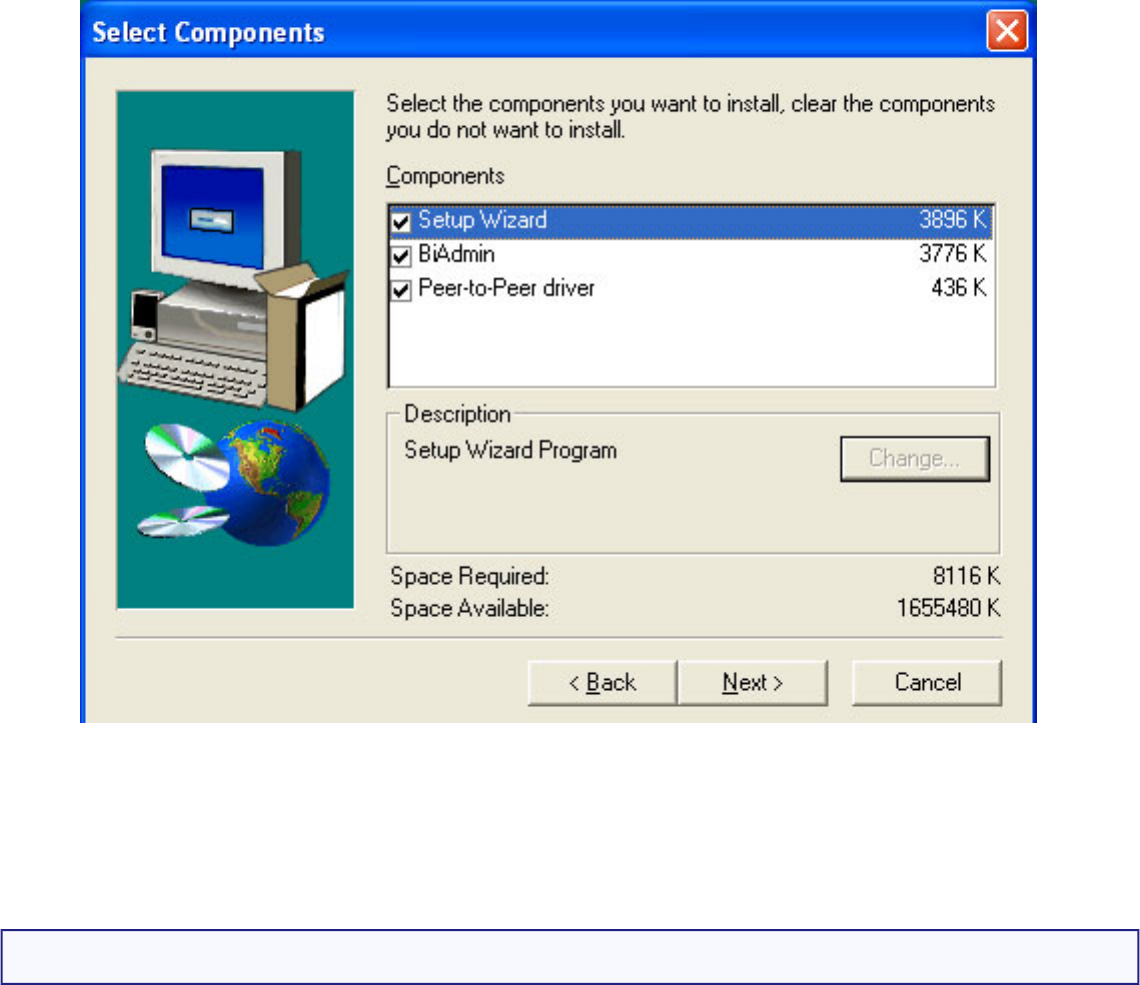
2. Select the options that you want to install: Setup Wizard, BiAdmin, and Peer-
to-Peer Driver. Click Next.
file:///G|/CSO/T-Writer Repository/Networking/5436A Wireless Gutenberg/User Guide/English/install_client.html (10 of 16)9/14/2006 4:35:27 PM
Wireless USB Print Server User Guide
3. Click Next.
file:///G|/CSO/T-Writer Repository/Networking/5436A Wireless Gutenberg/User Guide/English/install_client.html (11 of 16)9/14/2006 4:35:27 PM
Wireless USB Print Server User Guide
4. Click Next and then Finish.
file:///G|/CSO/T-Writer Repository/Networking/5436A Wireless Gutenberg/User Guide/English/install_client.html (12 of 16)9/14/2006 4:35:27 PM

Wireless USB Print Server User Guide
The selected options are now installed.
IPP Client
IPP (Internet Printing Protocol) Client is required if you want to print to any
IPP servers, either on the local network or accessed remotely over the Internet. This
should only be chosen by more advanced network clients.
For these platforms, IPP Client software is supplied on the CD-ROM. You can also
distribute the setup program (IPP_CLIENT.EXE) to users vial E-mail.
Installing from the Installation CD-ROM
1. Select IPP (Internet Printing Protocol) Client from the list and click Next.
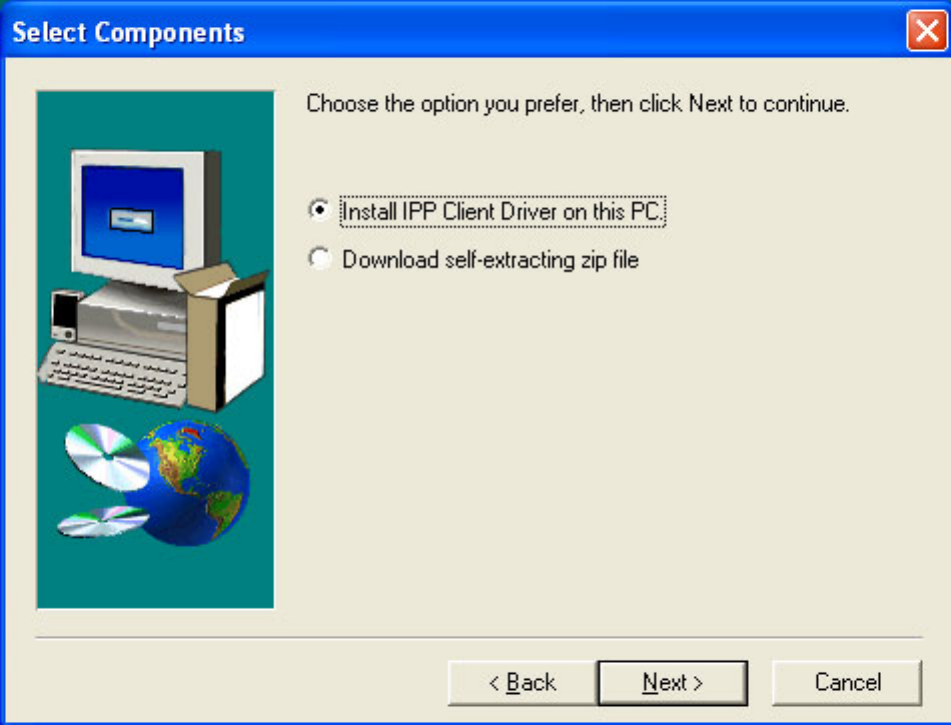
2. Select either Install IPP Client Driver on this PC or Download self-
extracting zip file and click Next.
file:///G|/CSO/T-Writer Repository/Networking/5436A Wireless Gutenberg/User Guide/English/install_client.html (13 of 16)9/14/2006 4:35:27 PM
Wireless USB Print Server User Guide
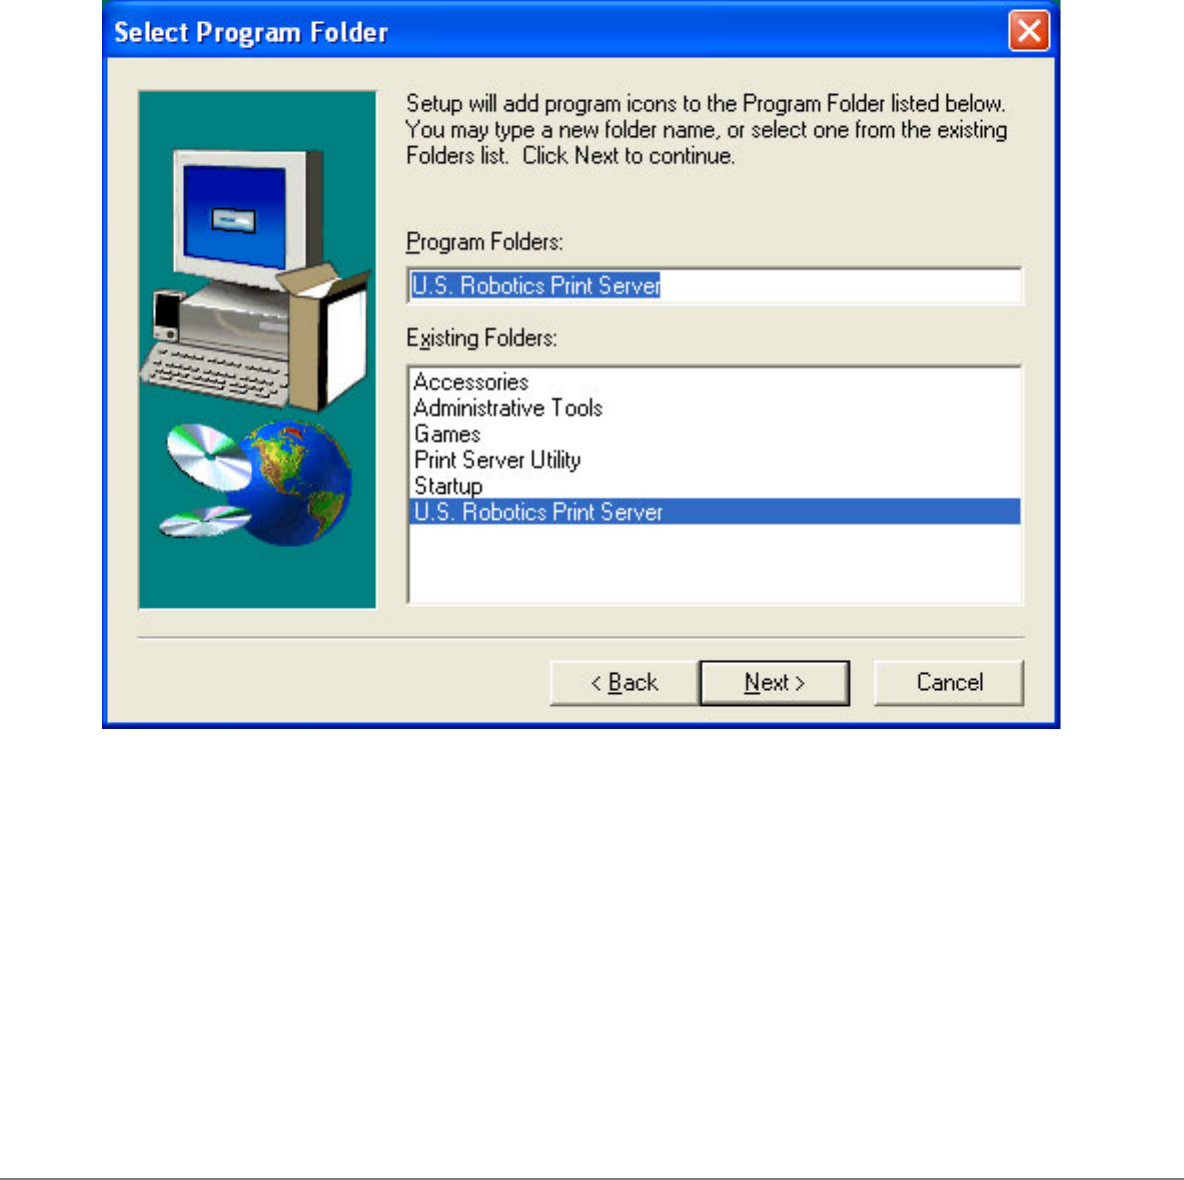
3. Click Next.
file:///G|/CSO/T-Writer Repository/Networking/5436A Wireless Gutenberg/User Guide/English/install_client.html (14 of 16)9/14/2006 4:35:27 PM

Wireless USB Print Server User Guide
4. Click Next and then Finish.
file:///G|/CSO/T-Writer Repository/Networking/5436A Wireless Gutenberg/User Guide/English/install_client.html (15 of 16)9/14/2006 4:35:27 PM
Wireless USB Print Server User Guide
Installing using IPP_CLIENT.EXE
1. Run this program to unzip the included files.
2. The IPP Setup program will then run.
3. Follow the prompts to complete the installation.
© 2004-2006 U.S. Robotics Corporation.
file:///G|/CSO/T-Writer Repository/Networking/5436A Wireless Gutenberg/User Guide/English/install_client.html (16 of 16)9/14/2006 4:35:27 PM
Wireless USB Print Server User Guide
Wireless USB Print Server User
Guide
Home Installation Configuration Tutorials
Help
Wireless USB Print Server Installation Client Installation Macintosh Installation
Unix Installation Netware Installation Windows Server Installation
Macintosh (AppleTalk)
The Wireless USB Print Server supports AppleTalk (EtherTalk), PAP, ATP, NBP, ZIP
and DDP protocols, enabling Macintosh computers on the network to view and use the
Wireless USB Print Server as a regular AppleTalk printer. Normally, no special
configuration is required.
Software Requirements
System 9.x OS or newer.
AppleTalk Setup
1. Click the apple icon and choose Control Panel and then AppleTalk.
2. Ensure that Ethernet is selected under AppleTalk Connection.
3. Click Chooser. The Chooser panel will open.
4. Click on either the LaserWriter 8 icon (recommended) or the LaserWriter 7
icon. LaserWriter 8 makes use of the fonts installed in the printer itself, so the
printing response time is quicker. LaserWriter 7 uses the fonts installed in the
computer, which increases network traffic and takes more printing time.
file:///G|/CSO/T-Writer Repository/Networking/5436A Wireless Gutenberg/User Guide/English/install_mac.htm (1 of 4)9/14/2006 4:35:45 PM

Wireless USB Print Server User Guide
5. Choose a PostScript printer from the list.
6. Click Create and it will search PPD automatically.
7. Select a printer description from the list.
8. Click Select.
9. Configuration is now complete.
Printing
Printing with the Wireless USB Print Server installed in an AppleTalk network is
identical to normal printing. Select File and then Print and choose the desired printer.
Advanced Setup and Management
In a mixed Windows computer/Macintosh environment, you can use the BiAdmin
Management Utility to configure the Wireless USB Print Server.
Macintosh OS X
If using LPR printing, you need to ensure the Wireless USB Print Server has a valid IP
address before configuring your Mac as follows.
LPR printing Setup
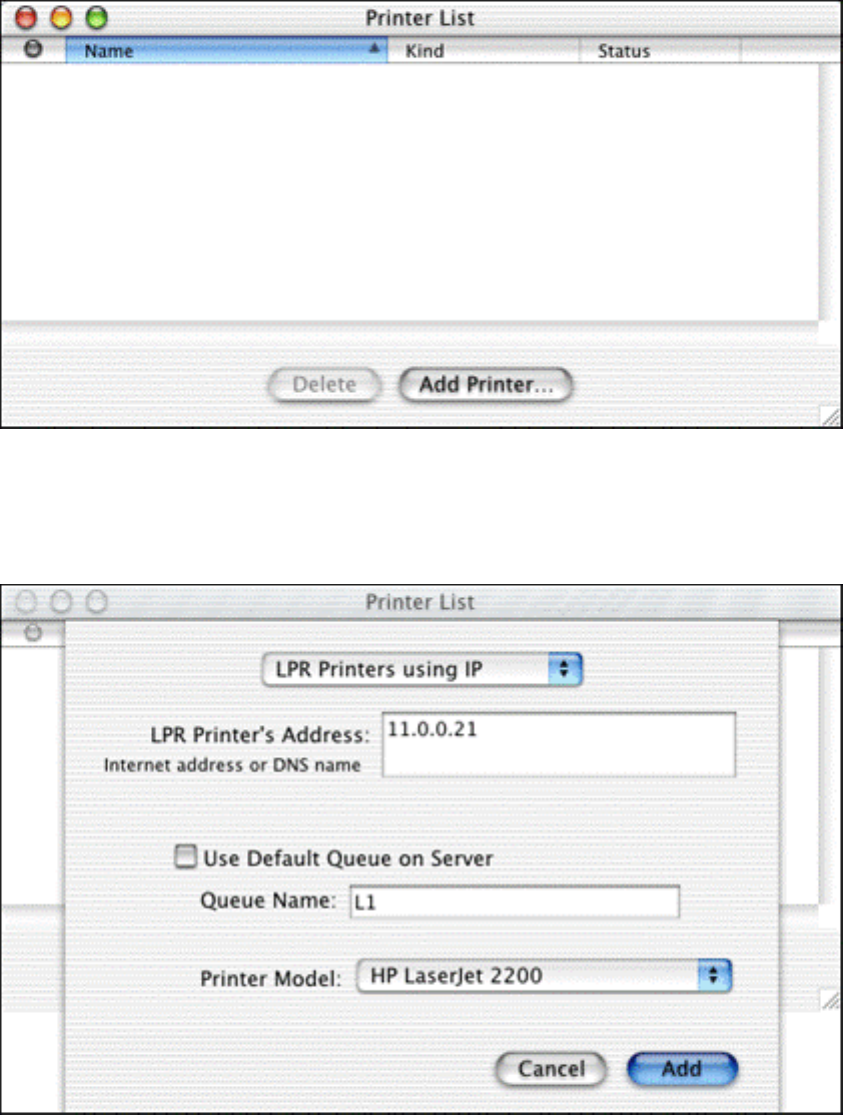
1. Select the Printer List icon.
file:///G|/CSO/T-Writer Repository/Networking/5436A Wireless Gutenberg/User Guide/English/install_mac.htm (2 of 4)9/14/2006 4:35:45 PM
Wireless USB Print Server User Guide
2. Click Add Printer.
3. Select LPR Printers Using IP.
4. Enter the IP address of the Print Server in the LPR Printer's Address field,
and enter the Queue Name (L1 for port 1, L2 for port 2 if the Wireless USB
Print Server has 2 printer ports.).
5. Select the Printer Model from the drop-down list.
6. Click Add.
7. Configuration is now complete.
file:///G|/CSO/T-Writer Repository/Networking/5436A Wireless Gutenberg/User Guide/English/install_mac.htm (3 of 4)9/14/2006 4:35:45 PM

Wireless USB Print Server User Guide
© 2004-2006 U.S. Robotics Corporation.
file:///G|/CSO/T-Writer Repository/Networking/5436A Wireless Gutenberg/User Guide/English/install_mac.htm (4 of 4)9/14/2006 4:35:45 PM
Wireless USB Print Server User Guide
Wireless USB Print Server User
Guide
Home Installation Configuration Tutorials
Help
Wireless USB Print Server Installation Client Installation Macintosh Installation
Unix Installation Netware Installation Windows Server Installation
Unix
Overview
Your Wireless USB Print Server supports the LPD Unix printing method, which is
supported by all common Unix systems.
You must configure both the Wireless USB Print Server and your Unix system, as
described in the following sections.
Wireless USB Print Server IP Address Configuration
Because it supports dynamic IP Address allocation using DHCP or BOOTP, the Wireless
USB Print Server ships with an IP Address of 0.0.0.0. This is NOT a valid IP Address.
Therefore, you must do ONE of the following:
● Check your DHCP server (if you have one), and determine the IP Address
allocated to the Wireless USB Print Server.
● Configure your BOOTP Server (if you have one), to provide an IP address to
the Wireless USB Print Server, then restart the Wireless USB Print Server.
● Use a Windows platform and run the Setup Wizard or BiAdmin utility to
allocate a valid IP Address to the Wireless USB Print Server.
● Add an entry to the arp table to associate the hardware address of the Wireless
USB Print Server with the desired IP address, as follows:
file:///G|/CSO/T-Writer Repository/Networking/5436A Wireless Gutenberg/User Guide/English/install_unix.htm (1 of 8)9/14/2006 4:36:16 PM

Wireless USB Print Server User Guide
arp -s IP_Address 00:c0:02:xx:xx:xx
Where:
IP_Address is the IP Address you wish to assign to the Wireless USB Print
Server.
00:c0:02:xx:xx:xx is the hardware address of the Wireless USB Print Server.
Example: arp -s 192.168.0.21 00:c0:02:12:34:56
You should then assign this IP address to the Wireless USB Print Server using your
Web Browser. Launch the Web User Interface and go to the TCP/IP section. Select
Fixed IP Address and then enter the appropriate information.
Note: The hardware address of the Wireless USB Print Server is shown on a
sticker on the base of the device.
Other Wireless USB Print Server Configuration
The recommended method to configure the Wireless USB Print Server is to use the
Web User Interface.
● Ensure that the TCP/IP settings are correct for your network.
● The logical printers (e.g. L1) must be configured correctly to match your
system.
LPD Configuration
Configuration for LPD on IBM AIX 4.15, LPD on System V, LPD on Linux, and
LPD on BSD are described below.
LPD on IBM AIX 4.15
Before proceeding, ensure that the Wireless USB Print Server has been assigned an IP
file:///G|/CSO/T-Writer Repository/Networking/5436A Wireless Gutenberg/User Guide/English/install_unix.htm (2 of 8)9/14/2006 4:36:16 PM
Wireless USB Print Server User Guide
Address. To setup your AIX system for LPD printing, perform the following steps.
1. Add the Wireless USB Print Server to /etc/hosts.lpd, using the name you
assigned to the Wireless USB Print Server.
2. Start the LPD daemon if it is not running, using the following command: start
src -s qdaemon
3. Start the system administration tool smit and select Print Spooling.
4. Create the required number of queues (one for each logical printer) by
selecting:
Add a Print Queue
Remote (Printer attached to Remote Host)
Standard Processing
5. Use the following information:
Name of queue to add: Use a single-word queue name, which indicates which
printer is attached.
Hostname for remote server: Wireless USB Print Server name as used in /
etc/hosts.lpd.
Name of queue on remote server: Logical printer number (e.g. L1) to
service this queue.
Type of print spooler on remote server: Use default value. (AIX Version
xxx)
6. Ensure that the logical printers are configured in the Wireless USB Print Server.
7. Print using the following command: lp -d printer_queue file_name
Where:
printer_queue is one of the entries used in Name of queue to add.
file_name is the file you wish to print.
LPD on System V
Before beginning LPD Setup, ensure that an IP Address has been assigned to the
Wireless USB Print Server. Keep the following points in mind:
file:///G|/CSO/T-Writer Repository/Networking/5436A Wireless Gutenberg/User Guide/English/install_unix.htm (3 of 8)9/14/2006 4:36:16 PM
Wireless USB Print Server User Guide
● The remote host name is the name of the Wireless USB Print Server.
● The remote printer name is the print queue name for the Logical Printer.
● Logical printers also need to be configured on the Wireless USB Print Server
itself.
● If your UNIX asks for the LPD type, be sure to identify the service type as BSD.
● The Wireless USB Print Server’s LPD protocol meets BSD system standards.
Commands
In the sample commands shown, printer_name is the name of the Print Queue
serviced by the Wireless USB Print Server, and Spooler_directory is the name of the
directory, which is used to spool the print jobs.
● Stop Print Services: /usr/lib/lpshut
● Add a System Printer: /usr/lib/lpadmin -p printer_name -v /dev/null
● Restart the Print Services: /usr/lib/lpsched
● Enable printing to the new printer device: enable printer_name
● Start accepting jobs for the new printer device: accept printer_name
● Create a spooling directory: mkdir /usr/spool/Spooler_directory
● Make spooling daemon the owner of this directory: chown daemon /usr/
spool/Spooler_directory
● Create read/write permissions: chmod 775 /usr/spool/Spooler_directory
● Give permissions to LPD processes: chgrp daemon /usr/spool/
Spooler_directory
Adding Remote Printers
A remote printer is added by inserting the following line in the /etc/printcap file.
file:///G|/CSO/T-Writer Repository/Networking/5436A Wireless Gutenberg/User Guide/English/install_unix.htm (4 of 8)9/14/2006 4:36:16 PM

Wireless USB Print Server User Guide
Note: The entry is really one line, but can be entered as shown. Use a TAB
character where shown.
Printer_name|Remote_Printer_Alias:\
[Tab] :lp=:\
[Tab] :rm=PS_NAME:\
[Tab] :rp=Logical_Printer_name:\
[Tab] :sd=Spooler_directory:\
[Tab] :mx#0:
Example:
Marketing|RP1_PS123456:\
[Tab] :lp=:\
[Tab] :rm=PS_Rm203:\
[Tab] :rp=L1:\
[Tab] :sd=/usr/spool/Marketing:\
[Tab] :mx#0:
Repeat this process for each Logical Printer/Print Queue combination that you wish to
create.
LPD on Linux
If using the command line, the procedure is the same as for System V. (above)
On recent Linux distributions, you can use the graphical X-windows interface instead
of the command line. The procedure is described below, but may vary according to
your version of Linux.
1. Start your X-windows shell.
2. Select Control Panel and then Printer Configuration.
3. Select Add. For the printer type, select Remote Unix (lpd) Queue.
4. Use the following data to complete the resulting dialog:
Name: Enter a name for this printer
file:///G|/CSO/T-Writer Repository/Networking/5436A Wireless Gutenberg/User Guide/English/install_unix.htm (5 of 8)9/14/2006 4:36:16 PM

Wireless USB Print Server User Guide
Spool Directory: /var/spool/lpd/name_of_printer
File Limit: 0 (no limit)
Remote Host: Name or IP Address of Wireless USB Print Server, e.
g. SC3000014
Note: host file entry is required to use the name instead of IP Address
Remote Queue: Ln
Where n is the Logical Printer number. By default, L1 is port 1, and L2 is port 2
if the Print Server has 2 ports.
5. Save this data and exit the Printer Configuration. Configuration is now
completed and the printer is now available for use.
LPD on BSD
Before continuing, ensure that an IP Address has been assigned to the Wireless USB
Print Server. Remember the following:
● The remote host name is the name of the Wireless USB Print Server.
● The remote printer name is the logical printer (e.g. L1) on the Wireless USB
Print Server.
● If asked for the LPD type, enter the service type as BSD.
Commands
In the sample commands shown, printer_name is the Print Queue serviced by the
logical printer on the Wireless USB Print Server, and Spooler_dir is the name of the
directory, which is used to spool the print jobs.
● Create a spooling directory: mkdir /usr/spool/Spooler_dir
● Set spooling daemon as owner of this directory: chown daemon /usr/spool/
Spooler_dir
● Create read/write permissions: chmod 775 /usr/spool/Spooler_dir
file:///G|/CSO/T-Writer Repository/Networking/5436A Wireless Gutenberg/User Guide/English/install_unix.htm (6 of 8)9/14/2006 4:36:16 PM

Wireless USB Print Server User Guide
● Give permissions to LPD processes: chgrp daemon /usr/spool/Spooler_dir
● Start lcomputer print mechanism: lcomputer start printer_name
Adding Remote Printers
A remote printer is added by inserting the following line in the /etc/printcap file.
Note: The entry is really one line, but can be entered as shown. Use a TAB
character where shown.
Printer_name|Remote_Printer_Alias:\
[Tab] :lp=:\
[Tab] :rm=PS_NAME:\
[Tab] :rp=Logical_Printer_name:\
[Tab] :sd=Spooler_directory:\
[Tab] :mx#0:
Where:
Printer_name is the Print Queue name used to store jobs for the corresponding
logical printer.
PS_NAME is the Wireless USB Print Server name defined in /etc/hosts.
Logical_Printer_name is the logical printer name on the Wireless USB Print Server.
(e.g. L1)
Spooler_directory is the directory you created.
Example:
Marketing|RP1_PS123456:\
[Tab] :lp=:\
[Tab] :rm=PS_Rm203:\
[Tab] :rp=L1:\
[Tab] :sd=/usr/spool/Marketing:\
[Tab] :mx#0:
Repeat this process for each Logical Printer/Print Queue combination that you wish to
create.
Printing using LPD
file:///G|/CSO/T-Writer Repository/Networking/5436A Wireless Gutenberg/User Guide/English/install_unix.htm (7 of 8)9/14/2006 4:36:16 PM

Wireless USB Print Server User Guide
For LPD printing instructions, refer to your UNIX manual.
The following example is for a BSD system: lpr -P printer_name filename
Where:
printer_name is the name of the Print Queue defined on the Unix host.
filename is the name of the file you wish to print.
Example: lpr -P Marketing /etc/hosts
In the above example, the /etc/hosts file is sent to the printer queue Marketing. It will
then be sent to the logical printer associated with this queue.
© 2004-2006 U.S. Robotics Corporation.
file:///G|/CSO/T-Writer Repository/Networking/5436A Wireless Gutenberg/User Guide/English/install_unix.htm (8 of 8)9/14/2006 4:36:16 PM
Wireless USB Print Server User Guide
Wireless USB Print Server User
Guide
Home Installation Configuration Tutorials
Help
Wireless USB Print Server Installation Client Installation Macintosh Installation
Unix Installation Netware Installation Windows Server Installation
Netware
Overview
The Print Server must be configured as a valid device on your TCP/IP network. This
printing method uses LPR over TCP/IP, not the Netware protocol.
To use NDPS (Novell Distributed Printing Services), the Novell server must be running
Novell NetWare 5, and the computers (clients) must be running IntranetWare Client
V2.2. or later.
The following procedure is designed to enable Public Access Printing under NDPS.
Public Access Printing allows anybody on the network to access the printer.
Creating an NDPS Manager Object
If an NDPS Manager Object already exists, skip this procedure and proceed to
Creating an NDPS Printer Agent.
1. Login to NetWare 5.0 Server as Admin and start the NetWare Administrator
program Nwadmn32.exe.
2. Select the container on NetWare Administrator where you want the NDPS
Manager object to reside. (e.g. TeSupp)
3. Select Create - Object from the menu bar to view the New Object dialog.
file:///G|/CSO/T-Writer Repository/Networking/5436A Wireless Gutenberg/User Guide/English/install_netware.htm (1 of 4)9/14/2006 4:36:26 PM
Wireless USB Print Server User Guide
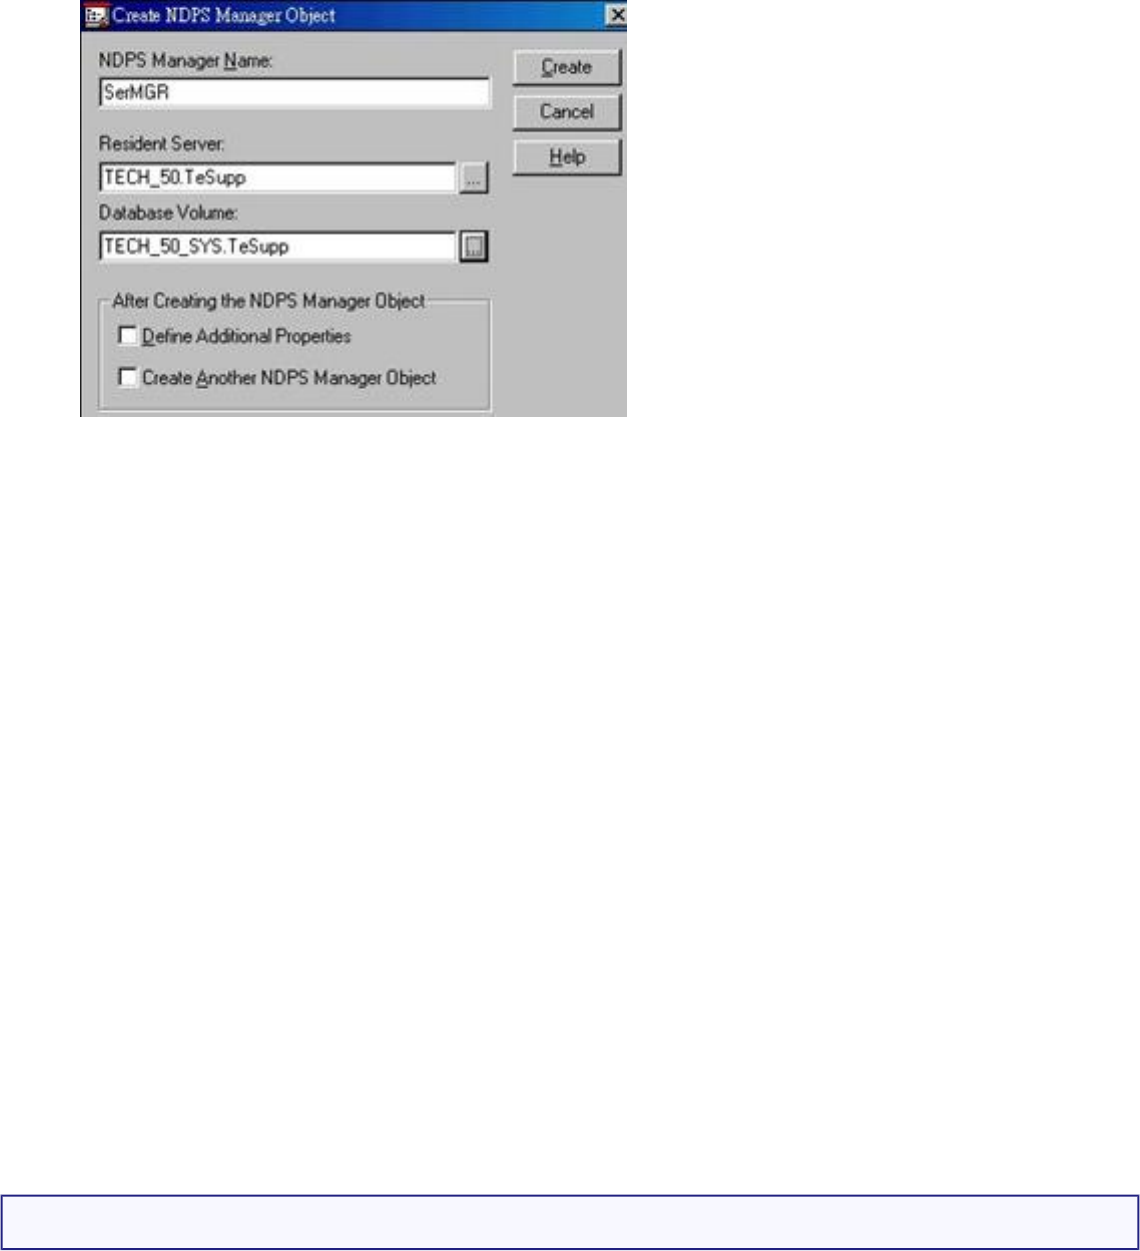
4. Select NDPS Manager as the object to create. The Create NDPS Manager
Object window shown below will appear.
5. Type a name in the NDPS Manager Name.(e.g. SerMGR, as shown above)
6. Browse the Resident Server and select where you want the NDPS Manager
object to be assigned. (e.g. TECH_50.TeSupp, as shown above)
7. Browse the Database Volume and select where you want the NDPS Manager
database to be assigned. (e.g. TECH_50_SYS.TeSupp, as shown above)
8. Click Create. The new NDPS Manager will appear in the main browser window.
To start the NDPS Manager in future, enter the following command at the
console: LOAD NDPSM
then select the NDPS Manager object.
To start the NDPS Manager whenever you bring up the server, add a command
like the following to your server's AUTOEXEC.NCF file: LOAD NDPSM SerMGR.
TeSupp
The last item is the name of the NDPS Manager object you wish to load.
9. After creating an NDPS Manager, you can create NDPS printers by using
NetWare Administrator, as explained below.
Creating an NDPS Printer Agent
To create Public Access Printers using the NDPS Manager Object in NetWare
Administrator, follow this procedure:
file:///G|/CSO/T-Writer Repository/Networking/5436A Wireless Gutenberg/User Guide/English/install_netware.htm (2 of 4)9/14/2006 4:36:26 PM
Wireless USB Print Server User Guide
1. Start the NDPS Manager object you will be using to control the Printer Agent.
2. At the Identification page, click Printer Agent List.
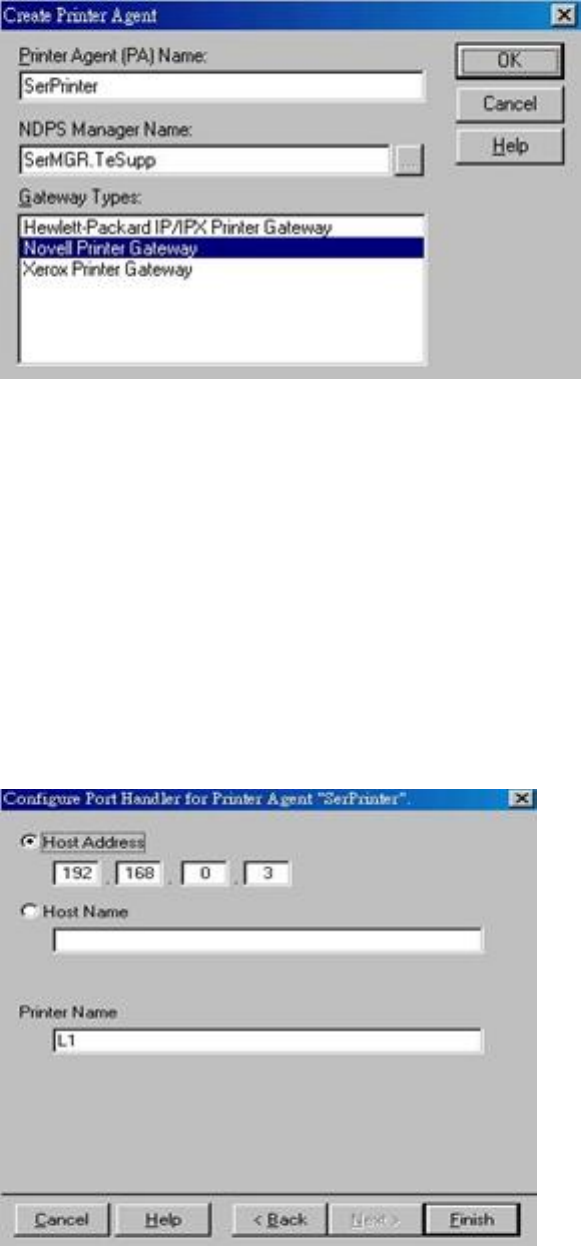
3. Click New to see the Create Printer Agent window, as shown below.
4. Enter the desired name for the Printer Agent (PA) Name.
5. Normally, the NDPS Manager will be the NDPS Manger object you are using.
6. Select Novell Printer Gateway in the Gateway Type.
7. Click OK and then select the available printer.
8. Select Remote (LPR on IP) in the Connection Type.
9. Click Next to see the following Configure Port Handler screen.
file:///G|/CSO/T-Writer Repository/Networking/5436A Wireless Gutenberg/User Guide/English/install_netware.htm (3 of 4)9/14/2006 4:36:26 PM

Wireless USB Print Server User Guide
10. In the Host address IP field, enter the IP Address previously assigned to the
Print Server device.
11. In the Printer Name field, enter the Logical Port name on the Print Server. (L1
for Port 1, L2 for port 2).
12. Click Finish, then select appropriate drivers for Windows 98 etc as required.
The new Printer Agent will now appear in the Printer Agent List window.
Repeat this procedure for any other ports on the Print Server or for any other logical
printers you wish to use. Client computers can now be configured.
© 2004-2006 U.S. Robotics Corporation.
file:///G|/CSO/T-Writer Repository/Networking/5436A Wireless Gutenberg/User Guide/English/install_netware.htm (4 of 4)9/14/2006 4:36:26 PM
Wireless USB Print Server User Guide
Wireless USB Print Server User
Guide
Home Installation Configuration Tutorials
Help
Wireless USB Print Server Installation Client Installation Macintosh Installation
Unix Installation Netware Installation Windows Server Installation
Windows Server
Windows NT4.0 Server
If using Windows NT 4.0, Microsoft TCP/IP Printing Support must be installed.
● If it is already installed, add a TCP/IP Remote Printer, as described below.
● If it is not already installed, install TCP/IP printing support, then add a TCP/IP
Remote Printer.
Adding TCP/IP Printing Support
1. Windows XP, 2000, and NT Users:
❍ Click Windows Start > Control Panel > Network.
Windows Me, 98, and 95 Users:
A. Click Windows Start > Settings > Control Panel > Network.
2. Click the Service option and ensure that Microsoft TCP/IP Printing is
enabled. If it is not enabled, click Add and enable it as usual.
3. If you added services in step 2, reboot the computer for the changes to take
file:///G|/CSO/T-Writer Repository/Networking/5436A Wireless Gutenberg/User Guide/English/install_winserver.htm (1 of 3)9/14/2006 4:37:10 PM

Wireless USB Print Server User Guide
effect.
Adding a TCP/IP Remote Printer
1. Windows XP, 2000, and NT Users:
❍ Click Windows Start > Printers and Faxes.
Windows Me, 98, and 95 Users:
A. Click Windows Start > Settings > Control Panel.
B. Within Control Panel, click Printers and Faxes.
2. Launch the Add Printer wizard.
3. When prompted with This printer will be managed by, select My Computer
and click Next.
4. Select Add Port… and then select LPR Port. Click New Port.
5. In the Name of Address of server providing lpd: dialogue box, enter the
Wireless USB Print Server's IP address.
6. In the Name of printer or print queue on that server dialogue box, enter
the appropriate logical printer number (e.g. L1) as previously configured on the
Wireless USB Print Server.
By default, L1 is port 1, and L2 is port 2 if the Wireless USB Print Server has 2
printer ports.
7. Click OK. When returned to the Printer Ports window, select Close and then
install your printer driver as usual.
8. When prompted whether or not the printer will be shared, select the Sharing
button.
9. In the Shared dialog box, enter the shared printer name. (The shared name is
how other users will see this printer.) Click OK to save and exit. Client
computers can now be configured.
file:///G|/CSO/T-Writer Repository/Networking/5436A Wireless Gutenberg/User Guide/English/install_winserver.htm (2 of 3)9/14/2006 4:37:10 PM

Wireless USB Print Server User Guide
Windows 2000/2003 Server
1. Launch the Add Printer Wizard, select Network Printer, then click Next to
browse for the Wireless USB Print Server.
2. Locate and double-click the Wireless USB Print Server, select the desired
port, and click Next.
A message like the following will be displayed:
3. Click OK and select the correct Manufacturer and Model for this printer.
4. Follow the prompts to complete the installation.
5. In the Printers folder, right-click the new printer and select Sharing.
Select Shared As: and enter an appropriate name for this printer. Users will
see this name when browsing for the printer during installation.
If desired, click Additional Drivers and install printer drivers for other versions
of Windows, such as Windows 98. This will assist users during the installation
process.
6. Click OK to close this Window. Configuration is now complete. Client computers
can now be configured.
© 2004-2006 U.S. Robotics Corporation.
file:///G|/CSO/T-Writer Repository/Networking/5436A Wireless Gutenberg/User Guide/English/install_winserver.htm (3 of 3)9/14/2006 4:37:10 PM
Wireless USB Print Server User Guide
Wireless USB Print Server User
Guide
Home Installation Configuration Tutorials
Help
Web User Interface Management Utility
The following section describes the various functions of the Web User Interface. This
utility provides quick access to all the settings of the Wireless USB Print Server.
To access the Web User Interface:
1. Start you Web browser.
2. In the location or address line, type the IP address of the Wireless USB Print
Server and press ENTER.
IP Address Example: 192.168.x.x
If you do not know the IP address of the Wireless USB Print Server, open the
BiAdmin Management Utility. The IP address, along with other information about
the print server, is displayed on the first screen of the utility. You could also run the
Setup Wizard and write down the IP address when it is displayed or print a copy of
the diagnostic page. The IP address is among the information provided in the
diagnostic page.
When the Web User Interface has opened, you will see the following menu options on
the left-hand side:
Server Status
Printer Status
Configure Server
Logical Printers
Wireless Basic
file:///G|/CSO/T-Writer Repository/Networking/5436A Wireless Gutenberg/User Guide/English/wui.html (1 of 2)9/14/2006 4:37:39 PM

Wireless USB Print Server User Guide
Wireless USB Print Server User
Guide
Home Installation Configuration Tutorials
Help
Web User Interface Management Utility
The BiAdmin Management Utility can be used to configure the settings of the Wireless
USB Print Server. This utility is for advanced users or for users on a network with
multiple Wireless USB Print Servers. On networks with multiple Wireless USB Print
Servers, it is recommended that you use the BiAdmin Management Utility instead of
the Web User Interface.
Installing the BiAdmin Management Utility
If you configured your client installation as Admin, the BiAdmin Management Utility is
already installed on your computer.
1. Insert the U.S. Robotics Installation CD-ROM into your CD-ROM drive.
2. Click Additional Installs and then click Next.
file:///G|/CSO/T-Writer Repository/Networking/5436A Wireless Gutenberg/User Guide/English/management.html (1 of 7)9/14/2006 4:38:13 PM
Wireless USB Print Server User Guide
3. Select Custom.
file:///G|/CSO/T-Writer Repository/Networking/5436A Wireless Gutenberg/User Guide/English/management.html (2 of 7)9/14/2006 4:38:13 PM
Wireless USB Print Server User Guide
4. Verify sure BiAdmin is selected.
file:///G|/CSO/T-Writer Repository/Networking/5436A Wireless Gutenberg/User Guide/English/management.html (3 of 7)9/14/2006 4:38:13 PM
Wireless USB Print Server User Guide
4. Follow the on-screen instructions to complete the installation.
Using the BiAdmin Management Utility
You can launch the BiAdmin Management Utility by using the link in the Programs
menu. When it is launched, the BiAdmin Management Utility will search your network
for all the Wireless USB Print Servers that are attached and running. The Wireless
USB Print Servers will then be shown in the device list of the BiAdmin Management
Utility.
file:///G|/CSO/T-Writer Repository/Networking/5436A Wireless Gutenberg/User Guide/English/management.html (4 of 7)9/14/2006 4:38:13 PM
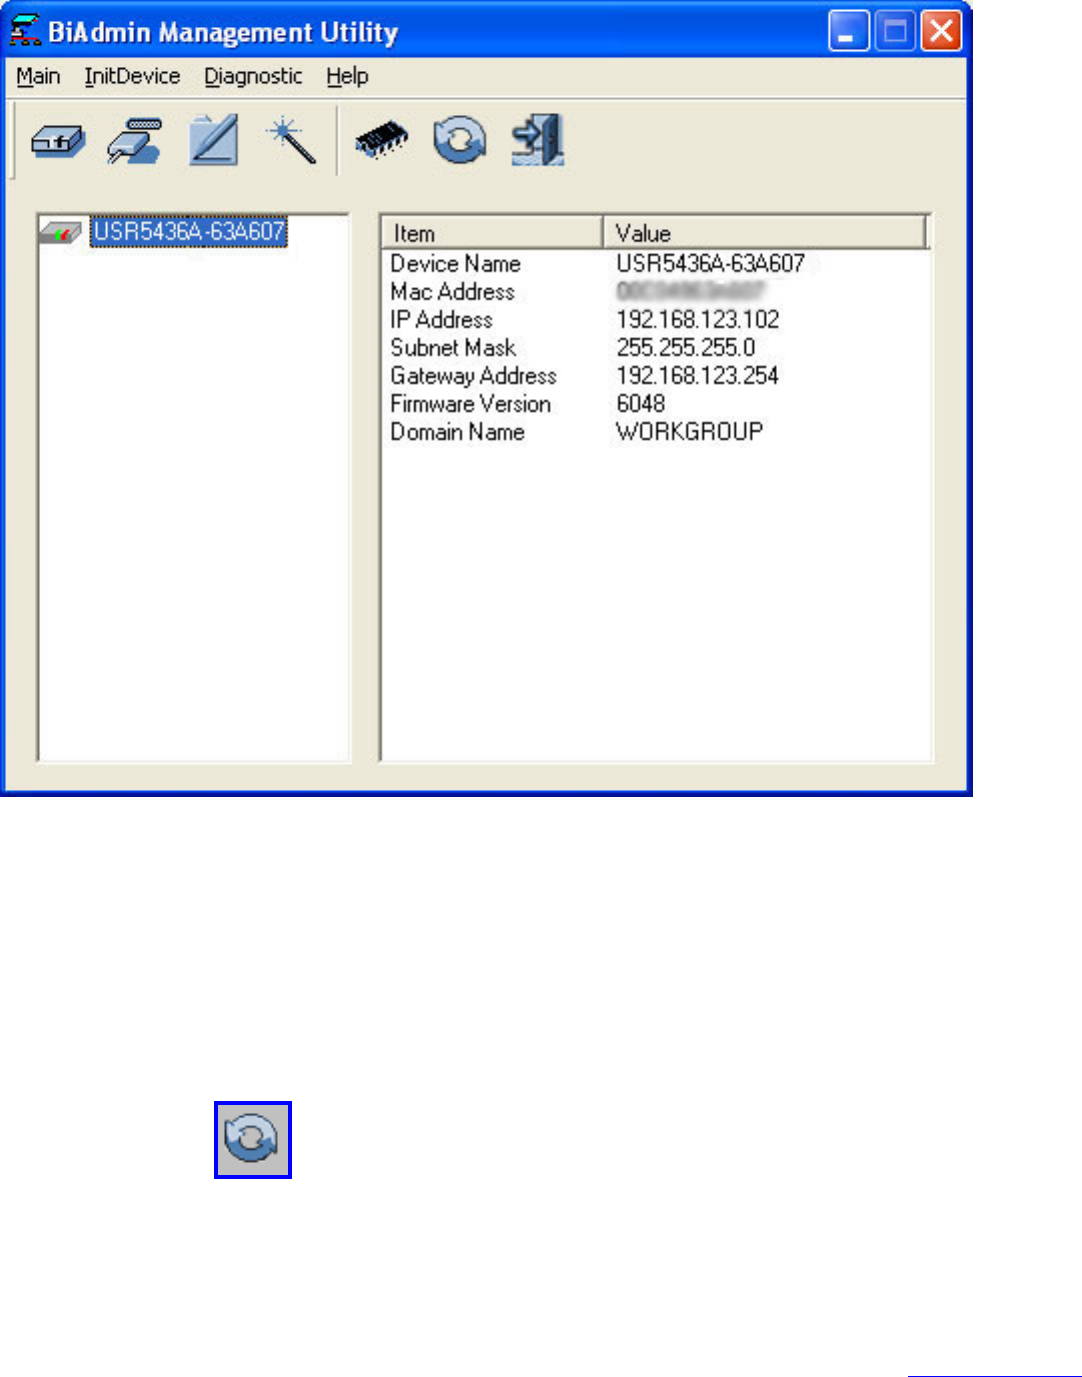
Wireless USB Print Server User Guide
On the left side of the screen, you will see each Wireless USB Print Server that is
attached to the network. If you select a Wireless USB Print Server, you will see the
settings information on the right side of the screen.
If the desired Wireless USB Print Server is not listed, try performing the following
steps:
● Make sure that the Wireless USB Print Server is installed and receiving power,
then click in the WUI to refresh the list.
● If the Wireless USB Print Server is on another LAN segment, in the menu, click
InitDevice and then Attach to locate and display the Wireless USB Print
Server.
At the top of the main BiAdmin Management Utility screen, there are status icons
and the following menus:
file:///G|/CSO/T-Writer Repository/Networking/5436A Wireless Gutenberg/User Guide/English/management.html (5 of 7)9/14/2006 4:38:13 PM

Wireless USB Print Server User Guide
Main: From this menu, you can select the following:
● Device Status
● Printer Status
● Configure
● Upgrade
● Refresh
● Exit
InitDevice: From this menu, you can select and perform the following:
● Reset Device: This will cause the Wireless USB Print Server to reboot. To
reboot the print server, click Yes. This should be done after making any
configuration changes or if the Wireless USB Print Server stops responding.
● Restore to Factory Default: To restore all of the Wireless USB Print Server
values to the factory default settings, click Yes. To restore the settings only for
the current screen in the management utility, click Set to Default on that
particular screen.
● Attached Remote: This is used to connect to a Wireless USB Print Server that
is located on another LAN segment. You need to enter IP address of the remote
Wireless USB Print Serve and click Set. If your LAN does not have a router, this
option is not applicable.
● Connected Protocol: This option allows you to designate which LAN protocol is
used for communication between the selected Wireless USB Print Server and
this application. You should select only one protocol.
Diagnostic: From this menu, you can select Print Test Page and then select the
printer that should print the page. This will print out a test page which contains the
configuration settings of the Wireless USB Print Server.
Help: From this menu, you can select Help Topics or the About BiAdmin for more
information on the BiAdmin Management utility.
Status Icons
file:///G|/CSO/T-Writer Repository/Networking/5436A Wireless Gutenberg/User Guide/English/management.html (6 of 7)9/14/2006 4:38:13 PM

Wireless USB Print Server User Guide
Once a Wireless USB Print Server has been selected, the icons can be used. The icons
provide status information as well as access to the selected Wireless USB Print Server
settings. If an icon is grayed out, that option or protocol is unavailable.
Device Information
Printer Status
Configuration
Wizard
Firmware Upgrade
Refresh
Exit
© 2004-2006 U.S. Robotics Corporation.
file:///G|/CSO/T-Writer Repository/Networking/5436A Wireless Gutenberg/User Guide/English/management.html (7 of 7)9/14/2006 4:38:13 PM
Wireless USB Print Server User Guide
Wireless USB Print Server User
Guide
Home Installation Configuration Tutorials
Help
Printing Methods IPP
Printing Methods
The Wireless USB Print Server supports a number of printing methods:
● Peer-to-peer Printing means that the print jobs are stored (queued) on your
computer, and sent directly to the Wireless USB Print Server when it is
available.
● Windows SMB Printing is a Microsoft standard for using a Network Printer. No
additional software needs to be installed on your Windows computer, and
printing from MS-DOS programs is supported. However, because the Wireless
USB Print Server cannot store files, large print jobs may cause problems.
● Server-based Print Queue means that all print jobs are stored (queued) on
the Network Server (e.g. Windows NT/2000) and then sent to the Wireless USB
Print Server. This allows the Network Administrator to modify the Print Queue.
For example, an important job can be moved to the head of the queue.
● AppleTalk is also supported, and normally no configuration of the Wireless USB
Print Server is required. Refer to the section for Macintosh installation
information.
Which printing method should I use?
● If using Windows 95, 98, NT, Me, 2000, or XP, the easiest method to use is
Peer-to-peer Printing.
● If using Windows and you need to print from MS-DOS programs, or you don't
wish to install additional software, use SMB. However, SMB is not suitable for
large, complex documents, so if you need this as well as MS-DOS printing, you
should install BOTH Peer-to-peer Printing and SMB printing. MS-DOS programs
can use the SMB printer, while the Windows programs should use Peer-to-peer
file:///G|/CSO/T-Writer Repository/Networking/5436A Wireless Gutenberg/User Guide/English/printing.html (1 of 14)9/14/2006 4:38:29 PM
Wireless USB Print Server User Guide
Printing.
● If your LAN has Network Servers (e.g. Windows NT, Windows 2000 Server), use
the method advised by your Network Administrator. The Wireless USB Print
Server can print via a queue located on a Network server, if desired.
● Unix users
● Macintosh users
Checking your Network Protocols (Windows 9x)
Your computer must have either the TCP/IP or NetBEUI protocols installed. (All
versions of Windows after Windows 95 have TCP/IP installed by default.)
If you are using the Peer-to-peer Printing, the installation program will check this
for you. If you are using other methods, you must perform a manual check of these
settings. Perform the following steps:
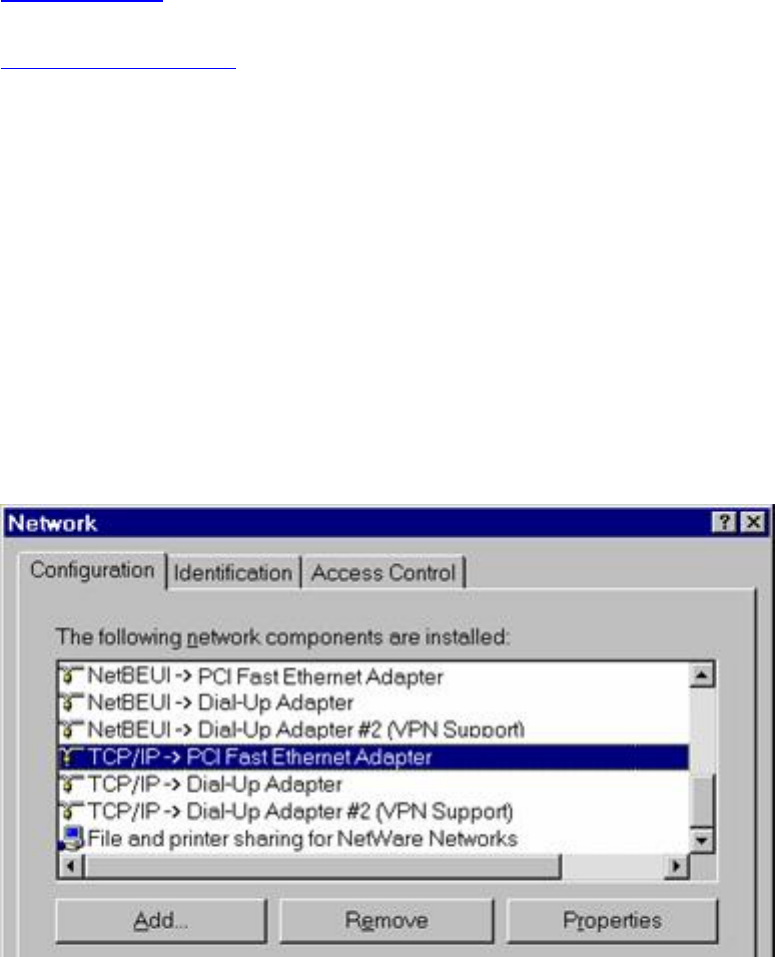
1. Click Windows Settings, Control Panel, and then Network. You should see a
screen similar to the following:
The top line in the list (NetBEUI -> PCI Fast Ethernet Adapter) indicates that
the NetBEUI protocol is installed on this computer. Your computer will show the
name of the your Network card rather than PCI Fast Ethernet Adapter.
The highlighted line (TCP/IP -> PCI Fast Ethernet Adapter) indicates that TCP/IP
is installed. Your computer will show the name of your Network card instead of
PCI Fast Ethernet Adapter.
file:///G|/CSO/T-Writer Repository/Networking/5436A Wireless Gutenberg/User Guide/English/printing.html (2 of 14)9/14/2006 4:38:29 PM

Wireless USB Print Server User Guide
2. If neither line is present, you will need to install the NetBEUI protocol. Click
Add, Protocol, and then Microsoft. Click NetBEUI and then OK. You may be
prompted for your Windows CD-ROM. This protocol requires no configuration.
If required, you can also install TCP/IP. However, depending on your LAN
environment, TCP/IP may require further configuration.
3. If either protocol is already installed, proceed with installation.
Windows Peer-to-peer Printing
With this printing method, print jobs are stored (queued) on your computer and then
sent to the Wireless USB Print Server when it is available.
Windows 2000 and XP require no additional software.
For other versions of Windows, the supplied PTP (Peer-to-Peer) Printer Port software
must be installed on each computer.
Windows 2000/XP Setup
The recommended printing method is to use LPR, as follows:
1. Open your Printers folder, right-click the desired printer, and select Properties.
2. Select the Ports tab and click Add Port.
3. Select Standard TCP/IP Port and then click New Port.
file:///G|/CSO/T-Writer Repository/Networking/5436A Wireless Gutenberg/User Guide/English/printing.html (3 of 14)9/14/2006 4:38:29 PM
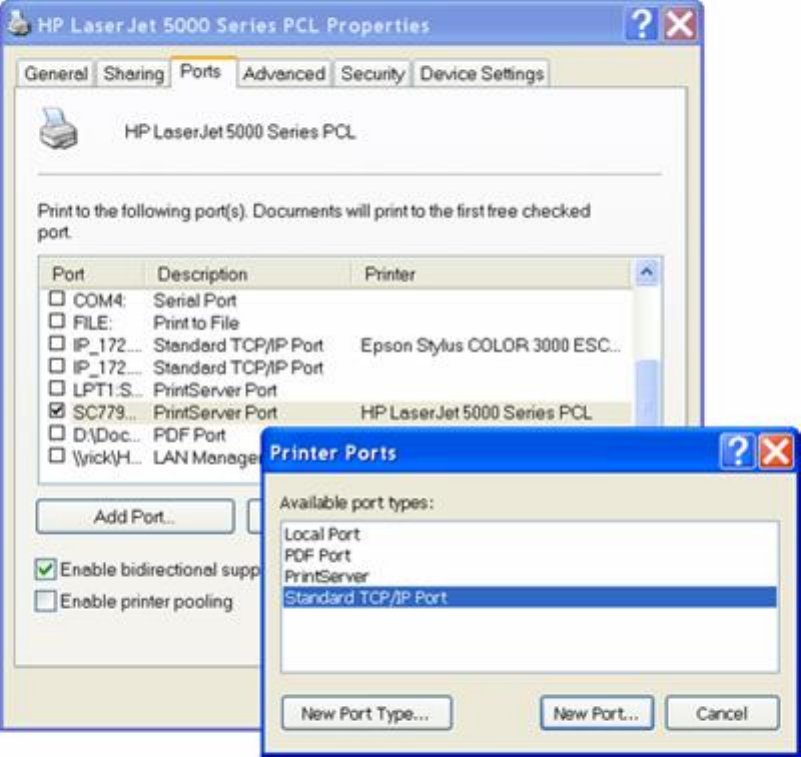
Wireless USB Print Server User Guide
4. On the Add Standard TCP/IP Printer Port screen above, enter the IP Address of
the Print Server in the Printer Name or IP Address field and then click Next.
file:///G|/CSO/T-Writer Repository/Networking/5436A Wireless Gutenberg/User Guide/English/printing.html (4 of 14)9/14/2006 4:38:29 PM
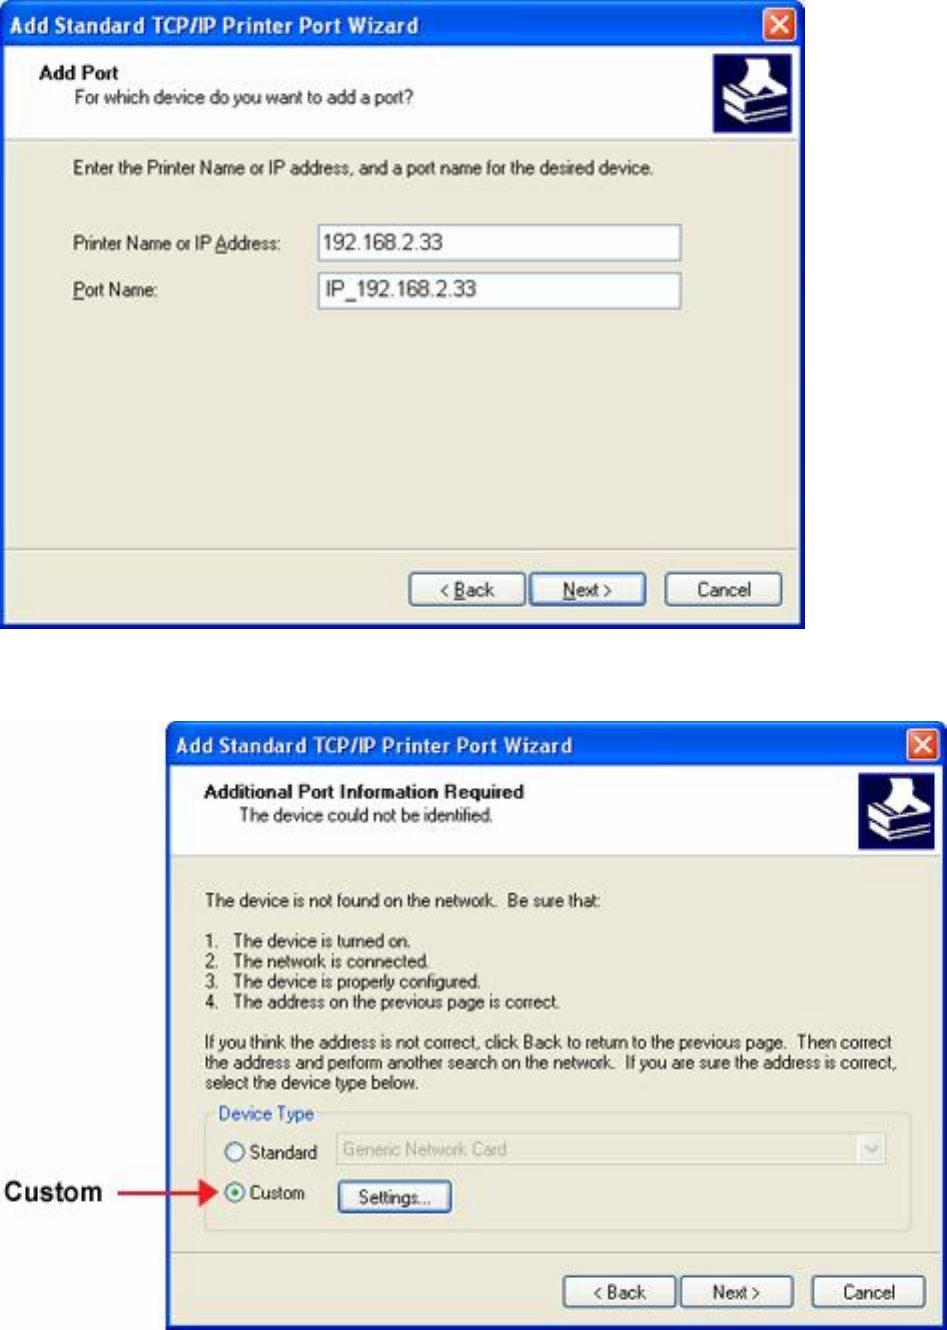
Wireless USB Print Server User Guide
5. On this screen, select Custom and click Settings.
6. On the Port Settings screen, select LPR in the Protocol section. Enter a Queue
name (L1 for the USB Port). Ensure the LPR Byte Counting Enabled setting
is Enabled. Click OK to confirm your changes and close this screen.
file:///G|/CSO/T-Writer Repository/Networking/5436A Wireless Gutenberg/User Guide/English/printing.html (5 of 14)9/14/2006 4:38:29 PM
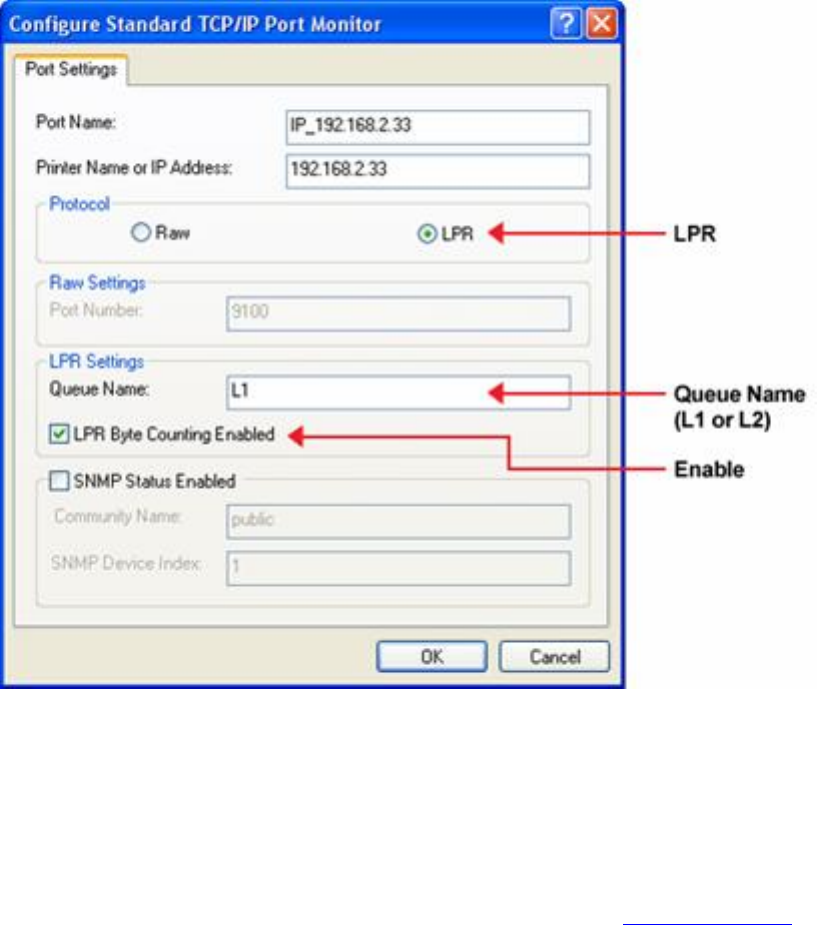
Wireless USB Print Server User Guide
7. Follow the prompts to complete the Wizard.
Windows 9x/ME Setup
Before performing the following procedure, the Wireless USB Print Server must be
installed on your LAN, and configured as described in Installation. Both the Wireless
USB Print Server and the attached printer should be powered ON.
1. Insert the U.S. Robotics Installation CD-ROM into your CD-ROM drive.
2. Click Additional Installs and then select the User.
3. Follow the prompts to complete the installation of the Peer-to-peer Printer Port
Driver.
4. The Print Driver Setup will then launch.
In future, you can click Windows Start > Programs > U.S. Robotics Print Server
> Printer Driver Setup to run the program again.
PTP (Peer-to-Peer) Printer Port Setup
file:///G|/CSO/T-Writer Repository/Networking/5436A Wireless Gutenberg/User Guide/English/printing.html (6 of 14)9/14/2006 4:38:29 PM
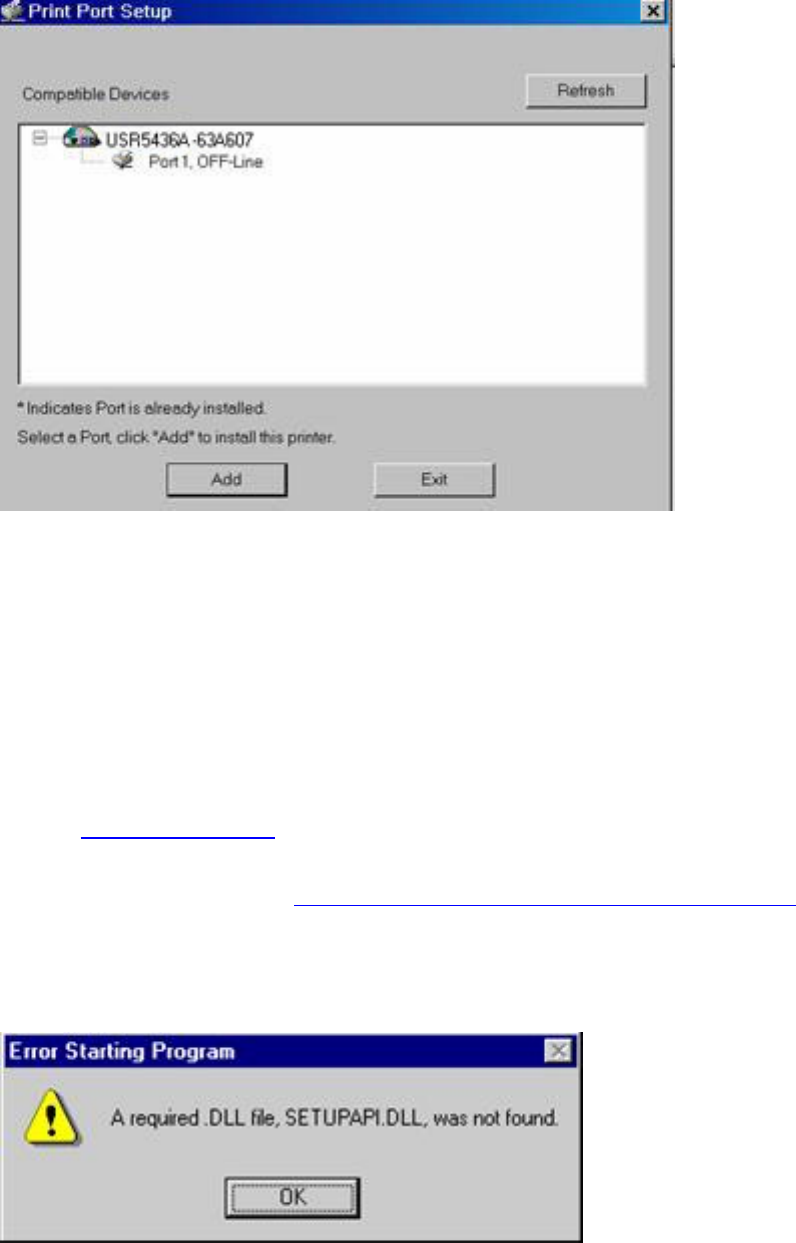
Wireless USB Print Server User Guide
1. The program will search for Printer Servers on the network, and a screen like
the following will be displayed. If desired, click Refresh to update the list. The
name of the attached printer will be displayed if possible. If No printer is
displayed, make sure that the printer is properly connected and powered on.
If your Wireless USB Print Server is not listed, perform the following:
❍ Click the Refresh button.
❍ Check that both the Wireless USB Print Server and the printer are
properly connected, and powered on.
❍ Check that the Wireless USB Print Server has been configured. (Use the
Setup Wizard on the CD-ROM.)
❍ If using TCP/IP, try installing the NetBEUI protocol. Then try again.
2. Select the desired port on a Wireless USB Print Server and then click Next. A
message will inform you if the port has been created successfully.
file:///G|/CSO/T-Writer Repository/Networking/5436A Wireless Gutenberg/User Guide/English/printing.html (7 of 14)9/14/2006 4:38:29 PM
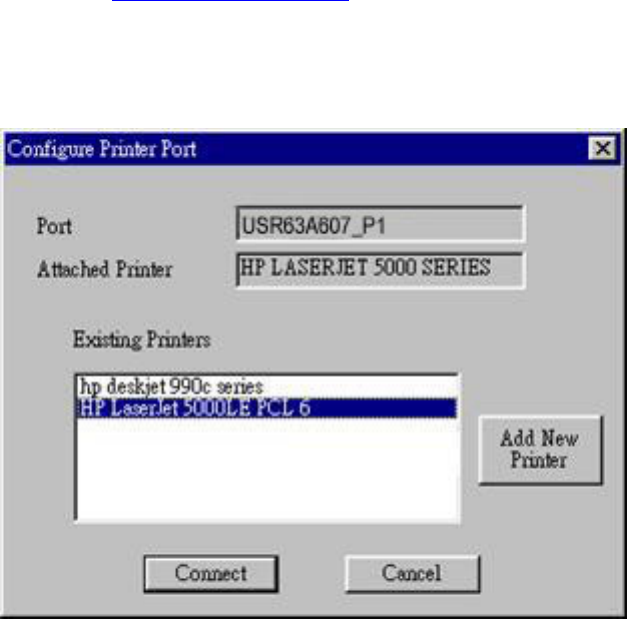
Wireless USB Print Server User Guide
If you see the following error message, either install Internet Explorer 4 or later
or go to Troubleshooting.
3. The printer port will be created, then a screen similar to the one below will be
displayed.
4. Select the correct Windows printer in the Existing Printers list and click
Connect.
If the correct printer type is not listed, click Add New Printer to run the
Windows Add Printer wizard. Perform the following steps of the Wizard and
install the required printer:
● Select the correct Printer Manufacturer and Model or click Have Disk if you
have the printer manufacturer's Installation CD-ROM.
● It is recommended that you change the Printer name to indicate the device to
which it is connected. (e.g. HP2100 on SCA43600_P1)
● If prompted about Sharing the printer, do not enable Sharing.
● When the Printer installation is finished, it will be listed in the Configure Printer
Port screen. Select the printer and click Connect.
5. Installation is complete and you can now print using this printer.
To install additional Printers, repeat steps 1-4.
To run this program in the future, click Windows Start and then Programs (this may
file:///G|/CSO/T-Writer Repository/Networking/5436A Wireless Gutenberg/User Guide/English/printing.html (8 of 14)9/14/2006 4:38:29 PM

Wireless USB Print Server User Guide
be slightly different depending on your version of Windows). Click Print Server
Utility and then Print Driver Setup.
Note: If using the Epson Spooler Manager, this program must be disabled, as
follows:
1. Run the Epson Spooler Manager.
2. Select Queue Setup from the menu.
3. Click Use Print Manager for this port.
4. Click OK to exit.
PTP (Peer-to-Peer) Printer Port Management
Print jobs can be managed like any Windows printer. Open the Printers folder by click
Windows Start, Settings, and then Printers (this may be slightly different
depending on your version of Windows). Double-click any printer to see the current
print jobs.
If the printer attached to the Wireless USB Print Server is changed, run this program
again and select the correct printer.
To delete a port created by this setup program, use the Windows Delete Port option:
1. Right-click any printer in the Printers folder and select Properties.
2. Locate the and click Delete Port. This button is on the Details or Ports tab,
depending on your version of Windows.
If the Wireless USB Print Server's IP Address is changed and you can no longer print,
delete the port (see procedure above) and re-install it.
PTP (Peer-to-Peer) Printer Port Advanced Options
Perform the following steps to access the Peer-to-peer Printing options.
Click Windows Start, Settings, and then Printers (this may be slightly different
depending on your version of Windows) to open the Printers folder. Right-click the
printer and select Properties. The Port Settings button is on the Details or Ports
tab, depending on your version of Windows. Click Port Settings.
An example screen is shown below:
file:///G|/CSO/T-Writer Repository/Networking/5436A Wireless Gutenberg/User Guide/English/printing.html (9 of 14)9/14/2006 4:38:29 PM
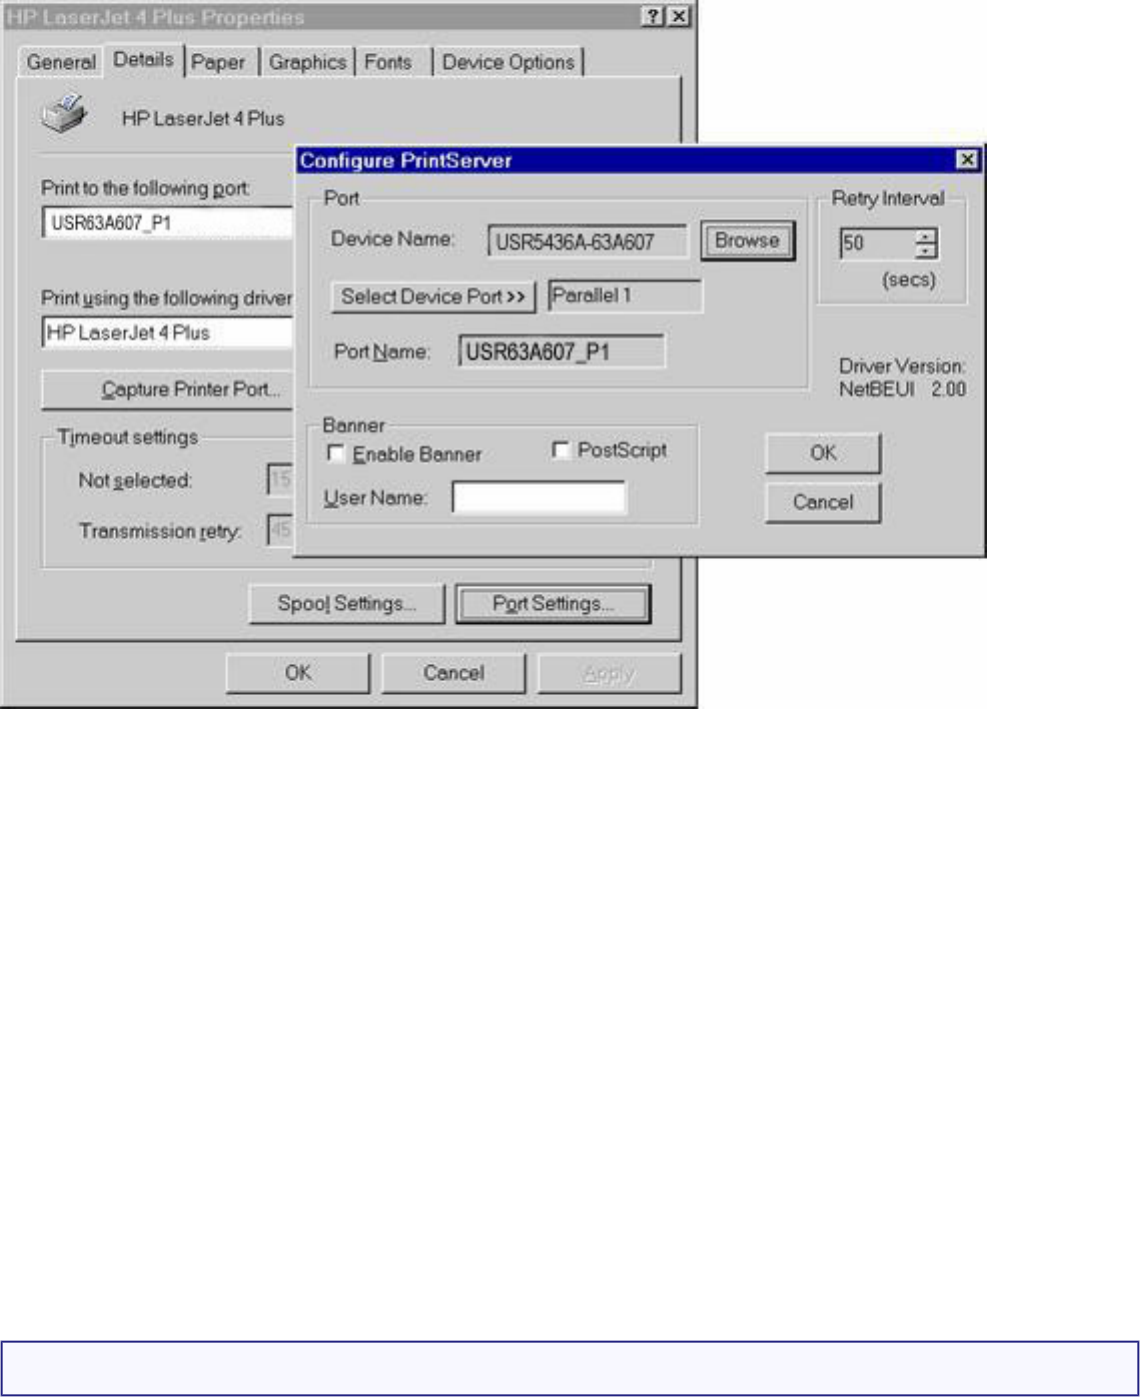
Wireless USB Print Server User Guide
Items shown on this screen are as follows:
Port: If desired, click Browse to select a different Wireless USB Print Server. If the
selected device has multiple ports, the Select Device Port button can be used to select
the port. The Port Name can not be changed after installation. This name is shown in
the Printer's Properties.
Banner: Check this option to print a banner page before each print job.
● If using a PostScript Printer, select the PostScript checkbox.
● The User Name will be printed on the banner page.
Retry Interval: Sets how often Windows will poll the Wireless USB Print Server to
establish a connection when the printer is busy. Increase this value if you get too
many warning messages.
Windows SMB Printing
file:///G|/CSO/T-Writer Repository/Networking/5436A Wireless Gutenberg/User Guide/English/printing.html (10 of 14)9/14/2006 4:38:29 PM
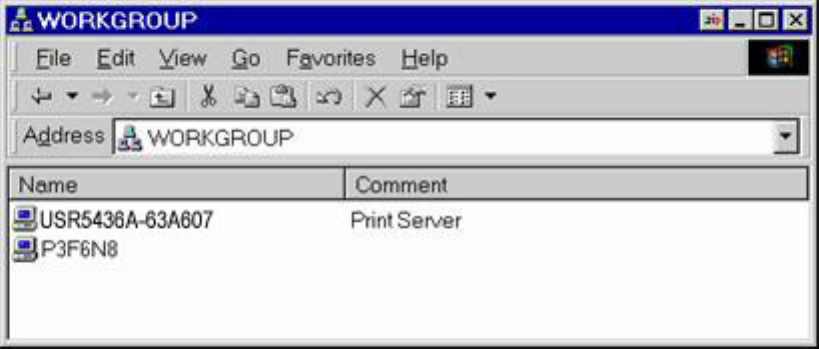
Wireless USB Print Server User Guide
This method requires no additional software to be installed, but the NetBEUI or TCP/IP
protocol must be installed on your computer. Use the following procedure to install
the Wireless USB Print Server's printer as a Windows SMB network printer:
1. Double-click the Network Neighborhood icon on the desktop.
2. On the View menu, click Details.
3. Locate the desired Wireless USB Print Server, as shown below:
● If it is the same Workgroup as your computer, it will be listed on screen.
● If it is in a different workgroup, double-click Entire Network, then double-click
the appropriate Workgroup to open it.
4. Double-click the Wireless USB Print Server icon to view a Printer icon for each
printer port. The Comment field may indicate what type of printer is connected
to the port.
5. To install a printer, right-click the desired printer icon and select Install. This
will start the Add Printer wizard.
file:///G|/CSO/T-Writer Repository/Networking/5436A Wireless Gutenberg/User Guide/English/printing.html (11 of 14)9/14/2006 4:38:29 PM

Wireless USB Print Server User Guide
6. Follow the on-screen prompts to complete the installation.
7. Select the Printer Manufacturer and Model to match the printer connected to
this port on the Wireless USB Print Server and complete the Wizard.
8. This printer will now appear in your Printers folder and can be used like any
other printer. However, SMB printing is not suitable for large complex print
jobs; you should use the Peer-to-peer Printing instead.
Windows with Server-based Print Queues
With a Server-based Print Queue, the Print Server is installed on an existing Network
Server (Windows, Unix, or NetWare), rather than on your computer. If your Network
Administrator uses this system, each Windows client must be set up in the following
manner:
1. Click Windows Start, Settings, and then Printers (this may be slightly
different depending on your version of Windows) to open the Printers folder.
2. When prompted, select Network Printer.
3. When prompted for Network Path or Queue Name, Windows 98 and Me
users should click Browse. Windows 2000/XP users should leave the field blank
and click Next.
Windows 98/ME:
file:///G|/CSO/T-Writer Repository/Networking/5436A Wireless Gutenberg/User Guide/English/printing.html (12 of 14)9/14/2006 4:38:29 PM
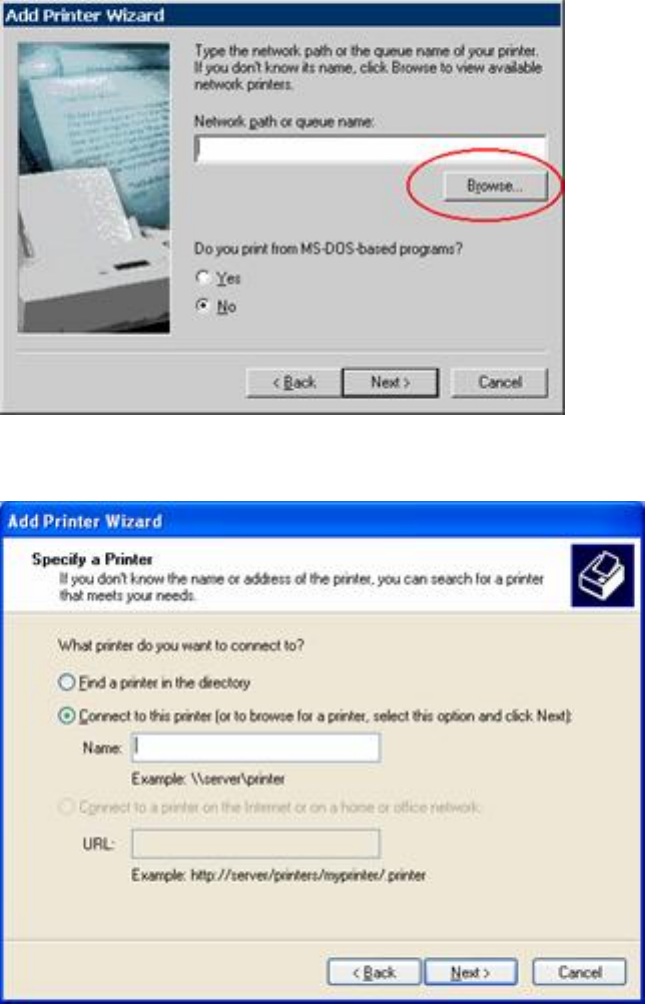
Wireless USB Print Server User Guide
Windows XP:
4. Browse the network, and locate the Server and Printer (or Print Queue) which
your Network Administrator advised you to use.
5. Click OK and then Next.
6. Select the correct printer Manufacturer and Model, as advised by your Network
Administrator, and click Next.
7. Follow the prompts to complete the Wizard.
The new printer will be listed with any other installed printers, and may be selected
when printing from any Windows application.
file:///G|/CSO/T-Writer Repository/Networking/5436A Wireless Gutenberg/User Guide/English/printing.html (13 of 14)9/14/2006 4:38:29 PM

Wireless USB Print Server User Guide
© 2004-2006 U.S. Robotics Corporation.
file:///G|/CSO/T-Writer Repository/Networking/5436A Wireless Gutenberg/User Guide/English/printing.html (14 of 14)9/14/2006 4:38:29 PM
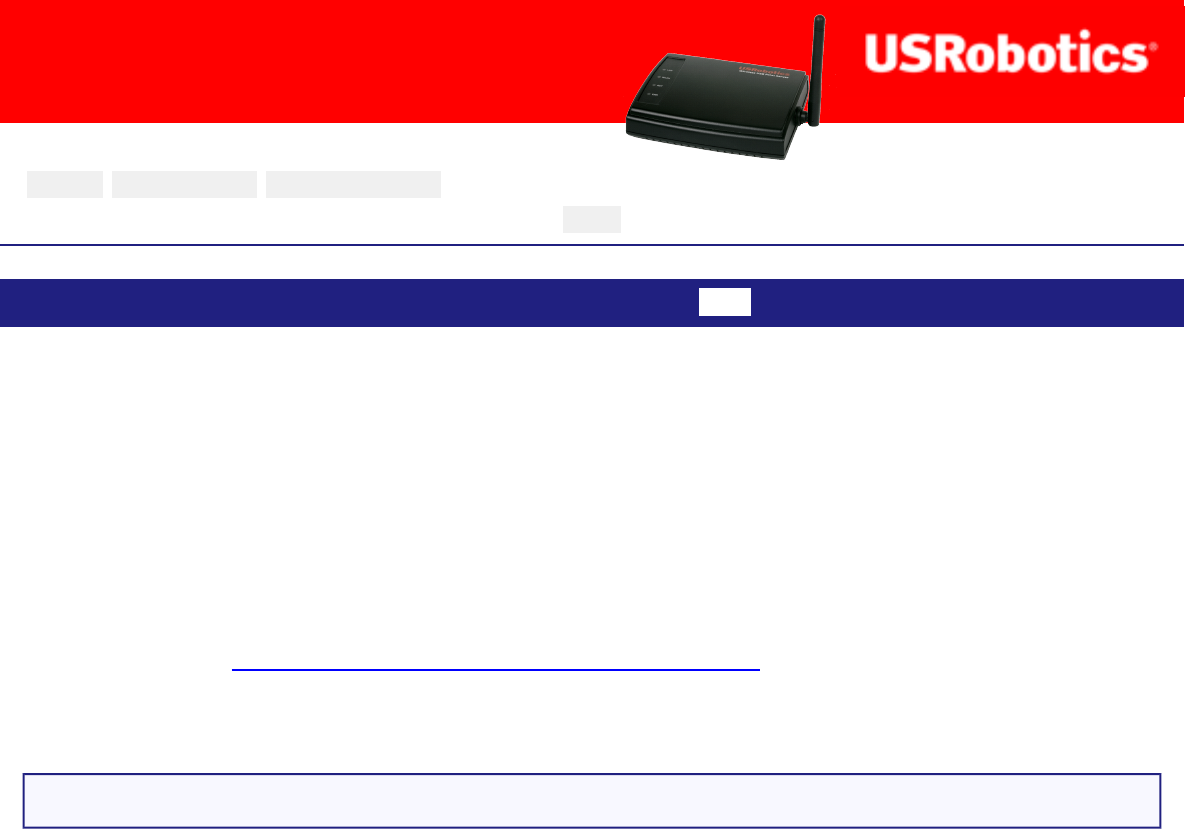
Wireless USB Print Server User Guide
Wireless USB Print Server User
Guide
Home Installation Configuration Tutorials
Help
Printing Methods IPP
IPP (Internet Printing Protocol)
IPP (Internet Printing Protocol) is a standards-based system to allow remote printing
from a computer to any accessible printer. Normally, the printer will be attached to a
computer or other device which functions as an IPP Server.
Client computers need a compatible IPP Client program. Windows 2000 and XP
include a suitable IPP client. For other versions of Windows, a client program is
supplied on the Wireless USB Print Server's CD-ROM. The Client must also know
the IP Address or URL of the IPP Server.
IPP Server Configuration
The Print Server contains the necessary firmware to act as an IPP Server. No
additional configuration is necessary. However, the following requirements must be
met.
● The Print Server must have a valid IP Address.
● Any router, gateway, or firewall linking your LAN to the Internet must NOT
block the IPP protocol (TCP port 631). Your router, gateway or firewall must
open or forward port TCP port 631 to the IP address of the Print Server.
● You must advise clients of the correct URL or IP Address of the IPP Server. To
use a URL rather than an IP Address, you need to register the domain name for
the URL.
● Unless clients are using Windows 2000 or XP, you must provide your clients
with the supplied IPP Client software. If it is not convenient to provide the CD-
ROM, supply the IPP_CLIENT.EXE file, located in the IPP folder.
file:///G|/CSO/T-Writer Repository/Networking/5436A Wireless Gutenberg/User Guide/English/ipp.html (1 of 6)9/14/2006 4:38:44 PM
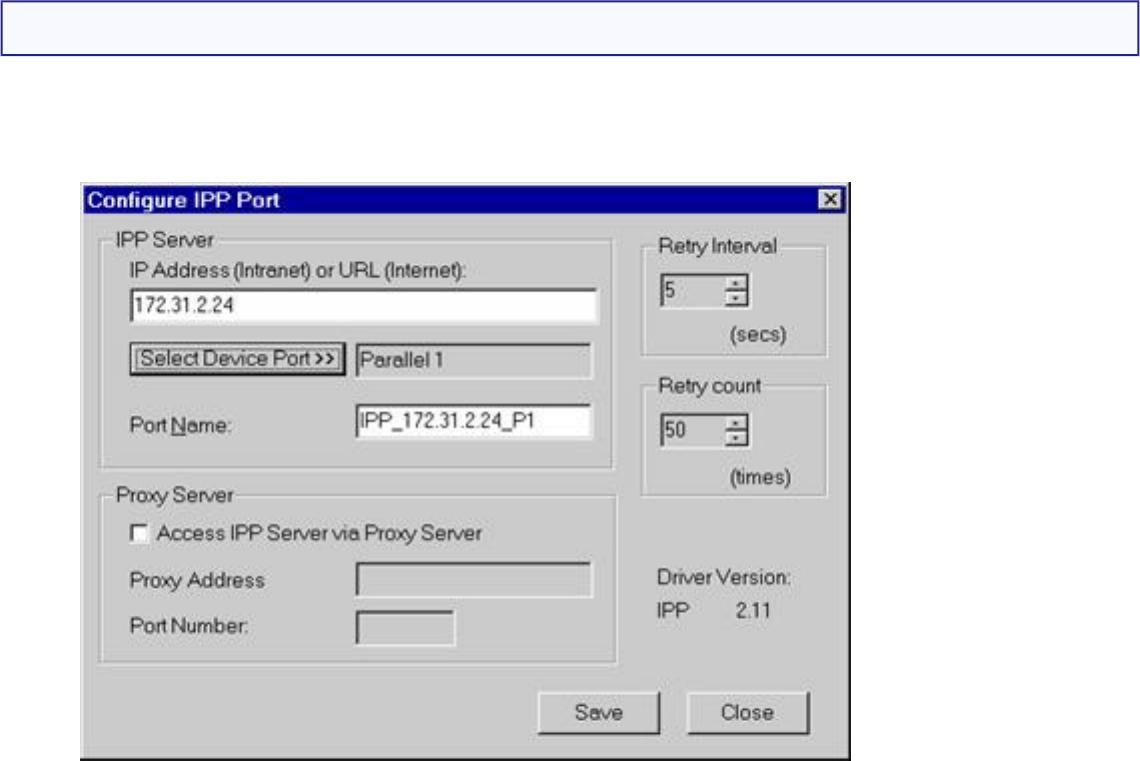
Wireless USB Print Server User Guide
IPP Client Configuration
1. Run the Add IPP Port program entry created by the installation. A screen like
the following will be displayed.
2. If Internet access from your location is via a Proxy Server, select Access IPP
Server via Proxy Server and enter the details of your Proxy Server. (This will
be the same as your Browser configuration.)
3. Enter the IP Address or URL of the IPP Server.
4. Click Select Device Port to view the available ports on the IPP Server and
select the appropriate port. A connection to the IPP Server will be established at
this time.
5. Click Save to create the IPP port on your system. You will see a message
confirming that the port has been created, then the following dialog:
file:///G|/CSO/T-Writer Repository/Networking/5436A Wireless Gutenberg/User Guide/English/ipp.html (2 of 6)9/14/2006 4:38:44 PM
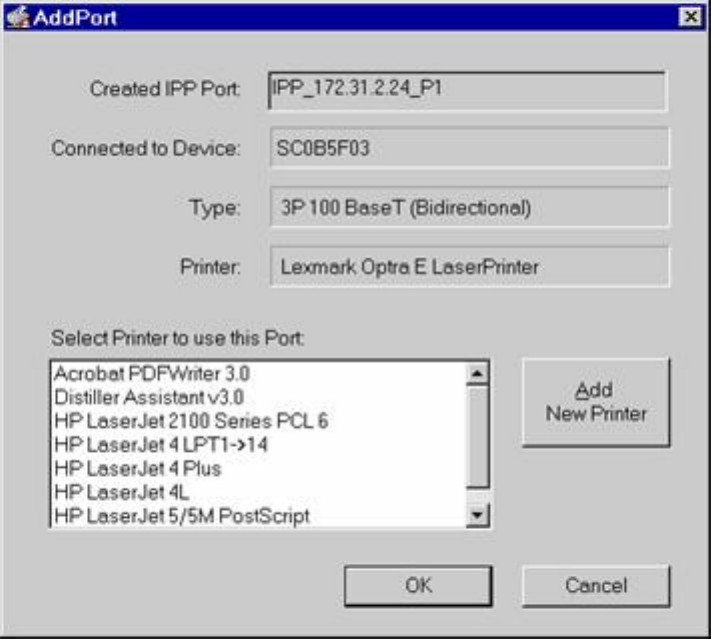
Wireless USB Print Server User Guide
6. Perform one of the following options:
● Select an existing printer to use the new port and click OK.
OR
● Click Add New Printer to create a new printer to use the IPP port. This will
start the Add Printer wizard. Follow the prompts to complete the process.
Ensure that the new printer uses the IPP port.
Installation is now complete. To create additional IPP Ports, repeat the entire
procedure. The Proxy Server and other options are set individually for each IPP Port.
Changing the IPP Port Settings
After the IPP port is created, perform the following steps:
1. Click Windows Start, Settings, and then Printers.
2. Right-click the IPP Printer and select Properties.
3. Locate and click Port Settings (in the Details or Port tab, depending on your
version of Windows).
file:///G|/CSO/T-Writer Repository/Networking/5436A Wireless Gutenberg/User Guide/English/ipp.html (3 of 6)9/14/2006 4:38:44 PM
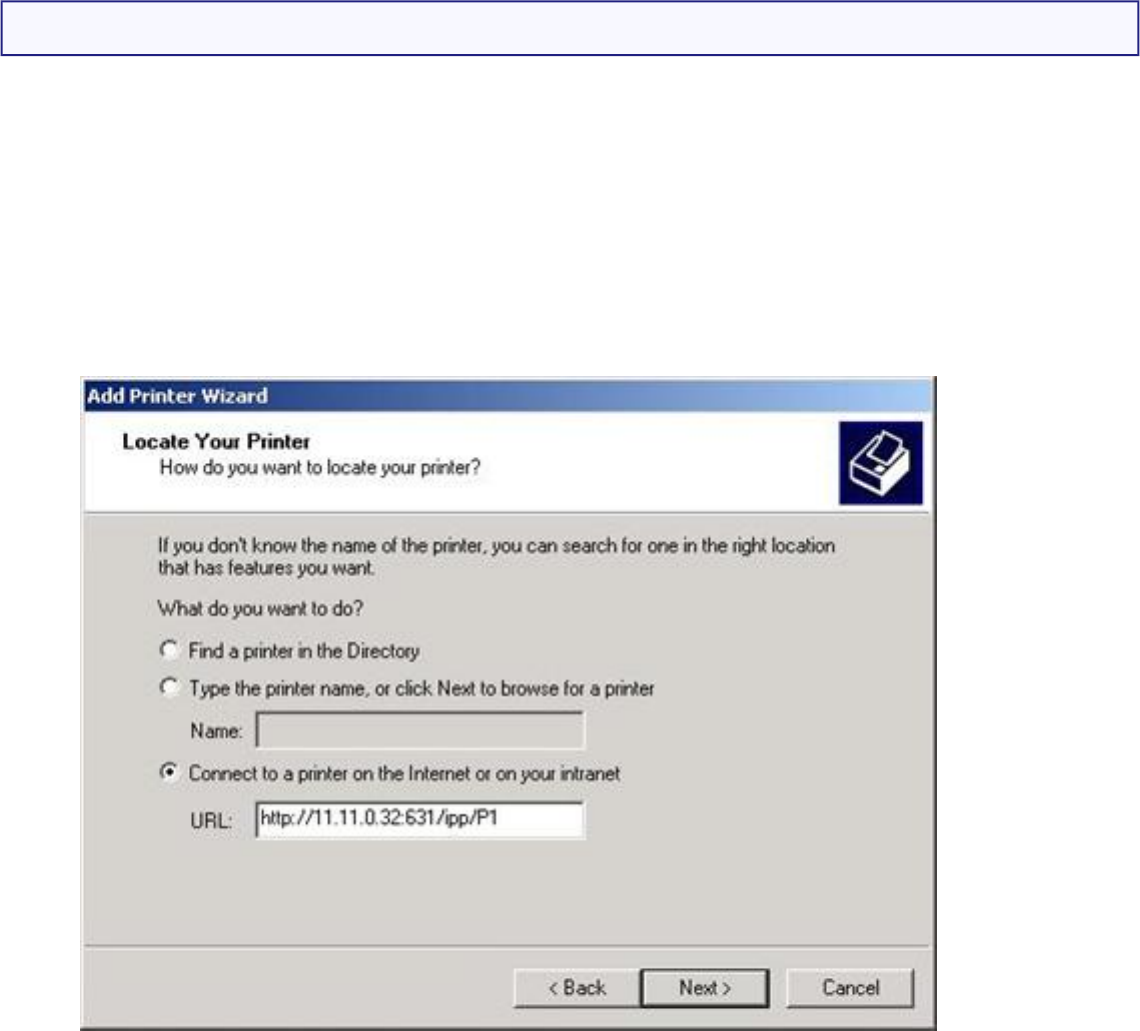
Wireless USB Print Server User Guide
There are 2 settings - Retry Interval and Retry Count - which can be adjusted if you
have problems connecting to the IPP Server.
● Retry Interval sets the time interval (in seconds) between connection
attempts. Increase this number if you have a poor connection, or the remote
server is very busy.
● Retry Count sets how many connection attempts will be made. Increase this
number if you have a poor connection, or the remote server is very busy.
IPP Client Setup - Windows 2000/XP
Windows 2000 and XP have their own IPP Client, and there is no need to install the
supplied IPP Client Software. To use the Windows IPP Client with the Print Server,
follow this procedure:
1. Start the Add Printer wizard.
2. Select Network Printer and click Next to see the Locate your Printer screen,
as shown below.
file:///G|/CSO/T-Writer Repository/Networking/5436A Wireless Gutenberg/User Guide/English/ipp.html (4 of 6)9/14/2006 4:38:44 PM
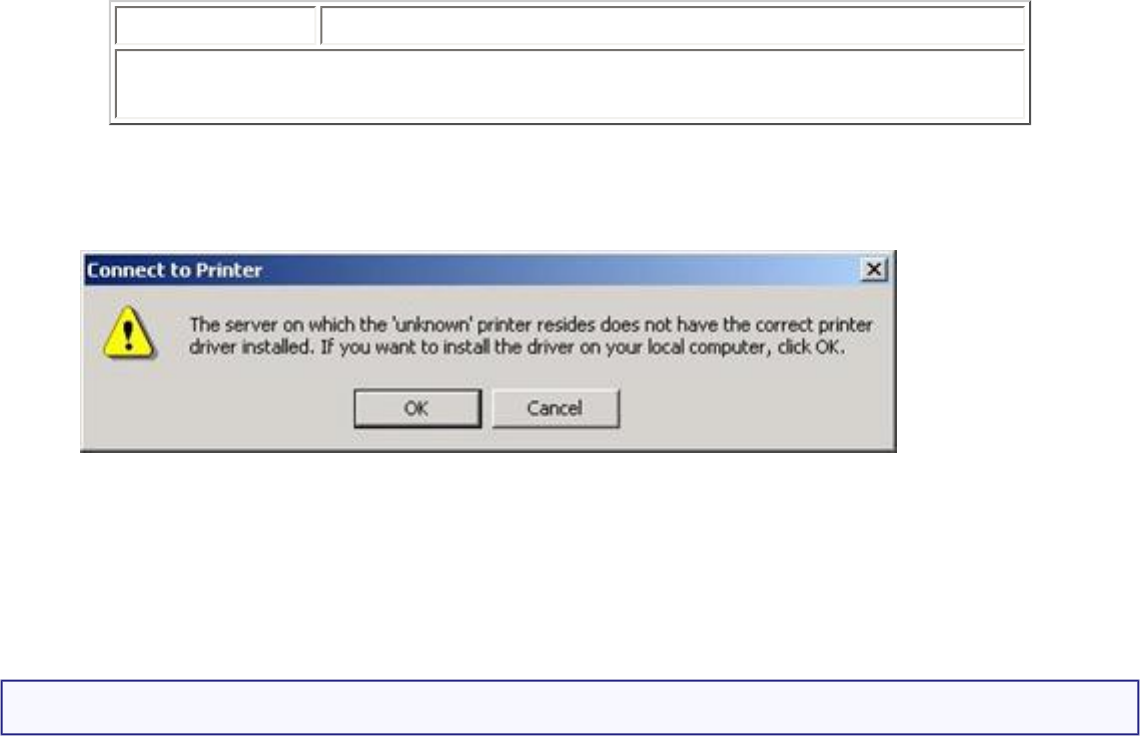
Wireless USB Print Server User Guide
3. Select Connect to a printer on the Internet or on your Intranet and enter
the URL of the IPP Server as follows, where ip_address represents the IP
Address of the IPP Server and 631 is the port number.
Port 1 ip_address:631/ipp/P1
These entries are case sensitive. They must be entered as shown,
with ipp in lower case, and P1 in UPPER case.
4. If the connection can be established and the printer on that port is online, the
following dialog will be displayed:
5. Click OK and then select the printer manufacturer and model to match the
printer connected to the port on the IPP Server.
6. Click Next and complete the Wizard. The IPP printer is now ready for use.
Using IPP Printers
The IPP Printer can be selected and used like any other Windows printer. If the IPP
Server is not on your network, your Internet connection needs to be active.
If using the supplied IPP Client software, you can use the Query IPP Printer program
installed with Add IPP Port to check the availability of the remote IPP Server.
An IPP Server may be unavailable for any of the following reasons:
● It is powered off.
● A printer problem has caused the IPP Server to cease responding, and a restart
(reboot) is required.
● The Server's IP Address has changed.
● The Internet connection for the IPP Server is down.
file:///G|/CSO/T-Writer Repository/Networking/5436A Wireless Gutenberg/User Guide/English/ipp.html (5 of 6)9/14/2006 4:38:44 PM

Wireless USB Print Server User Guide
● Network congestion causes the connection attempt to time out.
If using the supplied IPP Client software, there are 2 settings - Retry Interval and
Retry Count - which can be adjusted if you have problems connecting to the IPP
Server.
See the Changing the IPP Port Settings section on this page for details.
© 2004-2006 U.S. Robotics Corporation.
file:///G|/CSO/T-Writer Repository/Networking/5436A Wireless Gutenberg/User Guide/English/ipp.html (6 of 6)9/14/2006 4:38:44 PM
Wireless USB Print Server User Guide
Wireless USB Print Server User
Guide
Home Installation Configuration Tutorials
Help
Troubleshooting Support
Basic Troubleshooting Procedure
This procedure addresses a number of symptoms that you might experience with your
print server:
1. Verify the physical cable connections between the print server, the printer, your
router, and your power outlet.
2. Ensure that the power outlet to which the print server is connected is a live
outlet.
3. Refer to the LED descriptions and then check the LEDs on the print server to
make sure you are receiving power and that there is not a print error.
If you still have trouble using the router, follow the procedure below that best
describes your symptom.
For specific operating system platform information, go to the appropriate section:
Windows
Macintosh
Unix
file:///G|/CSO/T-Writer Repository/Networking/5436A Wireless Gutenberg/User Guide/English/troubleshooting.html (1 of 3)9/14/2006 4:38:56 PM

Wireless USB Print Server User Guide
Windows Troubleshooting
My Setup Wizard can’t detect the Wireless USB Print Server.
At the end of the Setup Wizard, I receive a message that says “Network
busy, or device not found”.
My Wireless USB Print Server is not appearing in the Printer Port Setup
screen.
I am unable to add my printer in the Add Printer Wizard screen.
I am unable to print a test page.
I am unable to print via a wireless connection or the Wireless Print Server is
not connecting to my wireless network.
I created a new wireless network and the Wireless USB Print Server is not
connecting to it.
I have installed my multi-function printer, but my fax and scanner
capabilities do not work.
I tried to install the software for Peer-to-Peer (PTP) printing, but received an
error message and the installation was aborted.
Some print jobs are not printing correctly.
Macintosh
Some print jobs are not printing correctly.
I cannot find the Wireless USB Print Server's name in the Chooser.
My document did not print to the correct printer.
file:///G|/CSO/T-Writer Repository/Networking/5436A Wireless Gutenberg/User Guide/English/troubleshooting.html (2 of 3)9/14/2006 4:38:56 PM

Wireless USB Print Server User Guide
My document doesn't use the correct fonts when printing.
My EPS file doesn't use the correct fonts when printing.
I can't select the Remaining from: item in the Print Dialog box.
A cover page prints either on the first or the last page of the document.
I am having trouble printing with the LaserWriter 8.
The colors on my printed output do not match the colors on my computer
screen.
When I send a print job, I get a PostScript Command error or nothing is
printed.
Unix
The Wireless USB Print Server is not recognized.
I don't know t he IP Address of the Wireless USB Print Server and it is being
moved to a new network environment.
© 2004-2006 U.S. Robotics Corporation.
file:///G|/CSO/T-Writer Repository/Networking/5436A Wireless Gutenberg/User Guide/English/troubleshooting.html (3 of 3)9/14/2006 4:38:56 PM
Wireless USB Print Server User Guide
Wireless USB Print Server User
Guide
Home Installation Configuration Tutorials
Help
Troubleshooting Support
Support
1. Know your model and serial number.
Your model number is 5436A. You can find your serial number on the side of
the package and on the bottom of the router.
2. Go to the Support section of the USRobotics Web site at www.usr.com/
support
Many of the most common difficulties that users experience have been
addressed in the FAQ and Troubleshooting Web pages for your router.
The Support Web pages also contain information on the latest firmware and
documentation updates.
3. Submit your technical support question using an online form, or contact the
USRobotics Technical Support Department.
Country Webmail Voice
United States & Canada http://www.usr.com/emailsupport (888) 216-2850
Country Webmail Voice
Austria www.usr.com/emailsupport/de 07110 900 116
Belgium (Flemish) www.usr.com/emailsupport/bn 070 23 35 45
Belgium (French) www.usr.com/emailsupport/bn 070 23 35 46
Czech Republic www.usr.com/emailsupport/cz
file:///G|/CSO/T-Writer Repository/Networking/5436A Wireless Gutenberg/User Guide/English/support.html (1 of 2)9/14/2006 4:39:06 PM

Wireless USB Print Server User Guide
Denmark www.usr.com/emailsupport/ea 38323011
Finland www.usr.com/emailsupport/ea 08 0091 3100
France www.usr.com/emailsupport/fr 0825 070 693
Germany www.usr.com/emailsupport/de 0180 567 1548
Greece www.usr.com/emailsupport/gr
Hungary www.usr.com/emailsupport/hu 0180 567 1548
Ireland www.usr.com/emailsupport/uk 1890 252 130
Italy www.usr.com/emailsupport/it 800 979 266
Luxembourg www.usr.com/emailsupport/be 342 080 8318
Middle East/Africa www.usr.com/emailsupport/me +44 870 844 4546
Netherlands www.usr.com/emailsupport/bn 0900 202 5857
Norway www.usr.com/emailsupport/ea 23 16 22 37
Poland www.usr.com/emailsupport/pl
Portugal www.usr.com/emailsupport/pt 0 21 415 4034
Russia www.usr.com/emailsupport/ru 8 800 200 20 01
Spain www.usr.com/emailsupport/es 902 117964
Sweden www.usr.com/emailsupport/se 08 5016 3205
Switzerland www.usr.com/emailsupport/de 0848 840 200
Turkey www.usr.com/emailsupport/tk 0212 444 4 877
UAE www.usr.com/emailsupport/me 0800 877 63
United Kingdom www.usr.com/emailsupport/uk 0870 844 4546
For current support contact information, go to: www.usr.com/emailsupport
© 2004-2006 U.S. Robotics Corporation.
file:///G|/CSO/T-Writer Repository/Networking/5436A Wireless Gutenberg/User Guide/English/support.html (2 of 2)9/14/2006 4:39:06 PM