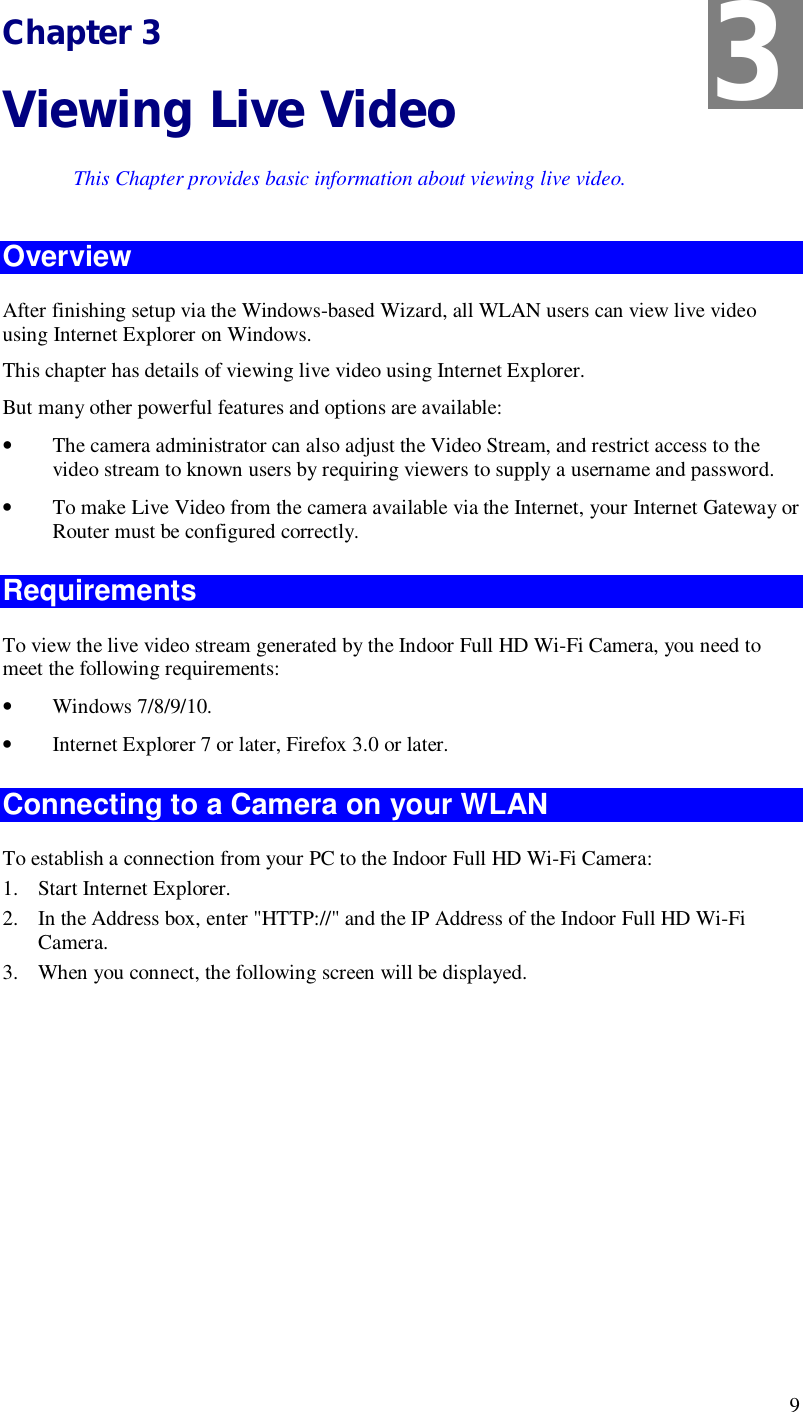
Sercomm RC8510A Indoor Full HD Wi-Fi Camera / Indoor HD Wi-Fi Camera User Manual RC8510A QIG v5 0922
Sercomm Corporation Indoor Full HD Wi-Fi Camera / Indoor HD Wi-Fi Camera RC8510A QIG v5 0922
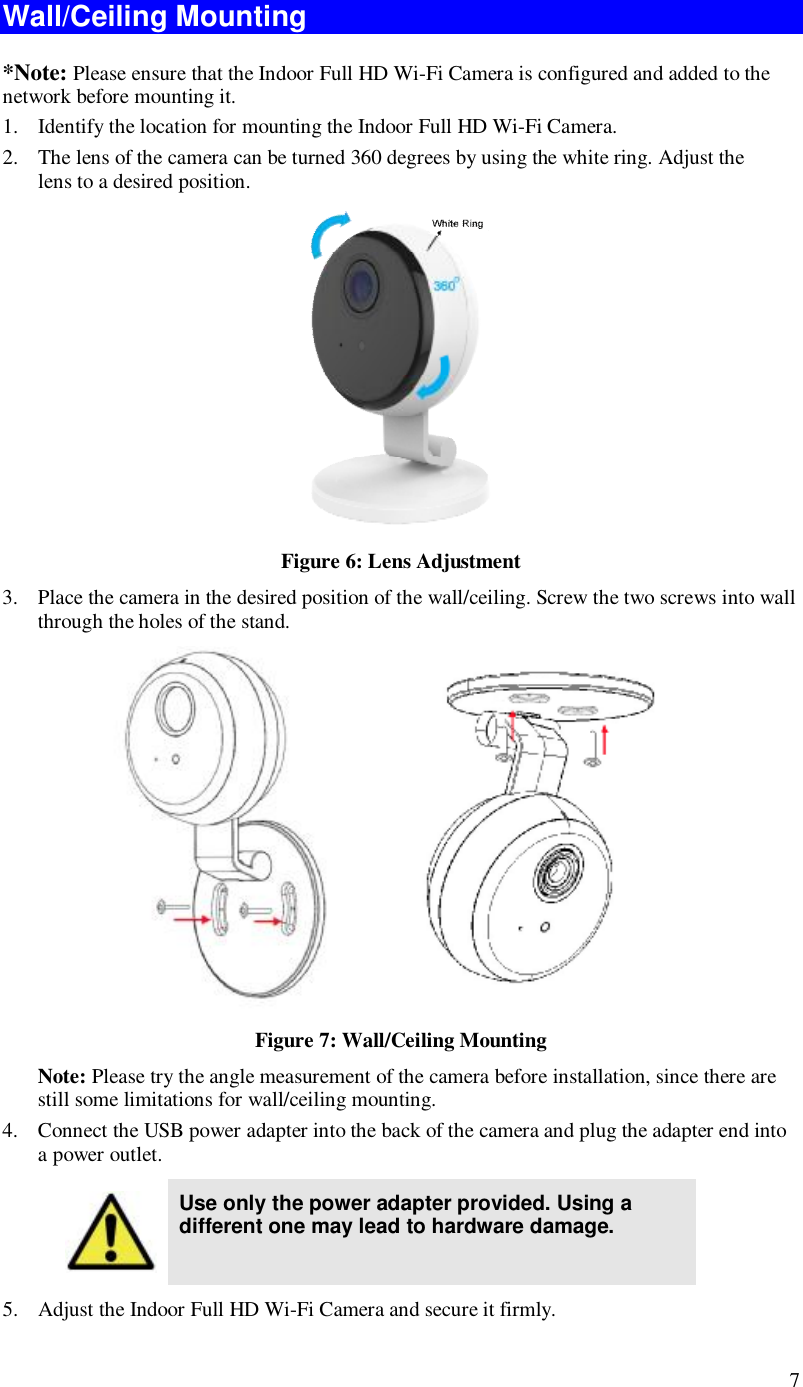
Sercomm >
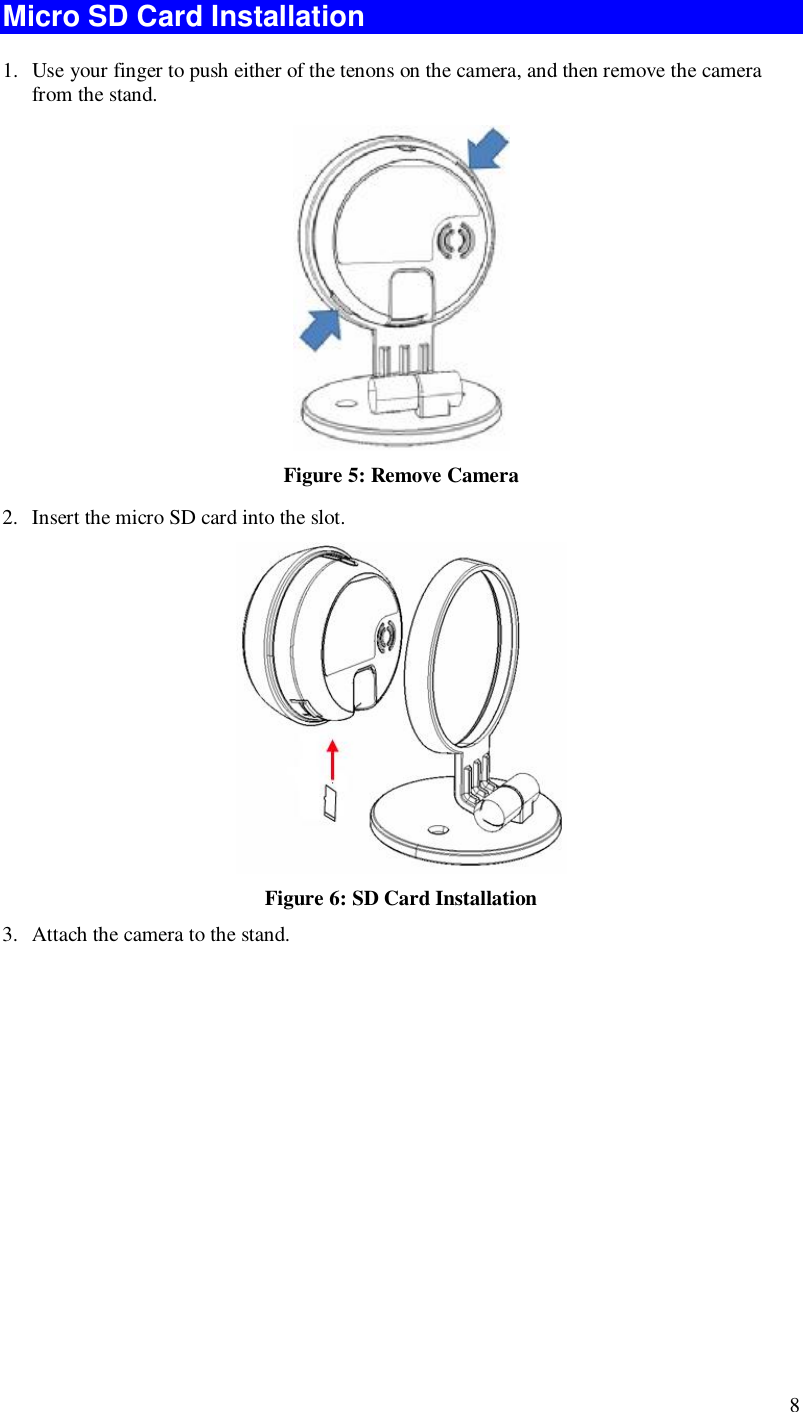
Contents
- 1. Users Manual-1
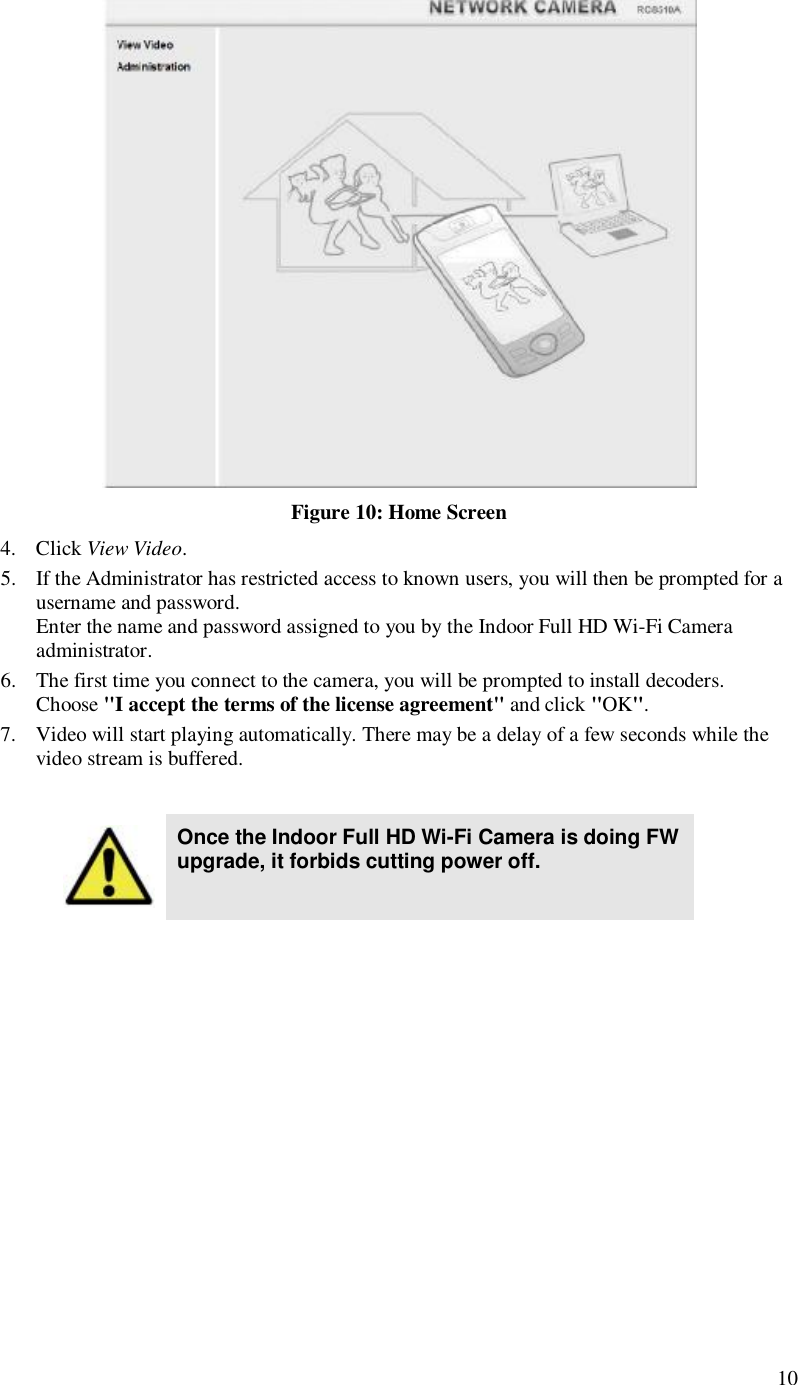
- 2. Users Manual-2
Users Manual-1